


Languages
Pages
Legal


SPIDER V FAMILYSPIDER V 30SPIDER V 60SPIDER V 120SPIDER V 240SPIDER V 240HC
PILOT’S GUIDE
MANUEL DE PILOTAGEPILOTENHANDBUCHMANUAL DEL PILOTO
パイロット・ガイド新手指南
40-00-0454 Rev D Pilot’s Guide also available at www.line6.com/manuals ©2016 Line 6, Inc.

SPIDER V Comparison ChartFeatures SPIDER V 30 SPIDER V 60 SPIDER V 120 SPIDER V 240 SPIDER V 240HC
Amp Models 78 78 78 78 78Cabinet Models 23 23 23 23 23Effect Models 101 101 101 101 101Amplifier Wattage 30 watts 60 watts 120 watts 240 watts (120 w/per side) 240 watts (120 w/per side)Mono/Stereo Mono Mono Mono Stereo StereoSpeaker Size 1 x 8" 1 x 10" 1 x 12" 2 x 12" 2 x 4"Tweeter Configuration 1 1 1 2 2XLR Direct Outs No No Yes Yes YesUSB Audio Interface Yes Yes Yes Yes YesHeadphone Output 1/8" Stereo 1/8" Stereo 1/4" Stereo 1/4" Stereo 1/4" Stereo
FBV Support Yes Yes Yes Yes YesDrum Loops Yes Yes Yes Yes YesMetronome Yes Yes Yes Yes YesLooper No Yes Yes Yes YesRelay Wireless Ready No Yes Yes Yes YesExternal Speaker Outs No No No No YesWeight (kg) 7.35 9.30 12.70 21.05 13.00Dimensions (mm) 392 x 380 x 208 442 x 430 x 230 520 x 489 x 271 684 x 550 x 271 684 x 276 x 271
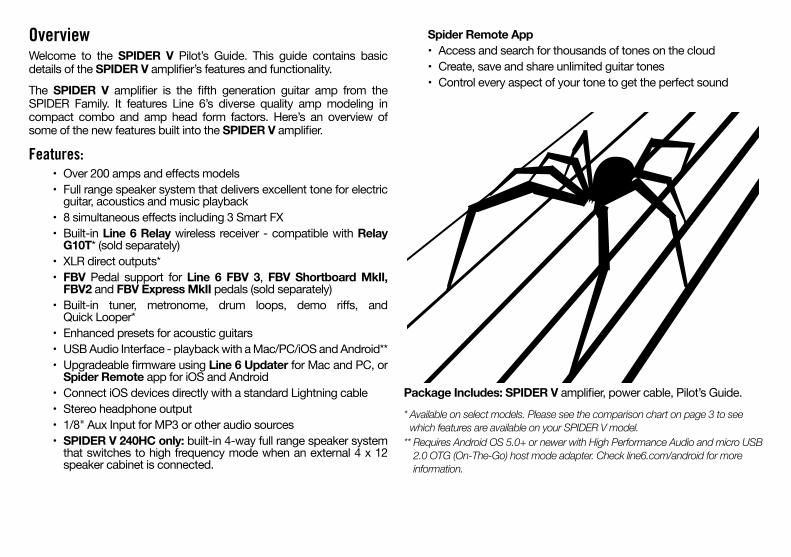
OverviewWelcome to the SPIDER V Pilot’s Guide. This guide contains basic details of the SPIDER V amplifier’s features and functionality.The SPIDER V amplifier is the fifth generation guitar amp from the SPIDER Family. It features Line 6’s diverse quality amp modeling in compact combo and amp head form factors. Here’s an overview of some of the new features built into the SPIDER V amplifier.
Features:• Over 200 amps and effects models• Full range speaker system that delivers excellent tone for electric
guitar, acoustics and music playback• 8 simultaneous effects including 3 Smart FX• Built-in Line 6 Relay wireless receiver - compatible with Relay
G10T* (sold separately)• XLR direct outputs*• FBV Pedal support for Line 6 FBV 3, FBV Shortboard MkII,
FBV2 and FBV Express MkII pedals (sold separately)• Built-in tuner, metronome, drum loops, demo riffs, and
Quick Looper*• Enhanced presets for acoustic guitars• USB Audio Interface - playback with a Mac/PC/iOS and Android**• Upgradeable firmware using Line 6 Updater for Mac and PC, or
Spider Remote app for iOS and Android• Connect iOS devices directly with a standard Lightning cable• Stereo headphone output• 1/8" Aux Input for MP3 or other audio sources• SPIDER V 240HC only: built-in 4-way full range speaker system
that switches to high frequency mode when an external 4 x 12 speaker cabinet is connected.
Spider Remote App• Access and search for thousands of tones on the cloud• Create, save and share unlimited guitar tones• Control every aspect of your tone to get the perfect sound
Package Includes: SPIDER V amplifier, power cable, Pilot’s Guide.* Available on select models. Please see the comparison chart on page 3 to see
which features are available on your SPIDER V model.** Requires Android OS 5.0+ or newer with High Performance Audio and micro USB
2.0 OTG (On-The-Go) host mode adapter. Check line6.com/android for more information.
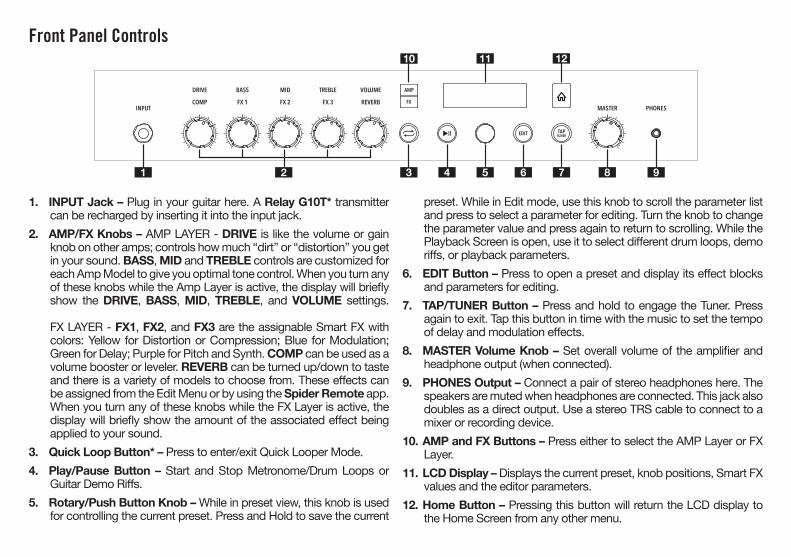
1. INPUT Jack – Plug in your guitar here. A Relay G10T* transmittercan be recharged by inserting it into the input jack.
2. AMP/FX Knobs – AMP LAYER - DRIVE is like the volume or gainknob on other amps; controls how much “dirt” or “distortion” you getin your sound. BASS, MID and TREBLE controls are customized foreach Amp Model to give you optimal tone control. When you turn anyof these knobs while the Amp Layer is active, the display will brieflyshow the DRIVE, BASS, MID, TREBLE, and VOLUME settings.
FX LAYER - FX1, FX2, and FX3 are the assignable Smart FX withcolors: Yellow for Distortion or Compression; Blue for Modulation;Green for Delay; Purple for Pitch and Synth. COMP can be used as avolume booster or leveler. REVERB can be turned up/down to taste and there is a variety of models to choose from. These effects canbe assigned from the Edit Menu or by using the Spider Remote app.When you turn any of these knobs while the FX Layer is active, thedisplay will briefly show the amount of the associated effect beingapplied to your sound.
3. Quick Loop Button* – Press to enter/exit Quick Looper Mode.4. Play/Pause Button – Start and Stop Metronome/Drum Loops or
Guitar Demo Riffs.5. Rotary/Push Button Knob – While in preset view, this knob is used
for controlling the current preset. Press and Hold to save the current
preset. While in Edit mode, use this knob to scroll the parameter list and press to select a parameter for editing. Turn the knob to change the parameter value and press again to return to scrolling. While the Playback Screen is open, use it to select different drum loops, demo riffs, or playback parameters.
6. EDIT Button – Press to open a preset and display its effect blocksand parameters for editing.
7. TAP/TUNER Button – Press and hold to engage the Tuner. Pressagain to exit. Tap this button in time with the music to set the tempoof delay and modulation effects.
8. MASTER Volume Knob – Set overall volume of the amplifier andheadphone output (when connected).
9. PHONES Output – Connect a pair of stereo headphones here. Thespeakers are muted when headphones are connected. This jack alsodoubles as a direct output. Use a stereo TRS cable to connect to amixer or recording device.
10. AMP and FX Buttons – Press either to select the AMP Layer or FXLayer.
11. LCD Display – Displays the current preset, knob positions, Smart FXvalues and the editor parameters.
12. Home Button – Pressing this button will return the LCD display tothe Home Screen from any other menu.
Front Panel Controls
1 7 8 9
10 12
4 6
11
3 52
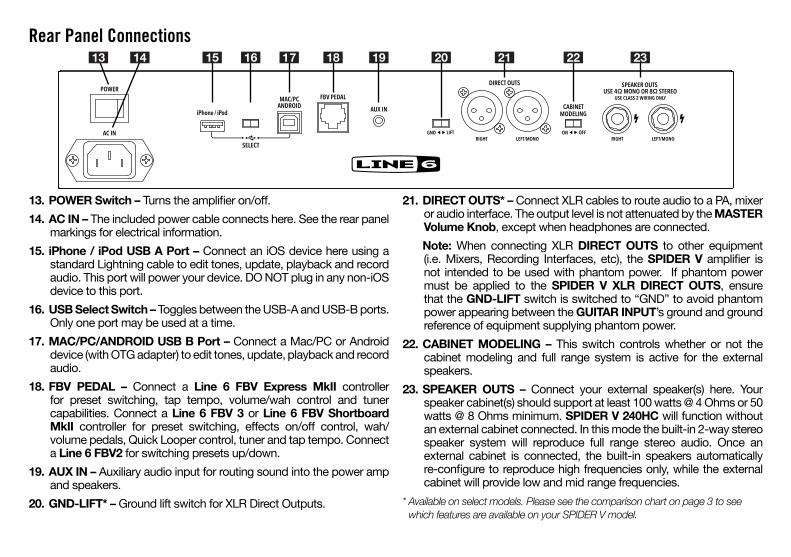
Rear Panel Connections13 14 15 16 17 18 19 21 22 2320
13. POWER Switch – Turns the amplifier on/off.14. AC IN – The included power cable connects here. See the rear panel
markings for electrical information. 15. iPhone / iPod USB A Port – Connect an iOS device here using a
standard Lightning cable to edit tones, update, playback and recordaudio. This port will power your device. DO NOT plug in any non-iOSdevice to this port.
16. USB Select Switch – Toggles between the USB-A and USB-B ports.Only one port may be used at a time.
17. MAC/PC/ANDROID USB B Port – Connect a Mac/PC or Androiddevice (with OTG adapter) to edit tones, update, playback and recordaudio.
18. FBV PEDAL – Connect a Line 6 FBV Express MkII controllerfor preset switching, tap tempo, volume/wah control and tunercapabilities. Connect a Line 6 FBV 3 or Line 6 FBV ShortboardMkII controller for preset switching, effects on/off control, wah/volume pedals, Quick Looper control, tuner and tap tempo. Connecta Line 6 FBV2 for switching presets up/down.
19. AUX IN – Auxiliary audio input for routing sound into the power ampand speakers.
20. GND-LIFT* – Ground lift switch for XLR Direct Outputs.
21. DIRECT OUTS* – Connect XLR cables to route audio to a PA, mixeror audio interface. The output level is not attenuated by the MASTERVolume Knob, except when headphones are connected.Note: When connecting XLR DIRECT OUTS to other equipment(i.e. Mixers, Recording Interfaces, etc), the SPIDER V amplifier isnot intended to be used with phantom power. If phantom powermust be applied to the SPIDER V XLR DIRECT OUTS, ensurethat the GND-LIFT switch is switched to “GND” to avoid phantompower appearing between the GUITAR INPUT’s ground and groundreference of equipment supplying phantom power.
22. CABINET MODELING – This switch controls whether or not thecabinet modeling and full range system is active for the externalspeakers.
23. SPEAKER OUTS – Connect your external speaker(s) here. Yourspeaker cabinet(s) should support at least 100 watts @ 4 Ohms or 50watts @ 8 Ohms minimum. SPIDER V 240HC will function withoutan external cabinet connected. In this mode the built-in 2-way stereospeaker system will reproduce full range stereo audio. Once anexternal cabinet is connected, the built-in speakers automaticallyre-configure to reproduce high frequencies only, while the externalcabinet will provide low and mid range frequencies.
* Available on select models. Please see the comparison chart on page 3 to seewhich features are available on your SPIDER V model.
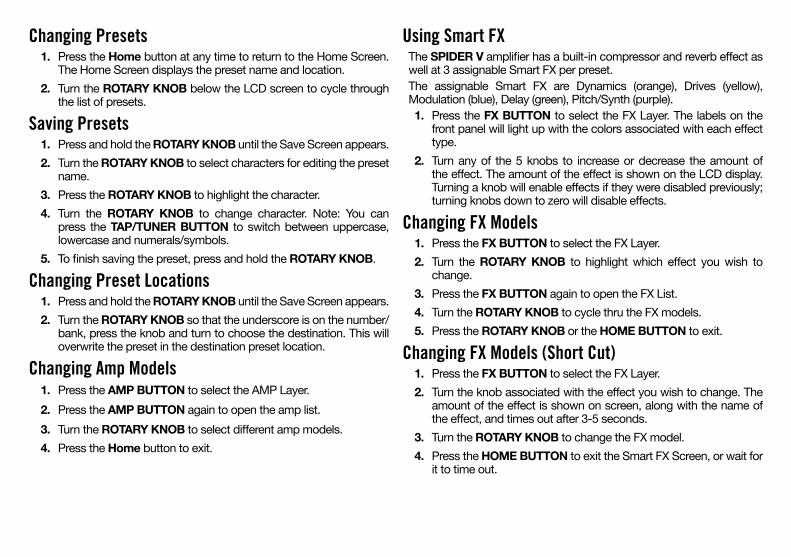
Changing Presets1. Press the Home button at any time to return to the Home Screen.
The Home Screen displays the preset name and location.2. Turn the ROTARY KNOB below the LCD screen to cycle through
the list of presets.
Saving Presets1. Press and hold the ROTARY KNOB until the Save Screen appears.2. Turn the ROTARY KNOB to select characters for editing the preset
name.3. Press the ROTARY KNOB to highlight the character.4. Turn the ROTARY KNOB to change character. Note: You can
press the TAP/TUNER BUTTON to switch between uppercase,lowercase and numerals/symbols.
5. To finish saving the preset, press and hold the ROTARY KNOB.
Changing Preset Locations1. Press and hold the ROTARY KNOB until the Save Screen appears.2. Turn the ROTARY KNOB so that the underscore is on the number/
bank, press the knob and turn to choose the destination. This willoverwrite the preset in the destination preset location.
Changing Amp Models1. Press the AMP BUTTON to select the AMP Layer.2. Press the AMP BUTTON again to open the amp list.3. Turn the ROTARY KNOB to select different amp models.4. Press the Home button to exit.
Using Smart FXThe SPIDER V amplifier has a built-in compressor and reverb effect as well at 3 assignable Smart FX per preset.The assignable Smart FX are Dynamics (orange), Drives (yellow), Modulation (blue), Delay (green), Pitch/Synth (purple).1. Press the FX BUTTON to select the FX Layer. The labels on the
front panel will light up with the colors associated with each effecttype.
2. Turn any of the 5 knobs to increase or decrease the amount ofthe effect. The amount of the effect is shown on the LCD display.Turning a knob will enable effects if they were disabled previously;turning knobs down to zero will disable effects.
Changing FX Models1. Press the FX BUTTON to select the FX Layer.2. Turn the ROTARY KNOB to highlight which effect you wish to
change.3. Press the FX BUTTON again to open the FX List.4. Turn the ROTARY KNOB to cycle thru the FX models.5. Press the ROTARY KNOB or the HOME BUTTON to exit.
Changing FX Models (Short Cut)1. Press the FX BUTTON to select the FX Layer.2. Turn the knob associated with the effect you wish to change. The
amount of the effect is shown on screen, along with the name ofthe effect, and times out after 3-5 seconds.
3. Turn the ROTARY KNOB to change the FX model.4. Press the HOME BUTTON to exit the Smart FX Screen, or wait for
it to time out.
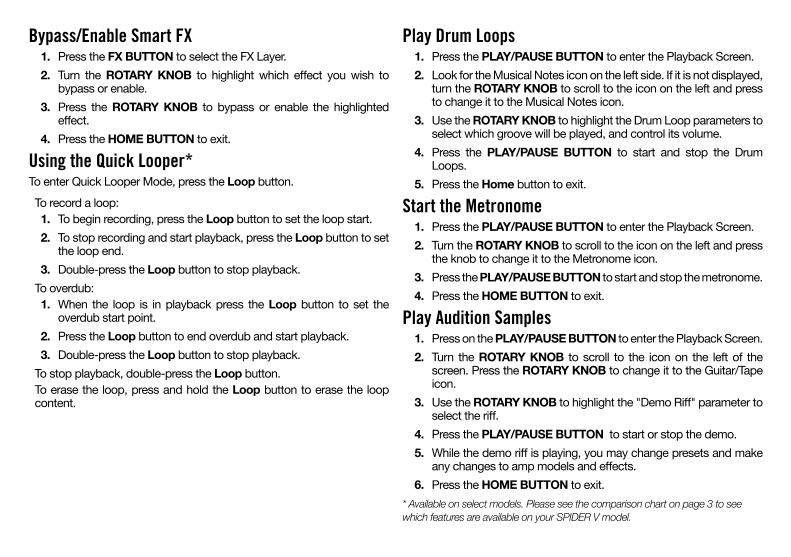
Bypass/Enable Smart FX1. Press the FX BUTTON to select the FX Layer.2. Turn the ROTARY KNOB to highlight which effect you wish to
bypass or enable. 3. Press the ROTARY KNOB to bypass or enable the highlighted
effect.4. Press the HOME BUTTON to exit.
Using the Quick Looper*To enter Quick Looper Mode, press the Loop button.To record a loop:1. To begin recording, press the Loop button to set the loop start.2. To stop recording and start playback, press the Loop button to set
the loop end.3. Double-press the Loop button to stop playback.
To overdub:1. When the loop is in playback press the Loop button to set the
overdub start point.2. Press the Loop button to end overdub and start playback.3. Double-press the Loop button to stop playback.
To stop playback, double-press the Loop button.To erase the loop, press and hold the Loop button to erase the loop content.
Play Drum Loops1. Press the PLAY/PAUSE BUTTON to enter the Playback Screen.2. Look for the Musical Notes icon on the left side. If it is not displayed,
turn the ROTARY KNOB to scroll to the icon on the left and pressto change it to the Musical Notes icon.
3. Use the ROTARY KNOB to highlight the Drum Loop parameters toselect which groove will be played, and control its volume.
4. Press the PLAY/PAUSE BUTTON to start and stop the DrumLoops.
5. Press the Home button to exit.
Start the Metronome1. Press the PLAY/PAUSE BUTTON to enter the Playback Screen.2. Turn the ROTARY KNOB to scroll to the icon on the left and press
the knob to change it to the Metronome icon.3. Press the PLAY/PAUSE BUTTON to start and stop the metronome.4. Press the HOME BUTTON to exit.
Play Audition Samples1. Press on the PLAY/PAUSE BUTTON to enter the Playback Screen.2. Turn the ROTARY KNOB to scroll to the icon on the left of the
screen. Press the ROTARY KNOB to change it to the Guitar/Tapeicon.
3. Use the ROTARY KNOB to highlight the "Demo Riff" parameter toselect the riff.
4. Press the PLAY/PAUSE BUTTON to start or stop the demo.5. While the demo riff is playing, you may change presets and make
any changes to amp models and effects.6. Press the HOME BUTTON to exit.
* Available on select models. Please see the comparison chart on page 3 to seewhich features are available on your SPIDER V model.
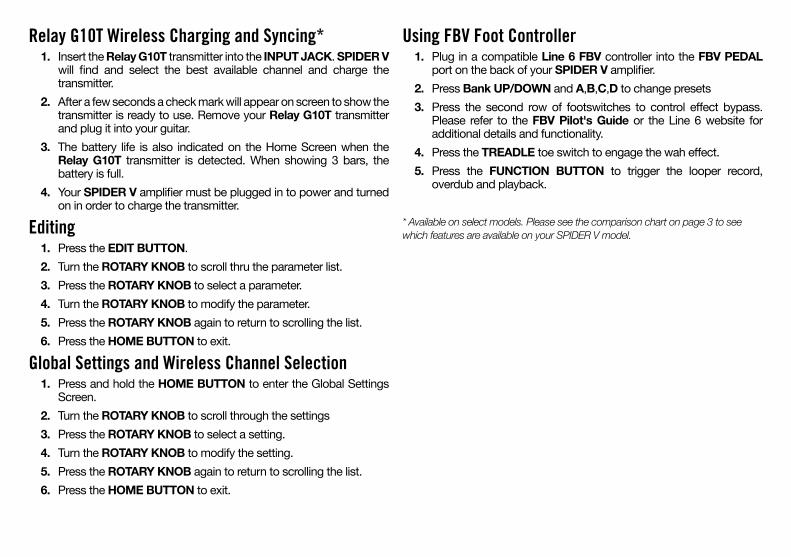
Relay G10T Wireless Charging and Syncing*1. Insert the Relay G10T transmitter into the INPUT JACK. SPIDER V
will find and select the best available channel and charge thetransmitter.
2. After a few seconds a check mark will appear on screen to show thetransmitter is ready to use. Remove your Relay G10T transmitterand plug it into your guitar.
3. The battery life is also indicated on the Home Screen when theRelay G10T transmitter is detected. When showing 3 bars, thebattery is full.
4. Your SPIDER V amplifier must be plugged in to power and turnedon in order to charge the transmitter.
Editing1. Press the EDIT BUTTON.2. Turn the ROTARY KNOB to scroll thru the parameter list.3. Press the ROTARY KNOB to select a parameter.4. Turn the ROTARY KNOB to modify the parameter.5. Press the ROTARY KNOB again to return to scrolling the list.6. Press the HOME BUTTON to exit.
Global Settings and Wireless Channel Selection 1. Press and hold the HOME BUTTON to enter the Global Settings
Screen.2. Turn the ROTARY KNOB to scroll through the settings3. Press the ROTARY KNOB to select a setting.4. Turn the ROTARY KNOB to modify the setting.5. Press the ROTARY KNOB again to return to scrolling the list.6. Press the HOME BUTTON to exit.
Using FBV Foot Controller1. Plug in a compatible Line 6 FBV controller into the FBV PEDAL
port on the back of your SPIDER V amplifier.2. Press Bank UP/DOWN and A,B,C,D to change presets3. Press the second row of footswitches to control effect bypass.
Please refer to the FBV Pilot's Guide or the Line 6 website foradditional details and functionality.
4. Press the TREADLE toe switch to engage the wah effect.5. Press the FUNCTION BUTTON to trigger the looper record,
overdub and playback.
* Available on select models. Please see the comparison chart on page 3 to seewhich features are available on your SPIDER V model.

8 OHM STEREO
RIGHT LEFT/MONO
SPEAKER OUTS USE 4Ω MONO OR 8Ω STEREO
USE CLASS 2 WIRING ONLY
RIGHT LEFT/MONO
SPEAKER OUTS USE 4Ω MONO OR 8Ω STEREO
USE CLASS 2 WIRING ONLY
4 OHM MONO
SPIDER V 240HC
Top Related