


Languages
Pages
Legal

8/8/2019 Shure Drum Mic Techniques
http://slidepdf.com/reader/full/shure-drum-mic-techniques 1/24
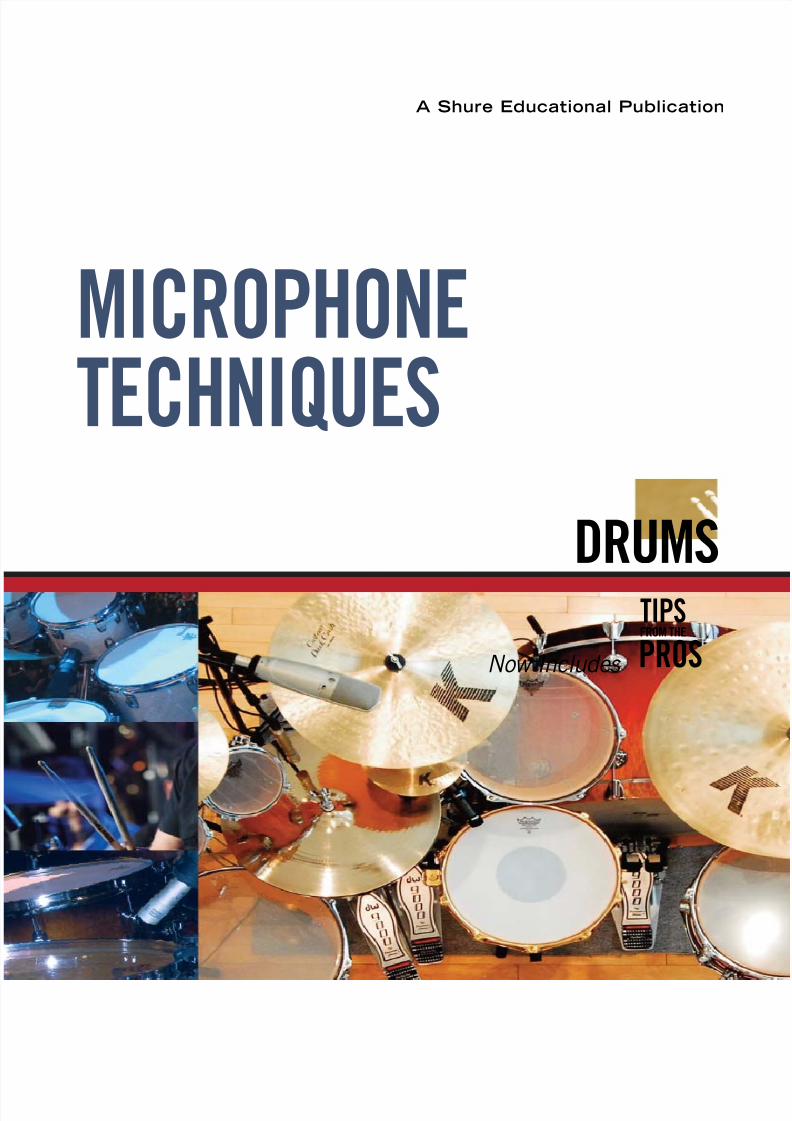
A Shure Educational Publication
MICROPHONE
TECHNIQUES
DRUMS
TIPS
PROSFROM THE
Now Includes

8/8/2019 Shure Drum Mic Techniques
http://slidepdf.com/reader/full/shure-drum-mic-techniques 2/24

8/8/2019 Shure Drum Mic Techniques
http://slidepdf.com/reader/full/shure-drum-mic-techniques 3/24
DRUMS
Microphone Techniques
3
for
General Rules . . . . . . . . . . . . . . . . . . . . . . . . . . . . . . . . . . . . . . . . . . . . . . . . . . . . . . 4
Microphone Positions . . . . . . . . . . . . . . . . . . . . . . . . . . . . . . . . . . . . . . . . . . . . . . . 6
Overhead-Cymbals . . . . . . . . . . . . . . . . . . . . . . . . . . . . . . . . . . . . . . . . . . . . . . 7
Snare drum . . . . . . . . . . . . . . . . . . . . . . . . . . . . . . . . . . . . . . . . . . . . . . . . . . . . 7
Bass drum (kick drum) . . . . . . . . . . . . . . . . . . . . . . . . . . . . . . . . . . . . . . . . . . . 8
Tom-toms . . . . . . . . . . . . . . . . . . . . . . . . . . . . . . . . . . . . . . . . . . . . . . . . . . . . . 8
Hi-hat . . . . . . . . . . . . . . . . . . . . . . . . . . . . . . . . . . . . . . . . . . . . . . . . . . . . . . . . 9
Snare, hi-hat and hi-tom . . . . . . . . . . . . . . . . . . . . . . . . . . . . . . . . . . . . . . . . . . 9Cymbals, floor tom and hi-tom . . . . . . . . . . . . . . . . . . . . . . . . . . . . . . . . . . . . . 9
Timbales, congas, bongos . . . . . . . . . . . . . . . . . . . . . . . . . . . . . . . . . . . . . . . . 10
Tambourine . . . . . . . . . . . . . . . . . . . . . . . . . . . . . . . . . . . . . . . . . . . . . . . . . . . 10
Steel drums . . . . . . . . . . . . . . . . . . . . . . . . . . . . . . . . . . . . . . . . . . . . . . . . . . . 10
Xylophone, marimba, vibraphone . . . . . . . . . . . . . . . . . . . . . . . . . . . . . . . . . . 10
Glockenspiel . . . . . . . . . . . . . . . . . . . . . . . . . . . . . . . . . . . . . . . . . . . . . . . . . . 10
Tips From The Pros . . . . . . . . . . . . . . . . . . . . . . . . . . . . . . . . . . . . . . . . . . . . . . . . 11
Kenny Aronoff . . . . . . . . . . . . . . . . . . . . . . . . . . . . . . . . . . . . . . . . . . . . . . . . . 11Ndugu Chancler . . . . . . . . . . . . . . . . . . . . . . . . . . . . . . . . . . . . . . . . . . . . . . . 12
Mike Mangini . . . . . . . . . . . . . . . . . . . . . . . . . . . . . . . . . . . . . . . . . . . . . . . . . 13
Russ Miller . . . . . . . . . . . . . . . . . . . . . . . . . . . . . . . . . . . . . . . . . . . . . . . . . . . 14
Simon Phillips . . . . . . . . . . . . . . . . . . . . . . . . . . . . . . . . . . . . . . . . . . . . . . . . . 15
Jim Riley . . . . . . . . . . . . . . . . . . . . . . . . . . . . . . . . . . . . . . . . . . . . . . . . . . . . . 16
John JR Robinson . . . . . . . . . . . . . . . . . . . . . . . . . . . . . . . . . . . . . . . . . . . . . . 17
Derek Roddy . . . . . . . . . . . . . . . . . . . . . . . . . . . . . . . . . . . . . . . . . . . . . . . . . . 18
Joel Stevenett . . . . . . . . . . . . . . . . . . . . . . . . . . . . . . . . . . . . . . . . . . . . . . . . . 19
Dave Weckl . . . . . . . . . . . . . . . . . . . . . . . . . . . . . . . . . . . . . . . . . . . . . . . . . . . 20
Paul Wertico . . . . . . . . . . . . . . . . . . . . . . . . . . . . . . . . . . . . . . . . . . . . . . . . . . 21
Glossary . . . . . . . . . . . . . . . . . . . . . . . . . . . . . . . . . . . . . . . . . . . . . . . . . . . . . . . . . 22
Microphone Selection Guide . . . . . . . . . . . . . . . . . . . . . . . . . . . . . . . . . . . . . . . . 23
Table of Contents
Drums
8/8/2019 Shure Drum Mic Techniques
http://slidepdf.com/reader/full/shure-drum-mic-techniques 4/24
DRUMS
Microphone Techniques
4
for
GENERAL RULESMicrophone technique is largely a matter of personal taste — whatever method
sounds right for the particular instrument, musician, and song is right. There is no one ideal
microphone to use on any particular instrument. There is also no one ideal way to place a
microphone. Place the microphone to get the sound you want. However, the desired sound
can often be achieved more quickly and consistently by understanding basic microphone
characteristics, sound-radiation properties of musical instruments, and acoustic
fundamentals.
Here are some suggestions to follow when miking musical instruments for sound
reinforcement.
• Try to get the sound source (instrument, voice, or amplifier) to sound good acoustically
(“live”) before miking it.
• Use a microphone with a frequency response that is limited to the frequency range
of the instrument, if possible, or filter out frequencies below the lowest fundamentalfrequency of the instrument.
• To determine a good starting microphone position, try closing one ear with your finger.
Listen to the sound source with the other ear and move around until you find a spot
that sounds good. Put the microphone there. However, this may not be practical (or
healthy) for extremely close placement near loud sources.
• The closer a microphone is to a sound source, the louder the sound source iscompared to reverberation and ambient noise. Also, the Potential Acoustic Gain is
increased — that is, the system can produce more level before feedback occurs.
Each time the distance between the microphone and sound source is halved, the
sound pressure level at the microphone (and hence the system) will increase by 6 dB.
(Inverse Square Law)
Drums

8/8/2019 Shure Drum Mic Techniques
http://slidepdf.com/reader/full/shure-drum-mic-techniques 5/24
DRUMS
Microphone Techniques
5
for
• Place the microphone only as close as necessary. Too close a placement can color the
sound source’s tone quality (timbre), by picking up only one part of the instrument.
Be aware of Proximity Effect with unidirectional microphones and use bass rolloff if
necessary.
• Use as few microphones as are necessary to get a good sound. To do that, you can
often pick up two or more sound sources with one microphone. Remember: every
time the number of microphones doubles, the Potential Acoustic Gain of the sound
system decreases by 3 dB. This means that the volume level of the system must be
turned down for every extra mic added in order to prevent feedback. In addition, the
amount of noise picked up increases as does the likelihood of interference effects
such as comb-filtering.
• When multiple microphones are used, the distance between microphones should be
at least three times the distance from each microphone to its intended sound source.
This will help eliminate phase cancellation. For example, if two microphones are each
placed one foot from their sound sources, the distance between the microphones
should be at least three feet. (3 to 1 Rule)
• To reduce feedback and pickup of unwanted sounds:
1) place microphone as close as practical to desired sound source
2) place microphone as far as practical from unwanted sound
sources such as loudspeakers and other instruments
3) aim unidirectional microphone toward desired sound source (on-axis)
4) aim unidirectional microphone away from undesired sound source
(180 degrees off-axis for cardioid, 126 degrees off-axis for supercardioid)
5) use minimum number of microphones
• If the sound from your loudspeakers is distorted even though you did not exceed a
normal mixer level, the microphone signal may be overloading your mixer’s input.
To correct this situation, use an in-line attenuator (such as the Shure A15AS), or use
the input attenuator on your mixer to reduce the signal level from the microphone.

8/8/2019 Shure Drum Mic Techniques
http://slidepdf.com/reader/full/shure-drum-mic-techniques 6/24
DRUMS
Microphone Techniques
6
for
Seasoned sound engineers have developed favorite microphone techniques through
years of experience. If you lack this experience, the suggestions listed on the following pages
should help you find a good starting point. These suggestions are not the only possibilities;
other microphones and positions may work as well or better for your intended application.
Remember — Experiment and Listen!
MICROPHONE POSITIONSIn most sound reinforcement systems, the drum set is miked with each drum having
its own mic. Using microphones with tight polar patterns on toms helps to isolate the sound
from each drum. It is possible to share one mic with two toms, but then, a microphone with
a wider polar pattern should be used. The snare requires a mic that can handle very high
SPL, so a dynamic mic is usually chosen. To avoid picking up the hi-hat in the snare mic,
aim the null of the snare mic towards the hi-hat. The brilliance and high frequencies of
cymbals are picked up best by a flat response condenser mic.
Front View Top View

8/8/2019 Shure Drum Mic Techniques
http://slidepdf.com/reader/full/shure-drum-mic-techniques 7/24
DRUMS
Microphone Techniques
7
for
Just above top head at edge of drum,
aiming at top head. Coming in from
front of set on boom (Position C);
or miniature microphone mounted
directly on drum.
Tape gauze pad or handker-
chief on top head to tighten
sound. Boost at 5,000 Hz for
attack, if necessary.
Full,
smooth
One microphone over center
of drum set, about 1 foot above
drummer’s head (Position A);
or use two spaced or crossed
microphones for stereo
(Positions A or B).
Natural; sounds
like drummer
hears set
Picks up ambience and
leakage. For cymbal pickup only,
roll off low frequencies. Boost
at 10,000 Hz for added sizzle.
To reduce excessive cymbal
ringing, apply masking tape in
radial strips from bell to rim.
1 Overhead-Cymbals:
2 Snare drum:
Joel Stevenett
“ I use an SM57 on my snare drum top and bottom…
plus a “Green Bullet” (520DX) lying under my snare, I get a
low-fi loop texture that can be used perfectly in a final mix.” To read the full tip, go to page 19.
Dave Weckl – On the SM57:
“ I like to put it right under the high-hat, so there is not a lot of
high-hat bleed into that mic.” To read the full tip, go to page 20.TIPS
Kenny Aronoff
“ The VP88 Stereo overhead is an amazing mic because it gives you
an incredible stereo image.” To read the full tip, go to page 11.
Russ Miller
“ I use what is called an "X/Y Configuration" utilizing a pair of KSM44's.
The two mics are placed close together and angled at about
75-90 degrees.” To read the full tip, go to page 14.
TIPS
Microphone Placement Tonal Balance Comments

8/8/2019 Shure Drum Mic Techniques
http://slidepdf.com/reader/full/shure-drum-mic-techniques 8/24
DRUMS
Microphone Techniques
8
for
Microphone Placement Tonal Balance Comments
One microphone between every
two tom-toms, close to top heads
(Position E); or one microphone
just above each tom-tom rim,
aiming at top head (Position F);
or one microphone inside each
tom-tom with bottom head
removed; or miniature microphone
mounted directly on drum.
Full,
good impact
Inside drum gives best
isolation. Boost at 5,000 Hz
for attack, if necessary.
4 Tom-toms:
Jim Riley – On the KSM27 (now the SM27):
“ I swear, not a night goes by that I do not get comments about the sound
(and impact) of my floor toms.” To read the full tip, go to page 16.
Simon Phillips – On the KSM137:
“ I do not place these mics close to the drums. They are at least 2" away
from each drum. If the kit is well balanced there is no leakage problem.” To read the full tip, go to page 15.
TIPS
Placing a pad of paper towels where the beater hits the drum will lessen boominess. If you get
rattling or buzzing problems with the drum, put masking tape across the drum head to damp
out these nuisances. Placing the mic off center will pick up more overtones.
Remove front head if necessary. Mount
microphone on boom arm inside drum
a few inches from beater head, about1/3 of way in from edge of head (Position
D); or place surface-mount microphone
inside drum, on damping material, with
microphone element facing beater head.
Put pillow or blanket on
bottom of drum against beater
head to tighten beat. Usewooden beater, or loosen head,
or boost around 2,500 Hz for
more impact and punch.
Full,
good impact
3 Bass drum (kick drum):
Paul Wertico
“ One of the best bass drum sounds we've gotten has actually been
with the SM7B microphone.” To read the full tip, go to page 21.
John Robinson
“ I, of course, use a Beta 52 inside the kick drum about 1/3 in from
the front head.
” To read the full tip, go to page 17.TIPS

8/8/2019 Shure Drum Mic Techniques
http://slidepdf.com/reader/full/shure-drum-mic-techniques 9/24
DRUMS
Microphone Techniques
9
for
Using single microphone,
place its grille just above
floor tom, aiming up toward
cymbals and one of hi-toms(Position I).
Natural In combination with
Placements 3 and 6, provides
good pickup with minimum
number of microphones.Tight sound with little leakage.
7 Cymbals, floor tom and hi-tom:
One microphone: Use Placement 1. Placement 6 may work if the
drummer limits playing to one side of the drum set.
Two microphones: Placements 1 and 3; or 3 and 6.
Three microphones: Placements 1, 2, and 3; or 3, 6, and 7.
Four microphones: Placements 1, 2, 3, and 4.
Five microphones: Placements 1, 2, 3, 4, and 5.
More microphones: Increase number of tom-tom microphones as needed.
Use a small microphone mixer to submix multiple drum microphones into one channel.
Aim microphone down
towards the cymbals, a few
inches over edge away
from drummer (Position G).
Or angle snare drum
microphone slightly toward
hi-hat to pick up both
snare and hi-hat.
Place microphone or adjust
cymbal height so that puff
of air from closing hi-hat
cymbals misses mike. Roll off
bass to reduce low-frequency
leakage. To reduce hi-hat
leakage into snare-drum
microphone, use small cymbals
vertically spaced 1/2” apart.
Place single microphone a few
inches from snare drum edge,
next to hi-tom, just above top
head of tom. Microphone comesin from front of the set on a
boom (Position H).
In combination with
Placements 3 and 7,
provides good pickup
with minimum numberof microphones. Tight
sound with little leakage.
Natural
Natural,
bright
5 Hi-hat:
6 Snare, hi-hat and hi-tom:
Microphone Placement Tonal Balance Comments
8/8/2019 Shure Drum Mic Techniques
http://slidepdf.com/reader/full/shure-drum-mic-techniques 10/24
DRUMS
Microphone Techniques
10
for
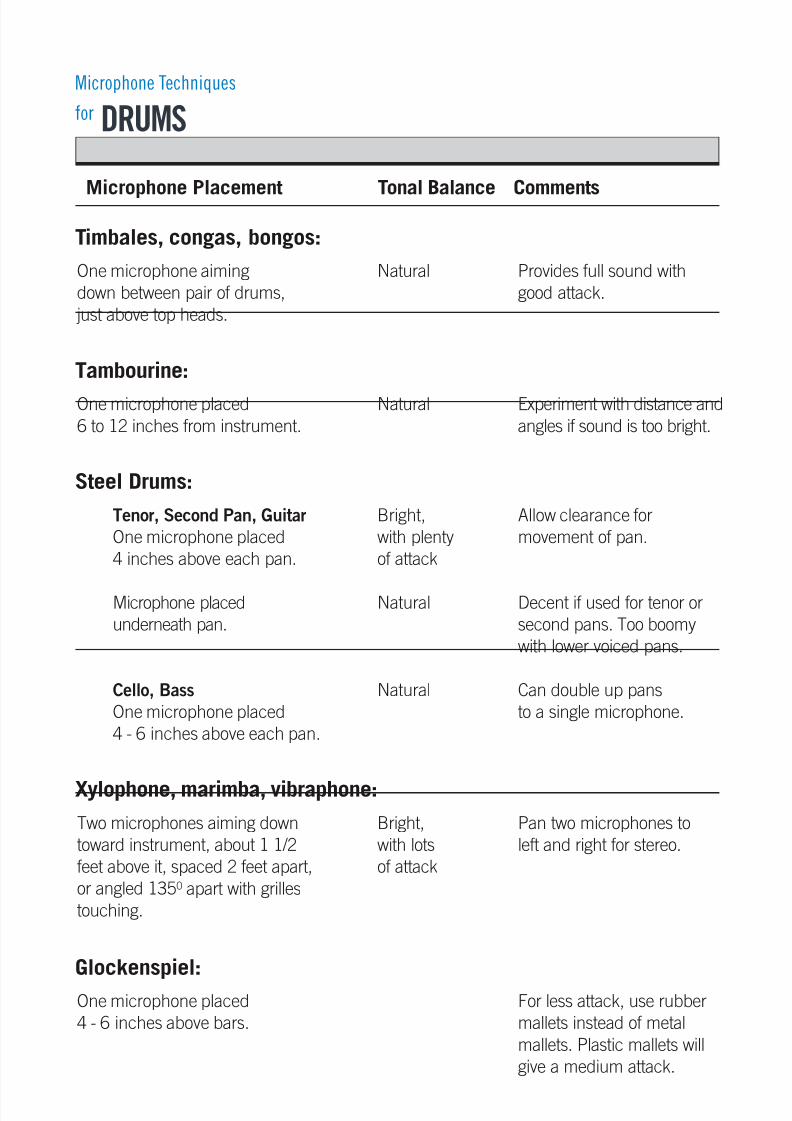
Tenor, Second Pan, Guitar
One microphone placed
4 inches above each pan.
Microphone placed
underneath pan.
Cello, Bass
One microphone placed
4 - 6 inches above each pan.
Bright,
with plenty
of attack
Natural
Natural
Allow clearance for
movement of pan.
Decent if used for tenor or
second pans. Too boomy
with lower voiced pans.
Can double up pans
to a single microphone.
Two microphones aiming down
toward instrument, about 1 1/2
feet above it, spaced 2 feet apart,
or angled 1350 apart with grilles
touching.
Bright,
with lots
of attack
Pan two microphones to
left and right for stereo.
Xylophone, marimba, vibraphone:
One microphone placed
4 - 6 inches above bars.
For less attack, use rubber
mallets instead of metal
mallets. Plastic mallets will
give a medium attack.
Glockenspiel:
One microphone aiming
down between pair of drums,
just above top heads.
Natural Provides full sound with
good attack.
Timbales, congas, bongos:
One microphone placed
6 to 12 inches from instrument.
Natural Experiment with distance and
angles if sound is too bright.
Tambourine:
Steel Drums:
Microphone Placement Tonal Balance Comments

8/8/2019 Shure Drum Mic Techniques
http://slidepdf.com/reader/full/shure-drum-mic-techniques 11/24
DRUMS
Microphone Techniques
11
for
“ I love the Beta 56's on the toms when I am on tour because the bigger mic makes my toms
have a fuller sound... engineers love the Beta 52 on the kick both live and in the studio...
That's what they ask for.
The VP88 Stereo overhead is an amazing mic because it gives you an incredible stereo
image. I have only used it in a live situation and the engineers love the sound quality and
the amazing stereo effect you can get from placing one mic (one source) over the drum kit
to get a stereo effect...”
Kenny Aronoff
TIPS
PROSFROM THE
8/8/2019 Shure Drum Mic Techniques
http://slidepdf.com/reader/full/shure-drum-mic-techniques 12/24
DRUMS
Microphone Techniques
12
for
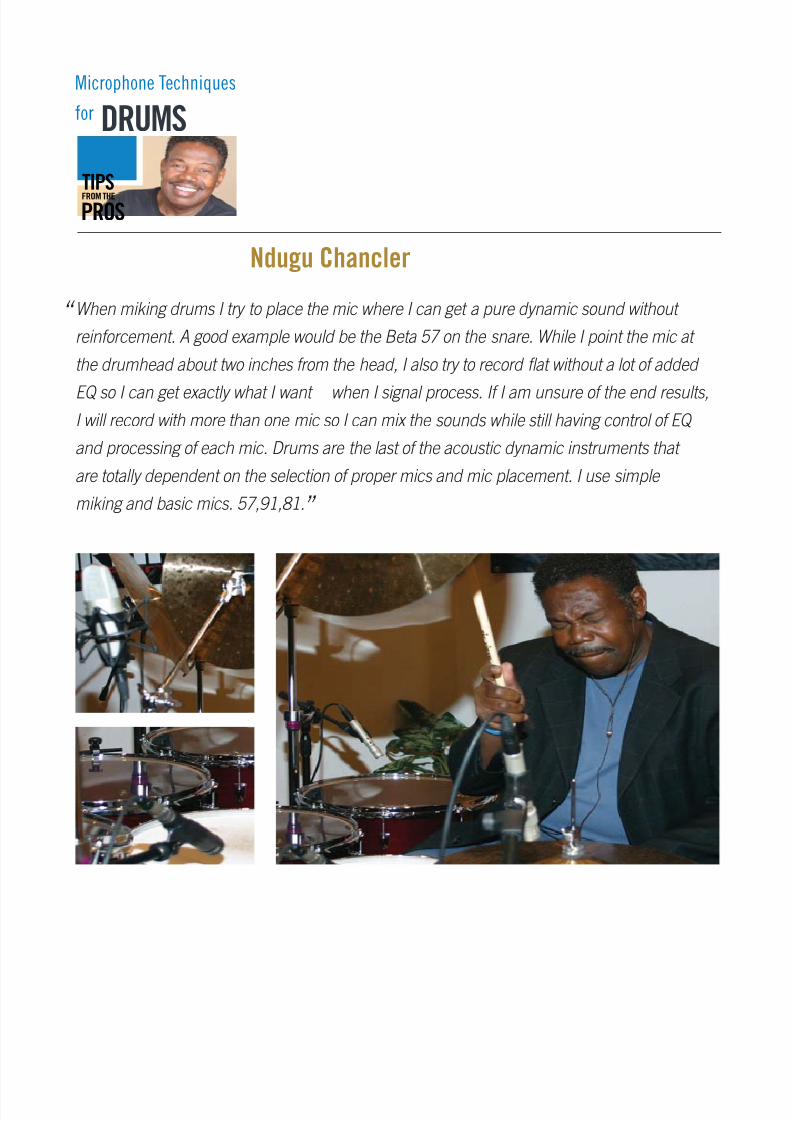
“ When miking drums I try to place the mic where I can get a pure dynamic sound without
reinforcement. A good example would be the Beta 57 on the snare. While I point the mic at
the drumhead about two inches from the head, I also try to record flat without a lot of added
EQ so I can get exactly what I want when I signal process. If I am unsure of the end results,I will record with more than one mic so I can mix the sounds while still having control of EQ
and processing of each mic. Drums are the last of the acoustic dynamic instruments that
are totally dependent on the selection of proper mics and mic placement. I use simple
miking and basic mics. 57,91,81.”
Ndugu Chancler
TIPS
PROSFROM THE

8/8/2019 Shure Drum Mic Techniques
http://slidepdf.com/reader/full/shure-drum-mic-techniques 13/24
DRUMS
Microphone Techniques
13
for
“ BASS DRUM "Tight (stuffing) Sound" – Beta 52A inside drum towards the top of the shell half
way in, aiming at the beater(s.) Aiming down won't pick up so much of the bottom snare.
BASS DRUM "Open (no stuffing) Sound" – Beta 52A outside the drum on the beater head
just like a Tom-Tom mic. It is near the hoop and aiming at the beater(s.)
TOM-TOMS – Beta 98S near the rim aiming half way between rim and the center of the drum
SNARE – Any of the following on the top: SM57, SM58, Beta 87A aiming halfway between the
rim and the center of the drum.
Beta 56A on the bottom aiming halfway between the rim and the center of the drum
CYMBALS – KSM32 down low, halfway between top rack of cymbals and bottom rack.
They are placed closer to the smaller cymbals, but aiming at the larger ones.
Sometimes, a KSM44 is placed behind me aiming at my back.”
Mike Mangini
TIPS
PROSFROM THE

8/8/2019 Shure Drum Mic Techniques
http://slidepdf.com/reader/full/shure-drum-mic-techniques 14/24
8/8/2019 Shure Drum Mic Techniques
http://slidepdf.com/reader/full/shure-drum-mic-techniques 15/24
DRUMS
Microphone Techniques
15
for
Simon Phillips
TIPS
PROSFROM THE
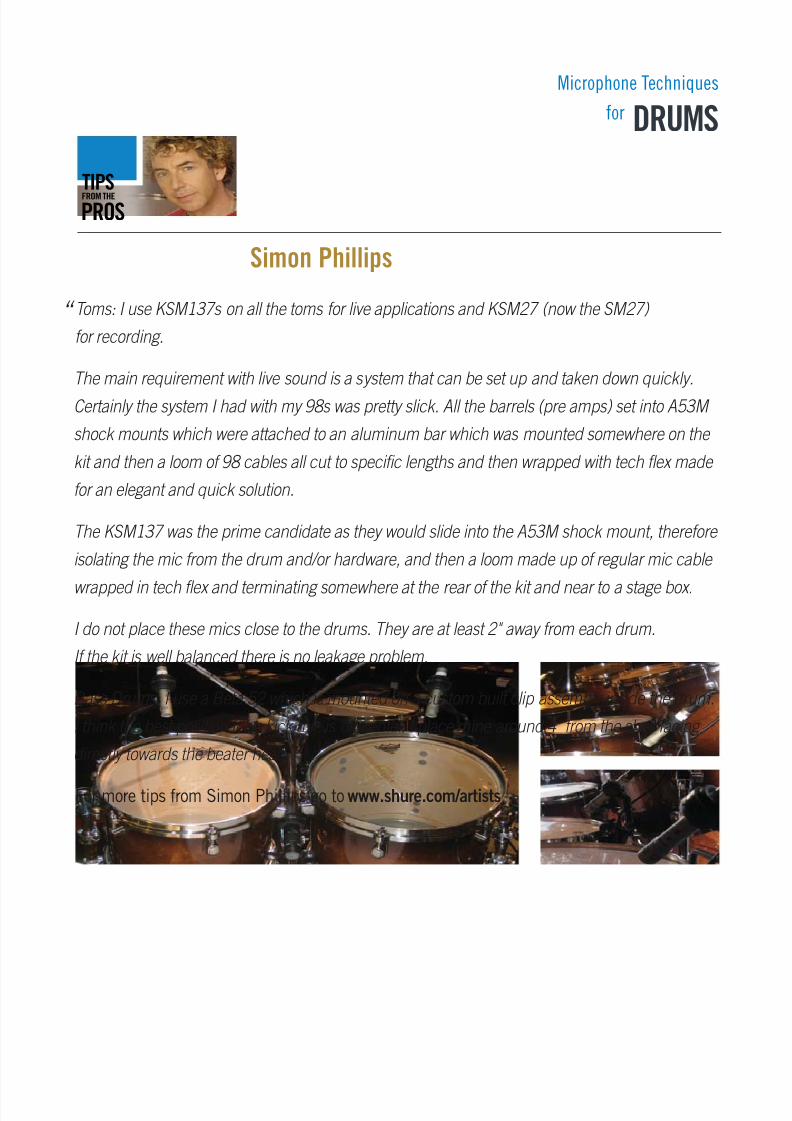
“ Toms: I use KSM137s on all the toms for live applications and KSM27 (now the SM27)
for recording.
The main requirement with live sound is a system that can be set up and taken down quickly.
Certainly the system I had with my 98s was pretty slick. All the barrels (pre amps) set into A53M
shock mounts which were attached to an aluminum bar which was mounted somewhere on the
kit and then a loom of 98 cables all cut to specific lengths and then wrapped with tech flex made
for an elegant and quick solution.
The KSM137 was the prime candidate as they would slide into the A53M shock mount, therefore
isolating the mic from the drum and/or hardware, and then a loom made up of regular mic cable
wrapped in tech flex and terminating somewhere at the rear of the kit and near to a stage box.
I do not place these mics close to the drums. They are at least 2" away from each drum.
If the kit is well balanced there is no leakage problem.
Bass Drums: I use a Beta 52 which is mounted on a custom built clip assembly inside the drum.
I think the best position for a kick mic is off center. I place mine around 4" from the shell facing
directly towards the beater head.”
For more tips from Simon Phillips go towww.shure.com/artists
8/8/2019 Shure Drum Mic Techniques
http://slidepdf.com/reader/full/shure-drum-mic-techniques 16/24
DRUMS
Microphone Techniques
16
for
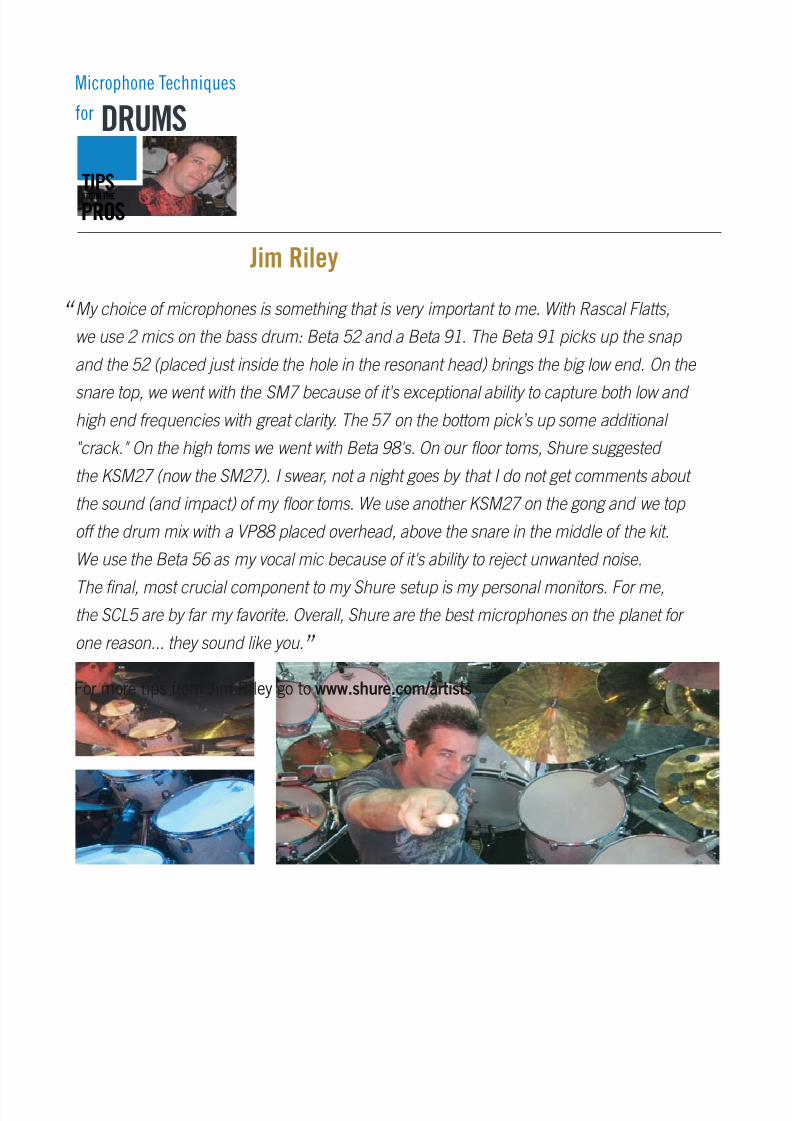
“ My choice of microphones is something that is very important to me. With Rascal Flatts,
we use 2 mics on the bass drum: Beta 52 and a Beta 91. The Beta 91 picks up the snap
and the 52 (placed just inside the hole in the resonant head) brings the big low end. On the
snare top, we went with the SM7 because of it's exceptional ability to capture both low and high end frequencies with great clarity. The 57 on the bottom pick’s up some additional
"crack." On the high toms we went with Beta 98's. On our floor toms, Shure suggested
the KSM27 (now the SM27). I swear, not a night goes by that I do not get comments about
the sound (and impact) of my floor toms. We use another KSM27 on the gong and we top
off the drum mix with a VP88 placed overhead, above the snare in the middle of the kit.
We use the Beta 56 as my vocal mic because of it's ability to reject unwanted noise.
The final, most crucial component to my Shure setup is my personal monitors. For me,the SCL5 are by far my favorite. Overall, Shure are the best microphones on the planet for
one reason... they sound like you.”
For more tips from Jim Riley go towww.shure.com/artists
Jim Riley
TIPS
PROSFROM THE

8/8/2019 Shure Drum Mic Techniques
http://slidepdf.com/reader/full/shure-drum-mic-techniques 17/24
DRUMS
Microphone Techniques
17
for
“ I, of course, use a Beta 52 inside the kick drum about 1/3 in from the front head.
I balance my sound with a KSM27 (now the SM27) in front of the bass drum about
2 inches off the head. I record two separate tracks of bass drum. Depending on the
song, the KSM27 add that extra "woof" sound needed on so many records today.
For overheads:
I use KSM44's on my be-bop kit in an old Ruddy Van Gelder Technique from the early
60's. If I'm behind the kit, the left overhead is above the crash angled down and the
right mic is just above the floor tom also slightly angled down. I don't need any tom
mics using this technique .”
John JR Robinson
TIPS
PROSFROM THE

8/8/2019 Shure Drum Mic Techniques
http://slidepdf.com/reader/full/shure-drum-mic-techniques 18/24
DRUMS
Microphone Techniques
18
for
Derek Roddy
TIPS
PROSFROM THE
“ My favorite miking technique is... whatever sounds best... given the situation I'm playing in.
I mic different sized drum kits... different ways.
For instance... I wouldn't mic a 4 piece the same way I would mic my monster 10 piece.
Also, depends on the sound I'm going for... Room sound, close sound, isolated sound, etc.
For the 4 piece and playing blues or Jazz type of "sounds"... I would use 4 mics.
A pair of KSM 32's for overheads, a Beta 52 on the kick and a SM57 on the snare.
More roomy type of sound.
For the big kit... and playing Rock, Metal, etc... I normally use 3 SM81's for overheads
(L, center, R) Beta 52's for the kicks, SM57 on top and bottom of snare, SM98's on the
Toms. A "closed mic" isolated type of sound.
One trick I always use is... cutting a small piece of cardboard in a 6 inch square, with a
hole (just big enough to push a 57 through) in the middle. I use the cardboard as a "buffer"
for air pressure coming from the Hi Hat... to prevent that annoying bleed.”

8/8/2019 Shure Drum Mic Techniques
http://slidepdf.com/reader/full/shure-drum-mic-techniques 19/24
DRUMS
Microphone Techniques
19
for
“ As a drummer, I’m very particular about how my drums sound live and in the studio.
Shure microphones have always provided me with a wide open sound, which gives
the engineer and producer the flexibility to mix exactly what the track demands.
For my perfect bass drum sound, I use a combination of the Beta 52A and a Beta 91.
For instance, this combination has worked perfectly on such recordings as the NBA theme
and Disney’s “Ultimate Band” (for Nintendo Wii).
I love the versatility of SHURE microphones! I use an SM57 on my snare drum top and
bottom. With the combination of that plus a “Green Bullet” (520DX) lying under my snare,
I get a low-fi loop texture that can be used perfectly in a final mix.”
Joel Stevenett
TIPS
PROSFROM THE
8/8/2019 Shure Drum Mic Techniques
http://slidepdf.com/reader/full/shure-drum-mic-techniques 20/24
DRUMS
Microphone Techniques
20
for
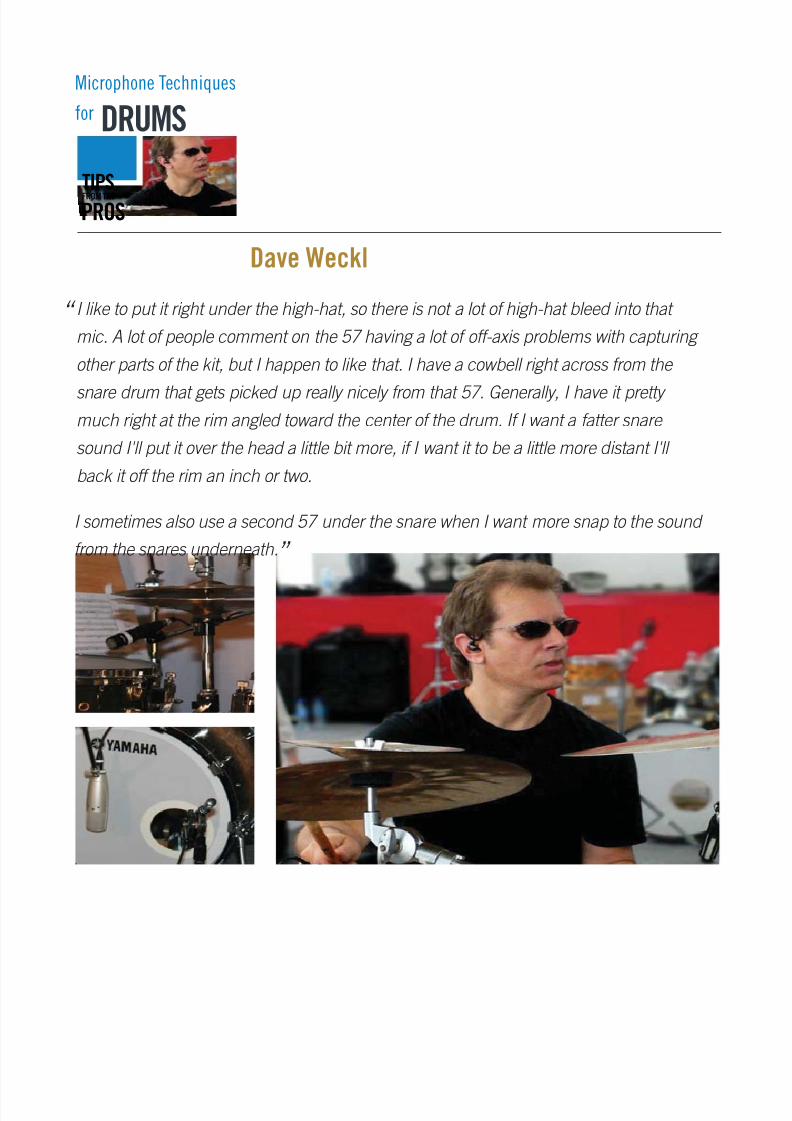
“ I like to put it right under the high-hat, so there is not a lot of high-hat bleed into that
mic. A lot of people comment on the 57 having a lot of off-axis problems with capturing
other parts of the kit, but I happen to like that. I have a cowbell right across from the
snare drum that gets picked up really nicely from that 57. Generally, I have it pretty much right at the rim angled toward the center of the drum. If I want a fatter snare
sound I'll put it over the head a little bit more, if I want it to be a little more distant I'll
back it off the rim an inch or two.
I sometimes also use a second 57 under the snare when I want more snap to the sound
from the snares underneath.”
Dave Weckl
TIPS
PROSFROM THE

8/8/2019 Shure Drum Mic Techniques
http://slidepdf.com/reader/full/shure-drum-mic-techniques 21/24
8/8/2019 Shure Drum Mic Techniques
http://slidepdf.com/reader/full/shure-drum-mic-techniques 22/24
DRUMS
Microphone Techniques
22
forGlossary
R e f e r e n c e I n f o r m a t i o n
3-to-1 Rule – When using multiple
microphones, the distance between
microphones should be at least 3 times
the distance from each microphone to
its intended sound source.
Ambience – Room acoustics or natural
reverberation.
Feedback – In a PA system consisting of a
microphone, amplifier, and loudspeaker
feedback is the ringing or howling sound
caused by amplified sound from the
loudspeaker entering the microphone
and being re-amplified.
Frequency Response – A graph showing
how a microphone responds to various
sound frequencies. It is a plot of electrical
output (in decibels) vs. frequency (in Hertz).
Interference – Destructive combining of
sound waves or electrical signals due to
phase differences.
Inverse Square Law – States that direct
sound levels increase (or decrease) by
an amount proportional to the square
of the change in distance.
Isolation – Freedom from leakage; ability to
reject unwanted sounds.
Leakage – Pickup of an instrument by a
microphone intended to pick up another
instrument. Creative leakage is artistically
favorable leakage that adds a “loose” or
“live” feel to a recording.
Noise – Unwanted electrical or acoustic
interference.
PAG – Potential Acoustic Gain is the
calculated gain that a sound system can
achieve at or just below the point of
feedback.
Polar Pattern (Directional Pattern, Polar
Response) – A graph showing how thesensitivity of a microphone varies with the
angle of the sound source, at a particular
frequency. Examples of polar patterns are
unidirectional and omnidirectional.
Proximity Effect – The increase in bass
occurring with most unidirectional
microphones when they are placed closeto an instrument or vocalist (within 1 ft.).
Does not occur with omnidirectional
microphones.
Rolloff – A gradual decrease in response
below or above some specified frequency.

8/8/2019 Shure Drum Mic Techniques
http://slidepdf.com/reader/full/shure-drum-mic-techniques 23/24
DRUMS
Microphone Techniques
23
forShure Microphone Selection Guide
R e f e r e n c e I n f o r m a t i o n
This guide is an aid in selecting microphones for various applications.
Microphone sound quality and appearance are subject to specific acoustic
environments, application technique, and personal taste.
*Requires drum mount accessory to mount on rim.
Kick Drum
Beta 52A
Beta 91Beta 57A
SM57
PG52
Snare Drum
Beta 57A*
Beta 56A*
SM57*
PG56PG57*
Rack/Floor Toms
Beta 98 D/S
Beta 57A*
Beta 56A*
SM57*
PG56
PG57*
Shure Microphone Selection Guide
Drums
Mallets
KSM141
KSM137KSM44
KSM32
SM137
SM94
SM81
SM27
PG81
PercussionKSM141
KSM137
KSM44
KSM32
Beta 57A
SM137
SM57
SM27
PG57
Congas
Beta 98D/S
Beta 56A*Beta 57A*
SM57*
PG56
PG57*
Cymbals
KSM141
KSM137
KSM44KSM32
SM137
SM94
SM81
SM27
PG81

8/8/2019 Shure Drum Mic Techniques
http://slidepdf.com/reader/full/shure-drum-mic-techniques 24/24
Top Related