


Languages
Pages
Legal


Student Notes:
Photo Studio Optimizer������������
Copyright DASSAULT SYSTEMES �
Cop
yrig
ht D
AS
SA
ULT
SY
STE
ME
S
Photo Studio Optimizer
CATIA V5 TrainingFoils
Version 5 Release 19September 2008
EDU_CAT_EN_PSO_FF_V5R19

Student Notes:
Photo Studio Optimizer������������
Copyright DASSAULT SYSTEMES �
Cop
yrig
ht D
AS
SA
ULT
SY
STE
ME
S
Photo Studio OptimizerObjectives of the courseUpon completion of this course you will be able to use the various Photo Studio Optimizer tools to enhance the quality of your photo realistic images.
Targeted audienceIndustrial Stylists and Designers
PrerequisitesCATIA V5 Fundamentals, Photo Studio
0.5 day

Student Notes:
Photo Studio Optimizer������������
Copyright DASSAULT SYSTEMES �
Cop
yrig
ht D
AS
SA
ULT
SY
STE
ME
S
Table of Contents (1/2)
Introduction to Photo Studio Optimizer 5Accessing the Photo Studio Workbench 6User settings: Photo Studio 73D Textures 8
Bump Mapping 12What is Bump Mapping? 13Defining the Bump Mapping Parameters 14
Global Illumination 16What is Global Illumination? 17Setting the Light Parameters for Global Illumination 18Setting the Shooting Parameters 19
Caustics 20What about Caustics? 21Setting the Light Parameters 22Setting the Caustic Parameters 23
Visual Effects 24What about Visual Effects ? 25Setting the Depth of Field 26

Student Notes:
Photo Studio Optimizer������������
Copyright DASSAULT SYSTEMES �
Cop
yrig
ht D
AS
SA
ULT
SY
STE
ME
S
Table of Contents (2/2)
Defining the Glow Parameters 27Cartoon Rendering 28

Student Notes:
Photo Studio Optimizer������������
Copyright DASSAULT SYSTEMES �
Cop
yrig
ht D
AS
SA
ULT
SY
STE
ME
S
Introduction to Photo Studio OptimizerIn this lesson you will see V5 Photo Studio Optimizer user interface

Student Notes:
Photo Studio Optimizer������������
Copyright DASSAULT SYSTEMES �
Cop
yrig
ht D
AS
SA
ULT
SY
STE
ME
S
Accessing the Photo Studio Workbench
You can access the Photo Studio Workbench by clicking on Start > Infrastructure > Photo Studio
Photo Studio Optimizer is a set of advanced capabilities which are added to the original capabilities of the Photo Studio workbench.

Student Notes:
Photo Studio Optimizer������������
Copyright DASSAULT SYSTEMES �
Cop
yrig
ht D
AS
SA
ULT
SY
STE
ME
S
Using Photo Studio settings, the rendering computation can be automatically distributed on remote workstations through a network. The rendering time is drastically reduced, particularly for huge mock-ups.
User Settings: Photo Studio
Declare the workstations (satellites) here (installation and customization on satellites is required)
The local host will allocate and distribute all the necessary data to the participating satellites, which, in turn, will process the rendering then return the final result back to the local host.
Click on ‘Tools > Options > Infrastructure > Photo Studio > Satellites’
1
2
Up to 8 CPU can be used simultaneously. All platforms are available.
Student Notes:
Photo Studio Optimizer������������
Copyright DASSAULT SYSTEMES �
Cop
yrig
ht D
AS
SA
ULT
SY
STE
ME
S
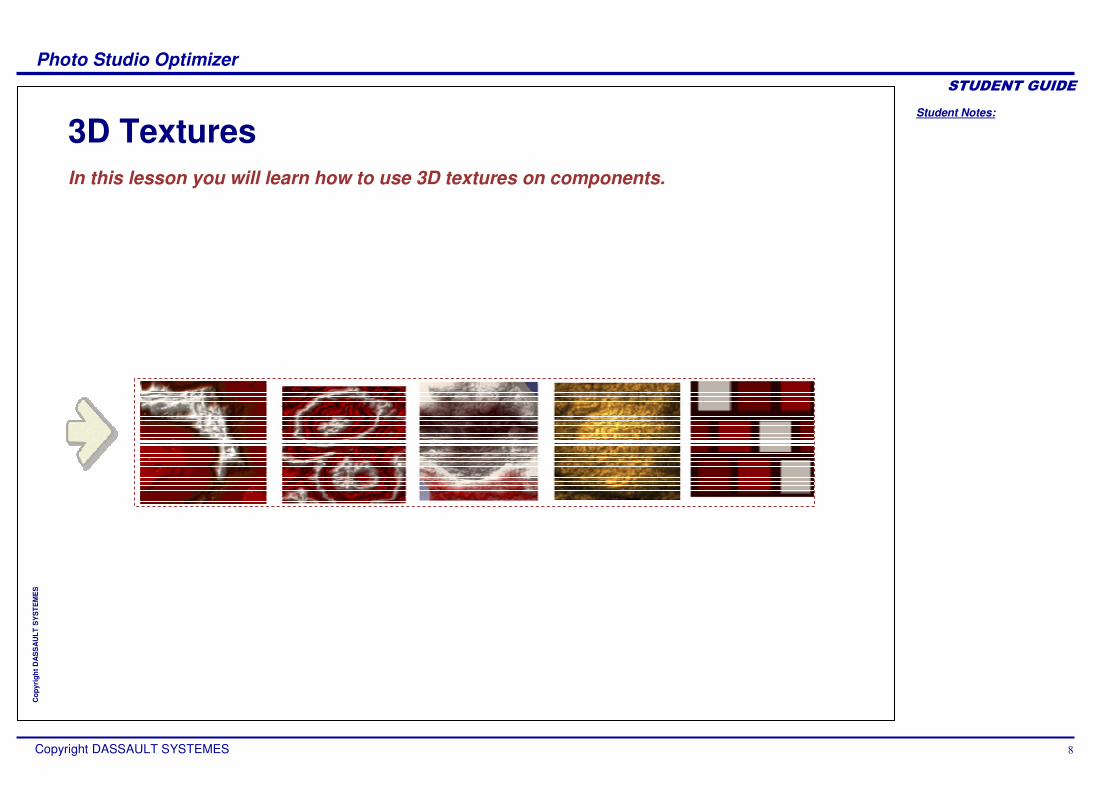
3D TexturesIn this lesson you will learn how to use 3D textures on components.

Student Notes:
Photo Studio Optimizer������������
Copyright DASSAULT SYSTEMES
Cop
yrig
ht D
AS
SA
ULT
SY
STE
ME
S
What is a 3D Texture?
What is a 3D texture? When using a 2D texture, a picture file is projected on the object using a specific projection method.Using a 3D texture is as sculpting the object directly in the material. The texture is very realistic and gives the illusion of relief. It can be customized through its own parameters (examples : complexity, amplitude, turbulence,…)
Which 3D textures can I use? CATIA Photo Studio Optimizer provides 5 different types of 3D textures:� Marble� Vein� Alternate vein� Rock� Chessboard

Student Notes:
Photo Studio Optimizer������������
Copyright DASSAULT SYSTEMES �
Cop
yrig
ht D
AS
SA
ULT
SY
STE
ME
S
Click on the ‘Texture’ tab
Applying a 3D Texture
Select the 3D texture from the list
Select the material properties
In real time in the 3D viewer, the corresponding texture image is mapped onto the geometry to give a rough visualization of the effect.
The final result is only seen in the rendered image.
1
2
Activate the ‘ray traced preview’ to visualize the final result in the dialog box
4
3
2
3
4

Student Notes:
Photo Studio Optimizer������������
Copyright DASSAULT SYSTEMES ��
Cop
yrig
ht D
AS
SA
ULT
SY
STE
ME
S
Editing a 3D Texture
Define the main color of the material
Define the object surface perturbation
Define the complexity of the motif of the texture
Position and scale the texture
Define the bump mapping

Student Notes:
Photo Studio Optimizer������������
Copyright DASSAULT SYSTEMES ��
Cop
yrig
ht D
AS
SA
ULT
SY
STE
ME
S
Bump MappingIn this lesson you will learn how to use bump mapping.

Student Notes:
Photo Studio Optimizer������������
Copyright DASSAULT SYSTEMES ��
Cop
yrig
ht D
AS
SA
ULT
SY
STE
ME
S
What is Bump Mapping?
The bump mapping allows to simulate, using lighting effect, a perturbation of the surface of an object.
This simulation modifies the aspect of the surface of the object. The perturbation is computed based on the contrast of the texture pixels.
For example, bright colors are displayed above dark colors, creating a 3D effect on the object.

Student Notes:
Photo Studio Optimizer������������
Copyright DASSAULT SYSTEMES ��
Cop
yrig
ht D
AS
SA
ULT
SY
STE
ME
S
Access the material properties from the contextual menu
Defining the Bump Mapping Parameters (1/2)
Value of Bump parameter:• 0: no bump effect• >0: bright color above dark color• <0: dark color above bright color Bump mapping is also
available for 3D textures
1
Select the Texture tab2
Define the Bump mapping amplitude
3
2
3
1

Student Notes:
Photo Studio Optimizer������������
Copyright DASSAULT SYSTEMES ��
Cop
yrig
ht D
AS
SA
ULT
SY
STE
ME
S
Defining the Bump Mapping Parameters (2/2)
Computation result with activation of the bump mapping
Computation result without activating the bump mapping

Student Notes:
Photo Studio Optimizer������������
Copyright DASSAULT SYSTEMES ��
Cop
yrig
ht D
AS
SA
ULT
SY
STE
ME
S
Global IlluminationIn this lesson you will learn how to create more realistic images using the global illumination.
Student Notes:
Photo Studio Optimizer������������
Copyright DASSAULT SYSTEMES ��
Cop
yrig
ht D
AS
SA
ULT
SY
STE
ME
S
What is Global Illumination?
photons
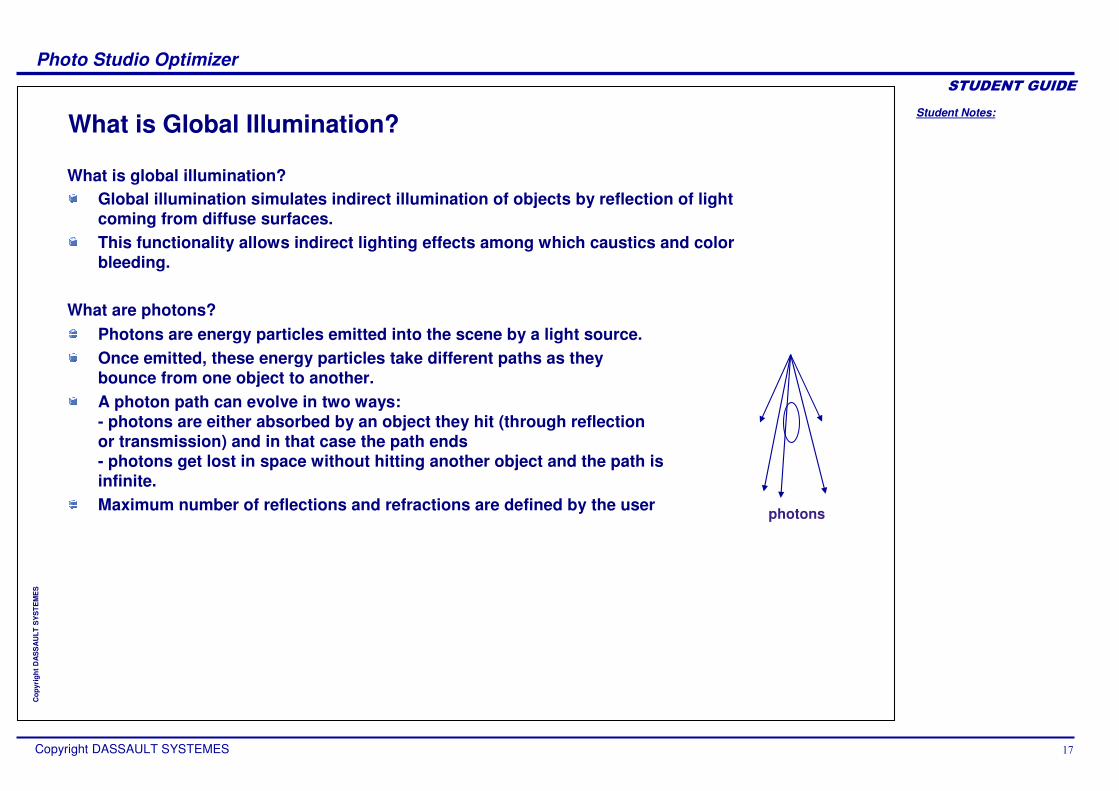
What is global illumination?Global illumination simulates indirect illumination of objects by reflection of light coming from diffuse surfaces.This functionality allows indirect lighting effects among which caustics and color bleeding.
What are photons?Photons are energy particles emitted into the scene by a light source.Once emitted, these energy particles take different paths as they bounce from one object to another.A photon path can evolve in two ways:- photons are either absorbed by an object they hit (through reflection or transmission) and in that case the path ends- photons get lost in space without hitting another object and the path is infinite.Maximum number of reflections and refractions are defined by the user

Student Notes:
Photo Studio Optimizer������������
Copyright DASSAULT SYSTEMES ��
Cop
yrig
ht D
AS
SA
ULT
SY
STE
ME
S
Setting the Light Parameters for Global Illumination
From the contextual menu of the light, click on ‘Properties’
Select ‘Indirect Illumination’
Activate photon emission
Set the intensity factor (0 to 100). It corresponds to the light intensity of the photons. It will be combined with the intensity parameter of the “Lighting” tabIt is recommended to be close to 1
Define the maximum number of photons to be used for the computation of the image (10.000 to 10.000.000).A low value can create puddles
1
2
1
3
4
5
2
3
4
Student Notes:
Photo Studio Optimizer������������
Copyright DASSAULT SYSTEMES �
Cop
yrig
ht D
AS
SA
ULT
SY
STE
ME
S
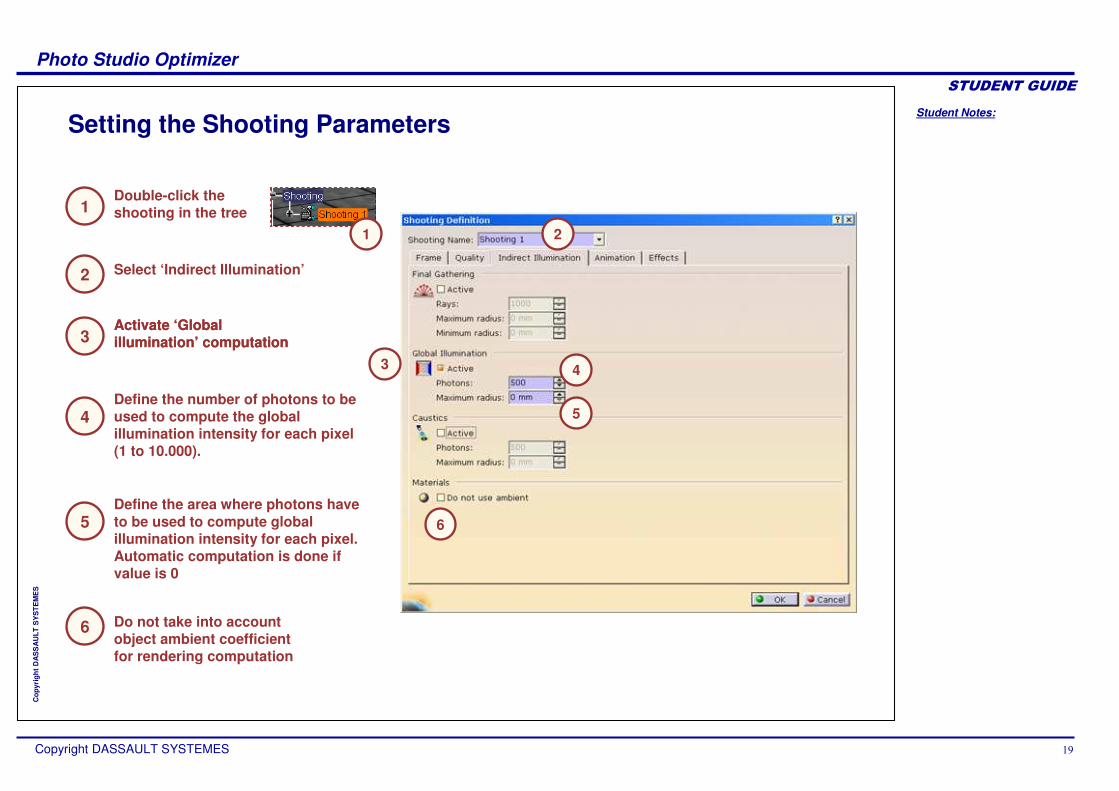
Setting the Shooting Parameters
Define the number of photons to be used to compute the global illumination intensity for each pixel (1 to 10.000).
Define the area where photons have to be used to compute global illumination intensity for each pixel.Automatic computation is done if value is 0
Double-click the shooting in the tree
Select ‘Indirect Illumination’
Activate ‘Global illumination’ computation
Do not take into account object ambient coefficient for rendering computation
1
2
3Activate ‘Global illumination’ computation
4
5
6
1 2
3 4
5
6

Student Notes:
Photo Studio Optimizer������������
Copyright DASSAULT SYSTEMES �
Cop
yrig
ht D
AS
SA
ULT
SY
STE
ME
S
CausticsIn this lesson you will learn how to use caustics.

Student Notes:
Photo Studio Optimizer������������
Copyright DASSAULT SYSTEMES ��
Cop
yrig
ht D
AS
SA
ULT
SY
STE
ME
S
What about Caustics?
What are caustics?
Caustics can be defined as small localized lighting effects created by specular light interactions (reflection or refraction) onto a diffuse surface.
A typical example of caustics would be the light pattern cast on the bottom of a swimming pool by the wave pattern on the water surface.

Student Notes:
Photo Studio Optimizer������������
Copyright DASSAULT SYSTEMES ��
Cop
yrig
ht D
AS
SA
ULT
SY
STE
ME
S
Setting the Light Parameters
Select the Properties from the contextual menu of the Light source.
Select ‘Indirect Illumination’
Activate photons emission
Define the maximum number of photons to be used for the computation of the caustics (10.000 to 10.000.000).This number must be lower than the number defined for global illumination
1
2
3
4
1
2
3
4

Student Notes:
Photo Studio Optimizer������������
Copyright DASSAULT SYSTEMES ��
Cop
yrig
ht D
AS
SA
ULT
SY
STE
ME
S
Setting the Caustic Parameters
Double-click the shooting in the tree
Select ‘Indirect Illumination’
Activate caustics computation
Define the number of photons to be used to compute caustics for each pixel (1 to 10.000)
Define the area where photons have to be used to compute caustics for each pixel.Automatic computation is done if value is 0
Do not take into account object ambient coefficient for rendering computation
1
2
3
4
5
6
1 2
3 4
5
6

Student Notes:
Photo Studio Optimizer������������
Copyright DASSAULT SYSTEMES ��
Cop
yrig
ht D
AS
SA
ULT
SY
STE
ME
S
Visual EffectsIn this lesson you will learn how to add visual effects.

Student Notes:
Photo Studio Optimizer������������
Copyright DASSAULT SYSTEMES ��
Cop
yrig
ht D
AS
SA
ULT
SY
STE
ME
S
What about Visual Effects ?
Depth of field : This visual effect makes objects that are not in focus (far from the camera target) appear blurry, thus giving a sense of depth to the image
Glow: This effect generates a halo around bright pixels of the rendered image. This glow not only gives an impression of greater brightness, but it can also interfere with the visibility of nearby pixels, thus improving the realism of images by adding effects which perceptually expand and enhance the perceived dynamic range. This effect is obtained thanks to a filter applied onto the image at the end of the rendering as a post-processing.
Depth of field and glow effects work independently from each other.

Student Notes:
Photo Studio Optimizer������������
Copyright DASSAULT SYSTEMES ��
Cop
yrig
ht D
AS
SA
ULT
SY
STE
ME
S
Setting the Depth of Field
Define Confusion radius (radius of the camera origin from which rays are sent)The smallest the radius, the sharpest the result
Select the Effects tab
Sharp area
Blur area
1 Double-click the shooting in the tree
2
3
2
4
Activate the Depth of field
3
4

Student Notes:
Photo Studio Optimizer������������
Copyright DASSAULT SYSTEMES ��
Cop
yrig
ht D
AS
SA
ULT
SY
STE
ME
S
Defining the Glow Parameters
Define the parameters : • Threshold : pixel intensities to be processed for
glow effect• Intensity : how bright the glow will be• Size : size of the glow• Flare intensity : makes the rainbow more or less
visible• Flare diffusion : Set the width of the rainbow• Radial line size : size of the streaks• Star effect : length and arrangement of the streaks
Select the Effects tab
Double-click the shooting in the tree1
2
4
3Activate the Glow
2
3
4

Student Notes:
Photo Studio Optimizer������������
Copyright DASSAULT SYSTEMES ��
Cop
yrig
ht D
AS
SA
ULT
SY
STE
ME
S
Cartoon Rendering (1/2)
You will learn to generate a rendered image showing the drawing of contours around the geometry to create a cartoon-style effect.
Activate ‘Cartoon’
Adjust the various parameters for Cartoon:• ‘Contours only’ : display only the
contours of the drawing• ‘Contour thickness’ : thickness of the
contour line when using ‘Contours only’or ‘Ink pen effect’
• ‘Ink pen effect’ : Make the thickness of the contour line dependent on its orientation
Select the Effects tab
Double-click the shooting in the tree1
2
4
3
2
34

Student Notes:
Photo Studio Optimizer������������
Copyright DASSAULT SYSTEMES �
Cop
yrig
ht D
AS
SA
ULT
SY
STE
ME
S
Cartoon Rendering (2/2)
Ink pen effectThickness : 0.5
Ink pen effectThickness : 0.1
Contours onlyThickness : 0.5

Student Notes:
Photo Studio Optimizer������������
Copyright DASSAULT SYSTEMES �
Cop
yrig
ht D
AS
SA
ULT
SY
STE
ME
S
To Sum Up ...
In this course you have seen:
How to use 3D texturesHow to use bump mappingHow to use global illuminationHow to compute causticsHow to add visual effects
Top Related