


Languages
Pages
Legal


Human-Computer Interaction DesignCOGS120/CSE170 - “Intro. HCI”
Instructor: Philip Guo
Lab 4 - Server-side backend web development (2016-10-20) by Michael Bernstein, Scott Klemmer, and Philip Guo

Lab roadmap
Browser
CSS for styling:Lab 2
JavaScript for interaction: Lab 3
HTML for page structure: Lab 1
Frontend development
Server-side
Portfolio website
Backend development
Express server-side web framework for Node.js: Lab 4
Data storage (future)
AJAX for updates w/out reload: Lab 6
2

Generate pages on-demand based on user inputRoutesControllersTemplatesJSON
3

The story so far… loading static content
4
index.htmlGET http://pgbovine.net/index.html
<html>…<p>Welcome!</p>…</html>
This only works if all data is static: they never change based on user input.
Web browser(e.g., Chrome on your laptop)
Web server(e.g., Heroku) loads HTML file from its hard drive

5
What about…

6
What about…

concepts
Dynamically generating HTML with code
7

8
GET http://introhci.org/name/Michael
<p>Welcome, Michael!</p>
This architecture supports dynamic responses.Instead of loading an HTML file, you are running code that generates an HTML file on-demand.
function { ... }
Web browser(e.g., Chrome on your laptop)
Web server (e.g., Heroku) runs code to generate HTML
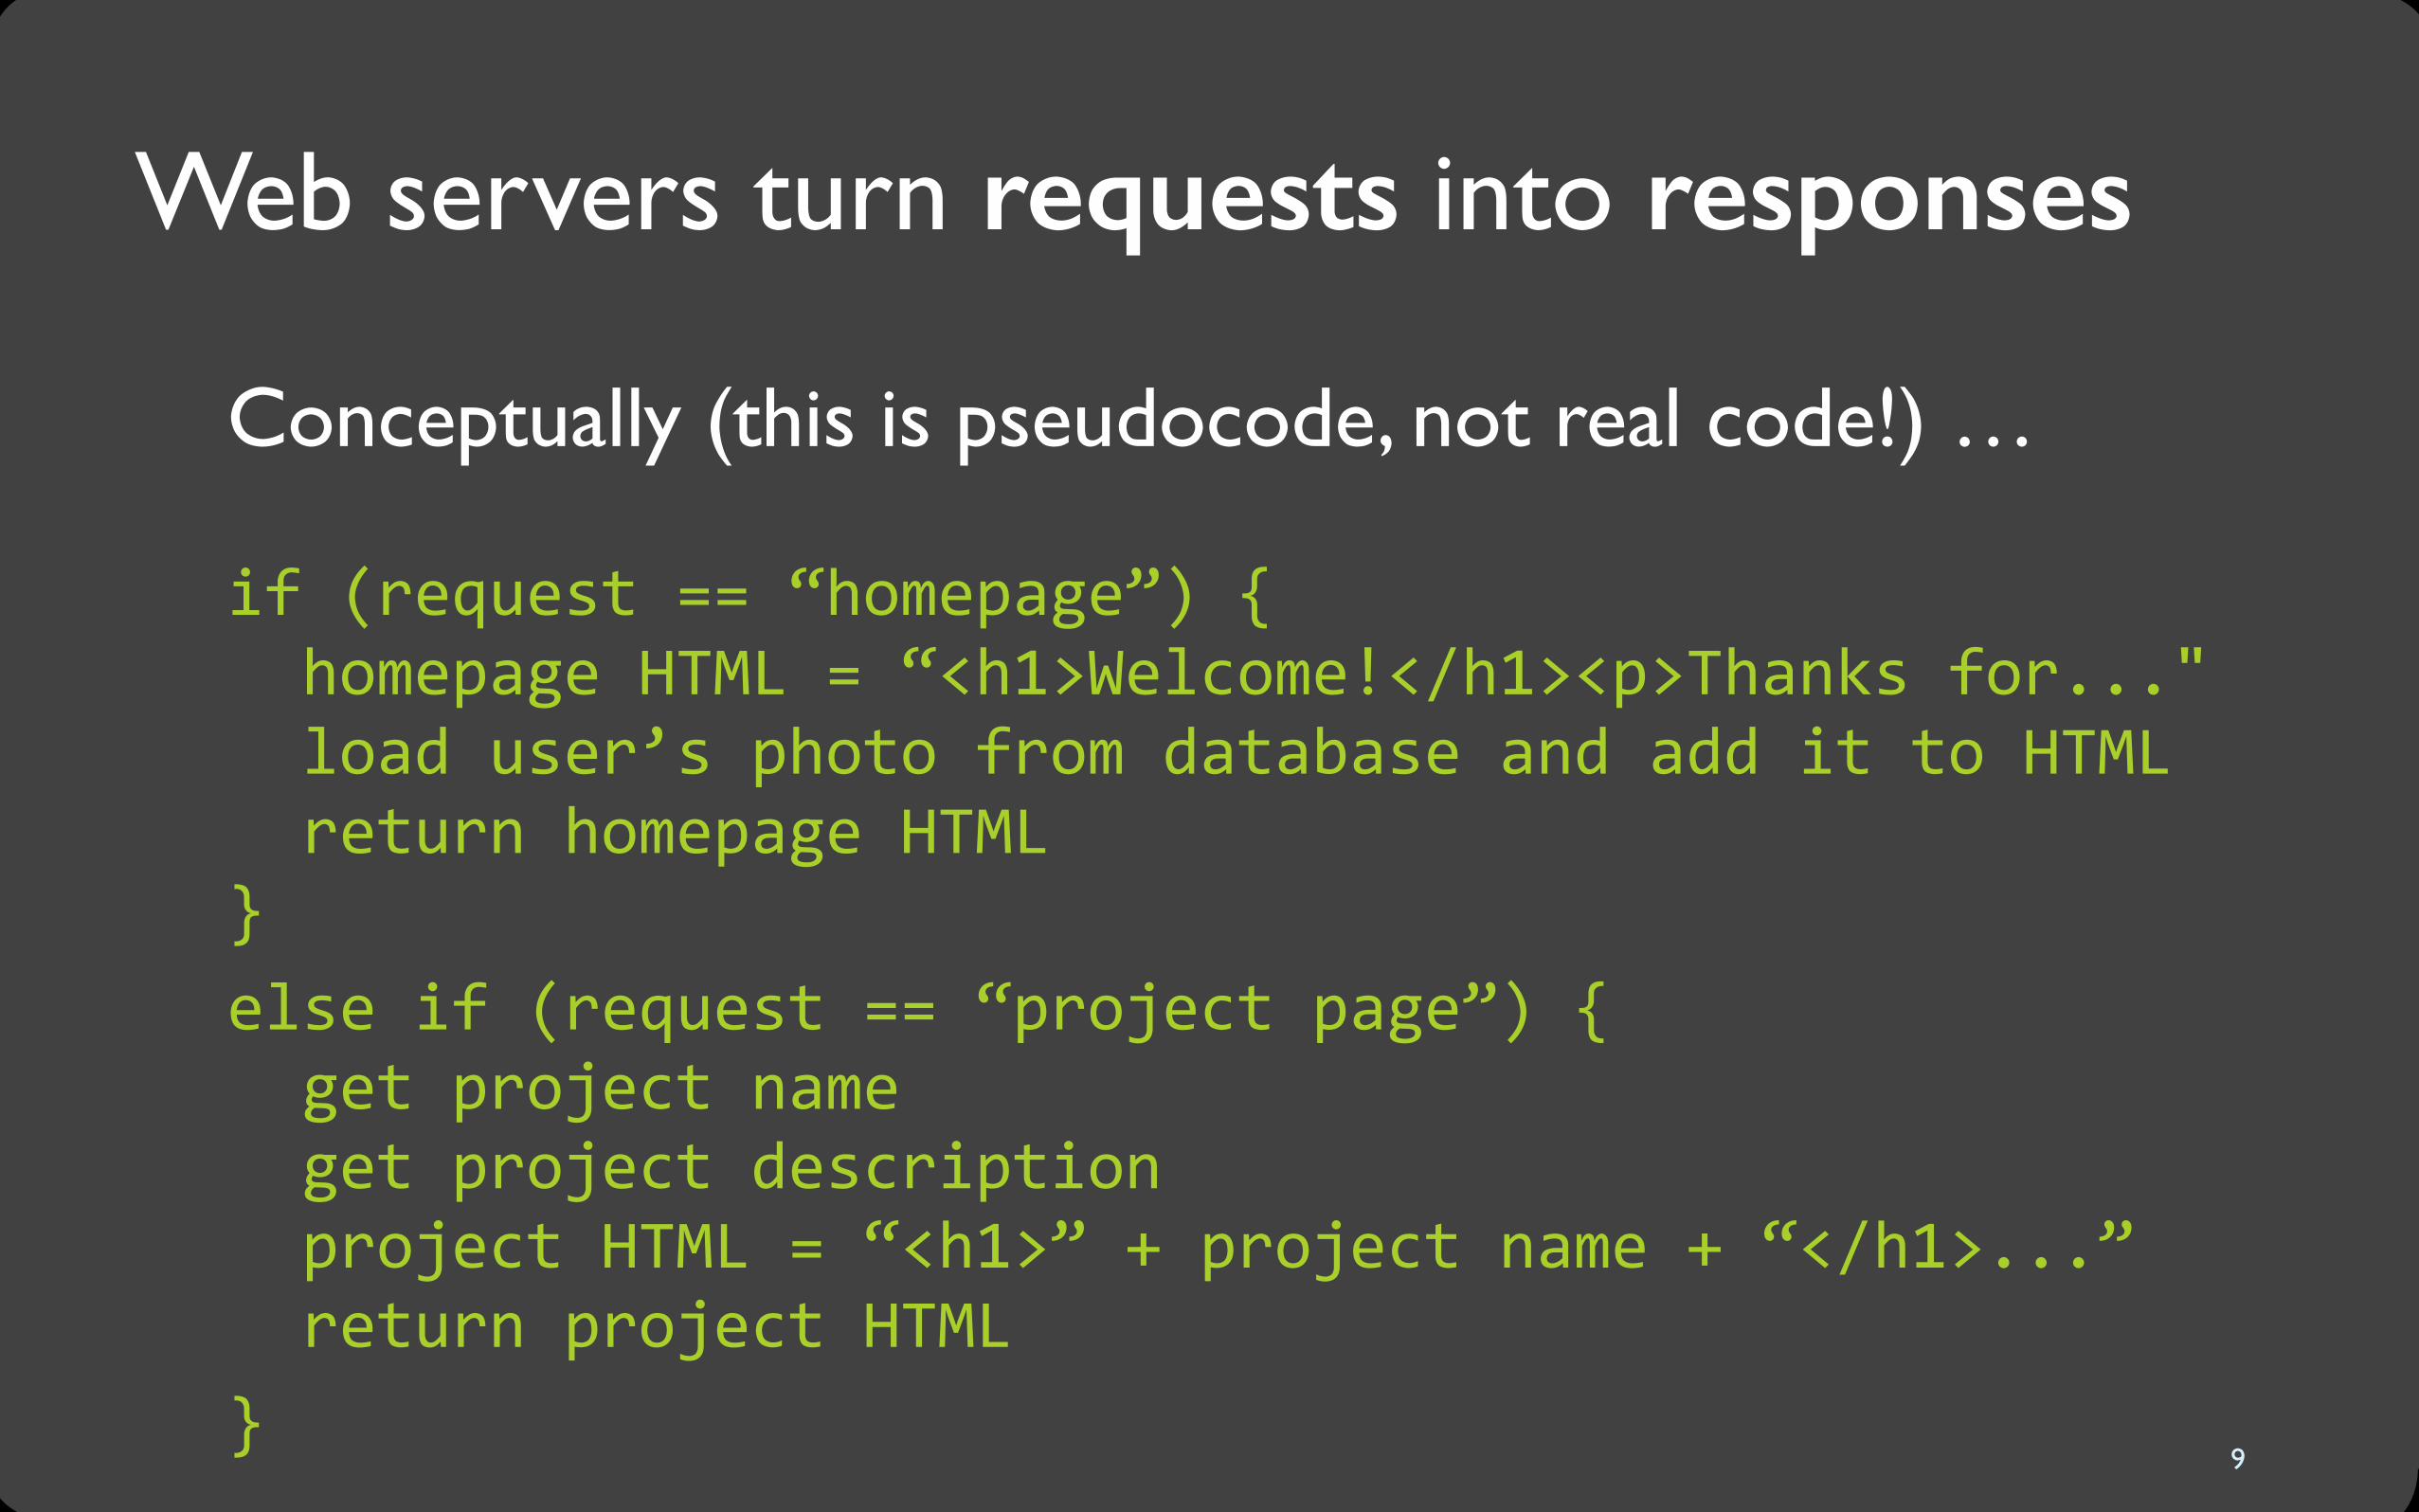
Web servers turn requests into responses
Conceptually (this is pseudocode, not real code!) …if (request == “homepage”) { homepage HTML = “<h1>Welcome!</h1><p>Thanks for..." load user’s photo from database and add it to HTML return homepage HTML} else if (request == “project page”) { get project name get project description project HTML = “<h1>” + project name + “</h1>...” return project HTML }
9
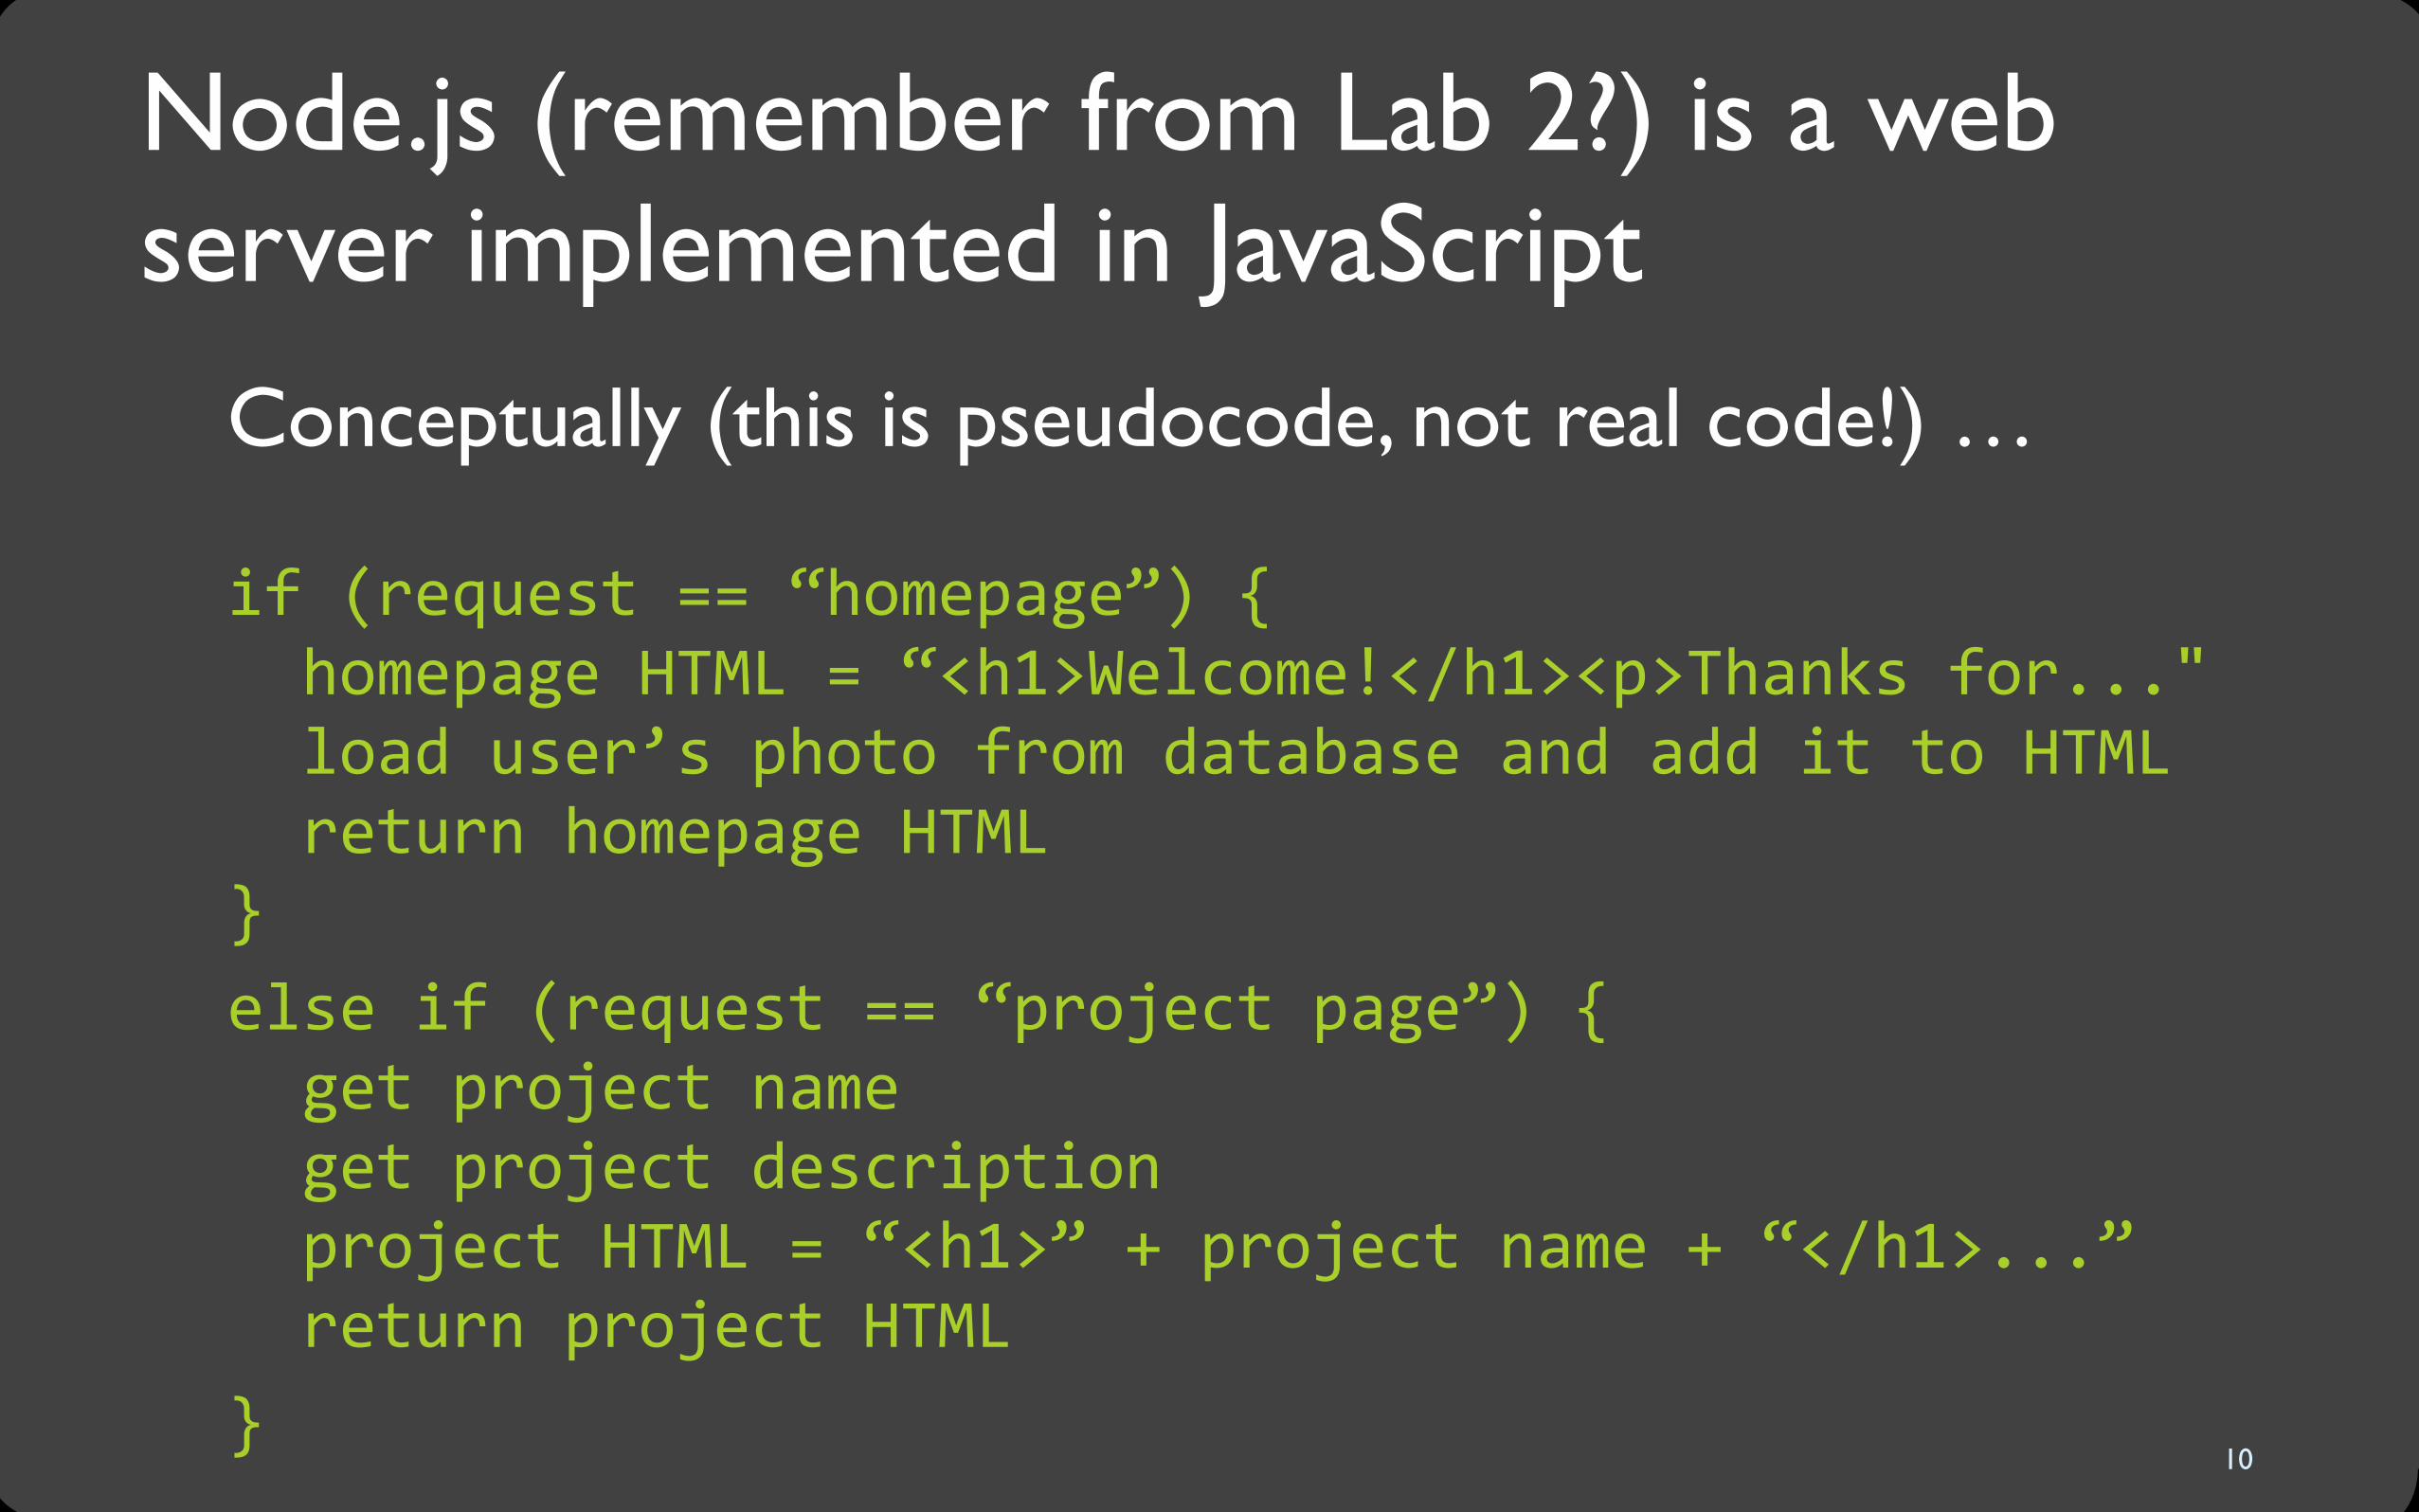
Node.js (remember from Lab 2?) is a web server implemented in JavaScript
Conceptually (this is pseudocode, not real code!) …if (request == “homepage”) { homepage HTML = “<h1>Welcome!</h1><p>Thanks for..." load user’s photo from database and add it to HTML return homepage HTML} else if (request == “project page”) { get project name get project description project HTML = “<h1>” + project name + “</h1>...” return project HTML }
10

Dissection: hello world Node.js application# clone from: https://github.com/pgbovine/lab4# change into the introHCI/lab4/hello directory cd introHCI cd lab4/hello
# start Node.js web server node app.js

Dissection: the major arteries
12
introHCI/lab4/hello ├─app.js ├─┬routes │ ├──hello.js ├─┬views │ ├──index.handlebars ├─┬public │ ├──css │ ├──js │ ├──images
Main project file
What do we do when the browser requests /name?
HTML lives here

Where did the HTML come from?
Inside a file called views/index.handlebars:
<div class="container"> <div class="jumbotron"> <h1>Hello, {{name}}!</h1> </div> </div>
13
Template variable Replaced with a variable that is passedto the template

Where did the template get the {{name}} variable?
Inside the file routes/hello.js: exports.view = function(req, res){ var nameToShow = req.params.userName; console.log("name is " + nameToShow); res.render('index', { 'name': nameToShow, }); };
14
URL parametersGet the name from the URL
Render template Insert variables into the HTML template

What called the hello.view() function?
15
Inside the application’s main file, app.js:
var app = express(); var hello = require('./routes/hello'); app.get('/hello/:userName', hello.view);
URL parameters (:variable) Place the URL parameter into the userName variable
Function to call Call view() in the hello module

All together now
{{name}} in HTML template
userName request parameter in hello.view()
A function registered to listen to the URL http://localhost:3000/hello/:userName
16
is populated with…
which is called by…

But that’s backward. It goes like this:
function { ... }
HTML
{{name}}
{{profile}}
Request comes fromthe browser
Routes decide which function to call
Controller executes code to prepare the template
Template inserts controller results into HTMLfile
Rendered HTML <p>Hello, Tom!</p> 17
localhost:3000/hello/Tom
hello.view() render(‘hello’, {‘name’: ‘Tom’})
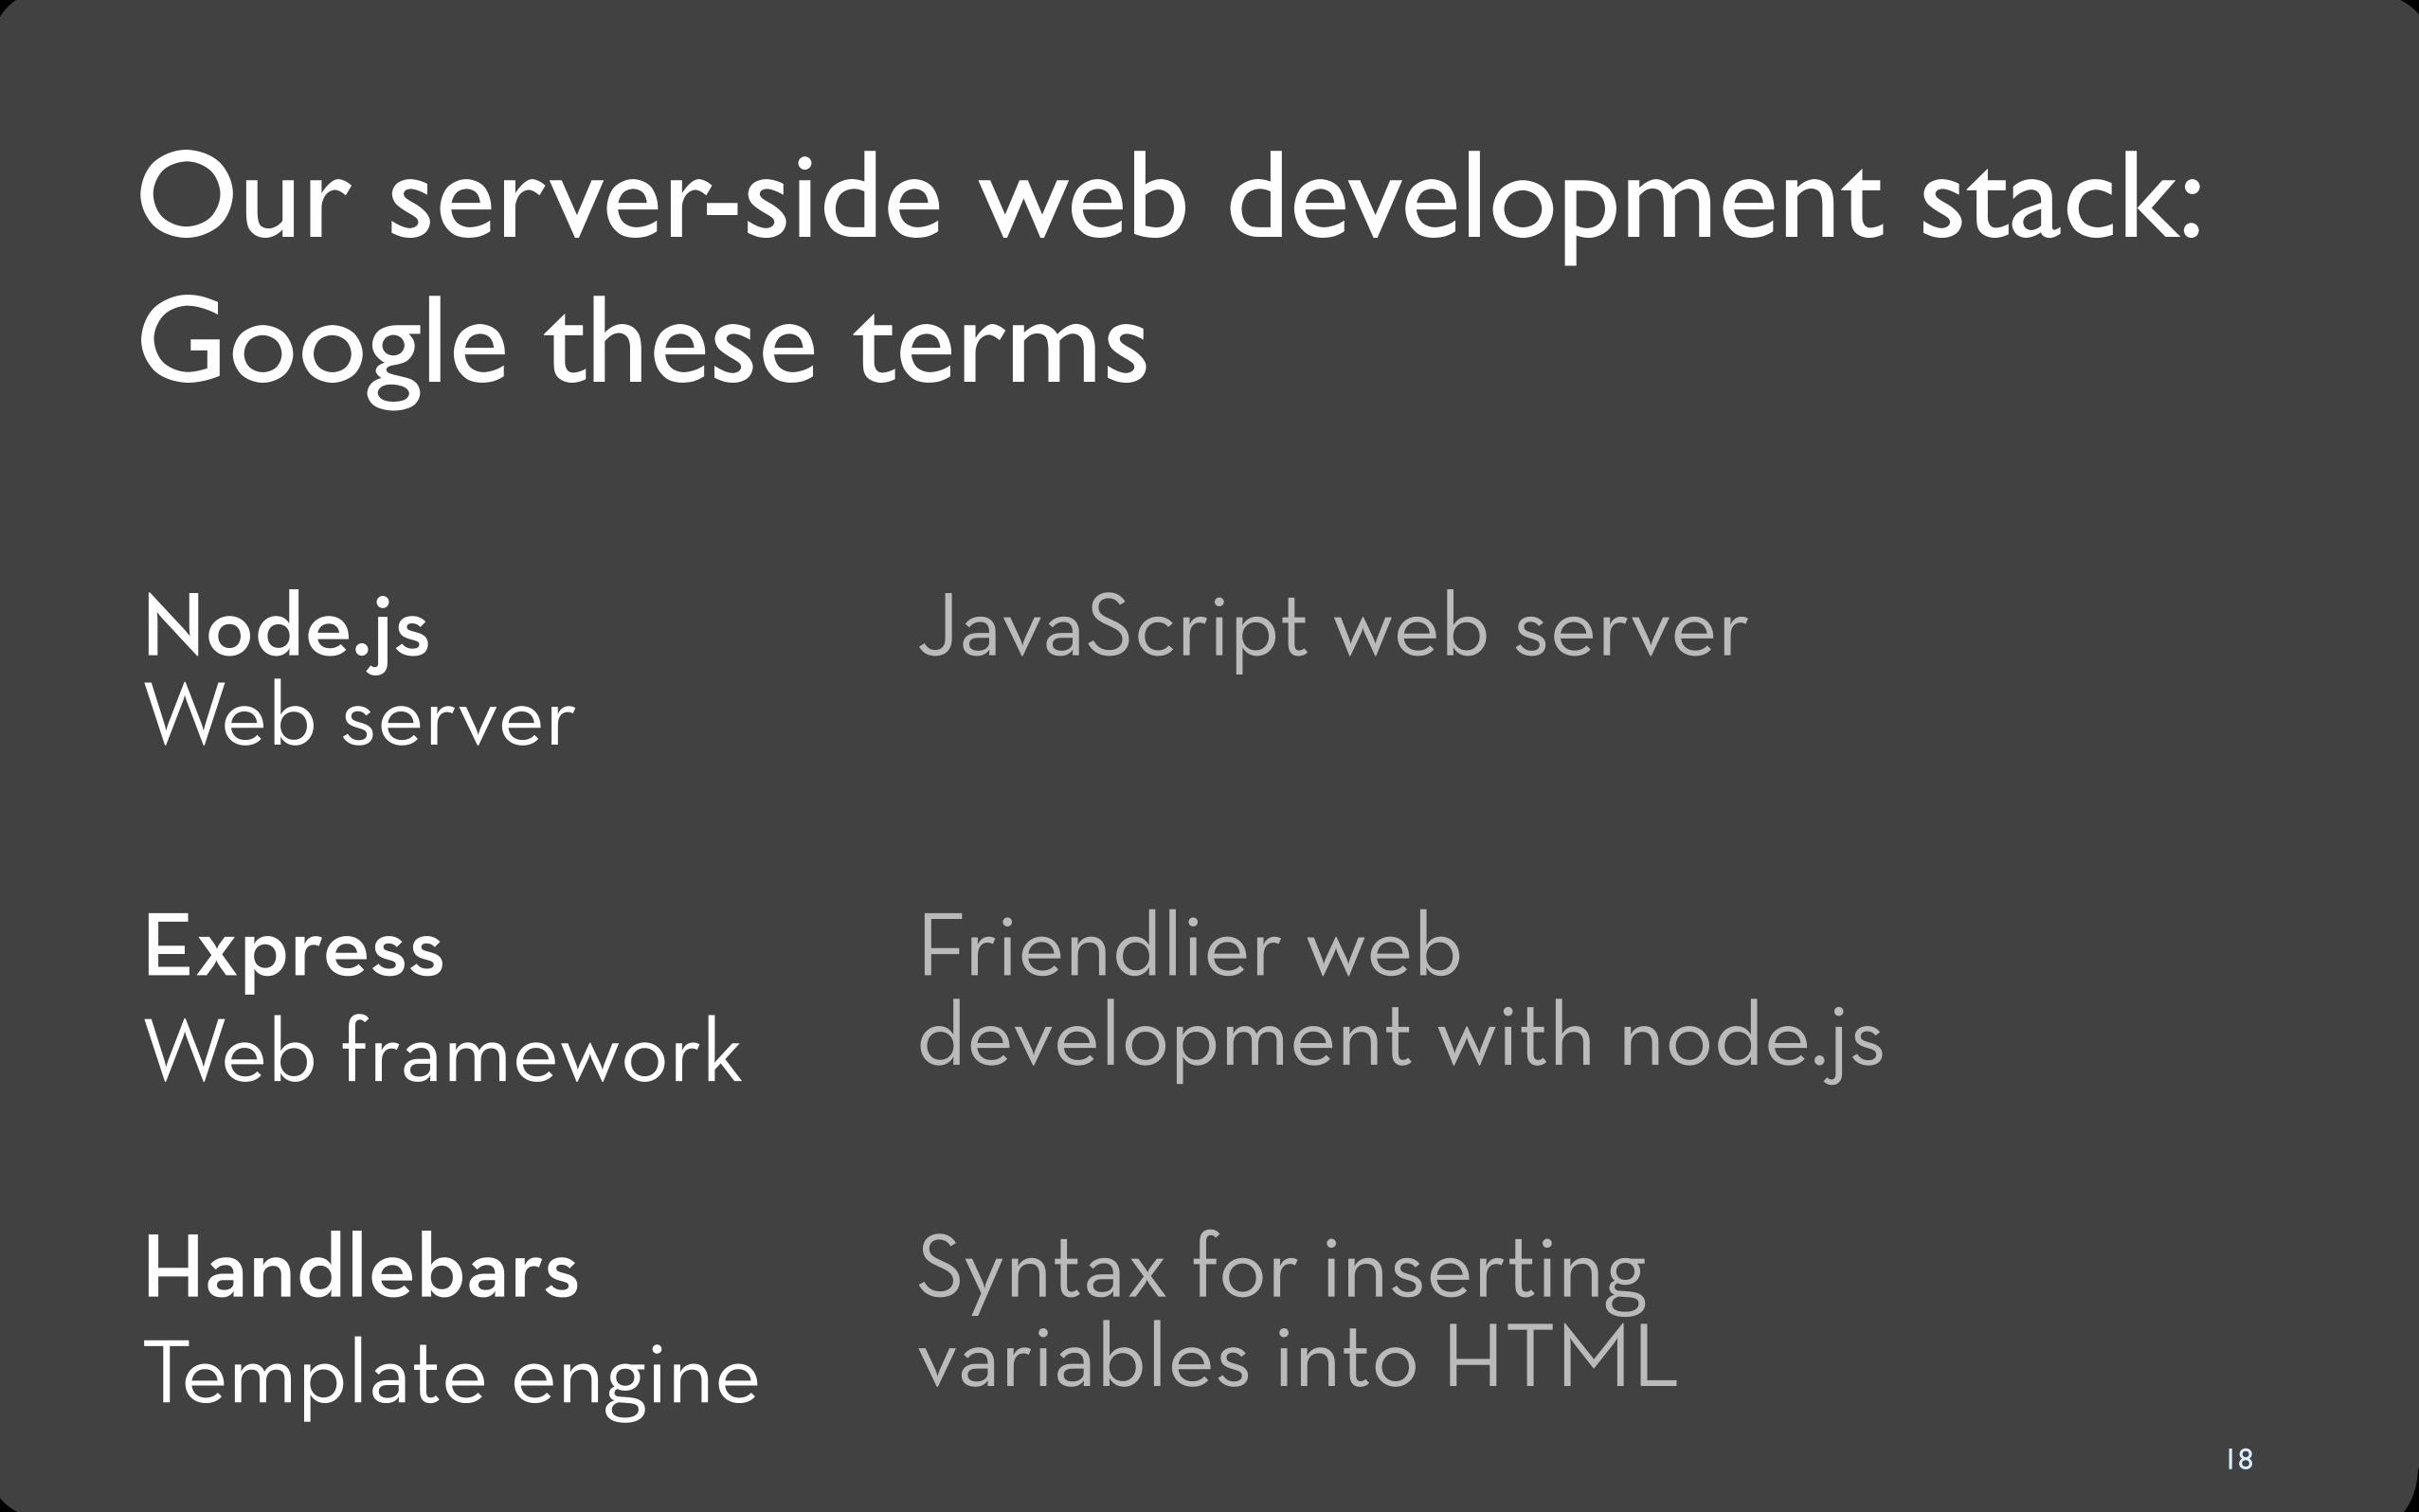
Our server-side web development stack: Google these terms
18
Node.js Web server
JavaScript web server
Express Web framework
Friendlier web development with node.js
Handlebars Template engine
Syntax for inserting variables into HTML

Our web server: Node.js
�Google made JavaScript engines fast. Really fast. Fast enough to run servers that handle lots of traffic.�Upsides of Node.js�It’s very popular and has an active community�You already know Javascript�Also, you already know Javascript
�Downsides�More complicated than Ruby on Rails to manage database calls
�For documentation: nodejs.org
19

Our web framework: Express
�Express is a web application framework for Node.js�It adds:�Easy routing�Template support�Plumbing to support common needs that node.js doesn’t provide
�For the purposes of this class, most of what we call “Node.js” will actually be Express helper functions�For documentation: expressjs.com
20

Our template engine: Handlebars
�Syntax is embedded in the HTML you know and love�For documentation: handlebarsjs.com and https://github.com/ericf/express3-handlebars
21
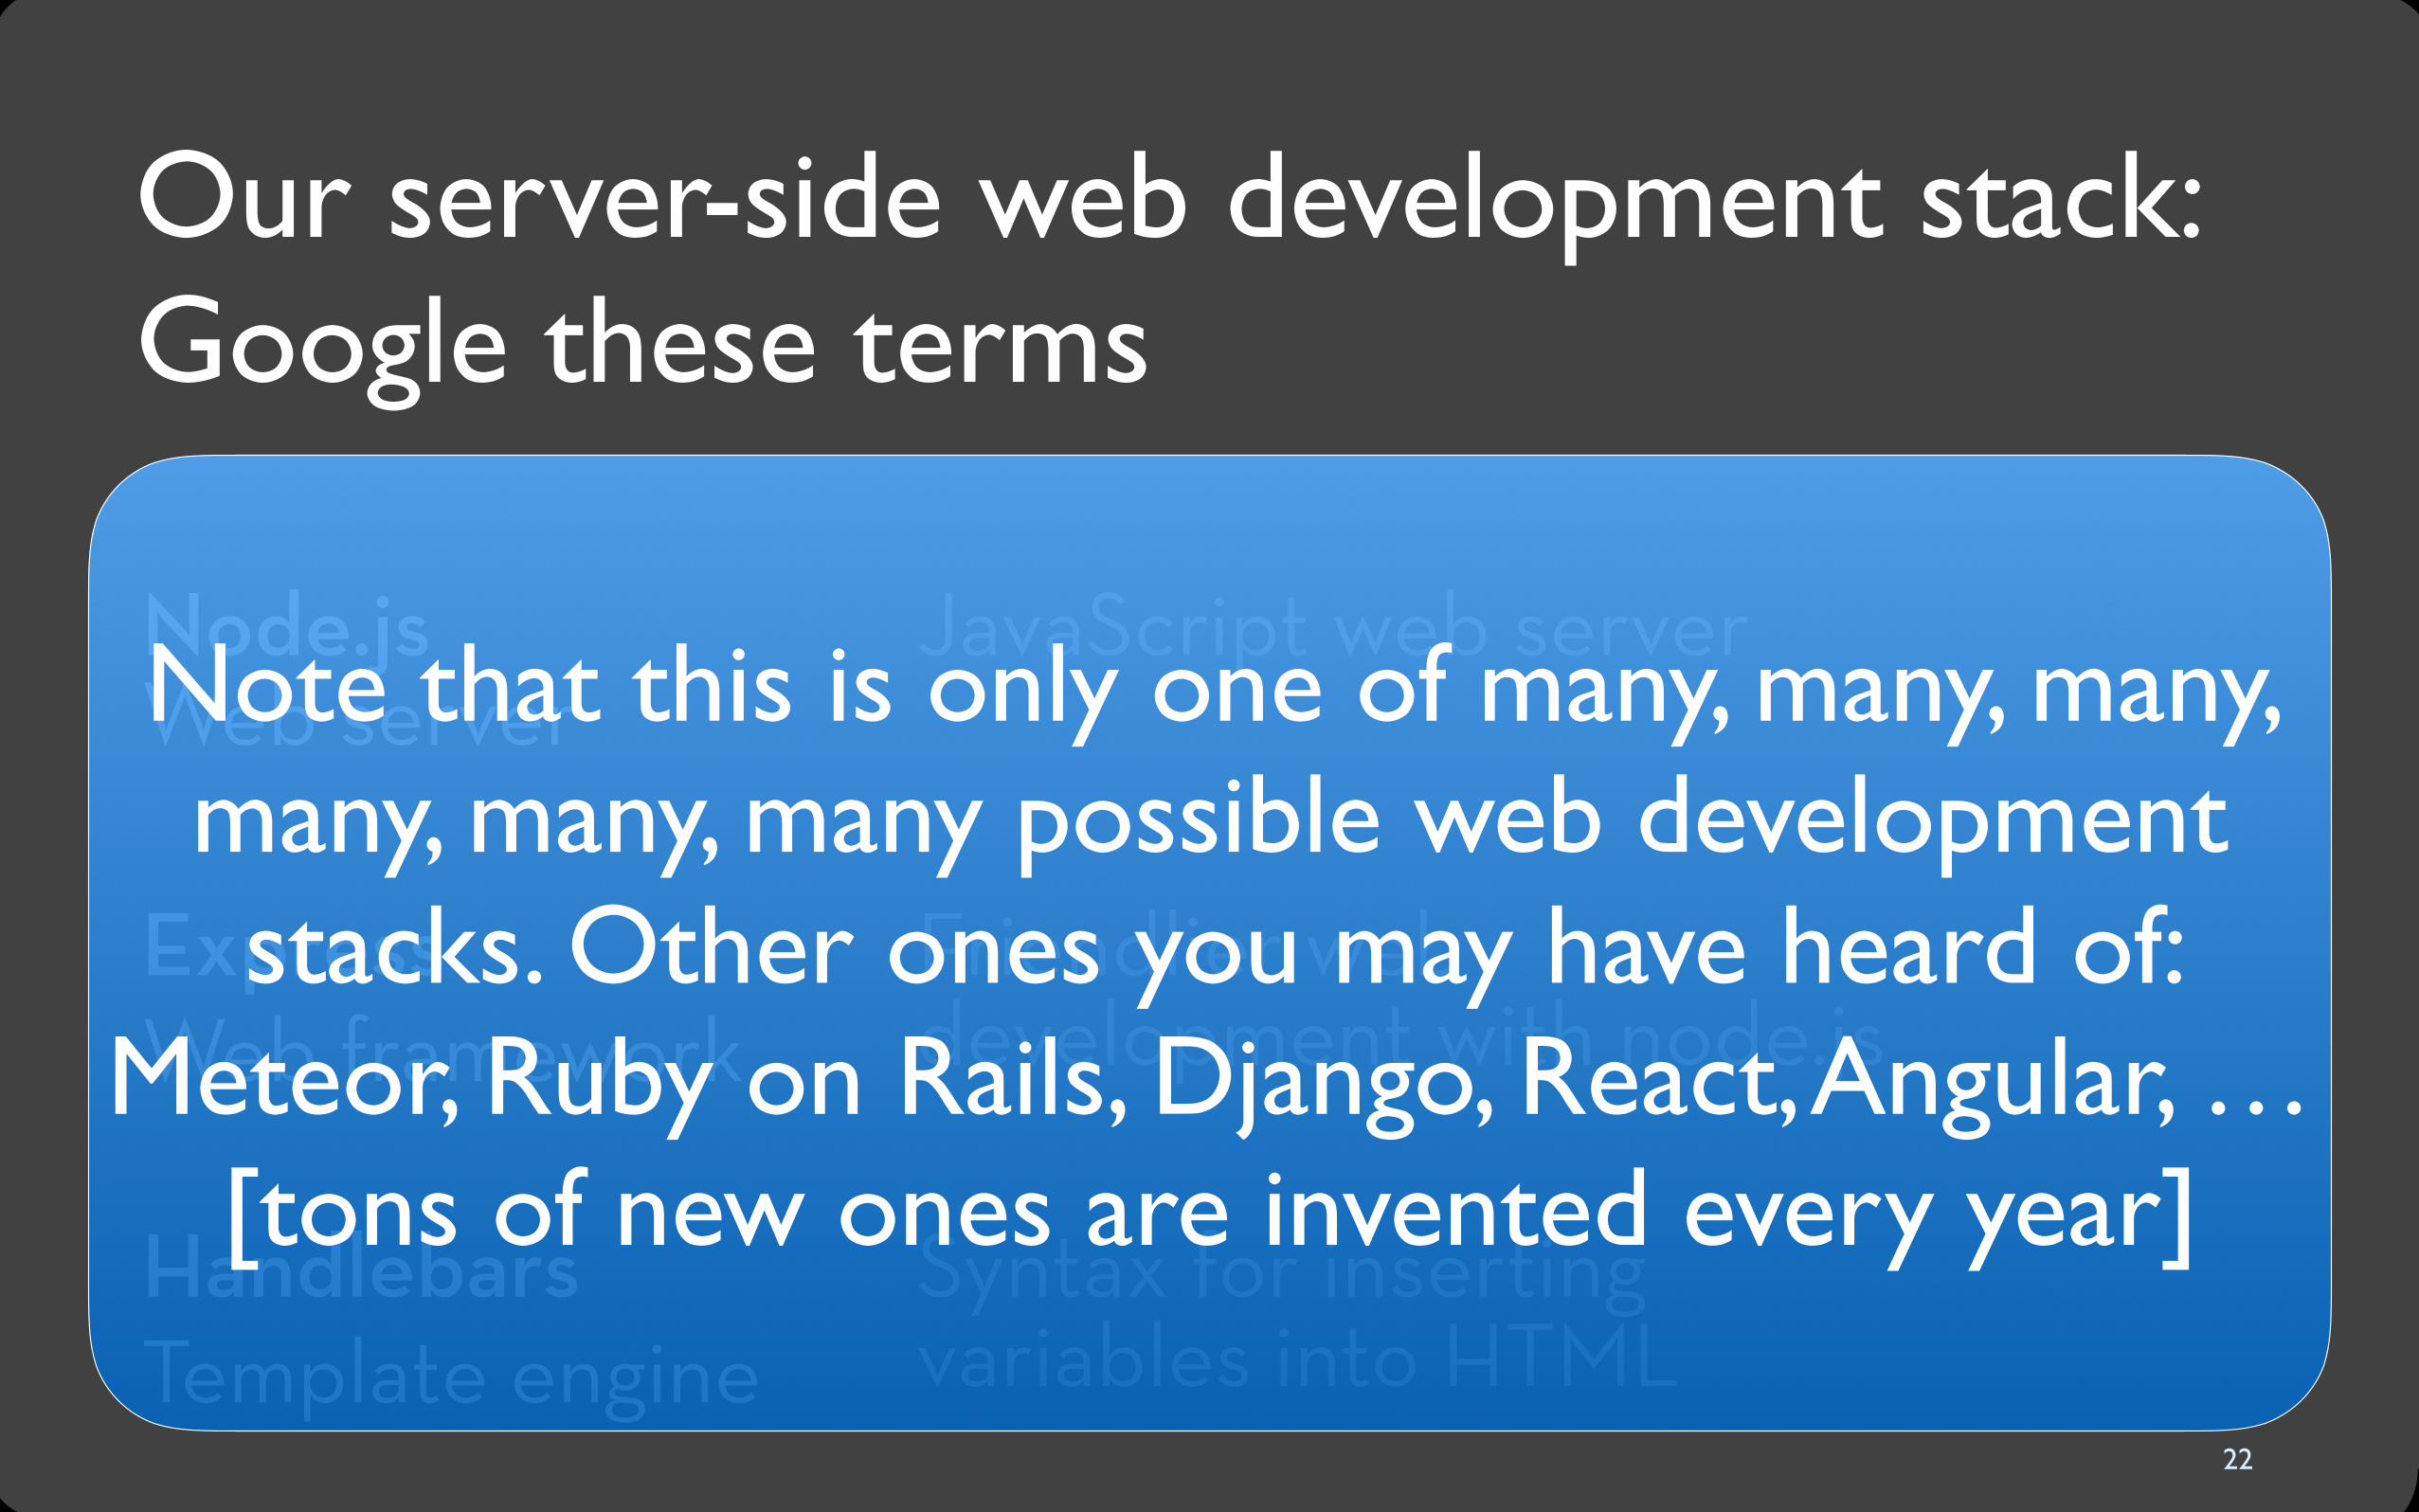
Our server-side web development stack: Google these terms
22
Node.js Web server
JavaScript web server
Express Web framework
Friendlier web development with node.js
Handlebars Template engine
Syntax for inserting variables into HTML
Note that this is only one of many, many, many, many, many, many possible web development stacks. Other ones you may have heard of:
Meteor, Ruby on Rails, Django, React, Angular, … [tons of new ones are invented every year]

Requests describe what the user wants
�URLs are user interfaces — design them. http://introhci.org/u/13249/p/view vs. http://introhci.org/project/needfinding
f()
23

Routes determine which controller functions to call on each kind of request
�http://introhci.org/createproject?user=msb: call createProject() in project.js�http://introhci.org/deleteproject?project=introhci call deleteProject() in project.js�http://introhci.org/reset call destroyAllHumans() in utils.js
f()
24
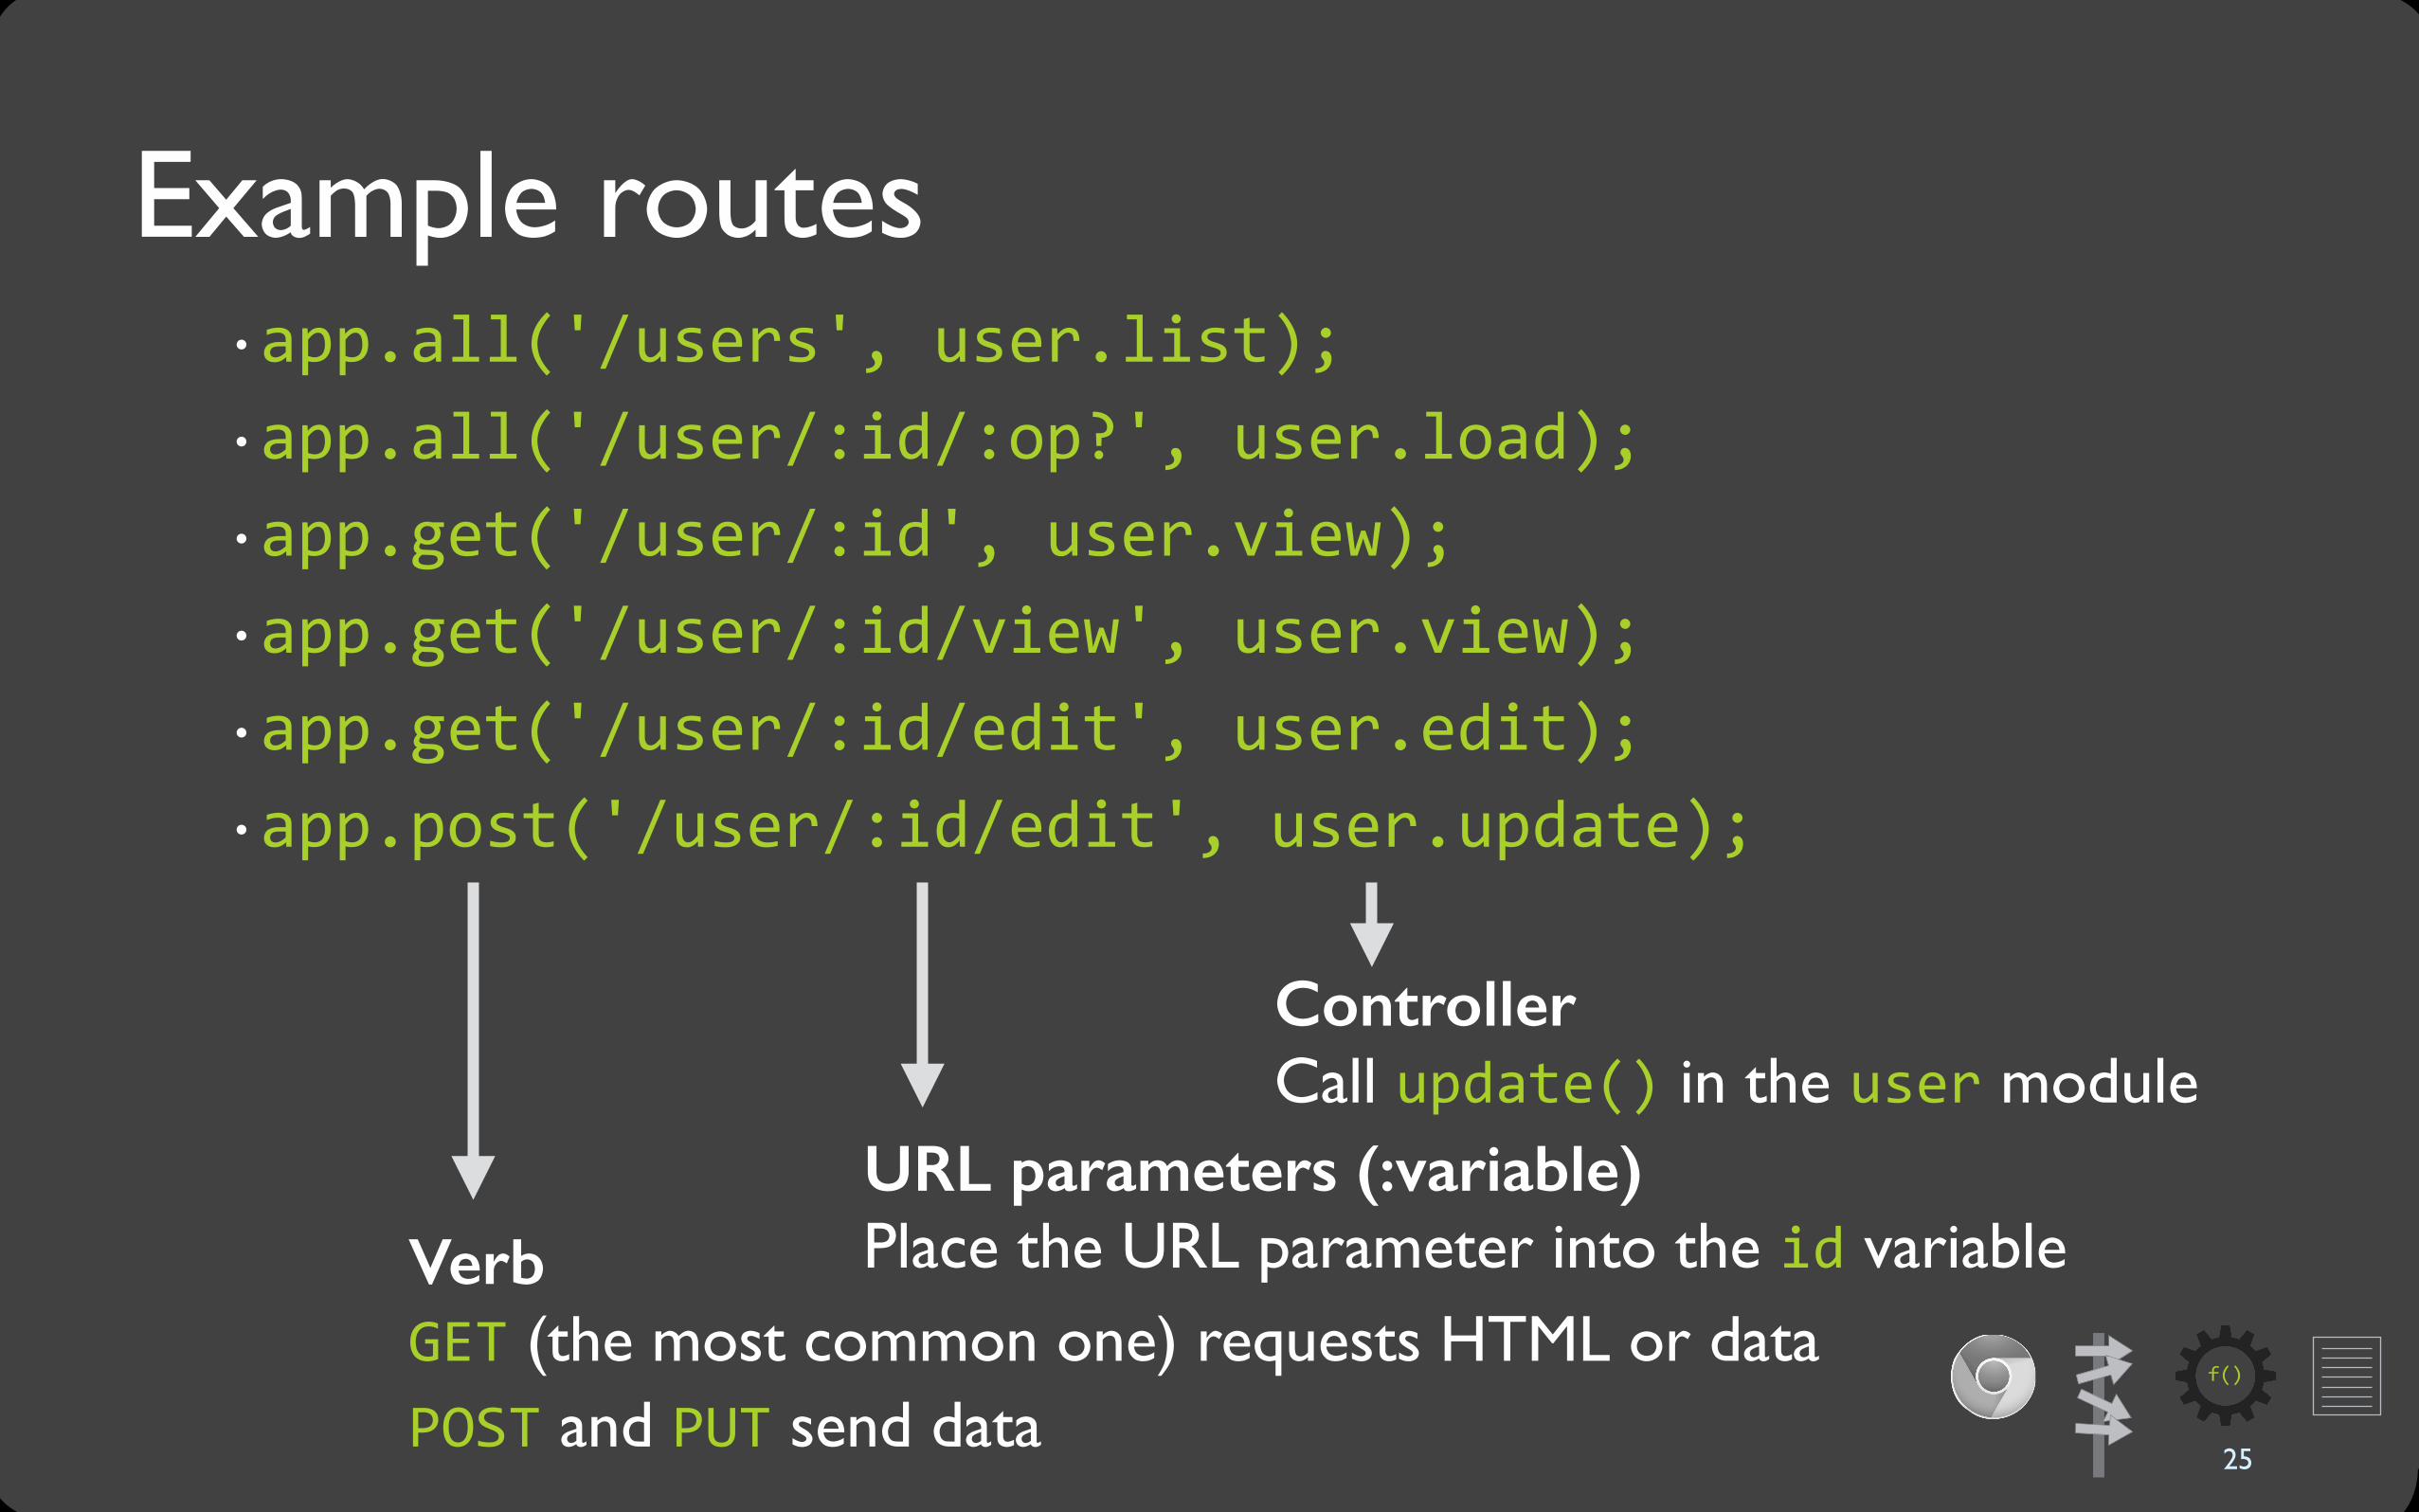
Example routes�app.all('/users', user.list); �app.all('/user/:id/:op?', user.load); �app.get('/user/:id', user.view); �app.get('/user/:id/view', user.view); �app.get('/user/:id/edit', user.edit); �app.post('/user/:id/edit', user.update);
f()
VerbGET (the most common one) requests HTML or dataPOST and PUT send data
URL parameters (:variable) Place the URL parameter into the id variable
Controller Call update() in the user module
25

Controllers process the request and prepare data
�In other words: this is where you write code�Things that controllers might want to do…�if/else logic�Query the database�Save to the database�Error check the user’s input�Prepare the result the user asked for
26
f()

Inside the file routes/hello.js: exports.view = function(req, res){ var nameToShow = req.params.userName; console.log("name is " + nameToShow); res.render('index', { 'name': nameToShow, }); };
The controller’s usual goal in life: prepare data for an HTML template
Controller logic Prepare anything you need to hand off to the template
Render template Load raw HTML and inserts its variables
27

Templates contain the HTML to send back to the browser
Almost identical to the index.html from previous labs<html> <head> <meta charset="utf-‐8" /> </head> <body> <h1>Presenting: {{userName}}</h1> </body> </html>
f()
28
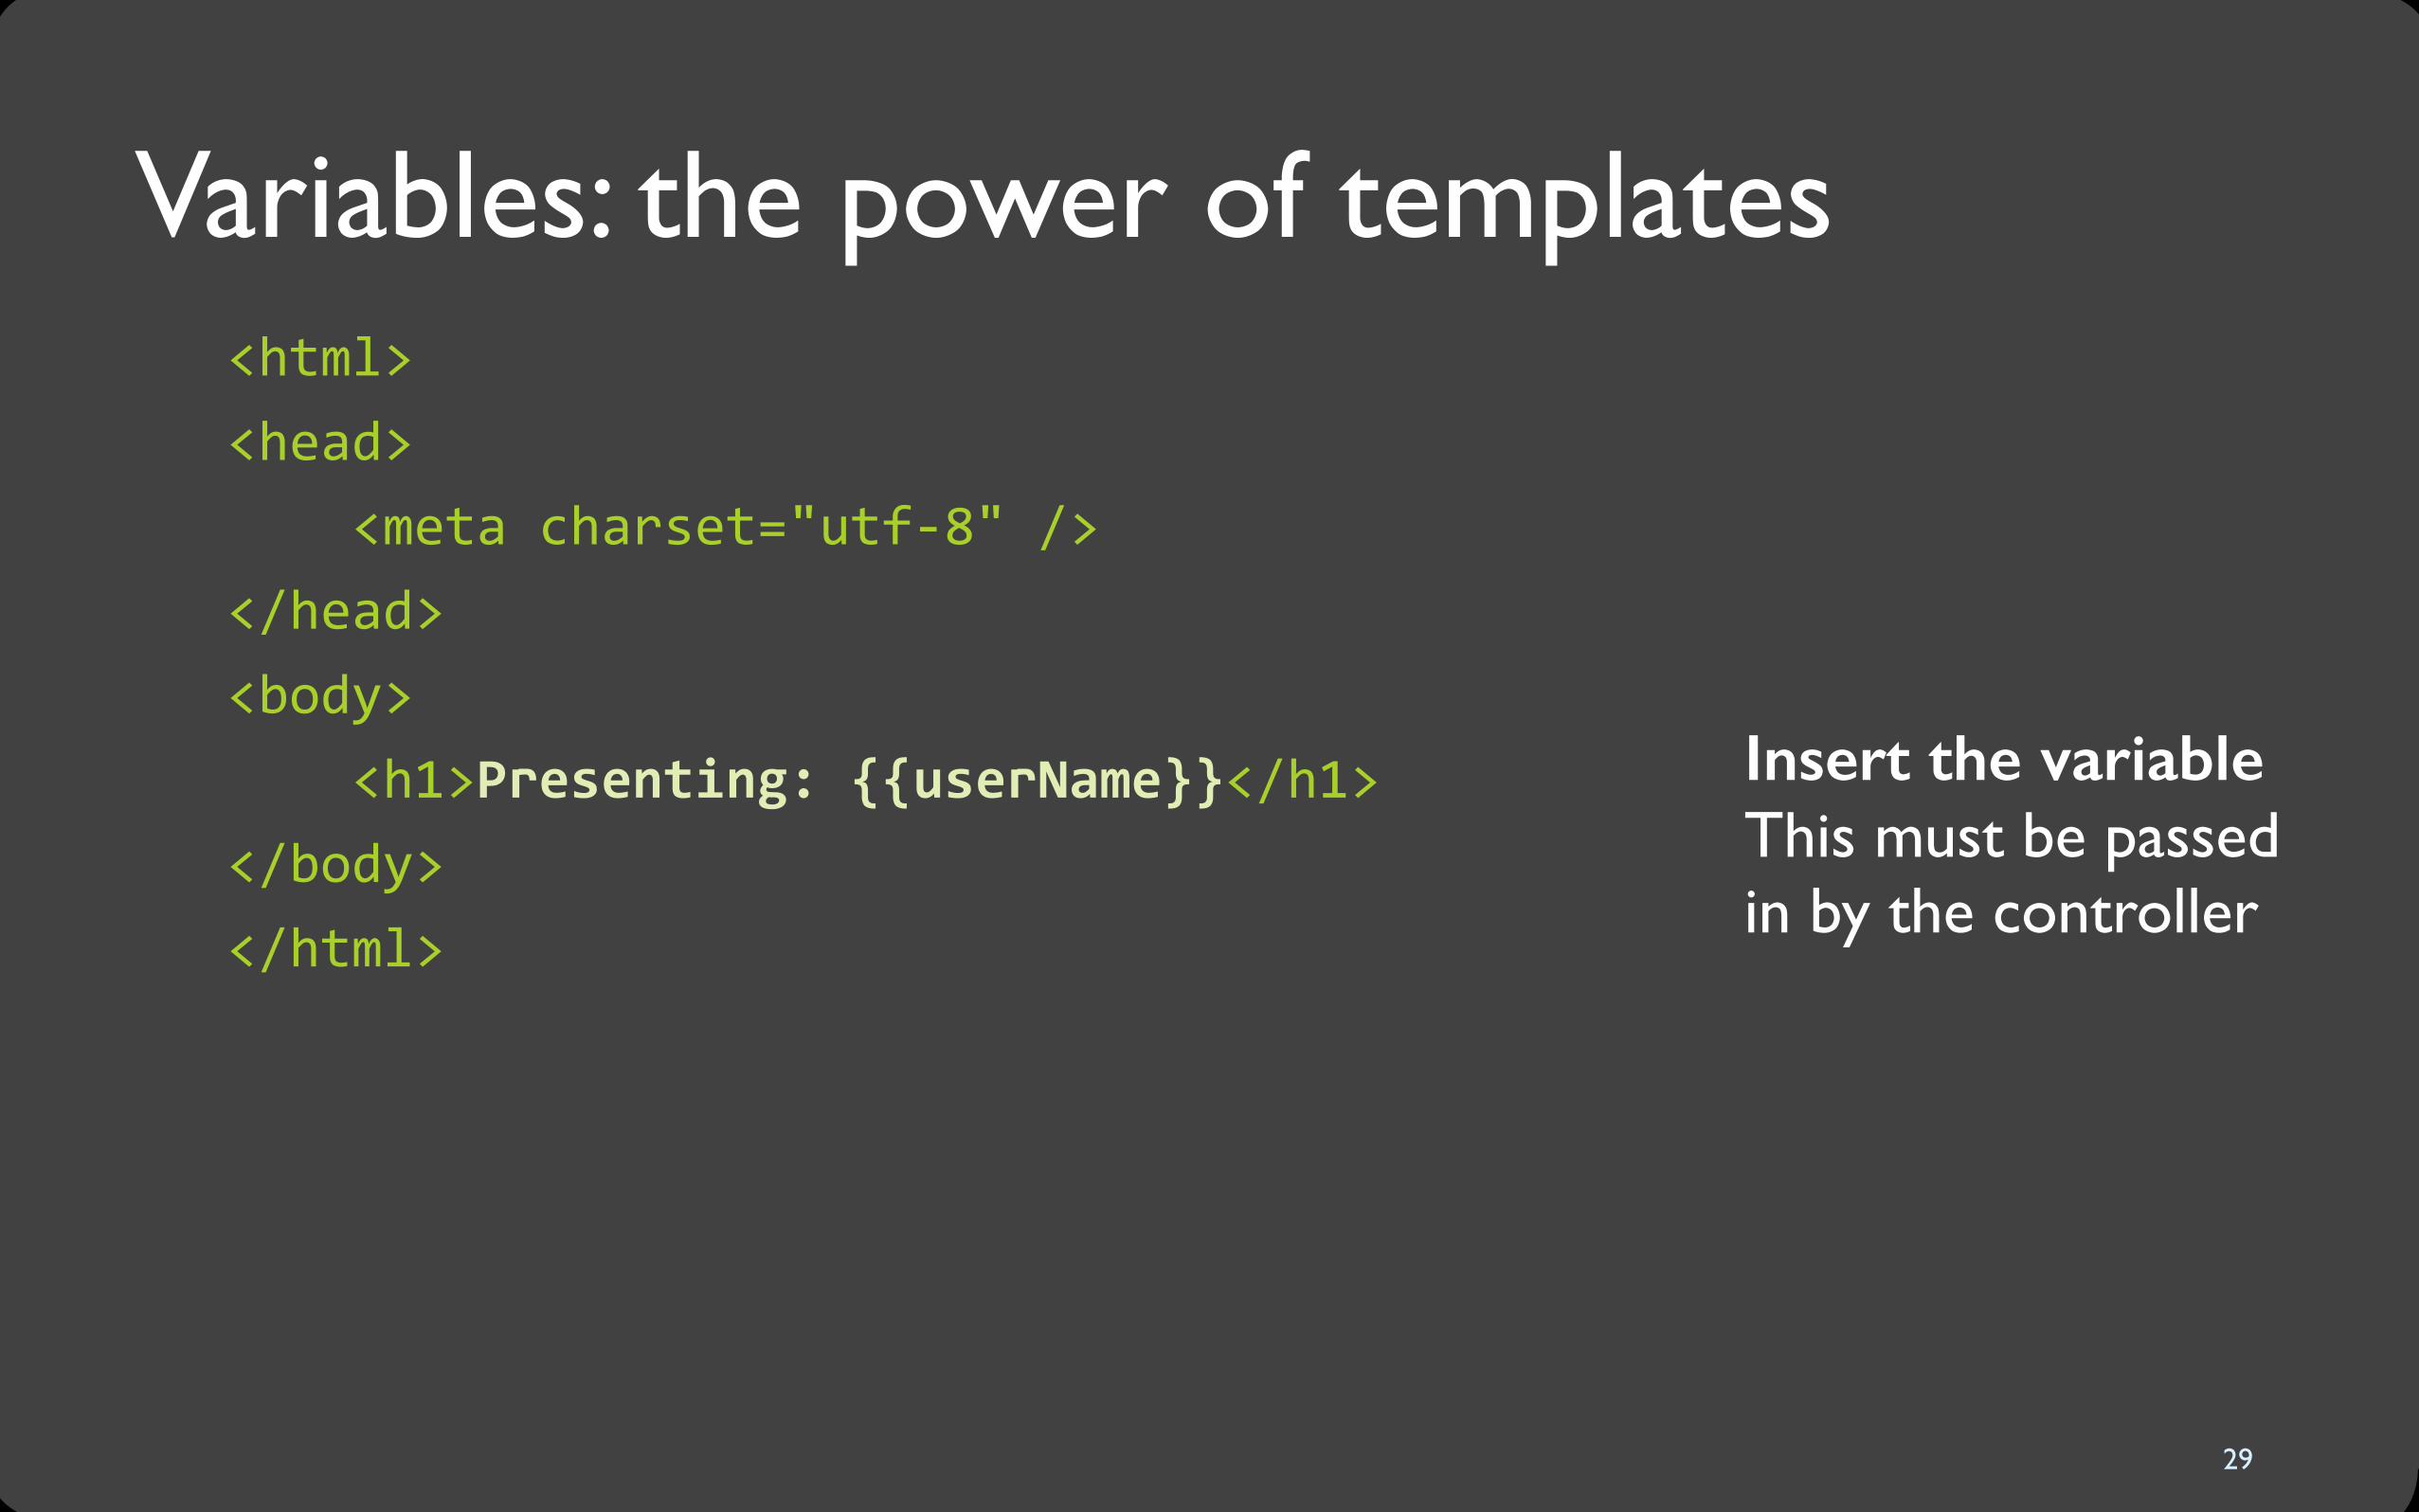
Variables: the power of templates
29
<html> <head> <meta charset="utf-‐8" /> </head> <body> <h1>Presenting: {{userName}}</h1> </body> </html>
Insert the variable This must be passed in by the controller
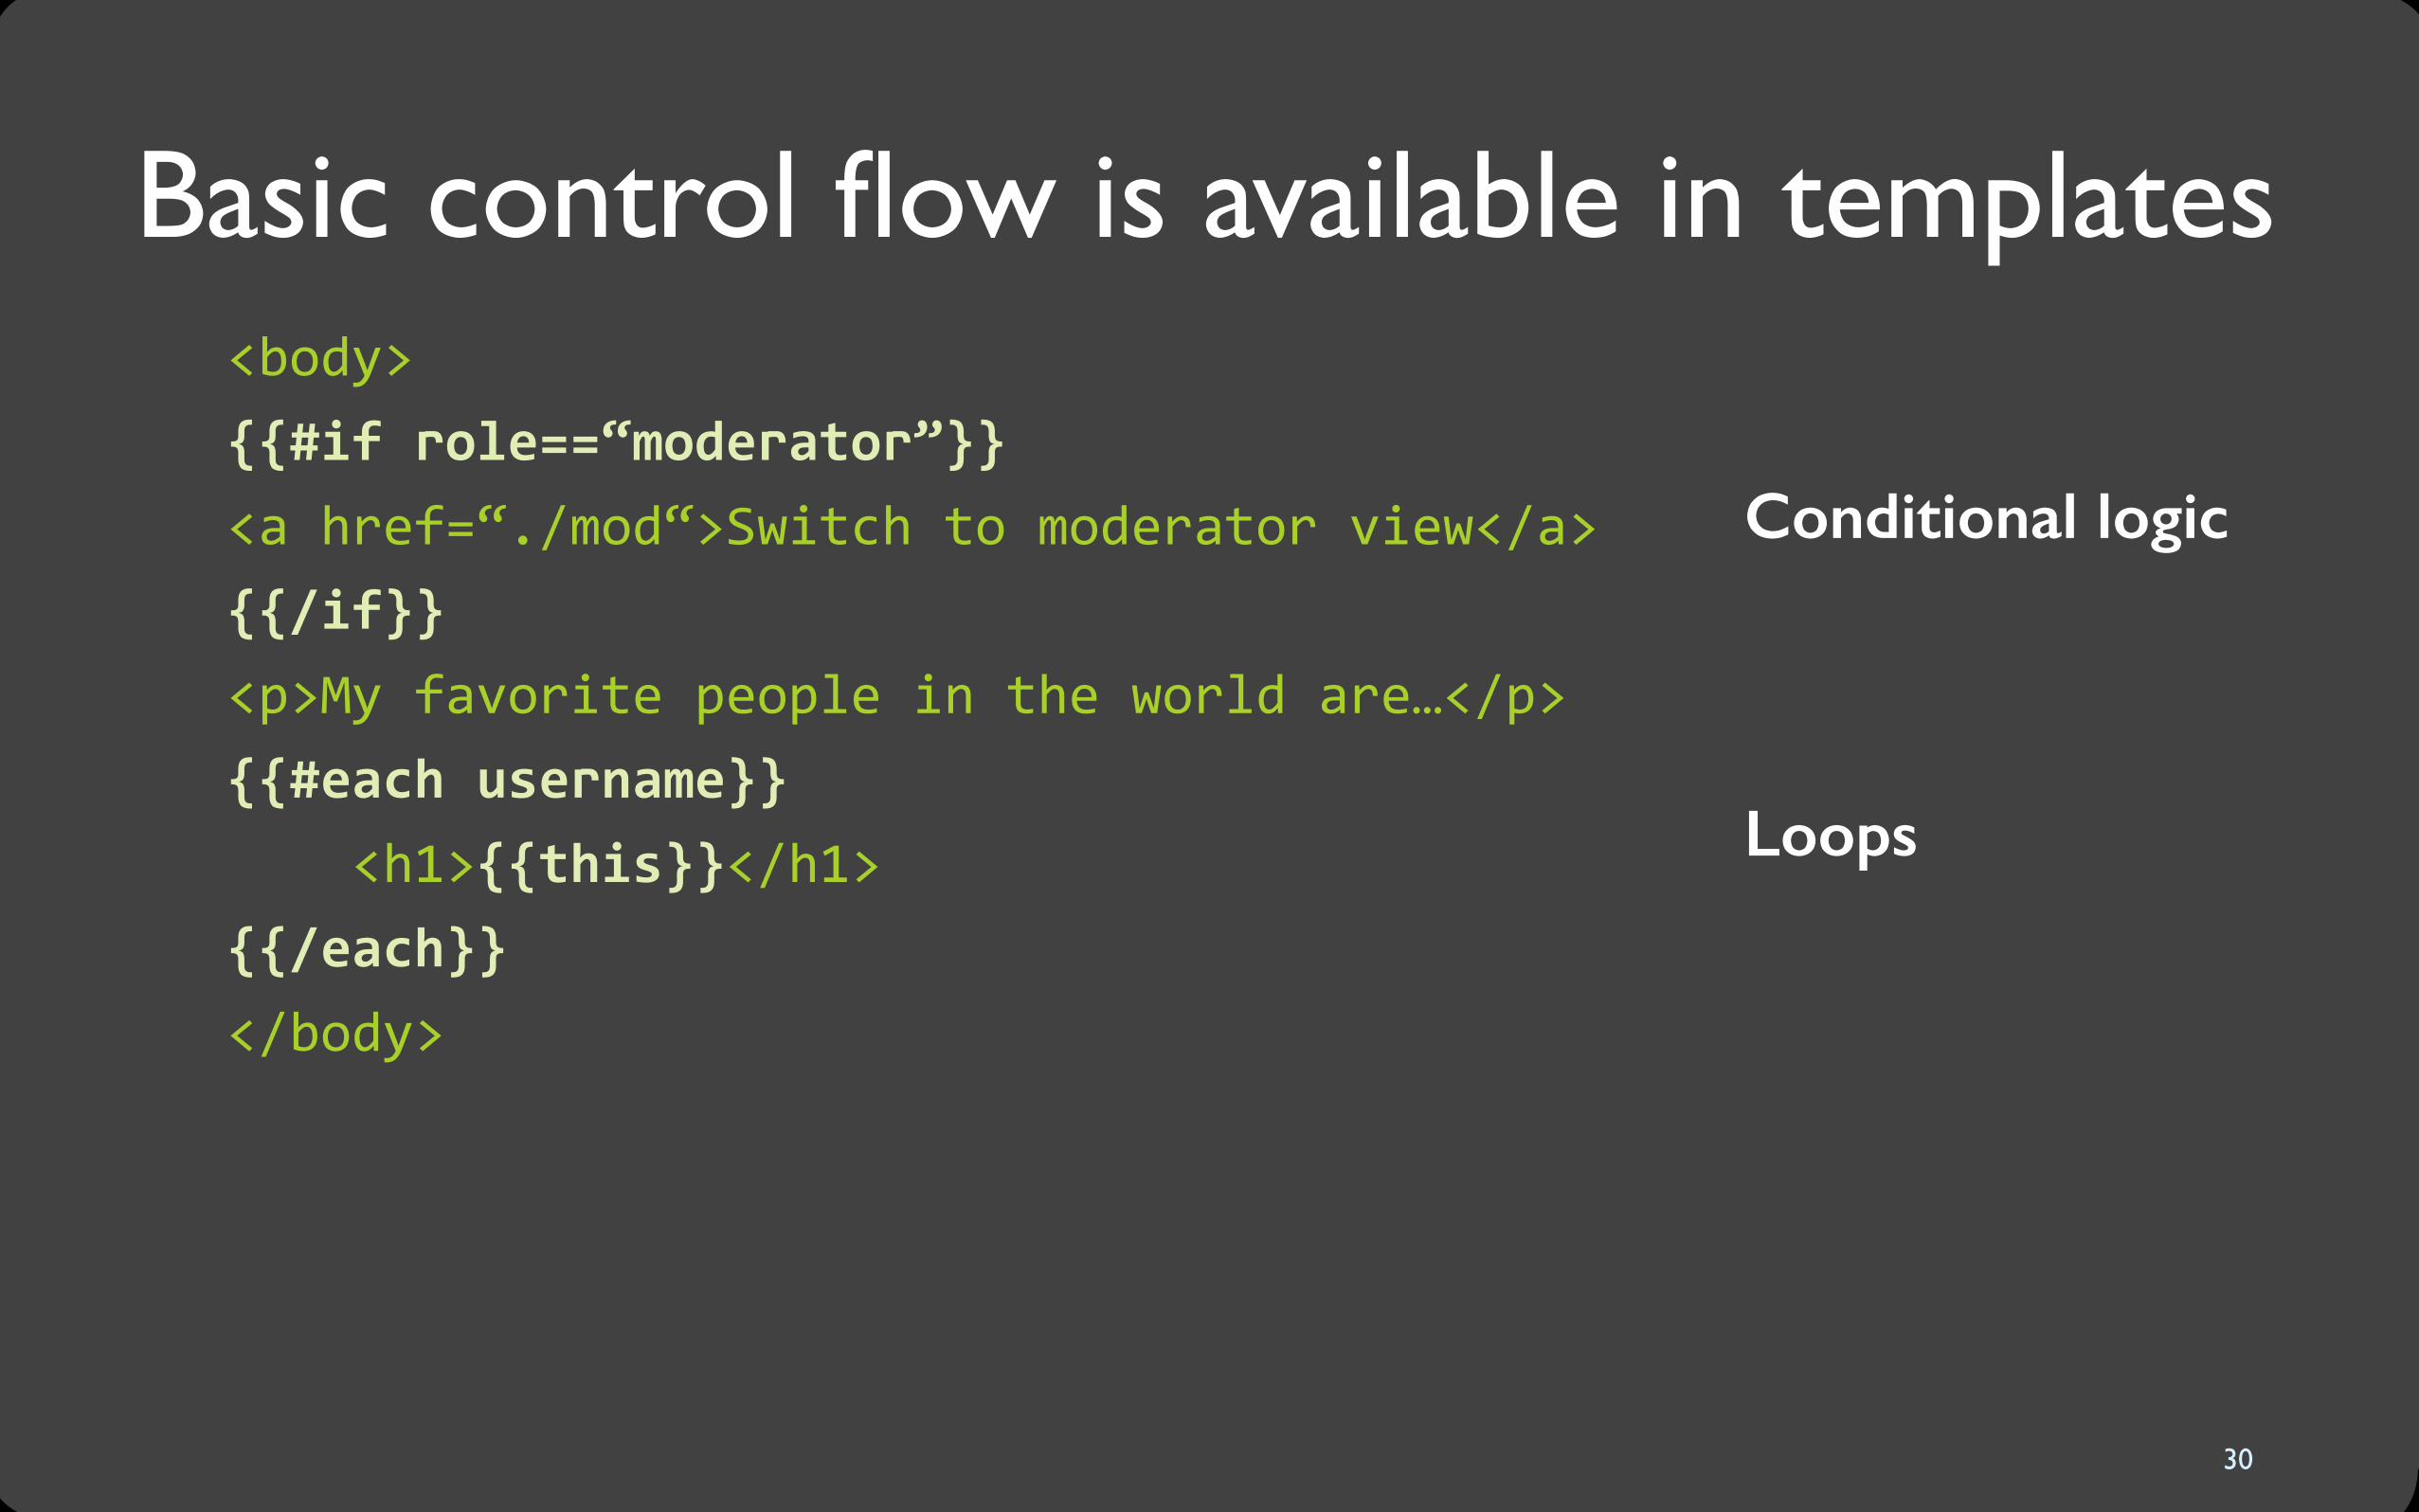
Basic control flow is available in templates
30
<body> {{#if role==“moderator”}} <a href=“./mod“>Switch to moderator view</a> {{/if}} <p>My favorite people in the world are…</p> {{#each username}} <h1>{{this}}</h1> {{/each}} </body>
Loops
Conditional logic

concepts
Data in Javascript
31

What’s with all the brackets { } ?
res.render('hello', { 'name': userName});
…from when we sent the data structure to the template
32

Javascript data structures are flexible
Define the contents as needed:{ 'userName': 'msb', 'firstName': 'Michael', 'lastName': 'Bernstein', 'milesFromCampus': 2, 'classes': ['CS147', 'CS247', 'CS376']}
Brackets { } define the beginning and end of an object Properties and values 'property': value follow as a list.
33

Nest objects within each other
{ 'userName': 'msb', 'firstName': 'Michael', 'lastName': 'Bernstein', 'classes': ['CS147', 'CS247', 'CS376'], 'milesFromCampus': 2, 'officeHours': { 'start': '15:45', 'end': '17:30', 'room': 'Gates 308' }}
34

This data format is called JSON
JavaScriptObjectNotation
35
(Note that technically JSON strings need to be enclosed in "double-quotes", but JavaScript also accepts 'single quotes' when the data appears within JavaScript code. Some people find single quotes easier to type and read.)

Common JSON mistakes
Can you find the four mistakes?[ userName = "msb" firstName = "Michael"]
36
1. Using Property = value instead of property: value
2. Forgetting quotes around the property name3. Forgetting the commas between properties4. Brackets [ ] instead of braces { }
{ "userName": "msb", "firstName": "Michael"}

practice
Template editing
37

Fork and clone lab 4
�git config --global core.autocrlf input�Fork (like last time): https://github.com/pgbovine/lab4�Then, git clone your forked repository into your introHCI directory
38

Start Node.js
�cd introHCI/lab4 to enter the lab 4 directory (not the hello directory from my earlier demo)�To start Node.js, run: node app.js
39

Test that it’s working on localhost
40

Open views/index.handlebars in Sublime text (or your text editor of choice)
�This is an exact copy of the previous labs’ HTML�Let’s make this code more elegant and reusable
41

Add template variables�Remove all but one copy of the project div
�Insert handlebars expressions for name, image, and id �To avoid pain, leave the images/ prefix to the img src
<div class="project" id="{{id}}"> <a href="project" class="thumbnail"> <img src="images/{{image}}" class="img"> <p>{{name}}</p> </a> </div>
42

Restart Node.js to load the changes�Node.js loaded everything in to its own memory when it started up, so when you make changes, it doesn’t know.�Now that you’ve made a change:�<Control>-‐c at command line to stop Node.js (Control key + c)
�Restart it: node app.js
�(more advanced tools exist for auto-reloading, Google for them)
43
�Type: <Control>-‐c

Not good: now we have no content
�We haven’t yet passed the data to the handlebars template
44

Add project JSON to routes/index.js
exports.view = function(req, res){ res.render('index', { 'name': 'Waiting in Line', 'image': 'lorempixel.people.1.jpeg', 'id': 'project1' }); };
45

To see your changes, restart node.js in terminal and reload localhost:3000 in your web browser
46
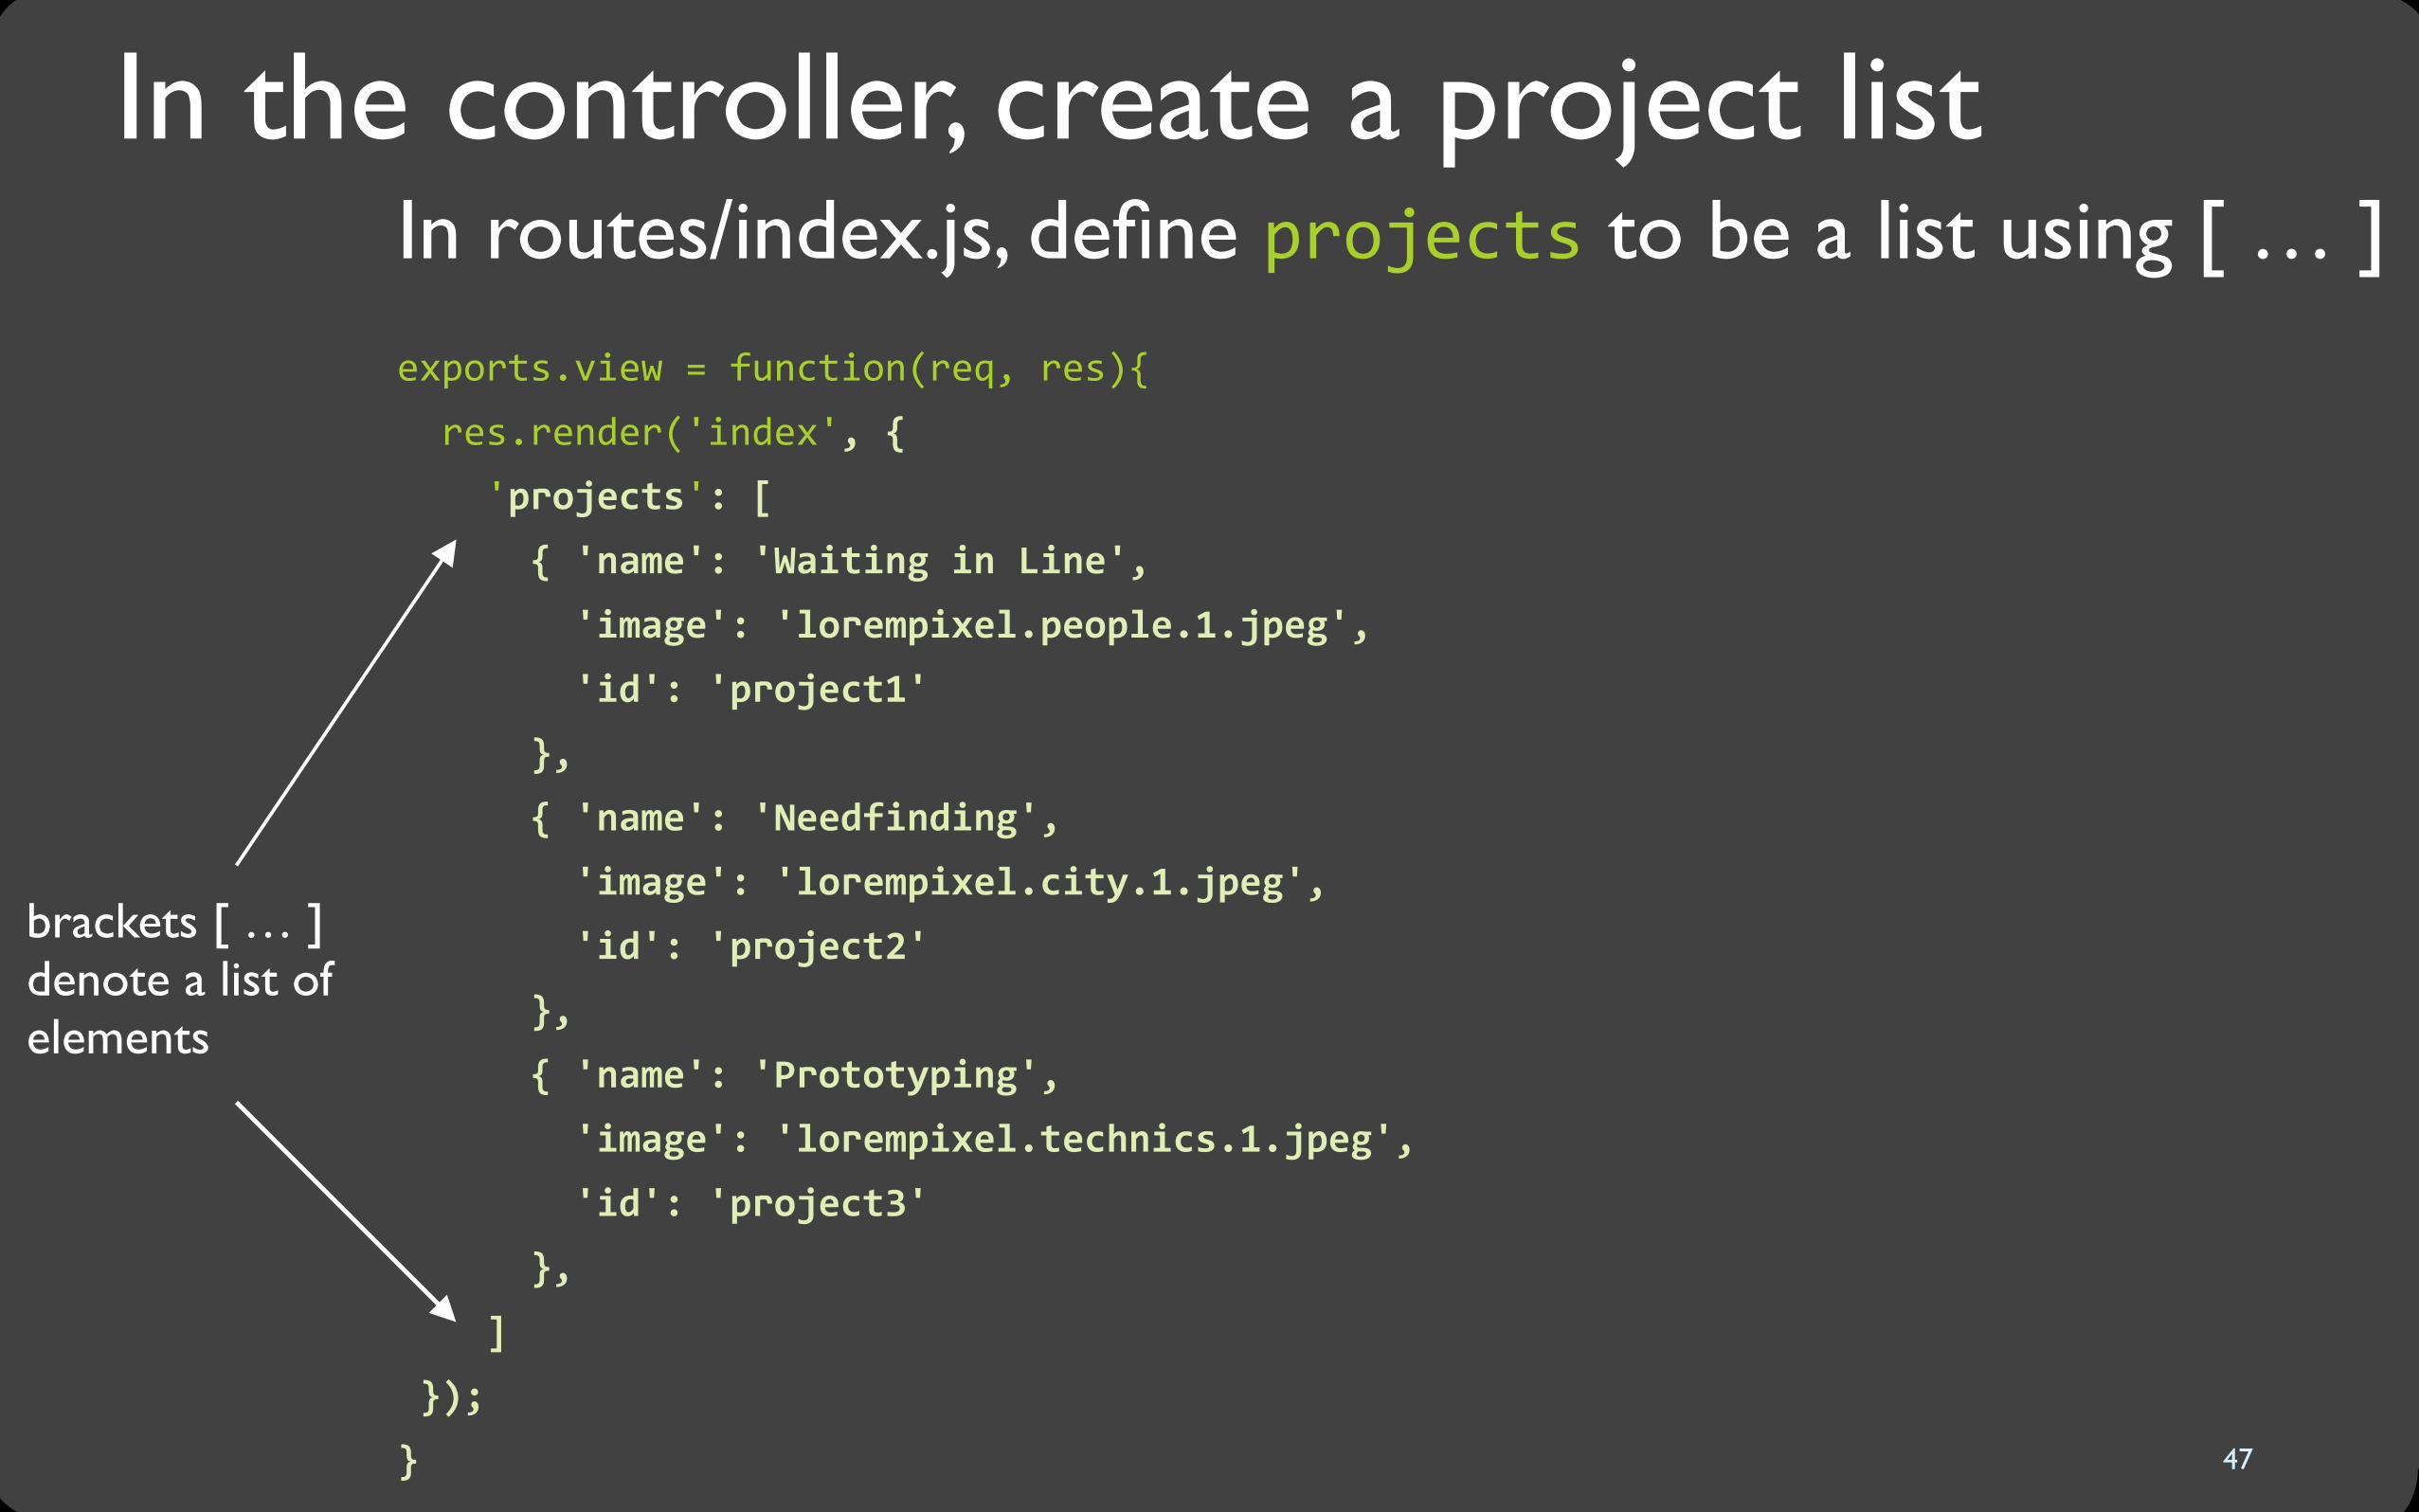
In the controller, create a project listIn routes/index.js, define projects to be a list using [ … ] exports.view = function(req, res){ res.render('index', { 'projects': [ { 'name': 'Waiting in Line',
'image': 'lorempixel.people.1.jpeg',
'id': 'project1'
},
{ 'name': 'Needfinding',
'image': 'lorempixel.city.1.jpeg',
'id': 'project2'
},
{ 'name': 'Prototyping',
'image': 'lorempixel.technics.1.jpeg',
'id': 'project3'
},
]
});
} 47
brackets [ … ] denote a list of elements

Practice: change the template to iterate over the list of projects
�Loop using {{#each projects}} and {{/each}}
�For each loop iteration, the fields name, image, and id are still accessible via {{name}}, {{image}}, {{id}}.
�Simple example: {{#each projects}} <p>Project name: {{name}}</p>{{/each}}
48

Solution: enclose your project template in an #each block
Everything else is the same:{{#each projects}} <div class="project" id="{{id}}"> <a href="project" class="thumbnail"> <img src="images/{{image}}" ... /> <p>{{name}}</p> </a> </div> {{/each}}
49

Restart Node.js, reload browser, and test again (manual reloads can get tedious; look up ways to auto-reload … require more setup, though)
50

Reflection: what did we accomplish?
�Changing the project JSON in routes/index.js will now change the project HTML!�We can change the UI for all the projects listed in the HTML by changing one {{#each}} block
51

Add a table of contents
�A second view using the same data — add it below the jumbotron:
<ol> {{#each projects}} <li><a href="#{{id}}">{{name}}</a></li> {{/each}} </ol>
52
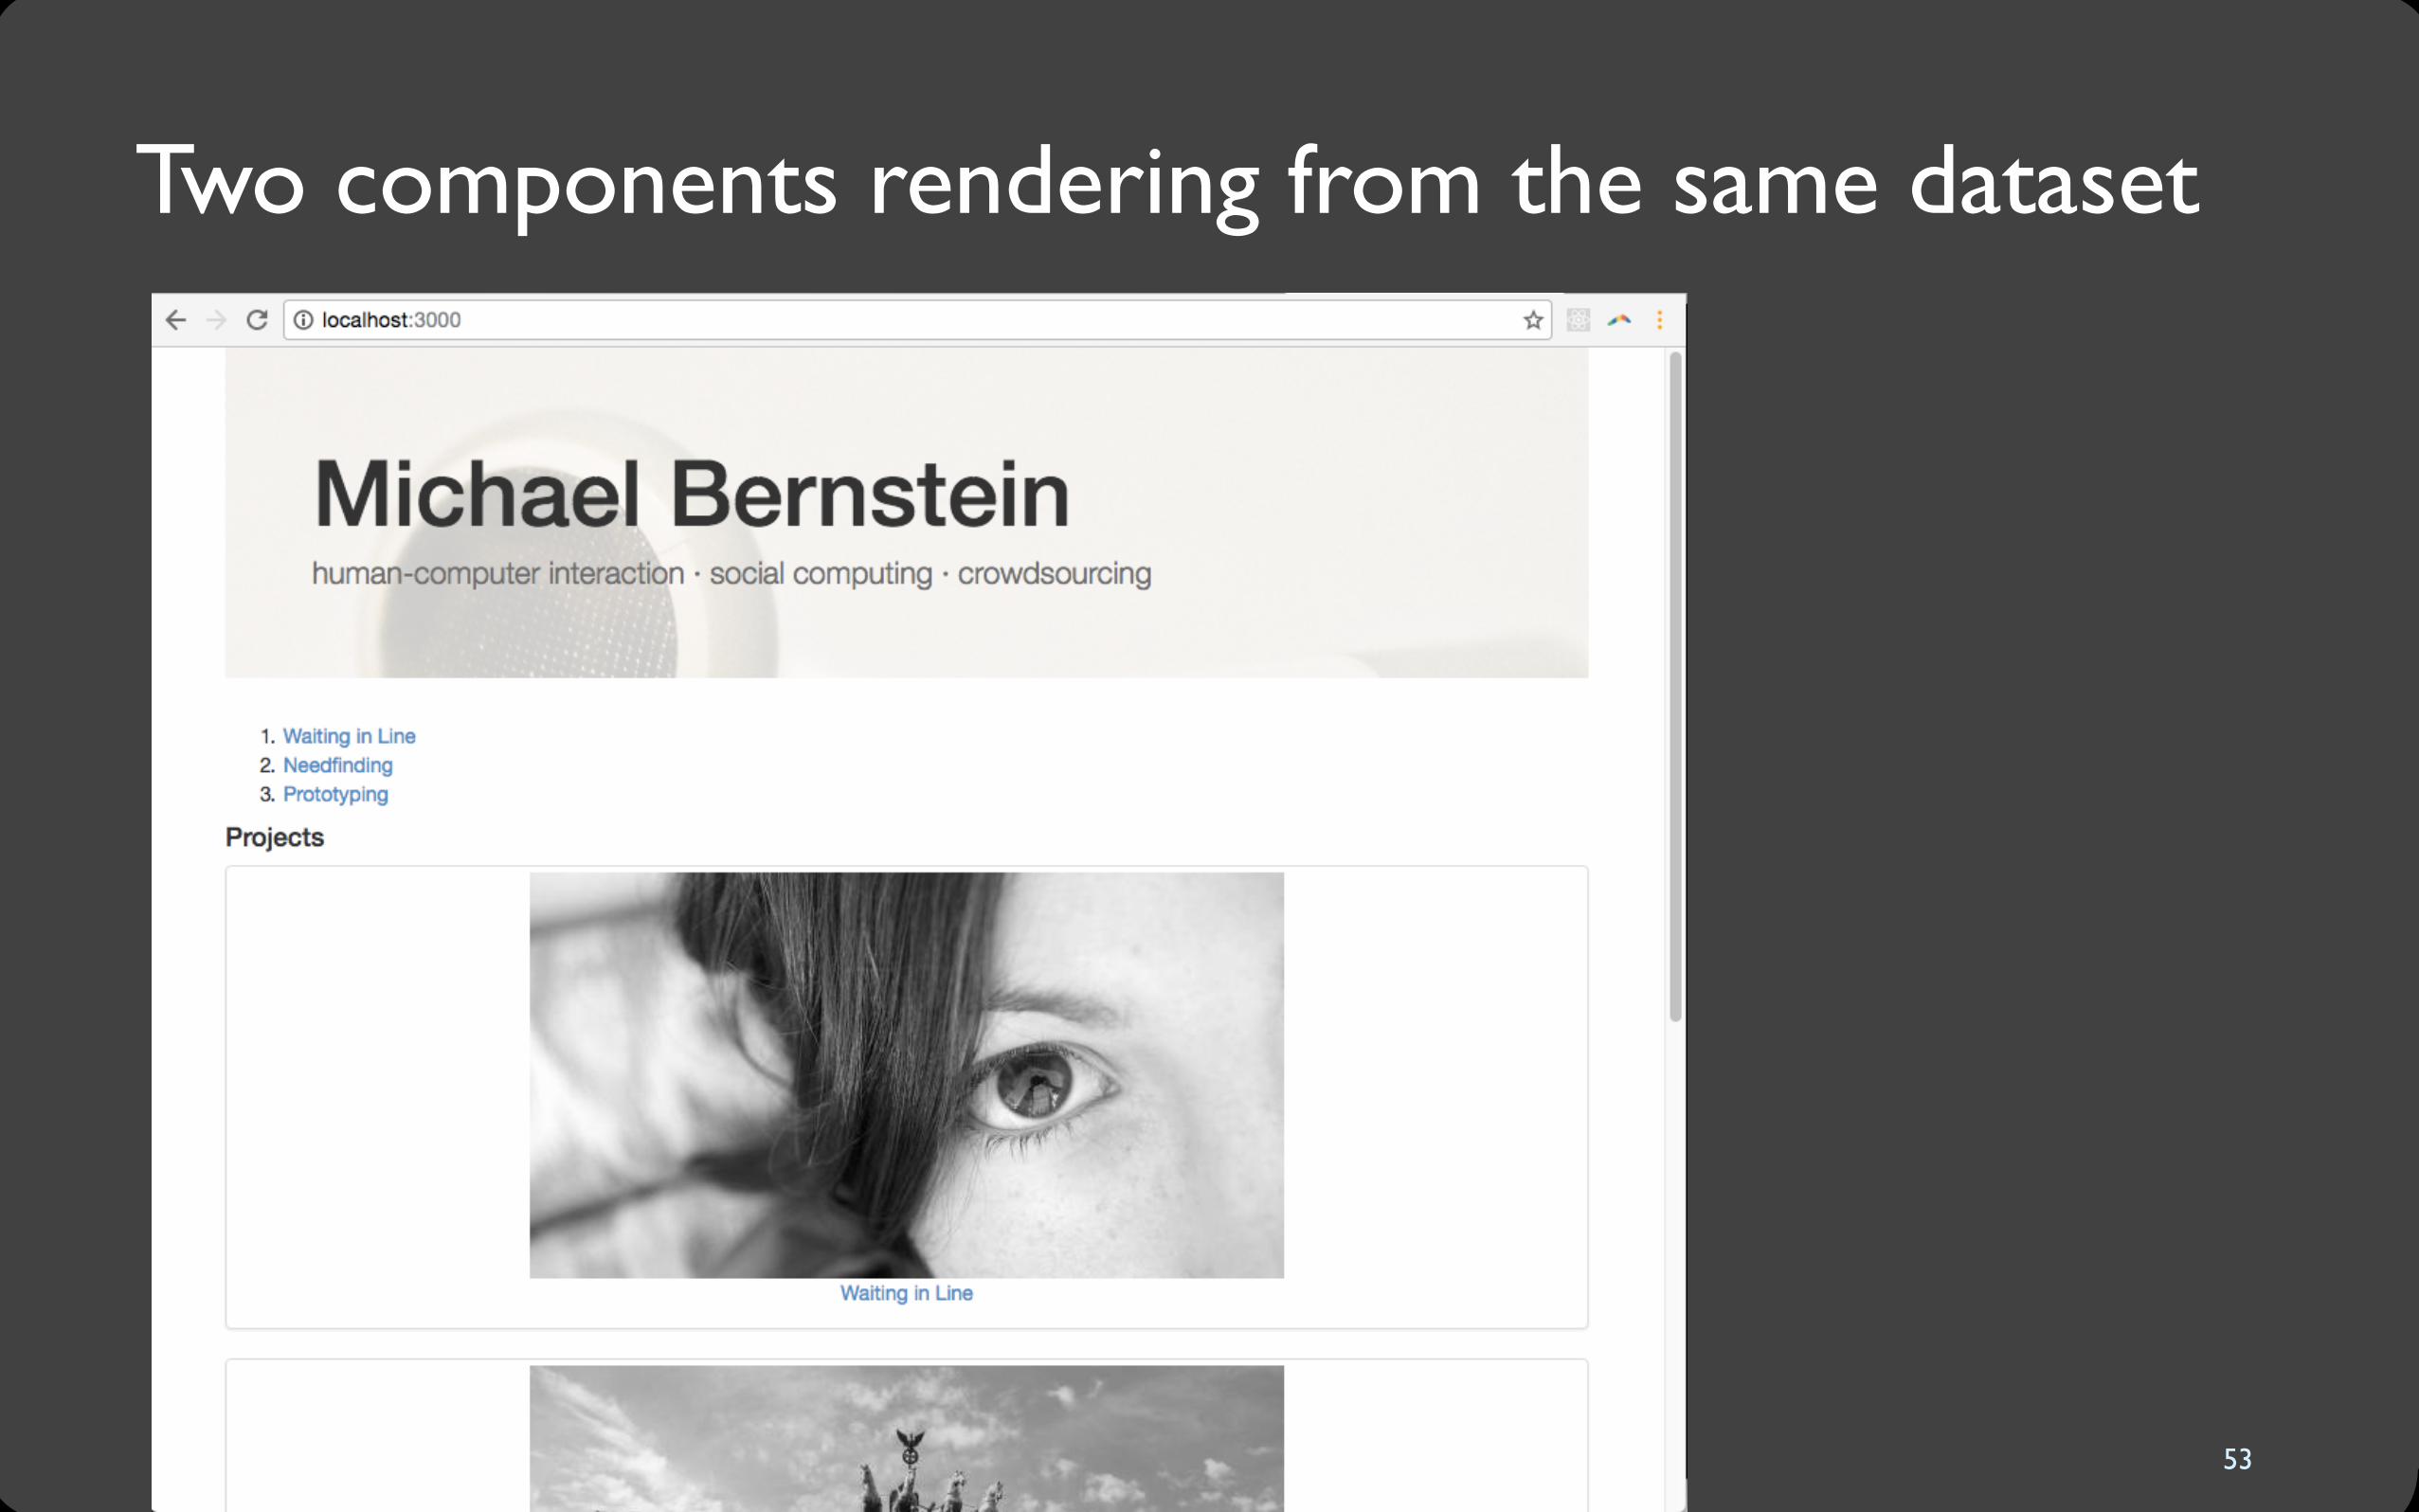
Two components rendering from the same dataset
53

practice
Route editing
54

Goal: add project pages to our portfolio
55

Add the route to app.js
�We want http://localhost:3000/project to load a project page�Open lab4/app.js in Sublime Text�Below our existing controller import var index = require('./routes/index');add a new one for projects: var project = require('./routes/project');
f()
Load all controllers in routes/project.js
56

Route the URL to the controller
�Still in app.js, near the bottom below our existing route app.get('/', index.view);at the bottom of the file, add a new one for projects: app.get('/project', project.viewProject);
f()
Register the URLlocalhost:3000/project
Call the project.viewProject() function when that URL is requested
57
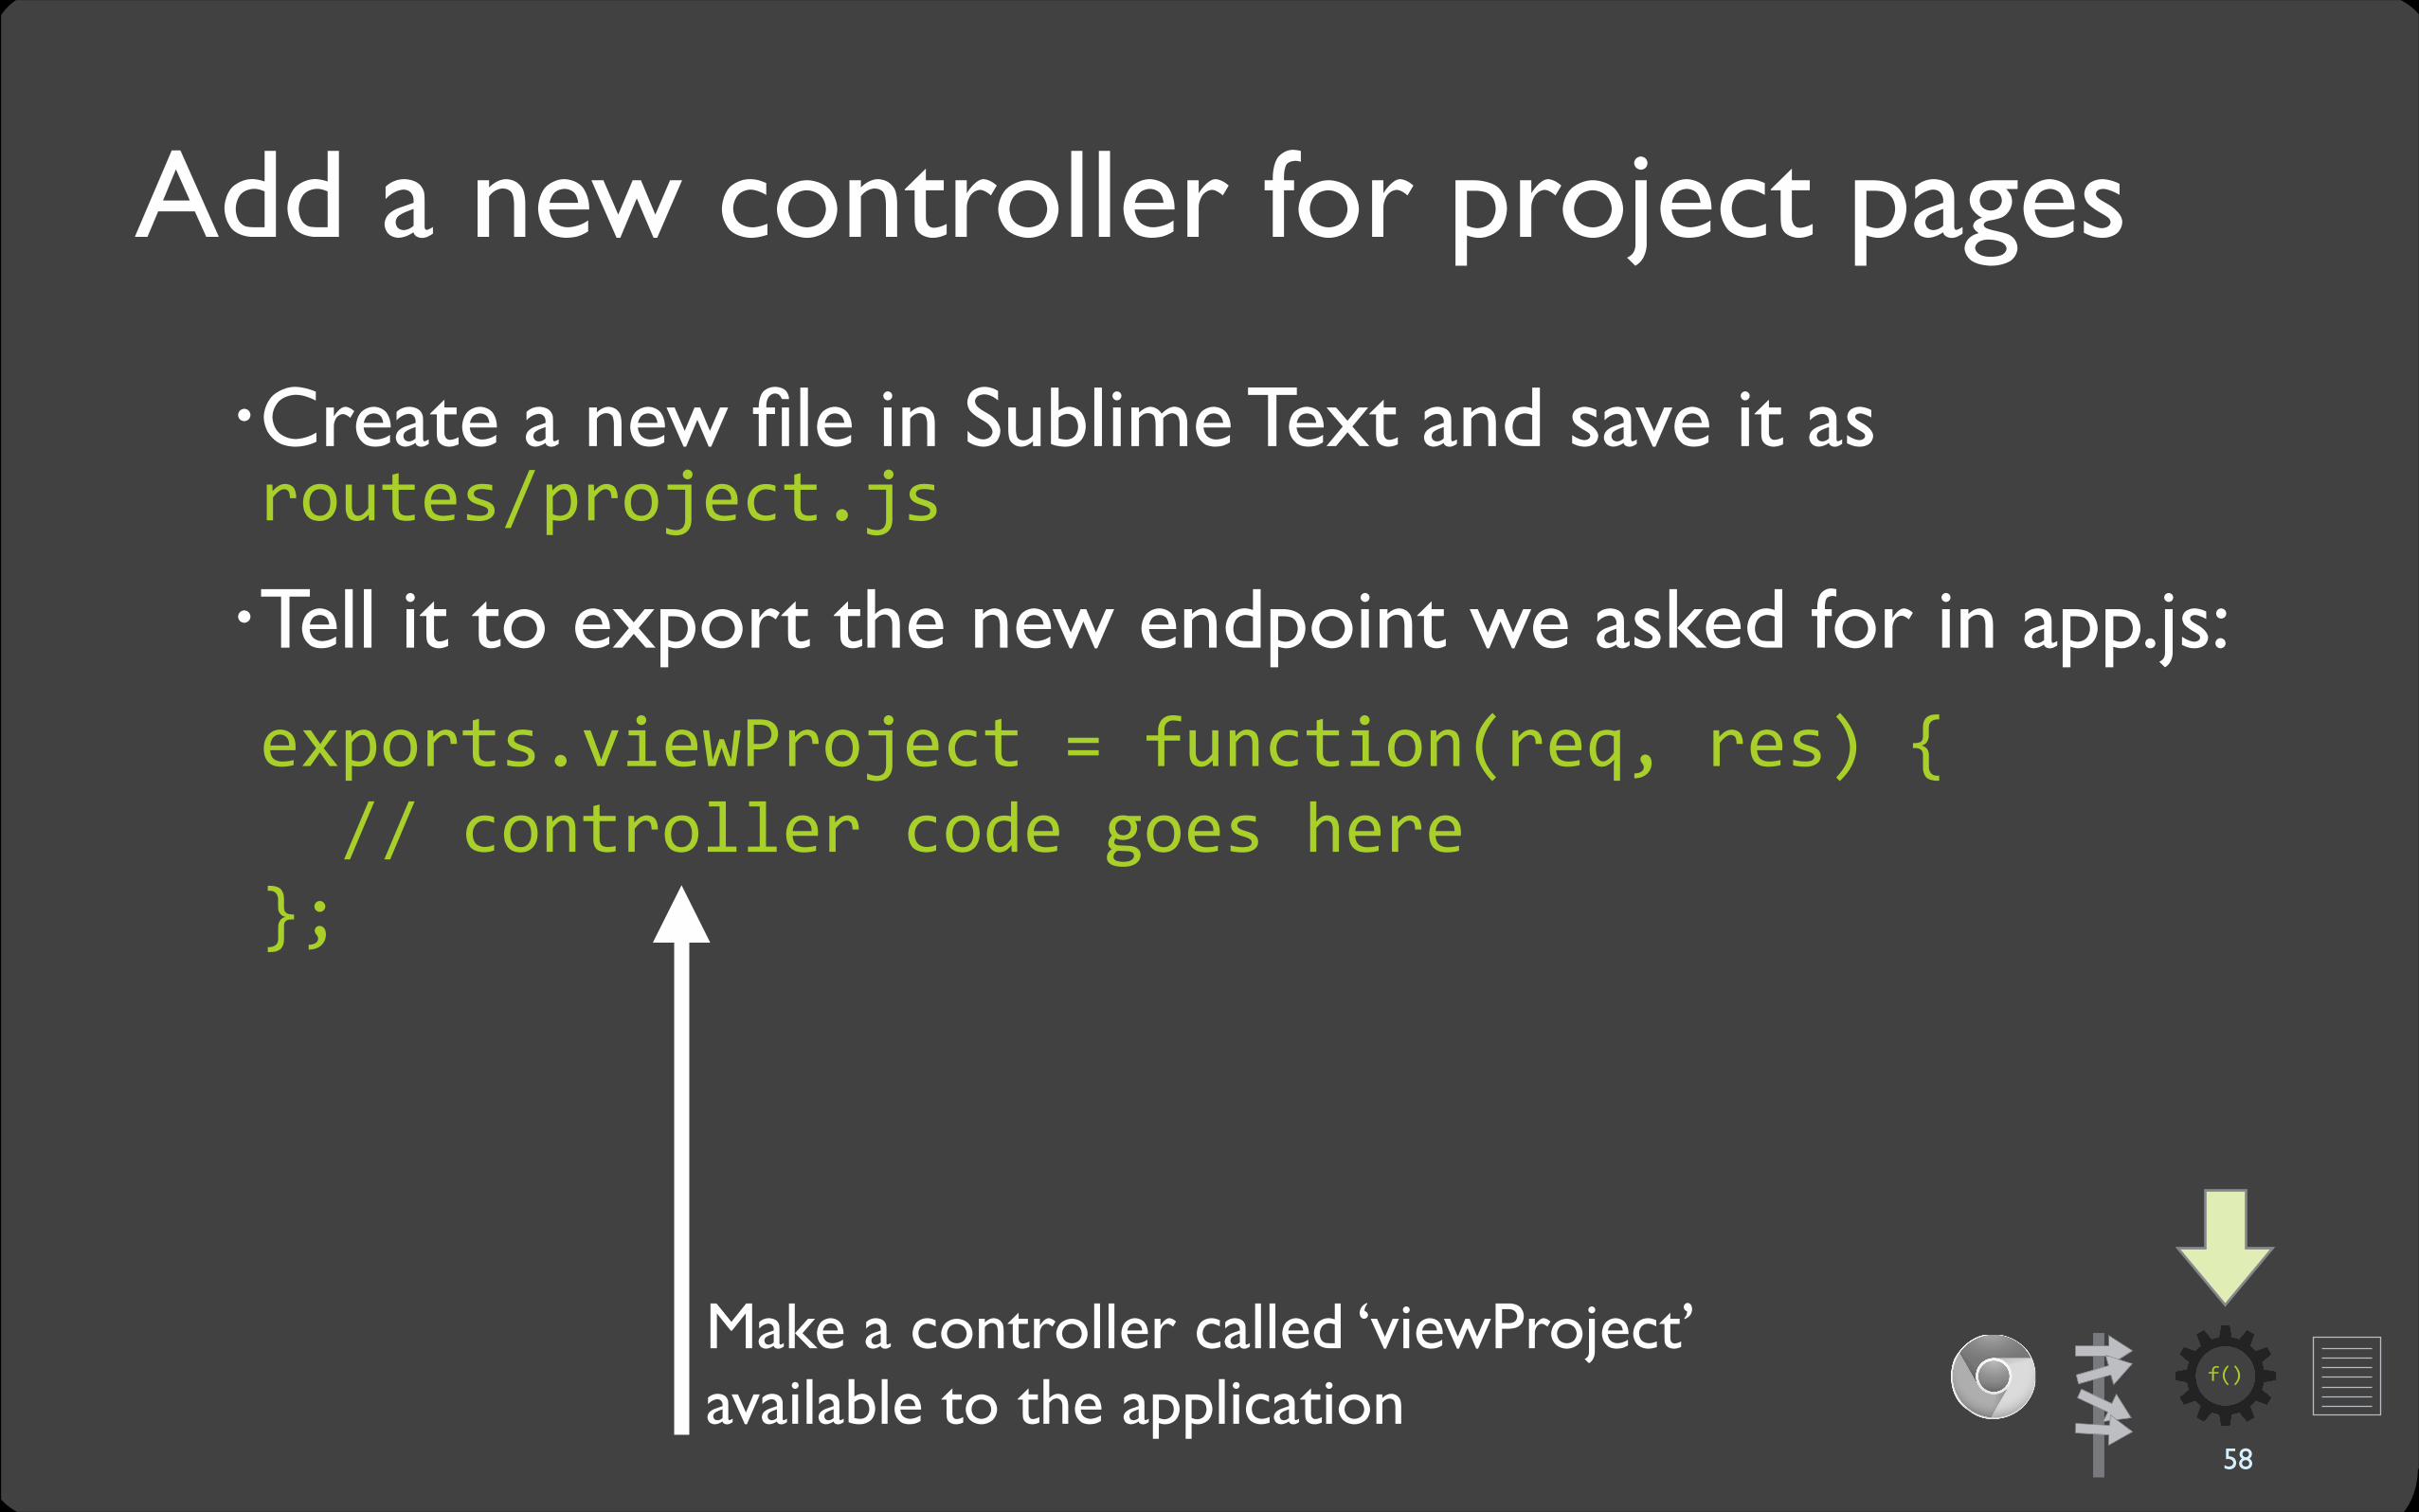
Add a new controller for project pages
�Create a new file in Sublime Text and save it as routes/project.js
�Tell it to export the new endpoint we asked for in app.js: exports.viewProject = function(req, res) { // controller code goes here};
f()Make a controller called ‘viewProject’ available to the application
58
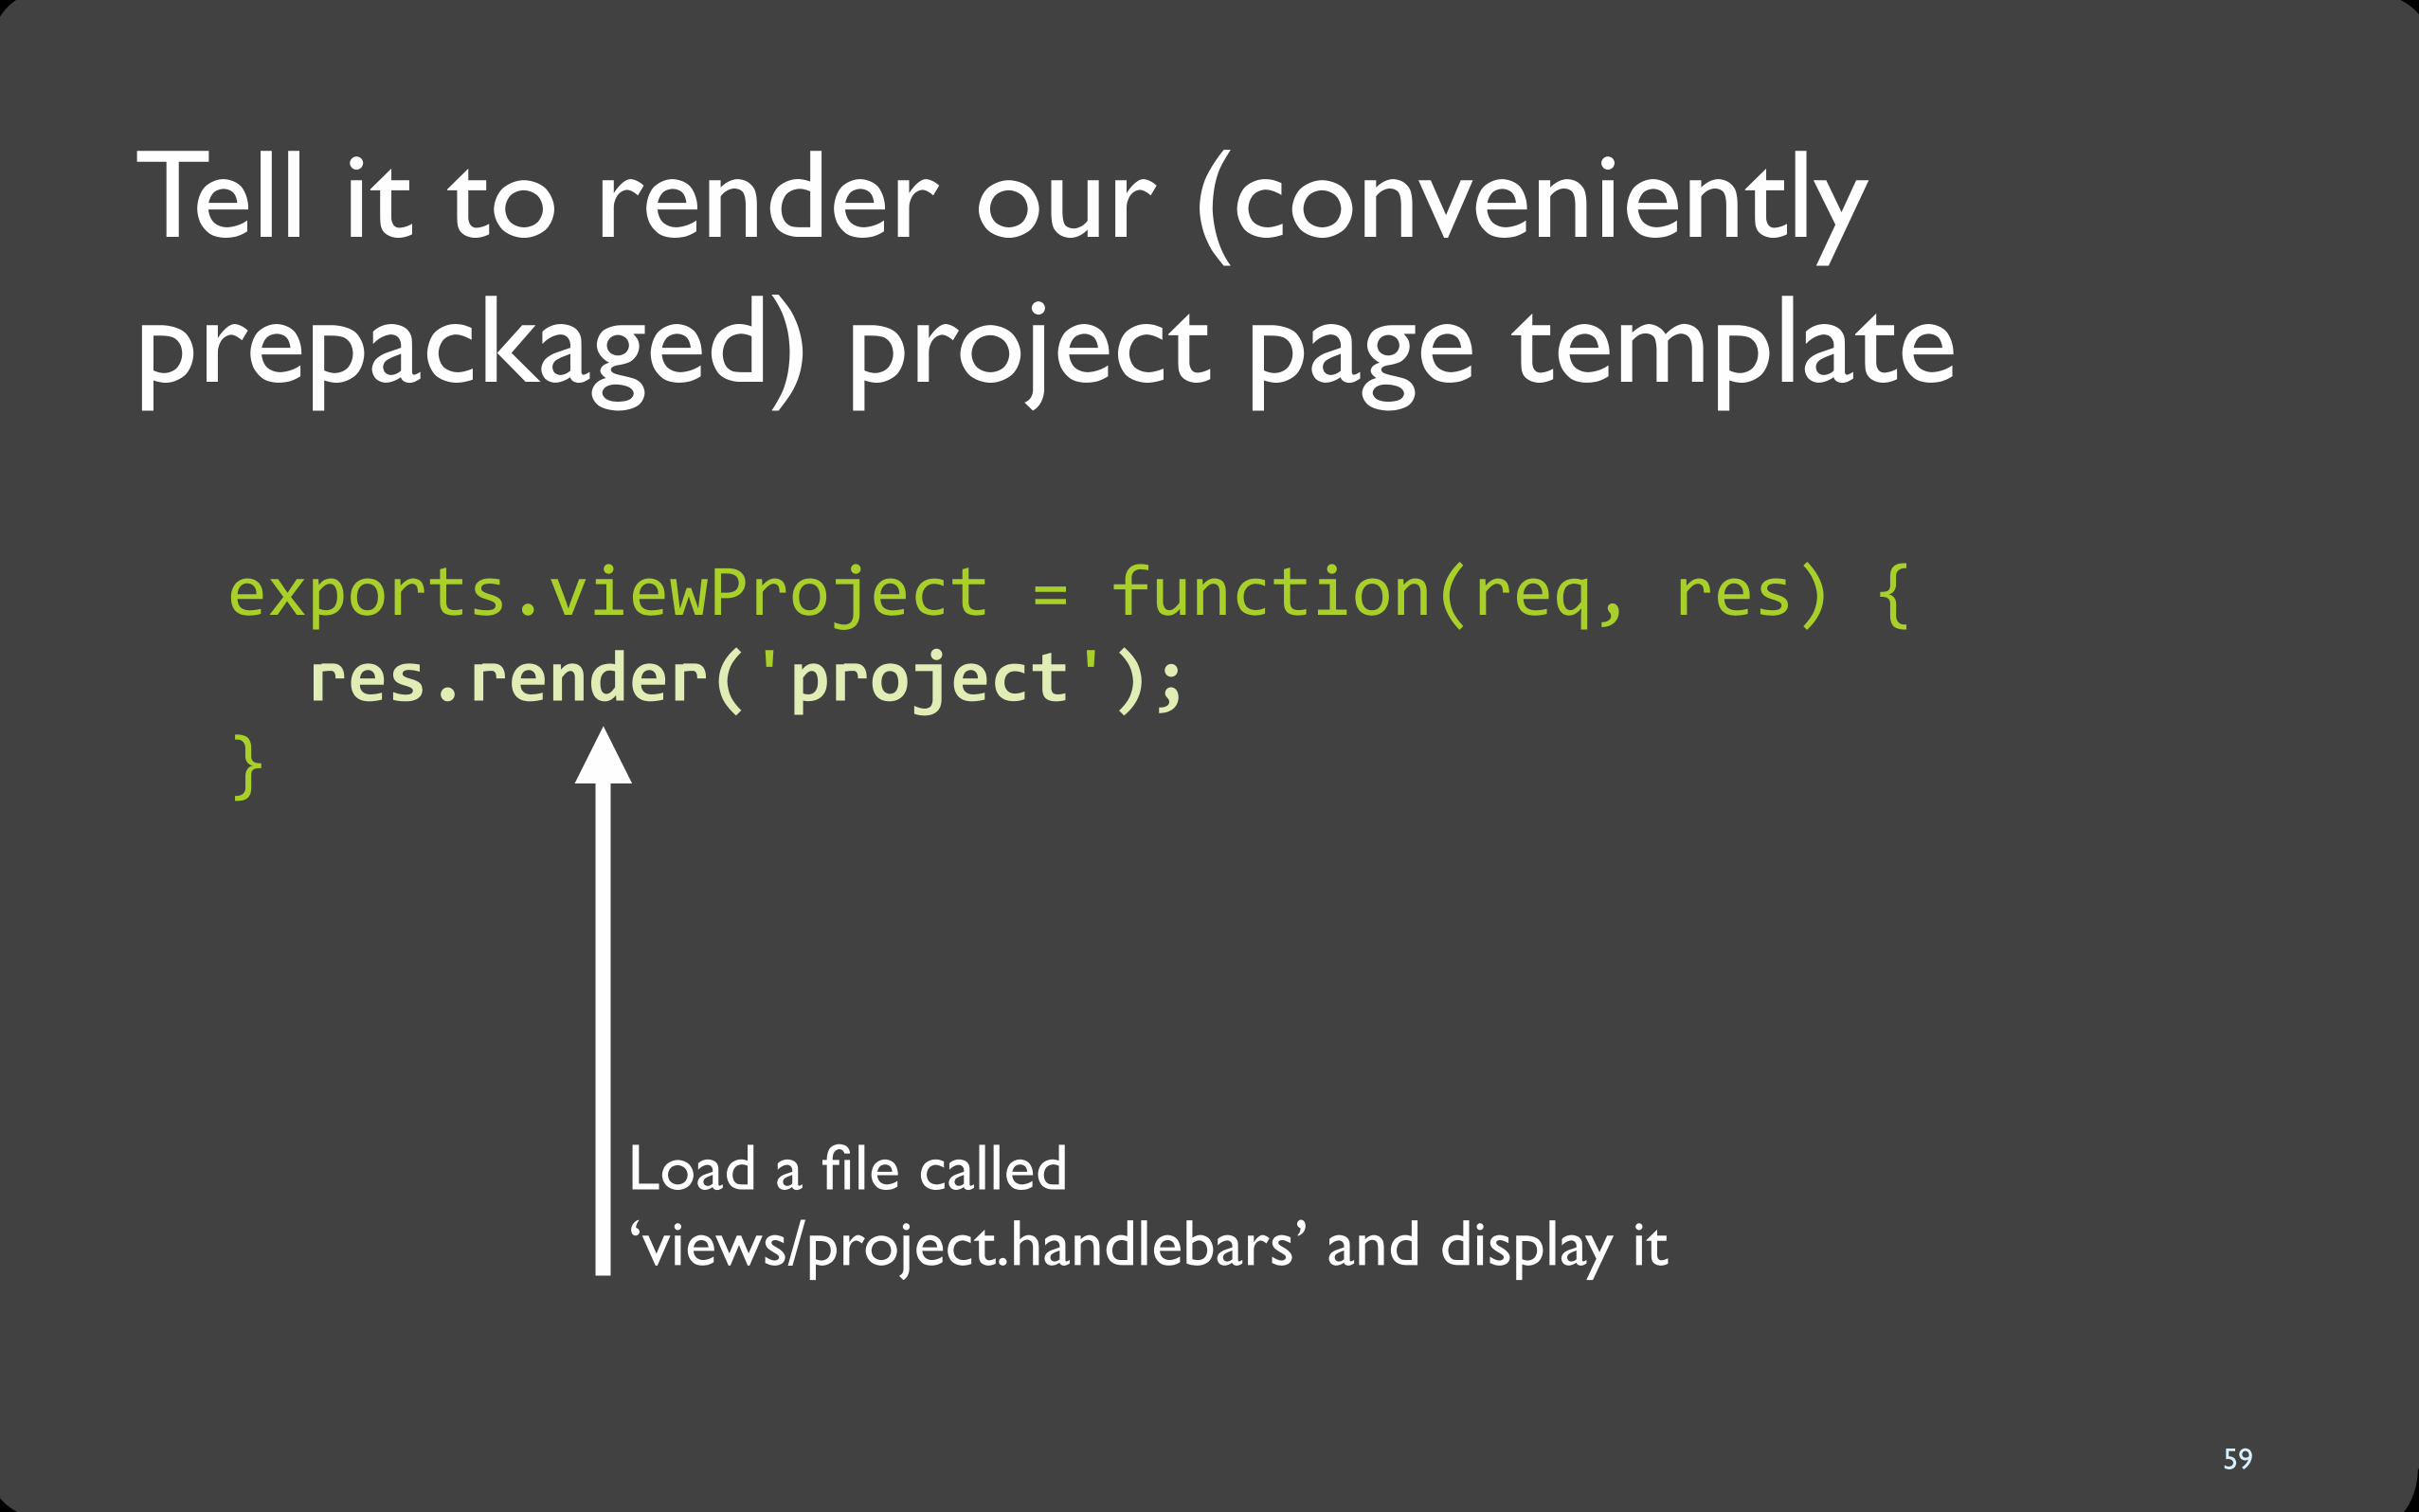
Tell it to render our (conveniently prepackaged) project page template
exports.viewProject = function(req, res) { res.render('project');}
59
Load a file called ‘views/project.handlebars’ and display it

Restart node.js and go to http://localhost:3000/project
60

practice
URL parameters
61

Goal: show the project title in the URL
62

Add an argument to the URL
�Go back to app.js to find the route near the bottom�Change the old routeapp.get('/project', project.viewProject);by adding a :name variable
app.get('/project/:name', project.viewProject);
63
Whatever is in this position in the URL becomes a variable named ‘name’
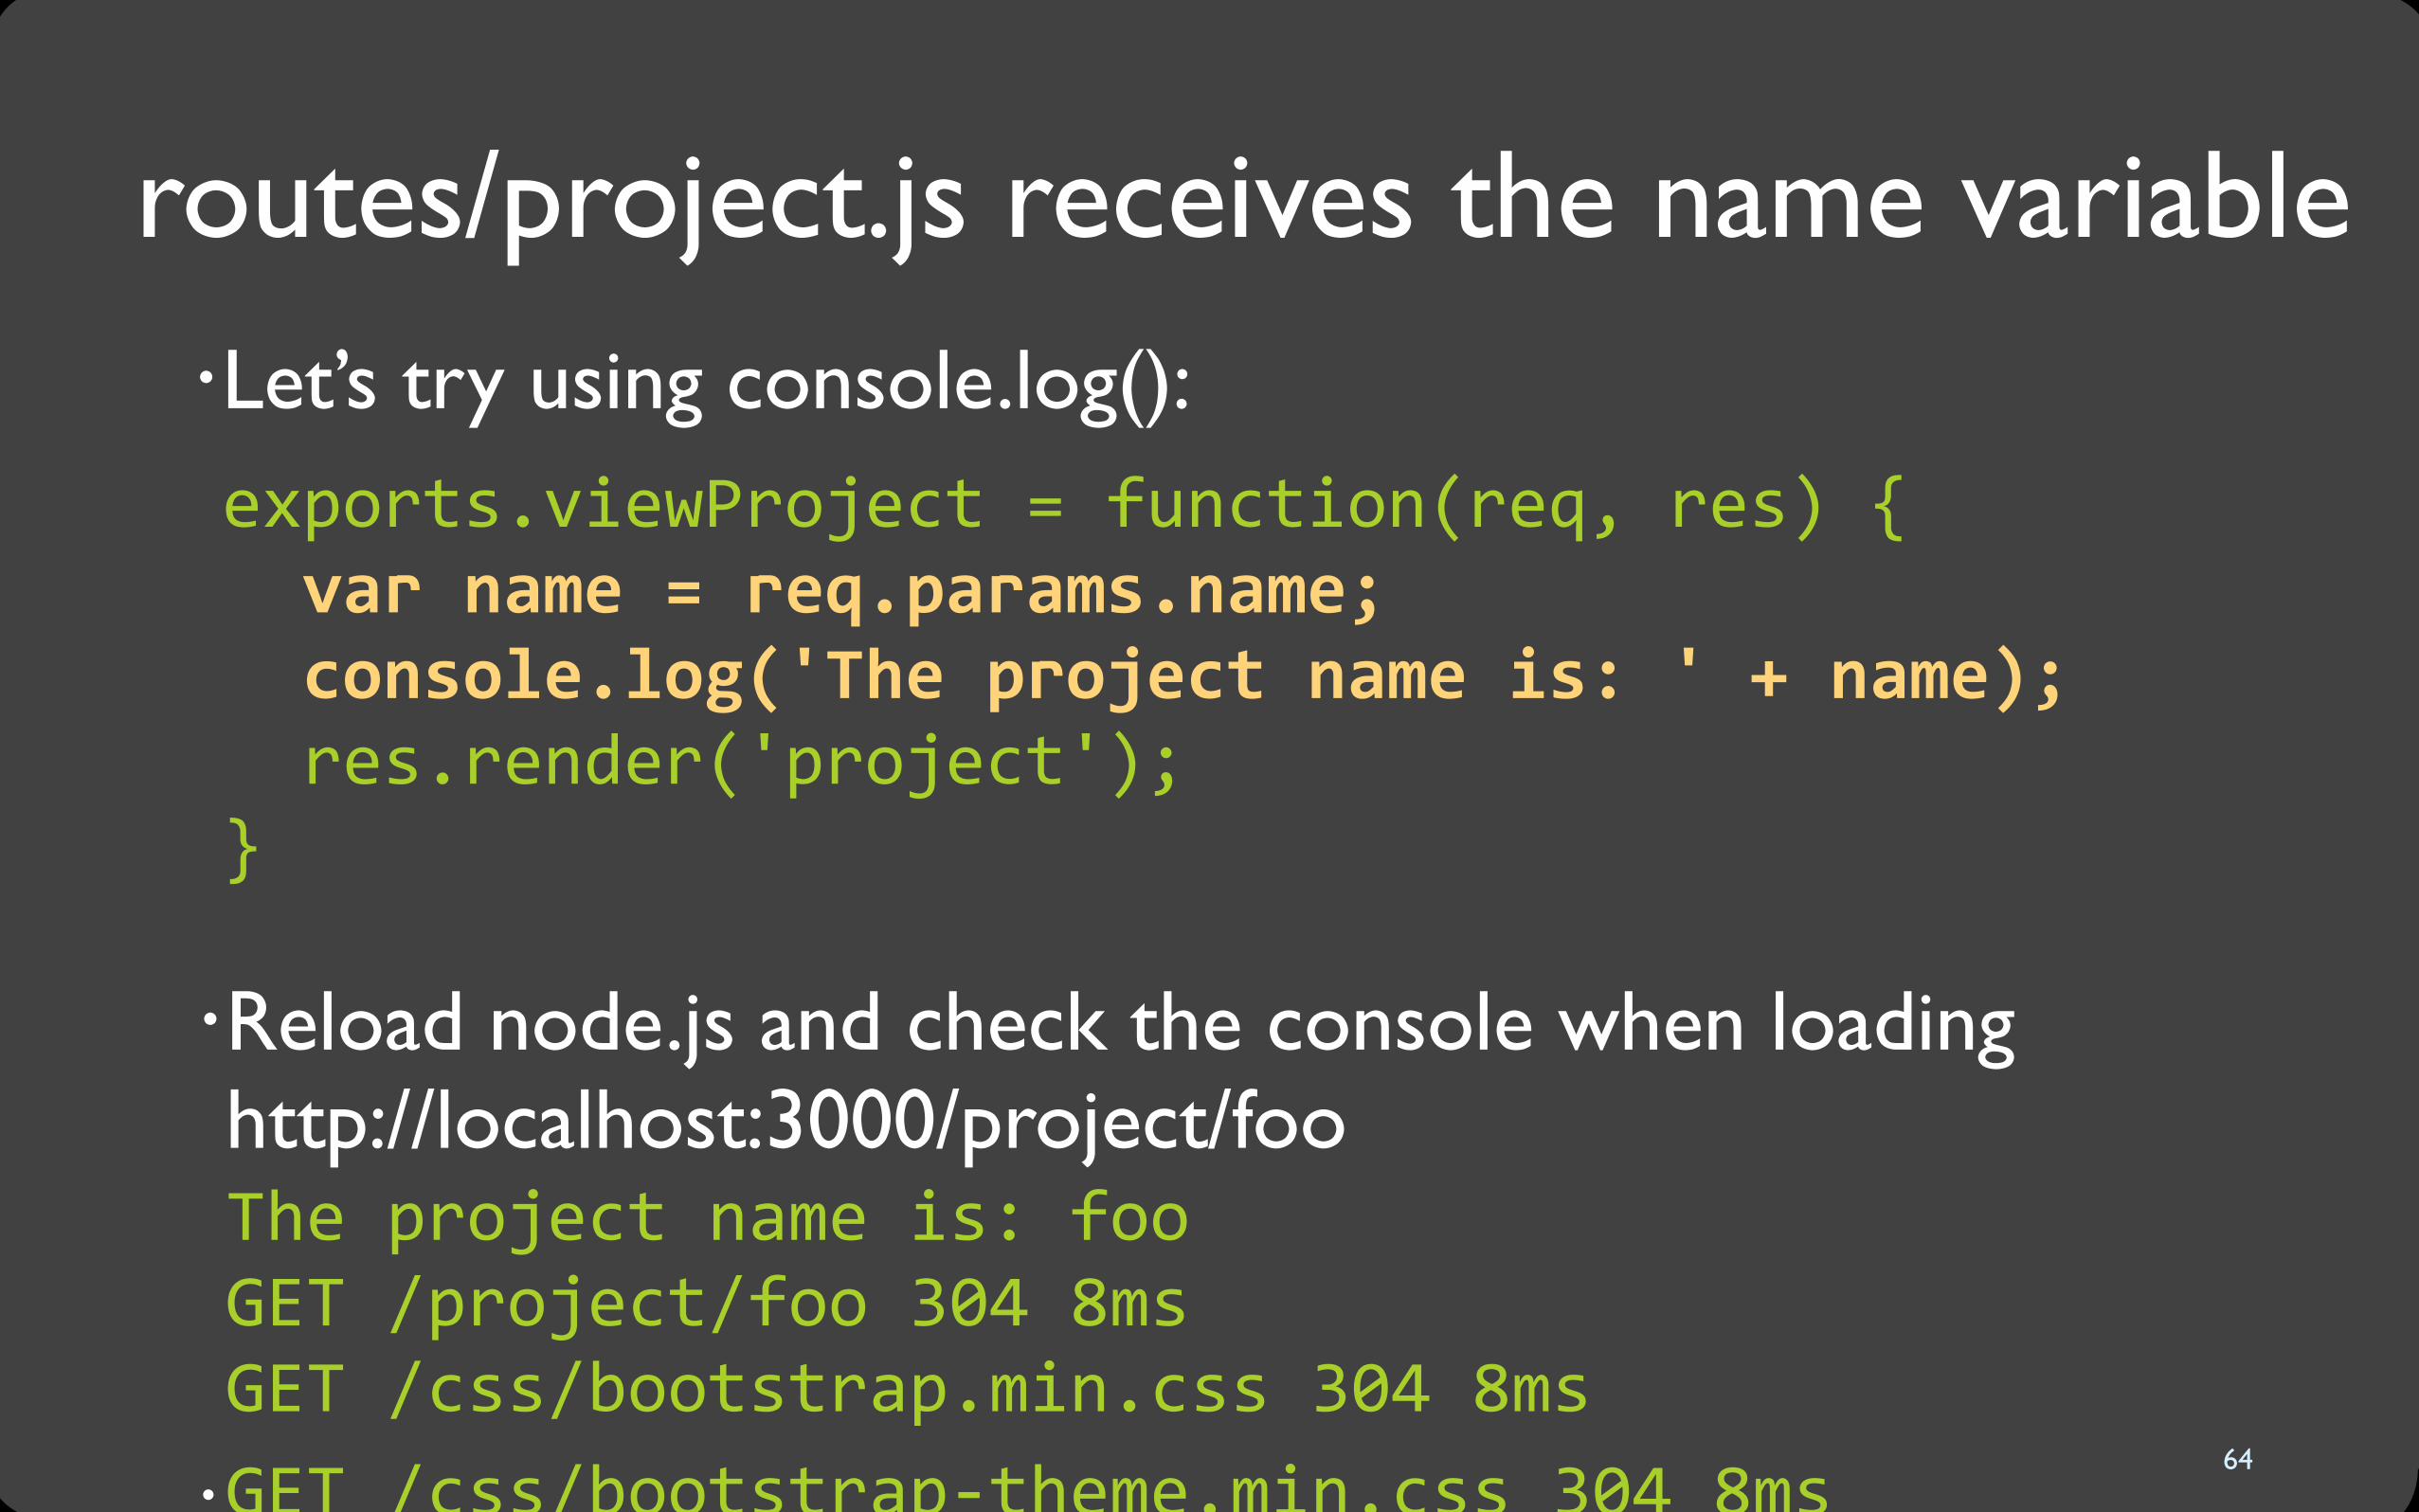
routes/project.js receives the name variable�Let’s try using console.log(): exports.viewProject = function(req, res) { var name = req.params.name; console.log('The project name is: ' + name); res.render('project');}
64
�Reload node.js and check the console when loadinghttp://localhost:3000/project/foo The project name is: fooGET /project/foo 304 8msGET /css/bootstrap.min.css 304 8ms �GET /css/bootstrap-‐theme.min.css 304 8ms
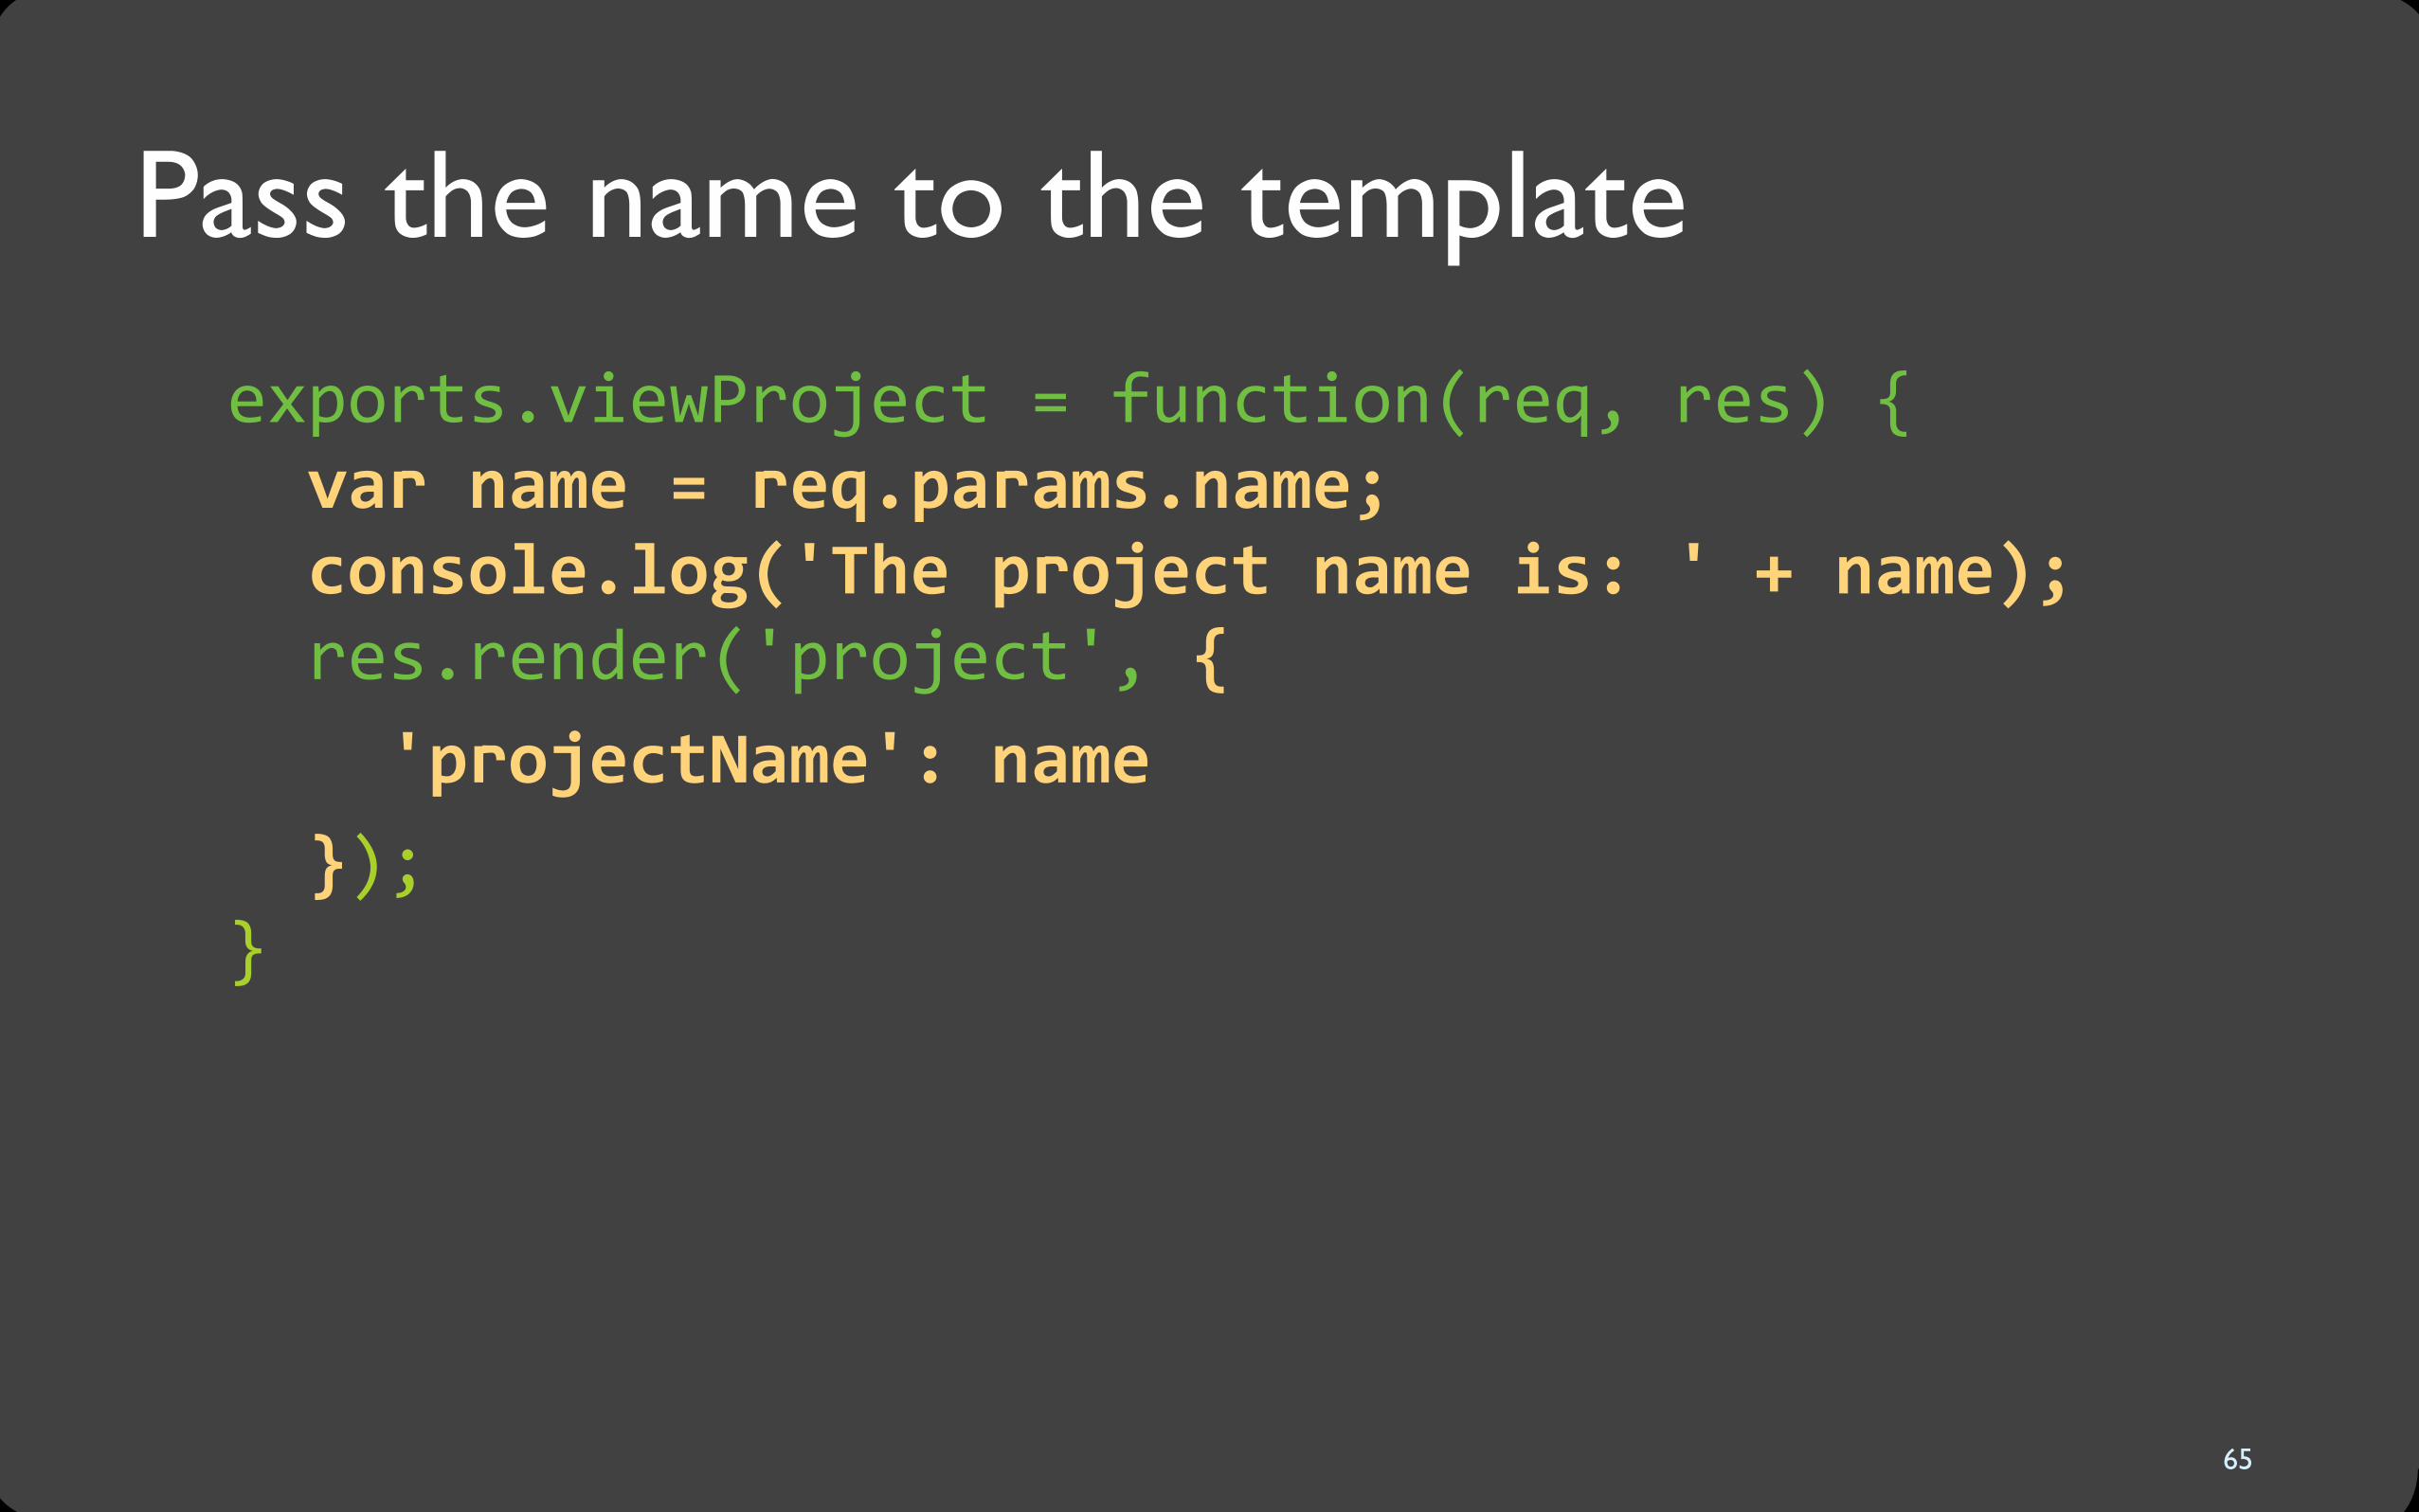
Pass the name to the template
exports.viewProject = function(req, res) { var name = req.params.name; console.log('The project name is: ' + name); res.render('project', { 'projectName': name });}
65
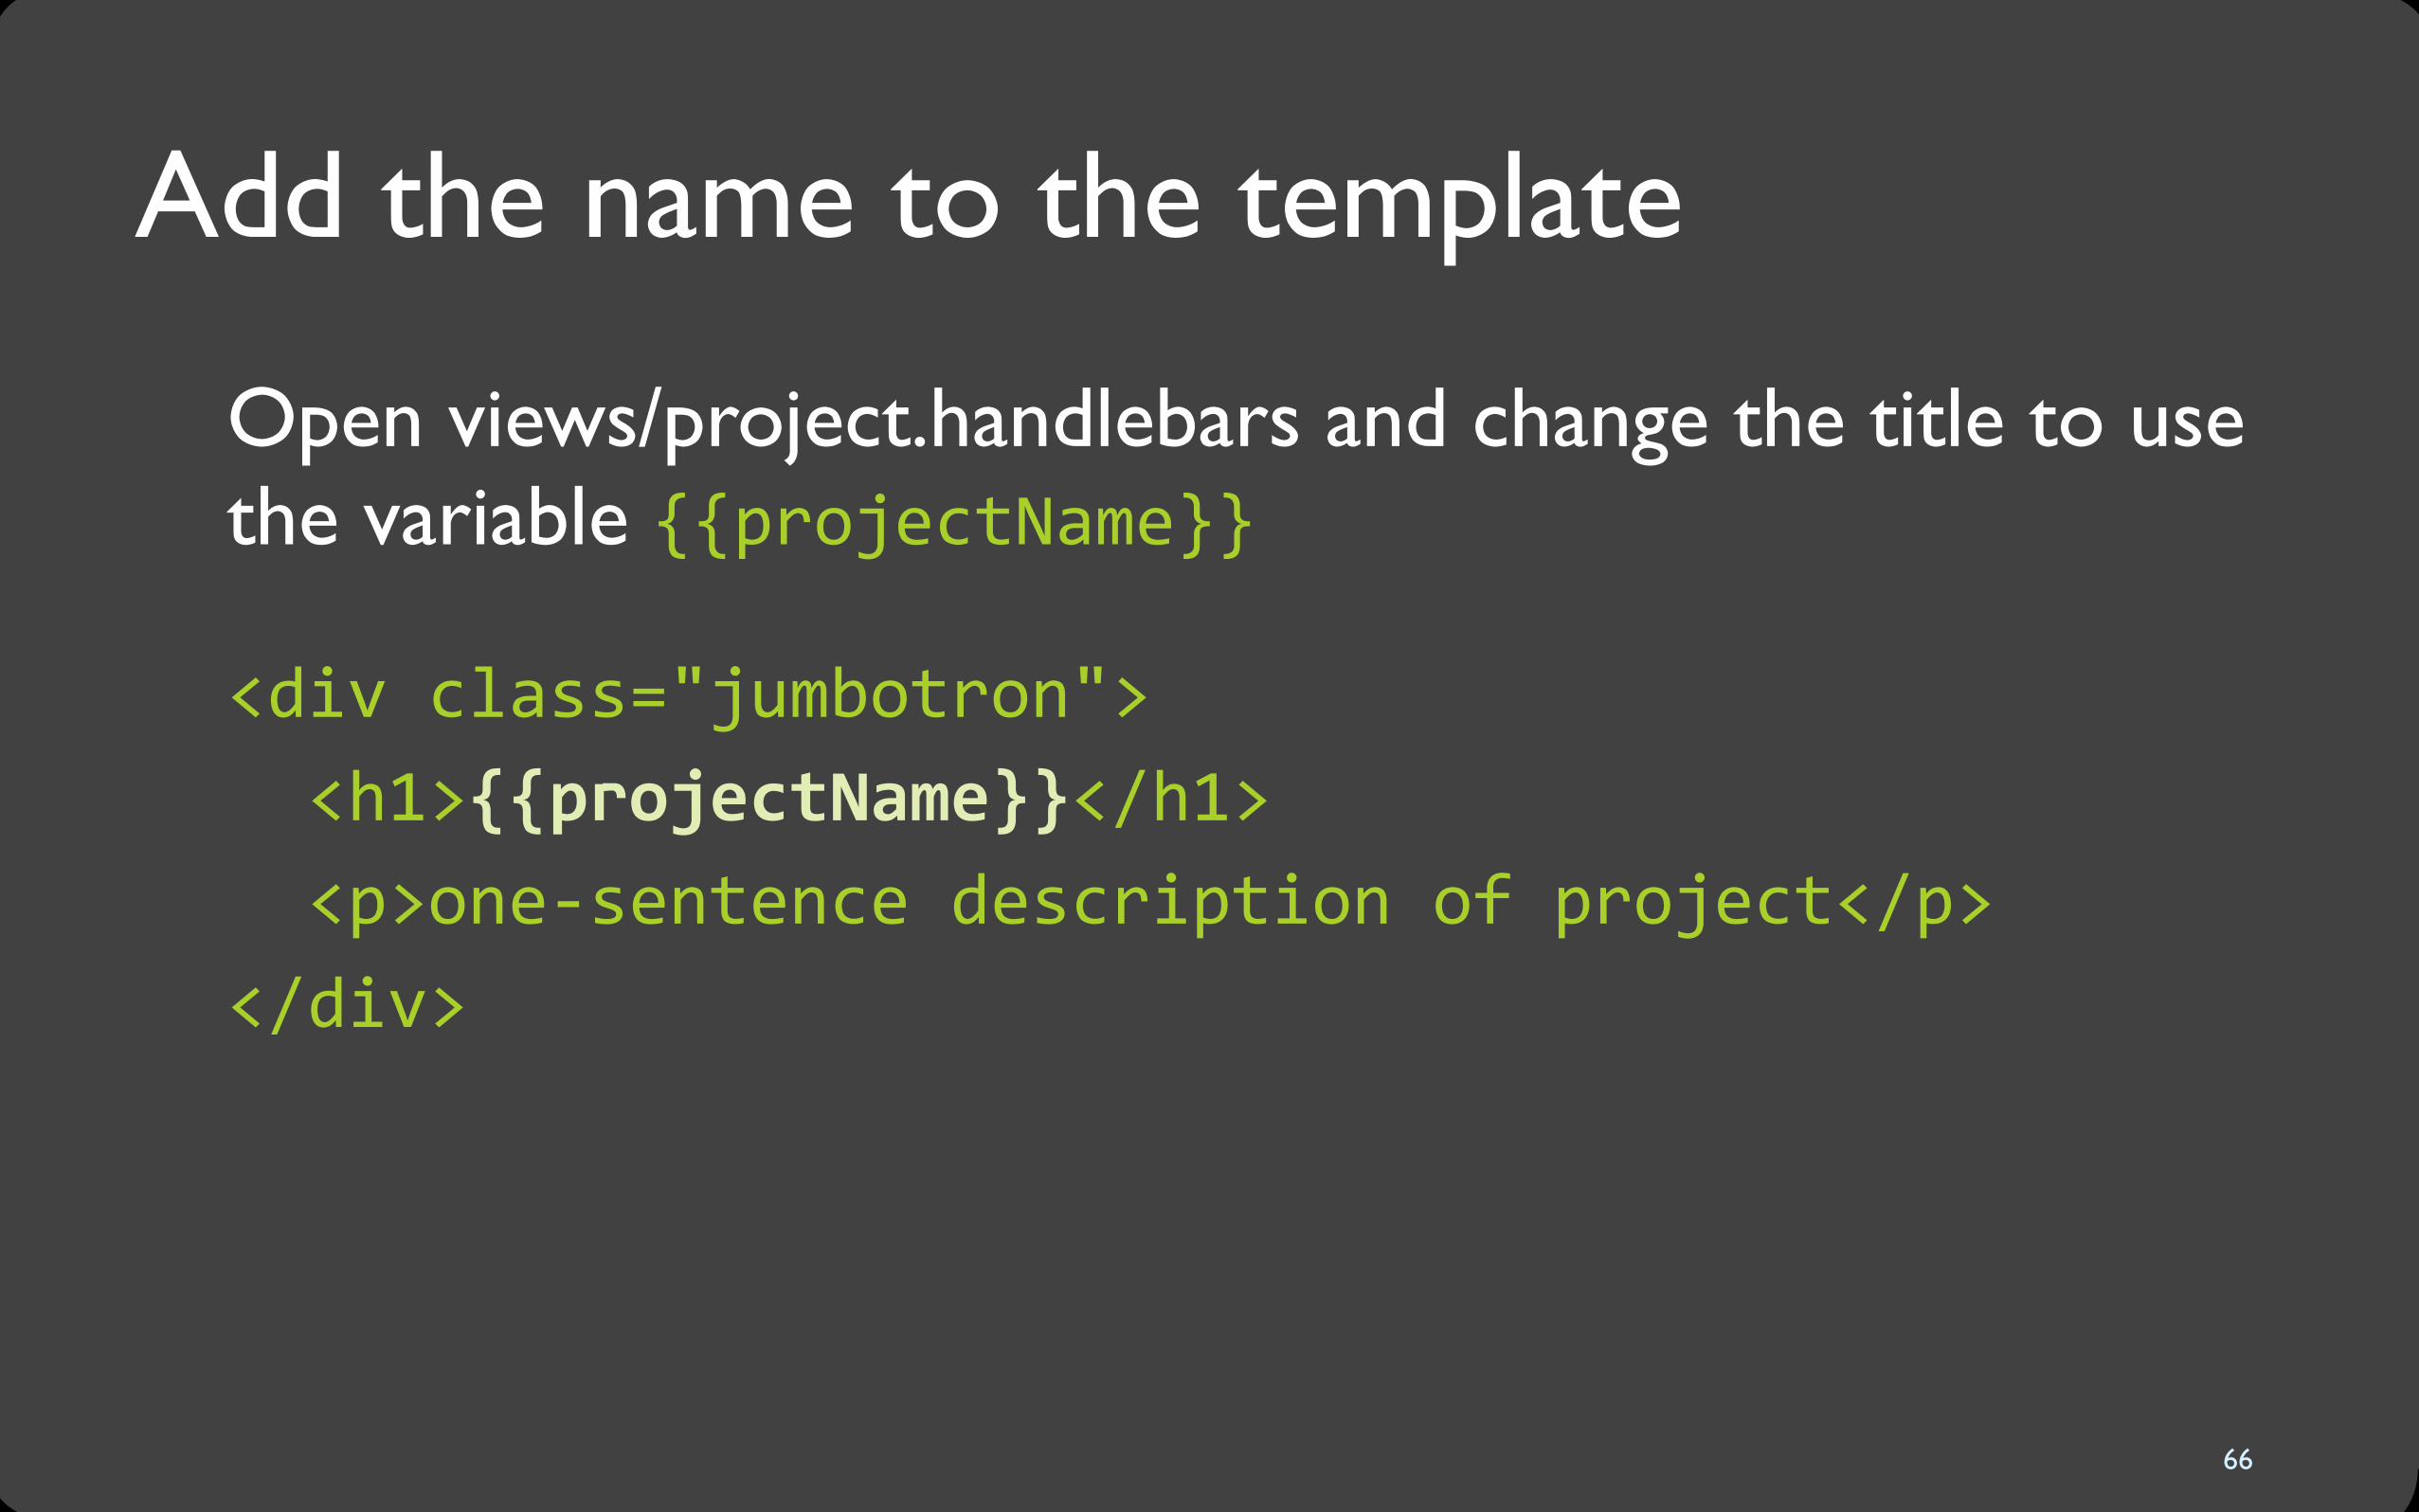
Add the name to the template
Open views/project.handlebars and change the title to use the variable {{projectName}}<div class="jumbotron"> <h1>{{projectName}}</h1> <p>one-‐sentence description of project</p> </div>
66

Homepage: embed titles in the <a> links
Back in index.handlebars: {{#each projects}} <div class="project" id="{{id}}"> <a href=“project/{{name}}” class="thumbnail"> <img src="images/{{image}}" ... /> <p>{{name}}</p> </a> </div> {{/each}}
67
Now restart Node.js, reload the home page, and click on the individual project links. Each project page should have a customized title now.
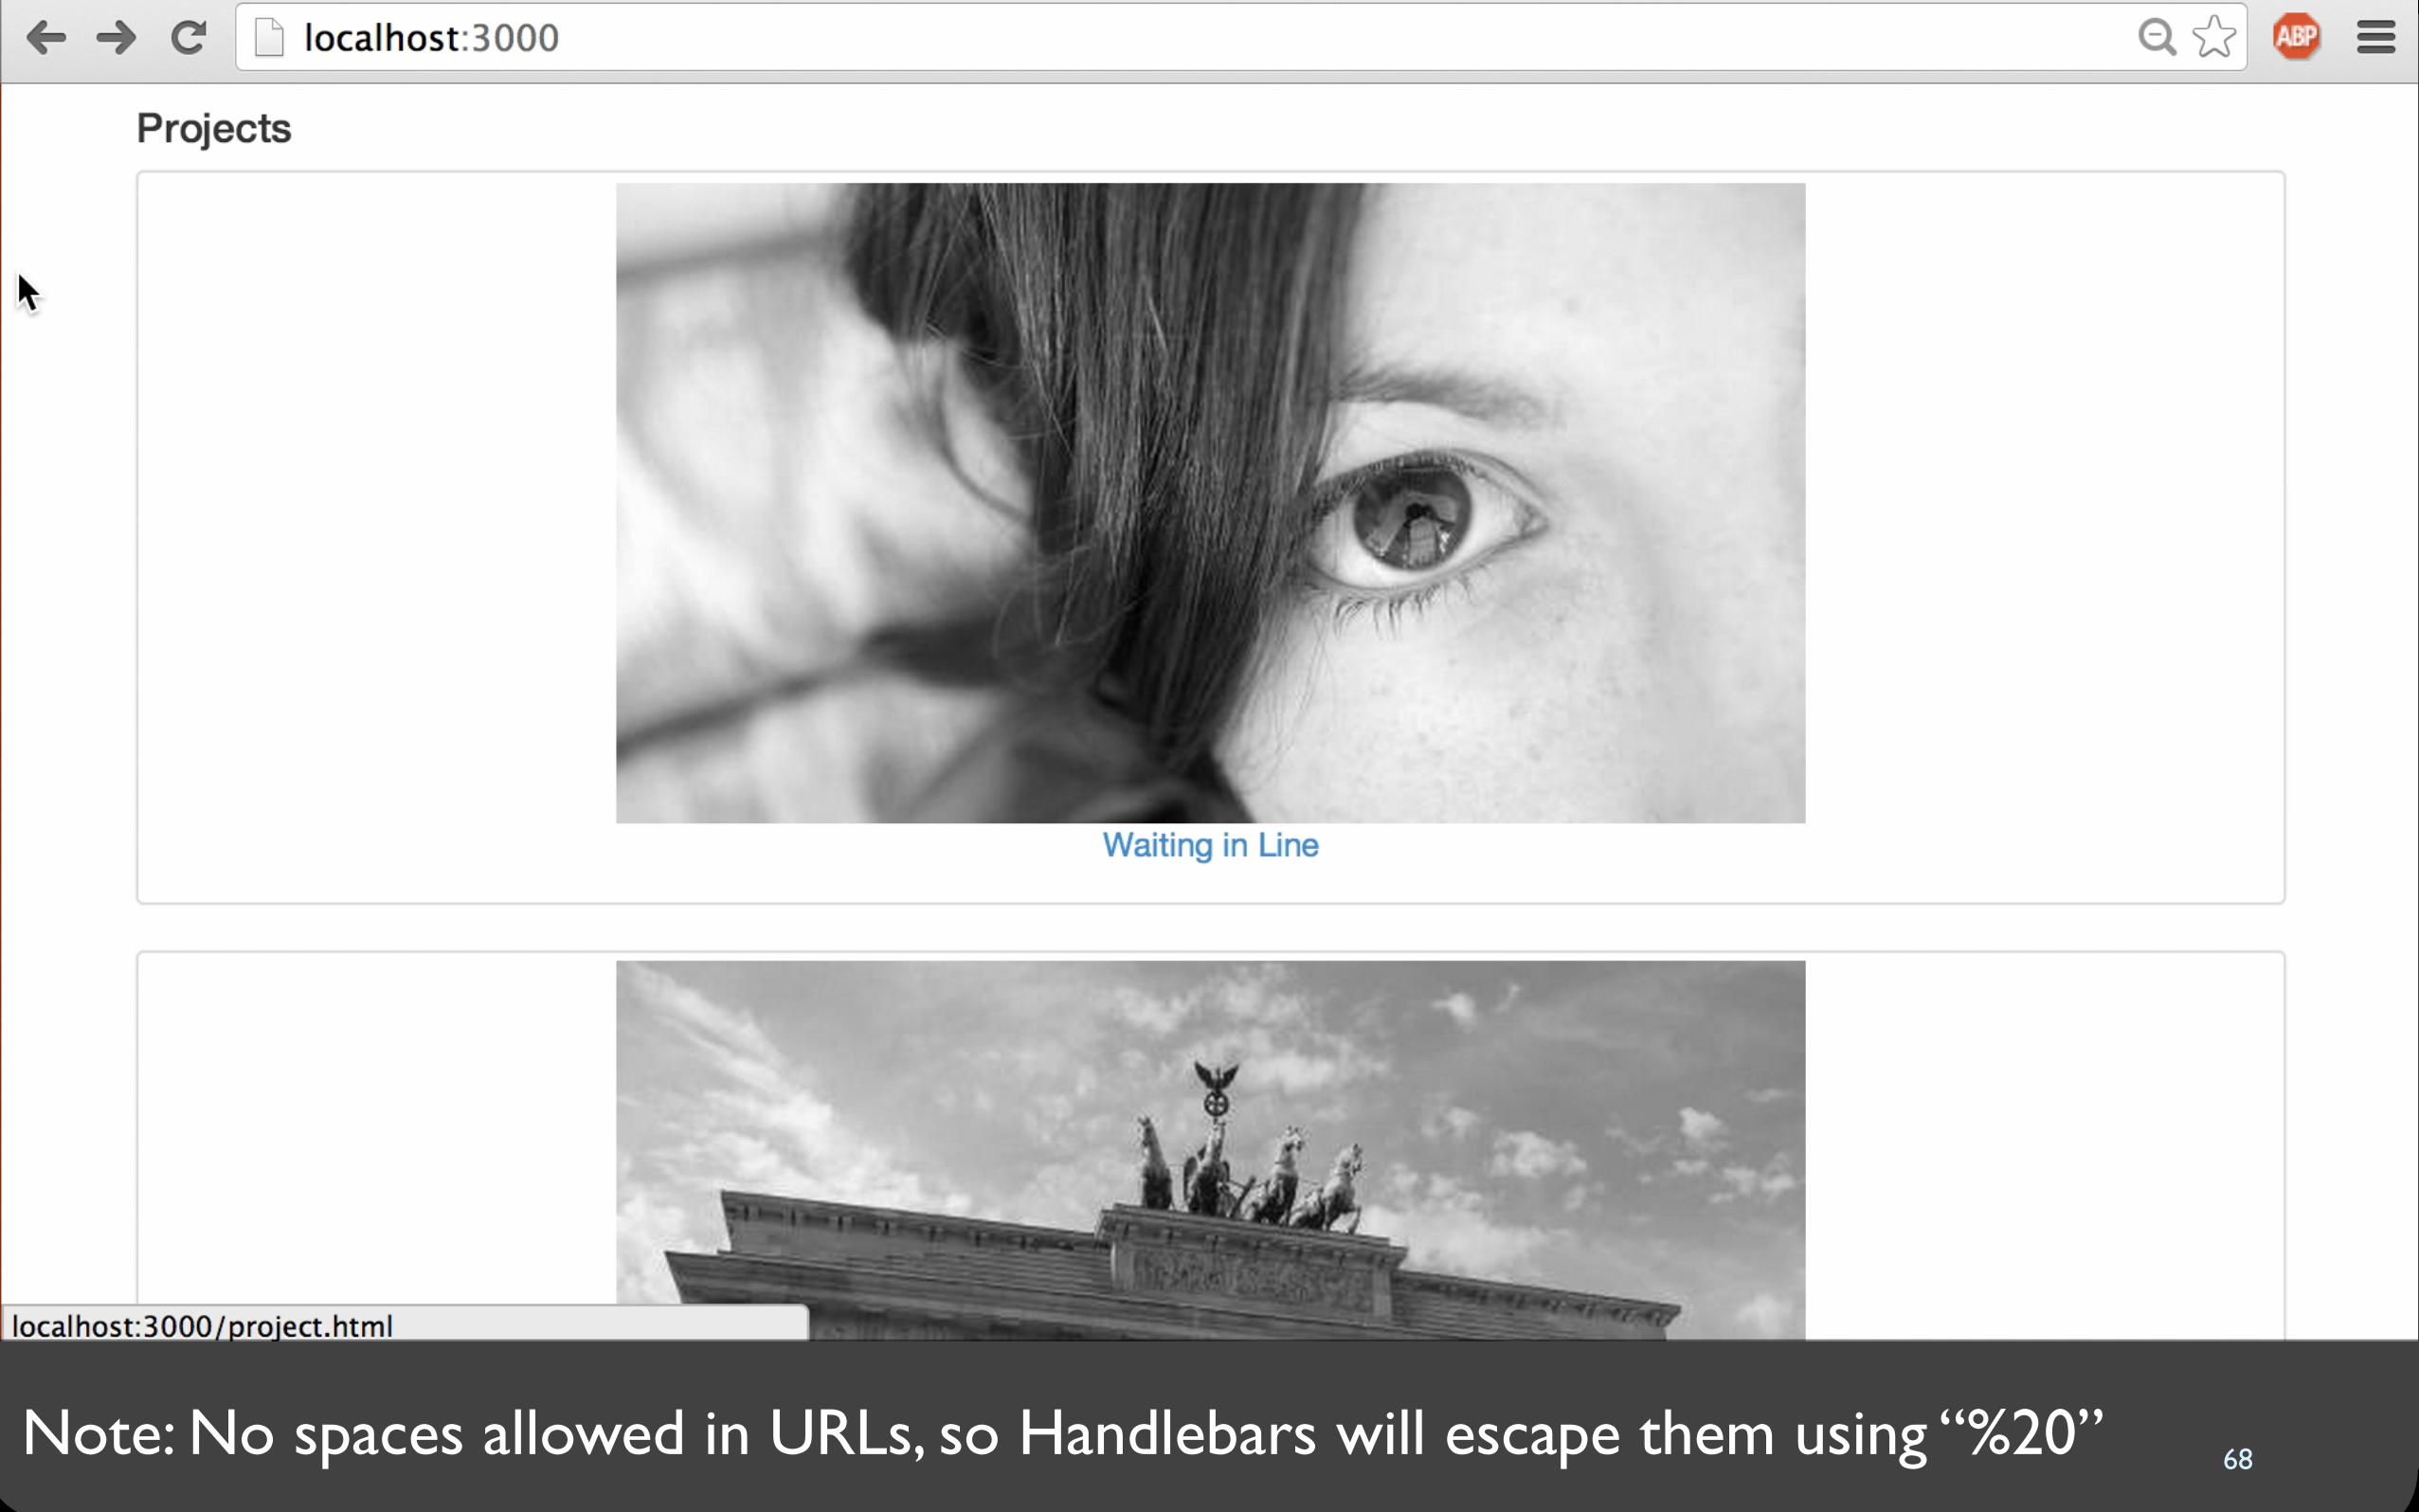
68Note: No spaces allowed in URLs, so Handlebars will escape them using “%20”
Top Related