


Languages
Pages
Legal

Car rental use case - Basic C#
Copyright © 2014, Jonas Fagerberg 1(20)
Car rental Use Case - Basic C# In this case study you will be looking at the different parts needed to build a portal for renting out
cars, like the one they use at gas stations and car rental companies. Obviously we don't have time to
build a super detailed and fully fledged system, we will however create the basic functionality looking
at different possibilities.
We will begin by looking at the specification and discern what needs to be built, and what
technologies to use for this scenario. After that we progress from variables and methods, to more
advanced things like classes and interfaces.
Theory: Specification and technologies
Case 1: Variables and Values
Case 2: Logic - Conditional logic, iterations, Arrays, Namespaces, Debugging
Case 3: Methods, Exception handling, Application monitoring
Case 4: Debugging
Case 5: Methods
Case 6: Try/Catch/Finally
Case 7: Output Window and Windows Event Log
Case 8: Enum
Case 9: Struct
Case 10: Properties
Case 11: Collections
Case 12: Events
Case 13: Classes
Case 14: Interfaces
Car rental use case - Basic C#
Copyright © 2014, Jonas Fagerberg 2(20)
Scenario for the car rental portal Your first task is to figure out the following:
What data types that are appropriate for this solution
Use conditional logic and iterations to achieve certain goals
Debug the code you implement
Implement exception handling and writing information to the Output window and the
Windows Event Log
Create a custom value type using a struct
Look at the difference between a method and a property
Store relevant data in collections
Use events to signal to the subscriber (the application) that a task has completed
Implement a first draft of the system using classes and interfaces.
Specification The cars are divided into categories. 3 categories are defined from the start: Sedan, Combi and Van.
More categories will be added later.
Every rental must be identifiable by a unique booking number. Every rental is defined as renting one
car per occasion.
Prices The car category determines which formula will be used when calculating the price. These numbers
may change over time. Common to all calculations are that two types of costs are taken into account:
a daily cost and a cost per Km driven.
Sedan: Price = daily cost * number of days
Combi: Price = daily cost * number of days * day tariff + cost per Km * actual Km driven. The day
tariff is initially 1.5, but that could be changed over time.
Van: Price = daily cost * number of days * day tariff + cost per Km * actual Km driven * distance tariff.
The day tariff is initially 2.0 and distance tariff is initially 2.5, but that could be changed over time.
Required Data The following data is mandatory when renting a car:
Unique booking number
Vehicle Id
Customer's social security number
Date and time of the rental
Meter setting (Km) at the time of rental
The following data is mandatory when returning a car:
Booking number
Date and time when the car was returned
Meter setting (Km) at the time of return
Car rental use case - Basic C#
Copyright © 2014, Jonas Fagerberg 3(20)
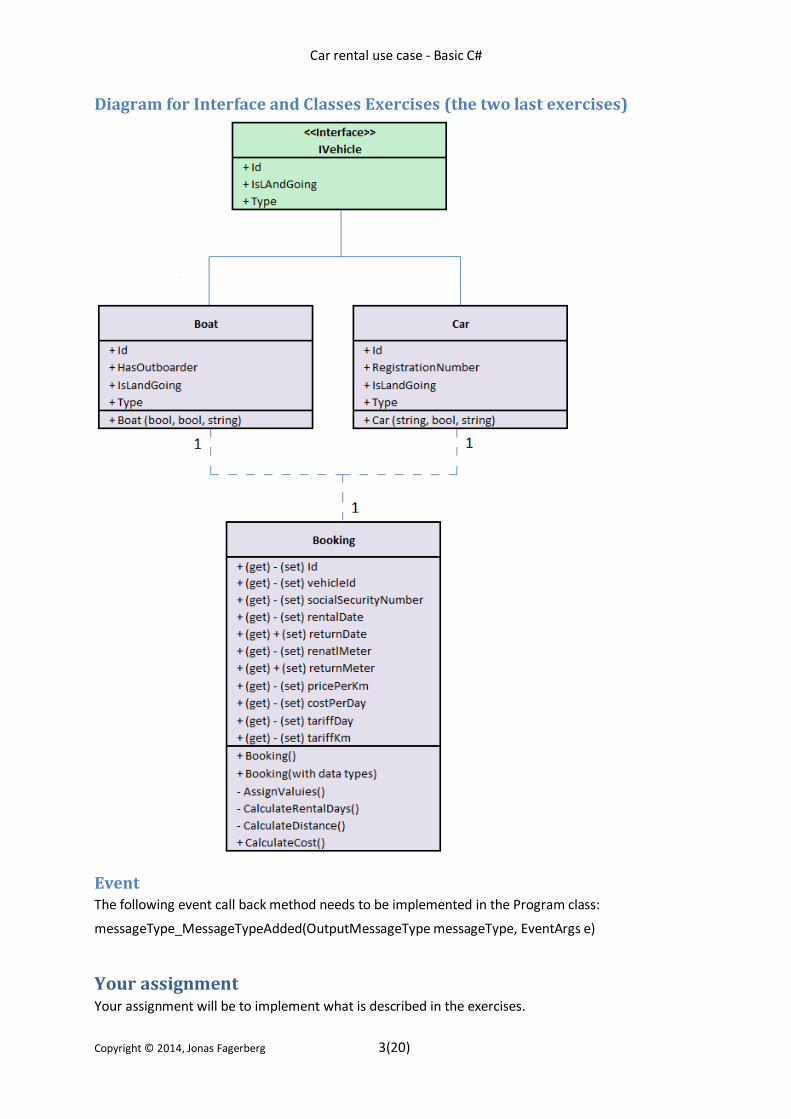
Diagram for Interface and Classes Exercises (the two last exercises)
Event The following event call back method needs to be implemented in the Program class:
messageType_MessageTypeAdded(OutputMessageType messageType, EventArgs e)
Your assignment Your assignment will be to implement what is described in the exercises.
Car rental use case - Basic C#
Copyright © 2014, Jonas Fagerberg 4(20)
Exercise 1 - Choosing data types Your first assignment is to determine what data types (variables) that are best suited to store the
mandatory data when renting and returning a car.
1. Read the section on data types in chapter 2 of the book C# Programming to get an
understanding of the data types available.
2. Go through the mandatory data of the use case, one at a time, and refer back to the list of
data types in chapter 2 when doing so.
3. Create a new Console application and name it Case1. Refer back to the section Creating an
application in chapter 1 of the book if needed.
4. Add the variables, with comments on why you chose that particular data type, to the Main
method of a Console application that you created.
5. When using variables in conditional logic it's not uncommon to check for their min and max
values. Use the variables you declared and assign a value to them.
6. Use the Console.WriteLine method for each variable to write the variable values to the
Console window. The results will be displayed when you run the application.
Example: Console.WriteLine(myVariableName);
7. Add a call to the Console.ReadLine method on a line after the last variable you declared. This
will halt the execution until you hit Return on the keyboard when the application is running.
Example: Console.ReadLine();
8. Assign new values to the variables, use the Min property value for the numeric variables.
Example: myIntVariable = Int32.MinValue;
9. Add another call to the Console.ReadLine method.
10. Sometimes you need to convert values from one data type to another data type; there are
two commonly used ways to do this, by calling methods on the Convert class or cast the
value using he data type inside parenthesis before the variable whose value you want to
convert. Read the section on Casting in Chapter 2.
a. Declare a variable called largeValue of type long and assign the value from the
meter variable. This can be done by a simple assignment because implicit casting is
used.
b. Declare a variable called largeMaxValue of type long and Assign the max value for
the long data type to the variable.
c. Declare a new variable called smallValue using the int data type and try to assign the
value of the largeValue directly to the variable. You will notice that an error is
displayed with a red squiggly line. This error is displayed because you are trying to
implicitly cast a larger data type to a smaller data type.
d. Add a casting statement before the variable name largeValue in the assignment.
Example: int smallValue = (int)largeValue;
e. Declare a new variable called smallLongMaxValue using the int data type and cast
the value from the largeMaxValue variable to this variable.
f. Print the values on a single row using Console.WriteLine, then add a call to the
ReadLine method. Note that the value cast from the largeMaxValue variable will
return -1 because the conversion failed.
11. In the specification the price for vans is calculated using the following formula:
Price = daily cost * number of days * tariff + cost per Km * actual Km driven * tariff
Car rental use case - Basic C#
Copyright © 2014, Jonas Fagerberg 5(20)
create a suitable variable and calculate the price, then show the result in the Console
window. Create a new variable called numberOfDays of suitable data type to hole the number of days that the car has been rented out, and another variable to hold
the current meter setting called currentMeterSetting of a suitable data type.
Use these variables along with the already defined variables to calculate the
price.
12. It is common to use input values from a text field in the user interface in a calculation; in
order to use this value in a calculation you first need to parse it to the desired data type. To
simulate this here, we will use a string value to parse to the intended data type. In this
scenario we will calculate the price for a sedan car using strings that we "pretend" are
fetched from text fields, storing the value in the price variable.
a. Create two string variables that hold the "text box" values, you can name them
txtDailyCost and txtNumberOfDays; assign them 100 and 3 respectively.
b. Use the Parse method for one of the values and the Convert class and an
appropriate conversion method.
Example: long.Convert(myValue) and long.Parse(theValue)
13. It's not uncommon to append string values to build a complete result, to do this you should
strive to use a variable of the StringBuilder class instead of concatenating strings using the +
operator. Declare two variables with the string data type that you assign string values, and
one with StringBuilder data type that you append the string values to. Then print the result
to the Console window.
Example of the + operator:
string result = "some text" + "some other text";
Console.WriteLine(result);
Example of the StringBuilder:
StringBuilder result = new StringBuilder("some text");
result.Append("some other text");
Console.WriteLine(result.ToString());
Exercise 2 - Conditional Logic Your second assignment is to add conditional logic to filter on car category and calculate the correct
price depending on what type of car it is. Assign the calculated price to the price variable you
declared in exercise 1. Refer back to the sections Conditional logic and Arrays in chapter 3 if needed.
The category values are stored in an array called categoriyIds. To create GUID values for the array
you can use a tool called Create GUID in the Tools menu.
1. After looking at the specification you decide to implement an if statement to filter on the car
category, using the value stored in the categoryId variable.
a. Create if and else if statements for each category id, and one else statement at the
end that catches all invalid values. The else statement should return the min value
for the data type used for the price variable.
b. Assign new realistic values to the variables used in the calculation.
c. When running the application you should end up with the min value assigned in the
else statement because an invalid GUID is used.
Car rental use case - Basic C#
Copyright © 2014, Jonas Fagerberg 6(20)
d. Run the application for each of the values stored in the array, first assigning one of
the values in the array to the categoryId variable to have a correct value to test with.
2. You need to display the open hours in the user interface. Since the open hours depends on
the day of the week, you decide to implement it using a Switch statement. The open hours
are the same for all week days except on Friday when the shop closes at 20:00, Saturday
when it opens at 10:00 and closes at 20:00, and Sunday when it opens at 11:00 and closes at
19:00. Regular open hours are 09:00 to 21:00.
a. Fetch the current week day by calling the DayOfWeek method of rentalDate variable
and convert it to a string that you use in the switch.
b. Store the open hours in a string called openHours and print the result to the Console
window.
Exercise 3 - Iterations Your third assignment is to add a loop that searches through the category ids and find the array index
of the id matching the GUID stored in the categoryId variable, if it exist; if it don't exist then the
result should be the min value for an integer. To achieve the result you are after you will need to use
am if statement and break the loop once the index has been obtained. Refer back to the Iterations
section in chapter 3 if needed.
1. Declare a variable called index that will hold the index that matches the matching GUID.
2. Create a for loop that loops exactly the number of times that there are GUIDs in the
categoryIds array.
3. Add an if-statement to compare the GUID at the current position with the GUID stored in the
categoryId variable.
a. Within the if-block, assign the index value to the index variable and exit the loop.
4. Print the result stored in the index variable along with the GUID value for that index position
in the array to the Console window.
5. Now do the steps 2-4 using a foreach loop and notice the differences in the code.
6. Now do the steps 2-4 using a While loop and notice the differences in the code.
7. Now do the steps 2-4 using a Do loop and notice the differences in the code.
8. When displaying values, in for instance drop-down lists, it is not uncommon to use loops to
add the values to the drop-down. Since we don't have a user interface yet we will simply
loop the GUIDS from the categoryIds array along with their individual index position within
the array to the consol window.
a. Create a for loop that loops over all the available GUIDs within the categoryIds array.
b. Within the for-block, print the current index and GUID value, on the same row, to the
console window.
9. Now do the step 8 using a foreach loop and notice the differences in the code.
10. Now do the step 8 using a While loop and notice the differences in the code.
11. Now do the step 8 using a Do loop and notice the differences in the code.
Exercise 4 - Debugging In this exercise you hardly have to write any code since you are going to experiment with the Debug
feature, to spy on values during execution. Open the solution for exercise 3 when doing this exercise.
1. If you haven't already read the Debugging section in chapter 3, then do so now.
2. Comment out all the rows with a call to the ReadLine method.
Car rental use case - Basic C#
Copyright © 2014, Jonas Fagerberg 7(20)
3. Place a break point on each of the rows with a call to the WriteLine method.
a. You can add or remove a break point on a row by making sure the cursor (not the
mouse pointer) is on the row, and press F9 on the keyboard.
4. When all the break points have been added, run the application in Debug mode. You can do
that by pressing F5 on the keyboard when the Build setting is set to Debug (see image 3-1).
5. Use the step options, outlined in the table in chapter 3, to execute portions of the code.
6. While at a break point do the following:
a. Hover with the mouse pointer over variables in the code and note the values as they
change, if a small + sign is displayed, hover over that sign to open more values..
b. At the bottom of the Visual Studio UI there should be a window named Locals, in
that window all available local variables will be displayed along with their values. If
the Locals window is closed, you can open it by going to the Debug-Windows-Locals
menu option.
c. There should also be a window named Call Stack, this window displays the chain of
method calls that was made to reach the break point. This information can be
invaluable when debugging a solution. If the Call Stack window is closed, you can
open it by going to the Debug-Windows- Call Stack menu option.
7. Another important window is the Output window. This window can be used if you want to
examine debug information that you don't want to be sent to the application UI. To write to
the Output window you use the same syntax as if writing to a Console window, with the
difference that you change Console to Debug. When you build an application for production
all Debug statements will be ignored by the compiler. You will have to add a using statement
to the System.Diagnostics namespace to use the methods of Debug class.
a. Add a Debug.WriteLine statement before one of the break points and step to that
break point, look in the Output window to see the result.
8. There are many other windows that you will want to explore on your own. The easiest way
to find information about a particular window is to Google the name of the window along
with the version of Visual Studio you are using.
Exercise 5 - Methods Writing all the code in the Main method is unpractical and a sure sign of bad programming. What you
want to do instead is to divide the code in smaller blocks of code that can be reused as needed
without having to duplicate the code being executed.
In this exercise you will create basic methods for fetching data, calculating price, return and rent a
car. Below is a list of the methods you need to implement, some return values others don't.
GetCategories()
Print(string)
Print(array)
GetBooking(bookingNumber)
CalculateRentalDays(rentalDate, returnDate)
CalculateDistance(rentalMeterSetting, returnMeterSetting)
CalculateCost(dailyCost, rentalDays)
CalculateCost(dailyCost, rentalDays, costPerKm, distanceInKm, tariffDay)
Car rental use case - Basic C#
Copyright © 2014, Jonas Fagerberg 8(20)
CalculateCost(dailyCost, rentalDays, costPerKm, distanceInKm, tariffDay, tariffKm)
Because the Main method is declared as static all methods and class level variables called from the
Main method must also be declared as static. We will get back to the static keyword in a later
chapter.
1. The first method you will create should return all the car categories from the data source; in
this case an array that contains the category id and category description of each category. To
store the categories you need to create an array on class level that is reachable from any
method in the class; to do this you declare it first in the class above the Main method. The
GetCategories method should not take any parameters and should return an array
containing the categories stored in the data source. Because there is no data source yet, you
simply return an array that you populate within the method. When calling the method from
the Main method the result should be assigned to the previously declared class level array.
a. Declare a class level array called categories (that will holds one array for each
fetched category; store the category and category id as strings in the category array).
Example: static string[][] categories;
b. Create a method called GetCategories which returns an array containing all
categories. Because no data storage is present you will have to create the array
within the method and populate it before returning the data.
Example: static string[][] GetCategories() {...}
c. Call the GetCategories method assigning the return data from the method to the
categories array.
Example: categories = GetCategories();
d. Run the application and make sure that the data is displayed as expected.
2. Next create a method that prints the categories to the Console window; use a loop to go
through all the categories.
a. Create a method called Print that takes an array of the same type used to declare the
categories array as a parameter.
b. Loop over all the stored values and print them to the Console window, one category
on a new row (Id and description on each row).
c. Call the Print method on the row below the call to the GetCategories method
passing in the categories array as a parameter to the Print method.
d. Run the application and make sure that the data is displayed as expected.
3. Because you anticipate the need for a method that prints a formatted string you decide to
create an overloaded version of the Print method which takes two parameters: the
description (label) of the value and the value itself.
a. Create an overload to the Print method that takes two string parameters, description
and value.
b. Print the description and label, on the same row, to the Console window.
c. Test the overloaded version of the Print method by calling it on the row below the
call to the previous Print method.
d. Run the application and make sure that the data is displayed as expected.
4. To be able to process a returned car you need to create a method called GetBooking that
return all data related to a booking, a booking id is passed in to the method. A booking
contain data that is needed to calculate distance and price. Because no data source is
Car rental use case - Basic C#
Copyright © 2014, Jonas Fagerberg 9(20)
present at this point you will have to return a booking with dummy data that can be used to
test the necessary calculations.
Because we haven't talked about structs, classes, and collections yet we will have a look at
how we can pass object data using an array. Note that we only do this here for illustrational
purposes and is NOT recommended in most real programming scenarios. To make things
easier for us we will use a data type not previously described called Object, which can contain
any type of data and as such requires casting when the data is used. Because it can contain
any type of data it is large with a lot of overhead. It is also stored on a slower memory area
reserved for large objects called the Heap.
a. Declare a GUID constant at class level that holds the current booking id.
b. Create a method called GetBooking that return an object array containing the
dummy booking data. The method should take a booking id (GUID) as a parameter
Example: static object[] GetBooking(Guid bookingId) {...}
c. Within the method, use an if-statement to check that the passed in GUID is the same
as the current booking Id before returning the dummy booking data. Return an
object array with the min or empty values for respective data type; we do this to be
able to check if it is a valid booking that is returned. These are the values a booking
contains: CarId, Social security number, Rental date, Return date, Meter, Price per Km, Price per day, tariff day, tariffKm
d. Call the method GetBooking method passing in the current booking id, store the
result in an object array (if you like, you can use the var keyword to create a generic
variable that will get its data type when the result is passed back from the method).
Example: var booking = GetBooking(currentBookingId);
e. Place a break point on the row after the call to the GetBooking method and debug
the application. Verify that the values returned are the values that you added to the
object array.
f. Stop the application and pass in another GUID that don't match the
currentBookingId GUID to the GetBooking method. Verify that the empty and min
values are returned.
g. Stop the application and change back the passed in value to the constant
curentBookingId.
5. Before we can calculate the price we need to calculate the number of days the car has been
rented out. To do this you need to create a method called CalculateRentalDays which
returns the number of days that the car has been rented out and; it takes two parameters:
rentalDate and returnDate.
a. Create a method called CalculateRentalDays which returns the number of days and
takes two dates as in parameters.
b. Within the methods subtract the rental date from the return date to calculate the
number of days that the car has been rented out and return the result.
c. Call the CalculateRentalDays method passing in the dates from the booking data.
Store the result as an integer and print the result to the Console window using the
Print method. Note that you have to cast the dates from the booking array to the
DateTime data type when passing them in the method, this because they are stored
as objects of the Object data type in the array.
Car rental use case - Basic C#
Copyright © 2014, Jonas Fagerberg 10(20)
d. Run the application and verify that the correct data is returned from the
CalculateRentalDays method and output to the Console window.
6. To make it easier to get the distance, and potentially change the distance calculation in the
future, we create a method called CalculateDistance that takes two parameters rentalMeter
and returnMeter which contains the meter setting at the time of rental and when the car is
returned.
7. Because the three calculations can use the same formula you will have the two methods with
the least parameters call the one with the most parameters to reuse the calculation. Create
three overloads of the CalculateCost method that calculates respective rental cost. All three
methods will return the cost as a value of the double data type.
a. Create a method called CalculateCost that takes all necessary parameters to
calculate the cost of renting a van. Store the result in a variable and print the result
to the Console window.
b. Create a method called CalculateCost that takes all parameters except the tariffKm.
Have this method call the first method and return the result. Store the result in a
variable and print the result to the Console window.
c. Create a method called CalculateCost that takes two parameters: dailyCost and
rentalDays. Have this method call the first method and return the result. Store the
result in a variable and print the result to the Console window.
d. Check the result and see that the calculations are correct.
Exercise 6 - Try/Catch/Finally Exception handling is a crucial part of application development, without it applications simply will
crash when something unexpected happens. In this exercise we will have a look at how to implement
exception handling to handle errors that may occur and thus enhance the user experience.
There are times when you simply want to pass the exception up the call stack, one such occasion is
when a method in an external library experiences an error; instead of handling the error in the
external library you can make sure that it is propagated to the client, which then will handle the error
in a way according to the client's logic and flow.
You always want to implement exception handling in the first method called in a call chain, that is the
top level methods. Doing this provides a basic protection that prevents the application from crashing
unexpectedly if something goes wrong.
Sometimes it is prudent to nest exception handlers within each other to make the program continue
running even though an error has occurred; one such occasion could be if you try to fetch data and
the fetching operation fails, you could then assign default values and let the application continue.
Another such occasion could be if an update fails; instead of crashing the application it could tell the
user to try again later.
an exception handler can consist of three blocks. The first is the try-block that triggers exceptions if
something unexpected happens. The second block is the catch-block that handles the exception that
has occurred; within this block you write the code that you want to execute when a specific error
occurs. You can have multiple catch-blocks; if you do be sure to end with a general exception block
that handles all exceptions that has not been defined with their own catch-blocks. The third block is
the finally-block; within this block you place code that you want to be executed whether a catch has
Car rental use case - Basic C#
Copyright © 2014, Jonas Fagerberg 11(20)
been executed or not. It will always be executed, and is usually used to run cleanup code, such as
closing database connections that was used in the try-block.
Read the section Try/Catch in chapter 4 for example code.
1. Let's create a method call chain involving three methods to see what happens when an
exception gets thrown (an error occurs). In this scenario we have the Main method that will
call a method on the client that creates a new car category and passes that information along
to a method (that usually resides in a data layer), which updated the database. In this
scenario the last method will not interact with a data source, it will simply either return
nothing or generate an exception for testing purposes.
a. Create a method that returns void called AddCategory that takes a sting parameter
called name, which is the name of the new car category to be added to the data
source.
b. Within the AddCategory method, create a new GUID that will act as the category id
for the category to be added.
c. Create a new method that is called AddCategoryToDatabase, which takes two
parameters: categoryId and name. Leave the method empty for now.
d. Add a call to the AddCategoryToDatabase method after the GUID creation in the
AddCategory method and pass in the id and name as parameters.
e. Call the AddCategory method from the Main method.
f. Everything should work fine when you run the application.
2. Now we will have a look at what happens when an actual exception occurs in the
AddCategoryToDatabase method. To do this we will simulate an exception by throwing a
new ApplicationException within the method. an ApplicationException can be used when
you want to throw a generic exception to signal that something has gone wrong in the
application.
a. Add the following row to the AddCategoryToDatabase method: throw new ApplicationException("Try/Catch exception test");
b. Now run the application. If all goes according to plan the application should halt,
displaying an exception message in a pop-up dialog and highlighting the row in the
code. This is what happens when an unhandled exception occurs in the application;
had it been a release version, the application would have crashed.
3. Now let's see what happens if we add some exception handling to the code.
a. Add a try-block around the throw new code you just added to the
AddCategoryToDatabase method.
b. Add a catch-block with a parameter called ex that catches any exception, after the
try-block. Within the catch-block, write the exception message to the Console
window.
c. Run the application and watch the result. If all is done correctly the message in the
exception should be displayed in the Console window and the application should
continue without any problem.
4. Because the AddCategoryToDatabase method need to alert the client that an unhandled
exception has been thrown, we need to propagate the exception up the call stack to the
AddCategory method that resides in the client.
Car rental use case - Basic C#
Copyright © 2014, Jonas Fagerberg 12(20)
a. By placing the following code in the catch-block we would expect the exception to be
propagated up the call stack to the method that made the call: throw;
b. Now run the application; As you see the call still halts in the
AddCategoryToDatabase method.
c. To fix this we need to add try-block around the call to the AddCategoryToDatabase
method within the AddCategory method.
d. Add a catch-block with a parameter called ex that catches any exception, after the
try-block. Within the catch-block, write the exception message to the Console
window.
e. Run the application and watch the result. If all is done correctly the message in the
exception should be displayed in the Console window and the application should
continue without any problem.
5. Now let's explore what happens if we add a finally block after the catch-block in the
AddCategoryToDatabase method.
a. Add a finally-block after the catch-block and print the text "Connection closed" to
the Console window from within the finally-block.
b. Run the application. Note that the message "Connection closed" is displayed before
the exception is propagated up the call stack to the AddCategory method.
6. Instead of using the generic Exception class when catching our ApplicationException we can
target that exception type directly in one of our catch-blocks. This makes it possible to tailor
specific actions to specific errors. Remember that you always should have generic exception
handler present which handles all unexpected errors.
a. Add a catch-block that handles the ApplicationException specifically and writes the
message "Handled by specific exception handler" to the Console window.
b. Run the application. The message "Handled by specific exception handler" should be
displayed after the "Connection closed" message written from within the finally-
block.
Exercise 7 - Writing to the Windows Event Log When collecting data from an application in a production environment, you cannot rely on a Console
window because it is unlikely that there will one. The methods of the Debug class is also useless in
this scenario, because information written using those methods are only available in debug mode.
The methods of the EventLog class, however, are available in a production environment. These
methods write messages to the Windows Event Log. The Event Viewer can be opened from:
Control Panel-System and Security-Administrative Tools.
If you on the other hand want to write debug information to the Output window when coding, you
can use the WriteLine method of the Debug or Trace classes.
Or you can use the Assert method to test a condition, the execution is interrupted if the condition is
not met; an error dialog box is displayed where you can choose to abort or continue the execution.
When executing code that writes to the Windows Event Log Visual Studio needs to be run with
Administrator privileges.
Car rental use case - Basic C#
Copyright © 2014, Jonas Fagerberg 13(20)
Read the section Application Monitoring in chapter 4 for example code.
In this exercise you will create methods that can be called when either debug information needs to
be written to the Output window or permanently stored in the Windows Event Log.
1. Open the previous example in Visual Studio with Administrator privileges.
a. If you are using Windows 8, the go to the app list in the Tiles view.
b. Find the Visual Studio icon and right click on it.
or
c. You right click on the Visual Studio icon in the Task bar
d. Then you right click on the Visual studio 201X context menu item
and
e. Select Run as administrator in the context menu
2. Create a method called WriteToEventLog that takes three string parameters
eventLog which is the name of the windows event log that you want to write the
message to.
eventSource which is the name of the event source; where the message originated.
eventMessage which is the message you want to write to the log.
a. Add a try-catch block in which you check if the event source already exists; if it does
not exist you create it.
b. Then you add a call to the WriteEntry method of the EventLog class to write your
message to the event log.
3. Create a method called WriteToOutput that takes an Exception parameter, which will write
the exception message and stack trace to the Output window.
4. Create a method called OutputException that takes three parameters
ex of type Exception, which will contain the thrown exception.
debug of type bool, which will determine if the message will be written to the
Output window. It should have a default value of true.
eventLog of type bool, which will determine if the message will be written to the
Event Log. It should have a default value of true.
a. Add if statements that direct the execution to the WriteToEventLog,
OutputException methods, or none of them depending on the passed in parameters.
5. Create a method called AddCategoryToDatabase which takes two parameters (or modify the
method with the same name from the previous exercise).
id of type Guid
description of type string
a. Add a try-catch block that throws a new ApplicationException in the try-block.
b. Make sure that the exception is re-thrown in the catch block.
c. If you like you can print messages to the Console window in the catch and finally
block to see when the blocks are executed.
6. Create a method called AddCategory that takes one input string parameter called name (or
modify the method with the same name from the previous exercise).
a. Add a try-catch block to the method.
b. create a new Guid that you pass in to a call to the AddCategoryToDatabase method
along with the name parameter.
Car rental use case - Basic C#
Copyright © 2014, Jonas Fagerberg 14(20)
c. Add a catch-block that handles ApplicationException exceptions. In this catch-block
you print a message to the Console window and call the OutputException method,
making sure that the message is written to both the Event Log and the Output
window.
(After you have done this you can experiment with the call to the
OutputException method writing the message only to one or the other.)
d. Add a catch-block that handles all other exceptions that also writes to the Console
window and the Event Log.
7. Debug the application and make sure that the messages are written to the Event Log and the
Output window (remember to run with Administrator privileges when writing to the Event
Log).
Exercise 8 - Enum In the previous example you used two Boolean method parameters to determine where an exception
message should be written, this way of passing in and checking values will rapidly be unmanageable
when multiple values are involved. A better way would be to use n enumeration to determine what
code should be executed.
Enumerations excel when it comes to handle lists of constant values that don't have to be fetched
from a data source and can be stored directly in the code. Examples include a list of week days or
months; these values are immutable and will not change over time.
In this exercise you will use an enumeration to determine where an exception message will be
written, to the Output window, the Event Log, both, or not written at all.
You will also, in one scenario, fetch a value stored in the App.Config file, and parse that value to act
as one of the possible Enum values used in the switch which determines where the exception
information will be written.
To be able to fetch data from the App.Config file you have to add a reference to the
System.Configuration assembly (.dll)
Read the section Enums in chapter 5 for example code.
1. Open the previous exercise with Administrator privileges (needed to write to the Event Log).
2. Create an Enum called OutputMessageType outside the class within the namespace
declaration. It should contain the values: Config, Debug, EventLog, DebugAndEventLog, and
Missing.
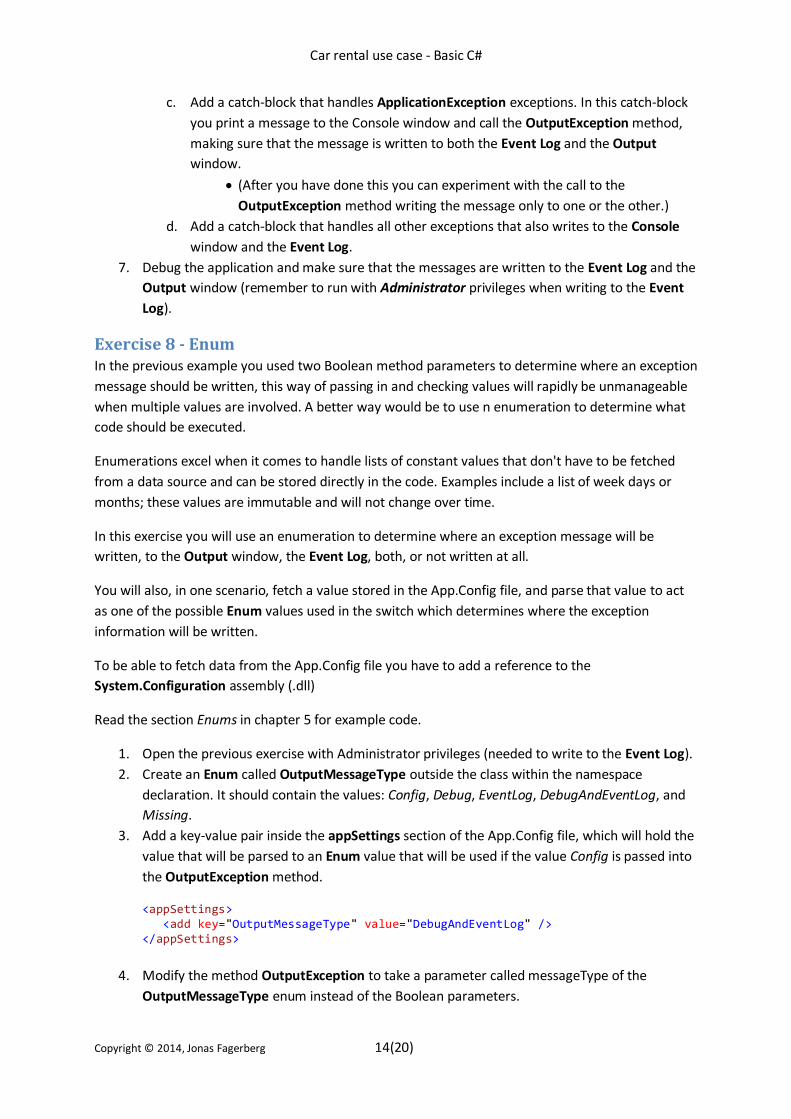
3. Add a key-value pair inside the appSettings section of the App.Config file, which will hold the
value that will be parsed to an Enum value that will be used if the value Config is passed into
the OutputException method.
<appSettings> <add key="OutputMessageType" value="DebugAndEventLog" /> </appSettings>
4. Modify the method OutputException to take a parameter called messageType of the
OutputMessageType enum instead of the Boolean parameters.
Car rental use case - Basic C#
Copyright © 2014, Jonas Fagerberg 15(20)
5. Add an if-statement that checks if the passed in enum value is Config. If it is then fetch the
value from the App.Config file.
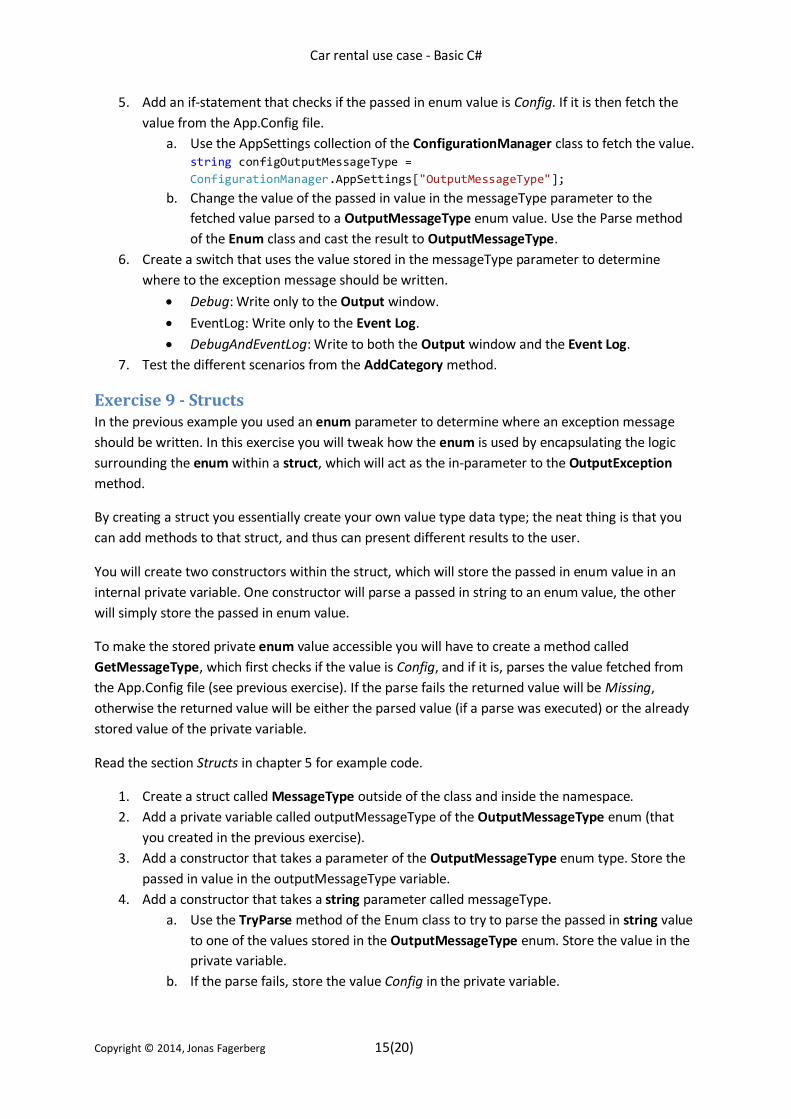
a. Use the AppSettings collection of the ConfigurationManager class to fetch the value. string configOutputMessageType =
ConfigurationManager.AppSettings["OutputMessageType"];
b. Change the value of the passed in value in the messageType parameter to the
fetched value parsed to a OutputMessageType enum value. Use the Parse method
of the Enum class and cast the result to OutputMessageType.
6. Create a switch that uses the value stored in the messageType parameter to determine
where to the exception message should be written.
Debug: Write only to the Output window.
EventLog: Write only to the Event Log.
DebugAndEventLog: Write to both the Output window and the Event Log.
7. Test the different scenarios from the AddCategory method.
Exercise 9 - Structs In the previous example you used an enum parameter to determine where an exception message
should be written. In this exercise you will tweak how the enum is used by encapsulating the logic
surrounding the enum within a struct, which will act as the in-parameter to the OutputException
method.
By creating a struct you essentially create your own value type data type; the neat thing is that you
can add methods to that struct, and thus can present different results to the user.
You will create two constructors within the struct, which will store the passed in enum value in an
internal private variable. One constructor will parse a passed in string to an enum value, the other
will simply store the passed in enum value.
To make the stored private enum value accessible you will have to create a method called
GetMessageType, which first checks if the value is Config, and if it is, parses the value fetched from
the App.Config file (see previous exercise). If the parse fails the returned value will be Missing,
otherwise the returned value will be either the parsed value (if a parse was executed) or the already
stored value of the private variable.
Read the section Structs in chapter 5 for example code.
1. Create a struct called MessageType outside of the class and inside the namespace.
2. Add a private variable called outputMessageType of the OutputMessageType enum (that
you created in the previous exercise).
3. Add a constructor that takes a parameter of the OutputMessageType enum type. Store the
passed in value in the outputMessageType variable.
4. Add a constructor that takes a string parameter called messageType.
a. Use the TryParse method of the Enum class to try to parse the passed in string value
to one of the values stored in the OutputMessageType enum. Store the value in the
private variable.
b. If the parse fails, store the value Config in the private variable.
Car rental use case - Basic C#
Copyright © 2014, Jonas Fagerberg 16(20)
5. Add a method called GetMessageType, which returns a value of the OutputMessageType
enum type.
a. Check if the private variable holds the value Config. If it does then parse the value
from App.Config (see previous exercise).
b. If the parse fails and you end up in the catch-block then set the value of the private
variable to Missing.
c. Return the value of the private variable.
6. Modify the OutputException method from the previous exercise to take an instance of the
struct instead of the enum directly.
a. Change the switch to check the value of the passed in struct parameter by calling its
GetMessageType method.
7. Modify the AddCategory method to pass in an instance of the struct to the OutputException
method when an exception occurs. Try different scenarios for the in-parameter to the struct
constructors (string value and enum value) to see that it works as expected.
Exercise 10 - Properties In the previous example you created a struct that uses an enum parameter to determine where an
exception message should be written.
In this exercise you will modify the struct to contain a property called Type that will return the enum
value stored in its private variable. In the previous exercise you created a method called
GetMessageType, call this method from the property.
A property is a way to store a value that you might need to alter before storing or fetching.
Read the section Properties in chapter 5 for example code.
1. Create a property called Type which handles a value of the OutputMessageType type in the
struct you created in the previous exercise.
a. The property should be visible outside the struct variable.
b. It should only return a value, it should be impossible to assign a value to it.
c. It should return the value generated from a call to the GetMessageType method.
2. The GetMessageType method should only be accessible from within the struct variable.
3. Alter the switch statement in the OutputException method to check the Type property you
just created instead of the GetMessageType method.
4. Test various different settings for the value passed into the OutputException method in the
AddCategory method.
Exercise 11 - Collections Collections is a better choice than arrays in most situations, largely because they are flexible and can
change size dynamically and has built in functionality that arrays don't have. It is also easy to add,
modify and fetch data using built in methods and lambda or Linq expressions.
There are a variety of collection types that has their own purpose, such as Dictionary, Stack and List.
In this exercise you will use a Dictionary collection to store and fetch data about vehicle types. A
dictionary is a good choice for this type of information where you have a unique key that will act as a
lookup value for the data.
Car rental use case - Basic C#
Copyright © 2014, Jonas Fagerberg 17(20)
The dictionary you will create will contain a Guid as a unique key and the vehicle type (Combi, Sedan
and Van) as strings.
The collection will be filled with data in a method called AddVehicleType, which takes a Dictionary as
a parameter and fills it with data.
To fetch the Id value of a vehicle type you will create a method called GetVehicleTypeId, which takes
the vehicle type Name as a parameter. You can use a Linq statement to fetch the data from the
Dictionary.
To fetch the vehicle type Name you will create a method called GetVehicleType, which takes the
vehicle type Id as a parameter. You can use a lambda expression in the FirstOrDefault method on the
collection to fetch the data from the Dictionary.
You will also need to create a Print method that prints the data in the Dictionary to the Console
Window.
Read chapter 6 for example code.
1. Create a Dictionary collection variable at class level called vehicleTypes that will hold the
vehicle types. The Dictionary key should be a Guid and the value a string.
2. Add a method called AddVehicleTypes that takes a Dictionary of the same configuration as
the collection variable you just created.
a. Start by clearing the collection of previously stored values, to make sure that no old
value remains if the method is called more than once.
b. Add the following vehicle types to the collection: Sedan, Combi and Van with unique
Guids for key values (You can generate guids with the Create Guid tool in the Tools
menu).
3. Add a method called GetVehicleTypeId, which takes the vehicle type Name as a parameter
and returns a Guid value (the vehicle type Id).
4. Add a method called GetVehicleType, which takes the vehicle type Id as a parameter and
returns a string value (the name of the vehicle type).
5. Add a Print method that prints the data in the collection in ascending order ordered by the
vehicle type name to the Console Window on the format: Id: 9805C224-6BE9-4E5E-9749-878B4B7D6F11, Name: Sedan
6. Call the AddVehicleTypes and the Print methods from the Main method and run the
application.
Exercise 12 - Events Events are a really important part of object oriented programming in that they enable
communication between objects in a Publisher-Subscriber manner. The Publisher is the object that
initiates the event by triggering it like a method call. When the event is triggered it goes out to all
objects that subscribe to that event. The subscriber object can then act upon the events as they
arrive.
In this exercise you will add an event to the MessageType struct you created in an earlier exercise.
The struct will act as the Publisher triggering the event when a new value is assigned to a property of
the MessageType struct.
Car rental use case - Basic C#
Copyright © 2014, Jonas Fagerberg 18(20)
The Program class, where the Main method is located, will act as the subscriber, acting on the events
triggered when the value of the MessageType variable you will create in the Main method is
changed.
Read chapter 7 for example code.
1. Declare a delegate called AddedHandler that takes a OutputMessageType parameter in the
MessageType struct.
2. Declare an event called MessageTypeAdded declared using the AddedHandler delegate.
3. Add a set-block to the Type property that will assign the passed in value to the private
outputMessageType variable and triggers the event passing in the assigned value to it.
4. Create an instance of the struct MessageType type called messageType.
5. Subscribe to the MessageTypeAdded event.
6. Assign a value to the Type property of the messageType variable to trigger the event.
7. Unsubscribe to the MessageTypeAdded event.
8. Print the value of the passed in parameter to the Console window from the event method
connected to the event.
9. Run the application and make sure that the correct information is printed to the Console
window.
Exercise 13 - Classes Classes are blueprints for objects and are used to encapsulate information creating "borders" around
that data. Using classes makes it possible to reuse logic and code saving time developing solutions.
Classes can be reused in several ways, one is to inherit functionality from a base class to an inheriting
class, making the declared content in the base class available directly from the inheriting class.
Another way is to create multiple instances of the same class to define objects of the same type but
with varying data. The class is a blueprint, which means that it can be used multiple times to create
however many instances we need in our application.
An example of a class could be Booking, which will define how data for a booking is stored in
memory. The application can however contain multiple bookings, to accommodate that we create
multiple instances (objects) of the same Booking class.
Another example is an order that can contain multiple order rows, we use the same OrderRow class
to create each of the order rows for the order.
In this exercise you will create two classes Utils which will contain static helper methods that can be
reused in the application without creating multiple instances of the Utils class. Because we will
declare the methods within this class as static they will belong to the class and not the individual
object instances that might be created from the class.
The second class you will create is the Booking class that will define what data (properties, variables
and constants) a booking contains. It will also define methods bound to the Booking objects that can
be used to act upon the data stored within the individual objects. These methods are not static,
because they only has a purpose when acting on the data in the Booking class. Methods that should
not be available outside the objects are declared as private while methods that should be available
outside the Booking objects are declared as public.
Car rental use case - Basic C#
Copyright © 2014, Jonas Fagerberg 19(20)
The Utils class
1. Add a folder called Classes to the project structure.
2. Add a class called Utils to the Classes folder.
3. Copy/move the methods OutputException, WriteToEventLog and WriteToOutput from
previous exercises and paste them into the Utils class.
a. Make sure that the OutputException method is declared as public because we want
to able to call it using the Utils class.
b. Make sure that the WriteToEventLog, WriteToOutput methods is declared as
private because they are methods that should not be able to call separately using
the Utils class directly, they should only be available from other methods within the
Utils class. These two methods are called from the OutputException method.
The Bookings class
1. Add a class called Booking to the Classes folder.
2. Add the following properties as read only from outside the objects but assignable from
within the objects. They will be assigned from the class constructor when the object
instances are created.
Guid: Id, CarId
string: SocialSecurityNumber
DateTime: RentalDate
int: RentalMeter
double: PricePerKm, CostPerDay, TariffDay, TariffKm
3. Add the following properties that can be assigned and read from outside the object instances
int: ReturnMeter
DateTime: ReturnDate
4. Create a private method called AssignValues that can be reused from the constructors that
you will add, that assigns the values to the appropriate properties.
5. Add a constructor that takes no parameters and assigns default values to the properties
calling the AssignValues method.
6. Add a constructor that takes the necessary parameters to be able to assign values to the read
only parameters of the objects calling the AssignValues method.
7. Add a private method called CalculateRentalDays which calculate the difference between
the return and rental dates and return the result as an int.
8. Add a private method called CalculateDistance which calculate the difference between the
return and rental meter settings and return the result as an int.
9. Create a public method called CalculateCost which is reachable from the object instance
variable. Use the formula:
CostPerDay * RentalDays * TariffDay + KmPrice * Distance * TariffKm
10. In the Main method:
a. Create an instance of the Booking class passing in appropriate values.
b. Call the CalculateCost method of the object variable storing the result in a variable
called cost.
c. Call the Print method passing in the calculated cost.
Car rental use case - Basic C#
Copyright © 2014, Jonas Fagerberg 20(20)
d. If something goes wrong the static OutputException method of the Utils class should
be called from the catch-block printing the exception information to the Output
window.
11. Run the application and make sure that the correct cost is calculated.
Exercise 14 - Interfaces An interface is a contract that defines what has to be implemented in a class. While a class only can
inherit directly from one base class, it can implement many interfaces.
Interfaces can be used to achieve polymorphism where one interface pointer can be assigned objects
of different classes as long as they implement that particular interface.
The ground rule is to keep the interfaces small and for a distinct purpose.
In this exercise you will create an interface called IVehicle that will be implemented by two classes
Car and Boat, which both are vehicles and yet have different characteristics.
You will also create a Print method that prints the content of an object instance that implements the
IVehicle interface. Note that only the properties from the interface are available when accessing the
members of the instance passed into the Print method, this because only that subset of data will be
available during runtime.
1. Add a new folder called Interfaces to the project.
2. Add an interface called IVehicle to the folder you just created.
3. Make the interface public.
4. Add two properties: IsLandGoing (bool) and Type (string).
5. Add a class called Car to the Classes folder.
6. Implement the interface's properties.
7. Add a public property called RegistrationNumber (string) to the class.
8. Add a class called Boat to the Classes folder.
9. Implement the interface's properties.
10. Add a public property called HasOutboarder (bool) to the class.
11. Add a method called Print, which takes a parameter of type IVehicle, to the Program class.
In this method print all available information from the IVehicle parameter to the Console
window. Note that only the properties from the IVehicle are present even though you pass in
a Car or a Boat to the method.
12. In the Main method:
a. Create one instance each of the Car and Boat class.
b. Call the Print method twice, once for each instance you created.
c. Run the application and make sure that the correct data is printed to the Console
window.
Top Related