


Languages
Pages
Legal


8/6/2019 Buggy Setup Guide
http://slidepdf.com/reader/full/buggy-setup-guide 1/19
BUGGY SETUP GUIDE
Volume
1GOKARTSUSA
GY6 150, CN250
Buggy SetupGuide

8/6/2019 Buggy Setup Guide
http://slidepdf.com/reader/full/buggy-setup-guide 2/19
GOKARTSUSA.COM
(800) 603-1437
GokartsUSA is a Nationwide Supplier of Powersports Products
2
GY6 150, CN250 DUNE BUGGY
Buggy Setup Guide
GOKARTSUSA.COM2000 Highway 50 • S. Lake Tahoe, CA 96150
Phone 800.603.1437

8/6/2019 Buggy Setup Guide
http://slidepdf.com/reader/full/buggy-setup-guide 3/19
GOKARTSUSA.COM
(800) 603-1437
GokartsUSA is a Nationwide Supplier of Powersports Products
3
Table of Contents
CONTENTS
Factory Direct 4
Mechanic Advisory 4
Components to be Installed 4
Buggy Setup 5
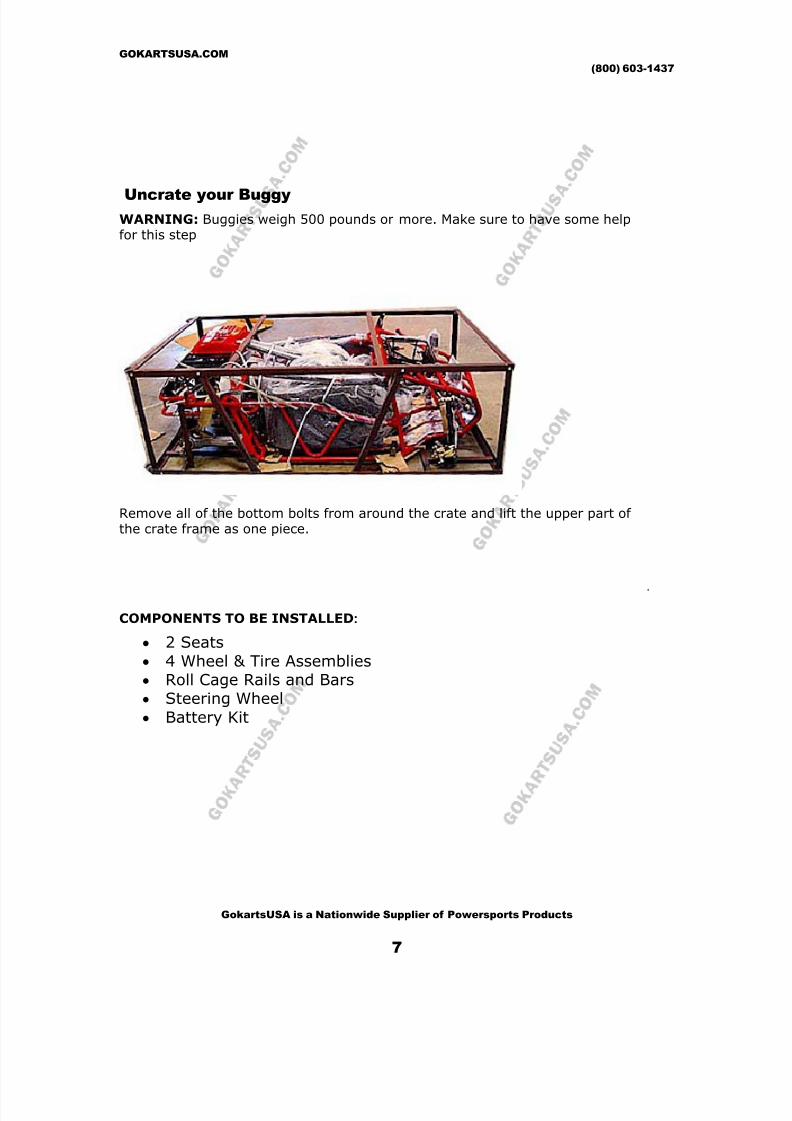
Uncrate your Buggy 7
Attach Shock Absorbers 8
Install Wheels 9
Battery Installation 11
Seat Installation 13
Steering Wheel Installation 14
Roll Cage Installation 15
Install Radiator Coolant (250 models) 16
Install Engine Oil 17
Install Gear Oil 17
Fuel Line Installation 18
Vacuum Line Installation 19
8/6/2019 Buggy Setup Guide
http://slidepdf.com/reader/full/buggy-setup-guide 4/19
GOKARTSUSA.COM
(800) 603-1437
GokartsUSA is a Nationwide Supplier of Powersports Products
4
Buggy
SETUPFactory Direct
When you purchase a Buggy Factory Direct, you can save a substantial amount of money.
However, this means you must perform the vehicle setup when your Buggy arrives.
Your Buggy is NOT A KIT. Your Buggy is assembled at the Factory, and then packaged forshipping. It will arrive with ALL MAJOR COMPONENTS INSTALLED including,Engine, Transmission, Brakes, Steering Systems, and Controls etc.
Your Buggy will arrive in a large crate. You must uncrate and setup your Buggy when youreceive it. This guide is indented to supplement the setup guide provided by themanufacturer
Mechanic: Although the setup is not a particularly difficult task, it does require somemechanical expertise. It is strongly recommended that if any setup task is beyond the scope
of expertise of the customer, that the customer seeks a qualified mechanic to perform thesetup of the vehicle. In addition to voiding the warranty, Damage, Serious Injury or Deathcan result form improper setup of a vehicle.
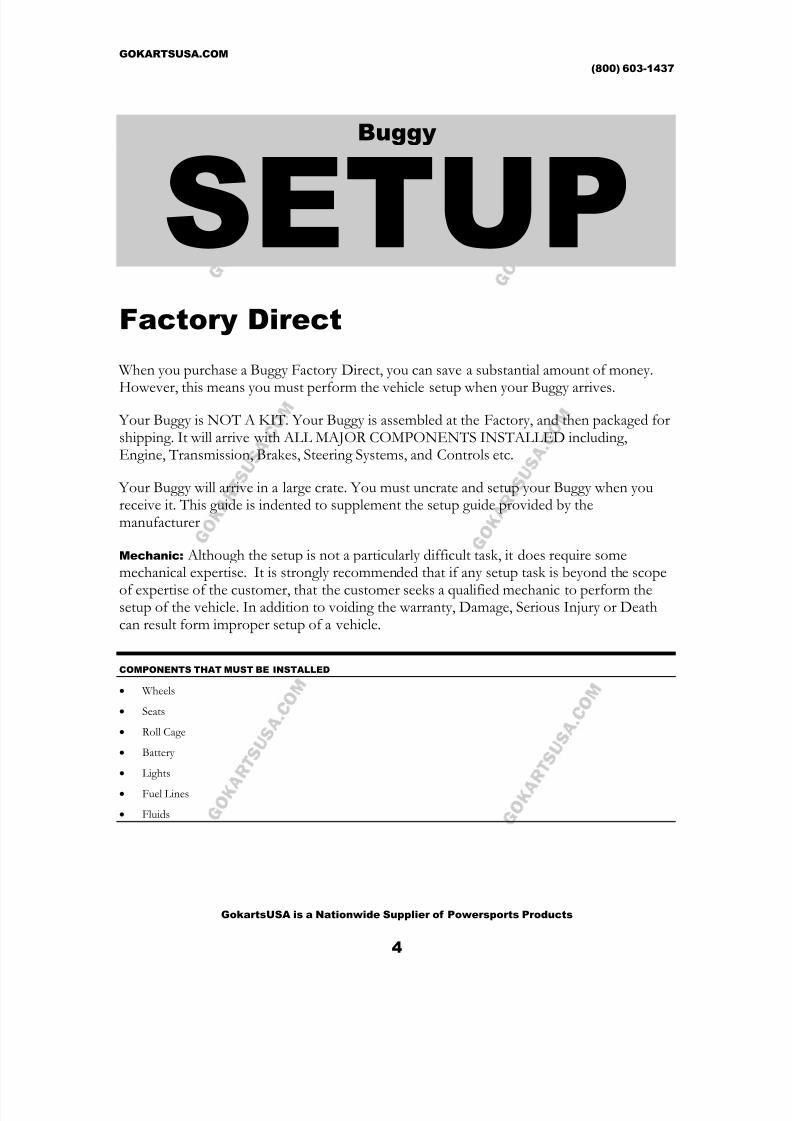
COMPONENTS THAT MUST BE INSTALLED
• Wheels
• Seats
• Roll Cage
• Battery
• Lights
• Fuel Lines
• Fluids
8/6/2019 Buggy Setup Guide
http://slidepdf.com/reader/full/buggy-setup-guide 5/19
GOKARTSUSA.COM
(800) 603-1437
GokartsUSA is a Nationwide Supplier of Powersports Products
5
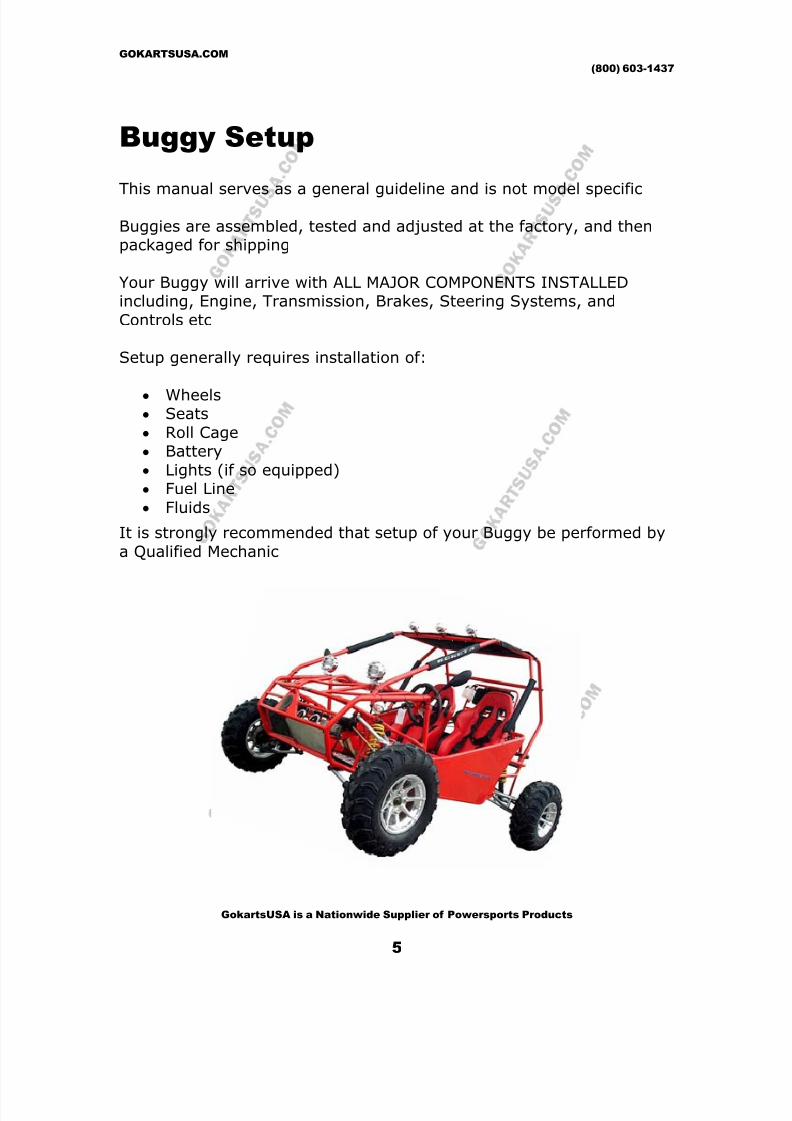
Buggy Setup
This manual serves as a general guideline and is not model specific
Buggies are assembled, tested and adjusted at the factory, and thenpackaged for shipping
Your Buggy will arrive with ALL MAJOR COMPONENTS INSTALLEDincluding, Engine, Transmission, Brakes, Steering Systems, and
Controls etc
Setup generally requires installation of:
•
Wheels• Seats
• Roll Cage
• Battery
• Lights (if so equipped)
• Fuel Line
• Fluids
It is strongly recommended that setup of your Buggy be performed by
a Qualified Mechanic

8/6/2019 Buggy Setup Guide
http://slidepdf.com/reader/full/buggy-setup-guide 6/19
GOKARTSUSA.COM
(800) 603-1437
GokartsUSA is a Nationwide Supplier of Powersports Products
6
Your Buggy will arrive in a metal Crate
8/6/2019 Buggy Setup Guide
http://slidepdf.com/reader/full/buggy-setup-guide 7/19
8/6/2019 Buggy Setup Guide
http://slidepdf.com/reader/full/buggy-setup-guide 8/19
GOKARTSUSA.COM
(800) 603-1437
GokartsUSA is a Nationwide Supplier of Powersports Products
8
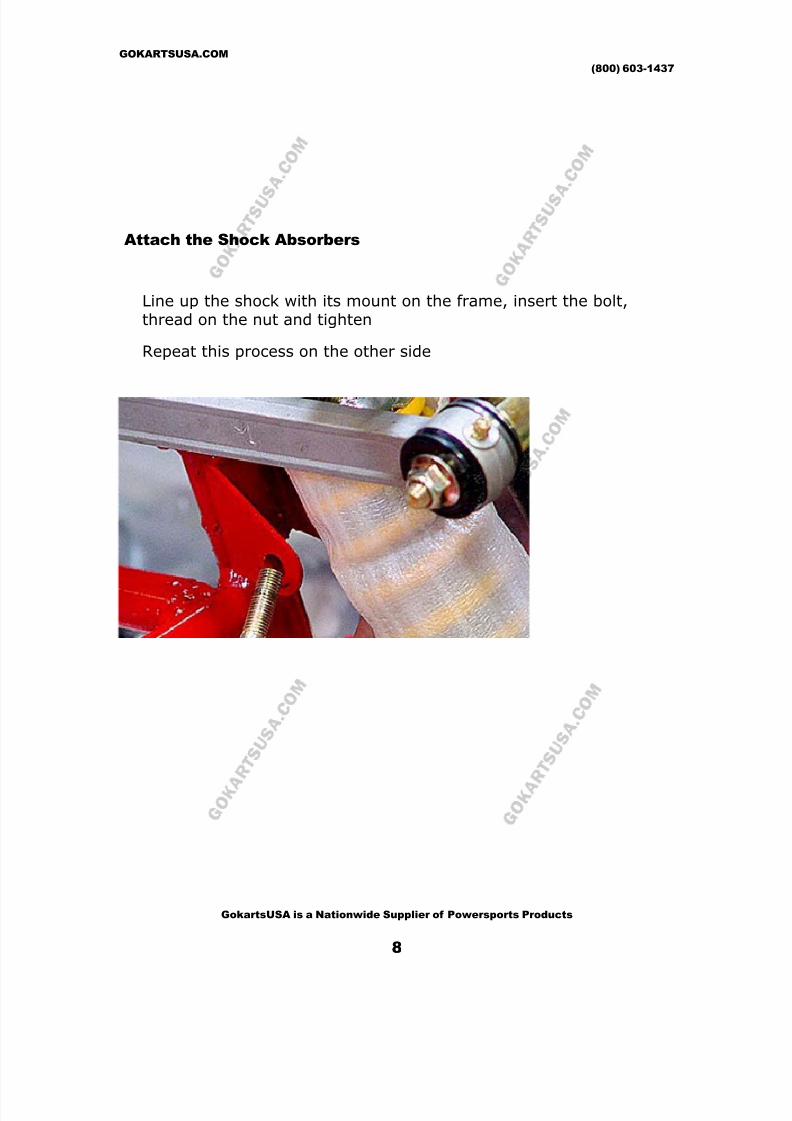
Attach the Shock Absorbers
Line up the shock with its mount on the frame, insert the bolt,thread on the nut and tighten
Repeat this process on the other side

8/6/2019 Buggy Setup Guide
http://slidepdf.com/reader/full/buggy-setup-guide 9/19
GOKARTSUSA.COM
(800) 603-1437
GokartsUSA is a Nationwide Supplier of Powersports Products
9
Install the Wheels
• Jack up one side of the buggy and insert jack stands
• Remove the 4 lug nuts and washers the hub
Some Buggies ship with uni-directional tires while others come
with bi-directional tires
• Uni-directional tires must be installed on a correct side. Findthe arrow on the tire sidewall. The arrow MUST point
towards the front of the buggy
•
Bi-directional tires have a tread that more closely resemblesknobby tires for dirt motorcycles and can roll in eitherdirection
8/6/2019 Buggy Setup Guide
http://slidepdf.com/reader/full/buggy-setup-guide 10/19
GOKARTSUSA.COM
(800) 603-1437
GokartsUSA is a Nationwide Supplier of Powersports Products
10
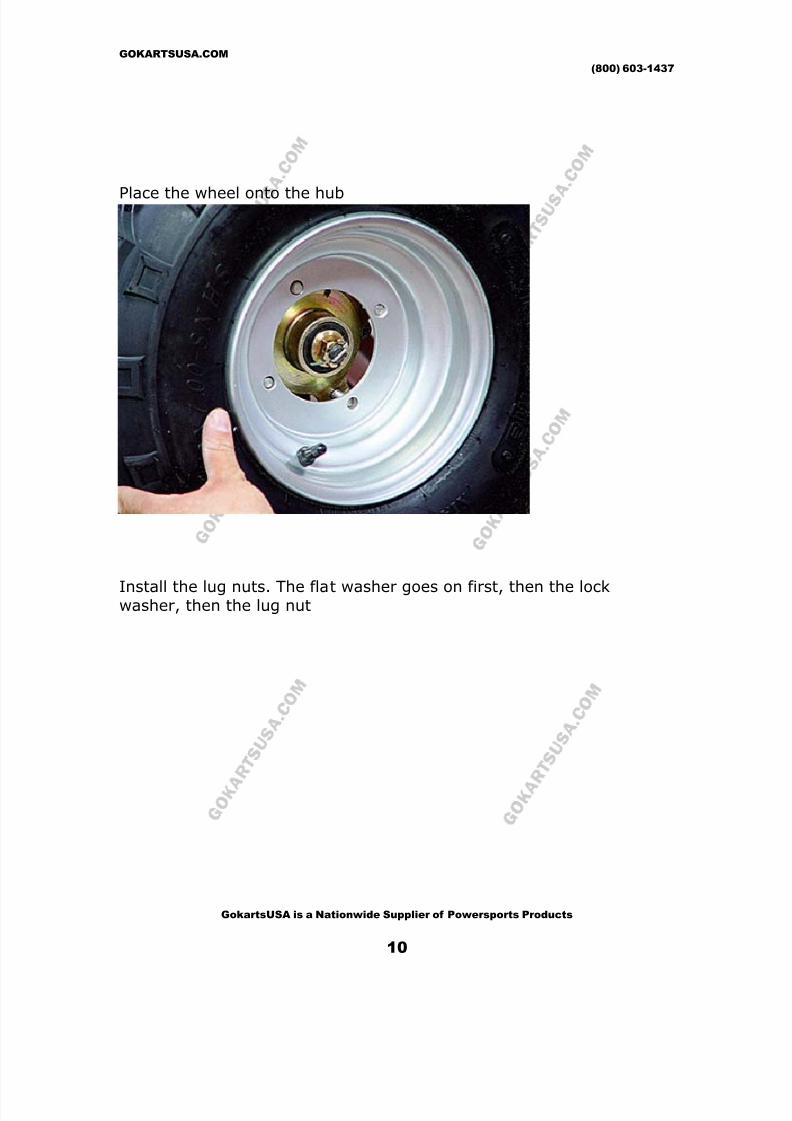
Place the wheel onto the hub
Install the lug nuts. The flat washer goes on first, then the lockwasher, then the lug nut
8/6/2019 Buggy Setup Guide
http://slidepdf.com/reader/full/buggy-setup-guide 11/19
GOKARTSUSA.COM
(800) 603-1437
GokartsUSA is a Nationwide Supplier of Powersports Products
11
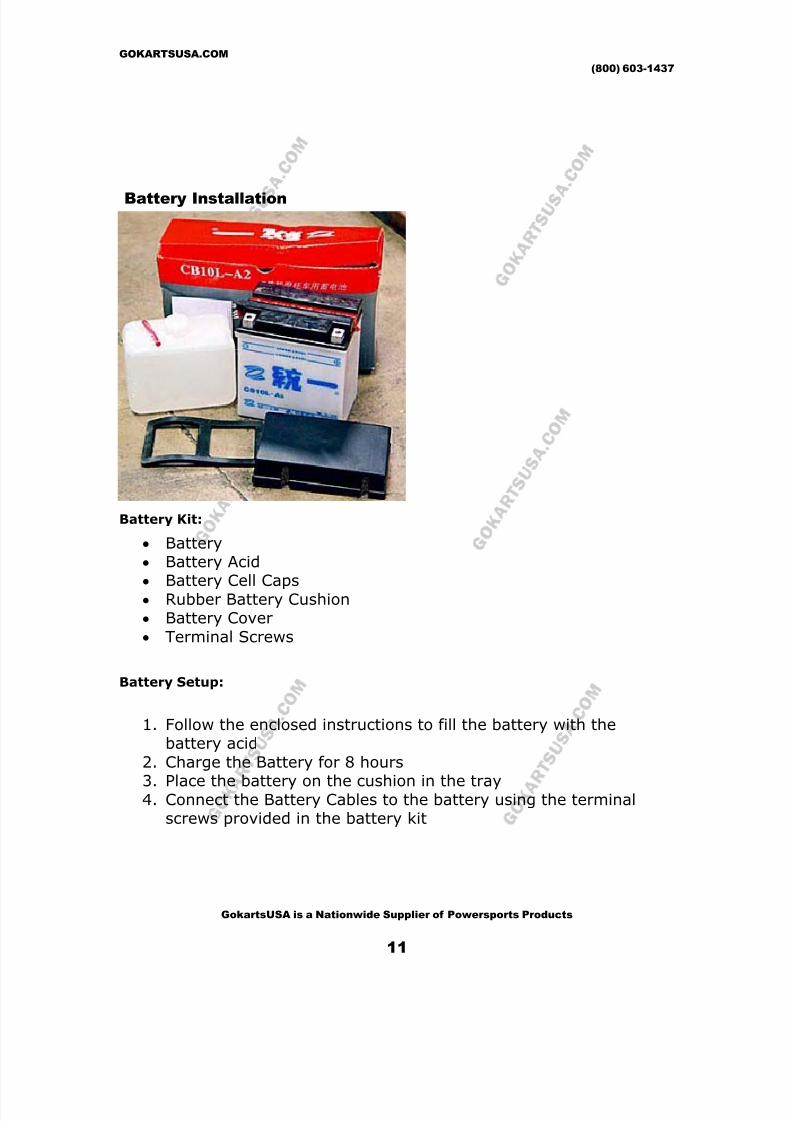
Battery Installation
Battery Kit:
• Battery
• Battery Acid
• Battery Cell Caps
• Rubber Battery Cushion
• Battery Cover
• Terminal Screws
Battery Setup:
1. Follow the enclosed instructions to fill the battery with thebattery acid
2. Charge the Battery for 8 hours
3.
Place the battery on the cushion in the tray4. Connect the Battery Cables to the battery using the terminal
screws provided in the battery kit
8/6/2019 Buggy Setup Guide
http://slidepdf.com/reader/full/buggy-setup-guide 12/19
GOKARTSUSA.COM
(800) 603-1437
GokartsUSA is a Nationwide Supplier of Powersports Products
12
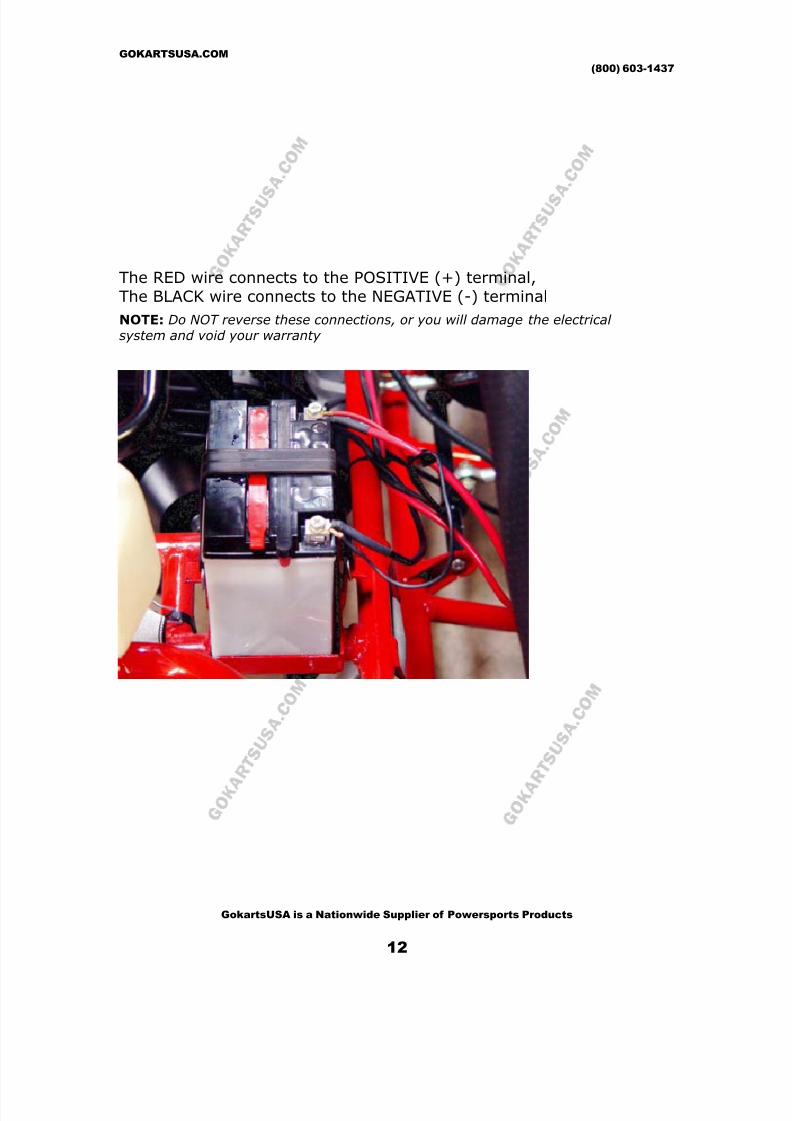
The RED wire connects to the POSITIVE (+) terminal,
The BLACK wire connects to the NEGATIVE (-) terminal
NOTE: Do NOT reverse these connections, or you will damage the electrical
system and void your warranty
8/6/2019 Buggy Setup Guide
http://slidepdf.com/reader/full/buggy-setup-guide 13/19
GOKARTSUSA.COM
(800) 603-1437
GokartsUSA is a Nationwide Supplier of Powersports Products
13
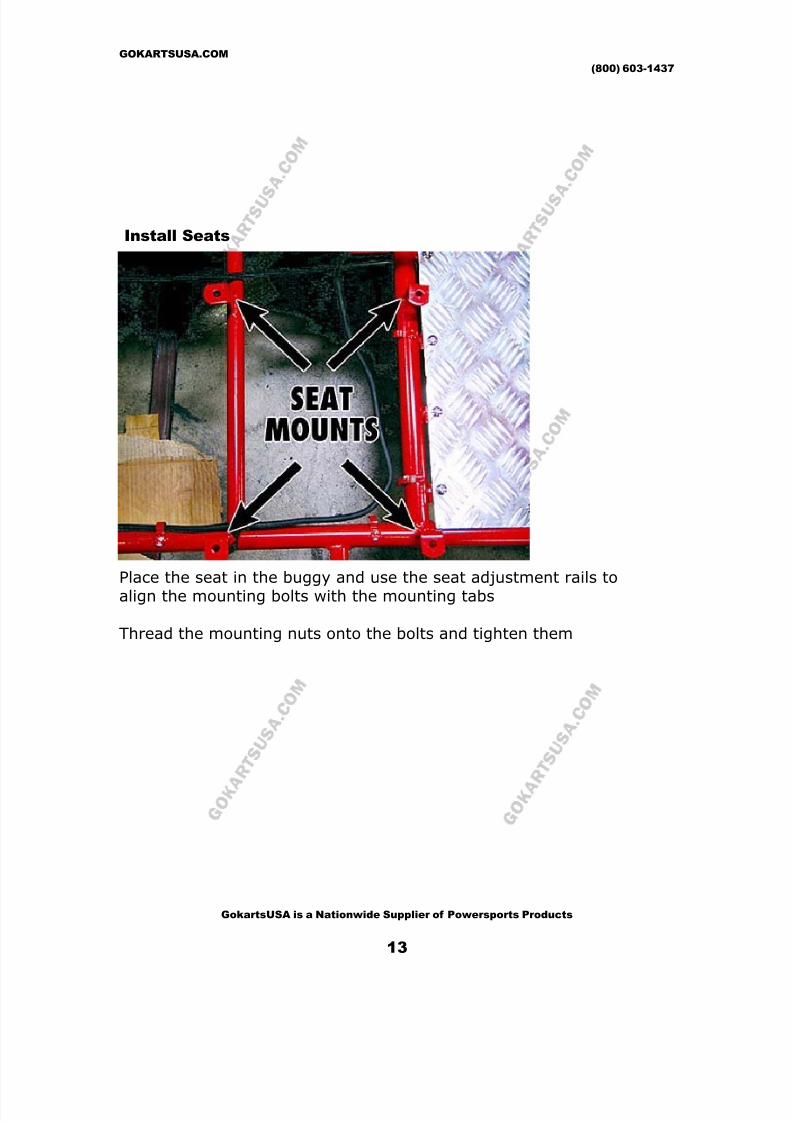
Install Seats
Place the seat in the buggy and use the seat adjustment rails toalign the mounting bolts with the mounting tabs
Thread the mounting nuts onto the bolts and tighten them
8/6/2019 Buggy Setup Guide
http://slidepdf.com/reader/full/buggy-setup-guide 14/19
GOKARTSUSA.COM
(800) 603-1437
GokartsUSA is a Nationwide Supplier of Powersports Products
14
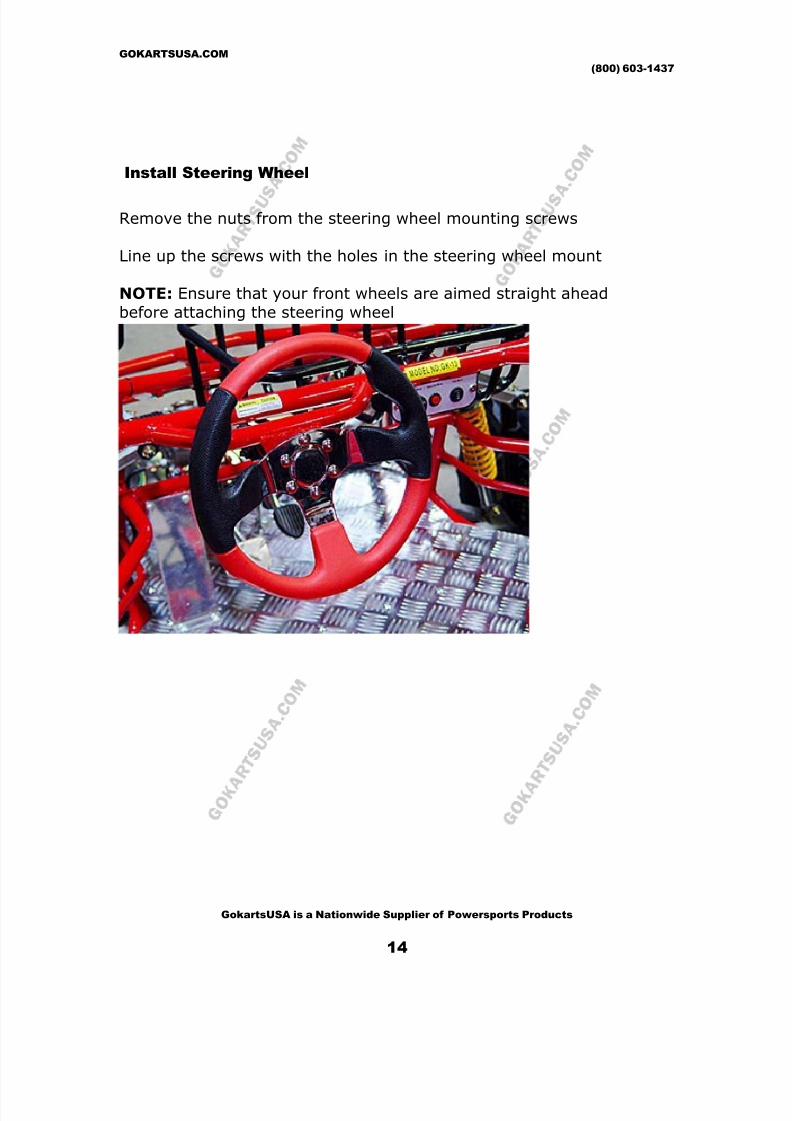
Install Steering Wheel
Remove the nuts from the steering wheel mounting screws
Line up the screws with the holes in the steering wheel mount
NOTE: Ensure that your front wheels are aimed straight ahead
before attaching the steering wheel
8/6/2019 Buggy Setup Guide
http://slidepdf.com/reader/full/buggy-setup-guide 15/19
GOKARTSUSA.COM
(800) 603-1437
GokartsUSA is a Nationwide Supplier of Powersports Products
15
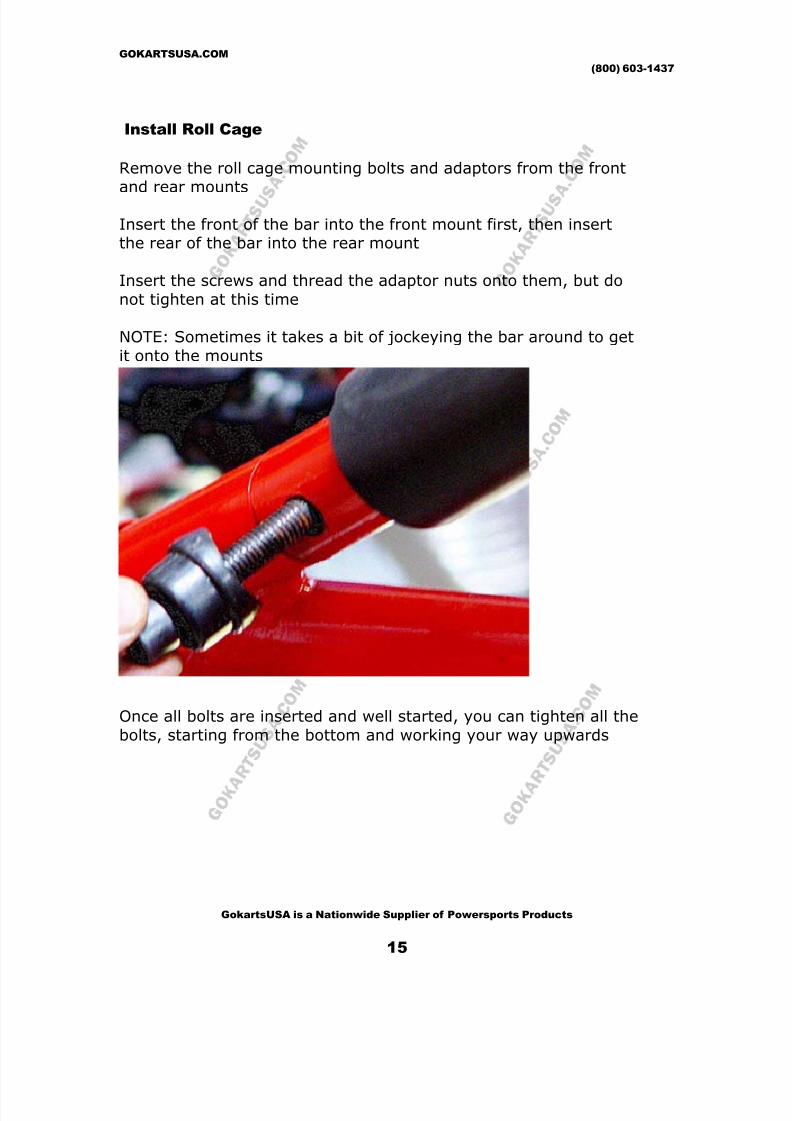
Install Roll Cage
Remove the roll cage mounting bolts and adaptors from the frontand rear mounts
Insert the front of the bar into the front mount first, then insertthe rear of the bar into the rear mount
Insert the screws and thread the adaptor nuts onto them, but do
not tighten at this time
NOTE: Sometimes it takes a bit of jockeying the bar around to get
it onto the mounts
Once all bolts are inserted and well started, you can tighten all the
bolts, starting from the bottom and working your way upwards
8/6/2019 Buggy Setup Guide
http://slidepdf.com/reader/full/buggy-setup-guide 16/19
8/6/2019 Buggy Setup Guide
http://slidepdf.com/reader/full/buggy-setup-guide 17/19
8/6/2019 Buggy Setup Guide
http://slidepdf.com/reader/full/buggy-setup-guide 18/19
GOKARTSUSA.COM
(800) 603-1437
GokartsUSA is a Nationwide Supplier of Powersports Products
18
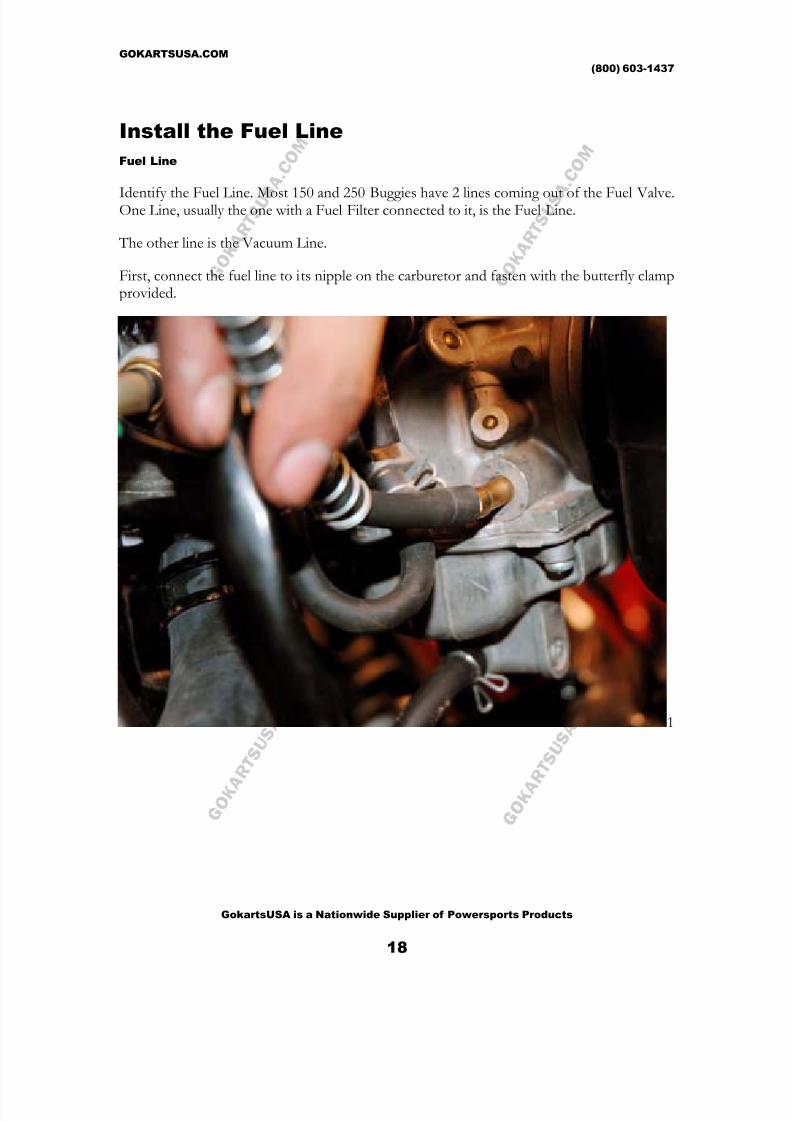
Install the Fuel Line
Fuel Line
Identify the Fuel Line. Most 150 and 250 Buggies have 2 lines coming out of the Fuel Valve.One Line, usually the one with a Fuel Filter connected to it, is the Fuel Line.
The other line is the Vacuum Line.
First, connect the fuel line to its nipple on the carburetor and fasten with the butterfly clampprovided.
1
8/6/2019 Buggy Setup Guide
http://slidepdf.com/reader/full/buggy-setup-guide 19/19
GOKARTSUSA.COM
(800) 603-1437
GokartsUSA is a Nationwide Supplier of Powersports Products
19
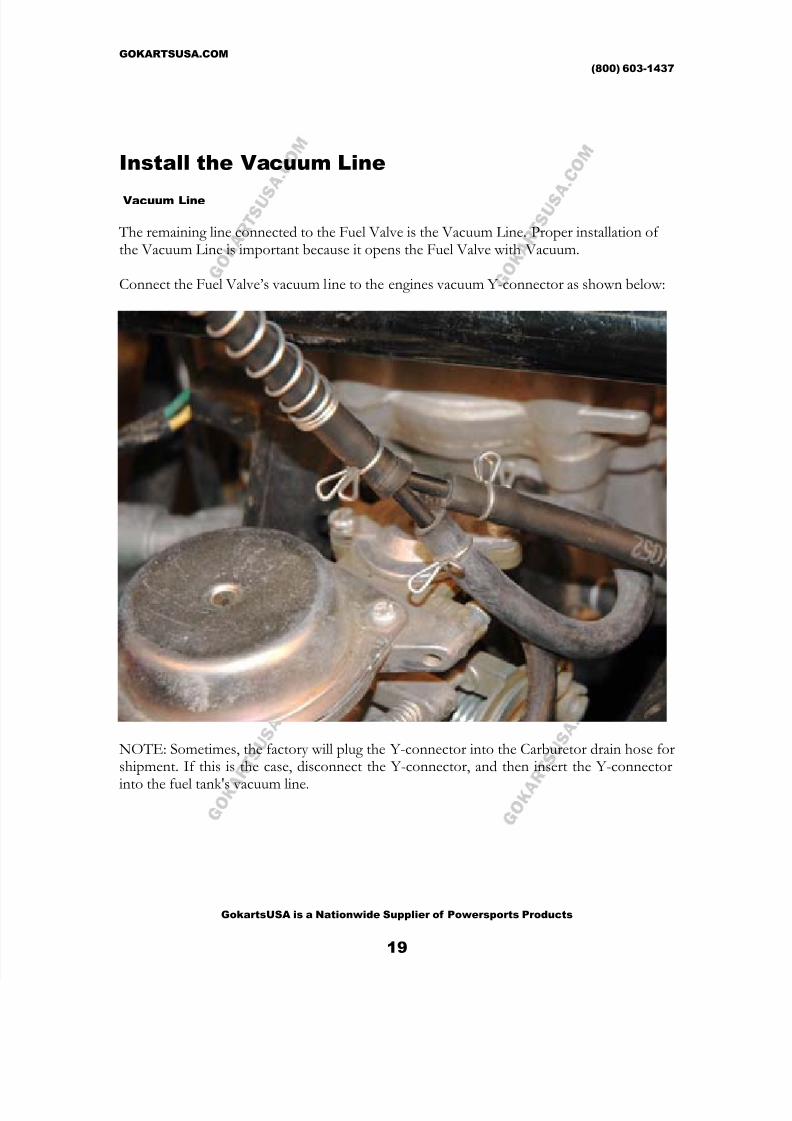
Install the Vacuum Line
Vacuum Line
The remaining line connected to the Fuel Valve is the Vacuum Line. Proper installation of the Vacuum Line is important because it opens the Fuel Valve with Vacuum.
Connect the Fuel Valve’s vacuum line to the engines vacuum Y-connector as shown below:
NOTE: Sometimes, the factory will plug the Y-connector into the Carburetor drain hose forshipment. If this is the case, disconnect the Y-connector, and then insert the Y-connector
into the fuel tank's vacuum line.
Top Related