


Languages
Pages
Legal


Agilent G1701DAMSD Productivity ChemStation Software
(version D.01.00 or later)
Installation Manual
Agilent Technologies
Notices© Agilent Technologies, Inc. 2003
No part of this manual may be reproduced in any form or by any means (including elec-tronic storage and retrieval or translation into a foreign language) without prior agree-ment and written consent from Agilent Technologies, Inc. as governed by United States and international copyright laws.
Manual Part NumberG1701-90047
EditionSecond edition, August 2003
Printed in USA
Agilent Technologies, Inc.2850 Centerville Road Wilmington, DE 19808-1610 USA
WarrantyThe material contained in this docu-ment is provided “as is,” and is sub-ject to being changed, without notice, in future editions. Further, to the max-imum extent permitted by applicable law, Agilent disclaims all warranties, either express or implied, with regard to this manual and any information contained herein, including but not limited to the implied warranties of merchantability and fitness for a par-ticular purpose. Agilent shall not be liable for errors or for incidental or consequential damages in connec-tion with the furnishing, use, or per-formance of this document or of any information contained herein. Should Agilent and the user have a separate written agreement with warranty terms covering the material in this document that conflict with these terms, the warranty terms in the sep-arate agreement shall control.
Safety Notices
CAUTION
A CAUTION notice denotes a haz-ard. It calls attention to an operat-ing procedure, practice, or the like that, if not correctly performed or adhered to, could result in damage to the product or loss of important data. Do not proceed beyond a CAUTION notice until the indicated conditions are fully understood and met.
WARNING
A WARNING notice denotes a hazard. It calls attention to an operating procedure, practice, or the like that, if not correctly per-formed or adhered to, could result in personal injury or death. Do not proceed beyond a WARNING notice until the indicated condi-tions are fully understood and met.
AcknowledgementsMicrosoft® and Windows® are U.S. regis-tered trademarks of Microsoft Corporation.
2 Software Installation

Contents
1 General Information
Software Installation
Before You Begin 8
Microsoft Windows 2000 or XP Configuration 9
Windows 2000 or XP Computer Hardware Considerations 10
Other Documentation 11
Product update news 11
2 Network Configuration
Network Configuration 14
Installation Checklist for LAN-based Systems 15
Preparing the Instruments 17
Designing the LAN instrument network 17Cabling the LAN instrument network 17Configuring the LAN instrument network 17
Network Configuration Checklist and Tables 19
To Configure the Windows 2000 or XP Network 23
To Configure IP Addresses from the Keyboards 38
6890N GC configuration 385973 LAN-based MSD with firmware 3.01.58 or higher 39
Installing Standard Instrument Control Library (SICL) Drivers for TCP/IP Support 41
3

3 GPIB Driver Installation
4
GPIB Driver Installation 56
Installation Checklist for GPIB-Based Systems 57
Installing Standard Instrument Control Library (SICL) Drivers for GPIB Support 59
4 MSD ChemStation Software Installation
Required and Recommended Components 82
Installing MSD ChemStation Software 83
Configuring Instruments in the MSD ChemStation 92
Configuring the 5973N or 5973 inert MSD 95Configuring the 5973 MSD 97Configuring MSD options and polarity 100Configuring the GC 101Configuring a LAN-based 6890 / Other GC 103Configuring a GPIB-based 6890 / Other GC 104Configuring data analysis and configuration review 107
5 Supplemental Information
Upgrading from Previous Versions 112
Customer responsibilities 112Checklist for PCs with existing MSD ChemStation
software 113Prepare the ChemStation computer for upgrade 114Upgrade the computer operating system 115
Installing Agilent BootP Service 116
Agilent BootP Service 116Agilent BootP Service installation 118
Configuring Agilent BootP Service 123
Setting Up an Instrument on Agilent BootP Service 132
Software Installation

Software Installation
Reinstalling MSD ChemStation Software 137
Removing (Uninstalling) MSD ChemStation Software 139
5973 Series MSD LAN system 140
Intended audience 140Assumptions 140Checklist 141Theory of LAN-based instrumentation 142Typical cold-start procedure 143Verify the Isolated LAN instrument 144Reconfigure the ChemStation computer 145Reconfigure analytical instruments 145Verify the instrument on the site LAN 147Other network customizations 148
6 Troubleshooting
Network Verification Tests 152Other Network Verification Tests 154
To check the IP Address, subnet mask, and gateway of the ChemStation computer 155
To check the IP Address, subnet mask, and gateway of the 6890N GC and 5973N MSD (firmware 3.01.58) 155
For older systems (6890N and MSD firmware 3.01.57) using Agilent BootP Service 155
Isolate the Problem 156
Try a different computer 156Re-establish a local instrument LAN 156Check cabling to the hub 157Check the ChemStation computer 157Check system integrity 158Check the GC 160Check the MSD 161
5

6
Intermittent Problems 163
LAN Communication Tests 164
Ping test 164RPCINFO test 166SCQ test 167
Error Messages 168
Error message: Loopback @ 10.1.1.100 failed the Ping test.Help message: Loopback Failure 168
Error message: GC @ www.xxx.yyy.zzz failed the Ping test.Help message: Ping GC Failure (loopback has succeeded!) 168
Error Message: MS @ www.xxx.yyy.zzz failed the Ping test. Help message: Ping MS Failure (loopback has succeeded!) (Ping GC, if present, has succeeded) 169
Error message: MS @ sc3-1 failed the Ping by name test. Help message: Ping MSD by Name failure (loopback has succeeded!) (Ping GC, if present, has succeeded) (Ping MSD, if present, has succeeded) 170
Error message: MS @ www.xxx.yyy.zzz failed the RPCINFO test. Help message: RPCINFO failure (loopback has succeeded!) (Ping GC, if present, has succeeded) (Ping MSD, if present, has succeeded) (Ping MSD by Name, if present, has succeeded) 171
Error Message: MS @ www.xxx.yyy.zzz failed the SCQ test. Help message: SCQ failure (loopback has succeeded!) (Ping GC, if present, has succeeded) (Ping MSD, if present, has succeeded) (Ping MSD by Name, if present, has succeeded) (RPCTest has succeeded) 171
Typical PCS Information in MSDCHEM.INI for the 5973N 172
Typical IP Configuration file (IPCONFIG.TXT) 176
Software Installation

Agilent G1701DA MSD Productivity ChemStation SoftwareInstallation Manual
1General Information
Before You Begin 8
Microsoft Windows 2000 or XP Configuration 9
Windows 2000 or XP Computer Hardware Considerations 10
Other Documentation 11
This Chapter describes minimum computer requirements for the MSD Productivity ChemStation installation.
7Agilent Technologies

General Information
Before You Begin
8
This manual contains instructions to install and configure the G1701DA MSD Productivity ChemStation software. Your service representative must finish installing your MSD hardware before you begin the software installation. Keep this manual, and use it if you need to reinstall the MSD ChemStation software.
This instructions in this manual sometimes vary depending on which instrument model you have. Disregard the sections that do not apply to your instrument configuration.
Installation of the MSD Productivity ChemStation software includes the following steps:
1 Verifying minimum computer requirements before you start as described in this Chapter
2 Network configuration (see “Network Configuration" on page 14)
• Applicable for Agilent LAN-based instruments only: 5973N or 5973 inert MSD systems, 6890N GC’s, and so forth
3 GPIB installation and configuration (see “GPIB Driver Installation" on page 56)
• Applicable for Agilent GPIB-based instruments only: 5973 MSD systems, 6890 GC’s, and so forth
4 MSD ChemStation Software installation and configuration (see “Installing MSD ChemStation Software" on page 83)
5 Supplemental activities (see Chapter 5, “Supplemental Information”)
• upgrading from earlier versions
• reinstalling the software
• removing the software
• installing 5973 Series MSD LAN-based instruments to the site LAN
6 Troubleshooting (see Chapter 6, “Troubleshooting”)
Software Installation

General Information
Microsoft Windows 2000 or XP Configuration
Software Installation
• Either Windows 2000 Professional (Service Pack 3 (SP3) or later), or Windows XP Professional Server (Service Pack 1a (SP1a) or later) software must be installed as the operating system. Note: ChemStation software is not supported on Windows 2000 Professional Server software, on Windows XP Professional, or on Windows NT.
Throughout this manual, references to “Windows 2000” and/or to “Windows XP” implies Windows 2000 Professional or Windows XP Professional, respectively.
• If you are upgrading from an earlier revision of the MSD ChemStation Software, you may have to change operating systems. See Upgrading from Earlier Versions in Chapter 5.
• The MSD ChemStation software requires that all disk partitions on the MSD ChemStation computer hard drives be formatted for NTFS and that active file systems are uncompressed.
• Minimize the Windows 2000 or XP desktop configuration as follow:
• minimum desktop icons
• no screen saver enabled
• no background or tray applications
• Disable unused computer hardware such as USB in the BIOS.
• The TCP/IP networking protocols must be installed and enabled; NetBEUI needs only to be installed if printer and/or files are to be shared.
• Microsoft Internet Explorer 5.5 or greater is required.
• Some devices which Windows 2000 or XP supports are not supported by MSD ChemStation software, for example magneto-optical drives and external CD-ROM writers. Do not use these devices.
• A Windows 2000 or XP repair disk must be created during installation, and recovery disks must be created.
9

General Information
Windows 2000 or XP Computer Hardware Considerations
10
The minimum requirements for operation of the MSD ChemStation Software are:
• A Pentium ® III computer (450 MHz or faster)
• BIOS which supports Windows 2000 with Service Pack 3 (or later) or Windows XP with Service Pack 1a (or later)
• All power-saving features of the BIOS disabled
• All power-saving programs removed
• An SVGA color monitor
• 1024 x 800 x 65,536 colors video display resolution(maximum supported resolution is 1600 x 1200 x 16,000,000 colors)
• 64 MB of RAM (additional RAM required for multiple instruments)
• 128 MB for dual MSD acquisition
• 256 MB for quad GC acquisition
• At least 800 MB of hard disk storage (MSD ChemStation program files use approximately 115 MB)
• A CD-ROM drive
• A sound card and speakers or headphones
• A Windows 2000- or XP-supported mouse
• A data backup device is strongly recommended
• Printer support:
• HP DeskJet printers are not tested / supported
• HP LaserJet 4050 or 4100 printers, although not tested with this release, they are supported due to testing on older revisions. Supported drivers include PCL 5e or 6, revision 5.02.
• HP LaserJet 2200d or 2300dn printers are fully tested / supported. Supported drivers are Post Script, revision 5.02.
Software Installation

General Information
Software Installation
• MSD communication card. Depending upon required communications, either
• a PCI Network Interface Card for LAN-based systems
• PCI GPIB Control Card, HP 82350A (or B) for GPIB-based systems
Other Documentation
Additional information is contained in the following documentation:
• MSD ChemStation online help
• MSD Quick Reference
• Agilent 5973 Series MSD Hardware Manuals
• Agilent 5973 Series MSD Hardware Installation Manual
• Local Control Panel Quick Reference
• Environmental Software Getting Started Manual
• Custom Reports Getting Started Manual
Product update news
For the most current information on the MSD Productivity ChemStation software, use your web browser to access http://www.agilent.com. Look under Life Sciences and then Technical Support. You must enter your product registration number to access the Software Status Bulletin information.
11

12
General Information
Software Installation

Agilent G1701DA MSD Productivity ChemStation SoftwareInstallation Manual
2Network Configuration
Network Configuration 14
Installation Checklist for LAN-based Systems 15
Preparing the Instruments 17
Network Configuration Checklist and Tables 19
To Configure the Windows 2000 or XP Network 23
To Configure IP Addresses from the Keyboards 38
Installing Standard Instrument Control Library (SICL) Drivers for TCP/IP Support 41
This Chapter describes network configuration activites required for the 5973N or 5973 inert MSD instrument only.
13Agilent Technologies

Network Configuration
Network Configuration
14
This Chapter describes how to install the MSD Productivity ChemStation software for use with the following LAN-based instruments:
• 5973N or 5973 inert MSD
• 6890 GC with LAN capability
The checklist on the next page summarizes steps required for installation and configuration of the MSD ChemStation software for LAN-based instruments. More information for each step required to configure the LAN is given in the remainder of this Chapter.
Use the table below as a guide to configuring the LAN as you perform steps in this Chapter.
See also Chapter 4, “MSD ChemStation Software Installation.
Unit Computer Instrument1-GC
Instrument 1-MSD
Model
Serial number
MAC address
Host name
IP address 10.1.1.100 10.1.1.101 10.1.1.102
Hub port (default)
Software Installation

Network Configuration
Installation Checklist for LAN-based Systems
Software Installation
This checklist provides a summary of installation and configuration steps for LAN-based systems (5973 Series MSD and/or 6890 Series GC). Use this checklist if you are familiar with TCP/IP and the MSD Productivity software. Otherwise, refer to the complete instructions which follow in this Chapter for network configuration, and in Chapter 4, “MSD ChemStation Software Installation.”
❏ Verify operating system prerequisites described in Chapter 1:
❏ Verify that Windows 2000 Professional or Windows XP is the operating system.
❏ Verify that Service Pack 3 (or later) is installed for Windows 2000 or that Service Pack 1a (or later) is installed for Windows XP.
❏ Verify that TCP/IP has been installed and configured.
❏ Connect LAN cables from the hub to the MSD and GC.
• Do not use a crossover cable.
❏ Connect a LAN cable from the hub to the ChemStation computer.
• Do not use a crossover cable.
❏ Configure IP addresses via keyboard (new system).
❏ Configure IP address for MSD (MSD with firmware 3.01.58 or higher).
❏ Configure IP address for GC (6890N GC).
15

16
Network Configuration
❏ For Agilent BootP Service (only required for upgrade systems):
❏ Install the Agilent BootP Service from the MSD ChemStation software CD.
❏ Add a BootP entry for the GC instrument (cannot be used for 6890N GC).
❏ Add a BootP entry for the MSD instrument (MSD with firmware 3.01.57).
❏ For SICL Drivers:
❏ Install the SICL TCP/IP drivers from the MSD ChemStation software CD.
❏ Configure the SICL TCP/IP drivers.
❏ For MSD Productivity ChemStation software:
❏ Install the MSD ChemStation software.
❏ Run the MSD ChemStation Configuration program and configure Instrument #1.
❏ Download firmware drivers to the LAN/MS Control card.
❏ Start up each MSD ChemStation instrument session to confirm operation.
Software Installation
Network Configuration
Preparing the Instruments
Software Installation
Agilent Technologies 5973N and 5973 inert MSDs have an integrated LAN interface within the instrument. The 6890 Series GC must also have LAN capability. These instruments communicate with the MSD ChemStation via LAN interface. To configure a GC/MSD system, both the GC and the MSD must have a LAN interface. An older 5973 MSD system with a 6890 Series GC must use GPIB communications if not upgraded to LAN-based instruments.
Designing the LAN instrument network
Before connecting any network cables and installing the MSD ChemStation software, the MSD ChemStation network will be an isolated local network. An isolated local network is easier to configure and to verify performance. Even if the system is going to be hooked up to your site LAN, it must be qualified first as a local network. Refer to Chapter 5 for more information on how to integrate the instrument network into your site LAN.
Cabling the LAN instrument network
To connect more than one instrument to the MSD ChemStation, connect standard (not crossover) EtherTwist cables from the network interface connectors on each instrument and on the MSD ChemStation computer to the EtherTwist hub. Do not use the cascade port or port 8 on the hub.
Configuring the LAN instrument network
NOTE If the Cascade port is to be used later to connect the hub to the site LAN, then port 8 must be left open.
For isolated instrument networks, the IP addresses do not need to conform to any pattern. It is recommended that the first segment of the IP addresses be 10, as this number indicates that the address is an unassigned or public address. The first three
17

18
Network Configuration
segments in the IP addresses of the instruments and the MSD ChemStation computer must be the same, and the last segment must be different for each node and be in the range from 1 to 254. For example, the following IP addresses represent a typical isolated instrument network:
The subnet mask must be the same for all nodes on the local instrument network (typically: 255.255.255.0). For an isolated instrument network, which is not connected to the site LAN, no default gateway is used.
MSD ChemStation computer 10.1.1.100GC instrument 10.1.1.101MSD instrument 10.1.1.102
NOTE Once the IP addresses are assigned, you can specify a host name for each node. While host names are optional, they are easier to identify than IP addresses. Host names are associated with instruments during Agilent BootP Service configuration described later in this Chapter. Host names are not required for operation of the GC/MS system.
Software Installation

Network Configuration
Network Configuration Checklist and Tables
Software Installation
Use the following checklist to install and configure the GC and MSD on a local instrument network. Perform these tasks prior to connecting the instruments to your site LAN as described in Chapter 5.
❏ Determine IP addresses for the GCs and ChemStation computer and record them in the following tables following this Checklist.
❏ Determine the Network Subnet Mask.
❏ Install the Network Interface Card in the ChemStation computer if it is not installed. Remember to follow all ESD safety precautions.
NOTE If you will be using a second network card to connect to the house network, it should NOT be physically present in the PC until after configuration and checkout as a standalone network.
❏ Install TCP/IP on the computer if it is not installed.
• Reinstall the Service Pack Utilities after installing the TCP/IP drivers.
❏ Configure TCP/IP with IP Addresses and Subnet Mask.
❏ Install the MIO JetDirect cards in 6890 GCs.
• 6890N GCs are shipped LAN-ready. Other 6890 GCs need to have MIO JetDirect cards installed.
• For a 6890 with JetDirect card, the MAC address is printed on a label normally attached to the non-component side of the circuit board. You must remove the JetDirect card from the GC to see the address if it is already installed. The MAC address is required in configuring the GC’s IP address.
❏ Connect LAN cables from the hub to the GC instruments.
• Do not use crossover cables. Do not use port 8 on the hub.
19

20
Network Configuration
❏ Connect LAN cable from the hub to the ChemStation computer.
• Do not use a crossover cable. Do not use port 8 on the hub.
❏ Configure GC IP address and subnet address via GC front panel.
• On older 6890 GCs, installation of BootP Service is required to assign IP addresses.
❏ Configure MSD IP and subnet addresses via local control panel.
• For 5973 MSDs with firmware version 3.01.57, installation of Agilent BootP Service is required to assign IP addresses.
• For 5973 MSDs with firmware version 3.01.58 or later, the IP address can be assigned via the MSD keyboard or via BootP Service.
• Using the BootP Server or BootP Service, the MAC address for the MSD can be found from the Local Control Panel. Press [Menu] to get to Network, then press [Item] until you get to MAC address. Ignore displayed 'colons', (“ : “), displayed here.
❏ Record configured addresses for the GC and MSD instruments in tables (examples shown below).
❏ Connect LAN cables from the hub to the MSD instruments.
• Do not use crossover cables.
❏ Install and configure SICL drivers.
❏ Install MSD ChemStation software as described in Chapter 4.
❏ Run the MSD ChemStation Configuration program to set the IP address for each instrument.
❏ Download current firmware drivers to the LAN/MS Control Card.
❏ Start up each MSD ChemStation instrument session to confirm operation.
Software Installation

Network Configuration
Software Installation
Unit Computer Instrument 1-GC Instrument 1-MSD
Model
Serial number
MAC address
Host name
IP address 10.1.1.100 10.1.1.101 10.1.1.102
Hub port (default)
3 2 1
Subnet mask 255.255.255.0
Default gateway
Unit Instrument 2-GC
Instrument 2-MSD
Instrument 3-GC
Instrument 3-MSD
Model
Serial number
MAC address
Host name
IP address
Hub port (default)
21

22
Network Configuration
Unit Instrument 4-GC Instrument 4-MSD
Model
Serial number
MAC address
Host name
IP address
Hub port (default)
Software Installation

Network Configuration
To Configure the Windows 2000 or XP Network
Software Installation
The following procedure describes how to set up Windows 2000 or XP networking. Have your original Windows 2000 or XP CD-ROM available as you might be prompted to place it in the drive. The network card must be installed prior to installation of TCP/IP drivers, otherwise an error is reported and the process terminated.
NOTE There are small appearance differences between Windows 2000 and Windows XP but content and functions in the following figures are the similar for either operating system.
1 Start up your computer and Windows 2000 or XP.Log on as Administrator or other user with Administrator privileges.
2 From the Windows Start menu, select Settings/Control Panel.
• For Windows 2000, double-click the Network and Dial-up Connections icon to display the dialog box.
• For Windows XP, double-click the Network Connections icon to display the Network and Dial-up Connections dialog box.
23

24
Network Configuration
3 Click the Local Area Connection icon. A message is displayed in the lower left hand corner indicating the network interface card is installed and detected.
Software Installation

Network Configuration
Software Installation
• If a Local Area Connection icon is not displayed, the Network Interface card is not installed or detected.
• If this is the case, shut down the computer and install a Network Interface card. When you restart the computer, the plug and play feature of Windows 2000 or XP should detect the new hardware and automatically configures the Network Interface card.
4 Double-click the Local Area Connection icon. The Local Area Connection Properties dialog box is displayed. Highlight the Internet Protocol (TCP/IP) item and click the Properties button.
25

26
Network Configuration
5 The Local Area Connection Status dialog box is displayed. Click the Properties button.
6 The Internet Protocol (TCP/IP) Properties dialog box is displayed. Enter the TCP/IP address to be used for the computer.
Software Installation

Network Configuration
Software Installation
7 Click the Advanced button. The Advanced TCP/IP Settings mask dialog box is displayed.
27

28
Network Configuration
8 Click the DNS tab. Make sure that all the fields are blank as shown in the following example:
Software Installation

Network Configuration
Software Installation
9 Click the WINS address tab as shown in the example below:
29

30
Network Configuration
10 Click the Options tab:
Software Installation

Network Configuration
Software Installation
11 Click OK. The Local Area Connection Properties dialog box is displayed.
Use the following steps to verify the network card is configured properly.
NOTEThe following examples show the default settings for the network card shipped with the standard PC bundle. Do not change these default settings.12 To check the configuration of the network interface card, click the Configure button. The following dialog box is displayed.
31

32
Network Configuration
The General tab displays information about the Ethernet Adapter and the device status. In this case, the device is working properly. The Troubleshooter button can be used to display the online help if there is a problem.
Software Installation

Network Configuration
Software Installation
13 Click the Advanced tab. The following dialog box is displayed:
The Advanced tab displays the available properties: in this case, Link Speed/Duplex Mode and Network Address. Leave the default values unchanged.
NOTE In setting the link speed, autodetect for hubs often sets communications to 100 mps. The MSD only communicates at 10 mps. This is not a problem when a switch is used.
33

34
Network Configuration
14 Click the Driver tab. The following dialog box is displayed:
The Driver tab displays information about the driver and lets you view the driver details, as well as uninstall or update the drivers.
Software Installation

Network Configuration
Software Installation
15 Click the Resources tab. The following dialog box is displayed:
The Resources tab lets you view the resource settings and displays the conflicting device list. In this case, there are no conflicts with other devices.
35

36
Network Configuration
16 Click the Power Management tab. The following dialog box is displayed:
The Power Management tab lets you use power save features.
17 When you are finished viewing your network configuration, click OK.
Software Installation

Network Configuration
Software Installation
18 To verify the network installation and configuration:
• From the Windows Start menu, select Programs > Command Prompt.
• In the Command Prompt window, if necessary, change to the C:\ directory and type ping 127.0.0.1. If successful, a message like the one in the example below appears:
NOTE ‘ping’ always should be run from the C:\ command prompt.
37

Network Configuration
To Configure IP Addresses from the Keyboards
6890N GC configuration
38
The Agilent 6890N GC communicates with a ChemStation via the LAN: it does not require BootP Service software, or use it if present. This procedure applies only when adding a 6890N GC. On a multi-instrument system where BootP Service is already installed to provide IP addresses to instruments, BootP should remain installed and enabled.
To enter the IP address into a 6890N GC:
1 On the 6890N keyboard, press [Options]. Scroll to Communication and press [Enter]. The following screen appears:
COMMUNICATION SETPTS
---- LAN ----
IP: 000.000.000.000 <
GW: 000.000.000.000
SM: 000.000.000.000
Enable DHCP OFF
---- RS-232 ----
2 Enter the IP address for your 6890N GC. Enter the numbers separated by dots and press [Enter]. The GC displays a message instructing you to power cycle the instrument. Do NOT power cycle yet.
3 Press [Clear]. Scroll to GW. Enter the Gateway number and press [Enter]. The GC displays a message instructing you to power cycle the instrument. Do NOT power cycle yet.
4 Press [Clear]. Scroll to SM and press [Mode/Type]. Scroll to the appropriate subnet mask from the list of modes and press [Enter]. The GC displays a message instructing you to power cycle the instrument.
5 Power cycle the instrument to apply the LAN setpoints to the card.
Software Installation

Network Configuration
Software Installation
6 Press [Options]. Scroll to Communications and press [Enter]. Confirm that the correct setpoints are present.
5973 LAN-based MSD with firmware 3.01.58 or higher
If you have a 5973 Series MSD with firmware 3.01.57, BootP Service must be used to assign TCP/IP addresses. See “Setting Up an Instrument on Agilent BootP Service" on page 132 for more information.
1 When a 5973 Series MSD is initially turned on, it will look for BootP Service. To disable the BootP Service/Server query, hold down the [No/Cancel] key on the local control panel for approximately five (5) seconds.
You will see a display that BootP has been disabled and that firmware is being downloaded.
2 On the local control panel, press [Menu] until the Network menu is displayed and then press [Item].
The default IP address will be 0.0.0.0 if the BootP Service was aborted or 10.1.1.102 if the IP address was downloaded from the BootP Service:
MSD IP via BootP Service
0.0.0.0
3 To assign a new IP address without using BootP Service, press the [Yes/Select] key on the local control panel.
The following is displayed and you can update the first numbers of the IP address:
EDIT MSD IP
>000<000.000.000
4 Enter the new IP address.
• Use the up arrow key to increase the value.
• Use the down arrow key to decrease the value.
• Use the [Item] key to move to the next group of numbers to edit.
39

40
Network Configuration
• When you have finished entering all the numbers for the IP address, press the [Yes/Select] key to temporarily save the IP address (the IP address is permanently saved when you update the flash memory below).
5 Press the [Item] key to edit the Gateway IP and/or subnet mask. Press [Yes/Select] to edit or Item to go to the next item.
6 Press [Item] until you see the prompt “Reboot with new network settings?”
7 Press [Yes/Select].
This will power cycle the 5973 Series MSD and update the flash memory with the new addresses.
Software Installation

Network Configuration
Installing Standard Instrument Control Library (SICL) Drivers for TCP/IP Support
Software Installation
The Standard Instrument Control Library (SICL) drivers are supplied on the MSD ChemStation software CD-ROM. If a previous version of the SICL drivers have been installed, they should be removed prior to the installation of the current version.
Drivers are provided to support either a LAN-based system or a GPIB-based system:
• If your system is LAN-based, continue with this section to install drivers for TCP/IP support.
• If your system is GPIB-based, skip this section and continue to Chapter 3 where installation of the appropriate GPIB drivers is described.
NOTE There are small appearance differences between Windows 2000 and Windows XP but content and functions in the following figures are the same for either operating system.1 Close any Windows applications that are running.
2 Insert the MSD ChemStation CD-ROM into the drive.
Click Cancel to exit the MSD ChemStation software setup program if it starts automatically. The ChemStation software will be installed later (see Chapter 4).
3 In Windows Explorer, double-click the wnl0201.exe file in the \SICL directory on the CD.
41

42
Network Configuration
4 The SICL InstallShield wizard will guide you through the setup.
5 When the Agilent IO Libraries screen appears, click Next.
Software Installation

Network Configuration
Software Installation
6 Read the Agilent IO Libraries License Agreement. When finished, click Yes.
43

44
Network Configuration
7 Read the Agilent IO Libraries Readme Information. When finished, click Next.
Software Installation

Network Configuration
Software Installation
8 Click the Full Installation button to select the type of installation.
45

46
Network Configuration
9 Components to be installed are listed. Click Next to accept the list and to proceed with installation.
Software Installation

Network Configuration
Software Installation
10 After files are copied, you are prompted to decide if you want to view information and/or to run IO Configuration. Select Run IO Config and click Finish to next configure SICL support.
Note that there are alternative ways of running IO Config at later times:
• By clicking on the IO icon in the task bar of your PC
which results in the following menu:
47

48
Network Configuration
• Or from the Agilent IO Libraries group found in Start > Programs:
Software Installation

Network Configuration
Software Installation
11 If prompted, select Manually configure interfaces and click Next to get the following screen:
49

50
Network Configuration
12 Select the interface to be installed, LAN Client (LAN Instruments):
Software Installation

Network Configuration
Software Installation
13 Click the Configure button to manually configure this interface.
51

52
Network Configuration
14 For the Default Protocol at the bottom of the screen, select SICL-LAN. Click OK to accept the settings.
Software Installation
Network Configuration
Software Installation
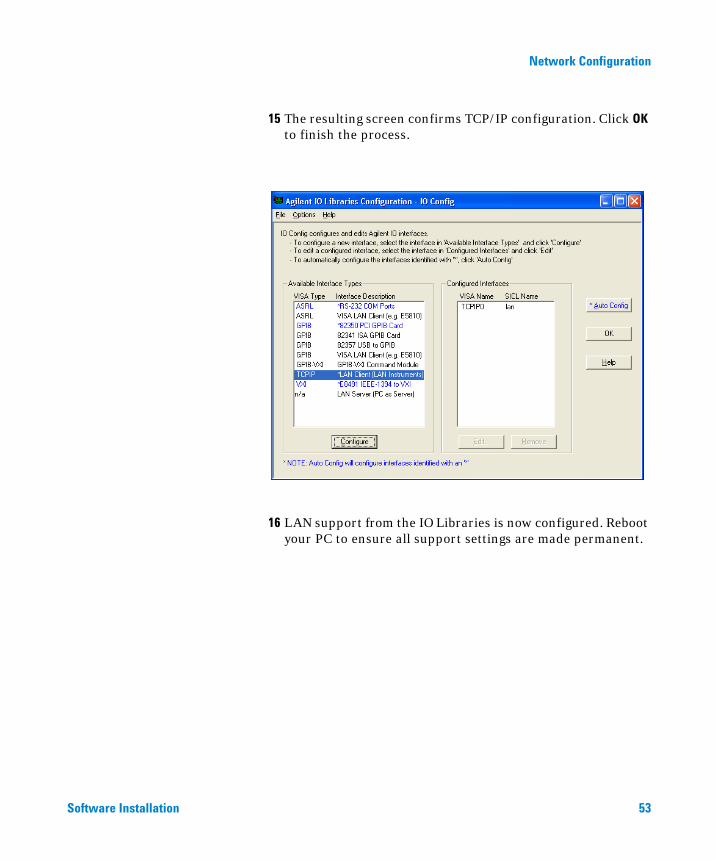
15 The resulting screen confirms TCP/IP configuration. Click OK to finish the process.
16 LAN support from the IO Libraries is now configured. Reboot your PC to ensure all support settings are made permanent.
53

54
Network Configuration
Software Installation

Agilent G1701DA MSD Productivity ChemStation SoftwareInstallation Manual
3GPIB Driver Installation
GPIB Driver Installation 56
Installation Checklist for GPIB-Based Systems 57
Installing Standard Instrument Control Library (SICL) Drivers for GPIB Support 59
This Chapter describes how to install and configure GPIB drivers required for 5973 MSDs and/or GPIB-based 6890 GC instruments.
55Agilent Technologies

GPIB Driver Installation
GPIB Driver Installation
56
This Chapter describes how to install and configure the GPIB drivers for use with the following GPIB-based instruments:
• 5973 MSD and 6890 Series GC
• 6890 Series GC (with GPIB card)
The following checklist summarizes steps required to install and configure GPIB drivers. More information for the SICL driver installation and configuration is given in the remainder of this Chapter.
Software Installation

GPIB Driver Installation
Installation Checklist for GPIB-Based Systems
Software Installation
This checklist provides a summary of installation and configuration steps for GPIB based systems (5973 MSD and/or 6890 GC). Use this checklist if you are familiar with GPIB and the MSD Productivity software. Otherwise, refer to the complete instructions which follow in this Chapter for GPIB configuration, and in Chapter 4, “MSD ChemStation Software Installation.”
❏ Verify operating system prerequisites described in Chapter 1.
❏ Verify that Windows 2000 or Windows XP is the operating system.
❏ Verify that Service Pack 3 (or later) is installed for Windows 2000, or Service Pack 1a (or later) is installed for Windows XP.
❏ For a 82350 GPIB card is present in the ChemStation computer.
❏ Design the GPIB instrument system.
❏ It is best to connect GPIB devices in a “chain”: when a GPIB device is connected to the next GPIB device, and it, in turn, is connected to the next, and so on. If at all possible, try to avoid “star” configurations (connecting all devices to a central point).
❏ For SICL Drivers:
❏ Install the SICL GPIB drivers from the MSD ChemStation software CD.
❏ Configure the SICL GPIB drivers.
57

58
GPIB Driver Installation
❏ For MSD Productivity ChemStation software:
❏ Install the MSD ChemStation software.
❏ Run the MSD ChemStation Configuration program and configure Instrument #1.
❏ Start up each MSD ChemStation instrument session to confirm operation.
See also Chapter 4, “MSD ChemStation Software Installation.”
Software Installation

GPIB Driver Installation
Installing Standard Instrument Control Library (SICL) Drivers for GPIB Support
Software Installation
The Standard Instrument Control Library (SICL) drivers are supplied on the MSD ChemStation software CD-ROM. If a previous version of the SICL drivers have been installed, they should be removed prior to the installation of the current version.
Drivers are provided to support either a LAN-based system or a GPIB-based system:
• If your system is GPIB-based, continue with this section to install drivers for GPIB support.
• If your system is LAN-based, skip this section and go to Chapter 2 where installation of the appropriate TCP/IP drivers is described.
NOTE There are small appearance differences between Windows 2000 and Windows XP but content and functions in the following figures are the same for either operating system.A GPIB card must be installed in your PC or installed drivers cannot be configured. GPIB SICL drivers must be version M.01.01 or later.
If your PC is being rebooted following installation of a GPIB card, the following Found New Hardware Wizard screen will appear (Windows XP is shown here; Windows 2000 is somewhat different).
If the New Hardware Wizard starts, click Cancel to immediately exit.
59

60
GPIB Driver Installation
1 Close any Windows applications that are running.
2 Insert the MSD ChemStation CD-ROM into the drive.
Click Cancel to exit the MSD ChemStation software setup program if it starts automatically. The ChemStation software will be installed later (see Chapter 4).
Software Installation

GPIB Driver Installation
Software Installation
3 In Windows Explorer, double-click the iolibs.exe file in the\SICL\GPIB DRIVERS\ directory on the CD.
4 The SICL InstallShield wizard will guide you through the setup.
61

62
GPIB Driver Installation
5 When the Agilent IO Libraries screen appears, click Next.
Software Installation

GPIB Driver Installation
Software Installation
6 Read the Agilent IO Libraries License Agreement. When finished, click Yes.
63

64
GPIB Driver Installation
7 Read the Agilent IO Libraries Readme Information. When finished, click Next.
Software Installation

GPIB Driver Installation
Software Installation
8 Click the Full Installation button to select the type of installation.
65
66
GPIB Driver Installation
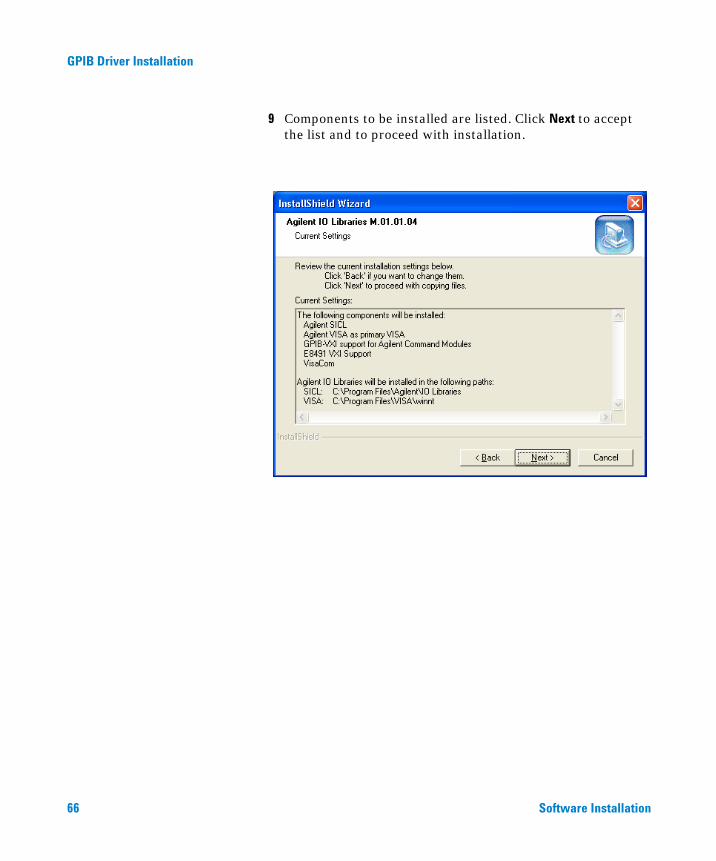
9 Components to be installed are listed. Click Next to accept the list and to proceed with installation.
Software Installation

GPIB Driver Installation
Software Installation
10 After files are copied, you are prompted to decide if you want to view information and/or to run IO Configuration. Select Run IO Config and click Finish to next configure SICL support.
Note that there are alternative ways of running IO Config at later times:
• By clicking on the IO icon in the task bar of your PC
which results in the following menu:
67

68
GPIB Driver Installation
• Or from Agilent IO Libraries group found in Start > Programs.
Software Installation

GPIB Driver Installation
Software Installation
11 If prompted, select Manually configure interfaces and click Next to get the following screen:
69

70
GPIB Driver Installation
12 Select GPIB - 82350 PCI GPIB Card:
13 Click the *Auto Config button to automatically configure this interface.
On some systems, the following message may appear. If so, click OK and continue:
Software Installation

GPIB Driver Installation
Software Installation
14 The next screen is the default configuration for the GPIB card:
71

72
GPIB Driver Installation
15 Change the SICL Interface Name to hp82341 (“hp” MUST be lower case) and, using the scroll arrows, change the Bus Address from 21 to 30. Then click OK to accept the changes.
NOTE The MSD ChemStation requires use of the 82350A or B card though the MSD Productivity Software uses the SICL Interface Name, “hp82341”.
Software Installation

GPIB Driver Installation
Software Installation
16 The resulting screen confirms GPIB configuration. Click OK to finish the process.
17 GPIB support from the IO Libraries is now configured. Reboot your PC to ensure all support settings are made permanent.
73

74
GPIB Driver Installation
18 After rebooting, run IO Config to verify the configured GPIB interface. Click on the Edit VISA Config . . . button to show GPIB devices:
Software Installation

GPIB Driver Installation
Software Installation
19 Click the Auto Add Devices button to have the software look for connected GPIB devices:
75

76
GPIB Driver Installation
20 Click on Continue to begin the process:
If you get the following message, any of the following are possible problem
NOTEsources which must be corrected: incorrect GPIB card configuration, GPIB cables are not connected, instruments are not powered on, and/or the PC needs to be rebooted. Other possible causes of GPIB scan failure include presence of unsupported hardware devices and/or drivers. In the event of problems, the PC should be power-cycled (“cold boot”) as the first step in troubleshooting.Software Installation

GPIB Driver Installation
Software Installation
21 The following screen should appear:
• GPIB0::20 represents identification of the MSD (default address 20) and GPIB0::15 represents identification of the GC (default address 15). Click OK.
77

78
GPIB Driver Installation
22 The following screen should appear now showing the found devices. Click OK:
Software Installation

GPIB Driver Installation
Software Installation
23 This process verifies GPIB devices are online. Click Cancel to exit:
79

80
GPIB Driver Installation
24 Click Cancel to exit:
Software Installation

Agilent G1701DA MSD Productivity ChemStation SoftwareInstallation Manual
4MSD ChemStation Software Installation
Required and Recommended Components 82
Installing MSD ChemStation Software 83
Configuring Instruments in the MSD ChemStation 92
This Chapter describes how to install and configure the MSD Productivity ChemStation software.
81Agilent Technologies

MSD ChemStation Software Installation
Required and Recommended Components
82
The MSD ChemStation software installation process prompts you for which files you want to install. You can either accept the default files or you can use the following table to install only the files needed for the application mode you will be using.
Component Enhanced mode EnviroQuant (EPA Aromatics in Gasoline Drug Analysis
Program files*
G1701DA MSD software Required Required Required Required
G1701DA Supplementary files
Recommended Recommended Recommended Recommended
Custom reports Required Required Required Required
Environmental forms(EPA only)
Required
Optional files
Utility programs† Recommended Recommended Recommended Recommended
Developer information
Drug Analysis Supplementary files‡
Required
User information** Recommended Recommended Recommended Recommended
Demo files††
MSD Demo files Recommended Recommended Recommended
MS Environmental Demo files
Required
GC Environmental Demo files
* If presented with a choice, always install the entire file set. Do not select individual files within the set
† Includes Data file header browser, mass spectrum creation utility, isotope information utility, chemical structures readme
‡ Macros for customizing DrugAnalysis reports
** Includes software status bulletins, data analysis font customization readme, 6890 report sample, ALS firmware upgrade
†† These files can help you learn to use the software. EnviroQuant tutorials require the MS Environmental demo files.
Software Installation

MSD ChemStation Software Installation
Installing MSD ChemStation Software
Software Installation
1 Before you start:
• Make sure the ChemStation computer has Windows 2000 Professional or Windows XP software installed and configured as described in Chapter 1.
• 5973N and 5973 inert MSDs: make sure the network is configured as described in Chapter 2.
• 5973 MSD: make sure GPIB is configured as described in Chapter 3.
• Any previous version of MSD ChemStation software must be removed prior to loading this version. See Removing (Uninstalling) MSD ChemStation software, page 139, for details.
• Close all Windows programs.
• Log on as Administrator or other user with Administrator privileges.
NOTE There are small appearance differences between Windows 2000 and Windows XP but content and functions in the following figures are the same for either operating system.
2 Insert the G1701DA MSD ChemStation CD into the CD-ROM drive. If autostart is enabled, then the following display should appear:
83

84
MSD ChemStation Software Installation
• If this screen does not appear, then, using Windows Explorer, double-click the file SETUP.EXE in the root directory of the CD-ROM.
In either case, after a few seconds, the setup program starts and presents a welcome screen:
Software Installation

MSD ChemStation Software Installation
Software Installation
3 Click Next to continue to the License Agreement:
85
86
MSD ChemStation Software Installation
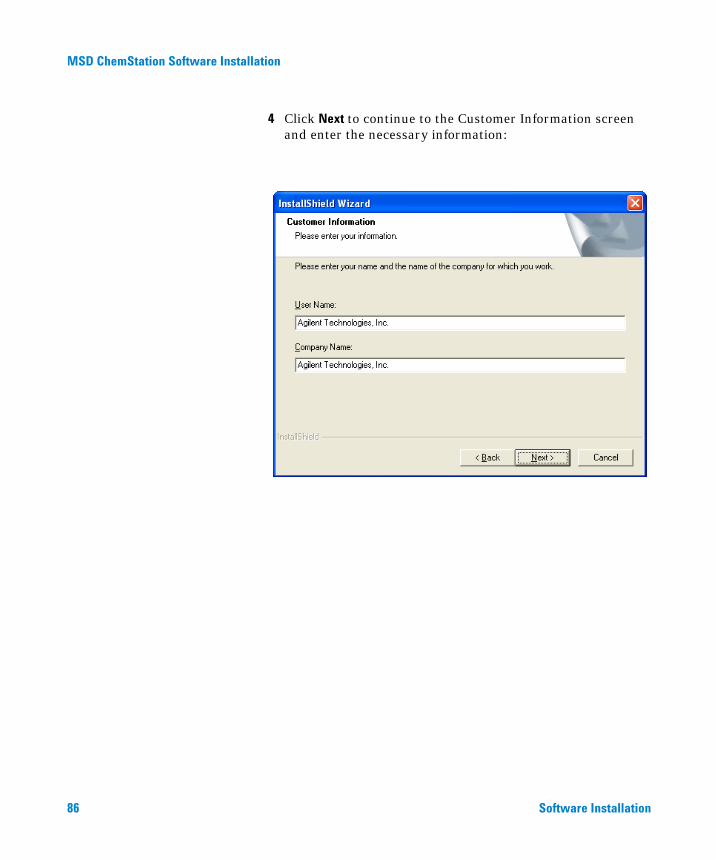
4 Click Next to continue to the Customer Information screen and enter the necessary information:
Software Installation

MSD ChemStation Software Installation
Software Installation
5 Click Next to accept the customer information and to then choose where to install the MSD ChemStation software:
• Click Next to accept the default target location,C:\MSDChem.
• Alternatively, use the Browse . . . button to select a different target location. Note that the ChemStation must be located on the same drive as the Agilent I/O Libraries (see Chapter 2 or Chapter 3).
87

88
MSD ChemStation Software Installation
6 Click Next to continue with ChemStation registration:
Your registration number is on the software registration certificate provided in your software kit.
Software Installation

MSD ChemStation Software Installation
Software Installation
7 Click Next to enter your registration and to then select components to be installed:
• Click Next to accept the default installation and to continue to an installation checkpoint screen.
• For a customized installation, see “Required and Recommended Components" on page 82.
89

90
MSD ChemStation Software Installation
8 After verifying the installation to be performed, click Next to start the process:
• For some systems, the following ‘Locked File Detected’ message(s) may appear:
Select Don’t display this message again. and then click Ignore to continue installation.
Software Installation

MSD ChemStation Software Installation
Software Installation
9 Upon installation completion, click the Finish button to exit the process:
91

MSD ChemStation Software Installation
Configuring Instruments in the MSD ChemStation
92
Use the following procedure to configure instruments in the MSD ChemStation software.
The System Configuration program allows you to configure instruments or to view instrument configuration information entered previously.
NOTE There are small appearance differences between Windows 2000 and Windows XP but content and functions in the following figures are the same for either operating system.
1 From the Windows Start Menu, select Programs/MSD ChemStation/Config.
Alternatively, double-click the Config icon, , on your Windows desktop.
Either way, the System Configuration window appears.
Software Installation

MSD ChemStation Software Installation
Software Installation
NOTE If you do not see the Data Analysis column, your screen resolution is not set according to system requirements. Correct the problem before continu-ing.
2 To configure an instrument, select number 1 from the toolbar or select Instrument 1 from the Configure menu.
If no instruments have yet been configured, the Configure Instrument dialog box shown below appears:
3 You can accept the default name or enter a different name for the instrument. Make sure the Offline Instrument option is not selected.
93

94
MSD ChemStation Software Installation
4 Click Next to display the Mass Spectrometer dialog box:
5 Select the Include a Mass Spectrometer in this Instrument Configuration option and click the New MS Device button. The New Mass Spectrometer Device dialog box appears:
Software Installation

MSD ChemStation Software Installation
Software Installation
6 Select the Model number of your MSD and then enter the associated IP Address or GPIB Address following either of the next two procedures: Configuring the 5973N or 5973 inert MSD (page 95) or Configuring the 5973 MSD (page 97)).
Configuring the 5973N or 5973 inert MSD
If your selected Model is 5973N, 5973 inert, then continue through the following procedure. If 5973 is selected as your Model, then go to the next section, Configuring the 5973 MSD (page 97), for the appropriate procedure.
1 Enter the MSD IP Address. For a MSD not on a site LAN system, this will be 10.1.1.100. Click OK to accept the address:
95

96
MSD ChemStation Software Installation
2 Verify you have the correct MSD Model and IP Address:
3 Click Next and go to the section, Configuring MSD Options and Polarity (page 100).
Software Installation

MSD ChemStation Software Installation
Configuring the 5973 MSD
Software Installation
If your selected Model is 5973, then continue with the following procedure. If 5973N, 5973N inert is selected as your Model, then go to the previous section, “Configuring the 5973N or 5973 inert MSD" on page 95, for the appropriate procedure.
1 Enter the default MSD GPIB Address, 20. Click OK to accept the address:
97

98
MSD ChemStation Software Installation
Software Installation

MSD ChemStation Software Installation
Software Installation
2 Verify you have the correct MSD Model and GPIB Address:
3 Click Next and continue with the next section.
99

MSD ChemStation Software Installation
Configuring MSD options and polarity
100
1 If your MSD has Chemical Ionization capability, select that Option. Otherwise, leave it unselected. Click Next to continue:
2 Refer to the Autotune report shipped with your MSD to determine optimum polarity to use and select the appropriate setting. Then click Next to complete MSD configuration.
Software Installation

MSD ChemStation Software Installation
Configuring the GC
Software Installation
Upon completing MSD configuration, the process continues with configuring the GC:
1 Select the Include a Gas Chromatograph in this Instrument Configuration option and click the New GC Device button.
101

102
MSD ChemStation Software Installation
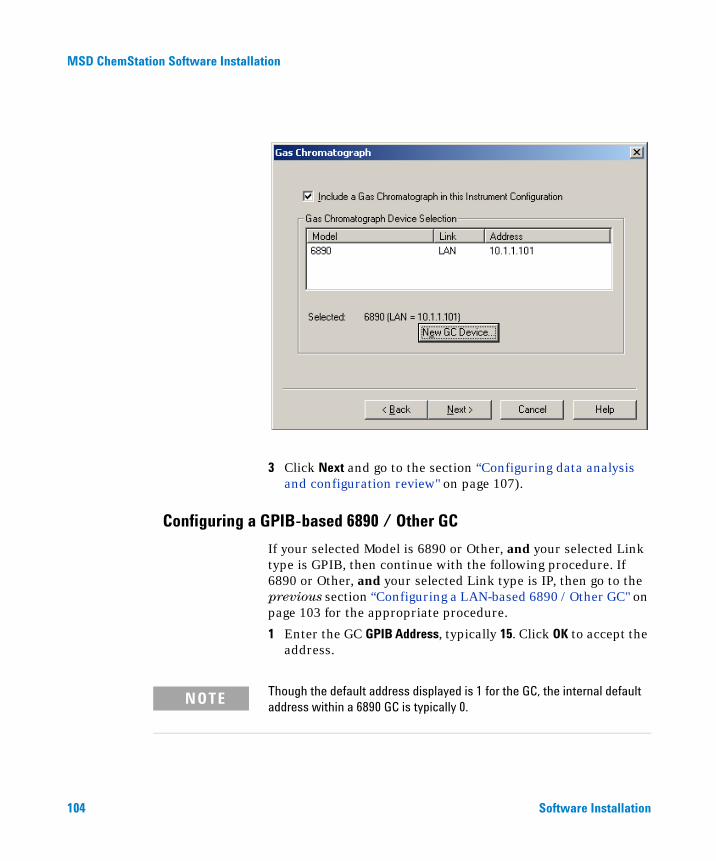
The New Gas Chromatograph Device dialog box shown below appears:
2 Select the GC Model as either 6890 (default) or Other. Then select the communications Link as either IP or as GPIB. Continue to the appropriate section following.
Software Installation

MSD ChemStation Software Installation
Configuring a LAN-based 6890 / Other GC
Software Installation
If your selected Model is 6890 or Other, and your selected Link type is IP, then continue with the following procedure. If 6890 or Other, and your selected Link type is GPIB, then go to the next section, “Configuring a GPIB-based 6890 / Other GC" on page 104, for the appropriate procedure.
1 Enter the GC IP Address. For a GC not on a site LAN system, this will be 10.1.1.101. Click OK to accept the address.
2 Verify you have the correct GC Model and IP Address. If correct, then click Next to continue.
103
104
MSD ChemStation Software Installation
3 Click Next and go to the section “Configuring data analysis and configuration review" on page 107).
Configuring a GPIB-based 6890 / Other GC
If your selected Model is 6890 or Other, and your selected Link type is GPIB, then continue with the following procedure. If 6890 or Other, and your selected Link type is IP, then go to the previous section “Configuring a LAN-based 6890 / Other GC" on page 103 for the appropriate procedure.
1 Enter the GC GPIB Address, typically 15. Click OK to accept the address.
Though the default address displayed is 1 for the GC, the internal default
NOTEaddress within a 6890 GC is typically 0.Software Installation

MSD ChemStation Software Installation
Software Installation
105

106
MSD ChemStation Software Installation
Software Installation

MSD ChemStation Software Installation
Software Installation
2 Verify you have the correct GC Model and GPIB Address. If correct, click Next to continue:
3 Click Next to continue.
Configuring data analysis and configuration review
1 Select the desired Data Analysis Mode and click Next to continue. The four choices for Mode are:
• Enhanced Quantitation (default, best for first-time users)
• EnviroQuant (EPA)
• Aromatics in Gasoline
• Drug Analysis
107

108
MSD ChemStation Software Installation
2 One of two possible review screens appears depending upon wheter your system is LAN- or GPIB-based. If everything is satisfactory, click on Finish to complete the configuration process.
Software Installation

MSD ChemStation Software Installation
Software Installation
LAN-based system:
109

110
MSD ChemStation Software Installation
GPIB-based system:
Software Installation

Agilent G1701DA MSD Productivity ChemStation SoftwareInstallation Manual
5Supplemental Information
Upgrading from Previous Versions 112
Installing Agilent BootP Service 116
Configuring Agilent BootP Service 123
Setting Up an Instrument on Agilent BootP Service 132
Reinstalling MSD ChemStation Software 137
Removing (Uninstalling) MSD ChemStation Software 139
5973 Series MSD LAN system 140
This Chapter describes additional information which applies to some systems but is not required for all users.
111Agilent Technologies

Supplemental Information
Upgrading from Previous Versions
112
G1701DA MSD ChemStation software requires either Windows 2000 with Service Pack 3 (or later) or Windows XP with Service Pack 1a (or later) operating systems; it does not support dual-boot operating systems or the FAT file system. Therefore, if you are upgrading from a version of the MSD ChemStation software that ran on a different operating system, you must first upgrade your computer operating system to the correct Windows operating system as described below. If your computer already is running Windows 2000 or XP, go to Reinstalling the MSD ChemStation software on page 137 to upgrade your ChemStation software.
Customer responsibilities
CAUTION If upgrading requires formatting the computer hard disk, this procedure will result in loss of all data on the hard disk. Be sure to back up the following files, as well as any other files you may need in the future.
• Methods and Data
• Sequences
• Tune Files (*.U) and comma-separated value (*.CSV) files
• User-created libraries
• User macros
The BIOS of the computer may need to be updated for the Windows operating system on your computer. Verify the BIOS setup on your computer and check with the manufacturer for the correct version of BIOS for your Windows operating system.
Other software applications on the computer may not work with your Windows operating system. Check with the manufacturer.
Software Installation
Supplemental Information
Software Installation
Computer hardware accessories and drivers may not work with your Windows operating system. Check the hardware compatibility list via Microsoft's website or via your PC manufacturer’s website.
Checklist for PCs with existing MSD ChemStation software
❏ Verify the GC/MSD performance prior to updating the software packages.
❏ Perform an autotune.
❏ Perform a quick method to verify acquisition, for example signal to noise.
❏ Backup all critical data, methods, sequences and/or libraries and any other specific information critical to the system.
❏ Archive data to a CD or to another backup source.
❏ Validate the backup information.
❏ Remove MSD Productivity ChemStation Software.
❏ Run the MSD ChemStation Configuration program and delete all instruments.
❏ Exit from program.
❏ Start > Settings > Control Panel > Add/Remove Programs > Remove MSD ChemStation.
❏ Delete directory HPCHEM or MSDCHEM or move to a new location.
❏ Reboot ChemStation (recommended even if not prompted).
❏ Remove CAG BootP Server (if applicable). Note that, if desired, the CAG BootP Server can be used to configure IP addresses before its removal.
❏ Run CAG BootP Server program.
❏ Record the MSD and/or GC MAC address.
❏ Remove all BootP Entries.
113

114
Supplemental Information
❏ Exit from program.
❏ Start > Settings > Control Panel > Add/Remove Programs > Remove CAG BootP Server.
❏ Reboot ChemStation (recommended even if not prompted).
❏ Remove SICL Drivers.
❏ Run the IO config program (on taskbar, right click on IO, then click on Run IO Config).
❏ Delete all entries (click on configure interface and then click on remove).
❏ Exit from program.
❏ Start > Settings > Control Panel > Add/Remove Programs > Remove SICL Drivers.
❏ Reboot ChemStation (recommended even if not prompted).
Prepare the ChemStation computer for upgrade
1 Verify Customer Responsibilities listed above have been performed.
2 Verify the computer meets minimum hardware requirements for this upgrade. See Chapter 1.
3 Verify the correct network card is installed.
4 Switch off your computer and remove its cover.
5 Follow manufacturer instructions to verify the network card part number.
6 Replace the cover and switch on the computer.
Software Installation

Supplemental Information
Upgrade the computer operating system
Software Installation
1 Format the hard drive.
Be aware that this procedure will result in loss of all data on the hard disk. See your computer documentation to change size of existing disk partition(s). Formatting the hard drive can be done during the Windows installation.
2 Install the Windows operating system from its CD-ROM as described in Windows documentation and/or readme file.
• Be sure to specify NTFS for the system file format
• Select Install the most common components
3 Disable power saver features of the computer.
4 Install and configure TCP/IP.
5 Select proper time zone and set the time.
6 Set up your display for a minimum of 1024 x 768 x 65,536 colors.
7 Install the latest Service Pack:
• Service Pack 3 (or later) for Windows 2000
• Service Pack 1a (or later) for Windows XP
NOTE Any time you update the system with new drivers such as LAN, BIOS, video, keyboard, or mouse drivers, you also must reinstall the Service Pack for your Windows operating system.
8 Reboot the computer.
9 For older GC/MS systems (MSD firmware 3.01.57) refer to the next page for instructions on how to install Agilent BootP Service.
10 Proceed to install the MSD ChemStation software as described in Chapter 4.
115
Supplemental Information
Installing Agilent BootP Service
116
Agilent BootP Service software should only be installed for older GC/MSD systems (5973 Series MSD firmware version 3.01.57 and 6890 GC with the JetDirect card installed) is not used for the 6890N GC.
Agilent BootP Service
Agilent BootP Service provides central administration of IP addresses for Agilent instruments residing on a LAN. This service can run on any Windows 2000 or XP PC on the instrument LAN. The PC running Agilent BootP Service must be running TCP/IP network protocol and cannot run a DHCP server or another BootP server.
When an instrument is first powered on, an Agilent JetDirect card located in the instrument broadcasts a request for an IP address or Host Name and provides its hardware address as an identifier. The request may continue for up to 5 minutes. The Agilent BootP Service can answer this request and pass a previously defined IP address and Host Name associated with the hardware address to the requesting instrument.
When the instrument receives its IP address and Host Name from the BootP Service, it stops broadcasting the request. The instrument maintains the IP address as long as it is powered on. Powering down the instrument causes it to lose its IP address and the Agilent BootP Service must be running when the instrument is next powered on to reestablish the correct address.
NOTE There are small appearance differences between Windows 2000 and Windows XP but content and functions in the following figures are the same for either operating system.
Software Installation

Supplemental Information
Software Installation
Prior to installing and configuring BootP service:
1 You need to know the IP address of your system:
• If on a system LAN, it will need to be entered into the TCP/IP configuration, or use the DHCP option
2 You need to know the IP address of your system components:
• An IP address for the MSD which is a fixed IP address, not DHCP
• An IP address for the GC which is a fixed IP address, not DHCP
3 You need to know Subnet Mask and Gateway addresses for your system:
• If you are on a building LAN then SelectStart > Run > CMD and click OK
• At the command prompt enter IPCONFIG:
• Record Subnet Mask and Default Gateway addresses to be used in configuring BootP services.
• Note that default addresses can be used if the system is not on a building LAN.
Device AddressPC 10.1.1.100MSD 10.1.1.101GC 10.1.1.102Gateway 10.1.1.100Subnet mask 255.255.255.0
117

Supplemental Information
Agilent BootP Service installation
118
1 Close all Windows programs.
2 If not already, log on as Administrator or other user with Administrator privileges.
3 Insert the MSD ChemStation Productivitiy Software CD into your CD-ROM drive. Click Cancel to exit the MSD ChemStation software setup program should it start automatically (the ChemStation software will be installed separately as described in Chapter 4).
4 The BootP Service installer is located in the BootP directory, \Bootp.
5 Select Start > Run > Browse > x:\bootp\setup.exe (where x is the CD-ROM drive letter).
6 A Welcome menu is displayed upon starting BootP installation. Click Next to continue with the installation.
Software Installation

Supplemental Information
Software Installation
7 After reviewing the License Agreement, click Next to continue:
119

120
Supplemental Information
8 Installation proceeds and ends with three screens presented:
• Agilent BootP Service information: making sure you have a printer connected/configured, select File and Print as you will need a printed copy at-hand during configuration. Close the screen after printing:
• The BootP Settings screen which, at this time, shows unconfigured default settings. Close the screen by clicking Cancel:
Software Installation

Supplemental Information
Software Installation
• The BootP install complete screen which, at this time, should be closed by clicking Finish to reboot your PC:
121

122
Supplemental Information
This completes BootP Service installation. After rebooting your PC, BootP must be configured as described in the next section.
Software Installation

Supplemental Information
Configuring Agilent BootP Service
Software Installation
BootP service starts automatically as your PC reboots. At any time, to properly configure BootP settings, the service must be stopped via the following procedure.
1 From your Windows desktop Start button, select Start > Settings > Control Panel > Administrative Tools > Services. Right-click Agilent BootP Service, then left-click to get a menu from which you select Stop:
123

124
Supplemental Information
Software Installation

Supplemental Information
Software Installation
After stopping BootP service, close Services, Administrative tools, and Control Panel screens.
2 Again from the Windows desktop Start button, next select Start > Programs > Agilent BootP Service > Edit BootP Settings:
3 The resulting BootP Settings screen shows default settings provided at initial installation. You may find items defined differently if you are here to change settings later in an already established system:
125

126
Supplemental Information
• Select Maintain bootp tabfile? to enable to edit the existing BootP tabfile, an ASCII text file which contains configuration information entered into this screen.
A default settings tabfile was created as part of BootP installation and located in the folder \Program Files\Common Files\Agilent Shared\BootP\bin\ as the file TabFile. If you wish to keep the file elsewhere, use the
Browse button, , to choose a different folder.
If you you want to create your own template for the BootP tabfile, select Create template bootp tabfile? and click the Create Template button. Note that a valid BootP tabfile location must already exist.
Software Installation

Supplemental Information
Software Installation
Select Do you want to log bootp requests? if you want to have a log entry every time the the device host requests configuration information from BootP. This feature is useful if you want to see all requests made to the host.
A default log file was created as part of BootP installation and located in the folder \Program Files\Common Files\Agilent Shared\BootP\bin\ as the file logfile. If you wish to keep the file
elsewhere, use the [Browse] button, , to choose a different folder.
127

128
Supplemental Information
• In the Default Settings portion of the screen, enter your network Subnet mask address. See your network adminstrator if you do not know this information.
The Subnet mask, combined with the IP address identifies the network where your device host machine resides.
• Similarly, enter your network Gateway address, or all 0’s (zeroes) if you have no Gateway. Again, see your network adminstrator if you do not know this information.
Software Installation

Supplemental Information
Software Installation
• Close the screen either by clicking OK to accept and save your settings, or by clicking Cancel to exit without saving the settings.
129

130
Supplemental Information
4 Restart BootP by returning to the Services screen via selecting Start > Settings > Control Panel > Administrative Tools > Services. Right-click on Agilent BootP Service, then left-click to get a menu from which you select Start:
Software Installation

Supplemental Information
Software Installation
After restarting BootP service, close Services, Administrative tools, and Control Panel screens. This completes configuring and restarting BootP service.131

Supplemental Information
Setting Up an Instrument on Agilent BootP Service
132
Agilent BootP Service maintains association between a unique identification code (MAC address) provided with the LAN card installed in a given instrument and the specific IP address assigned to that instrument. Therefore, whether adding a new instrument, exchanging an instrument (or its LAN card), or changing the IP address assigned to an instrument, all require defining or redefining this association.
Software Installation

Supplemental Information
Software Installation
For convenience, record the following for your system:
1 As described in the previous section, stop BootP service and open the BootP Settings screen via Edit BootP Settings:
Instrument MAC address IP addressChemStation computer 130.27.53.203MSD1 0060b0dd03d8 130.27.53.204GC1MSD2GC2MSD3GC3MSD4
133

134
Supplemental Information
2 Click the Launch Manager button to open BootP Manager. For a new installation, no instruments are listed:
3 In BootP Manager, click the Add . . . button to obtain the Add BootP Entry screen. Here, enter information to correctly associate the given instrument MAC address with its assigned IP address:
Software Installation

Supplemental Information
Software Installation
• You must also enter an assigned Host Name and Subnet Mask associated with this IP. Host Name must begin with alpha char.
• You may enter a Comment if desired.
• Enter the Gateway address for the instrument. This is either the building LAN Gateway if on a house LAN system, or the IP address of the connected PC if not on a house LAN system.
135

136
Supplemental Information
4 Click on the OK button to accept the added instrument settings. The newly-added instrument is now shown in the BootP Manager table:
5 Repeat the process for any other instrument(s) to be added at this time. When finished, click the Exit Manager button, then click OK on the BootP Settings screen to complete the adding/editing process.
6 As described in the previous section, restart Agilent BootP service.
7 Power cycle the instrument(s) to confirm they are properly configured in the BootP server.
Software Installation

Supplemental Information
Reinstalling MSD ChemStation Software
Software Installation
This procedure contains tips to help you reload the MSD ChemStation software on an existing system. If you are upgrading from an earlier version of the MSD Chemstation software which ran on an operating system other than Windows 2000 or Windows XP, see “Upgrading from Previous Versions" on page 112.
CAUTION This procedure assumes you have experience using a mouse and Windows programs. Agilent Technologies assumes no responsibility for any serious consequences or data loss resulting from the use of the procedure. Please read all instructions first. If you do not understand any sections, then do not perform this procedure.
1 Insert a floppy disk into the 3-½" drive and copy the following files to it.
• c:\autoexec.bat
• c:\winnt\msdchem.ini
2 Open the MSD ChemStation icon group, then click the Config icon.
Or, select Run from the Windows Start menu and type<n>:\msdchem\msexe\msconfig.exe, where <n> is the drive where the MSD productivity software is installed.
This program contains a Configure menu that allows you to display a listing of all instruments that are currently configured on your system. Be sure to write down all configuration information, such as model numbers and IP addresses, for each instrument. This information will be used to reinstall each instrument later in this procedure.
Note that previous versions of the MSD ChemStation software could be installed in the \hpchem directory, rather than in \msdchem.
137

138
Supplemental Information
3 Backup all important files and folders, including the msdchem directory (<n>:\msdchem, where <n> is the drive where the MSD productivity software is installed).
Rename the \msdchem directory to \msdchem.old using Windows Explorer.
4 Run the MSD ChemStation installation program from the CD-ROM to reinstall the software.
The installation program will start the msconfig.exe program and allow instrument configuration.
5 Start up the MSD ChemStation software and load and run the default method and sequence to verify operation of all instruments and confirm that the software is working properly.
6 Copy or move your methods and data files you backed up in Step 3 to the new msdchem instrument directories.
Delete the backup files when you are sure you don’t need them any more.
Software Installation

Supplemental Information
Removing (Uninstalling) MSD ChemStation Software
Software Installation
Use the following procedure only if you are comfortable editing system files. Otherwise, ask your system administrator for assistance.
1 If there are any data, methods, libraries, or other files or directories that you want to save, move or copy them to a separate directory.
2 Use the MS Config program to delete all instruments.
3 Use the Add/Remove Programs icon in the Windows Control Panel to remove the MSD Productivity ChemStation software.
4 Close ALL applications except Explorer.
• Remove the files \msexe\instcfg.txt and\msexe\installd.txt.
• Delete the \msdchem directory (might be \hpchem on older systems).
5 Click the Start button on the taskbar, and select Run.
• Type sysedit and click OK.
• In the autoexec.bat file, delete the C:\msdchem andC:\msdchem\SYS references from the SET PATH= statement.
• Save and exit Sysedit.
6 Right-click the Start button on the Windows task bar; select Open All Users.
• Empty the Recycle Bin. (Right-click the Recycle Bin icon and select Empty).
• Reboot the computer.
139

Supplemental Information
5973 Series MSD LAN system
140
Connecting the instrument to the customer building network is not part of the installation and familiarization of the 5973 Series MSD instrument. This option can be purchased and is done after initial installation and familiarization.
Intended audience
This section is written to help network administrators migrate analytical instrumentation from an isolated or standalone network to their site LAN. To use these instructions, you are expected to understand the Windows operating system and TCP/IP networking, and to be familiar with the particular hardware devices and configurations of your organization’s local area network.
Assumptions
This documentation assumes that a service engineer has already installed, configured, and verified the installation and performance of the analytical instrumentation as described in the hardware and software installation manuals using the default IP addresses described in this manual.
Agilent Technologies is not responsible for any software problems, LAN configuration conflicts or performance problems that may result when a system is connected to a non-isolated LAN. Service calls requested by the operators of analytical instruments that are determined to have a "root cause" of networking reconfiguration may result in an unexpected billing for time & materials. This section and Troubleshooting in Chapter 6 are intended to provide you with the information to configure, manage, and maintain LAN-based analytical instruments without any detrimental effects on the operation or supportability of that instrumentation.
Software Installation

Supplemental Information
Checklist
Software Installation
This checklist summarizes steps described in this section:
❏ Verify functionality of the isolated LAN:
❏ Msconfig - Check Networking.
❏ Run the instrument.
❏ Reconfigure the computer:
❏ Connect hub to site LAN.
❏ Fill out worksheet of networking information.
❏ Update the IP address of the ChemStation computer.
❏ Ping proposed IP addresses of analytical instruments to avoid duplicate IP addresses.
❏ Reconfigure Analytical Instruments:
❏ Update the IP address of the 5973 Series MSD.
❏ Update the IP address of the 6890 GC.
❏ Verify the functionality of the site LAN:
❏ Msconfig - Check Networking.
❏ Run the instrument.
❏ Other Networking Customizations:
❏ Networked Printers.
❏ Shared disc drives.
❏ Switches, routers, and so forth.
❏ Accounts, Permissions, and so forth.
141

Supplemental Information
Theory of LAN-based instrumentation
142
MSD Chemstation systems consist of:
• a computer running Windows 2000 or Windows XP equipped with a network interface card
• a 6890 GC with appropriate LAN communication
• a 5973 Series MSD with a proprietary LAN/MS control card
• a 10baseT hub or switches
• Note that switches do not have a cascade port, nor do they care about using crossover cables. Also, they allow the PC and GC to run at 100 mps instead of 10. And, after checkout, they can be simply plugged into the house network.
• Newer Systems include switches only. If upgrading an older system using a hub, it is recommended that the hub be replaced with a switch.
• For a building LAN, a switch is preferred as it greatly reduces traffic on the building LAN: traffic only occurs upon initial contact with the instrument.
• Requirements in using a SWITCH:
1 The IP addresses of the PC and the instruments must be compatible with the building LAN.
2 You must give the computer a hostname and domain compatible with the building LAN.
3 You need to add DNS's compatible with the building LAN.
4 You cannot ENABLE DHCP.
5 You must log on as Administrator.
• Additional advantages of the Switch shipped with the MSD:
• Can use standard or crossover LAN cables
• Takes care of speed resolution: the PC and GC can operate at 100 mps while the MS operates at 10 mps
• Isolates GPIB-controlled (BootP) systems from seeing a DHCP server on the other side of the switch
Software Installation

Supplemental Information
Software Installation
• Reduces traffic on the 'house' side of the LAN
• Eliminates problems and complexities arising from use of dual network cards
• Category 5 LAN cables to connect the hub with the other components
The software environment consists of:
• Windows 2000 with SP3 (or later) or Windows XP with SP1a (or later)
• TCP/IP networking configured; RPC and Winsock are used in the application
• SICL (Standard Instrument Control Library) drivers for GC/MS LAN communication
• Assign IP addresses, Gateway addresses, and subnet masks to the GC and MSD
• ChemStation Configuration program - requires administrative privileges
• ChemStation software for instrument control, sequencing, and data analysis
Typical cold-start procedure
Assumes that the GC, MSD, and ChemStation computer are all off.
1 Power up the hub or switch.
2 Power up the MSD:After 20 seconds of ‘POST’ (“Power-On and Self-Test”), the Local Control Panel should display its status.
3 Power up the GC:After 50 seconds of POST, the local user interface should report its status.
143

144
Supplemental Information
4 Power up the ChemStation computer.
• For older systems, after logging in, Agilent BootP Service should start and appear on the Taskbar. If the MSD and/or GC requires BootP Service to assign the IP address, then powering up the ChemStation computer must be before steps 2 and 3 to ensure instruments are assigned their IP addresses.
Verify the Isolated LAN instrument
1 Run the MSCONFIG program:
Select the Help/Check Networking item, which will indicate the status of the MSD. If it is not okay, proceed to the troubleshooting information in Chapter 6. This item performs the following tests to verify the functionality of the LAN and the existence of the instrument.
• Ping loopback (10.1.1.100)
• Ping GC by its IP address (10.1.1.101)
• Ping MSD by its IP address (10.1.1.102)
• Ping MSD by its LAN name - configured in the HOSTS file and required by RPC
• RPCINFO test verifies the IP address is a MSD
• SCQ test verifies MSD firmware is functioning properly
2 Run the instrument. During the startup of the instrument, the following tests are performed:
• Ping GC
• Ping MSD
• Check high order bytes of PC, GC, and MSD IP addresses for commonality
After the program has completed its startup and initialization procedures, select the View/Instrument Control item and verify that Instrument Status is READY.
Software Installation

Supplemental Information
Reconfigure the ChemStation computer
Software Installation
1 Connect the hub to the site LAN. Use "cascade" connector.
2 Write down all appropriate LAN information.
3 Reconfigure the IP, subnet mask and gateway addresses.
NOTE The troubleshooting section in this manual is based on troubleshooting the system (computer, GC, and MSD) on a isolated LAN. Problems associated with the site LAN must be solved by whoever owns and maintains the site LAN. If the networking configuration of the ChemStation computer is modified to preclude proper operation of the computer on an isolated LAN, service engineers are trained to reinstall TCP/IP networking and configure the computer to work on an isolated LAN. For instance, the use of a DHCP server to assign the IP address to the PC is an example of a typical network administration procedure that would preclude proper functioning on an isolated LAN.
4 Verify that the ChemStation computer can successfully ping the gateway and is functioning properly on your site LAN.
5 Ping the proposed IP addresses for the GC and the MSD to verify that those addresses are not currently in use by another device.
Reconfigure analytical instruments
This procedure is for older GC/MSD systems (non-6890N GC with LAN-based 5973 Series MSD).
1 Turn off Agilent BootP Service.
2 Select the Configure/BootP Manager to reconfigure the MSD:
a Obtain the MSD MAC address from the Local Control Panel.
b Change the IP address, gateway address, and subnet mask to conform to your site LAN.
c Exit the Modify dialog box.
d Turn on (restore) Agilent BootP Service.
e Power cycle the MSD.
145

146
Supplemental Information
f After 20 seconds you should see the BootP request and the IP address being assigned.
g Ping the MSD.
h Connect the hub to the site LAN and ping the MSD.
3 Select the Configure/BootP Manager to reconfigure the GC:
a Turn off Agilent BootP Service.
b Obtain the GC MAC address directly from the JetDirect Card itself.
c Change the IP address, gateway address, and subnet mask to conform to your site LAN.
d Exit the Modify dialog box.
e Turn on (restore) Agilent BootP Service.
f Power cycle the GC.
g After 40 seconds you should see the BootP request and the IP address being assigned.
h Ping the GC.
i Connect the hub to the site LAN and ping the GC.
CAUTION The next step should be performed with input from the lab manager or MSD instrument operator as it overwrites tune or calibration files for the MSD. It also resets the default method (DEFAULT.M). Contact the MSD instrument operator to see if tune (c:\msdchem\1\5973N\*.U) and default method (c:\msdchem\1\methods\default.m\*.*) files should be backed up before proceeding.
4 Reconfigure the MSD Chemstation software to use the new IP addresses:
a Run the MSCONFIG program from the MSD ChemStation Folder.
b Select the Help/Network Information. Print the information that appears on the screen.
c Select File/Delete All Instruments.
d Select Configure/Instrument #1 and configure the building LAN IP addresses.
Software Installation

Supplemental Information
Verify the instrument on the site LAN
Software Installation
1 Run the MSCONFIG program and select Help/Check Networking which will indicat status of the MSD. If it is not okay, proceed to troubleshooting information in Chapter 6.
The following tests are performed to verify LAN functionality and existence of the instrument:
• Pings loopback (10.1.1.100)
• Pings GC by its IP address
• Pings MSD by its IP address
• Pings MSD by its LAN name - configured in the HOSTS file and required by RPC
• Performs RPCINFO test to verify the IP address is a MSD
• Performs SCQ test to verify MSD firmware on the LAN/MS Control card is functioning properly
2 Run the instrument. During instrument startup, the following tests are performed:
• Pings GC
• Pings MSD
• Checks high order bytes of PC, GC, and MSD IP addresses for commonality
3 After the program has completed startup and initialization procedures, select View/Instrument Control and verify that Instrument Status is READY. At this point, the MSD system is ready to use.
147

Supplemental Information
Other network customizations
148
Networked printers - Add any network printers which may be useful to the operator or the organization. MSD ChemStation software is designed to use only the Windows default local printer. The typical system is sold with an HP LaserJet printer, which is intended to be local printer on the parallel port of the ChemStation computer. These are the only fully supported printers. Service engineers are not trained to configure and support network printers. Experience has shown that network printers work very well if the correct printer drivers are installed with a supported printer. However, analytical instrumentation may produce long graphical reports which may overburden a shared network printer and, for that reason, local printers are recommended.
Shared disk drives - Connect to any network file systems which may be useful to the operator or the organization. MSD ChemStation software is designed to write data to the local disk in the ChemStation computer during data acquisition. After data has been collected, you may copy data to networked drives using the standard operating system tools such as Windows Explorer. Response center engineers can provide assistance to customize the MSD ChemStation software to automatically copy data files to a server-based file system for archiving or shared processing.
File system format - MSD ChemStation software is only tested with NTFS local file systems. Other file systems such as Novell can work correctly in a carefully administered environment.
User accounts - Security, accounts, and permissions are your responsibility. The critical operations of the MSD ChemStation software (acquiring and processing data) require the user to have full access to directory structures for data files and methods. If file permissions are restricted, operation of the MSD ChemStation will be impaired. Service engineers are not trained to identify or correct these problems which are not considered to be defects or warrantable items by the manufacturer.
Software Installation

Supplemental Information
Software Installation
Switches, routers, and other network devices - Real-time control of analytical instruments places additional traffic onto your network. Analysis reveals that each GC/MS/PC system uses between 5 to 10% of a 10baseT network bandwidth when MSD ChemStation software is running. For modest network environments such as a small laboratory, this may be acceptable. In larger environments, we highly recommend that each hub supplied with an analytical instrument be connected to a "switch" on the site LAN infrastructure rather than to another hub. This strategy effectively isolates instrument-related LAN traffic from the normal traffic of your organization, and vice versa. Another technique to isolate data traffic generated by the analytical instrument from the site LAN is to add a second network interface card to the ChemStation computer.
149

150
Supplemental Information
Software Installation

Agilent G1701DA MSD Productivity ChemStation SoftwareInstallation Manual
6Troubleshooting
Network Verification Tests 152
Other Network Verification Tests 154
Isolate the Problem 156
Intermittent Problems 163
LAN Communication Tests 164
Error Messages 168
Typical PCS Information in MSDCHEM.INI for the 5973N 172
Typical IP Configuration file (IPCONFIG.TXT) 176
This Chapter describes procedures to help you determine problem locations in your system and how to solve them.
151Agilent Technologies

Troubleshooting
Network Verification Tests
152
The ChemStation software employs several tests to verify that the networking environment and analytical instrumentation are functioning. These tests can be initiated by selecting Check Networking from the Help menu in the MSD Configuration program. To open MSD Configuration, select Programs/MSD ChemStation/Config from the Windows Start menu.
When using the the MSD Configuration program to configure the analytical instruments in your system, initiate network verification tests by selecting Check Networking from the Help menu. If no errors are detected, the following messages appear:
MSD@ www.xxx.yyy.zzz Passed all Network Tests
OK to run the ChemStation
where www.xxx.yyy.zzz is the IP address for the MSD.
If there is a detectable problem you will see one of the following messages:
• Loopback @ 10.1.1.100 failed the Ping test.
• GC @ 10.1.1.101 failed the Ping test.
• MSD @ 10.1.1.102 failed the Ping test.
• MSD @ 10.1.1.102 failed the Ping by name test.
• MSD @ 10.1.1.102 failed the RPCINFO test.
• MSD @ 10.1.1.102 failed the SCQ test.
• Network Problem must be fixed prior to running ChemStation.
Note that the following default IP addresses were used in the examples above:
ChemStation computer 10.1.1.100GC 10.1.1.101MSD 10.1.1.102
Software Installation

Troubleshooting
Software Installation
Generally, if the networking tests are successful, the ChemStation will start up properly and the instrument will run properly. If you do get one of the error messages, review troubleshooting information in the remainder of this Chapter.
153
Troubleshooting
Other Network Verification Tests
154
In addition to tests described in the previous section, several other network verification tests are performed whenever a LAN-based GC/MSD is started up. If these tests succeed, the instrument will start up. If the tests fail, you will see one of the following messages and MSD ChemStation startup will halt:
• GC at IP address www.xxx.yyy.zzz Did Not Respond.
• MSD at IP address www.xxx.yyy.zzz Did Not Respond.
• Warning: Configure Instruments to be in the same subnet with Agilent BootP Service.
The first two messages indicate the GC or MSD did not respond to the ping test. The third message indicates there may be something fundamentally wrong with the IP address or subnet mask assignments for the ChemStation computer, the GC, and/or the MSD.
NOTE If you get any of these error messages when starting up the MSD ChemStation, run Check Networking in the MSD Configuration program as described in the previous section. Also run Check Networking if networking tests in the ChemStation succeed, but the instrument fails to run correctly, or messages such as "MSD did not respond." are displayed.
For most networking situations, the following rules should be followed. Do not deviate from these rules unless you are knowledgable about IP addresses, subnet masks, and gateways.
1 The subnet mask for the ChemStation computer, the GC, and the MSD should be 255.255.255.0.
2 The first three segments of the IP address for the ChemStation computer, the GC, and the MSD should be the same. If www.xxx.yyy.zzz represents an IP address, then www.xxx.yyy should be the same for the ChemStation computer, the GC, and the MSD.
3 The last segment of the IP address for the ChemStation computer, the GC, and the MSD should be different for each. If www.xxx.yyy.zzz represents an IP address, then zzz should be
Software Installation

Troubleshooting
Software Installation
different for the ChemStation computer, the GC, and the MSD.
4 If the organization possesses a gateway, the IP of the gateway should be the same for the ChemStation computer, the GC, and the MSD.
To check the IP Address, subnet mask, and gateway of the ChemStation computer
Windows 2000 or XP
1 Select Settings > Control Panel from the Windows Start menu.
2 From the Control Panel, double-click the Network + Dialup Local Area Connection icon to display the Network dialog box.
3 Double-click on Local Area Connection.
4 Highlight the Internet Protocol (TCP/IP) item.
5 Click the Properties button and make sure DHCP is not selected.
To check the IP Address, subnet mask, and gateway of the 6890N GC and 5973N MSD (firmware 3.01.58)• Use the GC front panel to verify addresses
• Use the MSD local control panel to verify addresses
For older systems (6890N and MSD firmware 3.01.57) using Agilent BootP Service
1 Select Programs > MSD ChemStation > BootP from the Windows Start menu.
2 Click the Agilent BootP Service entry from the Windows taskbar.
3 Click Configure/BootP Manager to display hardware (MAC) address, Host Name, IP Address, Comment, Subnet Mask, and Gateway.
155

Troubleshooting
Isolate the Problem
156
Here are some approaches you can try to help you determine what part of the system is causing a problem. First, characterize the problem as a constant or intermittent failure. Intermittent failures are discussed later in this Chapter.
Try a different computer
If you have another computer with the same revision of software, can you configure and run the analytical instrument that isn't working? If so, the problem may be the computer. If you do not have another computer already configured, you can install the SICL drivers, Agilent BootP Service (if required), and MSD ChemStation software on another computer for diagnostic purposes. If you have other computers on the same LAN, can they Ping the ChemStation computer, the GC, or the MSD? If they can, then you know that certain equipment is probably good. It is important to rule out malfunctioning of even the smaller network components, such as hubs, switches, and LAN cables.
Re-establish a local instrument LAN
The first and most important step is to isolate the system from the site LAN. If the computer was moved so it is no longer connected to the hub, move it so that it can be connected to the same hub as the GC and MSD to eliminate problems relating to the network system. If the computer had been configured such that it doesn’t work in an isolated LAN, configure it now on a local instrument LAN as described in Chapter 2 so components in the network are limited to:
• the computer with its network card
• the GC with LAN communication
• the MSD with its embedded LAN/MS Control card
• the hub
• three LAN cables
Software Installation

Troubleshooting
Software Installation
Run the Help/Check Networking item in the MSD Configuration program. If it indicates that the instrument is okay, try to run the instrument. If the instrument operates normally in an isolated LAN, but fails in the site LAN, the problem might be LAN traffic, duplicate IP addresses, or other network configuration problems.
Check cabling to the hub
1 Cycle power to the hub.
2 If the hub has a ‘POST’ (“Power-On and Self-Test”) described in its manual, verify it is correct.
3 Physically trace the three cables back to the computer, to the GC, and to the MSD.
4 Verify cables are plugged in firmly.
5 If you have a crossover LAN cable, verify it is not being used. Do not connect crossover cables to the hub.
6 Verify the cascade port of the hub is not being used.
7 Verify the power cord of the power adapter is firmly plugged in.
8 Try installing new LAN cables.
Check the ChemStation computer
1 Clear/Save the System and Application logs in the Event Viewer. You can access the Event Viewer by selecting Programs/AdministrativeTool/EventViewer from the Windows Start menu.
2 Reboot the computer and log in with administrative privileges.
3 Examine the System and Application logs in the Event Viewer for network-related error messages such as a hardware problem with the network card, or for TCP/IP configuration errors such as duplicate IP addresses.
4 Ping loopback (10.1.1.100). If this succeeds, you can assume that the ChemStation computer, its network card, and TCP/IP configuration are good. When this test fails or times out, the most serious type of LAN problem is indicated and
157

158
Troubleshooting
must be resolved before proceeding. Resolving this problem requires complete access to the original media for all operating system software, and also drivers for hardware peripherals such as mouse and printer, and may even require that the computer be completely reinstalled or rebuilt. Proceed to Check system integrity following.
Check system integrity
The following suggestions are ordered from least to most drastic:
1 Run a current and competent virus detection program. Viruses can cause a computer to either fail completely or to behave erratically.
2 Scrutinize the BIOS setting of the ChemStation computer to ensure no setting precludes use of LAN. Disable superfluous hardware in the BIOS to avoid IRQ and/or other resource conflicts.
3 Remove and reinstall TCP/IP with the current network card as described below.
To uninstall the TCP/IP driver
1 Select Settings > Control Panel from the Windows Start menu.
2 Double-click the Network icon in the Control Panel to display the Network dialog box.
3 Click the Protocols tab, then select TCP/IP Protocol from the Network Protocols list.
4 Click Remove.
5 After removal of the drivers, reboot the ChemStation.
To install the TCP/IP driver
1 Select Settings > Control Panel from the Windows Start menu.
2 Double-click the Network icon in the Control Panel to display the Network dialog box.
3 Click the Protocols tab, then select TCP/IP Protocol from the Network Protocols list.
Software Installation

Troubleshooting
Software Installation
4 Click Add.
5 After addition of the TCP/IP drivers, reboot the ChemStation and reload any Service Pack(s) back into the ChemStation.
6 Remove and reinstall TCP/IP with a different network card as described below.
To uninstall the TCP/IP driver
1 Select Settings > Control Panel from the Windows Start menu.
2 Double-click the Network icon in the Control Panel to display the Network dialog box.
3 Click the Protocols tab, then select TCP/IP Protocol from the Network Protocols list.
4 Click Remove.
5 After removal of the drivers, shut down the ChemStation.
6 While the ChemStation is turned off, follow ESD guidelines to remove the existing network card from the Chemstation computer and reinstall a new network card.
7 Turn the ChemStation back on.
To install the TCP/IP driver
NOTE Some systems display a hardware wizard to help guide you through these steps.
1 Select Settings > Control Panel from the Windows Start menu.
2 Double-click the Network icon in the Control Panel to display the Network dialog box.
3 Click the Protocols tab, then select TCP/IP from the Network Protocols list.
4 Click Add.
5 After addition of the TCP/IP drivers, reboot the ChemStation PC and reload any Service Pack(s).
159

Troubleshooting
Check the GC
160
Assuming that the computer has passed the loopback test described previously, proceed to check out the GC:
1 GC LAN Hardware Test:
From the keyboard of the GC, access Config/Diagnostics/Electronics/Communication/MIO_Destructive_Test. If this test passes, then the GC recognizes presence of the LAN card (internal or embedded) and can reboot it.
2 GC LAN Configuration Test (for non-6890N GCs).
Cycle power to the GC and wait 40 seconds to determine if Agilent BootP Service detected the BootP request.
If Yes: Did the BootP request supply the correct IP address?
If Yes: Can you ping the GC?
If Yes: the GC is configured properly on the network
If No: the unit could be controlled by another Agilent BootP server: verify Local Network
If No: Add the new MAC address to the BootP Server: delete the old MAC address that had been assigned to that IP address. Now can you ping it?
If Yes: the GC is configured properly on the network
If No: verify hardware connections
If No: Replace the LAN cables to the ChemStation computer and the GC. Repeat the tests in this section.
Software Installation

Troubleshooting
Check the MSD
Software Installation
MSD LAN hardware test
Power cycle the MSD. Examine the LEDs at the back of the instrument. Beneath the LAN RJ-45 cable, there are two LEDs: a power LED and a heartbeat LED.
Is the Power LED on or off?:
If ON: Power and power cord are okay
If OFF:
Power and power cord should be checked. Are they okay?
If Yes: There is a hardware problem with the MSD
If No: Check circuit breaks and replace power cord as necessary.
Is the heartbeat LED blinking?
If Yes: Is it blinking on/off/on/off evenly?
If Yes: The hardware is okay
If No: Report the blinking pattern to your service representative
If No: Flash memory has been corrupted or the LAN/MS control card is defective. Place service call.
161

162
Troubleshooting
MSD LAN configuration test (for use with non-6890N GCs)
Power cycle the MSD and wait 20 sec to determine if Agilent BootP Service detected the BootP request.
If Yes: Did the BootP request supply the correct IP address?
If Yes: Can you ping the MSD?
If Yes: the MSD is configured properly on the network
If No: the unit could be controlled by another Agilent BootP server: verify Local Network
If No: Add the new MAC address to the BootP server: delete the old MAC address that had been assigned to that IP address. Now can you ping it?
If Yes: the MSD is configured properly on the network
If No: verify hardware connections
If No: Replace the LAN cables to the ChemStation computer and the MSD. Repeat tests in this section.
Software Installation

Troubleshooting
Intermittent Problems
Software Installation
Intermittent problems are much more difficult to identify and solve. Executing the following commands from the Windows Command Prompt may help located the problems.
If the networking configuration is working most of the time, probing the reliability and performance of the LAN by using ping can help with system diagnostics.
ping -t -w 1000 -n 1 -l 1024
-t = ping continuously until interrupted by Ctrl-C
-w 1000= 1000 millisecond timeout
-n 1= 1 packet per ping
-l 1023= 1024 byte packets
When this command is executed, you should see a continuous stream of packet returns. If you see occasional "timed out" messages, it indicates that something caused the packet not to be returned within the timeout period.
ipconfig /all >ipconfig.txt
When this command is executed, you should see a series of network connections setup on the computer. This could be useful to help identify incorrectly entered IP Addresses (Subnet Masks, Gateways, and so forth). All information is stored in the current directory in a file named ipconfig.txt. An example file is shown later in this Chapter.
163

Troubleshooting
LAN Communication Tests
Ping test
164
When ping succeeds
If ping succeeds, it implies the device specified by the IP address in the MSD Configuration program exists and basics of network communications are functional. What you learn if ping succeeds:
• The Instrument exists
• The network drivers are installed correctly on the ChemStation computer and on the device
• TCP/IP as a protocol is running and adequately configured on the ChemStation computer and device
• LAN cables are good and no gateway, router, or switch is presenting any obvious problem
• Subnet masks are not presenting a problem
What you still do not know even if ping succeeds:
• If the selected device is a GC or an MSD
• If the device is ready to be controlled by an MSD ChemStation
• If the GC has the right firmware (note that PING is the only network diagnostic available for the GC)
If ping succeeds, proceed to the RPCINFO test (page 166) described later in this Chapter.
When ping fails
If ping fails, it implies that something is fundamentally wrong and could be one or more of the following:
• Bad network card in the ChemStation computer. If the network card is bad, there should be a message in the Event Viewer system log to indicate the problem.
Software Installation
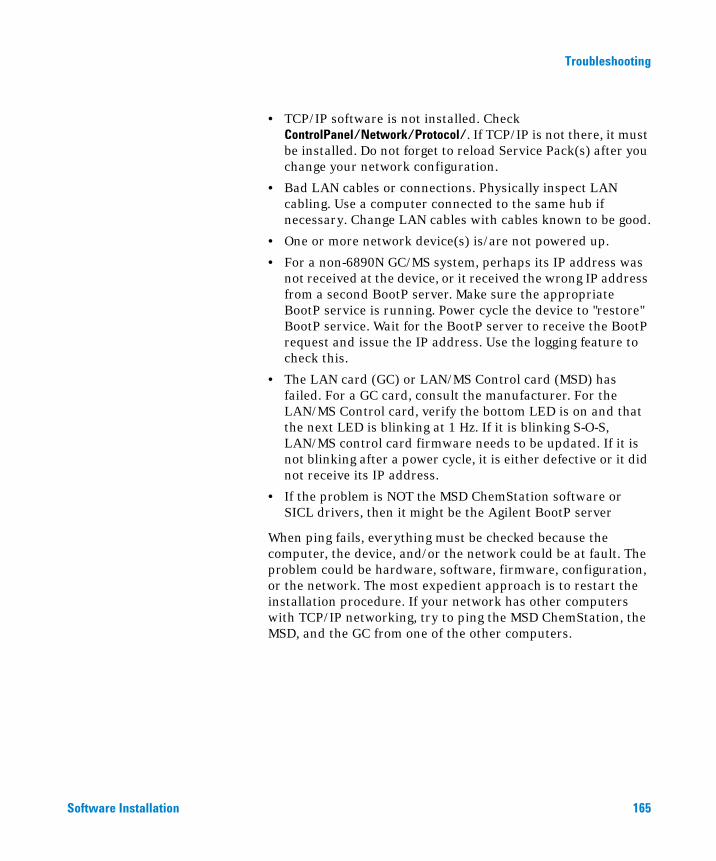
Troubleshooting
Software Installation
• TCP/IP software is not installed. Check ControlPanel/Network/Protocol/. If TCP/IP is not there, it must be installed. Do not forget to reload Service Pack(s) after you change your network configuration.
• Bad LAN cables or connections. Physically inspect LAN cabling. Use a computer connected to the same hub if necessary. Change LAN cables with cables known to be good.
• One or more network device(s) is/are not powered up.
• For a non-6890N GC/MS system, perhaps its IP address was not received at the device, or it received the wrong IP address from a second BootP server. Make sure the appropriate BootP service is running. Power cycle the device to "restore" BootP service. Wait for the BootP server to receive the BootP request and issue the IP address. Use the logging feature to check this.
• The LAN card (GC) or LAN/MS Control card (MSD) has failed. For a GC card, consult the manufacturer. For the LAN/MS Control card, verify the bottom LED is on and that the next LED is blinking at 1 Hz. If it is blinking S-O-S, LAN/MS control card firmware needs to be updated. If it is not blinking after a power cycle, it is either defective or it did not receive its IP address.
• If the problem is NOT the MSD ChemStation software or SICL drivers, then it might be the Agilent BootP server
When ping fails, everything must be checked because the computer, the device, and/or the network could be at fault. The problem could be hardware, software, firmware, configuration, or the network. The most expedient approach is to restart the installation procedure. If your network has other computers with TCP/IP networking, try to ping the MSD ChemStation, the MSD, and the GC from one of the other computers.
165

Troubleshooting
RPCINFO test
166
If ping succeeds, the next test is RPCINFO, which determines if the MSD is capable of receiving communication from the SICL drivers which use a TCP/IP service called ‘RPC’ (“Remote Procedure Calls”) for I/O communication.
NOTE rpcinfo must be run from the \msexe subdirectory. If necessary, for a typical installation, change directories to:
cd c:\msdchem\msexe
When RPCINFO succeeds
What you learn if RPCINFO succeeds:
1 The operating system for the LAN/MS control card in the MSD is up and running. Lower level communication drivers are up and running. Also note that the PowerOn LED should be on. The Heartbeat LED should be blinking at 1 Hz. The Local Control Panel on the MSD should be functional.
2 Most systems with TCP/IP respond successfully to RPCINFO.
If RPCINFO succeeds, proceed to the SCQ test (page 167) described later in this Chapter.
When RPCINFO fails
If RPCINFO fails, one of the following could be wrong:
The device at the specified address is not an MSD. Use the Local Control Panel on the MSD to verify IP address of the MSD. If the Local Control Panel is not up and running, then the LAN/MSD Control card did not boot up successfully.
Software Installation
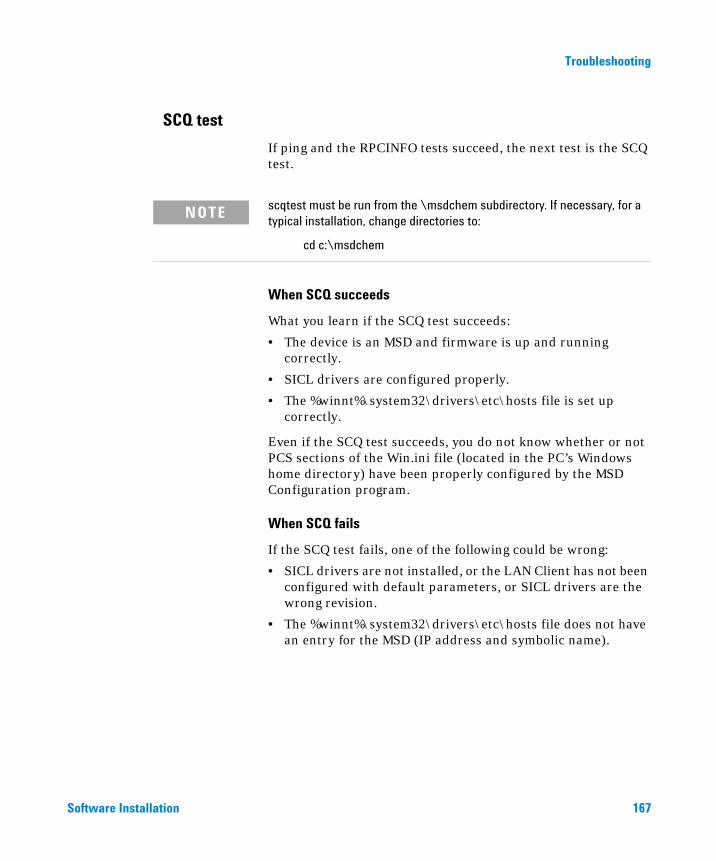
Troubleshooting
SCQ test
Software Installation
If ping and the RPCINFO tests succeed, the next test is the SCQ test.
NOTE scqtest must be run from the \msdchem subdirectory. If necessary, for a typical installation, change directories to:
cd c:\msdchem
When SCQ succeeds
What you learn if the SCQ test succeeds:
• The device is an MSD and firmware is up and running correctly.
• SICL drivers are configured properly.
• The %winnt%\system32\drivers\etc\hosts file is set up correctly.
Even if the SCQ test succeeds, you do not know whether or not PCS sections of the Win.ini file (located in the PC’s Windows home directory) have been properly configured by the MSD Configuration program.
When SCQ fails
If the SCQ test fails, one of the following could be wrong:
• SICL drivers are not installed, or the LAN Client has not been configured with default parameters, or SICL drivers are the wrong revision.
• The %winnt%\system32\drivers\etc\hosts file does not have an entry for the MSD (IP address and symbolic name).
167

Troubleshooting
Error Messages
Error message: Loopback @ 10.1.1.100 failed the Ping test.Help message: Loopback Failure
168
This is a fundamental problem with TCP/IP networking protocol and generally means networking drivers are not correctly bound to the network card or that TCP/IP is not installed correctly. It could also mean the network card is defective or that there is an IRQ conflict.
Reinstall/reconfigure the system as an isolated LAN, then try again. If still bad, do the following:
1 Verify BIOS enables LAN.
2 Check the system log using the operating system Event Viewer for network errors (indicated in red).
3 Reinstall and reconfigure TCP/IP.
4 Verify drivers.
5 Verify port (aui, 10baseT, and so forth).
6 Reinstall current Windows Service Pack(s).
Error message: GC @ www.xxx.yyy.zzz failed the Ping test.Help message: Ping GC Failure (loopback has succeeded!)
Possible causes
• incorrect IP address
• no physical connection
• GC powered down
• BootP service not up (non-6890N GCs)
• JetDirect card failure (non-6890N GCs)
• ChemStation computer network card failure
• bad cables
Software Installation
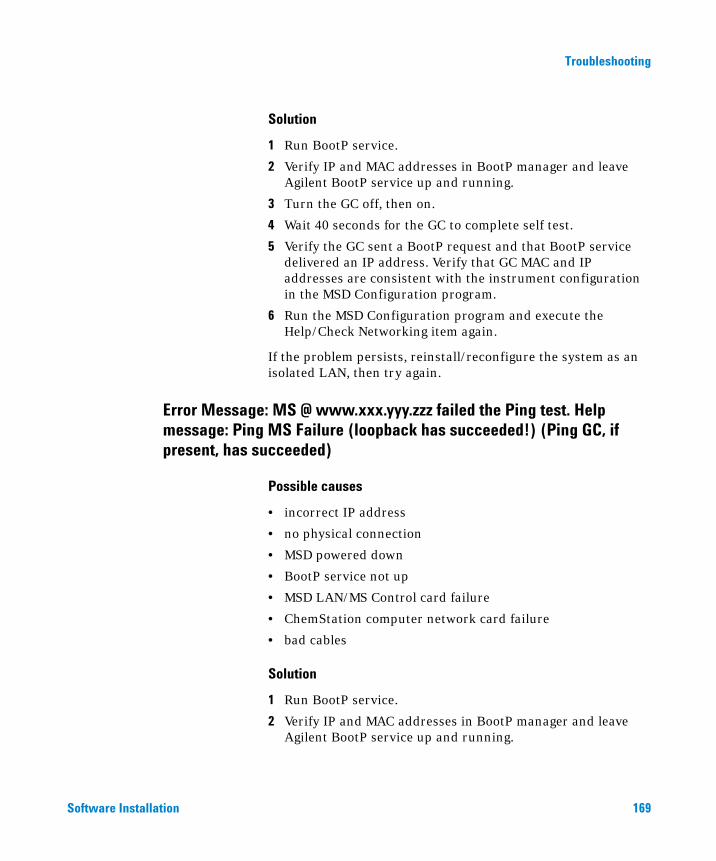
Troubleshooting
Software Installation
Solution
1 Run BootP service.
2 Verify IP and MAC addresses in BootP manager and leave Agilent BootP service up and running.
3 Turn the GC off, then on.
4 Wait 40 seconds for the GC to complete self test.
5 Verify the GC sent a BootP request and that BootP service delivered an IP address. Verify that GC MAC and IP addresses are consistent with the instrument configuration in the MSD Configuration program.
6 Run the MSD Configuration program and execute the Help/Check Networking item again.
If the problem persists, reinstall/reconfigure the system as an isolated LAN, then try again.
Error Message: MS @ www.xxx.yyy.zzz failed the Ping test. Help message: Ping MS Failure (loopback has succeeded!) (Ping GC, if present, has succeeded)
Possible causes
• incorrect IP address
• no physical connection
• MSD powered down
• BootP service not up
• MSD LAN/MS Control card failure
• ChemStation computer network card failure
• bad cables
Solution
1 Run BootP service.
2 Verify IP and MAC addresses in BootP manager and leave Agilent BootP service up and running.
169

170
Troubleshooting
3 Reboot the MSD from the Local Control Panel (Controller/Reboot Controller).
4 Wait 25 seconds for the MSD to complete its bootup.
5 Verify that the MSD sent a BootP request and that BootP service delivered an IP address. Verify that MSD MAC and IP addresses are consistent with the instrument configuration in the MSD Configuration program.
6 Run the MSD Configuration program and execute the Help/Check Networking item again.
If the problem persists, reinstall/reconfigure the system as an isolated LAN, then try again.
Error message: MS @ sc3-1 failed the Ping by name test. Help message: Ping MSD by Name failure (loopback has succeeded!) (Ping GC, if present, has succeeded) (Ping MSD, if present, has succeeded)
Cause
The %winnt%\system32\drivers\etc\hosts file does not have an entry for the MSD.
Solution
Reconfigure the instrument in the MSD Configuration program and execute the Help/Check Networking item again.
Warning
If the %winnt%\system32\drivers\etc\hosts file is updated by your system administrator or Information Technology group, the instrument must be reconfigured to be sure that network name and IP address for the MSD are correct.
Software Installation

Troubleshooting
Error message: MS @ www.xxx.yyy.zzz failed the RPCINFO test. Help message: RPCINFO failure (loopback has succeeded!) (Ping GC, if present, has succeeded) (Ping MSD, if present, has succeeded) (Ping MSD by Name, if present, has succeeded)
Software Installation
Possible causes
• IP address is not an MSD
• LAN/MS Control card did not boot up completely
• LAN/MS Control card firmware needs to be updated
Procedure
1 Determine the MSD IP address from the Local Control Panel on the MSD using the MSD IP item on the Network menu.
2 Verify the IP address of the MSD determined in step 1 is the same as the IP address configured in the MSD Configuration program.
3 If system was configured properly, reboot the LAN/MS Control card and try again.
Error Message: MS @ www.xxx.yyy.zzz failed the SCQ test. Help message: SCQ failure (loopback has succeeded!) (Ping GC, if present, has succeeded) (Ping MSD, if present, has succeeded) (Ping MSD by Name, if present, has succeeded) (RPCTest has succeeded)
Cause
When the SCQ test fails, it usually means the SICL I/O libraries are not properly installed and configured.
Solution
Reinstall and configure SICL I/O libraries.
171

Troubleshooting
Typical PCS Information in MSDCHEM.INI for the 5973N
172
[HP DDE Library]
ExecFocus=0
[PCS]
USEPOLL=YES
Devices=1,2
Applications=HP-GCMS
Instruments=1,2,4
mscustrpt=1
Path=C:\MSDchem
links=1
link1=ARPALAN,9100
CORELOWMEM=0
Device1=1,0,68GC,IP:156.140.169.95
Device2=1,0,68GC,IP:156.140.169.41
[PCS,1]
_autopath$=C:\MSDchem\MSEXE\
_exepath$=C:\MSDchem\MSEXE\
_helppath$=C:\MSDchem\MSEXE\
_datapath$=C:\MSDchem\1\DATA\
_methpath$=C:\MSDchem\1\METHODS\
_seqpath$=C:\MSDchem\1\SEQUENCE\
Start=no
Devices=
InstType=SMARTCARD
MS_TYPE=4
INLET_GC=3
MS_ID=1
GC_ID=
ALS_ID=
ALS_TYPE=0
MSCONNECTION=0
INSTNAME=Instrument #1
Offline=0
MS_EI=1
MS_CI=1
MS_HED=0
Application=2
Software Installation

Troubleshooting
Software Installation
MS_DCPOL=0
Program=C:\MSDchem\MSEXE\MSTOP.EXE
_HELPFILE$=HPMSD.CHM
_INSTPATH$=C:\MSDchem\1\
_DATAFILE$=EVALDEMO.D
_METHFILE$=DEFAULT.M
_SEQFILE$=DEFAULT.S
_LIBPATH$=C:\DATABASE\
_TUNEPATH$=C:\MSDchem\1\5973N\
[PCS_32]
Device1=1,SMARTCARD
Link1=lan[156.140.168.94]:hpib,0
Device2=2,SMARTCARD
Link2=lan[156.140.169.40]:hpib,0
[PCS,2]
Devices=1
InstType=SMARTCARD
MS_TYPE=4
INLET_GC=0
MS_ID=1
GC_ID=1
ALS_ID=
ALS_TYPE=0
start=no
MSCONNECTION=0
INSTNAME=Instrument #2
Offline=1
MS_EI=1
MS_CI=1
MS_HED=0
Application=5
MS_DCPOL=0
_HELPPATH$=C:\MSDchem\MSEXE\
_AUTOPATH$=C:\MSDchem\MSEXE\
_EXEPATH$=C:\MSDchem\MSEXE\
Program=C:\MSDchem\MSEXE\MSTOP.EXE
_HELPFILE$=HPMSD.CHM
_INSTPATH$=C:\MSDchem\2\
_DATAPATH$=C:\MSDchem\2\DATA\
_DATAFILE$=EVALDEMO.D
173
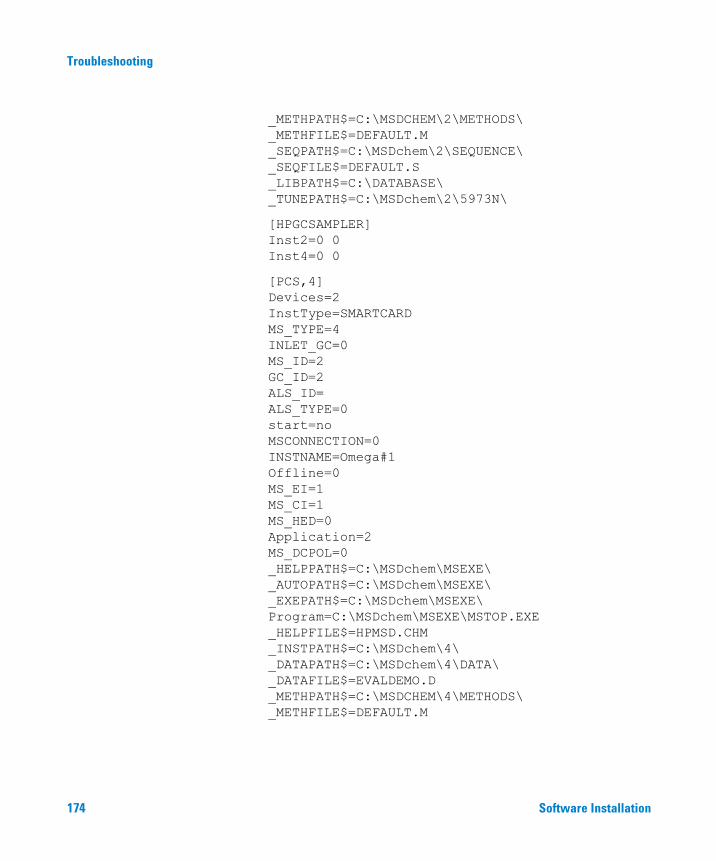
174
Troubleshooting
_METHPATH$=C:\MSDCHEM\2\METHODS\
_METHFILE$=DEFAULT.M
_SEQPATH$=C:\MSDchem\2\SEQUENCE\
_SEQFILE$=DEFAULT.S
_LIBPATH$=C:\DATABASE\
_TUNEPATH$=C:\MSDchem\2\5973N\
[HPGCSAMPLER]
Inst2=0 0
Inst4=0 0
[PCS,4]
Devices=2
InstType=SMARTCARD
MS_TYPE=4
INLET_GC=0
MS_ID=2
GC_ID=2
ALS_ID=
ALS_TYPE=0
start=no
MSCONNECTION=0
INSTNAME=Omega#1
Offline=0
MS_EI=1
MS_CI=1
MS_HED=0
Application=2
MS_DCPOL=0
_HELPPATH$=C:\MSDchem\MSEXE\
_AUTOPATH$=C:\MSDchem\MSEXE\
_EXEPATH$=C:\MSDchem\MSEXE\
Program=C:\MSDchem\MSEXE\MSTOP.EXE
_HELPFILE$=HPMSD.CHM
_INSTPATH$=C:\MSDchem\4\
_DATAPATH$=C:\MSDchem\4\DATA\
_DATAFILE$=EVALDEMO.D
_METHPATH$=C:\MSDCHEM\4\METHODS\
_METHFILE$=DEFAULT.M
Software Installation

Troubleshooting
Software Installation
_SEQPATH$=C:\MSDchem\4\SEQUENCE\
_SEQFILE$=DEFAULT.S
_LIBPATH$=C:\DATABASE\
_TUNEPATH$=C:\MSDchem\4\5973N\
175
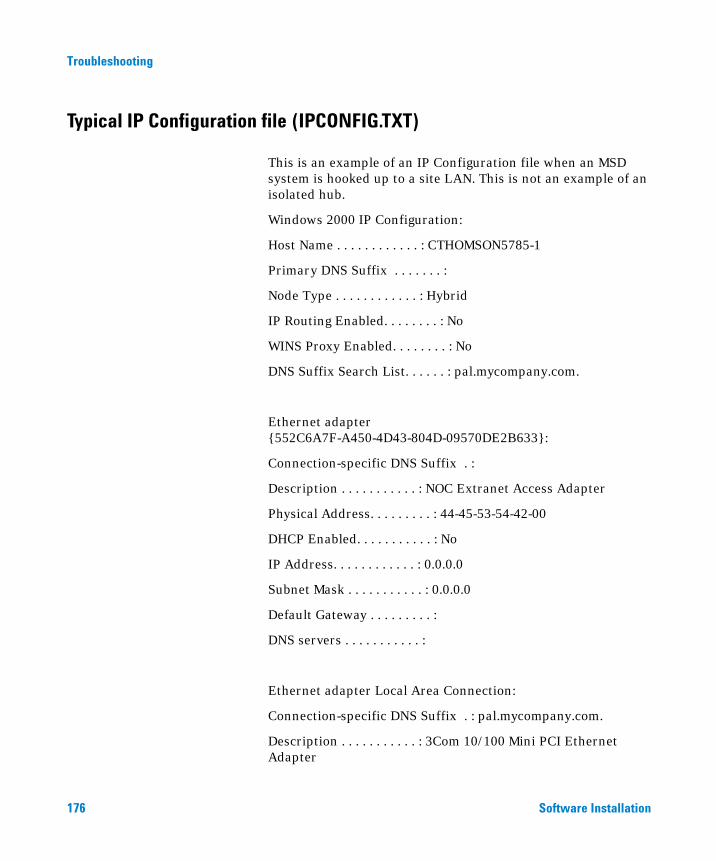
Troubleshooting
Typical IP Configuration file (IPCONFIG.TXT)
176
This is an example of an IP Configuration file when an MSD system is hooked up to a site LAN. This is not an example of an isolated hub.
Windows 2000 IP Configuration:
Host Name . . . . . . . . . . . . : CTHOMSON5785-1
Primary DNS Suffix . . . . . . . :
Node Type . . . . . . . . . . . . : Hybrid
IP Routing Enabled. . . . . . . . : No
WINS Proxy Enabled. . . . . . . . : No
DNS Suffix Search List. . . . . . : pal.mycompany.com.
Ethernet adapter {552C6A7F-A450-4D43-804D-09570DE2B633}:
Connection-specific DNS Suffix . :
Description . . . . . . . . . . . : NOC Extranet Access Adapter
Physical Address. . . . . . . . . : 44-45-53-54-42-00
DHCP Enabled. . . . . . . . . . . : No
IP Address. . . . . . . . . . . . : 0.0.0.0
Subnet Mask . . . . . . . . . . . : 0.0.0.0
Default Gateway . . . . . . . . . :
DNS servers . . . . . . . . . . . :
Ethernet adapter Local Area Connection:
Connection-specific DNS Suffix . : pal.mycompany.com.
Description . . . . . . . . . . . : 3Com 10/100 Mini PCI Ethernet Adapter
Software Installation

Troubleshooting
Software Installation
Physical Address. . . . . . . . . : 00-04-75-17-14-80
DHCP Enabled. . . . . . . . . . . : Yes
Autoconfiguration Enabled . . . . : Yes
IP Address. . . . . . . . . . . . : 156.140.169.203
Subnet Mask . . . . . . . . . . . : 255.255.252.0
Default Gateway . . . . . . . . . : 156.140.168.1
DHCP Server . . . . . . . . . . . : 156.140.162.33
DNS Servers . . . . . . . . . . . : 156.140.162.33
156.140.162.34
Primary WINS Server . . . . . . . : 130.27.152.33
Secondary WINS Server . . . . . . : 130.29.152.23
Lease Obtained. . . . . . . . . . : Tuesday, August 07, 2001
Lease Expires . . . . . . . . . . : Wednesday, August 08, 2001
177

178
Troubleshooting
Software Installation

Glossary
ALS (Automatic Liquid Sampler)A device which transfers a volume of sample from a vial into the inlet of an instrument such as a gas chromatograph for analysis.
BootpBootstrap protocol. A TCP/IP network protocol. Agilent Bootp service for the MSD ChemStation provides IP addresses as instruments are powered on. When a GC with a JetDirect card is powered up, it sends out a request for an address and keeps requesting until Bootp service responds. It keeps the information until it powered off. Bootp maps hardware addresses to software addresses. When an MSD with a LAN/MS control card is powered up, it sends out a request for an address and keeps requesting until Bootp service responds. It keeps the information until it powered off.
DNSDomain Name System. DNS servers use a database to map host names to IP addresses.
DHCPDynamic Host Configuration Protocol. Provides dynamic configuration of IP addresses and related information. DHCP provides safe, reliable, and simple TCP/IP network configuration, prevents address conflicts, and helps conserve the use of IP addresses through centralized management of address allocation.
GatewayDescribes a system connected to multiple physical TCP/IP networks, capable of routing or delivering IP packets between them. A gateway translates between different transport protocols or data formats and is generally added to a network primarily for its translation ability. Also referred to as an IP router. See also router, IP address.
Software Installation
GCGas Chromatograph.
HostAny device attached to the network useing TCP/IP.
Host NameName given to a device connected to the network. The name is limited to 15 characters.
HubA network interconnectivity device used to connect media segments.
IP AddressSoftware address used to identify a device connected to a network using TCP/IP.
JetDirect cardThe HP JetDirect Print Server Card which is used to connect the 6890 Series GC to a network or hub instead of directly to a computer.
LAN/MS Control CardA proprietary network card that allows communication between the MSD and the ChemStation computer.
local area network (LAN)A group of computers and other devices dispersed over a relatively limited area and connected by a communications link that enables any device to interact with any other on the network.
179

Glossary
loopbackA troubleshooting technique where a device on a LAN tests its own connection to verify its functionality (pings itself). See ping.
MACMedia Access Control. A layer in the network architecture which deals with network access and collision detection. See also MAC Address.
MAC AddressA unique 12-digit hex address assigned by the manufacturer to every piece of hardware connected to an Ethernet network. MAC addresses (which are physical addresses) are used for mapping in TCP/IP network communication.
MIOModular input/output.
MIO Jet Direct CardSee JetDirect Card.
MSDMass Selective Detector.
Network Card, Network Interface CardAn expansion card or other device used to connect a computer to a local area network (LAN). Also called a network adapter; network adapter card; adapter card; network interface card (NIC).
NIC.See Network Card.
PingA command used to verify communication to one or more remote hosts.
180
Remote Procedure Call (RPC)A message-passing facility that allows a distributed application to call services available on various machines in a network. Used during remote administration of computers.
RouterHelps LANs achieve interoperability and connectivity and can link LANs that have different network topologies (such as Ethernet and Token Ring). Routers match packet headers to a LAN segment and choose the best path for the packet, optimizing network performance.
SCQSmart Card Query. A test of communication between the ChemStation computer and the LAN/MS control card in the MSD.
SICLStandard Instrument Control Library. A proprietary utility used to configure I/O interfaces. Supplied on the MSD ChemStation CD-ROM.
SmartCardIIIA proprietary network card that allows communication between the MSD and the ChemStation computer. See LAN/MS Control Card.
Subnet MaskA 32-bit value that allows the recipient of IP packets to distinguish the network ID portion of the IP address from the host ID. Partitions the network into groups called segments. It is the way a router knows if a packet sent stays on the local network or needs to be passed to a different network. If your IP address is 15.25.25.110 and your subnet mask is 255.255.255.0, then your Network ID is 15.25.25 and the host ID is 110. To send a packet to 15.25.20.111, the packet must be routed to the subnet 15.25.20. The maximum number of hosts on this subnet is 254, because only 1-254 are valid addresses. 0 and 255 are reserved.
Software Installation
Glossary
TCP/IPTransmission Control Protocol/Internet Protocol. A set of networking protocols which provide communications across interconnected networks made up of computers with diverse hardware architectures and various operating systems. TCP/IP includes standards for how computers communicate and conventions for connecting networks and routing traffic.
WINSWindows Internet Name Service. A name resolution service which resolves Windows NT networking computer names to IP addresses in a routed environment. A WINS server handles name registrations, queries, and releases. See also IP address.
Software Installation
181
Glossary
182
Software Installation

Agilent Technologies
© Agilent Technologies, Inc.
Printed in USA, August 2003
G1701-90047
Top Related