ZoneMinder Documentation - Read the Docs · ZoneMinder Documentation ... dev libswscale-dev...
41
ZoneMinder Documentation Release 1.27.0 https://github.com/ZoneMinder/ZoneMinder/graphs/contributors December 19, 2015
-
Upload
truongkhuong -
Category
Documents
-
view
353 -
download
0
Transcript of ZoneMinder Documentation - Read the Docs · ZoneMinder Documentation ... dev libswscale-dev...
ZoneMinder DocumentationRelease 1.27.0
https://github.com/ZoneMinder/ZoneMinder/graphs/contributors
December 19, 2015

Contents
1 Installation Guide 11.1 Ubuntu . . . . . . . . . . . . . . . . . . . . . . . . . . . . . . . . . . . . . . . . . . . . . . . . . . 11.2 Debian . . . . . . . . . . . . . . . . . . . . . . . . . . . . . . . . . . . . . . . . . . . . . . . . . . 21.3 Fedora . . . . . . . . . . . . . . . . . . . . . . . . . . . . . . . . . . . . . . . . . . . . . . . . . . 21.4 Centos . . . . . . . . . . . . . . . . . . . . . . . . . . . . . . . . . . . . . . . . . . . . . . . . . . 2
2 User Guide 32.1 Introduction . . . . . . . . . . . . . . . . . . . . . . . . . . . . . . . . . . . . . . . . . . . . . . . 32.2 Components . . . . . . . . . . . . . . . . . . . . . . . . . . . . . . . . . . . . . . . . . . . . . . . 32.3 Getting Started . . . . . . . . . . . . . . . . . . . . . . . . . . . . . . . . . . . . . . . . . . . . . . 62.4 Defining Monitors . . . . . . . . . . . . . . . . . . . . . . . . . . . . . . . . . . . . . . . . . . . . 72.5 Defining Zones . . . . . . . . . . . . . . . . . . . . . . . . . . . . . . . . . . . . . . . . . . . . . . 132.6 Viewing Monitors . . . . . . . . . . . . . . . . . . . . . . . . . . . . . . . . . . . . . . . . . . . . 162.7 Controlling Monitors . . . . . . . . . . . . . . . . . . . . . . . . . . . . . . . . . . . . . . . . . . . 172.8 Filtering Events . . . . . . . . . . . . . . . . . . . . . . . . . . . . . . . . . . . . . . . . . . . . . 182.9 Viewing Events . . . . . . . . . . . . . . . . . . . . . . . . . . . . . . . . . . . . . . . . . . . . . . 202.10 Options . . . . . . . . . . . . . . . . . . . . . . . . . . . . . . . . . . . . . . . . . . . . . . . . . . 212.11 Camera Control . . . . . . . . . . . . . . . . . . . . . . . . . . . . . . . . . . . . . . . . . . . . . 222.12 Mobile Devices . . . . . . . . . . . . . . . . . . . . . . . . . . . . . . . . . . . . . . . . . . . . . . 262.13 Logging . . . . . . . . . . . . . . . . . . . . . . . . . . . . . . . . . . . . . . . . . . . . . . . . . . 27
3 API 313.1 Overview . . . . . . . . . . . . . . . . . . . . . . . . . . . . . . . . . . . . . . . . . . . . . . . . . 313.2 Examples . . . . . . . . . . . . . . . . . . . . . . . . . . . . . . . . . . . . . . . . . . . . . . . . . 31
4 FAQ 334.1 Why can’t I view all of my monitors in Montage view? . . . . . . . . . . . . . . . . . . . . . . . . . 334.2 How do I enable ZoneMinder’s security? . . . . . . . . . . . . . . . . . . . . . . . . . . . . . . . . 334.3 To Manage Users . . . . . . . . . . . . . . . . . . . . . . . . . . . . . . . . . . . . . . . . . . . . . 334.4 The “Zones” view for a Monitor is blank (I can’t see / setup a Zone) . . . . . . . . . . . . . . . . . . 334.5 How do the 3 AlarmCheckMethods interact? . . . . . . . . . . . . . . . . . . . . . . . . . . . . . . 33
5 Contributing 35
6 Indices and tables 37
i

ii
CHAPTER 1
Installation Guide
Contents:
1.1 Ubuntu
1.1.1 PPA Install
Follow these instructions to install current release version on Ubuntu 13.04 or under.:
sudo apt-add-repository ppa:iconnor/zoneminder
Or Ubuntu 14.10 you will need to install the Snapshot PPA from the master branch instead.:
sudo apt-add-repository ppa:iconnor/zoneminder-master
Once you have updated the repository then update and install the package.:
sudo apt-get update sudo apt-get install zoneminder
1.1.2 Build Package From Source
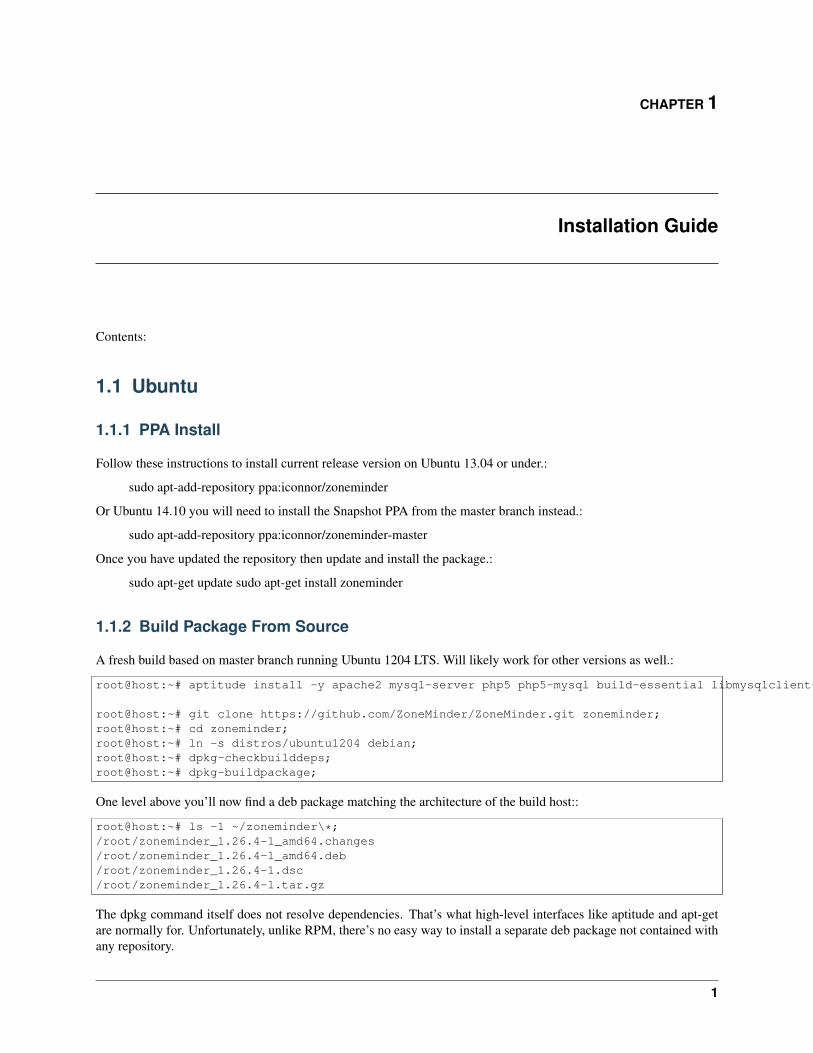
A fresh build based on master branch running Ubuntu 1204 LTS. Will likely work for other versions as well.:
root@host:~# aptitude install -y apache2 mysql-server php5 php5-mysql build-essential libmysqlclient-dev libssl-dev libbz2-dev libpcre3-dev libdbi-perl libarchive-zip-perl libdate-manip-perl libdevice-serialport-perl libmime-perl libpcre3 libwww-perl libdbd-mysql-perl libsys-mmap-perl yasm automake autoconf libjpeg8-dev libjpeg8 apache2-mpm-prefork libapache2-mod-php5 php5-cli libphp-serialization-perl libgnutls-dev libjpeg8-dev libavcodec-dev libavformat-dev libswscale-dev libavutil-dev libv4l-dev libtool ffmpeg libnetpbm10-dev libavdevice-dev libmime-lite-perl dh-autoreconf dpatch;
root@host:~# git clone https://github.com/ZoneMinder/ZoneMinder.git zoneminder;root@host:~# cd zoneminder;root@host:~# ln -s distros/ubuntu1204 debian;root@host:~# dpkg-checkbuilddeps;root@host:~# dpkg-buildpackage;
One level above you’ll now find a deb package matching the architecture of the build host::
root@host:~# ls -1 ~/zoneminder\*;/root/zoneminder_1.26.4-1_amd64.changes/root/zoneminder_1.26.4-1_amd64.deb/root/zoneminder_1.26.4-1.dsc/root/zoneminder_1.26.4-1.tar.gz
The dpkg command itself does not resolve dependencies. That’s what high-level interfaces like aptitude and apt-getare normally for. Unfortunately, unlike RPM, there’s no easy way to install a separate deb package not contained withany repository.
1
ZoneMinder Documentation, Release 1.27.0
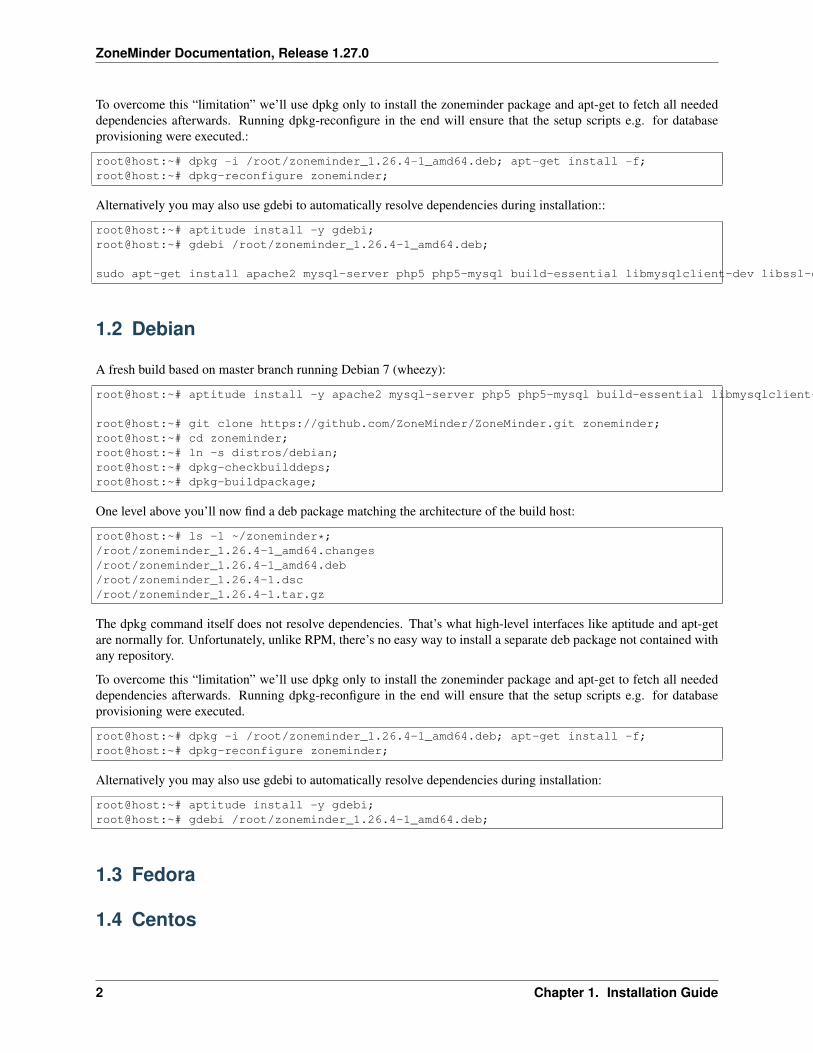
To overcome this “limitation” we’ll use dpkg only to install the zoneminder package and apt-get to fetch all neededdependencies afterwards. Running dpkg-reconfigure in the end will ensure that the setup scripts e.g. for databaseprovisioning were executed.:
root@host:~# dpkg -i /root/zoneminder_1.26.4-1_amd64.deb; apt-get install -f;root@host:~# dpkg-reconfigure zoneminder;
Alternatively you may also use gdebi to automatically resolve dependencies during installation::
root@host:~# aptitude install -y gdebi;root@host:~# gdebi /root/zoneminder_1.26.4-1_amd64.deb;
sudo apt-get install apache2 mysql-server php5 php5-mysql build-essential libmysqlclient-dev libssl-dev libbz2-dev libpcre3-dev libdbi-perl libarchive-zip-perl libdate-manip-perl libdevice-serialport-perl libmime-perl libpcre3 libwww-perl libdbd-mysql-perl libsys-mmap-perl yasm automake autoconf libjpeg-turbo8-dev libjpeg-turbo8 apache2-mpm-prefork libapache2-mod-php5 php5-cli
1.2 Debian
A fresh build based on master branch running Debian 7 (wheezy):
root@host:~# aptitude install -y apache2 mysql-server php5 php5-mysql build-essential libmysqlclient-dev libssl-dev libbz2-dev libpcre3-dev libdbi-perl libarchive-zip-perl libdate-manip-perl libdevice-serialport-perl libmime-perl libpcre3 libwww-perl libdbd-mysql-perl libsys-mmap-perl yasm automake autoconf libjpeg8-dev libjpeg8 apache2-mpm-prefork libapache2-mod-php5 php5-cli libphp-serialization-perl libgnutls-dev libjpeg8-dev libavcodec-dev libavformat-dev libswscale-dev libavutil-dev libv4l-dev libtool ffmpeg libnetpbm10-dev libavdevice-dev libmime-lite-perl dh-autoreconf dpatch;
root@host:~# git clone https://github.com/ZoneMinder/ZoneMinder.git zoneminder;root@host:~# cd zoneminder;root@host:~# ln -s distros/debian;root@host:~# dpkg-checkbuilddeps;root@host:~# dpkg-buildpackage;
One level above you’ll now find a deb package matching the architecture of the build host:
root@host:~# ls -1 ~/zoneminder*;/root/zoneminder_1.26.4-1_amd64.changes/root/zoneminder_1.26.4-1_amd64.deb/root/zoneminder_1.26.4-1.dsc/root/zoneminder_1.26.4-1.tar.gz
The dpkg command itself does not resolve dependencies. That’s what high-level interfaces like aptitude and apt-getare normally for. Unfortunately, unlike RPM, there’s no easy way to install a separate deb package not contained withany repository.
To overcome this “limitation” we’ll use dpkg only to install the zoneminder package and apt-get to fetch all neededdependencies afterwards. Running dpkg-reconfigure in the end will ensure that the setup scripts e.g. for databaseprovisioning were executed.
root@host:~# dpkg -i /root/zoneminder_1.26.4-1_amd64.deb; apt-get install -f;root@host:~# dpkg-reconfigure zoneminder;
Alternatively you may also use gdebi to automatically resolve dependencies during installation:
root@host:~# aptitude install -y gdebi;root@host:~# gdebi /root/zoneminder_1.26.4-1_amd64.deb;
1.3 Fedora
1.4 Centos
2 Chapter 1. Installation Guide
CHAPTER 2
User Guide
2.1 Introduction
Welcome to ZoneMinder, the all-in-one Linux GPL’d security camera solution.
Most commercial “security systems” are designed as a monitoring system that also records. Recording quality canvary from bad to unusable, locating the relevant video can range from challenging to impractical, and exporting canoften only be done with the manual present. ZoneMinder was designed primarily to record, and allow easy searchesand exporting. Recordings are of the best possible quality, easy to filter and find, and simple to export using any systemwith a web browser. It also monitors.
ZoneMinder is designed around a series of independent components that only function when necessary limiting anywasted resource and maximising the efficiency of your machine. A fairly ancient Pentium II PC should be able totrack one camera per device at up to 25 frames per second with this dropping by half approximately for each additionalcamera on the same device. Additional cameras on other devices do not interact so can maintain this frame rate. Evenmonitoring several cameras still will not overload the CPU as frame processing is designed to synchronise with captureand not stall it.
As well as being fast ZoneMinder is designed to be friendly and even more than that, actually useful. As well as thefast video interface core it also comes with a user friendly and comprehensive PHP based web interface allowing youto control and monitor your cameras from home, at work, on the road, or even a web enabled cell phone. It supportsvariable web capabilities based on available bandwidth. The web interface also allows you to view events that yourcameras have captured and archive them or review them time and again, or delete the ones you no longer wish to keep.The web pages directly interact with the core daemons ensuring full co-operation at all times. ZoneMinder can evenbe installed as a system service ensuring it is right there if your computer has to reboot for any reason.
The core of ZoneMinder is the capture and analysis of images and there is a highly configurable set of parametersthat allow you to ensure that you can eliminate false positives whilst ensuring that anything you don’t want to misswill be captured and saved. ZoneMinder allows you to define a set of ‘zones’ for each camera of varying sensitivityand functionality. This allows you to eliminate regions that you don’t wish to track or define areas that will alarm ifvarious thresholds are exceeded in conjunction with other zones.
ZoneMinder is free, but if you do find it useful then please feel free to visit http://www.zoneminder.com/donate.htmland help to fund future improvements to ZoneMinder.
2.2 Components
ZoneMinder is not a single monolithic application but is formed from several components. These components primar-ily include executable compiled binaries which do the main video processing work, perl scripts which usually performhelper and/or external interface tasks and php web scripts which are used for the web interface.
3
ZoneMinder Documentation, Release 1.27.0
A brief description of each of the principle components follows.
2.2.1 Binaries
zmc This is the ZoneMinder Capture daemon. This binary’s job is to sit on a video device and suck frames off it asfast as possible, this should run at more or less constant speed.
zma This is the ZoneMinder Analysis daemon. This is the component that goes through the captured frames andchecks them for motion which might generate an alarm or event. It generally keeps up with the Capture daemonbut if very busy may skip some frames to prevent it falling behind.
zmf This is the ZoneMinder Frame daemon. This is an optional daemon that can run in concert with the Analysisdaemon and whose function it is to actually write captured frames to disk. This frees up the Analysis daemon todo more analysis (!) and so keep up with the Capture daemon better. If it isn’t running or dies then the Analysisdaemon just writes them itself.
zms This is the ZoneMinder Streaming server. The web interface connects with this to get real-time or historicalstreamed images. It runs only when a live monitor stream or event stream is actually being viewed and dieswhen the event finishes or the associate web page is closed. If you find you have several zms processes runningwhen nothing is being viewed then it is likely you need a patch for apache (see the Troubleshooting section). Anon-parsed header version of zms, called nph-zms, is also installed and may be used instead depending on yourweb server configuration.
zmu This is the ZoneMinder Utility. It’s basically a handy command line interface to several useful functions. It’snot really meant to be used by anyone except the web page (there’s only limited ‘help’ in it so far) but can be ifnecessary, especially for debugging video problems.
2.2.2 PHP
As well as this there are the web PHP files in the web directory. Currently these consist of 4 possible skins.
Classic Original ZoneMinder skin
Flat An updated version of classic skin, retaining the same layout with a more modern style
XMl Used by eyeZM as an interfacing skin
Mobile [Check status and purpose]
2.2.3 Perl
Finally some perl scripts in the scripts directory. These scripts all have some configuration at the top of the files whichshould be viewed and amended if necessary and are as follows.
zmpkg.pl This is the ZoneMinder Package Control script. This is used by the web interface and service scripts tocontrol the execution of the system as a whole.
zmdc.pl This is the ZoneMinder Daemon Control script. This is used by the web interface and the zmpkg.pl script tocontrol and maintain the execution of the capture and analysis daemons, amongst others. You should not needto run this script yourself.
zmfilter.pl This script controls the execution of saved filters and will be started and stopped by the web interfacebased on whether there are filters that have been defined to be autonomous. This script is also responsible forthe automatic uploading of events to a 3rd party server.
4 Chapter 2. User Guide
ZoneMinder Documentation, Release 1.27.0
zmaudit.pl This script is used to check the consistency of the event file system and database. It can delete orphanedevents, i.e. ones that appear in one location and not the other as well as checking that all the various event relatedtables are in line. It can be run interactively or in batch mode either from the command line or a cron job orsimilar. In the zmconfig.pl there is an option to specify fast event deletes where the web interface only deletesthe event entry from the database itself. If this is set then it is this script that tidies up the rest.
zmwatch.pl This is a simple script purely designed to keep an eye on the capture daemons and restart them if theylockup. It has been known for sync problems in the video drivers to cause this so this script makes sure thatnothing important gets missed.
zmupdate.pl Currently this script is responsible for checking whether a new version of ZoneMinder is available andother miscellaneous actions related to upgrades and migrations. It is also intended to be a ‘one stop shop’ forany upgrades and will execute everything necessary to update your installation to a new version.
zmvideo.pl This script is used from the web interface to generate video files in various formats in a common way.You can also use it from the command line in certain circumstances but this is not usually necessary.
zmx10.pl This is an optional script that can be used to initiate and monitor X10 Home Automation style events andinterface with an alarm system either by the generation of X10 signals on ZoneMinder events or by initiatingZoneMinder monitoring and capture on receipt of X10 signals from elsewhere, for instance the triggering ofan X10 PIR. For example I have several cameras that don’t do motion detection until I arm my alarm systemwhereupon they switch to active mode when an X10 signal is generated by the alarm system and received byZoneMinder.
zmtrigger.pl This is an optional script that is a more generic solution to external triggering of alarms. It can handleexternal connections via either internet socket, unix socket or file/device interfaces. You can either use it ‘as is’if you can interface with the existing format, or override connections and channels to customise it to your needs.The format of triggers used by zmtrigger.pl is as follows “<id>|<action>|<score>|<cause>|<text>|<showtext>”where
• ‘id’ is the id number or name of the ZM monitor.
• ‘action’ is ‘on’, ‘off’, ‘cancel’ or ‘show’ where ‘on’ forces an alarm condition on, ‘off’ forces an alarmcondition off and ‘cancel’ negates the previous ‘on’ or ‘off’. The ‘show’ action merely updates someauxiliary text which can optionally be displayed in the images captured by the monitor. Ordinarily youwould use ‘on’ and ‘cancel’, ‘off’ would tend to be used to suppress motion based events. Additionally‘on’ and ‘off’ can take an additional time offset, e.g. on+20 which automatically ‘cancel’s the previousaction after that number of seconds.
• ‘score’ is the score given to the alarm, usually to indicate it’s importance. For ‘on’ triggers it should benon-zero, otherwise it should be zero.
• ‘cause’ is a 32 char max string indicating the reason for, or source of the alarm e.g. ‘Relay 1 open’. Thisis saved in the ‘Cause’ field of the event. Ignored for ‘off’ or ‘cancel’ messages.
• ‘text’ is a 256 char max additional info field, which is saved in the ‘Description’ field of an event. Ignoredfor ‘off’ or ‘cancel’ messages.
• ‘showtext’ is up to 32 characters of text that can be displayed in the timestamp that is added to images. The‘show’ action is designed to update this text without affecting alarms but the text is updated, if present, forany of the actions. This is designed to allow external input to appear on the images captured, for instancetemperature or personnel identity etc.
Note that multiple messages can be sent at once and should be LF or CRLF delimited. This script is notnecessarily intended to be a solution in itself, but is intended to be used as ‘glue’ to help ZoneMinder interfacewith other systems. It will almost certainly require some customisation before you can make any use of it. If allyou want to do is generate alarms from external sources then using the ZoneMinder::SharedMem perl moduleis likely to be easier.
2.2. Components 5
ZoneMinder Documentation, Release 1.27.0
zmcamtool.pl This optional script is new for the upcoming 1.27 release of ZoneMinder. It is intended to make it easyto do the following: bring in new ptz controls and camera presets, convert existing monitors into presets, andexport custom ptz controls and presets. For the initial release, this script is not integrated into the UI and mustbe called from the command line. Type ‘’zmcamtool.pl –help” from the command line to get an explanation ofthe different arguments one can pass to the script.
zmcontrol-*.pl These are a set of example scripts which can be used to control Pan/Tilt/Zoom class cameras. Eachscript converts a set of standard parameters used for camera control into the actual protocol commands sent tothe camera. If you are using a camera control protocol that is not in the shipped list then you will have to createa similar script though it can be created entirely separately from ZoneMinder and does not need to named asthese scripts are. Although the scripts are used to action commands originated from the web interface they canalso be used directly or from other programs or scripts, for instance to implement periodic scanning to differentpresets.
zmtrack.pl This script is used to manage the experimental motion tracking feature. It is responsible for detectingthat an alarm is taking place and moving the camera to point to the alarmed location, and then subsequentlyreturning it to a defined standby location. As well as moving the camera it also controls when motion detectionis suspended and restored so that the action of the camera tracking does not trigger endless further alarms whichare not justified.
zm This is the (optional) ZoneMinder init script, see below for details.
Finally, there are also a number of ZoneMinder perl modules included. These are used by the scripts above, but canalso be used by your own or 3rd party scripts. Full documentation for most modules is available in ‘pod’ form via‘perldoc’ but the general purpose of each module is as follows.
ZoneMinder.pm This is a general ZoneMinder container module. It includes the Base.pm, Config.pm Debug.pm,Database.pm, and SharedMem.pm modules described below. It also exports all of their symbols by default. Ifyou use the other modules directly you have request which symbol tags to import.
ZoneMinder/Base.pm This is the base ZoneMinder perl module. It contains only simple data such as version infor-mation. It is included by all other ZoneMinder perl modules
ZoneMinder/Config.pm This module imports the ZoneMinder configuration from the database.
ZoneMinder/Debug.pm This module contains the defined Debug and Error functions etc, that are used by scripts toproduce diagnostic information in a standard format.
ZoneMinder/Database.pm This module contains database access definitions and functions. Currently not a lot is inthis module but it is included as a placeholder for future development.
ZoneMinder/SharedMem.pm This module contains standard shared memory access functions. These can be usedto access the current state of monitors etc as well as issuing commands to the monitors to switch things on andoff. This module effectively provides a ZoneMinder API.
ZoneMinder/ConfigAdmin.pm This module is a specialised module that contains the definition, and other informa-tion, about the various configuration options. It is not intended for use by 3rd parties.
ZoneMinder/Trigger/*.pm These modules contain definitions of trigger channels and connections used by thezmtrigger.pl script. Although they can be used ‘as is’, they are really intended as examples that can be cus-tomised or specialised for different interfaces. Contributed modules for new channels or connections will bewelcomed and included in future versions of ZoneMinder.
2.3 Getting Started
Having followed the Installation Guide for your distribution you should now be able to load the ZoneMinder webfrontend. By default this will be with the Classic skin, below is an example of the page you should now see.
6 Chapter 2. User Guide
ZoneMinder Documentation, Release 1.27.0
To add cameras to the system you need to create a Monitor for each camera. Click ‘Add New Monitor’ to bring up thedialog.
[To be completed, removing tutorial style documentation from wiki documentation and putting first time user guidehere]
2.4 Defining Monitors
To use ZoneMinder properly you need to define at least one Monitor. Essentially, a monitor is associated with a cameraand can continually check it for motion detection and such like.
There are a small number of camera setups that ZoneMinder knows about and which can be accessed by clicking onthe ‘Presets’ link. Selecting one of the presets will fill in the monitor configuration with appropriate values but youwill still need to enter others and confirm the preset settings.
The options are divided into a set of tabs to make it easier to edit. You do not have to ‘save’ to change to different tabso you can make all the changes you require and then click ‘Save’ at the end. The individual options are explained ina little more detail below,
2.4.1 Monitor Tab
Name The name for your monitor. This should be made up of alphanumeric characters (a-z,A-Z,0-9) and hyphen (-)and underscore(_) only. Whitespace is not allowed.
Source Type This determines whether the camera is a local one attached to a physical video or USB port on yourmachine, a remote network camera or an image source that is represented by a file (for instance periodicallydownloaded from a alternate location). Choosing one or the other affects which set of options are shown in theSource tab.
Function This essentially defines what the monitor is doing. This can be one of the following;
None – The monitor is currently disabled. No streams can be viewed or events generated. Nothing isrecorded. Monitor – The monitor is only available for live streaming. No image analysis is done so noalarms or events will be generated, and nothing will be recorded. Modect – or MOtion DEteCTtion.All captured images will be analysed and events generated with recorded video where motion isdetected. Record – The monitor will be continuously recorded. Events of a fixed-length will begenerated regardless of motion, analogous to a conventional time-lapse video recorder. No motiondetection takes place in this mode. Mocord – The monitor will be continuously recorded, with anymotion being highlighted within those events. Nodect – or No DEteCTtion. This is a special modedesigned to be used with external triggers. In Nodect no motion detection takes place but events arerecorded if external triggers require it.
Generally speaking it is best to choose ‘Monitor’ as an initial setting here.
Enabled The enabled field indicates whether the monitor should be started in an active mode or in a more passivestate. You will nearly always want to check this box, the only exceptions being when you want the camera to beenabled or disabled by external triggers or scripts. If not enabled then the monitor will not create any events inresponse to motion or any other triggers.
Linked Monitors This field allows you to select other monitors on your system that act as triggers for this monitor. Soif you have a camera covering one aspect of your property you can force all cameras to record while that cameradetects motion or other events. You can either directly enter a comma separated list of monitor ids or click on‘Select’ to choose a selection. Be very careful not to create circular dependencies with this feature however youwill have infinitely persisting alarms which is almost certainly not what you want! To unlink monitors you canctrl-click.
2.4. Defining Monitors 7
ZoneMinder Documentation, Release 1.27.0
Maximum FPS On some occasions you may have one or more cameras capable of high capture rates but find that yougenerally do not require this performance at all times and would prefer to lighten the load on your server. Thisoption permits you to limit the maximum capture rate to a specified value. This may allow you to have morecameras supported on your system by reducing the CPU load or to allocate video bandwidth unevenly betweencameras sharing the same video device. This value is only a rough guide and the lower the value you set theless close the actual FPS may approach it especially on shared devices where it can be difficult to synchronisetwo or more different capture rates precisely. This option controls the maximum FPS in the circumstance whereno alarm is occurring only. (Note for IP cameras: ZoneMinder has no way to set or limit the mjpeg stream thecamera passes, some cams you can set this through the url string, others do not. So if you’re using mjpeg feedsyou must NOT throttle here at the server end, only the cam end. If you want to use this feature, the server tothrottle, then you MUST use jpeg instead of mjpeg method to get picture from the camera)
Alarm Maximum FPS If you have specified a Maximum FPS it may be that you don’t want this limitation to applywhen your monitor is recording motion or other event. This setting allows you to override the Maximum FPSvalue if this circumstance occurs. As with the Maximum FPS setting leaving this blank implies no limit so ifyou have set a maximum fps in the previous option then when an alarm occurs this limit would be ignored andZoneMinder would capture as fast as possible for the duration of the alarm, returning to the limited value afterthe alarm has concluded. Equally you could set this to the same, or higher (or even lower) value than MaximumFPS for more precise control over the capture rate in the event of an alarm.
Reference Image Blend %ge Each analysed image in ZoneMinder is a composite of previous images and is formedby applying the current image as a certain percentage of the previous reference image. Thus, if we entered thevalue of 10 here, each image’s part in the reference image will diminish by a factor of 0.9 each time round. So atypical reference image will be 10% the previous image, 9% the one before that and then 8.1%, 7.2%, 6.5% andso on of the rest of the way. An image will effectively vanish around 25 images later than when it was added.This blend value is what is specified here and if higher will make slower progressing events less detectable asthe reference image would change more quickly. Similarly events will be deemed to be over much sooner asthe reference image adapts to the new images more quickly. In signal processing terms the higher this value thesteeper the event attack and decay of the signal. It depends on your particular requirements what the appropriatevalue would be for you but start with 10 here and adjust it (usually down) later if necessary.
Triggers This small section lets you select which triggers will apply if the run mode has been set to ‘triggered’ above.The most common trigger is X10 and this will appear here if you indicated that your system supported it duringinstallation. Only X10 is supported as a shipped trigger with ZoneMinder at present but it is possible that othertriggers will become available as necessary. You can also just use ‘cron’ jobs or other mechanisms to actuallycontrol the camera and keep them completely outside of the ZoneMinder settings. The zmtrigger.pl script is alsoavailable to implement custom external triggering.
2.4.2 Source Tab
FFmpeg
Source Path Use this field to enter the full URL of the stream or file. Look in Supported Hardware > NetworkCameras section, how to obtain these strings that may apply to your camera. RTSP streams may be specifiedhere.
Source Colours Specify the amount of colours in the captured image. Unlike with local cameras changing this hasno controlling effect on the remote camera itself so ensure that your camera is actually capturing to this palettebeforehand.
Capture Width/Height Make sure you enter here the same values as they are in the remote camera’s internal setting.
Keep aspect ratio As per local devices.
Orientation As per local devices.
8 Chapter 2. User Guide
ZoneMinder Documentation, Release 1.27.0
LibVLC
cURL
Local
Device Path/Channel Enter the full path to the device file that your camera is attached to, e.g. /dev/video0. Somevideo devices, e.g. BTTV cards support multiple cameras on one device so in this case enter the channelnumber in the Channel box or leave it at zero if you’re using a USB camera or one with just one channel. Lookin Supported Hardware section, how to see if your capture card or USB webcam is supported or not, and whatextra settings you may have to do, to make it work.
Device Format Enter the video format of the video stream. This is defined in various system files (e.g./usr/include/linux/videodev.h) but the two most common are 0 for PAL and 1 for NTSC.
Capture Palette Finally for the video part of the configuration enter the colour depth. ZoneMinder supports a handfulof the most common palettes, so choose one here. If in doubt try grey first, and then 24 bit colour. If neither ofthese work very well then YUV420P or one of the others probably will. There is a slight performance penaltywhen using palettes other than grey or 24 bit colour as an internal conversion is involved. These other formatsare intended to be supported natively in a future version but for now if you have the choice choose one of greyor 24 bit colour.
Capture Width/Height The dimensions of the video stream your camera will supply. If your camera supports severaljust enter the one you’ll want to use for this application, you can always change it later. However I would recom-mend starting with no larger than 320x240 or 384x288 and then perhaps increasing and seeing how performanceis affected. This size should be adequate in most cases. Some cameras are quite choosy about the sizes you canuse here so unusual sizes such as 197x333 should be avoided initially.
Keep aspect ratio When typing in the dimensions of monitors you can click this checkbox to ensure that the widthstays in the correct ratio to the height, or vice versa. It allows height to be calculated automatically from width(or vice versa) according to preset aspect ratio. This is preset to 4:3 but can be amended globally via the Options->Config->ZM_DEFAULT_ASPECT_RATIO setting. Aside from 4:3 which is the usual for network and analogcameras another common setting is 11:9 for CIF (352x288) based sources.
Orientation If your camera is mounted upside down or at right angles you can use this field to specify a rotation thatis applied to the image as it is captured. This incurs an additional processing overhead so if possible it is betterto mount your camera the right way round if you can. If you choose one of the rotation options remember toswitch the height and width fields so that they apply, e.g. if your camera captures at 352x288 and you choose‘Rotate Right’ here then set the height to be 352 and width to be 288. You can also choose to ‘flip’ the image ifyour camera provides mirrored input.
Remote
Remote Host/Port/Path Use these fields to enter the full URL of the camera. Basically if your camera isat http://camserver.home.net:8192/cameras/camera1.jpg then these fields will be camserver.home.net, 8192and /cameras/camera1.jpg respectively. Leave the port at 80 if there is no special port required. Ifyou require authentication to access your camera then add this onto the host name in the form <user-name>:<password>@<hostname>.com. This will usually be 24 bit colour even if the image looks black andwhite. Look in Supported Hardware > Network Cameras section, how to obtain these strings that may apply toyour camera.
Remote Image Colours Specify the amount of colours in the captured image. Unlike with local cameras changingthis has no controlling effect on the remote camera itself so ensure that your camera is actually capturing to thispalette beforehand.
Capture Width/Height Make sure you enter here the same values as they are in the remote camera’s internal setting.
2.4. Defining Monitors 9
ZoneMinder Documentation, Release 1.27.0
Keep aspect ratio As per local devices.
Orientation As per local devices.
For an example to setup a MPEG-4 camera see: How_to_Setup_an_Axis211A_with_MPEG-4_streaming
File
File Path Enter the full path to the file to be used as the image source.
File Colours Specify the amount of colours in the image. Usually 24 bit colour.
Capture Width/Height As per local devices.
Keep aspect ratio As per local devices.
Orientation As per local devices.
2.4.3 Timestamp Tab
Timestamp Label Format This relates to the timestamp that is applied to each frame. It is a ‘strftime’ style stringwith a few extra tokens. You can add %f to add the decimal hundredths of a second to the frame timestamp,so %H:%M:%S.%f will output time like 10:45:37.45. You can also use %N for the name of the monitor and%Qwhich will be filled by any of the ‘show text’ detailed in the zmtriggers.pl section.
Timestamp Label X/Y The X and Y values determine where to put the timestamp. A value of 0 for the X value willput it on the left side of the image and a Y value of 0 will place it at the top of the image. To place the timestampat the bottom of the image use a value eight less than the image height.
2.4.4 Buffers Tab
Image Buffer Size This option determines how many frames are held in the ring buffer at any one time. The ringbuffer is the storage space where the last ‘n’ images are kept, ready to be resurrected on an alarm or just keptwaiting to be analysed. It can be any value you like with a couple of provisos, (see next options). However it isstored in shared memory and making it too large especially for large images with a high colour depth can use alot of memory. A value of no more than 50 is usually ok. If you find that your system will not let you use thevalue you want it is probably because your system has an arbitrary limit on the size of shared memory that maybe used even though you may have plenty of free memory available. This limit is usually fairly easy to change,see the Troubleshooting section for details.
Warm-up Frames This specifies how many frames the analysis daemon should process but not examine when itstarts. This allows it to generate an accurate reference image from a series of images before looking too carefullyfor any changes. I use a value of 25 here, too high and it will take a long time to start, too low and you will getfalse alarms when the analysis daemon starts up.
Pre/Post Event Image Buffer These options determine how many frames from before and after an event should bepreserved with it. This allows you to view what happened immediately prior and subsequent to the event. Avalue of 10 for both of these will get you started but if you get a lot of short events and would prefer them torun together to form fewer longer ones then increase the Post Event buffer size. The pre-event buffer is a truebuffer and should not really exceed half the ring buffer size. However the post-event buffer is just a count thatis applied to captured frames and so can be managed more flexibly. You should also bear in mind the frame rateof the camera when choosing these values. For instance a network camera capturing at 1FPS will give you 10seconds before and after each event if you chose 10 here. This may well be too much and pad out events morethan necessary. However a fast video card may capture at 25FPS and you will want to ensure that this settingenables you to view a reasonable time frame pre and post event.
Stream Replay Image Buffer This option ...
10 Chapter 2. User Guide
ZoneMinder Documentation, Release 1.27.0
Alarm Frame Count This option allows you to specify how many consecutive alarm frames must occur before analarm event is generated. The usual, and default, value is 1 which implies that any alarm frame will cause orparticipate in an event. You can enter any value up to 16 here to eliminate bogus events caused perhaps by screenflickers or other transients. Values over 3 or 4 are unlikely to be useful however. Please note that if you havestatistics recording enabled then currently statistics are not recorded for the first ‘Alarm Frame Count’-1 framesof an event. So if you set this value to 5 then the first 4 frames will be missing statistics whereas the more usualvalue of 1 will ensure that all alarm frames have statistics recorded.
2.4.5 Control Tab
Note: This tab and its options will only appear if you have selected the ZM_OPT_CONTROL option to indicate thatyour system contains cameras which are able to be controlled via Pan/Tilt/Zoom or other mechanisms. See the CameraControl section elsewhere in this document for further details on camera control protocols and methods.
Controllable Check this box to indicate your camera can be controlled.
Control Type Select the control type that is appropriate for your camera. ZoneMinder ships with a small number ofpredefined control protocols which will works with some cameras without modification but which may have toamended to function with others, Choose the edit link to create new control types or to edit the existing ones.
Control Device This is the device that is used to control your camera. This will normally be a serial or similar port.If your camera is a network camera, you will generally not need to specify a control device.
Control Address This is the address of your camera. Some control protocols require that each camera is identifiedby a particular, usually numeric, id. If your camera uses addressing then enter the id of your camera here. Ifyour camera is a network camera then you will usually need to enter the hostname or IP address of it here. Thisis ordinarily the same as that given for the camera itself.
Auto Stop Timeout Some cameras only support a continuous mode of movement. For instance you tell the camerato pan right and then when it is aligned correctly you tell it to stop. In some cases it is difficult to time thisprecisely over a web interface so this option allows you to specify an automatic timeout where the commandwill be automatically stopped. So a value of 0.25 here can tell the script to stop moving a quarter of a secondafter starting. This allows a more precise method of fine control. If this value is left blank or at zero it will beignored, if set then it will be used as the timeout however it will only be applied for the lower 25% of possiblespeed ranges. In other words if your camera has a pan speed range of 1 to 100 then selecting to move at 26 orover will be assumed to imply that you want a larger movement that you can control yourself and no timeoutwill be applied. Selecting motion at lower speeds will be interpreted as requiring finer control and the automatictimeout will be invoked.
Track Motion This and the following four options are used with the experimental motion function. This will onlywork if your camera supports mapped movement modes where a point on an image can be mapped to a controlcommand. This is generally most common on network cameras but can be replicated to some degree on othercameras that support relative movement modes. See the Camera Control section for more details. Check thisbox to enable motion tracking.
Track Delay This is the number of seconds to suspend motion detection for following any movement that the cameramay make to track motion.
Return Location If you camera supports a ‘home’ position or presets you can choose which preset the camera shouldreturn to after tracking motion.
Return Delay This is the delay, in seconds, once motion has stopped being detected, before the camera returns to anydefined return location.
2.4. Defining Monitors 11
ZoneMinder Documentation, Release 1.27.0
2.4.6 X10 Tab
Note: This tab and its options will only appear if you have indicated that your system supports the X10 home automa-tion protocol during initial system configuration.
X10 Activation String The contents of this field determine when a monitor starts and/or stops being active whenrunning in ‘Triggered; mode and with X10 triggers. The format of this string is as follows,
n : If you simply enter a number then the monitor will be activated when an X10 ON signal for thatunit code is detected and will be deactivated when an OFF signal is detected. !n : This inverts theprevious mode, e.g. !5 means that the monitor is activated when an OFF signal for unit code 5 isdetected and deactivated by an ON. n+ : Entering a unit code followed by + means that the monitor isactivated on receipt of a ON signal for that unit code but will ignore the OFF signal and as such willnot be deactivated by this instruction. If you prepend a ‘!’ as per the previous definition it similarlyinverts the mode, i.e. the ON signal deactivates the monitor. n+<seconds> : As per the previousmode except that the monitor will deactivate itself after the given number of seconds. n- : Enteringa unit code followed by - means that the monitor is deactivated on receipt of a OFF signal for thatunit code but will ignore the ON signal and as such will not be activated by this instruction. If youprepend a ‘!’ as per the previous definition it similarly inverts the mode, i.e. the OFF signal activatesthe monitor. n-<seconds> : As per the previous mode except that the monitor will activate itself afterthe given number of seconds.
You can also combine several of these expressions to by separating them with a comma to create multiplecircumstances of activation. However for now leave this blank.
X10 Input Alarm String This has the same format as the previous field but instead of activating the monitor withwill cause a forced alarm to be generated and an event recorded if the monitor is Active. The same definitionas above applies except that for activated read alarmed and for deactivated read unalarmed(!). Again leave thisblank for now.
X10 Output Alarm String This X10 string also has the same format as the two above options. However it works in aslightly different way. Instead of ZoneMinder reacting to X10 events this option controls how ZoneMinder emitsX10 signals when the current monitor goes into or comes out of the alarm state. Thus just entering a number willcause the ON signal for that unit code to be sent when going into alarm state and the OFF signal when comingout of alarm state. Similarly 7+30 will send the unit code 7 ON signal when going into alarm state and the OFFsignal 30 seconds later regardless of state. The combination of the X10 instruction allows ZoneMinder to reactintelligently to, and also assume control of, other devices when necessary. However the indiscriminate use ofthe Input Alarm and Output Alarm signals can cause some horrendous race conditions such as a light going onin response to an alarm which then causes an alarm itself and so on. Thus some circumspection is required here.Leave this blank for now anyway.
2.4.7 Misc Tab
Event Prefix By default events are named ‘Event-<event id>’, however you are free to rename them individually asyou wish. This option lets you modify the event prefix, the ‘Event-‘ part, to be a value of your choice so thatevents are named differently as they are generated. This allows you to name events according to which monitorgenerated them.
Section Length This specifies the length (in seconds) of any fixed length events produced when the monitor functionis ‘Record’ or ‘Mocord’. Otherwise it is ignored. This should not be so long that events are difficult to navigatenor so short that too many events are generated. A length of between 300 and 900 seconds I recommended.
Frame Skip This setting also applies only to the ‘Record’ or ‘Mocord’ functions and specifies how many framesshould be skipped in the recorded events. The default setting of zero results in every captured frame beingsaved. Using a value of one would mean that one frame is skipped between each saved, two means that twoframes are skipped between each saved frame etc. An alternate way of thinking is that one in every ‘Frame
12 Chapter 2. User Guide
ZoneMinder Documentation, Release 1.27.0
Skip + 1’ frames is saved. The point of this is to ensure that saved events do not take up too much spaceunnecessarily whilst still allowing the camera to capture at a fairly high frame rate. The alternate approach is tolimit the capture frame rate which will obviously affect the rate at which frames are saved.
FPS Report Interval How often the current performance in terms of Frames Per Second is output to the system log.Not used in any functional way so set it to maybe 1000 for now. If you watch /var/log/messages (normally) youwill see this value being emitted at the frequency you specify both for video capture and processing.
Default Scale If your monitor has been defined with a particularly large or small image size then you can choose adefault scale here with which to view the monitor so it is easier or more visible from the web interface.
Web Colour Some elements of ZoneMinder now use colours to identify monitors on certain views. You can selectwhich colour is used for each monitor here. Any specification that is valid for HTML colours is valid here, e.g.‘red’ or ‘#ff0000’. A small swatch next to the input box displays the colour you have chosen.
2.5 Defining Zones
The next important thing to do with a new monitor is set up Zones for it to use. By default you’ll already haveone generated for you when you created your monitor but you might want to modify it or add others. Click on theZones column for your monitor and you should see a small popup window appear which contains an image from yourcamera overlain with a stippled pattern representing your zone. In the default case this will cover the whole image.The colour of the zones appearing here is determined by what type they are. The default zone is Active and so will bered, Inclusive zones are orange, exclusive zones are purple, preclusive zones are blue and inactive zones are white.
Beneath the zones image will be a table containing a listing of your zones. Clicking on either the relevant bit of theimage or on the Id or Name in the table will bring up another window where you can edit the particulars for yourZones. For more information on defining or editing a zone, see Defining Zones.
Zone configuration and tuning are important when running in the motion detection modes to avoid storing, sortingthrough, or being alerted on uninteresting video data. Configuring a zone involves setting some basic parameters, aswell as choosing an alarm check method and tuning their associated detection parameters.
The Zone view is split into two main areas, on the left is the options are area and on the right is the zone drawing area.A default or new zone will cover the whole drawing area and will overlay any other zones you already have on there.Unlike the previous zones image, the current zone is coloured green, other zones will be orange regardless of type.The smaller the zone, the less processing time it takes to examine it.
2.5.1 Basic parameters
Name Each Zone can be named for reference purposes. It is used for logging and debugging. Choose a name thathelps you identify your zones.
Type This is one of the more important concepts in ZoneMinder and there are five to choose from.
• Active Triggers an alarm when motion is detected within it. This is the zone type you’ll use most often,and which will be set for your default zone. Only Active and Exclusive zones can trigger an alarm.
• Inclusive This zone type can be used for any zones that you want to trigger an alarm only if at least oneother Active zone has already triggered one. This might be for example to cover an area of the image likea plant or tree which moves a lot and which would trigger lots of alarms. Perhaps this is behind an areayou’d like to monitor though, in this case you’d create an active zone covering the non-moving parts and aninclusive zone covering the tree perhaps with less sensitive detection settings also. If something triggeredan alarm in the Active zone and also in the Inclusive zone they would both be registered and the resultingalarm would be that much bigger than if you had blanked it out altogether.
2.5. Defining Zones 13

ZoneMinder Documentation, Release 1.27.0
• Exclusive Triggers an alarm when motion is detected within it, as long as no alarms have already beentriggered in an Active zone. This is the most specialized of the zone types. For instance in the cameracovering my garden I keep watch for a hedgehog that visits most nights and scoffs the food out of my catsbowls. By creating a sensitive Exclusive zone in that area I can ensure that a hedgehog alarm will onlytrigger if there is activity in that small area. If something much bigger occurs, like someone walking by itwill trigger a regular alarm and not one from the Exclusive zone. Thus I can ensure I get alarms for bigevents and also special small events but not the noise in between.
• Preclusive This zone type is relatively recent. It is called a Preclusive zone because if it is triggered itactually precludes an alarm being generated for that image frame. So motion or other changes that occurin a Preclusive zone will have the effect of ensuring that no alarm occurs at all. The application for thiszone type is primarily as a shortcut for detecting general large-scale lighting or other changes. Generallythis may be achieved by limiting the maximum number of alarm pixels or other measure in an Activezone. However in some cases that zone may cover an area where the area of variable illumination occursin different places as the sun and/or shadows move and it thus may be difficult to come up with generalvalues. Additionally, if the sun comes out rapidly then although the initial change may be ignored in thisway as the reference image catches up an alarm may ultimately be triggered as the image becomes lessdifferent. Using one or more Preclusive zones offers a different approach. Preclusive zones are designed tobe fairly small, even just a few pixels across, with quite low alarm thresholds. They should be situated inareas of the image that are less likely to have motion occur such as high on a wall or in a corner. Should ageneral illumination change occur they would be triggered at least as early as any Active zones and preventany other zones from generating an alarm. Obviously careful placement is required to ensure that they donot cancel any genuine alarms or that they are not so close together that any motion just hops from onePreclusive zone to another. Preclusive zones may also be used to reduce processing time by situating oneover an Active zone. The Preclusive zone is processed first; if it is small, and is triggered, the rest of thezone/image will not be processed.
• Inactive Suppresses the detection of motion within it. This can be layered on top of any other zone type,preventing motion within the Inactive zone from being effective for any other zone type. Use inactivezones to cover areas in which nothing notable will ever happen or where you get false alarms that don’trelate to what you are trying to monitor. Inactive zones may be overlaid on other zones to blank out areas,and are processed first. As a general practice, you should try and make zones abut each other instead ofoverlapping to avoid repeated duplicate processing of the same area.
Preset The preset chooser sets sensible default values based on computational needs (fast v. best) and sensitivity (low,medium, high.) It is not required that you select a preset, and you can alter any of the parameters after choosinga preset. For a small number of monitors with ZoneMinder running on modern equipment, Best, high sensitivitycan be chosen as a good starting point.
Units
• Pixels - Selecting this option will allow many of the following values to be entered (or viewed) in units ofpixels.
• Percentage - Selecting this option will allow may of the following values to be entered (or viewed) as apercentage. The sense of the percentage values refers to the area of the zone and not the image as a whole.This makes trying to work out necessary sizes rather easier.
Region points [[File:Zone - Region sample.jpg|frame|right|The sample region shown to the right shows a region de-fined by 6 control points. The shape of the region causes the check methods to ignore the sidewalk and areasof the porch wall that receive changing sunlight; two conditions that are not of interest in this zone.]] A regionis a part of the captured image that is of interest for this zone. By default, a region is configured to cover thewhole captured image. Depending on the selected type of this zone, the shape of the region can be adjusted toaccommodate multiple effects. This can be done by dragging the control points in the reference image around,or by altering the coordinates found in the controls below the reference image. Clicking on a control point inthe reference image highlights the coordinates in the table below. Clicking the + button in a point row adds acontrol point between this point and the next; clicking the - button removes this control point. It is possible to
14 Chapter 2. User Guide
ZoneMinder Documentation, Release 1.27.0
accidentally place a control point outside of the valid coordinates of the image. This will prevent the monitorfrom working properly. You can make zones almost any shape you like; except that zones may not self-intersect(i.e. edges crossing over each other).
Alarm Colour These parameters can be used to individually colorize the zone overlay pattern. Alarms in this zonewill be highlighted in the alarm colour. This option is irrelevant for Preclusive and Inactive zones and will bedisabled.
Alarm Check Methods There are 3 Alarm Check Methods. They are sequential, and are layered: In AlarmedPixelsmode, only the AlarmedPixel analysis is performed. In FilteredPixels mode, the AlarmedPixel analysis is per-formed first, followed by the AlarmedPixel analysis. In the Blobs mode, all 3 analysis methods are performed inorder. An alarm is only triggered if all of the enabled analysis modes are triggered. For performance reasons, assoon as the criteria for one of the analysis modes is not met, the alarm checking for the frame is complete. Sincethe subsequent modes each require progressively more computations, it is a good idea to tune the parameters ineach of the activated layers.
For reference purposes, the Zone Area box shows the area of the entire region of interest. In percent mode, thisis 100. In Pixels mode, this is the pixel count of the region. All 3 Min/Max Area parameter groups are based onthe Zone Area as the maximum sensible value, and all 3 are interpreted in the units specified in the Units input.
AlarmedPixels Alarmed pixels is the first layer of analysis, and is always enabled. Its recommended that you startwith this method and move on to the subsequent methods once the effects of the basic parameters are understood.In the AlarmedPixels mode, 2 parameter categories are available for tuning: Min/Max Pixel Threshold, andMin/Max Alarmed Area.
Min/Max Pixel Threshold (0-255) In the AlarmedPixel layer of analysis, each individual pixel of the image is com-pared to the current reference image. Pixels that are different from the reference image are considered alarmedpixels. However, small aberrations in lighting or auto exposure camera adjustments may cause the explicit valueof a pixel to vary by small amounts from image to image. This parameter allows you to set the limits of whatwill be considered a changed pixel. For example, if your camera points to a blank white wall, and you raise ablack colored item into view, then the change in any one pixel will be great, indeed, extreme. If however, youraise a white piece of paper, then the change in an individual pixel will be less.
The minimum pixel threshold setting should be high enough to cause minor lighting, imaging, or compressionchanges to be ignored. Setting the minimum value too high, may allow a white cat to walk undetected across theview of the white wall. A good starting point for the minimum pixel threshold is 40, meaning that the differencein pixel value from must be greater than 40. A good default for the maximum pixel threshold is 0 (indicatingthat all differences above the minimum threshold are considered a change.)
Min/Max Alarmed Area The count of alarmed pixels (or percentage of alarmed pixels relative to the pixel area ofthe region if in percent mode) is used in this first layer of analysis to determine if an alarm is triggered. If thecount or percentage is above the minimum alarmed area, but less than the maximum alarmed area, an alarm istriggered. These settings depend on the size of the object you are trying to capture: a value too low may causefalse alarms, while a value too high might not detect small objects. A good starting point for both the minimumand maximum are 0 and 0, indicating that any number of alarmed pixels (or any percentage) greater than 0 willtrigger an alarm. The frame scores from logged events can then be used to bring the minimum up to a reasonablevalue. An alternative starting point for the minimum alarmed area (in percent) is 25% of the area that an objectof interest takes up in the region. For example, if you approximate that a subject moving through the frame takesup 30% of the frame, then a good starting minimum area is about 7.5%.
FilteredPixels Selecting the FilteredPixels Alarm Check Method adds an additional layer of analysis to the Alarmed-Pixels check along with 2 additional parameter categories for tuning. This layer works by analyzing the alarmedpixels identified in the first layer. Alarmed pixels are disregarded, in this and future layers if enabled, if they arenot in groups of a minimum small square size. Primarily, this filtering removes isolated alarmed pixels that maybe artifacts of the camera, lens, or compression.
Filter Width/Height (pixels) This parameter is always specified in Pixels, even when Percentages are the selectedunits. It specifies the size of the group of pixels surrounding a given pixel that must be in alarmed pixels for
2.5. Defining Zones 15
ZoneMinder Documentation, Release 1.27.0
the pixel itself to be considered an alarmed pixel. The width and height should always be an odd number. 3 x3 is the default value, and 5 x 5 is also suggested as a sensible alternative. Avoid using large numbers for thewidth and height of the filter area. When using the Blobs Alarm Check Method, FilteredPixels can be effectivelydisabled by setting either the width or height to a value less than 1.
Min/Max Filtered Area Applying the filtering analysis results in an area that is less than or equal to the alarmedarea. Thus the minimum and maximum filtered area parameters for alarm should be equal to or less than thecorresponding alarm area parameters, or the FilteredPixels analysis will never trigger an alarm. In particular,it is useful to raise the minimum alarmed area parameter until false events from image artifacts disappear, andsetting a minimum filtered area parameter less the minimum alarmed area parameter by enough to capture smallevents of interest.
Blobs File:Zone - 1 blob example.jpg|frame|right|This captured frame shows an image with 1 identified blob. The blobis outlined in the Alarm Colour specified above. When two or more Filtered areas touch or share a boundary,it is sensible to evaluate the regions as one contiguous area instead of separate entities. A Blob is a contiguousarea made up of multiple filtered areas. Whereas FilteredPixes is useful for excluding parts of the image thatare not part of the actual scene, Blob filtering is better suited to disregarding areas of the actual scene that arenot of interest. Selecting the Blobs Alarm Check Method opens up all of the available parameters. EnablingBlobs adds one more layer of analysis to the AlarmedPixel and FilteredPixel checks in the determination of avalid alarm along along with 2 additional parameter categories for tuning: the size of the blobs, and the numberof blobs. A Blob is not necessarily the whole object that may be of interest. In the example image, the subjectis moving, but only a portion of him is marked as a blob. This is because as the subject moves, many pixels ofthe image do not change in value beyond the set threshold. A pixel that is representing the subject’s shoulder inone frame may be representing his back in the next, however, the value of the pixel remains nearly the same.
Min/Max Blob Area The blob area parameters control the smallest and largest contiguous areas that are to be con-sidered a blob. A good value for the maximum area is the default of 0. (There is no upper bound for the size ofa contiguous area that will still be considered a blob.)
Min/Max Blobs Normally, you would want any positive number of blobs to trigger an event, so the default value of1 should suffice. In some circumstances, it may benefit to have only one blob NOT trigger an event, in whichcase, setting this value to 2 or higher may serve some special purpose. A good value for the maximum blobs isthe default of 0. (There is no upper bound for the number of blobs that will trigger an event. Use the maximumblobs parameter can be used to tune out events that show a high number of blobs.
Overload Frame Ignore Count This setting specifies the number of frames to NOT raise an alarm after an overload.In this context, overload is defined as a detected change too big to raise an alarm. Depending on the alarm checkmethod that could be * Number of alarmed pixels > Max Alarmed Area or * Number of filtered pixels > MaxFiltered Area or * Number of Blobs > Max Blobs The idea is that after a change like a light going on that isconsidered too big to count as an alarm, it could take a couple of frames for things to settle down again.
2.6 Viewing Monitors
As this point you should have one or more Monitors running with one or more Zones each. Returning to the mainConsole window you will see your monitors listed once more. The columns not explored so far are the Monitor name,and various event totals for certain periods of time. Clicking on any of the event totals will bring up a variation on thesame window but click on the Monitor name for now. If it is not a link then this means that that monitor is not runningso ensure that you have started ZoneMinder and that your Monitor function is not set to ‘None’. If the link works,clicking on it will pop another window up which should be scaled to contain a heading, an image from your monitor,a status and a list of recent events if any have been generated.
Depending on whether you are able to view a streamed image or not the image frame will either be this stream or aseries of stills. You have the option to change from one to the other (if available) at the centre of the top heading. Alsoalong the top are a handful of other links. These let you change the scale of the image stream, modify image settings
16 Chapter 2. User Guide
ZoneMinder Documentation, Release 1.27.0
(for local devices) or close the window. If you have cameras that can be controlled, a ‘Control’ link should also bepresent which is described below.
The image should be self-explanatory but if it looks like garbage it is possible that the video configuration is wrongso look in your system error log and check for or report anything unusual. The centre of the window will have a tinyframe that just contains a status; this will be ‘Idle’, ‘Alarm’ or ‘Alert’ depending on the function of the Monitor andwhat’s going on in the field of view. Idle means nothing is happening, Alarm means there is an alarm in progress andAlert means that an alarm has happened and the monitor is ‘cooling down’, if another alarm is generated in this timeit will just become part of the same event. These indicators are colour coded in green, red and amber.
By default if you have minimised this window or opened other windows in front it will pop up to the front if it goesto Alarm state. This behaviour can be turned off in ‘options’ if required. You can also specify a sound file in theconfiguration, which will be played when an alarm occurs to alert you to the fact if you are not in front of yourcomputer. This should be a short sound of only a couple of seconds ideally. Note that as the status is refreshed everyfew seconds it is possible for this not to alert you to every event that takes place, so you shouldn’t rely on it for thispurpose if you expect very brief events. Alternatively you can decrease the refresh interval for this window in theconfiguration though having too frequent refreshing may impact on performance.
Below the status is a list of recent events that have occurred, by default this is a listing of just the last 10 but clickingon ‘All’ will give you a full list and ‘Archive’ will take you to the event archive for this monitor, more on this later.Clicking on any of the column headings will sort the events appropriately.
From here you can also delete events if you wish. The events themselves are listed with the event id, and eventname (which you can change), the time that the event occurred, the length of the event including any preamble andpostamble frames, the number of frames comprising the event with the number that actually contain an alarm inbrackets and finally a score. This column lists the average score per alarm frame as well as the maximum score thatany alarm frame had.
The score is an arbitrary value that essentially represents the percentage of pixels in the zone that are in blobs dividedby the square root of the number of blobs and then divided by the size of the zone. This gives a nominal maximumof 100 for a zone and the totals for each zone are added together, Active zones scores are added unchanged, Inclusivezones are halved first and Exclusive zones are doubled. In reality values are likely to be much less than 100 but it doesgive a simple indication of how major the event was.
2.7 Controlling Monitors
If you have defined your system as having controllable monitors and you are looking at a monitor that is configuredfor control, then clicking on the ‘Control’ link along the top of the window will change the short event listing area to acontrol area. The capabilities you have defined earlier determine exactly what is displayed in this window. Generallyyou will have a Pan/Tilt control area along with one or subsidiary areas such as zoom or focus control to the side.If you have preset support then these will be near the bottom of the window. The normal method of controlling themonitor is by clicking on the appropriate graphics which then send a command via the control script to the cameraitself. This may sometimes take a noticeable delay before the camera responds.
It is usually the case that the control arrows are sensitive to where you click on them. If you have a camera that allowsdifferent speeds to be used for panning or zooming etc then clicking near the point of the arrow will invoke the fasterspeed whilst clicking near the base of the arrow will be slower. If you have defined continuous motion then ongoingactivities can be stopped by clicking on the area between the arrows, which will either be a graphic in the case ofpan/tilt controls or a word in the case of zoom and focus controls etc.
Certain control capabilities such as mapped motion allow direct control by clicking on the image itself when used inbrowsers which support streamed images directly. Used in this way you can just click on the area of the image thatinterests you and the camera will centre on that spot. You can also use direct image control for relative motion whenthe area of the image you click on defines the direction and the distance away from the centre of the image determinesthe speed. As it is not always very easy to estimate direction near the centre of the image, the active area does not startuntil a short distance away from the centre, resulting in a ‘dead’ zone in the middle of the image.
2.7. Controlling Monitors 17
ZoneMinder Documentation, Release 1.27.0
2.8 Filtering Events
The other columns on the main console window contain various event totals for your monitors over the last hour, day,week and month as well as a grand total and a total for events that you may have archived for safekeeping. Clickingon one of these totals or on the ‘All’ or ‘Archive’ links from the monitor window described above will present youwith a new display. This is the full event window and contains a list of events selected according to a filter which willalso pop up in its own window. Thus if you clicked on a ‘day’ total the filter will indicate that this is the period forwhich events are being filtered. The event listing window contains a similar listing to the recent events in the monitorwindow. The primary differences are that the frames and alarm frames and the score and maximum score are nowbroken out into their own columns, all of which can be sorted by clicking on the heading. Also this window will notrefresh automatically, rather only on request. Other than that, you can choose to view events here or delete them asbefore.
The other window that appeared is a filter window. You can use this window to create your own filters or to modifyexisting ones. You can even save your favourite filters to re-use at a future date. Filtering itself is fairly simple; you firstchoose how many expressions you’d like your filter to contain. Changing this value will cause the window to redrawwith a corresponding row for each expression. You then select what you want to filter on and how the expressionsrelate by choosing whether they are ‘and’ or ‘or’ relationships. For filters comprised of many expressions you willalso get the option to bracket parts of the filter to ensure you can express it as desired. Then if you like choose howyou want your results sorted and whether you want to limit the amount of events displayed.
There are several different elements to an event that you can filter on, some of which require further explanation. Theseare as follows, ‘Date/Time’ which must evaluate to a date and a time together, ‘Date’ and ‘Time’ which are variantswhich may only contain the relevant subsets of this, ‘Weekday’ which as expected is a day of the week.
All of the preceding elements take a very flexible free format of dates and time based on the PHP strtotime function(http://www.php.net/manual/en/function.strtotime.php). This allows values such as ‘last Wednesday’ etc to be entered.I recommend acquainting yourself with this function to see what the allowed formats are. However automated filtersare run in perl and so are parsed by the Date::Manip package. Not all date formats are available in both so if you aresaved your filter to do automatic deletions or other tasks you should make sure that the date and time format you useis compatible with both methods. The safest type of format to use is ‘-3 day’ or similar with easily parseable numbersand units are in English.
The other things you can filter on are all fairly self explanatory, except perhaps for ‘Archived’ which you can use toinclude or exclude Archived events. In general you’ll probably do most filtering on un-archived events. There arealso two elements, Disk Blocks and Disk Percent which don’t directly relate to the events themselves but to the diskpartition on which the events are stored. These allow you to specify an amount of disk usage either in blocks or inpercentage as returned by the ‘df’ command. They relate to the amount of disk space used and not the amount leftfree. Once your filter is specified, clicking ‘submit’ will filter the events according to your specification. As the diskbased elements are not event related directly if you create a filter and include the term ‘DiskPercent > 95’ then if yourcurrent disk usage is over that amount when you submit the filter then all events will be listed whereas if it is less thennone at all will. As such the disk related terms will tend to be used mostly for automatic filters (see below). If youhave created a filter you want to keep, you can name it and save it by clicking ‘Save’.
If you do this then the subsequent dialog will also allow you specify whether you want this filter automatically appliedin order to delete events or upload events via ftp to another server and mail notifications of events to one or more emailaccounts. Emails and messages (essentially small emails intended for mobile phones or pagers) have a format definedin the Options screen, and may include a variety of tokens that can be substituted for various details of the event thatcaused them. This includes links to the event view or the filter as well as the option of attaching images or videosto the email itself. Be aware that tokens that represent links may require you to log in to access the actual page, andsometimes may function differently when viewed outside of the general ZoneMinder context. The tokens you can useare as follows.
: %EI% Id of the event : %EN% Name of the event : %EC% Cause of the event : %ED% Event description : %ET%Time of the event : %EL% Length of the event : %EF% Number of frames in the event : %EFA% Number of alarmframes in the event : %EST% Total score of the event : %ESA% Average score of the event : %ESM% Maximum
18 Chapter 2. User Guide
ZoneMinder Documentation, Release 1.27.0
score of the event : %EP% Path to the event : %EPS% Path to the event stream : %EPI% Path to the event images: %EPI1% Path to the first alarmed event image : %EPIM% Path to the (first) event image with the highest score :%EI1% Attach first alarmed event image : %EIM% Attach (first) event image with the highest score : %EV% Attachevent mpeg video : %MN% Name of the monitor : %MET% Total number of events for the monitor : %MEH%Number of events for the monitor in the last hour : %MED% Number of events for the monitor in the last day :%MEW% Number of events for the monitor in the last week : %MEM% Number of events for the monitor in the lastmonth : %MEA% Number of archived events for the monitor : %MP% Path to the monitor window : %MPS% Pathto the monitor stream : %MPI% Path to the monitor recent image : %FN% Name of the current filter that matched :%FP% Path to the current filter that matched : %ZP% Path to your ZoneMinder console
Finally you can also specify a script which is run on each matched event. This script should be readable and executableby your web server user. It will get run once per event and the relative path to the directory containing the event inquestion. Normally this will be of the form <MonitorName>/<EventId> so from this path you can derive both themonitor name and event id and perform any action you wish. Note that arbitrary commands are not allowed to bespecified in the filter, for security the only thing it may contain is the full path to an executable. What that contains isentirely up to you however.
Filtering is a powerful mechanism you can use to eliminate events that fit a certain pattern however in many casesmodifying the zone settings will better address this. Where it really comes into its own is generally in applying timefilters, so for instance events that happen during weekdays or at certain times of the day are highlighted, uploadedor deleted. Additionally using disk related terms in your filters means you can automatically create filters that deletethe oldest events when your disk gets full. Be warned however that if you use this strategy then you should limit thereturned results to the amount of events you want deleted in each pass until the disk usage is at an acceptable level.If you do not do this then the first pass when the disk usage is high will match, and then delete, all events unless youhave used other criteria inside of limits. ZoneMinder ships with a sample filter already installed, though disabled. ThePurgeWhenFull filter can be used to delete the oldest events when your disk starts filling up. To use it you shouldselect and load it in the filter interface, modify it to your requirements, and then save it making you sure you checkthe ‘Delete all matches’ option. This will then run in the background and ensure that your disk does not fill up withevents.
2.8.1 Relative items in date strings
Relative items adjust a date (or the current date if none) forward or backward. The effects of relative items accumulate.Here are some examples:
1 year 1 year ago 3 years 2 days
The unit of time displacement may be selected by the string ‘year’ or ‘month’ for moving by whole years or months.These are fuzzy units, as years and months are not all of equal duration. More precise units are ‘fortnight’ whichis worth 14 days, ‘week’ worth 7 days, ‘day’ worth 24 hours, ‘hour’ worth 60 minutes, ‘minute’ or ‘min’ worth 60seconds, and ‘second’ or ‘sec’ worth one second. An ‘s’ suffix on these units is accepted and ignored.
The unit of time may be preceded by a multiplier, given as an optionally signed number. Unsigned numbers are takenas positively signed. No number at all implies 1 for a multiplier. Following a relative item by the string ‘ago’ isequivalent to preceding the unit by a multiplier with value -1.
The string ‘tomorrow’ is worth one day in the future (equivalent to ‘day’), the string ‘yesterday’ is worth one day inthe past (equivalent to ‘day ago’).
The strings ‘now’ or ‘today’ are relative items corresponding to zero-valued time displacement, these strings comefrom the fact a zero-valued time displacement represents the current time when not otherwise changed by previousitems. They may be used to stress other items, like in ‘12:00 today’. The string ‘this’ also has the meaning of azero-valued time displacement, but is preferred in date strings like ‘this thursday’.
When a relative item causes the resulting date to cross a boundary where the clocks were adjusted, typically fordaylight saving time, the resulting date and time are adjusted accordingly.
2.8. Filtering Events 19
ZoneMinder Documentation, Release 1.27.0
The fuzz in units can cause problems with relative items. For example, ‘2003-07-31 -1 month’ might evaluate to2003-07-01, because 2003-06-31 is an invalid date. To determine the previous month more reliably, you can ask forthe month before the 15th of the current month. For example:
$ date -R Thu, 31 Jul 2003 13:02:39 -0700 $ date –date=’-1 month’ +’Last month was %B?’ Last monthwas July? $ date –date=”$(date +%Y-%m-15) -1 month” +’Last month was %B!’ Last month was June!
As this applies to ZoneMinder filters, you might want to search for events in a period of time, or maybe for examplecreate a purge filter that removes events older than 30 days. For the later you would want at least two lines in yourfilter. The first line should be:
[<Archive Status> <equal to> <Unarchived Only>]
as you don’t want to delete your archived events.
Your second line to find events older than 30 days would be:
[and <Date><less than> -30 days]
You use “less than” to indicate that you want to match events before the specified date, and you specify “-30 days” toindicate a date 30 days before the time the filter is run. Of course you could use 30 days ago as well(?).
You should always test your filters before enabling any actions based on them to make sure they consistently returnthe results you want. You can use the submit button to see what events are returned by your query.
2.9 Viewing Events
From the monitor or filtered events listing you can now click on an event to view it in more detail. If you havestreaming capability you will see a series of images that make up the event. Under that you should also see a progressbar. Depending on your configuration this will either be static or will be filled in to indicate how far through the eventyou are. By default this functionality is turned off for low bandwidth settings as the image delivery tends to not beable to keep up with real-time and the progress bar cannot take this into account. Regardless of whether the progressbar updates, you can click on it to navigate to particular points in the events.
You will also see a link to allow you to view the still images themselves. If you don’t have streaming then you willbe taken directly to this page. The images themselves are thumbnail size and depending on the configuration andbandwidth you have chosen will either be the full images scaled in your browser of actual scaled images. If it is thelatter, if you have low bandwidth for example, it may take a few seconds to generate the images. If thumbnail imagesare required to be generated, they will be kept and not re-generated in future. Once the images appear you can mouseover them to get the image sequence number and the image score.
You will notice for the first time that alarm images now contain an overlay outlining the blobs that represent thealarmed area. This outline is in the colour defined for that zone and lets you see what it was that caused the alarm.Clicking on one of the thumbnails will take you to a full size window where you can see the image in all its detail andscroll through the various images that make up the event. If you have the ZM_RECORD_EVENT_STATS option on,you will be able to click the ‘Stats’ link here and get some analysis of the cause of the event. Should you determinethat you don’t wish to keep the event, clicking on Delete will erase it from the database and file system. Returning tothe event window, other options here are renaming the event to something more meaningful, refreshing the window toreplay the event stream, deleting the event, switching between streamed and still versions of the event (if supported)and generating an MPEG video of the event (if supported).
These last two options require further explanation. Archiving an event means that it is kept to one side and notdisplayed in the normal event listings unless you specifically ask to view the archived events. This is useful forkeeping events that you think may be important or just wish to protect. Once an event is archived it can be deleted orunarchived but you cannot accidentally delete it when viewing normal unarchived events.
The final option of generating an MPEG video is still somewhat experimental and its usefulness may vary. It usesthe open source ffmpeg encoder to generate short videos, which will be downloaded to your browsing machine or
20 Chapter 2. User Guide
ZoneMinder Documentation, Release 1.27.0
viewed in place. When using the ffmpeg encoder, ZoneMinder will attempt to match the duration of the video withthe duration of the event. Ffmpeg has a particularly rich set of options and you can specify during configuration whichadditional options you may wish to include to suit your preferences. In particular you may need to specify additional,or different, options if you are creating videos of events with particularly slow frame rates as some codecs only supportcertain ranges of frame rates. A common value for FFMPEG_OUTPUT_OPTIONS under Options > Images might be‘-r 25 -b 800k’ for 25 fps and 800 kbps. Details of these options can be found in the [http://ffmpeg.org/ffmpeg-doc.htmldocumentation] for the encoders and is outside the scope of this document.
Building an MPEG video, especially for a large event, can take some time and should not be undertaken lightly as theeffect on your host box of many CPU intensive encoders will not be good. However once a video has been created foran event it will be kept so subsequent viewing will not incur the generation overhead. Videos can also be included innotification emails, however care should be taken when using this option as for many frequent events the penalty inCPU and disk space can quickly mount up.
2.10 Options
The final area covered by the tutorial is the options and user section. If you are running in authenticated mode anddon’t have system privileges then you will not see this section at all and if you are running in un-authenticated modethen no user section will be displayed.
The various options you can specify are displayed in a tabbed dialog with each group of options displayed under adifferent heading. Each option is displayed with its name, a short description and the current value. You can alsoclick on the ‘?’ link following each description to get a fuller explanation about each option. This is the same as youwould get from zmconfig.pl. A number of option groups have a master option near the top which enables or disablesthe whole group so you should be aware of the state of this before modifying options and expecting them to make anydifference.
If you have changed the value of an option you should then ‘save’ it. A number of the option groups will then promptyou to let you know that the option(s) you have changed will require a system restart. This is not done automaticallyin case you will be changing many values in the same session, however once you have made all of your changes youshould restart ZoneMinder as soon as possible. The reason for this is that web and some scripts will pick up the newchanges immediately but some of the daemons will still be using the old values and this can lead to data inconsistencyor loss.
One of the options you may notice in the ‘System’ tab allows you to specify the default language for your installationof ZoneMinder. Versions 1.17.0 and later support multiple languages but rely on users to assist in creating languagefiles for specific languages. To specify a language you will have to give the applicable code, thus for UK English this isen_gb, and for US English it would be en_us, if no language is given then UK English is assumed. Most languages willbe specified in this nn_mm format and to check which languages are available look for files named zm_lang_*.php inthe ZoneMinder build directory where the parts represented by the ‘*’ would be what you would enter as a language.This is slightly unwieldy and will probably be improved in future to make it easier to determine language availability.On checking which languages are available it may be that your preferred language is not currently included and if thisis the case please consider doing a translation and sending it back to it may be included in future releases. All thelanguage elements are given in the zm_lang_en_gb.php file along with a few notes to help you understand the format.
As mentioned above, you may also see a ‘users’ tab in the Options area. In this section you will see a list of the currentusers defined on the system. You can also add or delete users from here. It is recommended you do not delete theadmin user unless you have created another fully privileged user to take over the same role. Each user is defined with aname and password (which is hidden) as well as an enabled setting which you can use to temporarily enable or disableusers, for example a guest user for limited time access. As well as that there is a language setting that allows you todefine user specific languages. Setting a language here that is different than the system language will mean that whenthat user logs in they will have the web interface presented in their own language rather than the system default, if it isavailable. Specifying a language here is done in the same way as for the system default language described above.
There are also five values that define the user permissions, these are ‘Stream’, ‘Events’, ‘Control’, ‘Monitors’ and
2.10. Options 21
ZoneMinder Documentation, Release 1.27.0
‘System’ Each can have values of ‘None’, ‘View’ or ‘Edit’ apart from ‘Stream’ which has no ‘Edit’ setting. Thesevalues cover access to the following areas; ‘Stream’ defines whether a user is allowed to view the ‘live’ video feedscoming from the cameras. You may wish to allow a user to view historical events only in which case this setting shouldbe ‘none’. The ‘Events’ setting determines whether a user can view and modify or delete any retained historical events.The ‘Control’ setting allows you to indicate whether the user is able to control any Pan/Tilt/Zoom type cameras youmay have on your system. The ‘Monitors’ setting specifies whether a user can see the current monitor settings andchange them. Finally the ‘System’ setting determines whether a user can view or modify the system settings as awhole, such as options and users or controlling the running of the system as a whole.
As well as these settings there is also a ‘Bandwidth’ setting which can be used to limit the maximum bandwidth that auser can view at and a ‘Monitor Ids’ setting that can be used for non-’System’ users to restrict them to only being ableto access streams, events or monitors for the given monitors ids as a comma separated list with no spaces. If a userwith ‘Monitors’ edit privileges is limited to specific monitors here they will not be able to add or delete monitors butonly change the details of those they have access to. If a user has ‘System’ privileges then the ‘Monitors Ids’ settingis ignored and has no effect.’
That’s pretty much is it for the tour, though there is a lot more to ZoneMinder as you will discover. You shouldexperiment with the various settings to get the results you think are right for your requirements.
2.11 Camera Control
ZoneMinder provides the facility to control cameras from the web interface and to some extent automatically.Pan/Tilt/Zoom (PTZ) cameras have a wide range of capabilities and use a large number of different protocols makingany kind of generic control solution potentially very difficult. To address this ZoneMinder uses two key approaches toget around this problem.
Definition of Capabilities For each camera model you use, an entry in the camera capabilities table must be created.These indicate what functions the camera supports and ensure that the interface presents only those capabilitiesthat the camera supports. There are a very large number of capabilities that may be supported and it is veryimportant that the entries in this table reflect the actual abilities of the camera. A small number of examplecapabilities are included in ZoneMinder, these can be used ‘as is’ or modified.
Control Scripts ZoneMinder itself does not generally provide the ability to send commands to cameras or receiveresponses. What it does is mediate motion requests from the web interface into a standard set of commandswhich are passed to a script defined in the control capability. Example scripts are provided in ZoneMinderwhich support a number of serial or network protocols but it is likely that for many cameras new scripts willhave to be created. These can be modelled on the example ones, or if control commands already exist from otherapplications, then the script can just act as a ‘glue’ layer between ZoneMinder and those commands.
It should be emphasised that the control and capability elements of ZoneMinder are not intended to be able to supportevery camera out of the box. Some degree of development is likely to be required for many cameras.
2.11.1 Control Capabilities
If you have a camera that supports PTZ controls and wish to use it with ZoneMinder then the first thing you need todo is ensure that it has an accurate entry in the capabilities table. To do this you need to go to the Control tab of theMonitor configuration dialog and select ‘Edit’ where it is listed by the Control Type selection box. This will bring upa new window which lists, with a brief summary, the existing capabilities. To edit an existing capability to modifyselect the Id or Name of the capability in question, or click on the Add button to add a new control capability. Eitherof these approaches will create a new window, in familiar style, with tabs along the top and forms fields below. Inthe case of the capabilities table there are a large number of settings and tabs, the mean and use of these are brieflyexplained below.
22 Chapter 2. User Guide

ZoneMinder Documentation, Release 1.27.0
Main Tab
Name This is the name of the control capability, it will usually make sense to name capabilities after the cameramodel or protocol being used.
Type Whether the capability uses a local (usually serial) or network control protocol.
Command This is the full path to a script or application that will map the standard set of ZoneMinder control com-mands to equivalent control protocol command. This may be one of the shipped example zmcontrol-*.pl scriptsor something else entirely.
Can Wake This is the first of the actual capability definitions. Checking this box indicates that a protocol commandexists to wake up the camera from a sleeping state.
Can Sleep The camera can be put to sleep.
Can Reset The camera can be reset to a previously defined state.
Move Tab
Can Move The camera is able move, i.e. pan or tilt.
Can Move Diagonally The camera can move diagonally. Some devices can move only vertically or horizontally at atime.
Can Move Mapped The camera is able internally map a point on an image to a precise degree of motion to centrethat point in the image.
Can Move Absolute The camera can move to an absolute location.
Can Move Relative The camera can more to a relative location, e.g. 7 point left or up.
Can Move Continuous The camera can move continuously in a defined direction until told to stop or the movementlimits are reached, e.g. left.
Pan Tab
Can Pan The camera can pan, or move horizontally.
Min/Max Pan Range If the camera supports absolute motion this is the minimum and maximum pan co-ordinatesthat may be specified, e.g. -100 to 100.
Min/Man Pan Step If the camera supports relative motion, this is the minimum and maximum amount of movementthat can be specified.
Has Pan Speed The camera supports specification of pan speeds.
Min/Max Pan Speed The minimum and maximum pan speed supported.
Has Turbo Pan The camera supports an additional turbo pan speed.
Turbo Pan Speed The actual turbo pan speed.
Tilt Tab
Definition of Tilt capabilities, fields as for ‘Pan’ tab.
2.11. Camera Control 23
ZoneMinder Documentation, Release 1.27.0
Zoom Tab
Can Zoom The camera can zoom.
Can Zoom Absolute The camera can zoom to an absolute position.
Can Zoom Relative The camera can zoom to a relative position.
Can Zoom Continuous The camera can zoom continuously in or out until told to stop or the zoom limits are reached.
Min/Max Zoom Range If the camera supports absolute zoom this is the minimum and maximum zoom amounts thatmay be specified.
Min/Man Zoom Step If the camera supports relative zoom, this is the minimum and maximum amount of zoomchange that can be specified.
Has Zoom Speed The camera supports specification of zoom speed.
Min/Max Zoom Speed The minimum and maximum zoom speed supported.
Focus Tab
Definition of Focus capabilities, fields as for ‘Zoom’ tab, but with the following additional capability.
Can Auto Focus The camera can focus automatically.
White Tab
Definition of White Balance capabilities, fields as for ‘Focus’ tab.
Iris Tab
Definition of Iris Control capabilities, fields as for ‘Focus’ tab.
Presets Tab
Has Presets The camera supports preset positions.
Num Presets How many presets the camera supports. If the camera supports a huge number of presets then it makessense to specify a more reasonable number here, 20 or less is recommended.
Has Home Preset The camera has a defined ‘home’ position, usually in the mid point of its range.
Can Set Presets The camera supports setting preset locations via its control protocol.
2.11.2 Control Scripts
The second key element to controlling cameras with ZoneMinder is ensuring that an appropriate control script orapplication is present. A small number of sample scripts are included with ZoneMinder and can be used directly oras the basis for development. Control scripts are run atomically, that is to say that one requested action from the webinterface results in one execution of the script and no state information is maintained. If your protocol requires stateinformation to be preserved then you should ensure that your scripts do this as ZoneMinder has no concept of the stateof the camera in control terms.
If you are writing a new control script then you need to ensure that it supports the parameters that ZoneMinder will passto it. If you already have scripts or applications that control your cameras, the ZoneMinder control script will just act as
24 Chapter 2. User Guide
ZoneMinder Documentation, Release 1.27.0
glue to convert the parameters passed into a form that your existing application understands. If you are writing a scriptto support a new protocol then you will need to convert the parameters passed into the script to equivalent protocolcommands. If you have carefully defined your control capabilities above then you should only expect commands thatcorrespond to those capabilities.
The standard set of parameters passed to control scripts is defined below,
–device=<device> : This is the control device from the monitor definition. Absent if no device is specified.
—address=<address> : This is the control address from the monitor definition. This will usually be ahostname or ip address for network cameras or a simple numeric camera id for other cameras.
–autostop=<timeout> : This indicates whether an automatic timeout should be applied to ‘’‘stop’‘’ thegiven command. It will only be included for ‘’‘continuous’‘’ commands, as listed below, and will be atimeout in decimal seconds, probably fractional.
—command=<command> : This specifies the command that the script should execute. Valid commandsare given below.
–xcoord=<x>, –ycoord=<y> : This specifies the x and/or y coordinates for commands which requirethem. These will normally be absolute or mapped commands.
—width=<width>’‘, ‘’–height=<height> : This specifies the width and height of the current image, formapped motion commands where the coordinates values passed must have a context.
–speed=<speed> : This specifies the speed that the command should use, if appropriate.
—panspeed=<speed>’‘, ‘’–tiltspeed=<speed> : This indicates the specific pan and tilt speeds fordiagonal movements which may allow a different motion rate for horizontal and vertical components.
–step=<step> : This specifies the amount of motion that the command should use, if appropriate. Nor-mally used for relative commands only.
—panstep=<step>’‘, ‘’–tiltstep=<step> : This indicates the specific pan and tilt steps for diagonalmovements which may allow a different amount of motion for horizontal and vertical components.
–preset=<preset> : This specifies the particular preset that relevant commands should operate on.
The command option listed above may take one of the following commands as a parameter.
wake Wake the camera.
sleep Send the camera to sleep.
reset Reset the camera.
move_map Move mapped to a specified location on the image.
move_pseudo_map As move_map above. Pseudo-mapped motion can be used when mapped motion is not supportedbut relative motion is in which case mapped motion can be roughly approximated by careful calibration.
move_abs_<direction> Move to a specified absolute location. The direction element gives a hint to the direction togo but can be omitted. If present it will be one of “up”, “down”, “left”, “right”, “upleft”, “upright”, “downleft”or “downright”.
move_rel_<direction> Move a specified amount in the given direction.
move_con_<direction> Move continuously in the given direction until told to stop.
move_stop Stop any motion which may be in progress.
zoom_abs_<direction> Zoom to a specified absolute zoom position. The direction element gives a hint to the direc-tion to go but can be omitted. If present it will be one of “tele” or “wide”.
zoom_rel_<direction> Zoom a specified amount in the given direction.
2.11. Camera Control 25
ZoneMinder Documentation, Release 1.27.0
zoom_con_<direction> Zoom continuously in the given direction until told to stop.
zoom_stop Stop any zooming which may be in progress.
focus_auto Set focusing to be automatic.
focus_man Set focusing to be manual.
focus_abs_<direction> Focus to a specified absolute focus position. The direction element gives a hint to the direc-tion to go but can be omitted. If present it will be one of “near” or “far”.
focus_rel_<direction> Focus a specified amount in the given direction.
focus_con_<direction> Focus continuously in the given direction until told to stop.
focus_stop Stop any focusing which may be in progress.
white_<subcommand> As per the focus commands, except that direction may be “in” or “out”.
iris_<subcommand> As per the focus commands, except that direction may be “open” or “close”.
preset_set Set the given preset to the current location.
preset_goto Move to the given preset.
preset_home Move to the “home” preset.
2.12 Mobile Devices
• After 1.24.x, access to the “light” interface changed to http://xxx.xxx.xxx.xxx/zm/index.php?skin=mobile ; Youmay find that you have a directory named “skins” under ZoneMinder base dir, so you may use one of the existentskins as a base to adapt to your needs;
Type this in your mobile browser: http://xxx.xxx.xxx.xxx/zm/index.php?format=xhtml (deprecated)
ZoneMinder has always had a minimal WML (Wireless Markup Language) capability to allow it to function on mobilephones and similar devices. However as of 1.20.0 this is now deprecated and has been replaced with a new XHTML– Mobile Profile mode as well as the default HTML4. XHTML-MP is a small, and limited, version of XHTMLintended for mobile devices and is based on XHTML Basic. It does not contain scripting or other dynamic elementsand essentially is a subset of HTML as most people know it.
The ZoneMinder XHTML-MP interface allows you to log into your installation via your phone or mobile devices andperform a limited number of tasks. These include viewing recent events, and monitoring live streams. However unlikethe full interfaces these elements are presented as still images requiring manual refreshing. For now the XHTML-MPinterface is presented as a prototype interface; rather than one offering full capabilities. As such, please feel free tomake comments or offer suggestions via the forums on http://www.zoneminder.com.
As well as XHTML-MP, ideally I’d like to be able to offer a WML2.0 interface. WML2.0 is a blending of WML1.3,which is traditional WAP, and XHTML. As such it offers the scripting that WML has traditionally included plus thebetter control of mark-up that is the realm of XHTML. Unfortunately so far I’m unaware of any devices that supportWML2.0 even if they say they are WAP2 compliant; certainly I’ve never had a phone that does. If you find out that aparticular phone does support this then please let me know (or better still send me the phone!).
If you wish to use the XHTML-MP interface to ZoneMinder there is no extra configuration required to enable it per se.However ZoneMinder needs to be able to figure out what kind of content to deliver to particular browsers, so you havetwo choices. You can edit zm.php and include a definition that corresponds to your phone, describing a small numberof basic capabilities, you will see a couple of examples already there, or you can use the comprehensive open sourceWURFL package available from http://wurfl.sourceforge.net/. You will need to download both the WURFL php filesand the wurfl.xml file itself. WURFL is a resource containing information on the capabilities of a huge number ofmobile phones, devices and browsers. Thus once it has matched your phone it can determine various capabilities itmay possess. This means that ZoneMinder itself only has to deal with these capabilities and not the individual phone
26 Chapter 2. User Guide
ZoneMinder Documentation, Release 1.27.0
types. If you prefer you can also add the format=xHTML url parameter when you load ZoneMinder to force thexHTML format and skip the automatic determination altoghether.
To use WURFL you should install the php files in the same directory as ZoneMinder and then create a ‘wurfl’ sub-directory and ensure it is readable and writeable (or preferably owned by) your web server user. You should put thewurfl.xml file in there. One other thing you may need to change, as the xml file is quite large, is the ‘memory_limit’setting in php.ini as the default setting of 8Mb may be too small. Once you’ve done this you should find that yourphone or device is recognised and if it can support XHTML-MP it will receive that interface. If your phone is verynew, or you are using an old version of the XML file you might find that it is not present however. The WURFL libraryuses a caching strategy to avoid reloading the whole XML file each time so check if a sensible looking cache file hasbeen created in the ‘wurfl’ sub-directory also check the wurfl.log in the same place.
The WURFL is a third party application and as such I am unable to offer support directly for it. If you feel your deviceis missing or incorrectly represented please contact the authors via their own channels. If on the other hand you haveany comments on ZoneMinder on your device specifically please let me know and I would be pleased to hear about it.
As support for cookies in mobile devices is patchy at best, the groups feature is not fully implemented in the XHTML-MP views. Instead if there is a group called ‘Mobile’ already defined then that group will always be effective, if notthen all monitors available to the logged in user will be visible,
2.13 Logging
Most components of ZoneMinder can emit informational, warning, error and debug messages in a standard format.These messages can be logged in one or more locations. By default all messages produced by scripts are logged in<script name>.log files which are placed in the directory defined by the ZM_PATH_LOGS configuration variable. Thisis initially defined as ‘/tmp’ though it can be overridden (see the Options and Users section above). So for example,the zmpkg.pl script will output messages to /tmp/zmpkg.pl, an example of these messages is:
03/01/06 13:46:00.166046 zmpkg[11148].INF [Command: start]
where the first part refers to the date and time of the entry, the next section is the name (or an abbreviated version)of the script, followed by the process id in square brackets, a severity code (INF, WAR, ERR or DBG) and the debugtext. If you change the location of the log directory, ensure it refers to an existing directory which the web user haspermissions to write to. Also ensure that no logs are present in that directory the web user does not have permissionto open. This can happen if you run commands or scripts as the root user for testing at some point. If this occurs thensubsequent non-privileged runs will fails due to being unable to open the log files.
As well as specific script logging above, information, warning and error messages are logged via the system syslogservice. This is a standard component on Linux systems and allows logging of all sorts of messages in a standard wayand using a standard format. On most systems, unless otherwise configured, messages produced by ZoneMinder willgo to the /var/log/messages file. On some distributions they may end up in another file, but usually still in /var/log.Messages in this file are similar to those in the script log files but differ slightly. For example the above event in thesystem log file looks like:
Jan 3 13:46:00 shuttle52 zmpkg[11148]: INF [Command: start]
where you can see that the date is formatted differently (and only to 1 second precision) and there is an additionalfield for the hostname (as syslog can operate over a network). As well as ZoneMinder entries in this file you may alsosee entries from various other system components. You should ensure that your syslogd daemon is running for syslogmessages to be correctly handled.
A number of users have asked how to suppress or redirect ZoneMinder messages that are written to this file. This mostoften occurs due to not wanting other system messages to be overwhelmed and obscured by the ZoneMinder producedones (which can be quite frequent by default). In order to control syslog messages you need to locate and edit thesyslog.conf file on your system. This will often be in the /etc directory. This file allows configuration of syslog so thatcertain classes and categories of messages are routed to different files or highlighted to a console, or just ignored. Full
2.13. Logging 27
ZoneMinder Documentation, Release 1.27.0
details of the format of this file is outside the scope of this document (typing ‘man syslog.conf’ will give you moreinformation) but the most often requested changes are easy to implement.
The syslog service uses the concept of priorities and facilities where the former refers to the importance of the messageand the latter refers to that part of the system from which it originated. Standard priorities include ‘info’, ‘warning’,‘err’ and ‘debug’ and ZoneMinder uses these priorities when generating the corresponding class of message. Standardfacilities include ‘mail’, ‘cron’ and ‘security’ etc but as well this, there are eight ‘local’ facilities that can be used bymachine specific message generators. ZoneMinder produces it’s messages via the ‘local1’ facility.
So armed with the knowledge of the priority and facility of a message, the syslog.conf file can be amended to handlemessages however you like.
So to ensure that all ZoneMinder messages go to a specific log file you can add the following line near the top of yoursyslog.conf file:
<pre># Save ZoneMinder messages to zm.loglocal1.* /var/log/zm/zm.log</pre>
which will ensure that all messages produced with the local1 facility are routed to fhe /var/log/zm/zm.log file. Howeverthis does not necessarily prevent them also going into the standard system log. To do this you will need to modify theline that determines which messages are logged to this file. This may look something like:
<pre># Log anything (except mail) of level info or higher.# Don't log private authentication messages!
*.info;mail.none;news.none;authpriv.none;cron.none /var/log/messages</pre>
by default. To remove ZoneMinder messages altogether from this file you can modify this line to look like:
<pre>*.info;local1.!*;mail.none;news.none;authpriv.none;cron.none /var/log/messages</pre>
which instructs syslog to ignore any messages from the local1 facility. If however you still want warnings and errorsto occur in the system log file, you could change it to:
<pre>*.info;local1.!*;local1.warning;mail.none;news.none;authpriv.none;cron.none /var/log/messages</pre>
which follows the ignore instruction with a further one to indicate that any messages with a facility of local1 and apriority of warning or above should still go into the file.
These recipes are just examples of how you can modify the logging to suit your system, there are a lot of othermodifications you could make. If you do make any changes to syslog.conf you should ensure you restart the syslogdprocess or send it a HUP signal to force it to reread its configuration file otherwise your changes will be ignored.
The discussion of logging above began by describing how scripts produce error and debug messages. The way that thebinaries work is slightly different. Binaries generate information, warning and error messages using syslog in exactlythe same way as scripts and these messages will be handled identically. However debug output is somewhat different.For the scripts, if you want to enable debug you will need to edit the script file itself and change the DBG_LEVELconstant to have a value of 1. This will then cause debug messages to be written to the <script>.log file as well as themore important messages. Debug messages however are not routed via syslog. Scripts currently only have one levelof debug so this will cause any and all debug messages to be generated. Binaries work slightly differently and whileyou can edit the call to zmDbgInit that is present in every binary’s ‘main’ function to update the initial value of thedebug level, there are easier ways.
The simplest way of collecting debug output is to click on the Options link from the main ZoneMinder console viewand then go to the Debug tab. There you will find a number of debug options. The first thing you should do is ensurethat the ZM_EXTRA_DEBUG setting is switched on. This enables debug generally. The next thing you need to do isselect the debug target, level and destination file using the relevant options. Click on the ‘?’ by each option for moreinformation about valid settings. You will need to restart ZoneMinder as a whole or at least the component in questionfor logging to take effect. When you have finished debugging you should ensure you switch debug off by uncheckingthe ZM_EXTRA_DEBUG option and restarting ZoneMinder. You can leave the other options as you like as they areignored if the master debug option is off.
28 Chapter 2. User Guide
ZoneMinder Documentation, Release 1.27.0
Once you have debug being logged you can modify the level by sending USR1 and USR2 signals to the relevant binary(or binaries) to increase or decrease the level of debug being emitted with immediate effect. This modification will notpersist if the binary gets restarted however.
If you wish to run a binary directly from the command line to test specific functionality or scenarios, you can set theZM_DBG_LEVEL and ZM_DBG_LOG environment variables to set the level and log file of the debug you wish tosee, and the ZM_DBG_PRINT environment variable to 1 to output the debug directly to your terminal.
All ZoneMinder logs can now be rotated by logrotate. A sample logrotate config file is shown below.:
<pre>/var/log/zm/*.log {missingoknotifemptysharedscriptspostrotate
/usr/local/bin/zmpkg.pl logrot 2> /dev/null > /dev/null || trueendscript
}</pre>
2.13. Logging 29

ZoneMinder Documentation, Release 1.27.0
30 Chapter 2. User Guide
CHAPTER 3
API
This document will provide an overview of ZoneMinder’s API.
3.1 Overview
In an effort to further ‘open up’ ZoneMinder, an API was needed. This will allow quick integration with and develop-ment of ZoneMinder.
The API is built in CakePHP and lives under the /api directory. It provides a RESTful service and supports CRUD(create, retrieve, update, delete) functions for Monitors, Events, Frames, Zones and Config.
3.2 Examples
Here be a list of examples. Some results may be truncated.
You will see each URL ending in either .xml or .json. This is the format of the request, and it determines theformat that any data returned to you will be in. I like json, however you can use xml if you’d like.
3.2.1 Return a list of all monitors
curl -XGET http://zmdevapi/monitors.json
3.2.2 Retrieve monitor 1
curl -XGET http://zmdevapi/monitors/1.json
3.2.3 Add a monitor
This command will add a new http monitor.
curl -XPOST http://zmdevapi/monitors.js -d "Monitor[Name]=Cliff-Burton \&Monitor[Function]=Modect \ &Monitor[Protocol]=http \ &Monitor[Method]=simple\ &Monitor[Host]=ussr:[email protected] \ &Monitor[Port]=80 \&Monitor[Path]=/mjpg/video.mjpg \ &Monitor[Width]=704 \ &Monitor[Height]=480 \&Monitor[Colours]=4"
31

ZoneMinder Documentation, Release 1.27.0
3.2.4 Edit monitor 1
This command will change the ‘Name’ field of Monitor 1 to ‘test1’
curl -XPUT http://zmdevapi/monitors/1.json -d "Monitor[Name]=test1"
3.2.5 Delete monitor 1
This command will delete Monitor 1, but will _not_ delete any Events which depend on it.
curl -XDELETE http://zmdevapi/monitors/1.json
3.2.6 Return a list of all events
curl -XGET http://zmdevapi/events.json
3.2.7 Retrieve event 1
curl -XGET http://zmdevapi/events/1.json
3.2.8 Edit event 1
This command will change the ‘Name’ field of Event 1 to ‘Seek and Destroy’
curl -XPUT http://zmdevapi/events/1.json -d "Event[Name]=Seek and Destroy"
3.2.9 Delete event 1
This command will delete Event 1, and any Frames which depend on it.
curl -XDELETE http://zmdevapi/events/1.json
3.2.10 Edit config 121
This command will change the ‘Value’ field of Config 121 to 901.
curl -XPUT http://zmdevapi/configs/121.json -d "Config[Value]=901"
3.2.11 Create a Zone
curl -XPOST http://zmdevapi/zones.json -d "Zone[Name]=Jason-Newsted\ &Zone[MonitorId]=3 \ &Zone[Type]=Active \ &Zone[Units]=Percent\ &Zone[NumCoords]=4 \ &Zone[Coords]=0,0 639,0 639,479 0,479 \&Zone[AlarmRGB]=16711680 \ &Zone[CheckMethod]=Blobs \ &Zone[MinPixelThreshold]=25\ &Zone[MaxPixelThreshold]= \ &Zone[MinAlarmPixels]=9216 \&Zone[MaxAlarmPixels]= \ &Zone[FilterX]=3 \ &Zone[FilterY]=3 \&Zone[MinFilterPixels]=9216 \ &Zone[MaxFilterPixels]=230400 \&Zone[MinBlobPixels]=6144 \ &Zone[MaxBlobPixels]= \ &Zone[MinBlobs]=1 \&Zone[MaxBlobs]= \ &Zone[OverloadFrames]=0"
32 Chapter 3. API
CHAPTER 4
FAQ
This is the FAQ page. Feel free to contribute any FAQs that you think are missing.
4.1 Why can’t I view all of my monitors in Montage view?
1. You will most likely need to increase mysql_max_connections in my.cnf.
2. If using Firefox, you may need to increase network.http.max-persistent-connections-per-server in about:config.
4.2 How do I enable ZoneMinder’s security?
You may also consider to use the web server security, for example, htaccess files under Apache, or mod_auth.
1. In the console, click on Options.
2. Check the box next to “ZM_OPT_USE_AUTH”.
3. Click Save
4. You will immediately be asked to login. The username is ‘admin’ and the password is ‘admin’.
4.3 To Manage Users
1. In main console, go to Options->Users.
4.4 The “Zones” view for a Monitor is blank (I can’t see / setup a Zone)
Snapshots and Zones images are stored in the images directory in your webroot. Ensure that the images directory iswritable by the user which ZoneMinder is running as. If the images directory is a symlink, ensure that your web serverhas access to that directory as well.
4.5 How do the 3 AlarmCheckMethods interact?
In example, if I set the alarm % to 5-10% and the filtered and blob to 1-100%, what happens?
33
ZoneMinder Documentation, Release 1.27.0
1. If any of the min/max values is 0, the check that the value is applied to is skipped.
2. If you have a min-alarmed area and you’re below that, then it quits.
3. If you have a max-alarmed area and you’re above that, then it quits.
4. If you’re on filtered or blobs
1. and have a min filtered area that you’re below then it quits
2. and have a max filtered area that you’re above then it quits
5. If you’re on blobs
1. any blob smaller than the min blob area (if set) is discarded
2. any blob larger than the max blob area (if set) is discarded
3. If there are less remaining blobs than the minimum-blobs, then it quits.
4. If there are more remaining blobs than the maximum-blobs, then it quits.
If AlarmedPixels is selected, you can only enter min/max pixel threshold and min/max alarmed area. If FilteredPixelsis selected, the Blob options are disabled. The Blob check method allows you to specify all options. Filtered addsmore checks than alarmed, and blobs adds more checks than filtered. The final ‘score’ is calculated using final checkmethod.
34 Chapter 4. FAQ
CHAPTER 5
Contributing
1. Check for open issues or open a fresh issue to start a discussion around a feature idea or a bug.
2. Fork the ZoneMinder repository on Github to start making your changes.
3. Send a pull request and bug the maintainer until it gets merged and published. Stop by the #zoneminder channelon irc.freenode.net.
Welcome to ZoneMinder’s documentation, the following resources are available
Installation Guide Many distrubution repos only hold older versions of ZoneMinder, current versions contain manybug fixes and updated functionality. Instructions here for installing updated packages or compiling from source.
User Guide Guide to setting up ZoneMinder for the first time and detailed guides for using the ZoneMinder frontend.
API Information on using the CakePHP based API for interfacing to ZoneMinder
FAQ Frequently Asked Questions
Contributing How to contribute to ZoneMinder. As a community project we always need help, you don’t need to bea coder to test or update documentation.
35
ZoneMinder Documentation, Release 1.27.0
36 Chapter 5. Contributing
CHAPTER 6
Indices and tables
• genindex
• modindex
• search
37


![[Dev/Testday] Dev testazure infra-arm - Manon Pernin](https://static.fdocuments.net/doc/165x107/58ee501a1a28aba0128b462d/devtestday-dev-testazure-infra-arm-manon-pernin.jpg)