You don’t need a kitchen to do it! - South Walsham...
22
1 You don’t need a kitchen to do it! First published: 15/3/2011 © 1st South Walsham Guides, Norfolk Republished as Cupcake Challenge with Extra Toppings in 2017 email us for an electronic copy - [email protected] download extra copies from: http://southwalshamguides.org.uk Updated 2017 with GUK logo Our original badge designed in 2011
Transcript of You don’t need a kitchen to do it! - South Walsham...

1
You don’t need a kitchen to do it!
First published: 15/3/2011 © 1st South Walsham Guides, Norfolk Republished as Cupcake Challenge with Extra Toppings in 2017
email us for an electronic copy - [email protected] download extra copies from: http://southwalshamguides.org.uk
Updated 2017 with GUK logo
Our original badge designed in 2011

2
Welcome to the 1st South Walsham Cupcake Challenge
An activity pack for all sections
Here at 1st South Walsham Guides in Norfolk we’ve gone muffin mad and cupcake crazy! We love baking, even though we have limited kitchen facilities at our meeting place and have to run over the road to our leader’s house to pop things in the oven! Like most Guides, we enjoy making yummy things and decided to design our own badge so that baking cupcakes could become an official activity! We have road tested all these ideas in our own Guide unit and with our friends Blofield District Rangers, 1st South Walsham Brownies and Acle Rainbows, so we know if works for all sections. It is up to you how many activities you choose to do to gain your badge, but we suggest Rainbows 3+ Brownies 4+ Guides 5+ Senior Section and Adults 6+
Try and choose activities from the different sections, which are: Section 1 – Crazy Cakes; a selection of games and challenges Section 2 – Clever Cakes; brain teasers and food for thought! Section 3 – Crafty Cakes; lots of cake-related makes Section 4 – Bake the Cake; recipes and tips for indoor and outdoor cakes Section 5 – Icing on the Cake; a design and decorating challenge You could use this badge as a theme for a camp, holiday or sleepover, or simply complete the badge in meeting time. Once you have finished, send off for your fabulous bun-shaped badges (see order form at the back of this booklet). We don’t pretend to be experts in cupcake creation, but we’ve had great fun designing and testing this badge. We hope you will enjoy doing it too; we’d love to hear how you get on and see some pictures of your buntastic creations.
HAVE FUN! email us on [email protected]
Some cupcakes we made earlier!
3
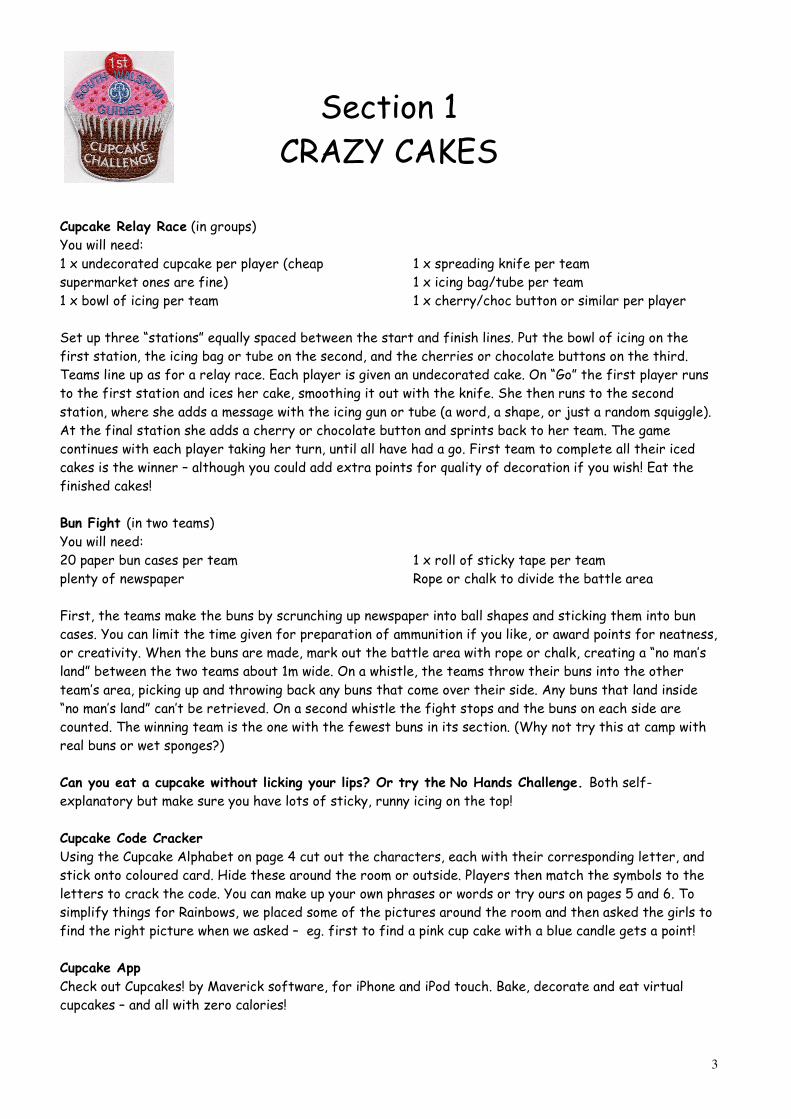
Section 1 CRAZY CAKES
Cupcake Relay Race (in groups) You will need: 1 x undecorated cupcake per player (cheap supermarket ones are fine) 1 x bowl of icing per team
1 x spreading knife per team 1 x icing bag/tube per team 1 x cherry/choc button or similar per player
Set up three “stations” equally spaced between the start and finish lines. Put the bowl of icing on the first station, the icing bag or tube on the second, and the cherries or chocolate buttons on the third. Teams line up as for a relay race. Each player is given an undecorated cake. On “Go” the first player runs to the first station and ices her cake, smoothing it out with the knife. She then runs to the second station, where she adds a message with the icing gun or tube (a word, a shape, or just a random squiggle). At the final station she adds a cherry or chocolate button and sprints back to her team. The game continues with each player taking her turn, until all have had a go. First team to complete all their iced cakes is the winner – although you could add extra points for quality of decoration if you wish! Eat the finished cakes! Bun Fight (in two teams) You will need: 20 paper bun cases per team plenty of newspaper
1 x roll of sticky tape per team Rope or chalk to divide the battle area
First, the teams make the buns by scrunching up newspaper into ball shapes and sticking them into bun cases. You can limit the time given for preparation of ammunition if you like, or award points for neatness, or creativity. When the buns are made, mark out the battle area with rope or chalk, creating a “no man’s land” between the two teams about 1m wide. On a whistle, the teams throw their buns into the other team’s area, picking up and throwing back any buns that come over their side. Any buns that land inside “no man’s land” can’t be retrieved. On a second whistle the fight stops and the buns on each side are counted. The winning team is the one with the fewest buns in its section. (Why not try this at camp with real buns or wet sponges?) Can you eat a cupcake without licking your lips? Or try the No Hands Challenge. Both self-explanatory but make sure you have lots of sticky, runny icing on the top! Cupcake Code Cracker
Using the Cupcake Alphabet on page 4 cut out the characters, each with their corresponding letter, and stick onto coloured card. Hide these around the room or outside. Players then match the symbols to the letters to crack the code. You can make up your own phrases or words or try ours on pages 5 and 6. To simplify things for Rainbows, we placed some of the pictures around the room and then asked the girls to find the right picture when we asked – eg. first to find a pink cup cake with a blue candle gets a point! Cupcake App
Check out Cupcakes! by Maverick software, for iPhone and iPod touch. Bake, decorate and eat virtual cupcakes – and all with zero calories!

4
Section 1 - CUP CAKE ALPHABET
A B C D E
F G H I J
K L M N O
P Q R S T U V W X Y Z

5
Section 1 – Cupcake Code Cracker 1 WHAT A MIX UP. CAN YOU CRACK THE CODE?
_ _ _ _ _ _ _ _
_ _ _ _ _ _ _ _ _ _ _ _ _
_ _ _ _

6
Section 1 - CUPCAKE CODE CRACKER 2 OH CRUMBS! NOT ANOTHER ONE…
_ _ / _ _ _ _ _ _ _
_ _ _ / _ _ _ _ _
_ _ _ _ _ _ !

7
Section 2 CLEVER CAKES
Plenty of food for thought! Cupcake Word Search
chocolate baking
margarine oven
decoration sugar flour spoon eggs bowl
cream frosting
icing temperature
yummy
Cake Mixture
What a mix up! All of these words have been scrambled. Can you un-mix them and find missing cakes and biscuits? 1 TLEAOCCHO FIMUNF 2 SMEILLI EOKCOI 3 YAPRT SGRNI 4 SGEIDISVET 5 SCLECE KEAC 6 ACVIITOR CSIAWDNH
7 NBRUOBO 8 KLBCA SFROET UGAATE 9 EGALN KECA 10 ENBOIRW 11 EACPUCSK 12 RIFTU EAKC
Cake Brain Teaser
How many different words can you make out of the words VICTORIA SPONGE? Each word must have three or more letters and use each of the original letters only once. Scores: Average 30 Good 45 Excellent 60 Genius! 75
Cupcake dot-to-dot
Doesn’t need any explanation! See page 8.
O R I M N Y I V E M I
N O G Y A I M T Y C E
O H N N G E A M I C G
I R I A I L R N U O G
T A T A O K G C E Y S
A O S C S S A N I P N
R U O L F U R B O W L
O H R N N G I O R C A
C O F R G A N I V Y O
E R U T A R E P M E T
D F G E S H U O T E N

8
Section 2 YUMMY DOT-TO-DOT

9
Section 3
CRAFTY CAKES Mini Cupcake Pin Cushion For each mini pin cushion you will need: 1 mini silicone cupcake case (pound shops stock these) 1 circle of main colour felt or other fabric (template A page 11) 1 small circle in icing shape in second colour (template B page 11) 1 tiny circle of fabric in a contrasting colour (template C paage 11) sewing needle and thread small quantity of craft stuffing glue pins 1. Cut out the main colour circle, icing shape and tiny circle using templates described above. 2. Stitch the icing circle to the main circle with a small running stitch or blanket stitch. (See page 11 for stitch guide.). 3. With a double thread, sew a running stitch around the outside of the tiny circle, put a really small amount of stuffing in the middle, and draw up the stitches carefully, to make a small ball shape. Sew a few stitches across the bottom to keep the shape in place. 4. Sew or glue the small ball to the middle of the icing circle. All three pieces should now be attached. 5. With a double thread, sew a running stitch around the large main circle. Take some stuffing and make it into a ball shape, enough to fill your cup cake case. Place the stuffing in the centre of your material, on the reverse side, and draw together the running stitch, to make a globe shape, the right size to fit into the cupcake case. Sew a few stitches across the bottom to keep the shape in place, as before. 6. Place some glue into the bottom and sides of the cupcake case and stick the cupcake globe shape inside. (You may need to be generous with the glue, because of the non-stick silicone!) 7. Allow the glue to dry then add some pins to complete. Handy hint: we found it was best not to glue the icing circle onto the main body of the cushion, as
it prevents the pins from sticking in well.
Cupcake Badge or Fridge Magnet
You will need: a small amount of fun foam/felt in three different colours glue (we found glue gun worked best on foam) safety pin for badge OR magnetic strip for fridge magnet scissors pencil sewing needle and threads if using fabric 1. Draw round the three templates D, E &F on page 11 and cut out the shapes in different colours. 2. Stick the icing shape to the main cupcake case and when dry, add the cherry on the top. 3. Stick either a safety pin or a fridge magnet piece on the back of the shape. 4. You can add sparkle to your badge or magnet with glitter glue or sequins.

10
Section 3
CRAFTY CAKES continued
Cupcake Needle Case You will need Felt pieces in three main colours Assorted embroidery threads (or glue) Scissors Sewing needle Pins and needles to complete 1. Cut out a rectangle from the main piece of felt measuring 14cm x 7.5cm. 2. Cut a second rectangle from a contrasting piece of felt, measuring 12cm x 6.5cm. (You can’t see this bit in the photo but it’s the middle “page” of the needle case.) 3. If you are into sewing, use blanket stitch around the whole of the outside of the main rectangle in a contrasting shade of embroidery thread. (See page 11 for stitch guide). 4. Cut out the cupcake shapes, using template G, H & I on page 11, and either sew or glue into place. You can use blanket stitch again or a small running stitch. Add French knots for decoration if you like. 5. Place the smaller rectangle inside the needle case, like the inner page of a book, and either sew into place with a small running stitch or thin line of glue down the spine. 6. Add needles and pins to the inner “page” to complete.
Beaded Cupcake Badge You will need Small amounts of pink and white felt Pink seed beads Small safety pin or brooch pin Glue White and pink embroidery thread (2 strands thickness) sewing needle 1. Using templates G& H on page 11, cut 1 pink cupcake and 1 white cupcake top from felt. 2. Carefully stitch or glue the white top to the pink cupcake bottom using the white embroidery thread. 3. Stitch four lines vertically along the cupcake base to create the “folds” of the cupcake paper using the pink embroidery thread. 4. Sew eight pink seed beads to the cupcake top (placing relatively even space between each bead). 5. Glue a pin or brooch back to the reverse of the cupcake. Or why not use these templates and ideas to make cupcake cards, gift tags or invitations? Just use the templates to cut out different coloured card and let your imagination run wild!

11
Section 3 CRAFT TEMPLATES & STITCH GUIDE
Blanket stitch
French Knot
Running stitch

12
Section 4
BAKE THE CAKE BASIC CUPCAKE MIXTURE (makes 24)
150g (6oz) butter or margarine (softened) 150g (6oz) caster sugar 150g (6oz) self-raising flour (sieved) 3 medium eggs 24 medium bun cases bun tins 1. Pre heat the oven to 180C/350F/ Gas mark 4. 2. In a bowl, mix together margarine or butter and caster sugar until smooth and creamy, with no “grittiness” left. Add the eggs and a little of the sieved flour and mix until combined. Add the rest of the flour carefully. 3. Place a bun case into each hole on the bun tin tray and spoon a little of the mixture into each. Don’t fill more than half way or your cupcake will explode and look messy. 4. Place the tray in the centre of the oven and bake for about 18-20 minutes until golden brown and springy to the touch.
BASIC MUFFIN MIXTURE (makes 24)
300g (10½ oz) plain flour 1 teaspoon baking power 150g (6 oz) caster sugar 2 medium eggs 200ml milk 150ml vegetable oil 24 medium bun cases bun tins 1. Pre heat the oven to 180C/350F/Gas mark 4. 2. Sift the flour, baking power, sugar and salt into a large bowl. 3. In a separate, medium-sized bowl, beat the milk, eggs and oil together with a fork. 4. Pour the liquids into the flour mix and fold gently with a metal spoon, taking care not to over mix. Complete as for cupcakes.
TRY ADDING SOME YUMMY EXTRAS
100g (4oz) chocolate chips (dark, milk or plain) 1 tbsp lemon curd in the mixture, plus 1 tsp on top of each cupcake before baking 175g (4oz) raisins or sultanas fresh raspberries, blueberries or blackberries 200g (8oz) chopped cheese + sprinkling of herbs 25g (1oz) fresh coriander + 175g (4oz) grated carrot 1 ripe mashed banana + 50g (2oz) chewy toffee
We divided into patrols and tried out different recipes. But you could try other options
� everyone makes the same recipe and you see how they all turn out � run a Pat-A-Cake evening (do the hand clapping while your cakes are in the oven then decorate
cakes with the girls’ initials!) See song lyrics on page 15. � run a Ready Steady Cook challenge � give each group £5 to buy ingredients and see who makes the most cupcakes for that money � use it as a fund-raising event – sell the cakes to parents at the end of your meeting

13
Section 4
BAKE THE CAKE OUTDOOR CAKES
Boil in the Bag Cakes
Just use any supermarket cake mix and mix up according to the packet instructions. Pop the mixture into a microwaveable poly bag, tie it really loosely so that it has room to expand and pop it in a pan of boiling water for about 10-15 minutes or until it looks cooked through. It even works on a Trangia (lightweight camping stove). Orange Cakes (makes about six)
6 medium sized oranges 1 x basic cupcake mixture cocktail sticks 1. Take a slice off the top end of each orange and then hollow it out with a spoon. 2. Spoon the cupcake mixture equally into the six oranges, making sure to leave some room for the cake to rise. (You make have to adjust your quantity of oranges, depending on their size. 3. Put the slice back on the top of each orange and secure in place with two or three cocktail sticks through the lid into the main orange. 4. Wrap in foil and cook for about 20 mins in campfire embers or on a barbecue. 5. You can either peel the cakes when cooled or eat with a spoon straight out of the orange. Build a camp oven in which to bake your cupcakes
These instructions are “as remembered” by our leader – there are various other outdoor oven projects you can try. Just Google camp oven on the internet and lots of other options come up.
“I last made one of these at my Camp Licence
test in the Year Dot… it was great fun!
“The chimney is made from a stack of tin cans
with both ends and the paper wrapper removed.
You’ll need a metal box with a lid – an old deep
biscuit tin is ideal if you can get one.
Dig a trench deep enough to light a fire
underneath the box – around 30-40cm.
Use a metal rack on top of your trench,
overlapping slightly onto the ground and sit your
metal box on top. An old oven shelf is ideal.
Stack the tins in a long chimney at the back of
the oven, to draw the fire below.
Cover the whole box and chimney in mud to
insulate it. Leave the front door clear.“
14
Section 5
ICING ON THE CAKE!
Design Challenge
Either individually, in pairs or small groups, ask your cake decorators to design � a cupcake with attitude or character � a cupcake for a birthday or anniversary � a cupcake for a special occasion in guiding � a cupcake for a special season, such as Christmas or Halloween � an arty cupcake
If you want to keep it simple, ask your decorators simply to design a cupcake on paper.
Icing recipes
Butter Icing
100g (4 oz) sieved icing sugar 50g (2 oz) butter or margarine Soften the butter or margarine in a bowl and gradually add in the icing sugar until they are thoroughly mixed and creamy. You may need to add a bit of water to make it the right consistency for piping – but only add a tiny amount at a time until you get it right. Practise with a small amount first!
Glacé Icing
100g (4oz) sieved icing sugar 1 tablespoon warm water Put the icing sugar into a bow and gradually add the water, stirring until smooth and glossy. It should be thick enough to coat the back of a spoon when ready. You may need it slightly stiffer if you are using it for piping your design, so experiment with either more icing sugar or less water until you get it right. Ready to roll fondant icing can be cut into shapes with small cooking cutters, made into petals to create flowers or used creatively as stripes and dots. It’s a good idea to have some pictures in recipe books to inspire the group – let them have a flick through before your session starts to get some creative ideas flowing! (We borrowed lots of books out of our local library).
There are hundreds of recipe books and internet sites to help you turn your plain cup cakes or muffins into gorgeous, gourmet creations. We particularly liked the ideas in these books
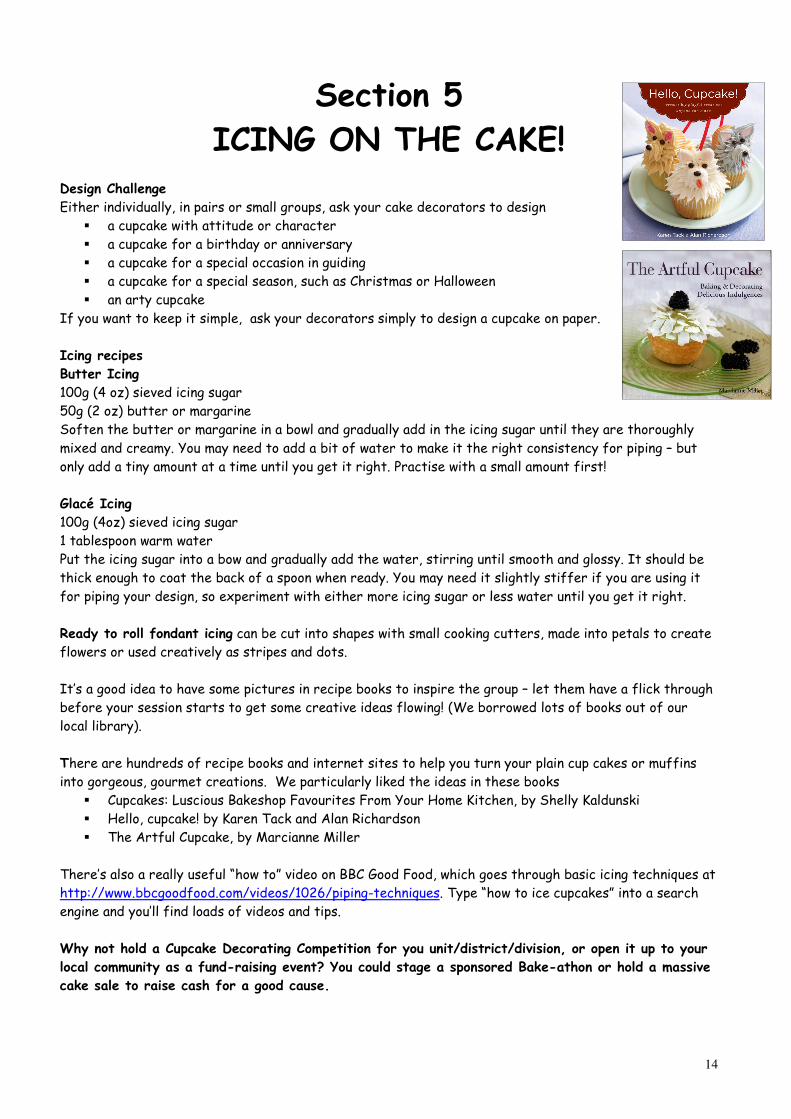
� Cupcakes: Luscious Bakeshop Favourites From Your Home Kitchen, by Shelly Kaldunski � Hello, cupcake! by Karen Tack and Alan Richardson � The Artful Cupcake, by Marcianne Miller
There’s also a really useful “how to” video on BBC Good Food, which goes through basic icing techniques at http://www.bbcgoodfood.com/videos/1026/piping-techniques. Type “how to ice cupcakes” into a search engine and you’ll find loads of videos and tips. Why not hold a Cupcake Decorating Competition for you unit/district/division, or open it up to your
local community as a fund-raising event? You could stage a sponsored Bake-athon or hold a massive
cake sale to raise cash for a good cause.

15
Extra Toppings for 2017
We've redesigned our badge to include the Girlguiding UK logo and added some extra activities too
Extra Topping 1 Cupcakes for the Birds
Extra Topping 2 Cupcake Mindfulness
Extra Topping 3 Spot the Difference
Extra Topping 4 Cupcake Mix up - Bite-sized & Fiendish Anagrams

16
Cupcakes for the Birds Spare a crumb or two for our feathered friends - especially in the winter months
with thanks to the RSPB for this recipe Stuff you need Good quality bird seed; raisins; peanuts; grated cheese; suet or lard; yoghurt pots; string; mixing bowl; scissors.
Steps 1. Carefully make a small hole in the bottom of a yoghurt pot. Thread string through the hole and tie a knot on the inside. Leave enough string so that you can tie the pot to a tree or your bird table.
2. Allow the lard to warm up to room temperature, but don’t melt it. Then cut it up into small pieces and put it in the mixing bowl.
3. Add the other ingredients to the bowl and mix them together with your finger tips. Keep adding the seed/raisin/cheese mixture and squidging it until the fat holds it all together.
4. Fill your yoghurt pots with bird cake mixture and put them in the fridge to set for an hour or so.
5. Hang your speedy bird cakes from trees or your bird table. Watch for greenfinches, tits and possibly even great spotted woodpeckers.
Watch the RSPB’s YouTube channel
(www.youtube.com/watch?v=aTSmRMBFRbw) for more details.
Important notes - not suitable for children with nut allergies. Bird seed and peanuts bought for birds are not suitable for human consumption.
Great spotted woodpecker
Blue tit
Greenfinch
Extra
Topping
1

17
Cupcake Mindfulness
Extra
Topping
2
We all need to take five minutes to chill out and slow down our hectic lives - and what better way to do that than to take some coloured pens or pencils and decorate our Cupcake design in whatever shades fit your mood? Write the name of your favourite type of cake in the centre,
surround it with deliciously mindful colouring ... and, chill!

18
Spot the Difference
Can you spot 10 differences between the two Cupcake stands? Answers on page 21
Extra
Topping
3

19
Cupcake Mix Up Choose between the Fiendish or Bite-sized
Anagram Challenges - or tackle both if you're feeling
Bite-sized anagrams -one word only, related to cakes and eating cakes
1. nub
2. ecka
3. ginci
4. funmif
5. ebrionw
6. mumyy
7. esgpno
8. selknirps
9. sgeg
10. rsgua
Fiendish Anagrams - types of cake or pudding
1. nozzle milder (two words)
2. grabnutbett (one word)
3. pig in overcoats (two words)
4. kecalsc cee (two words)
5. kneaded cue (two words)
6. waffled ounce ant (three words)
7. aim I rust (one word)
8. swirl loss (two words)
9. Pain beef foe (two words)
10. Ace Puck (one word)
Answers on page 21
Extra
Topping
4

20
CLEVER CAKES ANSWERS
CUPCAKE WORD SEARCH
CAKE MIXTURES
1 CHOCOLATE MUFFIN 2 MILLIES COOKIE 3 PARTY RINGS 4 DIGESTIVES 5 ECCLES CAKE 6 VICTORIA SANDWICH
7 BOURBON 8 BLACK FOREST GATEAU 9 ANGEL CAKE 10 BROWNIE 11 CUPCAKES 12 FRUIT CAKE
PAT-A-CAKE SONG No one knows for sure the origins of this children’s nursery rhyme but it’s believed that the first record of it dates back to 1698. There’s a long tradition of decorating cakes with a child’s initial. Why not try this clapping song with a partner while you’re waiting for your cakes to bake! Pat a cake, Pat a cake, baker's man (first two lines - alternate hand clapping) Bake me a cake as fast as you can; Mix it and prick it and mark it with a 'B', (pretend to mix in bowl, prick,then draw a B in the air)
Then put it in the oven for Baby and me. (alternate hand-clapping again.)
CUPCAKE CODE CRACKER
1. Brownies love chocolate cake 2. My Leaders are crazy ladies!

21
EXTRA TOPPINGS - ANSWERS
CAKE MIX UP ANAGRAMS - answers 1. nozzle milder (two words) Lemon drizzle 2. grabnutbett (one word) Battenburg 3. pig in overcoats (two words) Victoria Sponge 4. kecalsc cee (two words) Eccles Cake 5. kneaded cue (two words) Dundee Cake 6. waffled ounce ant (three words) Coffee and walnut 7. aim I rust (one word) Tiramisu 8. swirl loss (two words) Swiss roll 9. Pain beef foe (two words) Banoffee Pie 10. Ace Puck (one word) Cupcake Bite sized anagrams (one word only) 1. nub Bun 2. ecka cake 3. ginci icing 4. funmif muffin 5. ebrionw brownie 6. mumyy yummy 7. esgpno sponge 8. selknirps sprinkles 9. sgeg eggs 10. rsgua sugar
SPOT THE DIFFERENCE

22
BADGE ORDER FORM Updated in 2017
Unit………………………………………........................County..................................................
No. of badges........@ £1 each = £..............
Postage (2nd class letter post)
1-25 badges £ 1.00
26-65 badges £ 1.50
66-130 badges £ 1.75
For larger orders please contact me
Total £................
Contact Name and Address:
……………………………………………………………………………….....................…………………………………………………
……………………………………………….....................……………………..........................................................................…
Postcode……………………………………………….................
Email: …..………………..………………..………......................
Telephone……………………………………………
Please make cheques payable to 1st South Walsham Guides and send your order to Chris Bond 1st South Walsham Guides 2 Church Close South Walsham Norwich NR13 6DW Tel: 01603 270210 E: [email protected] W: http://southwalshamguides.org.uk/ You can download extra copies from here Or pay via PayPal, using [email protected], and giving your full name and address details.
Badge updated for 2017