YCL Session 1 Lesson Plan - GlobalHack · YCL Session 1 Lesson Plan Summary This week, students are...
16
YCL Session 1 Lesson Plan Summary This week, students are meeting each other and the coach if they do not know them already, and learning more about the Youth Coding League and how the semester will proceed. They will also start using their code editor PyCharm to create directories and files, as well as navigate through their view of the course website to copy-paste code snippets into PyCharm files. They will have a chance to write their first program in Python, as well as add comments to it. Lastly, they will prepare a basic drawing which they will hard-code in the following session. Session Goals ● Meet team and coach/mentor ● Gain basic familiarity with PyCharm editor and directory/file creation ● Use comments in code Agenda ● Welcome (15 min) ● Concept 1: Coding 101 (10 min) ● Activity 1: “Hello World!” (10 min) ○ Instructions ○ Solutions ● Activity 2: Creating Another Directory (5 min) ○ Instructions ○ Code Snippet: drawing_samples.py ● Activity 3: Commenting (10 min) ○ Instructions ○ Code Snippet: commenting.py ● Activity 4: Drawing Prep (10 min)
Transcript of YCL Session 1 Lesson Plan - GlobalHack · YCL Session 1 Lesson Plan Summary This week, students are...

YCL Session 1 Lesson Plan
Summary This week, students are meeting each other and the coach if they do not know them
already, and learning more about the Youth Coding League and how the semester will
proceed. They will also start using their code editor PyCharm to create directories and
files, as well as navigate through their view of the course website to copy-paste code
snippets into PyCharm files. They will have a chance to write their first program in
Python, as well as add comments to it. Lastly, they will prepare a basic drawing which
they will hard-code in the following session.
Session Goals ● Meet team and coach/mentor
● Gain basic familiarity with PyCharm editor and directory/file creation
● Use comments in code
Agenda ● Welcome (15 min)
● Concept 1: Coding 101 (10 min)
● Activity 1: “Hello World!” (10 min)
○ Instructions
○ Solutions
● Activity 2: Creating Another Directory (5 min)
○ Instructions
○ Code Snippet: drawing_samples.py
● Activity 3: Commenting (10 min)
○ Instructions
○ Code Snippet: commenting.py
● Activity 4: Drawing Prep (10 min)
Welcome, Introductions and Icebreakers, Classroom Expectations
(15 min)
The following is an example script of how to welcome your students to the Youth
Coding League. Please make sure to cover every bullet point below at the minimum.
See the “Session 1” Powerpoint for more details.
This is the first meeting of your Youth Coding League team!
● The goal of this program is to learn coding while creating fun 2D games. You’ll
be learning all the standard programming concepts, as well as the syntax of
Python. At the end of the semester, you will compete against other schools in
the area with the final game you’ve created, and build on your game(s) during
the event!
Next week you will start creating graphics using a program called Arcade. This
week is about making sure all of our systems are up and running, understanding
a few important concepts, and learning how to work in our new coding
environment, PyCharm.
There is so much you can do with programming, including expressing yourself by
creating amazing art, entertaining yourself and your friends by building fun
games, and eventually making money too!
Here are some videos of games students have created using the Arcade library
and Python:
http://bit.ly/arcproj1
http://bit.ly/arcproj2
http://bit.ly/arcproj3
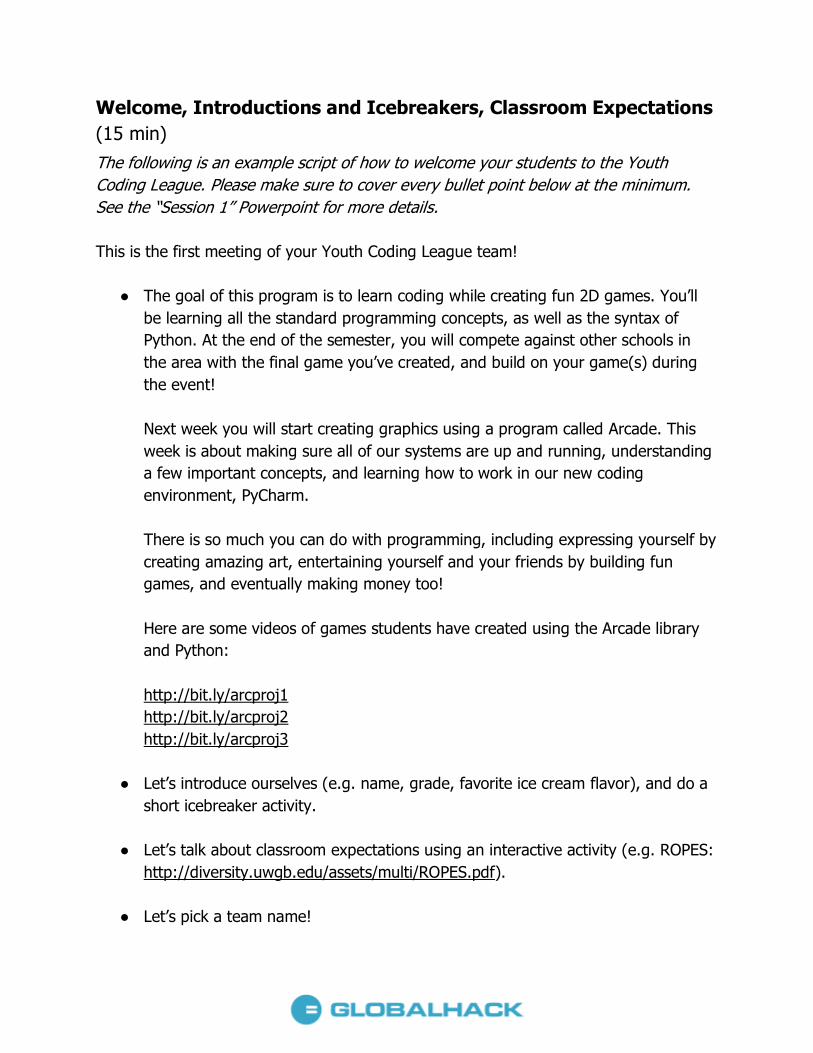
● Let’s introduce ourselves (e.g. name, grade, favorite ice cream flavor), and do a
short icebreaker activity.
● Let’s talk about classroom expectations using an interactive activity (e.g. ROPES:
http://diversity.uwgb.edu/assets/multi/ROPES.pdf).
● Let’s pick a team name!

● The theme for this season is: Adventures and Movies
Concepts (10 min)
The script below should serve as a way for you to introduce students to what coding is,
as well as a brief introduction to the programming language Python. The section
addressing different versions of Python is not required, but does provide students with
helpful context as well as a “heads up”. Do make sure to introduce the 3 necessary
“tools of the toolbox”: Python, PyCharm, and Arcade, even if it is in just a few
sentences.
How many of you use computers on a daily basis?
Computers are not intelligent, self-sufficient beings. They cannot (for now at least!)
create anything without being given a specific set of instructions, a blueprint for what to
create. This is where programming comes in; think of programming a computer like
writing a recipe or a play.
To give the computer instructions, we will use a programming language called Python.
The creator of Python, Guido van Rossum, was a fan of Monty Python, and this is
where the name comes from (nothing to do with the snake!)
Python is a great language to start learning programming. Graphics are easier to create
in Python than in other languages, and you can apply all the same concepts learned
here in other programming languages you learn, like C or Java. Python is also a great
language for people interested in doing making sense of lots of information at once (i.e.
data processing), and automating boring things (https://automatetheboringstuff.com/).
A quick note on Python 2.x.x vs. 3.x.x
There are two main versions of Python. When Python moved to version 3, there were
changes that didn’t work with all the currently written Python 2 programs. So both
Python 2 and Python 3 were being developed simultaneously. Some people don’t want
to move to Python 3 at all.
We use Python 3. Why are you going to care?
● If you search up examples you will find both Python 2 and Python 3
examples.

● Systems such as the Mac and Linux have Python 2 installed by default.
If you see a Python example on the web that has a print statement that looks like:
print "Hi"
Instead of:
print("Hi")
Then you have a Python 2 example and it won’t run with what we have installed and
will use in this class. Since Python 2 is installed on a Mac and sometimes Linux
operating systems by default, you will need to make sure to use Python 31.
In addition to using Python, we will be using an editor called PyCharm, which is the
“environment” in which we will be writing all of our code. In order to build games, we
will need one last component: the Arcade “library”, which is a set of pre-written
instructions that we can directly include at the top of our instructions (think of it like
bringing an entire virtual library full of books with you wherever you go!)
Activity 1: “Hello World!” (10 min)
Most if not all of your students should have Python, PyCharm, and Arcade
downloaded/installed, and this activity is meant to start familiarizing them with how to
write and execute Python code in the PyCharm editor.
In order to give our computer instructions using the Python language, we must use an
integrated learning and development environment, or IDE, called PyCharm.This
environment will allow us to write, edit, and “run”, or “execute”, code, to see what the
computer can do with our instructions! PyCharm’s component you will use the most is
called the edit window. This where you will write the actual instructions, or code. All of
the lines of code taken together are called your script (like the script for a movie!).
In order to see what the result, or output, of your code/instructions looks like, you will
first need create a file for your code, then save your code (we wouldn’t want to lose our
hard earned work!), and then you will need to “execute” your scripts.
One of the first exercises most people complete when they first learn to code is a “Hello
World!” print statement. Printing in computing means displaying whatever you want
(usually a word, a letter, a number, or an equation), to your Python shell. In our “edit”
window, we will use a command called a print function, which is a piece of code you
1 http://arcade-book.readthedocs.io/en/latest/chapters/01_setup/setup.html

can use over and over again, and parentheses to surround whatever it is we want to
display (aka print!). We’ve just given the computer instructions to display the words
“Hello World!”
“Hello World!” is what we call a string, and print is what we call a built-in function. We
will learn more about these two during the course.
Instructions:
● Start PyCharm. If you’ve got it installed, just hit the “Window” key and start
typing in “PyCharm”.
● If this is the first time you are opening it, just press next/skip for the
prompts.
● Create a “Pure Python” project. But wait! Don’t just hit “Create” when you get
to this page. There are two more steps.
● Step 1: Change where you want to save the file. If you are developing on
your own computer, save to the C: drive. If you are developing on a lab
computer, save to your flash drive, or to a network drive. Don’t save to the C:
drive. Ask if you need help.
● Step 2: Change “untitled” to the name “YCL 2017”. We’ll use the same
project for everything we do in class.
● Make sure that the interpreter is 3.6.0 or later.

● Now you can create the project.
● Inside of this project, create a new directory. Call it Session 1. We’ll have a
new directory for each session, and a new file for each activity or code
snippet. If you want to create a “scratch” program to play around with, put it
in a new directory. Give your directory a good name, so you can go back and
find the code easier.

● Navigate to the directory you just created (you may have to double click on
the “YCL 2017” project to to find the “Session 1” directory). Right click on the
directory you just created. Make sure you are inside the Session 1 directory.
Create a new “Python File”. Not simply “New File”, but “New Python File”.

● Call it hello.py and make sure it appears in the new directory.
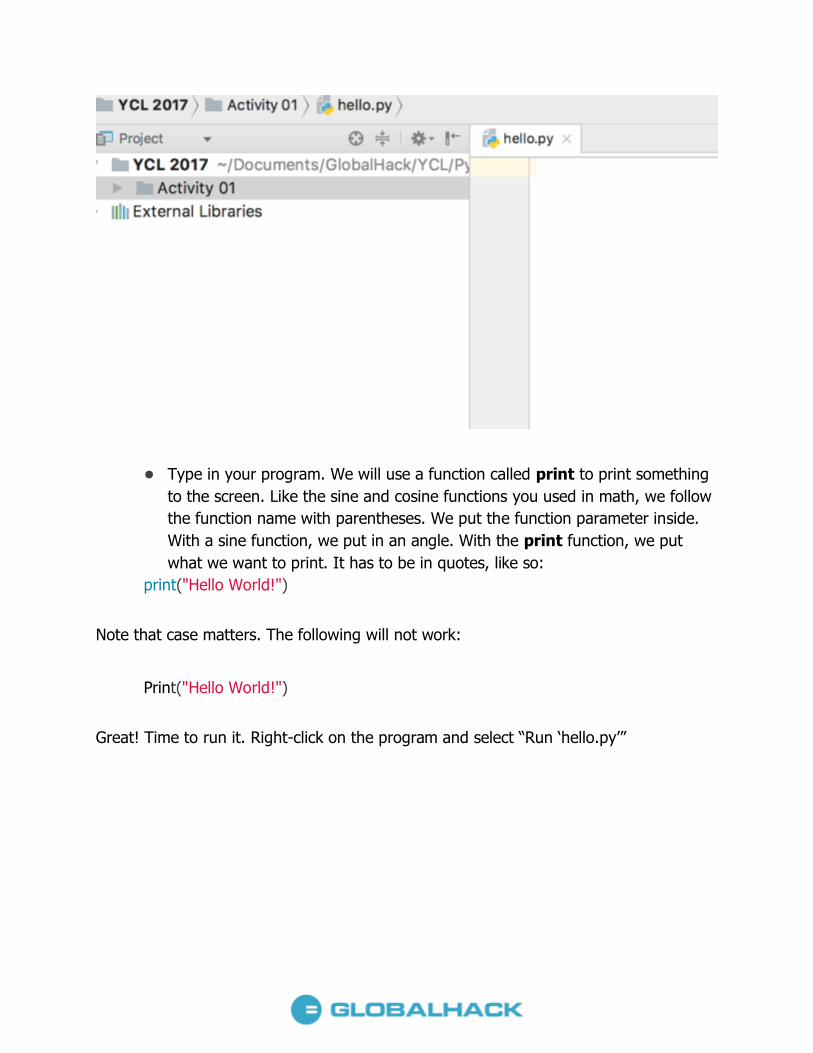
● Type in your program. We will use a function called print to print something
to the screen. Like the sine and cosine functions you used in math, we follow
the function name with parentheses. We put the function parameter inside.
With a sine function, we put in an angle. With the print function, we put
what we want to print. It has to be in quotes, like so:
print("Hello World!")
Note that case matters. The following will not work:
Print("Hello World!")
Great! Time to run it. Right-click on the program and select “Run ‘hello.py’”

See the output of your program at the bottom of the screen. Click the image below to
make it better and note the:
● Right margin. You can write code past this point, but don’t.
● Where you can hover your mouse for “hints” on how to make your code better.
● Where you can quickly click to run your program again.
Solution:
print(“Hello World!")
[output] Hello World!
● Try printing anything other words/sentences you want, like “School is
awesome!” or “My teacher is the best!”

Activity 2: Creating Another File (5 min)
Again, this activity is meant to familiarize students with how to operate PyCharm, in this
case creating a new file. Once drawing_samples.py is created, practice accessing the
course website’s sessions from the student view to retrieve code samples for copy-
pasting and running in PyCharm.
Students will get instructions to this activity in the student view as well, but it’s up to
you whether you want to download the powerpoint and add the screenshots below. We
recommend you use these screenshots to do a demo for students before they try it out
on their own.
We are going to run some code snippets as we go through the semester. Let’s create a
Python file for this chapter called drawing_sample.py. Your system should look like
this:
You can see a complete breakdown of what your Session directories should look like, as
well as all the files that should be included, on the course website. This is also where
you will find the code snippets to copy, paste and execute inside of your PyCharm code
snippet files.
Let’s find the drawing_sample.pdf code snippet under the “Session 1” folder on the
course website, and copy-paste the code there into the newly created
drawing_sample.py in PyCharm. Run it and see what happens!
Code Snippet drawing_sample.py

""" This is a sample program to show how to draw using the Python programming language and the Arcade library. """ # Import the "arcade" library import arcade # Open up a window. # From the "arcade" library, use a function called "open_window" # Set the window title to "Drawing Example" # Set the and dimensions (width and height) arcade.open_window(800, 600, "Drawing Example") # Set the background color arcade.set_background_color(arcade.color.AIR_SUPERIORITY_BLUE) # Get ready to draw arcade.start_render() # Draw the grass arcade.draw_lrtb_rectangle_filled(0, 800, 200, 0, arcade.color.BITTER_LIME) # --- Draw the barn --- # Barn cement base arcade.draw_lrtb_rectangle_filled(30, 350, 210, 170, arcade.color.BISQUE) # Bottom half arcade.draw_lrtb_rectangle_filled(30, 350, 350, 210, arcade.color.BROWN) # Left-bottom window arcade.draw_rectangle_filled(70, 260, 30, 40, arcade.color.BONE) arcade.draw_rectangle_filled(70, 260, 20, 30, arcade.color.BLACK) # Right-bottom window arcade.draw_rectangle_filled(310, 260, 30, 40, arcade.color.BONE) arcade.draw_rectangle_filled(310, 260, 20, 30, arcade.color.BLACK) # Barn door arcade.draw_rectangle_filled(190, 230, 100, 100, arcade.color.BLACK_BEAN) # Rail above the door arcade.draw_rectangle_filled(190, 280, 180, 5, arcade.color.BONE)
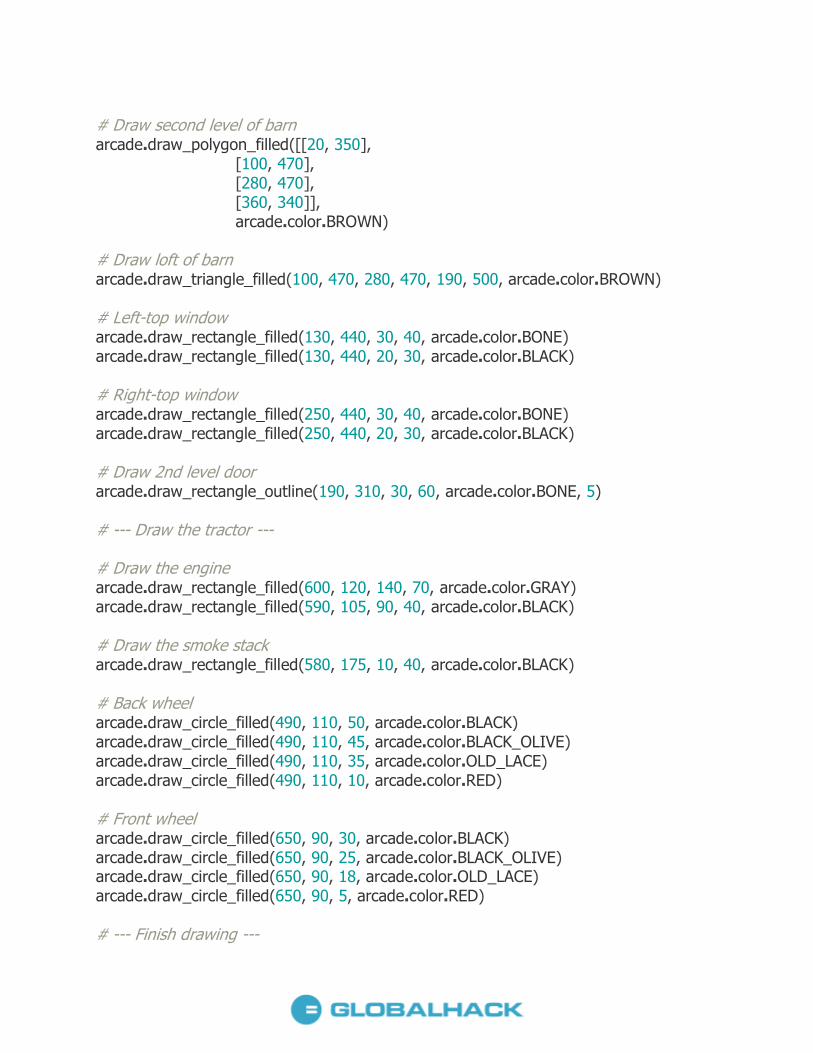
# Draw second level of barn arcade.draw_polygon_filled([[20, 350], [100, 470], [280, 470], [360, 340]], arcade.color.BROWN) # Draw loft of barn arcade.draw_triangle_filled(100, 470, 280, 470, 190, 500, arcade.color.BROWN) # Left-top window arcade.draw_rectangle_filled(130, 440, 30, 40, arcade.color.BONE) arcade.draw_rectangle_filled(130, 440, 20, 30, arcade.color.BLACK) # Right-top window arcade.draw_rectangle_filled(250, 440, 30, 40, arcade.color.BONE) arcade.draw_rectangle_filled(250, 440, 20, 30, arcade.color.BLACK) # Draw 2nd level door arcade.draw_rectangle_outline(190, 310, 30, 60, arcade.color.BONE, 5) # --- Draw the tractor --- # Draw the engine arcade.draw_rectangle_filled(600, 120, 140, 70, arcade.color.GRAY) arcade.draw_rectangle_filled(590, 105, 90, 40, arcade.color.BLACK) # Draw the smoke stack arcade.draw_rectangle_filled(580, 175, 10, 40, arcade.color.BLACK) # Back wheel arcade.draw_circle_filled(490, 110, 50, arcade.color.BLACK) arcade.draw_circle_filled(490, 110, 45, arcade.color.BLACK_OLIVE) arcade.draw_circle_filled(490, 110, 35, arcade.color.OLD_LACE) arcade.draw_circle_filled(490, 110, 10, arcade.color.RED) # Front wheel arcade.draw_circle_filled(650, 90, 30, arcade.color.BLACK) arcade.draw_circle_filled(650, 90, 25, arcade.color.BLACK_OLIVE) arcade.draw_circle_filled(650, 90, 18, arcade.color.OLD_LACE) arcade.draw_circle_filled(650, 90, 5, arcade.color.RED) # --- Finish drawing ---
arcade.finish_render() # Keep the window up until someone closes it. arcade.run()
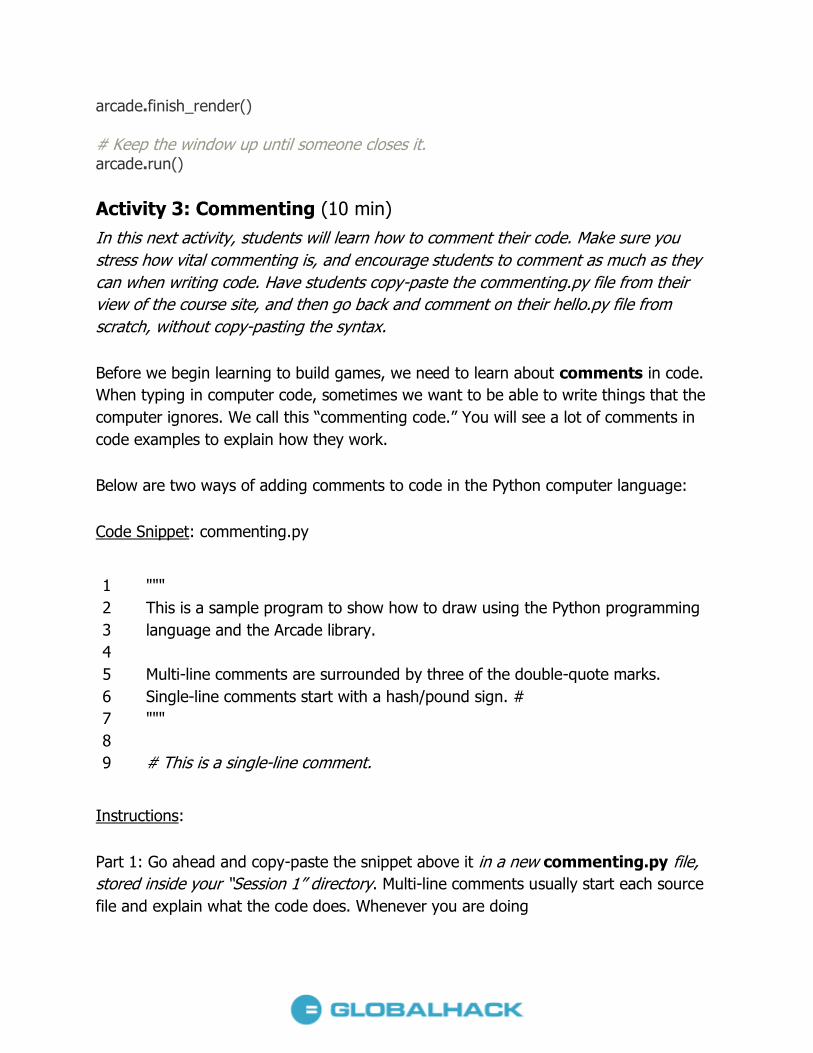
Activity 3: Commenting (10 min)
In this next activity, students will learn how to comment their code. Make sure you
stress how vital commenting is, and encourage students to comment as much as they
can when writing code. Have students copy-paste the commenting.py file from their
view of the course site, and then go back and comment on their hello.py file from
scratch, without copy-pasting the syntax.
Before we begin learning to build games, we need to learn about comments in code.
When typing in computer code, sometimes we want to be able to write things that the
computer ignores. We call this “commenting code.” You will see a lot of comments in
code examples to explain how they work.
Below are two ways of adding comments to code in the Python computer language:
Code Snippet: commenting.py
1
2
3
4
5
6
7
8
9
"""
This is a sample program to show how to draw using the Python programming
language and the Arcade library.
Multi-line comments are surrounded by three of the double-quote marks.
Single-line comments start with a hash/pound sign. #
"""
# This is a single-line comment.
Instructions:
Part 1: Go ahead and copy-paste the snippet above it in a new commenting.py file,
stored inside your “Session 1” directory. Multi-line comments usually start each source
file and explain what the code does. Whenever you are doing

Let’s try running the program. But before we run the program, we need to make sure
we are running the right program. Look at the image below. If I select “run” with the
green arrow, I will run drawing_sample.py, not the program I want to run. You need
to right-click on our program commenting.py and select “Run ‘commenting.py’”
instead.
Note: “running” a program is synonymous to “executing” a program.
Hey! When we run the program, nothing happens. That’s because the only code that
we wrote were “comments.” Comments are ignored. Therefore, there was nothing for
the computer to do.
Part 2: go back and comment on your hello.py file!
Activity 4: Drawing Prep (10 min)
In this activity, students should prepare what they will be drawing in the next session,
using graph paper to place where on the screen they want their drawings. A helpful hint
here is to give students an example dimensions of the screen, like 800 pixels by 800
pixels, so that they know what they’re working with, i.e. if they want their drawing to
be in the middle, they should start the origin at (400, 400)
An example of an easy drawing would be a snowman (3 white balls, a red hat, 2 small
black circles), and a more complex drawing would be the tractor example below and in
the drawing_sample.py code snippet.
Materials Needed: graph paper, pens/pencils, colored pens/pencils
We are going to prepare for our drawing activity next week by sketching out we want
to draw out using code next week, including the shapes and the colors we want
to use.

Here’s an example of something you could draw next week:
In this example, you can see circular shapes, rectangular shapes...what else can you
see? Identify all colors and all shapes in this image, and plan your drawing out in a
similar fashion.
Don’t forget to align your shapes with the squares of your graph paper as if you were
drawing on a coordinate plane (hint hint: you will be next week!), keeping in mind
which square you begin on (e.g. your origin), and how many squares your extend in
every direction (e.g. your x and y coordinates, or width and height).