
Workingman’s 8004
15
Workingman’s 8004 T/O/P OWNER’S MANUAL SWR • CORONA, CA • USA
Transcript of Workingman’s 8004

Workingman’s 8004T/O/P
OWNER’S MANUAL
SWR • CORONA, CA • USA
2 • WORKINGMAN’S 8004 T/O/P
INTRODUCTION
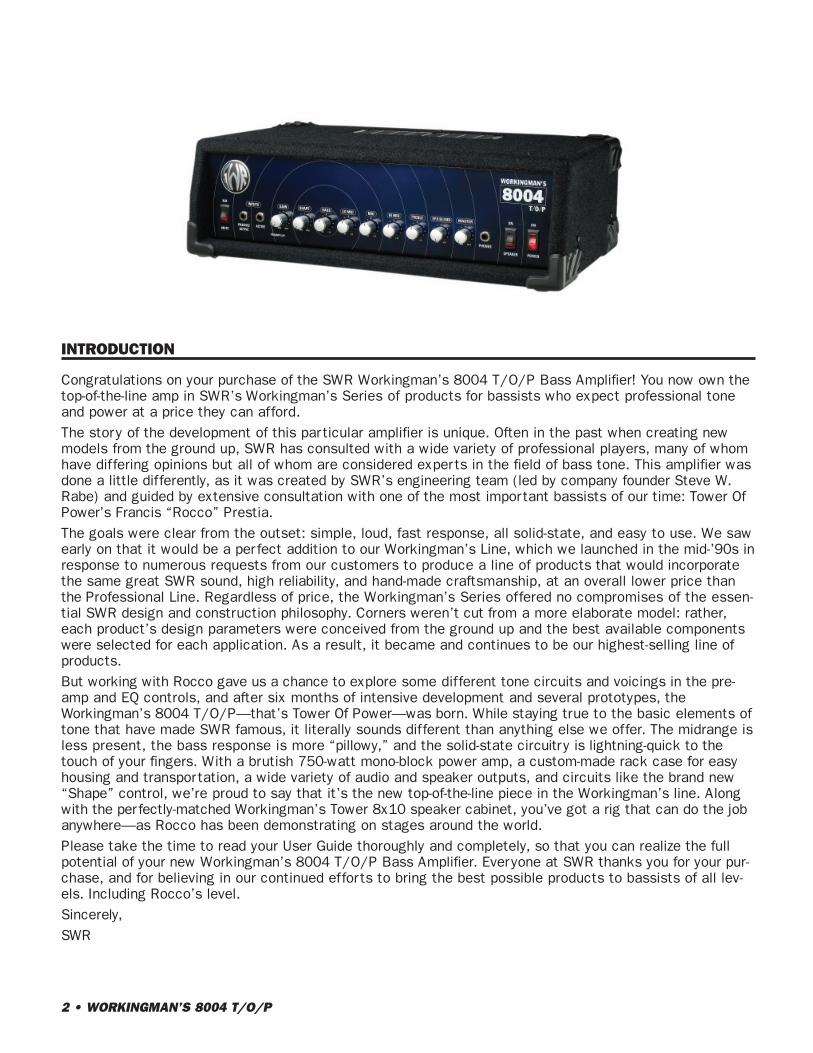
Congratulations on your purchase of the SWR Workingman’s 8004 T/O/P Bass Amplifier! You now own thetop-of-the-line amp in SWR’s Workingman’s Series of products for bassists who expect professional toneand power at a price they can afford.The story of the development of this particular amplifier is unique. Often in the past when creating newmodels from the ground up, SWR has consulted with a wide variety of professional players, many of whomhave differing opinions but all of whom are considered experts in the field of bass tone. This amplifier wasdone a little differently, as it was created by SWR’s engineering team (led by company founder Steve W.Rabe) and guided by extensive consultation with one of the most important bassists of our time: Tower OfPower’s Francis “Rocco” Prestia.The goals were clear from the outset: simple, loud, fast response, all solid-state, and easy to use. We sawearly on that it would be a perfect addition to our Workingman’s Line, which we launched in the mid-’90s inresponse to numerous requests from our customers to produce a line of products that would incorporatethe same great SWR sound, high reliability, and hand-made craftsmanship, at an overall lower price thanthe Professional Line. Regardless of price, the Workingman’s Series offered no compromises of the essen-tial SWR design and construction philosophy. Corners weren’t cut from a more elaborate model: rather,each product’s design parameters were conceived from the ground up and the best available componentswere selected for each application. As a result, it became and continues to be our highest-selling line ofproducts. But working with Rocco gave us a chance to explore some different tone circuits and voicings in the pre-amp and EQ controls, and after six months of intensive development and several prototypes, theWorkingman’s 8004 T/O/P—that’s Tower Of Power—was born. While staying true to the basic elements oftone that have made SWR famous, it literally sounds different than anything else we offer. The midrange isless present, the bass response is more “pillowy,” and the solid-state circuitry is lightning-quick to thetouch of your fingers. With a brutish 750-watt mono-block power amp, a custom-made rack case for easyhousing and transportation, a wide variety of audio and speaker outputs, and circuits like the brand new“Shape” control, we’re proud to say that it’s the new top-of-the-line piece in the Workingman’s line. Alongwith the perfectly-matched Workingman’s Tower 8x10 speaker cabinet, you’ve got a rig that can do the jobanywhere—as Rocco has been demonstrating on stages around the world.Please take the time to read your User Guide thoroughly and completely, so that you can realize the fullpotential of your new Workingman’s 8004 T/O/P Bass Amplifier. Everyone at SWR thanks you for your pur-chase, and for believing in our continued efforts to bring the best possible products to bassists of all lev-els. Including Rocco’s level.Sincerely,SWR
WORKINGMAN’S 8004 T/O/P • 3
Note: Please take a moment to verify that the following items were included in your Workingman’s8004 packaging: AC Cable, SWR Catalog.
WORKINGMAN’S 8004 T/O/P FRONT PANEL FEATURES
• Steel chassis enclosed in custom carpeted rack case (with stack-lock corners and side strap handle)• Discrete solid-state front end• XLR Mute Switch• Hi and Low Sensitivity 1/4" Inputs• Gain control with LED peak clipping indicator• Shape control• Bass control• Lo-Mid control• Mid control• Hi-Mid control• Treble control• Effects Blend control• Master Volume control• Stereo Headphones Jack• Speaker On/Off switch• Illuminated Neon Power On/Off switch
WORKINGMAN’S 8004 T/O/P REAR PANEL FEATURES
• Balanced (XLR) Output jack• Ground Lift Switch for XLR Output jack• Line/Direct Switch for XLR Output jack• Tuner Out jack• Side-Chain Effects Loop (Effects Send and Effects Return 1/4" jacks)• Unbalanced Line Out jack (pre-master)• Preamp Out jack (post-master)• Power Amp In jack • Cooling Fan On/Off switch• Two 1/4" Speaker Output jacks• Two Speakon Output jacks• Speaker Fuse (10 Amp Fast-Blo)• Line Fuse• A/C Receptacle
4 • WORKINGMAN’S 8004 T/O/P
ELECTRICAL SPECIFICATIONS
Note: All measurements were taken with a line voltage of 120VAC. All voltages and watts are“RMS.” All measurements are taken with tone controls set flat, Shape control at minimum.
Power Ratings (minimum):750 Watts @ 4 ohms450 Watts @ 8 ohms
Power Bandwidth (frequency response):(@ 850 watts RMS) -3dB @ 20 Hz and 40 kHz
Dimensions: 23 1/4" W x 7 1/2" H x 13 1/2" D
Weight: 37 lbs.
WORKINGMAN’S 8004 T/O/P – GETTING STARTED
Connecting Your Speaker CabinetsThe Workingman’s 8004 is a mono amplifier, which makes things fairly simple. Locate the “SpeakerOutputs” section on the rear of the amp. You will notice that there are four different speaker output jacks:two 1/4" type and two Speakon type jacks. The Speakon jacks are preferable if your speaker cabinet isequipped with Speakons as well; however, you can use any of the four available jacks to connect yourspeaker(s) to the Workingman’s 8004.
Using One Speaker CabinetUsing a speaker cable of 18 gauge or heavier (the heavier the cable, the lower the gauge), simply connectany one of the Workingman’s 8004’s Speaker Output jacks to the input jacks of your speaker cabinet. Ifyour cabinet is a 4 ohm enclosure, the Workingman’s 8004 will deliver 750 watts into it. If your cabinet isan 8 ohm enclosure, it will deliver 450 watts into it. This is a loud amplifier. Be sure to check the powerhandling capabilities of your speaker cabinet before connection and operation.
Using Two Speaker CabinetsUsing a speaker cable of 18 gauge or heavier (the heavier the cable, the lower the gauge), simply connectany of the Workingman’s 8004’s Speaker Output jacks to the input jacks of your two speaker cabinets.(You can use one 1/4" and one Speakon Output jack each if you wish; however, it is always best to usespeaker cables with similar type ends.) If the cabinets are the same impedance, the same amount ofpower will be sent to each enclosure. If the cabinets are different impedances, more power will flow to thecabinet with the lower impedance. Since the Workingman’s 8004 is a mono amplifier and individual cabi-net levels cannot be adjusted, it is recommended that you use cabinets of the same impedance whenusing more than one cabinet. If you use two 8 ohm cabinets—the two-cabinet setup recommended bySWR—the resulting “total” impedance will be 4 ohms, and the Workingman’s 8004 will deliver 750 wattsspread across both cabinets. Needless to say, in all cases, be sure to check the power handling capabili-ties and impedance of your speaker cabinet(s) before connection and operation.
Note: The minimum total impedance when operating the Workingman’s 8004 is 4 ohms. This meansyou can safely use:
1) A single 8 ohm cabinet
2) A single 4 ohm cabinet
3) Two 8 ohm cabinets (total: 4 ohms)
More details are available in the “Speaker Outputs” section of this guide, and we strongly recommend thatyou read the entire guide. However, this should be enough information to get you started.
WORKINGMAN’S 8004 T/O/P • 5
Turning The Unit OnRemove the AC cable from the accessory pack and connect it from the amplifier to a standard wall outlet.Make sure that the both the Gain and Master Volume controls are set to the minimum position. Locate thepower switch on the right side of the front panel and turn the amplifier on. The power switch should thenilluminate in red. Upon powering up, if the Speaker On/Off switch is set to the “On” position, don’t be sur-prised if you hear a small pop. This is absolutely normal. (Eliminating this “power on transient” wouldrequire a component called a relay. SWR chose not to incorporate this type of component due to the factthat relays degrade signal quality and often fail, causing the unit to have no output and requiring a trip to alocal service center. It can be eliminated by setting the Speaker On/Off switch to the “Off” position uponpowering up, after which point you can set the switch to “On” for operation.)
Getting Sound Out Of The Workingman’s 8004Make sure that the Speaker On/Off switch is set to the “On” position. Plug your instrument into thedesired input jack (please refer to “Front Panel Features” for more detail). Turn your instrument’s volumeup to at least 75% of maximum and slowly adjust up the Gain control to the halfway point. Now turn up theMaster Volume control to an equal level or less (given that the amp can deliver such a large amount ofpower, it would be wise to adjust the Master Volume control up slowly). You should now hear the sound ofyour instrument amplified through the Workingman’s 8004 into your speaker cabinet(s).
FRONT PANEL FEATURES
XLR Mute SwitchThis switch can be used to defeat the signal present at the Balanced (XLR) Output jack on the rear panel.When set to the up (“XLR”) position, the signal will be present as normal. When set to the down (“MUTE”)position, the signal will be defeated. This way you can choose to tune between songs during live per for-mances without the house P.A. amplifying your harmonics, and you still have the option of hearing your sig-nal onstage in your rig depending on the setting of the Speaker On/Off switch (located on the right side ofthe front panel). The XLR Mute is also useful for preventing the “pop” sound that sometimes occurs whenyou plug or unplug your bass—especially if the front-of-house or studio engineer has forgotten to bring thefaders down on the mixing board (which, as we all know, happens on occasion).
Input JacksBoth input jacks accept a standard 1/4" phone plug and both inputs can be used at the same time. Sincethe two inputs are totally independent, no loss in volume or tone will occur by using two instruments simul-taneously. However, the main applicational use for the two separate input jacks is their difference in level,as the Passive/Active input has over twice the gain of the Active input. In other words, it’s not necessarilyintended as a “submixer” for two instruments, but no harm will come from having two instruments pluggedin at once. Please read below for more details.
Passive/Active Input JackThis input jack is designed to accommodate both “passive” instruments and most “active” instruments. Apassive instrument has no built-in preamp and does not use a battery, while an active bass utilizes a bat-tery-operated preamp for gain, tone controls, or both. The Passive/Active Input will work with all instrumentshaving a maximum output of less than 1 volt RMS. Some active pickups such as EMG, Bartolini, etc., usebatteries for operation and will work perfectly using this input. Instruments made by MTD, Sadowsky,Modulus, etc., have active electronics that are suited for use in the Passive/Active input.Generally speaking, try this input first. If you hear a small amount of distortion and the Preamp Clip LED isnot activated, try using the Active input jack. If the Active input does not correct any audible distortion,check the battery in your bass.
6 • WORKINGMAN’S 8004 T/O/P
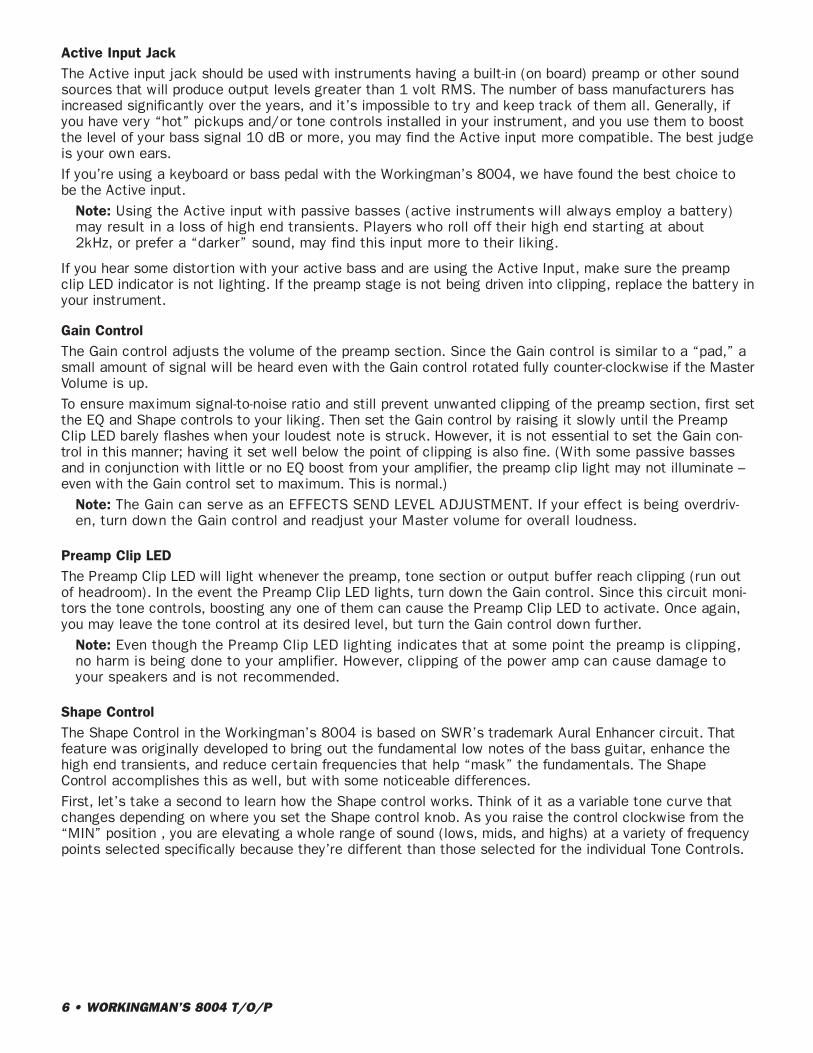
Active Input JackThe Active input jack should be used with instruments having a built-in (on board) preamp or other soundsources that will produce output levels greater than 1 volt RMS. The number of bass manufacturers hasincreased significantly over the years, and it’s impossible to try and keep track of them all. Generally, ifyou have very “hot” pickups and/or tone controls installed in your instrument, and you use them to boostthe level of your bass signal 10 dB or more, you may find the Active input more compatible. The best judgeis your own ears.If you’re using a keyboard or bass pedal with the Workingman’s 8004, we have found the best choice tobe the Active input.
Note: Using the Active input with passive basses (active instruments will always employ a battery)may result in a loss of high end transients. Players who roll off their high end starting at about2kHz, or prefer a “darker” sound, may find this input more to their liking.
If you hear some distortion with your active bass and are using the Active Input, make sure the preampclip LED indicator is not lighting. If the preamp stage is not being driven into clipping, replace the battery inyour instrument.
Gain ControlThe Gain control adjusts the volume of the preamp section. Since the Gain control is similar to a “pad,” asmall amount of signal will be heard even with the Gain control rotated fully counter-clockwise if the MasterVolume is up.To ensure maximum signal-to-noise ratio and still prevent unwanted clipping of the preamp section, first setthe EQ and Shape controls to your liking. Then set the Gain control by raising it slowly until the PreampClip LED barely flashes when your loudest note is struck. However, it is not essential to set the Gain con-trol in this manner; having it set well below the point of clipping is also fine. (With some passive bassesand in conjunction with little or no EQ boost from your amplifier, the preamp clip light may not illuminate –even with the Gain control set to maximum. This is normal.)
Note: The Gain can serve as an EFFECTS SEND LEVEL ADJUSTMENT. If your effect is being overdriv-en, turn down the Gain control and readjust your Master volume for overall loudness.
Preamp Clip LEDThe Preamp Clip LED will light whenever the preamp, tone section or output buffer reach clipping (run outof headroom). In the event the Preamp Clip LED lights, turn down the Gain control. Since this circuit moni-tors the tone controls, boosting any one of them can cause the Preamp Clip LED to activate. Once again,you may leave the tone control at its desired level, but turn the Gain control down further.
Note: Even though the Preamp Clip LED lighting indicates that at some point the preamp is clipping,no harm is being done to your amplifier. However, clipping of the power amp can cause damage toyour speakers and is not recommended.
Shape ControlThe Shape Control in the Workingman’s 8004 is based on SWR’s trademark Aural Enhancer circuit. Thatfeature was originally developed to bring out the fundamental low notes of the bass guitar, enhance thehigh end transients, and reduce certain frequencies that help “mask” the fundamentals. The ShapeControl accomplishes this as well, but with some noticeable differences.First, let’s take a second to learn how the Shape control works. Think of it as a variable tone curve thatchanges depending on where you set the Shape control knob. As you raise the control clockwise from the“MIN” position , you are elevating a whole range of sound (lows, mids, and highs) at a variety of frequencypoints selected specifically because they’re different than those selected for the individual Tone Controls.
WORKINGMAN’S 8004 T/O/P • 7
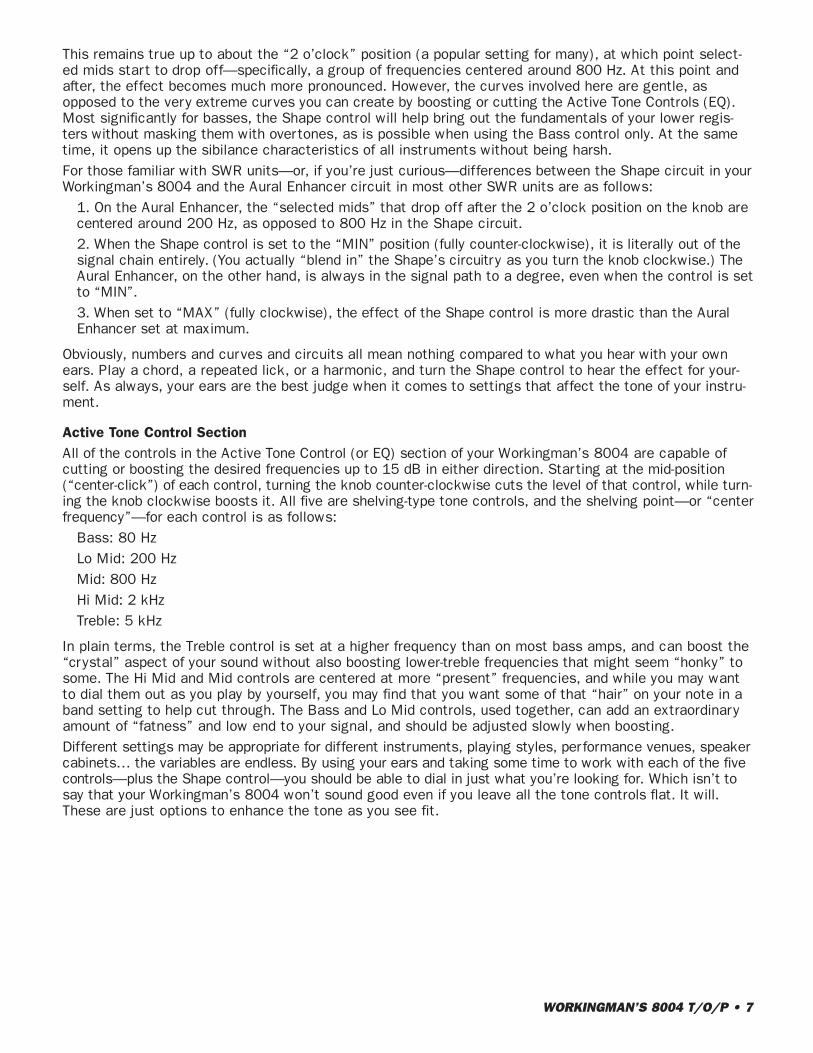
This remains true up to about the “2 o’clock” position (a popular setting for many), at which point select-ed mids start to drop off—specifically, a group of frequencies centered around 800 Hz. At this point andafter, the effect becomes much more pronounced. However, the curves involved here are gentle, asopposed to the very extreme curves you can create by boosting or cutting the Active Tone Controls (EQ).Most significantly for basses, the Shape control will help bring out the fundamentals of your lower regis-ters without masking them with overtones, as is possible when using the Bass control only. At the sametime, it opens up the sibilance characteristics of all instruments without being harsh.For those familiar with SWR units—or, if you’re just curious—differences between the Shape circuit in yourWorkingman’s 8004 and the Aural Enhancer circuit in most other SWR units are as follows:
1. On the Aural Enhancer, the “selected mids” that drop off after the 2 o’clock position on the knob arecentered around 200 Hz, as opposed to 800 Hz in the Shape circuit.2. When the Shape control is set to the “MIN” position (fully counter-clockwise), it is literally out of thesignal chain entirely. (You actually “blend in” the Shape’s circuitry as you turn the knob clockwise.) TheAural Enhancer, on the other hand, is always in the signal path to a degree, even when the control is setto “MIN”.3. When set to “MAX” (fully clockwise), the effect of the Shape control is more drastic than the AuralEnhancer set at maximum.
Obviously, numbers and curves and circuits all mean nothing compared to what you hear with your ownears. Play a chord, a repeated lick, or a harmonic, and turn the Shape control to hear the effect for your-self. As always, your ears are the best judge when it comes to settings that affect the tone of your instru-ment.
Active Tone Control SectionAll of the controls in the Active Tone Control (or EQ) section of your Workingman’s 8004 are capable ofcutting or boosting the desired frequencies up to 15 dB in either direction. Starting at the mid-position(“center-click”) of each control, turning the knob counter-clockwise cuts the level of that control, while turn-ing the knob clockwise boosts it. All five are shelving-type tone controls, and the shelving point—or “centerfrequency”—for each control is as follows:
Bass: 80 HzLo Mid: 200 HzMid: 800 HzHi Mid: 2 kHz Treble: 5 kHz
In plain terms, the Treble control is set at a higher frequency than on most bass amps, and can boost the“crystal” aspect of your sound without also boosting lower-treble frequencies that might seem “honky” tosome. The Hi Mid and Mid controls are centered at more “present” frequencies, and while you may wantto dial them out as you play by yourself, you may find that you want some of that “hair” on your note in aband setting to help cut through. The Bass and Lo Mid controls, used together, can add an extraordinaryamount of “fatness” and low end to your signal, and should be adjusted slowly when boosting.Different settings may be appropriate for different instruments, playing styles, performance venues, speakercabinets… the variables are endless. By using your ears and taking some time to work with each of the fivecontrols—plus the Shape control—you should be able to dial in just what you’re looking for. Which isn’t tosay that your Workingman’s 8004 won’t sound good even if you leave all the tone controls flat. It will.These are just options to enhance the tone as you see fit.
8 • WORKINGMAN’S 8004 T/O/P
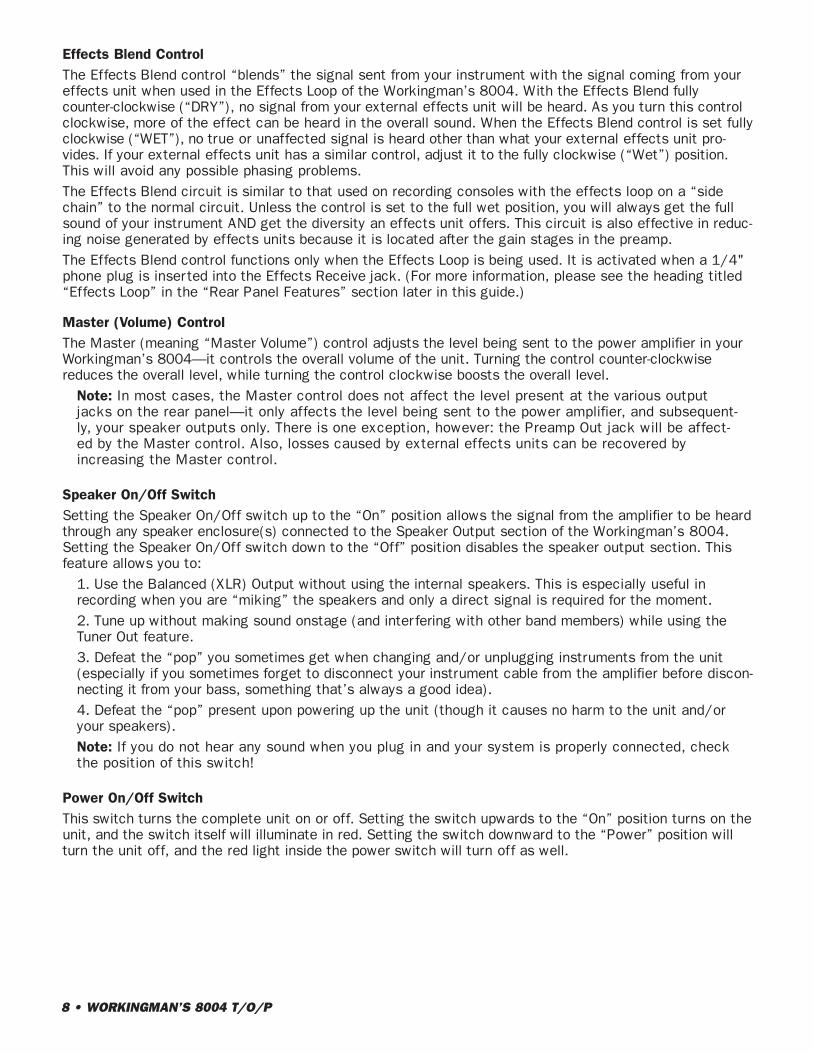
Effects Blend ControlThe Effects Blend control “blends” the signal sent from your instrument with the signal coming from youreffects unit when used in the Effects Loop of the Workingman’s 8004. With the Effects Blend fullycounter-clockwise (“DRY”), no signal from your external effects unit will be heard. As you turn this controlclockwise, more of the effect can be heard in the overall sound. When the Effects Blend control is set fullyclockwise (“WET”), no true or unaffected signal is heard other than what your external effects unit pro-vides. If your external effects unit has a similar control, adjust it to the fully clockwise (“Wet”) position.This will avoid any possible phasing problems.The Effects Blend circuit is similar to that used on recording consoles with the effects loop on a “sidechain” to the normal circuit. Unless the control is set to the full wet position, you will always get the fullsound of your instrument AND get the diversity an effects unit offers. This circuit is also effective in reduc-ing noise generated by effects units because it is located after the gain stages in the preamp.The Effects Blend control functions only when the Effects Loop is being used. It is activated when a 1/4"phone plug is inserted into the Effects Receive jack. (For more information, please see the heading titled“Effects Loop” in the “Rear Panel Features” section later in this guide.)
Master (Volume) ControlThe Master (meaning “Master Volume”) control adjusts the level being sent to the power amplifier in yourWorkingman’s 8004—it controls the overall volume of the unit. Turning the control counter-clockwisereduces the overall level, while turning the control clockwise boosts the overall level.
Note: In most cases, the Master control does not affect the level present at the various outputjacks on the rear panel—it only affects the level being sent to the power amplifier, and subsequent-ly, your speaker outputs only. There is one exception, however: the Preamp Out jack will be affect-ed by the Master control. Also, losses caused by external effects units can be recovered byincreasing the Master control.
Speaker On/Off SwitchSetting the Speaker On/Off switch up to the “On” position allows the signal from the amplifier to be heardthrough any speaker enclosure(s) connected to the Speaker Output section of the Workingman’s 8004.Setting the Speaker On/Off switch down to the “Off” position disables the speaker output section. Thisfeature allows you to:
1. Use the Balanced (XLR) Output without using the internal speakers. This is especially useful inrecording when you are “miking” the speakers and only a direct signal is required for the moment.2. Tune up without making sound onstage (and interfering with other band members) while using theTuner Out feature.3. Defeat the “pop” you sometimes get when changing and/or unplugging instruments from the unit(especially if you sometimes forget to disconnect your instrument cable from the amplifier before discon-necting it from your bass, something that’s always a good idea).4. Defeat the “pop” present upon powering up the unit (though it causes no harm to the unit and/oryour speakers).Note: If you do not hear any sound when you plug in and your system is properly connected, checkthe position of this switch!
Power On/Off SwitchThis switch turns the complete unit on or off. Setting the switch upwards to the “On” position turns on theunit, and the switch itself will illuminate in red. Setting the switch downward to the “Power” position willturn the unit off, and the red light inside the power switch will turn off as well.
WORKINGMAN’S 8004 T/O/P • 9
REAR PANEL FEATURES
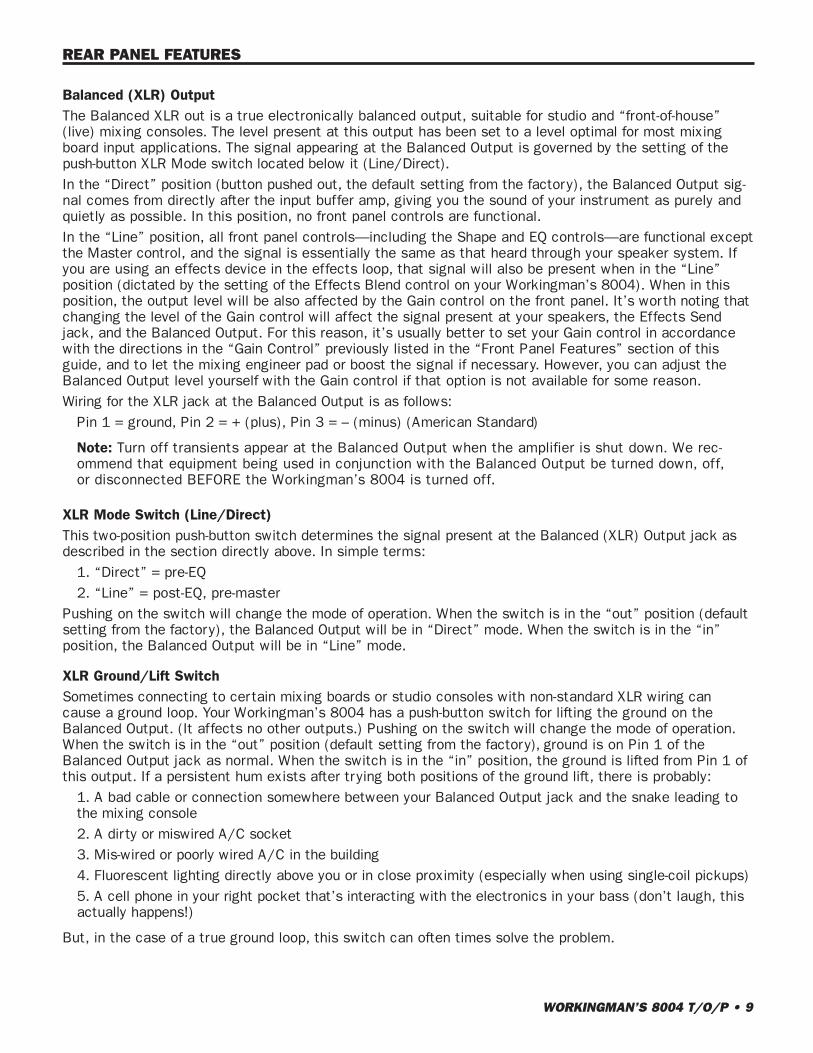
Balanced (XLR) OutputThe Balanced XLR out is a true electronically balanced output, suitable for studio and “front-of-house”(live) mixing consoles. The level present at this output has been set to a level optimal for most mixingboard input applications. The signal appearing at the Balanced Output is governed by the setting of thepush-button XLR Mode switch located below it (Line/Direct). In the “Direct” position (button pushed out, the default setting from the factory), the Balanced Output sig-nal comes from directly after the input buffer amp, giving you the sound of your instrument as purely andquietly as possible. In this position, no front panel controls are functional.In the “Line” position, all front panel controls—including the Shape and EQ controls—are functional exceptthe Master control, and the signal is essentially the same as that heard through your speaker system. Ifyou are using an effects device in the effects loop, that signal will also be present when in the “Line”position (dictated by the setting of the Effects Blend control on your Workingman’s 8004). When in thisposition, the output level will be also affected by the Gain control on the front panel. It’s worth noting thatchanging the level of the Gain control will affect the signal present at your speakers, the Effects Sendjack, and the Balanced Output. For this reason, it’s usually better to set your Gain control in accordancewith the directions in the “Gain Control” previously listed in the “Front Panel Features” section of thisguide, and to let the mixing engineer pad or boost the signal if necessary. However, you can adjust theBalanced Output level yourself with the Gain control if that option is not available for some reason.Wiring for the XLR jack at the Balanced Output is as follows:
Pin 1 = ground, Pin 2 = + (plus), Pin 3 = – (minus) (American Standard)
Note: Turn off transients appear at the Balanced Output when the amplifier is shut down. We rec-ommend that equipment being used in conjunction with the Balanced Output be turned down, off,or disconnected BEFORE the Workingman’s 8004 is turned off.
XLR Mode Switch (Line/Direct)This two-position push-button switch determines the signal present at the Balanced (XLR) Output jack asdescribed in the section directly above. In simple terms:
1. “Direct” = pre-EQ2. “Line” = post-EQ, pre-master
Pushing on the switch will change the mode of operation. When the switch is in the “out” position (defaultsetting from the factory), the Balanced Output will be in “Direct” mode. When the switch is in the “in”position, the Balanced Output will be in “Line” mode.
XLR Ground/Lift SwitchSometimes connecting to certain mixing boards or studio consoles with non-standard XLR wiring cancause a ground loop. Your Workingman’s 8004 has a push-button switch for lifting the ground on theBalanced Output. (It affects no other outputs.) Pushing on the switch will change the mode of operation.When the switch is in the “out” position (default setting from the factory), ground is on Pin 1 of theBalanced Output jack as normal. When the switch is in the “in” position, the ground is lifted from Pin 1 ofthis output. If a persistent hum exists after trying both positions of the ground lift, there is probably:
1. A bad cable or connection somewhere between your Balanced Output jack and the snake leading tothe mixing console2. A dirty or miswired A/C socket3. Mis-wired or poorly wired A/C in the building4. Fluorescent lighting directly above you or in close proximity (especially when using single-coil pickups)5. A cell phone in your right pocket that’s interacting with the electronics in your bass (don’t laugh, thisactually happens!)
But, in the case of a true ground loop, this switch can often times solve the problem.
10 • WORKINGMAN’S 8004 T/O/P
Tuner OutThe Tuner Out function allows the user to plug their instrument tuner into this jack and “tune up” withouthaving to unplug and go back and forth from amp to tuner. In conjunction with either the XLR Mute switchand the Speaker On/Off switch, you can achieve silent tuning between songs onstage during a gig. To usethis feature, connect a shielded patch cord from the Tuner Out jack on your Workingman’s 8004 to theinput jack on your tuner. Turn the amplifier on and you’re ready to go.
Effects LoopAs mentioned previously in the “Effects Blend Control” section of the manual, the Effects Blend circuit inyour Workingman’s 8004 is similar to that used on recording consoles, with the effects loop on a “sidechain” to the normal circuit. Unless the Effects Blend control is set to the full “wet” position, you willalways get the full sound of your instrument AND get the diversity an effects unit offers. Use of the effectsloop will reduce the noise generated by external effects units (as compared to using the effect betweenyour instrument and the input jack, though many people use it in this fashion anyway). This is because theloop is after the preamp gain stages.The Effects Loop is compatible with most individual or multi-effect devices. Many effects devices on themarket have input level adjustments. For instance, some units have a switch that you can set for either–20 dB or +4 dB. In all cases, these should be set for 0 dB (if available) or +4 dB. The level going to youreffect is controlled by the Gain control on the front panel.
Note: The Effects Loop is used in conjunction with the Effects Blend control on the front panel.When the Effects Blend control is in the full counter-clockwise (“Dry”) position, no effects will beheard. This is normal.
Connecting An Effects Device To The Workingman’s 8004 Effects LoopObtain two high-quality shielded patch cables, preferably as short as possible. Route them in the mostdirect way possible. (Running patch cables over the top of the Workingman’s 8004—as with any amplifi-er—can induce hum in the cables and is not recommended.) Take one cable and connect it from theEffects Send jack on the Workingman’s 8004 to the input of your external effects device. Take the secondcable and connect it from the output of your external effects device to the Effects Return jack on yourWorkingman’s 8004. To set levels, follow the instructions as previously listed in the “Effects BlendControl” heading under “Front Panel Features.”
Effects SendThis jack’s primary function is to send a post-EQ, pre-master signal to an effects device for use in theWorkingman’s 8004 Effects Loop. However, it can also be used as:
1. A line level output for use in conjunction with an additional (slave) power amp—such as SWR’s Power750.2. An unbalanced output suitable for recording or live mixing board purposes.
The output impedance of the Effects Send jack is 100 Ohms.
Effects ReceiveThis jack’s primary function is to complete the Effects Loop circuit by routing the post-effects-device signalback into the power amp of the Workingman’s 8004, where it can be blended back in with the original sig-nal by using the Effects Blend control on the front panel. However, it can also be used as:
1. An additional power amp input jack. The Workingman’s 8004 comes equipped with a Power AmpInput jack, but that input goes directly into the power amp at a preset level (as is typical in a “patchpoint” setup). If, for some reason, you wished to bypass the entire front end and use the Workingman’s8004 strictly as a power amp and still have the ability to use the Master Volume control, you could takethe output of whatever line-level audio source you wished and connect it to this jack. Then, set theEffects Blend control to the full clockwise (“Wet”) position. Use the Master control to set the overalllevel, and your Workingman’s 8004 is now a power amp only.

WORKINGMAN’S 8004 T/O/P • 11
2. An input for pre-recorded music, for playing along and practicing purposes. To accomplish this, inserta CD player or other sound source into the Effects Receive jack. (It must be a MONO 1/4" plug thatgoes into this input, so you’ll have to use a stereo-to-mono cable adapter of some kind.) You can adjustthe level of recorded music versus the “live” sound of your instrument by using both the Effects Blendcontrol (the more clockwise the control, the more pre-recorded music signal you’ll hear) and the volumecontrol of your CD (or other) audio source. The mixed sound will be heard through your speakers.Besides pre-recorded music, this is also an excellent way to practice along with a drum machine.
Input impedance of the Receive jack is 27k Ohms minimum.Note: Inserting a plug into the Effects Receive jack activates the Effects Blend control. The controlreceives this command through the ground created by the phone plug making contact with thejack. The plug must be a mono plug (tip and ground). If you have a stereo plug only, it will be nec-essary to tie the ring and the ground together.
Unbalanced (1/4") Line OutThis jack provides another audio output, but it is located later in the signal chain than the Effects Sendjack. This signal is post-EQ AND post-effects loop, but still before (pre) the Master (volume) control. Youshould use this jack when using an effects device in the effects loop and wish to achieve:
1. A line level output for use in conjunction with an additional (slave) power amp—such as SWR’s Power750.2. An unbalanced output suitable for recording or live mixing board purposes.
Patch Point (Preamp Out and Power Amp In Jacks)For additional patching flexibility at the very end of the audio signal chain, we have provided what somerefer to as a “patch point” on your Workingman’s 8004. This is comprised of:
1. A Preamp Out jack that is post-master (in other words, its signal level is affected by the Master con-trol on the front panel)2. A Power Amp In jack that is post-everything (it goes directly into the power amp at a preset level andcannot be adjusted specifically by anything on the front panel)
The “patch point” circuit can be utilized as an effects loop after your side-chain effects loop’s signal hasreturned. The Preamp Out can be used as a final audio output if you’re already using the Effects Send andthe Unbalanced Line Out jacks for other purposes. If connected to an additional power amp, the PreampOut can be useful in that you now have the ability to control the levels of both the power amp in yourWorkingman’s 8004 and your additional power amp with a single control: the Master (volume) on the frontpanel of the Workingman’s 8004.
Note: SWR loyalists may find it interesting that this circuit was also present on two of our earliestmodels: the Studio 220 and the classic SM-400.
Cooling Fan & Fan Mode SwitchThe power amp in your Workingman’s 8004 is cooled by two methods: 1) An (internal) extruded aluminumheatsink; 2) A fan. You have complete operational control of the fan via the Fan Mode Switch. Setting theFan Mode Switch to the “On” position activates the internal cooling fan. Setting the switch to the “Off”position deactivates the cooling fan, regardless of the internal temperature of the unit. For this reason, itis recommended that the Fan Mode Switch be set to the “On” position for the majority of the time that theamplifier is in operation.Be sure to leave at least a 1/2" clearance between the vent on the top of your Workingman’s 8004 andanything you wish to put on top of it. This will allow for the heat generated by internal componentsto escape.Note: It is normal for the cooling fan to be audible at low levels. We recommend deactivating the fan onlyin situations where the noise floor is so low that normal fan noise might be noticeable or distracting, suchas recording situations where a microphone is used in close proximity to the unit.
12 • WORKINGMAN’S 8004 T/O/P
SPEAKER OUTPUT SECTION
This section of the manual will deal with the proper connection of speaker cabinets to the power amplifierin the Workingman’s 8004. Some of this ground has already been covered in the Getting Started—Connecting Your Speaker Cabinets section in the beginning of the manual. This is meant to supplementthat section and provide information in greater detail, as power amplifiers, impedance and speaker cabi-nets are all crucial in determining how best to operate your new Workingman’s 8004.
How Impedance Affects Power RatingsPeople often have questions about impedance. What is it? The root of the word “impedance” is the verb“impede,” which means to block or resist. That’s what impedance is—resistance to power.Power amps do not have a pre-determined impedance. They deliver power at whatever impedance thespeaker cabinet tells it to. That’s why you hear the term “slave amp”—amplifiers only do what they’retold. So if someone tells you that they have a “4 ohm power amp,” their terminology and understanding ofthe concept is way off the mark.Unlike power amps, every speaker cabinet has a pre-determined impedance rating measured in “ohms.” Inmost cases this rating is either 4 or 8 ohms (though there may still be some old 2 ohm creakers outthere). The higher the impedance of the speaker cabinet, the more resistance to power it will offer. Thelower the resistance of the speaker cabinet, the less resistance to power it will offer. In other words,HIGHER IMPEDANCE MEANS LESS POWER CAN ENTER THE SPEAKER CABINET. LOWER IMPEDANCEMEANS MORE POWER CAN ENTER THE SPEAKER CABINET.You may be thinking that you’ve found the solution to the universe—just use speaker cabinets with reallylow impedances and you can get skull-crushing power out of your amplifier, right? Wrong. There’s a catch.Power amps have limits as to how low an impedance they can drive safely. This is what’s known as anamplifier’s “Minimum Impedance Rating.” If you try and operate a power amp below its minimum imped-ance rating, it will give you lots and lots of power for about five minutes… and then overheat, short outand fail completely. In other words, THE LOWER THE OPERATING IMPEDANCE OF THE AMPLIFIER, THE HOT-TER IT WILL GET.
Power Amplifier Minimum Impedance RatingsHere’s what this means to the power amp in the Workingman’s 8004. As mentioned previously, the 8004contains a mono power amp, which makes things fairly simple. The Minimum Impedance Rating of theWorkingman’s 8004 is 4 ohms. This means that you can safely connect:
• One 8 ohm speaker enclosure = 8 ohms total impedance• Two 8 ohm speaker enclosures = 4 ohms total impedance• Two 16 ohm speaker enclosures = 8 ohms total impedance• One 4 ohm speaker enclosure = 4 ohms total impedance
The owner’s manual that came with your speaker cabinet should state its total impedance. On SWR speak-er enclosures, the total impedance is generally indicated on the speaker’s input panel.(For an even more in-depth discussion of impedance and power rating issues, go to the SWR web site atwww.swrsound.com, click on “Press,” then click on “Articles,” then click on “Plug and Play–Setup Tips forAmps and Speakers”—an article by SWR founder Steve Rabe that ran in the August ’92 issue of BassPlayer Magazine.)
Power Delivery Capabilities (Power Ratings)After determining how the number of cabinets you wish to run will affect the total operating impedance,you need to take into account the power handling capabilities of your speaker cabinets as compared towhat the Workingman’s 8004 can deliver at that impedance. Those ratings are as follows:
750 Watts @ 4 ohms450 Watts @ 8 ohms
So if you have two 8 ohm speaker cabinets, they will each get up to 375 watts of power, and more duringtransient peaks. A single 4 ohm cabinet will get 750 watts of power, and again, more during peaks. Makesure your speaker cabinet(s) can handle the power!
WORKINGMAN’S 8004 T/O/P • 13
Remember, it’s always better to have a little too much power than just barely enough. If you find yourselfconstantly wanting more power than the Workingman’s 8004 provides, either:
a) Tell your bandmates to turn downb) Tell the monitor engineer to turn you upc) (best option) Take the time to investigate getting an external power amp and/or additional speakercabinets to supplement your rig.Note: The frequency response of the Workingman’s 8004 is far greater than usually found in musi-cal instrument amplifiers (20 Hz to 40 kHz). This was engineered in order to give the bass playerthe same punch and clarity on stage as found in the studio or concert P.A. systems. Therefore, it isdoubly important that you are aware of the impedance and power rating of the speakers that youintend to use, and that they are compatible with the Workingman’s 8004. Speakers that have beenoverdriven are easy to detect and generally do not fall under a manufacturer’s warranty.
Speaker Output JacksTwo 1/4" phone jacks and two Speakon Jacks (all wired in parallel) are provided for connection of theWorkingman’s 8004 to your speaker system. Whenever possible, use of the Speakon jacks is recommend-ed. Speakon jacks and connectors offer the best possible connection and are far superior to banana or1/4" phone jacks in that they not only lock in place (preventing accidental disconnection), but also offer agreater and more stable connection surface. This solid connection provides a more effective transfer ofpower to your speakers.Only SPEAKER CABLE of 18 gauge or heavier (the heavier the cable, the lower the gauge) should be usedto connect your Workingman’s 8004 to your speaker system. Do not use shielded instrument cable to con-nect your amplifier to your speaker enclosure, as this can result in intermittent power loss, cause youramp to oscillate and damage itself and/or your speakers, and render the cable useless for any purpose.
Note: Unlike most amplifiers on the market, the Workingman’s 8004 can be used for recording pur-poses without speakers attached to the speaker output jacks (using only the Balanced [XLR] Output).
The most highly recommended single SWR Speaker enclosure for use with the Workingman’s 8004 is—ofcourse—the Workingman’s Tower! It’s a perfectly matched rig in terms of both tone and powerdelivery/handling. Other single SWR Speaker enclosures recommended for use with the Workingman’s8004 include:
• Megoliath• Goliath Senior• Henry 8x8• Big Bertha
Note: All above cabinets are from SWR’s Professional Line.
Recommended SWR Workingman’s Speaker combinations for use with the Workingman’s 8004 include:• (2) Workingman’s 4x10Ts• (1) Workingman’s 2x10T and (1) Workingman’s 4x10T• (1) Workingman’s 4x10T and (1) Workingman’s 1x15T
Speaker FuseThe speaker fuse is provided to protect your speakers in the unlikely event of a power amp failure or toprotect your power amplifier from incorrect speaker impedances or hookups. Size and rating of the fuse is3AG, 10 amp, fast-blo. Do not defeat the purpose of this feature by using a higher rated fuse as it candamage your amplifier and void your warranty.The fuse can open as a result of a fault in the speaker cable, the speakers themselves, or the power ampbeing sent well into clipping. With this in mind, it is wise to carry extra fuses at all times.
14 • WORKINGMAN’S 8004 T/O/P
Line Fuse (A/C or Mains Fuse)This fuse is provided to protect the internal electronics against power surges, etc. It also protects the unitagainst itself should one of the internal components fail. If this fuse should open, replace it with the sametype of fuse and rating. Do not defeat the purpose of this feature by using a higher rated fuse as it canvoid your warranty.Proper rating of the fuse is as follows:
United States: 3AG 10 amp slo-bloJapan: 3AG 10 amp slo-bloEurope (230-240V): 3AG 5 amp slo-blo
A/C Cord ReceptacleAccepts a standard A/C power cable (supplied with the Workingman’s 8004 in the United States) usedwith almost all current musical, professional and household electronic devices. We recommend great carewhen packing up. Put the cable in your instrument or accessory case or leave it attached and loopedaround the side strap handle. If it does become misplaced, a replacement cable can be purchased atalmost any music or computer store.
Note: The rating for this cable is 3 conductor, 10 amperes minimum. Look for this rating on thecable. Make sure the cable is plugged in all the way in both the amp and the wall socket.

WORKINGMAN’S 8004 T/O/P • 15
WORKINGMAN’S 8004 T/O/P LIMITED WARRANTY
The WORKINGMAN’S 8004 T/O/P from SWR is warranted to the original consumer purchaserfor TWO YEARS from the date of purchase against defects in materials and workmanship, provid-ed that it is purchased from an Authorized SWR dealer. This warranty applies only to productspurchased in the USA or Canada.
This warranty is VOID if the unit has been damaged due to accident, improper handling, installa-tion or operation, shipping damage, abuse or misuse, unauthorized repair or attempted repair, or ifthe serial number has been defaced or removed. FMIC reserves the right to make such determi-nation on the basis of inspection by an Authorized FMIC Service Center.
All liability for any incidental or consequential damages for breach of any expressed or impliedwarranties is disclaimed and excluded herefrom.
Some states do not allow limitations on how long an implied warranty lasts, or the exclusion orlimitation of incidental or consequential damages, so that the above exclusion may not apply toyou. This warranty gives you specific legal rights and you may also have other rights which varyfrom state to state.
For a complete list of Authorized FMICService Centers, and the latest SWRnews, interviews, and more, check outour website:
SWR8860 E Chaparral Rd, Suite 100
Scottsdale, AZ 85250-2618 USAPHONE: (480) 596-9690
FAX: (480) 367-5262 EMAIL: [email protected]
WEB: swrsound.com
swrsound.com
WORKINGMAN’S 8004 T/O/P • Part # 0066588000 • 08/03Copyright © 2003 SWR
SHOULD YOUR SWR AMPLIFIER REQUIRE SERVICE OR REPAIR, PLEASE USE THEFOLLOWING PROCEDURE:
Locate your original receipt showing date of purchase, model and serial number.
Determine the closest Authorized FMIC Service Center to your location. The fastest way to get a complete list of Authorized FMIC ServiceCenters is on the web at:
http://www.mrgearhead.com/faq/allservice.html
You can also get this information by calling FMIC Consumer Relations at (480) 596-7195
To receive warranty service, return the complete product to an Authorized FMIC Electronics Service Center, with proof of purchase, duringthe applicable warranty period. Transportation costs are not included in this Limited Warranty.
Defective products that qualify for coverage under this warranty will be repaired or replaced, at FMIC’s discretion, with a like or comparableproduct, without charge.
12
3
4