
Working with Coroplast and PVC - Young's...
56
With content from Darryl Brown and Ron Lister Using Coroplast ™ and PVC in Your Display www.youngschristmas.com
Transcript of Working with Coroplast and PVC - Young's...
With content from
Darryl Brown and Ron Lister
Using Coroplast ™ and PVC
in Your Display
www.youngschristmas.com

We’ll Discuss
• Working with Coroplast™
– Coroplast™ Projects
• Letters
• Snowflakes
• Large projects
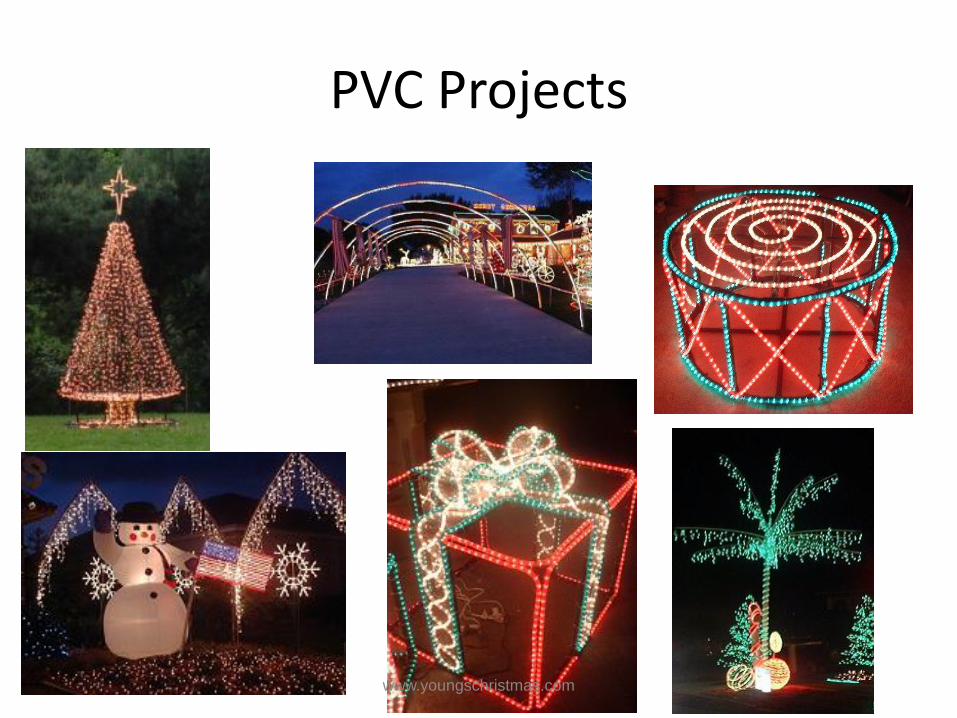
• Working with PVC Pipe – PVC Projects
• Palm Tree
• PVC Arches
• Christmas Packages
• Christmas Drum www.youngschristmas.com

Working with Coroplast ™
www.youngschristmas.com

Coroplast ™ – The Basics
• Coroplast™ is a brand name for corrugated plastic
• Usually comes in 4 ft. by 8 ft. sheets
• Can be purchased at most sign shops
• Easy to cut with a utility knife
• Lightweight
• Waterproof
• Resistance to stains and most chemicals
www.youngschristmas.com
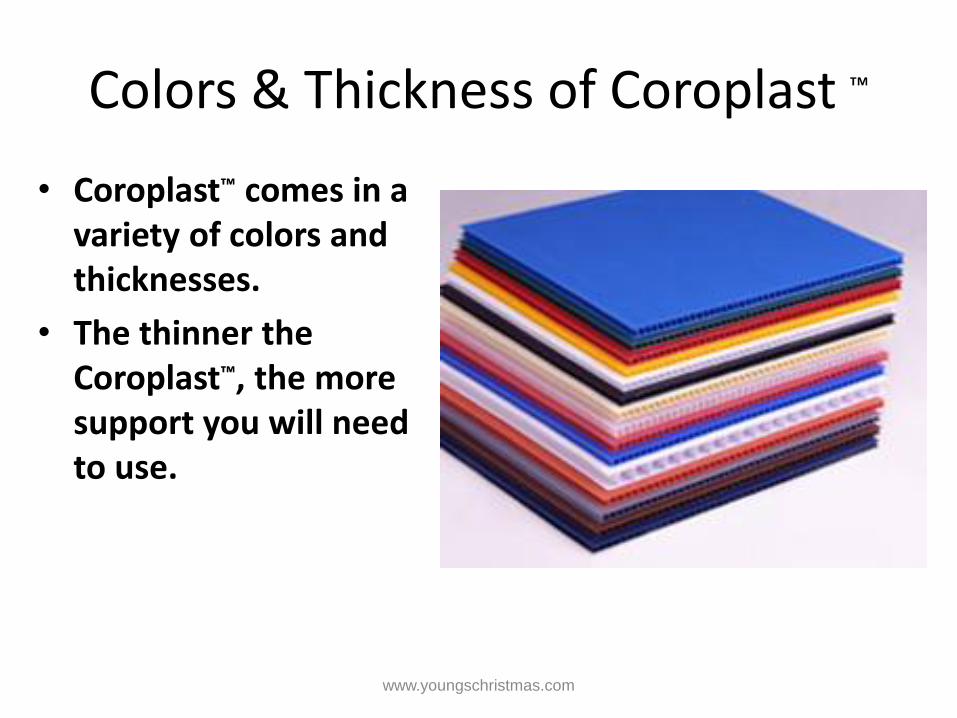
Colors & Thickness of Coroplast ™
• Coroplast™ comes in a variety of colors and thicknesses.
• The thinner the Coroplast™, the more support you will need to use.
www.youngschristmas.com

Coroplast ™ Project Examples

Making Letters • Draw each letter on graph paper or in Excel.
• Try to design your letters to have as close to (but not over) 100 lights as possible so you don’t have to use blackout caps.
• Leave at least 1 to 1 1/2 inches around each edge to attach support.
• Make a transparency of your letter, or enlarge the Excel spreadsheet to the appropriate size, and print it.
OR... www.youngschristmas.com

Making a Snowflake
• Tape pieces of paper (such as newspaper) together to create a piece big enough for the size of snowflake you desire.
Fold the paper in half.
Fold the half into equal thirds.
Draw your design on the folded section.
.
Unfold your completed template.
Cut out your design.
OR... www.youngschristmas.com
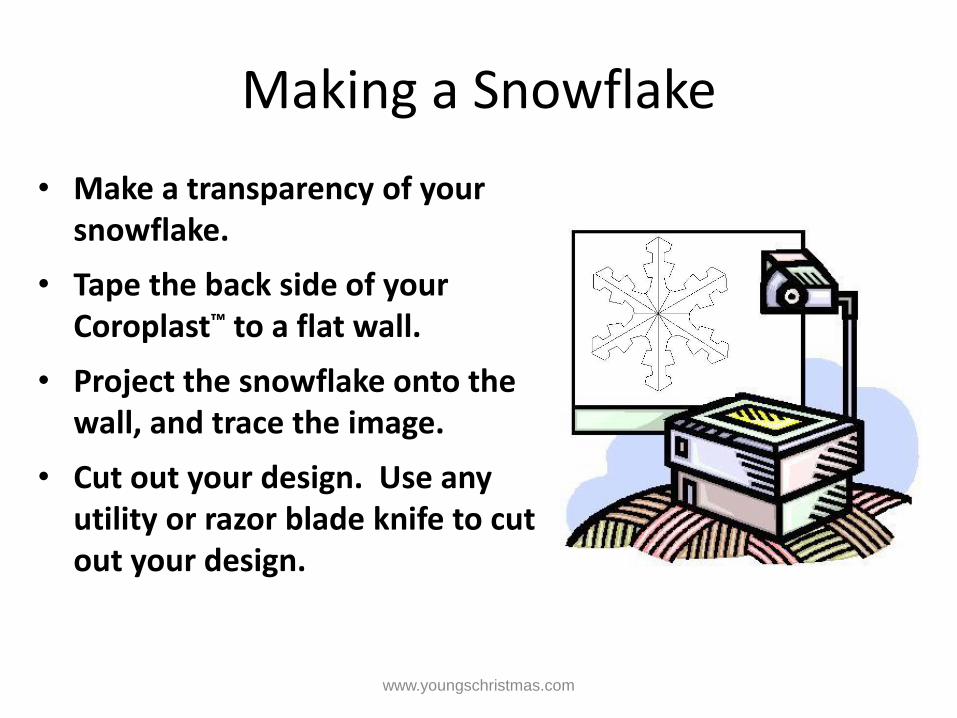
Making a Snowflake
• Make a transparency of your snowflake.
• Tape the back side of your Coroplast™ to a flat wall.
• Project the snowflake onto the wall, and trace the image.
• Cut out your design. Use any utility or razor blade knife to cut out your design.
www.youngschristmas.com

Making a Large Project
• This would also be the best method to do a large project, such as this Santa’s Toy Shop.
• Divide your design into 4 x 8 foot sections, and draw one section per sheet of Coroplast™.
• Cut out your design. Use any utility or razor blade knife to cut out your design.
www.youngschristmas.com

Adding Lights to Your Project
• Layout (from the backside) the spacing for your mini lights,
• Make a mark for where each hole will be made. The most common spacing is 1 or 1 1/2 inches.
• If you have a lot of straight edges, you can mark a straight edge every inch (or 1½ inch if you use the wider spacing), making it quicker to mark where the lights need to go.
www.youngschristmas.com
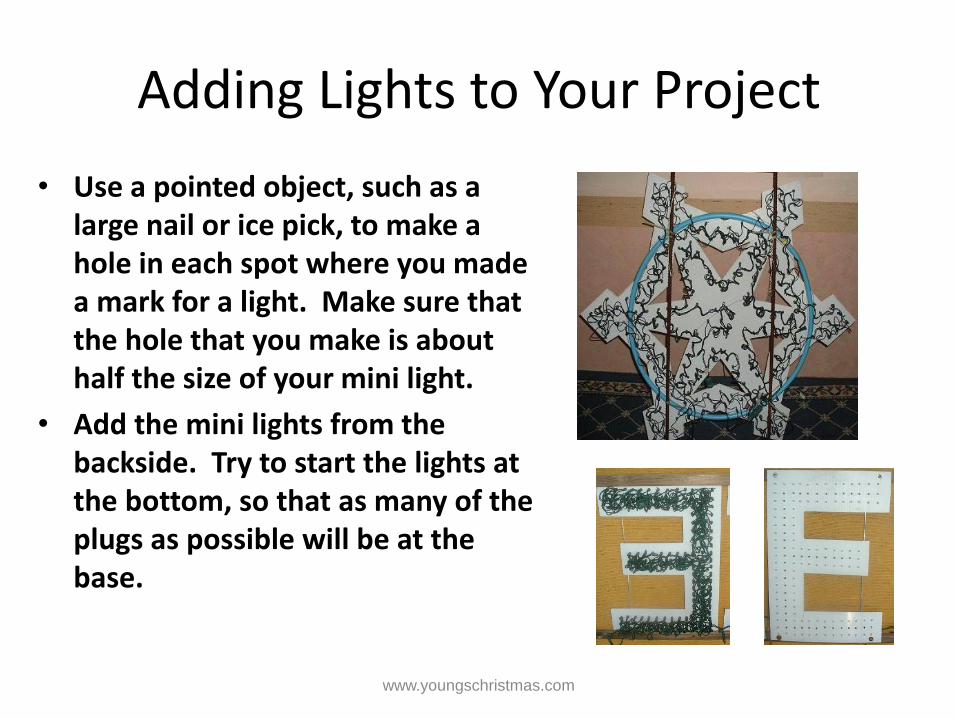
Adding Lights to Your Project
• Use a pointed object, such as a large nail or ice pick, to make a hole in each spot where you made a mark for a light. Make sure that the hole that you make is about half the size of your mini light.
• Add the mini lights from the backside. Try to start the lights at the bottom, so that as many of the plugs as possible will be at the base.
www.youngschristmas.com
Adding Lights to Your Project
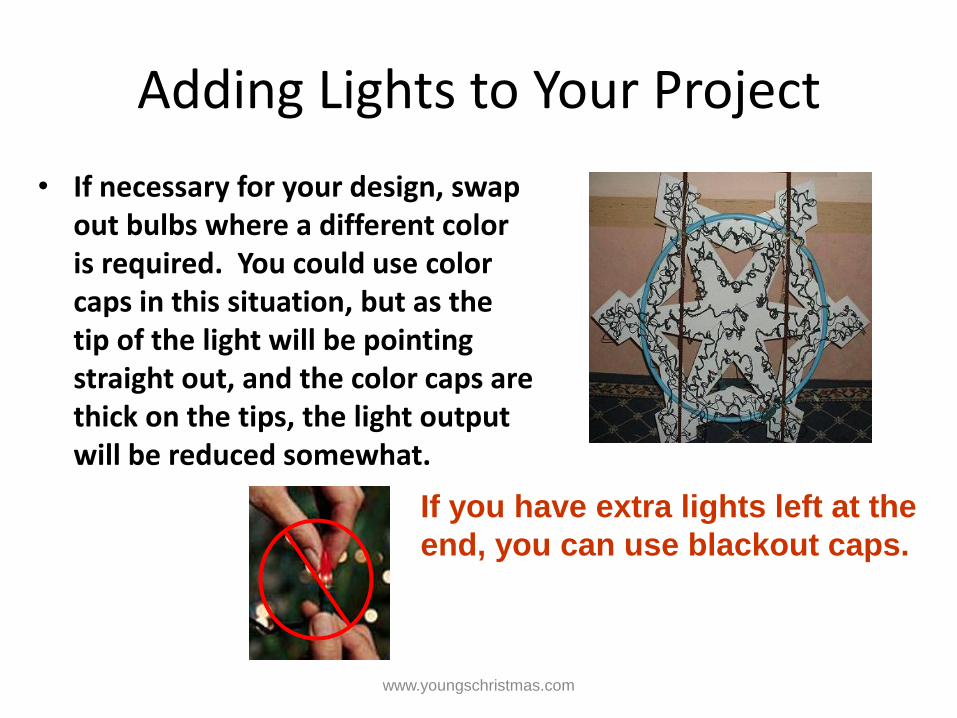
• If necessary for your design, swap out bulbs where a different color is required. You could use color caps in this situation, but as the tip of the light will be pointing straight out, and the color caps are thick on the tips, the light output will be reduced somewhat.
If you have extra lights left at the
end, you can use blackout caps.
www.youngschristmas.com

Supporting Your Project
• You will need to provide support for you creation. The larger the display, the more rigid support you will need. The support used here on the snowflakes is actually a hula-hoop!
www.youngschristmas.com
Supporting Your Project
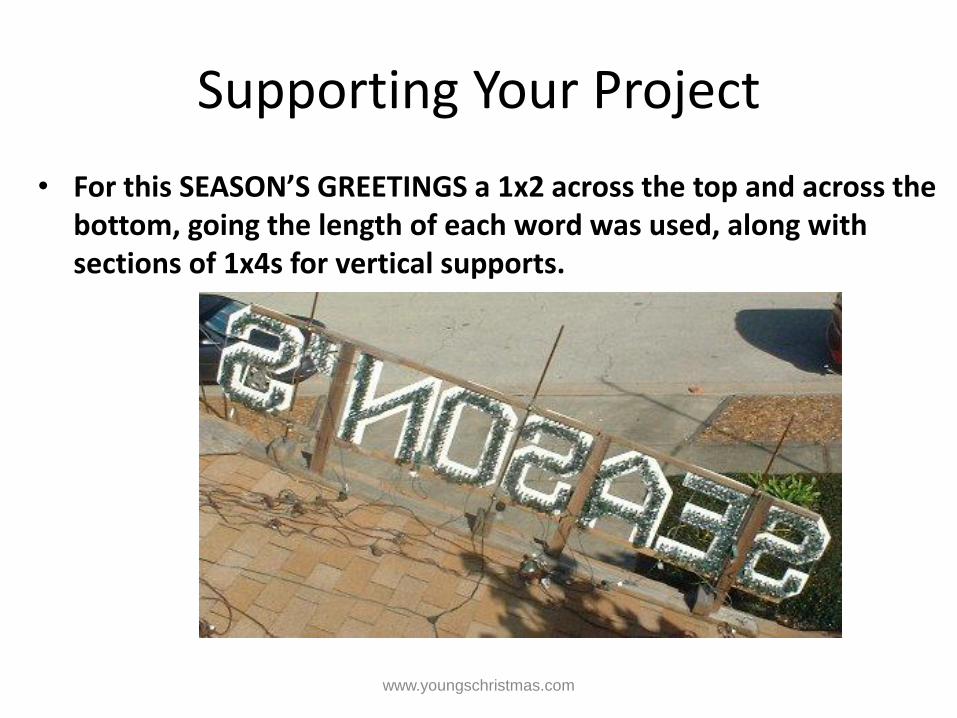
• For this SEASON’S GREETINGS a 1x2 across the top and across the bottom, going the length of each word was used, along with sections of 1x4s for vertical supports.
www.youngschristmas.com
Supporting Your Project
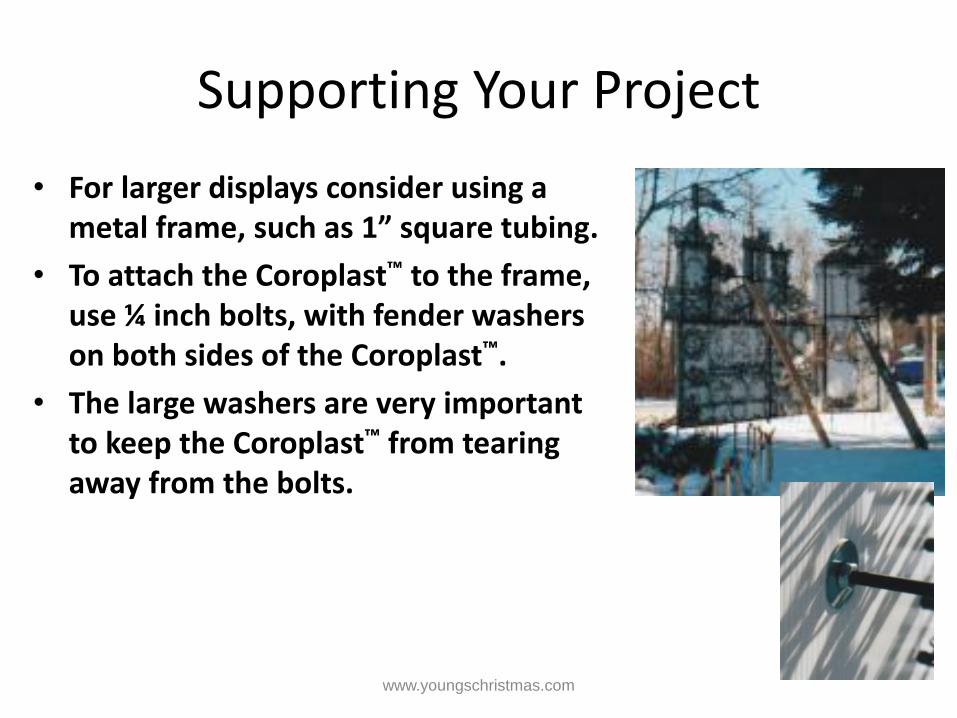
• For larger displays consider using a metal frame, such as 1” square tubing.
• To attach the Coroplast™ to the frame, use ¼ inch bolts, with fender washers on both sides of the Coroplast™.
• The large washers are very important to keep the Coroplast™ from tearing away from the bolts.
www.youngschristmas.com
Supporting Your Project
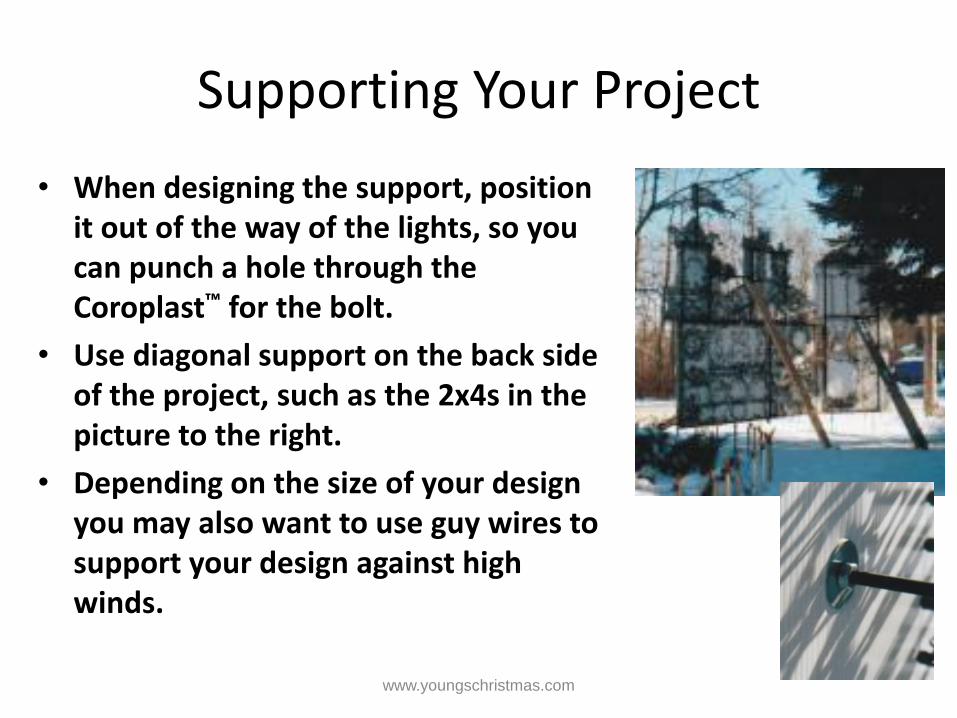
• When designing the support, position it out of the way of the lights, so you can punch a hole through the Coroplast™ for the bolt.
• Use diagonal support on the back side of the project, such as the 2x4s in the picture to the right.
• Depending on the size of your design you may also want to use guy wires to support your design against high winds.
www.youngschristmas.com
Working with PVC
www.youngschristmas.com
Working with PVC Pipe
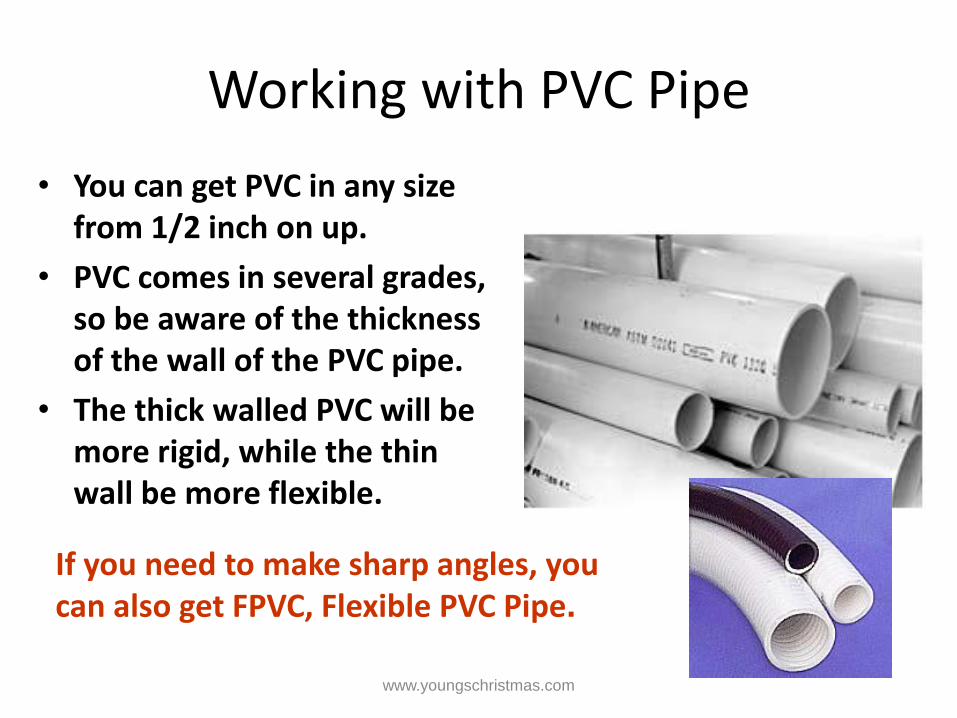
• You can get PVC in any size from 1/2 inch on up.
• PVC comes in several grades, so be aware of the thickness of the wall of the PVC pipe.
• The thick walled PVC will be more rigid, while the thin wall be more flexible.
If you need to make sharp angles, you can also get FPVC, Flexible PVC Pipe.
www.youngschristmas.com
PVC Projects
www.youngschristmas.com

Constructing a Palm Tree
• These palm trees were designed to use with Light-O-Rama.
• They use red/green morphing icicle lights on the fronds, and red/green morphing rope lights on the trunk.
• The lights all had to be re-wired to be controlled with the software.
• 9 channels were used to control the tree: 2 for the trunk, 6 for the 3 levels of fronds, and 1 channel to control the strobes.
www.youngschristmas.com
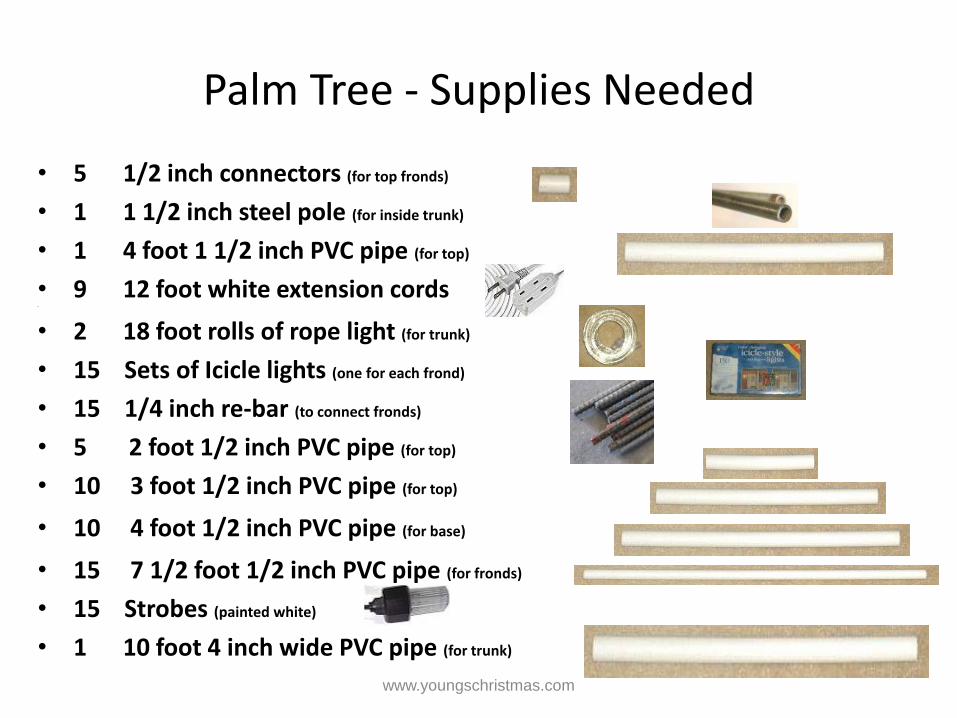
Palm Tree - Supplies Needed
• 5 1/2 inch connectors (for top fronds)
• 1 1 1/2 inch steel pole (for inside trunk)
• 1 4 foot 1 1/2 inch PVC pipe (for top)
• 9 12 foot white extension cords •
• 2 18 foot rolls of rope light (for trunk)
• 15 Sets of Icicle lights (one for each frond)
• 15 1/4 inch re-bar (to connect fronds)
• 5 2 foot 1/2 inch PVC pipe (for top)
• 10 3 foot 1/2 inch PVC pipe (for top)
• 10 4 foot 1/2 inch PVC pipe (for base)
• 15 7 1/2 foot 1/2 inch PVC pipe (for fronds)
• 15 Strobes (painted white)
• 1 10 foot 4 inch wide PVC pipe (for trunk)
www.youngschristmas.com
Constructing a Palm Tree
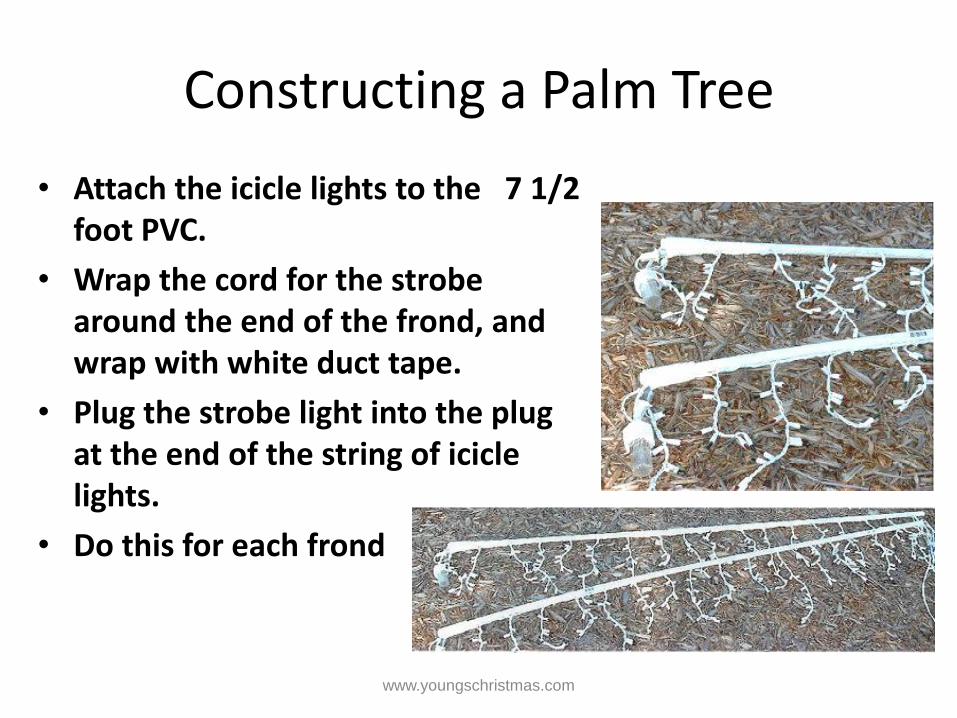
• Attach the icicle lights to the 7 1/2 foot PVC.
• Wrap the cord for the strobe around the end of the frond, and wrap with white duct tape.
• Plug the strobe light into the plug at the end of the string of icicle lights.
• Do this for each frond
www.youngschristmas.com

Constructing the Palm Tree Trunk
• For inside the trunk of the palm tree, take the ten 4 ft sections of 1/2 inch PVC pipes and tape them around the steel pipe for the base of the tree.
• Wrap additional duct tape around the pipes so that it will be snug when you slide it inside the 4in. PVC trunk.
www.youngschristmas.com

Constructing the Palm Tree Trunk
• On the outside of the 10ft. PVC pipe, line-up the white extension cords, and tape to pipe with white duct tape, leaving extra extension cord at the top for each level of the fronds.
• Tape the cords as required for the entire length of the pipe (about every 6 inches).
• Wrap the rope light around the trunk as tightly as possible. You can attach the rope light to the extension cords, in between the tape, to keep it from sliding on the pipe.
www.youngschristmas.com
Constructing the Palm Tree Trunk
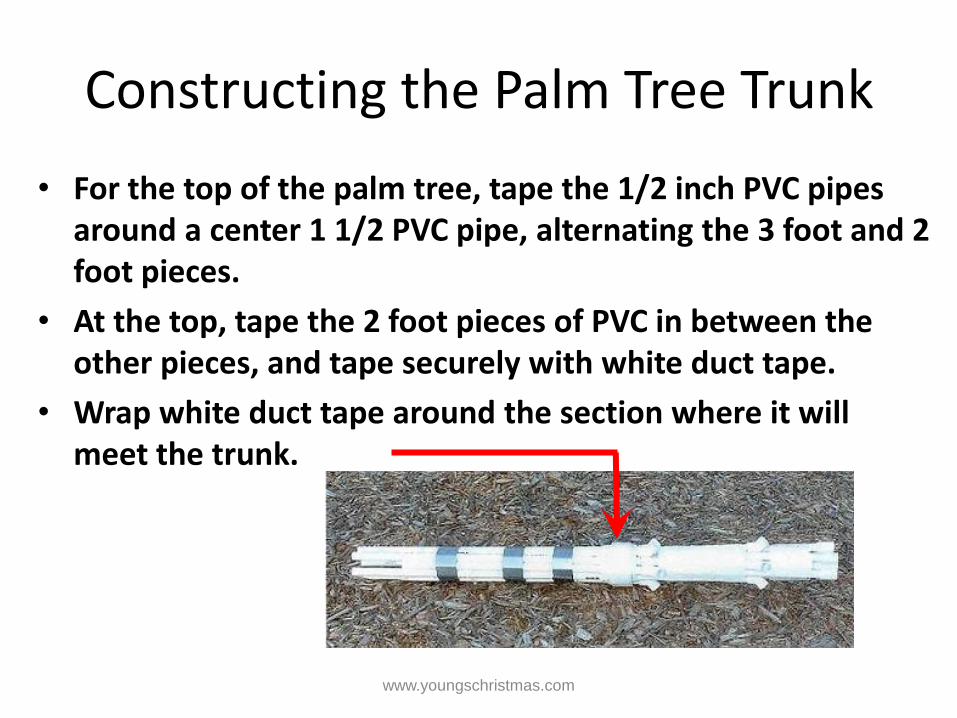
• For the top of the palm tree, tape the 1/2 inch PVC pipes around a center 1 1/2 PVC pipe, alternating the 3 foot and 2 foot pieces.
• At the top, tape the 2 foot pieces of PVC in between the other pieces, and tape securely with white duct tape.
• Wrap white duct tape around the section where it will meet the trunk.
www.youngschristmas.com

Constructing the Palm Tree Trunk
• When you slide this section into the trunk, it will fit snuggly on the top of the 4 inch PVC pipe.
• The 45° connectors shown are no longer used, as they kept breaking off in the wind.
• Instead a 4 ft. piece of rebar, bent to shape, stuck down each 1/2 inch PVC pipe on the trunk to slide the palm frond over is used.
www.youngschristmas.com

Constructing a Palm Tree
www.youngschristmas.com
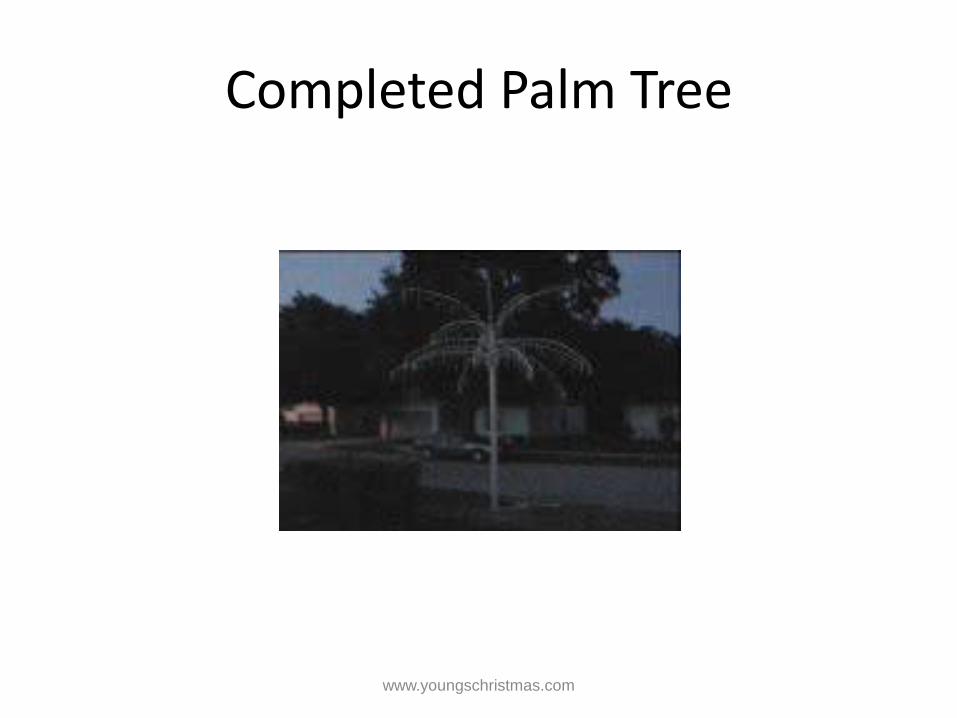
Completed Palm Tree
www.youngschristmas.com
Constructing Arches
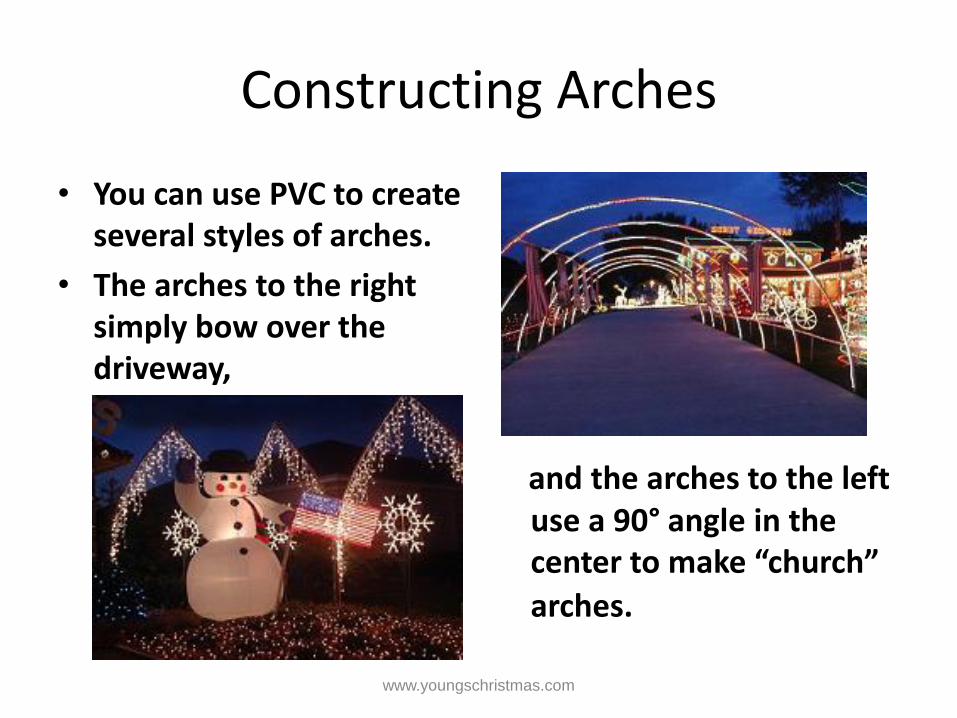
• You can use PVC to create several styles of arches.
• The arches to the right simply bow over the driveway,
and the arches to the left use a 90° angle in the center to make “church”
arches.
www.youngschristmas.com
Constructing Arches
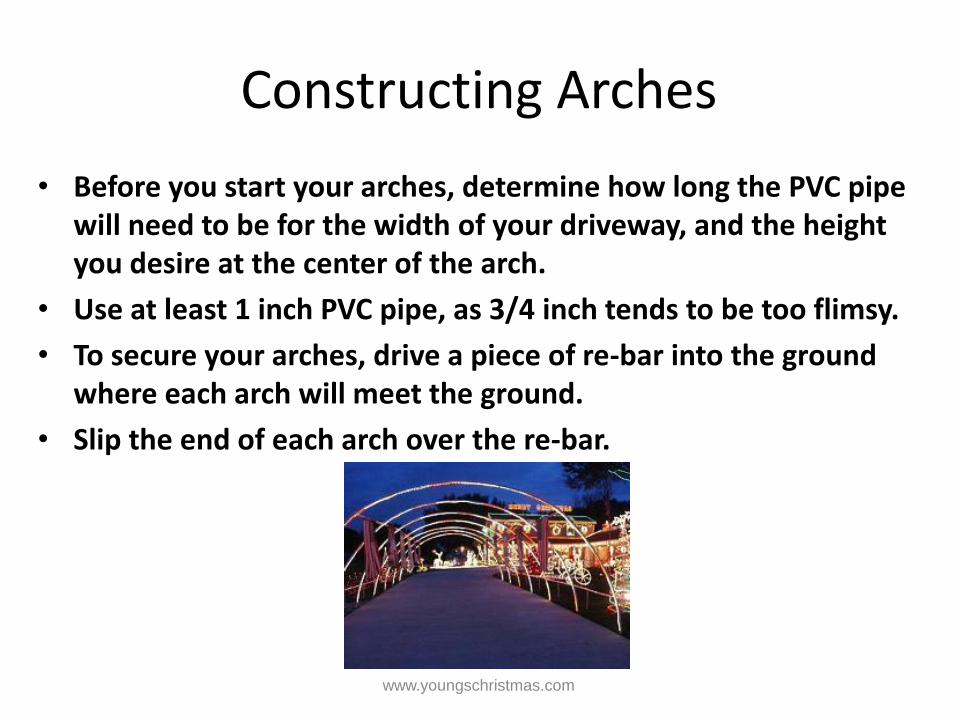
• Before you start your arches, determine how long the PVC pipe will need to be for the width of your driveway, and the height you desire at the center of the arch.
• Use at least 1 inch PVC pipe, as 3/4 inch tends to be too flimsy.
• To secure your arches, drive a piece of re-bar into the ground where each arch will meet the ground.
• Slip the end of each arch over the re-bar.
www.youngschristmas.com
Constructing Arches
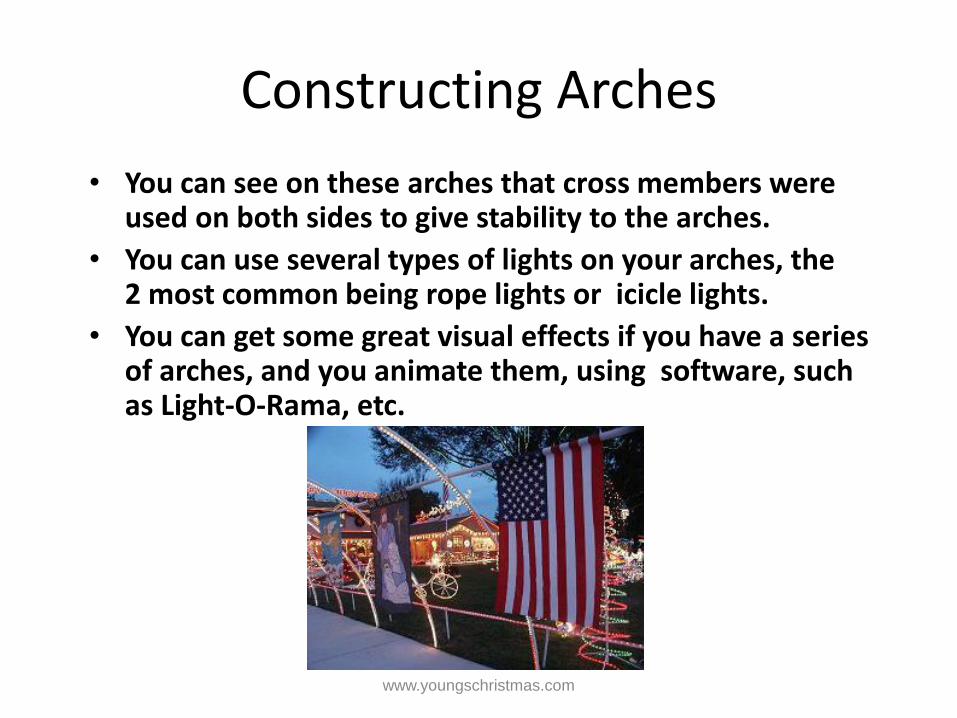
• You can see on these arches that cross members were used on both sides to give stability to the arches.
• You can use several types of lights on your arches, the 2 most common being rope lights or icicle lights.
• You can get some great visual effects if you have a series of arches, and you animate them, using software, such as Light-O-Rama, etc.
www.youngschristmas.com
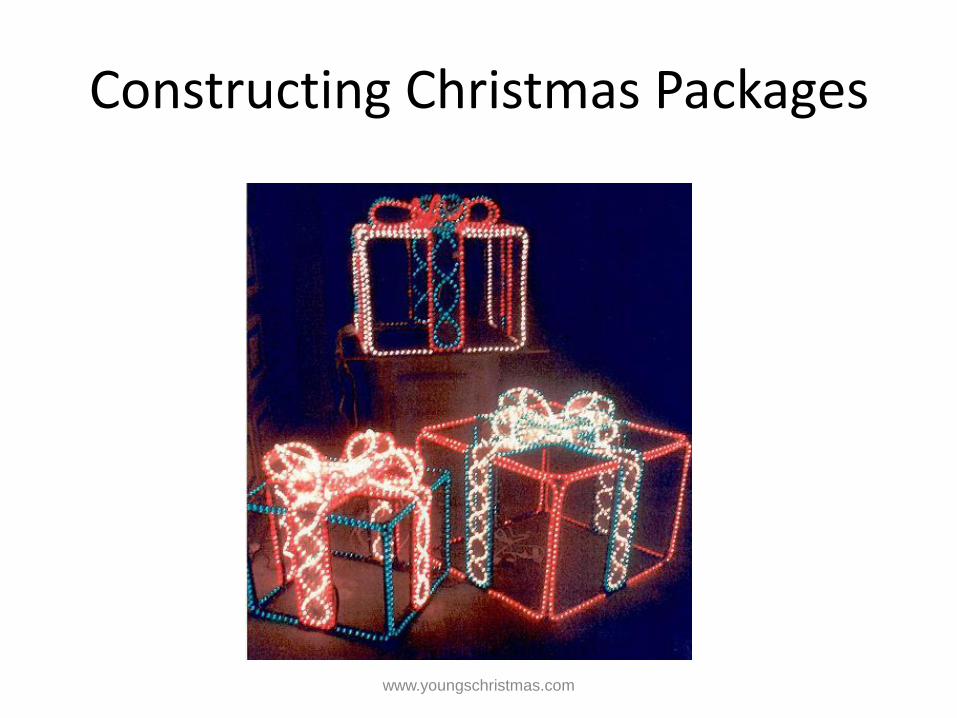
Constructing Christmas Packages
www.youngschristmas.com
Christmas Packages - Supplies Needed
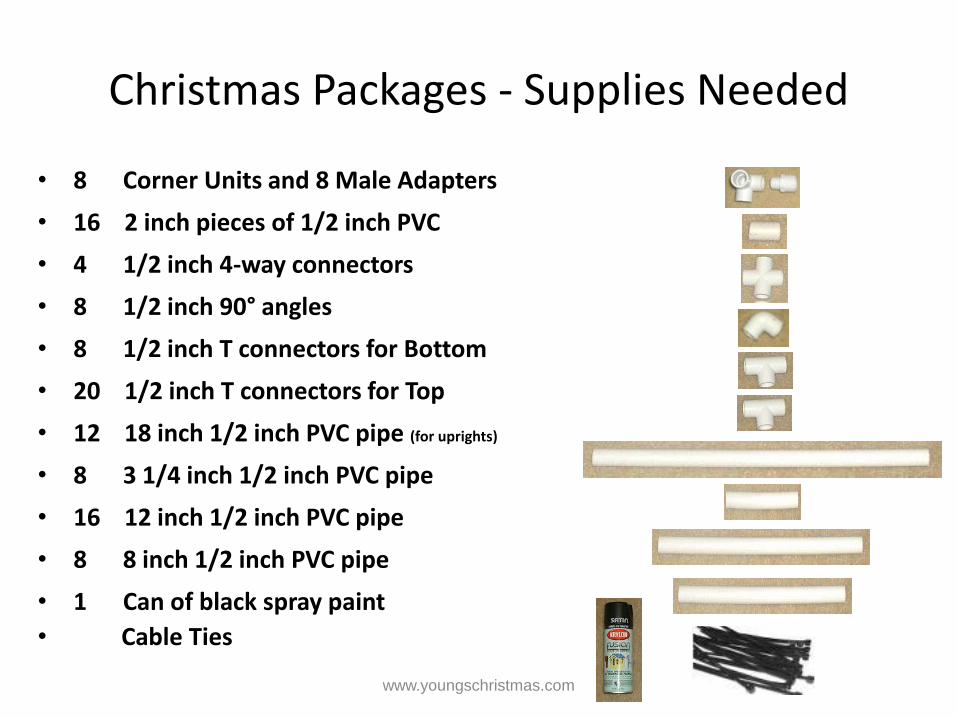
• 8 Corner Units and 8 Male Adapters
• 16 2 inch pieces of 1/2 inch PVC
• 4 1/2 inch 4-way connectors
• 8 1/2 inch 90° angles
• 8 1/2 inch T connectors for Bottom
• 20 1/2 inch T connectors for Top
• 12 18 inch 1/2 inch PVC pipe (for uprights)
• 8 3 1/4 inch 1/2 inch PVC pipe
• 16 12 inch 1/2 inch PVC pipe
• 8 8 inch 1/2 inch PVC pipe
• 1 Can of black spray paint
• Cable Ties
www.youngschristmas.com
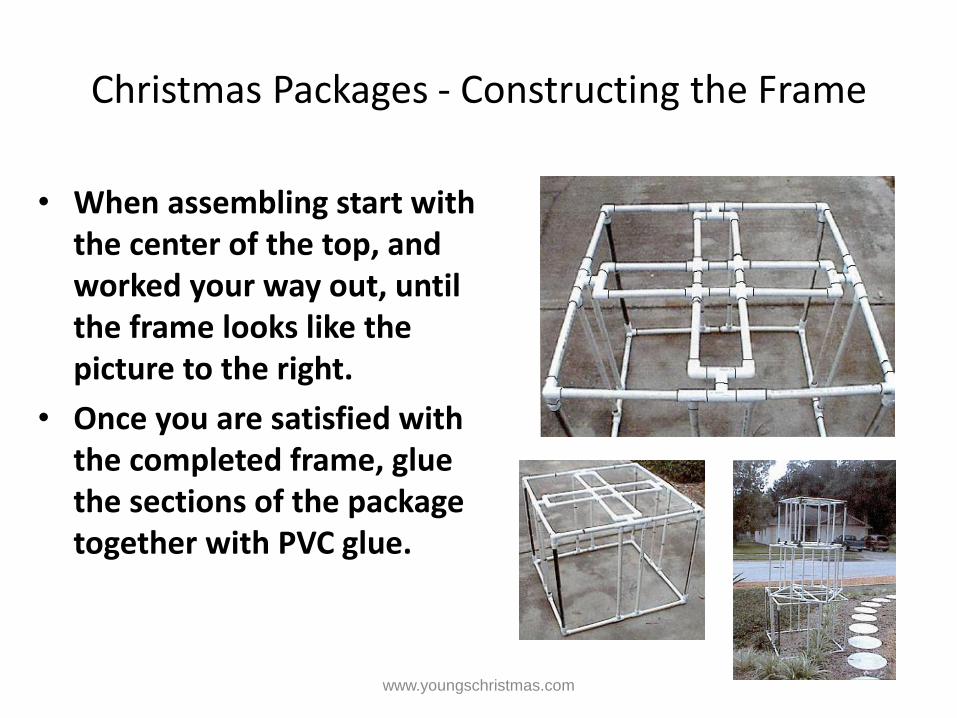
Christmas Packages - Constructing the Frame
• When assembling start with the center of the top, and worked your way out, until the frame looks like the picture to the right.
• Once you are satisfied with the completed frame, glue the sections of the package together with PVC glue.
www.youngschristmas.com
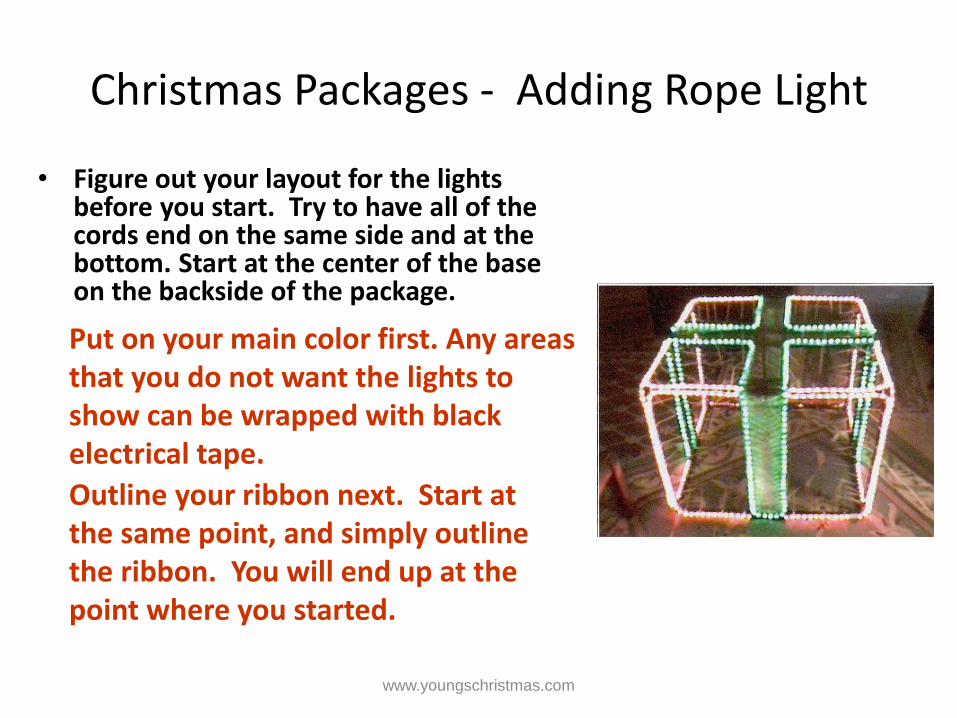
Christmas Packages - Adding Rope Light
• Figure out your layout for the lights before you start. Try to have all of the cords end on the same side and at the bottom. Start at the center of the base on the backside of the package.
Put on your main color first. Any areas that you do not want the lights to show can be wrapped with black electrical tape.
Outline your ribbon next. Start at the same point, and simply outline the ribbon. You will end up at the point where you started.
www.youngschristmas.com
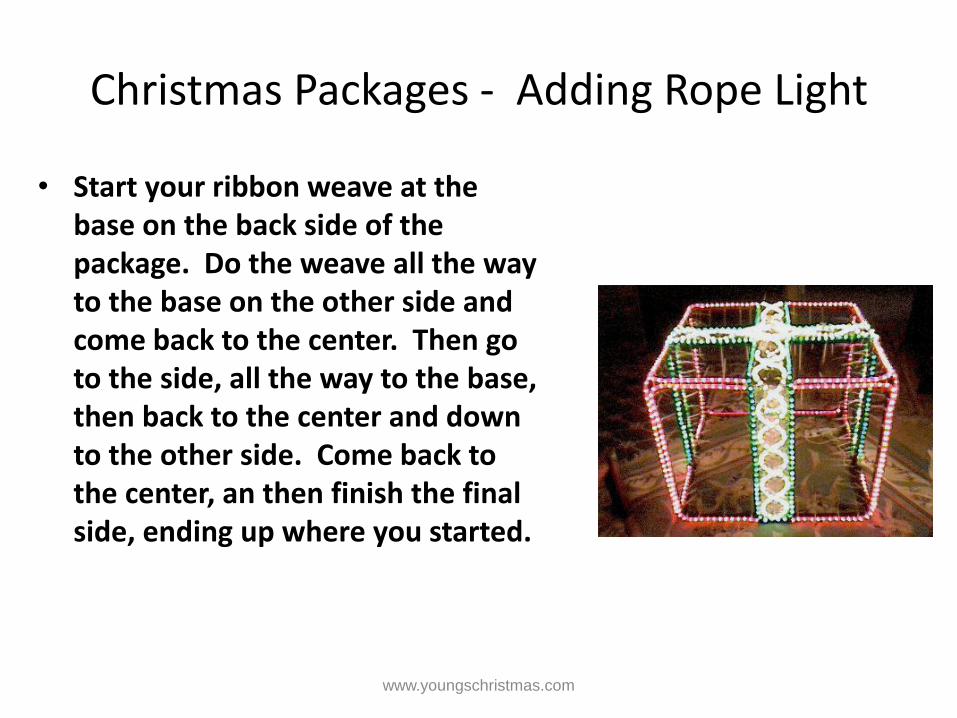
Christmas Packages - Adding Rope Light
• Start your ribbon weave at the base on the back side of the package. Do the weave all the way to the base on the other side and come back to the center. Then go to the side, all the way to the base, then back to the center and down to the other side. Come back to the center, an then finish the final side, ending up where you started.
www.youngschristmas.com
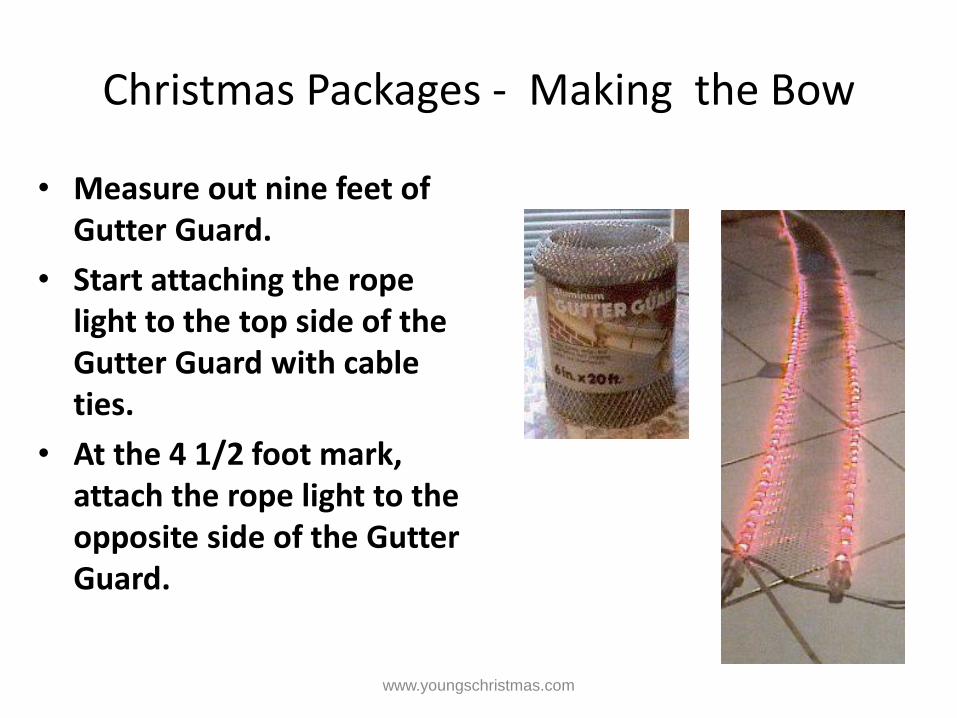
Christmas Packages - Making the Bow
• Measure out nine feet of Gutter Guard.
• Start attaching the rope light to the top side of the Gutter Guard with cable ties.
• At the 4 1/2 foot mark, attach the rope light to the opposite side of the Gutter Guard.
www.youngschristmas.com
Christmas Packages - Making the Bow
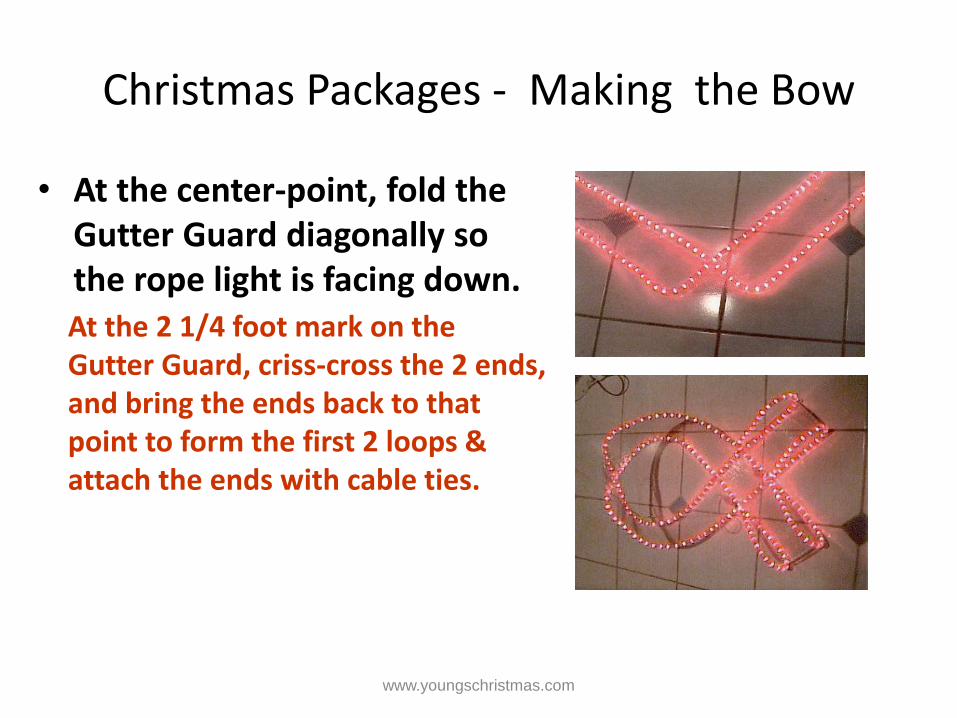
• At the center-point, fold the Gutter Guard diagonally so the rope light is facing down. At the 2 1/4 foot mark on the Gutter Guard, criss-cross the 2 ends, and bring the ends back to that point to form the first 2 loops & attach the ends with cable ties.
www.youngschristmas.com
Christmas Packages - Making the Bow
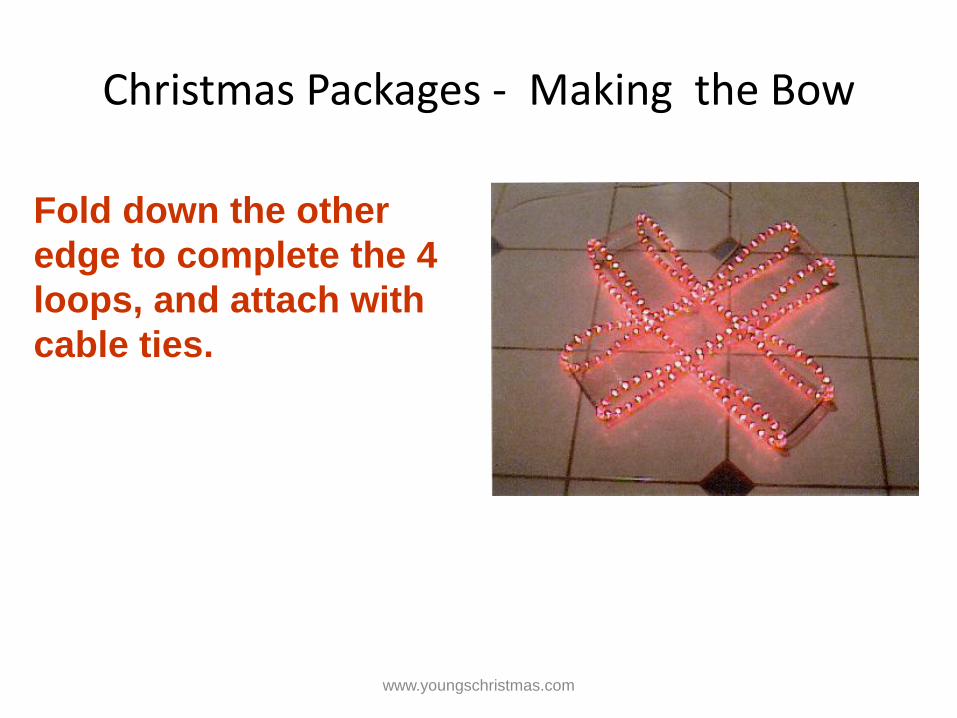
Fold down the other
edge to complete the 4
loops, and attach with
cable ties.
www.youngschristmas.com
Christmas Packages - Making the Bow
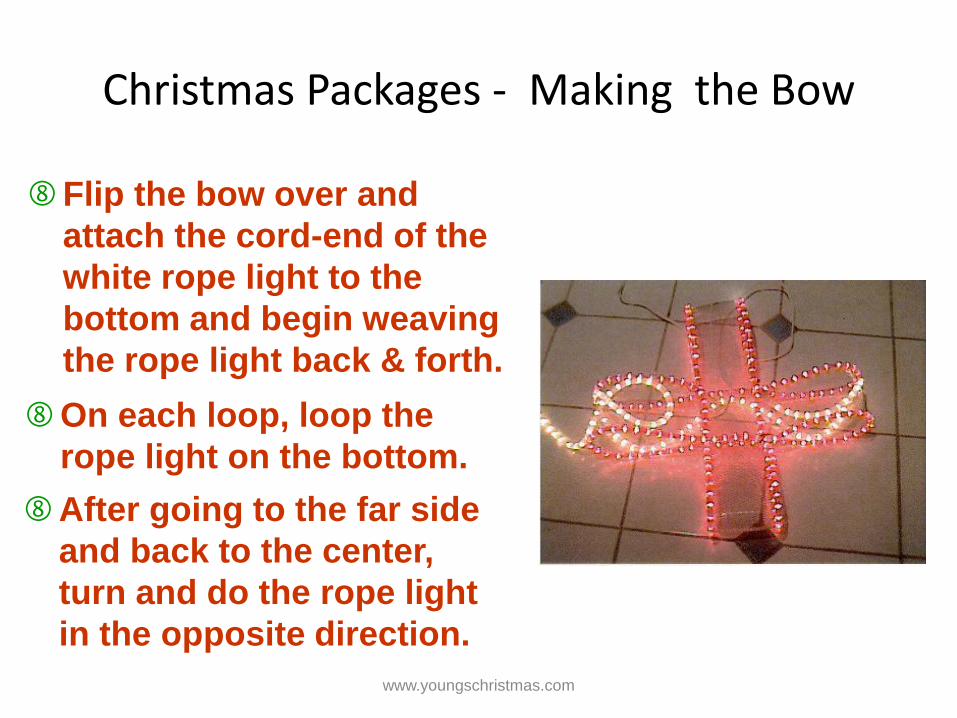
Flip the bow over and
attach the cord-end of the
white rope light to the
bottom and begin weaving
the rope light back & forth.
On each loop, loop the
rope light on the bottom.
After going to the far side
and back to the center,
turn and do the rope light
in the opposite direction.
www.youngschristmas.com
Christmas Packages - Making the Bow
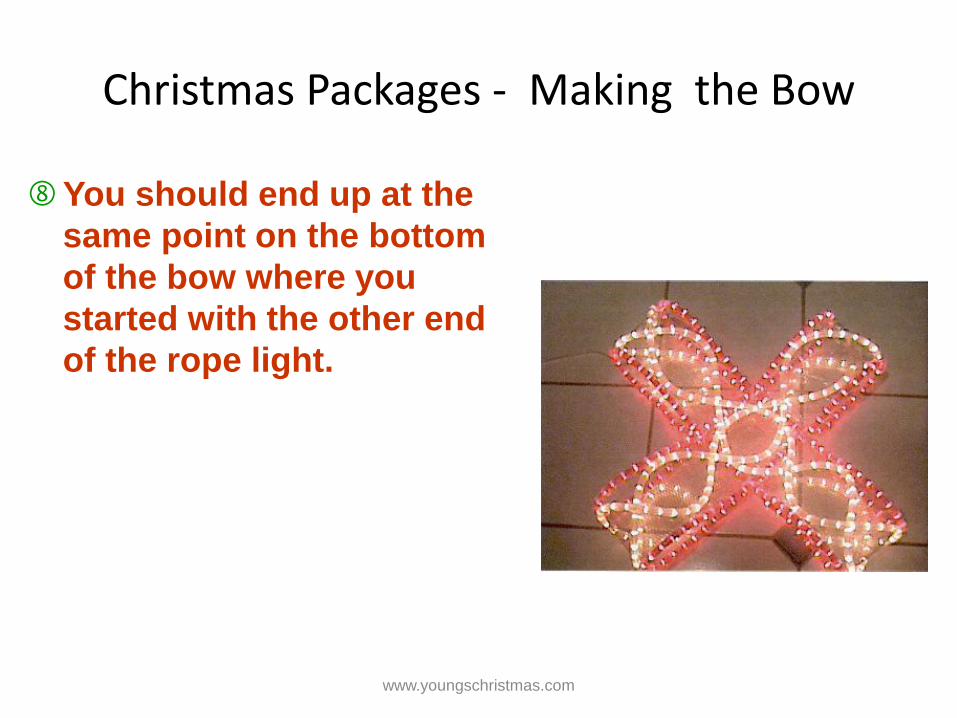
You should end up at the
same point on the bottom
of the bow where you
started with the other end
of the rope light.
www.youngschristmas.com
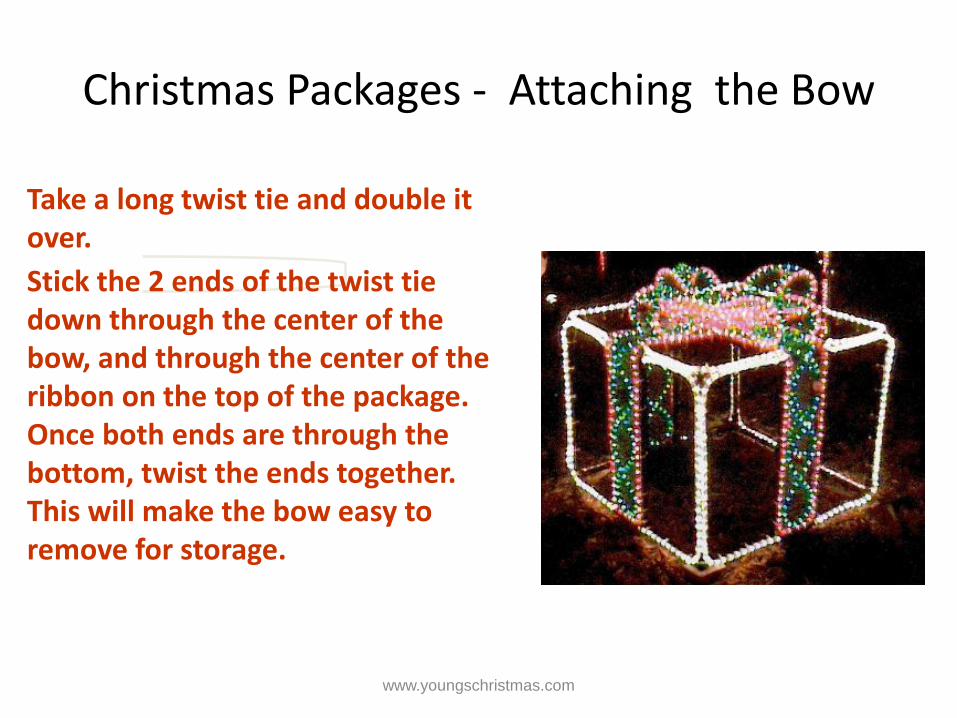
Christmas Packages - Attaching the Bow
Take a long twist tie and double it over.
www.youngschristmas.com
Stick the 2 ends of the twist tie down through the center of the bow, and through the center of the ribbon on the top of the package. Once both ends are through the bottom, twist the ends together. This will make the bow easy to remove for storage.
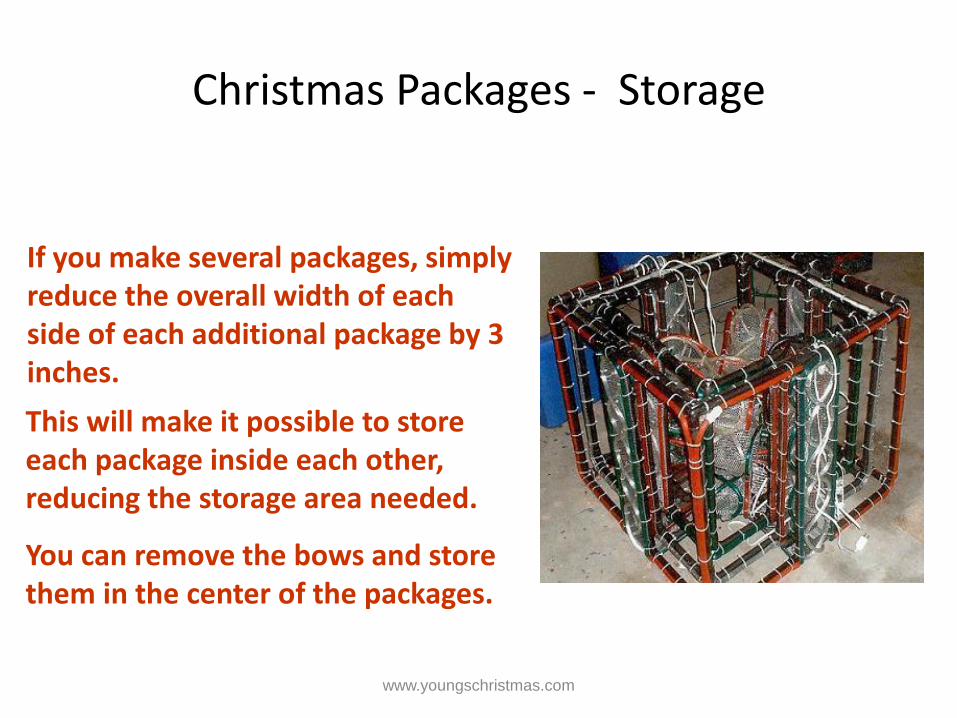
Christmas Packages - Storage
If you make several packages, simply reduce the overall width of each side of each additional package by 3 inches.
This will make it possible to store each package inside each other, reducing the storage area needed.
You can remove the bows and store them in the center of the packages.
www.youngschristmas.com
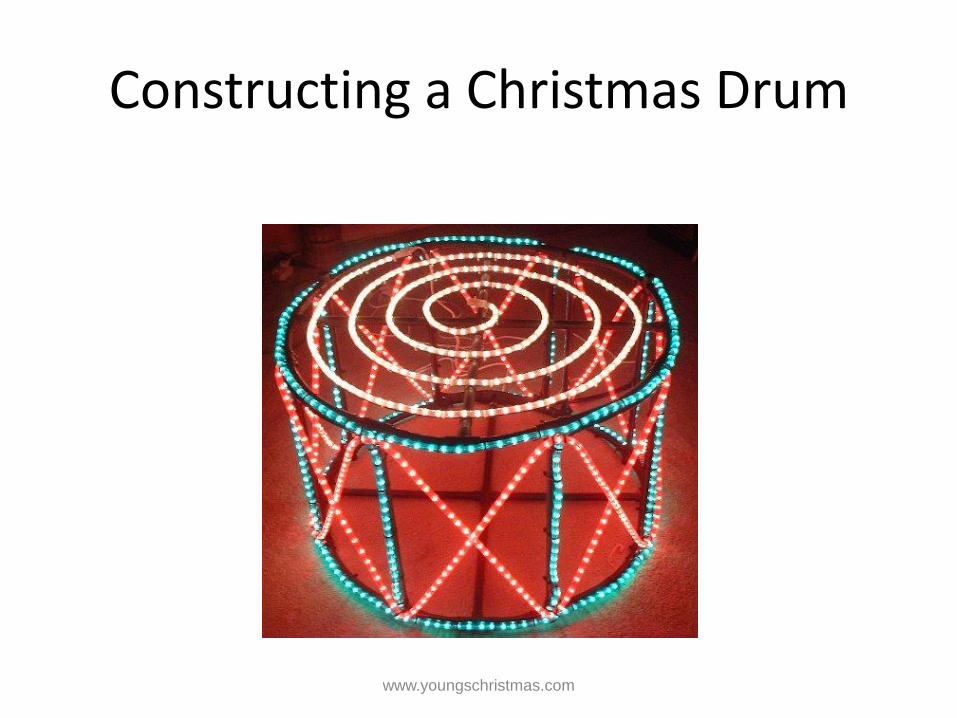
Constructing a Christmas Drum
www.youngschristmas.com
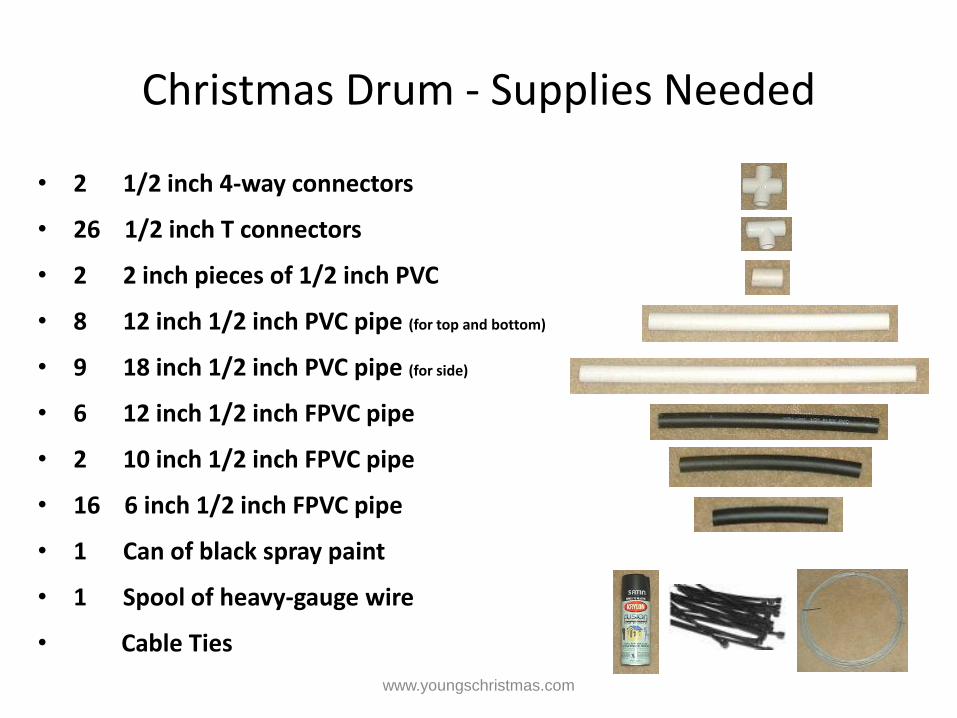
Christmas Drum - Supplies Needed
• 2 1/2 inch 4-way connectors
• 26 1/2 inch T connectors
• 2 2 inch pieces of 1/2 inch PVC
• 8 12 inch 1/2 inch PVC pipe (for top and bottom)
• 9 18 inch 1/2 inch PVC pipe (for side)
• 6 12 inch 1/2 inch FPVC pipe
• 2 10 inch 1/2 inch FPVC pipe
• 16 6 inch 1/2 inch FPVC pipe
• 1 Can of black spray paint
• 1 Spool of heavy-gauge wire
• Cable Ties
www.youngschristmas.com
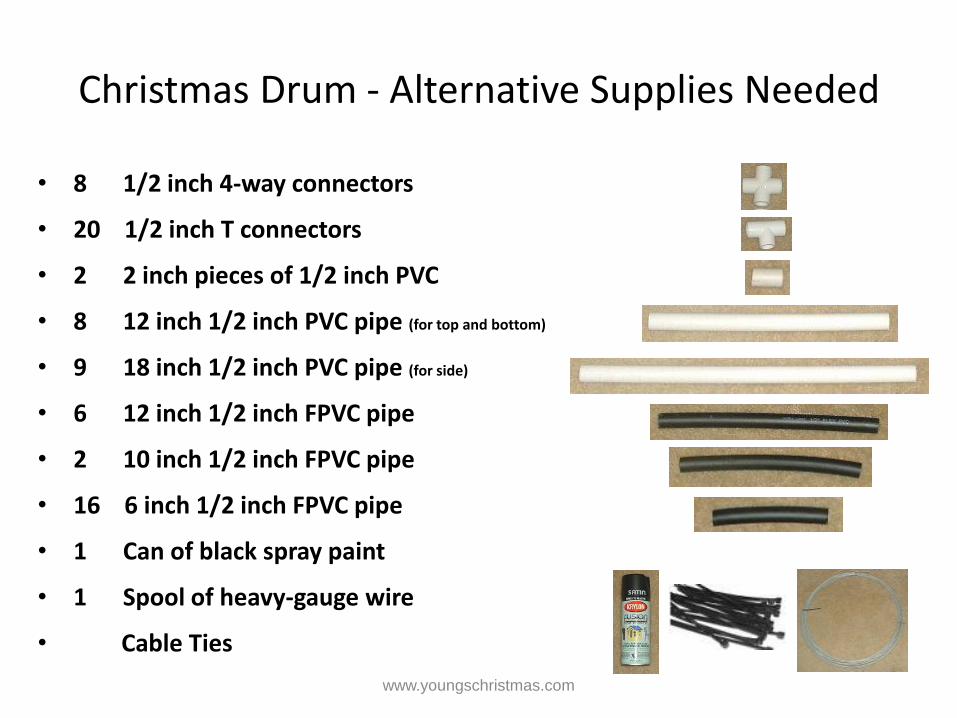
Christmas Drum - Alternative Supplies Needed
• 8 1/2 inch 4-way connectors
• 20 1/2 inch T connectors
• 2 2 inch pieces of 1/2 inch PVC
• 8 12 inch 1/2 inch PVC pipe (for top and bottom)
• 9 18 inch 1/2 inch PVC pipe (for side)
• 6 12 inch 1/2 inch FPVC pipe
• 2 10 inch 1/2 inch FPVC pipe
• 16 6 inch 1/2 inch FPVC pipe
• 1 Can of black spray paint
• 1 Spool of heavy-gauge wire
• Cable Ties
www.youngschristmas.com

Christmas Drum - Constructing The Frame
• Connect the pieces to form the side of the drum.
• Place the 2” pieces in the first section.
• On section 2, 4, 6 & 8 use the 5” FPVC pieces with a “T” in the center.
• Do not glue anything until you are sure everything fits properly.
www.youngschristmas.com

Christmas Drum - Constructing The Frame
• Connect the pieces to form the top and bottom supports for the drum.
www.youngschristmas.com
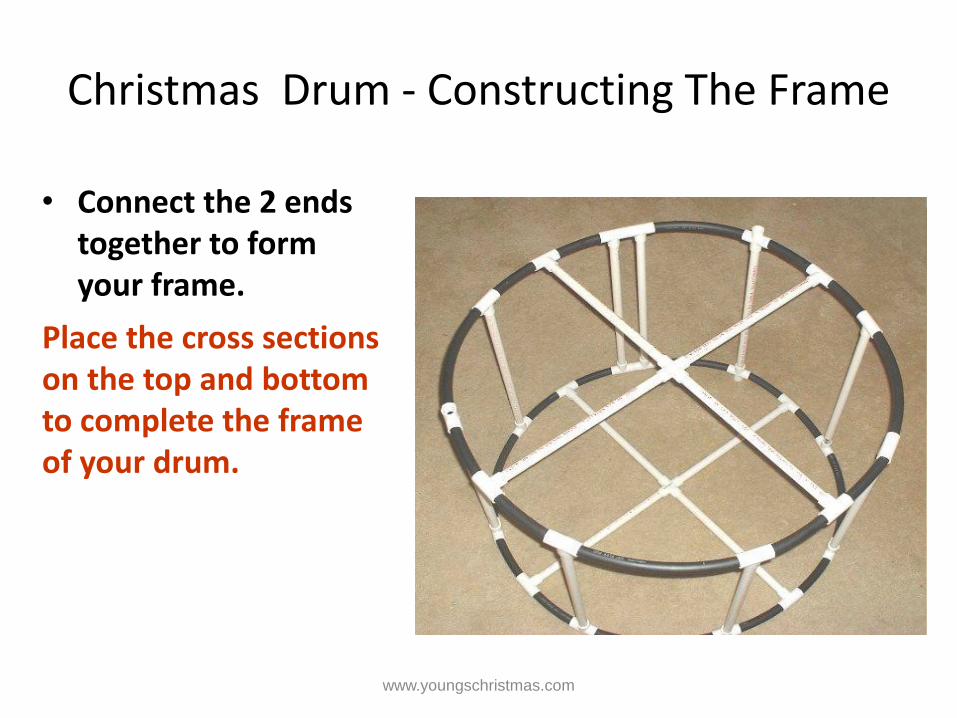
Christmas Drum - Constructing The Frame
• Connect the 2 ends together to form your frame.
Place the cross sections on the top and bottom to complete the frame of your drum.
www.youngschristmas.com

Christmas Drum - Gluing The Frame
• Once you are satisfied with the layout, take the sections of the drum apart.
• Glue all the sections of the “ladder” with PVC glue.
• Glue the top and bottom cross sections.
www.youngschristmas.com

Christmas Drum - Paint the Frame
• Re-assemble the frame of the drum.
• Paint the entire frame with black paint.
• Use a spray paint specifically made for plastic, such as Krylon™ FUSION.
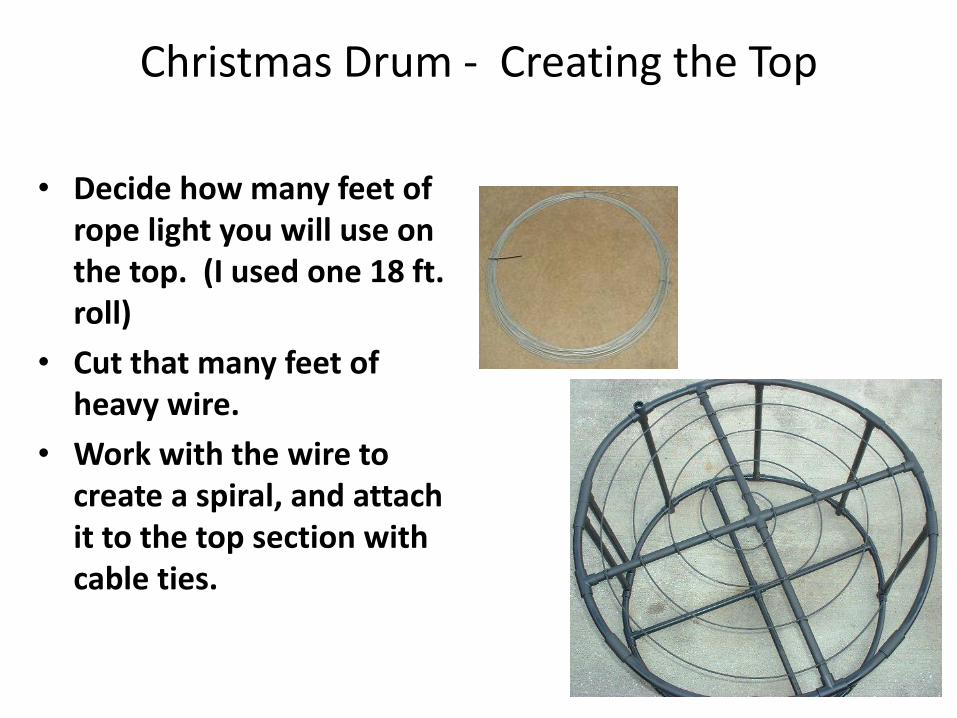
Christmas Drum - Creating the Top
• Decide how many feet of rope light you will use on the top. (I used one 18 ft. roll)
• Cut that many feet of heavy wire.
• Work with the wire to create a spiral, and attach it to the top section with cable ties.
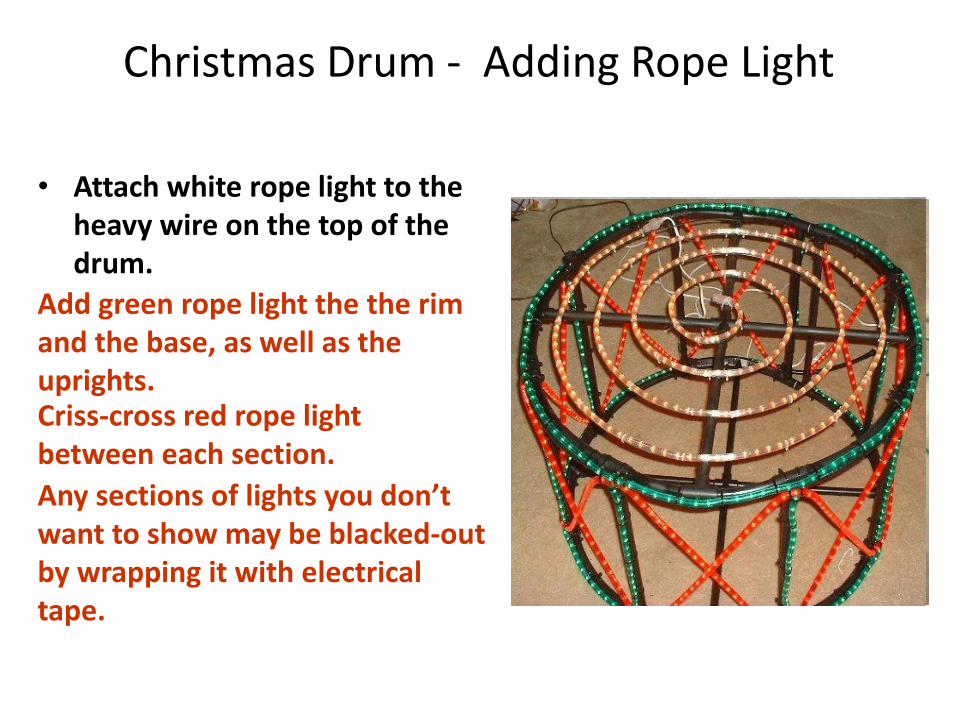
Christmas Drum - Adding Rope Light
• Attach white rope light to the heavy wire on the top of the drum.
Criss-cross red rope light between each section.
Add green rope light the the rim and the base, as well as the uprights.
Any sections of lights you don’t want to show may be blacked-out by wrapping it with electrical tape.

Christmas Drum - Completing
• Cut the ends off all of the cable ties tails.
• Paint all of the electrical cords black.
The End
Special thanks to
Doug Lawrence/Sylvanlights.com
Larry and Rachel Charpiat
www.youngschristmas.com