Worker’s (Employee) Self-Service User Guide
54
Worker’s (Employee) Self-Service User Guide Ohio Unemployment Employee Benefit Information at Your Fingertips
Transcript of Worker’s (Employee) Self-Service User Guide
Worker’s (Employee) Self-ServiceUser Guide
Ohio Unemployment Employee Benefit Information at Your Fingertips

2
Why Use Employee Self Service?
• Fast and convenient service
• Reduction in your response time
• Reduction in your mail costs
• View, respond, and archive correspondence on-line
• Peace of mind that your responses and appeals have been received
• Filing your continued weeks on-line
• Tracking the status of your claim information
• Extended “business hours”
Employee Self-Service offers many “benefits” in processing your claim:
Note: When filing via self-service (online), your application will be effective in the week the application is filed. If you wish to have the application effective for a previous week, you
must file by phone at 1-877-644-6562.
3
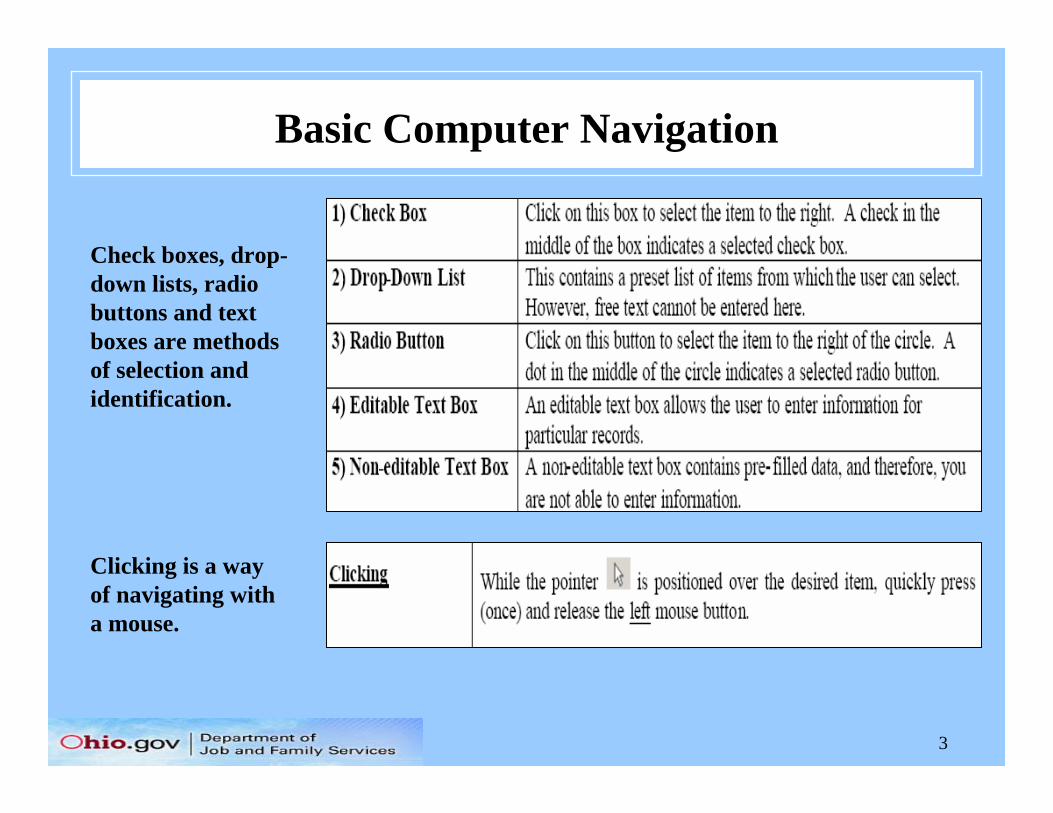
Basic Computer Navigation
Check boxes, drop-down lists, radio buttons and text boxes are methods of selection andidentification.
Clicking is a way of navigating with a mouse.
4
Filing a New Claim - What to Expect
The online initial application takes about 25 minutes. You will need to file a new claim if you have not applied for unemployment benefits at any time in the past 12 months.
Your application is not filed until you receive a confirmation number. If you are disconnected, use your username and PIN to log back on and resume the application process.
CAUTION: From the time you begin a new application online, you have 48 hours to complete it. After this time period, all information you previously entered will be deleted and you will have to start from the beginning. Keep this deadline in mind if you are disconnected, or if you choose to sign off and sign on again at a later time.
5
Filing a New Claim - What You Will Need • Your name, address , telephone number and e-mail address. • Your social security number. • Employment history, including most recent employment start and end dates. • The name, address, telephone number and dates of your employment with each employer for
whom you worked in the last 6 weeks of employment (have your W-2 form or pay stub available). • If you had out of state employment within the last 18 months, the name, address, telephone
number and dates of your employment with each employer for whom you worked out of state within the past 18 months.
• If you were separated from military service with any branch of the U.S. armed forces within the past 18 months, your discharge papers (form DD-214, member 4).
• If you were employed by the federal government within the past 18 months, the SF-8 and SF-50 form given to you by your government employer at the time of your separation.
• The reason you became unemployed from each employer. • Dependents' names, social security numbers, and dates of birth. • If claiming dependents, your spouse's name and social security number. • Alien Registration number and the expiration date of your work authorization (if you are not a
U.S. citizen or National). • Your regular occupation and job skills.
6
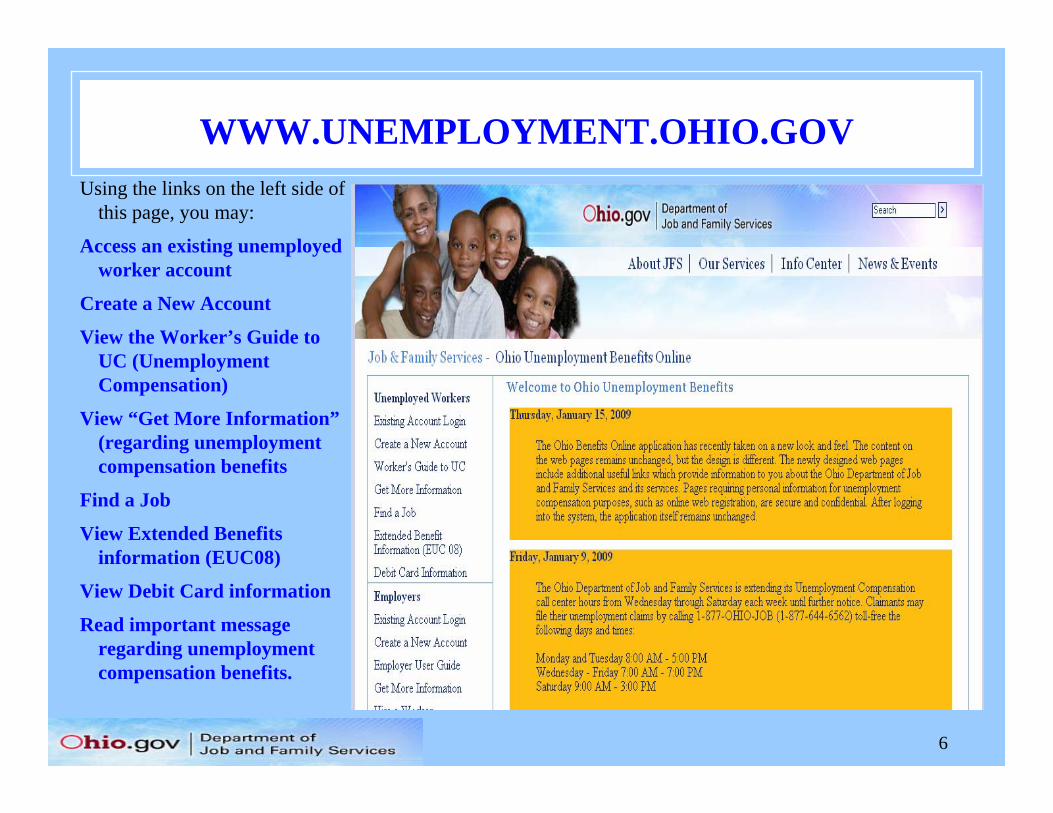
WWW.UNEMPLOYMENT.OHIO.GOVUsing the links on the left side of
this page, you may:
Access an existing unemployed worker account
Create a New Account
View the Worker’s Guide to UC (Unemployment Compensation)
View “Get More Information” (regarding unemployment compensation benefits
Find a Job
View Extended Benefits information (EUC08)
View Debit Card information
Read important message regarding unemployment compensation benefits.
7
Employee Registration: System Requirements
Browser Support: Our on-line services require either Internet Explorer, version 4.0 or higher, or Netscape Navigator, 6.0 or higher. You might experience difficulty with this application because of particular characteristics or your browser. For best results, use the latest version of the browser. Click on Internet Explorer or Netscape to download a free upgrade to the latest version.
Adobe Acrobat Reader: You must have Adobe Acrobat Reader, version 4.02 or higher, installed on your computer to view documents that have been posted to your in-box. For best results, use the latest version of Adobe Acrobat Reader. Click on Adobe Reader to download a free version of Adobe Acrobat Reader.
Note: When filing your claim via Internet and logged into the secure site, do not use the back button on your browser. This will cause an error in processing your application.
The Helplink is a consistent feature throughout the self-service web views. In addition to using this feature during registration, log-in, and the PIN reset process, employees can use the Help links to better understand various fields completed during the application process.
8
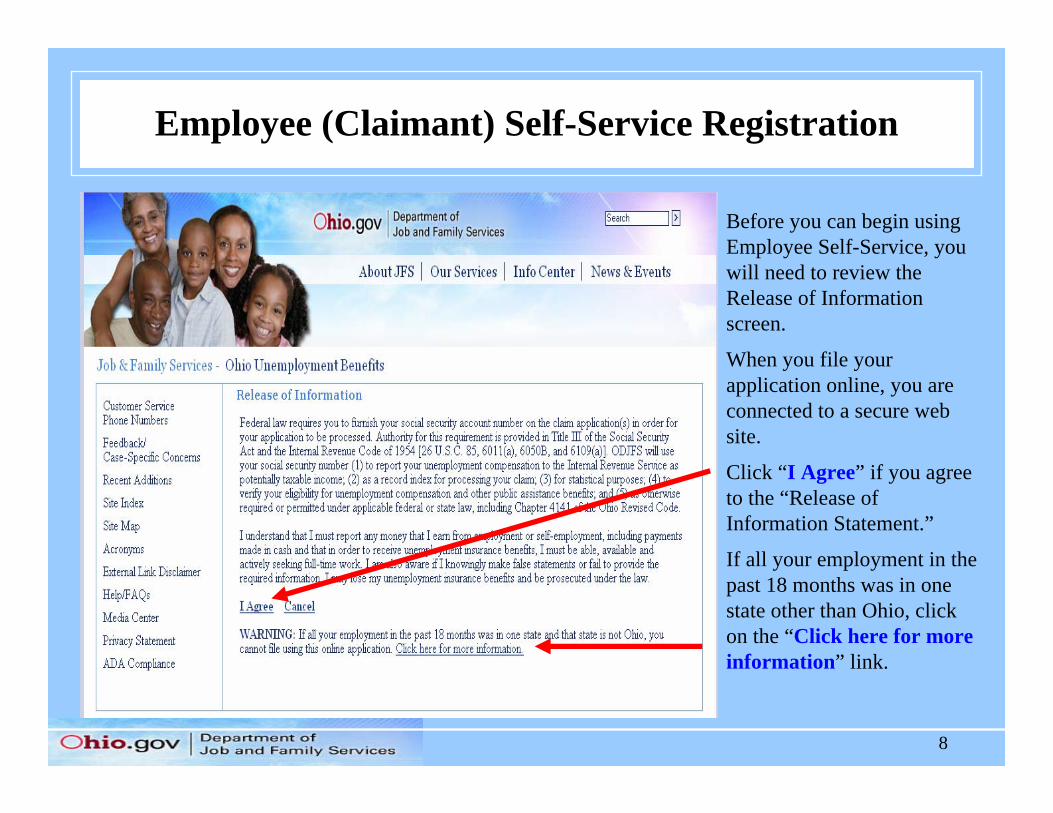
Employee (Claimant) Self-Service Registration
Before you can begin using Employee Self-Service, you will need to review the Release of Information screen.
When you file your application online, you are connected to a secure web site.
Click “I Agree” if you agree to the “Release of Information Statement.”
If all your employment in the past 18 months was in one state other than Ohio, click on the “Click here for more information” link.
9
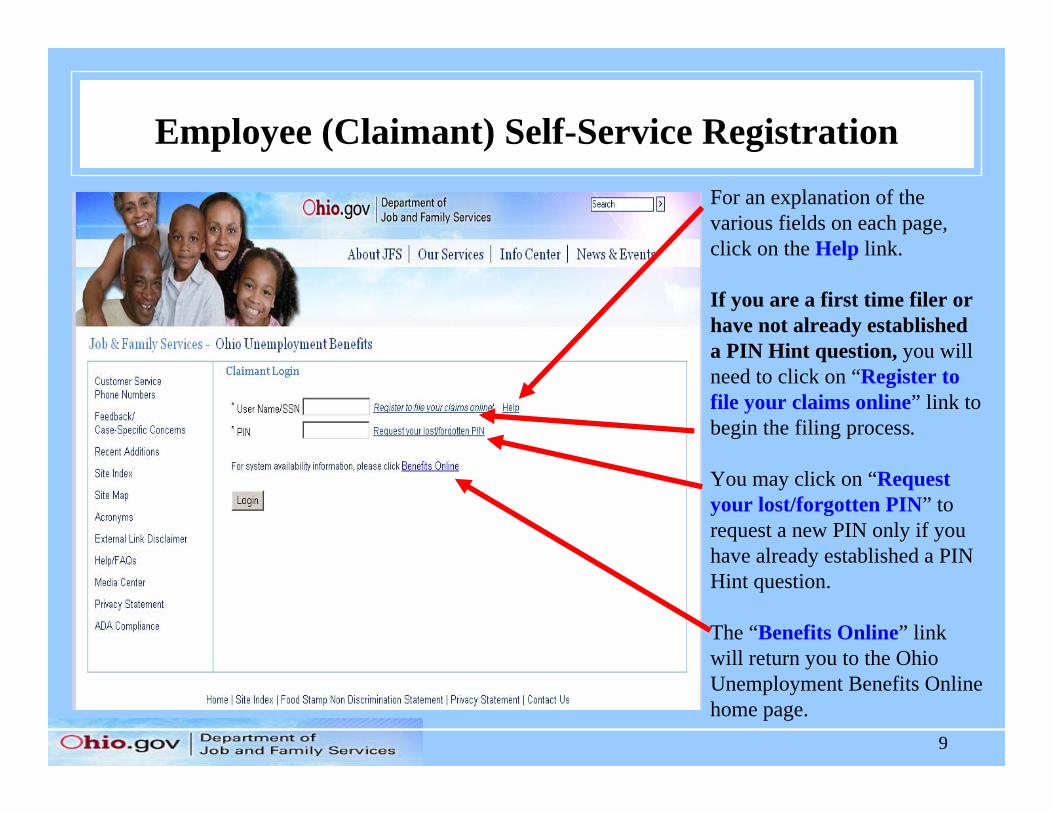
Employee (Claimant) Self-Service RegistrationFor an explanation of the various fields on each page, click on the Help link.
If you are a first time filer or have not already established a PIN Hint question, you will need to click on “Register to file your claims online” link to begin the filing process.
You may click on “Request your lost/forgotten PIN” to request a new PIN only if you have already established a PIN Hint question.
The “Benefits Online” link will return you to the Ohio Unemployment Benefits Online home page.
10
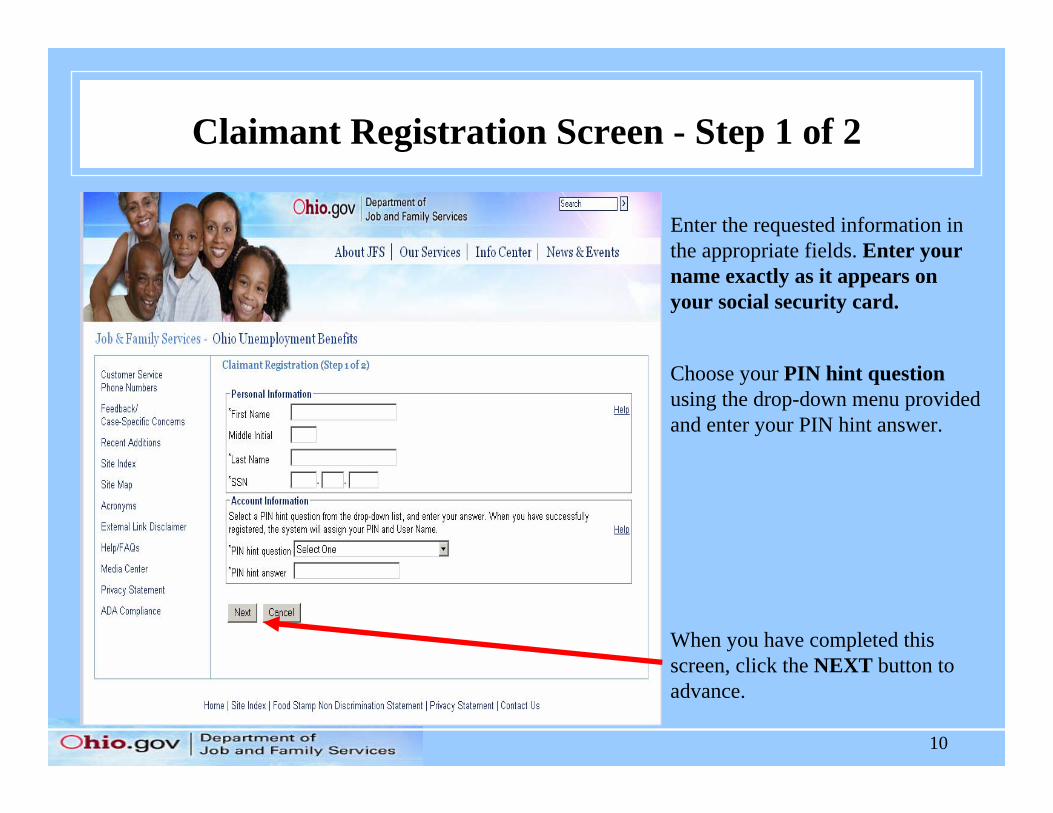
Claimant Registration Screen - Step 1 of 2
Enter the requested information in the appropriate fields. Enter your name exactly as it appears on your social security card.
Choose your PIN hint questionusing the drop-down menu provided and enter your PIN hint answer.
When you have completed this screen, click the NEXT button to advance.
11
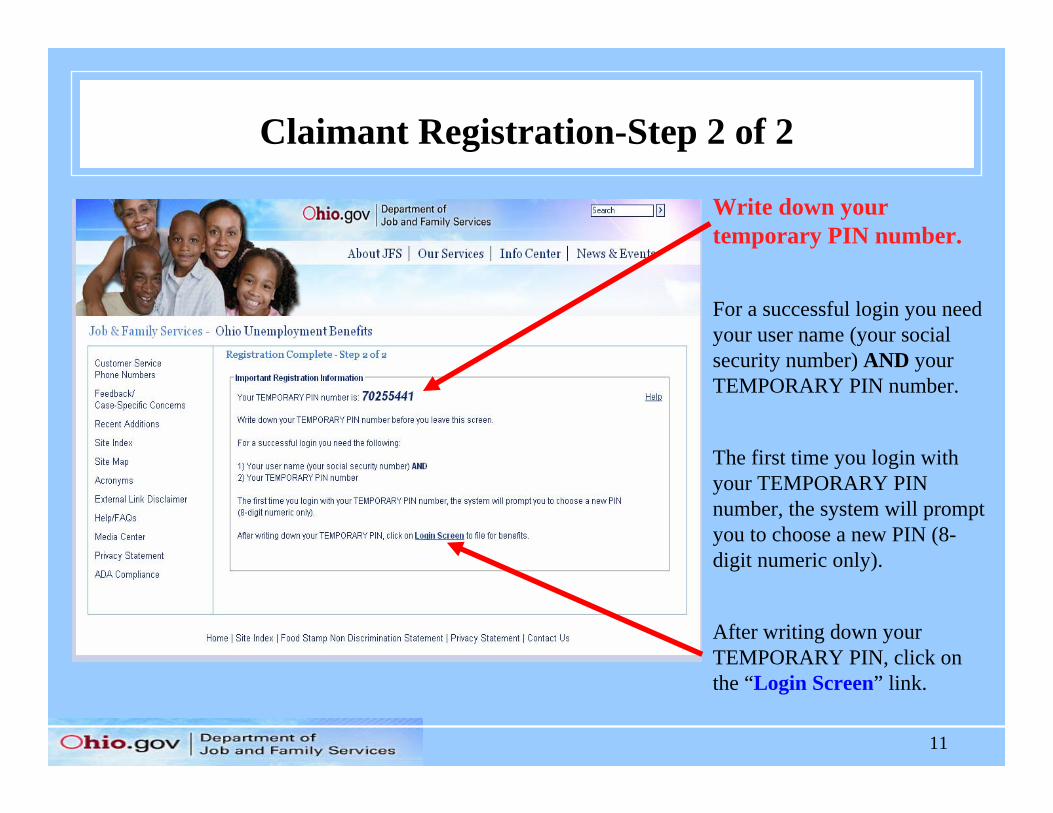
Claimant Registration-Step 2 of 2
Write down your temporary PIN number.
For a successful login you need your user name (your social security number) AND your TEMPORARY PIN number.
The first time you login with your TEMPORARY PIN number, the system will prompt you to choose a new PIN (8-digit numeric only).
After writing down your TEMPORARY PIN, click on the “Login Screen” link.
12
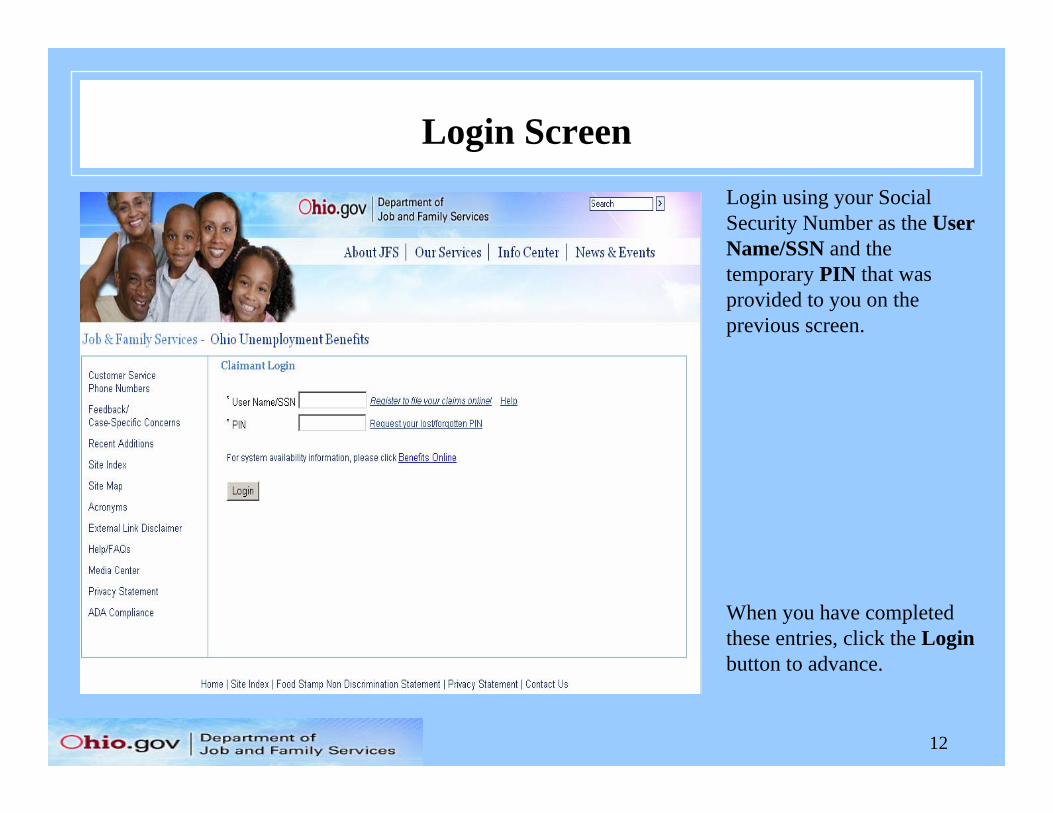
Login ScreenLogin using your Social Security Number as the User Name/SSN and the temporary PIN that was provided to you on the previous screen.
When you have completed these entries, click the Login button to advance.
13
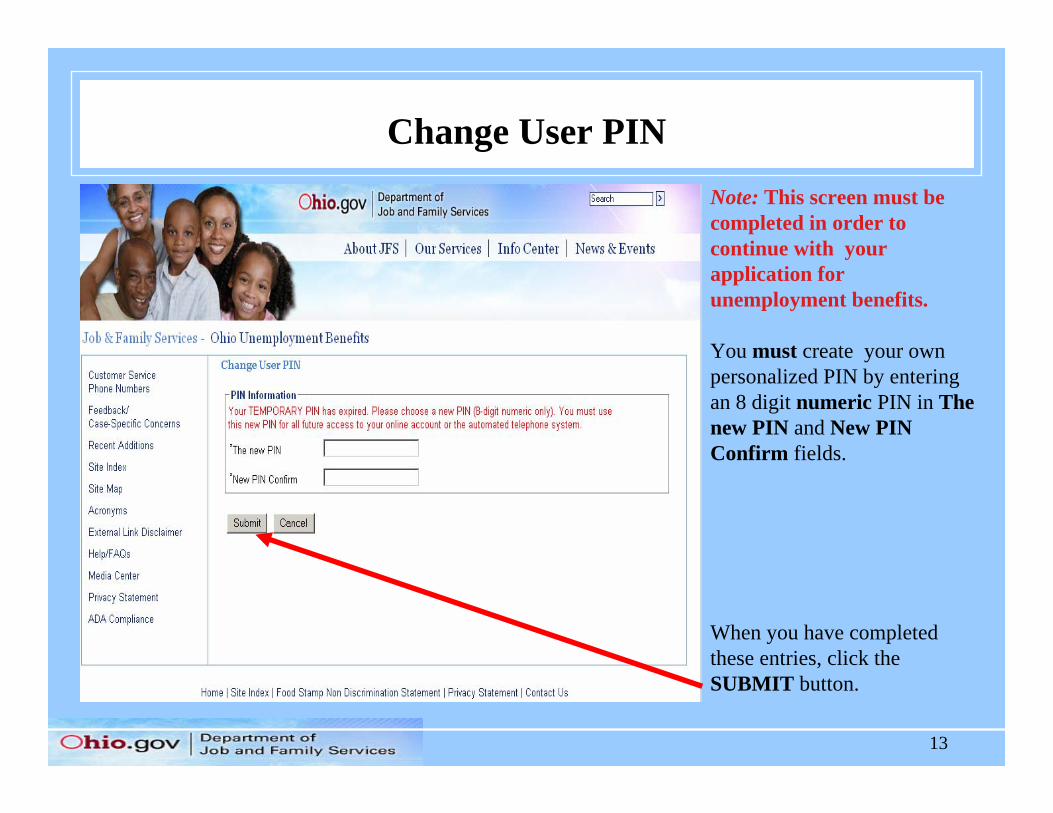
Change User PINNote: This screen must be completed in order to continue with your application for unemployment benefits.
You must create your own personalized PIN by entering an 8 digit numeric PIN in The new PIN and New PIN Confirm fields.
When you have completed these entries, click the SUBMIT button.
14
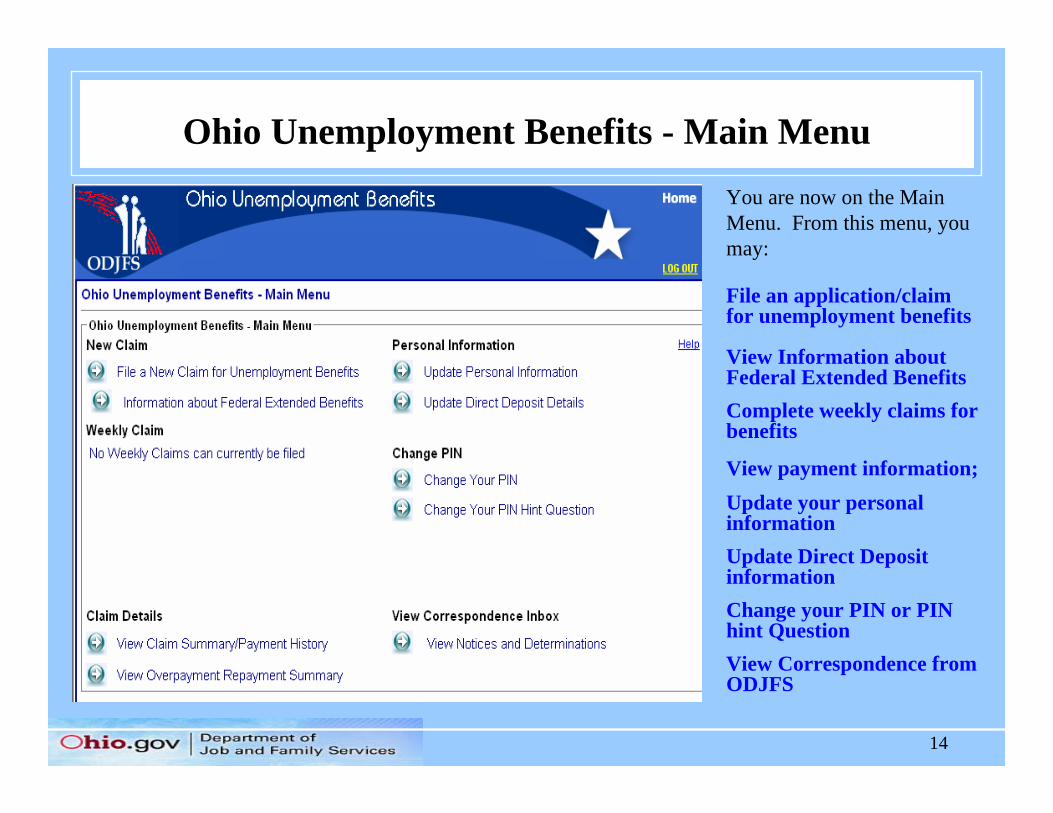
Ohio Unemployment Benefits - Main MenuYou are now on the Main Menu. From this menu, you may:
File an application/claim for unemployment benefits
View Information about Federal Extended BenefitsComplete weekly claims for benefits
View payment information;Update your personal informationUpdate Direct Deposit informationChange your PIN or PIN hint Question View Correspondence from ODJFS

15
Filing an Application/ClaimTo file an initial application/claim for unemployment; or restart your existing claim after a period of reemployment; or a period of not filing weekly claims for benefits: click on the “File a new Claim for Unemployment Benefits” link.
If you have exhausted regular unemployment benefits and eligible to file for Extended Unemployment Compensation (EUC08), the option to file for EUC08 will appear under the New Claim section of this screen.
16
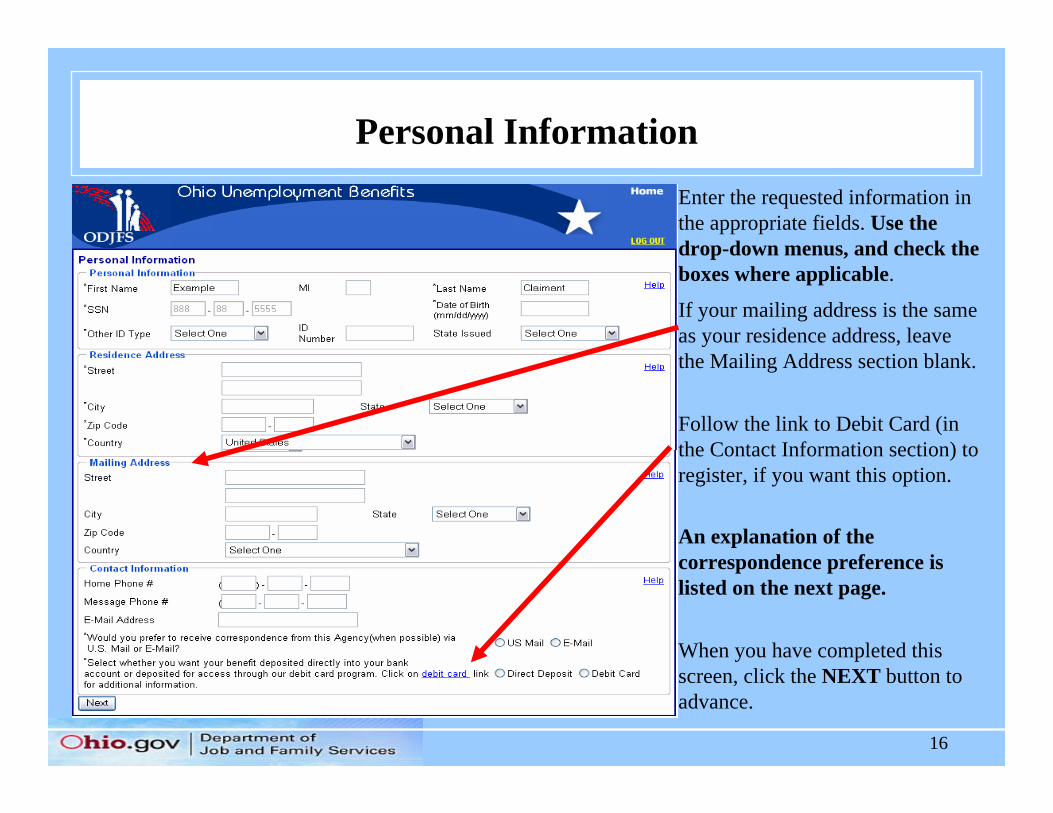
Personal InformationEnter the requested information in the appropriate fields. Use the drop-down menus, and check the boxes where applicable.
If your mailing address is the same as your residence address, leave the Mailing Address section blank.
Follow the link to Debit Card (in the Contact Information section) to register, if you want this option.
An explanation of the correspondence preference is listed on the next page.
When you have completed this screen, click the NEXT button to advance.
17
Correspondence Preferences
You can receive correspondence by regular mail or e-mail.
Regular Mail
• Regular mail is the option to receive correspondence via the U.S. Postal Service and is the automatic (default) setting for all claims filed.
E-mail Notification• You can be notified by e-mail that you have new correspondence in your
Correspondence Inbox. Generally, the correspondence is not viewable in the e-mail notification. To view correspondence you will need to log into your account then go to Main Menu and, under View Correspondence Inbox, click on View Notices and Determinations. Some correspondences are time sensitive. You are responsible for viewing all correspondences in a timely manner.
• Note: E-mail notification has the same appeal rights as the regular mail option.
18
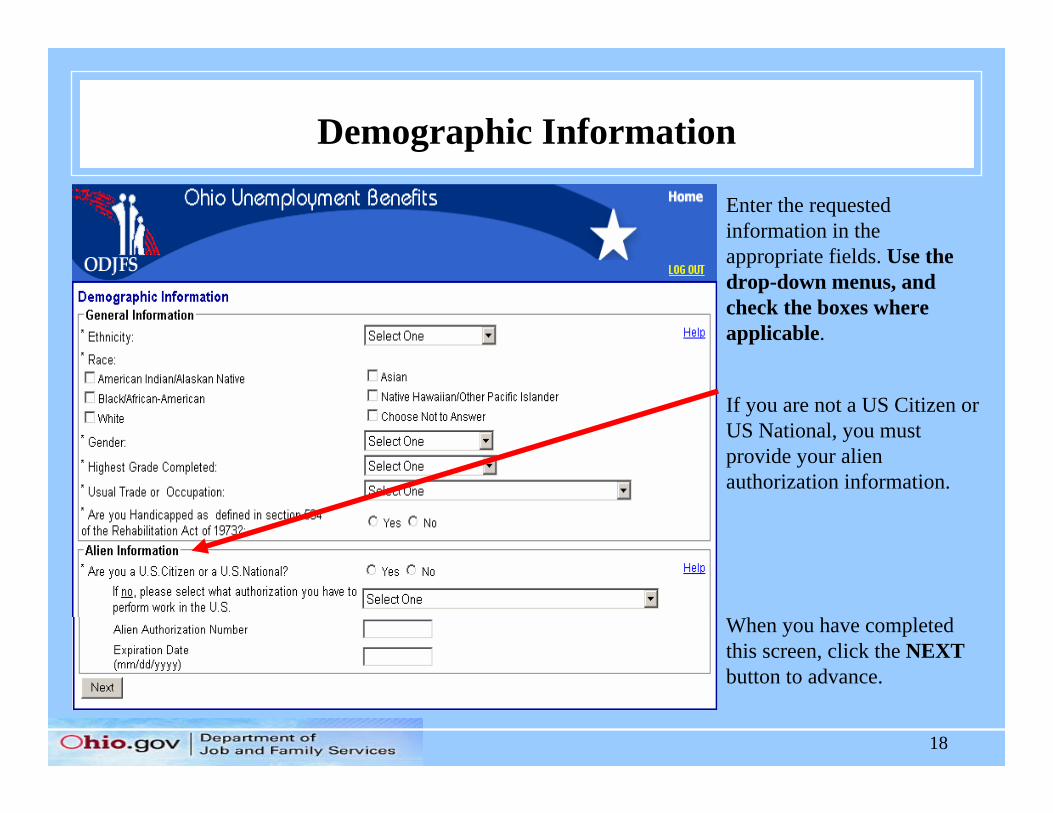
Demographic Information
Enter the requested information in the appropriate fields. Use the drop-down menus, and check the boxes where applicable.
If you are not a US Citizen or US National, you must provide your alien authorization information.
When you have completed this screen, click the NEXT button to advance.
19
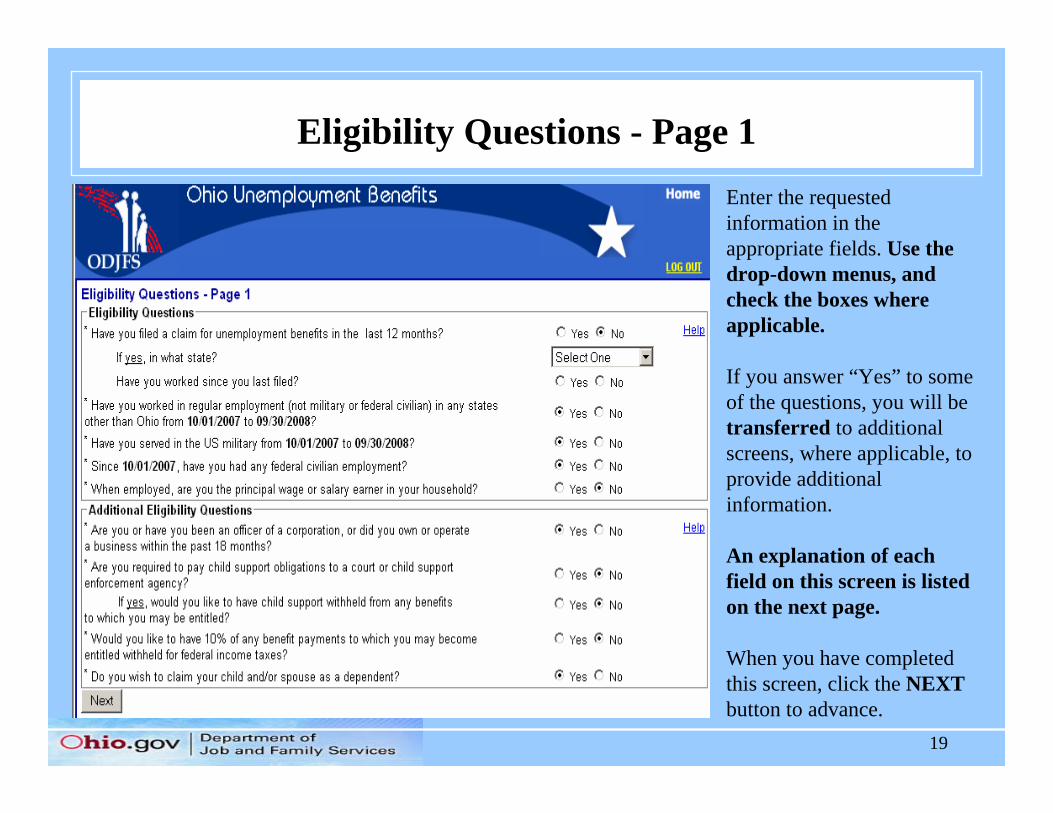
Eligibility Questions - Page 1Enter the requested information in the appropriate fields. Use the drop-down menus, and check the boxes where applicable.
If you answer “Yes” to some of the questions, you will betransferred to additional screens, where applicable, to provide additional information.
An explanation of each field on this screen is listed on the next page.
When you have completed this screen, click the NEXT button to advance.
20
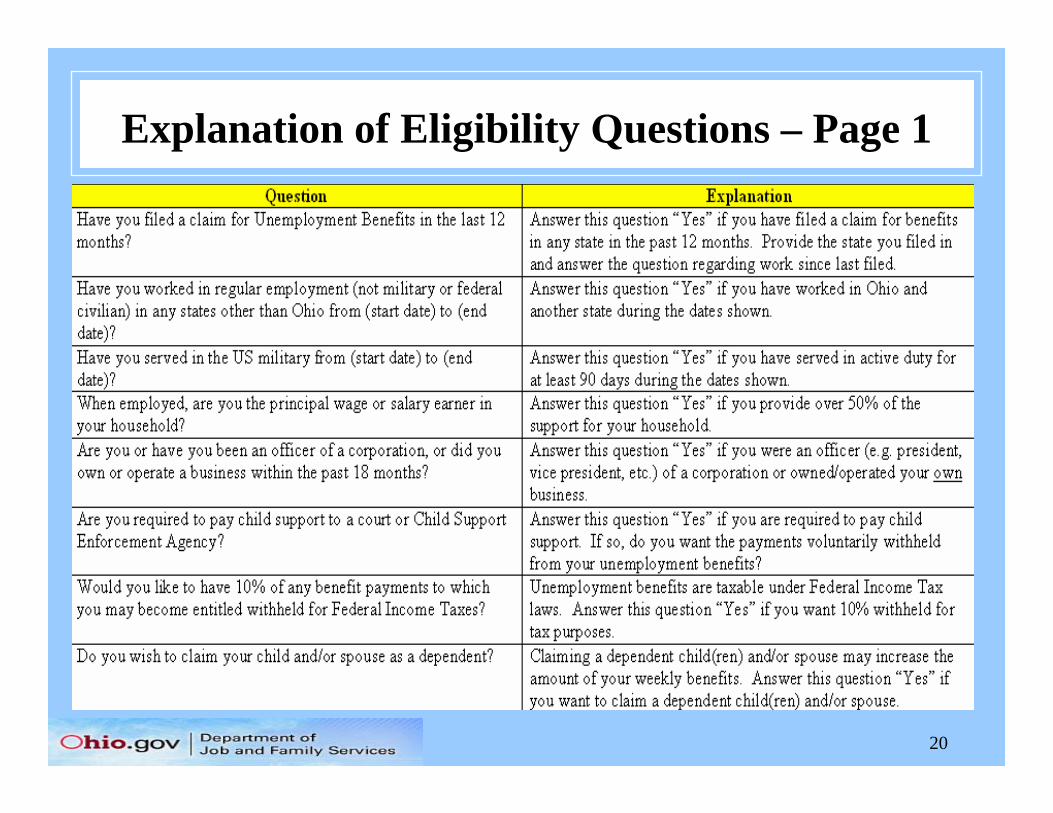
Explanation of Eligibility Questions – Page 1
21
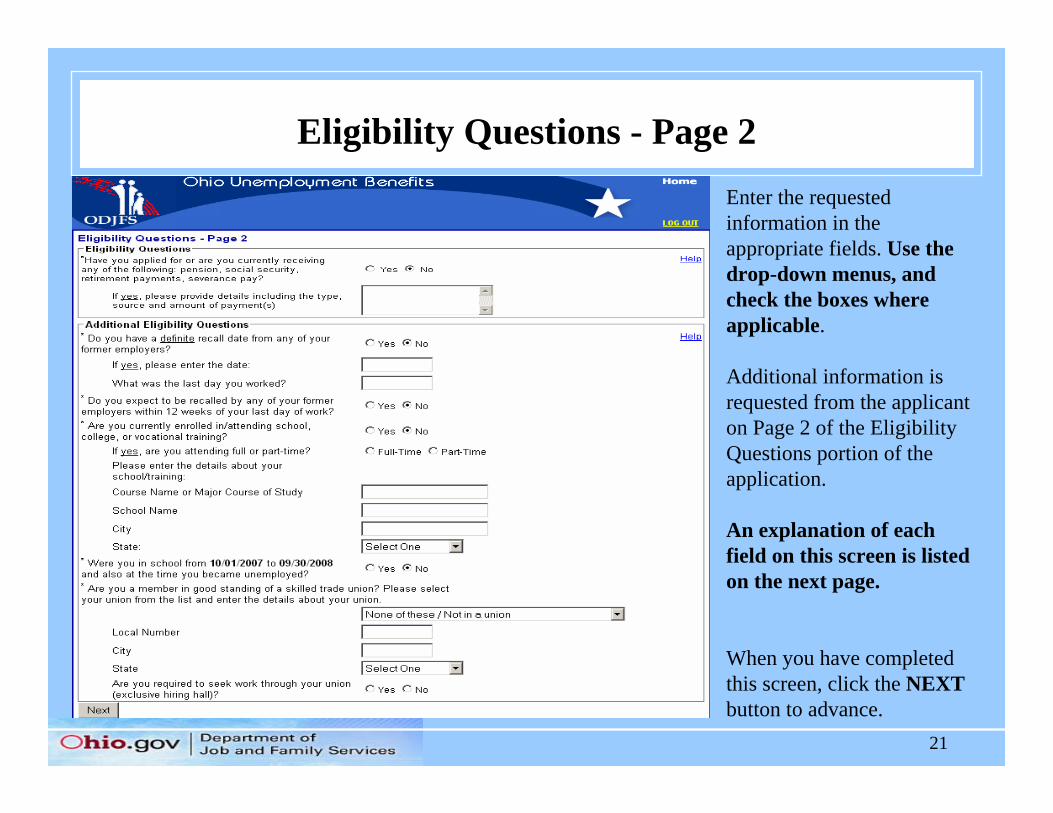
Eligibility Questions - Page 2Enter the requested information in the appropriate fields. Use the drop-down menus, and check the boxes where applicable.
Additional information is requested from the applicant on Page 2 of the Eligibility Questions portion of the application.
An explanation of each field on this screen is listed on the next page.
When you have completed this screen, click the NEXT button to advance.

22
Explanation of Eligibility Questions – Page 2
23
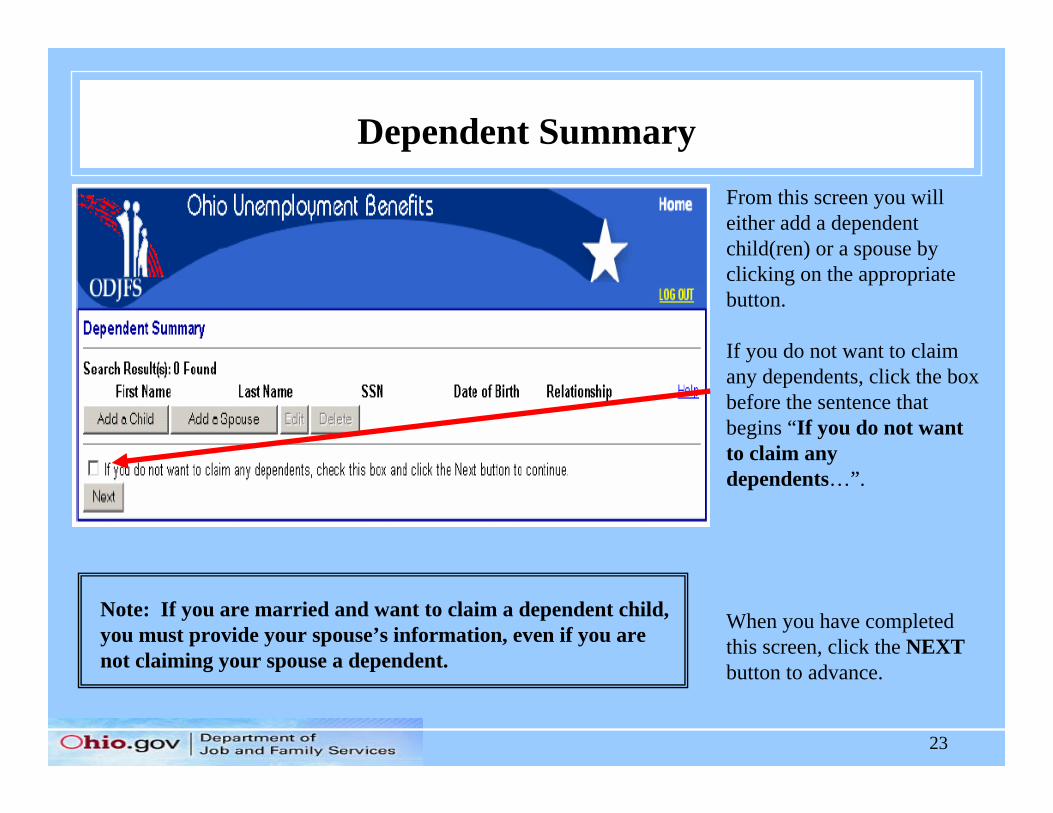
Dependent SummaryFrom this screen you will either add a dependent child(ren) or a spouse by clicking on the appropriate button.
If you do not want to claim any dependents, click the box before the sentence that begins “If you do not want to claim any dependents…”.
When you have completed this screen, click the NEXT button to advance.
Note: If you are married and want to claim a dependent child, you must provide your spouse’s information, even if you are not claiming your spouse a dependent.
24
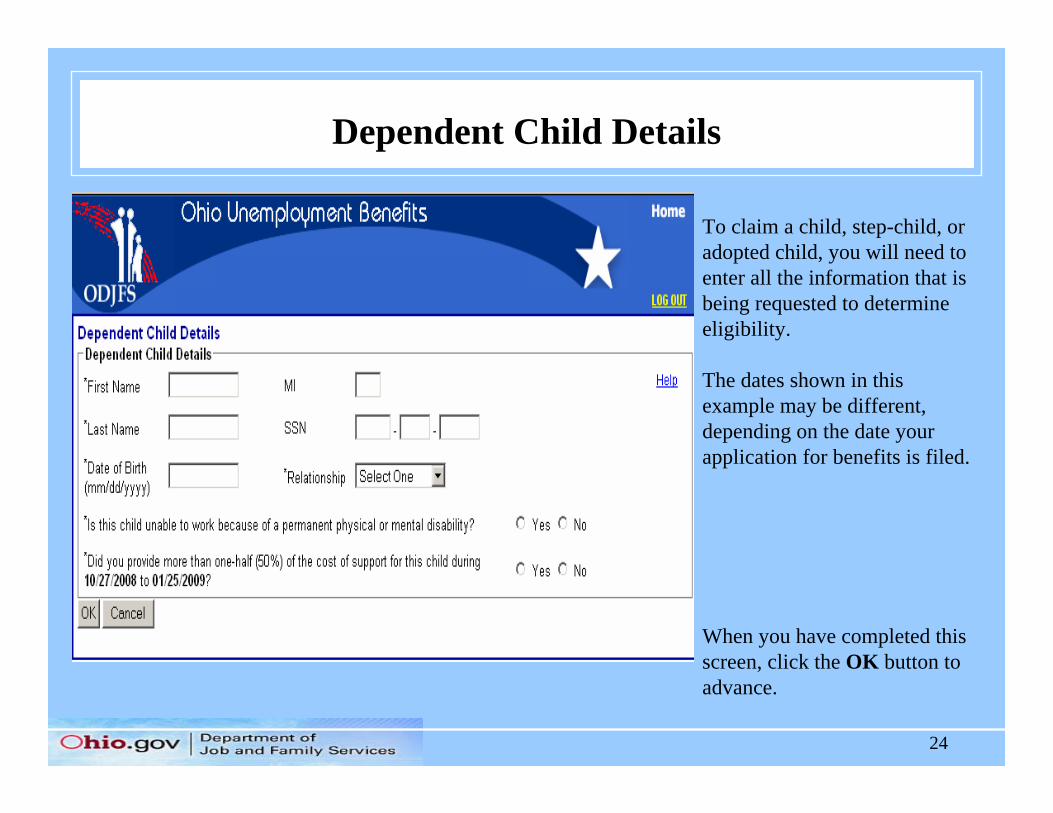
Dependent Child Details
To claim a child, step-child, or adopted child, you will need to enter all the information that is being requested to determine eligibility.
The dates shown in this example may be different, depending on the date your application for benefits is filed.
When you have completed this screen, click the OK button to advance.
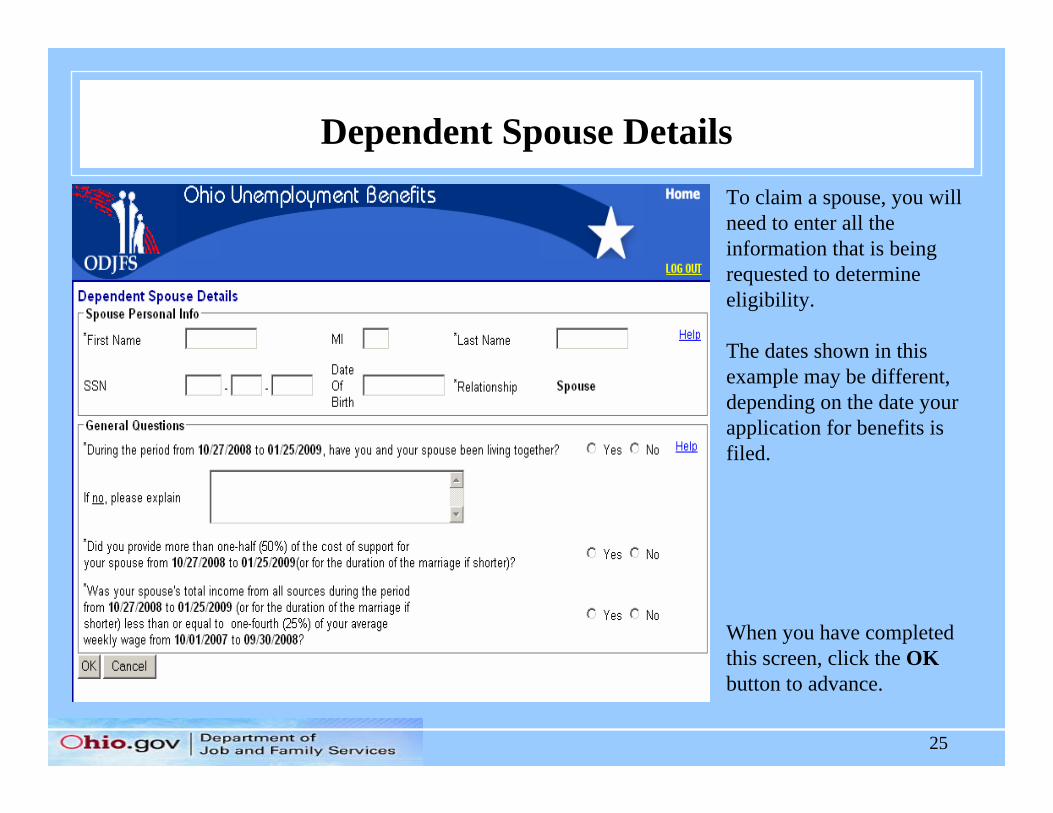
25
Dependent Spouse DetailsTo claim a spouse, you will need to enter all the information that is being requested to determine eligibility.
The dates shown in this example may be different, depending on the date your application for benefits is filed.
When you have completed this screen, click the OK button to advance.
26
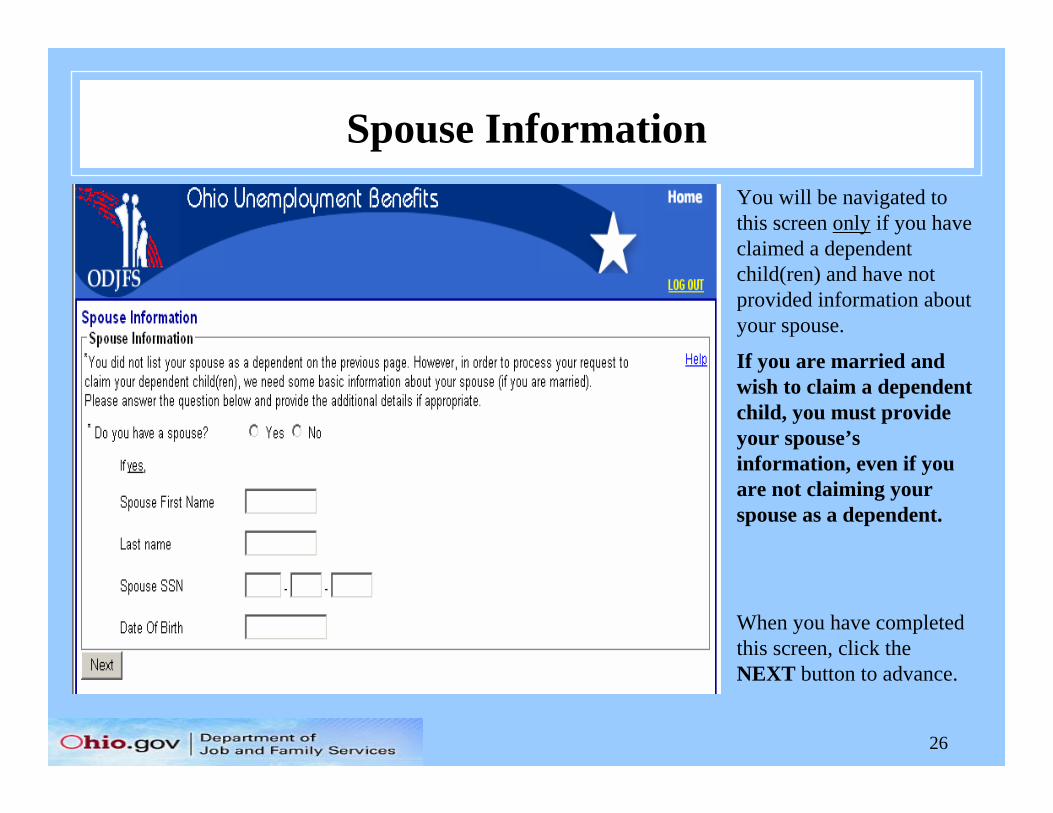
Spouse InformationYou will be navigated to this screen only if you have claimed a dependent child(ren) and have not provided information about your spouse.
If you are married and wish to claim a dependent child, you must provide your spouse’s information, even if you are not claiming your spouse as a dependent.
When you have completed this screen, click theNEXT button to advance.
27
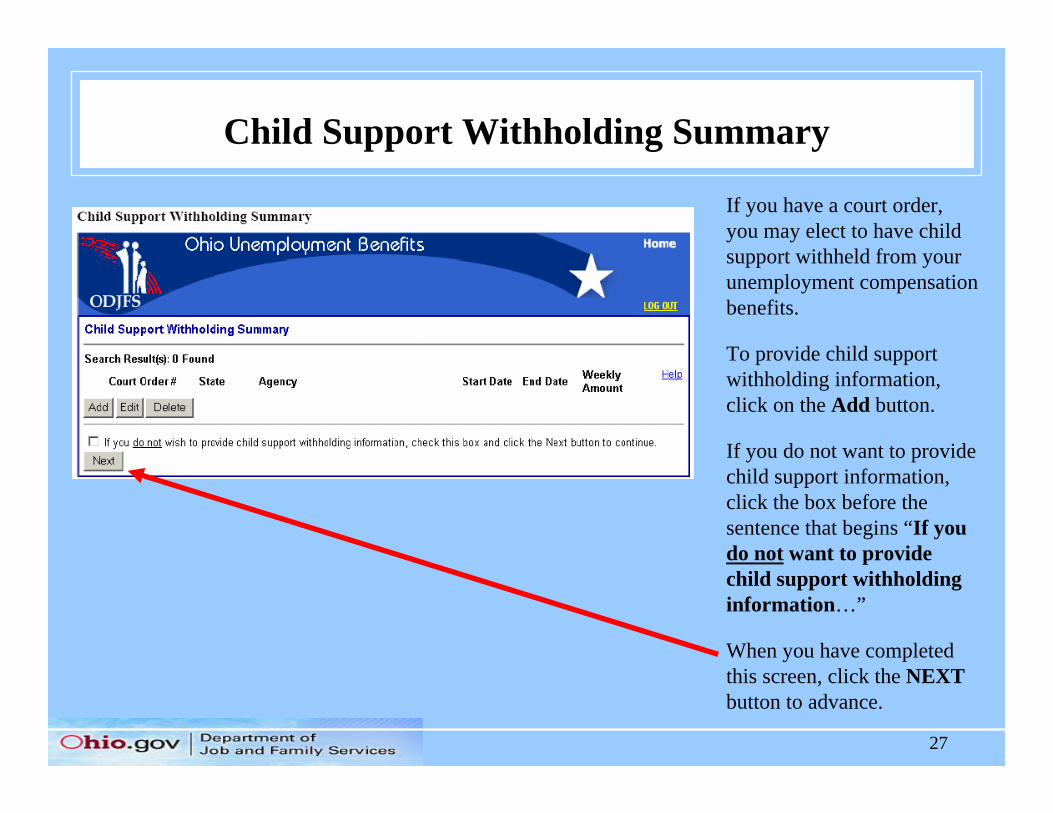
Child Support Withholding Summary
If you have a court order, you may elect to have child support withheld from your unemployment compensation benefits.
To provide child support withholding information, click on the Add button.
If you do not want to provide child support information, click the box before the sentence that begins “If you do not want to provide child support withholding information…”
When you have completed this screen, click the NEXT button to advance.
28
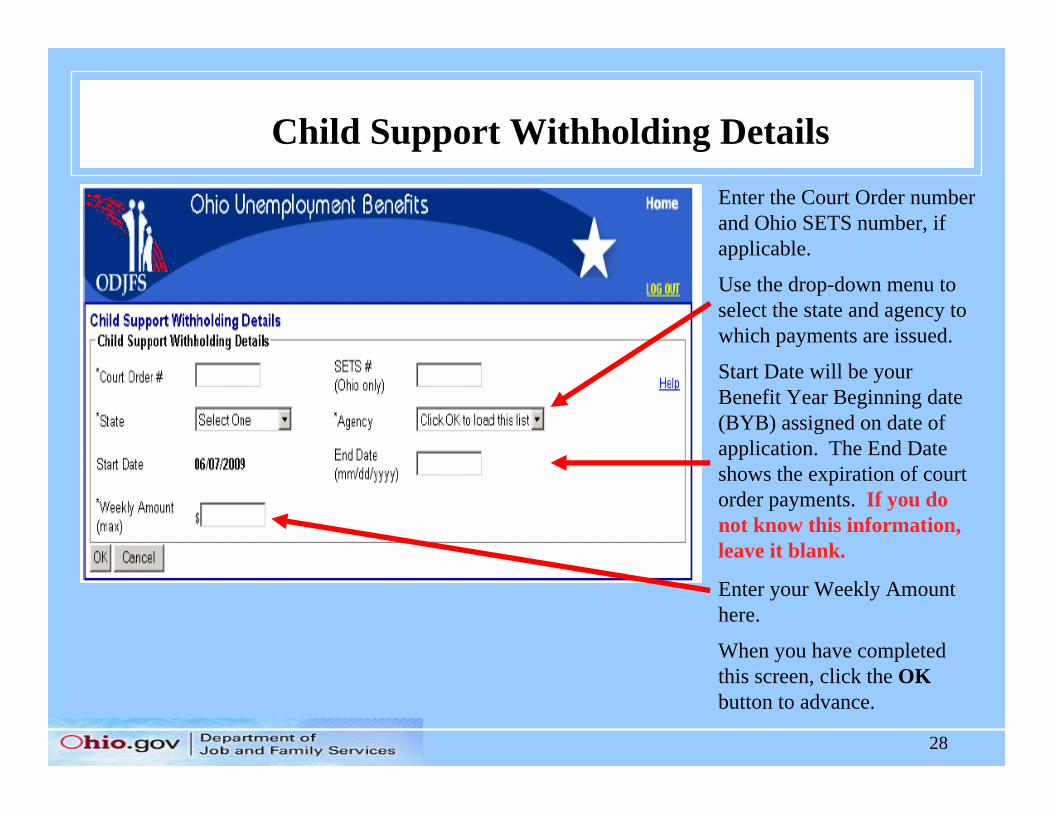
Child Support Withholding DetailsEnter the Court Order number and Ohio SETS number, if applicable.
Use the drop-down menu to select the state and agency to which payments are issued.
Start Date will be your Benefit Year Beginning date (BYB) assigned on date of application. The End Date shows the expiration of court order payments. If you do not know this information, leave it blank.
Enter your Weekly Amount here.
When you have completed this screen, click the OK button to advance.

29
Military EmploymentA “Yes” response to questions about military employment on the Eligibility screen will cause the system to route you to this screen to provide the necessary information.
Use the drop-down menu to select your branch of service.
Enter your official discharge date.
If you did not have military employment during the dates listed, click the box before the sentence that begins “If you have not had any military…”
When you have completed this screen, click the Next button to advance.
30
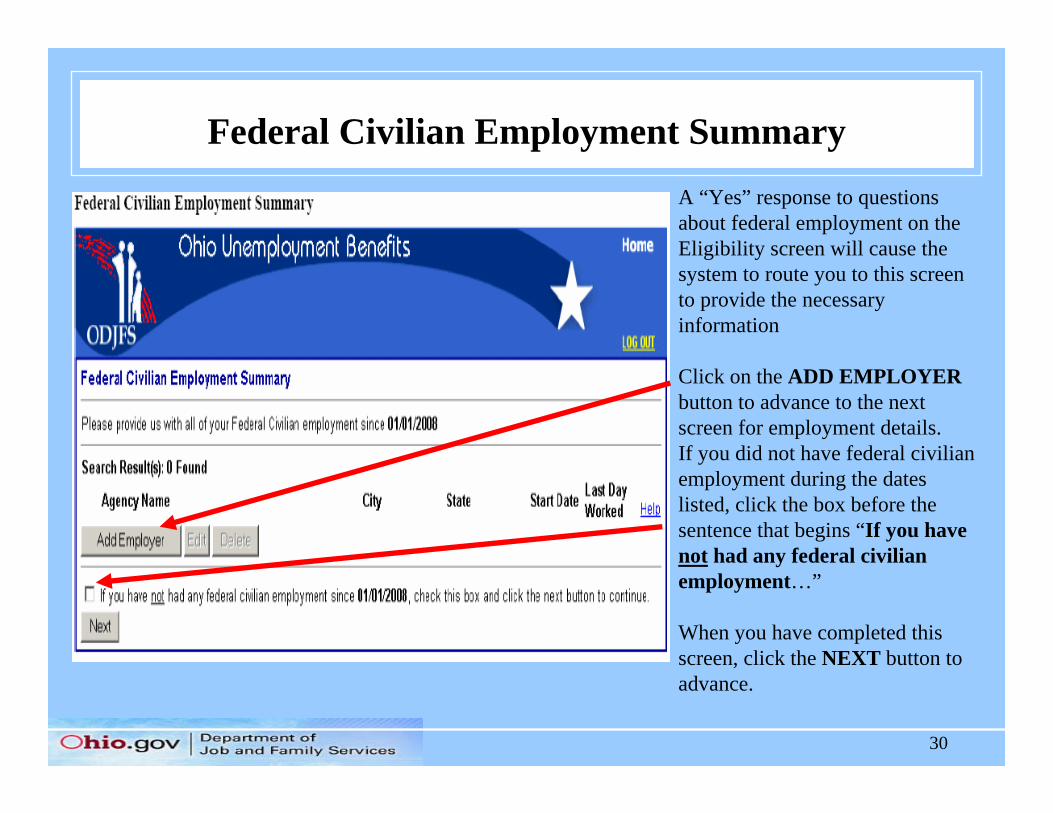
Federal Civilian Employment SummaryA “Yes” response to questions about federal employment on the Eligibility screen will cause the system to route you to this screen to provide the necessary information
Click on the ADD EMPLOYER button to advance to the next screen for employment details.If you did not have federal civilian employment during the dates listed, click the box before the sentence that begins “If you havenot had any federal civilian employment…”
When you have completed this screen, click the NEXT button to advance.
31
Select Federal Civilian Employer
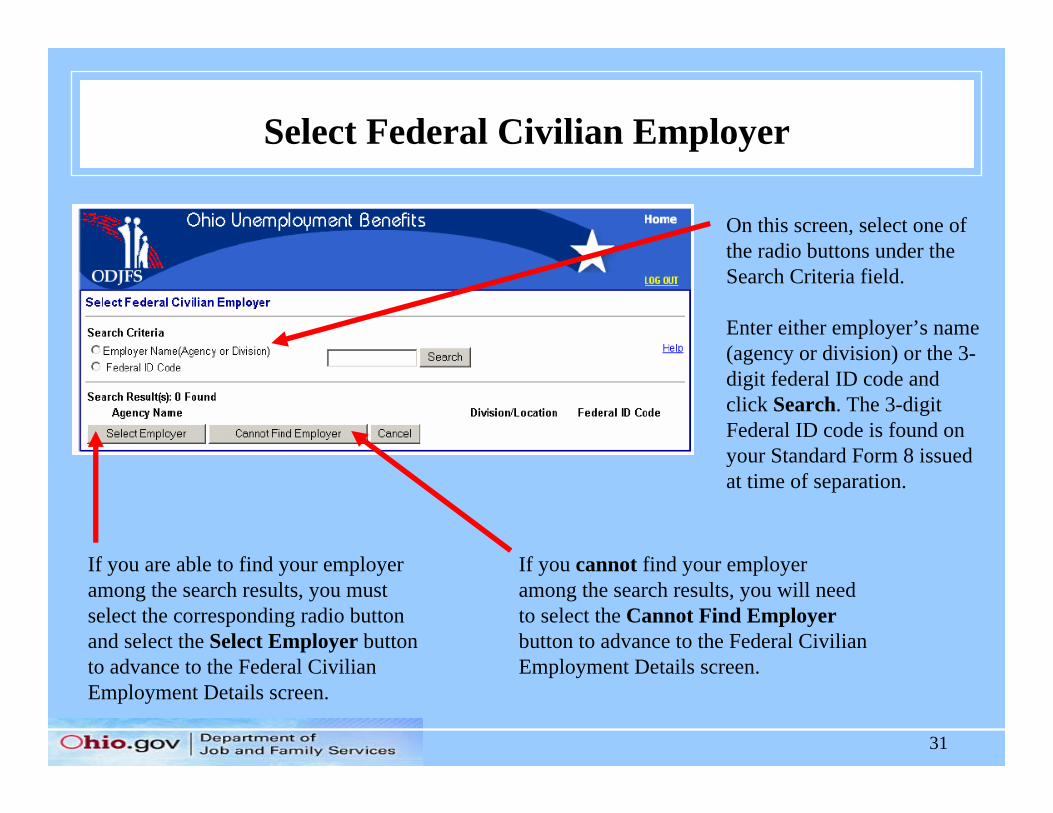
On this screen, select one of the radio buttons under the Search Criteria field.
Enter either employer’s name (agency or division) or the 3-digit federal ID code and click Search. The 3-digit Federal ID code is found on your Standard Form 8 issued at time of separation.
If you are able to find your employer among the search results, you must select the corresponding radio button and select the Select Employer button to advance to the Federal Civilian Employment Details screen.
If you cannot find your employer among the search results, you will need to select the Cannot Find Employerbutton to advance to the Federal Civilian Employment Details screen.
32
Federal Civilian Employment Details
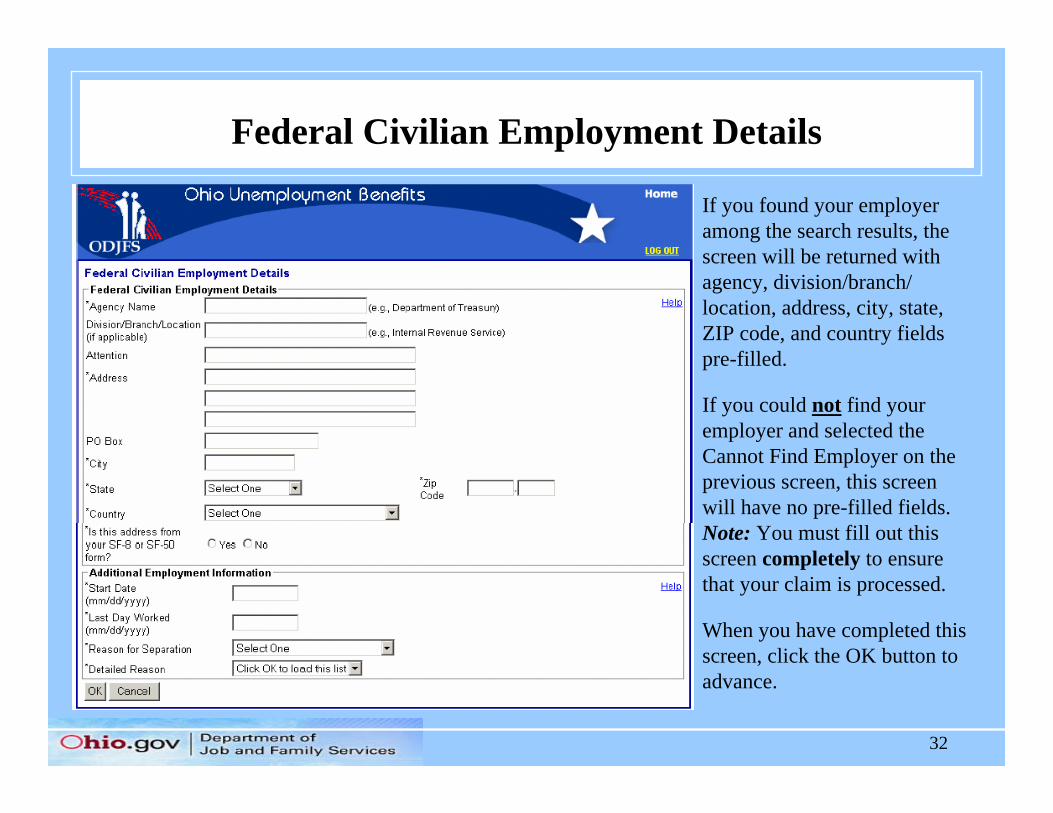
If you found your employer among the search results, the screen will be returned with agency, division/branch/ location, address, city, state, ZIP code, and country fields pre-filled.
If you could not find your employer and selected the Cannot Find Employer on the previous screen, this screen will have no pre-filled fields. Note: You must fill out this screen completely to ensure that your claim is processed.
When you have completed this screen, click the OK button to advance.
33
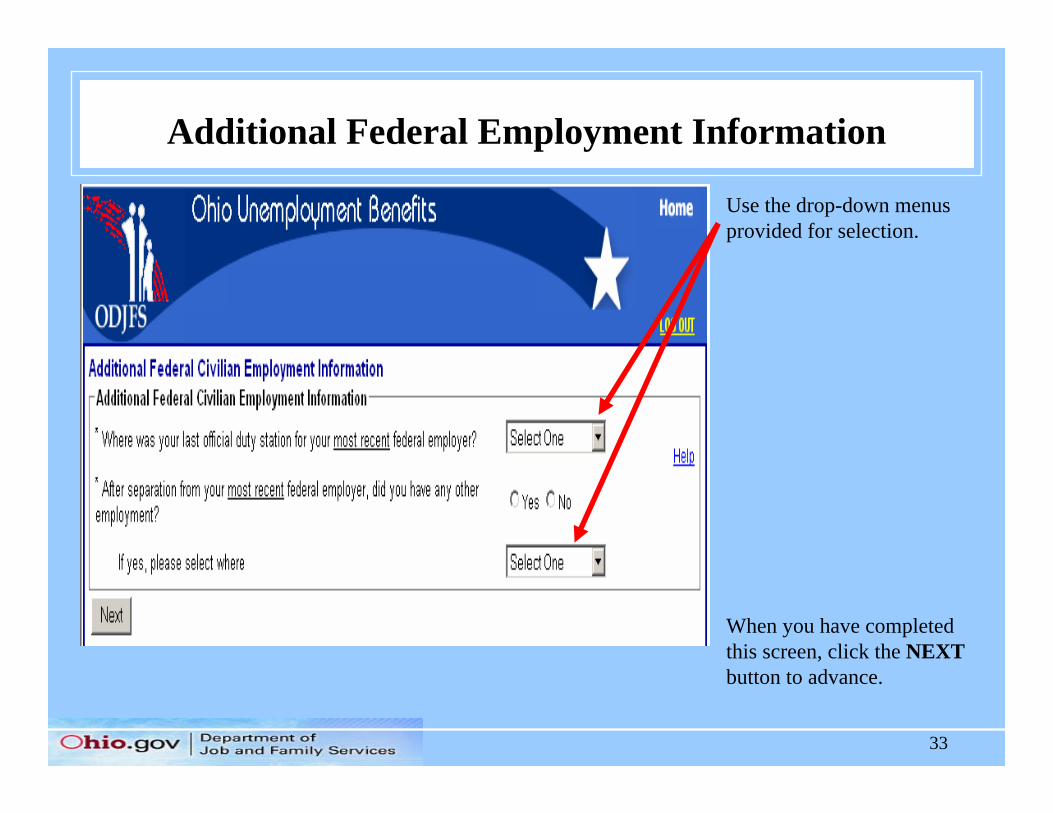
Additional Federal Employment Information
Use the drop-down menus provided for selection.
When you have completed this screen, click the NEXT button to advance.
34
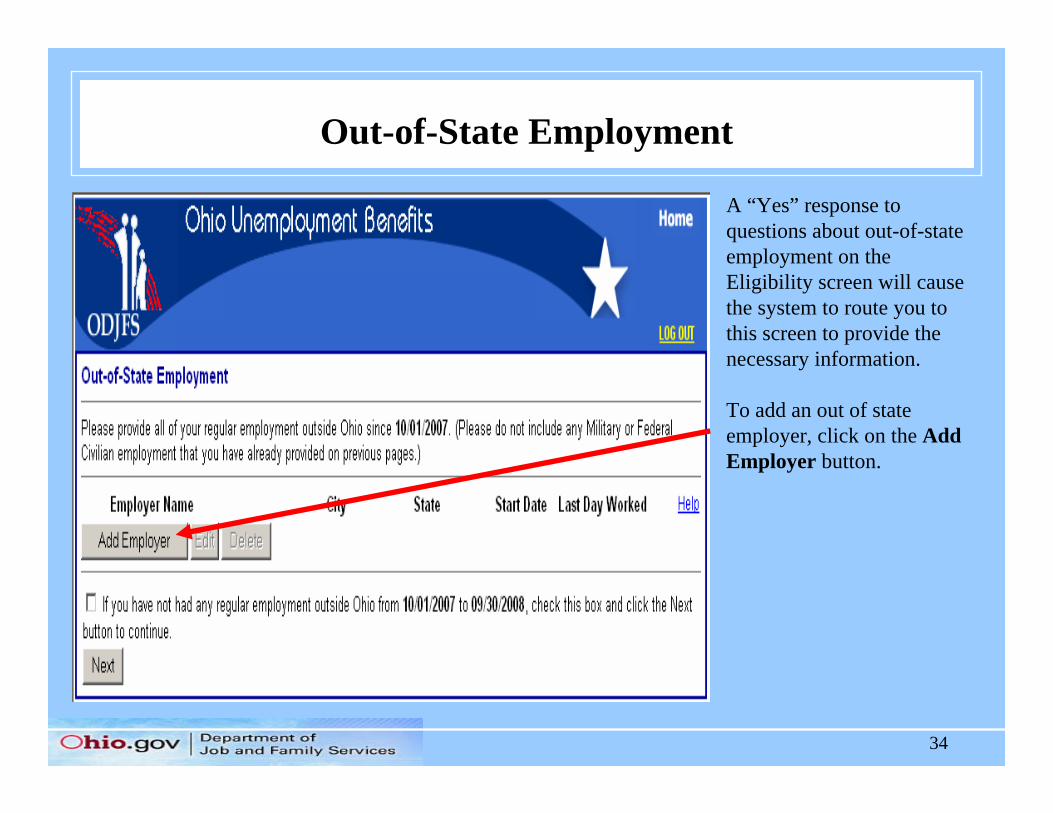
Out-of-State Employment
A “Yes” response to questions about out-of-state employment on the Eligibility screen will cause the system to route you to this screen to provide the necessary information.
To add an out of state employer, click on the Add Employer button.
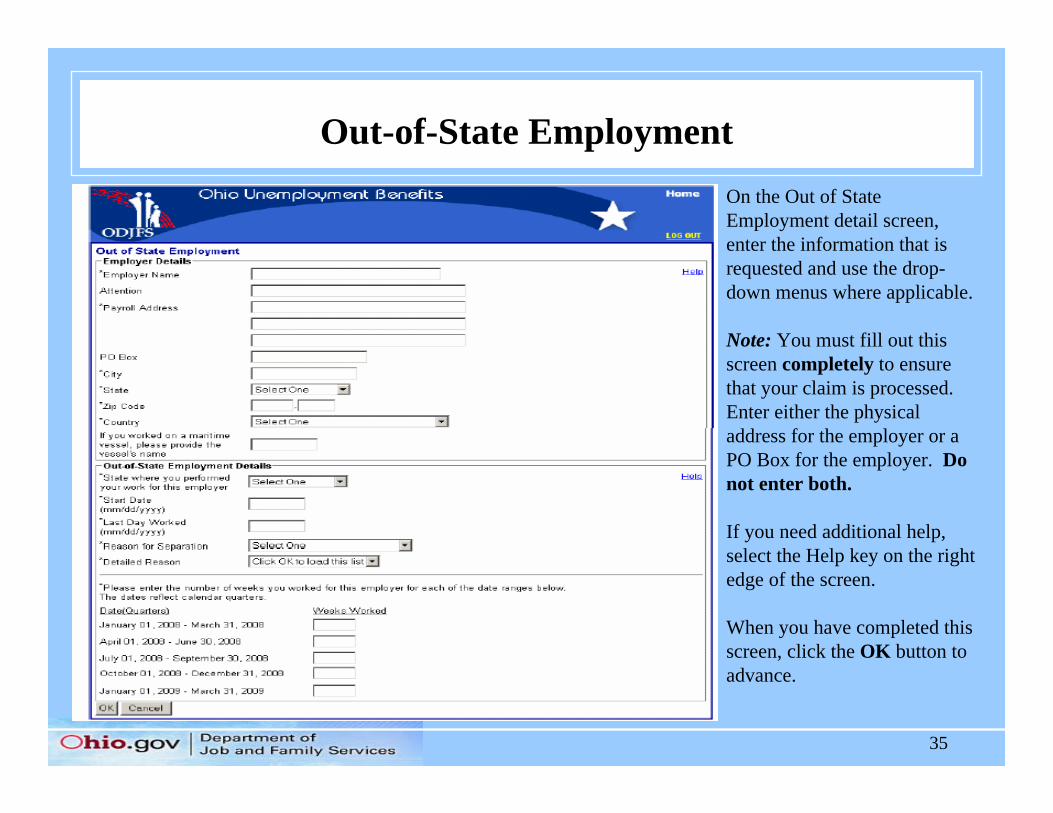
35
Out-of-State EmploymentOn the Out of State Employment detail screen, enter the information that is requested and use the drop-down menus where applicable.
Note: You must fill out this screen completely to ensure that your claim is processed. Enter either the physical address for the employer or a PO Box for the employer. Do not enter both.
If you need additional help, select the Help key on the right edge of the screen.
When you have completed this screen, click the OK button to advance.
36
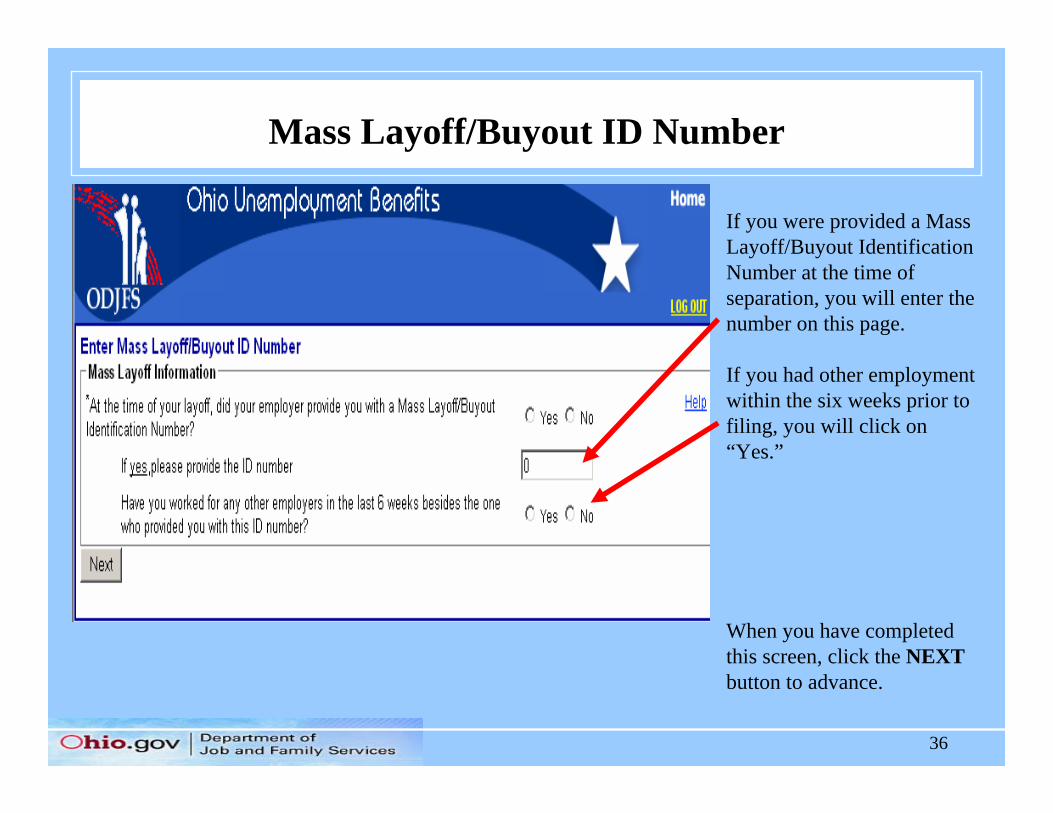
Mass Layoff/Buyout ID Number
If you were provided a Mass Layoff/Buyout Identification Number at the time of separation, you will enter the number on this page.
If you had other employment within the six weeks prior to filing, you will click on “Yes.”
When you have completed this screen, click the NEXT button to advance.
37
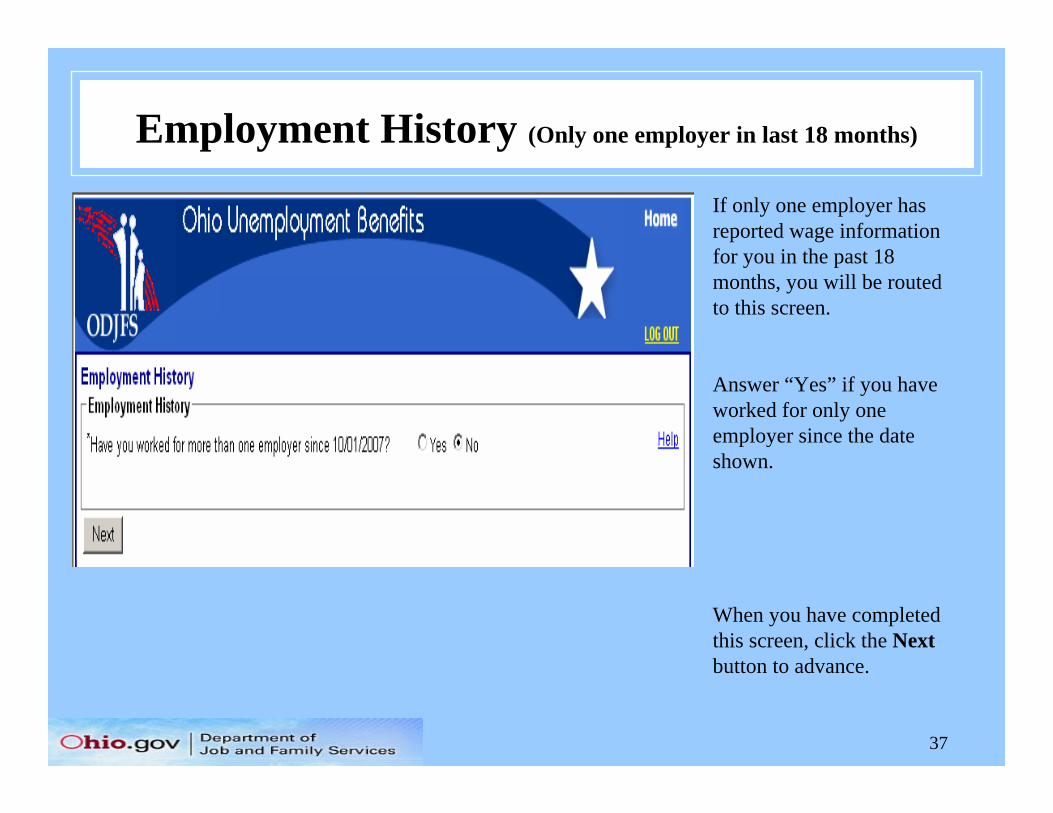
Employment History (Only one employer in last 18 months)
If only one employer has reported wage information for you in the past 18 months, you will be routed to this screen.
Answer “Yes” if you have worked for only one employer since the date shown.
When you have completed this screen, click the Nextbutton to advance.
38
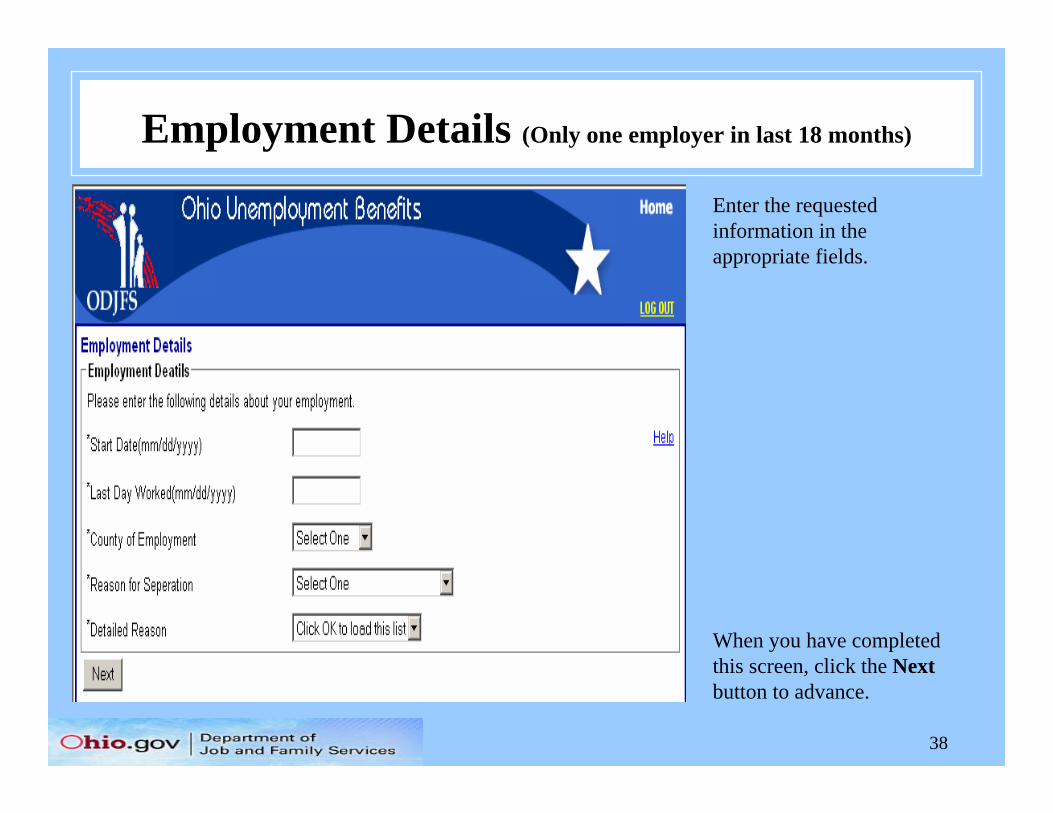
Employment Details (Only one employer in last 18 months)
Enter the requested information in the appropriate fields.
When you have completed this screen, click the Nextbutton to advance.
39
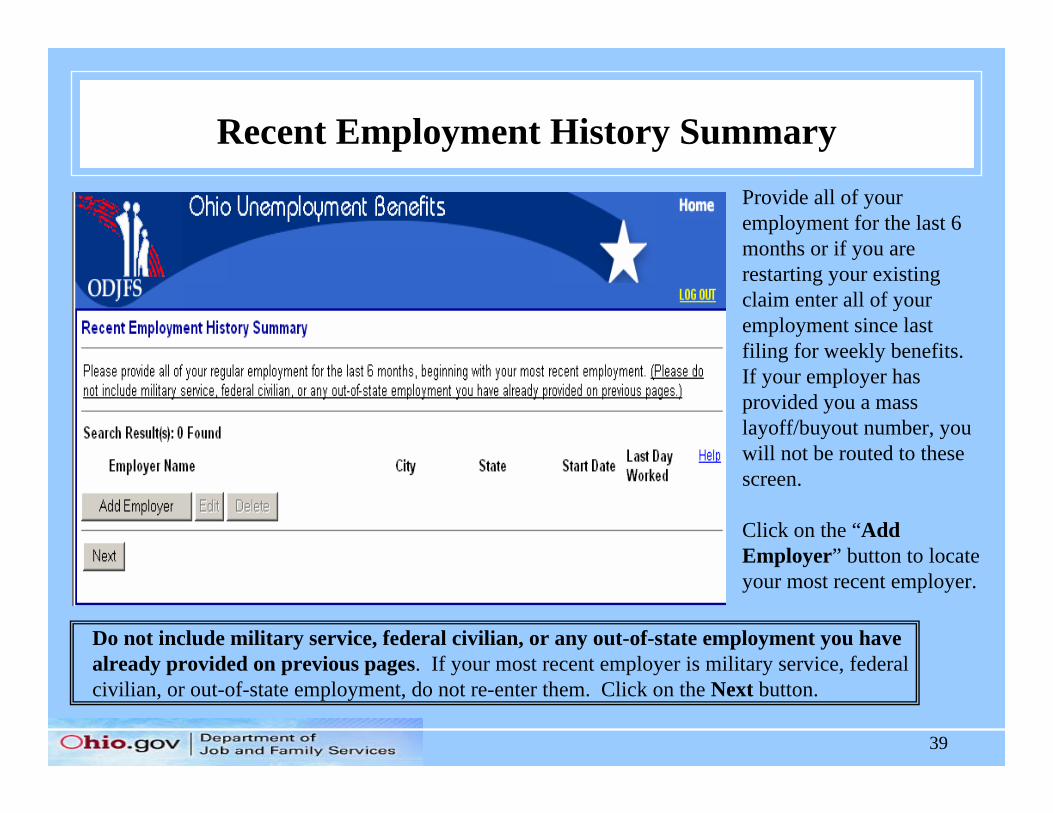
Recent Employment History SummaryProvide all of your employment for the last 6 months or if you are restarting your existing claim enter all of your employment since last filing for weekly benefits. If your employer has provided you a mass layoff/buyout number, you will not be routed to these screen.
Click on the “Add Employer” button to locate your most recent employer.
Do not include military service, federal civilian, or any out-of-state employment you have already provided on previous pages. If your most recent employer is military service, federal civilian, or out-of-state employment, do not re-enter them. Click on the Next button.
40
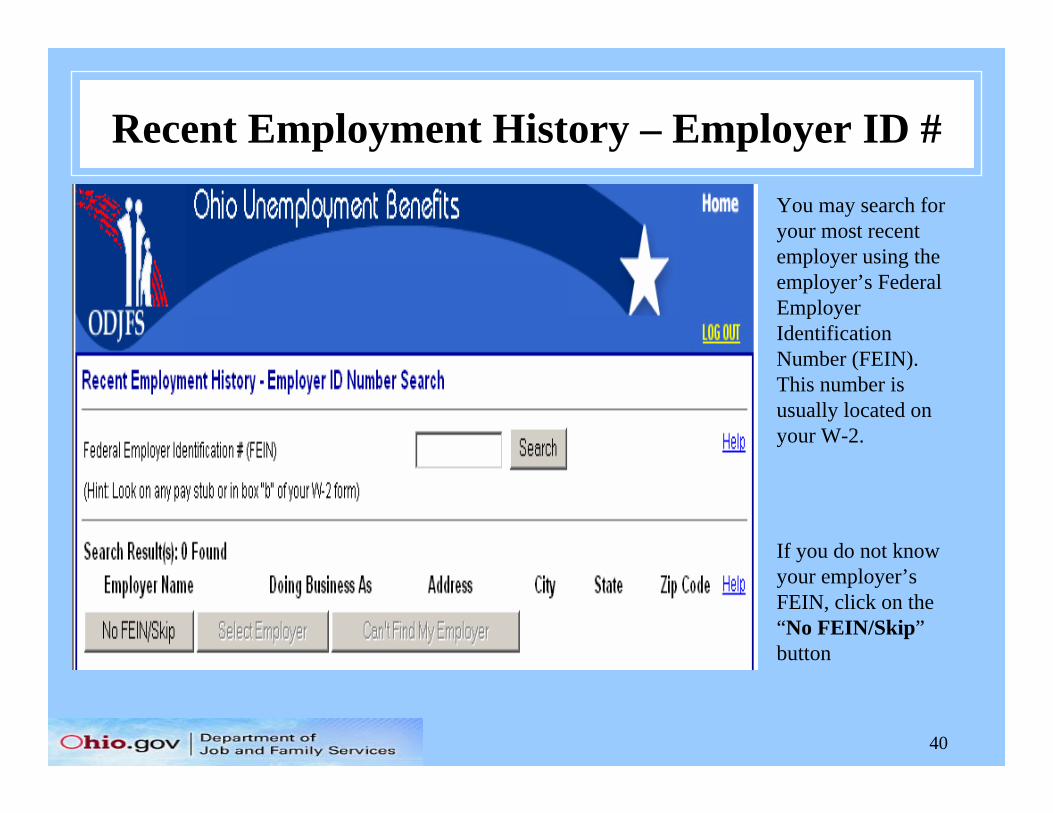
Recent Employment History – Employer ID #You may search for your most recent employer using the employer’s Federal Employer Identification Number (FEIN). This number is usually located on your W-2.
If you do not know your employer’s FEIN, click on the “No FEIN/Skip” button
41
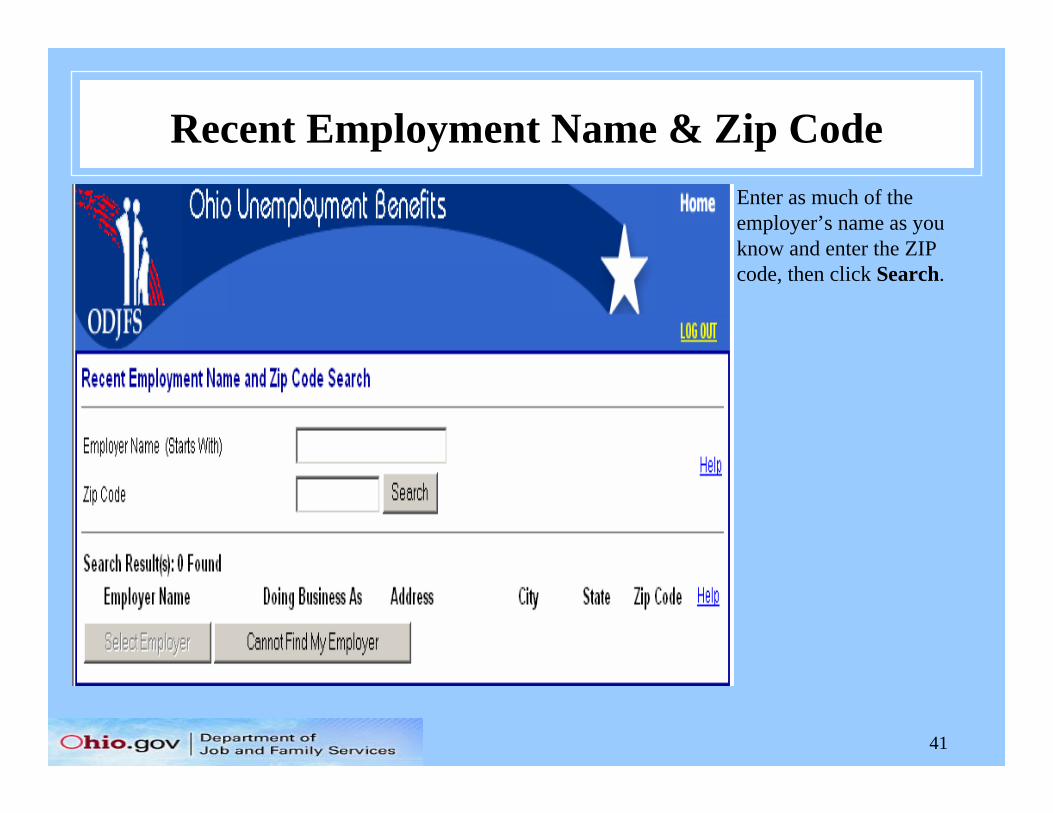
Recent Employment Name & Zip CodeEnter as much of the employer’s name as you know and enter the ZIP code, then click Search.
42
Helpful Hints for Locating Employer
• If available, search for your employer using their Federal Employer Identification Number (FEIN) that appears on your W2 or possibly your check stubs.
• Search for your employer using the employer’s name as it appears on your check stub. The name on the building may not always be the name the employer uses for unemployment purposes.
• When your employer’s name contains several words, try using one or two of the words that begin the employer’s name, then add the additional words as needed to locate the employer. Example: if your employer is “ABC Warehouse and Storage Company,” start with “ABC Warehouse.”
• If your employer’s name contains the word “and,” try searching for the employer using the word “and” or use the symbol “&.” Example: if your employer is “ABC Warehouse and Storage Company” or “ABC Warehouse & Storage Company.”
• Try searching for the employer using the company owner’s name.
43
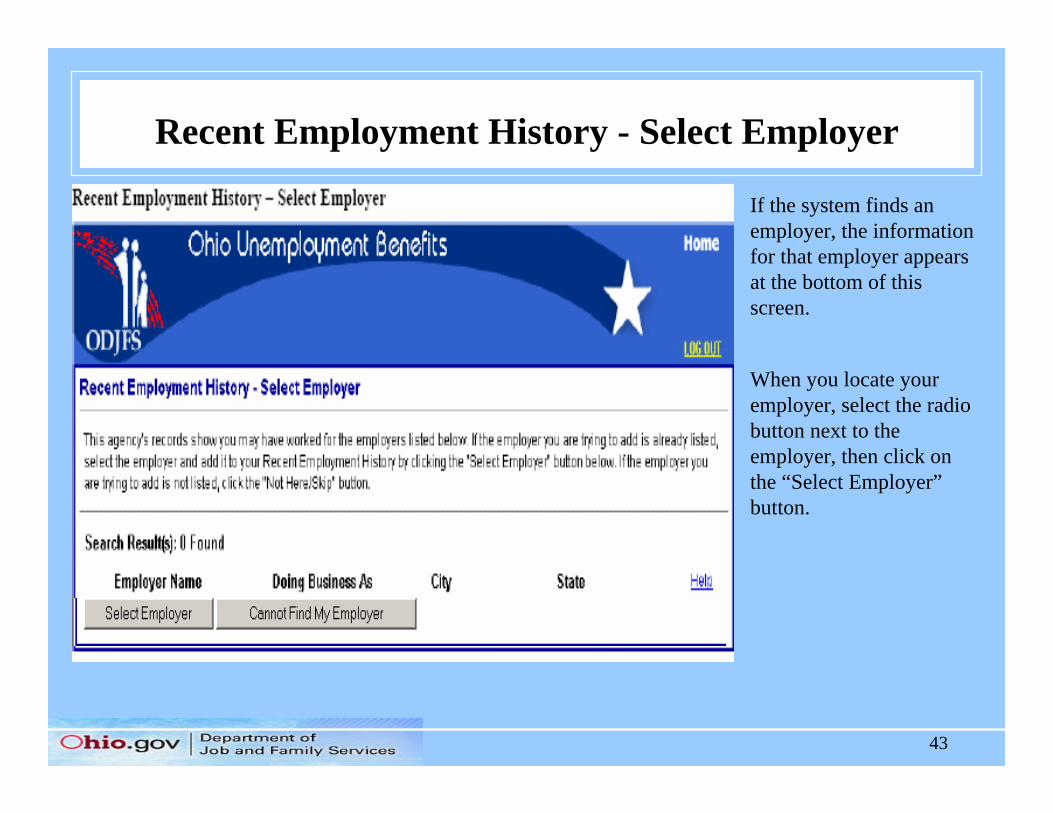
Recent Employment History - Select Employer
If the system finds an employer, the information for that employer appears at the bottom of this screen.
When you locate your employer, select the radio button next to the employer, then click on the “Select Employer” button.
44
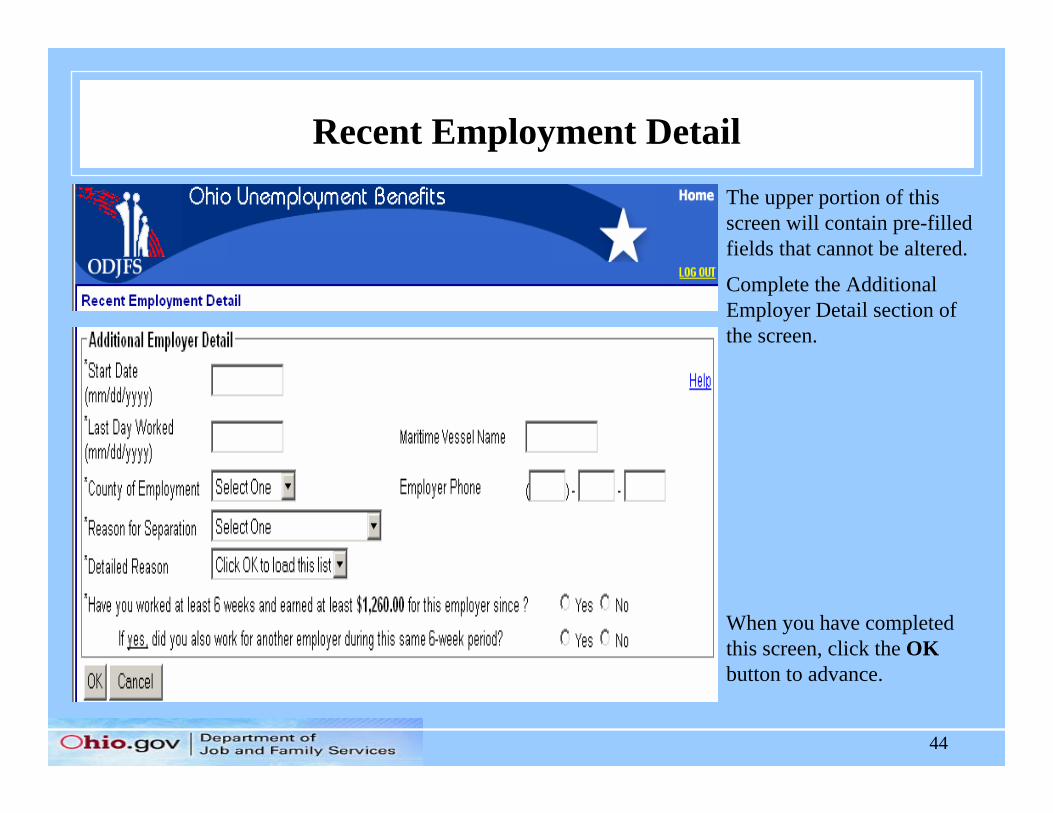
Recent Employment DetailThe upper portion of this screen will contain pre-filled fields that cannot be altered.
Complete the Additional Employer Detail section of the screen.
When you have completed this screen, click the OK button to advance.
45
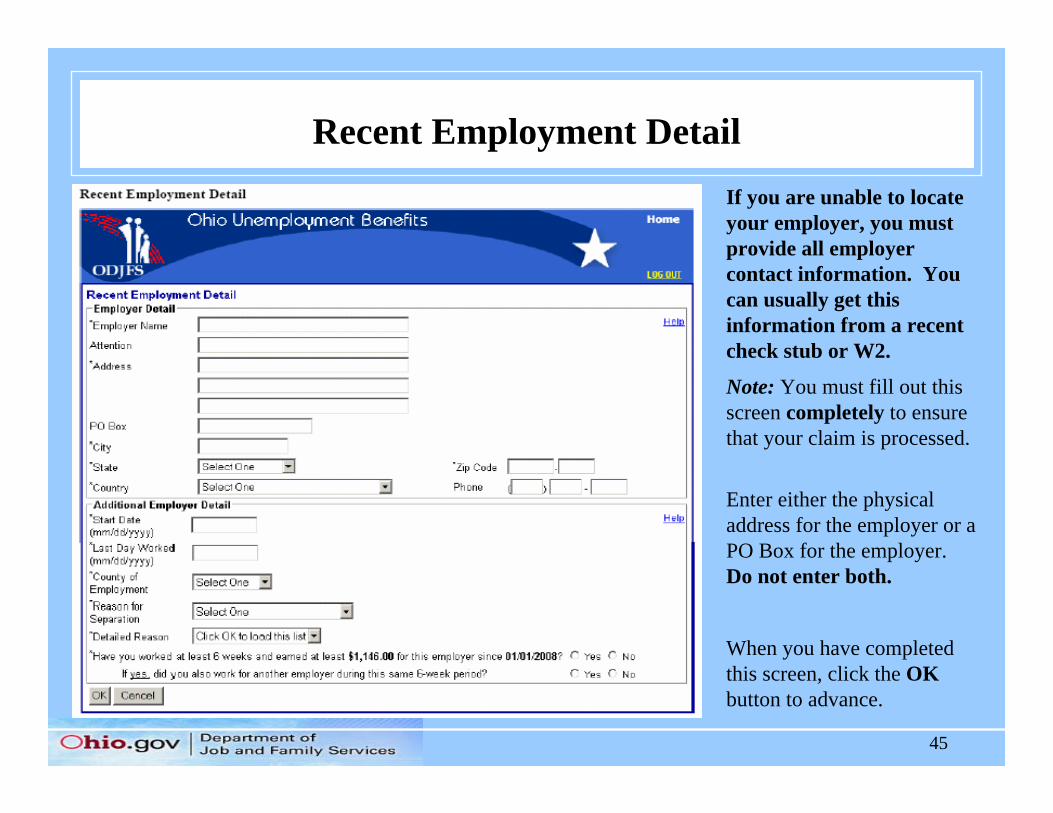
Recent Employment DetailIf you are unable to locate your employer, you must provide all employer contact information. You can usually get this information from a recent check stub or W2.
Note: You must fill out this screen completely to ensure that your claim is processed.
Enter either the physical address for the employer or a PO Box for the employer. Do not enter both.
When you have completed this screen, click the OK button to advance.
46
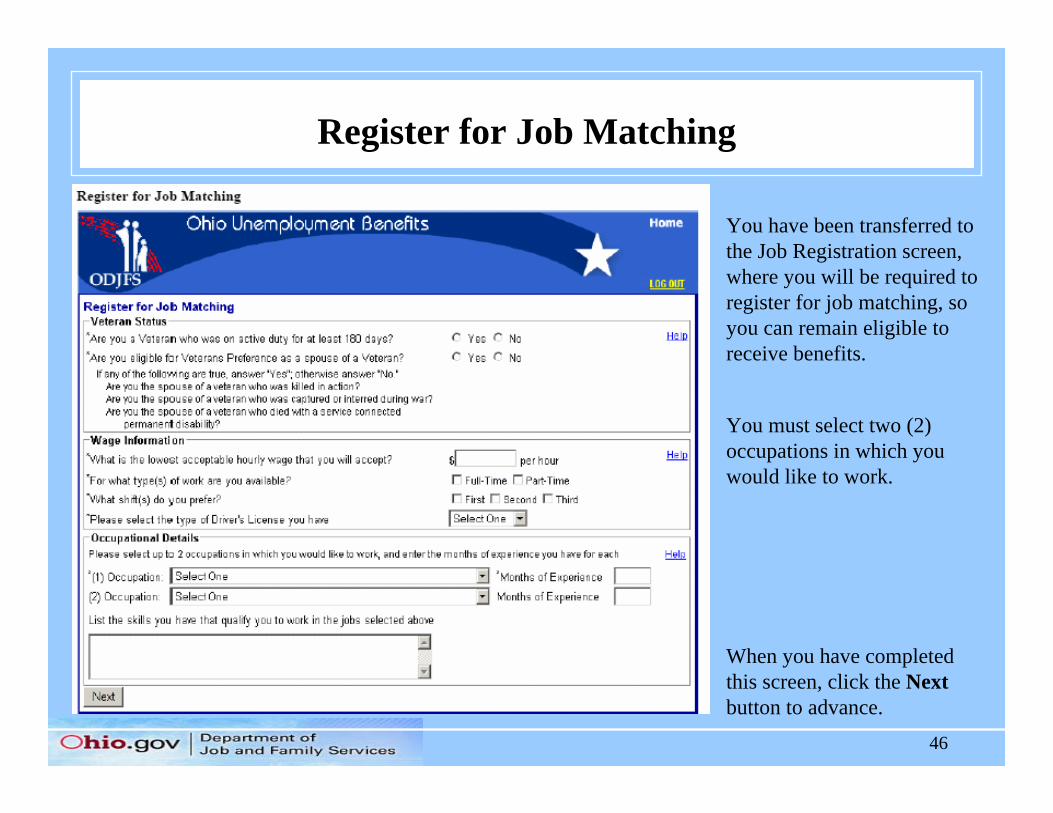
Register for Job Matching
You have been transferred to the Job Registration screen, where you will be required to register for job matching, so you can remain eligible to receive benefits.
You must select two (2) occupations in which you would like to work.
When you have completed this screen, click the Next button to advance.
47
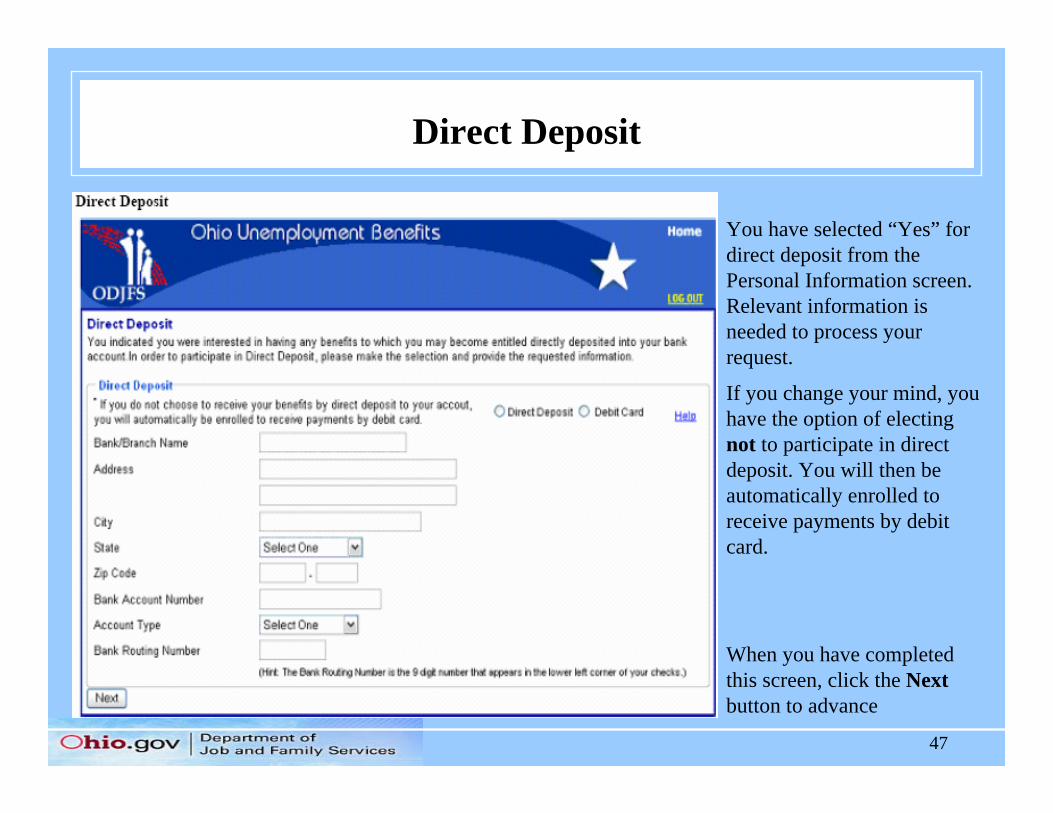
Direct Deposit
You have selected “Yes” for direct deposit from the Personal Information screen. Relevant information is needed to process your request.
If you change your mind, you have the option of electingnot to participate in direct deposit. You will then be automatically enrolled to receive payments by debit card.
When you have completed this screen, click the Next button to advance
48
Certification
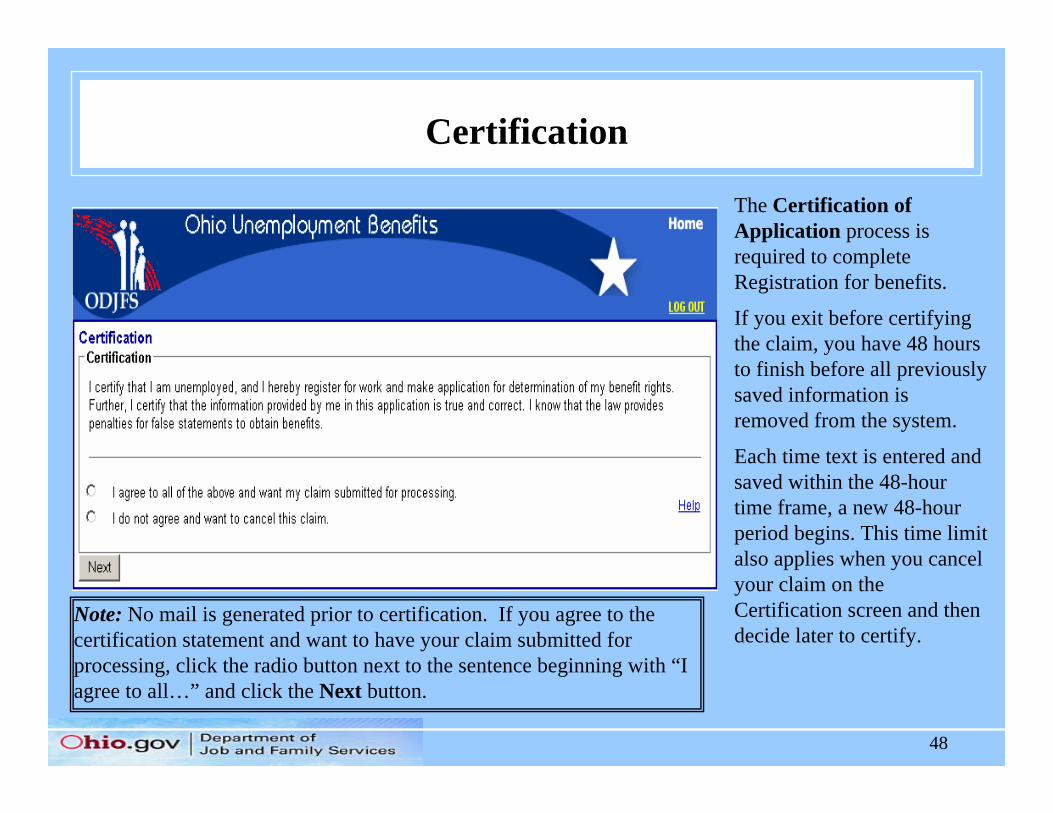
The Certification of Application process is required to complete Registration for benefits.
If you exit before certifying the claim, you have 48 hours to finish before all previously saved information is removed from the system.
Each time text is entered and saved within the 48-hour time frame, a new 48-hour period begins. This time limit also applies when you cancel your claim on the Certification screen and then decide later to certify.
Note: No mail is generated prior to certification. If you agree to the certification statement and want to have your claim submitted for processing, click the radio button next to the sentence beginning with “I agree to all…” and click the Next button.
49
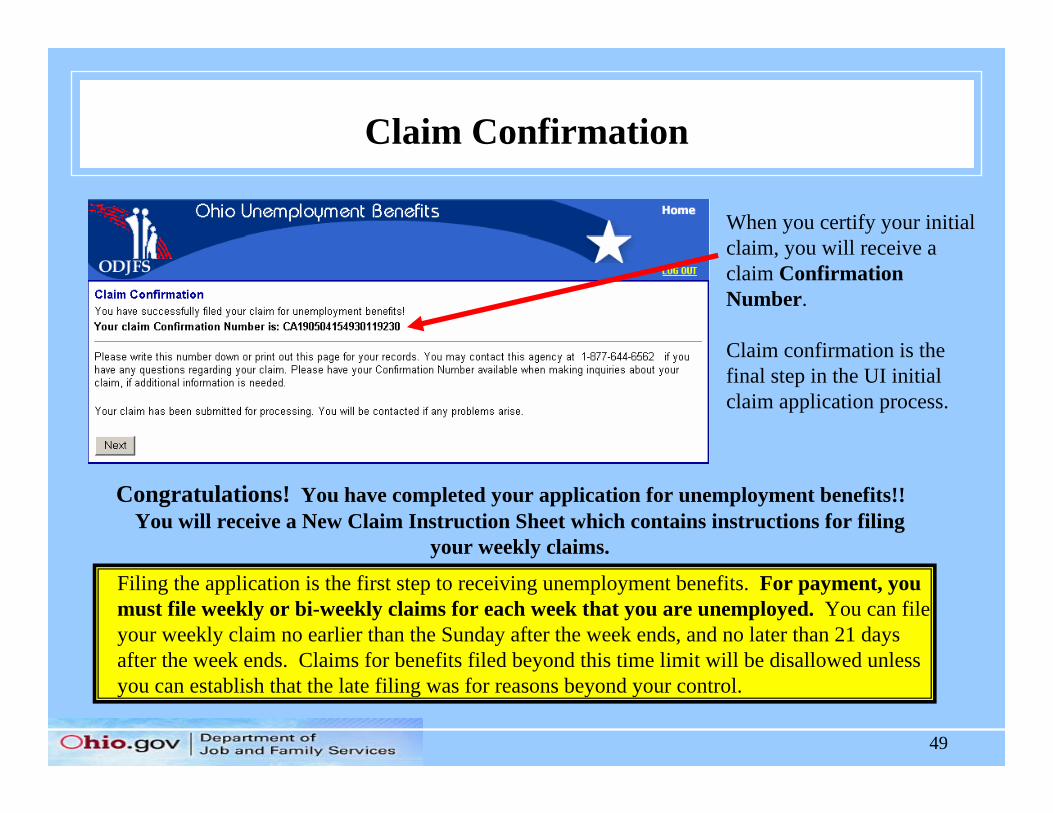
Claim Confirmation
When you certify your initial claim, you will receive a claim Confirmation Number.
Claim confirmation is the final step in the UI initial claim application process.
Congratulations! You have completed your application for unemployment benefits!! You will receive a New Claim Instruction Sheet which contains instructions for filing
your weekly claims.
Filing the application is the first step to receiving unemployment benefits. For payment, you must file weekly or bi-weekly claims for each week that you are unemployed. You can file your weekly claim no earlier than the Sunday after the week ends, and no later than 21 days after the week ends. Claims for benefits filed beyond this time limit will be disallowed unless you can establish that the late filing was for reasons beyond your control.
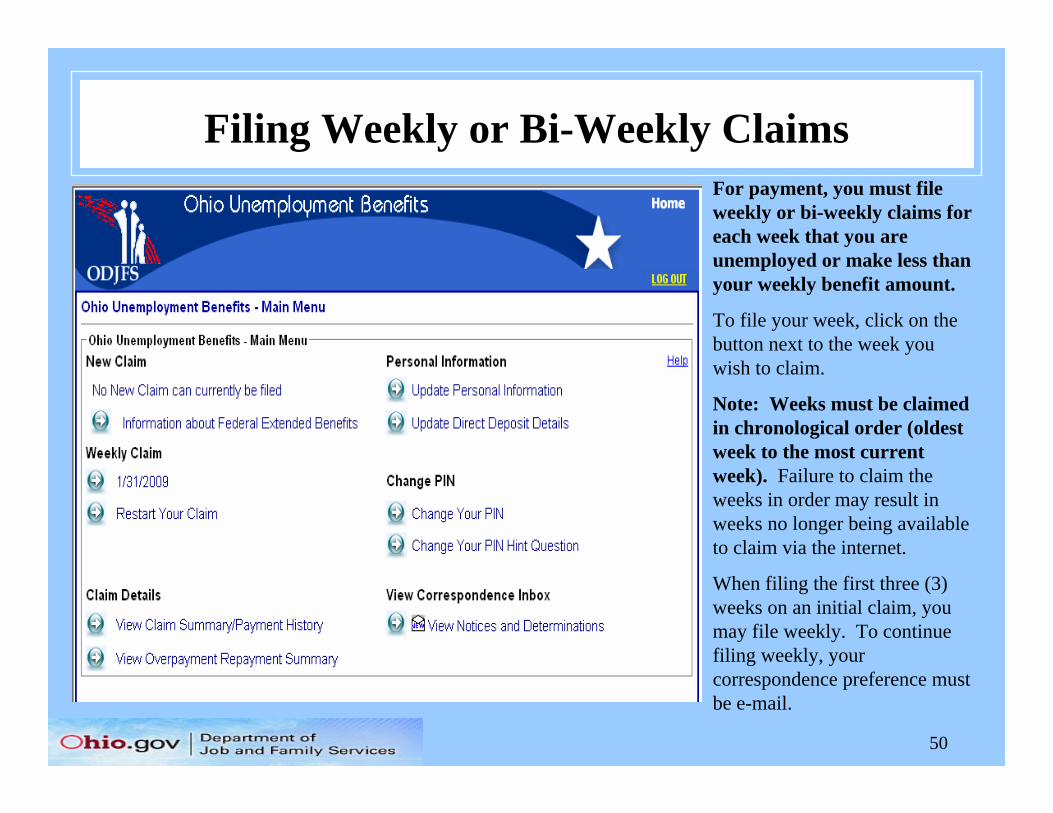
50
Filing Weekly or Bi-Weekly ClaimsFor payment, you must file weekly or bi-weekly claims for each week that you are unemployed or make less than your weekly benefit amount.
To file your week, click on the button next to the week you wish to claim.
Note: Weeks must be claimed in chronological order (oldest week to the most current week). Failure to claim the weeks in order may result in weeks no longer being available to claim via the internet.
When filing the first three (3) weeks on an initial claim, you may file weekly. To continue filing weekly, your correspondence preference must be e-mail.
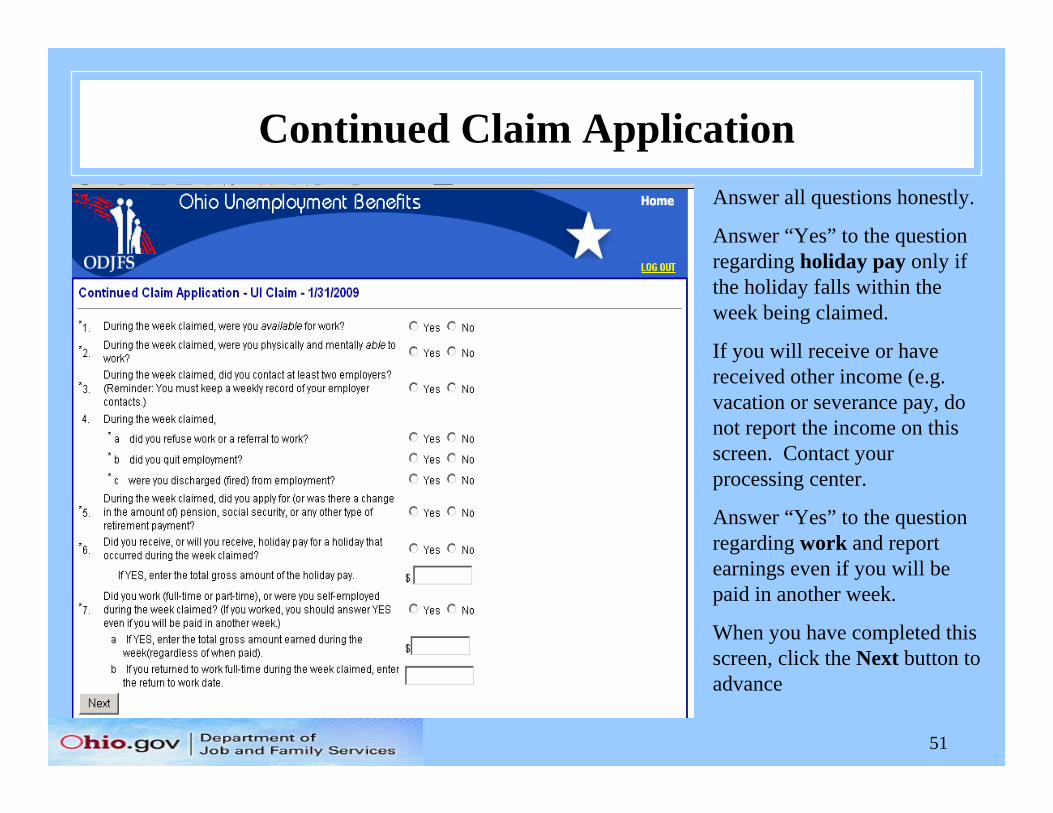
51
Continued Claim ApplicationAnswer all questions honestly.
Answer “Yes” to the question regarding holiday pay only if the holiday falls within the week being claimed.
If you will receive or have received other income (e.g. vacation or severance pay, do not report the income on this screen. Contact your processing center.
Answer “Yes” to the question regarding work and report earnings even if you will be paid in another week.
When you have completed this screen, click the Next button to advance
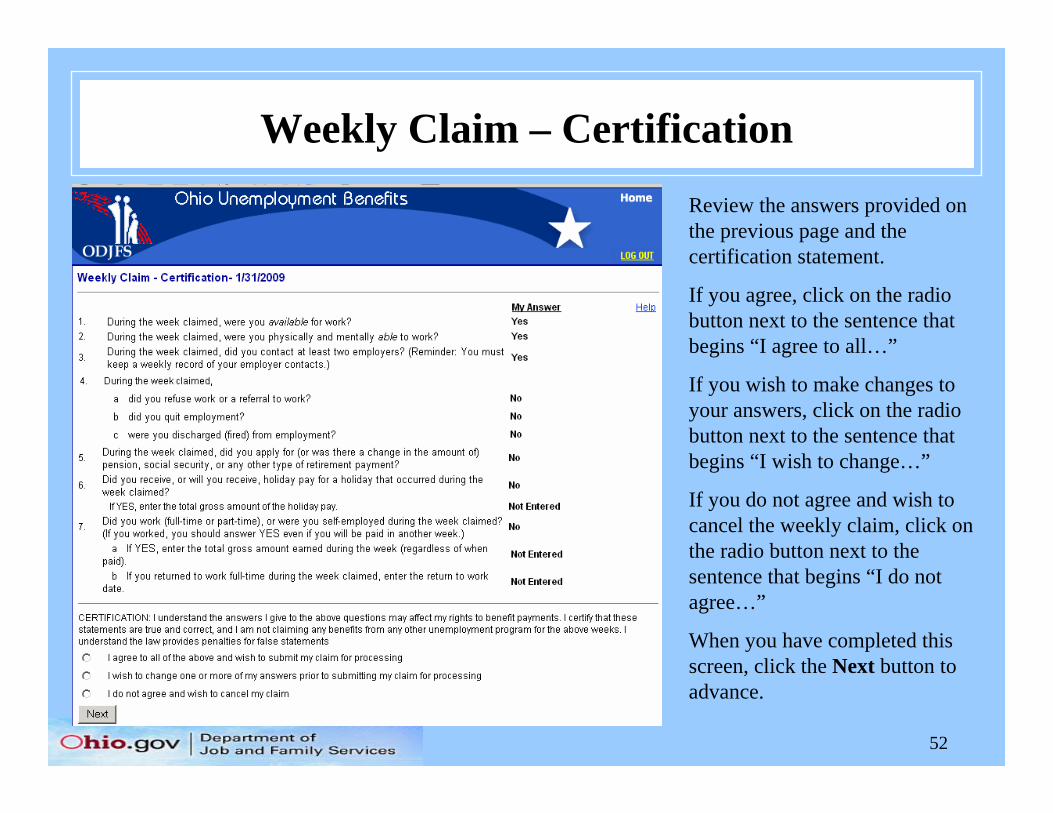
52
Review the answers provided on the previous page and the certification statement.
If you agree, click on the radio button next to the sentence that begins “I agree to all…”
If you wish to make changes to your answers, click on the radio button next to the sentence that begins “I wish to change…”
If you do not agree and wish to cancel the weekly claim, click on the radio button next to the sentence that begins “I do not agree…”
When you have completed this screen, click the Next button to advance.
Weekly Claim – Certification
53
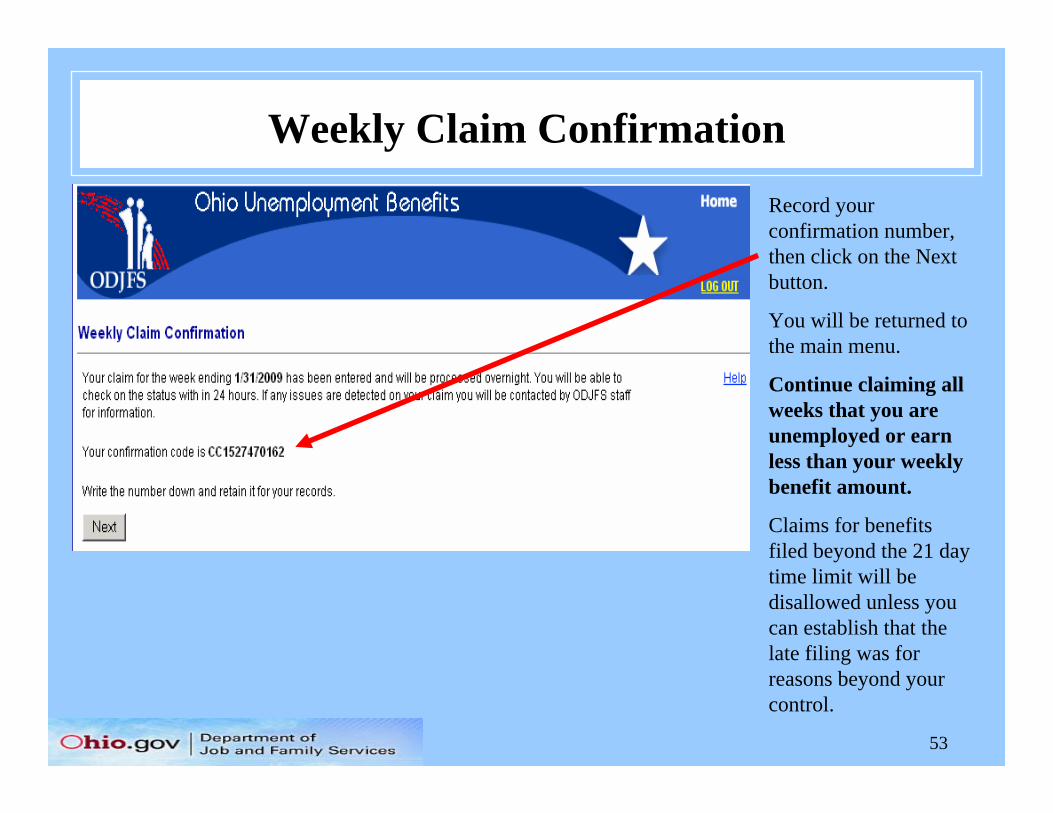
Weekly Claim ConfirmationRecord your confirmation number, then click on the Next button.
You will be returned to the main menu.
Continue claiming all weeks that you are unemployed or earn less than your weekly benefit amount.
Claims for benefits filed beyond the 21 day time limit will be disallowed unless you can establish that the late filing was for reasons beyond your control.
54
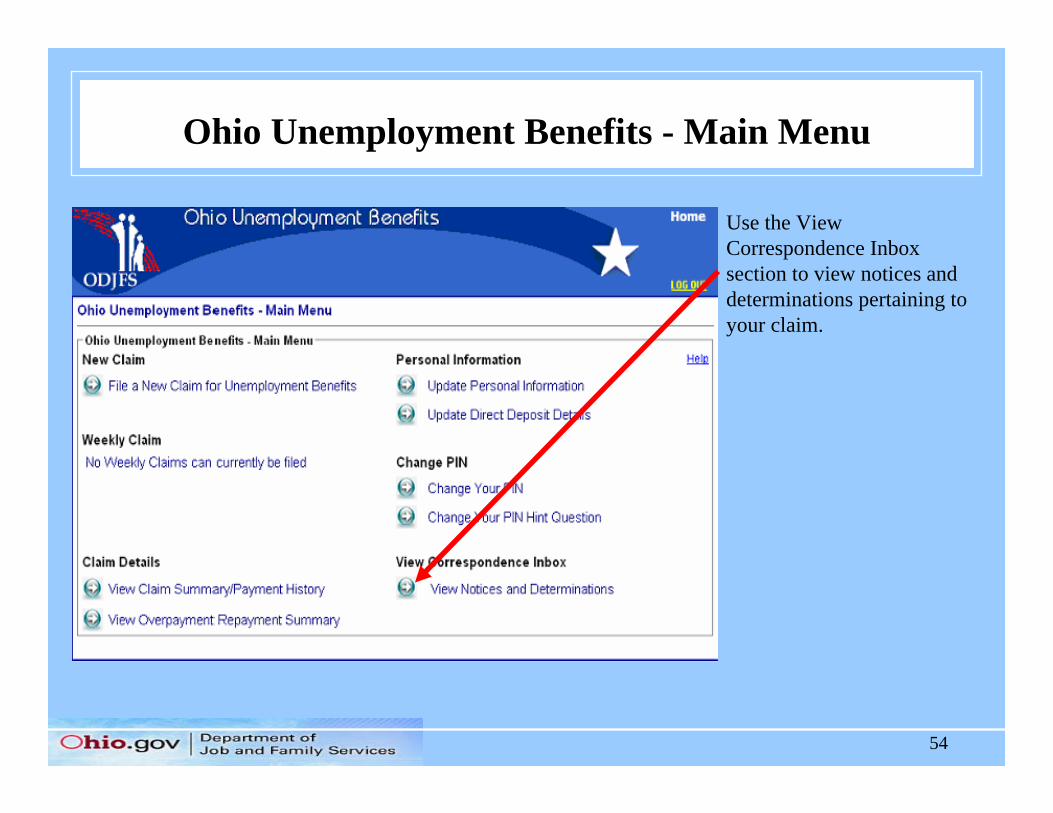
Ohio Unemployment Benefits - Main Menu
Use the View Correspondence Inbox section to view notices and determinations pertaining to your claim.