Word 2010: Tips and Shortcuts - · PDF fileHandout: Word 2010 Tips and Shortcuts Topics came...
15
Handout: Word 2010 Tips and Shortcuts Topics came directly from Microsoft Word 2010 Help. ICT Training, Maxwell School of Syracuse University Page 1 Word 2010: Tips and Shortcuts Table of Contents EXPORT A CUSTOMIZED QUICK ACCESS TOOLBAR ......................................................................... 2 IMPORT A CUSTOMIZED QUICK ACCESS TOOLBAR ............................................................................................ 2 USE THE FORMAT PAINTER ........................................................................................................................ 3 REPEAT THE LAST ACTION .................................................................................................................................. 3 SHOW OR HIDE FORMATTING MARKS ................................................................................................... 3 TURN OFF SELECTED FORMATTING MARKS ........................................................................................................ 3 INSERT A PAGE BREAK ................................................................................................................................. 4 DELETE A PAGE BREAK....................................................................................................................................... 4 INSERT A LINE BREAK ......................................................................................................................................... 4 CHANGE THE DEFAULT “NORMAL” STYLE IN WORD ....................................................................... 4 CREATE A NEW STYLE ........................................................................................................................................ 5 APPLY A STYLE ................................................................................................................................................... 5 CREATE A TABLE OF CONTENTS .............................................................................................................. 5 CREATE A TABLE OF CONTENTS FROM BUILT-IN HEADING STYLES .................................................................... 6 CREATE A TABLE OF CONTENTS FROM CUSTOM STYLES THAT YOU APPLIED ..................................................... 6 UPDATE THE TABLE OF CONTENTS ..................................................................................................................... 6 DELETE A TABLE OF CONTENTS .......................................................................................................................... 6 INSERT A SCREENSHOT OR SCREEN CLIPPING ................................................................................... 7 CREATE A QUICK PART ................................................................................................................................ 8 ADDING QUICK PARTS TO A DOCUMENT ............................................................................................................ 9 CREATE COLUMNS IN A DOCUMENT..................................................................................................... 10 FORMAT THE ENTIRE WHOLE DOCUMENT AS COLUMNS ................................................................................... 10 ADD COLUMNS TO PART OF A DOCUMENT ........................................................................................................ 10 CREATE A NEW WINDOW OF THE SAME DOCUMENT ..................................................................... 10 CREATE A NEW WINDOW .................................................................................................................................. 10 ARRANGE THE WINDOWS ................................................................................................................................. 11 USE THE NAVIGATION PANE TO SEARCH AND MOVE AROUND IN YOUR DOCUMENT ....... 11 VIEW HEADINGS ............................................................................................................................................... 11 ORGANIZE YOUR DOCUMENT USING THE NAVIGATION PANE .......................................................................... 11 VIEW PAGES...................................................................................................................................................... 12 SEARCH FOR TEXT ............................................................................................................................................ 12 SEARCH FOR OBJECTS ....................................................................................................................................... 12 FULL SCREEN READING VIEW ................................................................................................................. 12 TURN OFF FULL SCREEN READING VIEW: ........................................................................................................ 13
Transcript of Word 2010: Tips and Shortcuts - · PDF fileHandout: Word 2010 Tips and Shortcuts Topics came...
Handout: Word 2010 Tips and Shortcuts Topics came directly from Microsoft Word 2010 Help.
ICT Training, Maxwell School of Syracuse University Page 1
Word 2010: Tips and Shortcuts Table of Contents
EXPORT A CUSTOMIZED QUICK ACCESS TOOLBAR ......................................................................... 2
IMPORT A CUSTOMIZED QUICK ACCESS TOOLBAR ............................................................................................ 2
USE THE FORMAT PAINTER ........................................................................................................................ 3
REPEAT THE LAST ACTION .................................................................................................................................. 3
SHOW OR HIDE FORMATTING MARKS ................................................................................................... 3
TURN OFF SELECTED FORMATTING MARKS ........................................................................................................ 3
INSERT A PAGE BREAK ................................................................................................................................. 4
DELETE A PAGE BREAK ....................................................................................................................................... 4
INSERT A LINE BREAK ......................................................................................................................................... 4
CHANGE THE DEFAULT “NORMAL” STYLE IN WORD ....................................................................... 4
CREATE A NEW STYLE ........................................................................................................................................ 5
APPLY A STYLE ................................................................................................................................................... 5
CREATE A TABLE OF CONTENTS .............................................................................................................. 5
CREATE A TABLE OF CONTENTS FROM BUILT-IN HEADING STYLES .................................................................... 6
CREATE A TABLE OF CONTENTS FROM CUSTOM STYLES THAT YOU APPLIED ..................................................... 6
UPDATE THE TABLE OF CONTENTS ..................................................................................................................... 6
DELETE A TABLE OF CONTENTS .......................................................................................................................... 6
INSERT A SCREENSHOT OR SCREEN CLIPPING ................................................................................... 7
CREATE A QUICK PART ................................................................................................................................ 8
ADDING QUICK PARTS TO A DOCUMENT ............................................................................................................ 9
CREATE COLUMNS IN A DOCUMENT..................................................................................................... 10
FORMAT THE ENTIRE WHOLE DOCUMENT AS COLUMNS ................................................................................... 10
ADD COLUMNS TO PART OF A DOCUMENT ........................................................................................................ 10
CREATE A NEW WINDOW OF THE SAME DOCUMENT ..................................................................... 10
CREATE A NEW WINDOW .................................................................................................................................. 10
ARRANGE THE WINDOWS ................................................................................................................................. 11
USE THE NAVIGATION PANE TO SEARCH AND MOVE AROUND IN YOUR DOCUMENT ....... 11
VIEW HEADINGS ............................................................................................................................................... 11
ORGANIZE YOUR DOCUMENT USING THE NAVIGATION PANE .......................................................................... 11
VIEW PAGES ...................................................................................................................................................... 12
SEARCH FOR TEXT ............................................................................................................................................ 12
SEARCH FOR OBJECTS ....................................................................................................................................... 12
FULL SCREEN READING VIEW ................................................................................................................. 12
TURN OFF FULL SCREEN READING VIEW: ........................................................................................................ 13
Handout: Word 2010 Tips and Shortcuts Topics came directly from Microsoft Word 2010 Help.
ICT Training, Maxwell School of Syracuse University Page 2
CUSTOMIZE THE LIST OF RECENTLY USED FILES AND RECENTLY VISITED PLACES ....... 13
CUSTOMIZE THE LIST OF RECENTLY USED FILES .............................................................................................. 13
Change the number of files that appear in the list of recently used files ..................................................... 13
Keep a file on the recently used files list ..................................................................................................... 14
Add a quick access list to the Backstage file navigation bar ....................................................................... 14
Clear the list of recently used files ............................................................................................................... 14
CUSTOMIZE THE LIST OF RECENTLY VISITED PLACES ....................................................................................... 15
Keep a file on the Recent Places list ............................................................................................................ 15
Remove a location from the recent Places list ............................................................................................. 15
Clear the list of recently visited places ......................................................................................................... 15
Export a customized Quick Access Toolbar You can export your ribbon and Quick Access Toolbar customizations into a file that can be imported and
used by a coworker or on another computer.
1) Click the File tab.
1) Under Help, click Options.
2) Click Quick Access Toolbar.
3) Click Import/Export, and then click Export all customizations.
Import a customized Quick Access Toolbar You can import customization files to replace the current layout of the ribbon and Quick Access Toolbar. By
being able to import the customization, you can keep Microsoft Office programs looking the same as your
coworkers or from computer to computer.
Important: When you import a ribbon customization file, you lose all prior ribbon and Quick Access Toolbar
customizations. If you think that you might want to revert to the customization you currently have, you should
export them before importing any new customizations.
1) Click the File tab.
2) Under Help, click Options.
3) Click Quick Access Toolbar.
4) Click Import/Export, and then click Import customization file.
Handout: Word 2010 Tips and Shortcuts Topics came directly from Microsoft Word 2010 Help.
ICT Training, Maxwell School of Syracuse University Page 3
Use the Format Painter You can use the Format Painter on the Home tab to apply text formatting and some basic graphics
formatting, such as borders and fills.
1) Select the text or graphic that has the formatting that you want to copy.
Note: If you want to copy text formatting, select a portion of a paragraph. If you want to copy text and
paragraph formatting, select an entire paragraph, including the paragraph mark.
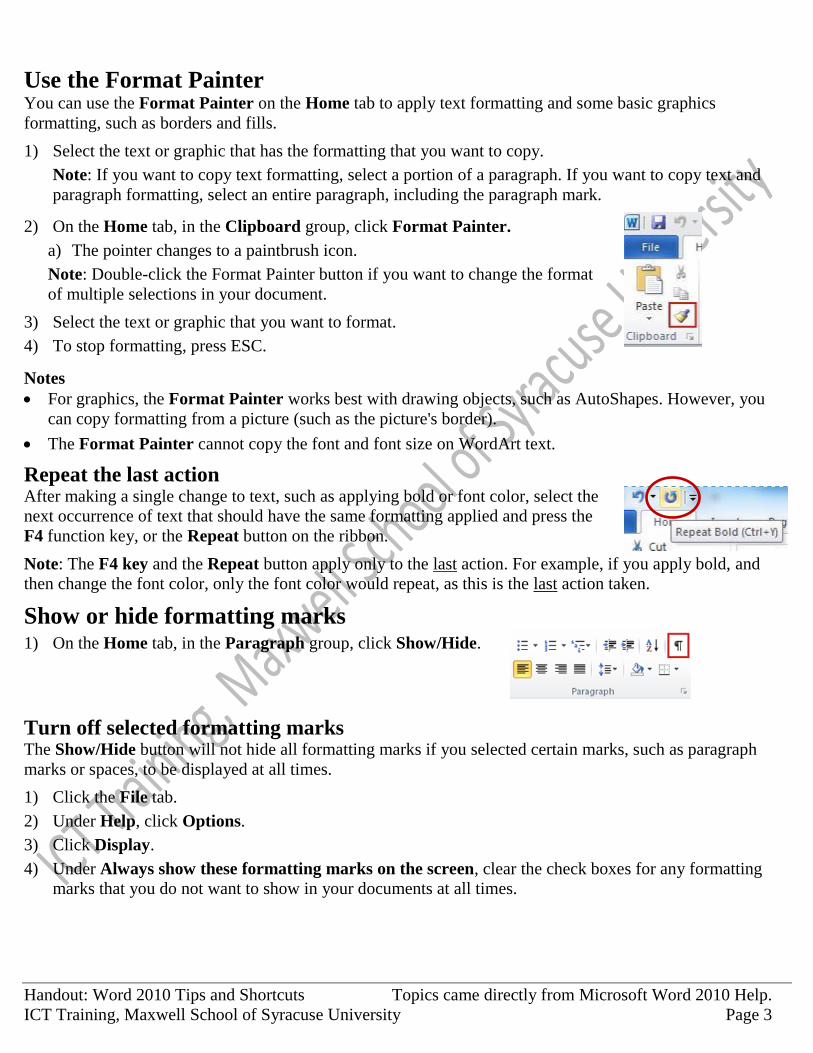
2) On the Home tab, in the Clipboard group, click Format Painter.
a) The pointer changes to a paintbrush icon.
Note: Double-click the Format Painter button if you want to change the format
of multiple selections in your document.
3) Select the text or graphic that you want to format.
4) To stop formatting, press ESC.
Notes
For graphics, the Format Painter works best with drawing objects, such as AutoShapes. However, you
can copy formatting from a picture (such as the picture's border).
The Format Painter cannot copy the font and font size on WordArt text.
Repeat the last action After making a single change to text, such as applying bold or font color, select the
next occurrence of text that should have the same formatting applied and press the
F4 function key, or the Repeat button on the ribbon.
Note: The F4 key and the Repeat button apply only to the last action. For example, if you apply bold, and
then change the font color, only the font color would repeat, as this is the last action taken.
Show or hide formatting marks 1) On the Home tab, in the Paragraph group, click Show/Hide.
Turn off selected formatting marks The Show/Hide button will not hide all formatting marks if you selected certain marks, such as paragraph
marks or spaces, to be displayed at all times.
1) Click the File tab.
2) Under Help, click Options.
3) Click Display.
4) Under Always show these formatting marks on the screen, clear the check boxes for any formatting
marks that you do not want to show in your documents at all times.
Handout: Word 2010 Tips and Shortcuts Topics came directly from Microsoft Word 2010 Help.
ICT Training, Maxwell School of Syracuse University Page 4
Insert a page break Word automatically inserts a page break when you reach the end of a page. If you want the page to break in a
different place, you can insert a manual page break.
1) Click where you want to start a new page.
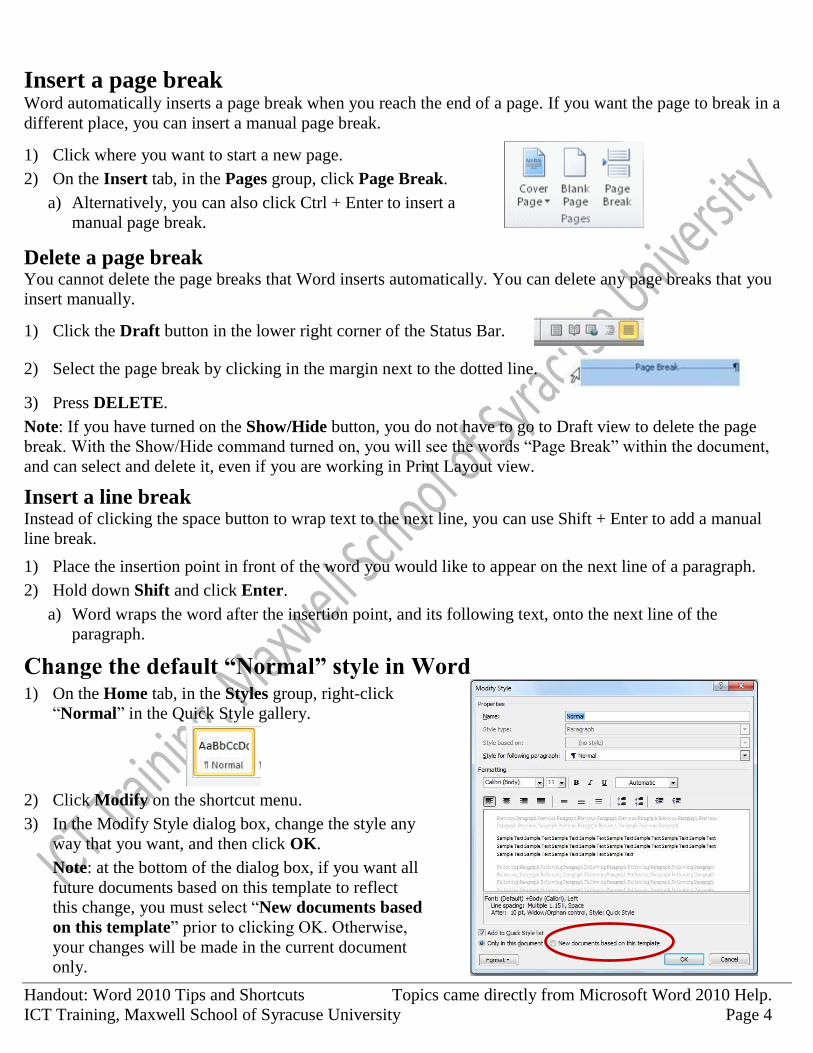
2) On the Insert tab, in the Pages group, click Page Break.
a) Alternatively, you can also click Ctrl + Enter to insert a
manual page break.
Delete a page break You cannot delete the page breaks that Word inserts automatically. You can delete any page breaks that you
insert manually.
1) Click the Draft button in the lower right corner of the Status Bar.
2) Select the page break by clicking in the margin next to the dotted line.
3) Press DELETE.
Note: If you have turned on the Show/Hide button, you do not have to go to Draft view to delete the page
break. With the Show/Hide command turned on, you will see the words “Page Break” within the document,
and can select and delete it, even if you are working in Print Layout view.
Insert a line break Instead of clicking the space button to wrap text to the next line, you can use Shift + Enter to add a manual
line break.
1) Place the insertion point in front of the word you would like to appear on the next line of a paragraph.
2) Hold down Shift and click Enter.
a) Word wraps the word after the insertion point, and its following text, onto the next line of the
paragraph.
Change the default “Normal” style in Word 1) On the Home tab, in the Styles group, right-click
“Normal” in the Quick Style gallery.
2) Click Modify on the shortcut menu.
3) In the Modify Style dialog box, change the style any
way that you want, and then click OK.
Note: at the bottom of the dialog box, if you want all
future documents based on this template to reflect
this change, you must select “New documents based
on this template” prior to clicking OK. Otherwise,
your changes will be made in the current document
only.
Handout: Word 2010 Tips and Shortcuts Topics came directly from Microsoft Word 2010 Help.
ICT Training, Maxwell School of Syracuse University Page 5
Create a new Style Styles can be defined as a series of text formatting that can be applied quickly to paragraphs and characters.
As in the past, Microsoft Office Word 2010 allows you to create your own styles. Quick Styles make it easy
for you to create a professional and well-designed document in minutes.
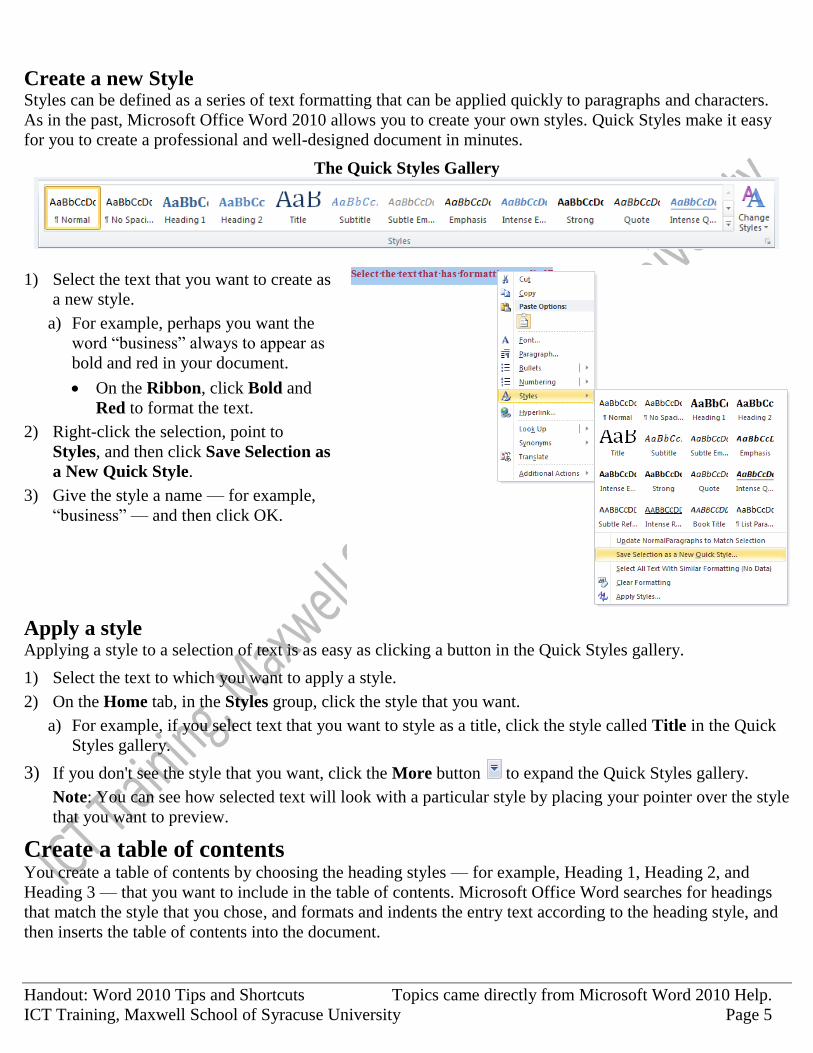
The Quick Styles Gallery
1) Select the text that you want to create as
a new style.
a) For example, perhaps you want the
word “business” always to appear as
bold and red in your document.
On the Ribbon, click Bold and
Red to format the text.
2) Right-click the selection, point to
Styles, and then click Save Selection as
a New Quick Style.
3) Give the style a name — for example,
“business” — and then click OK.
Apply a style Applying a style to a selection of text is as easy as clicking a button in the Quick Styles gallery.
1) Select the text to which you want to apply a style.
2) On the Home tab, in the Styles group, click the style that you want.
a) For example, if you select text that you want to style as a title, click the style called Title in the Quick
Styles gallery.
3) If you don't see the style that you want, click the More button to expand the Quick Styles gallery.
Note: You can see how selected text will look with a particular style by placing your pointer over the style
that you want to preview.
Create a table of contents You create a table of contents by choosing the heading styles — for example, Heading 1, Heading 2, and
Heading 3 — that you want to include in the table of contents. Microsoft Office Word searches for headings
that match the style that you chose, and formats and indents the entry text according to the heading style, and
then inserts the table of contents into the document.

Handout: Word 2010 Tips and Shortcuts Topics came directly from Microsoft Word 2010 Help.
ICT Training, Maxwell School of Syracuse University Page 6
The easiest way to create a table of contents is to use the built-in heading styles (Microsoft Word has nine
different built-in styles: Heading 1 through Heading 9.). You can also create a table of contents that is based
on the custom styles that you have applied.
Create a table of contents from built-in heading styles Use this procedure if you created a document by using heading styles.
1) Click where you want to insert the table of contents, usually at the
beginning of a document.
2) On the References tab, in the Table of Contents group, click Table of
Contents, and then click the table of contents style that you want.
Create a table of contents from custom styles that you applied Use this procedure if you already applied custom styles to your headings. You can choose the style settings
that you want Word to use when it builds the table of contents.
1) Click where you want to insert the table of contents.
2) On the References tab, in the Table of Contents group, click Table of Contents, and then click Insert
Table of Contents.
a) Click Options.
b) Under Available styles, find the style that you applied to the headings in your document.
c) Under TOC level, next to the style name, type a number from 1 to 9 to indicate the level that you want
the heading style to represent.
Note: If you want to use only custom styles, delete the TOC level numbers for the built-in styles, such
as Heading 1.
d) Repeat step 4 and step 5 for each heading style that you want to include in the table of contents.
e) Click OK.
Update the table of contents If you added or removed headings or other table of contents entries in your document, you can quickly update
the table of contents.
1) On the References tab, in the Table of Contents group, click Update
Table.
a) Click Update page numbers only or Update entire table.
Note: you can also “refresh” a Table of Contents by selecting the TOC
and clicking F9, or right-clicking the TOC, and choosing Update
Field.
Delete a table of contents
1) On the References tab, in the Table of Contents group, click Table of Contents.
a) Click Remove Table of Contents.
Handout: Word 2010 Tips and Shortcuts Topics came directly from Microsoft Word 2010 Help.
ICT Training, Maxwell School of Syracuse University Page 7
Insert a screenshot or screen clipping You can quickly and easily add a screenshot to your Office file to enhance the readability or capture
information without leaving the program that you are working in. This feature is available in Microsoft Excel,
Outlook, PowerPoint, and Word. You can use it to take a picture of all or part of the windows open on your
computer. These screenshots are easy to read in printed documents and on PowerPoint slides that you project.
When you click the Screenshot button, you can insert the whole program window or use the Screen Clipping
tool to select part of a window. Only windows that have not been minimized to the taskbar can be captured.
When you choose Screen Clipping, your entire window will temporarily become opaque or “frosted over”.
After you select the part of the window that you want, your selection will show through this opaqueness.
Open program windows are displayed as thumbnails in the Available Windows gallery and when you pause
your pointer over a thumbnail, a tooltip pops up with the program name and document title.
Note: Only one screenshot at a time can be added. To add multiple screenshots, repeat steps 2 and 3 below.
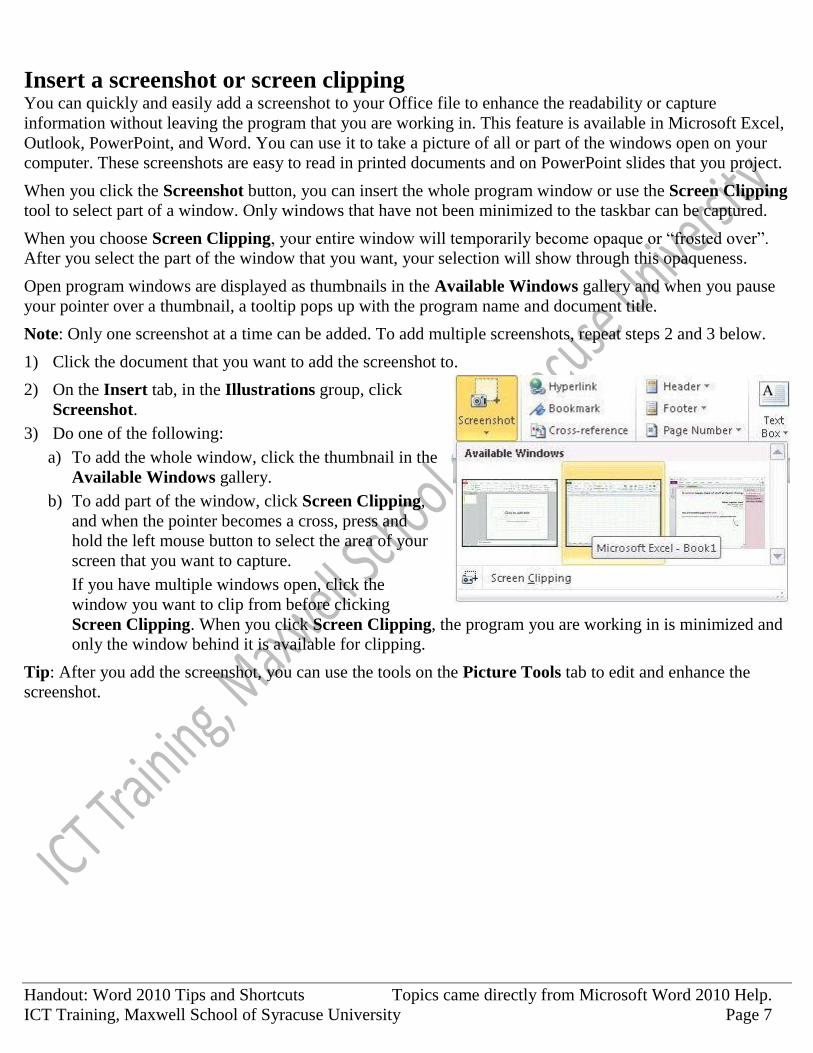
1) Click the document that you want to add the screenshot to.
2) On the Insert tab, in the Illustrations group, click
Screenshot.
3) Do one of the following:
a) To add the whole window, click the thumbnail in the
Available Windows gallery.
b) To add part of the window, click Screen Clipping,
and when the pointer becomes a cross, press and
hold the left mouse button to select the area of your
screen that you want to capture.
If you have multiple windows open, click the
window you want to clip from before clicking
Screen Clipping. When you click Screen Clipping, the program you are working in is minimized and
only the window behind it is available for clipping.
Tip: After you add the screenshot, you can use the tools on the Picture Tools tab to edit and enhance the
screenshot.
Handout: Word 2010 Tips and Shortcuts Topics came directly from Microsoft Word 2010 Help.
ICT Training, Maxwell School of Syracuse University Page 8
Create a Quick Part Quick Parts, also referred to as “building blocks,” are frequently used text saved in a gallery, from which it
can be inserted quickly into a document. The Quick Part Gallery is a gallery where you can create, store, and
find reusable pieces of content.
1) Select the content you want to save as a building block.
a) To store paragraph formatting — including indentation, alignment, line spacing, and pagination —
with the entry, include the paragraph mark ( ) in the selection.
To view paragraph marks, on the Home tab, in the Paragraph group, click Show/Hide
Tip: The content you select can include text, images, and special formats. Whatever you save as a
building block will be placed in the new document as is, so lines, logos, hyperlinks, and more can be
saved for reuse.
2) Click the Insert tab and in the Text group, click the down arrow next to Quick Parts.
3) Click Save Selection To Quick Part Gallery.
a) The Create New Building Block dialog box appears.
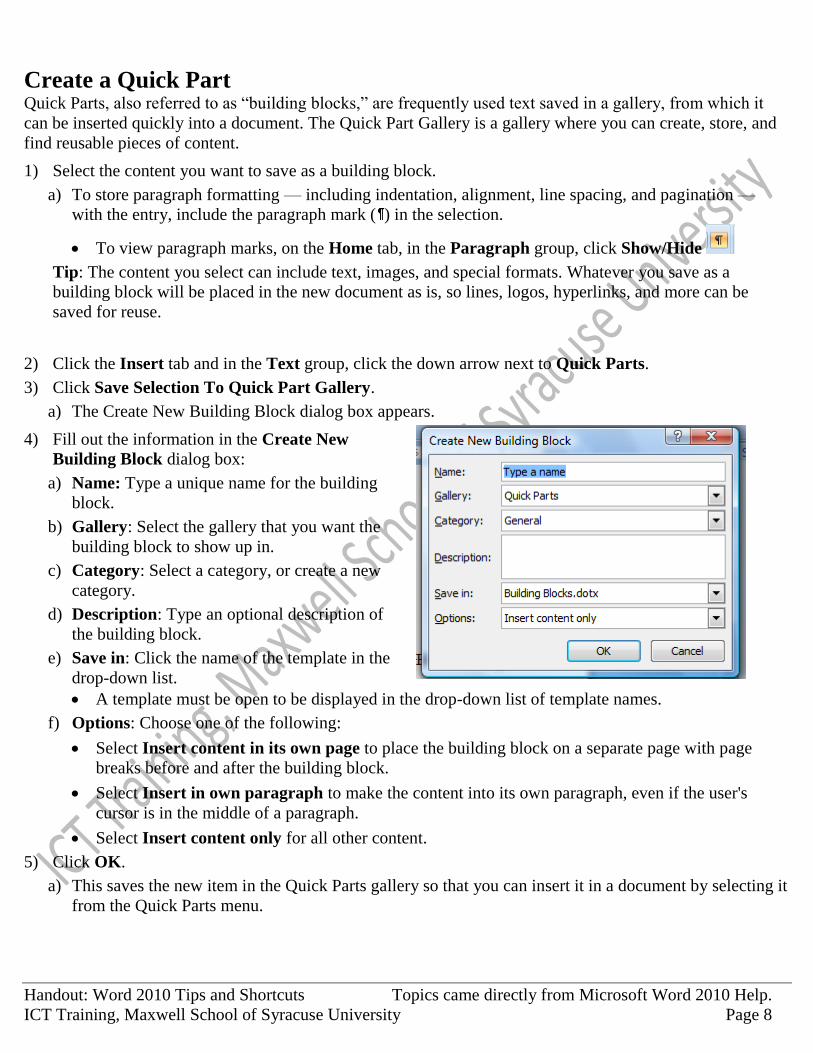
4) Fill out the information in the Create New
Building Block dialog box:
a) Name: Type a unique name for the building
block.
b) Gallery: Select the gallery that you want the
building block to show up in.
c) Category: Select a category, or create a new
category.
d) Description: Type an optional description of
the building block.
e) Save in: Click the name of the template in the
drop-down list.
A template must be open to be displayed in the drop-down list of template names.
f) Options: Choose one of the following:
Select Insert content in its own page to place the building block on a separate page with page
breaks before and after the building block.
Select Insert in own paragraph to make the content into its own paragraph, even if the user's
cursor is in the middle of a paragraph.
Select Insert content only for all other content.
5) Click OK.
a) This saves the new item in the Quick Parts gallery so that you can insert it in a document by selecting it
from the Quick Parts menu.

Handout: Word 2010 Tips and Shortcuts Topics came directly from Microsoft Word 2010 Help.
ICT Training, Maxwell School of Syracuse University Page 9
Adding Quick Parts to a document
1) Open the document in which you want to add the Quick Part.
2) Place the insertion point in the document where you want to add the item.
3) Click the arrow next to Quick Parts.
a) In addition to the options previously available, now you see a list of building blocks you have added to
the list.
4) Click the part you want to insert.
a) Where ever your insertion was placed, this is where the Quick Part will be placed.
A graphic saved as a Quick Part
A full paragraph saved as a Quick Part
Formatted text saved as a Quick Part
Handout: Word 2010 Tips and Shortcuts Topics came directly from Microsoft Word 2010 Help.
ICT Training, Maxwell School of Syracuse University Page 10
Create Columns in a document
Format the entire whole document as columns
1) Click anywhere in your document.
2) On the Page Layout tab, in the Page Setup group, click Columns.
3) Click the layout that you want.
4) Your document is now formatted as columns.
Note: To add a vertical line between the columns, click Columns again, click More Columns, and then
select the Line between check box. You can also adjust the column width and spacing.
Add columns to part of a document
1) Select the text you would like formatted as columns.
2) On the Page Layout tab, in the Page Setup group, click Columns.
3) Click More Columns.
4) Click the layout that you want.
5) In the Apply to list, click Selected text.
Tip: as an alternative, you can also select the text you’d like to appear as columns, and then click the number
of columns you require, found under the Columns command.
Create a new window of the same document You may want to compare one part of your document with another part of the same document, but the other
part appears on a different page. The “New Window” command allows you to open a second, or third, or
fourth... occurrence of the same document in one window. Once you create a new window, you can arrange it
so that it appears vertically or horizontally with the original window. You can also turn on the View Side by
Side option, which activates the Synchronized Scrolling option. Synchronized Scrolling allows you to scroll
through two windows are the same time.
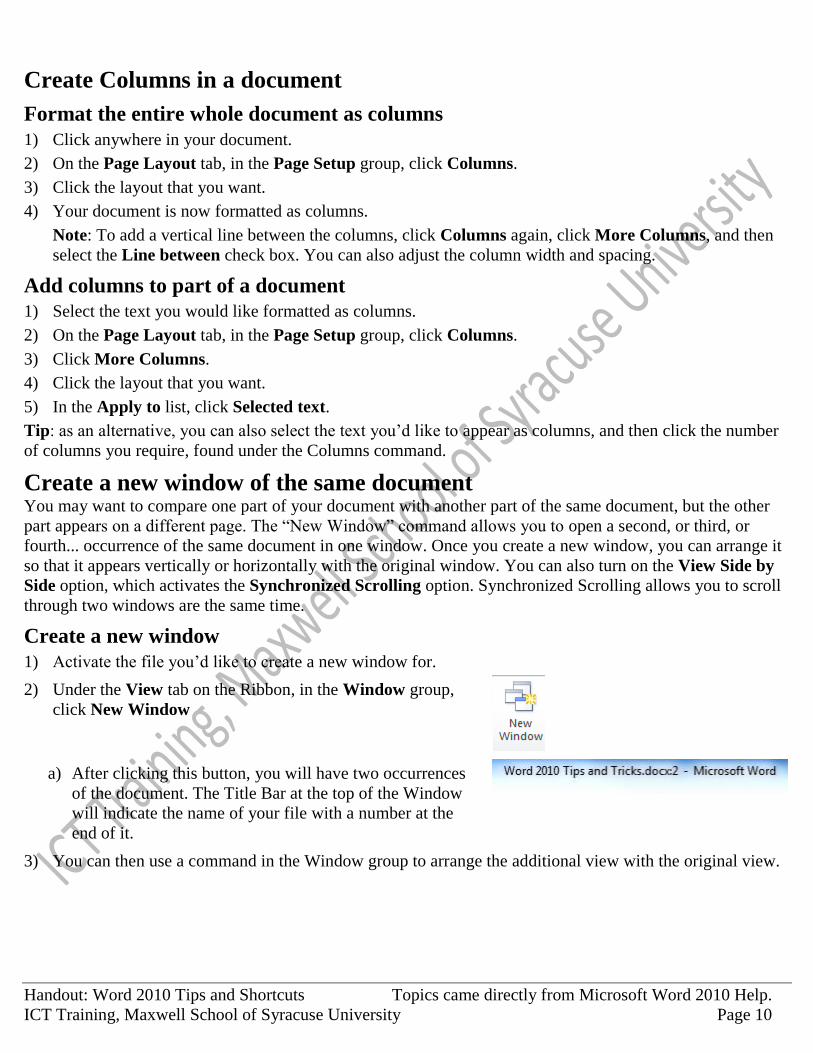
Create a new window
1) Activate the file you’d like to create a new window for.
2) Under the View tab on the Ribbon, in the Window group,
click New Window
a) After clicking this button, you will have two occurrences
of the document. The Title Bar at the top of the Window
will indicate the name of your file with a number at the
end of it.
3) You can then use a command in the Window group to arrange the additional view with the original view.
Handout: Word 2010 Tips and Shortcuts Topics came directly from Microsoft Word 2010 Help.
ICT Training, Maxwell School of Syracuse University Page 11
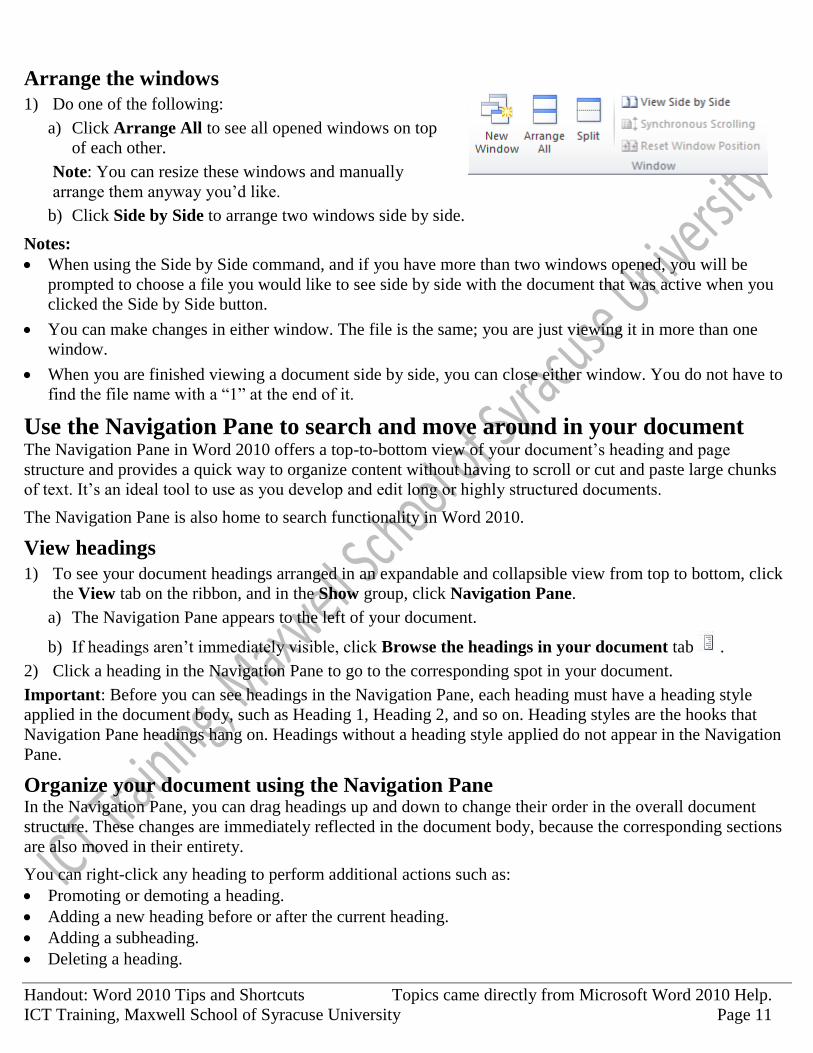
Arrange the windows
1) Do one of the following:
a) Click Arrange All to see all opened windows on top
of each other.
Note: You can resize these windows and manually
arrange them anyway you’d like.
b) Click Side by Side to arrange two windows side by side.
Notes:
When using the Side by Side command, and if you have more than two windows opened, you will be
prompted to choose a file you would like to see side by side with the document that was active when you
clicked the Side by Side button.
You can make changes in either window. The file is the same; you are just viewing it in more than one
window.
When you are finished viewing a document side by side, you can close either window. You do not have to
find the file name with a “1” at the end of it.
Use the Navigation Pane to search and move around in your document The Navigation Pane in Word 2010 offers a top-to-bottom view of your document’s heading and page
structure and provides a quick way to organize content without having to scroll or cut and paste large chunks
of text. It’s an ideal tool to use as you develop and edit long or highly structured documents.
The Navigation Pane is also home to search functionality in Word 2010.
View headings
1) To see your document headings arranged in an expandable and collapsible view from top to bottom, click
the View tab on the ribbon, and in the Show group, click Navigation Pane.
a) The Navigation Pane appears to the left of your document.
b) If headings aren’t immediately visible, click Browse the headings in your document tab .
2) Click a heading in the Navigation Pane to go to the corresponding spot in your document.
Important: Before you can see headings in the Navigation Pane, each heading must have a heading style
applied in the document body, such as Heading 1, Heading 2, and so on. Heading styles are the hooks that
Navigation Pane headings hang on. Headings without a heading style applied do not appear in the Navigation
Pane.
Organize your document using the Navigation Pane In the Navigation Pane, you can drag headings up and down to change their order in the overall document
structure. These changes are immediately reflected in the document body, because the corresponding sections
are also moved in their entirety.
You can right-click any heading to perform additional actions such as:
Promoting or demoting a heading.
Adding a new heading before or after the current heading.
Adding a subheading.
Deleting a heading.
Handout: Word 2010 Tips and Shortcuts Topics came directly from Microsoft Word 2010 Help.
ICT Training, Maxwell School of Syracuse University Page 12
View pages You can view a thumbnail of every page in the document, a bird’s-eye view of sorts. In the Navigation Pane,
click the Browse the pages in your document tab . As with headings, you can click a thumbnail to go
directly to the corresponding page.
Search for text You can search for text from any area of the Navigation Pane. Type the text in the Search Document box.
Results are displayed differently according to which area you’re in:
In heading view, headings that contain a match are highlighted. You can click a heading to go directly to
that spot in the document body, where results are also highlighted. No need to scroll through results.
Page view is filtered so that only pages containing a match are displayed. You can click a thumbnail to go
directly to that page in the document.
In search view, available by clicking Browse the results from your current search , all the matches
are displayed in a top-to-bottom list that includes the surrounding text for each match. These results, too,
are clickable.
Tip: The keyboard shortcut CTRL+F works just the same as in earlier versions, except that in Word 2010 it
opens the Navigation Pane, where you can begin your search as described here.
Replacing text works the same way it did in earlier versions. Press CTRL+H on the keyboard, or, in any view
in the Navigation Pane, click the arrow next to the Search Document box, and then click Replace. This opens
the familiar Find and Replace dialog box.
Search for objects Using the Navigation Pane, you can search your document for graphics, tables, equations, and other elements.
Click the magnifying glass icon and then, under Find, click the type of object you want to locate. All
instances are displayed in the Navigation Pane.
Full Screen Reading view You can use Full Screen Reading to preview your document without showing hidden characters such as
paragraph or space markers, or the gridlines of inserted tables. The difference between using Full Screen
Reading view and Print Preview and Print view, is that you can edit your document as you preview it.
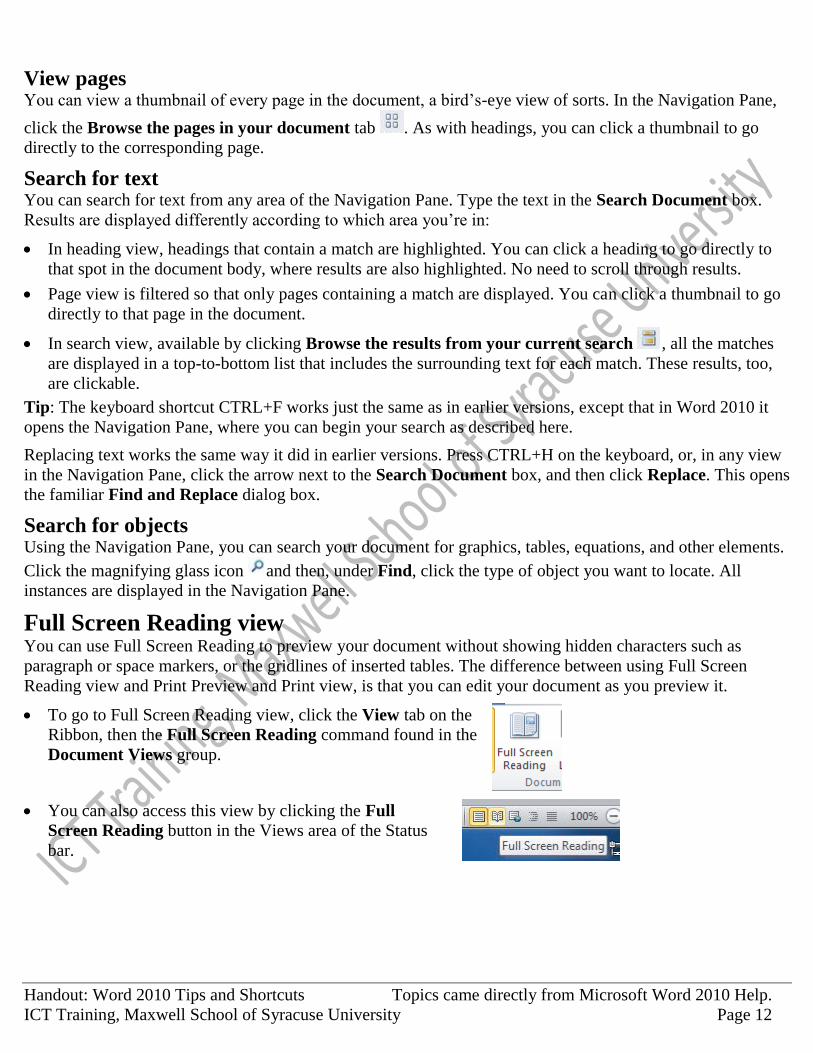
To go to Full Screen Reading view, click the View tab on the
Ribbon, then the Full Screen Reading command found in the
Document Views group.
You can also access this view by clicking the Full
Screen Reading button in the Views area of the Status
bar.
Handout: Word 2010 Tips and Shortcuts Topics came directly from Microsoft Word 2010 Help.
ICT Training, Maxwell School of Syracuse University Page 13
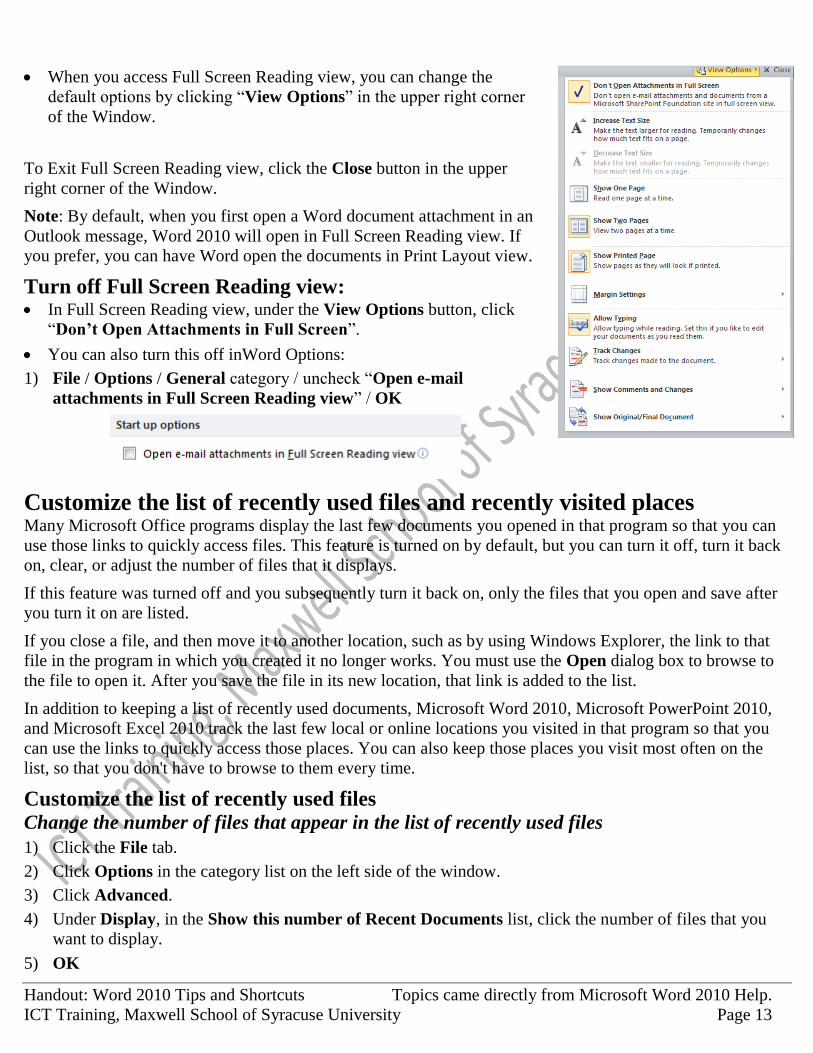
When you access Full Screen Reading view, you can change the
default options by clicking “View Options” in the upper right corner
of the Window.
To Exit Full Screen Reading view, click the Close button in the upper
right corner of the Window.
Note: By default, when you first open a Word document attachment in an
Outlook message, Word 2010 will open in Full Screen Reading view. If
you prefer, you can have Word open the documents in Print Layout view.
Turn off Full Screen Reading view: In Full Screen Reading view, under the View Options button, click
“Don’t Open Attachments in Full Screen”.
You can also turn this off inWord Options:
1) File / Options / General category / uncheck “Open e-mail
attachments in Full Screen Reading view” / OK
Customize the list of recently used files and recently visited places Many Microsoft Office programs display the last few documents you opened in that program so that you can
use those links to quickly access files. This feature is turned on by default, but you can turn it off, turn it back
on, clear, or adjust the number of files that it displays.
If this feature was turned off and you subsequently turn it back on, only the files that you open and save after
you turn it on are listed.
If you close a file, and then move it to another location, such as by using Windows Explorer, the link to that
file in the program in which you created it no longer works. You must use the Open dialog box to browse to
the file to open it. After you save the file in its new location, that link is added to the list.
In addition to keeping a list of recently used documents, Microsoft Word 2010, Microsoft PowerPoint 2010,
and Microsoft Excel 2010 track the last few local or online locations you visited in that program so that you
can use the links to quickly access those places. You can also keep those places you visit most often on the
list, so that you don't have to browse to them every time.
Customize the list of recently used files Change the number of files that appear in the list of recently used files
1) Click the File tab.
2) Click Options in the category list on the left side of the window.
3) Click Advanced.
4) Under Display, in the Show this number of Recent Documents list, click the number of files that you
want to display.
5) OK
Handout: Word 2010 Tips and Shortcuts Topics came directly from Microsoft Word 2010 Help.
ICT Training, Maxwell School of Syracuse University Page 14
Keep a file on the recently used files list
1) Click the File tab.
2) Click Recent to see a list of the recently used files.
3) Right click the file you want to keep, and then select Pin to list, or click the pin icon: .
a) When a file is pinned to the list, the pin icon looks like a push pin viewed from the top: .
4) Click the pin button again to unpin the file.
Add a quick access list to the Backstage file navigation bar
1) Click the File tab.
2) Click Recent.
3) At the bottom of the Window, select the check box to Quickly access this number of recent documents:
and choose how many files you want to see.
4) Links to those files will appear above Info in the navigation bar, regardless of where you are in the
Backstage View.
Note: Clearing the check box removes the list.
Clear the list of recently used files
1) Click the File tab.
2) Click Recent.
3) Under Recent Documents, right click a file in the list and select Clear unpinned items.
4) Click Yes to clear the list.
Note: Setting the number of recent files to zero also clears the list. To turn the feature back on, set the number
to something other than zero. Update the list by opening the files again and resetting the pins.
Handout: Word 2010 Tips and Shortcuts Topics came directly from Microsoft Word 2010 Help.
ICT Training, Maxwell School of Syracuse University Page 15
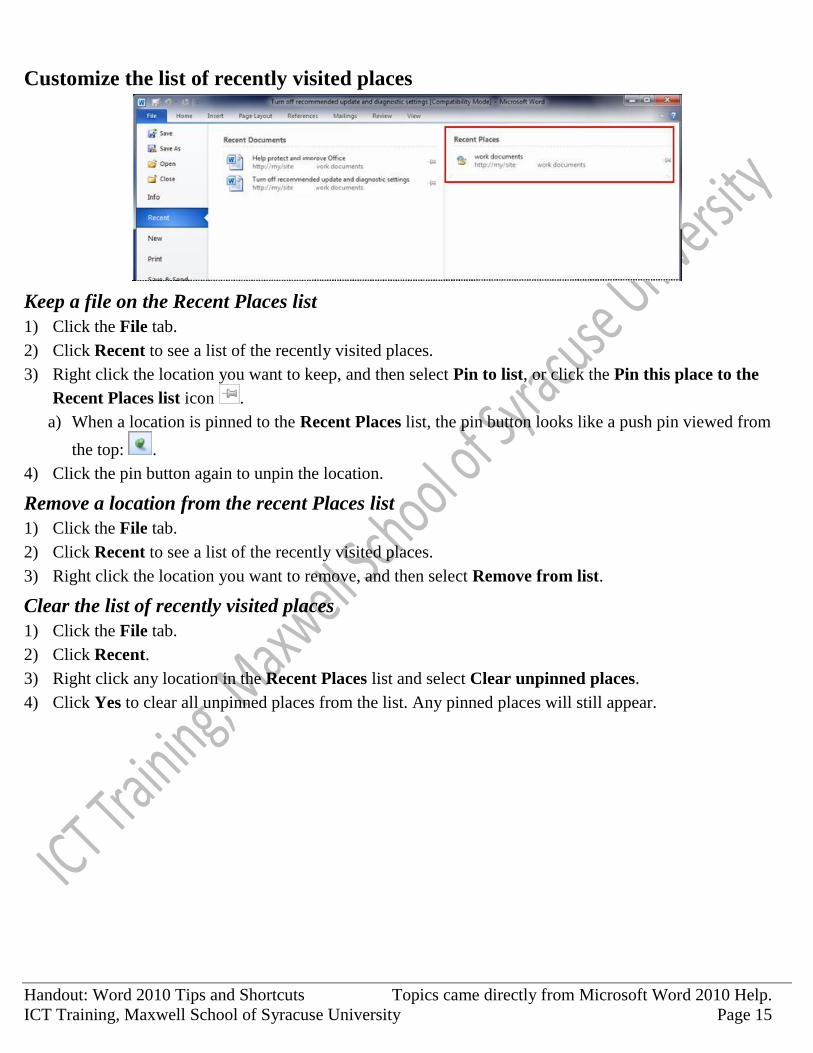
Customize the list of recently visited places
Keep a file on the Recent Places list
1) Click the File tab.
2) Click Recent to see a list of the recently visited places.
3) Right click the location you want to keep, and then select Pin to list, or click the Pin this place to the
Recent Places list icon .
a) When a location is pinned to the Recent Places list, the pin button looks like a push pin viewed from
the top: .
4) Click the pin button again to unpin the location.
Remove a location from the recent Places list
1) Click the File tab.
2) Click Recent to see a list of the recently visited places.
3) Right click the location you want to remove, and then select Remove from list.
Clear the list of recently visited places
1) Click the File tab.
2) Click Recent.
3) Right click any location in the Recent Places list and select Clear unpinned places.
4) Click Yes to clear all unpinned places from the list. Any pinned places will still appear.


![221 Microsoft Word Shortcuts[1]](https://static.fdocuments.net/doc/165x107/577d39be1a28ab3a6b9a7241/221-microsoft-word-shortcuts1.jpg)