Windows Server 2008 IIS Installation - Advantage...
12
Windows Server 2008 IIS Installation Guide v1.0 Advantage for Windows Copyright © 2009 by The Advantage Software Company, Inc. All rights reserved
Transcript of Windows Server 2008 IIS Installation - Advantage...
Windows Server 2008 IIS Installation Guide v1.0
Advantage for Windows Copyright © 2009 by The Advantage Software Company, Inc. All rights reserved
Windows Server 2008 IIS Installation 2
Overview
This document will walk you through the process of installing IIS on Windows 2008.
Requirements
Webvantage v3.x+
32-bit Windows Server 2008
Windows 2008 - IIS Role Installation Note: Advantage will attempt to automatically create and destroy the PDF printer Advantage
requires to create a PDF. If Advantage is unable to create the PDF automatically manual installation of the PDF printer is required.
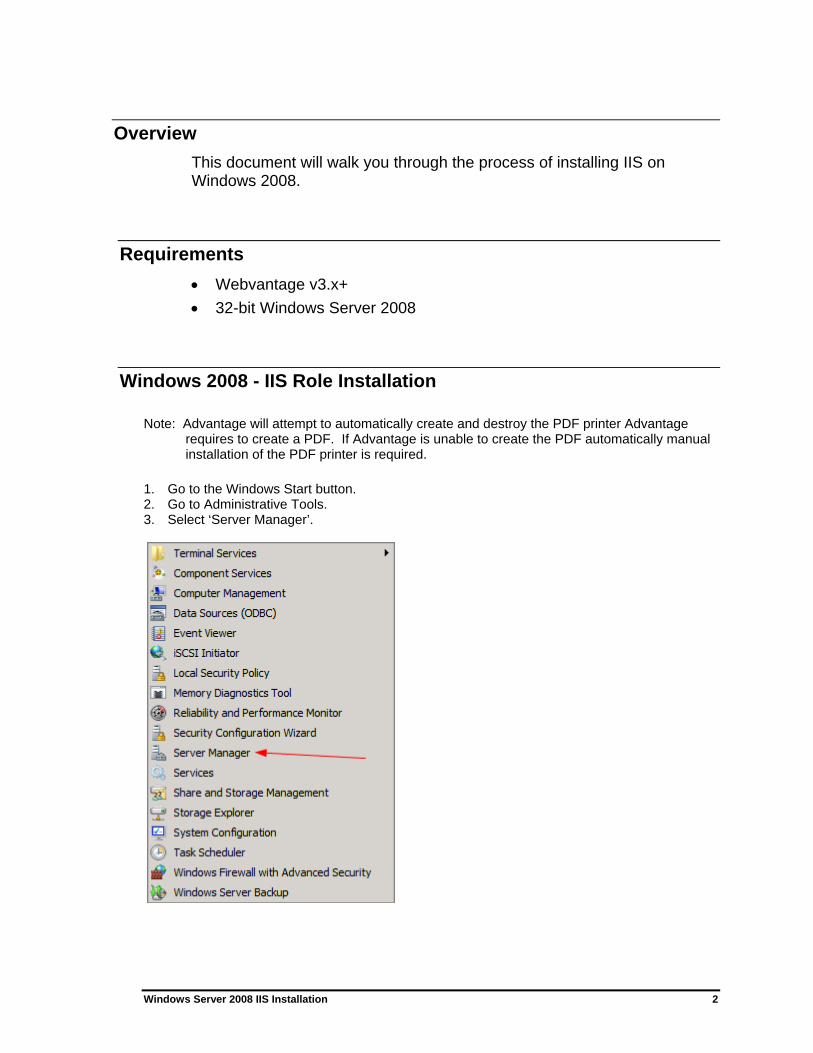
1. Go to the Windows Start button. 2. Go to Administrative Tools. 3. Select ‘Server Manager’.
Windows Server 2008 IIS Installation 3
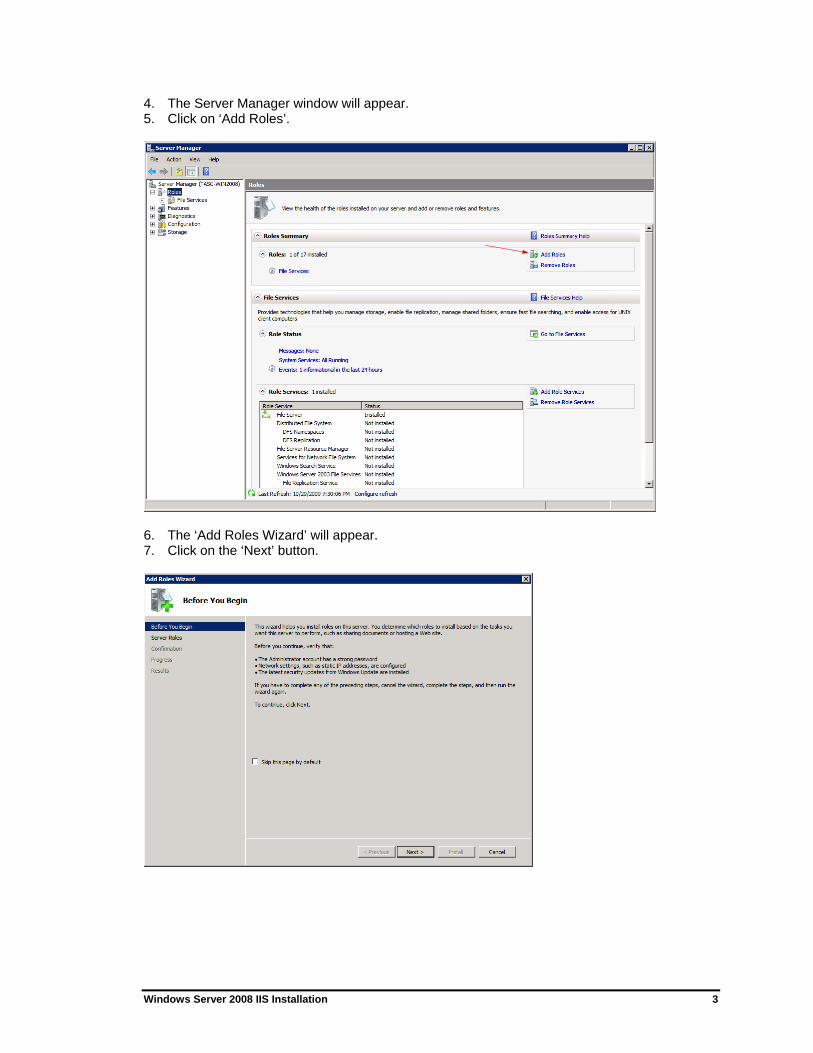
4. The Server Manager window will appear. 5. Click on ‘Add Roles’.
6. The ‘Add Roles Wizard’ will appear. 7. Click on the ‘Next’ button.
Windows Server 2008 IIS Installation 4
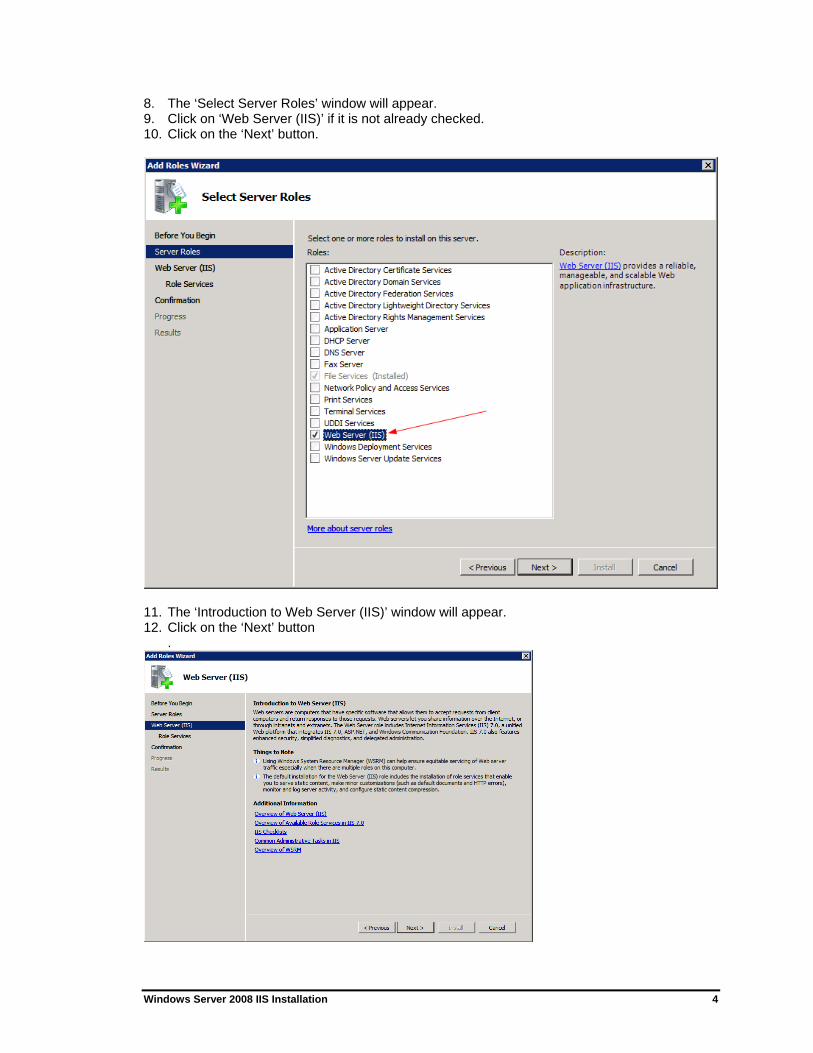
8. The ‘Select Server Roles’ window will appear. 9. Click on ‘Web Server (IIS)’ if it is not already checked. 10. Click on the ‘Next’ button.
11. The ‘Introduction to Web Server (IIS)’ window will appear. 12. Click on the ‘Next’ button
.
Windows Server 2008 IIS Installation 5
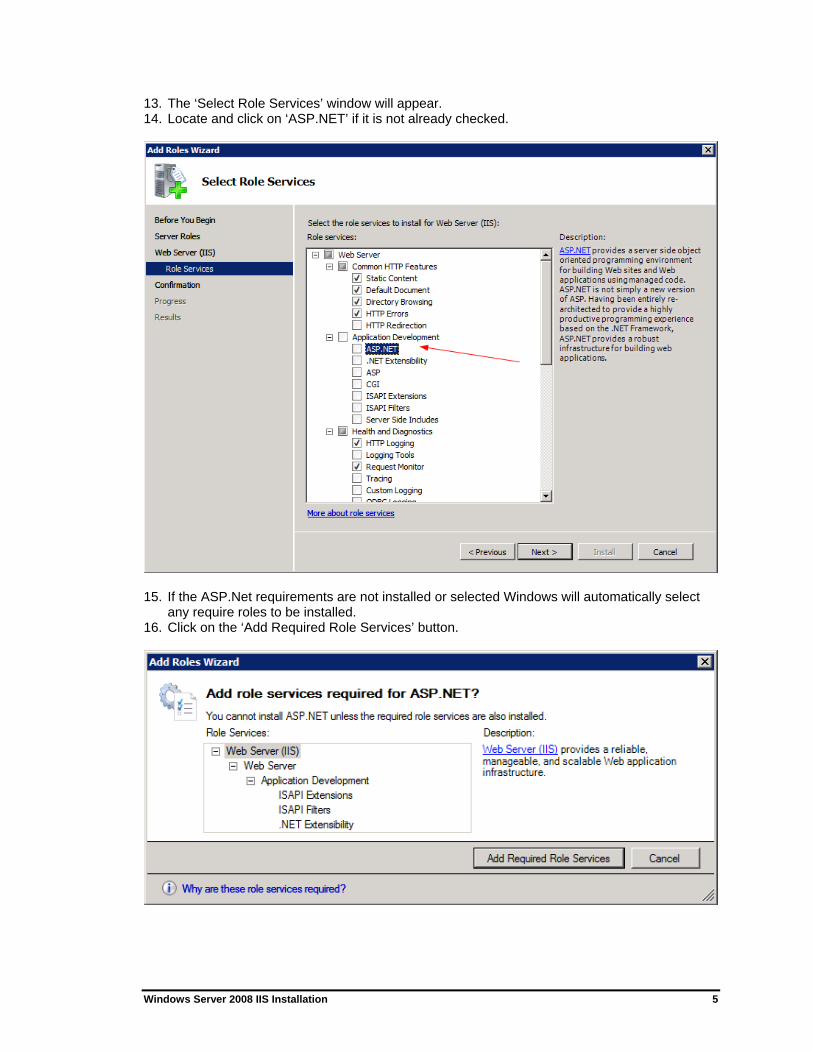
13. The ‘Select Role Services’ window will appear. 14. Locate and click on ‘ASP.NET’ if it is not already checked.
15. If the ASP.Net requirements are not installed or selected Windows will automatically select any require roles to be installed.
16. Click on the ‘Add Required Role Services’ button.
Windows Server 2008 IIS Installation 6
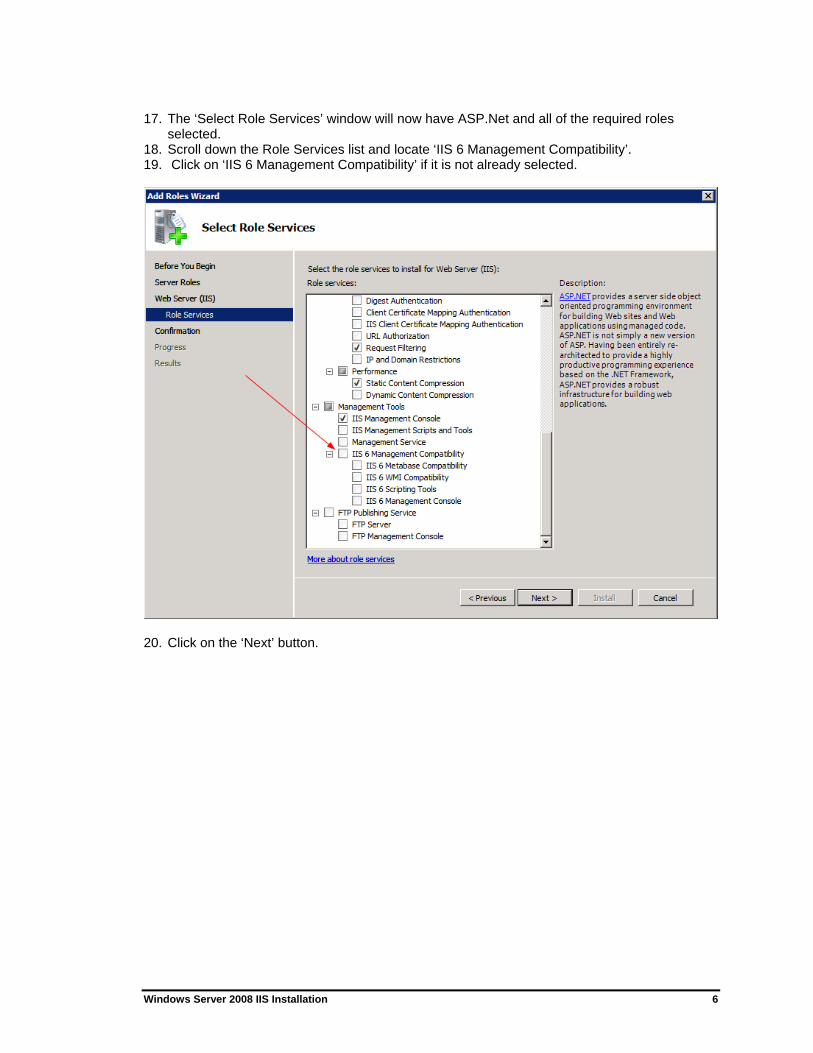
17. The ‘Select Role Services’ window will now have ASP.Net and all of the required roles
selected. 18. Scroll down the Role Services list and locate ‘IIS 6 Management Compatibility’. 19. Click on ‘IIS 6 Management Compatibility’ if it is not already selected.
20. Click on the ‘Next’ button.
Windows Server 2008 IIS Installation 7
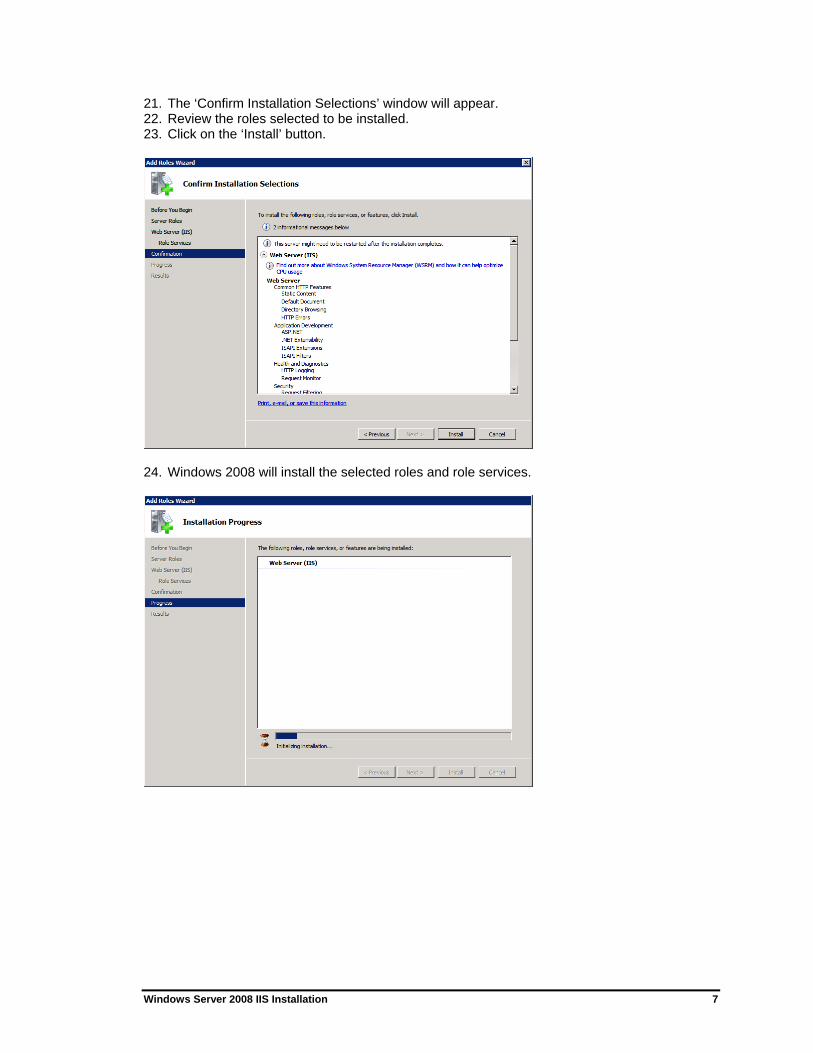
21. The ‘Confirm Installation Selections’ window will appear. 22. Review the roles selected to be installed. 23. Click on the ‘Install’ button.
24. Windows 2008 will install the selected roles and role services.
Windows Server 2008 IIS Installation 8
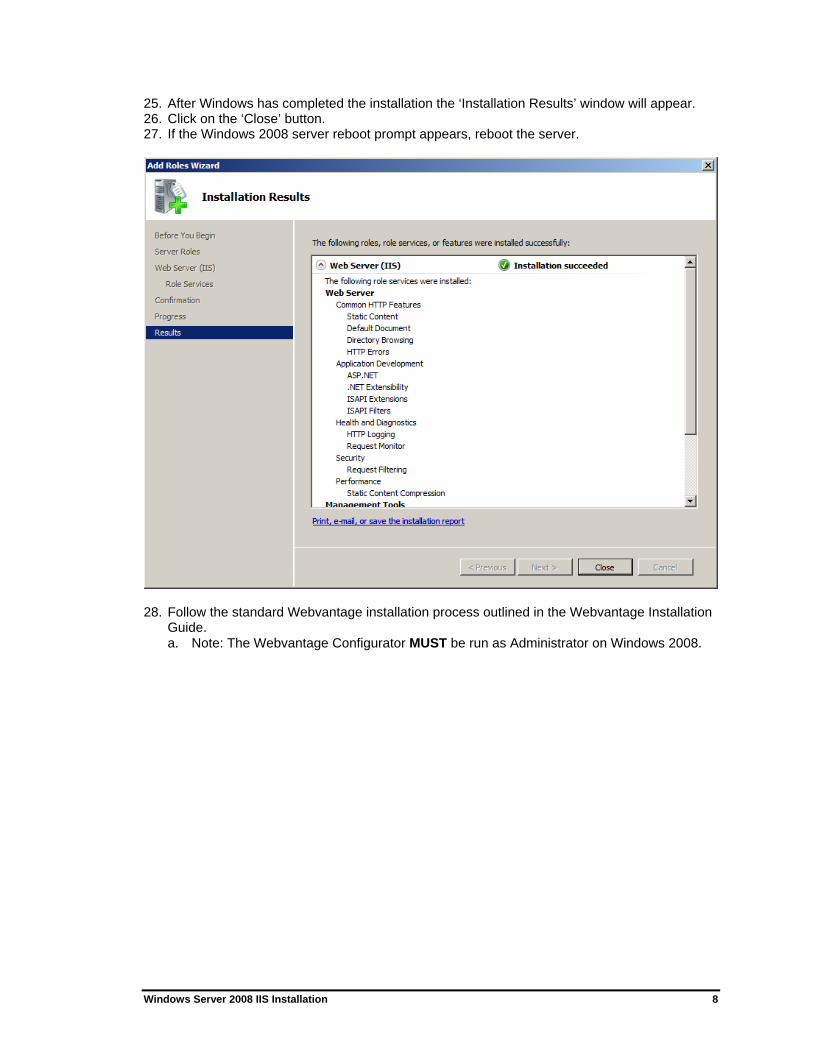
25. After Windows has completed the installation the ‘Installation Results’ window will appear. 26. Click on the ‘Close’ button. 27. If the Windows 2008 server reboot prompt appears, reboot the server.
28. Follow the standard Webvantage installation process outlined in the Webvantage Installation Guide. a. Note: The Webvantage Configurator MUST be run as Administrator on Windows 2008.
Windows Server 2008 IIS Installation 9
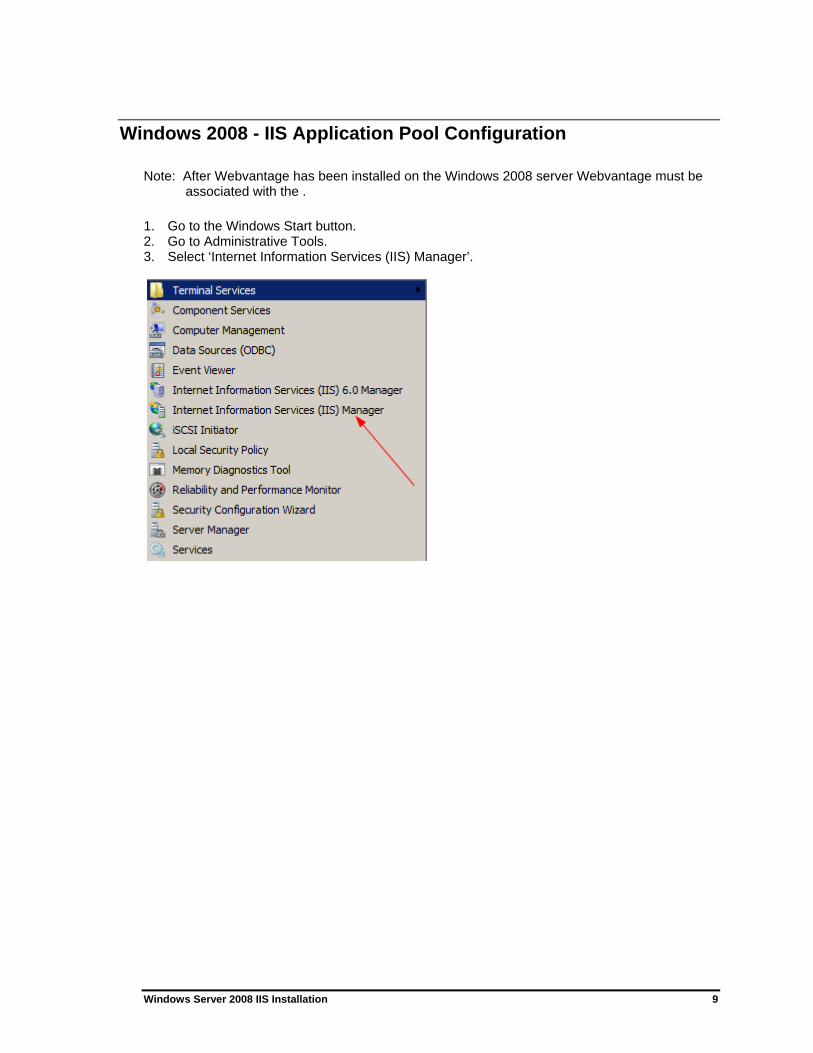
Windows 2008 - IIS Application Pool Configuration Note: After Webvantage has been installed on the Windows 2008 server Webvantage must be
associated with the .
1. Go to the Windows Start button. 2. Go to Administrative Tools. 3. Select ‘Internet Information Services (IIS) Manager’.
Windows Server 2008 IIS Installation 10
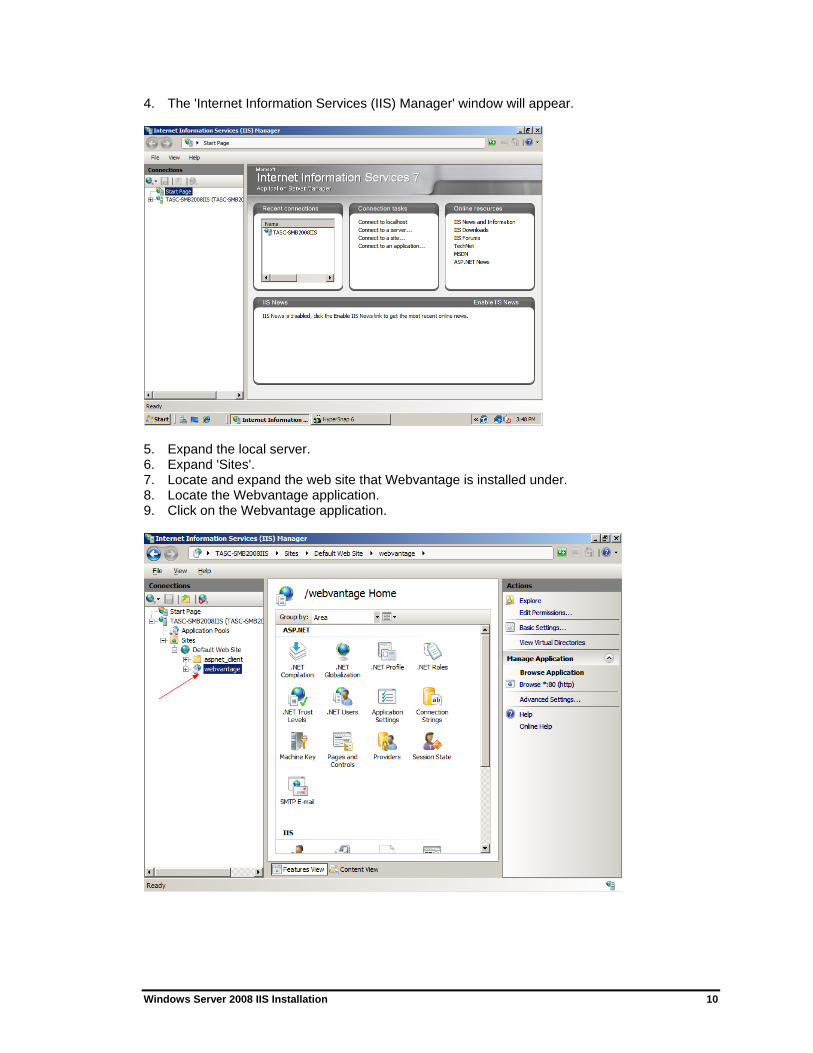
4. The 'Internet Information Services (IIS) Manager' window will appear.
5. Expand the local server. 6. Expand 'Sites'. 7. Locate and expand the web site that Webvantage is installed under. 8. Locate the Webvantage application. 9. Click on the Webvantage application.
Windows Server 2008 IIS Installation 11
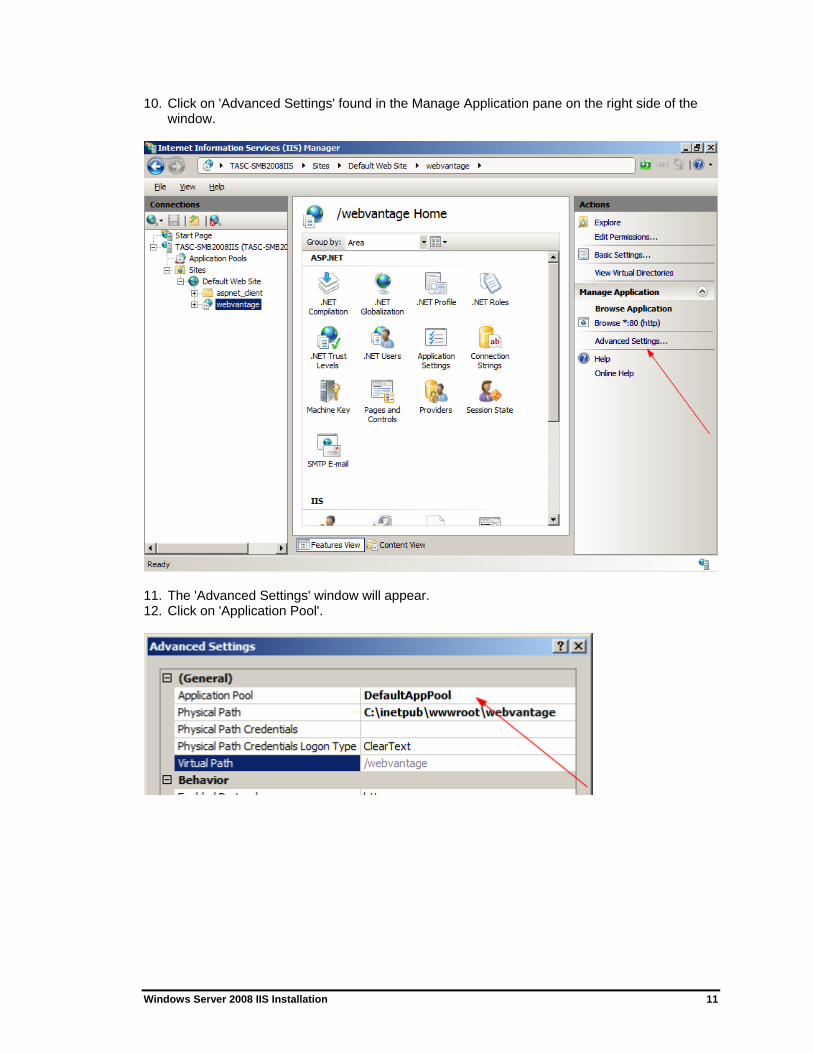
10. Click on 'Advanced Settings' found in the Manage Application pane on the right side of the window.
11. The 'Advanced Settings' window will appear. 12. Click on 'Application Pool'.
Windows Server 2008 IIS Installation 12
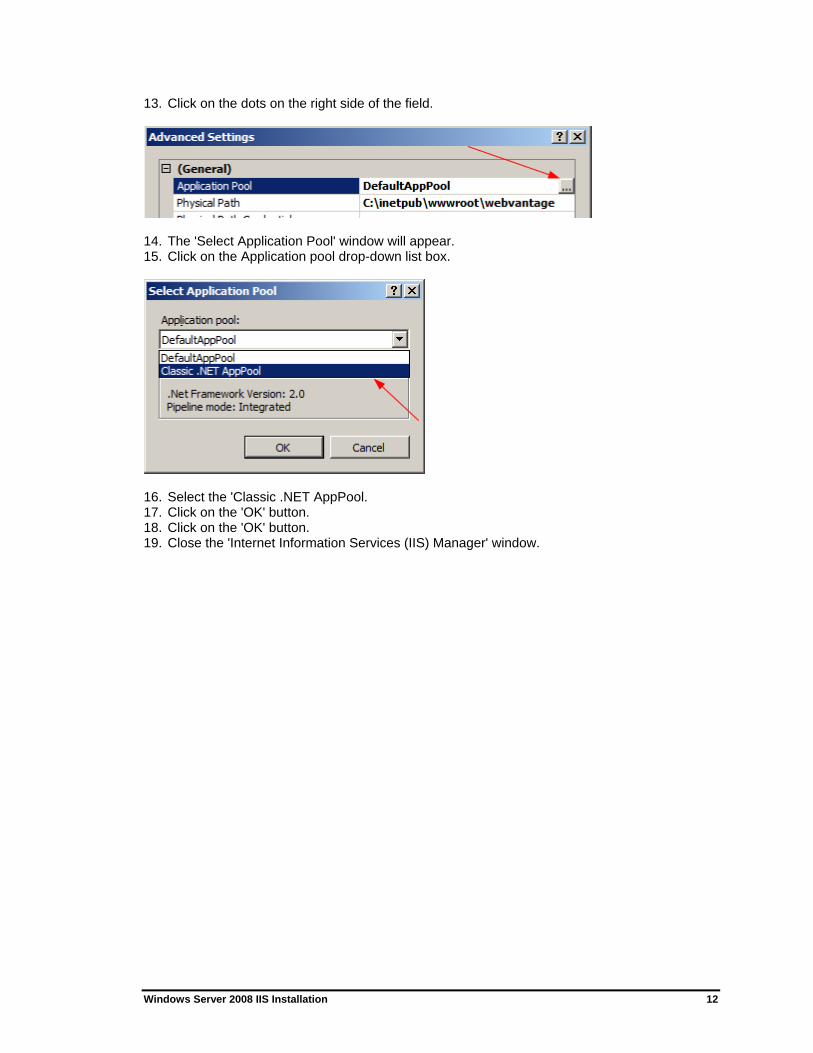
13. Click on the dots on the right side of the field.
14. The 'Select Application Pool' window will appear. 15. Click on the Application pool drop-down list box.
16. Select the 'Classic .NET AppPool. 17. Click on the 'OK' button. 18. Click on the 'OK' button. 19. Close the 'Internet Information Services (IIS) Manager' window.