Windows Movie Maker help sheet - The Coyle · PDF fileWindows Movie Maker help sheet 2 4....
3
Windows Movie Maker help sheet 1 1. After Movie Maker is started, select “File” and “Save Project As…” 2. Select the folder where all your files are 3. Import all of your video clips, pictures, clip art, and music from the folder where all of your documents are. a. Click “File” and “Import into Collections…,” choose your files and click “Import.” b. Be sure you’ve selected “Collections” from the drop-down menu.
Transcript of Windows Movie Maker help sheet - The Coyle · PDF fileWindows Movie Maker help sheet 2 4....
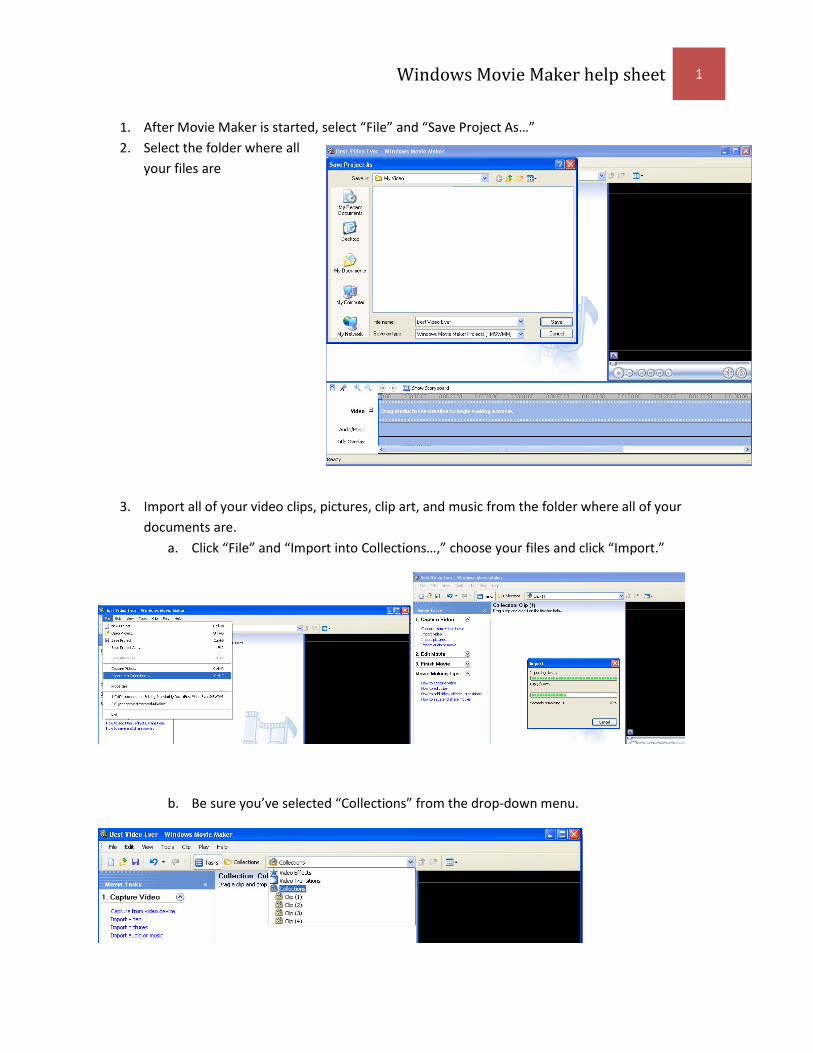
Windows Movie Maker help sheet 1
1. After Movie Maker is started, select “File” and “Save Project As…”
2. Select the folder where all
your files are
3. Import all of your video clips, pictures, clip art, and music from the folder where all of your
documents are.
a. Click “File” and “Import into Collections…,” choose your files and click “Import.”
b. Be sure you’ve selected “Collections” from the drop-down menu.
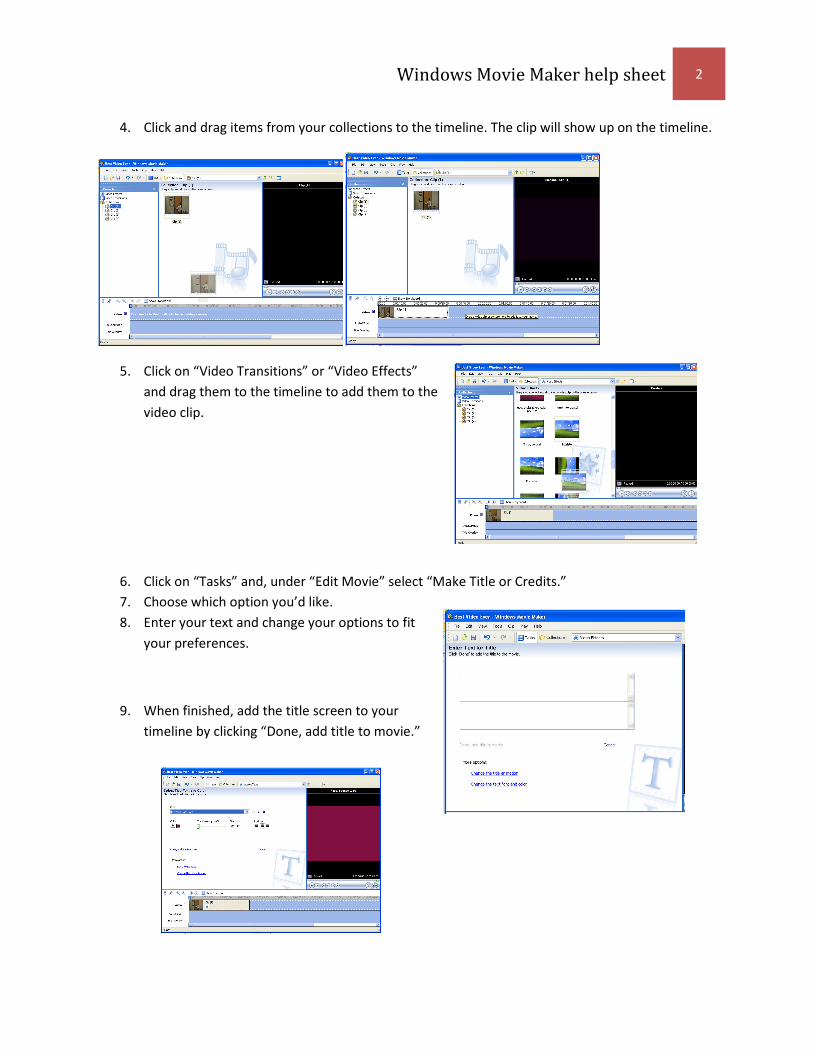
Windows Movie Maker help sheet 2
4. Click and drag items from your collections to the timeline. The clip will show up on the timeline.
5. Click on “Video Transitions” or “Video Effects”
and drag them to the timeline to add them to the
video clip.
6. Click on “Tasks” and, under “Edit Movie” select “Make Title or Credits.”
7. Choose which option you’d like.
8. Enter your text and change your options to fit
your preferences.
9. When finished, add the title screen to your
timeline by clicking “Done, add title to movie.”
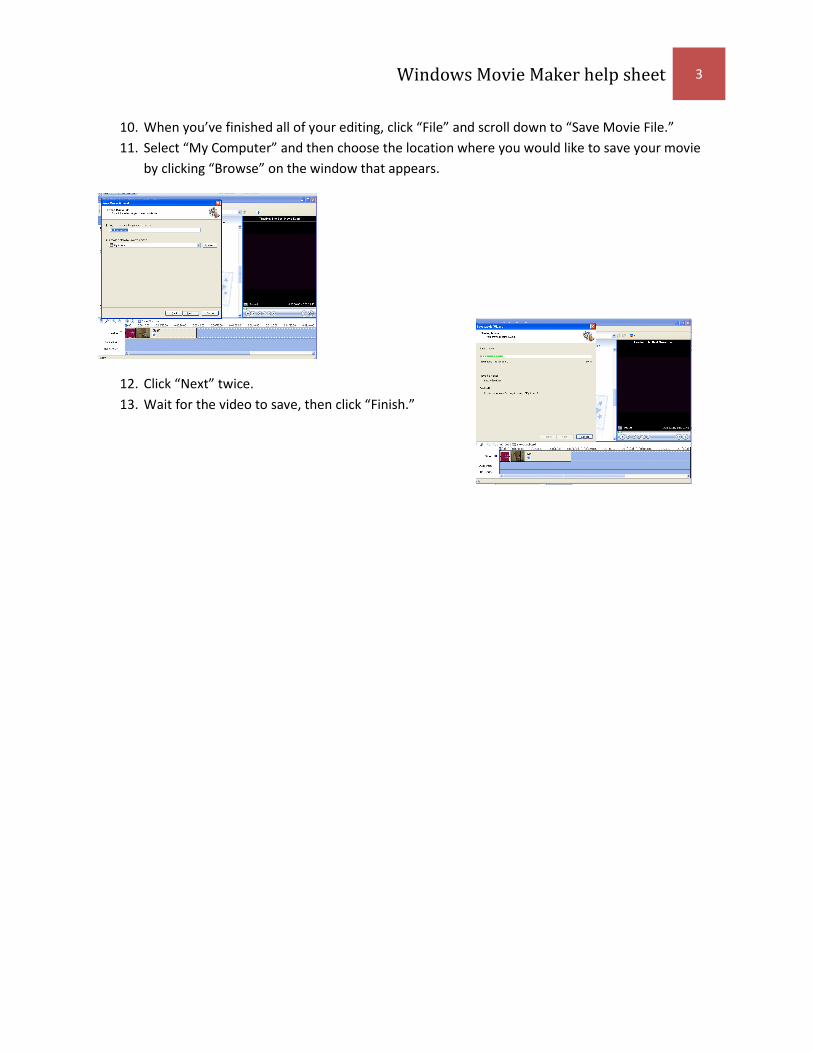
Windows Movie Maker help sheet 3
10. When you’ve finished all of your editing, click “File” and scroll down to “Save Movie File.”
11. Select “My Computer” and then choose the location where you would like to save your movie
by clicking “Browse” on the window that appears.
12. Click “Next” twice.
13. Wait for the video to save, then click “Finish.”