DSL Broadband Modem Configuration _ Dlink 2730U_2750U With WiFi Setup
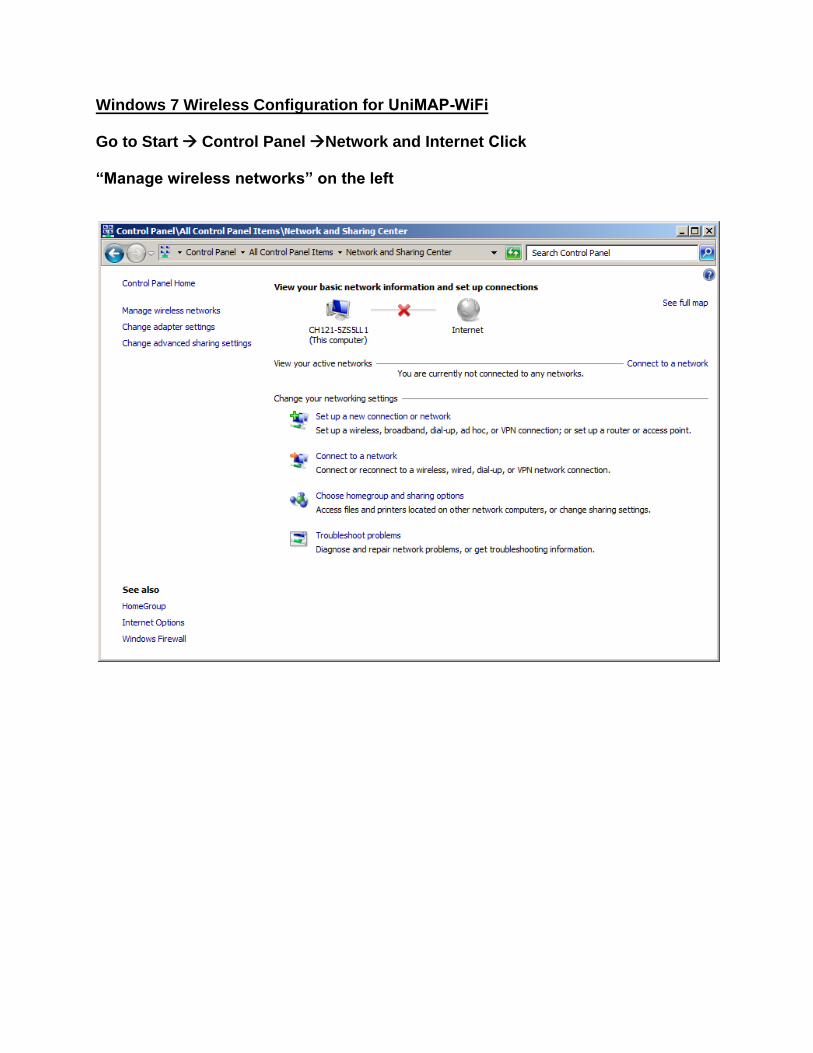
Windows 7 Wireless Configuration for UniMAP-WiFi
Go to Start Control Panel Network and Internet Click
“Manage wireless networks” on the left

Please make sure UniMAP-WiFi is not in the list below. If available, please remove UniMAP-WiFi before proceed to the next step.
Cllick "Yes"

Click “Manually create a network profile”
Click "Add"

Enter the information exactly as pictured below
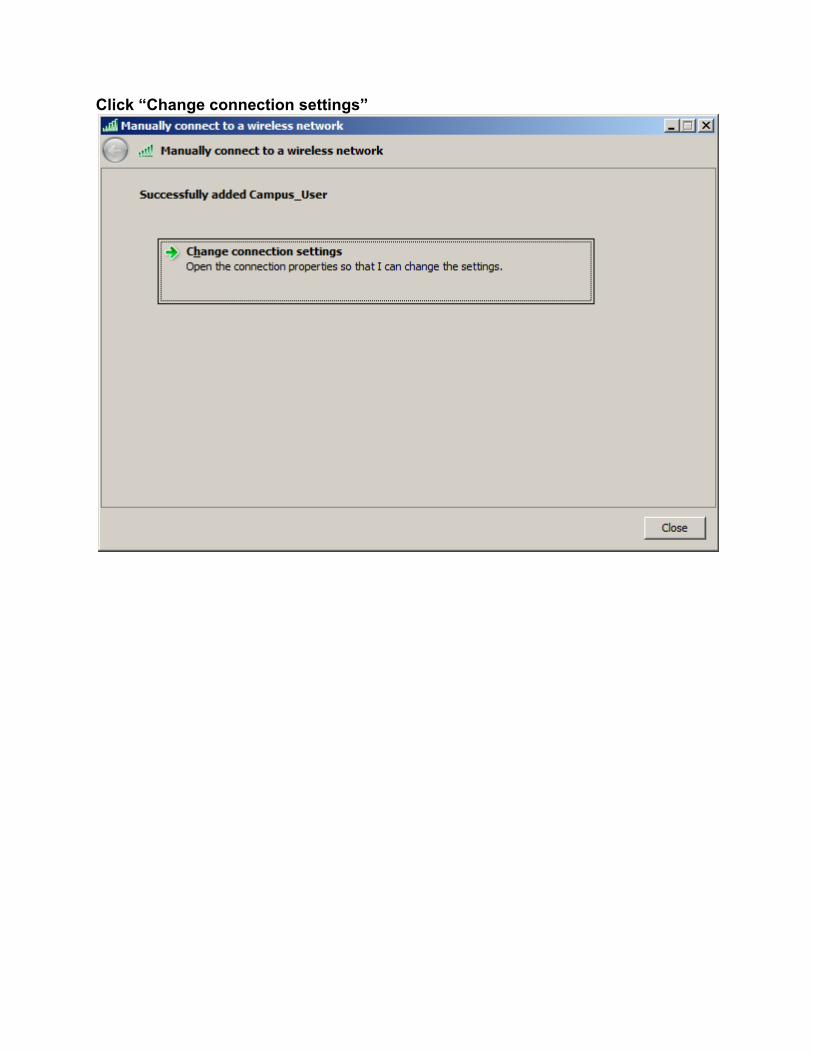
Click “Change connection settings”

Click the Security tab
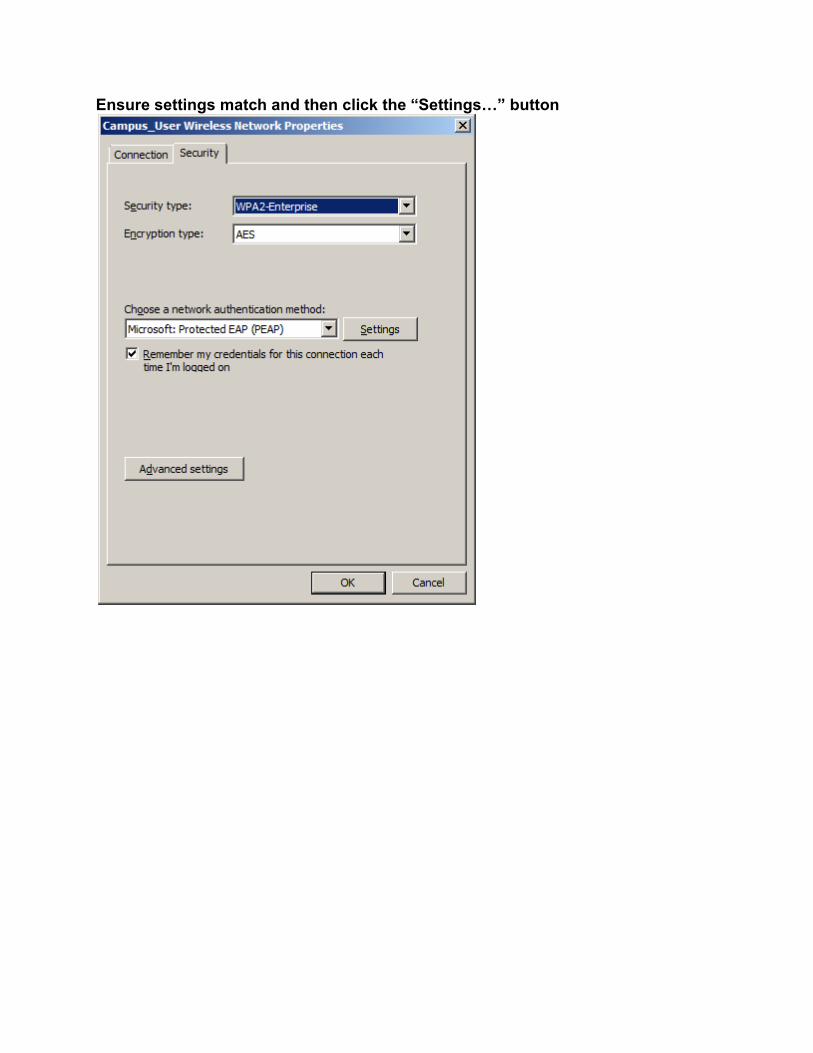
Ensure settings match and then click the “Settings…” button
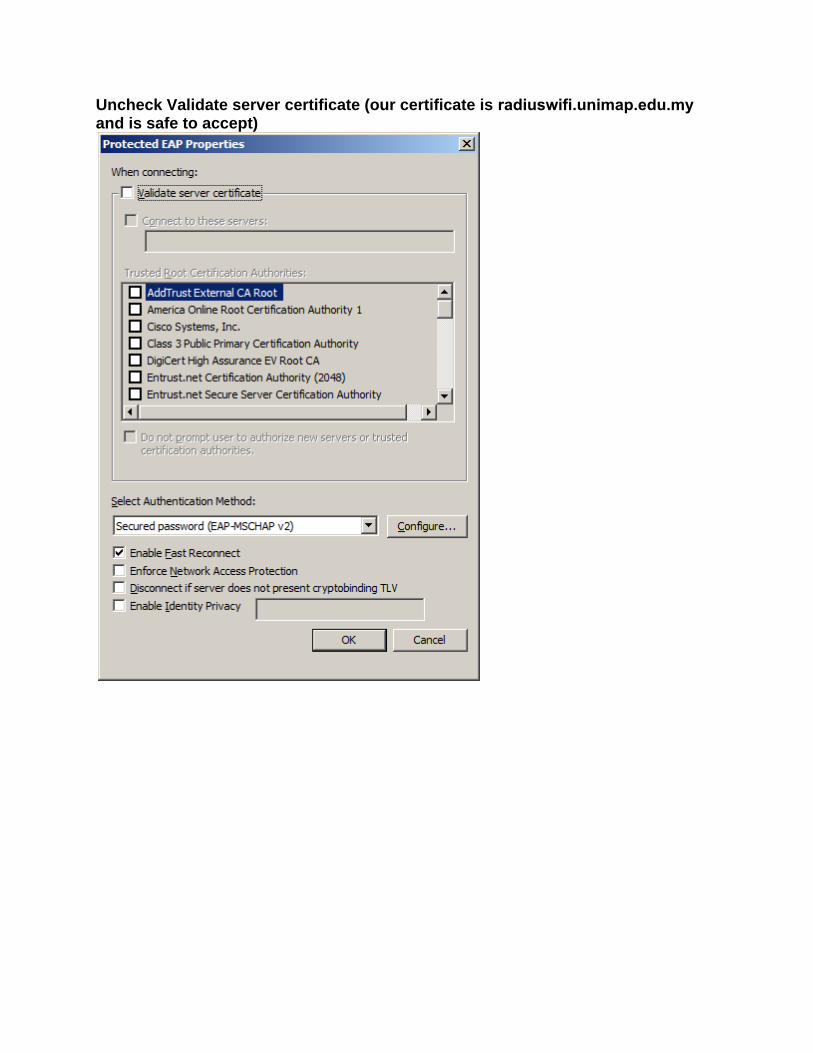
Uncheck Validate server certificate (our certificate is radiuswifi.unimap.edu.my and is safe to accept)

Click "Configure" button
Uncheck “Automatically use my Windows logon name and password”
Click OK
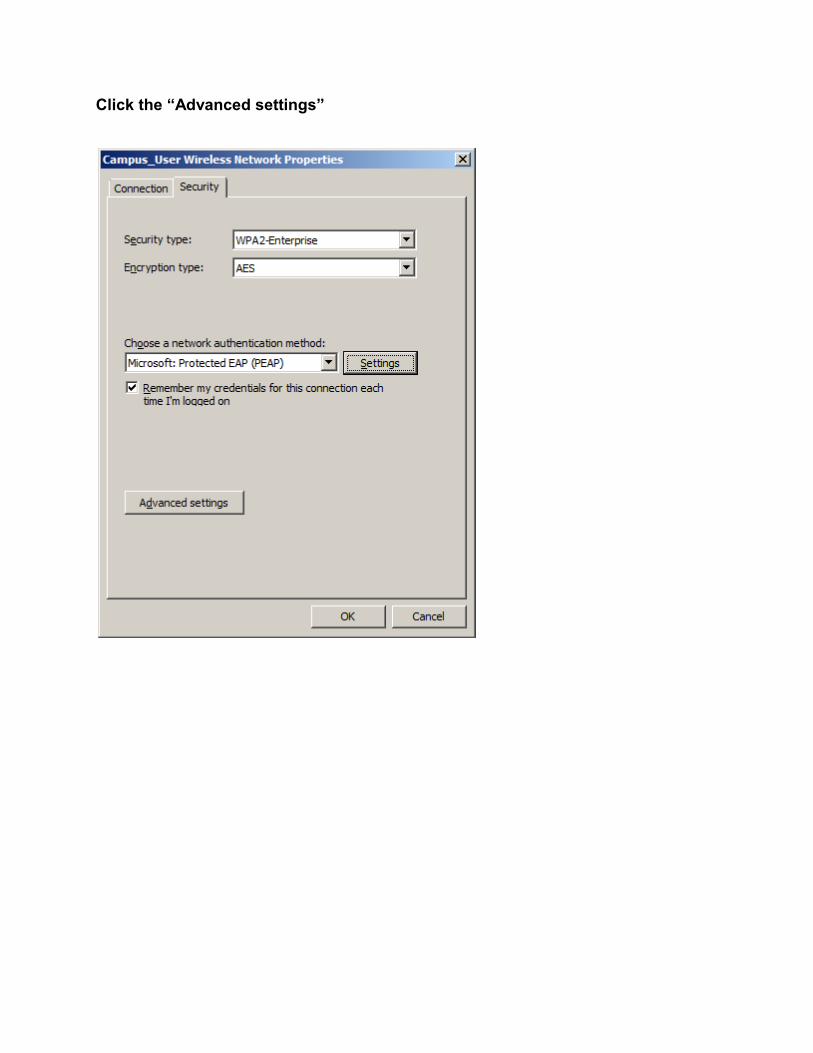
Click the “Advanced settings”

Check “Specify authentication mode:” and select “User Authentication
Click OK OK Close

View available wireless networks and connect to UniMAP-WiFi
Enter you username and your password using your UniMAP Portal account
Note: Please make sure your portal account is active and usable