WiLife Pro-Line Training Documentfinediningpos.com/POS SYSTEM...
14
WiLife Pro Training Document Version 1.3 April 25, 2007
Transcript of WiLife Pro-Line Training Documentfinediningpos.com/POS SYSTEM...

WiLife Pro Training Document
Version 1.3April 25, 2007

Introduction
The WiLife Pro Video Security System is the world's first fully-integrated, turnkey, professional digital video security system. WiLife Pro seamlessly integrates WiLife-engineered components that include High-performance WiLife IP Cameras, feature-rich Windows-based Command Center software, and robust Internet remote access. Using powered Ethernet and plug-and-play camera discovery, it also offers the world's easiest set-up and most intuitive interface.
Innovative user features include motion-based recording onto the computer's hard-drive with quick and easy search and playback. WiLife Pro also offers free anywhere, anytime remote access to your cameras from Windows PCs and cell phones as well as providing motion-based instant email and cell phone alerts.
How does WiLife Pro compare to the retail WiLife System?The WiLife Pro Video Security System has all of the user advantages of the WiLife retail system including free remote viewing, motion alerts and easy search and playback. It is also a system that has fully integrated cameras, PC software and remote viewing.
WiLife Pro is designed specifically for commercial applications and uses digital IP network communications, using existing or new CAT5 Ethernet cabling. Additionally, the system uses Powered Ethernet, which delivers the power for the cameras on the same line, from the WiLife Power Injector.
Benefits of WiLife Pro include use in very large buildings and spaces, transmitting higher quality video images, and the ability to use Uninterruptible Power Supply (UPS) protection for the system.
Unlike the retail version of WiLife, WiLife Pro requires network know-how for installation and is only available for sale from WiLife authorized resellers.

DefinitionsEthernet: The standard local area network (LAN) access method. A specification for "LAN," "LAN connection" or "network card" automatically implies Ethernet without saying so. Ethernet connects devices to a company or home network as well as to a cable modem or DSL modem for Internet access. Ethernet is defined by the IEEE as the 802.3 standard.
PoE: (Power Over Ethernet) Transmitting DC power to the target device at the end of an Ethernet cable by carrying power in the unused 4/5 and 7/8 wires. It enables access points and other remote devices to be installed where there is no AC power outlet.
LAN: Local Area Network. A system that links together electronic office equipment, such as computers and word processors, and forms a network within an office or building.
Router: Most routers in the world sit in homes and small offices and do nothing more than direct traffic from the network to the Internet. Sitting at the edge of the network, they may also contain a built-in firewall for security, and the firewall serves all users in the network without requiring a personal firewall in each computer. Routers assign IP addresses to devices connected on the network.
Switch (LAN Switch): A network device that cross-connects clients, servers and network devices. Also known as a "frame switch," stand-alone LAN switches are common in all Ethernet networks. A four-port switch is also typically built into a wired or wireless router for homes and small business. Switches do not assign IP addresses to devices connected on the network.
IP Address (Internet Protocol Address): Every device that is on a network (a local network, or the network of the Internet) has a unique IP number [four sets of numbers divided by period with up to three numbers in each set. (Ie 64.139.27.165)] - If a device does not have an IP address it cannot be on a network.
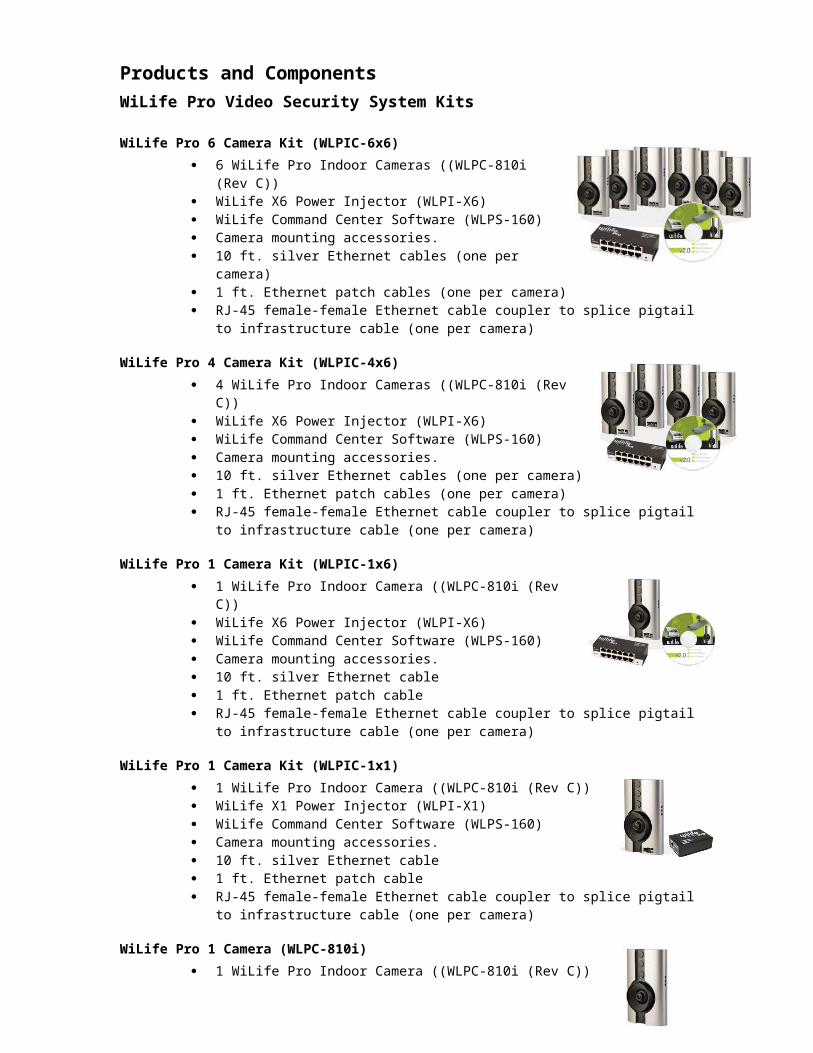
Products and ComponentsWiLife Pro Video Security System Kits
WiLife Pro 6 Camera Kit (WLPIC-6x6) 6 WiLife Pro Indoor Cameras ((WLPC-810i (Rev C)) WiLife X6 Power Injector (WLPI-X6) WiLife Command Center Software (WLPS-160) Camera mounting accessories. 10 ft. silver Ethernet cables (one per camera) 1 ft. Ethernet patch cables (one per camera) RJ-45 female-female Ethernet cable coupler to splice
pigtail to infrastructure cable (one per camera)
WiLife Pro 4 Camera Kit (WLPIC-4x6) 4 WiLife Pro Indoor Cameras ((WLPC-810i (Rev C)) WiLife X6 Power Injector (WLPI-X6) WiLife Command Center Software (WLPS-160) Camera mounting accessories. 10 ft. silver Ethernet cables (one per camera) 1 ft. Ethernet patch cables (one per camera) RJ-45 female-female Ethernet cable coupler to splice pigtail to
infrastructure cable (one per camera)
WiLife Pro 1 Camera Kit (WLPIC-1x6) 1 WiLife Pro Indoor Camera ((WLPC-810i (Rev C)) WiLife X6 Power Injector (WLPI-X6) WiLife Command Center Software (WLPS-160) Camera mounting accessories. 10 ft. silver Ethernet cable 1 ft. Ethernet patch cable RJ-45 female-female Ethernet cable coupler to splice pigtail
to infrastructure cable (one per camera)
WiLife Pro 1 Camera Kit (WLPIC-1x1) 1 WiLife Pro Indoor Camera ((WLPC-810i (Rev C)) WiLife X1 Power Injector (WLPI-X1) WiLife Command Center Software (WLPS-160) Camera mounting accessories. 10 ft. silver Ethernet cable 1 ft. Ethernet patch cable RJ-45 female-female Ethernet cable coupler to splice pigtail to infrastructure
cable (one per camera)
WiLife Pro 1 Camera (WLPC-810i) 1 WiLife Pro Indoor Camera ((WLPC-810i (Rev C)) Camera mounting accessories. 10 ft. silver Ethernet cable 1 ft. Ethernet patch cable RJ-45 female-female Ethernet cable coupler to splice pigtail to
infrastructure cable (one per camera)
WiLife HomePlug Bridge (WLPB-100) 1 WiLife HomePlug Bridge (WLPB-100) 3 ft. Ethernet patch cable Configuration Software

WiLife Pro Video Security System Components
WiLife Pro Indoor CameraWiLife Pro Indoor Camera (WLPC-810i (Rev C)) can be used with any WiLife Pro video security system. Connect up to six cameras per PC using Ethernet cables and 6-port WiLife Pro Power Injector (WLPI-X6) or single-port WiLife Pro Power Injector (WLPI-X1). Cameras are automatically discovered by the WiLife Command Center software (WLPS-160), without complex configuration and setup. Kit includes flexible mounting accessories. May also be used with HomePlug Bridge (WLPB-100).
WiLife Pro X1 Power InjectorWiLife X1 Power Injector (WLPI-X1) powers a single WiLife Pro camera (WLPC-810i (Rev C)) at distances up to 300 feet using the WiLife Power Injector™ technology. The powerful injector makes powering a camera easy, eliminating the need for finding local power, and allowing for central power backup.
WiLife Pro X6 Power InjectorWiLife X6 Power Injector (WLPI-X6) with six camera ports can power up to six WiLife Pro cameras (WLPC-810i (Rev C)) at distances up to 300 feet using WiLife Power Injector™ technology. The powerful injector makes powering a camera easy, eliminating the need for finding local power, and allowing for central power backup.
WiLife HomePlug BridgeWiLife HomePlug Bridge (WLPB-100) connects a building’s powerline network to the customer’s LAN. The module is plugged into a standard AC outlet near the user’s switch/router then connected to an open port on the LAN. Instantly, the two networks become one and the WiLife Video Security System will be able to communicate with Standard and Pro cameras.
WiLife Command Center SoftwareWiLife Command Center Software (WLPS-160) is the heart of the WiLife Video Security System. It provides simultaneous viewing of up to six cameras at a time with sixteen user-configurable motion zones and motion sensitivity for each camera. Alerts can be sent to email and smart phones. Powerful search tools easily manage recorded video. Secure remote viewing from any Web browser.

Installation and Setup
What you’ll need: Networking experience Windows PC that meets minimum system requirements Ethernet cable tester Cat5e wires. Router with sufficient open ports for your cameras. If you need more ports add a
switch to increase the number of available ports. Uninterruptible Power Supply (UPS) Recommended
Setup Overview:
The installation process is simple. With a basic knowledge of networking just about anyone can setup the WiLife Pro Video Security System. Follow these 5 Easy Steps.
1. Install WiLife Pro Command Center Software
IMPORTANT: WiLife Pro-Line Configurations are only compatible with WiLife Command Center (Werks) 1.6 or later.
2. Make sure the PC is connected to the network.
3. Connect power supply to power injector.
After installing the software and restarting the computer, the First Run Wizard will help configure the system the first time you run the software.

IMPORTANT: In the section titled “Tell Us About Your System”, be sure to change the Connection Method to Non-Powerline LAN as shown below. If using a powerline bridge (Hybrid Network shown below) select the second option, Other HomePlug Powerline Adapter.
4. Connect Power Injector port(s) for camera(s) to Ethernet router/switch.
Place the single or 6-Port Power Injector near the network switch or router and use a CAT5e to connect a port for each camera from the switch/router to the power injector. Supply power to the power injector using the provided wall wart.
5. Attach cameras via Ethernet cable to Power Injector near the PC. Adjust the focus of each camera, as needed. Then position cameras
The following graphics demonstrate three possible configurations:
The WiLife Power Injector has sufficient ports for six indoor cameras. The following scenario uses only Pro-Line Cameras.
Ethernet Only

If a customer already has Standard WiLife Cameras the following configuration shows how the power line network can be bridged with the Ethernet network. This allows the Command Center PC to communicate with cameras on the power line through the Ethernet.
Hybrid Network (Ethernet Centric)
In the following scenario the user has mostly Standard WiLife Cameras and only needs one camera to be placed at a large distance from the Command Center PC. Instead of buying a 6-port power injector there is the option of a single port injector.
Hybrid Network (HomePlug Centric)
None of the above configurations use the WiLife USB Adapter. All communication between cameras and the Command Center PC is done over the customer’s personal network.

FAQs
What are the advantages of WiLife Pro over the Standard Powerline System?1) Ethernet networking provides higher bandwidth than powerline. Ethernet allows users to
set their cameras at higher resolutions and higher bit rates, which deliver higher quality images.
2) Powered Ethernet avoids the need to for finding a power outlet near the location of the camera. The power is provided over an Ethernet cable that may be as long as 300 feet. And, because the camera power is delivered from the possible centralized injector, users can add a UPS, allowing the system weather temporary power outages.
What are the best applications for the WiLife Pro Video Security System?WiLife Pro is most suitable for homes or businesses that require a professional-grade video security system. How far away can a camera be placed from the Computer?Cameras can be placed 300 ft from the Router.
How many cameras will Pro-Line support?Currently, the WiLife Command Center Software supports up to six cameras.
Will Standard WiLife Cameras work when plugged into the port injector?All cameras plugged into the port injector need to have a “WiLife Pro” logo.
Can I mix Pro Cameras and Standard Cameras in the same system?There are two methods for mixing Standard and Pro camera systems: 1) Using both USB and network connections or 2) Adding a WiLife Powerline bridge to connect WiLife powerline cameras to your LAN. Using hybrid systems is common as this allows users to mix cameras. For example, they may use Standard Spy and Outdoor cameras, while adding four Pro Indoor cameras for complete property coverage.
How far can the port injector be placed from the switch?The port injector can be placed at any distance from the switch as long as each port being used by a camera is connected back to the switch and the total distance from the camera to the switch is less than 300 ft (100 m).
Which versions of the software are compatible with WiLife Pro?Version 1.6 or later is required for WiLife Pro.
Are Pro cameras compatible with off-the-shelf PoE equipment, such as routers?WiLife Pro cameras cannot be connected directly to PoE routers, but can be connected through a power injector to the PoE router.
Can I connect other PoE networking equipment to my WiLife Power Injector?The WiLife Pro system uses WiLife Powered Ethernet using the WiLife Power Injector. This allows users to use existing standard network routers and switches rather than the more expensive PoE models. The WiLife Powered Ethernet is a different standard and is not interchangeable with PoE equipment.

Troubleshooting
Camera(s) not detected1. Verify the camera is receiving power. The green status LEDs on the side of the camera should blink when the camera has power.2. Verify the camera is connected to a port in the Power Injector that is also connected to the network switch.3. Verify the computer running the Command Center Software is connected to the network.4. In some cases your switch or router may block broadcast communication between the camera and computer. If you are using a managed switch or router disable IGMP Multicast Filtering and enable UPnP.
Camera Status LEDs
On power-up:
All three green LEDs will be on solid for about 3 to 5 seconds, then blink in unison a few times.
The top two green LEDs will toggle (alternately blink) each time a frame is handled, indicating that the camera is capturing and processing video frames.
When the camera is discovered by Werks, the third (bottom) green LED will blink as it transmits data to Werks.
The red power/motion-detection LED will blink when motion is detected, otherwise it will remain on.
The green Ethernet LED next to the bottom connector will be on or blinking. The amber Ethernet LED next to the bottom connector will blink occasionally.
When video is streaming:
All three green LEDs will be blinking. The red power/motion-detection LED will stay solid or blink if motion is detected. The green Ethernet LED will be blinking. The amber Ethernet LED will blink occasionally.
When video is NOT streaming:
The top two green LEDs will blink. The third green LED will stay solid. The red power/motion-detection LED will stay solid or blink, if motion is detected. The green Ethernet LED will stay solid or blink. The amber Ethernet LED will stay solid.
When Camera is seeking DHCP address:
The three LEDs will blink in unison
Cameras that have been updated to version 1.5 and above firmware but have not been assigned a DHCP address will blink all three LEDs in unison. This is a sign that the camera has firmware above the 1.19 version and it is not compatible with Software version 1.4 and below. This is also an indicator that there may be third party security software that is blocking DHCP traffic.