What is a Moov? · What is a Moov? A Moov is a generic word for multimedia content you can make...
30
Transcript of What is a Moov? · What is a Moov? A Moov is a generic word for multimedia content you can make...


What is a Moov? A Moov is a generic word for multimedia content you can make with Moovly. Examples of Moovs are:
Animated videos Banner ads Video presentations Animated infographics Ecards Demo videos Elearning and training videos Fun videos for social sharing Music videos...
as well as any combination of the above. In other words, Moovs are multimedia creations of any size, style or type. Moovs demonstrate, explain, show or entertain. Moovs are what you create with Moovly. Is Moovly available in other languages?
Although certain landing pages may contain introductory content in other languages, Moovly’s applications and support materials are currently only available in English . More information:
The Moovly Studio editor : Both Moovly Studio editor as well as the older Moovly Classic editor are only available in English
Adding text in the Moovly editor : While the Moovly editor applications are only available in English, you can create videos in another language if you wish. Not all of our fonts support the special characters of certain languages, but some fonts do. You can also add screenshots of text to your Moov, as well as voiceovers
Support : Support is only provided in English. If you have a support question, just translate it into English and we’ll be happy to help you out
Who owns your Moovly video?
You get a full, exclusive usage right of your video, but as your content also contains Moovly and VideoBlocks components, you do not own it. Of course, you also stay owner of all media you uploaded. That's what is also written in our Terms & Conditions, which can be found here: https://www.moovly.com/termsandconditions What are Moovly partners?
Although Moovly is meant to be a userfriendly platform and we want to enable everyone to create multimedia content in a simple and intuitive way, we sometimes receive requests from users seeking professional help. Our users range from single users, education, small to medium business to large brands and corporations. All of them have different needs and types of projects, so these types of requests can vary and we rely on our Moovly partners to handle these. Once a certain request comes in, we refer them to one or some of our partners. At that point, the partner is in direct contact with the Moovly user to set up the project, make arrangements, agree on pricing and deliverables. The type of services our partners offer can vary from:

Delivering creative advice (writing of the storyboard, scriptwriting, … ) Copywriting and translations Providing voiceovers Custom content creation (create projects in Moovly based on a script) in an existing Moovly
style Custom content creation based in a new, specific graphical style requested by the client Create custom objects (still and/or animated) Organize online & onsite trainings Reselling Moovly licenses
If you are interested in becoming a Moovly partner, simply fill in the Contact Form on the website and someone will get back to you! How do I become a Moovly partner?
Are you Interested in becoming a Moovly partner and providing Moovlybased services to Moovly users? We don’t expect our partners to offer all of these services. Focus on your own strengths when defining what kind of services you would like to offer, or what kind of partnership you have in mind. We would first expect you to create a Moovly demo video, to make sure you are familiar enough with the Moovly editor and platform. Once this is completed and approved, we can discuss next steps. This includes that we will incorporate your logo + clickthrough on our partner page and will start referring requests from our users to you. If you’re still interested in pursuing a partnership, please fill in the contact form or contact support to fill us in about your specialities, what you're willing to provide as a service and we can take it from there! What is Moovly Studio?
Moovly Studio is based on HTML5 , which is a new browser technology that enables all features that Flash included and more but also comes with some additional benefits:
HTML5 works on all computers and mobile devices with a browser HTML5 is supported by most recent and popular browsers (Chrome, Firefox, Safari, Internet
Explorer): no plugin or software installation required HTML5 is more secure than Flash based technology
Moovly Studio is based on HTML5 technology and offers more value to you: The new Moovly Studio editor is fast The new Moovly Studio editor is easy to use The new Moovly Studio editor features over 500,000 royalty free digital assets (stock videos,
illustrations, photos, sounds and music)
Moovly Studio is a new and better version of the Moovly Classic editor. Over time, Moovly will be phasing out this Moovly Classic editor (users who have existing content made with Moovly Classic will still get access to it for a longer time). The Moovly Classic editor was based on Flash, which is a browser plugin that needs to be installed on your computer. Flash however is a technology that is disappearing and more and more computer vendors are not installing or recommending it anymore. Flash is also not supported on many mobile devices (iOS and others). Please note that content made with the Moovly Classic editor is not compatible with Moovly Studio. If you are still using Moovly Classic, we strongly advise that you make new projects in Moovly Studio. What are the technical requirements for Moovly Studio?
The Moovly Studio editor is supported by the following browsers: Chrome, Firefox, Safari, Internet Explorer, and Edge, running on either Windows or Mac OSX / macOS. Older versions of these browsers or operating systems are not supported. There is no need for software or plugin installation (as Moovly Studio is HTML5 based, Flash is not required). How to get started with Moovly Studio?
New to Moovly? The following Getting Started video shows an overview of the Moovly Studio (with the HTML5based editor) and explains the first steps in the creation of a Moov. It is based on adding images, adding video, speech bubbles, and working with text: https://www.youtube.com/watch?v=zia2U0dIaTw Is there a Moovly mobile app?
Moovly has a mobile app for iOS devices (iPhone or iPad). This mobile app synchronizes with the old version of Moovly (Moovly Classic), and is not yet compatible with Moovly’s most recent editor release, called Moovly Studio. Moovly is currently preparing the update of this app to work with its new version. Visit the help.moovly.com/moovlyclassic for more information on the existing Moovly app.

What’s in the Free Trial?
We want everybody to be able to create engaging content. This is why we offer you a Free 1 month trial of Moovly! You can use most of Moovly's powerful features to make your first Moov, including:
Most of the features of Unlimited license in terms of making and creating your Moovs Access, from within the Moovly Studio editor, to VideoBlocks, including AudioBlocks and
GraphicStock Video upload 1GB upload storage Publish to the Gallery and embed moovs
If you upgraded to Unlimited, you would be able to download a Moov and you would also be able to share your Moov with other Moovly users. What happens if do not upgrade after my 1 month Free trial?
8 days before the end of your Free Trial, you will receive an email prompting you to ‘Upgrade Now’. When you log in after your Free Trial has ended, you will see a message that read your Free Trial period has ended, and to access your account, upgrade to an Unlimited license for only $5 a month. If you choose not to upgrade after your 1 month Free trial, your account will be frozen for 90 days and all your Personal Library uploads (sounds, images and videos) and Moovs (videos you have created in Moovly) will be deleted. If your account is frozen for the 90 days, you can choose to pay a catch up fee to reactivate your account. The catch up fee is 5$ per started month. For example: if you upgrade in your 1st month: you pay a $5 catch up fee if you upgrade in your 2nd frozen month: you pay a $10 catch up fee if you upgrade in your 3rd frozen month: you pay a $15 catch up fee Then you go into a subscription setup (= Unlimited license). What’s in the Unlimited License?
The Moovly Unlimited license adds many additional possibilities on top of the features of the Free Trial, including:
Uploading 3 times more images, sounds and videos into your Personal Library, with 3GB storage space available
Downloading 3 videos simultaneously Priority rendering Storing videos offline on a mobile device Downloading Moovs Removing the Moovly watermark and outro ("Made with Moovly") which is automatically added
to videos made with the Free trial license. Sharing your Moov with other Moovly users

IMPORTANT: If you choose to not renew your subscription, your account will be frozen for 90 days and all your Personal Library uploads (sounds, images and videos) and Moovs (videos you have created in Moovly) will be deleted. If your account is frozen for the 90 days, you can choose to pay a catch up fee to reactivate your account. The catch up fee is 5$ per started month. For example: if you renew in your 1st month: you pay a $5 catch up fee if you renew in your 2nd frozen month: you pay a $10 catch up fee if you renew in your 3rd frozen month: you pay a $15 catch up fee For a complete overview of the features that are included in the different Moovly licenses, please take a look at the Pricing page What’s in the Business License?
Moovly is a flexible platform that is fully prepared for business environments. Whether your organization is a small company or a large enterprise, Moovly can be customized to accommodate your needs and requirements. Business licenses include all individual features of the Unlimited license and on top of that many additional possibilities, including:
Uploading 5 times more images, sounds and videos into your Personal Library , with 5GB storage space available
Priority 1 rendering Using your Moovs for commercial use Custom setup of features for your organization and/or per user: features can be enabled or
disabled on a per user basis. This requires a minimum of 5 licenses. A few examples: Fonts and colors can be restricted to the ones that are in line with your organization's graphical guidelines; publishing content to YouTube or Facebook can be disabled or restricted to certain users; downloading content can be disabled or restricted to certain users; sharing of editable content can be restricted to people within the organization, to support your workflows or approval processes
Next business day support Volume discounts available for a minimum of 5 licenses purchased No Moovly watermark logo or replacing it by yours. Making an unlimited number of Moovs, with no restrictions in content length.
Pricing for a Business license depends on your needs and requirements. To request a quote for your organization, complete the Business Contact Form . Does Moovly offer an Education license?
If your Educational domain is known to us, Moovly provides an Education license to teachers, students,
professors and other individual professionals working in the noncommercial education sector.
This Education license has most of the features of the Unlimited license, except:
All downloads are in SD, not HD Includes the watermark and outro

If you wanted to download in HD, or remove the watermark or outro, you just need to upgrade your
license to Unlimited.
If you already had an Edu Plus or Edu Group license on the old editor (Moovly Classic), you will
get an Education license on Moovly Studio. If you already have an Edu Pro license on the old
Editor (Moovly Classic), you will get an Unlimited license on Moovly Studio.
How do I subscribe to an Education license?
If your Educational domain is known to us, you will be automatically upgraded to an Education license. If your domain is not known to us, and you would like to apply for an Education license, you can do so by filling in the contact form . If you’re not logged in, you will be redirected to the login page first. Afterwards, you can request your Education license using the link to the contact form. Please note that you need to sign up with the email address that was given to you by your educational institution, otherwise your request will not be approved. Please note that we cannot approve education license requests from users with email addresses from general domains like gmail, hotmail, yahoo or
similar.
If you have a Moovly account with another email address, you can quickly and easily create a new Moovly account using your educational email address. What are the Moovly solutions for Business?
Moovly is a flexible platform that is fully prepared for business environments. Whether your organization is a small company or a large enterprise, Moovly can be fully customized to accommodate your needs and requirements. Business licenses include all individual features of the Unlimited license and on top of that many additional possibilities: with this license, you are able to setup your own company library with custom animations, fonts and colors, you benefit from premium online support within the next business day, you have maximum storage, your videos get priority rendering and you get higher upload capacity! Interested in custom business solutions or ordering 5 or more licenses? Contact us for more information. Can we have a custom video made in Moovly?
Yes, our partners can help you with that! If you want a professional video for your company or organization and you'd like that made by experts in Moovly, we refer you to our Moovly Partners. Whether you'd like:
a wellwritten script for your content a studio voiceover recording with a professional voice artist a great graphical design with animated objects in line with your organization's guidelines a perfectly animated master version of your content in Moovly a translation of this content in any language all of the above
For these types of services or support, we partner with digital communications agencies with experience in creating videos for business purposes. They can create a great master version for you that you can
access afterwards in Moovly, for later editing, additional versions, etc. Contact one of our partners for more information. Moovly Bots
A Moovly Bot allows companies, organizations and brands to produce templatebased, customized videos in high volumes (hundreds or thousands of videos). Would you like to create a personalized video per user or a customized video per product or item, and generate these in high volumes? Then a Moovly Bot is what you need! A Moovly Bot is available in different types: 1.Collect Thousands of User Generated Content Videos Offer customizable templates to your clients, customers or even your whole community who can turn your branded template in an onbrand testimonial or a personalized video. Imagine collecting hundreds or thousands of such user generated videos in no time. That is the power of a Moovly Bot. 2. Mass Generated Video Content from any Data List This version of a Moovly Bot is a little like mail merge. Except, it makes videos and combines your branded video template with any data list: e.g. a CSV file, XML file or SQL database. The Moovly Bot merges each individual line of the list with the template video to generate hundreds or thousands of customized videos. Feel like sending a special personal video message to your 10,000 employees or customers? Or generating a video for each of your hundreds or thousands of webshop products? Now you can. 3. Automated Video Generation Based on Data Feeds A Moovly Bot is also able to automatically generate videos using data feeds, coming from any source: e.g. Twitter, RSS, news feeds, statistics, results, measurements… Turn any feed into a video stream! Application examples include narrowcasting, automatic news video production or social media feed animation. Can I earn money with my Moovly content?
If you are subscribed to a Business license, you can use your Moovly content for commercial purposes. This license allows you to sell the videos you create to third parties or to generate advertising revenues with your videos on YouTube or other platforms. You get a full, exclusive usage right of your video, but as your content also contains Moovly components, you do not own it. Of course, you also stay owner of all media you uploaded. More information can be found in our Terms & Conditions . What is VideoBlocks?
VideoBlocks is a leading and award winning stock media company who Moovly has partnered with to bring our users more than 500,000 media assets. Do you need an Easter video to include in your Moov? VideoBlocks has that! Do you need a sunset or an office background? VideoBlocks has that, too! You can find pretty much any video, image and sound files you require! With 115,000 HD video clips, 350,000 images, photos and vectors plus 100,000 music tracks, sounds effects and loops, you can make your video creations more engaging and impressive than ever before.

VideoBlocks is only available in Moovly Studio, our HTML5based Editor. You can find the VideoBlocks library by selecting ‘VideoBlocks’ from the drop down menu on the left side of the Editor. Simply enter your search term in the search field and off you go! How to search the VideoBlocks library?
Choose VideoBlocks from the drop down Library list on the left side of the Editor:
You can filter by videos, sounds or images:
Select one of these (we will use images as an example) and you will be asked to enter a search term in the upper right corner. We will look for an image of a teacher:
You’ll then see all available images of a teacher. You will notice that when you select one of these images, a preview will appear on the right side. Click Insert in Moov and you’ll see a message that your object is being fetched from VideoBlocks and it will be added to your Moov shortly. Images, sounds and videos from VideoBlocks are all added into your Personal Library. You just follow the same process for videos and sounds and apply animations from the choices on the Timeline. What is the Stage?

The Stage is the area where you compose your content. It is the canvas for your creation. By default this area is white, but you can adjust the Stage Properties and configure the Background Color in the Stage Properties Panel on the right of the Editor.
Properties you can adjust here include the following: Stage Color: Modify the color of the Stage. You can change this default Stage color in the Stage Properties that you see on the right side of the Editor. Click the white square to change the Stage color and a color chart will appear. Select a new color and just click in an empty area to close the color chart. Stage Size: Modify the size of the Stage. You can do this by clicking ‘Size’ and selecting a size from the dropdown. Current sizes are 4:3 and 16:9:
You have more options available to you above the Stage. These include: Zoom: You can zoom in and out on the Stage dragging the magnifying glass slider bar to the left or right:
Flip an Object: You can flip an object vertically or horizontally by clicking these icons above the Stage:
Cut, copy and paste objects, including their properties and animations: You can copy an object by selecting the object in the Timeline and hitting Cmd+C (Mac) or Ctrl+F5 (PC) to paste. You can then rename the object, if you wish. You can also use the icons above the Stage to cut, copy and paste Clips:

Jump to the start of your Moov: Double click the rewind button to do this:
Text: You can add text to your Moov by clicking the text box:
How do I change the background of my Moov?
When you start the Moovly Editor and create a new Moov, the background color of your Moov is white by default. You can change this default Stage color in the Stage Properties that you see on the right side of the Editor:
Click the white square to change the Stage color and a color picker will appear. Select a new color and just click in an empty area to close the color picker. If you want a specific background color for a part of your Moov or Clip, you could use the square shape from the Infographics Library and put it to the back of all other Moovs (drag it to the lowest layer in the Timeline). You can also use a background image from VideoBlocks. How does the Moovly Studio Timeline work?
The Timeline is where you synchronize the animation of your objects. When you select an object on the Stage, the corresponding object timeline is highlighted.
Per animation effect that you add, an additional subtimeline is added for that specific effect. Your can hide these subtimelines using the small arrow left of the object name.
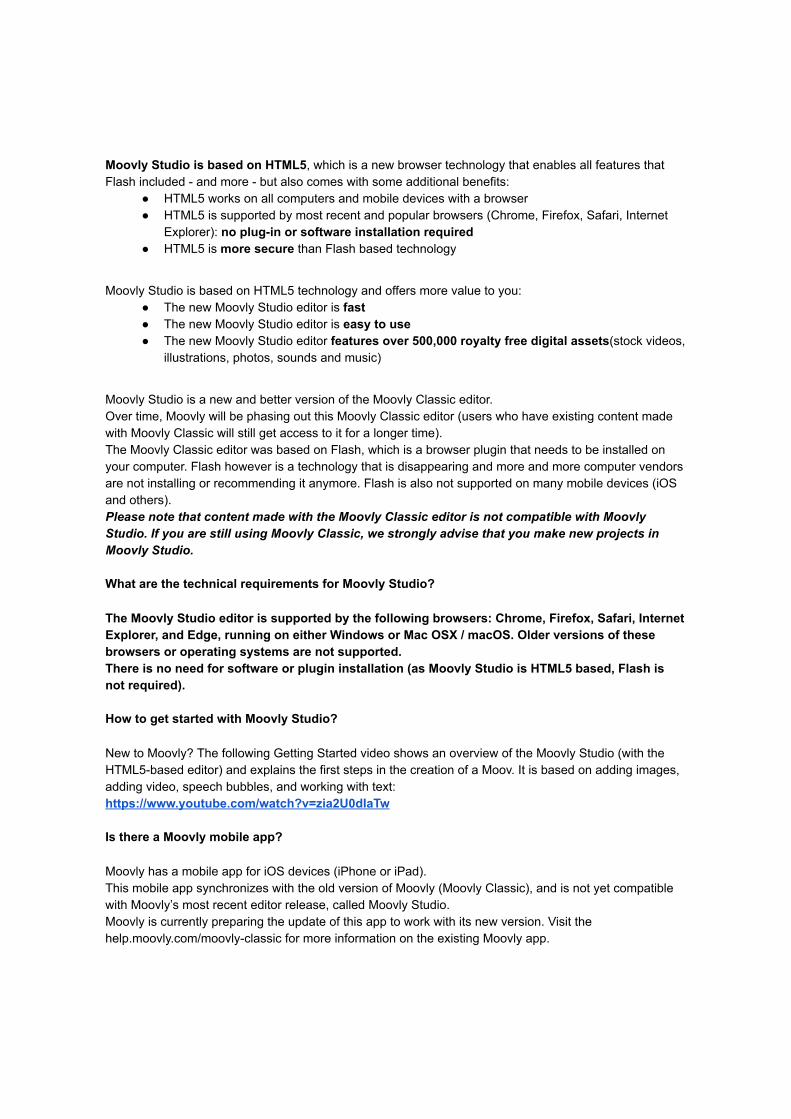
To add an animation to an object: you can click the little arrow next to the object name and select "add animation". From the animation menu you can then choose a standard animation, or a specific animation if the object you selected contains such an animation. Eg. the Hand Writing animation can be applied to text objects
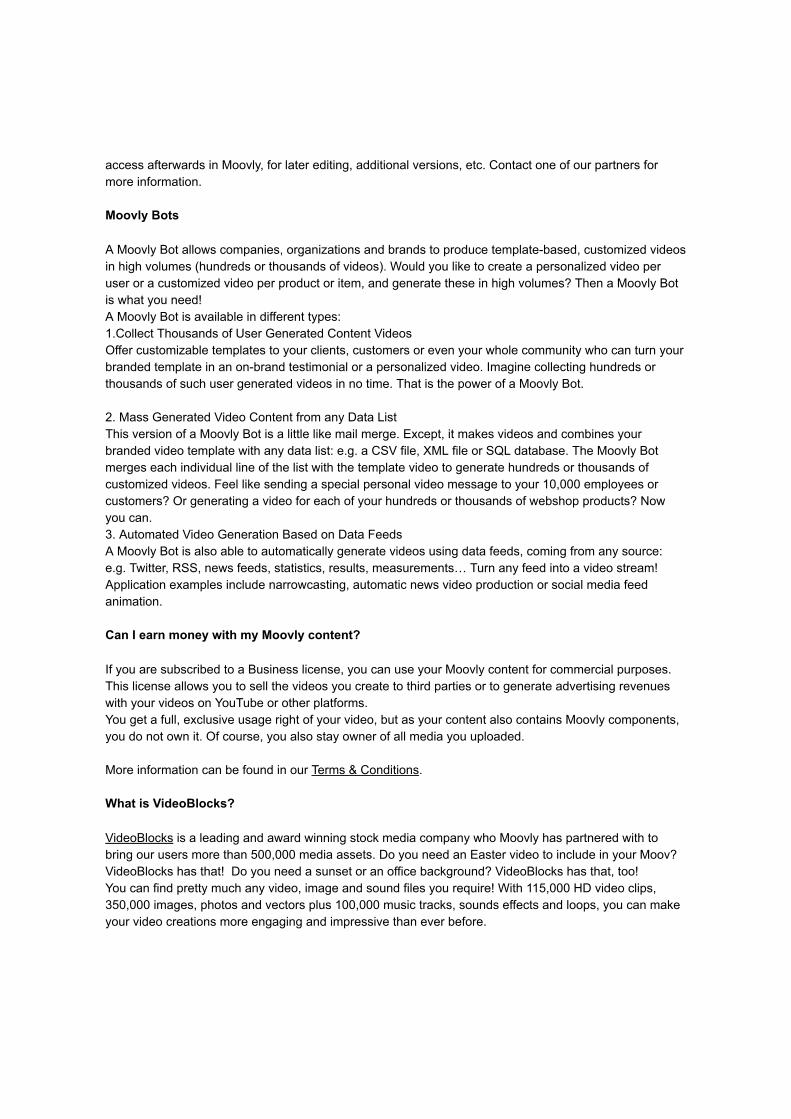
The lines on the Timeline also represent Object Layers: when two objects visually overlap each other on the stage, the object higher on the timeline will be in front of the object lower on the timeline By default, your content is organized in one Clip. You can add additional Clips for easier management of content in your timeline: locking Clips, deleting entire Clips, inserting time, etc. Once you’ve synchronized your objects, you can preview your animation by clicking the Play button. Click the fastforward or rewind buttons to move forward or backward on the timeline.
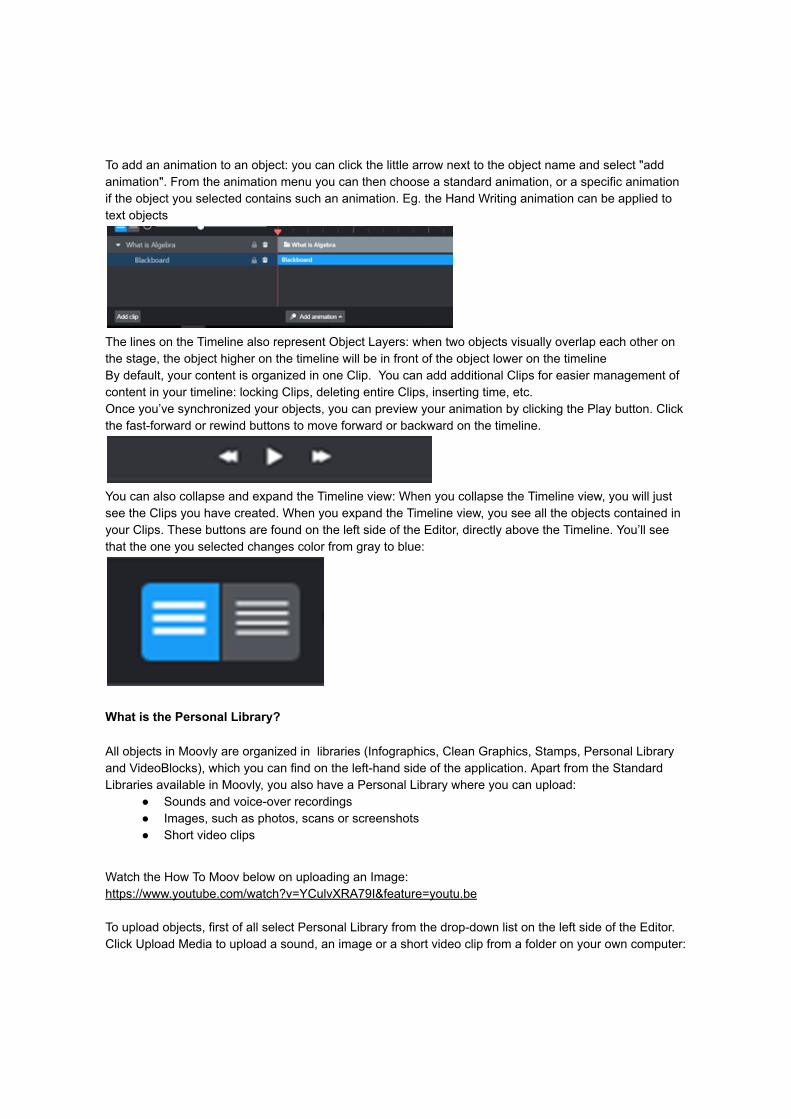
You can also collapse and expand the Timeline view: When you collapse the Timeline view, you will just see the Clips you have created. When you expand the Timeline view, you see all the objects contained in your Clips. These buttons are found on the left side of the Editor, directly above the Timeline. You’ll see that the one you selected changes color from gray to blue:
What is the Personal Library?
All objects in Moovly are organized in libraries (Infographics, Clean Graphics, Stamps, Personal Library and VideoBlocks), which you can find on the lefthand side of the application. Apart from the Standard Libraries available in Moovly, you also have a Personal Library where you can upload:
Sounds and voiceover recordings Images, such as photos, scans or screenshots Short video clips
Watch the How To Moov below on uploading an Image: https://www.youtube.com/watch?v=YCulvXRA79I&feature=youtu.be To upload objects, first of all select Personal Library from the dropdown list on the left side of the Editor. Click Upload Media to upload a sound, an image or a short video clip from a folder on your own computer:

Note: Make sure you possess the intellectual property rights of any media you upload for usage in your animation. Please read our Terms & Conditions for more information. The number of objects you can upload to your Personal Library depends on the storage space that’s available for your license. Once you’ve uploaded an object, you can drag and drop it on the Stage:
You can resize and rotate images or video clips, apply standard animation effects to them and adjust their timing
When you drag a sound object (uploaded or recorded) to the Stage, it does not visually appear on the Stage but only on the Timeline, where you can adjust its timing and apply animation effects.
Which graphical object libraries are available in Moovly?
There are several different object libraries available in Moovly Studio. Over time, more libraries will be added. 1.Infographics Library: This contains 100 images you can select. Under ‘Library’ on the left of the Editor, just click ‘Infographics’ from the dropdown list and select the image(s) you need:
2. Personal Library: You can upload sounds and voiceover recordings; images such as photos, scans or screenshots; and short video clips. You can even upload multiple files from your own computer and it is possible to upload a mixture of sound, image or video when you do this! 3. VideoBlocks: With 115,000 HD video clips, 350,000 images, photos and vectors plus 100,000 music tracks, sounds effects and loops from the stunning VideoBlocks stock libraries, you can make your video creations more engaging and impressive than ever before.

4. Clean Graphic Library: Fun characters with different styles and skin tones. The perfect choice when you want to be visual and modern. Under ‘Library’ on the left of the Editor, just click ‘Clean Graphic’ from the dropdown list and select the image(s) you need:
5 Stamp Library: Under ‘Library’ on the left of the Editor, just click ‘Stamp Library’ from the dropdown list and select the image(s) you need:

The following How To Moov shows you how to use the Personal and Infographics Libraries: https://www.youtube.com/watch?v=dACtZFH2bLM&feature=youtu.be How to upload video clips to the Moovly Studio editor?
You can use Moovly to make multimedia content with a variety of objects: graphical objects, text objects, sounds, music, voice and even video objects. The video upload feature is available for all users. There are 2 ways in which you can upload video clips: 1.Personal Library: You can upload short pieces of video to your Personal Library and use them in the same way as other objects. To upload a video from your Personal Library, first of all select Personal Library from the dropdown list on the left side of the Editor. Click Upload Media to upload the short video clip from a folder on your own computer. Watch the How To Moov below on how to add video to your
Personal Library:
https://www.youtube.com/watch?v=OMwa8DxVDQs&feature=youtu.be How to apply animation effects in the Moovly Studio editor?

The following How To Moov shows you how to animate your Moov: https://www.youtube.com/watch?v=AtzTZgYZWKY&feature=youtu.be Images and Sounds: You can add animation to an image and a video by highlighting the specific object you wish to animate in the timeline. You will notice it turns blue when selected. Next, select ‘Add Animation”.
You can add a fade in or fade out effect to a sound by selecting the sound on the Timeline and selecting ‘Add effect’
You can reduce the volume level or even mute the sound of your video, for example when you want to put other sounds over it (e.g. voiceover or music)
You can also split a sound. Videos: To split a video, first position the Playhead (the vertical red line) where you want to split the video. Next, put your mouse close to the Playhead and rightclick the video bar. Select Split layer in the rightclick menu. and your video will be split over two layers. (Doubleclick the video names to rename the videos if you wish). If the split did not happen at the exact location you had in mind, you can still drag the border of the bar left or right to adjust.

Please note that splitting your video is no longer possible once you’ve paused the video clip.
How to work with text in the Moovly Studio editor?
Text objects are very easy to work with. To add text, click the “T” icon above the Stage. Next, click on the stage and you will see a text box appear on the Stage automatically. Enter your text in the box underneath ‘Text Properties’ on the right side of the Editor:
Once you’ve typed your text, you can start adjusting it. Change the font type by selecting from the drop down box next to Font Family. Resize the text by resizing the bounding box around the text on the Stage. Or, change the font size in the Font Size panel on the righthand side of the Editor. With a Business license, you are able to setup your own company library with custom fonts. You can also change the text style of individual words into bold or italic. In the box underneath Text Properties, highlight the word/words you want to change to Bold or Italic, and then just click the “B“ or the “I“ icon to change the text style:
You can change the color of sentences by clicking the box next to Text color and selecting a color from the chart. You can also change the background color of a text box by selecting Background color You can add animation to text also by highlighting the text you wish to animate in the timeline, and selecting ‘Add Animation”. The HandWriting animation is only available for text objects.
You can use the in and out ‘Present Hand’ animation for objects also. How to use the Move & Zoom animation?

Moovly makes it possible for you to have an object move to a new position, using the Move & Zoom animation. This animation effect allows you to zoom in on an object, zoom out on it, move an object, rotate it, or include any combination of zooming, moving and rotating. To use the Move & Zoom animation on an object, select the effect from the animation options list:
A default animation will be proposed, which you can then change as follows: click the first bullet of the animation in the Timeline, then drag your object to its new starting position on the Stage click the end bullet of the animation in the Timeline, then drag your object to its desired end position on the Stage
How to find a professional voiceover?
You can record your voiceover with a professional, locally installed software (eg Audacity), and then
upload this as a sound file to Moovly. Just click the Upload media button on the left of the Editor window
when you’re in edit mode, and you can choose the sound file from your computer:

If you’re looking for a specific voiceover there are different platforms you can check. You can easily
define what you’re looking for, what language, what kind of voice, etc. and request your voiceover. Easy
as that!
Our trusted partner, Voices.com , has over 125 000 professional voiceover artists worldwide, speaking
over 100 languages and dialects. Visit Voices.com to sign up free and join the world’s #1 voiceover
marketplace and get connected to voiceover talent from around the world!
If you're on a lower budget, Fiverr might be a perfect solution (although you might have to look around a
bit before finding a voiceover artist that meets your quality standards).
What is a Clip?
A Clip is a collection of preanimated objects on the Timeline. Clips differ from Scenes in Moovly Classic
(the old editor), because whereas Scenes are in a linear order, Clips are a predefined group of objects.
These include preanimated, timed objects that are easily configurable.
When you create a new Moov in the editor, you will see ‘Clip 1’ in the panel underneath the Stage:
In your first clip, you can drag and drop your own images and sounds, as well as those available from the
huge VideoBlocks library, plus of course videos! When you click the arrow next to Clip 1, you will see any
objects that are part of this Clip:
Working with Clips allows you to manage and order your content in an easier way: renaming Clips, saving
Clips…
With the Moovly Unlimited and Business licenses, you can even save a Clip to your Personal Library and
reuse them in other Moovs. This way, you can easily compose new videos or presentations based on
saved Clips or Clips saved from other Moovs.
How to add a Clip?
To add a Clip, click the ‘Add clip’ tab at the bottom left of the Editor:

This adds a new Clip, that you can then rename by double clicking the Clip name:
How to move an object to another Clip?
If you want to move an object such as an image, sound or video, into another Clip, this is an easy
process.
In the Timeline, just click on the name of the object you want to move to another Clip, and drag and drop
to the Clip you want to move it to.
How to lock an object or a Clip?
In some cases, it may be useful for you to temporarily lock an object or a Clip to protect yourself from
unintended edits. When locked, you will not be able to edit the Clip, so no changes to objects or their
animations can occur and you will not be able to add items to the Clip.
To lock an object or a Clip, just click the padlock icon next to the name of the object or Clip you wish to
lock:
You will notice that the padlock icon turns white after you have clicked it:

That object or Clip will now be locked, and no editing properties will be available.
When you want to edit the object or Clip again, just click the padlock icon once more and it will return to
its original gray color and you will then be able to edit that object or Clip again.
How to delete a Clip?
In the Timeline, you will see a small trash can next to the name of your Clip. Just click the trash can next
to the Clip you want to delete, and your Clip will be deleted:
Warning : It is not currently possible to restore a deleted Clip
How to copy, paste and cut a Clip?
There are a couple of ways to copy and paste Clips:
1.Use the ctrl tab on your keyboard:
To copy a Clip, just hit Cmd+C (Mac) or Ctrl+C (PC).
To paste a Clip, just hit Cmd+V (Mac) Ctrl+V (PC)
You can then rename the Clip, if you wish.
2. You can also use the icons in the editor to copy and paste a Clip. You can find these icons above the
Stage:

To copy : Click on the Clip you want to copy and the select the copy icon from above the stage (you can
see it below the title of your Moov):
To paste : Click the following icon to paste your Clip (you can find it to the right of the copy icon):
To cut : Click the scissors icon to cut your Clip:

How to rename a Clip or an object?
To rename a Clip, double click on its name, change it and hit the Enter key.
You can also change the name of the objects within the Clip in the same way as you change the name of
a Clip:
How to add sounds in the Moovly Studio editor?
You can quickly and easily upload sounds from your computer to your Personal Library.
The following Moov shows you how to add sounds to your Personal Library in the Moovly Studio editor:
https://youtu.be/6EotCwWUe0
Which sound formats does the Moovly Studio editor support?
Moovly allows you to work with all kinds of sounds and to synchronize them with the animations of your
graphical objects. The following formats are currently supported by Moovly: MP3, WAV, AIFF, M4A, AAC,
OGG and FLAC.
Although each audio file is converted upon uploading, we preserve the original audio quality as much as
possible
How to edit sounds in the Moovly Studio editor?
Once you've added a sound to your animation, you have a few simple sound editing options at your
disposal:

Modify the volume level of your sound : To do that, first select the sound in the Timeline (its background
turns blue when selected). You will see a Volume slider under Object Properties on the right side of the
Editor. Use this slider to select the volume level you want:
Split your sound : First position the Playhead (the vertical red line) where you want to split the sound.
Next, rightclick the sound layer in the Timeline. Select “Split Sound” in the rightclick menu and your
sound will be split over two layers:
Add a Fade In or Fade Out effect to your sound : To do that, first select your sound and click "Add
Effect". You can adjust the length of the Fade effect by dragging the small border bullets to the left or the
right:
How to manage your Moovs?
Every project you create with Moovly called a Moov is represented on your 'My Moovs' Dashboard as
a thumbnail:

From this Dashboard, you can manage your Moovs: move your mouse over the thumbnail for the
following options:
Pen symbol : Click this to edit your Moov
Trash can symbol : Click this to delete your Moov. You will be asked if you are sure you want
to delete the Moov.:
Share your Moov : sharing your Moov with other Moovly users is possible with Unlimited and
Business licenses
When you click the pen to edit your moov, you get some additional options, using the buttons underneath
the video player:

Edit video
Edit description : change the description of your Moov
Copy: make a copy of your Moov
Download : if you have an Unlimited or a Business license, you can download your video. If
you are using the Free Trial and would like to download a video, upgrade your license to
Unlimited.
Publish : publish your video to the Moovly Gallery. This option is available to all users,
including Free Trial users.
How to change the name and description of a Moov?
You can easily change the name and the description of your Moov. A description is not mandatory, but
might be interesting if you publish a Moov to the Moovly Gallery, because its title and description are
published as well.
To change the name and description of a Moov, click on its thumbnail to open the preview page:
Underneath the video player, you’ll see the current name (and description, if there is one) of your Moov.
Click the 'Edit description' tab:

Clicking the 'Edit description' tab changes the view to 2 fields: one for the name and one for the
description. Enter your text and click the Edit button.
How do I save a Moov?
When you are editing your Moov, it is saved automatically on our servers every minute. So no need to
press the Save button all the time! If you have done a last minute change and want to make sure that
change is saved, press the Save button (top right hand corner) before closing the editor window:
If you see a ‘save failed’ message, probably you have closed the window in which you were logged into
Moovly. In that case, please try the following:
Open a new browser window
Surf to www.moovly.com and log in again
Now switch to your editor window again and push the save button once more. The saving error
should not appear anymore.
How to delete a Moov?
On the My Moovs page, just click the trash can on the thumbnail of the Moov you want to delete. It will be
highlighted:

You will then be asked if you’re sure you want to delete the Moov. If you are sure, click Delete, and your
Moov will be deleted:
How to download a Moov?
To download your Moov, first click its thumbnail to enter the preview page of your creation (video,
presentation or other). Underneath your video, you see a couple of export options, such as Download and
Publish to Gallery. Click Download, and you see this popup:
If you have a Free trial license and you would like to download your Moov, upgrade your license to
Unlimited.
If you have an Unlimited or a Business license, you can download your Moov in MP4 format. This
includes the option to remove the Moovly watermark and outro.
What download formats are available for my video?
At the moment, downloads are only possible in MP4 format. If you have a Free trial and you want to
download, upgrade to an Unlimited license.
What is rendering?
When you click a thumbnail of a Moov, you enter the View mode of your creation. On your Moov details
page, underneath the Moov, you see a couple of export options, such as Download and Publish:
When you select 'Download', you will see that your Moov will be rendered, which means that your video
will be prepared and processed on our servers. As soon as your Moov is ready, you will be notified by
email. Don't forget to check your Spam folder too!

How do I publish a Moov ?
You have a couple of different options to publish your Moov:
1. Publish to the Moovly Gallery : this is free
2. Publish to FaceBook : Publish your Moov to the Gallery, and you can then share the link to FaceBook
To publish to the Gallery is a simple process. Click 'Publish' under your Moov, then 'Publish to Gallery'.
You will then see a message saying your Moov has now been published to the Gallery
3. Publish to YouTube : Upgrade to an Unlimited license and you can then publish your Moov to YouTube
Which payment methods are supported?
We currently accept Visa, MasterCard and American Express. For larger orders (multiple licenses) and
Business licenses we accept both payment via credit card and payments via invoice or Paypal.
We partner with Recurly for our subscription billing. Recurly saves your credit card details in a secure,
protected and encrypted way. Your financial data is never stored on Moovly's servers, but safely
encrypted and secured by Recurly. More information on www.recurly.com .
You can manage your personal data in Moovly via the Profile menu.
What is VAT and when is it applied?

When you purchase something on the Moovly website, such as a subscription, VAT may be applied to the
amount you have to pay. VAT stands for Value Added Tax, and is a tax added by the government to the
purchase price.
Whether VAT is applied and if so, how much, depends on who you are (a person or a business) and on
the country you live in:
If you are based outside the European Union, no VAT is applied by us. You should however
always comply with your national laws!
If you are an individual customer based in the European Union, VAT is applied. The amount of
VAT that is charged will depend on your country.
If you are a company based in Belgium, with a valid VATnumber, then 21% VAT is applied.
If you are a company based in the European Union but outside Belgium, with a valid
VATnumber, then no VAT is applied. If your VAT number is not valid, then VAT will be charged.
You can check your VATnumber on http://ec.europa.eu/taxation_customs/vies/.
If VAT applies, it will be charged in your local currency. The Plans & Pricing page also shows the price of
licenses as excluding VAT.