Welding Safety Module 29101-09 Annotated Instructor’s Guide · Welding 1 PowerPoint®...
36
Welding Safety Annotated Instructor’s Guide Module Overview This module, an extension of the Core Curriculum safety module, identifies general safety considerations that apply to welding and metal cutting. It describes the steps that must be taken to avoid job-related deaths and injuries while establishing and maintaining a safe work environment. Prerequisites Prior to training with this module, it is recommended that the trainee shall have successfully completed Core Curriculum: Introductory Craft Skills. Objectives Upon completion of this module, the trainee will be able to do the following: 1. Identify some common hazards in welding. 2. Explain and identify proper personal protection used in welding. 3. Describe how to avoid welding fumes. 4. Explain some of the causes of accidents. 5. Identify and explain uses for material safety data sheets. 6. Explain safety techniques for storing and handling cylinders. 7. Explain how to avoid electric shock when welding. 8. Describe proper material handling methods. Performance Tasks This is a knowledge-based module. There are no Performance Tasks. Materials and Equipment List Module 29101-09 Markers/chalk Pencils and scratch paper Whiteboard/chalkboard Welding 1 PowerPoint ® Presentation Slides (ISBN 0-13-609092-3) Multimedia projector and screen Desktop or laptop computer Appropriate personal protective equipment Leather protective gear Various welding gloves Samples of protective welding footwear Earplugs Various welding and cutting helmets with face shields Welding helmet with auto-darkening lens Full-face supplied-air respirator (SAR) Oxyfuel gas cutting/welding equipment Module Examinations* *Located in the Test Booklet Safety Considerations Ensure that the trainees are equipped with appropriate personal protective equipment and know how to use it properly. Emphasize the special safety precautions associated with welding because of the added potential for fire, burns, respiratory problems, and electrical shock. Ensure that trainees are briefed on shop safety procedures.
Transcript of Welding Safety Module 29101-09 Annotated Instructor’s Guide · Welding 1 PowerPoint®...

Welding SafetyAnnotated Instructor’s Guide
Module Overview
This module, an extension of the Core Curriculum safety module, identifies general safety considerationsthat apply to welding and metal cutting. It describes the steps that must be taken to avoid job-relateddeaths and injuries while establishing and maintaining a safe work environment.
Prerequisites
Prior to training with this module, it is recommended that the trainee shall have successfully completedCore Curriculum: Introductory Craft Skills.
Objectives
Upon completion of this module, the trainee will be able to do the following:
1. Identify some common hazards in welding.2. Explain and identify proper personal protection used in welding.3. Describe how to avoid welding fumes.4. Explain some of the causes of accidents.5. Identify and explain uses for material safety data sheets.6. Explain safety techniques for storing and handling cylinders.7. Explain how to avoid electric shock when welding.8. Describe proper material handling methods.
Performance Tasks
This is a knowledge-based module. There are no Performance Tasks.
Materials and Equipment List
Module 29101-09
Markers/chalkPencils and scratch paperWhiteboard/chalkboardWelding 1 PowerPoint® Presentation Slides
(ISBN 0-13-609092-3)Multimedia projector and screenDesktop or laptop computerAppropriate personal protective equipmentLeather protective gear
Various welding glovesSamples of protective welding footwearEarplugsVarious welding and cutting helmets with face
shieldsWelding helmet with auto-darkening lensFull-face supplied-air respirator (SAR)Oxyfuel gas cutting/welding equipmentModule Examinations*
*Located in the Test Booklet
Safety Considerations
Ensure that the trainees are equipped with appropriate personal protective equipment and know how touse it properly. Emphasize the special safety precautions associated with welding because of the addedpotential for fire, burns, respiratory problems, and electrical shock. Ensure that trainees are briefed onshop safety procedures.

Additional Resources
This module is intended to present thorough resources for task training. The following reference worksare suggested for both instructors and motivated trainees interested in further study. These are optionalmaterials for continued education rather than for task training.
Arc Welding Safety E205, Latest Edition. Cleveland, OH: Lincoln Electric.Ventilation Guide for Weld Fumes AWS F32M/F32, Latest Edition. Miami, FL: American Welding Society.
Teaching Time for this Module
An outline for use in developing your lesson plan is presented below. Note that each Roman numeral inthe outline equates to one session of instruction. Each session has a suggested time period of 21⁄2 hours.This includes 10 minutes at the beginning of each session for administrative tasks and one 10-minutebreak during the session. Approximately 21⁄2 hours are suggested to cover Welding Safety. You will need toadjust the time required for testing based on your class size and resources. There are no performance tasksfor this module.
Topic Planned Time
Session I. Introduction; Welding Safety PracticesA. Introduction _____________B. Welding Safety Practices _____________C. Appropriate Personal Protective Equipment _____________D. Fumes and Gases _____________E. Confined Space Permits _____________F. Area Safety _____________G. Hot Work Permits and Fire Watches _____________H. Oxyfuel Gas Welding and Cutting Safety _____________I. Cutting Containers _____________J. Cylinder Storage and Handling _____________K. Power Tool Safety _____________L. Electrical Safety _____________M. Material Safety Data Sheets _____________N. Material Handling _____________O. Safety Planning and Emergency Action Plans _____________P. Module Review _____________Q. Module Examination _____________
1. Trainees must score 70% or higher to receive recognition from NCCER.2. Record the testing results on Craft Training Report Form 200, and submit
the results to the Training Program Sponsor.

Oxyfuel CuttingAnnotated Instructor’s Guide
Module Overview
This module teaches principles of safe oxyfuel cutting. Setup, care, and maintenance are covered, as wellas procedures and methods for performing various types of oxyfuel cuts.
Prerequisites
Prior to training with this module, it is recommended that the trainee shall have successfully completedthe following: Core Curriculum and Welding Level One, Module 29101-09.
Objectives
Upon completion of this module, the trainee will be able to do the following:
1. Identify and explain the use of oxyfuel cutting equipment.2. Set up oxyfuel equipment.3. Light and adjust an oxyfuel torch.4. Shut down oxyfuel cutting equipment.5. Disassemble oxyfuel equipment.6. Change cylinders.7. Perform oxyfuel cutting:
• Straight line and square shapes• Piercing and slot cutting• Bevels• Washing• Gouging
8. Operate a motorized, portable oxyfuel gas cutting machine.
Performance Tasks
1. Set up oxyfuel equipment.2. Light and adjust an oxyfuel torch.3. Shut down oxyfuel cutting equipment.4. Disassemble oxyfuel equipment.5. Change empty cylinders.6. Cut shapes from various thicknesses of steel, emphasizing:
• Straight line• Square shape• Piercing• Bevel• Slot
7. Perform washing.8. Perform gouging.
Materials and Equipment List
Module 29102-09
Markers/chalkPencils and scratch paperWhiteboard/chalkboardWelding 1 PowerPoint® Presentation Slides
(ISBN 0-13-609092-3)Multimedia projector and screenDesktop or laptop computerAppropriate personal protective equipmentOxygen cylinder (with cap)Fuel gas cylinder (with cap)
Extra empty cylindersRegulators (oxygen and fuel gas)Extra regulators with check valves and flashback
arrestorsHose setA selection of usable and non-usable hosesCombination cutting torchOne-piece cutting torchAssorted torch nozzles (cutting, washing,
gouging)

*Located in the Test Booklet
Safety Considerations
Ensure that the trainees are equipped with appropriate personal protective equipment and know how touse it properly. Emphasize the special safety precautions associated with the handling and use of cylin-ders and oxyfuel cutting equipment. Ensure that trainees are briefed on shop safety procedures.
Additional Resources
This module is intended to present thorough resources for task training. The following reference work issuggested for both instructors and motivated trainees interested in further study. This is optional mater-ial for continued education rather than for task training.
ANSI Z49.1, Safety in Welding, Cutting, and Allied Processes, American Welding Society, Miami, FL.
Teaching Time for this Module
An outline for use in developing your lesson plan is presented below. Note that each Roman numeral inthe outline equates to one session of instruction. Each session has a suggested time period of 21⁄2 hours.This includes 10 minutes at the beginning of each session for administrative tasks and one 10-minutebreak during the session. Approximately 171⁄2 hours are suggested to cover Oxyfuel Cutting. You will needto adjust the time required for testing based on your class size and resources. Because laboratories oftencorrespond to Performance Tasks, the proficiency of the trainees may be noted during these exercises forPerformance Testing purposes.
Topic Planned Time
Session I. Introduction to Oxyfuel Safety; Oxyfuel Cutting Equipment, Part OneA. Introduction _____________B. Oxyfuel Safety Summary _____________
1. Protective Clothing and Equipment _____________2. Fire/Explosion Prevention _____________3. Work Area Ventilation _____________
C. Oxyfuel Cutting Equipment _____________1. Oxygen _____________2. Acetylene _____________3. Liquefied Fuel Gases _____________4. Regulators _____________
a. Laboratory _____________Allow trainees to install and remove regulators from empty oxygen and gas cylinders.
5. Hoses _____________
Cylinder cartMotorized oxyfuel track cutterFraming squaresCombination squares with protractor headTape measureSoapstonePenknifePliersChipping hammersFriction lightersVendor cutting tip chart
Tip cleaners, drills, and filesVendor-supplied videos/DVDs showing oxyfuel
equipment in operation (optional)TV/VCR/DVD player (optional)Approved leak-testing solutionWrenches (torch, hose, and regulator)Steel plate
• Thin (16 to 10 gauge)• Thick (1⁄4-inch thick to 1-inch thick)
Module Examinations*Performance Profile Sheets*
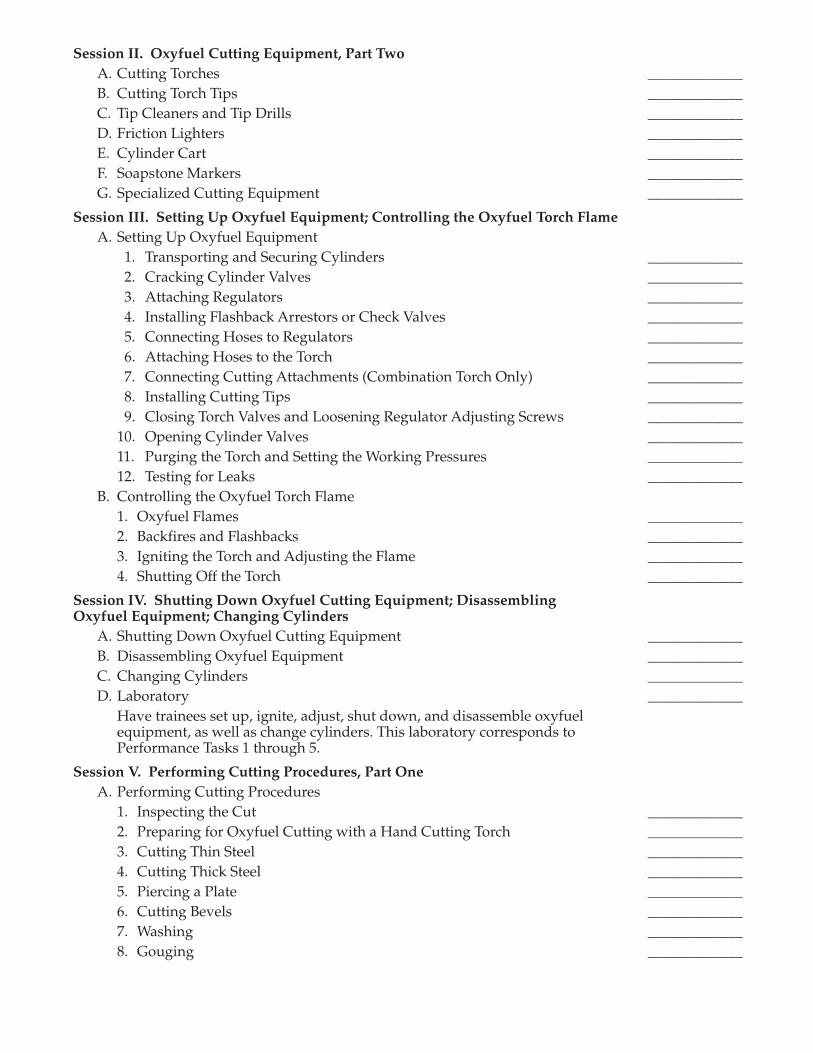
Session II. Oxyfuel Cutting Equipment, Part TwoA. Cutting Torches _____________B. Cutting Torch Tips _____________C. Tip Cleaners and Tip Drills _____________D. Friction Lighters _____________E. Cylinder Cart _____________F. Soapstone Markers _____________G. Specialized Cutting Equipment _____________
Session III. Setting Up Oxyfuel Equipment; Controlling the Oxyfuel Torch FlameA. Setting Up Oxyfuel Equipment
1. Transporting and Securing Cylinders _____________2. Cracking Cylinder Valves _____________3. Attaching Regulators _____________4. Installing Flashback Arrestors or Check Valves _____________5. Connecting Hoses to Regulators _____________6. Attaching Hoses to the Torch _____________7. Connecting Cutting Attachments (Combination Torch Only) _____________8. Installing Cutting Tips _____________9. Closing Torch Valves and Loosening Regulator Adjusting Screws _____________
10. Opening Cylinder Valves _____________11. Purging the Torch and Setting the Working Pressures _____________12. Testing for Leaks _____________
B. Controlling the Oxyfuel Torch Flame1. Oxyfuel Flames _____________2. Backfires and Flashbacks _____________3. Igniting the Torch and Adjusting the Flame _____________4. Shutting Off the Torch _____________
Session IV. Shutting Down Oxyfuel Cutting Equipment; Disassembling Oxyfuel Equipment; Changing Cylinders
A. Shutting Down Oxyfuel Cutting Equipment _____________B. Disassembling Oxyfuel Equipment _____________C. Changing Cylinders _____________D. Laboratory _____________
Have trainees set up, ignite, adjust, shut down, and disassemble oxyfuel equipment, as well as change cylinders. This laboratory corresponds to Performance Tasks 1 through 5.
Session V. Performing Cutting Procedures, Part OneA. Performing Cutting Procedures
1. Inspecting the Cut _____________2. Preparing for Oxyfuel Cutting with a Hand Cutting Torch _____________3. Cutting Thin Steel _____________4. Cutting Thick Steel _____________5. Piercing a Plate _____________6. Cutting Bevels _____________7. Washing _____________8. Gouging _____________

Session VI. Performing Cutting Procedures, Part Two; Portable Oxyfuel Cutting Machine OperationA. Laboratory _____________
Have trainees perform straight-line cutting, square shape cutting, piercing, slot cutting, bevel cutting, washing, and gouging. This laboratory corresponds to Performance Tasks 6 through 8.
B. Portable Oxyfuel Cutting Machine Operation _____________1. Torch Adjustment _____________2. Straight-Line Cutting _____________
a. LaboratoryAllow trainees to practice straight-line cutting with an oxyfuel machine.
3. Bevel Cutting _____________a. Laboratory
Allow trainees to practice bevel cutting with an oxyfuel machine.
Session VII. Review and TestingA. Module Review _____________B. Module Examination _____________
1. Trainees must score 70% or higher to receive recognition from NCCER.2. Record the testing results on Craft Training Report Form 200, and submit
the results to the Training Program Sponsor.C. Performance Testing _____________
1. Trainees must complete each task to the satisfaction of the instructor to receive recognition from the NCCER. If applicable, proficiency noted during laboratory exercises can be used to satisfy the performance testing requirements.
2. Record the testing results on Craft Training Report Form 200 and submit the results to the Training Program Sponsor.
D. Performance Accreditation Tasks – Have trainees complete PATs 1 through 3 according to the acceptance criteria. _____________1. Have trainees perform PAT 1, Setting Up, Igniting, Adjusting, and Shutting
Down Oxyfuel Equipment. This task corresponds to AWS EG2.0,Module 8 – Thermal Cutting Processes, Unit 1 – Manual OFC Principles, Key Indicators: 3 and 4.
2. Have trainees perform PAT 2, Cutting a Shape from Thin Steel. This task corresponds to AWS EG2.0, Module 8 – Thermal Cutting Processes, Unit 1 – Manual OFC Principles, Key Indicators: 5, 6, and 7. _____________
3. Have trainees perform PAT 3, Cutting a Shape from Thick Steel. This task corresponds to AWS EG2.0, Module 8 – Thermal Cutting Processes, Unit 1 – Manual OFC Principles, Key Indicators: 5, 6, and 7. _____________

Plasma Arc CuttingAnnotated Instructor’s Guide
Module Overview
This module describes plasma arc cutting equipment; safe work area preparation; plasma arc cuttingmethods for piercing, slotting, squaring, and beveling metals; and proper storage and housekeeping.
Prerequisites
Prior to training with this module, it is recommended that the trainee shall have successfully completedthe following: Core Curriculum and Welding Level One, Modules 29101-09 and 29102-09.
Objectives
Upon completion of this module, the trainee will be able to do the following:
1. Explain the plasma arc cutting processes.2. Identify plasma arc cutting equipment.3. Prepare and set up plasma arc cutting equipment.4. Use plasma arc cutting equipment to make various types of cuts.5. Properly store equipment and clean the work area after use.
Performance Tasks
Under the supervision of the instructor, the trainee should be able to:
1. Set up plasma arc cutting equipment.2. Set the amperage and gas pressures or flow rates for the type and thickness of metal to be cut.3. Square-cut metal using plasma arc cutting equipment.4. Bevel-cut metal using plasma arc equipment.5. Pierce and cut slots in metal using plasma arc cutting equipment.6. Dismantle and store the equipment.
Materials and Equipment List
Module 29103-09
Markers/chalkPencils and scratch paperWhiteboard/chalkboardWelding 1 PowerPoint® Presentation Slides
(ISBN 0-13-609092-3)Multimedia projector and screenDesktop or laptop computerAppropriate personal protective equipmentLeather protective gear (jacket or sleeves)Various welding glovesSamples of protective welding footwearEarplugsSafety glasses with approved lensesFull face shieldsWelding shield or helmet with appropriate lensRespiratorExamples of welding job opening postings
(welding labs may post them on bulletin boards)
Vendor manuals for PAC equipment showing cutting ratings
Photographs or videos showing large industrial PAC units
Bearings damaged by electric arcsSoapstoneTape measurePliersPlasma arc cutting unit with cutting torch and
appropriate gas sourcesScrap steel sheet or plate, 12 gauge to 1⁄2" thickScrap stainless steel sheet or plate, 12 gauge to
1⁄2" thick (if available)Scrap aluminum plate, 3⁄16" to 1⁄2" thick (if available)Wire brushChipping hammerWorkpiece damaged by improper gas or current
settingsExamples of good and bad cuts produced by
plasma arc cuttingModule Examinations*Performance Profile Sheets*
*Located in the Test Booklet
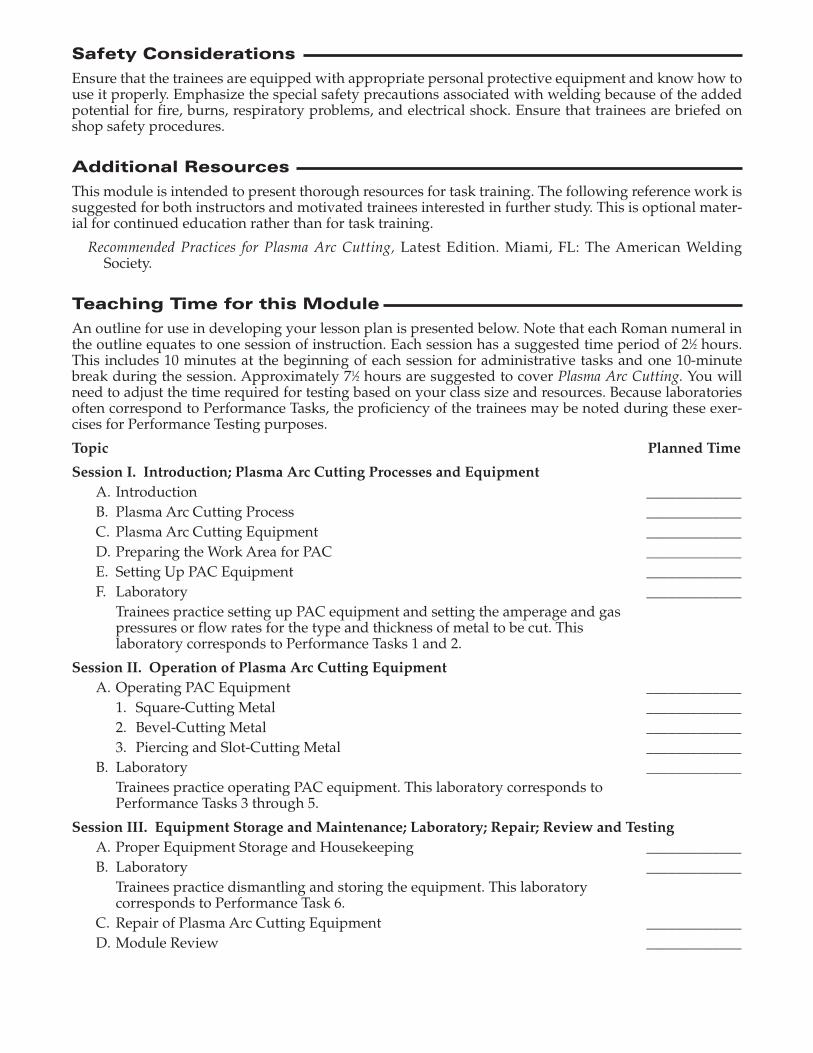
Safety Considerations
Ensure that the trainees are equipped with appropriate personal protective equipment and know how touse it properly. Emphasize the special safety precautions associated with welding because of the addedpotential for fire, burns, respiratory problems, and electrical shock. Ensure that trainees are briefed onshop safety procedures.
Additional Resources
This module is intended to present thorough resources for task training. The following reference work issuggested for both instructors and motivated trainees interested in further study. This is optional mater-ial for continued education rather than for task training.
Recommended Practices for Plasma Arc Cutting, Latest Edition. Miami, FL: The American Welding Society.
Teaching Time for this Module
An outline for use in developing your lesson plan is presented below. Note that each Roman numeral inthe outline equates to one session of instruction. Each session has a suggested time period of 21⁄2 hours.This includes 10 minutes at the beginning of each session for administrative tasks and one 10-minutebreak during the session. Approximately 71⁄2 hours are suggested to cover Plasma Arc Cutting. You willneed to adjust the time required for testing based on your class size and resources. Because laboratoriesoften correspond to Performance Tasks, the proficiency of the trainees may be noted during these exer-cises for Performance Testing purposes.
Topic Planned Time
Session I. Introduction; Plasma Arc Cutting Processes and EquipmentA. Introduction _____________B. Plasma Arc Cutting Process _____________C. Plasma Arc Cutting Equipment _____________D. Preparing the Work Area for PAC _____________E. Setting Up PAC Equipment _____________F. Laboratory _____________
Trainees practice setting up PAC equipment and setting the amperage and gas pressures or flow rates for the type and thickness of metal to be cut. This laboratory corresponds to Performance Tasks 1 and 2.
Session II. Operation of Plasma Arc Cutting EquipmentA. Operating PAC Equipment _____________
1. Square-Cutting Metal _____________2. Bevel-Cutting Metal _____________3. Piercing and Slot-Cutting Metal _____________
B. Laboratory _____________Trainees practice operating PAC equipment. This laboratory corresponds to Performance Tasks 3 through 5.
Session III. Equipment Storage and Maintenance; Laboratory; Repair; Review and TestingA. Proper Equipment Storage and Housekeeping _____________B. Laboratory _____________
Trainees practice dismantling and storing the equipment. This laboratory corresponds to Performance Task 6.
C. Repair of Plasma Arc Cutting Equipment _____________D. Module Review _____________

E. Module Examination _____________1. Trainees must score 70% or higher to receive recognition from NCCER.2. Record the testing results on Craft Training Report Form 200, and submit the
results to the Training Program Sponsor.F. Performance Testing _____________
1. Trainees must complete each task to the satisfaction of the instructor to receive recognition from the NCCER. If applicable, proficiency noted during laboratory exercises can be used to satisfy the performance testing requirements.
2. Record the testing results on Craft Training Report Form 200 and submit the results to the Training Program Sponsor.
G. Performance Accreditation Tasks – Have trainees complete PAT 1 according to the acceptance criteria. _____________1. Have trainees perform PAT 1, Plasma Arc Cutting. This task corresponds
to AWS EG2.0, Module 8 – Thermal Cutting Processes, Unit 3 – Manual Plasma Arc Cutting (PAC), Key Indicators: 3, 4, and 5. _____________

Air Carbon Arc Cutting and GougingAnnotated Instructor’s Guide
Module Overview
This module describes air carbon arc cutting (CAC-A) equipment, safe work area preparation, CAC-Amethods for cutting and cleaning defective metals, CAC-A methods for gouging and preparing base met-als, and proper storage and housekeeping of CAC-A equipment.
Prerequisites
Prior to training with this module, it is recommended that the trainee shall have successfully completedthe following: Core Curriculum and Welding Level One, Modules 29101-09 through 29103-09.
Objectives
Upon completion of this module, the trainee will be able to do the following:
1. Identify and explain the air carbon arc cutting (CAC-A) process and equipment.2. Select and install CAC-A electrodes.3. Prepare the work area and CAC-A equipment for safe operation.4. Use CAC-A equipment for washing and gouging activities.5. Perform storage and housekeeping activities for CAC-A equipment.6. Make minor repairs to CAC-A equipment.
Performance Tasks
Under the supervision of the instructor, the trainee should be able to:
1. Select and install CAC-A electrodes.2. Prepare the work area and CAC-A equipment for safe operation.3. Use CAC-A equipment for washing.4. Use CAC-A equipment for gouging.5. Perform storage and housekeeping activities for CAC-A equipment.
Materials and Equipment List
Module 29104-09
Markers/chalkPencils and scratch paperWhiteboard/chalkboardWelding 1 PowerPoint® Presentation Slides
(ISBN 0-13-609092-3)Multimedia projector and screenDesktop or laptop computerPencils and scratch paperAppropriate personal protective equipmentLeather protective gear (jacket or sleeves)Various welding glovesSamples of protective welding footwearWelding shield or helmet with appropriate lensesEarplugsSafety glasses with approved lensesFull face shieldsRespiratorSoapstone
Tape measurePliersWire brushChipping hammerCAC-A unit with cutting torch and appropriate
gas sourcesScrap steel shapes containing bolts, rivets,
protruding welds, eyes, clips, and other protrusions to be washed
DC welding machine, minimum 200 amps for light duty, or 600 amps for medium duty
Air carbon arc torch and cableSelection of carbon electrodes up to 3⁄8"Compressed air source, minimum of 16 cfm at
80 psig for light and medium duty, or minimum of 50 cfm at 100 psig for heavy duty
Module Examinations*Performance Profile Sheets*
*Located in the Test Booklet

Safety Considerations
Ensure that the trainees are equipped with appropriate personal protective equipment and know how touse it properly. Emphasize the special safety precautions associated with welding because of the addedpotential for fire, burns, respiratory problems, and electrical shock. Ensure that trainees are briefed onshop safety procedures.
Additional Resources
This module is intended to present thorough resources for task training. The following reference work issuggested for both instructors and motivated trainees interested in further study. This is optional mater-ial for continued education rather than for task training.
ANSI C5.3, Recommended Practices for Air Carbon Arc Gouging and Cutting, Latest Edition. Miami, FL:American Welding Society.
Teaching Time for this Module
An outline for use in developing your lesson plan is presented below. Note that each Roman numeral inthe outline equates to one session of instruction. Each session has a suggested time period of 21⁄2 hours.This includes 10 minutes at the beginning of each session for administrative tasks and one 10-minutebreak during the session. Approximately 121⁄2 hours are suggested to cover Air Carbon Arc Cutting andGouging. You will need to adjust the time required for testing based on your class size and resources.Because laboratories often correspond to Performance Tasks, the proficiency of the trainees may be notedduring these exercises for Performance Testing purposes.
Topic Planned Time
Session I. Introduction; Air Carbon Arc Cutting (CAC-A) Process and EquipmentA. Introduction _____________B. CAC-A Process _____________C. CAC-A Equipment _____________
Session II. Selection and Installation of CAC-A ElectrodesA. CAC-A Electrodes _____________B. Electrode Selection _____________C. Electrode Installation _____________D. Laboratory _____________
Trainees practice selecting and installing electrodes. This laboratory corresponds to Performance Task 1.
Session III. Preparing Work Area and CAC-A EquipmentA. Preparing Work Area for CAC-A _____________B. Setting Up CAC-A Equipment _____________C. Test Operating CAC-A Equipment _____________D. Laboratory _____________
Trainees practice setting up the work area and the CAC-A equipment. This laboratory corresponds to Performance Task 2.

Session IV. Washing and Gouging with CAC-A EquipmentA. CAC-A Planning _____________B. CAC-A Washing _____________C. Laboratory _____________
Trainees practice CAC-A washing. This laboratory corresponds to Performance Task 3.
D. CAC-A Gouging _____________E. Laboratory _____________
Trainees practice CAC-A gouging. This laboratory corresponds to Performance Task 4.
Session V. Proper CAC-A Equipment Storage and Repair; Review and TestingA. Proper Storage of CAC-A Equipment _____________B. Repair of CAC-A Equipment _____________C. Laboratory _____________
Trainees practice storage and housekeeping activities on CAC-A equipment. This laboratory corresponds to Performance Task 5.
D. Module Review _____________E. Module Examination _____________
1. Trainees must score 70% or higher to receive recognition from NCCER. _____________2. Record the testing results on Craft Training Report Form 200, and submit
the results to the Training Program Sponsor.F. Performance Testing _____________
1. Trainees must complete each task to the satisfaction of the instructor to receive recognition from the NCCER. If applicable, proficiency noted during laboratory exercises can be used to satisfy the performance testing requirements.
2. Record the testing results on Craft Training Report Form 200 and submit the results to the Training Program Sponsor. _____________
G. Performance Accreditation Tasks – Have trainees complete PATs 1 through 3 according to the acceptance criteria. _____________1. Have trainees perform PAT 1, CAC-A Washing and Gouging. This task
corresponds to AWS EG2.0, Module 8 – Thermal Cutting Processes, Unit 4 – Manual Air Carbon Arc Cutting (CAC-A), Key Indicators: 4 & 5.

Base Metal PreparationAnnotated Instructor’s Guide
Module Overview
This module teaches how to clean base metals for welding and cutting, how to identify and explain jointdesign, and how to prepare base metal joints for welding.
Prerequisites
Prior to training with this module, it is recommended that the trainee shall have successfully completedthe following: Core Curriculum and Welding Level One, Modules 29101-09 through 29104-09.
Objectives
Upon completion of this module, the trainee will be able to do the following:
1. Clean base metal for welding or cutting.2. Identify and explain joint design.3. Explain joint design considerations.4. Mechanically bevel the edge of a mild steel plate.5. Thermally bevel the end of a mild steel plate.6. Select the proper joint design based on a welding procedure specification (WPS) or instructor
direction.
Performance Tasks
Under the supervision of the instructor, the trainee should be able to:
1. Mechanically bevel the edge of a mild steel plate 1⁄4" to 3⁄4" thick at 221⁄2 degrees (or 30 degrees, depend-ing on the equipment available).
2. Thermally prepare a bevel.
Materials and Equipment List
Module 29105-09
Markers/chalkPencils and scratch paperWhiteboard/chalkboardWelding 1 PowerPoint® Presentation Slides
(ISBN 0-13-609092-3)Multimedia projector and screenDesktop or laptop computerAppropriate personal protective equipmentFull face shieldsExamples (photos or actual objects) of metals that
have and have not been prepared for weldingExamples of surface corrosion on different metalsExamples of defects caused by surface
contaminationMSDSs for metal cleaning chemicalsExamples of welding drawings and welding
procedure specificationsExamples of surfacing weldsPhotos of surfacing welds before and after being
ground down and cleanedExamples of plug and slot welds
Examples of fillet weldsSections of bar stock to illustrate various jointsAn oxyfuel or plasma arcing system or pictures
showing how these systems can be used for joint preparation
Properly beveled couponsChipping hammerSoapstoneTape measurePliersFilesFraming squareCombination square with protractor headHand scrapers and wire brushesPower grinder with grinding and wire brush
attachmentsMechanical beveling equipment for plateThermal beveling equipment for plateModule Examinations*Performance Profile Sheets*
*Located in the Test Booklet

Safety Considerations
Ensure that the trainees are equipped with appropriate personal protective equipment and know how touse it properly. Emphasize any special safety precautions associated with cutting and shaping metalbecause of the added potential for fire, burns, respiratory problems, and electrical shock. Ensure thattrainees are briefed on shop safety procedures.
Additional Resources
This module is intended to present thorough resources for task training. The following reference worksare suggested for both instructors and motivated trainees interested in further study. These are optionalmaterials for continued education rather than for task training.
Welding Handbook, Volume 5, 2001. Miami, FL: The American Welding Society.The Procedure Handbook of Arc Welding, 2000. Cleveland, OH: The Lincoln Electric Company.OSHA Standard 1926.351, Arc Welding and Cuttingwww.lincolnelectric.com
Teaching Time for this Module
An outline for use in developing your lesson plan is presented below. Note that each Roman numeral inthe outline equates to one session of instruction. Each session has a suggested time period of 21⁄2 hours.This includes 10 minutes at the beginning of each session for administrative tasks and one 10-minutebreak during the session. Approximately 121⁄2 hours are suggested to cover Base Metal Preparation. You willneed to adjust the time required for testing based on your class size and resources. Because laboratoriesoften correspond to Performance Tasks, the proficiency of the trainees may be noted during these exer-cises for Performance Testing purposes.
Topic Planned Time
Session I. Introduction; Basic Welding Safety; Base Metal CleaningA. Introduction _____________B. Basic Welding Safety _____________
1. Protective Clothing and Equipment for Preparing Metals _____________2. Fire/Explosion Prevention _____________3. Work Area Ventilation _____________
C. Base Metal Cleaning _____________1. Surface Corrosion _____________2. Defects Caused by Surface Contamination _____________3. Mechanical Cleaning _____________4. Chemical Cleaning _____________
Session II. Joint Design IA. Load Considerations _____________B. Types of Joints _____________C. Types of Welds _____________
Session III. Joint Design IIA. Types of Welds (continued) _____________B. Welding Position _____________C. Codes and Welding Procedure Specifications _____________D. Welding Joint Preparation _____________
1. Identify Joint Specification _____________2. Mechanical Joint Preparation _____________

Session IV. Laboratory; Welding Joint Preparation (Continued)A. Laboratory _____________
Trainees practice beveling steel plate by mechanical means. This laboratory corresponds to Performance Task 1.
B. Thermal Joint Preparation _____________
Session V. Laboratory; Review and TestingA. Laboratory _____________
Trainees practice beveling steel plate by thermal means. This laboratory corresponds to Performance Task 2.
B. Module Review _____________C. Module Examination _____________
1. Trainees must score 70% or higher to receive recognition from the NCCER.2. Record the testing results on Craft Training Report Form 200 and submit the
results to the Training Program Sponsor.D. Performance Testing _____________
1. Trainees must complete each task to the satisfaction of the instructor to receive recognition from the NCCER. If applicable, proficiency noted during laboratory exercises can be used to satisfy the performance testing requirements.
2. Record the testing results on Craft Training Report Form 200 and submit the results to the Training Program Sponsor.
E. Performance Accreditation Tasks - Have trainees complete PATs 1 and 2 according to the acceptance criteria. _____________1. Have trainees perform PAT 1, Prepare Plate Joints Mechanically. This task
has no AWS EG2.0 reference.2. Have trainees perform PAT 2, Prepare Plate Joints Thermally. This task
corresponds to AWS EG2.0, Module 8 – Thermal Cutting Processes, Unit 2 – Manual OFC Principles, Key Indicators: 4, 5, and 6.

Weld QualityAnnotated Instructor’s Guide
Module Overview
This module teaches the importance of quality workmanship and covers how to find, identify, and avoidweld imperfections while adhering to necessary codes and specifications.
Prerequisites
Prior to training with this module, it is recommended that the trainee shall have successfully completedthe following: Core Curriculum and Welding Level One, Modules 29101-09 through 29105-09.
Objectives
Upon completion of this module, the trainee will be able to do the following:
1. Identify and explain codes governing welding.2. Identify and explain weld imperfections and their causes.3. Identify and explain nondestructive examination practices.4. Identify and explain welder qualification tests.5. Explain the importance of quality workmanship.6. Identify common destructive testing methods.7. Perform a visual inspection of fillet welds.
Performance Tasks
There are no performance tasks for this module.
Materials and Equipment List
Module 29106-09
Markers/chalkPencils and scratch paperWhiteboard/chalkboardWelding 1 PowerPoint® Presentation Slides
(ISBN 0-13-609092-3)Multimedia projector and screenDesktop or laptop computerPencils and scratch paperAppropriate personal protective equipmentWelding samples showing:
• Porosity• Inclusions• Cracks• Weld metal cracks• Base metal cracks• Incomplete joint penetration• Incomplete fusion• Undercut
• Arc strikes• Spatter• Unacceptable weld profiles
Undercut gaugeButt weld reinforcement gaugeFillet weld blade gauge setWelding coupon examplesSamples of ASME, AWS, API, and ANSI welding
codesPhotos of damage to equipment and structures
caused by failed weldsExamples of Welding Procedure Specifications
and Procedure Qualification RecordsLiquid penetrant test kitRadiograph examplesTested specimens of good and failed weldsModule Examinations*
*Located in the Test Booklet

Safety Considerations
Ensure that the trainees are equipped with appropriate personal protective equipment. Review generalsafety guidelines associated with welding and refer to the MSDS for liquid penetrant solvent.
Additional Resources
This module is intended to present thorough resources for task training. The following reference worksare suggested for both instructors and motivated trainees interested in further study. These are optionalmaterials for continued education rather than for task training.
AWS B1.10: Guide for the Nondestructive Inspection of Welds, 1999. Miami, FL: The American WeldingSociety.
AWS B1.11: Guide for the Visual Inspection of Welds, 2000. Miami, FL: The American Welding Society.OSHA Standard 1926.351, Arc Welding and Cutting.Welding Handbook, Volume 1 (2001) and Volume 2 (2004). Miami, FL: The American Welding Society.AWS D3.5-93R: Guide for Steel Hull Welding, 1993. Miami, FL: The American Welding Society.AWS D3.6M: Specification for Underwater Welding, 1999. Miami, FL: The American Welding Society.AWS D3.7: Guide for Aluminum Hull Welding, 2004. Miami, FL: The American Welding Society.The Procedure Handbook of Arc Welding, 2000. Cleveland, OH: The Lincoln Electric Company.
Teaching Time for this Module
An outline for use in developing your lesson plan is presented below. Note that each Roman numeral inthe outline equates to one session of instruction. Each session has a suggested time period of 21⁄2 hours.This includes 10 minutes at the beginning of each session for administrative tasks and one 10-minutebreak during the session. Approximately 10 hours are suggested to cover Weld Quality. You will need toadjust the time required for hands-on activity and testing based on your class size and resources.
Topic Planned Time
Session I. Introduction; Codes; Weld DiscontinuitiesA. Introduction _____________B. Codes Governing Welding _____________
1. American Society of Mechanical Engineers _____________2. American Welding Society _____________3. American Petroleum Institute _____________4. American National Standards Institute _____________5. Marine Codes _____________
C. Basic Elements of Welding Codes _____________1. Welding Procedure Qualification _____________2. Welder Performance Qualification _____________3. Welder Operator Qualification _____________
D. Weld Discontinuities and Their Causes1. Porosity _____________2. Inclusions _____________3. Cracks _____________4. Incomplete Joint Penetration _____________5. Incomplete Fusion _____________6. Undercut _____________7. Arc Strikes _____________8. Spatter _____________9. Acceptable and Unacceptable Weld Profiles _____________

Session II. Nondestructive Examination (NDE) PracticesA. Visual Inspection _____________B. Liquid Penetrant Inspection _____________C. Magnetic Particle Inspection _____________D. Radiographic Inspection _____________E. Ultrasonic Inspection _____________F. Electromagnetic (Eddy Current) Inspection _____________G. Leak Testing _____________
Session III. Destructive Testing; Welder Performance Qualification TestsA. Destructive Testing _____________B. Welder Performance Qualification Tests _____________
1. Welding Positions Qualification _____________2. AWS Structural Steel Code _____________3. ASME Code _____________4. Welder Qualification Tests _____________
Session IV. Quality Workmanship; Review and TestingA. Quality Workmanship _____________
1. Typical Site Organization _____________2. Chain of Command _____________
B. Module Review _____________C. Module Examination _____________
1. Trainees must score 70% or higher to receive recognition from the NCCER.2. Record the testing results on Craft Training Report Form 200 and submit the
results to the Training Program Sponsor.

SMAW – Equipment and SetupAnnotated Instructor’s Guide
Module Overview
This module covers shielded metal arc welding (SMAW) safety, types of SMAW equipment, and how toset up SMAW equipment for use.
Prerequisites
Prior to training with this module, it is recommended that the trainee shall have successfully completedthe following: Core Curriculum and Welding Level One, Modules 29101-09 through 29106-09.
Objectives
Upon completion of this module, the trainee will be able to do the following:
1. Identify and explain shielded metal arc welding (SMAW) safety.2. Explain welding electrical current.3. Identify welding power supplies and their characteristics.4. Explain how to set up welding power supplies.5. Set up a machine for welding.6. Identify tools used for weld cleaning.
Performance Tasks
Under the supervision of the instructor, the trainee should be able to:
1. Set up a SMAW machine for welding.
Materials and Equipment List
Module 29107-09
Markers/chalkPencils and scratch paperWhiteboard/chalkboardWelding 1 PowerPoint® Presentation Slides
(ISBN 0-13-609092-3)Multimedia projector and screenDesktop or laptop computerAppropriate personal protective equipmentWelding cablesLugs and quick disconnectsWorkpiece clampsElectrode holdersElectrical plugs used with welding machines and
matching electrical outlets
Chipping hammersWire brushesFilesPneumatic weld flux chipperPneumatic needle scalerTransformer welding machineTransformer-rectifier welding machineMotor generator welding machineEngine-driven generator welding machine and
alternator(If any of these welding machines are unavailable,
provide photos instead)Module Examinations*Performance Profile Sheets*
*Located in the Test Booklet
Safety Considerations
Ensure that the trainees are equipped with appropriate personal protective equipment. Review generalsafety guidelines associated with arc welding and engine-driven machinery, including electrical safetyand procedures to prevent carbon monoxide poisoning. Explain that welding machines are heavy andcan cause injury if they fall on people. Proper rigging devices and procedures must be used when liftingand moving welding machines. Emphasize that welding sparks can cause batteries to explode, shower-ing the area with acid.

Additional Resources
This module is intended to present thorough resources for task training. The following reference worksare suggested for both instructors and motivated trainees interested in further study. These are optionalmaterials for continued education rather than for task training.
OSHA Standard 1926.351, Arc Welding and Cutting.The Procedure Handbook of Arc Welding, 2000. Cleveland, OH: The Lincoln Electric Company.Stick Electrode Welding Guide, 2004. Cleveland, OH: The Lincoln Electric Company.Stick Electrode Product Catalog, 2008. Cleveland, OH: The Lincoln Electric Company.
Teaching Time for this Module
An outline for use in developing your lesson plan is presented below. Note that each Roman numeral inthe outline equates to one session of instruction. Each session has a suggested time period of 21⁄2 hours.This includes 10 minutes at the beginning of each session for administrative tasks and one 10-minutebreak during the session. Approximately 5 hours are suggested to cover SMAW – Equipment and Setup.You will need to adjust the time required for hands-on activity and testing based on your class size andresources. Because laboratories often correspond to Performance Tasks, the proficiency of the traineesmay be noted during these exercises for Performance Testing purposes.
Topic Planned Time
Session I. Shielded Metal Arc WeldingA. Introduction _____________B. SMAW Safety _____________
1. Moving Welding Equipment _____________2. Electrical Hazards _____________3. Lifting Hazards _____________4. Working at Heights _____________5. Welding Hazards _____________
C. Welding Current _____________1. Types of Welding Current _____________2. Polarity _____________3. Characteristics of Welding Current _____________
D. SMAW Machines _____________1. SMAW Machine Classifications _____________2. SMAW Machine Types _____________3. SMAW Machine Ratings _____________4. Welding Cable _____________5. SMAW Cable Connectors _____________
E. SMAW Equipment Setup _____________1. Selecting the Proper SMAW Equipment _____________2. Welding Machine Location _____________3. Moving a Welding Machine _____________4. Stringing Welding Cable _____________5. Locating the Workpiece Clamp _____________
F. Starting SMAW Welding Machines _____________1. Energizing Electrically Powered Welding Machines _____________2. Starting Engine-Driven Welding Machines _____________
G. Tools for Cleaning Welds _____________1. Hand Tools _____________2. Pneumatic Cleaning and Slag Removal Tools _____________

Session II. Laboratory; Review and TestingA. Laboratory _____________
Trainees practice setting up a machine for welding.B. Module Review _____________C. Module Examination _____________
1. Trainees must score 70% or higher to receive recognition from the NCCER.2. Record the testing results on Craft Training Report Form 200 and submit the
results to the Training Program Sponsor.D. Performance Testing _____________
1. Trainees must complete each task to the satisfaction of the instructor to receive recognition from the NCCER. If applicable, proficiency noted during laboratory exercises can be used to satisfy the performance testing requirements.
2. Record the testing results on Craft Training Report Form 200 and submit the results to the Training Program Sponsor.

Shielded Metal Arc Welding –ElectrodesAnnotated Instructor’s Guide
Module Overview
This module discusses the classification, selection, storage, and control of electrodes that are used forshielded metal arc welding.
Prerequisites
Prior to training with this module, it is recommended that the trainee shall have successfully completedthe following: Core Curriculum and Welding Level One, Modules 29101-09 through 29107-09.
Objectives
Upon completion of this module, the trainee will be able to do the following:
1. Identify factors that affect electrode selection.2. Explain the American Welding Society (AWS) and the American Society of Mechanical Engineers
(ASME) filler metal classification system.3. Identify different types of filler metals.4. Explain the storage and control of filler metals.5. Explain filler metal traceability requirements and how to use applicable code requirements.6. Identify and select the proper electrode for an identified welding task.
Performance Tasks
There are no performance tasks for this module.
Materials and Equipment List
Module 29108-09
Markers/chalkPencils and scratch paperWhiteboard/chalkboardWelding 1 PowerPoint® Presentation Slides
(ISBN 0-13-609092-3)Multimedia projector and screen
Desktop or laptop computerAppropriate personal protective equipmentElectrodes of various typesSample MSDS for an electrodeSample MSDS for a surface coatingModule Examinations*
*Located in the Test Booklet
Safety Considerations
Ensure that the trainees are equipped with appropriate personal protective equipment. Review generalsafety guidelines associated with welding and refer to the MSDS for each electrode type. Point out thatmany surface coatings produce toxic fumes when heated.
Additional Resources
This module is intended to present thorough resources for task training. The following reference worksare suggested for both instructors and motivated trainees interested in further study. These are optionalmaterials for continued education rather than for task training.
OSHA Standard 1926.351, Arc Welding and Cutting.The Procedure Handbook of Arc Welding, 2000. Cleveland, OH: The Lincoln Electric Company.Stick Electrode Welding Guide, 2004. Cleveland, OH: The Lincoln Electric CompanyStick Electrode Product Catalog, 2008. Cleveland, OH: The Lincoln Electric Company.

Teaching Time for this Module
An outline for use in developing your lesson plan is presented below. Note that each Roman numeral inthe outline equates to one session of instruction. Each session has a suggested time period of 21⁄2 hours.This includes 10 minutes at the beginning of each session for administrative tasks and one 10-minutebreak during the session. Approximately 21⁄2 hours are suggested to cover SMAW – Electrodes. You willneed to adjust the time required for hands-on activity and testing based on your class size and resources.
Topic Planned Time
Session I. Introduction; SMAW Electrodes; Review and ExaminationA. Introduction _____________B. Shielded Metal Arc Welding Electrodes _____________C. AWS Filler Metal Specification System _____________
1. Classification System _____________2. Manufacturers’ Classification _____________3. Electrode Sizes
D. Selecting Electrodes _____________1. Electrode Groups _____________2. Electrode Selection Considerations _____________
E. Filler Metal Storage and Control _____________1. Code Requirements _____________2. Receiving Filler Metal _____________3. Storing Filler Metal _____________4. Storage Ovens _____________
F. Filler Metal Traceability Requirements _____________G. Module Review _____________H. Module Examination _____________
1. Trainees must score 70% or higher to receive recognition from the NCCER.2. Record the testing results on Craft Training Report Form 200 and submit
the results to the Training Program Sponsor.
SMAW – Beads and Fillet WeldsAnnotated Instructor’s Guide
Module Overview
This module explains how to strike an arc and how to make stringer, weave, and overlapping beads withE6010 and E7018 electrodes. It also covers making fillet welds in the 2F, 3F, and 4F positions with E6010and E7018 electrodes.
Prerequisites
Prior to training with this module, it is recommended that the trainee shall have successfully completedthe following: Core Curriculum and Welding Level One, Modules 29101-09 through 29108-09.
Objectives
Upon completion of this module, the trainee will be able to do the following:
1. Set up shielded metal arc welding (SMAW) equipment.2. Describe methods of striking an arc.3. Properly strike and extinguish an arc.4. Describe causes of arc blow and wander.5. Make stringer, weave, and overlapping beads.6. Make fillet welds in the following positions:
• Horizontal (2F)• Vertical (3F)• Overhead (4F)
Performance Tasks
Under the supervision of the instructor, the trainee should be able to:
1. Set up welding equipment.2. Strike an arc.3. Make stringer, weave, and overlapping beads using E6010 and E7018 electrodes.4. Make corner welds on an angle iron section end welded to a plate coupon.5. Make fillet welds using E6010 and E7018 electrodes in the specified position:
• Horizontal (2F)• Vertical (3F)• Overhead (4F)
Module 29109-09
Materials and Equipment List
Markers/chalkPencils and scratch paperWhiteboard/chalkboardWelding 1 PowerPoint® Presentation Slides
(ISBN 0-13-609092-3)Multimedia projector and screenDesktop or laptop computerAppropriate personal protective equipmentSample electrodesRod holdersCarbon steel for practice coupons, 1⁄4" thick
minimumAngle iron sections, 3⁄16" thickDC or AC welding machineWelding bench with arm for position work
Oxyfuel cutting equipmentWelding shield or helmetGrindersFraming squareSoapstoneTape measurePliersWire brushWorkpiece clampsChipping hammerElectrode holderElectrodes, E6010 and E7018 (or E6011 and E6013
for AC)Friction lighterModule Examinations*Performance Profile Sheets*
*Located in the Test Booklet

Safety Considerations
Ensure that the trainees are equipped with appropriate personal protective equipment. Review generalsafety guidelines associated with arc welding, including electrical safety. Emphasize the importance ofproper housekeeping. Point out that face shields must be worn to prevent injury from hot slag.
Additional Resources
This module is intended to present thorough resources for task training. The following reference worksare suggested for both instructors and motivated trainees interested in further study. These are optionalmaterials for continued education rather than for task training.
Stick Electrode Welding Guide, 2004. Cleveland, OH: The Lincoln Electric Company. www.lincolnelectric.com
Teaching Time for this Module
An outline for use in developing your lesson plan is presented below. Note that each Roman numeral inthe outline equates to one session of instruction. Each session has a suggested time period of 21⁄2 hours.This includes 10 minutes at the beginning of each session for administrative tasks and one 10-minutebreak during the session. Approximately 120 hours are suggested to cover Shielded Metal Arc Welding –Beads and Fillet Welds. You will need to adjust the time required for hands-on activity and testing basedon your class size and resources. Because laboratories often correspond to Performance Tasks, the profi-ciency of the trainees may be noted during these exercises for Performance Testing purposes. The labo-ratory portion should take approximately 1071⁄2 hours, or 43 sessions.
Topic Planned Time
Session I. Shielded Metal Arc Welding – Beads and Fillet WeldsA. Introduction _____________B. Safety Summary _____________
1. Protective Clothing and Equipment _____________2. Fire/Explosion Prevention _____________3. Work Area Ventilation _____________
C. Arc Welding Equipment Setup _____________1. Preparing the Welding Area _____________2. Preparing the Weld Coupons _____________3. Electrodes _____________4. Preparing the Welding Machine _____________
D. Striking an Arc _____________1. Scratching Method _____________2. Tapping Method _____________3. Practicing Striking and Extinguishing an Arc _____________
E. Arc Blow _____________
Session II. Laboratory Practice and Performance TestingA. Laboratory _____________
Trainees practice setting up welding equipment, striking an arc, and extinguishing an arc. This laboratory corresponds to Performance Tasks 1 and 2.

Session III. Stringer, Weave, and Overlapping BeadsA. Stringer and Weave Beads _____________
1. Practicing Stringer Beads with E6010 _____________2. Practicing Stringer Beads with E7018 _____________3. Restarting a Weld _____________4. Terminating a Weld _____________5. Practicing Weave Beads with E6010 _____________6. Practicing Weave Beads with E7018 _____________
B. Overlapping Beads _____________1. Practicing Overlapping Beads with E6010 _____________2. Practicing Overlapping Beads with E7018 _____________
C. Make Corner Welds _____________
Session IV. Fillet WeldsA. Fillet Weld Positions _____________B. Practicing Horizontal Fillet Welds with E6010 (2F position) _____________C. Practicing Horizontal Fillet Welds with E7018 (2F position) _____________D. Practicing Vertical Fillet Welds with E6010 (3F position) _____________E. Practicing Vertical Fillet Welds with E7018 (3F position) _____________F. Practicing Overhead Fillet Welds with E6010 (4F position) _____________G. Practicing Overhead Fillet Welds with E7018 (4F position) _____________
Sessions V – XLVII. Laboratory and Performance TestingA. Laboratory (43 sessions). This laboratory corresponds to Performance
Tasks 3 and 4.1. Trainees prepare practice welding coupons _____________2. Trainees practice the following using E6010 electrodes: _____________
• Make stringer, weave, and overlapping beads• Make fillet welds in the 2F, 3F, and 4F positions
3. Trainees practice the following using E7018 electrodes: _____________• Make stringer, weave, and overlapping beads• Make fillet welds in the 2F, 3F, and 4F positions
Session XLVIII. Review and Testing; Performance Accreditation TasksA. Module Review _____________B. Module Examination _____________
1. Trainees must score 70% or higher to receive recognition from the NCCER.2. Record the testing results on Craft Training Report Form 200 and submit the
results to the Training Program Sponsor.C. Performance Testing _____________
1. Trainees must complete each task to the satisfaction of the instructor toreceive recognition from the NCCER. If applicable, proficiency noted duringlaboratory exercises can be used to satisfy the performance testingrequirements.

D. Performance Accreditation Tasks – Have trainees complete PAT 1 through PAT 8 according to the acceptance criteria. _____________1. Have trainees perform PAT 1, Build a Pad with E6010 Electrodes in the Flat
Position. This task corresponds to AWS EG2.0, Module 4 – Shielded Metal Arc Welding, Key Indicators: 3 and 4. _____________
2. Have trainees perform PAT 2, Build a Pad with E7018 Electrodes in the Flat Position. This task corresponds to AWS EG2.0, Module 4 – Shielded Metal Arc Welding, Key Indicators: 3 and 4. _____________
3. Have trainees perform PATs 3, 5, and 7, Make Fillet Welds with E6010 Electrodes in 2F, 3F, and 4F Positions. This task corresponds to AWS EG2.0, Module 4 – Shielded Metal Arc Welding, Key Indicators: 3, 4, and 5. _____________
4. Have trainees perform PATs 4, 6, and 8, Make Fillet Welds with E7018 Electrodes in 2F, 3F, and 4F Positions. This task corresponds to AWS EG2.0, Module 4 – Shielded Metal Arc Welding, Key Indicators: 3, 4, and 5. _____________

Joint Fit-Up and AlignmentAnnotated Instructor’s Guide
Module Overview
This module covers job code specifications, using gauges to check joint fit-up, fitting up joints using pipeand plate fit-up tools, controlling distortion, and checking for misalignment and poor fit-up.
Prerequisites
Prior to training with this module, it is recommended that the trainee shall have successfully completedthe following: Core Curriculum and Welding Level One, Modules 29101-09 through 29109-09.
Objectives
Upon completion of this module, the trainee will be able to do the following:
1. Identify and explain job code specifications.2. Use fit-up gauges and measuring devices to check joint fit-up.3. Identify and explain distortion and how it is controlled.4. Fit up joints using plate and pipe fit-up tools.5. Check for joint misalignment and poor fit-up before and after welding.
Performance Tasks
Under the supervision of the instructor, the trainee should be able to:
1. Fit up joints using plate and pipe fit-up tools.2. Check the joint for proper fit-up and alignment using gauges and measuring devices.
Materials and Equipment List
Module 29110-09
Markers/chalkPencils and scratch paperWhiteboard/chalkboardWelding 1 PowerPoint® Presentation Slides
(ISBN 0-13-609092-3)Multimedia projector and screenDesktop or laptop computerAppropriate personal protective equipmentStraightedgesSquaresLevelsHi-Lo gauges
Hydraulic jacks, chain hoists, come-alongsStrongbacks, clips, yokes, wedgesPlate alignment toolsPipe jacks and rollersChain clamps, cage clamps, rim clampsSmall-diameter pipe clamping devicesPipe pullersFlange alignment toolsCarbon steel plate and pipe of various sizesModule Examinations*Performance Profile Sheets*
* Located in the Test Booklet
Safety Considerations
Ensure that the trainees are equipped with appropriate personal protective equipment. Review generalsafety guidelines associated with welding, including electrical safety. Emphasize that jack stands androller assemblies should not be field-fabricated.

Additional Resources
This module is intended to present thorough resources for task training. The following reference worksare suggested for both instructors and motivated trainees interested in further study. These are optionalmaterials for continued education rather than for task training.
The Procedure Handbook of Arc Welding, 2000. Cleveland, OH: The Lincoln Electric Company.Welding Handbook, 2001. Miami, FL: The American Welding Society.The Dearman System Booklet, 2008. Tulsa, OK: The Mathey Dearman Company.
Teaching Time for this Module
An outline for use in developing your lesson plan is presented below. Note that each Roman numeral inthe outline equates to one session of instruction. Each session has a suggested time period of 21⁄2 hours.This includes 10 minutes at the beginning of each session for administrative tasks and one 10-minutebreak during the session. Approximately 5 hours are suggested to cover Joint Fit-Up and Alignment. Youwill need to adjust the time required for hands-on activity and testing based on your class size andresources. Because laboratories often correspond to Performance Tasks, the proficiency of the traineesmay be noted during these exercises for Performance Testing purposes.
Topic Planned Time
Session I. Introduction; Joint Fit-Up and AlignmentA. Introduction _____________B. Job Code Specifications _____________
1. Governing Codes and Standards _____________2. Code Changes _____________3. Welding Procedure Specifications _____________
C. Fit-Up Gauges and Measuring Devices _____________1. Straightedges _____________2. Squares _____________3. Levels _____________4. Hi-Lo Gauges _____________
D. Fit-Up Tools _____________1. Positioning Parts of a Weldment _____________2. Plate Fit-Up Tools _____________3. Pipe Fit-Up Tools _____________
E. Weldment Distortion _____________1. Causes of Distortion _____________2. Correlation of Metal Properties and Distortion _____________3. Controlling Distortion _____________
F. Checking Joint Misalignment and Poor Fit-Up _____________

Session II. Laboratory; Review and TestingA. Laboratory _____________
1. Trainees practice fitting up plate and pipe joints using applicable fit-up tools. This laboratory corresponds to Performance Task 1. _____________
2. Trainees practice checking fit-up of plate and pipe joints, using applicable gauges and other measuring devices. This laboratory corresponds to Performance Task 2. _____________
B. Module Review _____________C. Module Examination _____________
1. Trainees must score 70% or higher to receive recognition from the NCCER. _____________2. Record the testing results on Craft Training Report 200 and submit the results
to the Training Program Sponsor. _____________D. Performance Testing _____________
1. Trainees must perform each task to the satisfaction of the instructor to receive recognition from the NCCER. _____________
2. Record the testing results on Craft Training Report 200 and submit the results to the Training Program Sponsor. _____________

SMAW – Groove Welds with BackingAnnotated Instructor’s Guide
Module Overview
This module explains how to make groove welds with backing in the 1G, 2G, 3G, and 4G positions usingE7018 electrodes.
Prerequisites
Prior to training with this module, it is recommended that the trainee shall have successfully completedthe following: Core Curriculum and Welding Level One, Modules 29101-09 through 29110-09.
Objectives
Upon completion of this module, the trainee will be able to do the following:
1. Identify and explain groove welds.2. Identify and explain groove welds with backing.3. Set up shielded metal arc welding (SMAW) equipment for making V-groove welds.4. Perform SMAW for V-groove welds with backing in the following positions:
• Flat (1G)• Horizontal (2G)• Vertical (3G)• Overhead (4G)
Performance Tasks
Under the supervision of the instructor, the trainee should be able to:
1. Set up arc welding equipment for making groove welds.2. Make flat welds with backing on V-groove joints using E7018 electrodes.3. Make horizontal welds with backing on V-groove joints using E7018 electrodes.4. Make vertical welds with backing on V-groove joints using E7018 electrodes.5. Make overhead welds with backing on V-groove joints using E7018 electrodes.
Materials and Equipment List
Module 29111-09
Markers/chalkPencils and scratch paperWhiteboard/chalkboardWelding 1 PowerPoint® Presentation Slides
(ISBN 0-13-609092-3)Multimedia projector and screenDesktop or laptop computerAppropriate personal protective equipmentSample electrodesCarbon steel for practice coupons, 1⁄4" thick
minimumDC or AC welding machineWelding bench with arm for position workOxyfuel cutting equipment
Welding shield or helmetGrindersFraming squareSoapstoneTape measurePliersWire brushWorkpiece clampsChipping hammerElectrode holderElectrodes, 5⁄32" and 3⁄16" E7018 (or E6013 for AC)Friction lighterModule Examinations*Performance Profile Sheets*
*Located in the Test Booklet

Safety Considerations
Ensure that the trainees are equipped with appropriate personal protective equipment. Review generalsafety guidelines associated with arc welding, including electrical safety. Emphasize the importance ofproper housekeeping. Point out that face shields must be worn to prevent injury from hot slag. Warn thetrainees of the dangers of hot weld coupons.
Additional Resources
This module is intended to present thorough resources for task training. The following reference worksare suggested for both instructors and motivated trainees interested in further study. These are optionalmaterials for continued education rather than for task training.
Welding Technology, 2004. J. W. Giachino, W. R. Weeks, G. S. Johnson. Homewood, IL: American Tech-nical Publishers, Inc.
www.lincolnelectric.com
Teaching Time for this Module
An outline for use in developing your lesson plan is presented below. Note that each Roman numeral inthe outline equates to one session of instruction. Each session has a suggested time period of 21⁄2 hours.This includes 10 minutes at the beginning of each session for administrative tasks and one 10-minutebreak during the session. Approximately 30 hours are suggested to cover SMAW – Groove Welds with Back-ing. You will need to adjust the time required for hands-on activity and testing based on your class sizeand resources. Because laboratories often correspond to Performance Tasks, the proficiency of the traineesmay be noted during these exercises for Performance Testing purposes. The laboratory portion shouldtake approximately 22.5 hours, or 9 sessions.
Topic Planned Time
Session I. Groove Welds and Welding Equipment SetupA. Introduction _____________B. Groove Welds _____________
1. Typical Groove Weld Styles _____________2. Single and Double Groove Welds _____________3. Groove Weld Terms _____________4. Combination Groove and Fillet Welds _____________5. Backings _____________
C. Welding Equipment Setup _____________1. Safety Practices _____________2. Preparing the Welding Area _____________3. Preparing the Weld Coupons _____________4. Electrodes _____________5. Preparing the Welding Machine _____________
D. Laboratory _____________Trainees practice setting up welding equipment for making groove welds. This laboratory corresponds to Performance Task 1.
Session II. V-Groove Welds with Backing and SMAW of Groove Welds with BackingA. V-Groove Welds with Backing _____________
1. Groove Weld Positions _____________2. Acceptable and Unacceptable Groove Weld Profiles _____________
B. SMAW of V-Groove Welds with Backing _____________1. Practicing Flat V-Groove Welds with Backing (1G Position) _____________2. Horizontal Welds (2G Position) _____________3. Vertical Welds (3G Position) _____________4. Overhead Welds (4G Position) _____________

Sessions III – XI. LaboratoryA. Laboratory (9 sessions) _____________
1. Trainees prepare practice welding coupons. _____________2. Trainees practice making V-groove welds with backing in the 1G, 2G, 3G,
and 4G positions using E7018 electrodes. This laboratory corresponds to Performance Tasks 2 through 5. _____________
Session XII. Review and Testing; Performance Accreditation TasksA. Module Review _____________B. Module Examination _____________
1. Trainees must score 70% or higher to receive recognition from the NCCER.2. Record the testing results on Craft Training Report 200 and submit the Results
to the Training Program Sponsor.C. Performance Testing _____________
1. Trainees must perform each task to the satisfaction of the instructor to receive recognition from the NCCER.
2. Record the testing results on Craft Training Report 200 and submit the results to the Training Program Sponsor.
D. Performance Accreditation Tasks – Have trainees complete PAT 1 through PAT 4, according to the acceptance criteria. _____________1. Have trainees perform PAT 1, Make V-Groove Welds with Backing in the
Flat (1G) Position. This task corresponds to AWS EG2.0, Module 4 – Shielded Metal Arc Welding, Key Indicators: 3, 4, and 6 _____________
2. Have trainees perform PAT 2, Make V-Groove Welds with Backing in the Horizontal (2G) Position. This task corresponds to AWS EG2.0, Module 4 – Shielded Metal Arc Welding, Key Indicators: 3, 4, and 6 _____________
3. Have trainees perform PAT 3, Make V-Groove Welds with Backing in the Vertical (3G) Position. This task corresponds to AWS EG2.0, Module 4 – Shielded Metal Arc Welding, Key Indicators: 3, 4, and 6 _____________
4. Have trainees perform PAT 3, Make V-Groove Welds with Backing in the Overhead (4G) Position. This task corresponds to AWS EG2.0, Module 4 – Shielded Metal Arc Welding, Key Indicators: 3, 4, and 6 _____________

SMAW – Open V-Groove WeldsAnnotated Instructor’s Guide
Module Overview
This module explains how to prepare arc welding equipment and make welds on pads and open-root V-groove joints in the 1G, 2G, 3G, and 4G positions using E6010 and E7018 electrodes.
Prerequisites
Prior to training with this module, it is recommended that the trainee shall have successfully completedthe following: Core Curriculum and Welding Level One, Modules 29101-09 through 29111-09.
Objectives
Upon completion of this module, the trainee will be able to do the following:
1. Prepare shielded metal arc welding (SMAW) equipment for open-root V-groove welds.2. Perform open-root V-groove welds in the following positions:
• Flat (1G) position• Horizontal (2G) position• Vertical (3G) position• Overhead (4G) position
Performance Tasks
Under the supervision of the instructor, the trainee should be able to:
1. Prepare arc welding equipment for open V-groove welds.2. Make open V-groove welds with E6010 and E7018 electrodes in the following positions:
• Flat (1G) position• Horizontal (2G) position• Vertical (3G) position• Overhead (4G) position
Materials and Equipment List
Module 29112-09
Markers/chalkPencils and scratch paperWhiteboard/chalkboardWelding 1 PowerPoint® Presentation Slides
(ISBN 0-13-609092-3)Multimedia projector and screenDesktop or laptop computerMarkers/chalkPencils and scratch paperAppropriate personal protective equipmentSample electrodesCarbon steel for practice coupons, 1⁄4" thick
minimumDC (or AC) welding machineWelding bench with arm for position work
Oxyfuel cutting equipmentWelding shield or helmetGrindersFraming squaresSoapstonePliersFriction lightersWire brushChipping hammerWorkpiece clampsElectrode holderElectrodes, E6010 and E7018 (or E6011 and E6013
for AC)Module Examinations*Performance Profile Sheets*
*Located in the Test Booklet

Safety Considerations
Ensure that the trainees are equipped with appropriate personal protective equipment and know how touse it properly. Emphasize the special safety precautions associated with the handling and use of cylin-ders and oxyfuel cutting equipment used in preparing the coupons. Ensure that trainees are briefed onshop safety procedures.
Additional Resources
This module is intended to present thorough resources for task training. The following reference work issuggested for both instructors and motivated trainees interested in further study. This is optional mater-ial for continued education rather than for task training.
www.lincolnelectric.com
Teaching Time for this Module
An outline for use in developing your lesson plan is presented below. Note that each Roman numeral inthe outline equates to one session of instruction. Each session has a suggested time period of 21⁄2 hours.This includes 10 minutes at the beginning of each session for administrative tasks and one 10-minutebreak during the session. Approximately 80 hours are suggested to cover SMAW – Open V-Groove Welds.You will need to adjust the time required for hands-on activity and testing based on your class size andresources. Because laboratories often correspond to Performance Tasks, the proficiency of the traineesmay be noted during these exercises for Performance Testing purposes. The laboratory portion of thiscourse should take approximately 62.5 hours, or 25 sessions.
Topic Planned Time
Session I. Introduction; Welding Equipment SetupA. Introduction _____________B. Welding Equipment Setup _____________
1. Safety Practices _____________2. Preparing the Welding Area _____________3. Preparing the Weld Coupons _____________4. Electrodes _____________5. Preparing the Welding Machine _____________
C. Laboratory _____________Trainees prepare the welding area and coupons, and practice setting up arc welding equipment for open V-groove welds. This laboratory corresponds to Performance Task 1.
Session II. Open-Root V-Groove Welds; SMAW of Open-Root V-Groove WeldsA. Open-Root V-Groove Welds _____________
1. Root Pass _____________2. Groove Weld Positions _____________3. Acceptable and Unacceptable Groove Weld Profiles _____________
B. SMAW of Open-Root V-Groove Welds _____________1. Practicing Flat Open-Root V-Groove Welds (1G Position) _____________2. Horizontal Welds (2G Position) _____________3. Vertical Welds (3G Position) _____________4. Overhead Welds (4G Position) _____________

Sessions III. XXXI. LaboratoryA. Laboratory (25 sessions). This laboratory corresponds to Performance Task 2. _____________
Trainees practice making open V-groove welds with E6010 and E7018 electrodes in the following positions:• Flat (1G)• Horizontal (2G)• Vertical (3G)• Overhead (4G)
Session XXXII. Review and Testing; Performance Accreditation TasksA. Module Review _____________B. Module Examination _____________
1. Trainees must score 70% or higher to receive recognition from the NCCER.2. Record the testing results on Craft Training Report Form 200 and submit the
results to the Training Program Sponsor.C. Performance Testing _____________
1. Trainees must perform each task to the satisfaction of the instructor to receive recognition from the NCCER.
2. Record the testing results on Craft Training Report Form 200 and submit the results to the Training Program Sponsor.
D. Performance Accreditation Tasks – Have trainees complete PAT 1 through PAT 4, according to the acceptance criteria. _____________1. Have trainees perform PAT 1, Make Open V-Groove Welds with E6010 and
E7018 electrodes in the Flat (1G) Position. This task corresponds to AWS EG2.0, Module 4 – Shielded Metal Arc Welding, Key Indicators: 3, 4, and 6 _____________
2. Have trainees perform PAT 2, Make Open V-Groove Welds with E6010 and E7018 electrodes in the Horizontal (2G) Position. This task corresponds to AWS EG2.0, Module 4 – Shielded Metal Arc Welding, Key Indicators: 3, 4, and 6 _____________
3. Have trainees perform PAT 3, Make Open V-Groove Welds with E6010 and E7018 electrodes in the Vertical (3G) Position. This task corresponds to AWS EG2.0, Module 4 – Shielded Metal Arc Welding, Key Indicators: 3, 4, and 6 _____________
4. Have trainees perform PAT 3, Make Open V-Groove Welds with E6010 and E7018 electrodes in the Overhead (4G) Position. This task corresponds to AWS EG2.0, Module 4 – Shielded Metal Arc Welding, Key Indicators: 3, 4, and 6 _____________