WebPlusX8 ResourceGuide En
192
description
User Manual WebPlusX8 ResourceGuide En
Transcript of WebPlusX8 ResourceGuide En

Contacting Serif
Help with your Product
community.serif.com Get answers and ask questions in the Serif community!
Additional Serif information
Serif website www.serif.com
Main office
Address The Software Centre, PO Box 2000 Nottingham, NG11 7GW, UK
Phone (0115) 914 2000
Phone (Registration) (0800) 376 1989 +44 800 376 1989 800-794-6876 (US, Canada)
Phone (Sales) (0800) 376 7070 +44 800 376 7070 800-489-6703 (US, Canada)
Customer Service 0845 345 6770 800-489-6720 (US, Canada)
Fax (0115) 914 2020
Credits
This Resource Guide, and the software described in it, is furnished under an end user License Agreement, which is included with the product. The agreement specifies the permitted and prohibited uses.
Trademarks Serif is a registered trademark of Serif (Europe) Ltd.
WebPlus is a registered trademark of Serif (Europe) Ltd.
All Serif product names are trademarks of Serif (Europe) Ltd.
Microsoft, Windows, and the Windows logo are registered trademarks of Microsoft Corporation. All other trademarks acknowledged.
Windows Vista and the Windows Vista Start button are trademarks or registered trademarks of Microsoft Corporation in the United States and/or other countries.
Google+ social service, Google Maps, Google Analytics web analytics service, and Google AdSense advertising service are trademarks of Google Inc.
Copyrights Digital Images ©2008 Hemera Technologies Inc. All Rights Reserved.
Portions images ©1997-2002 Nova Development Corporation; ©1995 Expressions Computer Software; ©1996-98 CreatiCom, Inc.; ©1996 Cliptoart; ©1997 Multimedia Agency Corporation; ©1997-98 Seattle Support Group. Rights of all parties reserved.
This application was developed using LEADTOOLS, copyright © 1991-2007 LEAD Technologies, Inc. ALL Rights Reserved.
THE PROXIMITY HYPHENATION SYSTEM © 1989 Proximity Technology Inc. All rights reserved.
THE PROXIMITY/COLLINS DATABASE © 1990 William Collins Sons & Co. Ltd.; © 1990 Proximity Technology Inc. All rights reserved.
THE PROXIMITY/MERRIAM-WEBSTER DATABASE © 1990 Merriam-Webster Inc.; © 1990 Proximity Technology Inc. All rights reserved.
The Sentry Spelling-Checker Engine © 2000 Wintertree Software Inc.
The ThesDB Thesaurus Engine © 1993-97 Wintertree Software Inc.
WGrammar Grammar-Checker Engine © 1998 Wintertree Software Inc.
Andrei Stcherbatchenko, Ferdinand Prantl
PayPal © 1999-2012 PayPal. All rights reserved.

Roman Cart © 2008 Roman Interactive Ltd. All rights reserved.
Mal's © 1998 to 2003 Mal's e-commerce Ltd. All rights reserved.
iTunes © 2000 to 2008 Apple, Inc. All rights reserved.
YouTube © 2008 YouTube, LLC
TM + © 2013 Vimeo, LLC. All rights reserved.
Facebook © 2008 Facebook Inc.
Twitter © 2012 Twitter Inc.
phpBB © 2000, 2002, 2003, 2007 phpBB Group
FontForge © 2000,2001,2002,2003,2004,2005,2006,2007,2008 by George Williams.
Portions of this software are copyright © 2008 The FreeType Project (www.freetype.org). All rights reserved.
ODF Translator © 2006-2008, Clever Age, DIaLOGIKa, Sonata Software Ltd. All rights reserved.
Office Binary Translator to OpenXML Copyright © 2008-2009, DIaLOGIKa. All rights reserved.
Anti-Grain Geometry - Version 2.4 Copyright © 2002-2005 Maxim Shemanarev (McSeem)
SlideShowPro © Dominey Design Inc. All rights reserved.
HTML5 Audio Copyright (c) 2010 Anthony Kolber (http://aestheticallyloyal.com)
Audio Player Copyright (c) 2009 - 2013 Happyworm Ltd
Clipart samples from Serif ArtPacks © Serif (Europe) Ltd. & Paul Harris
TrueType font samples from Serif FontPacks © Serif (Europe) Ltd.
© 2014 Serif (Europe) Ltd. All rights reserved. No part of this Resource Guide may be reproduced in any form without the express written permission of Serif (Europe) Ltd.
Serif WebPlus X8 © 2014 Serif (Europe) Ltd. All rights reserved.
Companies and names used in samples are fictitious.

Introduction
Welcome to the WebPlus X8 Resource Guide.
This Resource Guide covers the best techniques for using the fundamental tools in WebPlus, from beginner- to advanced-level, and provides creative inspiration for producing a website.
1: Tutorials This chapter will help you work with the tools and content available in WebPlus X8. You'll learn how to use these fundamental tools and professional features to create a dynamic and eye-catching website. Each tutorial contains a wealth of information and techniques for using WebPlus.
2: Creative Showcase We showcase a few Pro Design Template and theme layout sites which you can use to get started easily. Instructions on accessing these templates and theme layouts are also included.

Working with tutorials
Throughout the Resource Guide, you'll be prompted to access resource files from the Startup Assistant and Assets tab within WebPlus. These files have been provided to get you started or to help focus on a key learning point. Details for accessing these files are provided within the tutorial.
We recommend working through the tutorials in sequence.
Useful icons Here is a quick guide to the icons you'll find useful along the way.
We'll remind you save your work with these helpful save points.
These give you an estimate of how long a tutorial will take to complete.
For guidance, tutorials are graded between 1 (beginner) - 3 (advanced).
This is a note. Notes provide useful information about the program or a particular technique.
This is a tip. Our tips provide information that will help you with your projects.
This is a warning! We don't want to make you panic but when you see this icon, you need to pay attention to the steps as they will be particularly important.
Exploring WebPlus X8
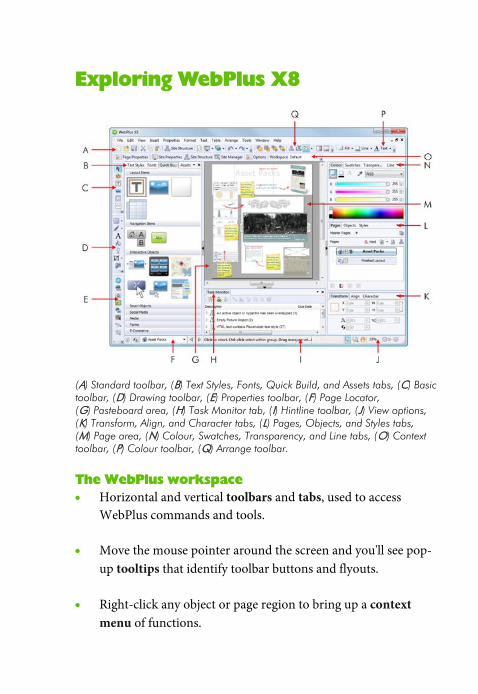
(A) Standard toolbar, (B) Text Styles, Fonts, Quick Build, and Assets tabs, (C) Basic toolbar, (D) Drawing toolbar, (E) Properties toolbar, (F) Page Locator, (G) Pasteboard area, (H) Task Monitor tab, (I) Hintline toolbar, (J) View options, (K) Transform, Align, and Character tabs, (L) Pages, Objects, and Styles tabs, (M) Page area, (N) Colour, Swatches, Transparency, and Line tabs, (O) Context toolbar, (P) Colour toolbar, (Q) Arrange toolbar.
The WebPlus workspace • Horizontal and vertical toolbars and tabs, used to access
WebPlus commands and tools.
• Move the mouse pointer around the screen and you'll see pop-up tooltips that identify toolbar buttons and flyouts.
• Right-click any object or page region to bring up a context menu of functions.

Table of Contents
Tutorials......................................................................... 1
Setting up a new site ........................................................................................................ 3
Master pages and Text Styles ...................................................................................... 15
Navigation bars and Sitemaps .................................................................................... 39
Sliders and text .............................................................................................................. 63
Forms, User Details and Google maps ...................................................................... 85
Using hyperlinks ......................................................................................................... 103
Linking to social media .............................................................................................. 119
Adding a search facility ............................................................................................. 131
Publishing your site .................................................................................................... 141
Making a mobile-ready site ....................................................................................... 153
Creative Showcase ................................................. 175
Pro Templates ............................................................................................................. 177
Theme Layouts ............................................................................................................ 181

Tutorials 1
Tutorials

2 Tutorials

Tutorials: Setting up a new site 3
Setting up a new site
30 min
Creating a website in WebPlus doesn't need to be a complicated affair. Even if you want to start from scratch, the process is a relatively simple one. In this tutorial, we'll show you how to set up your site ready to add site content.
By the end of this tutorial you will be able to:
• Customize the initial setup of your website.
• Add new pages.
• Preview your site in a browser.
• Add a Favourites icon (Favicon).
• Set up margin guides.

4 Tutorials: Setting up a new site
Whether you are creating a website for a business, charity, or club, or setting up a personal website, it is worth researching potential web addresses before starting your design. Your web address (URL) should be easy to remember and should have a strong link to your site name. Also consider acquiring social media profiles which are identical (or close to) your URL.
Let's begin...
1. From the File menu, click Startup Assistant.
2. On the left, click New Site.
3. On the right, in the Site Name input box, type the name of your site. We called ours "Million Budget".
By naming your site here, it will populate throughout your site and provide instant branding on every page.
4. From the Colour Scheme drop-down list, select your preferred scheme. We chose Clean 01. Your setup should now resemble ours...
5. Leave the remaining settings set to the default and click Start new site. The Site Name specified in step 3 appears as the default File name in the Save As dialog.

Tutorials: Setting up a new site 5
6. Navigate to your chosen location and click Save.
Your new site opens with the Home page displayed in the workspace. We'll add some additional pages to begin building our site.
Adding pages
All websites contain a Home page (for details, see the Sliders and text tutorial on p. 63) to greet visitors. Any other pages are optional, though we highly recommend adding a page which allows visitors to easily get in touch with you.
To add a new page:
1. On the Pages tab, click the down arrow on the Add new page or link button and select New Blank Page.
2. In the Page Properties dialog:
• In the Page name input box, drag to select the default name and then type 'Support'. This is used for navigation purposes.
6 Tutorials: Setting up a new site
• Select the Specify page title option and update the contents of the adjacent input box.
The page title has already been pre-populating using the Site Name you specified when you create your site from the Startup Assistant.
• In the File name input box, drag to select the default name and then type 'support.html'.
We recommend that all HTML names remain in lower case and do not contain spaces.
• Click OK.
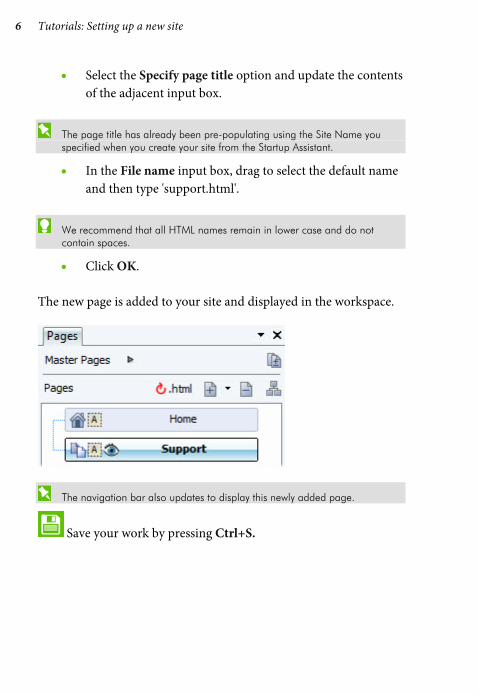
The new page is added to your site and displayed in the workspace.
The navigation bar also updates to display this newly added page.
Save your work by pressing Ctrl+S.

Tutorials: Setting up a new site 7
Previewing your site
Previewing your site in a browser window gives you a great indication of what the final published website will look like.
We recommend testing compatibility for a range of browsers such as Internet Explorer, Firefox, Chrome, Safari, and Opera.
To preview your site in a browser:
• On the Standard toolbar, click the down arrow on the Preview site button and select Preview in {browser of choice}.
If you leave the browser open with your site displayed, changes to your site can be quickly viewed by refreshing/reloading the page directly in the browser (commonly by pressing F5).
If we examine the displayed information, you'll get an idea of how visitors to your website will see the settings you've implemented.
The page title of the current page is displayed on the tab and the file name is displayed in the address bar. If a page from your website is added to a visitor's bookmarks, the page title is used to identify it by default. (We added our Home page to our browser's favourites bar.)
Page titles are also important as they identify the contents of website pages to search engines.

8 Tutorials: Setting up a new site
Adding a Favourites Icon
Adding a Favourites icon (Favicon) gives your site a graphic identity and credibility, and helps it to stand out in a cluttered list of bookmarks or favourites.
To add a favicon:
1. On the context toolbar, click Site Properties.
2. In the Site Properties dialog:
• On the left, from the Features category, select the Favourites Icon sub-category.
• Select the Show a favourites icon for the site option.

Tutorials: Setting up a new site 9
• Select an asset from the gallery.
• Select the Export Apple touch icons option.
• Click OK.
Feel free to Preview your changes. (See p. 7 for details.)
Depending on the browser, the Favicon is displayed in the tab next to the page name and/or before a website's URL in a browser's address bar. The icon also displays next to the website's name in a list of bookmarks, when a visitor bookmarks your site or adds it to their 'favourites'.
Save your work by pressing Ctrl+S.
Setting the site background
When previewing the site, you may have noticed there was no clear distinction between the site background and the site page. This is because, by default, the site background is set to scheme colour 1 and the page colour to transparent. This may suit your needs, but we'll show you how you can update the settings to define the page against the background.
10 Tutorials: Setting up a new site
To adjust background settings:
1. On the context toolbar, click Site Properties.
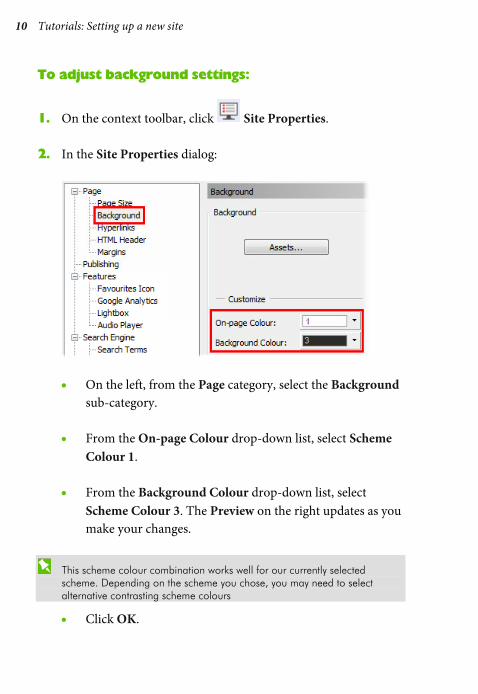
2. In the Site Properties dialog:
• On the left, from the Page category, select the Background sub-category.
• From the On-page Colour drop-down list, select Scheme Colour 1.
• From the Background Colour drop-down list, select Scheme Colour 3. The Preview on the right updates as you make your changes.
This scheme colour combination works well for our currently selected scheme. Depending on the scheme you chose, you may need to select alternative contrasting scheme colours
• Click OK.
Tutorials: Setting up a new site 11
Save your work by pressing Ctrl+S.
Feel free to Preview your changes. (See p. 7 for details.)
Setting up margins
Before we begin putting our design together, it is worth thinking about the general layout of our site pages.
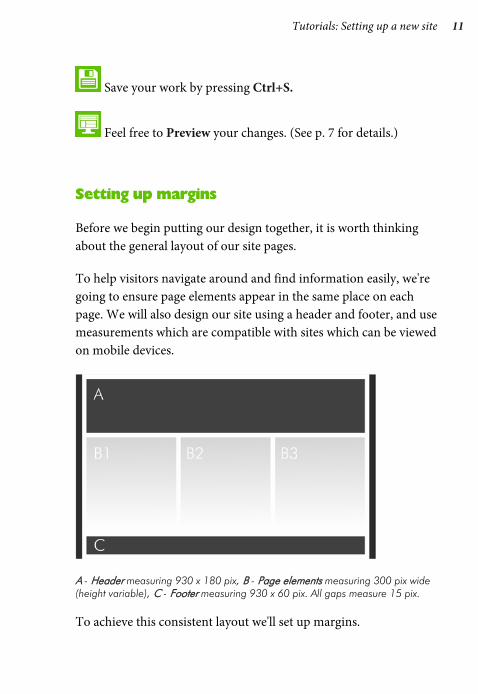
To help visitors navigate around and find information easily, we're going to ensure page elements appear in the same place on each page. We will also design our site using a header and footer, and use measurements which are compatible with sites which can be viewed on mobile devices.
A - Header measuring 930 x 180 pix, B - Page elements measuring 300 pix wide (height variable), C - Footer measuring 930 x 60 pix. All gaps measure 15 pix.
To achieve this consistent layout we'll set up margins.

12 Tutorials: Setting up a new site
To set up margins:
1. On the context toolbar, click Site Properties.
2. In the Site Properties dialog:
• On the left, from the Page category, select the Margins sub-category.
• Set the Left and Right margins to 15 pix.
• Set the Top margin to 210 pix.
• Set the Bottom margin to 90 pix.
• Set the Columns to 3.
• Set the Col. gap to 15 pix.
• Click OK.

Tutorials: Setting up a new site 13
The setting will ensure margin guides appear consistently on all pages, regardless of their width or height.
When laying out page content, working within these guides will help visitors find information quickly. To ensure we do not accidently move our guides, we'll lock them.
Save your work by pressing Ctrl+S.
14 Tutorials: Setting up a new site
To lock guides:
1. On the context toolbar, click Options.
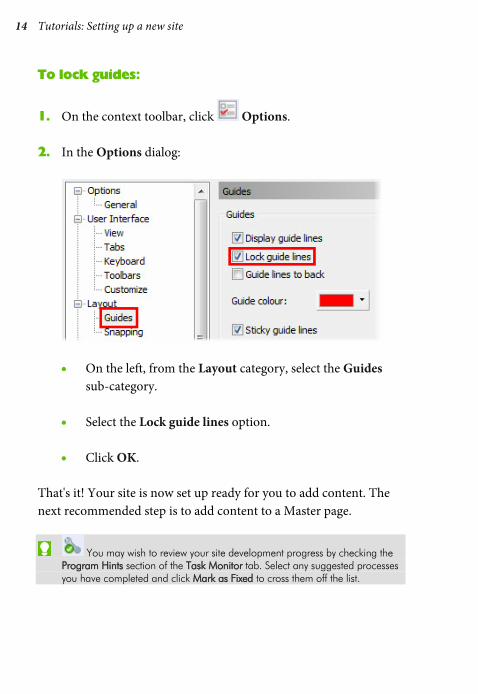
2. In the Options dialog:
• On the left, from the Layout category, select the Guides sub-category.
• Select the Lock guide lines option.
• Click OK.
That's it! Your site is now set up ready for you to add content. The next recommended step is to add content to a Master page.
You may wish to review your site development progress by checking the Program Hints section of the Task Monitor tab. Select any suggested processes you have completed and click Mark as Fixed to cross them off the list.
Tutorials: Master pages and Text Styles 15
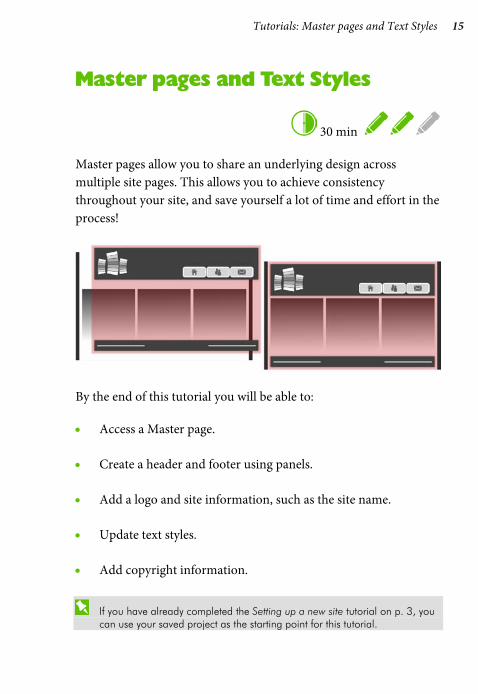
Master pages and Text Styles
30 min
Master pages allow you to share an underlying design across multiple site pages. This allows you to achieve consistency throughout your site, and save yourself a lot of time and effort in the process!
By the end of this tutorial you will be able to:
• Access a Master page.
• Create a header and footer using panels.
• Add a logo and site information, such as the site name.
• Update text styles.
• Add copyright information.
If you have already completed the Setting up a new site tutorial on p. 3, you can use your saved project as the starting point for this tutorial.

16 Tutorials: Master pages and Text Styles
Let's begin...
1. From the File menu, click Startup Assistant.
2. On the left, click Open.
3. From the gallery on the right, select WPX8 Tutorial 01.wpp.
If the tutorial file is not available from the gallery, click Sample files.
From the Open dialog, select the file, select Open as untitled, and click Open.
Alternatively, in the Open dialog, navigate to the folder where you saved your project file from the Setting up a new site tutorial on p. 3, select it and click Open.
A site will open in the workspace with two pages and page guides.

Tutorials: Master pages and Text Styles 17
Why use Master pages?
Master pages are like transparent sheets behind or in front of your main site pages.
When you add text frames, pictures, or other elements to the Master page, they appear in the same position on all site pages that use that Master page.
What you place on a Master page is entirely up to you and often depends on the type of site you are creating. Typical elements that you'd place on a Master page include:
• navigation elements (see the Navigation bars and Sitemaps tutorial on p. 39 for more details).
• company name, logo and/or contact details.
Master pages simplify site maintenance as objects placed on a Master page only need updating once.
So let's access the Master page in our site and begin designing!

18 Tutorials: Master pages and Text Styles
To access the master page:
1. On the Pages tab, click Master Pages.
2. Double-click the Master A thumbnail.
The Master page is displayed in the workspace.
We'll begin our design using panels to create a page header and footer.

Tutorials: Master pages and Text Styles 19
Creating a header and footer using panels
Headers and footers are a great way of organizing information and navigation on a website. We'll create these using panels. Panels can host a whole range of content including text, pictures, navigation bars, and maps. Once content has been placed on a panel, it becomes attached to that panel. Moving the panel will also move all the content on it.
To add a panel:
1. On the Quick Build tab, in the Layout Items category, drag the Panel layout item to the page.
2. In the Insert Panel dialog, click OK.

20 Tutorials: Master pages and Text Styles
3. On the Swatches tab, select Scheme Colour 3.
The scheme colour is applied to the panel's fill.
4. With the panel still selected, on the Transform tab:
• Ensure the object is set to Anchor Top Left and the Aspect Ratio is Unlocked.
• Set X to 15 pix and Y to 15 pix.
• Set W (Width) to 930 pix and H (Height) to 180 pix.
The panel is resized and positioned on the page precisely. The measurements meet the criteria we set in the Setting up a new site tutorial on p. 11.
We'll duplicate this panel to create a footer.

Tutorials: Master pages and Text Styles 21
To duplicate an object:
1. Hold down the Ctrl key and then drag the panel.
2. Release the Ctrl key and mouse button. A copy of the panel is created.
3. With the panel still selected, on the Transform tab:
• Ensure the object is set to Anchor Top Left and the Aspect Ratio is Unlocked.
• Set X to 15 pix and Y to 925 pix.
• Set H (Height) to 60 pix.
Save your work by pressing Ctrl+S.

22 Tutorials: Master pages and Text Styles
Our basic Master page layout, with header and footer, is now complete.
It closely resembles the layout we originally sketched out in the Setting up a new site tutorial on p. 11.
However, to ensure our footer always appears at the bottom of the page, we need to attach it there.
To attach an object to the bottom of the page:
• With the footer panel still selected, from the Arrange menu, select Attach to Bottom of Page.
The footer panel will now move in relation to the bottom of the page if a page is resized.
Feel free to Preview your changes. (See p. 7 for details.)

Tutorials: Master pages and Text Styles 23
Adding content to the header
Now we have our basic page structure in place, let's begin adding elements to our site. We'll focus on the header and the objects which appear on them, such as a company logo and site name.
To add a logo:
1. On the Assets tab, click Browse to open the Asset Browser.
2. On the left, in the Pack Files section, click to select the Logos pack. The logos from all installed packs are displayed in the main pane.
3. In the main pane, click a logo of your choice.
The green shows that the asset has been added to the tab. The icon indicates the object is schemed.
4. Click Close.

24 Tutorials: Master pages and Text Styles
5. On the Assets tab, the Graphics category should be displayed (if not, click the header).
6. Drag the logo to the pasteboard.
7. With the logo still selected, drag the object's move button to position it neatly on the header panel.
Next we'll add our site name...
Tutorials: Master pages and Text Styles 25
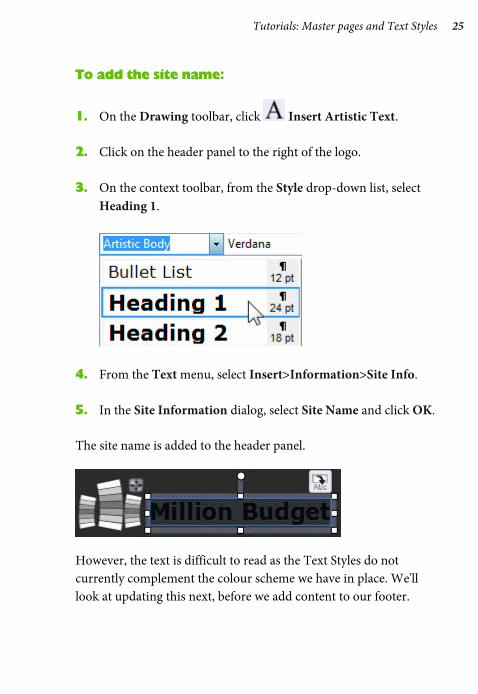
To add the site name:
1. On the Drawing toolbar, click Insert Artistic Text.
2. Click on the header panel to the right of the logo.
3. On the context toolbar, from the Style drop-down list, select Heading 1.
4. From the Text menu, select Insert>Information>Site Info.
5. In the Site Information dialog, select Site Name and click OK.
The site name is added to the header panel.
However, the text is difficult to read as the Text Styles do not currently complement the colour scheme we have in place. We'll look at updating this next, before we add content to our footer.

26 Tutorials: Master pages and Text Styles
You can change the name of your site (and other information) from the File Summary category in the Site Properties dialog (accessible from the Properties menu).
Save your work by pressing Ctrl+S.
Updating text styles
A text style is a set of character and/or paragraph attributes saved as a group. When you apply a style to text, you apply the whole group of attributes in just one step. We'll update the preset styles to suit our needs, but before we do, let's quickly discuss fonts.
All available fonts on your computer are displayed in the Fonts tab. These are divided into categories by default. Websafe fonts are available on all computers and designing with these fonts will guarantee your website looks identical on all viewing platforms. Embeddable fonts give you more creative freedom. These fonts will be embedded with your website so that even if a font is not installed on a visitor's computer, they will be able to view text as you have designed it. See Using fonts in WebPlus Help for more information on fonts.
To speed up your design process, you can add any fonts to a customizable Favourites category.

Tutorials: Master pages and Text Styles 27
To add fonts to the Favourites category:
• On the Fonts tab:
• In the search box at the bottom, type 'elementary'.
• In the Embeddable category, right-click Elementary SF and select Favourite.
• Repeat the above steps to add Elementary Heavy SF to the Favourites category.
28 Tutorials: Master pages and Text Styles
Now, onto updating our text styles...
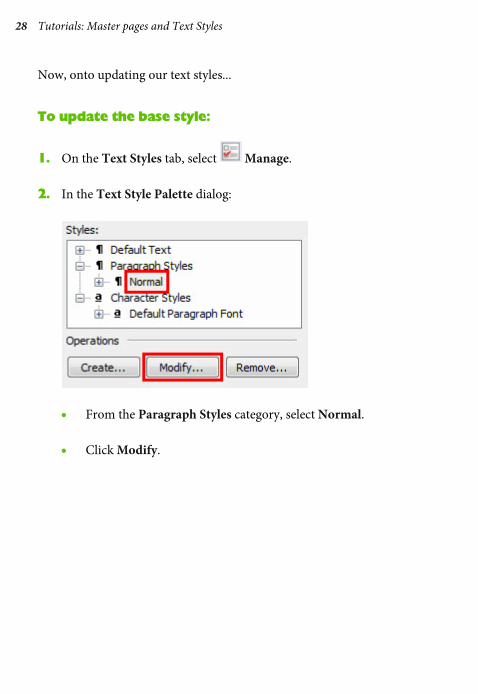
To update the base style:
1. On the Text Styles tab, select Manage.
2. In the Text Style Palette dialog:
• From the Paragraph Styles category, select Normal.
• Click Modify.

Tutorials: Master pages and Text Styles 29
3. In the Text Style dialog:
• From the Character category, select the Font sub-category.
• From the second Font drop-down list (displays Websafe by default), select Favourites.
• From the first Font drop-down list, select Elementary SF.
• From the Text fill drop-down list, select Scheme Colour 12.
• Click OK.
Modifying the Normal style will affect all other styles which are based on it (such as Body). We'll also update the generic Headings style.

30 Tutorials: Master pages and Text Styles
To update a parent style:
1. In the Text Style Palette dialog:
• From the Paragraph Styles category, expand the Normal branch, and select Headings.
• Click Modify.
2. In the Text Style dialog:
• From the Character category, select the Font sub-category.
• From the second Font drop-down list (displays Websafe by default), select Favourites.
• From the first Font drop-down list, select Elementary Heavy SF.
• Click OK.
The changes made to the Headings parent style is adopted by all the child styles underneath.
Currently our text set to Heading 1 appears on a dark background, so let's modify our Heading 1 style to adopt a light colour.

Tutorials: Master pages and Text Styles 31
To update an individual style:
1. In the Text Style Palette dialog:
• From the Paragraph Styles category, expand the Headings branch, and select Heading 1.
• Click Modify.
2. In the Text Style dialog:
• From the Character category, select the Font sub-category.
• Select the All CAPS option.
• From the Text fill drop-down list, select Scheme Colour 1.
• Click OK.
3. Back in the Text Style Palette dialog, click Close.
The styles in the Text Styles tab and the text on the page update to reflect your changes.
32 Tutorials: Master pages and Text Styles
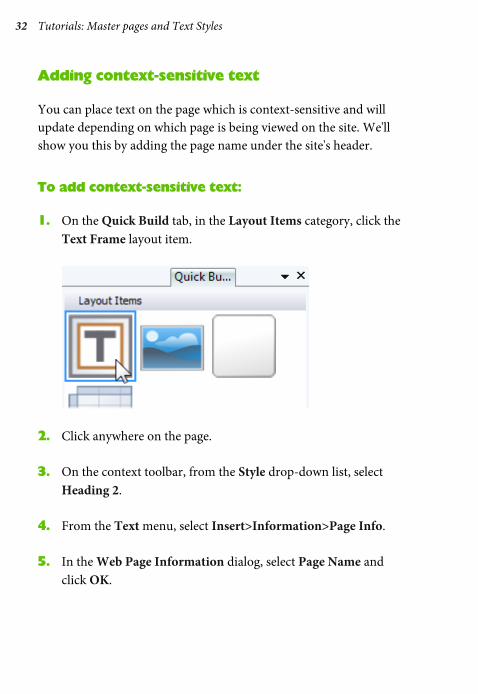
Adding context-sensitive text
You can place text on the page which is context-sensitive and will update depending on which page is being viewed on the site. We'll show you this by adding the page name under the site's header.
To add context-sensitive text:
1. On the Quick Build tab, in the Layout Items category, click the Text Frame layout item.
2. Click anywhere on the page.
3. On the context toolbar, from the Style drop-down list, select Heading 2.
4. From the Text menu, select Insert>Information>Page Info.
5. In the Web Page Information dialog, select Page Name and click OK.

Tutorials: Master pages and Text Styles 33
6. On the Transform tab:
• Ensure the object is set to Anchor Top Left and the Aspect Ratio is Unlocked.
• Set X to 15 pix and Y to 210 pix.
• Set W (Width) to 300 pix and H (Height) to 35 pix.
The text will now update depending on the page viewed. The page's name will be displayed.
Let's finish our Master page design by adding a copyright to the footer.
Save your work by pressing Ctrl+S.
Feel free to Preview your changes. (See p. 7 for details.)
34 Tutorials: Master pages and Text Styles
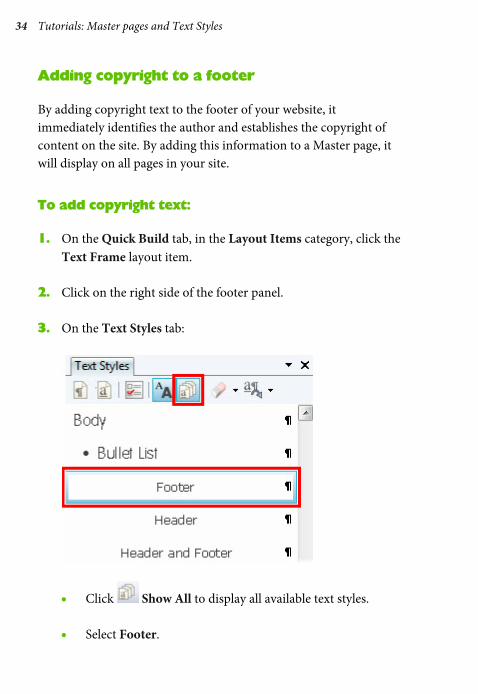
Adding copyright to a footer
By adding copyright text to the footer of your website, it immediately identifies the author and establishes the copyright of content on the site. By adding this information to a Master page, it will display on all pages in your site.
To add copyright text:
1. On the Quick Build tab, in the Layout Items category, click the Text Frame layout item.
2. Click on the right side of the footer panel.
3. On the Text Styles tab:
• Click Show All to display all available text styles.
• Select Footer.

Tutorials: Master pages and Text Styles 35
4. To insert a copyright symbol, click on the Text menu and then click Insert>Symbol>Copyright.
5. Next press the Spacebar and type your name and the year.
The current Footer text style isn't very readable. Let's modify this to suit our design. As the Footer style is based on the Header and Footer parent style, we'll modify this instead.
To modify a text style:
1. On the Text Styles tab, right-click Header and Footer and select Modify Header and Footer.

36 Tutorials: Master pages and Text Styles
2. In the Text Style dialog:
• From the Character category, select the Font sub-category.
• From the second Font drop-down list (displays Websafe by default), select Favourites.
• From the first Font drop-down list, select Elementary SF.
• From the Text fill drop-down list, select Scheme Colour 1.
• From the Paragraph category, select Alignment and Spacing sub-category.
• From the Alignment drop-down list, select Right.
• Click OK. Your copyright text updates to match the new settings.
3. Resize and reposition the text frame on the footer.

Tutorials: Master pages and Text Styles 37
That's it! Your basic Master page design is complete.
Feel free to Preview your changes. (See p. 7 for details.)

38 Tutorials: Master pages and Text Styles
We haven't discussed navigation bars, which generally appear on Master pages, in this tutorial. It is such an important feature of websites, we've got an entire tutorial dedicated to them. See the Navigation bars and Sitemaps tutorial starting on the following page for more details.
Save your work by pressing Ctrl+S.
You may wish to review your site development progress by checking the Program Hints section of the Task Monitor tab. Select any suggested processes you have completed and click Mark as Fixed to cross them off the list.

Tutorials: Navigation bars and Sitemaps 39
Navigation bars and Sitemaps
45 min
Having fantastic content on your website is useless unless your visitors can get to it! Navigation bars are essential to successful site navigation. Luckily for us, WebPlus has a whole host of professionally designed dynamic navigation bars for us to use, and the process is easy.
By the end of this tutorial you will be able to:
• Change the design of an existing navigation bar.
• Customize a navigation bar.
• Add a navigation bar.
• Create a Sitemap.
If you have already completed the Master pages and Text Styles tutorial on p. 15, you can use your saved project as the starting point for this tutorial.
40 Tutorials: Navigation bars and Sitemaps
Let's begin...
• Open the WPX8 Tutorial 02.wpp project file (see p. 16 for details).
Alternatively, in the Open dialog, navigate to the folder where you saved your project file from the Master pages and Text Styles tutorial on p. 15, select it and click Open.
A site will open in the workspace with two pages, page guides and a basic Master page design.
Changing the style of an existing navigation bar
Generally, the main 'top level' navigation bar is shared by all of the pages on a website. As a result, the navigation bar is usually placed on the Master page. This means that you only have to place the navigation bar once, even though it appears on each page.
So let's access the Master page in our site and begin work on the main navigation bar!
To access the master page:
1. On the Pages tab, click Master Pages.
2. Double-click the Master A thumbnail. The Master page is displayed in the workspace.
Tutorials: Navigation bars and Sitemaps 41
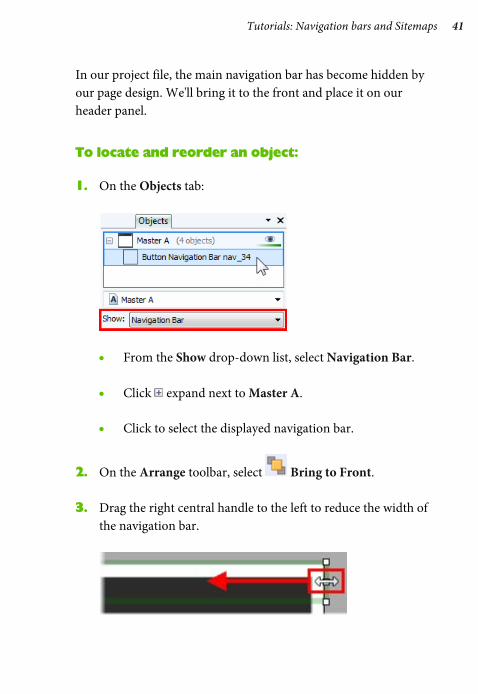
In our project file, the main navigation bar has become hidden by our page design. We'll bring it to the front and place it on our header panel.
To locate and reorder an object:
1. On the Objects tab:
• From the Show drop-down list, select Navigation Bar.
• Click expand next to Master A.
• Click to select the displayed navigation bar.
2. On the Arrange toolbar, select Bring to Front.
3. Drag the right central handle to the left to reduce the width of the navigation bar.
42 Tutorials: Navigation bars and Sitemaps
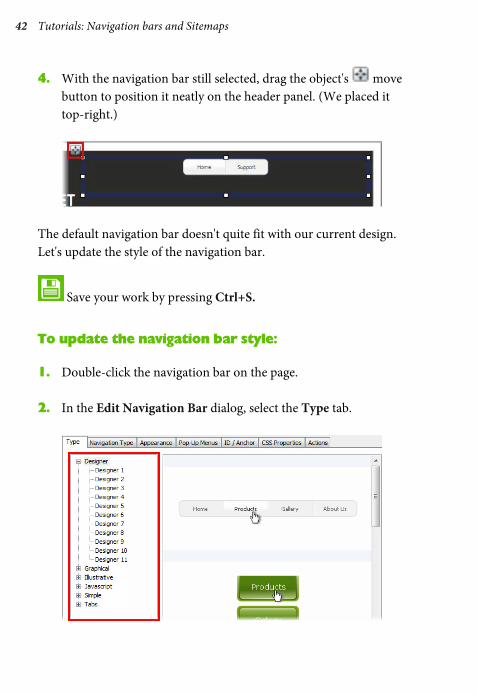
4. With the navigation bar still selected, drag the object's move button to position it neatly on the header panel. (We placed it top-right.)
The default navigation bar doesn't quite fit with our current design. Let's update the style of the navigation bar.
Save your work by pressing Ctrl+S.
To update the navigation bar style:
1. Double-click the navigation bar on the page.
2. In the Edit Navigation Bar dialog, select the Type tab.

Tutorials: Navigation bars and Sitemaps 43
The category list (highlighted red) displays the available navigation bar categories. A preview is displayed in the main pane on the right.
3. From the Designer category, click to select the Designer 2 navigation bar style. A preview of the navigation bar appears on the right. (If you point to a part of the bar containing a pop-up menu the menu will also preview.)
4. Click OK.
The navigation bar is updated on the page.
Save your work by pressing Ctrl+S.
Feel free to Preview your changes. (See p. 7 for details.)

44 Tutorials: Navigation bars and Sitemaps
The navigation bar matches better, but we can customize the bar further to fit our design.
Customizing a navigation bar
WebPlus hosts a dedicated studio which allows you to customize the buttons on your navigation bar to suit your specific needs. We'll explore this studio, as well as some of the other options in the Edit Navigation Bar dialog.
To customize navigation bar buttons in Button Studio:
1. Double-click the navigation bar on the page.
2. In the Edit Navigation Bar dialog, select the Appearance tab.
3. From the categories on the left, select Buttons.
4. Next to the Single design, click Edit.
The Button Studio opens. We'll update the text's font and colours within the design.
For more details on using the Button Studio, see the studio's dedicated How To tab.

Tutorials: Navigation bars and Sitemaps 45
To update button text:
1. Click to select the text.
2. From the context toolbar, from the Font drop-down list, select Elementary SF.
To update design colours:
1. On the States tab, double-click the Down state to display this state in the workspace.

46 Tutorials: Navigation bars and Sitemaps
2. Click to select the lower rectangle on the page.
3. On the Swatches tab, select Scheme Colour 1.
4. Repeat the steps 1-3 with the Hover state except, on the Swatches tab, select Scheme Colour 10.
5. On the Standard toolbar, click Commit Changes.
As you can see from the Preview in the Edit Navigation Bar dialog, the button text now matches our site text and buttons which are selected or 'hovered over' display as white or blue (scheme colour 1 or 10) rather than black (scheme colour 3).
The alignment of our navigation bar is currently set to Centre and Top. However, we've placed our navigation bar at the top right of our header (and page). We'll set our navigation bar's alignment to match our navigation bar's current position to keep our design neat.

Tutorials: Navigation bars and Sitemaps 47
To change navigation bar alignment:
1. In the Edit Navigation Bar dialog, select the Appearance tab.
2. From the categories on the left, select Layout.
3. From the Horizontal Alignment drop-down list, select Right.
4. Click OK. The navigation bar updates on the page.
5. With the navigation bar still selected, drag the object's move button to position it neatly on the header panel. (We placed it top-right.)
Our customized design fits the look of our website better.
Save your work by pressing Ctrl+S.

48 Tutorials: Navigation bars and Sitemaps
Feel free to Preview your changes. (See p. 7 for details.)
Adding a navigation bar
Although our main site navigation is situated on the header, it's also a good idea to add site navigation to the bottom of your site so visitors have quick access if they're at the bottom of a page. Traditionally, this second navigation bar is less decorative. We'll add this new navigation bar to our footer.
To add a navigation bar:
1. On the Quick Build tab, in the Navigation Items category, click Navigation Bar.
Tutorials: Navigation bars and Sitemaps 49
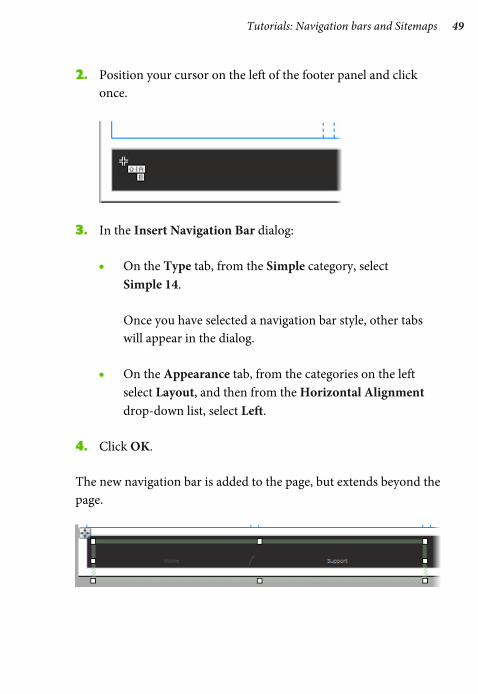
2. Position your cursor on the left of the footer panel and click once.
3. In the Insert Navigation Bar dialog:
• On the Type tab, from the Simple category, select Simple 14. Once you have selected a navigation bar style, other tabs will appear in the dialog.
• On the Appearance tab, from the categories on the left select Layout, and then from the Horizontal Alignment drop-down list, select Left.
4. Click OK.
The new navigation bar is added to the page, but extends beyond the page.
50 Tutorials: Navigation bars and Sitemaps
To resize a navigation bar:
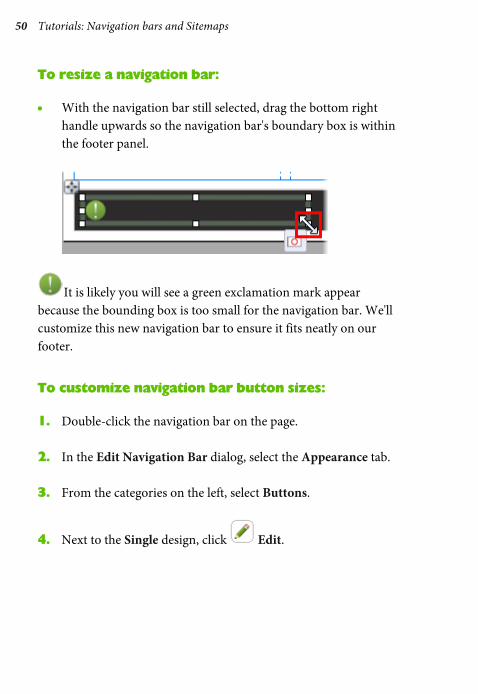
• With the navigation bar still selected, drag the bottom right handle upwards so the navigation bar's boundary box is within the footer panel.
It is likely you will see a green exclamation mark appear because the bounding box is too small for the navigation bar. We'll customize this new navigation bar to ensure it fits neatly on our footer.
To customize navigation bar button sizes:
1. Double-click the navigation bar on the page.
2. In the Edit Navigation Bar dialog, select the Appearance tab.
3. From the categories on the left, select Buttons.
4. Next to the Single design, click Edit.

Tutorials: Navigation bars and Sitemaps 51
5. In Button Studio:
• On the States tab, ensure the Aspect Ratio is Locked and then set the W (Width) to 40 pix.
• Click to select the text.
• From the context toolbar, from the Font drop-down list, select Elementary SF.
• From the context toolbar, click Colour and select Scheme Colour 1.
• On the Align tab, click Centre Horizontally and Centre Vertically.

52 Tutorials: Navigation bars and Sitemaps
• Drag the central handles on the text boundary box inwards so the box sits neatly within the red guides.
• On the Standard toolbar, click Commit Changes.
6. Back in the Edit Navigation Bar dialog, click OK. The navigation bar updates to match our design and fits neatly within the boundary box. The green exclamation mark has vanished.
7. With the navigation bar still selected, drag the object's move button to position it neatly on the footer panel. (We placed it on the left.)
Now we have two sets of navigation objects on our site to help visitors access areas of our site.
Save your work by pressing Ctrl+S.

Tutorials: Navigation bars and Sitemaps 53
Feel free to Preview your changes. (See p. 7 for details.)
Creating a Sitemap
A Sitemap is a special type of navigation element that displays every page in your site. It allows visitors to jump straight to any page and can help elevate your site’s status within search engines.
First let's create a new blank page on which to place our Sitemap.
To add blank pages:
1. On the Pages tab, on the Pages panel, click the down arrow on the Add new page or link button and select New Blank Page.
2. In the Page Properties dialog:
• In the Page name input box, drag to select the default name and then type 'Sitemap'.
• Select the Specify page title option and update the contents of the adjacent input box.

54 Tutorials: Navigation bars and Sitemaps
• In the File name input box, drag to select the default name and then type 'sitemap.html'.
• In the Placement section, select After and then select Support from the drop-down list.
3. Click OK.
The new page is added to the site and displayed in the workspace and on the Pages tab. Our current navigation bars also update automatically.
Now let's add our Sitemap navigation bar to the page.
Save your work by pressing Ctrl+S.

Tutorials: Navigation bars and Sitemaps 55
To add a Sitemap navigation element:
1. On the Pages tab, double-click Sitemap to select it and display the page in the workspace.
2. On the Quick Build tab, in the Navigation Items category, click the Navigation Bar layout item.
3. Click once on the page.
4. In the Insert Navigation Bar dialog:
• On the Type tab, from the Javascript category, select Javascript 1. This design is perfect for a Sitemap because all child pages automatically display regardless of whether the parent pages are selected.
• Click OK.
5. Using the navigation bar's move button, drag to position it under the page name and drag the handles to display all the pages on the site.
56 Tutorials: Navigation bars and Sitemaps
We can customize the design of this sitemap as well.
To customize a Sitemap:
1. Double-click the navigation bar on the page.
2. In the Edit Navigation Bar dialog, select the Style tab.
3. From the categories on the left, select Level 1.
4. On the right, double-click Link Text Style to edit the listed style.
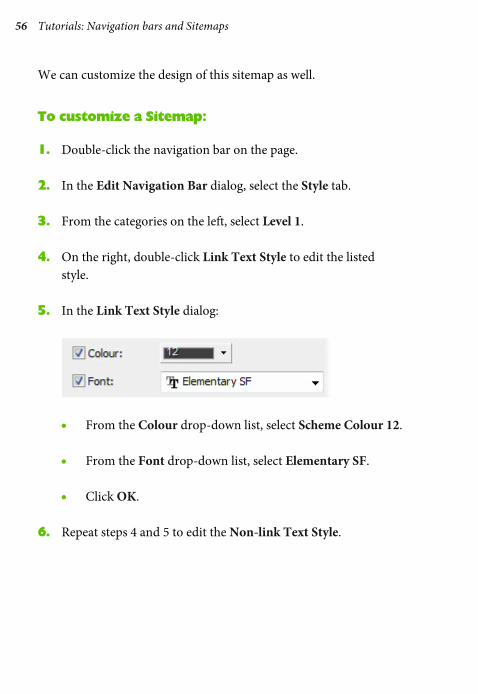
5. In the Link Text Style dialog:
• From the Colour drop-down list, select Scheme Colour 12.
• From the Font drop-down list, select Elementary SF.
• Click OK.
6. Repeat steps 4 and 5 to edit the Non-link Text Style.

Tutorials: Navigation bars and Sitemaps 57
7. On the right, double-click Link Rollover Colour and select Scheme Colour 10. Your setup should now resemble ours...
8. Repeat steps 3-7 to edit the style for Level 2.
9. Click OK.
Your Sitemap page is now complete.
Save your work by pressing Ctrl+S.
Feel free to Preview your changes. (See p. 7 for details.)

58 Tutorials: Navigation bars and Sitemaps
Add and exclude pages from navigation bars
Traditionally links to a Sitemap do not appear in main navigation (or in the Sitemap itself). So to complete this tutorial, we will show you how to add and exclude pages from navigation bars.
To exclude a page from navigation bars:
1. With the Sitemap page still displayed in the workspace, on the context toolbar, click Page Properties.
2. In the Page Properties dialog:
• On the left, select the Navigation category.
• From the Navigation drop-down list, select Exclude page from site navigation.
• Click OK.
All the navigation bars on the site update to exclude the Sitemap page. It also appears greyed-out with a cross beside it on the Pages tab.

Tutorials: Navigation bars and Sitemaps 59
Now we'll re-add our Sitemap page to the navigation bar on our footer, to allow visitors to access the page.
To customize navigation bar structure:
1. On the Pages tab, click Master Pages.
2. Double-click the Master A thumbnail.
3. Double-click the navigation bar on the footer.
4. In the Edit Navigation Bar dialog, on the Navigation Type tab, select the Custom option.
By selecting the Custom option, you can now create an entirely bespoke navigation bar structure. This will no longer be linked to the site structure and will therefore need manually updating if more pages are added.
To create a custom navigation bar structure:
1. Click Add Link.
2. In the Edit Hyperlink dialog:
• On the Custom Navigation Tree Item tab, in the Menu name input box, type 'Sitemap'.
• Click the Hyperlink tab.

60 Tutorials: Navigation bars and Sitemaps
• On the Hyperlink Type tab, select the Site Page category.
• From the Page name drop-down list, select Sitemap.
• Click OK. In the Edit Navigation Bar dialog, the custom navigation bar structure displays with the added link.
3. Click OK.
The selected navigation bar on the footer updates but the other navigation bars remain unchanged.

Tutorials: Navigation bars and Sitemaps 61
Feel free to Preview your changes. (See p. 7 for details.)
That's it! We've now explored some of the preset navigation bars available in WebPlus and how to customize them to suit your needs.
Save your work by pressing Ctrl+S.

62 Tutorials: Navigation bars and Sitemaps

Tutorials: Sliders and text 63
Sliders and text
30 min
The Home page is the first page visitors will see when they access your website. It is important that the page is both visually appealing and informative so as to catch a visitor's attention. A slider and frame text can help you achieve this dual goal of a Home page.
By the end of this tutorial you will be able to:
• Remove a Master page object from a single page.
• Add a blank slider to the page and resize a slider.
• Populate a slider using picture frames and pictures.
• Preview and customize slider animation.
• Add frame text.
If you have already completed the Navigation bars and Sitemaps tutorial on p. 39, you can use your saved project as the starting point for this tutorial.

64 Tutorials: Sliders and text
Let's begin...
• Open the WPX8 Tutorial 03.wpp project file (see p. 16 for details).
Alternatively, in the Open dialog, navigate to the folder where you saved your project file from the Navigation bars and Sitemaps tutorial on p. 39, select it and click Open.
A site will open in the workspace with three pages, page guides and a Master page design with navigation elements.
Removing Master page objects
Our Master page contains a page object which displays the current page's name just below the header. This is unnecessary for the Home page. So let's remove this object from the Home page without affecting other pages or the Master page design.
To remove Master page objects from a single site page:
1. On the Pages tab, double-click Home to select it and display the page in the workspace.
2. Click to select the Page name Master page object (currently displayed as Home). The object displays a unique toolbar.
Tutorials: Sliders and text 65
3. Click Promote from Master Page. The object remains in the same place on the page but is no longer attached to the Master page in this instance.
4. Click to select the border of the text frame and press the Delete key.
Now we'll begin our Home page design using a slider.
Save your work by pressing Ctrl+S.
Adding a blank slider to a page
If you want to add a new slider to your site, you'll find many different types of slider in the Assets Browser ready to be added to your page and customized to suit your requirements. However, for full design freedom, you can add a blank slider to the page.
To add a slider to the page:
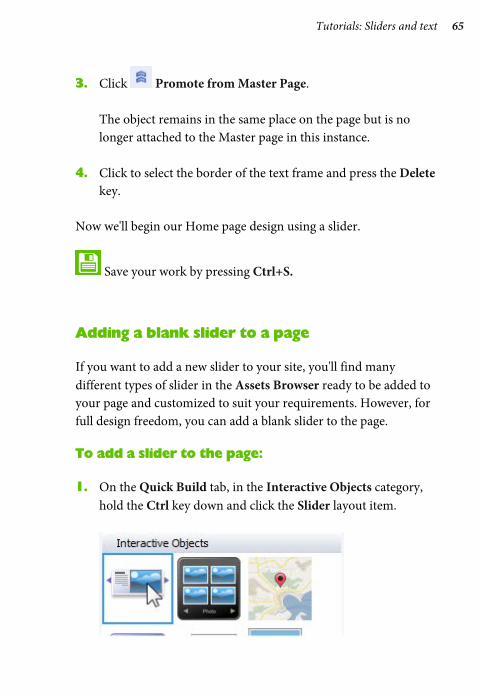
1. On the Quick Build tab, in the Interactive Objects category, hold the Ctrl key down and click the Slider layout item.

66 Tutorials: Sliders and text
2. Click on the page. The empty slider is added at a default size.
3. With the slider still selected, drag the object's move button to position it alongside the top and left margin guides.
Next, we'll explore various ways in which you can resize your slider.
To resize a slider on the page:
1. Click on the slider to select it.
2. Drag the bottom-right corner handle to resize the slider.
Hold down the Shift key as you drag to maintain the slider's aspect ratio
Alternatively, you can set a specific size for the slider using the Transform tab.
Tutorials: Sliders and text 67
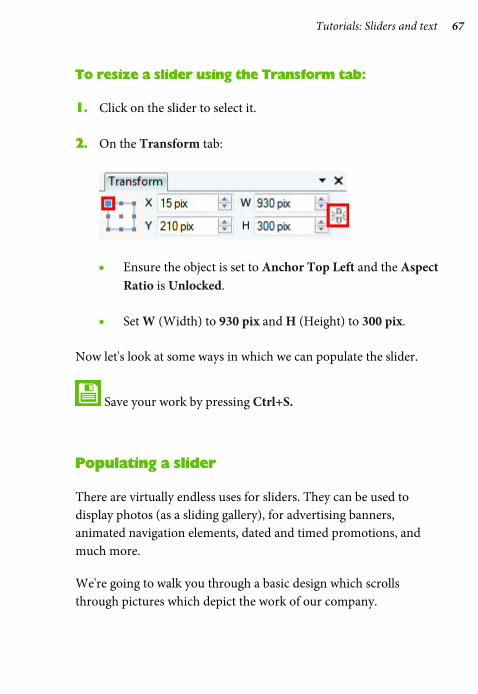
To resize a slider using the Transform tab:
1. Click on the slider to select it.
2. On the Transform tab:
• Ensure the object is set to Anchor Top Left and the Aspect Ratio is Unlocked.
• Set W (Width) to 930 pix and H (Height) to 300 pix.
Now let's look at some ways in which we can populate the slider.
Save your work by pressing Ctrl+S.
Populating a slider
There are virtually endless uses for sliders. They can be used to display photos (as a sliding gallery), for advertising banners, animated navigation elements, dated and timed promotions, and much more.
We're going to walk you through a basic design which scrolls through pictures which depict the work of our company.

68 Tutorials: Sliders and text
We'll do all our work in the dedicated Slider Studio.
To access the Slider Studio:
1. Click on the slider to select it.
2. On the context toolbar, click Slider Studio.
The Slider Studio opens, displaying the first panel of your slider in the workspace. We'll begin our design using a framed picture.
To add a framed picture:
1. On the Quick Build tab, in the Layout Items category, hold the Ctrl key down and click the Picture layout item.
2. Click on the panel in the workspace.
The empty picture frame is added at a default size. We'll resize and position this precisely using the Transform tab.

Tutorials: Sliders and text 69
To resize a picture frame using the Transform tab:
1. Click on the picture frame to select it.
2. On the Transform tab:
• Ensure the object is set to Anchor Top Left and the Aspect Ratio is Unlocked.
• Set X to 0 pix and Y to 0 pix.
• Set W (Width) to 930 pix and H (Height) to 300 pix.
The picture frame resizes to fill the entire panel.
Before we fill this with a picture, we'll replicate the panel.

70 Tutorials: Sliders and text
To replicate slider panels:
• On the Panels tab:
• Click to select the first Panel.
• Click Copy Slider Panel.
We now have three panels in total, one blank and the other two with a picture frame each. We'll remove the blank panel.
To remove a slider panel:
• On the Panels tab:
• Click to select the second (blank) Panel.
• Click Delete Slider Panel.
Next we'll add pictures to our frames. We'll show you the two ways you can do this.

Tutorials: Sliders and text 71
To add a picture from file:
1. Click to select the picture frame on the panel.
2. On the object toolbar, click Replace Picture from File.
3. In the Import Picture dialog, browse to your Images folder.
In a standard installation, the image files can be accessed from the following location: C:\Program Files\Serif\WebPlus\X8\Images or C:\Program Files (x86)\Serif\WebPlus\X8\Images However, the path may differ if you changed the installation location.
4. Select 060510n0046.JPG and click Open.
The picture is added to the frame and scaled to maximum-fit by default.
You can also add (or replace) a picture within a frame directly using a Picture asset.
We've provided a convenient Tutorial asset pack which contains all the pictures you will need to help you progress through this tutorial.

72 Tutorials: Sliders and text
To add a Picture asset to a frame:
1. On the Panels tab, double-click the other Panel to display it in the workspace.
2. Click to select the picture frame on the panel.
3. On the object toolbar, click Replace Picture from Assets.
4. In the Asset Browser:
• From the Tutorials category, select the photo of the two businesswomen.
• Click OK.
The picture is added to the frame and scaled to maximum-fit by default. The default position applies an unfortunate crop, which we'll fix next.

Tutorials: Sliders and text 73
To reposition the picture inside the frame:
1. Click to select the picture.
2. On the object toolbar, click Position Image, and drag on the picture to position it better.
Feel free to experiment with the other adjustments on the Picture Frame toolbar. See Adding picture frames in WebPlus Help for details.
Next we'll look at the unique properties of the Foreground panel.
74 Tutorials: Sliders and text
Using the Foreground panel
All sliders contain a Foreground panel, which you can use at your discretion. Any objects added to the Foreground panel will appear on top of all the content placed on other slider panels.
We'll add some content to the Foreground panel to show you how it works.
To add content to the Foreground panel (QuickShape):
1. On the Panels tab, double-click the Foreground panel to display it in the workspace.
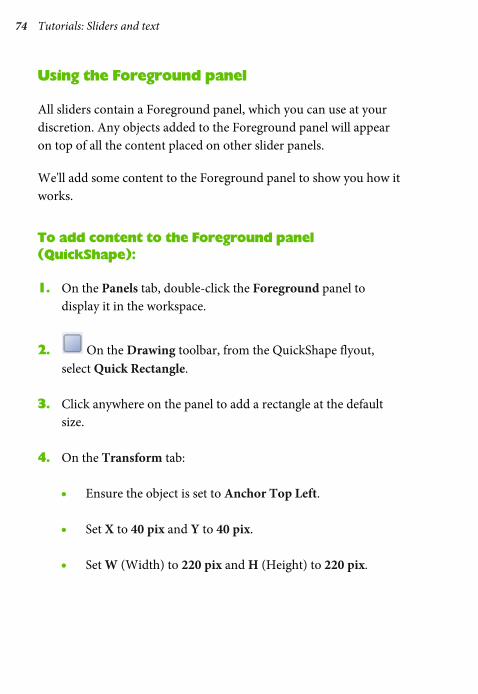
2. On the Drawing toolbar, from the QuickShape flyout, select Quick Rectangle.
3. Click anywhere on the panel to add a rectangle at the default size.
4. On the Transform tab:
• Ensure the object is set to Anchor Top Left.
• Set X to 40 pix and Y to 40 pix.
• Set W (Width) to 220 pix and H (Height) to 220 pix.

Tutorials: Sliders and text 75
5. On the Swatches tab:
• Set the Fill to Scheme Colour 10.
• Click Line and set this to None.
6. On the Transparency tab:
• Click Fill.
76 Tutorials: Sliders and text
• Select the Solid Transparency 40% swatch. (Names appear as tooltips.)
The first stage of our Foreground panel design is now complete.
Next, we'll add text.
To add content to the Foreground panel (Frame Text):
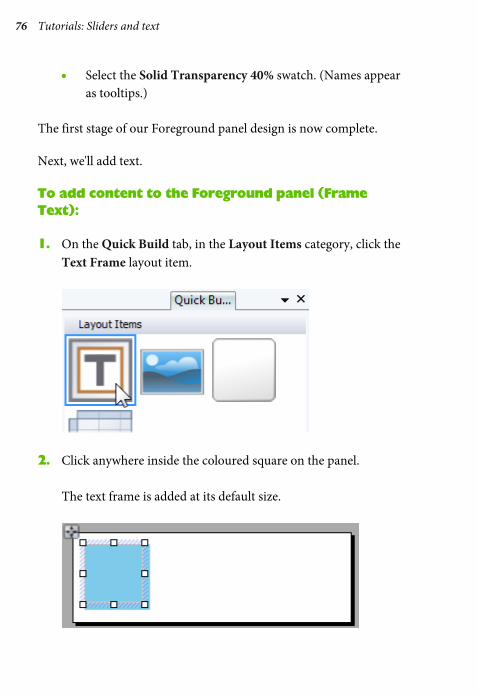
1. On the Quick Build tab, in the Layout Items category, click the Text Frame layout item.
2. Click anywhere inside the coloured square on the panel. The text frame is added at its default size.

Tutorials: Sliders and text 77
A flashing cursor will indicate the text frame is ready for you to type (or paste) text.
3. On the context toolbar, from the Style drop-down list, select Heading 2.
4. Type 'Welcome...' and then press the Return key.
5. From the Text menu, select Insert>Fill with Placeholder Text. Alternatively, feel free to add your own welcome text.
6. Select the edge of the text frame and hold down the Shift key and click to select the coloured square also.

78 Tutorials: Sliders and text
7. On the Align tab:
• From the Relative to drop-down list, select Selection.
• Click Centre Horizontally and Centre Vertically.
Our Foreground panel design is now complete.
Let's preview our slider within Slider Studio and adjust the slider options to suit our needs.
Tutorials: Sliders and text 79
The foreground panel is a great place to put information that you always want people to see. Examples of its use could be for contact information, a button or a watermark. As the foreground panel itself cannot be animated, you could add a picture to it. This way you can use a single image with animated text panels. You'll find examples of different kinds of sliders in the Asset Browser.
Previewing and modifying options in Slider Studio
Let's see how our design looks and how the Foreground panel interacts with the other panels.
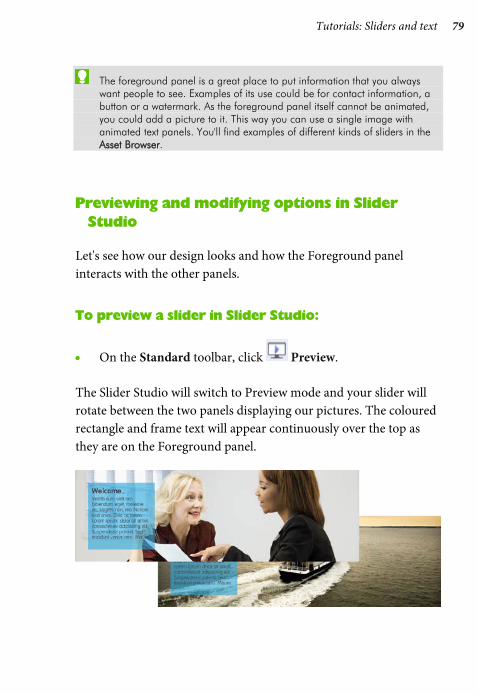
To preview a slider in Slider Studio:
• On the Standard toolbar, click Preview.
The Slider Studio will switch to Preview mode and your slider will rotate between the two panels displaying our pictures. The coloured rectangle and frame text will appear continuously over the top as they are on the Foreground panel.

80 Tutorials: Sliders and text
The default transitions are a little abrupt, so let's create a smoother transition for our panels.
To adjust panel transitions:
• On the Slider Options tab:
• From the Animation style drop-down list, select From the right.
• Set the Panel Loop Time (ms) to 3000.
• Set the Panel Animation Time (ms) to 1000.
The slider will now take longer to cycle through each panel and the transition time is doubled. Panels will now slide in from the right rather than flicking between each other.
Feel free to adjust the settings to suit your needs and experiment with the other options on the panel. See Inserting Sliders in WebPlus Help for more details of the available settings.
If you wish to modify the slider content, on the context toolbar, click Return to Editor.
Tutorials: Sliders and text 81
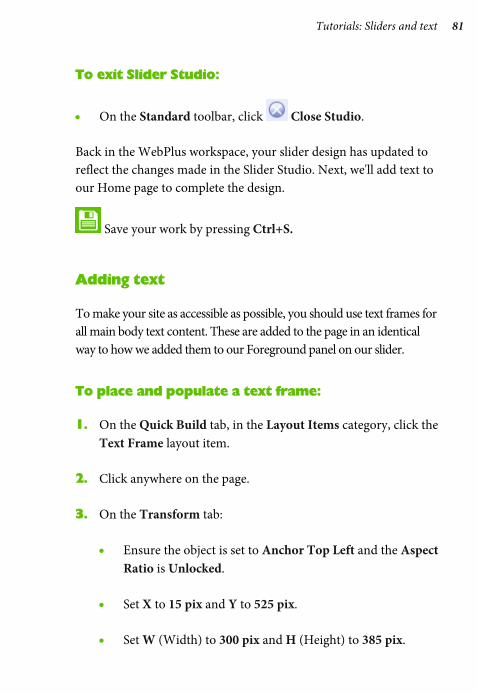
To exit Slider Studio:
• On the Standard toolbar, click Close Studio.
Back in the WebPlus workspace, your slider design has updated to reflect the changes made in the Slider Studio. Next, we'll add text to our Home page to complete the design.
Save your work by pressing Ctrl+S.
Adding text
To make your site as accessible as possible, you should use text frames for all main body text content. These are added to the page in an identical way to how we added them to our Foreground panel on our slider.
To place and populate a text frame:
1. On the Quick Build tab, in the Layout Items category, click the Text Frame layout item.
2. Click anywhere on the page.
3. On the Transform tab:
• Ensure the object is set to Anchor Top Left and the Aspect Ratio is Unlocked.
• Set X to 15 pix and Y to 525 pix.
• Set W (Width) to 300 pix and H (Height) to 385 pix.

82 Tutorials: Sliders and text
4. On the context toolbar, from the Style drop-down list, select Heading 3.
5. Type 'Who are we?' and then press the Return key.
6. From the Text menu, select Insert>Fill with Placeholder Text. Alternatively, feel free to add your own custom text.
We'll add another text frame to our Home page by using another placement method.
We can align this new text frame with our first text frame using dynamic guides.
Dynamic guides allow you to align new objects to the last three selected page objects.
To use dynamic guides:
• On the Arrange toolbar:
• Ensure Snapping is enabled.
• From the Snapping flyout, ensure Dynamic Guides is enabled.
Tutorials: Sliders and text 83
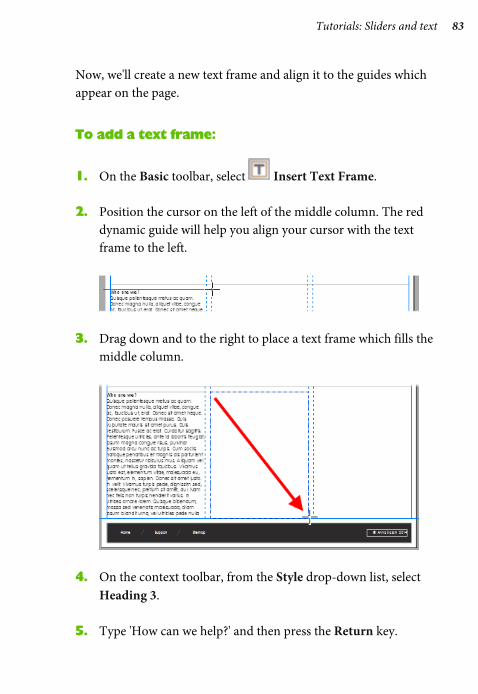
Now, we'll create a new text frame and align it to the guides which appear on the page.
To add a text frame:
1. On the Basic toolbar, select Insert Text Frame.
2. Position the cursor on the left of the middle column. The red dynamic guide will help you align your cursor with the text frame to the left.
3. Drag down and to the right to place a text frame which fills the middle column.
4. On the context toolbar, from the Style drop-down list, select Heading 3.
5. Type 'How can we help?' and then press the Return key.

84 Tutorials: Sliders and text
6. From the Text menu, select Insert>Fill with Placeholder Text. Alternatively, feel free to add your own custom text.
That's it! Our Home page design is complete. We're going to leave the third column empty so we can use the space in the Linking to social media tutorial on p. 119.
Feel free to Preview your changes. (See p. 7 for details.)
Save your work by pressing Ctrl+S.

Tutorials: Forms, User Details and Google maps 85
Forms, User Details and Google maps
30 min
In this tutorial we'll explore many of the contact options you can offer to visitors, including a contact form and Google map.
By the end of this tutorial you will be able to:
• Add a contact form.
• Customize a contact form.
• Set up form submission using Serif Web Resources.
• Add telephone and email User Details.
• Add a Google map.
If you have already completed the Sliders and text tutorial on p. 63, you can use your saved project as the starting point for this tutorial.
86 Tutorials: Forms, User Details and Google maps
Let's begin...
• Open the WPX8 Tutorial 04.wpp project file (see p. 16 for details).
Alternatively, in the Open dialog, navigate to the folder where you saved your project file from the Sliders and text tutorial on p. 63, select it and click Open.
A partially designed site will open in the workspace.
The Contact page is arguably the most important page on your website. Many visitors will use your website to find a way of getting in touch with you. We recommend offering as many contact avenues as possible. We’ll start with a contact form.
Adding a contact form
A contact form is a convenient way for visitors to get in touch with you. It is particularly useful if you are reticent on displaying your phone number or email address directly on your site.
WebPlus comes with preset forms which you can quickly add to your page and modify to meet your needs. We'll add a contact form to our blank Support page.

Tutorials: Forms, User Details and Google maps 87
To add a contact form to the page:
1. On the Pages tab, double-click Support to select it and display the page in the workspace.
2. On the Quick Build tab, click the Forms header, and then click the Form item.
3. Click anywhere on the page. The Form Designer dialog opens.
4. On the Templates tab, from the Form Templates list, select Comments 1. The current form design displays in the preview on the right.

88 Tutorials: Forms, User Details and Google maps
5. On the Form tab's Form Properties tab:
• In the Form Name input box, type 'Support'.
• In the Form Title input box, type 'Contact Us'.
• Set the Width to 300. The preview on the right updates to reflect the changes.
6. Click OK.
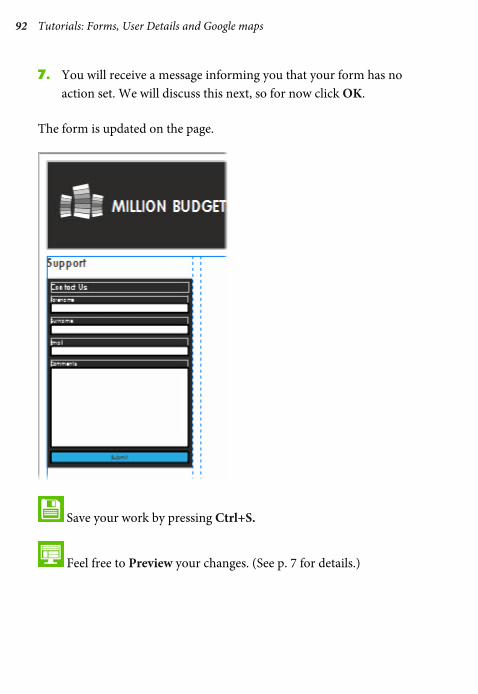
7. You will receive a message informing you that your form has no action set. We will discuss this on p. 93, so for now click OK. The form is added to the page.

Tutorials: Forms, User Details and Google maps 89
8. On the Transform tab:
• Ensure the object is set to Anchor Top Left.
• Set X to 15 pix and Y to 255 pix.
The form contains the contact fields we need, but does not fit our current site's design. We'll modify this next.
Save your work by pressing Ctrl+S.
Feel free to Preview your changes. (See p. 7 for details.)
Customizing a form
To customize the form we'll use the scheme colours and fonts already using in our site.
To speed up your design process, you can add any fonts to a customizable Favourites category. See p. 27 for more information.
Now, onto customizing the contact form...

90 Tutorials: Forms, User Details and Google maps
To customize a form:
1. Double-click the form on the page. The Form Designer dialog opens.
2. On the Theme tab's Customize Form tab:
• From the second Font drop-down list (displays Websafe by default), select Favourites.
• From the first Font drop-down list, select Elementary Heavy SF.

Tutorials: Forms, User Details and Google maps 91
• From the Text Colour drop-down list, select Scheme Colour 1.
• From the Background Colour drop-down list, select Scheme Colour 3.
3. On the Theme tab's Customize Fields tab, in the Label section:
• From the second Font drop-down list (displays Websafe by default), select Favourites.
• From the first Font drop-down list, select Elementary SF.
• From the Size drop-down list, select 12 pix.
• From the Text Colour drop-down list, select Scheme Colour 1.
4. In the Input Element section, repeat step 3, except from the Text Colour drop-down list, select Scheme Colour 12.
5. In the Buttons section:
• From the Text Colour drop-down list, select Scheme Colour 12.
• From the Background drop-down list, select Scheme Colour 10. The preview on the right updates to reflect the changes.
6. Click OK.
92 Tutorials: Forms, User Details and Google maps
7. You will receive a message informing you that your form has no action set. We will discuss this next, so for now click OK.
The form is updated on the page.
Save your work by pressing Ctrl+S.
Feel free to Preview your changes. (See p. 7 for details.)

Tutorials: Forms, User Details and Google maps 93
Form submission via Serif Web Resources
We recommend using Serif Web Resources as the destination for data submission. Serif Web Resources will collect the data and then send it to a specified email address.
To use Serif Web Resources to collect data:
1. Double-click the form on the page. The Form Designer dialog opens.
2. On the Form Submission tab:
• Select Serif Web Resources.
• Next to the Email Address field, click Select. If you're logged into Serif Web Resources, the Form Email Targets dialog will open. This allows you to set the email address which data will be sent to.
94 Tutorials: Forms, User Details and Google maps
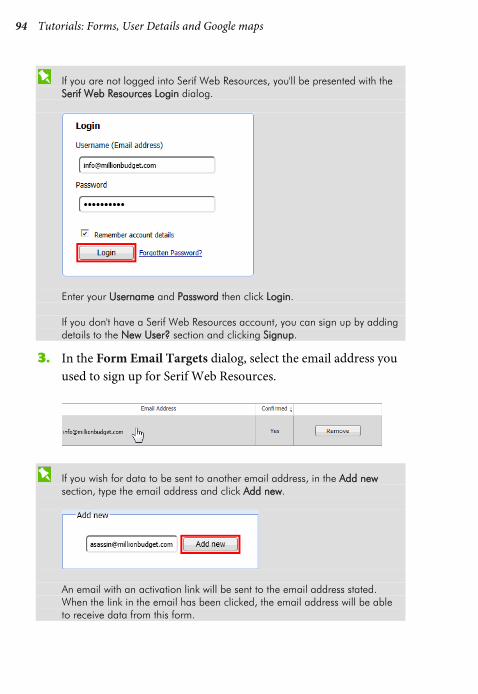
If you are not logged into Serif Web Resources, you'll be presented with the Serif Web Resources Login dialog.
Enter your Username and Password then click Login. If you don't have a Serif Web Resources account, you can sign up by adding details to the New User? section and clicking Signup.
3. In the Form Email Targets dialog, select the email address you used to sign up for Serif Web Resources.
If you wish for data to be sent to another email address, in the Add new section, type the email address and click Add new.
An email with an activation link will be sent to the email address stated. When the link in the email has been clicked, the email address will be able to receive data from this form.

Tutorials: Forms, User Details and Google maps 95
4. Back on the Form Submission tab, from the Confirmation Field drop-down list, select Email and then click Format.
5. In the Email Format dialog:
• In the Subject Line input box, type the subject of the email which can be read from the visitor's email inbox.
• Type an optional Header and Footer. The Header text appears in the body of the email before a list of the data submitted, while the Footer text appears after the list.
• Click OK.
6. Click OK to return to the WebPlus workspace.
We have now set the form submission via Serif Web Resources. This means that when a visitor fills in the form, the data is sent via Serif Web Resources to the email address selected.

96 Tutorials: Forms, User Details and Google maps
To protect yourself from receiving spam from your form, Serif Web Resources will automatically redirect visitors to a page where they will need to complete a reCAPTCHA™ field before the data from the form is submitted. Alternatively, you can add your own CAPTCHA or reCAPTCHA™ field to the bottom of the form. For details, see Form field properties in WebPlus Help.
Save your work by pressing Ctrl+S.
Feel free to Preview your changes. (See p. 7 for details.)
You can test the form works by filling out the fields and adding your own email address before clicking Submit.
You may wish to review your site development progress by checking the Program Hints section of the Task Monitor tab. Select any suggested processes you have completed and click Mark as Fixed to cross them off the list.
Adding User Details
Rather than using a form, visitors may be interested in contacting you directly via telephone or email. You can add these details to your page using a text frame and User Details.
To add a text frame:
1. On the Quick Build tab, in the Layout Items category, click the Text Frame layout item.
2. Position the cursor below the contact form and drag on the page to create a text frame which spans the first column.

Tutorials: Forms, User Details and Google maps 97
To add User Details:
1. With the text frame still selected, from the Text menu, click Insert>Information>User Details.
2. In the User Details dialog:
• From the entry list, select (Business) Phone.
• In the Prefix input box, type 'Telephone: '.
• Click OK. The user detail field is added to the text frame.

98 Tutorials: Forms, User Details and Google maps
3. Press the Return key and then repeat the above steps to add another user detail field for the (Business) Email with a prefix of 'Email: '.
The user details which currently display use the default settings. We will update these to match our company.
To update User Details:
1. From the Tools menu, select Set User Details.
2. In the User Details dialog, in the input boxes on the Business Sets tab, drag to select the default text and then type your custom text.
For this tutorial in particular, update the Phone and Email fields.
3. Click Update.

Tutorials: Forms, User Details and Google maps 99
Your custom user details are updated on the page.
Save your work by pressing Ctrl+S.
Feel free to Preview your changes. (See p. 7 for details.)
Adding a Google map
To complete our page design, we're going to provide visitors with a map so they can locate the company premises easily, if needed.
To insert a Google map:
1. On the Quick Build tab, in the Interactive Objects category, click the Google Map layout item.

100 Tutorials: Forms, User Details and Google maps
2. Position the cursor in line with the top of the contact form.
3. Drag down to the right so the map fills the remaining space on the page.
4. In the Insert Google Map dialog:
• In the Search for a location input box, type the location you wish to appear at the centre of the map.
• Click Search. The map on the right will update to show the searched location.
Navigate around the map using regular panning and zoom controls—drag the hand cursor to pan, the zoom slider and buttons to magnify/zoom out.
• Click OK.
The Google map is added to the page showing the location set in the dialog.
Save your work by pressing Ctrl+S.
Feel free to Preview your changes. (See p. 7 for details.)

Tutorials: Forms, User Details and Google maps 101
To improve our map, we'll add a marker to inform visitors precisely where the company is located.
To add a marker:
1. Double-click the map on the page.
2. In the Edit Google Map dialog, in the Map Markers section, click Add.
3. In the Google Map Marker dialog:
• Click a chosen location using the cursor.
• In the Name input box, type the name of the company. This "tooltip" displays on hover over.
• In the Label input box, type the company address.
Select the Open InfoWindow by default option if you wish your Label to display without the marker being clicked.

102 Tutorials: Forms, User Details and Google maps
• Click OK. The marker appears on the map preview in green (to indicate it is currently selected).
4. Back in the Edit Google Map dialog, click OK.
The map updates on the page.
That's it! Our contact page design is complete. Now visitors can get in touch with you via a contact form, telephone, and email and locate your business on a map.
Feel free to Preview your changes. (See p. 7 for details.)
Save your work by pressing Ctrl+S.

Tutorials: Using hyperlinks 103
Using hyperlinks
15 min
WebPlus provides a wide and very flexible range of hyperlink options. This means easy navigation for your site's visitors—and possibly a more efficient visit if your site includes large pictures.
By the end of this tutorial you will be able to:
• Create a link to a site page.
• Create anchors.
• Create a hyperlink to an anchor.
• Create a link to the top of the page.
• Create external hyperlinks to a social media account.
If you have already completed the Forms, User Details and Google maps tutorial on p. 85, you can use your saved project as the starting point for this tutorial.

104 Tutorials: Using hyperlinks
Let's begin...
• Open the WPX8 Tutorial 05.wpp project file (see p. 16 for details).
Alternatively, in the Open dialog, navigate to the folder where you saved your project file from the Forms, User Details and Google maps tutorial on p. 85, select it and click Open.
A partially designed site will open in the workspace.
Hyperlinks are an effective way of navigating around websites.
Almost any object on your page can have a hyperlink assigned to it or can be the destination for a hyperlink.
Let's jump straight in and set up a hyperlink to a site page.
Creating a link to a site page using text
Navigation bars are generally used for jumping between pages within a website. See the Navigation bars and Sitemaps tutorial on p. 39 for more information on navigation bars. However, there may be times when you refer to a site page in your text and want to link to it there. This can be achieved using a hyperlink.

Tutorials: Using hyperlinks 105
To create a link to a site page:
1. On the Basic toolbar, select Pointer Tool.
2. Click anywhere in the second text frame on the Home page and then drag to select the words 'How can we help?'.
3. On the Properties toolbar, select Hyperlink.
4. In the Edit Hyperlink dialog:
• On the Hyperlink Type tab, select the Site Page category.
• From the Page name drop-down list, select Support.
• Click OK.
The text is converted into a hyperlink.
Save your work by pressing Ctrl+S.
106 Tutorials: Using hyperlinks
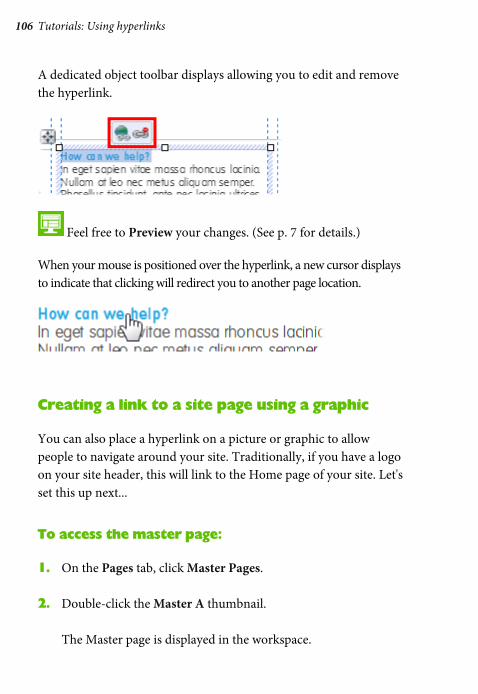
A dedicated object toolbar displays allowing you to edit and remove the hyperlink.
Feel free to Preview your changes. (See p. 7 for details.)
When your mouse is positioned over the hyperlink, a new cursor displays to indicate that clicking will redirect you to another page location.
Creating a link to a site page using a graphic
You can also place a hyperlink on a picture or graphic to allow people to navigate around your site. Traditionally, if you have a logo on your site header, this will link to the Home page of your site. Let's set this up next...
To access the master page:
1. On the Pages tab, click Master Pages.
2. Double-click the Master A thumbnail. The Master page is displayed in the workspace.

Tutorials: Using hyperlinks 107
To create a link to a site page:
1. On the Basic toolbar, select Pointer Tool.
2. Click to select the logo on the header.
3. On the Properties toolbar, select Hyperlink.
4. In the Edit Hyperlink dialog:
• On the Hyperlink Type tab, select the Site Page category.
• From the Page name drop-down list, select Home.
• Click OK.
The logo now contains a hyperlink.
Save your work by pressing Ctrl+S.
Feel free to Preview your changes. (See p. 7 for details.)

108 Tutorials: Using hyperlinks
When your mouse is positioned over the hyperlink, a new cursor displays to indicate that clicking will redirect you to another page location.
Adding anchors
Anchors act as fixed points on your site which you can link to. Anchors must be created first before a hyperlink can be established to it.
We'll create an anchor on our Support page.
To add an anchor:
1. On the Pages tab, from the Pages pane, double-click the Support page.
2. On the Basic toolbar, select Pointer Tool.

Tutorials: Using hyperlinks 109
3. Click to select the telephone user detail in the text frame.
4. On the Properties toolbar, click ID and Anchor.
5. In the Edit Text Frame dialog, on the ID/Anchor tab:
• In the Set the HTML ID of the object input box, replace the default name with something easier to remember. We used 'phone_number'.
We recommend that all HTML names remain in lower case and do not contain spaces.
• Select the Treat this object as an anchor option.
• Click OK.

110 Tutorials: Using hyperlinks
Anchors can be added to any object on any page, so it's possible to create unique navigation, and to offer speedy access to any of your site's content. Anchors for important parts of your site can be included within navigation bars by checking the Include Anchor In Navigation option. Make sure that you give the anchor a meaningful title as this is what your site visitors will see.
We now have an anchor which specifically identifies our telephone number on the Support page. This is indicated by the icon on the object toolbar.
Save your work by pressing Ctrl+S.
Linking to anchors
To make the best use of an anchor, we need to create a hyperlink to take visitors to it! Let's do this next.
To link to an anchor:
1. On the Pages tab, from the Pages pane, double-click the Home page.
2. On the Basic toolbar, select Pointer Tool.
3. Click anywhere in the second text frame and then drag to select the final sentence.
4. On the Properties toolbar, select Hyperlink.

Tutorials: Using hyperlinks 111
5. In the Edit Hyperlink dialog:
• On the Hyperlink Type tab, select the Anchor category.
• From the Page name drop-down list, select Support.
• From the Anchor drop-down list, select your previously created anchor.
• Click OK.
The text now hyperlinks to telephone number on the Support page.
Save your work by pressing Ctrl+S.
Feel free to Preview your changes. (See p. 7 for details.)
Our pages aren't particularly long, so the difference between linking to this anchor and the entire page is subtle. However, you may notice that when using the 'How can we help?' text link the Support page displays with the header fully visible, whereas the text linking to the anchor displays the footer fully on the Support page.

112 Tutorials: Using hyperlinks
Creating 'to top' hyperlinks
For long web pages you may want to offer a link back to the top of the page.
To add assets to the Assets tab:
1. On the Pages tab, click Master Pages, and then double-click the Master A thumbnail.
2. On the Assets tab, click Browse to open the Asset Browser.
3. In the Asset Browser, select the Page Content category.
4. In the search box (top-right of the dialog), type 'back to top'.
As you type, the assets in the gallery will reduce down.

Tutorials: Using hyperlinks 113
5. Click to select a button of your choice from the Back to Top sub-category of the Page Content category. We chose the white arrow on a clear background.
The green shows the asset will be added to the Assets tab.
6. Click Close to exit the dialog and return to the page. The button is displayed in the Assets tab.
Next, we'll add this button to the page.

114 Tutorials: Using hyperlinks
To add a button to the page:
1. On the Assets tab, the Page Content category should be displayed (if not, click the header).
2. Drag the button onto the page.
3. On the Transform tab:
• Ensure the Aspect Ratio is Locked.
• Set W (Width) to 40 pix.
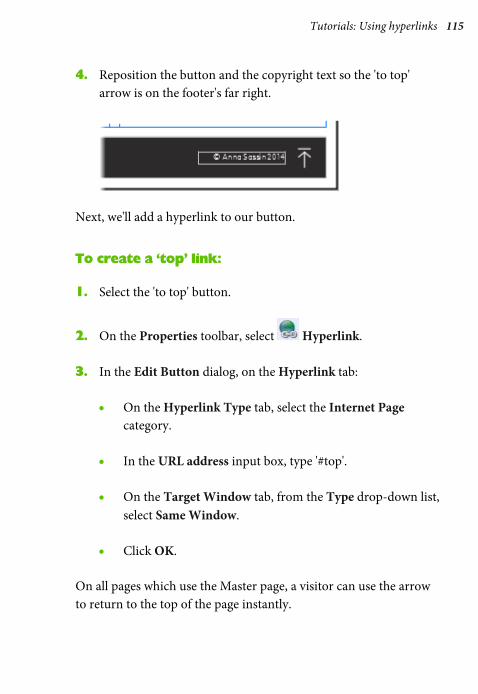
Tutorials: Using hyperlinks 115
4. Reposition the button and the copyright text so the 'to top' arrow is on the footer's far right.
Next, we'll add a hyperlink to our button.
To create a ‘top’ link:
1. Select the 'to top' button.
2. On the Properties toolbar, select Hyperlink.
3. In the Edit Button dialog, on the Hyperlink tab:
• On the Hyperlink Type tab, select the Internet Page category.
• In the URL address input box, type '#top'.
• On the Target Window tab, from the Type drop-down list, select Same Window.
• Click OK.
On all pages which use the Master page, a visitor can use the arrow to return to the top of the page instantly.

116 Tutorials: Using hyperlinks
Save your work by pressing Ctrl+S.
Feel free to Preview your changes. (See p. 7 for details.)
Creating an external hyperlink to Twitter
For this final section, we'll look at setting up a hyperlink which links to an external website on the internet.
To add an external hyperlink:
1. On the Pages tab, from the Pages pane, double-click the Support page.
2. On the Basic toolbar, select Pointer Tool.
3. Click to select the text frame below the form and then increase the height of the frame (if necessary).
4. Click to place the cursor at the end of the email address and then press the Return key.

Tutorials: Using hyperlinks 117
5. Type in 'Twitter: @millionbudget' and then drag to select '@millionbudget'.
6. On the Properties toolbar, select Hyperlink.
7. In the Edit Hyperlink dialog:
• On the Hyperlink Type tab, select the Internet Page category.
• In the URL address input box, type 'https://twitter.com/millionbudget'.
• On the Target Window tab, from the Type drop-down list, select New Window.
• Click OK.
By setting the Target Window to New Window, this will ensure a new window (or tab) is opened in the visitor's browser when the link is

118 Tutorials: Using hyperlinks
clicked. This will mean your website remains open in the browser for visitors to get back to quickly once they have finished browsing the external website.
That's it! You now have a variety of hyperlinks on your site to help visitors move around efficiently. Remember, you can add hyperlinks to virtually any page object and can link to a huge variety of locations.
You can link to social media throughout your website to fully promote your company, club, charity, or personal activities. We look at ways you can do this in the Linking to social media tutorial on the following pages.
Feel free to Preview your changes. (See p. 7 for details.)
Save your work by pressing Ctrl+S.
Tutorials: Linking to social media 119
Linking to social media
15 min
Social media can be great for growing a business or promoting a company, charity, or club. This tutorial explores some of the ways you can link your site to social media platforms or enable visitors to actively shout about your website with ease!
By the end of this tutorial you will be able to:
• Add a Facebook Like feed.
• Add a Pinterest pin to a picture.
• Add Facebook, Twitter, and Google+ recommendation buttons.
• Add a bookmarking button strip.
If you have already completed the Using hyperlinks tutorial on p. 103, you can use your saved project as the starting point for this tutorial.

120 Tutorials: Linking to social media
Let's begin...
• Open the WPX8 Tutorial 06.wpp project file (see p. 16 for details).
Alternatively, in the Open dialog, navigate to the folder where you saved your project file from the Using hyperlinks tutorial on p. 103, select it and click Open.
A partially designed site will open in the workspace.
Adding a Facebook Like feed
A Facebook Like feed allows visitors to recommend your Facebook page while at the same time displaying its most recent posts. This is a great way of linking your website to your social media activity and ensures anything you post on Facebook immediately appears on your website!
We'll place our feed on the Home page, as this will keep the content fresh for returning visitors.

Tutorials: Linking to social media 121
To add a Facebook widget:
1. On the Quick Build tab, in the Social Media category, click Facebook Widget.
2. Click once in the empty column on the page.
3. In the Insert Facebook Widget dialog, on the Facebook Widget tab:
• From the Type drop-down list, select Like Feed.
• In the URL of Facebook Page to be feed source input box, type the web address for your Facebook page.
• Click OK. The Facebook Like feed is added to the page.
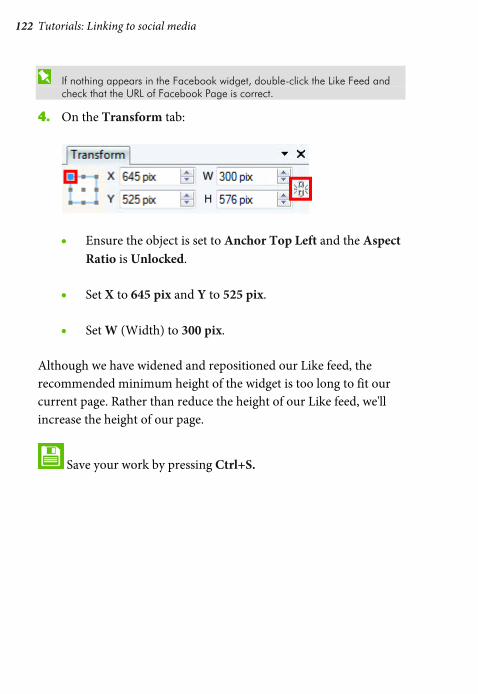
122 Tutorials: Linking to social media
If nothing appears in the Facebook widget, double-click the Like Feed and check that the URL of Facebook Page is correct.
4. On the Transform tab:
• Ensure the object is set to Anchor Top Left and the Aspect Ratio is Unlocked.
• Set X to 645 pix and Y to 525 pix.
• Set W (Width) to 300 pix.
Although we have widened and repositioned our Like feed, the recommended minimum height of the widget is too long to fit our current page. Rather than reduce the height of our Like feed, we'll increase the height of our page.
Save your work by pressing Ctrl+S.

Tutorials: Linking to social media 123
To increase the height of a page:
1. Hover the cursor at the bottom of the page until it changes to show a double-headed arrow.
2. Drag downwards to increase the height (length) of the page until the bottom of the widget fits neatly against the bottom blue margin.
Our page now neatly accommodates the Facebook Like feed.
Feel free to Preview your changes. (See p. 7 for details.)
124 Tutorials: Linking to social media
Pinning a picture
You can add a Pinterest pin to any picture on your site to allow visitors to pin it to their Pinterest account and share it with their Pinterest followers. We'll show you how using the pictures on our slider.
Due to Google Chrome's in-built pop-up blocker, visitors to your site who use Chrome may not be able to see the Pinterest pin.
To pin a picture:
1. Click to select the slider at the top of the Home page and on the object's toolbar, click Show Next Panel.
2. Click to select the picture on the slider panel.
3. On the Properties toolbar, select Edit actions.
4. In the Edit Picture dialog, on the Actions tab, click Add and then select Pinterest from the drop-down list.
5. In the Pinterest Action dialog, click OK. Pinterest is added to the picture's list of actions.
6. Click OK.
7. With the picture still select, on the object's toolbar, click Select Parent to select the slider panel and then click Show Next Panel.

Tutorials: Linking to social media 125
8. Repeat steps 2-6 to add a pin to the second picture on the slider.
Now, when a visitor positions their mouse cursor over the pictures on the slider a Pinterest pin will appear in the top left corner. When the Pin it button is clicked, the visitor will add the picture to their Pinterest collection and it will be seen by their followers.
Save your work by pressing Ctrl+S.
Feel free to Preview your changes. (See p. 7 for details.)
Adding recommendation buttons
Social media is a great way of spreading the word about your website. WebPlus includes widgets which allow users to recommend your website on Facebook, Twitter, and Google+. We'll add these to our Support page.
To add a Twitter Follow button:
1. On the Pages tab, double-click Support to select it and display the page in the workspace.
2. On the Quick Build tab, in the Social Media category, click Twitter Widget.
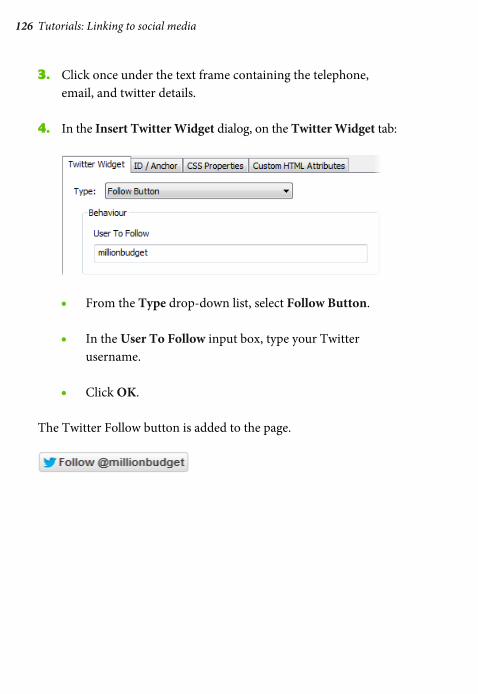
126 Tutorials: Linking to social media
3. Click once under the text frame containing the telephone, email, and twitter details.
4. In the Insert Twitter Widget dialog, on the Twitter Widget tab:
• From the Type drop-down list, select Follow Button.
• In the User To Follow input box, type your Twitter username.
• Click OK.
The Twitter Follow button is added to the page.

Tutorials: Linking to social media 127
To add a Google +1 button:
1. On the Quick Build tab, in the Social Media category, click Google +1 Button.
2. Click once under the Twitter Follow button.
3. In the Insert Google +1 Button dialog, on the Google +1 Button tab:
• Ensure the +1 Current Page option is not selected.
• In the Custom URL input box, type 'http://www.millionbudget.com/index.html'.
The two settings above ensure the Home page is recommended on the visitor's Google+ network rather than the Support page.
• From the Annotation drop-down list, select Inline.
• Click OK.
The Google +1 button is added to the page.

128 Tutorials: Linking to social media
To add a Facebook Like button:
1. On the Quick Build tab, in the Social Media category, click Facebook Widget.
2. Click once under the Google +1 button.
3. In the Insert Facebook Widget dialog, on the Facebook Widget tab:
• From the Type drop-down list, select Like Button.
• Click OK.
The Facebook Like button is added to the page under the Google +1 button.
Save your work by pressing Ctrl+S.
Feel free to Preview your changes. (See p. 7 for details.)
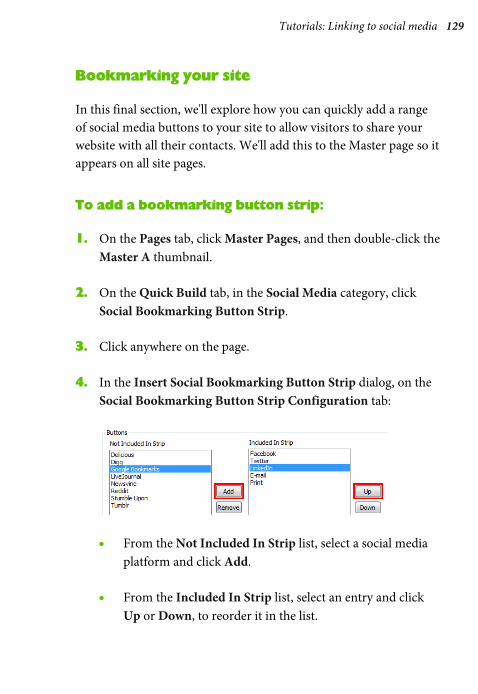
Tutorials: Linking to social media 129
Bookmarking your site
In this final section, we'll explore how you can quickly add a range of social media buttons to your site to allow visitors to share your website with all their contacts. We'll add this to the Master page so it appears on all site pages.
To add a bookmarking button strip:
1. On the Pages tab, click Master Pages, and then double-click the Master A thumbnail.
2. On the Quick Build tab, in the Social Media category, click Social Bookmarking Button Strip.
3. Click anywhere on the page.
4. In the Insert Social Bookmarking Button Strip dialog, on the Social Bookmarking Button Strip Configuration tab:
• From the Not Included In Strip list, select a social media platform and click Add.
• From the Included In Strip list, select an entry and click Up or Down, to reorder it in the list.
130 Tutorials: Linking to social media
• Under the Share option, select Page. This will share, or bookmark, the current page rather than the site.
• From the Target Window or Frame section, from the drop-down list, select New Window and then click OK.
5. With the button strip still selected, drag the object's move button to position it neatly on the footer panel. (We placed it central.)
Feel free to Preview your changes. (See p. 7 for details.)
That's it! We have now explored some of the options for linking to various social media platforms. Feel free to experiment with the other widgets. See the Social Media book in WebPlus Help.
Save your work by pressing Ctrl+S.

Tutorials: Adding a search facility 131
Adding a search facility
15 min
A search facility allows visitors to quickly find information on your website, particularly if it contains numerous pages or lots of text.
By the end of this tutorial you will be able to:
• Add new pages.
• Add a search results frame.
• Add a search input box.
If you have already completed the Linking to social media tutorial on p. 119, you can use your saved project as the starting point for this tutorial.

132 Tutorials: Adding a search facility
Let's begin...
• Open the WPX8 Tutorial 07.wpp project file (see p. 16 for details).
Alternatively, in the Open dialog, navigate to the folder where you saved your project file from the Linking to social media tutorial on p. 119, select it and click Open.
A partially designed site will open in the workspace.
Adding pages
First, we need to create a new blank page on which to display the results of the search. We'll exclude this page from site navigation so it only appears if the search facility is used.
To add blank pages:
1. On the Pages tab, click the down arrow on the Add new page or link button and select New Blank Page.
2. In the Page Properties dialog:
• In the Page name input box, drag to select the default name and then type 'Search'.
• Select the Specify page title option and update the contents of the adjacent input box.

Tutorials: Adding a search facility 133
• In the File name input box, drag to select the default name and then type 'search.html'.
• In the Navigation Options section, from the Navigation drop-down list, select Exclude page from site navigation.
• In the Placement section, select After and then select Sitemap from the drop-down list.
3. Click OK.
The new page is added to the site and displayed in the workspace and on the Pages tab.

134 Tutorials: Adding a search facility
Now let's add our search facility.
Adding a search results frame
The search facility is built from two components—an input box where a visitor will type their search terms and a frame where the search results will display. These both need adding to your site. We'll start with the results frame.
To add a search results frame to the page:
1. On the Quick Build tab, in the Smart Objects category, click Site Search Results Frame.
2. Position the cursor below the page title and drag to fill the page (using the blue margins as guides). The Insert Site Search Frame dialog opens displaying the Site Search Results Frame tab.
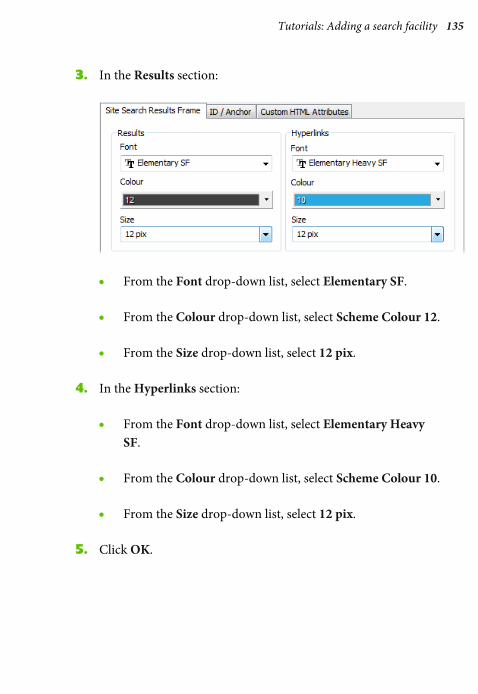
Tutorials: Adding a search facility 135
3. In the Results section:
• From the Font drop-down list, select Elementary SF.
• From the Colour drop-down list, select Scheme Colour 12.
• From the Size drop-down list, select 12 pix.
4. In the Hyperlinks section:
• From the Font drop-down list, select Elementary Heavy SF.
• From the Colour drop-down list, select Scheme Colour 10.
• From the Size drop-down list, select 12 pix.
5. Click OK.

136 Tutorials: Adding a search facility
The search results frame is added to the page and populated with placeholder text.
Next, we'll add an input box for visitors to type their search terms.
Save your work by pressing Ctrl+S.
Adding a search input box
We'll use the Online Search option for our search input box. This will enable a user's search terms to match with text content on pages in your site, as well as any Smart Objects (such as blogs and forums) placed on the page.
Online Search uses the Site Membership Manager facility created using Serif Web Resources. You'll need to create a Serif Web Resources account and then a Site Membership Manager if you wish to use the Online Search option.

Tutorials: Adding a search facility 137
To add a search input box to the site:
1. On the Pages tab, click Master Pages, and then double-click the Master A thumbnail.
2. On the Quick Build tab, in the Smart Objects category, click Site Search Form.
3. Click anywhere on the page.
4. In the Insert Site Search Form dialog:
• From the Search Type section, ensure the Online Search option is selected.
This option ensures that the search also includes words used in any Smart objects you have added to your site (or add in the future).
If you do not intend on adding Smart objects to your site, you can use the Client-side Search which will search text added to your site within WebPlus only.
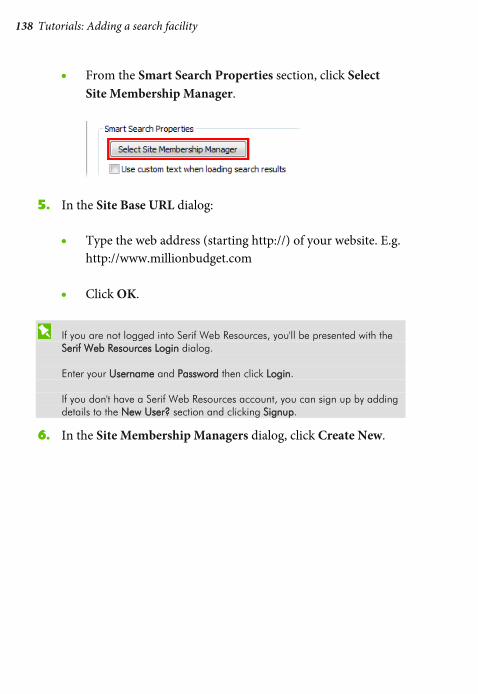
138 Tutorials: Adding a search facility
• From the Smart Search Properties section, click Select Site Membership Manager.
5. In the Site Base URL dialog:
• Type the web address (starting http://) of your website. E.g. http://www.millionbudget.com
• Click OK.
If you are not logged into Serif Web Resources, you'll be presented with the Serif Web Resources Login dialog. Enter your Username and Password then click Login. If you don't have a Serif Web Resources account, you can sign up by adding details to the New User? section and clicking Signup.
6. In the Site Membership Managers dialog, click Create New.
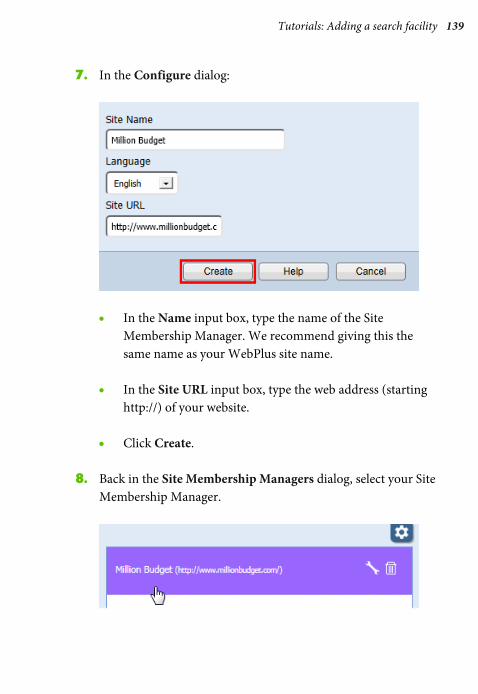
Tutorials: Adding a search facility 139
7. In the Configure dialog:
• In the Name input box, type the name of the Site Membership Manager. We recommend giving this the same name as your WebPlus site name.
• In the Site URL input box, type the web address (starting http://) of your website.
• Click Create.
8. Back in the Site Membership Managers dialog, select your Site Membership Manager.

140 Tutorials: Adding a search facility
9. Back in the Insert Site Search Form dialog, click OK. The search input box is added to the page.
10. With the input box still selected, drag the object's move button to position it neatly on the header panel. (We placed it bottom-right.)
That's it! We now have a search facility established on our site. When a visitor types words into the input box and clicks Search, the website will redirect them to the Search page and display the results there.
You now have a site which contains the essential components which will help visitors find the information they need when accessing your site. You can now publish this site online. Alternatively, you may wish to create a mobile-ready site from it. See the Publishing your site and Making a mobile-ready site tutorials starting on the following page and p. 153, respectively, for details.
Save your work by pressing Ctrl+S.

Tutorials: Publishing your site 141
Publishing your site
30 min
Once you have made your site, the next step is to publish it to the internet. We'll take you through the steps in this tutorial.
By the end of this tutorial you will be able to:
• Preview your site in WebPlus at different screen resolutions.
• Prepare your website for publication.
• Set up your FTP account.
• Publish and maintain your website.
If you have already completed the Adding a search facility tutorial on p. 131, you can use your saved project as the starting point for this tutorial.

142 Tutorials: Publishing your site
Let's begin...
• Open the WPX8 Tutorial 08.wpp project file (see p. 16 for details).
Alternatively, in the Open dialog, navigate to the folder where you saved your project file from the Adding a search facility tutorial on p. 131, select it and click Open.
A completed site will open in the workspace.
Before we look at publishing the site to the web, let's first preview how the website will look.
Previewing your site
Previewing your site in a browser gives you a great indication of what the final published website will look like. We show you how to do this on p. 7. You can also preview your site directly in WebPlus, which allows you to view the site at different screen resolutions.
To preview your site in WebPlus:
1. On the Standard toolbar, click the arrow to expand the Preview site drop-down list.
2. Click the Preview in Window (Internet Explorer) option. WebPlus displays the site preview in a built-in Microsoft Internet Explorer window.

Tutorials: Publishing your site 143
3. On the context toolbar, from the Screen preview resolution drop-down list, select a preview size.
This allows you to determine how much of your page width is visible at certain resolutions.
4. When you’ve finished, click Close Preview.
Preparing your website for publication
The Task Monitor tab displays a list of issues currently present in your site. It is worth running through these issues and resolving them before publishing your site online.
If you're using the supplied project file (WPX8 Tutorial 08.wpp), the following issues will be present:
• Form has no method of submission
• HTML text contains Lorem Ipsum
The numbers in parenthesis indicate how many times the issue occurs.

144 Tutorials: Publishing your site
If you have already completed the Forms, User Details and Google maps tutorial on p. 85, the first issue may not be present.
If you're using other project files, you may have different or additional reported issues.
Each issue will have a unique way of being resolved. We'll show you the process of locating the issue so you can then resolve it.
To locate an issue to resolve:
• On the Task Monitor tab:
• Click to select the issue.
• Click Display Object. In the workspace the page object will be selected.
If the issue was Form has no method of submission, you can follow the Form submission via Serif Web Resources procedure in the Forms, User Details and Google maps tutorial on p. 85 to resolve the issue.
The Task Monitor tab also provides a Program Hints section which you may wish to work through before publishing your site.

Tutorials: Publishing your site 145
For more information on using the Task Monitor tab and resolving issues, see Task Monitor tab in WebPlus Help.
When you are satisfied all issues with your website have been resolved (or you're happy to leave them unresolved), you can set up your FTP account and publish to the world wide web.
Save your work by pressing Ctrl+S.
Setting up your FTP account
You will only have to set up your FTP account the first time you publish your site to the web.
Now it's time to publish our site to a live location. Even though you may have saved your website as a WebPlus project, it's not truly a ‘website’ until you've converted it to files that can be viewed in a browser. WebPlus does this automatically when you publish the site.
Useful terms to know: • FTP - File Transfer Protocol—this is the standard way of uploading your website's files from your computer to your web host. • URL - Universal Resource Locator—this is the ‘address’ where your website resides on the web. • Web Host - this is a company which provides web space for you to store the files necessary to display your website pages on the internet.
The next steps assume that you have dedicated space on a web server. If you are unsure how to access this, contact your Web host.
To set up your FTP account:

146 Tutorials: Publishing your site
1. On the Standard toolbar, click the arrow to expand the Publish site drop-down list.
2. Click Publish to Web.
3. If the Publish To Web: Get Hosting dialog displays, click Add Details.
4. In the Publishing Options dialog, click Manage Accounts. The Account Details dialog will open.
5. When publishing to the Web you’ll need to provide the following information, which you can obtain from your Web Host. (When you receive this information, usually displayed on-screen or sent by email on purchase of your web space, it is worth printing out for your own records and for later reference.)

Tutorials: Publishing your site 147
• Use SFTP: This is a file transfer variant which some Web hosts use. Select the option if indicated to do so by your Web host.
• Account name: A descriptive name for this connection. This can be any name of your choice. You’ll use it to identify this account in WebPlus (you may have more than one).
• FTP address: The URL that locates the internet-based server that will store your files—it will look similar to a Web address but often starts 'ftp.' or ‘ftp://’. The FTP address is supplied by your Web host.
• Port number: Unless directed by your Web host, leave the Port number set at 21. This is the default port used by most FTP servers for file transfer.
• Folder: Allows you to upload sites to sub-folders of your main website's address. You can leave this blank unless you are directed otherwise by your Web host, or you want to publish to a specific sub-folder. (This may also be needed to correctly route your upload specifically to your own Web space.)
• Username: Specified by your Web host—this is often case-sensitive.
• Password: Specified by your Web host—this is often case-sensitive.

148 Tutorials: Publishing your site
• Passive Mode: Leave checked (by default) unless you experience upload problems.
• Website URL: The web address of your site—it often starts ‘http://’ or ‘https://’.
• Click OK.
For more information about setting up your account details, see Publishing to the web in WebPlus Help.
Before you proceed further, it's a good idea to test your account settings to ensure there are no issues with connecting to the internet.
To test your account details and connection:
• In the FTP Accounts dialog, click Test. WebPlus will attempt to connect to your hosting account.
You will be informed if the connection has been successful:
• If unsuccessful, select your FTP Account from the Account drop-down list and click Edit to review your settings.
• If successful, click Update Account—your new FTP account and settings are displayed in the Publishing Options dialog. (Your FTP account details are saved for future use.) Click OK.
Once you've set up your FTP account and can connect your computer to the host, publishing to the Web is simply a matter of transferring files.

Tutorials: Publishing your site 149
Publishing to the web
With your FTP account set up and project ready-to-go, let's get onto the exciting task of getting your site onto the web!
If you're currently in the main workspace, click File>Publish Site>Publish to Web to access the Publish To Web dialog.
To publish your site to the web:
1. In the Publish to Web dialog:
• Your current FTP account details should be displayed.
If not, click Change, select an account from the FTP account drop-down list, and click OK.
• Any unresolved issues on your site are displayed in the Tasks section.
To resolve these issues before you publish your site, click Goto Task Monitor Tab. (This will cancel the publishing process.)
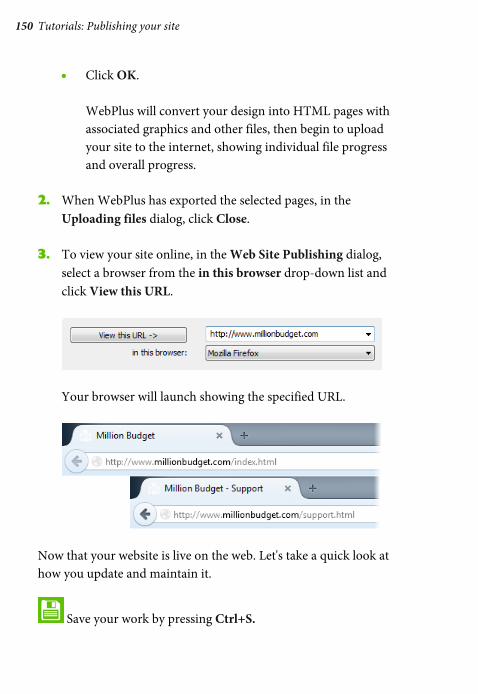
150 Tutorials: Publishing your site
• Click OK. WebPlus will convert your design into HTML pages with associated graphics and other files, then begin to upload your site to the internet, showing individual file progress and overall progress.
2. When WebPlus has exported the selected pages, in the Uploading files dialog, click Close.
3. To view your site online, in the Web Site Publishing dialog, select a browser from the in this browser drop-down list and click View this URL.
Your browser will launch showing the specified URL.
Now that your website is live on the web. Let's take a quick look at how you update and maintain it.
Save your work by pressing Ctrl+S.

Tutorials: Publishing your site 151
Maintaining your website
The great thing about websites is the ability to update them frequently at no extra cost—in fact, visitors will expect your website to be up-to-date with all the latest information. With WebPlus, it's quick to update a modified website which has been previously published.
To update a previously published website:
1. With your WebPlus project still open in your workspace, make any necessary changes and then save your work.
2. From the File menu, click Publish Site and then select Publish to Web.
3. In the Publish To Web dialog:
• In the Page Range section, ensure the Publish All Pages option is not selected.
• Select the Home page option.
• Click OK.

152 Tutorials: Publishing your site
4. In the Uploading Files dialog, select Incremental Update or Full Upload.
• Incremental Update: WebPlus will export your site and compare the exported files to those already on the server. It will only upload files that are new or have changed since the last upload. This option can also check for missing files. Incremental updates are great when you want to quickly replace minor elements of your site!
• Full Upload: WebPlus will upload all the files, regardless of whether they have changed since the last upload. In both cases you can instruct WebPlus to delete uploaded files that are no longer required by selecting this option in the dialog.
By only uploading pages which have changed (and selecting Incremental Update) you will notice that the web upload is much quicker. You can view your updated page in a browser.
You can maintain your published website further by using the Maintain Website dialog (accessible from File>Publish Site). For more information, see Maintaining your website in WebPlus Help.
That’s it! You’ve published your site to the Web for all to see! As you can see, WebPlus makes it very easy to publish your site and upload new content.
If you’re having problems we suggest you check your provider’s website to find the information you need, or contact their customer support team. Note: Serif cannot supply you with this information unless you have a Serif web hosting account.

Tutorials: Making a mobile-ready site 153
Making a mobile-ready site
60 min
Websites designed for viewing on 'desktop' devices can be viewed using mobile devices. However, if you have the time, you may wish to consider creating a site which is designed specifically for viewing on mobile devices such as smart phones and tablets.
By the end of this tutorial you will be able to:
• Set up page redirects.
• Create a mobile site from a desktop site.
• Modify Master page design and objects.
• Preview your site at mobile screen resolution.
• Publish your mobile site to the web.
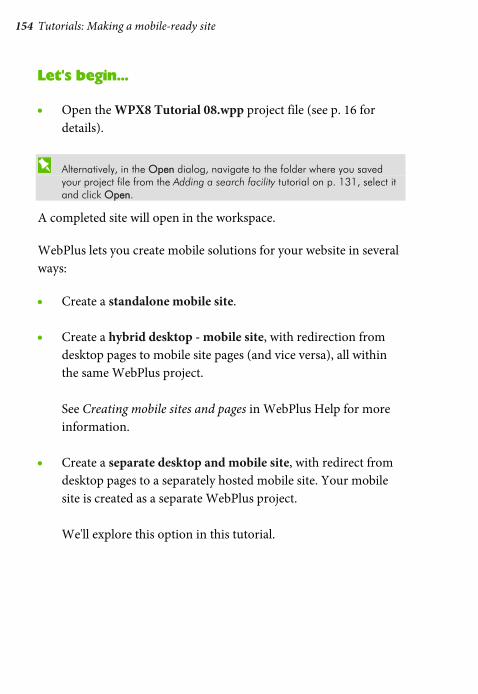
154 Tutorials: Making a mobile-ready site
Let's begin...
• Open the WPX8 Tutorial 08.wpp project file (see p. 16 for details).
Alternatively, in the Open dialog, navigate to the folder where you saved your project file from the Adding a search facility tutorial on p. 131, select it and click Open.
A completed site will open in the workspace.
WebPlus lets you create mobile solutions for your website in several ways:
• Create a standalone mobile site.
• Create a hybrid desktop - mobile site, with redirection from desktop pages to mobile site pages (and vice versa), all within the same WebPlus project. See Creating mobile sites and pages in WebPlus Help for more information.
• Create a separate desktop and mobile site, with redirect from desktop pages to a separately hosted mobile site. Your mobile site is created as a separate WebPlus project. We'll explore this option in this tutorial.

Tutorials: Making a mobile-ready site 155
Setting up page redirects
Setting up page redirects is a quick and easy process in WebPlus. First, we'll show you how to redirect visitors from the main Home page to the mobile version, if they access the website from a mobile device.
To redirect to a mobile page:
1. With the Home page displayed in the workspace, on the context toolbar, click Page Properties.
2. In the Page Properties dialog:
• On the left, select the Redirect category.
• Click Link next to the Redirect to box.
3. In the Edit Page Redirect dialog:
• Select the Internet Page category.
• In the URL address input box, type the web address of the Home page of the mobile site—http://www.millionbudget.com/mobile/index.html. (We will discuss this choice on p. 171.)
• Click OK.

156 Tutorials: Making a mobile-ready site
4. Back in the Page Properties dialog, select Redirect only on condition option and then select If recognised mobile device.
5. Click OK.
Now, when a visitor accesses the Home page of the desktop site from a mobile device they will be immediately redirected to the Home page of the mobile site.
You may wish to follow the procedure above to set up a redirect from the Support page to http://www.millionbudget.com/mobile/support.html and the Sitemap page to http://www.millionbudget.com/mobile/sitemap.html. (There is no need to redirect the Search page, as it is only accessible via the search facility.)
Save your work by pressing Ctrl+S.

Tutorials: Making a mobile-ready site 157
Creating a mobile site from a previously created site
You can create a mobile site based on the pages created for your desktop site. First we'll save our project as a new, mobile project.
To save to a new project:
1. From the File menu, select Save As.
2. In the Save As dialog:
• In the File name input box, modify the current project name.
• Click Save.
Now you are working in a new project, any changes you make will not affect the desktop site.

158 Tutorials: Making a mobile-ready site
Before we get stuck into the redesign of our site, we'll modify the redirects to ensure anyone accessing the mobile site pages on a desktop device will be redirected to the desktop site.
To redirect to a desktop page:
1. With the Home page displayed in the workspace, on the context toolbar, click Page Properties.
2. In the Page Properties dialog:
• On the left, select the Redirect category.
• Click Link next to the Redirect to box.
3. In the Edit Page Redirect dialog:
• In the URL address input box, type the web address of the Home page of the desktop site—http://www.millionbudget.com/index.html.
• Click OK.
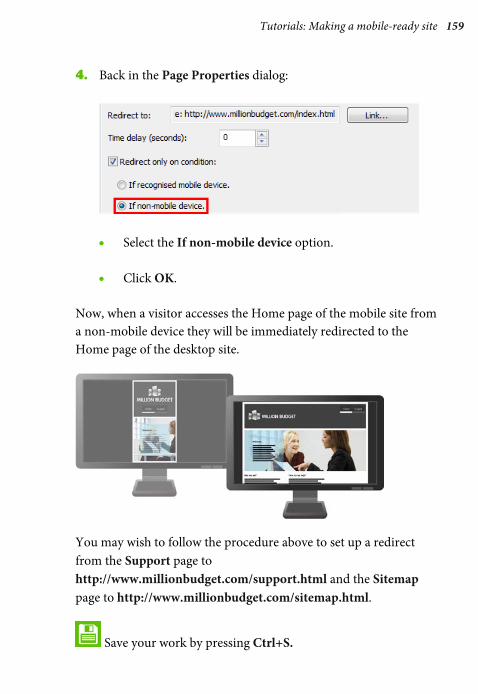
Tutorials: Making a mobile-ready site 159
4. Back in the Page Properties dialog:
• Select the If non-mobile device option.
• Click OK.
Now, when a visitor accesses the Home page of the mobile site from a non-mobile device they will be immediately redirected to the Home page of the desktop site.
You may wish to follow the procedure above to set up a redirect from the Support page to http://www.millionbudget.com/support.html and the Sitemap page to http://www.millionbudget.com/sitemap.html.
Save your work by pressing Ctrl+S.
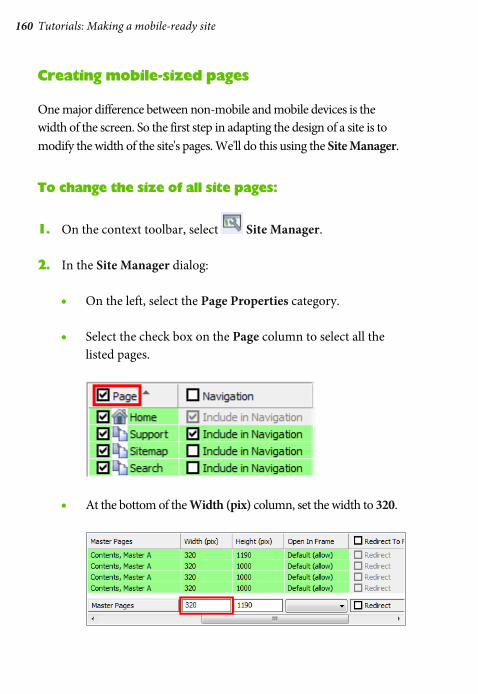
160 Tutorials: Making a mobile-ready site
Creating mobile-sized pages
One major difference between non-mobile and mobile devices is the width of the screen. So the first step in adapting the design of a site is to modify the width of the site's pages. We'll do this using the Site Manager.
To change the size of all site pages:
1. On the context toolbar, select Site Manager.
2. In the Site Manager dialog:
• On the left, select the Page Properties category.
• Select the check box on the Page column to select all the listed pages.
• At the bottom of the Width (pix) column, set the width to 320.
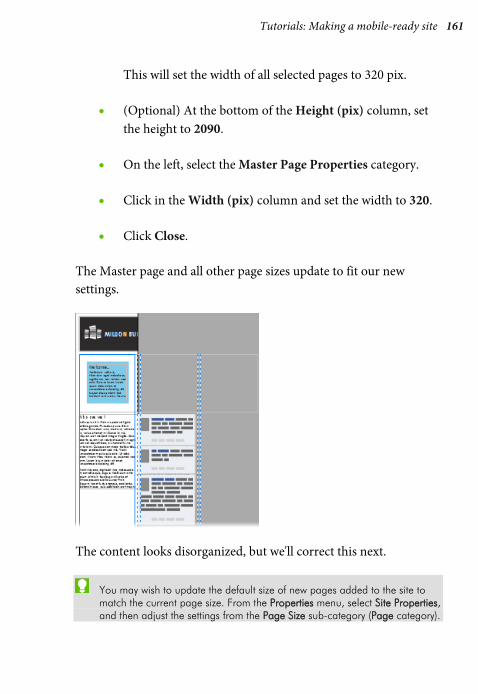
Tutorials: Making a mobile-ready site 161
This will set the width of all selected pages to 320 pix.
• (Optional) At the bottom of the Height (pix) column, set the height to 2090.
• On the left, select the Master Page Properties category.
• Click in the Width (pix) column and set the width to 320.
• Click Close.
The Master page and all other page sizes update to fit our new settings.
The content looks disorganized, but we'll correct this next.
You may wish to update the default size of new pages added to the site to match the current page size. From the Properties menu, select Site Properties, and then adjust the settings from the Page Size sub-category (Page category).

162 Tutorials: Making a mobile-ready site
Setting up margins
Before we begin reorganizing our design, we'll set up margins to work against.
To set up margins:
1. On the context toolbar, click Site Properties.
2. In the Site Properties dialog:
• On the left, from the Page category, select the Margins sub-category.
• Set the Left and Right margins to 10 pix.
• Set the Top margin to 265 pix.
• Set the Bottom margin to 150 pix.

Tutorials: Making a mobile-ready site 163
• In the Row and Column Guides section, set the Columns to 1.
• Click OK.
The above settings will ensure margin guides appear consistently on all pages, regardless of their width or height. We can now rework our page content to fit with these margins.
Save your work by pressing Ctrl+S.
Reworking Master page content
Our content reorganization will begin on the Master page before moving onto individual site pages. We'll not step through every procedure, but will discuss the major issues you will need to address.
To rework the header:
1. On the Pages tab, click Master Pages, and then double-click the Master A thumbnail.
2. Select the Frame text Page name object and drag the object's move button to position it neatly within the page margins.

164 Tutorials: Making a mobile-ready site
3. Drag each header object to the pasteboard until you are left with just the panel partially on the page.
4. Select the panel and then, on the Transform tab:
• Ensure the object is set to Anchor Top Left and the Aspect Ratio is Unlocked.
• Set X to 10 pix and Y to 10 pix.
• Set W (Width) to 300 pix and H (Height) to 245 pix. The panel is resized and positioned on the page precisely.

Tutorials: Making a mobile-ready site 165
5. Reposition the header objects on the header as desired.
You may have to resize the navigation bar to fit the new header size.
Save your work by pressing Ctrl+S.
The navigation bar will probably look better centred like the other header elements.
To change navigation bar alignment:
1. Double-click the navigation bar on the page.
2. In the Edit Navigation Bar dialog, select the Appearance tab.
3. From the categories on the left, select Layout.
4. From the Horizontal Alignment drop-down list, select Centre.
5. Click OK.
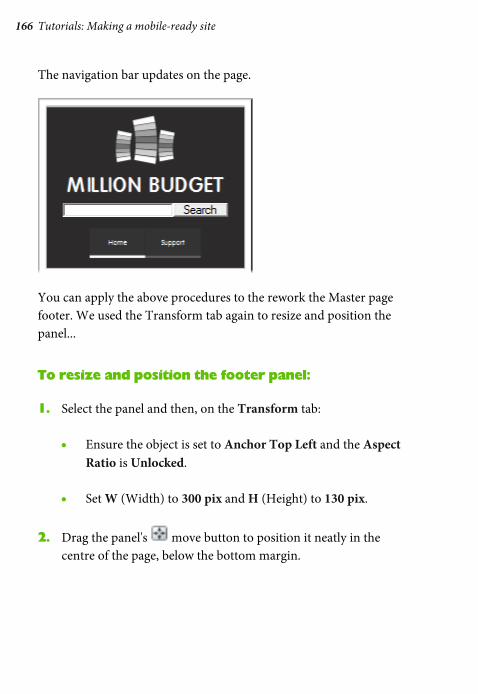
166 Tutorials: Making a mobile-ready site
The navigation bar updates on the page.
You can apply the above procedures to the rework the Master page footer. We used the Transform tab again to resize and position the panel...
To resize and position the footer panel:
1. Select the panel and then, on the Transform tab:
• Ensure the object is set to Anchor Top Left and the Aspect Ratio is Unlocked.
• Set W (Width) to 300 pix and H (Height) to 130 pix.
2. Drag the panel's move button to position it neatly in the centre of the page, below the bottom margin.

Tutorials: Making a mobile-ready site 167
...and then repositioned the footer objects.
It is unlikely a visitor would print the web page from a mobile device, so we'll remove this option from the Social Bookmarking Button Strip.
To modify a bookmarking button strip:
1. Double-click the Social Bookmarking Button Strip on the page.
2. In the Edit Social Bookmarking Button Strip dialog, on the Social Bookmarking Button Strip Configuration tab:
• From the Included In Strip list, select Print and click Remove.
• Click OK.
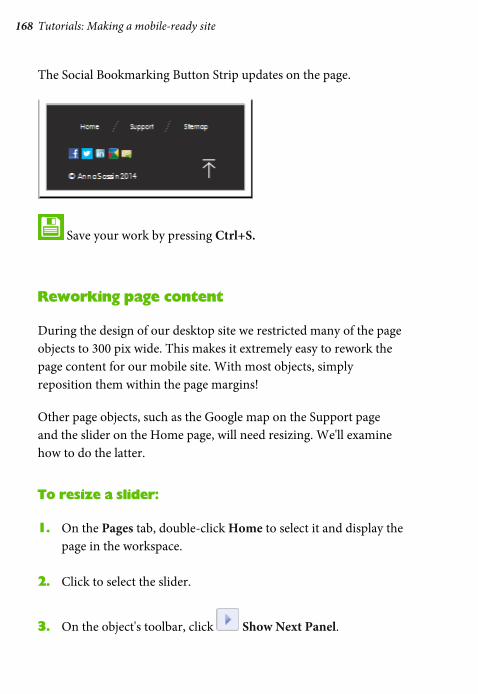
168 Tutorials: Making a mobile-ready site
The Social Bookmarking Button Strip updates on the page.
Save your work by pressing Ctrl+S.
Reworking page content
During the design of our desktop site we restricted many of the page objects to 300 pix wide. This makes it extremely easy to rework the page content for our mobile site. With most objects, simply reposition them within the page margins!
Other page objects, such as the Google map on the Support page and the slider on the Home page, will need resizing. We'll examine how to do the latter.
To resize a slider:
1. On the Pages tab, double-click Home to select it and display the page in the workspace.
2. Click to select the slider.
3. On the object's toolbar, click Show Next Panel.
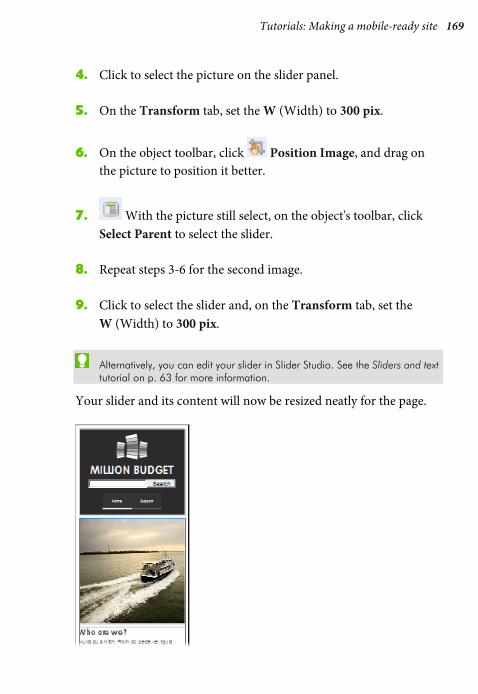
Tutorials: Making a mobile-ready site 169
4. Click to select the picture on the slider panel.
5. On the Transform tab, set the W (Width) to 300 pix.
6. On the object toolbar, click Position Image, and drag on the picture to position it better.
7. With the picture still select, on the object's toolbar, click Select Parent to select the slider.
8. Repeat steps 3-6 for the second image.
9. Click to select the slider and, on the Transform tab, set the W (Width) to 300 pix.
Alternatively, you can edit your slider in Slider Studio. See the Sliders and text tutorial on p. 63 for more information.
Your slider and its content will now be resized neatly for the page.

170 Tutorials: Making a mobile-ready site
Save your work by pressing Ctrl+S.
Previewing your site
Previewing your site in WebPlus gives you a great indication of what the final published website will look like on a mobile device.
To preview your site in WebPlus:
1. On the Standard toolbar, click the arrow to expand the Preview site drop-down list, and then:
• Select Disable Page Redirects when Previewing. This will allow you to preview the mobile site despite working on a desktop computer.
• Click the Preview in Window (Internet Explorer) option. WebPlus displays the site preview in a built-in Microsoft Internet Explorer window.
2. On the context toolbar, from the Screen preview resolution drop-down list, select 320x480 (iPhone 3G).
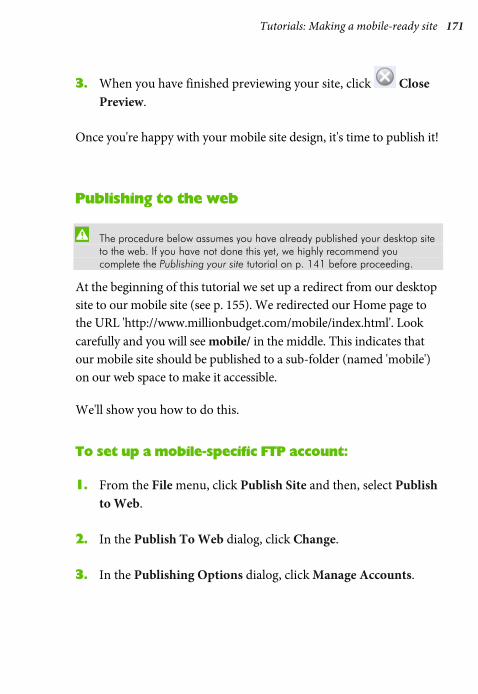
Tutorials: Making a mobile-ready site 171
3. When you have finished previewing your site, click Close Preview.
Once you're happy with your mobile site design, it's time to publish it!
Publishing to the web
The procedure below assumes you have already published your desktop site to the web. If you have not done this yet, we highly recommend you complete the Publishing your site tutorial on p. 141 before proceeding.
At the beginning of this tutorial we set up a redirect from our desktop site to our mobile site (see p. 155). We redirected our Home page to the URL 'http://www.millionbudget.com/mobile/index.html'. Look carefully and you will see mobile/ in the middle. This indicates that our mobile site should be published to a sub-folder (named 'mobile') on our web space to make it accessible.
We'll show you how to do this.
To set up a mobile-specific FTP account:
1. From the File menu, click Publish Site and then, select Publish to Web.
2. In the Publish To Web dialog, click Change.
3. In the Publishing Options dialog, click Manage Accounts.
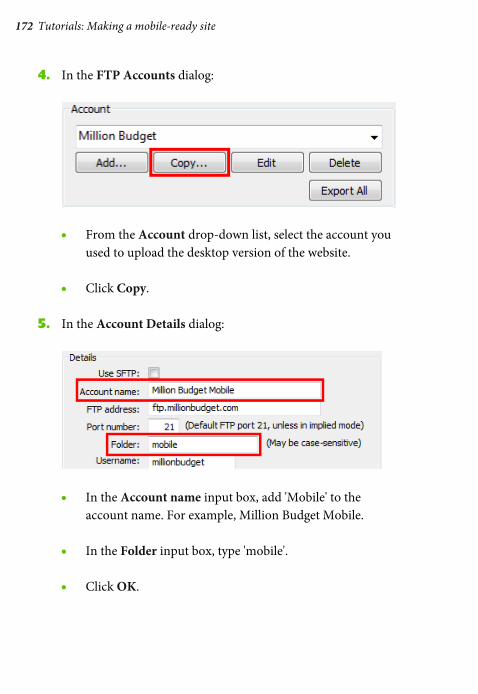
172 Tutorials: Making a mobile-ready site
4. In the FTP Accounts dialog:
• From the Account drop-down list, select the account you used to upload the desktop version of the website.
• Click Copy.
5. In the Account Details dialog:
• In the Account name input box, add 'Mobile' to the account name. For example, Million Budget Mobile.
• In the Folder input box, type 'mobile'.
• Click OK.

Tutorials: Making a mobile-ready site 173
6. Back in the FTP Accounts dialog, click Update Account.
7. Back in the Publishing Options dialog, click OK.
The Publishing to details in the Publish To Web dialog have now updated. Now you are ready to upload your mobile-ready site!
To publish your site to the web:
1. In the Publish to Web dialog:
• Any unresolved issues on your site are displayed in the Tasks section. To resolve these issues before you publish your site, click Goto Task Monitor Tab. (This will cancel the publishing process.) See the Preparing your website for publication procedure in the Publishing your site tutorial on p. 143 for more information.
• Click OK. WebPlus will convert your design into HTML pages with associated graphics and other files.
2. In the FTP Error dialog, click Create Directory. WebPlus will begin to upload your site to the internet, showing individual file progress and overall progress.

174 Tutorials: Making a mobile-ready site
3. When WebPlus has exported the selected pages, in the Uploading files dialog, click Close.
4. In the Web Site Publishing dialog, click Close. To view your mobile site online, you will need to use a mobile device.
5. Simply type your website address (e.g. millionbudget.com) in the browser on your mobile device and you'll see the mobile version of your Home page display!
That's it! You now have a mobile-ready site for visitors to access via their portable devices.
Save your work by pressing Ctrl+S.

Creative Showcase 175
Creative Showcase

176 Creative Showcase

Creative Showcase: Pro Templates 177
Pro Templates
WebPlus provides a selection of Pro Template sites that are populated with pictures and text placeholders which you can start using straight away.
To open a Pro Template site:
1. On the File menu, click Startup Assistant.
2. On the left, click Templates.
3. On the Templates list, select WebPlus X8 Pro Templates, and from the thumbnail gallery, click to select a site from one of the templates.
4. Click OK.
We’ll showcase the Ready Digital Marketing (as selected above), Stack & Stone and Ski Resort & Leisure templates next.
You can get more Pro Template Packs from Serif's template store. Visit http://www.serif.com/templates

178 Creative Showcase: Pro Templates
Ready Digital Marketing

Creative Showcase: Pro Templates 179
Stack & Stone

180 Creative Showcase: Pro Templates
Ski Resort & Leisure
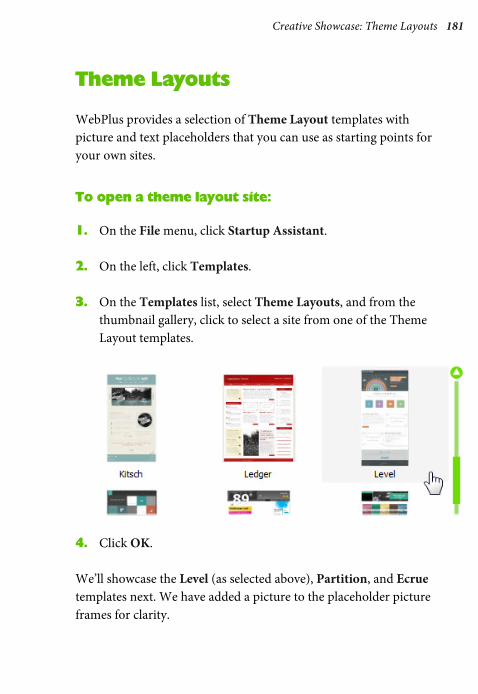
Creative Showcase: Theme Layouts 181
Theme Layouts
WebPlus provides a selection of Theme Layout templates with picture and text placeholders that you can use as starting points for your own sites.
To open a theme layout site:
1. On the File menu, click Startup Assistant.
2. On the left, click Templates.
3. On the Templates list, select Theme Layouts, and from the thumbnail gallery, click to select a site from one of the Theme Layout templates.
4. Click OK.
We’ll showcase the Level (as selected above), Partition, and Ecrue templates next. We have added a picture to the placeholder picture frames for clarity.

182 Creative Showcase: Theme Layouts
Level

Creative Showcase: Theme Layouts 183
Partition

184 Creative Showcase: Theme Layouts
Ecrue