

Webasto Thermo 50 Operating Instructions
5
-
Upload
butlertechnik -
Category
Documents
-
view
262 -
download
1
description
A full set of operating instructions for the Webasto Thermo 50 water heater.
Transcript of Webasto Thermo 50 Operating Instructions
General information
Maintenance and safety instructions
Dear Webasto user
We presume that the principle and mode of operation of your new heater has beenexplained to your complete satisfaction by the workshop / service centre whichinstalled the heater. This manual summarizes the main points of importance for usingthe heaters Thermo 50.
The water heaters Thermo 50 have been type-tested and approved in accordance withDirectives 2001/56/EC (heaters) and 72/245/EEC (EMC) within the territory governed byEuropean Directive 70/156/EEC.
The units must be installed in accordance with the enclosed installation instructions.Theequipment must be installed in accordance with the enclosed installation instructions.The installation must be checked in accordance with statutory installation provisions.Refer to the installation instructions for more details.The year in which the heater is used for the first time must be permanently marked onthe rating plate by removing the inapplicable year figures.If the Thermo 50 heater is installed in hazchem vehicles, then not only the requirementsof the motor vehicle construction and use regulations but also the provisions of therelevant edition of ADR (Accord européen relatif au transport international desmarchandises dangereuses par route) must be complied with.
�
�
�
In filling stations and tank farms.
In places where explosive vapours or dust may build up(e.g. near fuel, coal, wood dust or cereal stores).
In enclosed rooms (e.g. garages), not even via the timeror Telestart.
�
�
be exposed to temperatures of more than 120 °C(storage temperature), otherwise the electronics maysuffer permanent damage.
be operated without at least 20% brandname anti-freezein the water of the heating circuit.
The heater :must not be operated
Danger of explosionand suffocation!
The heater must not:
�
!
Operation of the heater
�
�
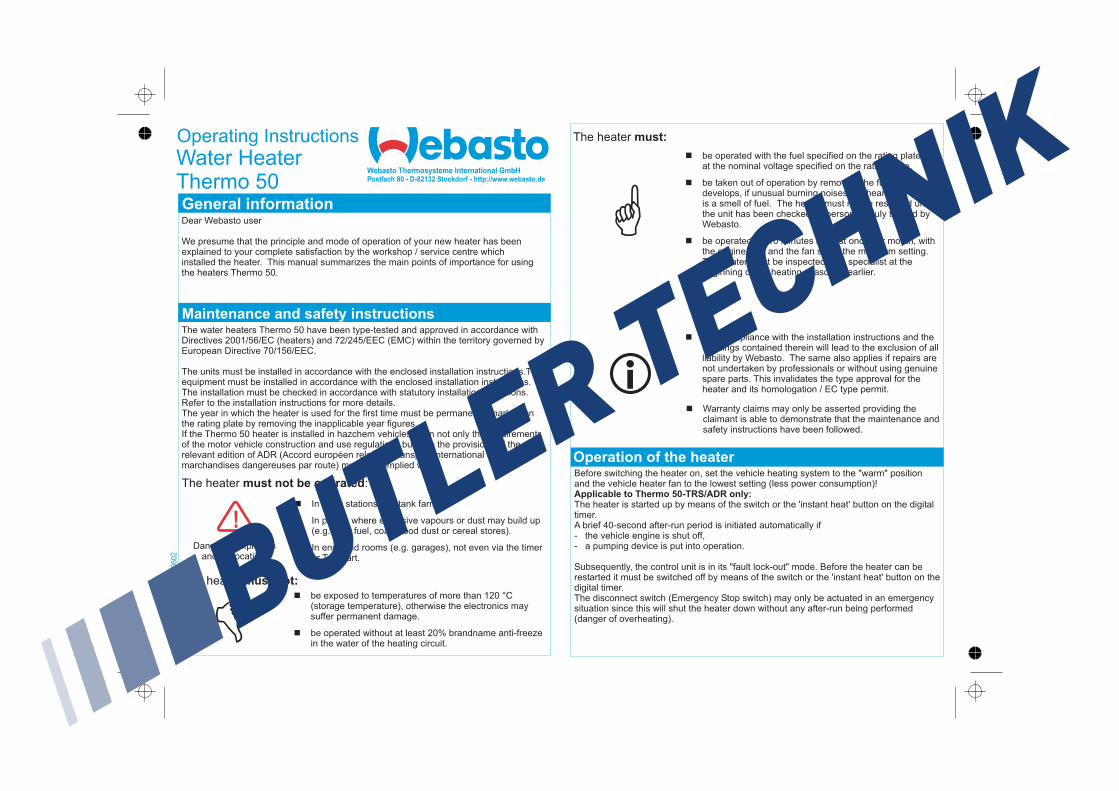
be operated with the fuel specified on the rating plate andat the nominal voltage specified on the rating plate.
be taken out of operation by removing the fuse if smokedevelops, if unusual burning noises are heard or if thereis a smell of fuel. The heater must not be restarted untilthe unit has been checked by personnel duly trained byWebasto.
be operated for 10 minutes at least once per month, withthe engine cold and the fan set to the minimum setting.The heater must be inspected by a specialist at thebeginning of the heating season or earlier.
�
� Non-compliance with the installation instructions and thewarnings contained therein will lead to the exclusion of allliability by Webasto. The same also applies if repairs arenot undertaken by professionals or without using genuinespare parts. This invalidates the type approval for theheater and its homologation / EC type permit.
The heater must:
�
Before switching the heater on, set the vehicle heating system to the "warm" positionand the vehicle heater fan to the lowest setting (less power consumption)!
The heater is started up by means of the switch or the 'instant heat' button on the digitaltimer.A brief 40-second after-run period is initiated automatically if- the vehicle engine is shut off,- a pumping device is put into operation.
Subsequently, the control unit is in its "fault lock-out" mode. Before the heater can berestarted it must be switched off by means of the switch or the 'instant heat' button on thedigital timer.The disconnect switch (Emergency Stop switch) may only be actuated in an emergencysituation since this will shut the heater down without any after-run being performed(danger of overheating).
Applicable to Thermo 50-TRS/ADR only:
Ident-
Nr.
67027C
3/0
502
Operating Instructions
Water HeaterThermo 50
Webasto Thermosysteme International GmbHPostfach 80 - D-82132 Stockdorf - http://www.webasto.de
� Warranty claims may only be asserted providing theclaimant is able to demonstrate that the maintenance andsafety instructions have been followed.
Standard Timer Switching theheater on
General
Switching theheater off
Operation
Setting time/day of theweek
Viewingthe time
Programmingheater startingtime
Recalling/erasing presettimes
Programmingduration ofoperating time
Setting theremainingoperating time
Setting thewakeup time
Recalling/erasing thewakeup time
Remote control
Manually: by pressing the button (continuous heating mode)Automatically: by programming the heater starting time
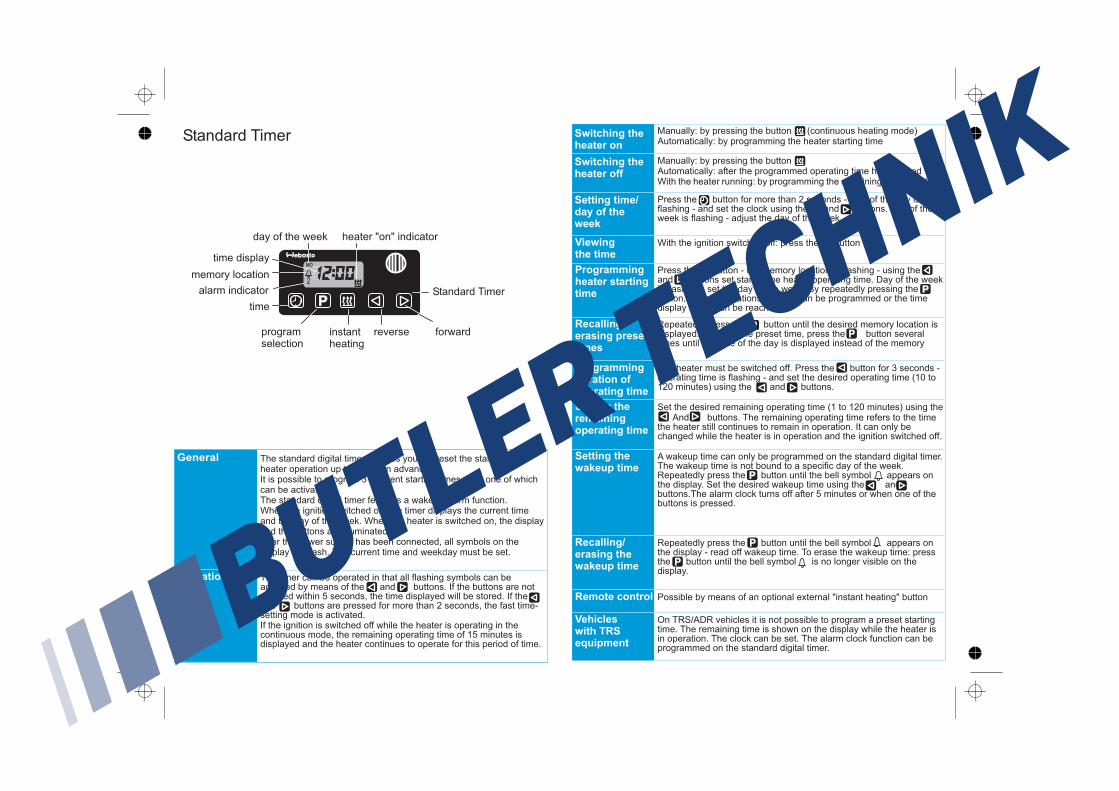
The standard digital timer enables you to preset the start of theheater operation up to 7 days in advance.It is possible to program 3 different starting times, only one of whichcan be activated.The standard digital timer features a wakeup alarm function.When the ignition switched on, the timer displays the current timeand the day of the week. When the heater is switched on, the displayand the buttons are illuminated.After the power supply has been connected, all symbols on thedisplay will flash. The current time and weekday must be set.
The timer can be operated in that all flashing symbols can beadjusted by means of the and buttons. If the buttons are notpressed within 5 seconds, the time displayed will be stored. If theand buttons are pressed for more than 2 seconds, the fast time-setting mode is activated.If the ignition is switched off while the heater is operating in thecontinuous mode, the remaining operating time of 15 minutes isdisplayed and the heater continues to operate for this period of time.
Manually: by pressing the buttonAutomatically: after the programmed operating time has elapsedWith the heater running: by programming the remaining operating time
Press the button for more than 2 seconds - time of the day isflashing - and set the clock using the and buttons. Day of theweek is flashing - adjust the day of the week.
With the ignition switched off: press the button
Press the button - the memory location is flashing - using theand buttons set start of the heater operating time. Day of the weekis flashing - set the day of the week. By repeatedly pressing thebutton, memory locations 2 and 3 can be programmed or the timedisplay mode can be reached.
Repeatedly press the button until the desired memory location isdisplayed. To erase the preset time, press the button severaltimes until the time of the day is displayed instead of the memory
The heater must be switched off. Press the button for 3 seconds -operating time is flashing - and set the desired operating time (10 to120 minutes) using the and buttons.
Set the desired remaining operating time (1 to 120 minutes) using theAnd buttons. The remaining operating time refers to the time
the heater still continues to remain in operation. It can only bechanged while the heater is in operation and the ignition switched off.
A wakeup time can only be programmed on the standard digital timer.The wakeup time is not bound to a specific day of the week.Repeatedly press the button until the bell symbol appears onthe display. Set the desired wakeup time using the andbuttons.The alarm clock turns off after 5 minutes or when one of thebuttons is pressed.
Repeatedly press the button until the bell symbol appears onthe display - read off wakeup time. To erase the wakeup time: pressthe button until the bell symbol is no longer visible on thedisplay.
Possible by means of an optional external "instant heating" button
day of the week heater "on" indicator
forward
Standard Timer
instantheating
reverseprogramselection
time
alarm indicator
memory location
time display
2
MO
Vehicleswith TRSequipment
On TRS/ADR vehicles it is not possible to program a preset startingtime. The remaining time is shown on the display while the heater isin operation. The clock can be set. The alarm clock function can beprogrammed on the standard digital timer.
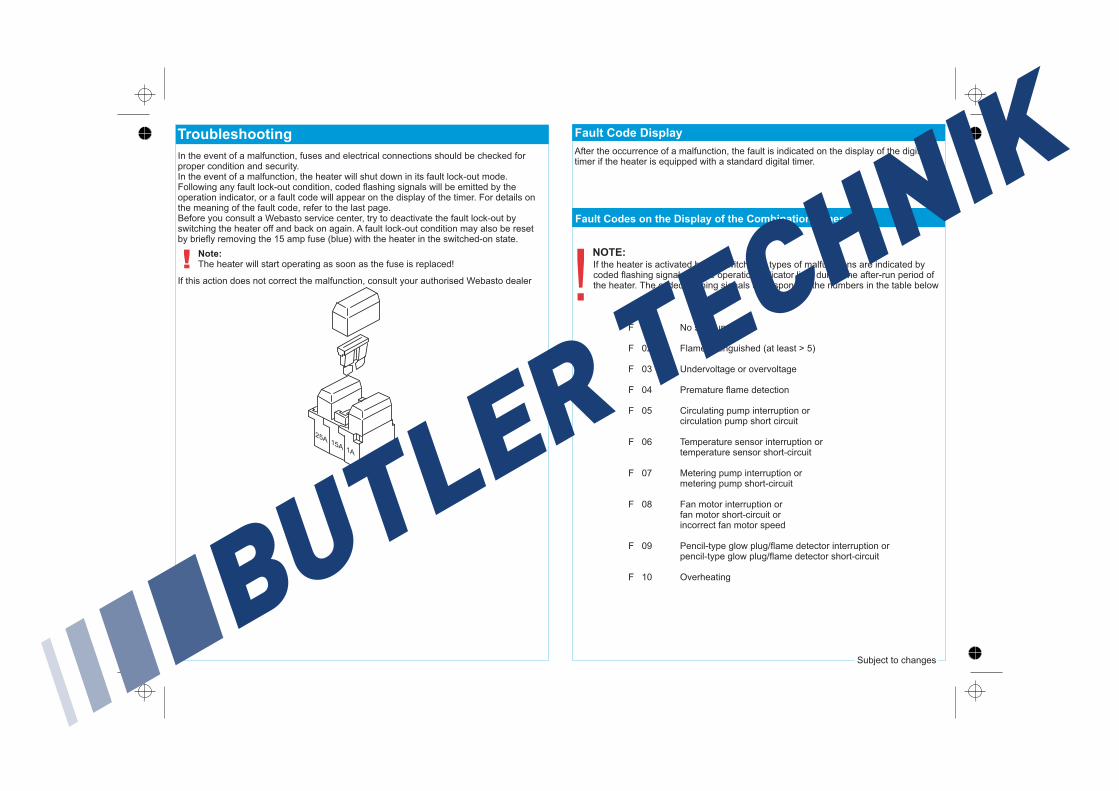
Fault Code Display
Fault Codes on the Display of the Combination Timer
NOTE:
!No start-up
Flame extinguished (at least > 5)
Undervoltage or overvoltage
Premature flame detection
Temperature sensor interruption ortemperature sensor short-circuit
Metering pump interruption ormetering pump short-circuit
Fan motor interruption orfan motor short-circuit orincorrect fan motor speed
Pencil-type glow plug/ interruption orpencil-type glow plug/ short-circuit
Overheating
Circulating pump interruption orcirculation pump short circuit
flame detectorflame detector
F 01
F 02
F 03
F 04
F 05
F 06
F 07
F 08
F 09
F 10
After the occurrence of a malfunction, the fault is indicated on the display of the digitaltimer if the heater is equipped with a standard digital timer.
If the heater is activated by the switch, the types of malfunctions are indicated bycoded flashing signals via the operation indicator light during the after-run period ofthe heater. The coded flashing signals correspond to the numbers in the table below
Troubleshooting
In the event of a malfunction, fuses and electrical connections should be checked forproper condition and security.In the event of a malfunction, the heater will shut down in its fault lock-out mode.Following any fault lock-out condition, coded flashing signals will be emitted by theoperation indicator, or a fault code will appear on the display of the timer. For details onthe meaning of the fault code, refer to the last page.Before you consult a Webasto service center, try to deactivate the fault lock-out byswitching the heater off and back on again. A fault lock-out condition may also be resetby briefly removing the 15 amp fuse (blue) with the heater in the switched-on state.
25A15A
1A
If this action does not correct the malfunction, consult your authorised Webasto dealer
Note:The heater will start operating as soon as the fuse is replaced!!
Subject to changes