
americanspaces.state.gov€¦ · Web viewCivil Society Certifications: OVERVIEW. Strengthening...
105
Overview: 1 Civil Society Certifications: OVERVIEW Strengthening civil society and democracy is a critical part of U.S. foreign policy. U.S. policies advocate for the development and strengthening of nations through providing universal rights and opportunity for betterment – work that can be done by governments, faith leaders, community leaders, and importantly, by individual citizens. American Spaces offer participants a means of understanding how they can contribute to building a civil society that provides opportunity and justice in their own countries and local communities. Together, teams at Smithsonian Institution’s ARTLAB+ and the U.S. Department of State’s Office of American Spaces created this curriculum to encourage participants to feel empowered and consider the myriad ways that individual contributions support broader national efforts to develop civil society. These Civil Society Certification workshops address how to use photography and video as tools for civic engagement. This overview provides facilitators with an introduction to the three certification workshops, a summary of technology requirements and suggestions for media organization and storage, a note on adhering to local laws, and ideas for sharing participant work, both in-person and digitally. Note: This overview provides guidelines to help implement each certification workshop more effectively. We strongly encourage facilitators to review this overview before beginning the certification workshops. I. What are Civil Society Certification Workshops? There are three easy-to-facilitate workshops included in this kit, each of which is adaptable in order to promote local relevance or work with a particular audience. Workshops work to build familiarity with the camera and video features of mobile devices, as well as computers or tablets and offer opportunities for discussion, brainstorming,
Transcript of americanspaces.state.gov€¦ · Web viewCivil Society Certifications: OVERVIEW. Strengthening...
Overview: 1
Civil Society Certifications: OVERVIEW
Strengthening civil society and democracy is a critical part of U.S. foreign policy. U.S. policies advocate for the development and strengthening of nations through providing universal rights and opportunity for betterment – work that can be done by governments, faith leaders, community leaders, and importantly, by individual citizens. American Spaces offer participants a means of understanding how they can contribute to building a civil society that provides opportunity and justice in their own countries and local communities. Together, teams at Smithsonian Institution’s ARTLAB+ and the U.S. Department of State’s Office of American Spaces created this curriculum to encourage participants to feel empowered and consider the myriad ways that individual contributions support broader national efforts to develop civil society.
These Civil Society Certification workshops address how to use photography and video as tools for civic engagement. This overview provides facilitators with an introduction to the three certification workshops, a summary of technology requirements and suggestions for media organization and storage, a note on adhering to local laws, and ideas for sharing participant work, both in-person and digitally.
Note: This overview provides guidelines to help implement each certification workshop more effectively. We strongly encourage facilitators to review this overview before beginning the certification workshops.
I. What are Civil Society Certification Workshops? There are three easy-to-facilitate workshops included in this kit, each of which is adaptable in order to promote local relevance or work with a particular audience. Workshops work to build familiarity with the camera and video features of mobile devices, as well as computers or tablets and offer opportunities for discussion, brainstorming, exploration, and hands-on learning.
The skills introduced in each workshop build upon each other, and it is strongly recommended that workshops are completed in order, starting with Digital Photography before moving to Video and concluding with the Civil Society Campaign. However, as part of its adaptability, facilitators may choose to run specific certifications or incorporate portions of certifications that they identify as most useful to their audience. Successful completion of each workshop results in a Certificate of Completion, included as a printable handout within each workshop packet.
Facilitators should consider using this kit as a lead-up to a larger event or program in support of Earth Day, World Press Freedom Day, Human Rights Day, International Women’s Day, or World AIDS Day to promote advocacy and awareness for meaningful causes, both locally and globally.
Overview: 2
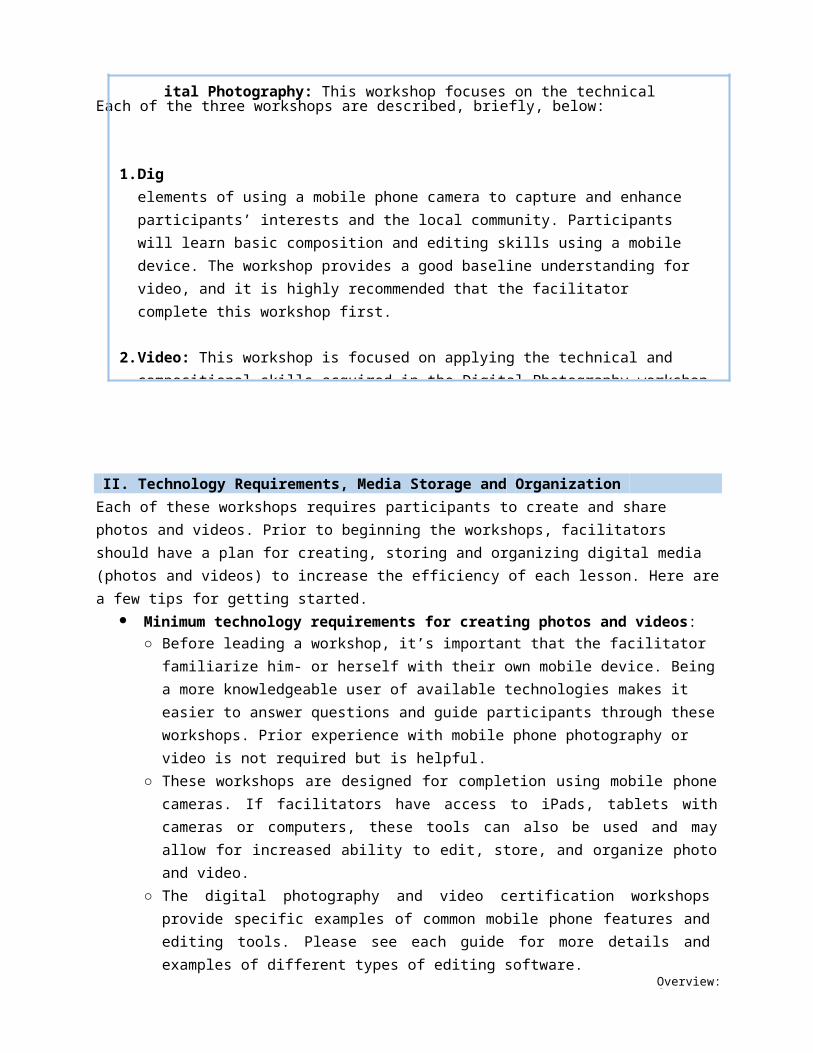
Each of the three workshops are described, briefly, below:
1. Dig
ital Photography: This workshop focuses on the technical elements of using a mobile
phone camera to capture and enhance participants’ interests and the local community. Participants will learn basic composition and editing skills using a mobile device. The workshop provides a good baseline understanding for video, and it is highly recommended that the facilitator complete this workshop first.
2. Video: This workshop is focused on applying the technical and compositional skills acquired in the Digital Photography workshop to create a short video about the local community.
3. Civil Society Campaign: This workshop focuses on applying the skills and techniques acquired during the Digital Photography and Video workshops. Participants will develop a
II. Technology Requirements, Media Storage and Organization Each of these workshops requires participants to create and share photos and videos. Prior to beginning the workshops, facilitators should have a plan for creating, storing and organizing digital media (photos and videos) to increase the efficiency of each lesson. Here are a few tips for getting started.
Minimum technology requirements for creating photos and videos:○ Before leading a workshop, it’s important that the facilitator familiarize him- or herself
with their own mobile device. Being a more knowledgeable user of available technologies makes it easier to answer questions and guide participants through these workshops. Prior experience with mobile phone photography or video is not required but is helpful.
○ These workshops are designed for completion using mobile phone cameras. If facilitators have access to iPads, tablets with cameras or computers, these tools can also be used and may allow for increased ability to edit, store, and organize photo and video.
○ The digital photography and video certification workshops provide specific examples of common mobile phone features and editing tools. Please see each guide for more details and examples of different types of editing software.
○ The mobile device or tablet should have a camera, flash, and be able to connect to the Internet, either wirelessly or via cable.
Media Storage and Organization:○ Cloud-based storage saves space: Photos and video files can be very large and take up
a lot of space on phones, tablets and computers.■ We recommend the following storage system:
Create certification workshop folders in Google Drive
Overview: 3
(https://drive.google.com/). We suggest creating a folder for each workshop and labeling it to the corresponding certification (i.e. Digital Photography Certification Workshop).
Within your certification workshop folder, create a folder for each participant. Encourage participants to use their individual folder to store their photo and/or video files as well as any other related work. You will need to “share” folders by entering each participant’s email address to provide access this file system.- If an individual does not have an email address, the facilitator can share the
folder(s) with participants via weblink. Start by clicking “Share” and then “Get Shareable Link.” Select the “Anyone with the link can edit” option.
Tip: Once participants have successfully uploaded their photos or videos to Google Drive, they can free up camera space by removing (deleting) the photo or video file from their mobile phone or camera.
■ Sharing the overall project folder with participants will allow them to view each other’s work to facilitate the sharing of ideas, brainstorming, feedback and discussion for a productive and successful workshop.
■ For helpful steps for working with Google Drive, visit: https://support.google.com/drive/answer/2375091?co=GENIE.Platform%3DDesk top&hl=en
III. Local Laws and Protections Facilitators should be aware of and adhere to local laws when facilitating each workshop, keeping in mind the following guidelines regarding workshop content, taking photos and videos in public and social media usage.
Review Workshop Content: Much of the content and examples provided in each certification workshop are relevant to the United States. Some of the examples provided may not be relevant or appropriate to the social or political climates in other areas of the world.○ Facilitators can also provide their own examples relevant to the local culture or
community to start a dialogue among participants, as well as how to use these devices or digital platforms to best enact social change.
Stay Within the Law: In some communities, photography and video may not be allowed in certain locations. Sensitive government buildings can prohibit these actions or permission may need to be obtained from individuals before recording. As a facilitator, be sure participants are aware of these laws and restrictions, as well as their rights as an active member of a civil society.o Emphasize the importance of talking with the public and asking for their permission to
be filmed and explaining the purpose of the photo or video.○ Many people are not interested in being photographed or filmed. It is important that
participants are taught to respect these decisions and make sure not to be aggressive or rude when asking permission.
Overview: 4
○ These workshops are great opportunities for participants to promote community engagement and awareness around an important subject. Many photographers have to personally engage with a community and become a trusted leader to gain access to these kinds of photography opportunities.
○ Consider preparing a “sign and release” form for photographed or videotaped subjects. This will ensure that everyone involved is willingly participating.
● Create Safe Environments for Sharing: Not all participants will feel comfortable having their work displayed in-person or digitally to the public, so it’s important to work closely with individuals to ensure they feel comfortable sharing their ideas and creations. This added level of protection will allow for more meaningful discussion of images and themes. Identify this digital and/or in-person space before facilitating a workshop.
● Use Social Media Responsibly: Social media platforms are a great way to spread and promote awareness of an important issue. Information shared on the Internet is accessible to potentially billions of users.○ The facilitator should actively remind participants of the importance of responsible
use of social media, both to protect themselves and associated organizations.○ Facilitators should check with their American Space management team and/or Post
for any relevant guidelines about social media usage and adhere accordingly to these policies.
IV. Additional Tips for Sharing Participant Work, Digitally and In-Person Examples of the most active social media sites are: Facebook, YouTube, Twitter, and Instagram. Basic suggestions for Facebook and YouTube are included here, as well as tips for an in-person event which does not require online posting. You may wish to refer to these suggestions for the Civil Society Campaign workshop, included in this packet, to help participants share and promote awareness of their campaigns.
How can you share these campaigns in your community?Can you inform people of this digital campaign through schools, libraries, community centers, or elsewhere in public? Use the Identify the Audience portion (section 4) of the Civil Society Campaign Workshop to consider who could be reached through: Emails, Posters, Flyers or Word-of-mouth
Sharing on FacebookBuilding a Facebook page for the finished photos and videos is an easy way to share participants’ campaigns. The facilitator can create a Group Facebook page (separate from your American Space’s official page) for participants to upload finished projects and campaigns. For step-by-step guidance for creating a Facebook page, please visit: https://www.facebook.com/pages/create/
Overview: 5
o If participants use Facebook on their own, invite them to ‘Like’ the page.o Fill out the ‘About’ section to let others visiting your page know about you, your
group's mission, and a description of the participants’ projects.o The facilitator or participant can then create an album under the ‘Photo’ or ‘Video’
sections of this page and upload related media into these sections. Each participant can add an album title. Ask participants to consider incorporating
their problem statement or even developing a unique campaign name. All related images/videos completed for the campaign can be uploaded into
these albums. If appropriate, adjust privacy settings to Public so that others outside of the group
can view page.
Sharing on YouTubeBuilding a YouTube page for videos is a great way to share participants’ videos with the public.o Start by making a YouTube Channel. For step-by-step guidance for creating a YouTube
Channel, please visit: https://support.google.com/youtube/answer/1646861?hl=en Fill out the ‘Channel Description’ to let others know who you are, your group's
mission, and a description of the participants’ projects. Upload finished videos onto this YouTube page. If appropriate, adjust privacy settings so that others can view these campaign
videos.
Hosting a Community Showcase EventIf your audience is better reached in-person or you have limited access to social media websites, hosting a community event is a great way to raise awareness and make an impact. o Community Space: Start by identifying a space in your community. It could be a
school, your American Space, a public building, or any place you can get permission touse.
o Get the word out! How will participants get the word out to their audience? Consider posting event fliers or posters advertising the event, getting out and talking to people, emailing community groups, or develop ideas for advertising the event.
o Showcasing the campaigns: It’s important that participants have a plan for sharing their photo and/or video campaigns in an impactful and appropriate manner for their audience and the community. Work with participants to identify different ways to share campaigns. For example, participants might display their photo campaigns around the room in your American Space or host a video viewing session with time for questions and answers afterward. Consider having a call to action for the audience. For example, if a participant’s
photo campaign is focused on the environment, each audience member might be invited to plant a tree in their yard.
Consider documenting these events and using this to further promote participant work and campaigns!
Digital Photography: 1
Civil Society Certifications:#1. DIGITAL PHOTOGRAPHY
This easy-to-facilitate workshop, created for American Spaces, focuses on developing basic digital photography skills, as well as understanding the power of photography as a tool for civic engagement and positive change in society. The workshop culminates with a Certification that facilitators can award to participants who have completed all the activities. This workshop may be completed in one day or spread out over multiple sessions.
While this workshop is written for participants who are using mobile devices, it may also be completed with digital cameras, tablets or computers. Depending on your mobile device, symbols and functions may vary slightly from those listed within this guide. The time durations listed for each portion of the workshop are a suggested minimum. Each component may be extended and expanded at the discretion of the facilitator. All printable handouts are included in this packet.Note: We strongly encourage facilitators to begin with this certification and review the entire lesson plan prior to leading the workshop.
LESSON SNAPSHOT:
TIME NEEDED
SKILLS TECHNOLOGY MATERIALS PROJECT
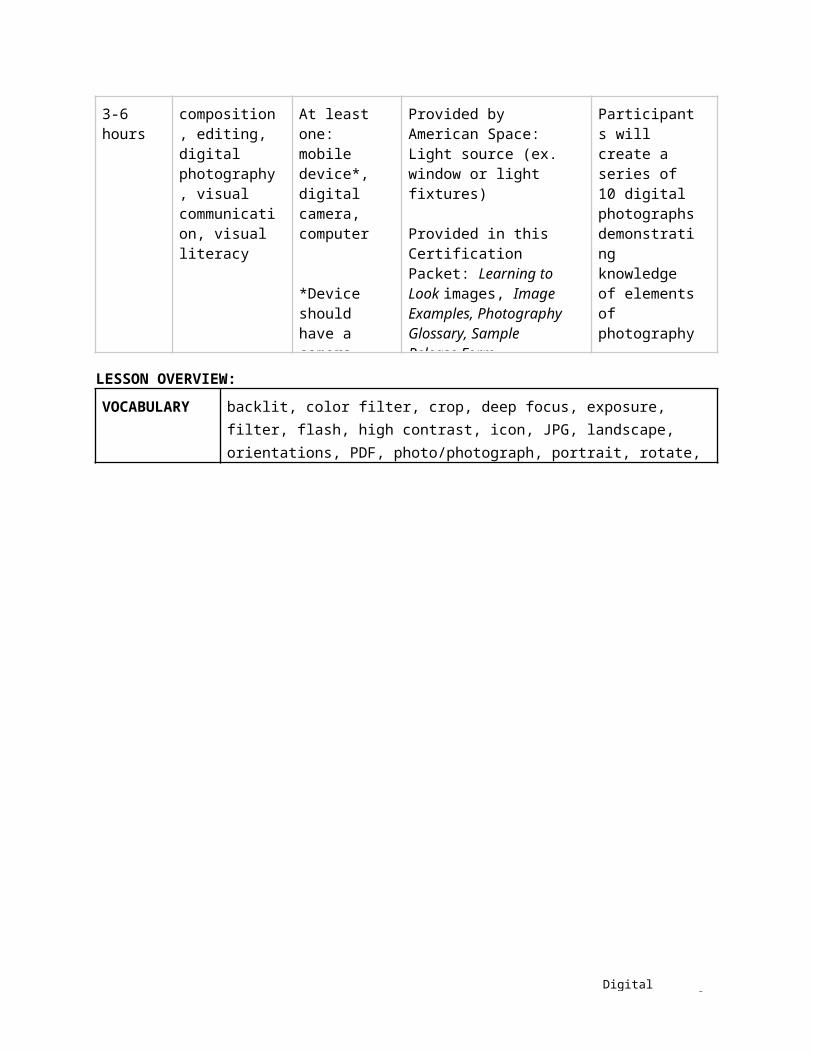
3-6 hours composition, editing, digital photography, visual communication, visual literacy
At least one: mobile device*, digital camera, computer
*Device should have a camera, flash, and focus and be able to connect to the internet, either wirelessly or via cable.
Provided by American Space: Light source (ex. window or light fixtures)
Provided in this Certification Packet: Learning to Look images, Image Examples, Photography Glossary, Sample Release Form, Community Engagement Challenges, Certificate of Completion
Participants will create a series of 10 digital photographs demonstrating knowledge of elements of photography.They will also develop critical thinking and public speaking skills.
LESSON OVERVIEW:
VOCABULARY backlit, color filter, crop, deep focus, exposure, filter, flash, high contrast, icon, JPG, landscape, orientations, PDF, photo/photograph, portrait, rotate, rule of thirds, self-timer, shallow focus, subject, tight shot, upload, zoom
Digital Photography: 2
LESSON OUTCOMES
Participants who complete these challenges will better understand the power and elements of digital photography. Through this improved understanding of photography, participants will be better able to engage and participate in a civil society.
FACILITATOR PREPARATION
Facilitators should prepare to lead this program by completing the activities listed below and familiarizing themselves with their own camera device and editing apps on their mobile device, tablet, or computer. Additionally, facilitators should identify a safe space (online or in-person) to display participants’ work in order to add a level of protection to those participating and allow for meaningful discussion of images and themes.
Digital Photography: 3
DETAILED LESSON PLAN:
1. Learning to Look Exercises (10-15 minutes)
● Display one or each of the Learning to Look images and lead a discussion about what participants see.
● Discussion questions can include:○ What do you see in this photograph? How would you describe
the photograph to someone who couldn’t see it?○ Where is the focus in this photograph?○ What do you think the photographer is trying to communicate?○ What makes this a powerful image?○ What change in society might this photograph have inspired?○ What does the photograph suggest to you about civil society
values at the time? How can you tell?
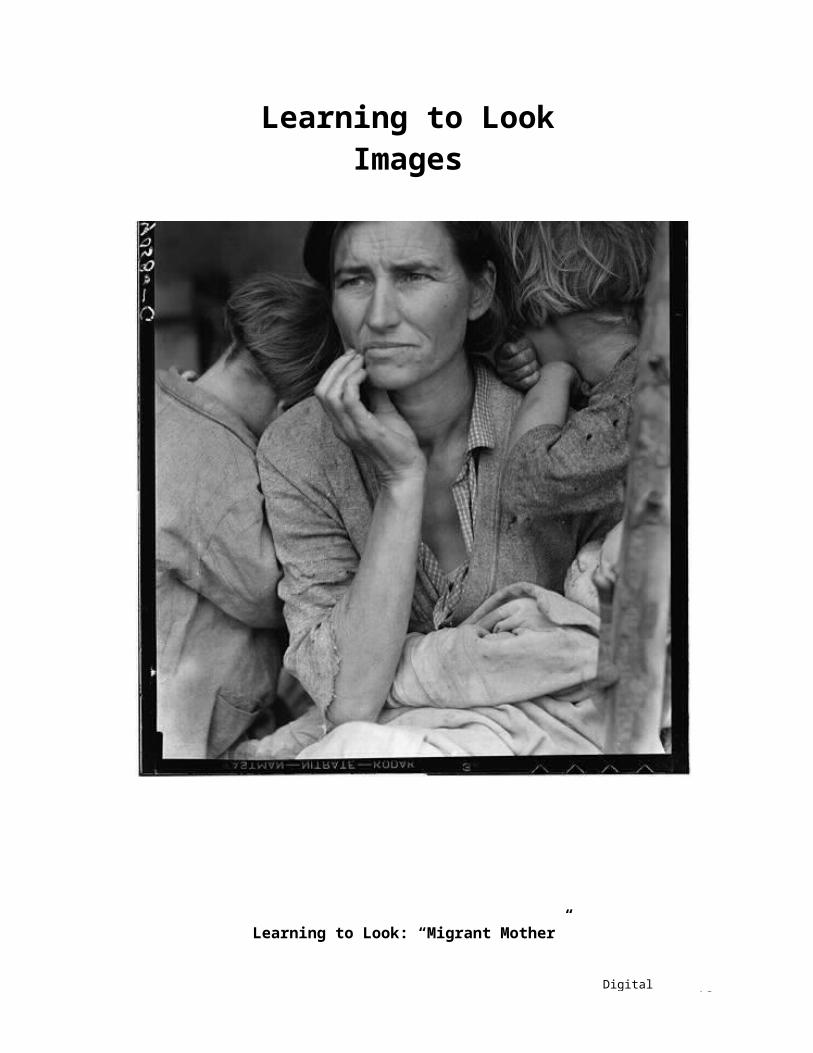
Learning to Look Images:● “Migrant Mother” by Dorothea Lange, 1936
○ “Migrant Mother” is also titled “Destitute pea pickers in California. Mother of seven children. Age thirty-two. Nipomo, California.” [1] This image by Dorothea Lange became an icon of the Great Depression. It humanized the effects of the Great Depression and contributed to the development of documentary photography [2]. This photograph has no known rights restrictions, so it may be reproduced. [1] Library of Congress [2] Wikipedia
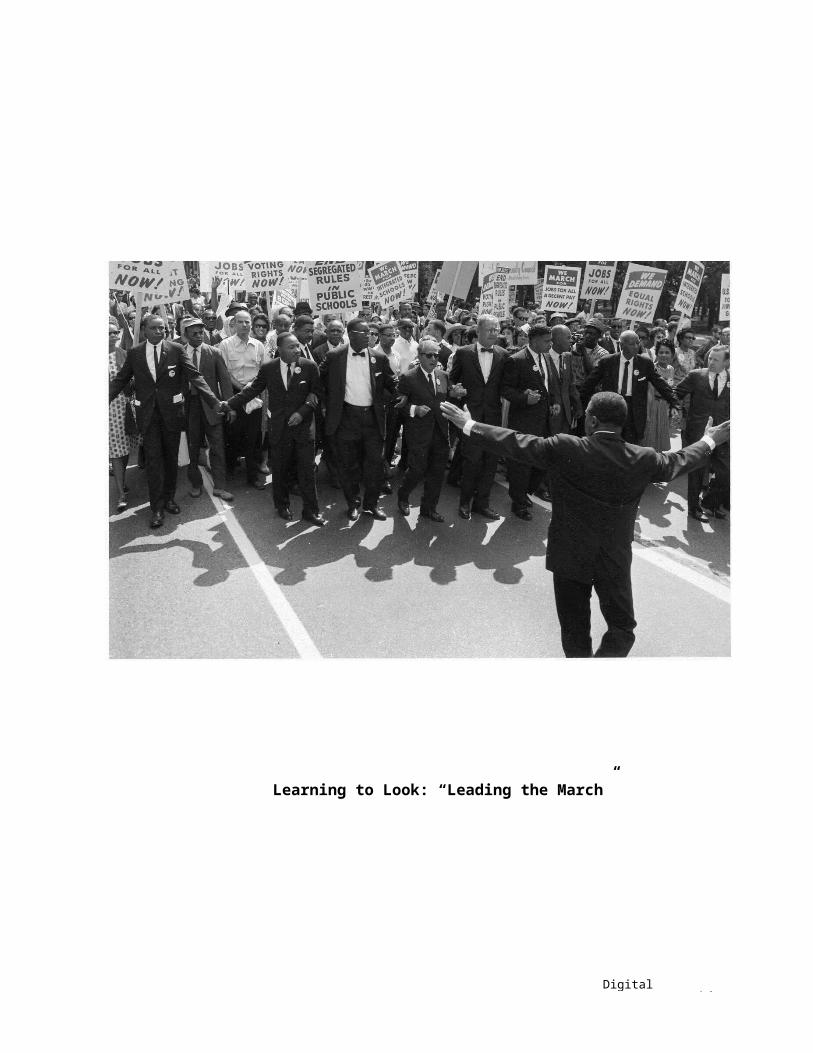
● “Leading the March” Photographer Unknown, 1963○ The Great March on Washington was one of the largest political
rallies for human rights in United States history and called for civil and economic rights for African Americans. It took place in Washington, D.C. Thousands of Americans headed to Washington on Tuesday August 27, 1963. [1]. This photograph captures Civil Rights Leader Martin Luther King, Jr. leading the March in front of protesters carrying signs with messages calling for equality in education and the workplace. This photograph has no known copyright restrictions [2]. [1]Wikipedia [2] National Archives Catalog
● “’Chippers’ Women War Workers of Marinship Corp”, 1942○ During World War II, women joined the workforce to replace
men who had joined the forces, and taking on jobs that traditionally men had done in the past. U.S. President Roosevelt stated that the efforts of civilians at home to support the war through personal sacrifice was as critical to winning the war as the efforts of the soldiers themselves. "Rosie the Riveter " became the symbol of women laboring in manufacturing. The war effort brought about significant changes in the role of
Digital Photography: 4
women in society as a whole [1]. This photograph has no known copyright restrictions [2]. [1] Wikipedia [2] U.S. National Archive Flickr Commons
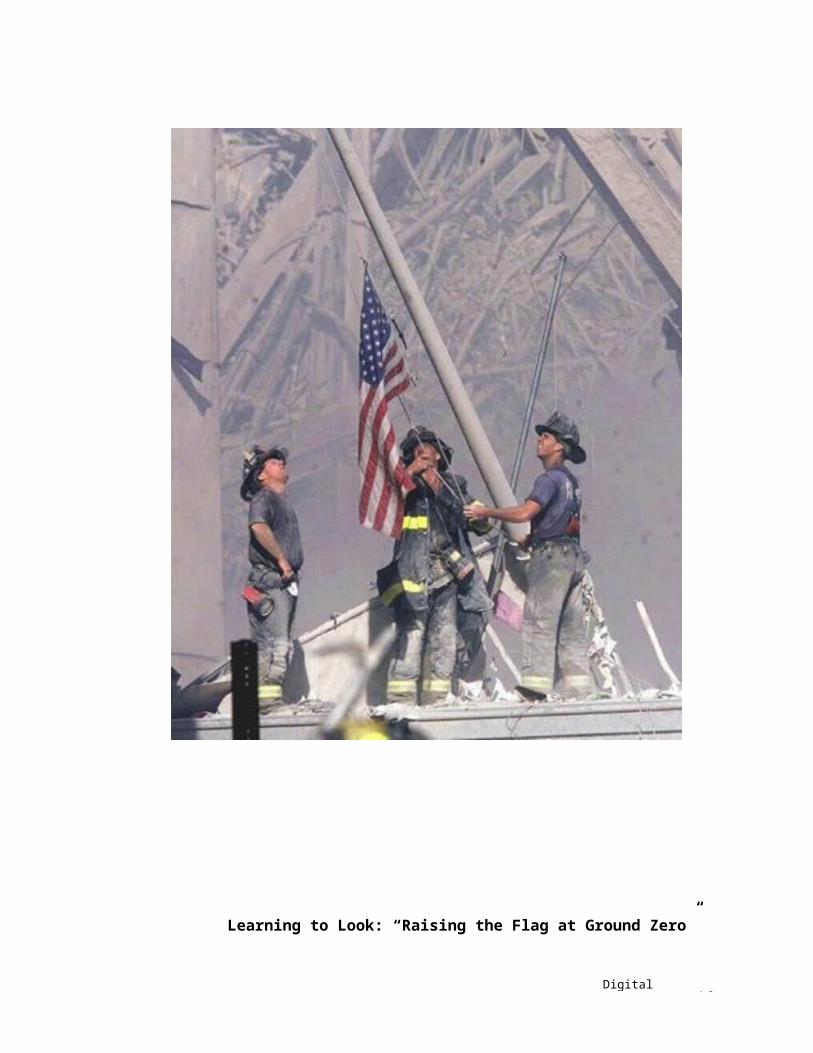
● “Raising the Flag at Ground Zero" by Thomas E. Franklin, 2001○ This picture shows three New York City firefighters raising the
American flag at Ground Zero of the World Trade Center, following the September 11, 2001 attacks. It has often been compared to the Raising the Flag on Iwo Jima photograph taken by Joe Rosenthal during World War II [1]. This photograph has no known copyright restrictions [2]. [1] Wikipedia [2] Library of Congress
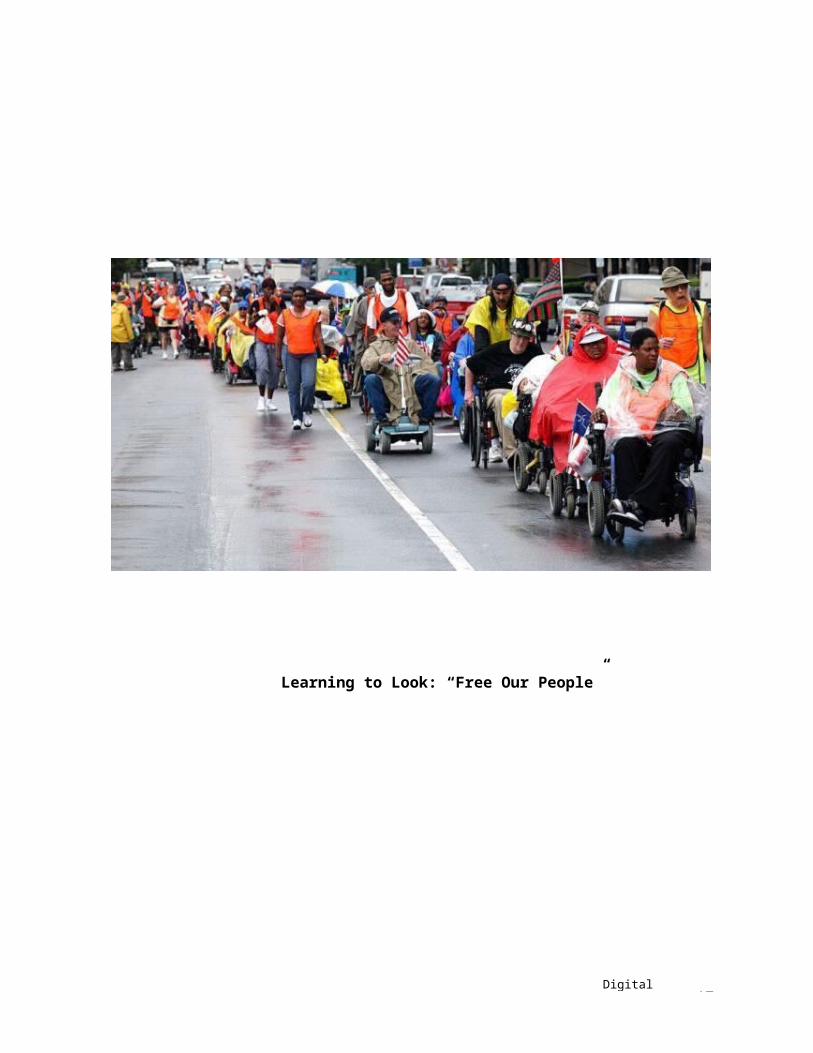
● “ADAPT” Community of Disabled Activists documented by Tom Olin, 1985-2016
○ Tom Olin began to document civil actions and protests, turning his camera into a tool for social justice. He was there when activists blocked traffic as they rolled through downtown Atlanta, and he was there when activists—including his then eight-year-old niece Jennifer Keelan—left their wheelchairs to crawl up the Capitol steps to demand equal rights. Today, he is a critical figure in the disability rights movement, not just for his work as a social documentarian, but for his tireless advocacy spanning three decades [1]. ADAPT is a national grassroots community that organizes disability rights activists to engage in nonviolent direct action, including civil disobedience, to assure the civil and human rights of people with disabilities to live in freedom [2]. ADAPT has two current national bases, one in Denver, Colorado and the other in Austin, Texas. ADAPT's web site provides information on its issues and actions. The site also archives photos and reports from past national actions. Most of the pictures posted are by the photographer Tom Olin, who has taken ADAPT photos for over twenty years [3]. This photograph has no known copyright restrictions [2]. [1] National Endowment for the Arts [2] ADAPT [3] Wikipedia
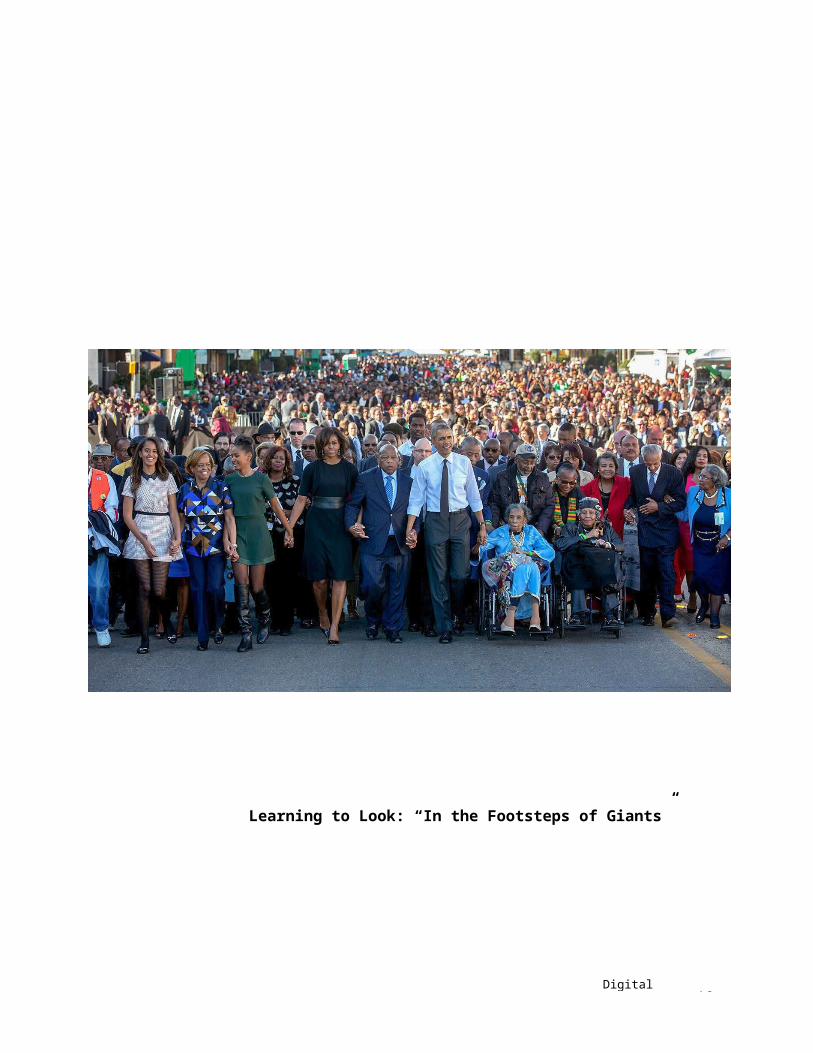
● “In the Footsteps of Giants” by Lawrence Jackson, 2015o President Barack Obama and First Lady Michelle Obama join
hands with Congressman and civil rights leader John Lewis, center, as they lead the walk across the Edmund Pettus Bridge to commemorate the 50th Anniversary of Bloody Sunday and the Selma to Montgomery civil rights marches, in Selma, Alabama, March 7, 2015. You are free to share and adapt this photo for non-commercial purposes and must provide proper
Digital Photography: 5
attribution [1]. For more detailed information on appropriate use of this image please visit the IIP Photo Archive website. [1] IIP Photo Archive
TIPS FOR FACILITATORS:● Background knowledge of the image(s) is not necessary to have a
discussion, but additional research/ information from above may inform the discussion and offer additional opportunities to discuss U.S. history, culture and values.
● The IIP Photo Archive on Flickr has a great selection of photos to choose from to suit specific themes you’d like to highlight during this portion of the workshop. Associated copyright information is clearly indicated in the description of each photo.
Lesson Extension:Extend this portion of the lesson by looking critically at locally important or iconic images from your country and facilitate an analysis of the image(s) through discussion. Use the above discussion questions or create your own to help guide the discussion.
2. Camera Anatomy(15-30 minutes)
● Participants should then review the Photography Glossary to familiarize themselves with the tools on their device. They will then work in small groups to identify where on their mobile device the camera tools are located. Display the Photography Glossary or print them as handouts to give to participants. Participants should familiarize themselves with the camera features on their own mobile device by exploring and experimenting with their devices.
● The facilitator may move around the room to help participants troubleshoot problems or locate camera elements on their mobile devices.
TIPS FOR FACILITATORS:● Let the participants know that the icons represented in the
Photography Glossary may not be identical to the icons on their devices. Participants should use the Photography Glossary only as a guide for understanding the camera features on their own mobile device. You can encourage them to develop additional Glossary items if they discover new ones.
● The facilitator does not need to be an expert with devices, but it may be useful to understand at least one device to use as an example.
3.Photography
● Next, explain the concepts from Image Examples.● The facilitator may choose to go over each photography concept listed
Digital Photography: 6
Techniques(60-90 minutes)
on the Image Examples handout with the group or ask participants to review on their own or in small groups.
● All participants should strive to take an example of each photograph listed on the Image Examples handout:
○ backlit○ deep focus○ flash, no flash○ high contrast○ landscape○ portrait○ rule of thirds○ self-timer○ shallow focus○ tight shot
TIPS FOR FACILITATORS:● Several of the above elements may be combined in one photograph.
For example, a portrait may both follow the rule of thirds and have a shallow focus, or the subject of a tight shot may be backlit. The facilitator may determine if participants should take one photograph exemplifying each of the above elements or if photographs may satisfy multiple elements.
4. Community Engagement Challenges (60 - 90 minutes)
● Now that the participants have practiced each photographic element, they can apply their new knowledge to the Community Engagement Challenges.
● The Community Engagement Challenges are meant to be completed by participants off-site and/or in their community.
Note: Because this portion of the workshop is intended to be completed off-site, facilitators may elect to split the workshop here and continue during a follow-up session after participants have had the opportunity to take photographs in the community.● Give each participant a Community Engagement Challenge card
(printouts included).● The Community Engagement Challenges are:
○ Deep Focus: Take a photograph highlighting your favorite part of your neighborhood where everything is in focus.
○ Flash: Take two photographs of a meal that represents your heritage. Keep the subject the same, but take one with flash and one without flash.
○ Self-Timer: Take a photograph of yourself alongside someone in your community whom you respect by propping up your
Digital Photography: 7
device, setting the self-timer, and moving to get in the photograph.
○ Tight Shot: Using the zoom, take a tight shot of a special family member or personal object.
○ High Contrast: Take a photograph of a light object on a dark background, or a dark object on a light background. Include thematic contrast by having the light object be something you feel affection towards, or the dark object be something you feel no connection to.
○ Rule of Thirds: Take a photograph of something you want to change about your community in three different ways; one with the subject in the middle, and two more displaying your knowledge of the rule of thirds.
○ Shallow Focus: Take a photograph of a small personal object on a flat surface. Make sure your device’s camera is only focused on the small object.
○ Backlit: Take a photograph of someone posing in front of a light source (this can be a window, a lamp, the sun) to create a silhouetted image of your subject.
○ Orientation: Take a photograph of your home holding the camera vertically (portrait orientation) and then holding the camera horizontally (landscape orientation).
TIPS FOR FACILITATORS:● The facilitator can decide to send participants out into the community
for a specific amount of time to take the list of photographs on the Community Engagement Challenge cards, or have them break for the day and bring their digital photographs back for the next session.
● The facilitator should take time to review local laws and restrictions related to taking photographs. Sensitive government buildings can prohibit photography, for example, or permission may need to be obtained from a parent before photographing a child. Be sure to review these rules with participants prior to sending them out to complete the Community Engagement Challenge and empower them to know their rights and stay within the local laws.
5. Editing Techniques (15-30 minutes)
● Review the Glossary of Symbols handout at this point. Many of the symbols listed are simple editing tools on mobile devices.
○ Have participants edit at least 3 of their photographs from the Image Examples or the Community Engagement Challenge list using the following tools on a device:
■ crop■ filter
Digital Photography: 8
■ rotate○ When participants have finished editing their photos using
their device, facilitators can suggest they upload their finished image as a JPG to a computer in order to access more advanced editing options using computer software (see examples below). A JPG is a great file format for sharing on social media!
TIPS FOR FACILITATORS:● The Editing Techniques segment can be introduced and worked on by
participants after completion of the Photography Techniques section, the Community Engagement Challenges section, or both.
● Facilitators should encourage participants to use the device’s editing tools to enhance the ideas listed in the Photography Technique’s section in their own photos.
● Options for free mobile editing apps: Snapseed, Aviary, Instagram.* It is also advised that facilitators research other apps that are compatible with their devices.
● Options for web-based editing: Picasa, Pixlr*● Professional Level Software for computer: PhotoShop, Lightroom*● Give participants a place to upload their photos by creating a shared
Google Drive Folder prior to leading the session. A shared digital folder allows the facilitator to easily review participants’ photos and prepare for the Share Out session to follow. Steps for creating a Google Drive folder can be found on pages 2-3 of the Overview (a separate document that is part of the full Certification packet).
* Please note these software examples are intended to provide ideas for facilitating your program. The Smithsonian Institution did not create the software and applications listed and does not specifically endorse these products or services.
6. Share Out (30 - 60 minutes)
● Have participants pick their favorite digital photographs to share with their peers.
● Facilitators should lead a discussion, asking some of the same questions from the Learning to Look exercise about the participants’ own photographs. Encourage participants to ask questions about each other’s photographs.
○ What do you see in this photograph?○ Where is the focus in this photograph?○ What do you think the photographer is trying to communicate?○ What makes this a powerful image?○ What change in society might this photograph have inspired?
Lesson Extension: Other Ways to Share● Encourage participants to share their photographs on social media
Digital Photography: 9
using the Upload function found in the Glossary of Symbols to format the photo as a JPG.
● Display works in your space and invite the community to an art opening event.
● Create postcards of participants’ work to give to the community.
7. Certificate of Completion
● The facilitator should complete a Certificate of Completion for each participant who completed all components of this workshop. In this packet you’ll find two versions of the certificate, one with the American Spaces logo and the other with a blank space at the top to allow you to personalize it with your American Space’s logo!
● A participant is qualified to receive the Certificate of Completion if he/she has completed all components of the workshop:
○ Participated in Learning to Look discussion component○ Participated in Camera Anatomy and Photography Techniques
component○ Completed all Community Engagement Challenges○ Presented one or more photographs to the group for discussion
and discussed the works of others● Encourage participants to continue their photographic practices on
their own and consider how they can use it as a tool to enact change.● Encourage participants to join for future certification courses, if you
plan to host them!
This curriculum and certification was written by ARTLAB+, a digital art studio for teens at the Smithsonian Institution's Hirshhorn Museum and Sculpture Garden. The ARTLAB+ program is a free afterschool program where teens can socialize with friends; explore digital media and technical tools; and take workshops to develop their interests and skills. The overarching pedagogy used in programming is HOMAGO, which stands for hang out, mess around, and geek out. Using this pedagogical approach, Mentors encourage teens to explore their own interests, create their own learning trajectories, and foster their own values. ARTLAB+ strives to be a radically inclusive space, where teens can learn from each other’s differences in a welcoming and safe environment. http://artlabplus.si.edu/
ARTLAB+ certifications are developed by Mentors using professional industry standards. In addition to displaying a specific set of skills, these certifications encourage teens to use critical thinking. ARTLAB+ certifications help to qualify teens to be hired to ARTLAB+ Production Teams, which are paid opportunities for teens to use their digital skills in a professional context and are great additions to resumes, job applications, and college applications.
Digital Photography: 10
Learning to Look Images
Learning to Look: “Migrant Mother”
Digital Photography: 11
Learning to Look: “Leading the March”
Digital Photography: 12
Learning to Look: “Women Workers in WWII”
Digital Photography: 13
Learning to Look: “Raising the Flag at Ground Zero”

Digital Photography: 14
Learning to Look: “Free Our People”
Digital Photography: 15
Learning to Look: “In the Footsteps of Giants”
Digital Photography: 16
Image ExamplesBacklit * The process of illuminating the subject from
the back. In other words, the lighting instrument and the viewer face each other with the subject in between. This creates a glowing effect on the edges of the subject, while other areas are darker.
Deep Focus * A technique using a large depth of field. In a deep focus photograph the foreground, middleground, and background are all in focus. A deep focus image is the opposite of a shallow focus image.
High Contrast *
Photographs that purposefully include strongly contrasting tones. In black-and-white photography, a high-contrast shot will have relatively few gray tones, but a lot of strong black and white tones.
Landscape * Landscape Images capture outdoor scenes, including the presence of nature, man-made features, or urban settings.
Orientation Orientation is the direction of the image. Most images have either a horizontal or vertical orientation. A vertical orientation is often used for portraiture while a horizontal orientation is often used for landscapes.

Digital Photography: 17
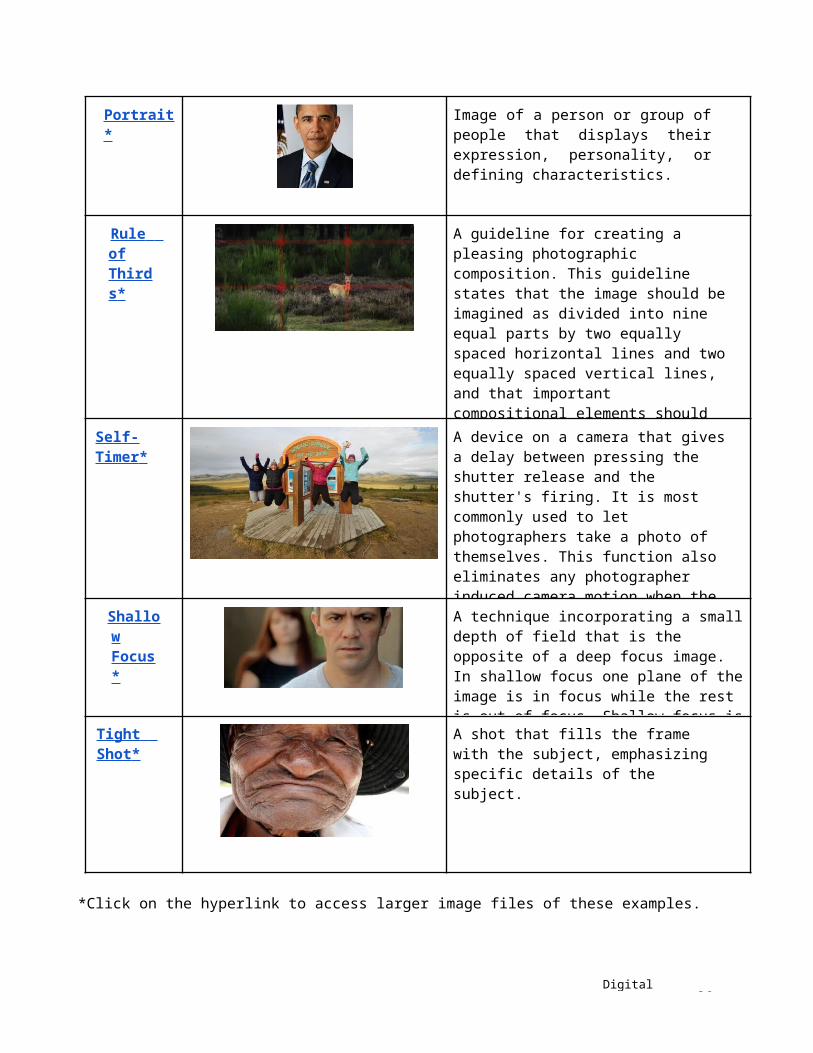
Portrait * Image of a person or group of people that displays their expression, personality, or defining characteristics.
Rule of Thirds *
A guideline for creating a pleasing photographic composition. This guideline states that the image should be imagined as divided into nine equal parts by two equally spaced horizontal lines and two equally spaced vertical lines, and that important compositional elements should be placed along these lines or their intersections. This creates more tension, energy and interest in the composition than simply centering the subject.
Self-Timer * A device on a camera that gives a delay between pressing the shutter release and the shutter's firing. It is most commonly used to let photographers take a photo of themselves. This function also eliminates any photographer induced camera motion when the shutter button is pressed, resulting in a sharper image.
Shallow Focus *
A technique incorporating a small depth of field that is the opposite of a deep focus image. In shallow focus one plane of the image is in focus while the rest is out of focus. Shallow focus is typically used to emphasize one part of the image over another.
Tight Shot * A shot that fills the frame with the subject, emphasizing specific details of the subject.
*Click on the hyperlink to access larger image files of these examples.
Digital Photography: 18
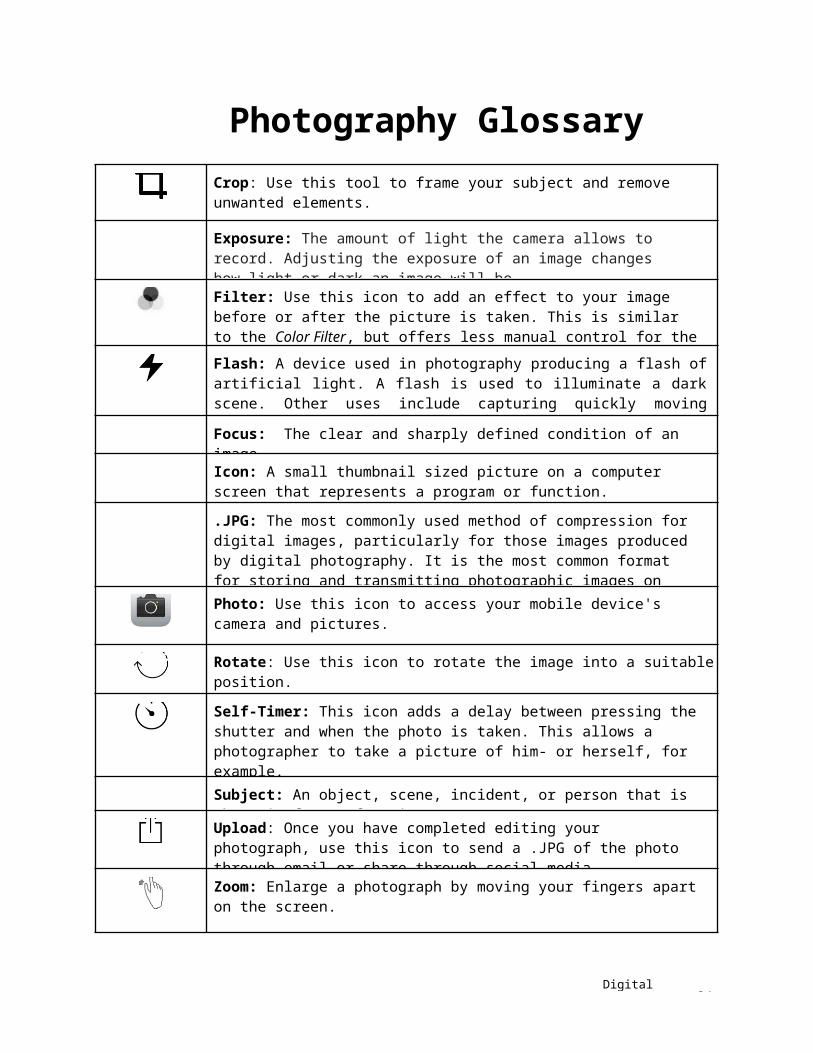
Photography GlossaryCrop: Use this tool to frame your subject and remove unwanted elements.
Exposure: The amount of light the camera allows to record. Adjusting the exposure of an image changes how light or dark an image will be.
Filter: Use this icon to add an effect to your image before or after the picture is taken. This is similar to the Color Filter, but offers less manual control for the user.
Flash: A device used in photography producing a flash of artificial light. A flash is used to illuminate a dark scene. Other uses include capturing quickly moving objects or changing the quality of light.
Focus: The clear and sharply defined condition of an image.
Icon: A small thumbnail sized picture on a computer screen that represents a program or function.
.JPG: The most commonly used method of compression for digital images, particularly for those images produced by digital photography. It is the most common format for storing and transmitting photographic images on the Internet.
Photo: Use this icon to access your mobile device's camera and pictures.
Rotate: Use this icon to rotate the image into a suitable position.
Self-Timer: This icon adds a delay between pressing the shutter and when the photo is taken. This allows a photographer to take a picture of him- or herself, for example.
Subject: An object, scene, incident, or person that is the main focus of an image.
Upload: Once you have completed editing your photograph, use this icon to send a .JPG of the photo through email or share through social media.
Zoom: Enlarge a photograph by moving your fingers apart on the screen.
Digital Photography: 19
Sample Release for Photography, Filming, Videotaping, and Recording
Before photographing, filming, or recording an individual or group, it’s important to obtain permission of those participating for the right to use their image. Asking participants to review and sign a form like the one below helps to ensure that individuals are willing participants of a project and will help avoid challenges after the fact. As workshop participants present this form for signature, they can use this as an opportunity to speak with individuals about the work they’re doing or the topic of their campaign.
Please note: the following form can be used as a guideline for creating a release form that is appropriate for local laws. Please do not assume that this release is comprehensive in covering issues that may be relevant for your community.
Subject/Title of Project: _________________________________________________________________________
Location: ____________________________________________________________________
I grant to [name of photographer/videographer] and [name of American Space] the right to photograph, film, videotape, and/or record my voice and likeness in connection with the above-identified project. I authorize [name of photographer/videographer] and [name of American Space] to copyright, use, and publish the same in print and/or electronically.
I agree that [name of photographer/videographer] and [name of American Space] may use such photographs, video, or recordings with or without my name for any lawful purpose, such as publicity, education, illustration, advertising, and Web content.
I understand and agree that I shall receive no honorarium, fee or payment of any kind either monetary or non-monetary, for being filmed, videotaped, photographed or recorded for the above use or any other use in relation to this project.
I have read and understand the above:
Signature: ________________________________________________________________________________________
Printed Name: ___________________________________________________________________________________
Date: _____________________________________________________________________________________________
Signature of parent or guardian: _______________________________________________________________(if under age 18)

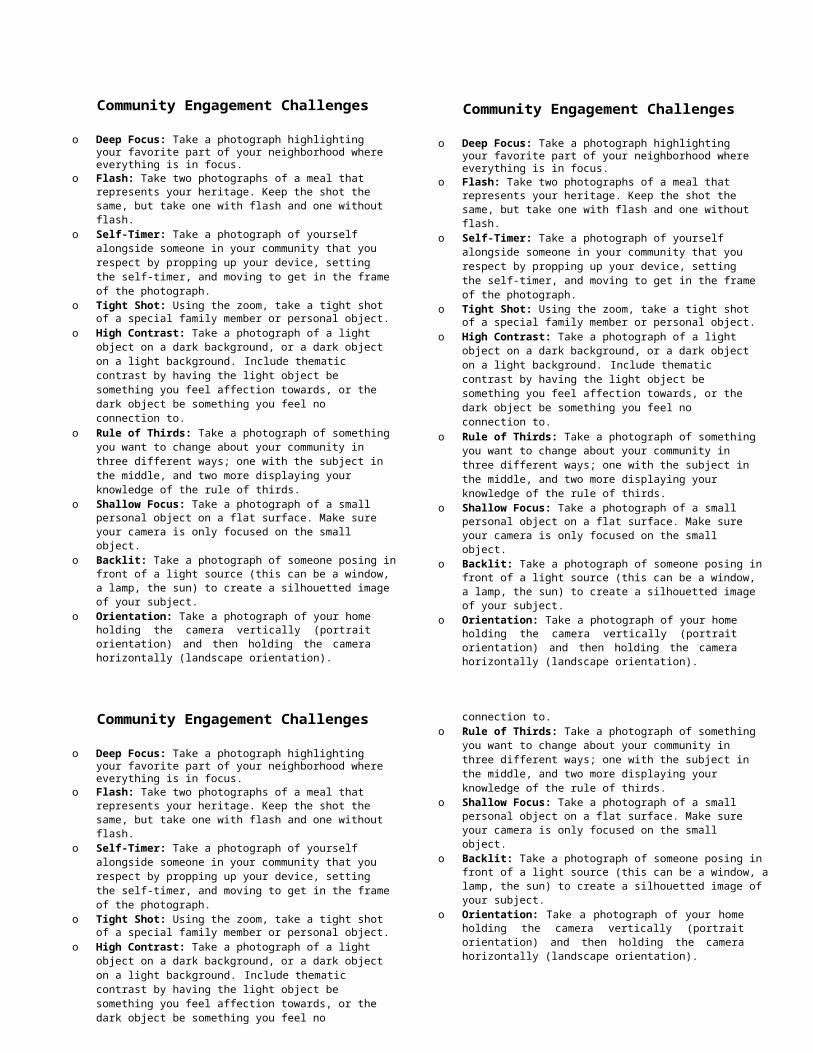
Community Engagement Challenges
o Deep Focus: Take a photograph highlighting your favorite part of your neighborhood where everything is in focus.
o Flash: Take two photographs of a meal that represents your heritage. Keep the shot the same, but take one with flash and one without flash.
o Self-Timer: Take a photograph of yourself alongside someone in your community that you respect by propping up your device, setting the self-timer, and moving to get in the frame of the photograph.
o Tight Shot: Using the zoom, take a tight shot of a special family member or personal object.
o High Contrast: Take a photograph of a light object on a dark background, or a dark object on a light background. Include thematic contrast by having the light object be something you feel affection towards, or the dark object be something you feel no connection to.
o Rule of Thirds: Take a photograph of something you want to change about your community in three different ways; one with the subject in the middle, and two more displaying your knowledge of the rule of thirds.
o Shallow Focus: Take a photograph of a small personal object on a flat surface. Make sure your camera is only focused on the small object.
o Backlit: Take a photograph of someone posing in front of a light source (this can be a window, a lamp, the sun) to create a silhouetted image of your subject.
o Orientation: Take a photograph of your home holding the camera vertically (portrait orientation) and then holding the camera horizontally (landscape orientation).
FACILITATOR DATE
Smithsonian Institution
Is proud to award this
CERTIFICATE OF COMPLETION IN DIGITAL PHOTOGRAPHY
To:
FACILITATOR DATE
Smithsonian Institution
Is proud to award this
CERTIFICATE OF COMPLETION IN DIGITAL PHOTOGRAPHY
To:
Video: 1
Civil Society Certifications:#2. VIDEO
This easy-to-facilitate workshop focuses on developing basic digital videography skills, as well as understanding the power of videography as a tool for civic engagement and positive change in society. This workshop may be completed in one day or spread out over multiple sessions.
While this workshop is written for mobile devices, it may also be completed with electronic media, such as computers or tablets. Depending on your mobile device, symbols and functions may vary slightly from those listed within this lesson plan. The time durations listed for each portion of the workshop are a suggested minimum. Each component may be extended and expanded at the discretion of the facilitator. All printable handouts are included in this packet.Note: We strongly encourage facilitators to begin with the Digital Photography Certification and to review the entire lesson plan prior to leading the workshop.
LESSON SNAPSHOT:
TIME NEEDED
SKILLS TECHNOLOGY MATERIALS PROJECT
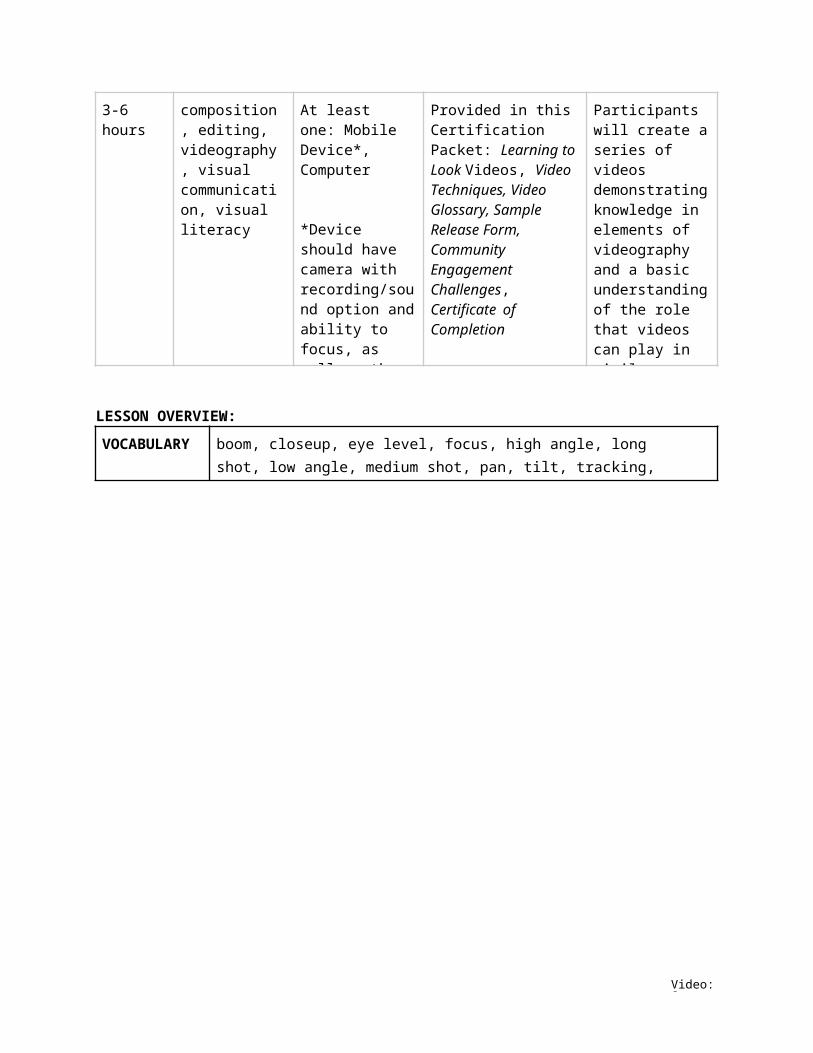
3-6 hours composition, editing, videography, visual communication, visual literacy
At least one: Mobile Device*, Computer
*Device should have camera with recording/sound option and ability to focus, as well as the ability to connect to the Internet, either wirelessly or via cable.
Provided in this Certification Packet: Learning to Look Videos, Video Techniques, Video Glossary, Sample Release Form, Community Engagement Challenges, Certificate of Completion
Participants will create a series of videos demonstrating knowledge in elements of videography and a basic understanding of the role that videos can play in civil society.
LESSON OVERVIEW:
VOCABULARY boom, closeup, eye level, focus, high angle, long shot, low angle, medium shot, pan, tilt, tracking, zoom

Video: 2
LESSON OUTCOMES
Participants who complete these challenges will better understand the power and elements of digital videography. Through this improved understanding of video, participants will be better able to engage and participate in a civil society.
FACILITATOR PREPARATION
Facilitators should prepare to lead this program by completing the activities listed below and by familiarizing themselves with their own device and the related editing options available to them on mobile devices and free digital apps. Additionally, facilitators should identify a safe space online to display participants’ work in order to add a level of protection to those participating and allow for meaningful discussion of images and themes.
DETAILED LESSON PLAN:
1. Learning to Look Exercises (30-45 minutes)
● The Learning to Look Exercises focus on social change taking place in America over a fifty-five year timespan. Evolving technology and communications, including television and current day social media, have amplified the impact and awareness of each of these movements. These exercises are broken into subcategories for discussing two different styles of video and their intended audiences.
○ The first category below is taken from Broadcast Television, with a focus on its large audience and the potential impact of one medium reaching so many.
○ The second category below represents documentary including historical, current-day, and individuals’ cell phone video examples.
Learning to Look Videos - Broadcast Television:● Pull up one or more of the videos from the Learning to Look - Broadcast
Television on a computer, projection screen, or participants’ individual mobile devices, and lead a discussion about what participants observe and what the videos make them think about.
● Discussion questions can include:○ What do you see in this video?○ Who or what is the focus of this and who is the intended
audience?○ What was happening in the United States during the time this
video was shown to the public? What does the video suggest to you about civil society values at the time?
○ Why is video an important medium to use for these events?○ What changes in society might this video have inspired when it
was filmed?
Video: 3
Videos:● “ JFK vs. Nixon Debat e” First Televised Presidential Debate,
1960[58:35 minutes]
○ Suggested timestamp: 0:00-0:55, 16:54-18:08, 18:17-19:35○ During presidential elections in the United States, it has
become customary for the main candidates (almost always the candidates of the two largest parties, currently the Democratic Party and the Republican Party) to engage in a public debate (or many). The topics discussed in the debate are often the most controversial issues of the time, and arguably elections have been nearly decided by these debates. The first debate for the 1960 election – the first to be televised – drew over 66 million viewers out of a population of 179 million, making it one of the most-watched broadcasts in U.S. television history [1]. This video has rights restrictions and may not be reproduced. [1] Wikipedia
● “ Moon Landing” Neil Armstrong, Moon Landing, 1969 [42:28 Minutes]
○ Suggested timestamp: 21:00-24:00○ Apollo 11 was the first manned mission to land on the Moon.
The first steps by humans on another planetary body were taken by Neil Armstrong and Buzz Aldrin [1]. Broadcast on live TV to a worldwide audience, Armstrong stepped onto the lunar surface and described the event as "one small step for [a] man, one giant leap for mankind." Apollo 11 effectively ended the Space Race and fulfilled a national goal proposed in 1961 by the U.S. President John F. Kennedy in a speech before the U.S. Congress: "before this decade is out, of landing a man on the Moon and returning him safely to the Earth.”[2]. Astronaut Armstrong emerged from the spacecraft first. While descending, he released the Modularized Equipment Stowage Assembly (MESA) on which the surface television camera was stowed, and the camera recorded humankind's first step on the Moon [1]. When Armstrong made his proclamation, Voice of America was re-broadcast live via the BBC and many other stations worldwide. The estimated global audience at that moment was 450 million listeners, out of a then estimated world population of 3.631 billion people [2]. This video has rights restrictions and may not be reproduced. [1] Smithsonian Air and Space Museum [2] Wikipedia
○ Additional resources:Sensationalism-Broadcasted Conspiracy Theory Documentation-How filming on the Moon was Achieved
Video: 4
● “ Diversit y an d In clusion: Love Has No Labels” Televised Campaign from the Ad Council, 2015. [03:19 Minutes]
○ Chris Northam didn't know what to expect when he set up a giant, X-ray installation at the Third Street Promenade in Santa Monica, California on Valentine's Day. But what he ended up with turned into one of the most beloved public service ads in recent memory...The demonstration showed different sets of skeletons kissing, hugging and dancing before revealing themselves to passersby as gay, lesbian and biracial couples and friends [1]. The Diversity & Inclusion campaign encourages everyone to reconsider the biases that we don't even know we have. Most Americans agree that people should be treated respectfully and fairly, yet many people in the United States still report feeling discriminated against. For example, one in five LGBT people report feeling there is little or no acceptance of their community. Six in ten Latinos report that discrimination is a major problem and a majority of African Americans report that they are not satisfied with the way they are treated in society [2]. This video has rights restrictions and may not be reproduced. [1] ADWEEK [2] Ad Council
○ Additional resources:Love Has No Labels website
Learning to Look Videos - Documentary:● The second set of videos takes previous video footage and applies
artistic and compositional techniques through editing to achieve the videographers’ intended effect in a documentary-style video that can be shared through many modern social media platforms.
● Play one or more of the second set of videos from the Learning to Look Videos - Documentary on a computer, T.V, screen or individual mobile devices, and lead a discussion about what participants see.
● Discussion questions can include:○ What do you see in this video?○ Who is the intended audience for this video?○ How has the videographer composed this video?○ How does the videographer’s editing affect your response to
this event?○ How was this video shared with the public, and why did the
videographer choose this sharing platform?○ What change in society might this video inspire today?
Videos:● “ I Have a Dream” March on Washington, Martin Luther
King, 1963. Published 2012. [18:30 minutes]

Video: 5
○ Suggested timestamp: 13:41-16:06○ This documentary film was produced by the Smithsonian’s
National Museum of African Art, and covers both the Emancipation Proclamation of 1863 and the March on Washington in 1963 [1]. The "I Have a Dream" is a public speech delivered by American civil rights activist Martin Luther King Jr. during the March on Washington for Jobs and Freedom on August 28, 1963, in which he calls for an end to racism in the United States. Delivered to over 250,000 civil rights supporters from the steps of the Lincoln Memorial in Washington, D.C., the speech was a defining moment of the American Civil Rights Movement. This speech helped Kennedy and his liberal civil rights plans [2]. This video has rights restrictions and may not be reproduced. [1] Smithsonian Museum of African American History [2] Wikipedia
● “ Lit t le Rock Nine” Desegregating Race in Arkansas Public school, 1957. Published 2015. [18:30 minutes]
○ Suggested timestamp: 1:44-4:47○ “Little Rock Nine” was a group of nine African American
students enrolled in Little Rock Central High School in 1957. Their enrollment was followed by the Little Rock Crisis, in which the students were initially prevented from entering the racially segregated school [1]. The crisis gained worldwide attention when Governor Faubus ordered the Arkansas National Guard to surround Central High School to keep the nine students from entering the school. President Eisenhower ordered the 101st Airborne Division into Little Rock to insure the safety of the "Little Rock Nine" and that the rulings of the Supreme Court’s decision on “Brown vs. Topeka Board of Education” were upheld [2]. This video has rights restrictions and may not be reproduced. [1] Wikipedia [2] Eisenhower Presidential Library
○ Additional resources:History Channel overview - Past and Present Clinton awards Congressional Gold Medal to Little Rock Nine
● “ Kon y” Documentary by the charity Invisible Children, to raise awareness of the Lord’s Resistance Army. Published 2012. [29:58 minutes]
○ Suggested timestamp: 3:41-5:42○ The film's purpose was to promote the charity's "Stop Kony"
movement to make Ugandan cult and militia leader, indicted war criminal and the International Criminal Court fugitive Joseph Kony globally known in order to have him arrested by

Video: 6
the end of 2012, when the campaign expired. The film spread virally. As of January 1, 2015, the film has received over 100 million views and nearly 1.4 million "likes" on the video- sharing website YouTube, and over 21.9 thousand "likes" on Vimeo, with other views on a central "Kony 2012" website operated by Invisible Children. The intense exposure of the video caused the "Kony 2012" website to crash shortly after it began gaining widespread popularity. The campaign resulted in a resolution by the United States Senate and contributed to the decision to send troops by the African Union [1]. But it has also attracted criticism: there are questions about the charity’s funding, its targeting of US leaders instead of African leaders to instigate change, and accusations that it is failing to criticize the Ugandan government, with its poor human rights record [2].This video has rights restrictions and may not be reproduced. [1] Wikipedia [2] The Guardian [3] L.A Times
○ Additional resources:Invisible Children Organization Kony 2012: Part 2 - Beyond Famous TMZ - Celebrity Gossip & Video Paparazzi
● “ This is Wort h Preservin g” President Barack Obama’s home video: Climate Change. Published 2015 [02:01 minutes]
○ President Obama's usage of social media in his political campaigns, including podcasting, Twitter, MySpace, Facebook, and YouTube has been compared to the adoption of radio, television, MTV, and the Internet in the rapid success of his presidential campaign. Obama has used Twitter to promote legislation and support for his policies. He has also used his account to respond to the public regarding the economy and employment. Based on its rate of adoption, Twitter will have a complementary role to other communication efforts that is more significant in Obama's 2012 presidential campaign than in prior elections [1]. On the final day of his trip to Alaska, President Obama was set to announce a set of initiatives to help remote Arctic communities beset by the effects of climate change. The announcement also included measures to fight climate change, which is happening twice as quickly in Alaska as in the continental US. “The Arctic is at the leading edge of climate change, a leading indicator of what the entire planet faces” [2]. This video has rights restrictions and may not be reproduced. [1] Wikipedia [2] The Guardian
○ Additional resources:
Video: 7
Obam a’s vi ral Buzzfeed video to prom ote Obam ac are Obam a’s personal Twi tter feed
TIPS FOR FACILITATORS:● Background knowledge of the videos or events is not necessary to have
a discussion about them, but additional research/ information above may inform the discussion and offer additional opportunities to discuss U.S. history, culture, and values.
● If possible, pull up these videos online and play the suggested 2-3 minute clip of each video for participants. It is recommended to play the segments of video noted under Suggested Timestamp when available. Time permitting, we suggest pulling up and testing videos in advance of the workshop.
● The Learning to Look Videos focus on videos becoming increasingly accessible to the masses through advancements in technology. With each technological advancement, the ability to enact social change increased by empowering individuals to create their own content, share messages and promote awareness of everyday issues, and reach a large number of people. Have participants consider how differing media platforms, i.e., radio, television and the Internet, help drive social movements and reach audiences, both locally and globally. Discuss what platforms are the most popular in their country and why.
● For additional insight on the impact and filming techniques of the videos listed above, click on the links provided after the description of each video, under additional resources. These resources can be shown to participants or viewed beforehand by the facilitator for a more thorough discussion and understanding of the video. Please note: Not all of the videos listed above have additional resources.
Lesson Extension:Extend this portion of the lesson by looking critically at important or iconic videos/news/commercials from your local culture and facilitate an analysis of the video through discussion. Consider also incorporating viral videos from your region and facilitate an analysis of these through discussion. Use the above suggested discussion questions or create your own to encourage thoughtful discussion and comparison.
2. Video Anatomy(15-30 minutes)
● Guide participants to review the Video Glossary to familiarize themselves with the defined tools. They will then work in small groups to identify where on their mobile device the video tools are located. Display the Video Glossary or print them as handouts to give to participants. Participants should familiarize themselves with the video

Video: 8
features on their own mobile device by exploring and experimenting with their devices to record a short video for editing.
● The facilitator may move around the room to help participants troubleshoot problems or locate video tools on their mobile devices.
TIPS FOR FACILITATORS:● Let the participants know that the icons represented in the Video
Glossary may not be identical to the icons on their digital devices. Participants should use the Video Glossary only as a guide for understanding the video features on their own mobile device. You can encourage them to develop additional Glossary items if they discover new ones.
3. Editing Techniques (15-30 minutes)
● Once participants know how to capture a video on their mobile device, introduce them to the mobile device’s editing tools.
● The facilitator should differentiate the editing tools from the other mobile tools in the Video Glossary section. These editing tools are:
○ Trim○ Upload
● These two editing tools will be used in both the Video Techniques, and the Community Engagement Challenges sections.
TIPS FOR FACILITATORS:● The facilitator should research other apps for video editing that are
compatible with their devices.○ Suggested free apps for Android and Apple devices: Adobe
Premiere Clip, Magisto, WeVideo● It would be helpful to prepare a cloud-based storage website like
Google Drive, Dropbox, or Senduit ahead of time. Doing this will allow participants to store the uploaded videos would increase the efficiency of this lesson and provide a space for participants to view and access the final videos from any location. Tips for creating a Google Drive folder can be found on pages 2-3 of the Overview (separate document within the Certification packet).
● Social media sites like Facebook, Instagram, Vine, Vimeo, YouTube, and Twitter offer basic video editing functions like trim and effects. It is recommended that facilitators explore each of these outlets in order to provide sharing platforms, similar to the video examples provided in the Learning to Look - Documentary section.

Video: 9
4. Video Techniques (60-90 minutes)
● The facilitator may choose to go over each of the video concepts listed on the Video Examples handout with the group or ask participants to review it on their own or in small groups.
● All participants should strive to use an example of each video technique listed on the Video Techniques handout.
○ Focus○ Angle
■ High■ Low■ Eye Level
○ Shot■ Close-up■ Medium shot■ Long shot
○ Camera Movement■ Tracking■ Pan■ Tilt■ Boom■ Zoom
● Have participants use the trim tool to edit down their videos to best capture the concepts of the Video Techniques.
Lesson Extension:Extend this portion of the lesson by having participants pick one of their own example videos they are proud of to share with their peers for feedback. It is suggested that participants complete this segment by uploading their video onto cloud-based storage, like Google Drive, for sharing with the group.
TIPS FOR FACILITATORS:● Several of these video techniques may be combined in one video. For
example, it is common to have multiple shots, angles, and camera movements in a single video with the focus playing a role as well. The facilitator may determine if participants should take one video focusing heavily on a single element from the above list, or if videos may satisfy multiple elements.
● Many of the concepts in the Photographic Image Examples from the Digital Photography Certification can also be applied to these techniques.
Video: 10
5. Community Engagement Challenges (60 - 90 minutes)
● The Community Engagement Challenges are meant to be completed by participants off-site and in their community. Now that the participants have practiced each element of video, they can apply their new knowledge to the Community Engagement Challenges to document civic events in their own community.
● Share the Community Engagement Challenge cards (printables attached) with the participants and discuss potential subject matter.
● Each participant should receive one card .● The Community Engagement Challenges are:
○ Focus: Film an important subject in your community such as a monument or significant individual. Keep the subject in focus while the community engages with it.
○ Angle: Film a public space in your community that holds significance to you for several minutes. This can be a religious space, a place for sports or recreation, an important family setting, etc. Try to capture your feelings about this space using a Low angle, a High angle, or both.
○ Shot: Choose a person of significance to you in your community and film them in a setting or context that is appropriate to who they are using a Long Shot. Film the same subject using a Close Shot talking about who they are and their relationship to you and/or the community.
○ Camera Movement: Film a routine you do daily from a first person perspective by using the Tracking camera movement. Use other camera movements to highlight and emphasize areas in your daily routine that hold significance to you as you move. Incorporate at least two more movement techniques into the challenge such as zoom, tilt, pan or boom.
● Facilitators should advise participants to ask their subjects if they are ok being on camera before filming takes place. Some people are not comfortable with their image being publically available and obtaining their permission is important to this exercise.
● Have participants use the trim tool to edit out any extraneous footage in their videos.
● Participants can upload their finished videos into a safe space such as a Google Drive folder or other cloud-based platform for viewing with the group.
TIPS FOR FACILITATORS:● The facilitator can decide to send participants out into the community
for a specific amount of time to film the list of videos on the Community Engagement Challenge cards, or have them break for the day and bring
Video: 11
their footage back for the next session.● The facilitator should take time to review local laws and restrictions
related to taking video. Sensitive government buildings can prohibit video or permission may need to be obtained from a parent before recording video of a child. Be sure to review these rules with participants prior to sending them out to complete the Community Engagement Challenge and empower them to know their rights and stay within the local laws.
6. Share Out (30 - 60 minutes)
● Have participants choose their favorite video from the challenges above to share with their peers.
● Facilitators should lead a discussion, asking some of the same questions from the Learning to Look exercise about the participants’ own videos. Encourage participants to ask questions about each other’s videos.
○ What do you see in this video?○ Why did you choose your subject in this video?○ What do you think the video is trying to communicate? How
does the videography or editing contribute to this message?○ What does this video show about your community?○ What change in your society might this video inspire?
Lesson Extension: Other Ways to Share● Host a showcase of the videos created during this workshop and invite
participants’ community to a video screening event.● Create a social media link for members of your program to upload their
finished videos, or encourage participants to share their videos on their own social media platforms.
7. Certificate of Completion
● The facilitator should complete a Certificate of Completion for each participant who completed all components of this workshop. In this packet you’ll find two versions of the certificate, one with the American Spaces logo and the other with a blank space at the top to allow you to personalize it with your American Space’s logo!
● A participant is qualified to receive the Certificate of Completion if s/he has completed all components of the workshop:
○ Participated in Learning to Look discussion component○ Participated in Video Anatomy and Video Technique
components○ Completed all Community Engagement Challenges○ Presented one or more video to the group for discussion and
discussed the works of others○ Uploaded one video onto a social media platform
Encourage participants to continue videography on their own and consider how they can use it as a tool to enact change and engage in civil society.
Video: 12
This curriculum and certification was written by ARTLAB+, a digital art studio for teens at the Smithsonian Institution's Hirshhorn Museum and Sculpture Garden. The ARTLAB+ program is a free afterschool program where teens can socialize with friends; explore digital media and technical tools; and take workshops to develop their interests and skills. The overarching pedagogy used in programming is HOMAGO, which stands for hang out, mess around, and geek out. Using this pedagogical approach, Mentors encourage teens to explore their own interests, create their own learning trajectories, and foster their own values. ARTLAB+ strives to be a radically inclusive space, where teens can learn from each other’s differences in a welcoming and safe environment. http://artlabplus.si.edu/
ARTLAB+ certifications are developed by Mentors using professional industry standards. In addition to displaying a specific set of skills, these certifications encourage teens to use critical thinking. ARTLAB+ certifications help to qualify teens to be hired to ARTLAB+ Production Teams, which are paid opportunities for teens to use their digital skills in a professional context and are great additions to resumes, job applications, and college applications.
Video: 13
Video Techniques
Angle Low Angle *
High Angle *
Eye Level *
Low Angle: A shot where the subject often appears powerful and commanding.
High Angle: A shot where the subject often appears weak or vulnerable.
Eye Level: A shot where the subject tends to be neutral to the viewer.
Shot Long Shot *
Medium Shot *
Closeup *
Long Shot: The onscreen subject appears small or is seen from some distance away. This gives the shot a sense of time and place and allows the viewers eye to wander around the scene.
Medium Shot: A neutral shot that does not call attention to itself and is the most commonly used. This is in between a long and a short shot.
Closeup: The onscreen object appears to be large, taking up the majority of the screen. This forces a specific viewpoint that is often intimate and revealing.
Video: 14
Camera Movement
Boom *
Pan/Tilt *
Tracking *
Zoom *
Boom: A shot where the camera physically moves along a vertical plane. This is the opposite of tracking.
Pan: When a camera pans, it pivots along a horizontal axis. This is the opposite of a tilt.
Tilt: When a camera tilts, it pivots along a vertical axis. This is the opposite of a pan.
Tracking: A shot where the camera physically moves along a horizontal axis. This is the opposite of a boom.
Zoom: To change from a long shot to a closeup shot (zoom in), or vice versa (zoom out). This is a filming technique used to give importance to the subject growing in size on the screen.
Focus * The subject of the scene. This can be a person, a place, or an inanimate object.
*Click on the hyperlink to access larger image files of these examples.
Video: 15
Video GlossaryCamera Rotate: Pressing this icon will flip the camera to record video in the opposite direction. This is primarily used so that the subject being recorded can see the video as it is shot on the screen of the mobile device.
Flash: A device used in video that produces artificial light by turning on the mobile device’s flashlight. For video, this is used to illuminate a dark scene where the subjects are not clearly visible.
Focus: The clear and sharply defined condition of the subject within a video.
Icon: A small thumbnail sized picture on a computer screen that represents a program or function.
.Mov: The most commonly used method of compression for digital video. This format is universal for editing, storing, and transmitting videos on the Internet.
Pause: This button will appear after a video is playing, and will cause the video to temporarily stop.
Play: This button causes a video to play when pressed.
Record: Press this icon to start filming a new video. Once recording has begun, the button will likely change slightly in appearance. Press it again to stop filming.
Selfie: A slang term for capturing oneself using a mobile device and shared via social media.
Subject: An object, scene, incident, or person that is the main focus of a video.
Trim: An editing technique that removes unwanted segments of video.
Upload: Use this icon to send a compressed .Mov version of the video through email or to share through social media. After a video is uploaded from a mobile device to a computer, it can be edited using separate software.
Video Viewing: Use this icon to access all the stored videos on your mobile device after they have been recorded. From here, videos can be uploaded to social media sites or external software for editing.
Video Recording: Use this icon to access your mobile device's video and camera functions.

Video: 16
Sample Release for Photography, Filming, Videotaping, and Recording
Before photographing, filming, or recording an individual or group, it’s important to obtain permission of those participating for the right to use their image. Asking participants to review and sign a form like the one below helps to ensure that individuals are willing participants of a project and will help avoid challenges after the fact. As workshop participants present this form for signature, they can use this as an opportunity to speak with individuals about the work they’re doing or the topic of their campaign.
Please note: the following form can be used as a guideline for creating a release form that is appropriate for local laws. Please do not assume that this release is comprehensive in covering issues that may be relevant for your community.
Subject/Title of Project: _________________________________________________________________________
Location: ____________________________________________________________________
I grant to [name of photographer/videographer] and [name of American Space] the right to photograph, film, videotape, and/or record my voice and likeness in connection with the above-identified project. I authorize [name of photographer/videographer] and [name of American Space] to copyright, use, and publish the same in print and/or electronically.
I agree that [name of photographer/videographer] and [name of American Space] may use such photographs, video, or recordings with or without my name for any lawful purpose, such as publicity, education, illustration, advertising, and Web content.
I understand and agree that I shall receive no honorarium, fee or payment of any kind either monetary or non-monetary, for being filmed, videotaped, photographed or recorded for the above use or any other use in relation to this project.
I have read and understand the above:
Signature: ________________________________________________________________________________________
Printed Name: ___________________________________________________________________________________
Date: _____________________________________________________________________________________________
Signature of parent or guardian: _______________________________________________________________(if under age 18)
Community Engagement Challenges
Community Engagement Challenges
Focus: Film an important subject in your community such as a monument or significant individual. Keep the subject in focus while the community engages with it.
Angle: Film a public space in your community that holds significance to you for several minutes. This can be a religious space, a place for sports or recreation, an important family setting, etc. Try to capture your feelings about this space using a Low angle or High angle.
Shot: Choose a person of significance to you in your community and film them in a setting or context that is appropriate to who they are using a Long Shot. Film the same subject using a Close Shot talking about who they are and their relationship to you and/or the community.
Camera Movement: Film a routine you do daily from a first person perspective by using the Tracking camera movement. Use other camera movements to highlight and emphasize areas in your daily routine that hold significance to you as you move. Incorporate at least two more movement techniques into the challenge such as zoom, tilt, pan or boom.
FACILITATOR DATE
Smithsonian Institution
Is proud to award this
CERTIFICATE OF COMPLETION IN VIDEO
To:
FACILITATOR DATE
Smithsonian Institution
Is proud to award this
CERTIFICATE OF COMPLETION IN VIDEO
To:
Civil Society Campaign: 1
Civil Society Certifications:#3. CIVIL SOCIETY CAMPAIGN
This easy-to-facilitate workshop, created for American Spaces, focuses on further developing and applying the skills acquired in the Photography and Video workshops to create a campaign, which shares an idea or message that promotes active participation in a civil society. Facilitators may want to consider using this workshop as a lead-up to a larger event or program to support policy priorities and amplify outreach efforts around topics such as: Earth Day, World Press Freedom Day, Human Rights Day, International Women’s Day, or World AIDS Day. The workshop culminates with a Certification that facilitators can award to participants who have completed all the activities. This workshop can take place during a single session but also works well spread out over multiple sessions.
While this workshop is written for participants who are using mobile devices, it may also be completed with digital cameras, tablets or computers. The time durations listed for each portion of the workshop are a suggested minimum. Each component may be extended at the discretion of the facilitator. All printable handouts are included in this packet. Note: We strongly encourage facilitators to conduct the Photo and Video Certification workshops first, so participants can apply their newly acquired skills to the Civil Society Campaign they develop as part of this workshop. We also suggest that facilitators review the entire lesson plan prior to leading the workshop.
LESSON SNAPSHOT:
TIME NEEDED SKILLS TECHNOLOGY MATERIALS PROJECT
The times listed in the Detailed Lesson Plan are a minimum.This lesson can be adapted and extended by the facilitator if desired.
visual communication, visual literacy, critical thinking, concept development, advocacy, publication/ sharing of work
At least one: mobile device*, digital camera, tablet, computer
*Device should have a camera, flash, and focus and be able to connect to the Internet, either wirelessly or via cable.
Provided in this Certification packet: Writing a Problem Statement, Storyboarding Template, Feedback Guidelines,Photo Certification guide, Video Certification guide, Sample Release Form, Certificate of Completion
Participants will create a civil society campaign on a local, national, or international issue that is important to them.

Civil Society Campaign: 2
LESSON OVERVIEW:
VOCABULARY advocacy, audience, campaign, cause, messaging, social media, storyboard
LESSON OUTCOMES
Participants who complete these challenges will better understand the potential of digital tools as means of self-expression and engaging in civic discourse. By understanding how advocacy campaigns are seen by and spread to the public using digital tools and platforms, participants will be better able to be active and contributing members of civil society and more conscientious media observers.
FACILITATOR PREPARATION
Facilitators should prepare to lead this program by completing the activities listed below and familiarizing themselves with their own camera device and editing apps on their mobile device, tablet, or computer. It is strongly recommended that facilitators complete the Digital Photography and/or Video workshops with participants first, as this workshop builds upon the skills obtained in those certifications. Additionally, facilitators should identify a safe space (online or in-person) to display participants’ work in order to add a level of protection to those participating and allow for meaningful discussion of images and themes.
ADDITIONAL NOTES
The curriculum for this workshop is intended to support serial programming and allow participants ample time to brainstorm and develop their ideas and effective communication techniques. It can also be adapted for a single- session workshop. To help guide the facilitator, we have outlined the workshop in 4 separate sections, all of which can be modified and adapted to suit your needs.SESSION I: What is a Digital Campaign?SESSION II: What is a Problem Statement?SESSION III: Developing Your Idea through StoryboardingSESSION IV: Producing Your Civil Society Campaign
DETAILED LESSON PLAN
SESSION I: What is a Digital Campaign?
1. Learning to Look Exercise: Exploring Photo and Video Campaigns(20-30 minutes)
Images, including photos and videos, are a part of our daily lives. Images are everywhere, including books, newspapers, television, print and billboard advertisements, and websites. Images used in photo and video campaigns have the power to inform and influence people’s perspectives. As instruments of civic engagement, images can be powerful tools for influencing opinions and behavior and getting people to speak up and take action on important issues. In this section, participants will look at examples of campaigns that use photo and video.
Civil Society Campaign: 3
Learning to Look, Part I: Photo Display one or more of the Learning to Look images and lead a
discussion about what participants see. Images and image URLs are provided within this packet, so you can print them out to display in your space, hand out to participants, or display them on a screen or projection surface.
Discussion questions can include:○ What do you see in the photograph? How would you
describe the photograph to someone who couldn’t see it?○ What is the image trying to communicate? What
techniques (i.e. composition, focus, lighting) make it effective or powerful?
○ If the image includes words, how do they impact the overall message?
○ Who is the intended audience of this image? How is this image customized for this audience?
○ How was this image made available to the public? Does this affect who will see this image? Do you think this was intentional?
Learning to Look Images: “The Afghan Girl” by Steve McCurry
National Geographic cover photo, June 1985o This famous National Geographic cover photo captivated
the world and raised awareness about the impact of war in Afghanistan. The photo inspired many aid workers to help Afghan refugees. In January 2002, National Geographic sent photographer Steve McCurry back to find the girl. You can find additional information here:
o http://ngm.nationalgeographic.com/2002/04/afghan- girl/index-text and in this interactive video: http://ngm.nationalgeographic.com/2002/04/afghan- girl/sight-and-sounds-interactive.
UN Women Campaign "Women Need to be Seen as Equal"Ad Campaign by Ogilvy and Mather, 2013
o This campaign uses actual Google search results and images of women to communicate the need for women’s equality.
o For more information on this campaign, visit: http://www.unwomen.org/en/news/stories/2013/10/w omen-should-ads
Civil Society Campaign: 4
Toronto Campaign “Littering Says a lot About you”Campaign by LiveGreen Toronto, 2014
o This 2014 advertisement used pieces of trash to spell out words describing the type of people who litter. Photos of the trash combined with the words “Littering says a lot about you” were placed on public buses and in local newspapers. After their release, companies depicted in the ads’ litter complained and the ads were removed.
o For the full set of images, visit: http://imgur.com/a/wNbpf.
o For the background story, read: http://www.huffingtonpost.ca/2014/08/27/toronto- anti-littering_n_5722152.html
Learning to Look Exercise Part II: Video Display one or more of the Learning to Look videos and lead a
discussion about what participants see and hear. Discussion questions can include:
○ What is happening in this video? Describe the actions in detail.
○ What is the video trying to communicate? What techniques (i.e. composition, sound, subject) make it effective?
○ Who is the intended audience of this video? How is this video customized for this audience?
○ How was this video made available to the public? Does this affect who will see this video? Do you think this was intentional?
Learning to Look Videos: “Legend” by Candice Breitz
o Candice Breitz is a South African artist who works in photography and Video. She created the Legend video series as a way to show Bob Marley’s importance to the Jamaican people. This is in contrast to the brand name Bob Marley has become outside of Jamaica [1]. Breitz worked with 30 Jamaicans to sing each song on Marley’s Legend soundtrack, and then created a 30-screen installation for each song.
o The Legend video series can be found on her website: http://www.candicebreitz.net/Or on YouTube: https://www.youtube.com/watch?v=h- 3HlTouaEU [1] Legend Writeup

Civil Society Campaign: 5
“Breathe In, Breathe Out” by Greenpeaceo This is a video stating the message about how ocean
health affects the quality of our breathable air.Greenpeace is an independent global campaigning organization that acts to change attitudes and behavior, to protect and conserve the environment and to promote peace [1]. [1] Greenpeace Website https://www.youtube.com/watch?v=tzcGFUsL4HM.
o Greenpeace’s entire YouTube video channel for awareness in climate changes can be found here: https://www.youtube.com/user/GreenpeaceVideo/vide os
Smoking Kid, Pro Bono & Social Marketing Showcase, 2012 – 2013
o At smoking areas outside busy public buildings in central Bangkok and suburbs, child actors aged 7 to 10, holding a cigarette, were asked to walk up to adults and ask them for a light. When adults refuse and warn the children not to smoke, the child actors would ask them why they themselves are smoking and hand a brochure to the adults. [1]” [1] Ogilvy & Mather .
o Campaign link: http://www.ogilvy.com/#/The- Work/Galleries/ProBono2013_18_Smoking_Kid.aspx/1/ %7Bfilter:The-Work%7D
TIPS FOR FACILITATORS:● Background knowledge of the image(s) and video(s) is not
necessary to have a discussion, but additional research may help inform the discussion. The links provided above can be a helpful starting point for background information and context.
● Facilitators may want to select a few example photos or videos from local culture in order to aid the discussion and draw comparisons between the various examples.
● Encourage participants to share different opinions on how the images communicate messages. Allow them to discuss and debate their ideas. This will help participants broaden their understanding of different viewpoints, and also ultimately help them to consider how different audiences may interpret their own digital civil society campaigns created in this workshop.
● Facilitators may want to load images and videos before the program to avoid issues with loading and/or bandwidth.
Civil Society Campaign: 6
2. Digital Advocacy(15-20 minutes)
Social Media as an Advocacy ToolIn today’s world, social media websites are very powerful in influencing how people think. Many individuals and organizations use social media to share information, including advocacy campaigns, where they can share or re-share information rapidly. Examples of photo and video campaigns that have been widely shared can be found in the Learning to Look examples included in this workshop.
Define: Discuss characteristics of social media with the group. It might
be helpful to use a few examples that are widely used in your country (i.e. Facebook, Twitter, YouTube) as a basis for discussion. Ultimately, it is important that participants understand what social media is and why it is important for social campaigns.
● Understand that social media can include websites and other means of communication used by large groups of people to share information digitally and develop social and professional contacts, both locally and globally.
● To help participants define social media, select 3 different social media platforms that locally popular (i.e. Facebook, Twitter, YouTube) to facilitate a discussion. Discussion questions could include:
○ What do all of these examples have in common?○ Can they share photo, video, or both?○ Are there certain features that make it easy to share
information (a photo or video) with friends or others?○ Why are these being made and/or shared using social
media?○ How would each photo and video campaign be different
without social media (i.e. posters or signage, face - to - face conversations, movie screening or gallery events in a community space, etc.)? In what ways might these non- digital or in-person campaign methods improve a campaign?
Discuss:Ask participants to discuss the idea of digital advocacy, or using photos and videos to advocate for or promote awareness of a cause.
Discussion questions can include:○ What does it mean to be an advocate?○ How might using the tools of photo and video improve

Civil Society Campaign: 7
your ability to advocate for a cause?○ How would the photo and video campaigns in the
Learning to Look exercise have been different without images (for example, if they only used words)?
TIPS FOR FACILITATORS:● This is a good time to examine how most people use social media
(i.e. to communicate with friends). Considering the purpose of different media platforms will help inform the role social media plays in daily life. This is a great opportunity for participants to share how they use social media!
● Popular social media sites worldwide include Facebook, Twitter, and YouTube. Depending on your region or country, other local sites may be more popular. Be aware of which social media sites are accessible to your participants and the audience(s) they want to reach.
SESSION II: What is a Problem Statement?
3. Identify an Issue and Develop a Problem Statement (20-30 minutes)
● Give participants time to brainstorm an issue they care about. The following prompts may help:
○ What would you like to see changed in the community? Consider your school, your neighborhood or other common gathering places.
○ Think about the people most in need in your community (e.g., the disabled, the elderly, the sick). How might you help them? How could you make others aware of their needs?
○ What global issues are you most concerned about? Consider broader topics such as poverty, climate change, violence and war, women’s rights, disabilities, or government corruption.
● Ask participants to share their issue with the group, and discuss why they selected it.
● Using the Problem Statement Worksheet (included in this packet), have participants develop a problem statement, which clearly defines the issue prompting change, as well as its larger impact on the community or the world. It’s important to articulate the issue in a way that is clear and easy to understand.
TIPS FOR FACILITATORS:● Consider having participants review the photos and videos from
their Community Engagement Challenges (from the Photo and
Civil Society Campaign: 8
Video workshops) as inspiration for selecting a local issue.● To promote participation and conversation, you may wish to split
participants into smaller groups and allow them to spend a few minutes brainstorming together before asking them to share their ideas with the entire group.
● Participants can review this list of global issues provided by the United Nations to spark ideas of their own: http://www.un.org/en/globalissues/
Lesson Extensions:● Use the Feedback Guidelines (included in this packet) to
encourage participants to get feedback from each other on the issue they selected.
● Encourage participants to talk to members of their family, community, school, etc. about the issue they are addressing to build a stronger more inclusive statement through multiple perspectives.
● Ask participants to conduct online research about the issue in order to better inform their understanding of it. Following their research, have them revisit their chosen issue and make any necessary revisions to their problem statement.
4. Identify the Audience(20-30 min.)
Have participants make a list of the different types of people they might want to inform about their issue.
Consider asking the participants the following questions to help them to identify their audience:
o Who is going to be the most receptive to your message?o Who is currently most affected by this issue?
Alternatively, who is least affected?o Whose mind might you change?o What is your call to action? (Or asked another way, what
would you like people to do once they’ve seen your message?) Additional explanation on p. 9 of this packet.
o Who will best respond to a call to action?
Have participants go through their list and brainstorm how their photo or video campaign might best reach their audience. Is their audience best reached in-person or through social media websites?
Consider the following in-person possibilities:● Distributing or displaying posters in the community● Hosting an event to share photos or videos with the public (photo
gallery at your American Space, a school, or a public screening of
Civil Society Campaign: 9
videos)● Other ideas?
Consider the following with social-media:● Which social media websites is your audience most likely to use?● What other tools might help reach your audience? Email? Online
interest groups?
TIPS FOR FACILITATORS:● It’s okay for participants to think big here. As they share their
ideas, prompt them to consider which ideas are most realistic to help narrow their list. Where can they actually reach their target audience and have the greatest impact?
Lesson Extensions:● Have participants share their issue, audience, and ideas for
audience outreach with the group. Use the tips found in the Peer Feedback Guidelines (included in this packet) as a tool to support additional brainstorming and revisions.
5. Develop Your Concept(45-60 min)
Crafting Your Message Work with participants to revisit their problem statement and
have them consider this: why is your cause important and how can people work towards positive change or improvement of the current situation? How can your message help people understand why the cause is important?
Have participants brainstorm and write down a list of action steps.
Use these action steps to create a call to action.
A call to action is a word, phrase, or graphic that tries to persuade a person to take immediate action to enact change.
Use these examples of calls to action to help participants get started on creating their own. Think about messages seen on bumper stickers, signage, or buttons, such as:
o “Be the change that you wish to see in the world.”o “Save Darfur”o “Reduce. Reuse. Recycle.”
● Have participants describe the images that might go with each of the above messages. For example, what images might support the message “Reduce. Reuse. Recycle.”
Selecting A Digital Focus
Civil Society Campaign: 10
Digital advocacy is about using the power of photo and/or video to amplify your message. Using what participants learned from the examples of calls to action provided above, ask participants to:
● Brainstorm imagery representing their message.● Select either using photo or video for their campaign.. Will their
message best be shared through a single photo, photo series or a short video?
● Consider which social media platform(s) would be best for sharing these photos and/or videos with the public.
Presenting The Campaign Concept Have participants present their campaign plans to their peers by
sharing the following details:o Are they using photo or video for their campaign?o What kinds of imagery or themes to they want to
include?o Who is their audience and what is the best way to reach
them?o What decisions did they have to make while creating the
campaign? What might they have done differently? After each participant has shared their plans and ideas, open up a
discussion with the larger group and encourage others to provide feedback for ways to improve or strengthen the campaign.
TIP FOR FACILITATORS:Use the Peer Feedback Guidelines (included in this packet) as a tool to support additional brainstorming and revisions.
● Discussion questions can include:○ How do you feel about this issue? Does the imagery used
reflect these feelings?○ How do you think people outside of the intended
audience will react to this campaign?○ Is the campaign’s outreach platform the best way to reach
this audience? Is there a better method?
● Using peer feedback and facilitator input, participants should have a good understanding of how their message will be received and the best practices and tools needed to convey the message. They are now ready to finalize their campaign.
TIPS FOR FACILITATORS:● Have participants focus on images and simple language for their
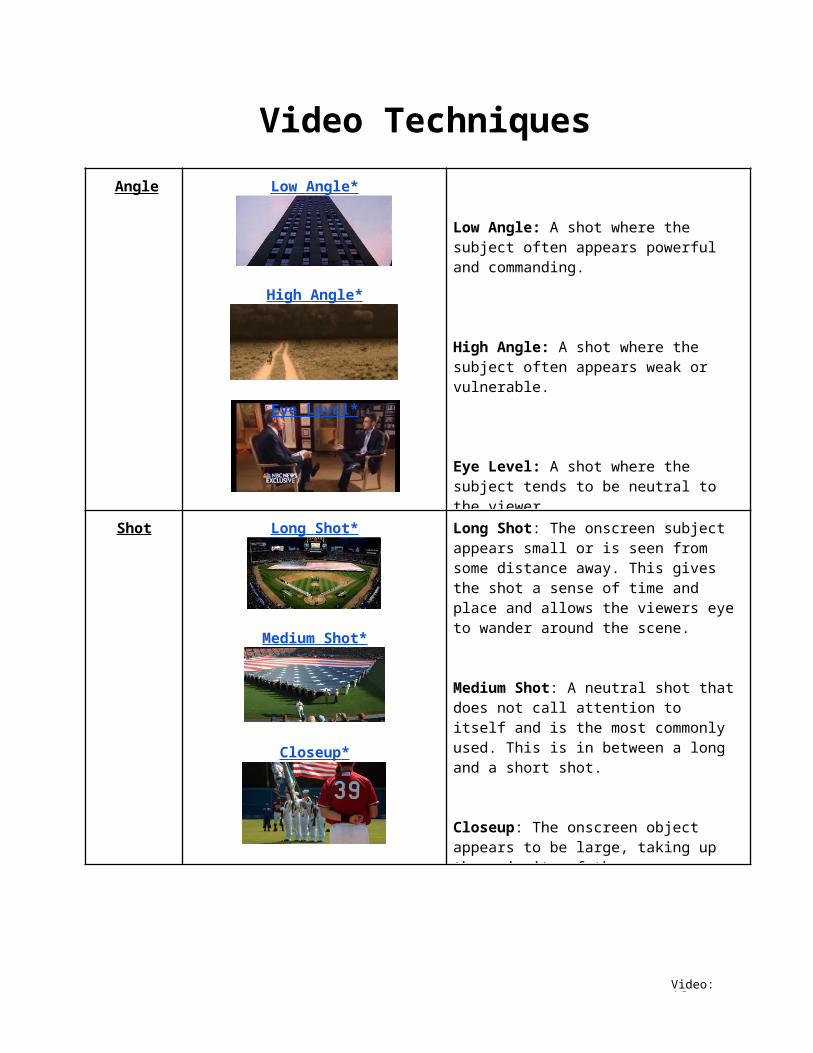
Civil Society Campaign: 11
campaign. Emphasize careful use of words and image to convey a powerful message.
● Examples of photo campaigns can be found here: http://digitalsynopsis.com/inspiration/60-public-service- announcements-social-issue-ads/
o Please note that this webpage restricts the ability to save or copy these images. We suggest using the campaign name to perform a keyword search to access these images for your program.
● It is important for participants to understand the value of sharing a message or campaign on social media, however facilitators should focus on sharing these campaigns within the group. If appropriate, encourage participants to share their campaigns more widely.
Lesson Extensions:● Facilitators may have participants rework a final draft after they
present their campaigns for feedback. Participants can present again for further feedback or continue straight into storyboarding (detailed below).
PART III: Developing Your Idea with Storyboarding
6. Storyboarding: Develop your Story (30- 45 min)
Now that participants have identified an issue, audience, and method of outreach, they can start developing how they will bring this campaign to the public.
Introduction to StoryboardingA storyboard is a layout of photos, sketches, and other graphic images used to pre-visualize a story. Using the Storyboard Template (included in this packet), participants will lay out images to map out their campaign about their chosen issue in preparation for their final project. Having a plan, like a storyboard, gives participants time to develop their ideas and messaging more thoroughly and promotes efficiency in the production phase of their campaign, as well as discussion.
Hand out a copy of the Storyboard Template (included in this packet) to each participant and explain the purpose creating a detailed plan for their campaign.
Work with participants to complete this storyboard template. Prompts and examples found on the template should be used to help guide participants’ work.
Identify the medium for the campaign (photo or video) and restate the problem statement at the top of the worksheet
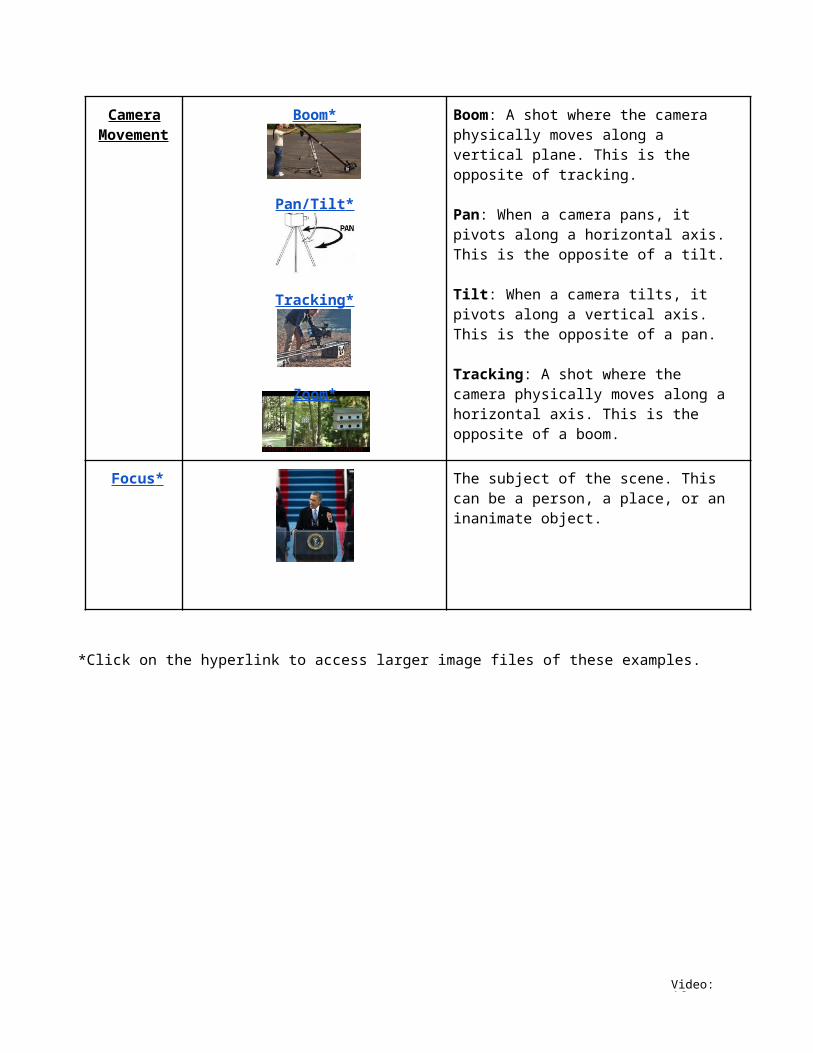
Civil Society Campaign: 12
Encourage participants to include at least five images, photo or video, in their storyboard. The storyboard can explore the best way to compose a single scene for a photographic campaign, arranging a series of photos, or for video, can be a layout of an entire film clip.
Participants should also consider whether they want to include any spoken words, music, or text, and can note this within their Storyboard Template.
While working on storyboarding, participants should be considering how they will share their work using an online platform (i.e. Facebook, YouTube). Additionally, they may wish to consider a more traditional printed media platform to reach their intended audience. Is this going to involve face-to-face interaction or aim to go viral online?
Option 1: Creating a Storyboard for PhotographyParticipants can focus on one or more subjects to use in their campaign. Use the Storyboard Template to compose a series of possible photographs that can be chosen from that best promote their ideas.
Have participants lay out pictures, drawings, and other reference photos to map out the campaign.
Encourage them to consider editing techniques that incorporate further elements, such as campaign slogans, calls to action, and captions.
Emphasize that the notes on this template will be used as references when photographing their subject in the Production section of this guide. Important items for participants to note on their storyboard include:
o DESCRIPTION - What is happening in this shot? What are your subjects (people, characters, etc.) doing in the scene and how can you best capture these actions?
o WORDS - Decide if you'd like to add words to your image. For example, you might add a title, slogan or a quote from one of your subjects.
o NOTES - Any notes about the photograph that cannot be represented in the template should be added here.
Option 2: Creating a Storyboard for Video Have participants lay out pictures, drawings, and other
references to map out their video campaign. Emphasize that the notes on this template will be used as
references when filming the entire campaign series in the
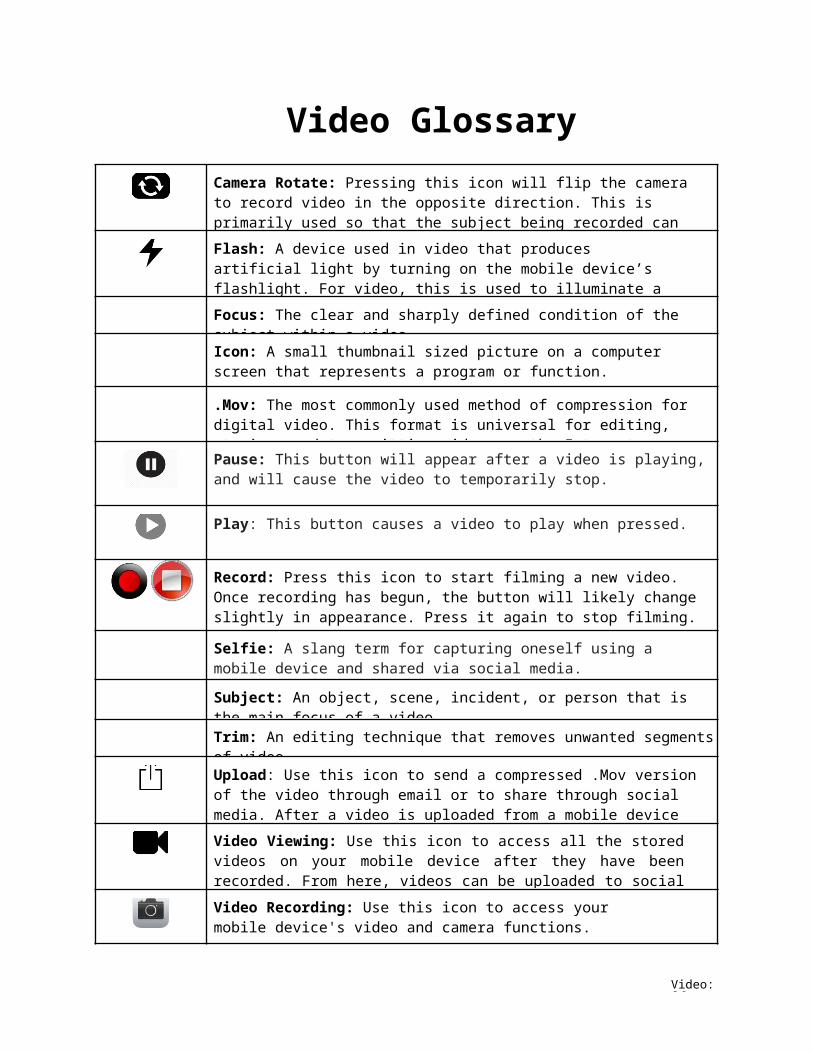
Civil Society Campaign: 13
Production section of this guide. Participants should be considering the techniques explored in the
Community Engagement Challenges (from the Video workshop) to best articulate their concept when laying out this storyboard.
Have participants use the Storyboard Template to plan a multi- shot video, or a series of videos around the problem statement. Important items for participants to note on their storyboard include:
o DESCRIPTION - What is happening in this video clip?What are the subjects doing in the scene, and why is this important? How can you best capture these actions?
o WORDS - Video allows for the addition of sound.Consider whether you'd like to include dialogue between characters or a narrators’ voice. How will the words you include make your video campaign more effective?
o NOTES - Any notes about the video that cannot be represented in the template should be added here.
TIPS FOR FACILITATORS:● Depending on the platform participants plan on using to get this
campaign to the public, they can include additional elements outside of only using photos and film, like drawings, narration, or a combination of photo and video. This should be encouraged and left open-ended.
● Storyboards are planning tools, and often include hand scribbled notes and quick sketches. These are not meant to be final products for display. In creating a storyboard, is more important to focus on the simple elements of a narrative and the working process rather than a polished piece of work.
Lesson Extensions:● Have participants submit their storyboards for feedback from
their peers and the facilitator. After review, participants can rework their storyboard to strengthen their campaigns.
PART IV: Producing Your Civil Society Campaign
7. Production (Variable time; can span multiple sessions)
Production After finishing the storyboard, have participants go out to take
photographs or film using their device.● Use the same concepts and techniques outlined in the Digital
Photography and Video Certification workshop glossaries (included in those packets) to photograph/film this campaign.
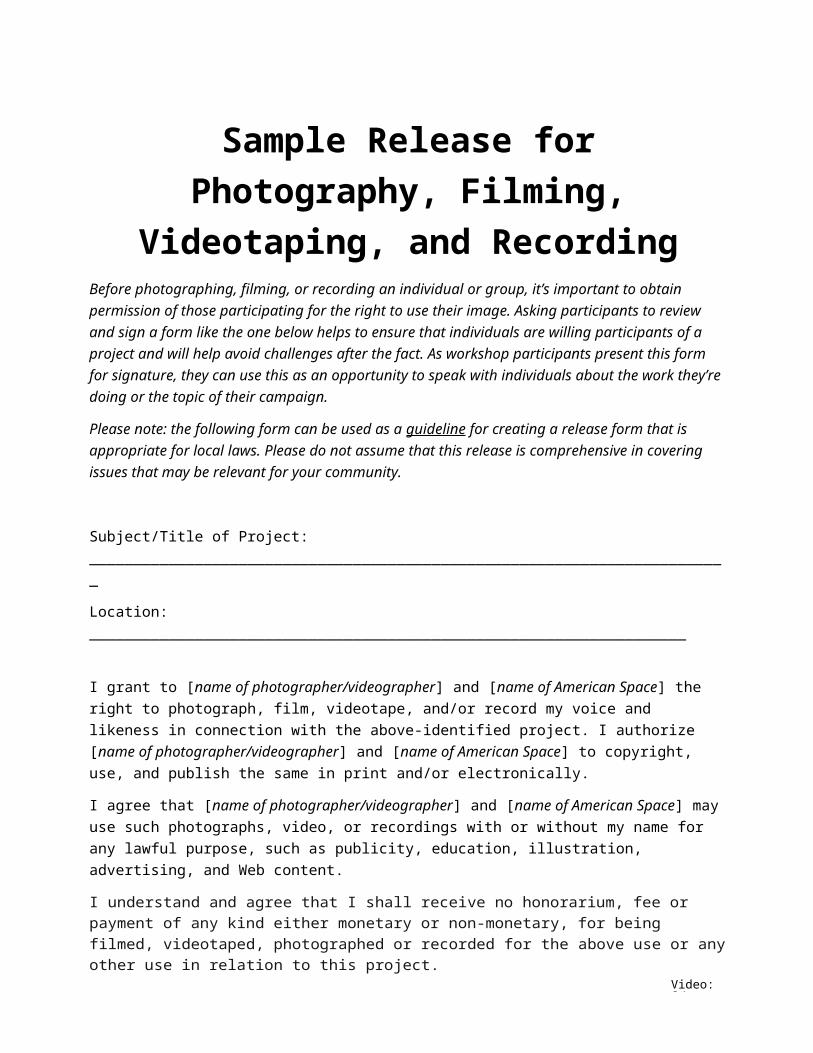
Civil Society Campaign: 14
TIPS FOR FACILITATORS:● The facilitator can decide to send participants out into the
community for a specific amount of time to take photos or film, or have them break for the day and bring their photos or footage back for the next session.
● The facilitator should take time to review the local laws and restrictions related to taking photographs and video. Sensitive government buildings can prohibit these actions or permission may need to be obtained from individuals before recording. Be sure to review these rules with participants prior to sending them out and empower them to know their rights and stay within the local laws.
Post Production Once all the pictures and video have been gathered, have
participants apply their editing skills to enhance the images.● Use the editing tools and software recommendations found in the
Digital Photography and Video Glossaries (included in those packets).
● Videos will always require editing unlike a photograph, which may not need any editing. The Video Glossary highlights basic editing tools on most devices. Additionally, facilitators and participants with access to YouTube may use their video editing tool. A tutorial for the YouTube video editor can be found here: https://support.google.com/youtube/answer/183851?hl=en
● If participants’ campaigns include physical elements (i.e. printed materials: handouts, pamphlets, banners, posters, etc.), use this time to edit, print, cut, fold, and make these promotional materials.
● Give participants a place to upload their campaigns! Use a cloud- based storage website like Google Drive, Dropbox, or Senduit to store the campaigns to make it easier for sharing and publication (detailed below).
TIPS FOR FACILITATORS:● Multiple participants might have intersecting concepts and
subject matter in their work. Encourage this opportunity for collaboration.
8. Certificate of Completion: Civil Society Campaign
● The facilitator should complete a Certificate of Completion: Civil Society Campaign (included in this packet) for each participant who completed all components of this project. In this packet

you’ll find two versions of the certificate, one with the American Spaces logo and the other with a blank space at the top to allow you to personalize it with your American Space’s logo!A participant is qualified to receive the Certificate of Completion: Civil Society Campaign if they have completed all components of the workshop:Received the Certificate of Completion: Digital PhotographyReceived the Certificate of Completion: VideoCreated a Civil Society CampaignEncourage participants to continue being involved in campaigns for social change on their own and consider how they can use these digital skills and tools to advocate for change both locally and globally.TIPS FOR FACILITATORS:For additional guidance on helping participants promote their civil society campaign on social media and/or in-person, please see Page 4 of the Overview.
Civil Society Campaign: 15
This curriculum and certification was written by ARTLAB+, a digital art studio for teens at the Smithsonian Institution's Hirshhorn Museum and Sculpture Garden. The ARTLAB+ program is a free afterschool program where teens can socialize with friends; explore digital media and technical tools; and take workshops to develop their interests and skills. The overarching pedagogy used in programming is HOMAGO, which stands for hang out, mess around, and geek out. Using this pedagogical approach, Mentors encourage teens to explore their own interests, create their own learning trajectories, and foster their own values. ARTLAB+ strives to be a radically inclusive space, where teens can learn from each other’s differences in a welcoming and safe environment. http://artlabplus.si.edu/
ARTLAB+ certifications are developed by Mentors using professional industry standards. In addition to displaying a specific set of skills, these certifications encourage teens to use critical thinking. ARTLAB+ certifications help to qualify teens to be hired to ARTLAB+ Production Teams, which are paid opportunities for teens to use their digital skills in a professional context and are great additions to resumes, job applications, and college applications.

Civil Society Campaign: 16
Civil Society Campaign Glossary
Advocacy public support for or recommendation of a particular cause or policy
Audience the persons reached by a communication
Call to action a word, phrase or graphic which tries to persuade a person to take immediate action
Campaign noun: an organized course of action to achieve a particular goal
verb: to work in an organized way toward a goal, such as improving a problem or social issue.
Cause A principle, aim or movement, that because of a deep commitment, one is prepared to defend or advocate for
Message the point, meaning or moral of a communication (such as a photo or a video)
Social Media websites and other means of communication that are used by large groups of people to share information and develop social and professional contacts
Storyboard a layout of photos, sketches, and other graphic images used to plan and pre- visualize a story or campaign
Civil Society Campaign: 17
Guide to Writing a Problem StatementWriting a Problem Statement will help you design a call to action for solving your problem. Phrasing is crucial. Your statement should clearly describe your vision and make it clear why the problem should be solved.
TIP EXAMPLES WORK AREA: Use this area to work on writing your problem statement. Think about what words add the most meaning to your issue or problem.
Describe your issue or problem.
Girls in Burkina Faso risk their lives every time they walk to school.
Describe your vision or ideal. What would your community be like if this problem didn’t exist?
Girls would attend school each day without risking their lives.
Be specific: Global issues tend to be broad; a specific local issue can help make meaningful connections to the global issue.
Only thirty percent of school age girls attend school in our community.
(Add your own tip)
PROBLEM STATEMENT | Write your problem statement in 15-25 words here. Choose your words carefully!
Get feedback! Use the Feedback Guidelines template to get suggestions of ways to improve and strengthen your problem statement from your teachers and peers.
Civil Society Campaign: 18
Storyboard TemplateA storyboard is a layout of photos, sketches, and other images used to plan a story. Use this template to arrange images for your photo or video campaign. This will help you prepare to create a final photo or video campaign.
● Write whether this storyboard is for Photography or Video, as well as your Problem Statement at the top.
● Try to include at least 3 images in your storyboard.○ For photography, the storyboard might explore the best way to compose a single
scene for a campaign or arrange a series of photos.○ For video, the storyboard should be a layout of an entire film from beginning to
end.
MEDIUM (Photo or Video) PROBLEM STATEMENT | Write your Problem Statement below
IMAGE 1 IMAGE 2
DESCRIPTION:
WORDS:
NOTES:
Civil Society Campaign: 19
IMAGE 3 IMAGE 4
DESCRIPTION:
WORDS:
NOTES:
IMAGE 5 IMAGE 6
DESCRIPTION:
WORDS:
NOTES:

Civil Society Campaign: 20
IMAGE 7 IMAGE 8
DESCRIPTION:
WORDS:
NOTES:
IMAGE 9 IMAGE 10
DESCRIPTION:
WORDS:
NOTES:
Civil Society Campaign: 21
Storyboard Examples

Civil Society Campaign: 22
FEEDBACK GUIDELINES:Be positive! Share something you like about the work. Be specific.Suggest something that could be improved. What could they do better?Ask questions. What do you want to know more about? What confuses you about their work?
Civil Society Campaign: 23
Feedback Guidelines & WorksheetFeedback is an essential component of any project, helping make the final result stronger than before. It provides individuals with opportunities to reflect on their work and make important revisions to generate creative solutions to challenges and propel them forward through the next project phase.Participants can use the attached Feedback Worksheet to guide their conversations and deliver constructive feedback throughout the workshop.
Preparation: Take time to discuss the value of feedback with participants. If time permits, share a piece of your own work and have students practice giving feedback. Model receiving feedback willingly and positively.
Challenges: Be aware that there are challenges to giving and receiving feedback, such as fear of hurting a peer’s feelings or difficulty constructing feedback beyond, “I like it,” or “I don’t like it.”
The following guidelines can be used in whole group settings, peer-to-peer, with outside experts, and in a variety of other forums.
SUGGESTED FEEDBACK FORMS:● Whole Group Presentation-Style: This format works well in both the early project phases
and the concluding phases. Try it out here:○ Feedback on Problem Statements: As students define the problem to investigate,
have them present their problem statements and supporting research/evidence. Give participants time to respond using the Feedback Guidelines, outlined above.
○ Feedback on Final Work: Presentations to a group are often used to share participants’ final work products. If appropriate, have participants share their final work with an authentic audience that includes project stakeholders. Use these feedback guidelines to have peers, community members, parents, experts, and others give the students meaningful feedback which will further activate their project.
● Peer-to-peer feedback: This format works well in the messier middle project phases. Students pair up with another student to share an update and then gets constructive feedback from the other team. Teams use the feedback guidelines to guide their conversation.
Civil Society Campaign: 24
Feedback WorksheetStudent Name
Feedback for (i.e. Problem Statement, Concept, Storyboard)
Positive Feedback(I like how…)
Suggestions for Improvement(Consider changing this…)
Questions(I’m confused by this aspect of your work? Would it have been better if…?)
Civil Society Campaign: 25
Sample Release for Photography, Filming, Videotaping, and Recording
Before photographing, filming, or recording an individual or group, it’s important to obtain permission of those participating for the right to use their image. Asking participants to review and sign a form like the one below helps to ensure that individuals are willing participants of a project and will help avoid challenges after the fact. As workshop participants present this form for signature, they can use this as an opportunity to speak with individuals about the work they’re doing or the topic of their campaign.
Please note: the following form can be used as a guideline for creating a release form that is appropriate for local laws. Please do not assume that this release is comprehensive in covering issues that may be relevant for your community.
Subject/Title of Project: _________________________________________________________________________
Location: ____________________________________________________________________
I grant to [name of photographer/videographer] and [name of American Space] the right to photograph, film, videotape, and/or record my voice and likeness in connection with the above-identified project. I authorize [name of photographer/videographer] and [name of American Space] to copyright, use, and publish the same in print and/or electronically.
I agree that [name of photographer/videographer] and [name of American Space] may use such photographs, video, or recordings with or without my name for any lawful purpose, such as publicity, education, illustration, advertising, and Web content.
I understand and agree that I shall receive no honorarium, fee or payment of any kind either monetary or non-monetary, for being filmed, videotaped, photographed or recorded for the above use or any other use in relation to this project.
I have read and understand the above:
Signature: ________________________________________________________________________________________
Printed Name: ___________________________________________________________________________________
Date: _____________________________________________________________________________________________
Signature of parent or guardian: _______________________________________________________________(if under age 18)
FACILITATOR DATE
Smithsonian Institution
Is proud to award this
CERTIFICATE OF COMPLETION IN CIVIL SOCIETY CAMPAIGN
To:
FACILITATOR DATE
Smithsonian Institution
Is proud to award this
CERTIFICATE OF COMPLETION IN CIVIL SOCIETY CAMPAIGN
To:


