
We wish you a Merry Christmas illustrationhartington.esu1.org/~mhochstein/Computer Apps/We wish you...
49
We wish you a Merry Christmas illustration Final Image Preview Start by creating a new file (File>New) with 1925×1218 and 200 dpi. Using the Rectangle Tool (U), represent the background of the picture that we ant to get finally. The layer’s parameters may be set by clicking on the processed layer on the layers’ panel: Blending Options>Gradient Overlay
-
Upload
truongtruc -
Category
Documents
-
view
223 -
download
3
Transcript of We wish you a Merry Christmas illustrationhartington.esu1.org/~mhochstein/Computer Apps/We wish you...

We wish you a Merry Christmas illustration
Final Image Preview
Start by creating a new file (File>New) with 1925×1218 and 200 dpi.
Using the Rectangle Tool (U), represent the background of the picture that we ant to get finally.
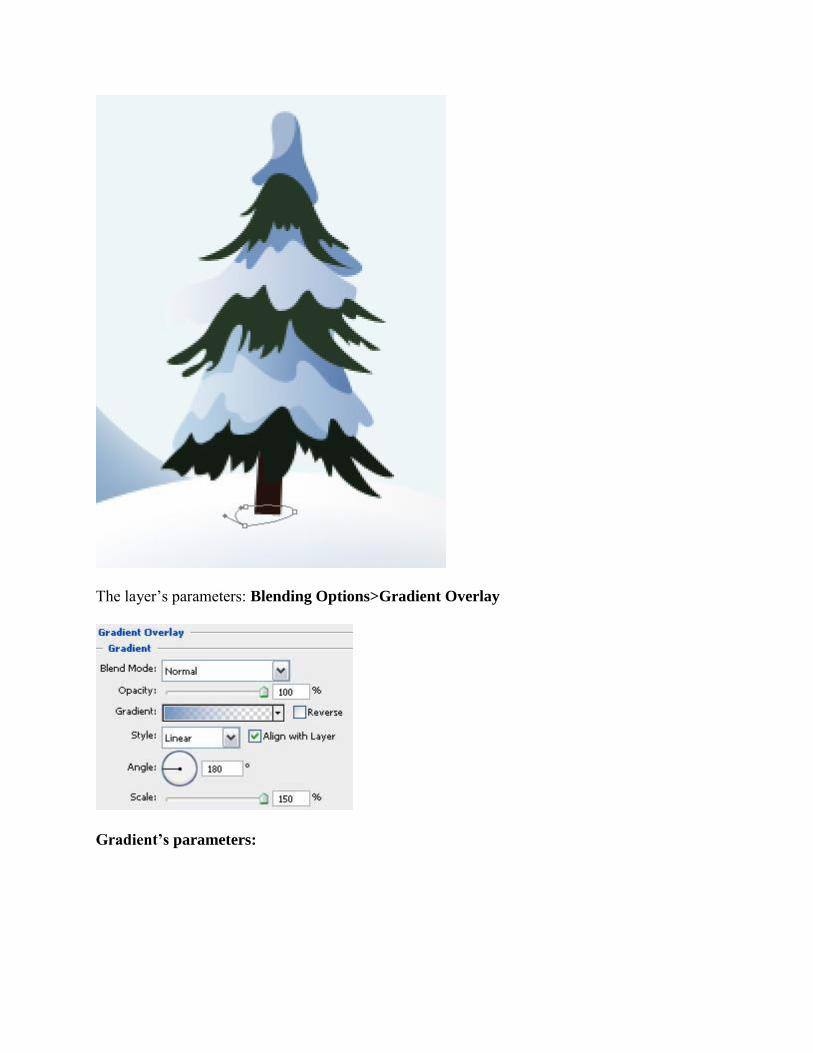
The layer’s parameters may be set by clicking on the processed layer on the layers’ panel:
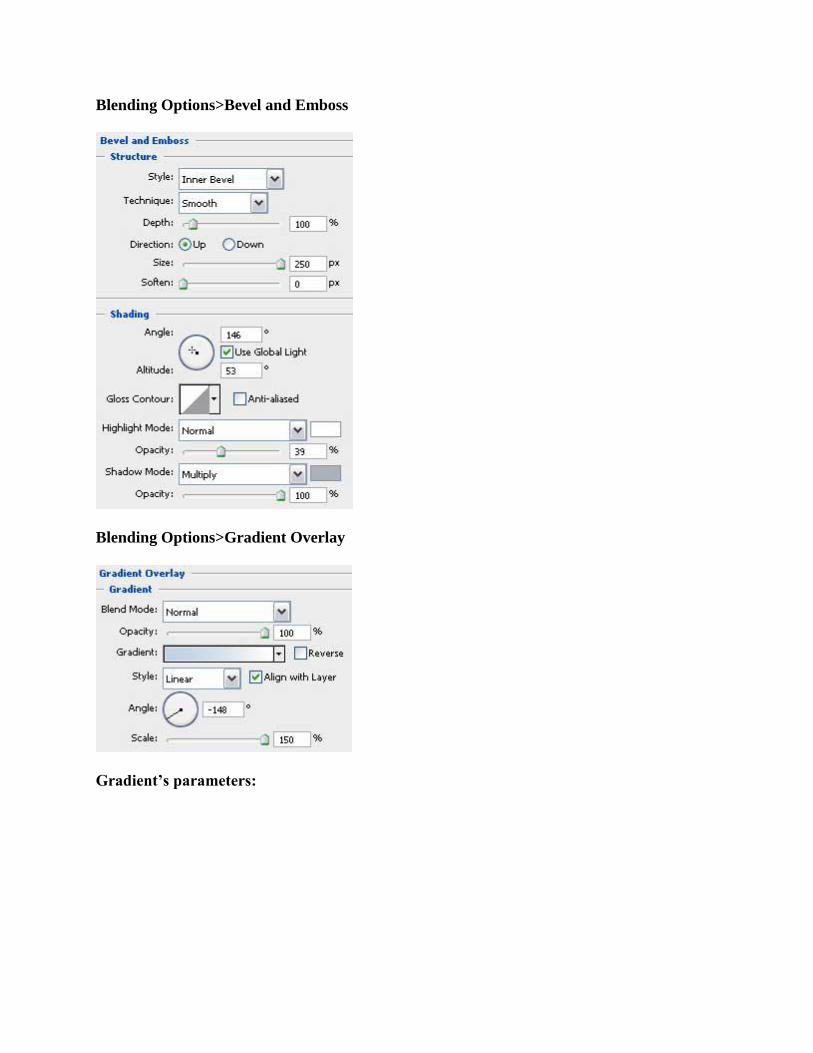
Blending Options>Gradient Overlay
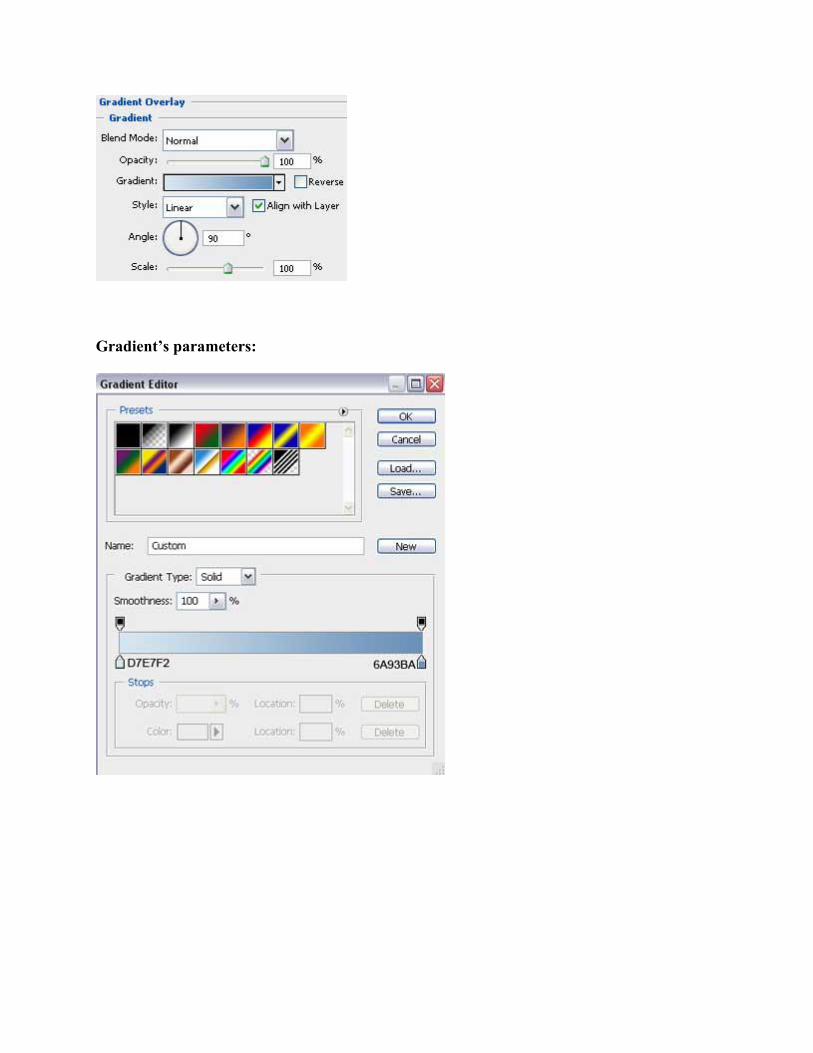
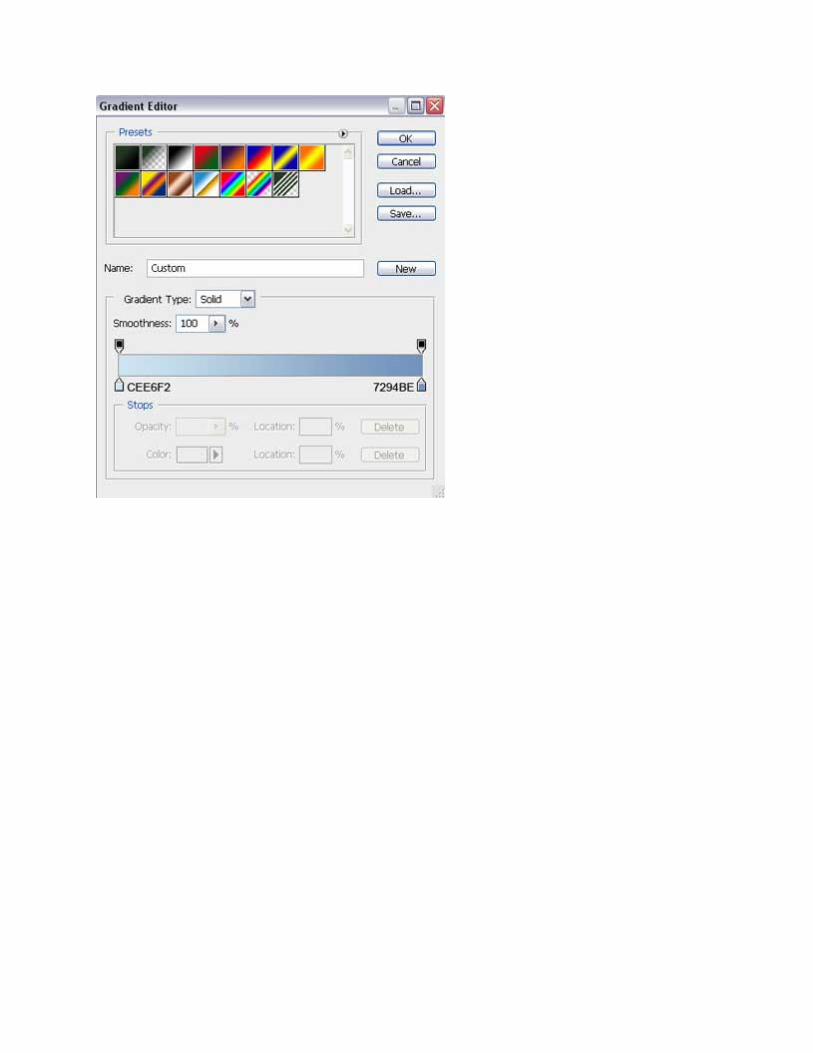
Gradient’s parameters:
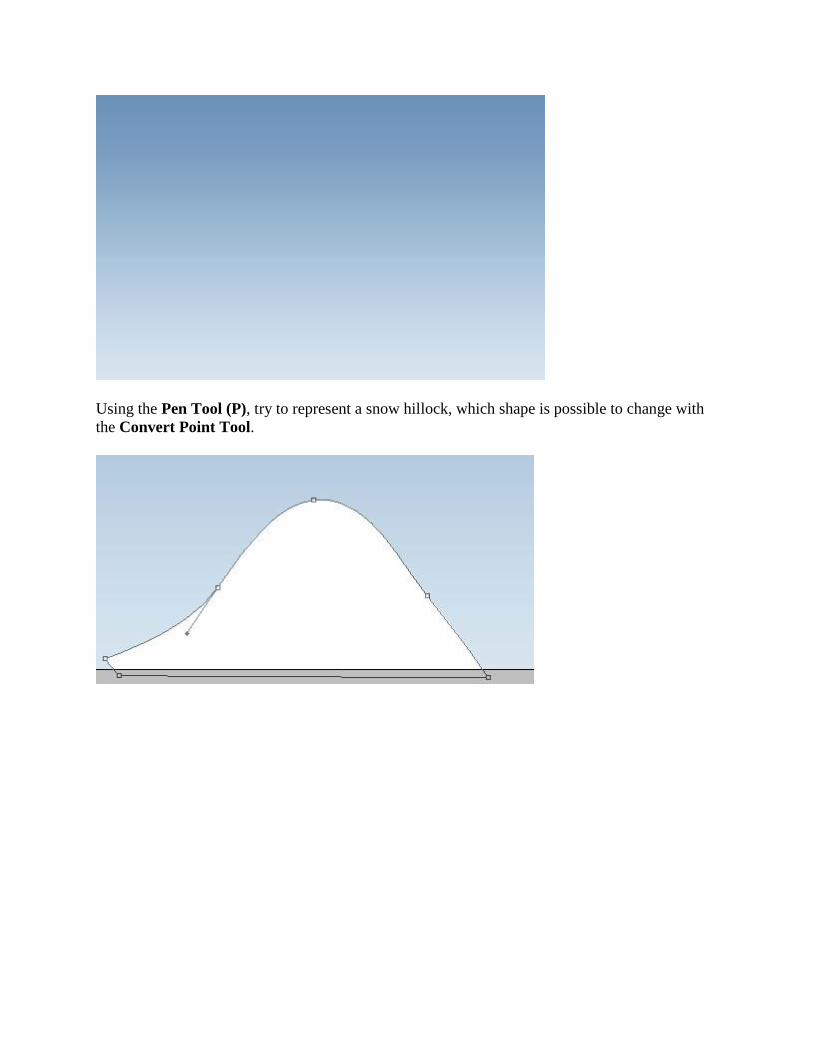
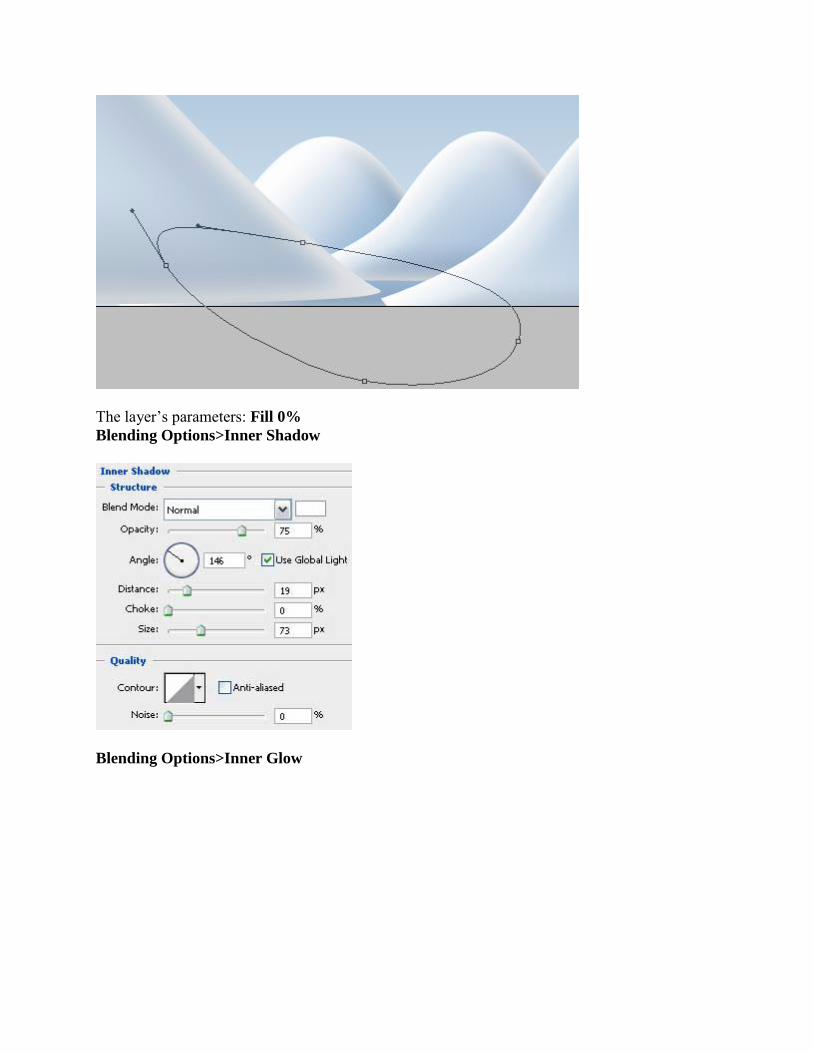
Using the Pen Tool (P), try to represent a snow hillock, which shape is possible to change with
the Convert Point Tool.
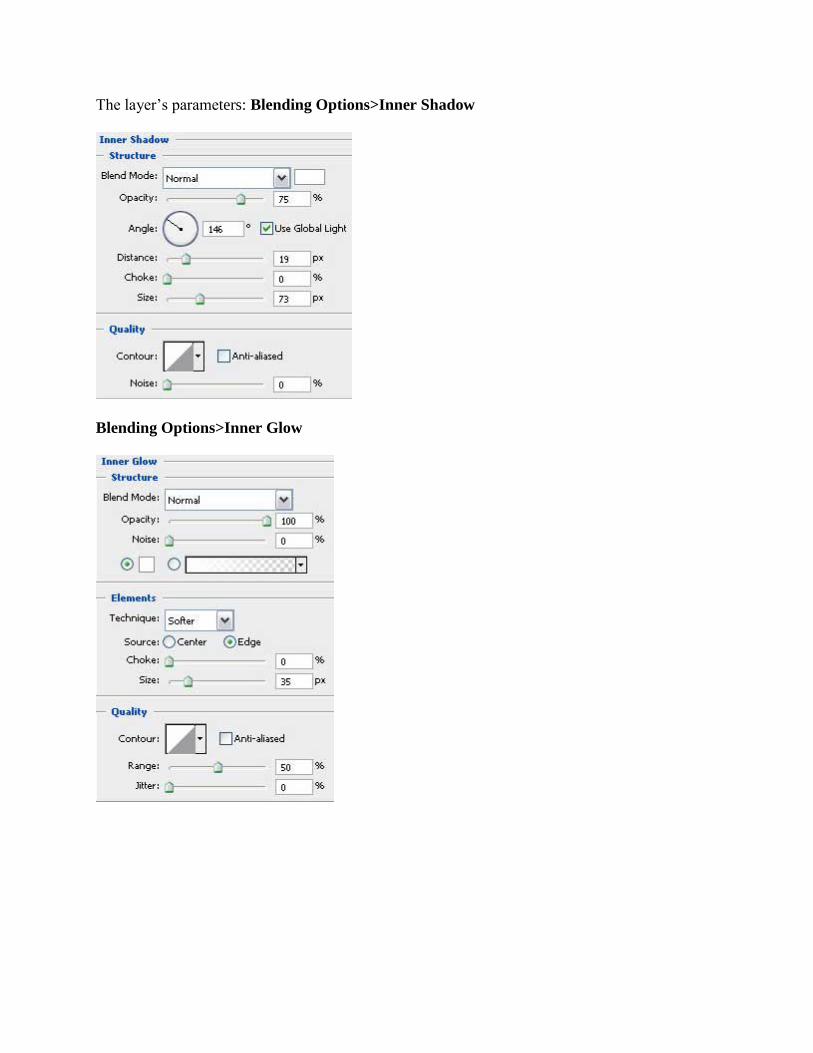
The layer’s parameters: Blending Options>Inner Shadow
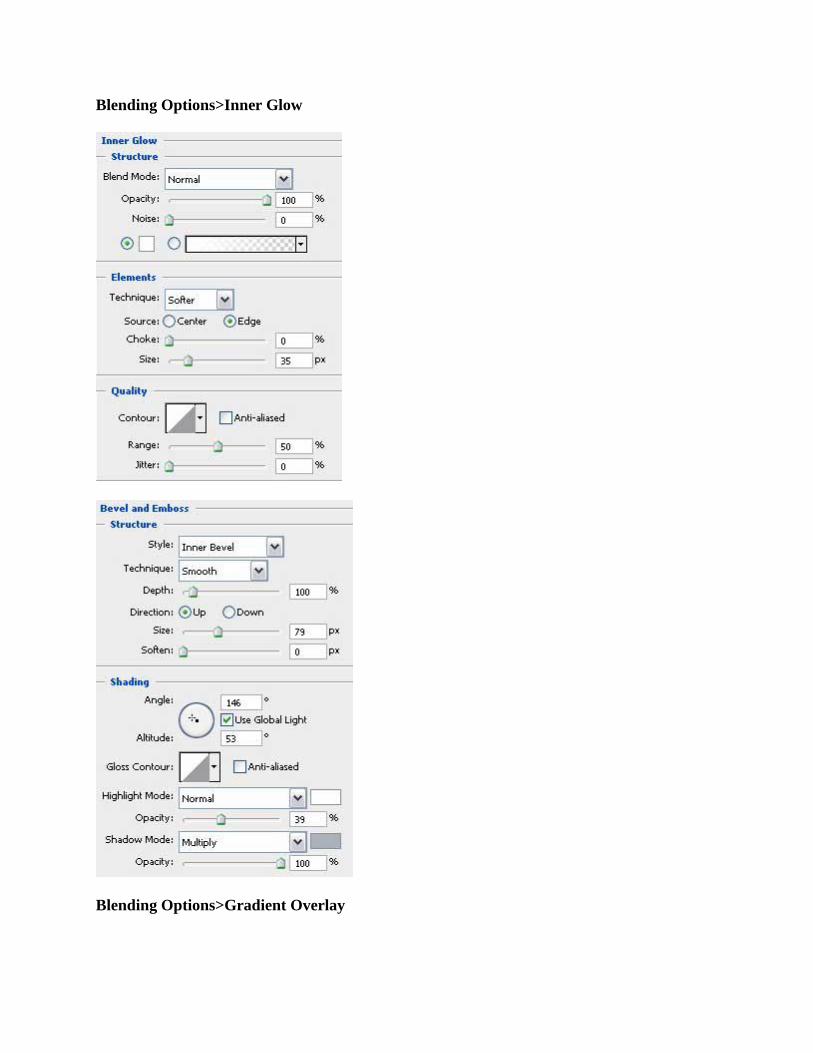
Blending Options>Inner Glow

Blending Options>Bevel and Emboss
Blending Options>Gradient Overlay
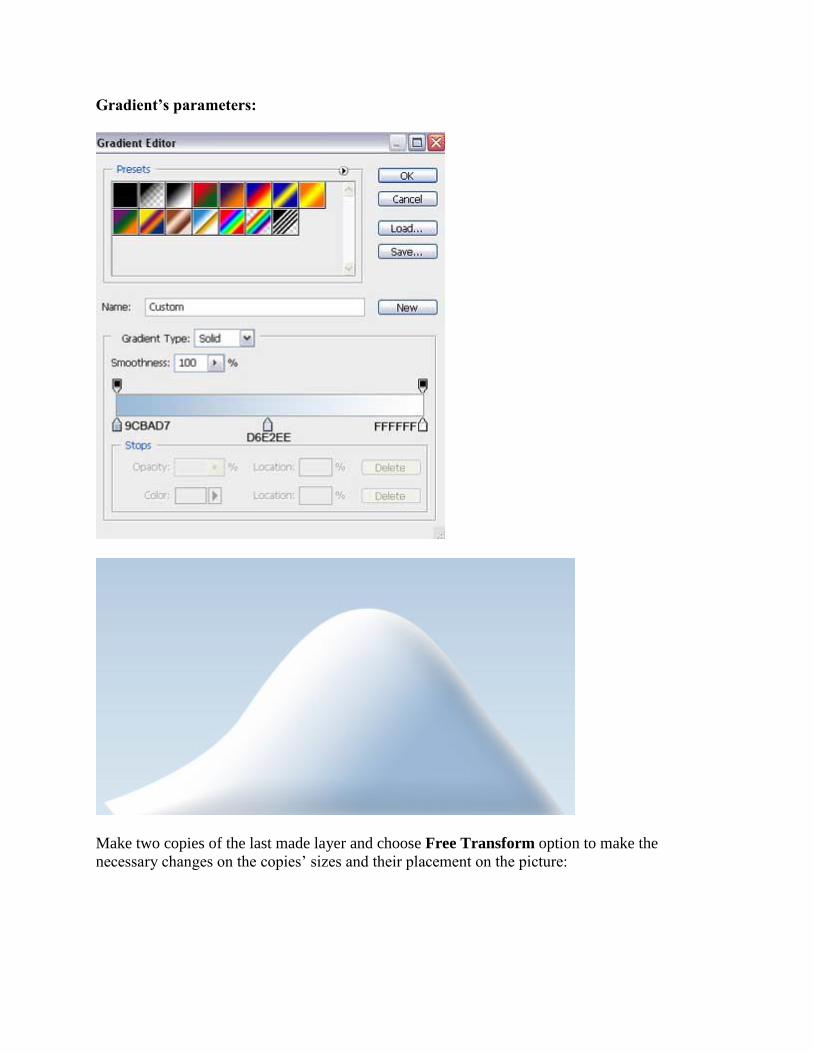
Gradient’s parameters:
Make two copies of the last made layer and choose Free Transform option to make the
necessary changes on the copies’ sizes and their placement on the picture:

Using the same
instruments, Pen Tool (P) and Convert Point Tool, try to represent another snow hillock.
The layer’s parameters: Fill 0%
Blending Options>Inner Shadow

Blending Options>Inner Glow
Blending Options>Bevel and Emboss
Blending Options>Gradient Overlay
Gradient’s parameters:

Next we’ll make another snow hillock, applying the already known instruments: Pen Tool (P)
and Convert Point Tool, for making the corresponding corrections on the element’s shape.
The layer’s parameters: Fill 0%
Blending Options>Inner Shadow
Blending Options>Inner Glow

Blending Options>Bevel and Emboss
Blending Options>Gradient Overlay

Gradient’s parameters:

Using the earlier described method, try to make the next element, representing also a snow
hillock.
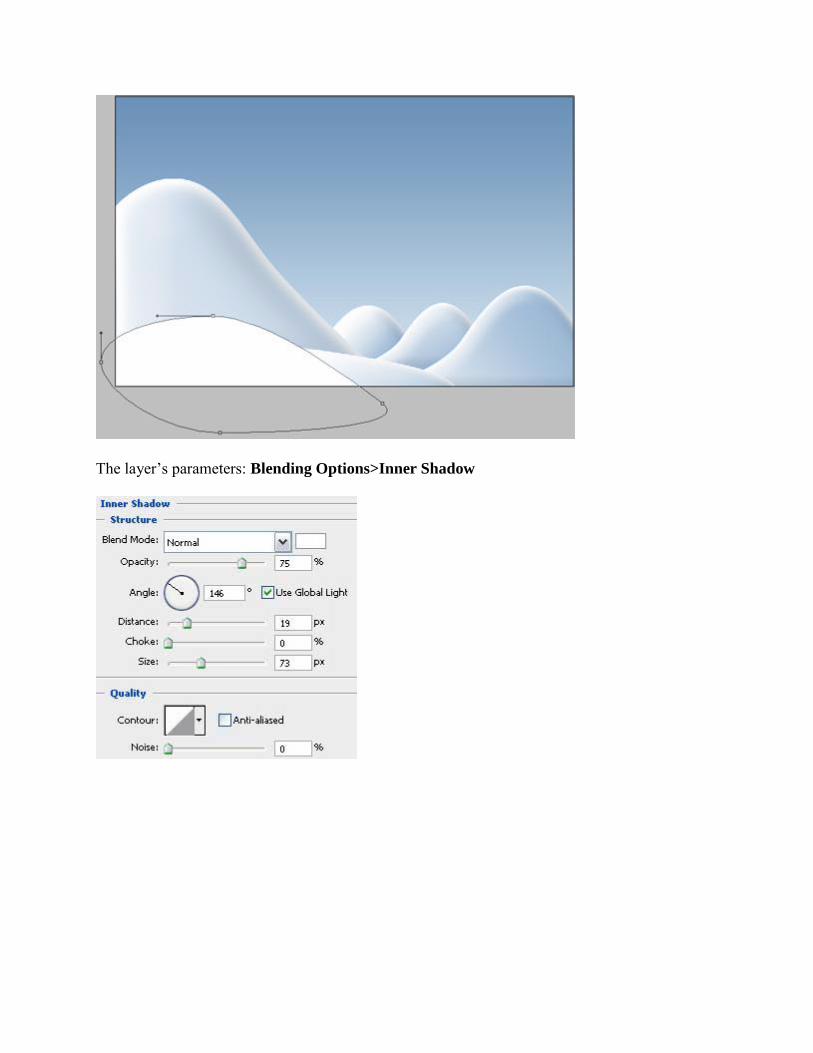
The layer’s parameters: Blending Options>Inner Shadow
Blending Options>Inner Glow
Blending Options>Gradient Overlay

Gradient’s parameters:

Now we must introduce on the picture the sun, colored with #EDF7F8 and made with the
Ellipse Tool (U). Place the sun’s layer lower than the layer containing the hillock, bordering
with the sun (on the layers’ panel).

The layer’s parameters: Blending Options>Outer Glow

Now we’ll represent the fir tree. For the beginning we’ll make the tree’s top, colored with
#6588B6 and then apply the Pen Tool (P). The fir tree’s contours may be corrected with the
usual Convert Point Tool.

Next we’ll make a highlight on the top, using the Ellipse Tool (U). The color in this case should
be white.
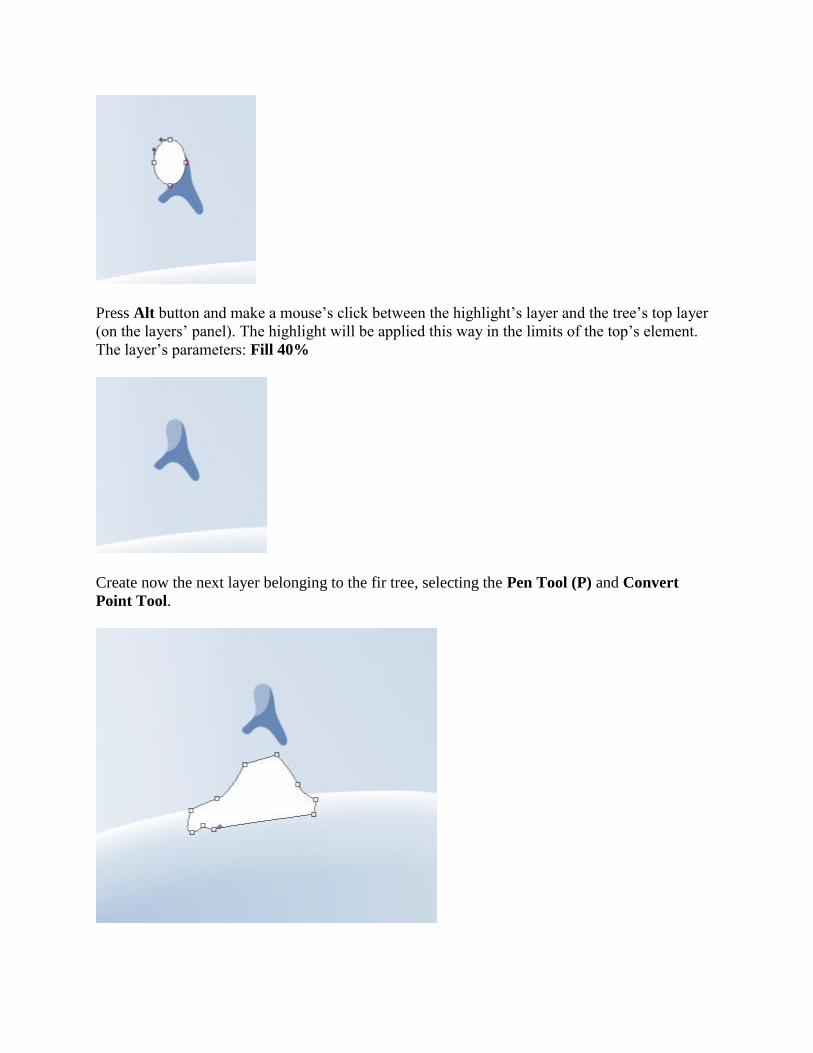
Press Alt button and make a mouse’s click between the highlight’s layer and the tree’s top layer
(on the layers’ panel). The highlight will be applied this way in the limits of the top’s element.
The layer’s parameters: Fill 40%
Create now the next layer belonging to the fir tree, selecting the Pen Tool (P) and Convert
Point Tool.

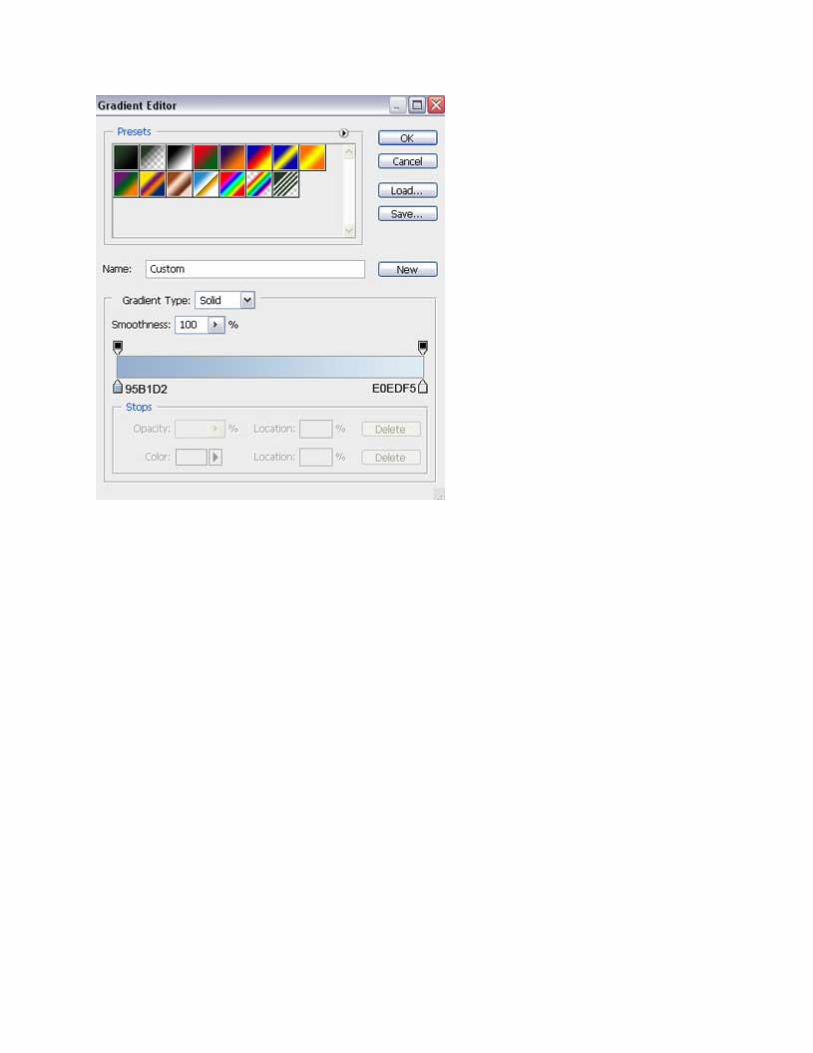
The layer’s parameters: Blending Options>Gradient Overlay

Gradient’s parameters:
Choosing the last instrument, Pen Tool (P), try to make the next layer, reserved for the fir tree.
Its contours may be corrected with the well-known instrument already – Convert Point Tool.
The color is #7495C0

Using the same instruments, Pen Tool (P) and Convert Point Tool, try to make the next layer of
the tree, colored with #253825.

Select also the Pen Tool (P) to make the next layer, belonging to our fir tree.
The layer’s parameters: Blending Options>Gradient Overlay
Gradient’s parameters:

Use the last described method to make one more layer, reserved for the fir tree.
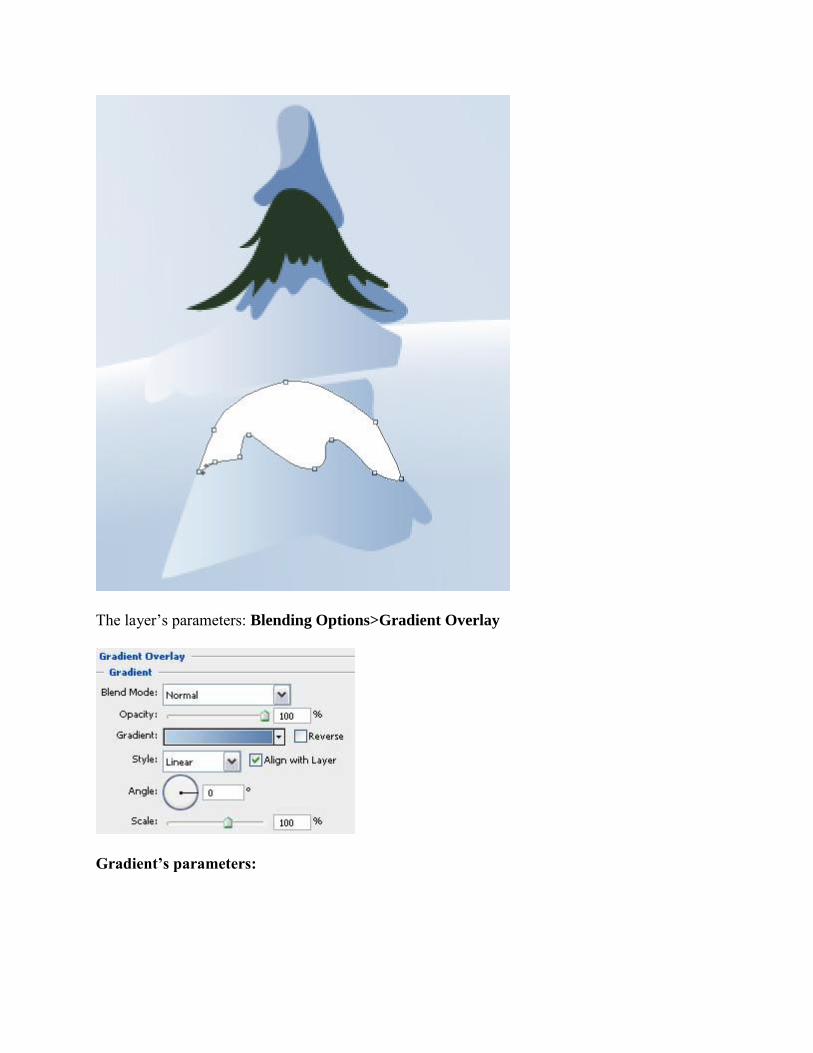
The layer’s parameters: Blending Options>Gradient Overlay
Gradient’s parameters:

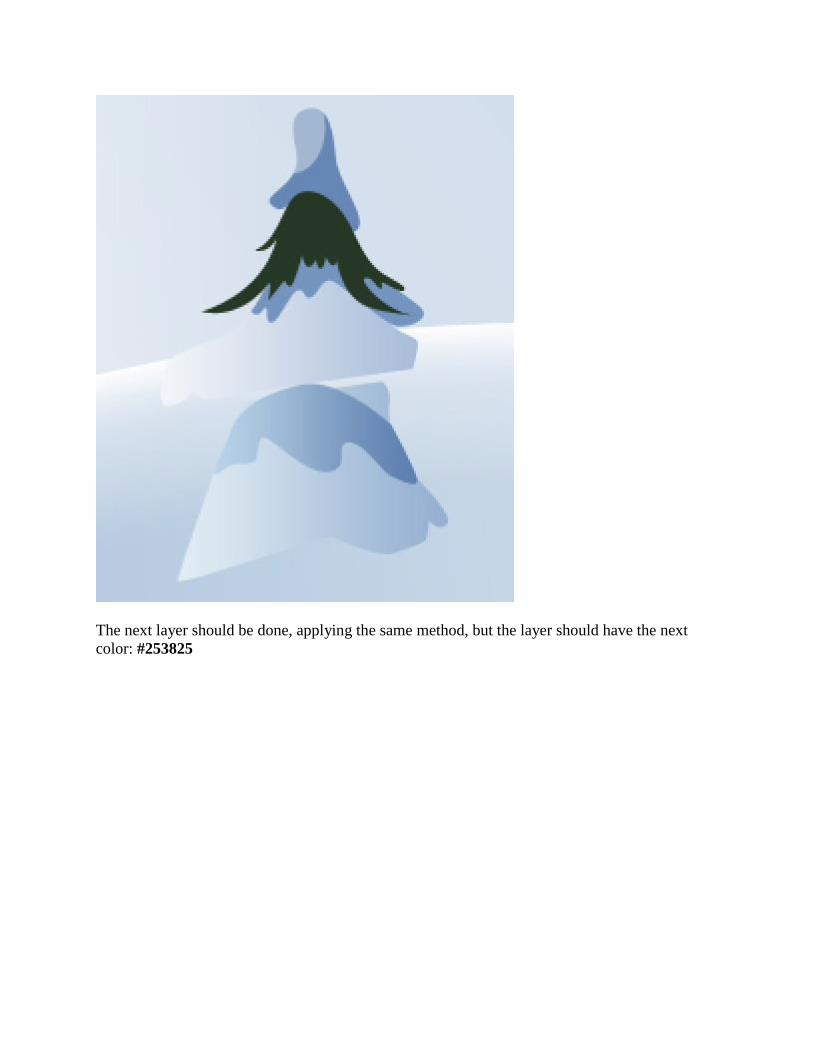
The next layer should be done, applying the same method, but the layer should have the next
color: #253825
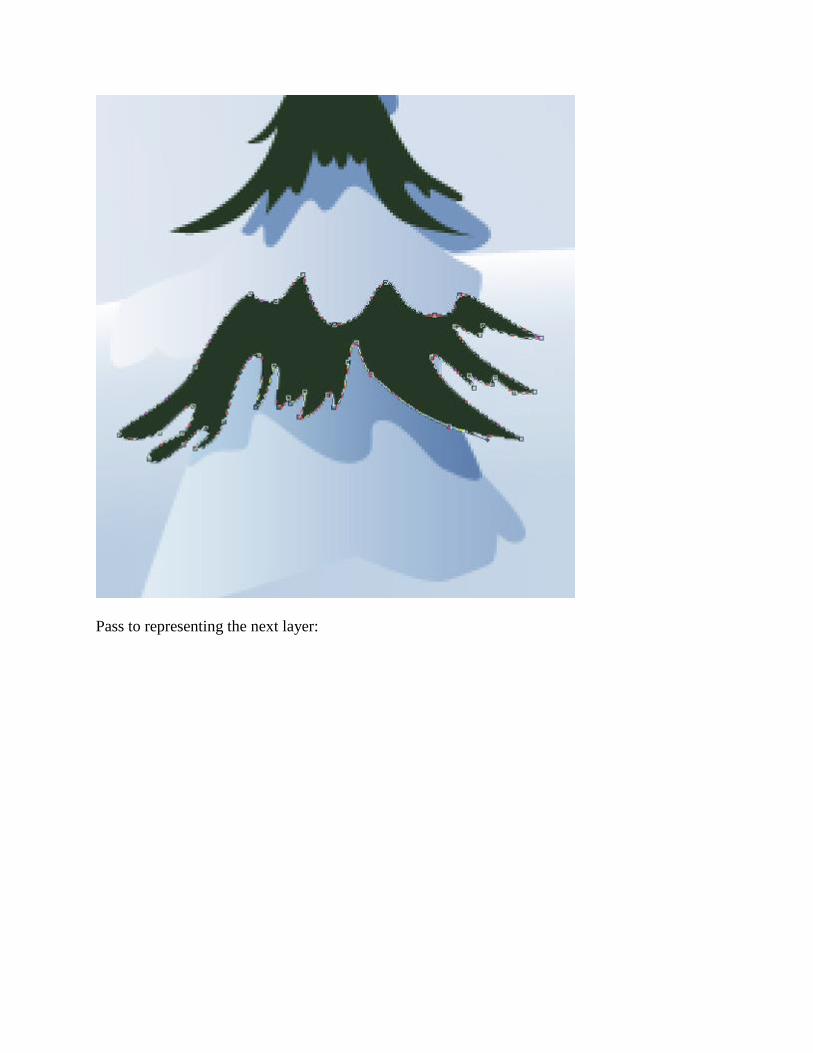
Pass to representing the next layer:

The layer’s parameters: Blending Options>Gradient Overlay
- See more at: http://designstacks.net/we-wish-you-a-merry-christmas-
illustration/2#sthash.hEe8fW6D.dpuf

Using the Pen Tool (P), represent the next layer of the fir tree, having the color this time
#111D13
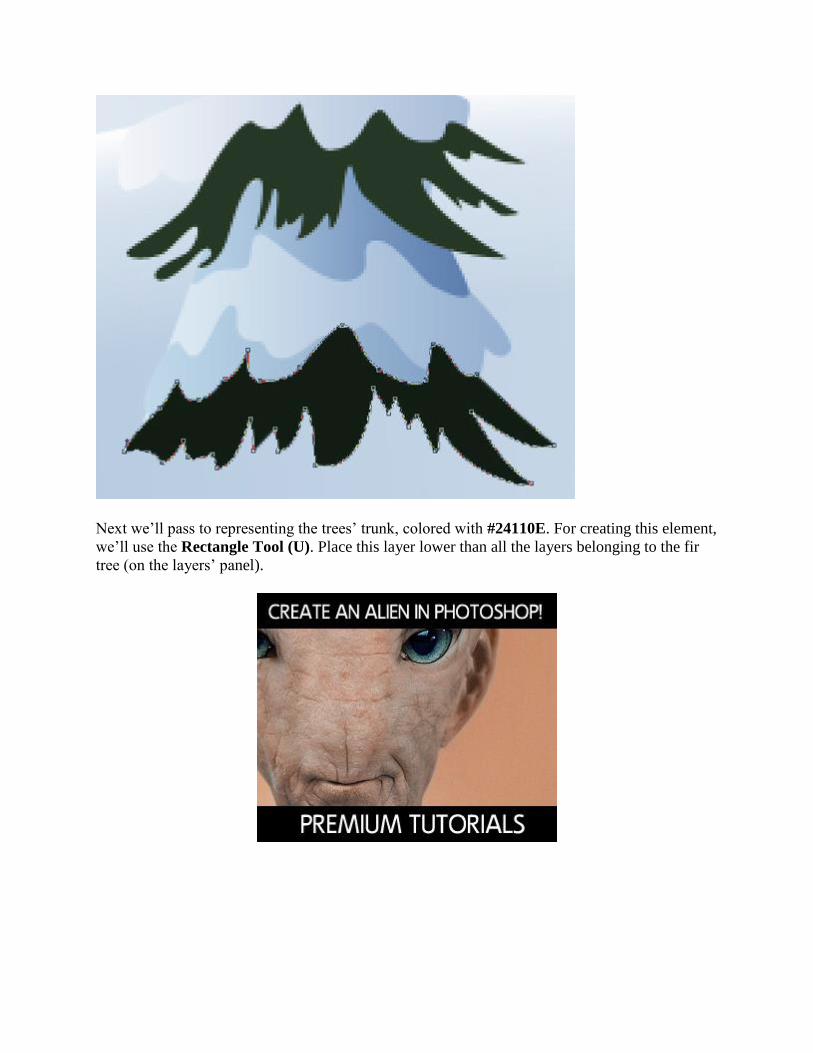
Next we’ll pass to representing the trees’ trunk, colored with #24110E. For creating this element,
we’ll use the Rectangle Tool (U). Place this layer lower than all the layers belonging to the fir
tree (on the layers’ panel).
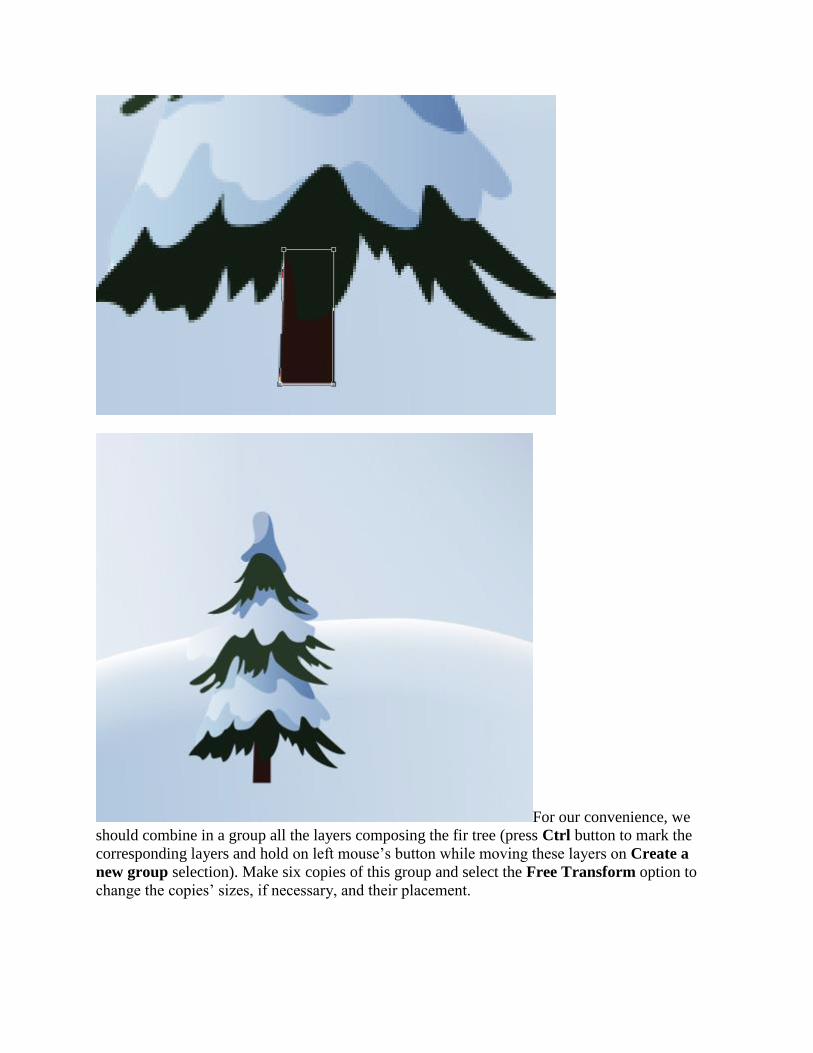
For our convenience, we
should combine in a group all the layers composing the fir tree (press Ctrl button to mark the
corresponding layers and hold on left mouse’s button while moving these layers on Create a
new group selection). Make six copies of this group and select the Free Transform option to
change the copies’ sizes, if necessary, and their placement.

Now we’ll make the shadow under the fir tree, using the Ellipse Tool (U). After that we’ll select
the Delete Anchior Point Tool to erase one of the ellipse’s tops. Make the necessary corrections
on the element, by choosing the Convert Point Tool.
The layer’s parameters: Blending Options>Gradient Overlay
Gradient’s parameters:

Make three copies of the layer, containing the fir tree’s shadow and select after that the Free
Transform option to place the copies under marked trees from below. The layers with the
shadows should be placed lower than the layers, composing the demonstrated trees (on the
layers’ panel).
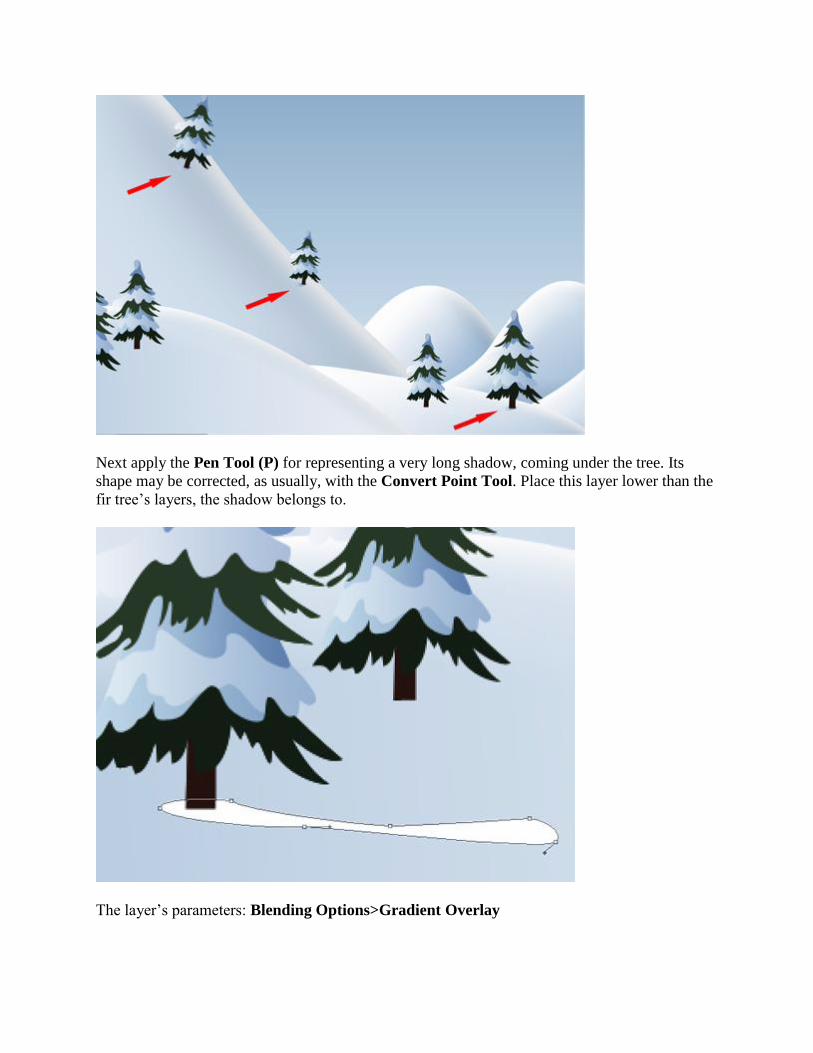
Next apply the Pen Tool (P) for representing a very long shadow, coming under the tree. Its
shape may be corrected, as usually, with the Convert Point Tool. Place this layer lower than the
fir tree’s layers, the shadow belongs to.
The layer’s parameters: Blending Options>Gradient Overlay

Gradient’s parameters:
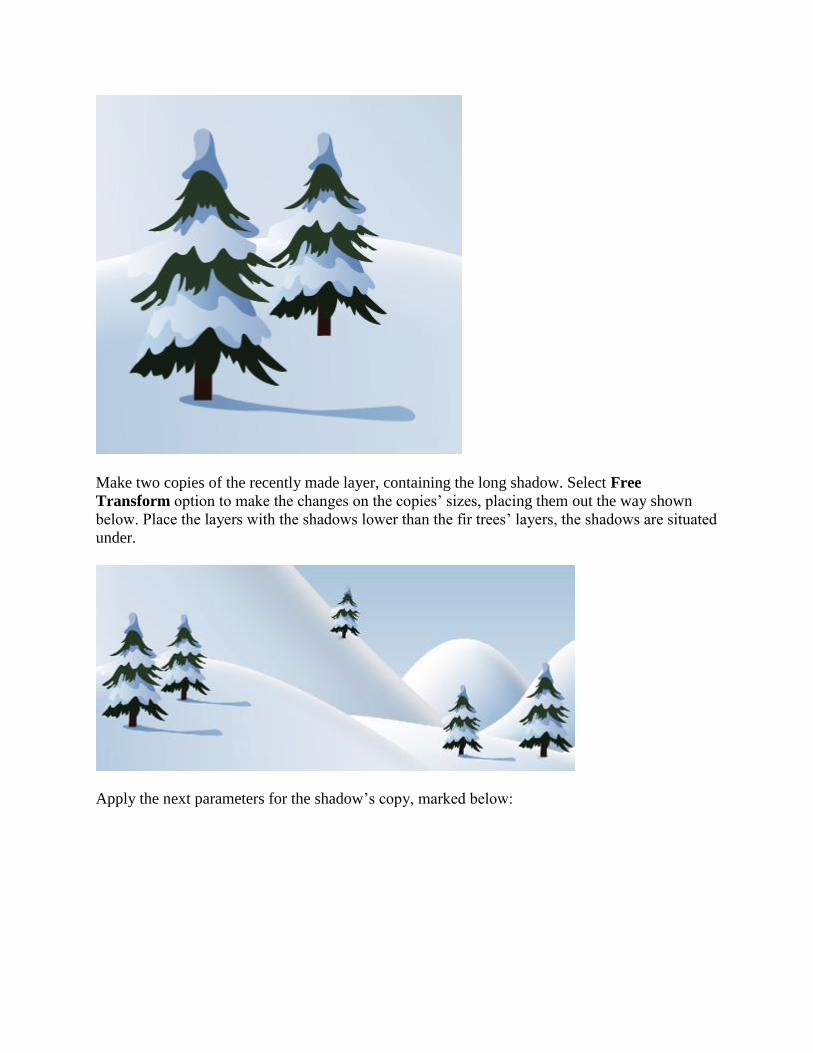
Make two copies of the recently made layer, containing the long shadow. Select Free
Transform option to make the changes on the copies’ sizes, placing them out the way shown
below. Place the layers with the shadows lower than the fir trees’ layers, the shadows are situated
under.
Apply the next parameters for the shadow’s copy, marked below:

Opacity 50%
Using the Ellipse Tool (U), it’s possible
to introduce in the picture the falling snow of white color.
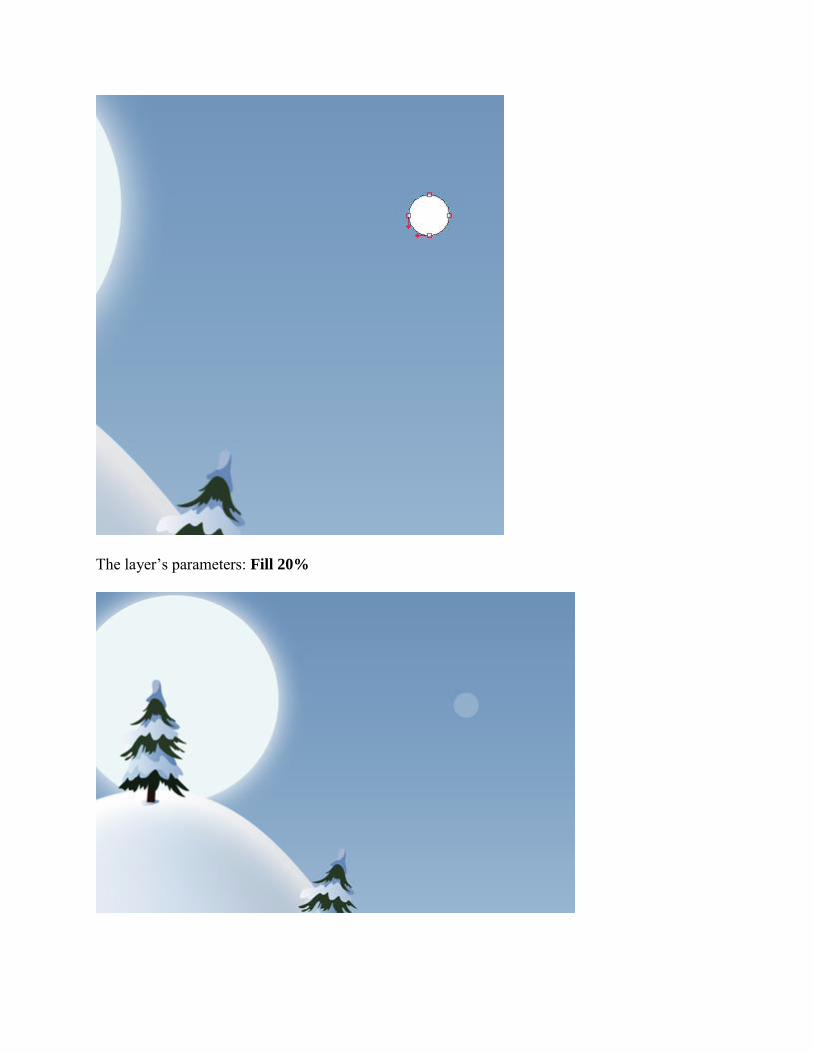
The layer’s parameters: Fill 20%
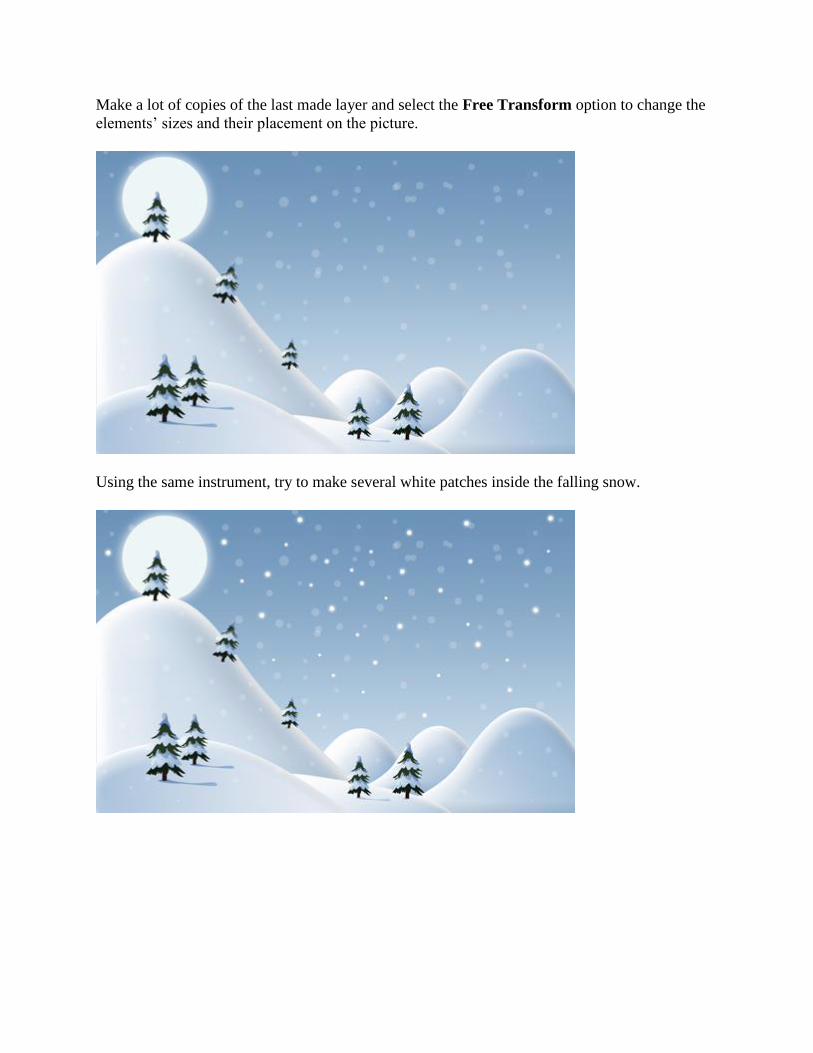
Make a lot of copies of the last made layer and select the Free Transform option to change the
elements’ sizes and their placement on the picture.
Using the same instrument, try to make several white patches inside the falling snow.

Apply now the Custom Shape Tool (U) to represent several white snowflakes of different sizes.
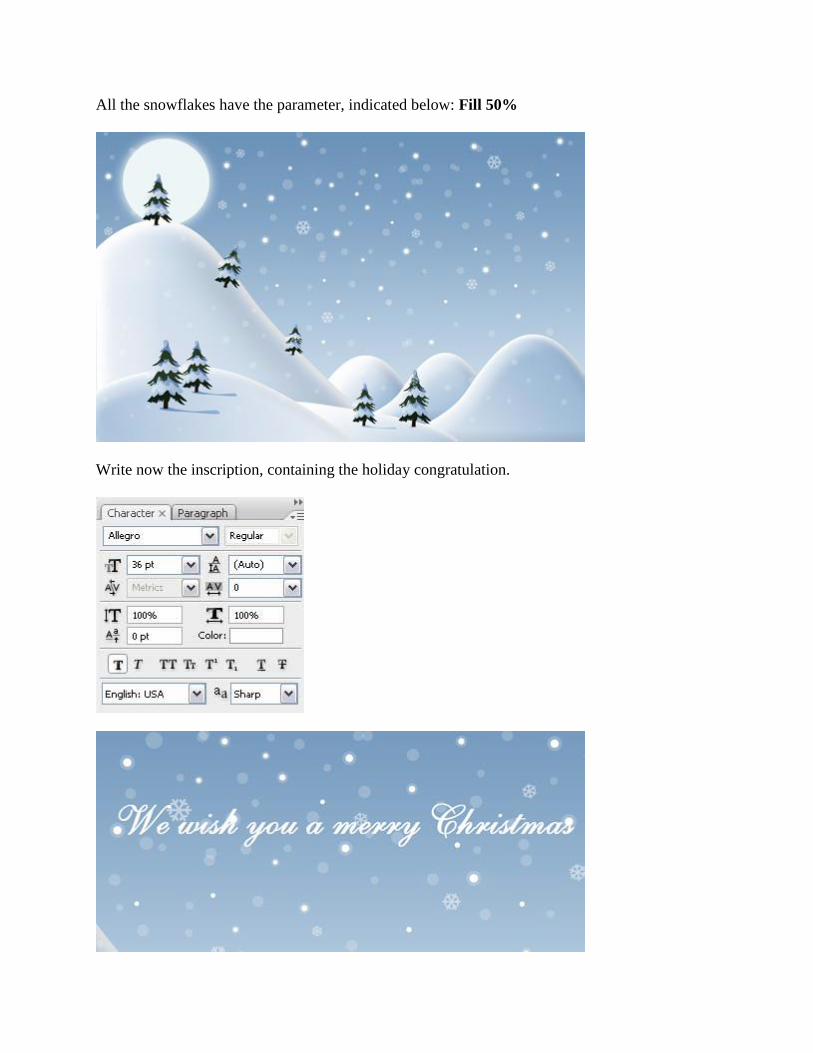
All the snowflakes have the parameter, indicated below: Fill 50%
Write now the inscription, containing the holiday congratulation.
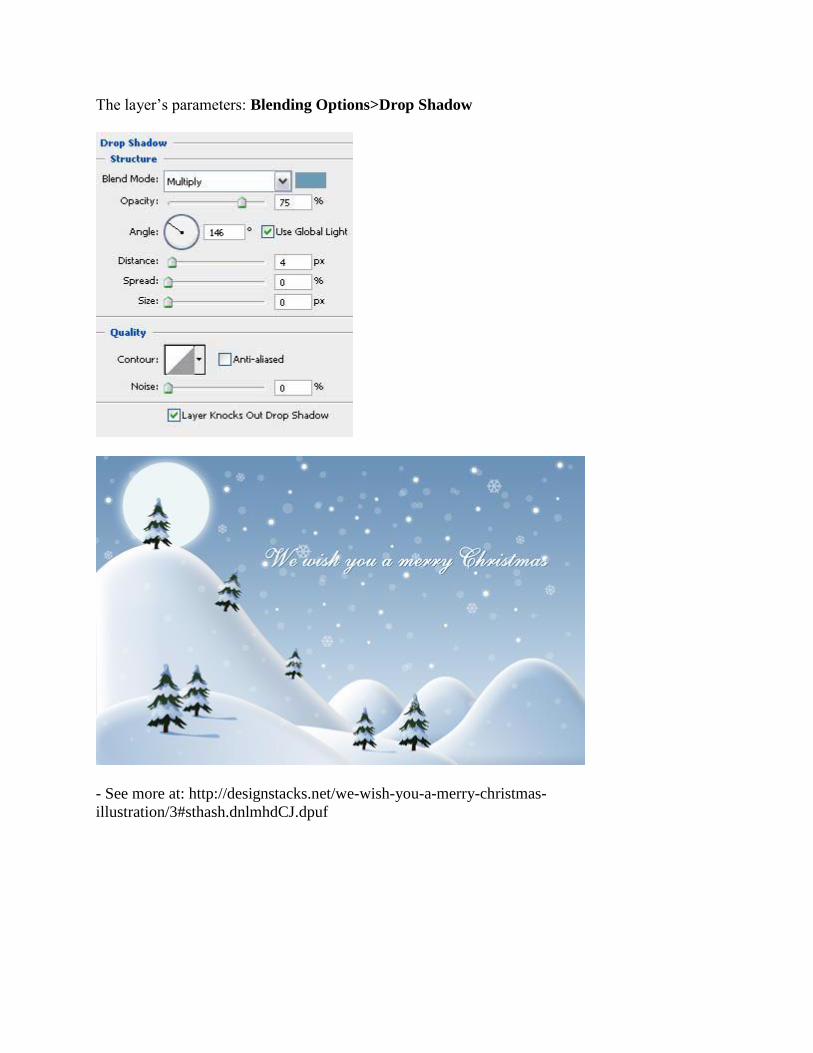
The layer’s parameters: Blending Options>Drop Shadow
- See more at: http://designstacks.net/we-wish-you-a-merry-christmas-
illustration/3#sthash.dnlmhdCJ.dpuf