
Warm-Up #12 9/6/12 1) To calculate the total magnification, you must multiple what two things? 2)...
36
Warm-Up #12 9/6/12 1) To calculate the total magnification, you must multiple what two things? 2) What are the 3 types of microscopes? 3) When 1st looking at a slide, what power should be on and where should the stage be? 4) What is another name for low power? 5) What part of the microscope holds the objectives and rotates 360 degrees?
-
Upload
joy-margery-marshall -
Category
Documents
-
view
213 -
download
0
Transcript of Warm-Up #12 9/6/12 1) To calculate the total magnification, you must multiple what two things? 2)...

Warm-Up #12 9/6/121) To calculate the total magnification, you must
multiple what two things?
2) What are the 3 types of microscopes?
3) When 1st looking at a slide, what power should be on and where should the stage be?
4) What is another name for low power?
5) What part of the microscope holds the objectives and rotates 360 degrees?

Quiz Study Guide
Types of microscopes Calculate total magnification 15 parts of the microscope Function of the 15 parts What the microscope should look like when you
1st look at a slide How you carry a microscope
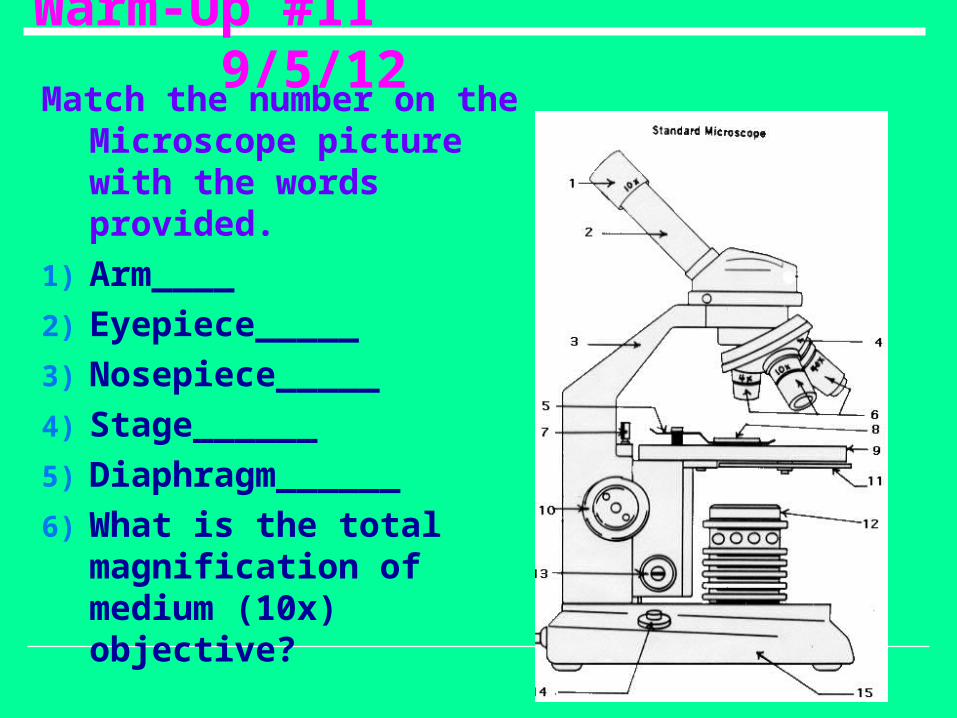
Warm-Up #11 9/5/12Match the number on the
Microscope picture with the words provided.
1) Arm____
2) Eyepiece_____
3) Nosepiece_____
4) Stage______
5) Diaphragm______
6) What is the total magnification of medium (10x) objective?

1) Arm =
# 32) Eyepiece =
# 13) Nosepiece =
# 44) Stage =
# 95) Medium power total
magnification =
10 (objective) x 10 (eyepiece)= 100x

Microscopes

Things to Know…
Essential Question: Would discoveries
have been made if the microscope was not invented?
Objectives: Demonstrate the
proper use of the microscope
Illustrate the parts of the microscope

Compound Light Microscope
Light passes through a specimen and uses two lenses to form an image

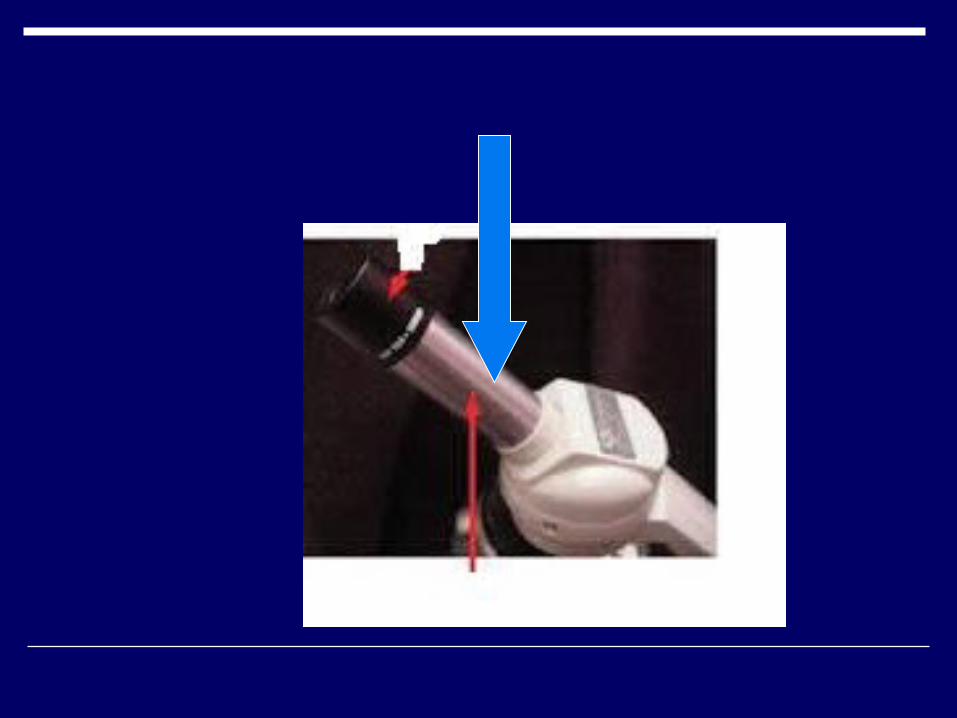
Eyepiece--1
Body tube--2
Arm--3
Nosepiece--4
Stage clips--5
Objectives--6
Stage stop--7
Slide--8
Stage--9
Coarse adjustment--10
Diaphragm--11
Light source--12
Fine adjustment--13
Power switch--14
Base--15

Parts of the Microscope
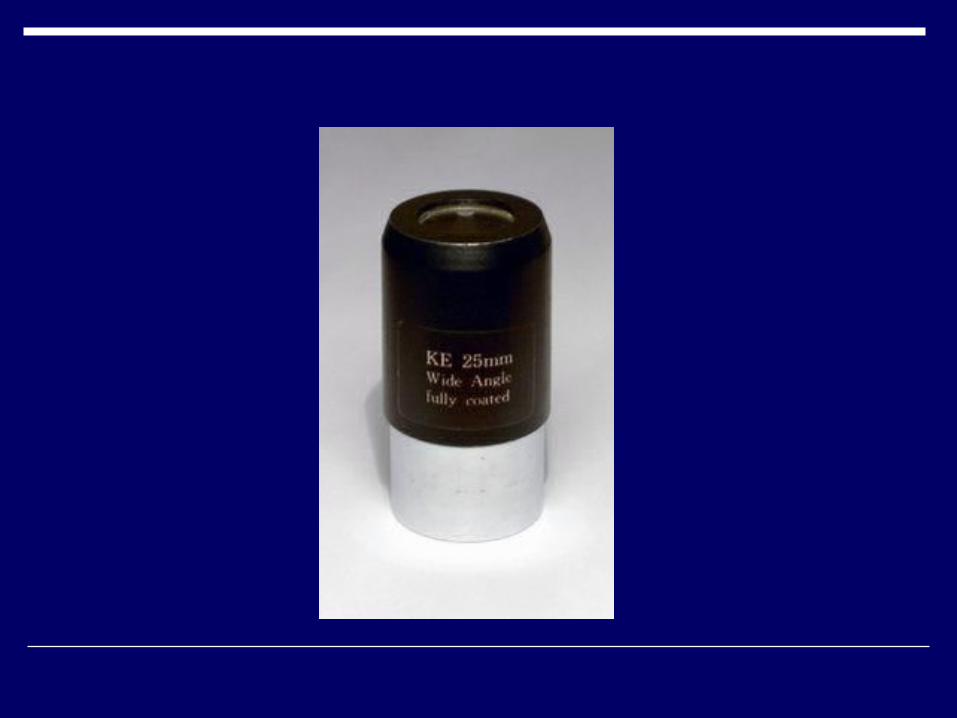
1. Eyepiece: Always 10X Where you look
through to see the image of your specimen
2. Body Tube Long tube that holds
the eyepiece and connects it to the objectives

Parts of the Microscope3. Arm: Part of the
microscope that you carry the microscope with
4. Nosepiece: Rotating part of the
microscope at the bottom of the body tube; it holds the objectives.

Parts of the Microscope5. Stage Clips: Shiny, clips on top
of the stage which hold the slide in place
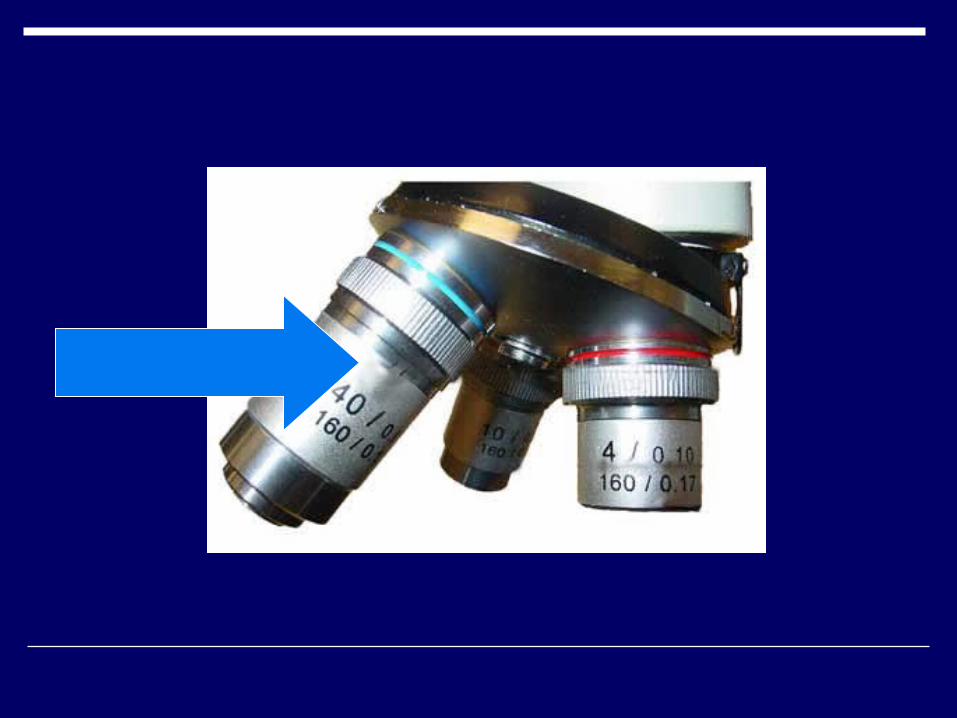
6. Objectives: Low, medium, high, oil
immersion Helps magnify the image Vary in length (the
shortest is the lowest power or magnification; the longest is the highest power or magnification).

Objectives 4x objective—lowest power
4 x 10 = 40 x magnification Scanning objective
10x objective—medium power 10 x 10 = 100 x magnification
40x objective—high power 40 x 10 = 400 x magnification
Objective X (eyepiece) = total magnification

Parts of the Microscope
7. Stage Stop: Stops the stage
8. Slide: Glass or plastic
where specimen is placed

Parts of the Microscope9. Stage: *Stage starts all the way
up when first looking, then slowly moves down
Large, flat area under the objectives; it has a hole in it (see aperture) that allows light through; the specimen/slide is placed on the stage for viewing.

Parts of the Microscope
10. Coarse Adjustment: Large, round knob on the side
of the microscope used for focusing the specimen; it may move either the stage or the upper part of the microscope

Parts of the Microscope11. Diaphragm: Controls the amount
of light going through the aperture
12. Light Source: Source of light
usually found near the base of the microscope; the light source makes the specimen easier to see

Parts of the Microscope
13. Fine Adjustment: Small, round knob on
the side of the microscope used to fine-tune the focus of your specimen after using the coarse adjustment knob
14. Power Switch: Turns it on and off
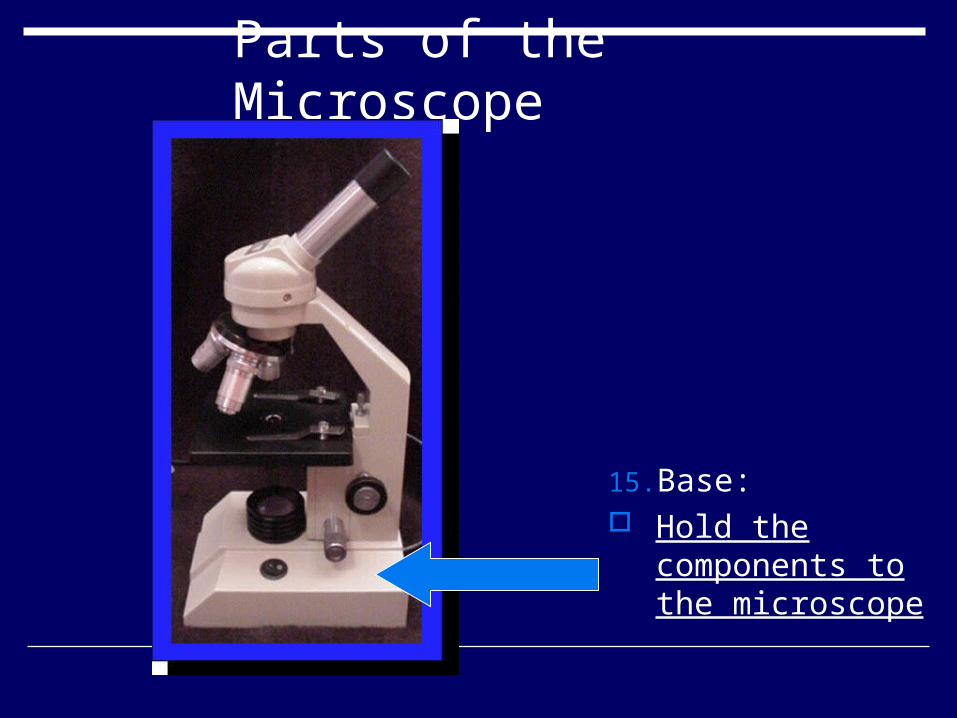
Parts of the Microscope
15. Base: Hold the
components to the microscope
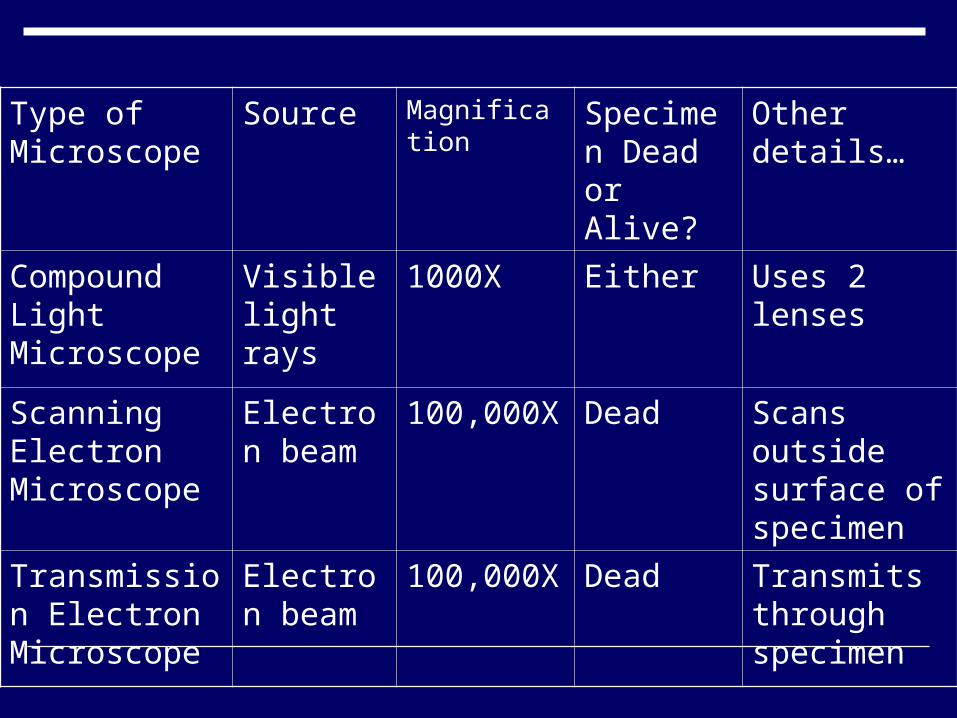
Type of Microscope
Source Magnification Specimen Dead or Alive?
Other details…
Compound Light Microscope
Visible light rays
1000X Either Uses 2 lenses
Scanning Electron Microscope
Electron beam
100,000X Dead Scans outside surface of specimen
Transmission Electron Microscope
Electron beam
100,000X Dead Transmits through specimen

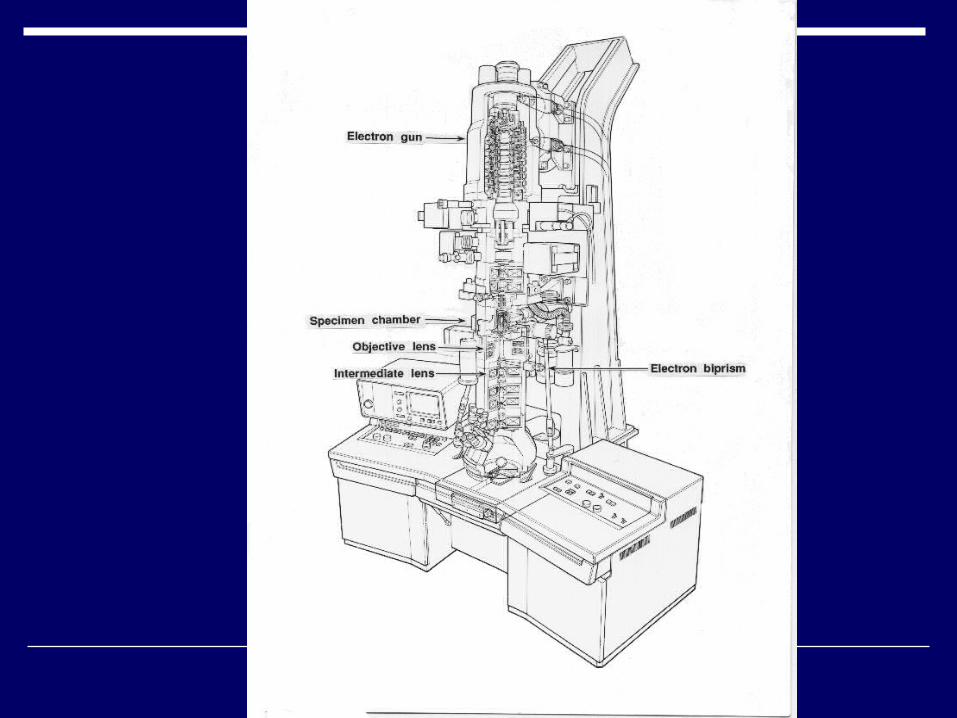
Electron Microscope
Focuses beams of electrons onto a specimen to form an image

Microscope Lab
1) Fill out the magnification table (other = medium)
2) Then look at the “e” slide in low power and medium power, then draw it
3) Look at one of the other slides
4) Answer the questions on back
DO NOT WRITE ON MY PAPER!!!


Warm-Up #5 8/22/11Describe what each symbol
means and what you should do when you see it.
1)
2)
3)
4)
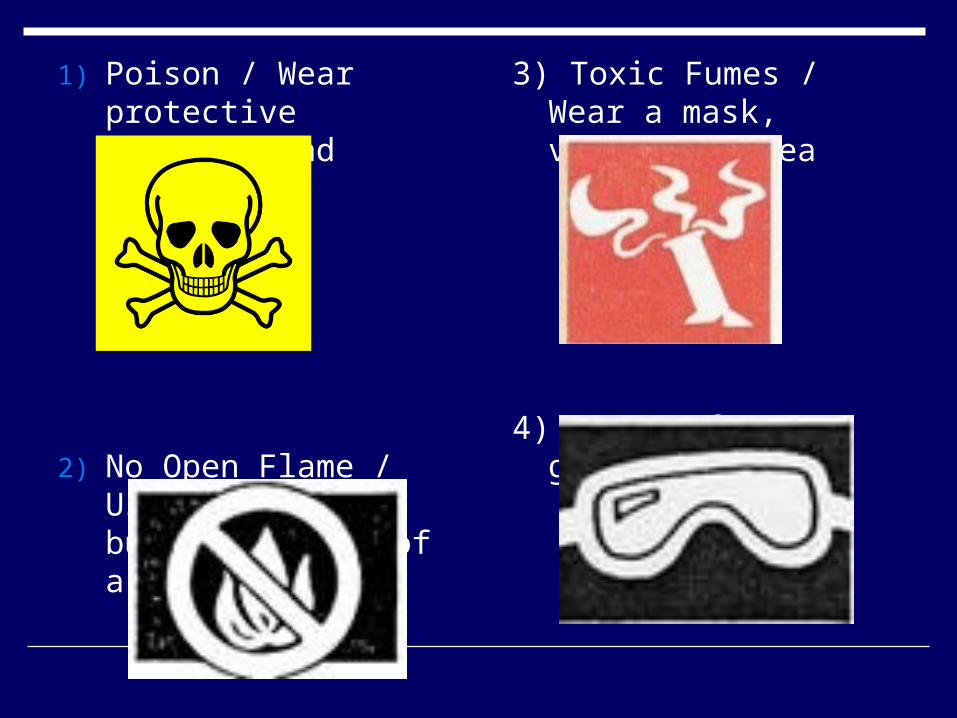
1) Poison / Wear protective clothing and gloves
2) No Open Flame / Use electric burner instead of a flame
3) Toxic Fumes / Wear a mask, ventilate area
4) Wear safety goggles

Warm-Up #10 9/3/121) Which is bigger : 56 cm or 6 m ?
2) Which is bigger: 33 kL or 500,000 mL?
3) How should you always carry a microscope?
4) What is the purpose of a microscope?
5) What type of microscope do we have at school?