· Web viewRun the cleaning recipe as described in for 25 minutes for every hour of Bosch use. See...
12
Oxford 100 Cryo DRIE SOP Page 1 of 12 Revision 1-060810 Oxford 100 Cryo DRIE SOP 1. Scope 1.1 This document provides operating procedures for the Oxford 100 Cryo DRIE. 2. Table of Contents 1. Scope........................................................................................................................................................... 1 2. Table of Contents........................................................................................................................................ 1 3. Reference Documents................................................................................................................................. 2 3.1 Referenced within this Document......................................................................................................... 2 3.2 External Documents.............................................................................................................................. 2 4. Equipment and/or Materials....................................................................................................................... 2 5. Safety........................................................................................................................................................... 2 6. Setup Procedures........................................................................................................................................ 2 6.1 Record Informaon in Log Book............................................................................................................ 2 6.2 Turn on Burn Box.................................................................................................................................. 2 6.3 Clean the Chamber................................................................................................................................ 2 6.4 Mask Wafer........................................................................................................................................... 2 6.5 Turn on the Liquid Nitrogen.................................................................................................................. 2 6.6 Turn on the Chiller................................................................................................................................ 3 6.7 Vent load lock........................................................................................................................................ 3 6.8 Load Wafer............................................................................................................................................ 3 6.9 Pump Down Load Lock.......................................................................................................................... 3 7. Cryo Etching Procedure............................................................................................................................... 3 7.1 Transfer Wafer to Etch Chamber........................................................................................................... 3 7.2 Etching Si with a Photoresist Mask........................................................................................................ 5 7.3 Control the Etch Profile......................................................................................................................... 5 8. Shutdown Procedures................................................................................................................................. 6 8.1 Vent Load Lock...................................................................................................................................... 6 8.2 Shutdown System.................................................................................................................................. 6 9. Maintenance Procedures............................................................................................................................. 7 9.1 Chamber Cleaning................................................................................................................................. 7 9.2 Check He Leak Rate............................................................................................................................... 7 9.3 Check Chamber Leak Rate..................................................................................................................... 7 9.4 Troubleshoong.................................................................................................................................... 7 10. Process Notes.............................................................................................................................................. 8 10.1 Typical Etch Characteriscs................................................................................................................... 8 10.2 Process Summary................................................................................................................................ 10 11. Revision History......................................................................................................................................... 10 Figure 1, Chiller......................................................................................................................................................... 2 Figure 2, Load Lock................................................................................................................................................... 3 Figure 3, Pump Controls Page................................................................................................................................... 4
Transcript of · Web viewRun the cleaning recipe as described in for 25 minutes for every hour of Bosch use. See...
Oxford 100 Cryo DRIE SOP Page 1 of 10Revision 1-060810
Oxford 100 Cryo DRIE SOP
1. Scope
1.1 This document provides operating procedures for the Oxford 100 Cryo DRIE.
2. Table of Contents1. Scope...........................................................................................................................................................12. Table of Contents........................................................................................................................................13. Reference Documents.................................................................................................................................2
3.1 Referenced within this Document.........................................................................................................23.2 External Documents..............................................................................................................................2
4. Equipment and/or Materials.......................................................................................................................25. Safety...........................................................................................................................................................26. Setup Procedures........................................................................................................................................2
6.1 Record Information in Log Book............................................................................................................26.2 Turn on Burn Box..................................................................................................................................26.3 Clean the Chamber................................................................................................................................26.4 Mask Wafer...........................................................................................................................................26.5 Turn on the Liquid Nitrogen..................................................................................................................26.6 Turn on the Chiller................................................................................................................................36.7 Vent load lock........................................................................................................................................36.8 Load Wafer............................................................................................................................................36.9 Pump Down Load Lock..........................................................................................................................3
7. Cryo Etching Procedure...............................................................................................................................37.1 Transfer Wafer to Etch Chamber...........................................................................................................37.2 Etching Si with a Photoresist Mask........................................................................................................57.3 Control the Etch Profile.........................................................................................................................5
8. Shutdown Procedures.................................................................................................................................68.1 Vent Load Lock......................................................................................................................................68.2 Shutdown System..................................................................................................................................6
9. Maintenance Procedures.............................................................................................................................79.1 Chamber Cleaning.................................................................................................................................79.2 Check He Leak Rate...............................................................................................................................79.3 Check Chamber Leak Rate.....................................................................................................................79.4 Troubleshooting....................................................................................................................................7
10. Process Notes..............................................................................................................................................810.1 Typical Etch Characteristics...................................................................................................................810.2 Process Summary................................................................................................................................10
11. Revision History.........................................................................................................................................10
Figure 1, Chiller.........................................................................................................................................................2Figure 2, Load Lock...................................................................................................................................................3Figure 3, Pump Controls Page...................................................................................................................................4Figure 4, Process Controls Page................................................................................................................................4Figure 5, Etch Profile.................................................................................................................................................6

Power Switch
Figure , Chiller
Oxford 100 Cryo DRIE SOP Page 2 of 10Revision 1-060810
Table 1, Cleaning Recipe Parameters.......................................................................................................................7Table 2, Cryo DRIE Parameters...............................................................................................................................10
3. Reference Documents
3.1 Referenced within this Document
3.1.1 Ecosys Burn Box SOP
3.2 External Documents
3.2.1 None
4. Equipment and/or Materials
4.1 Wafer/Sample
4.2 Oxford 100
4.3 Liquid Nitrogen
5. Safety
5.1 Follow all Nanofab safety procedures.
5.2 Include all other safety precautions necessary for these procedures.
6. Setup Procedures
6.1 Record Information in Log Book
6.1.1 Record all processing and characterization information in log book.
6.2 Turn on Burn Box
6.2.1 Follow the procedure in the Ecosys Burn Box SOP to turn on the burn box.
6.3 Clean the Chamber
6.3.1 Run the cleaning recipe as described in for 25 minutes for every hour of Bosch use. See Section 9.1 Chamber Cleaning.
6.4 Mask Wafer
6.4.1 For etch depths less than 20 um, S1813 spun at 3000 RPM can be used. For depths greater than 20 um, it is highly suggested that you use a thicker resist. The etch selectivity of Si:S1813 is about 10:1.
6.5 Turn on the Liquid Nitrogen
6.5.1 Open the liquid nitrogen valve.
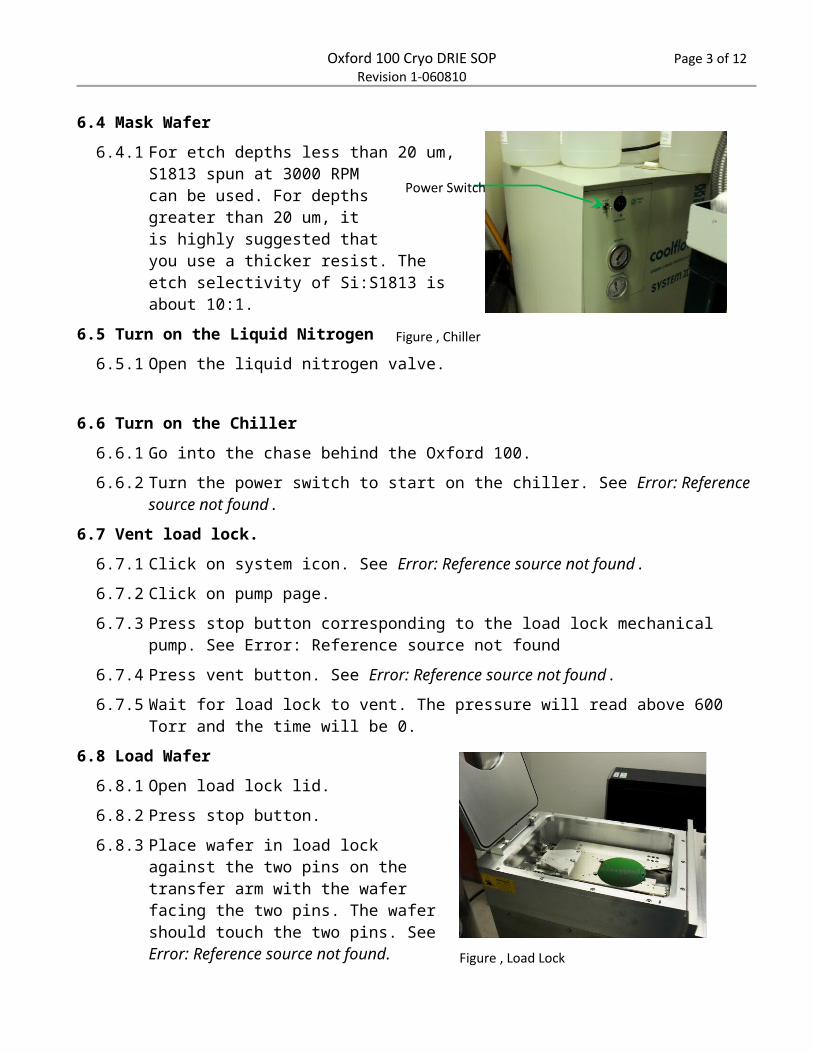
Figure , Load Lock
Oxford 100 Cryo DRIE SOP Page 3 of 10Revision 1-060810
6.6 Turn on the Chiller
6.6.1 Go into the chase behind the Oxford 100.
6.6.2 Turn the power switch to start on the chiller. See Error: Reference source not found.
6.7 Vent load lock.
6.7.1 Click on system icon. See Error: Reference source not found.
6.7.2 Click on pump page.
6.7.3 Press stop button corresponding to the load lock mechanical pump. See Error: Reference source not found
6.7.4 Press vent button. See Error: Reference source not found.
6.7.5 Wait for load lock to vent. The pressure will read above 600 Torr and the time will be 0.
6.8 Load Wafer
6.8.1 Open load lock lid.
6.8.2 Press stop button.
6.8.3 Place wafer in load lock against the two pins on the transfer arm with the wafer facing the two pins. The wafer should touch the two pins. See Error: Reference source not found.
6.9 Pump Down Load Lock
6.9.1 Close load lock lid.
6.9.2 Select the evacuate button. See Error: Reference source not found.
6.9.3 Enter an ID name or number for your wafer.
6.9.4 Wait for the load lock to pump down (~1 min).
7. Cryo Etching Procedure
NOTE: This recipe can be used to etch smooth shallow trenches in 100 mm wafers. It is strongly advised that you do a test run on a practice wafer before working with your device wafer.
7.1 Transfer Wafer to Etch Chamber
7.1.1 Click on the icon for the etch chamber. See Error: Reference source not found.
7.1.2 Click on the icon for the load lock chamber.
7.1.3 Click on the etch chamber icon.
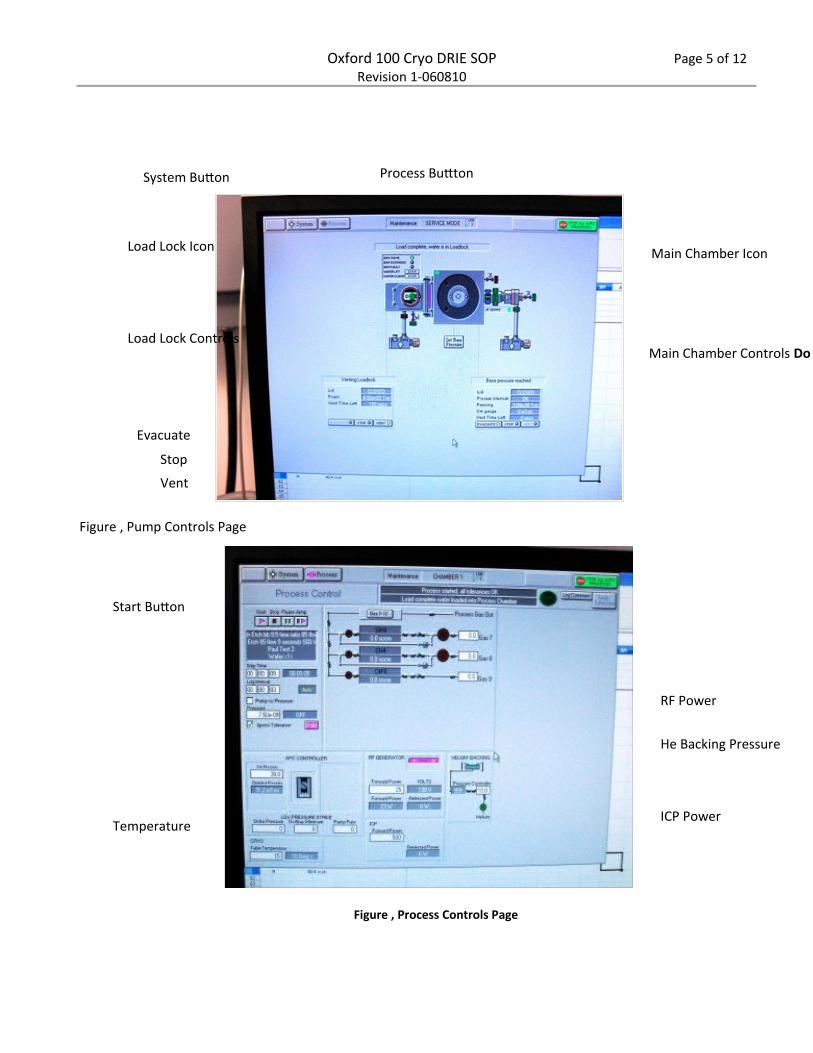
System Button Process Buttton
Load Lock Controls
Evacuate
Stop
Vent
Main Chamber Controls Do Not Touch
Figure , Pump Controls Page
Load Lock Icon Main Chamber Icon
Figure , Process Controls Page
Start Button
RF Power
ICP Power
He Backing Pressure
Temperature
Oxford 100 Cryo DRIE SOP Page 4 of 10Revision 1-060810
Oxford 100 Cryo DRIE SOP Page 5 of 10Revision 1-060810
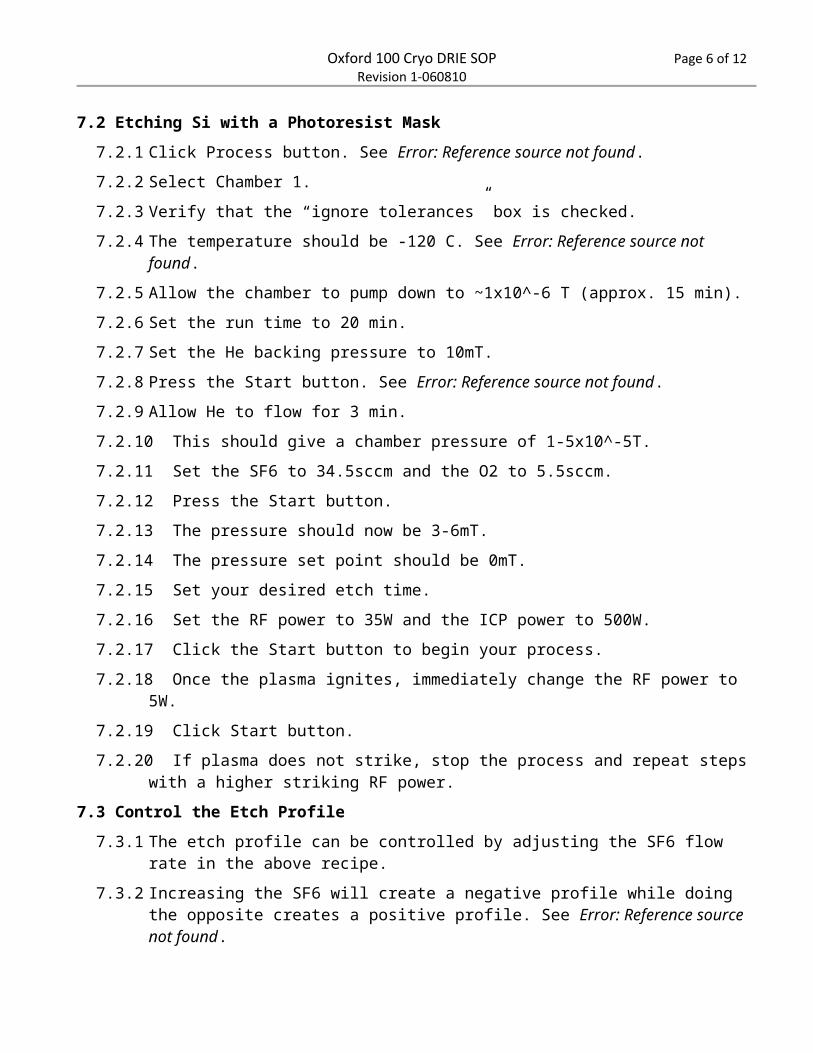
7.2 Etching Si with a Photoresist Mask
7.2.1 Click Process button. See Error: Reference source not found.
7.2.2 Select Chamber 1.
7.2.3 Verify that the “ignore tolerances” box is checked.
7.2.4 The temperature should be -120 C. See Error: Reference source not found.
7.2.5 Allow the chamber to pump down to ~1x10^-6 T (approx. 15 min).
7.2.6 Set the run time to 20 min.
7.2.7 Set the He backing pressure to 10mT.
7.2.8 Press the Start button. See Error: Reference source not found.
7.2.9 Allow He to flow for 3 min.
7.2.10 This should give a chamber pressure of 1-5x10^-5T.
7.2.11 Set the SF6 to 34.5sccm and the O2 to 5.5sccm.
7.2.12 Press the Start button.
7.2.13 The pressure should now be 3-6mT.
7.2.14 The pressure set point should be 0mT.
7.2.15 Set your desired etch time.
7.2.16 Set the RF power to 35W and the ICP power to 500W.
7.2.17 Click the Start button to begin your process.
7.2.18 Once the plasma ignites, immediately change the RF power to 5W.
7.2.19 Click Start button.
7.2.20 If plasma does not strike, stop the process and repeat steps with a higher striking RF power.
7.3 Control the Etch Profile
7.3.1 The etch profile can be controlled by adjusting the SF6 flow rate in the above recipe.
7.3.2 Increasing the SF6 will create a negative profile while doing the opposite creates a positive profile. See Error: Reference source not found.
a) b) c)
d) e) f)
Change in etch profile as a function of SF6. a) SF6=37, b) SF6=36, c) SF6=35, d) SF6=34, e) SF6= 33, and f) SF6=32 sccm.
Figure , Etch Profile
Oxford 100 Cryo DRIE SOP Page 6 of 10Revision 1-060810
8. Shutdown Procedures
8.1 Vent Load Lock
8.1.1 Click OK when the software says “Process completed”.
8.1.2 Vent load lock.
8.1.2.1 Press stop button corresponding to the load lock mechanical pump.
8.1.2.2 Click ok when it says “Wafer has finished processing”.
8.1.2.3 Press vent button. See Error: Reference source not found.
8.1.2.4 Wait 3 min. for the load lock to vent.
8.1.3 Pull up to open load lock lid. Do not force it open, once it is vented it should open easily. If it does not open easily, press stop, then vent, and wait 3 minutes again.
8.1.4 Press stop button to stop venting.
8.1.5 Remove wafer.
8.2 Shutdown System
8.2.1 Close valve on liquid nitrogen tank.
8.2.2 Turn off the chiller.
8.2.3 Pump down load lock.
8.2.3.1 Close load lock lid.
8.2.3.2 Select the evacuate button.
8.2.3.3 Press ‘cancel’ when software asks for ID #.

Oxford 100 Cryo DRIE SOP Page 7 of 10Revision 1-060810
8.2.4 Turn off burn box.
8.2.4.1 Follow procedures in the Ecosys Burn Box SOP to turn off the burn box.
9. Maintenance Procedures
9.1 Chamber Cleaning
9.1.1 Chamber cleaning should be done after every 3-5 hours of etching or as needed.
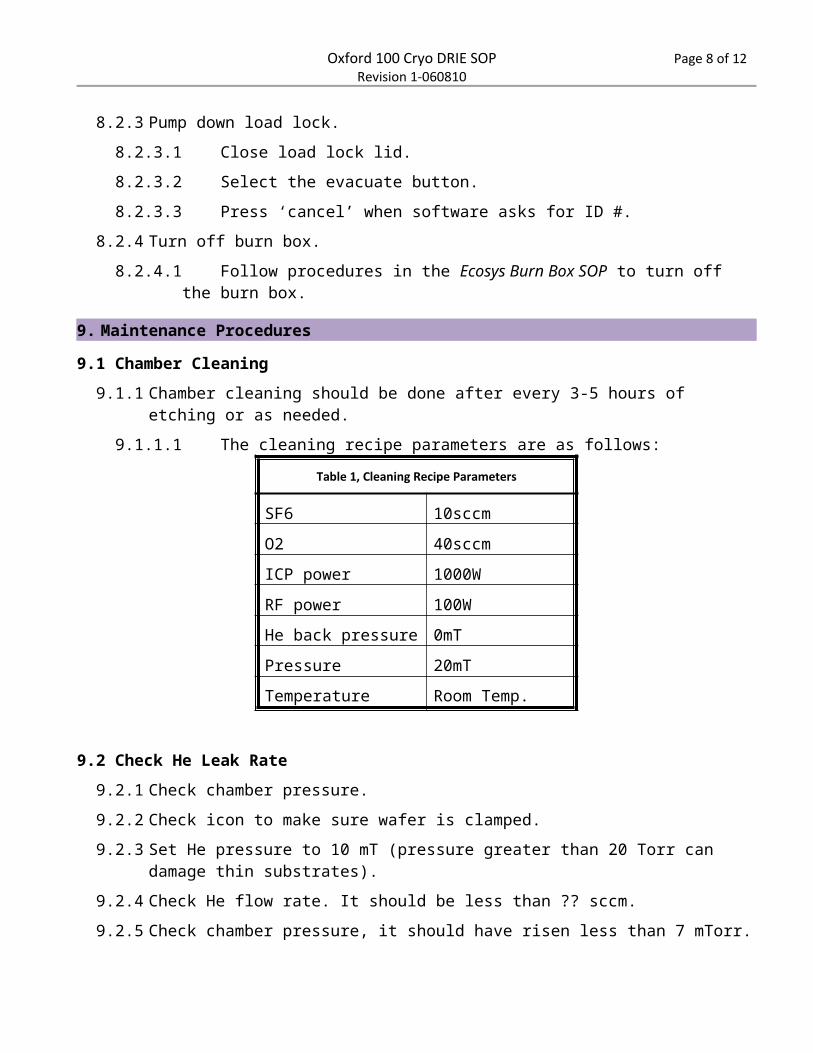
9.1.1.1 The cleaning recipe parameters are as follows:
Table 1, Cleaning Recipe Parameters
SF6 10sccm
O2 40sccm
ICP power 1000W
RF power 100W
He back pressure 0mT
Pressure 20mT
Temperature Room Temp.
9.2 Check He Leak Rate
9.2.1 Check chamber pressure.
9.2.2 Check icon to make sure wafer is clamped.
9.2.3 Set He pressure to 10 mT (pressure greater than 20 Torr can damage thin substrates).
9.2.4 Check He flow rate. It should be less than ?? sccm.
9.2.5 Check chamber pressure, it should have risen less than 7 mTorr.
9.3 Check Chamber Leak Rate
9.3.1 Click on Chamber 1.
9.3.2 Click on leak detection.
9.3.3 Pump down over night.
9.3.4 Run leak test (step time) for 20 minutes.
9.3.5 Log interval 5 sec.
9.3.6 Pumping to 7e-7 Torr
9.3.7 Click return to process.
9.4 Troubleshooting
9.4.1 To remove clamped wafer when the system doesn’t recognize there is a wafer in the chamber:
Oxford 100 Cryo DRIE SOP Page 8 of 10Revision 1-060810
9.4.1.1 Pump down load lock.
9.4.1.2 Click on service mode.
9.4.1.3 Click on location where the wafer is located in the chamber.
9.4.1.4 Click “add wafer”.
9.4.1.5 Exit service mode.
9.4.1.6 Click on green wafer and blue arrow should appear.
9.4.1.7 Pump down load lock.
9.4.1.8 Click on center of load lock to transfer wafer to load lock.
10. Process Notes
10.1 Typical Etch Characteristics
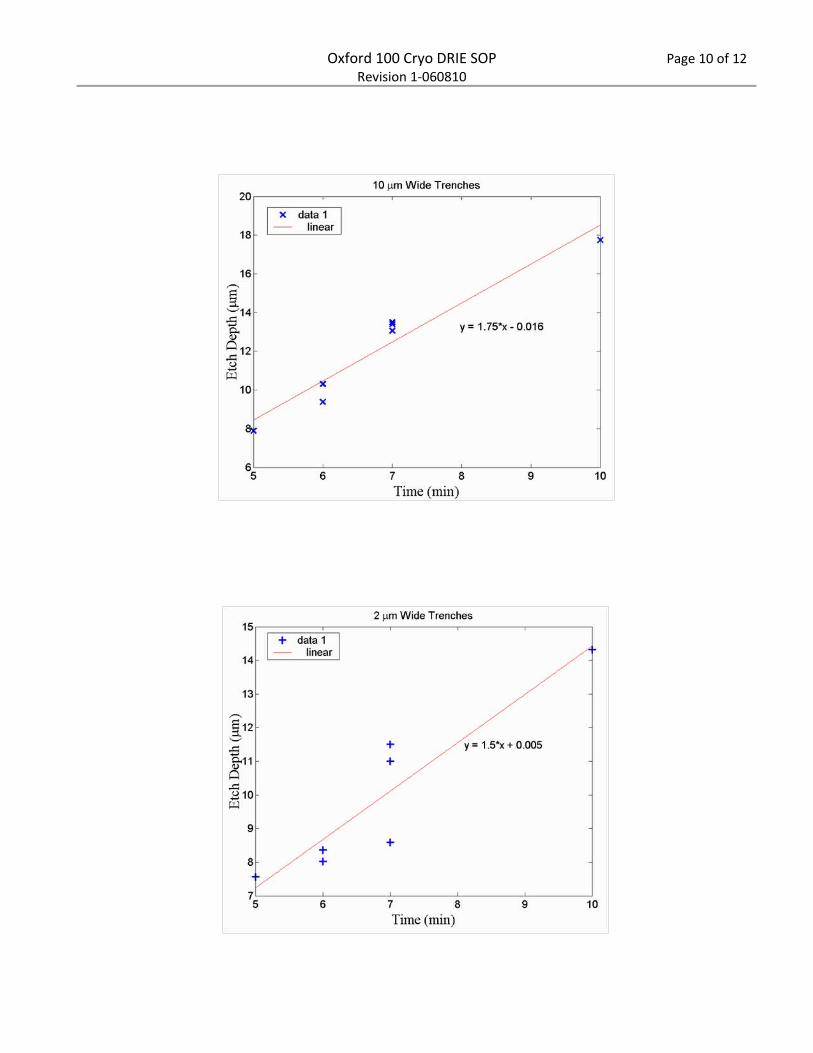
10.1.1 The etch rate for aspect ratios less than 5:1 is approx. 1.75 um/min. For higher aspect ratios the etch rate decreases.
Oxford 100 Cryo DRIE SOP Page 9 of 10Revision 1-060810
Oxford 100 Cryo DRIE SOP Page 10 of 10Revision 1-060810
10.2 Process Summary
10.2.1 The Cryo DRIE parameters are as follows:
Table 2, Cryo DRIE Parameters
SF6 34.5sccm
O2 5.5sccm
ICP forward power 500W
RF forward power 5W
He back pressure 10mT
Pressure 0mT (2-6mT)
Temperature -120 C
11. Revision History
Rev Date Originator Description of Changes
1 08 June 2010 Sam Bell