
VIEWING AND PRINTING INFOPAC
22
1 USER’S GUIDE FOR VIEWING AND PRINTING INFOPAC TABLE OF CONTENTS Overview Benefits------------------------------------------------------------------------------------------------------------------- 3 Online Reports---------------------------------------------------------------------------------------------------------- 3 Report ID, Version, Section------------------------------------------------------------------------------------------ 4 Security------------------------------------------------------------------------------------------------------------------- 4 Getting Started Sign On-------------------------------------------------------------------------------------------------------------------- 5 Sign Off------------------------------------------------------------------------------------------------------------------- 5 Navigating In InfoPac Basic Navigation--------------------------------------------------------------------------------------------------------- 5 Scrolling------------------------------------------------------------------------------------------------------------------- 5 Locate Command------------------------------------------------------------------------------------------------------ 6 Selecting a Report Viewing Menu----------------------------------------------------------------------------------------------------------- 6 Reports Menu----------------------------------------------------------------------------------------------------------- 6 Versions Menu---------------------------------------------------------------------------------------------------------- 7 Viewing a Report Viewing Window------------------------------------------------------------------------------------------------------- 8 Scale Command-------------------------------------------------------------------------------------------------------- 9 View Command-------------------------------------------------------------------------------------------------------- 9 Searching in a Report Find Command------------------------------------------------------------------------------------------------------- 10 Filter Command------------------------------------------------------------------------------------------------------ 11 Customizing a Report Freeze Command---------------------------------------------------------------------------------------------------- 11
Transcript of VIEWING AND PRINTING INFOPAC
1
USER’S GUIDE FOR
VIEWING AND PRINTING
INFOPAC
TABLE OF CONTENTS
Overview Benefits------------------------------------------------------------------------------------------------------------------- 3 Online Reports---------------------------------------------------------------------------------------------------------- 3 Report ID, Version, Section------------------------------------------------------------------------------------------ 4 Security------------------------------------------------------------------------------------------------------------------- 4 Getting Started Sign On-------------------------------------------------------------------------------------------------------------------- 5 Sign Off------------------------------------------------------------------------------------------------------------------- 5
Navigating In InfoPac Basic Navigation--------------------------------------------------------------------------------------------------------- 5 Scrolling------------------------------------------------------------------------------------------------------------------- 5 Locate Command------------------------------------------------------------------------------------------------------ 6
Selecting a Report Viewing Menu----------------------------------------------------------------------------------------------------------- 6 Reports Menu----------------------------------------------------------------------------------------------------------- 6 Versions Menu---------------------------------------------------------------------------------------------------------- 7 Viewing a Report Viewing Window------------------------------------------------------------------------------------------------------- 8 Scale Command-------------------------------------------------------------------------------------------------------- 9 View Command-------------------------------------------------------------------------------------------------------- 9
Searching in a Report
Find Command------------------------------------------------------------------------------------------------------- 10 Filter Command------------------------------------------------------------------------------------------------------ 11
Customizing a Report Freeze Command---------------------------------------------------------------------------------------------------- 11

2
Printing Print Menu------------------------------------------------------------------------------------------------------------- 12 Mark Command------------------------------------------------------------------------------------------------------ 15
Report Distribution Distributed Reports--------------------------------------------------------------------------------------------------- 16
Screens------------------------------------------------------------------------------------------------------------------- 16 Appendix
Changing your password------------------------------------------------------------------------------------------- 17 Glossary---------------------------------------------------------------------------------------------------------------- 18 F Key List--------------------------------------------------------------------------------------------------------------- 21 Help--------------------------------------------------------------------------------------------------------------------- 22

3
OVERVIEW InfoPac is a mainframe application for viewing and printing online reports. It is also called ViewDirect. InfoPac makes reports, created by DHS (MAXIS, MMIS, and PRISM applications,) available for viewing on a monitor (“online reports”.) InfoPac also lets you print selected pages, sections, or a full copy of an online report on a printer in your county office. This guide is intended to help you view and print reports online using InfoPac. A Cheat Sheet for InfoPac is also available. BENEFITS: There are several benefits in using InfoPac:
Reports are available for viewing and printing in your county shortly after the jobs that produce them have finished processing. You don’t have to wait for printing and mailing from St. Paul.
With the report online, if the printed copy is lost, you can reprint it yourself.
InfoPac can keep multiple versions of a report online. InfoPac tracks each version by the date and time the report was created.
InfoPac lets you print the sections or pages you need in the format of your choice.
DHS believes that by offering on-line viewing we can improve service to our users and help conserve our natural resources.
ON LINE REPORTS: InfoPac can display reports on any computer that can access the State of MN screen or MDHS menu. Since most reports are wider than a display screen, InfoPac commands and F-keys let you move around the report while displaying it on your screen. In addition, you can use commands to change how a report looks on your screen. (Commands and F-keys are discussed in their own chapters.) InfoPac allows you to rearrange a report for viewing or printing to make it easier to work with, but these changes only apply to the session in which you make them. Changes you make in how the report looks won’t change how anyone else sees the report or the way InfoPac maintains the report.

4
REPORT ID, VERSION, SECTION: Every report is stored in InfoPac using 3 logical sub dividers.
Think of it like a monthly magazine:
Magazine = Report ID (Identifier) Issue = Version (When the report was created) Article or Story = Section (Subdivision of a report) Report ID: Unique identifier for a report
Although you may think of it as the monthly claims summary report, InfoPac needs a shorter, simpler way of keeping track of it. To InfoPac, the Claims Summary Report (County totals) Monthly report in MAXIS IS FN790202, the DD Cumulative SVC Encumbrance and Payments report in MMIS is MW6684 and Funds Remaining Detail report in PRISM is QQ50501.
Version: Date and time stamp assigned by the system that indicates when a report was stored in
InfoPac. It doesn’t always exactly reflect the period for reporting. For example, a monthly report
for June information might have a version date of 170623. That’s the date the report was created. (The format is YYMMDD and HHMMSS-year, month, day and hours, minutes, seconds-time is based on a 24 hour clock.) DHS keeps all reports in InfoPac according to Federal and State retention requirements. Each month’s report is stored as a version. Beginning with the first month a report is processed by InfoPac, all versions (months) of the report are available to users for viewing or printing until retention requirements expire.
Section: Subdivision of a report version that contains related information. DHS creates reports that include all counties. Most of the time, InfoPac splits each report
into county sections. Users in each county often receive only that county’s information.
You may select a report and find that the first page you see is not page 1. That’s because your “report” is really a section of the statewide report.
SECURITY: InfoPac lets you view and print the reports, versions and sections to which you have been given access. DHS SSAM is responsible for providing access to reports according to guidelines developed considering data privacy, security and user needs. Report data is the same as private data. If you think you should
5
have access to an existing report or are receiving reports you don’t want or need, contact your security liaison. County Security Liaisons must make a request to SSAM for access to InfoPac and for specific reports. If you do not know who your security liaison is, log on to DHS-SIR. At the top of the page (in the blue line) double click on MAXIS. It should now say-Welcome to the MAXIS Content Area-at the top of the page. Scroll down to the bottom of the page where it says Security Information. Now click on the blue County Security Liaison Information. Scroll down to your county and click on the plus sign. You will now be able to see a list of your county’s liaisons, their SIR web mail address and their phone numbers. If you click on an individual’s name, a screen will open up showing all of their contact information and what areas they are responsible for.
GETTING STARTED SIGN ON: Reports are on line, but what does that mean? This section explains how to sign on to the InfoPac system, gives you some standard screen information, and explains how to sign off.
At the STATE of MN Screen, ----key in the letter - i --- Press enter Enter your XID number Tab and then enter your password (same as MAXIS) Press enter
SIGN OFF: To log out of InfoPac..click the F3 button twice or simply click on the F12 button.
(InfoPac will not let you log off if you have pages marked for printing, but have not yet printed them. You must press the F2 button to either print or delete your print request before you can exit InfoPac.)
NAVIGATING IN INFOPAC
BASIC NAVIGATION: You will now see a “ViewDirect” screen Press enter This will take you to all the reports you have been given access to SCROLLING: On the REPORTS screen, you may use the F8 key to scroll down your report listing and the F7 key to scroll back to the beginning of your list. Once you have selected a report, you may use the F10 key to scroll to the left and the F11 key to scroll to the right.
6
LOCATE COMMAND: If you just key L or LOCATE by itself, the system displays your most recent Locate command. On the Reports, Versions, and Sections menus, you MUST use Locate. (Find-does not work in these menus.) Locate command is used to search for a full or partial report ID, version or section.
When using the locate command with sections, it is helpful to think of sections as “file folders,” where
like counties, departments, cost pools, etc. are filed together. The LOCATE command only will find the
headings of these file folders. Basically the locate command uses a higher level index that InfoPac builds
when it first places the report into viewing. Use ‘single quotes’ if it contains blanks. The Locate
command begins its search from the beginning of the list or report. (In other words the locate command
will find a previous folder if you have already passed it.) InfoPac moves the report, version, or section
that most nearly matches your entry to the top of the list of screen.
On the REPORTS menu, search for a report ID
On the VERSIONS menu, search for a version
On the SECTIONS menu or report display screen, search for a section name or code
SELECTING A REPORT VIEWING MENU: If you know what report number you want, you may simply key that number in on the “ViewDirect” screen. If you know the report you want starts with FN, but can’t remember the number, key the FN in on the “ViewDirect” screen and press enter. The reports list will now begin at the closest match to the data you entered. REPORTS MENU: If you want to simply see all the reports available to you--on the “ViewDirect” screen press enter and you will see a Reports listing of all reports you have access to.
If the message END OF REPORT doesn’t appear on the system message line (at the top of the screen,) you have additional reports listed on one or more screens available.
Scroll down, using the F8 key until you see the report number you want. Tab until you are on the line of the report you would like (or use your mouse and click it there) When you have found the report you would like to review, put an X next to the number under the OPTION column, then press enter.
HINT: To quickly “jump” to another report in your list, use the “Locate” command. Hold down the shift key and hit tab until the cursor is on the command line, or simply use your mouse and click there. The way to use it is by typing on the command line (at the top of the page) L xxxxxxxx where xxxxxxxx is the respective report ID you are looking to obtain. (i.e.: MW7117)
7
VERSIONS MENU: The archived Report Versions menu displays a list of versions of a given report. The most recent version of the report is on the top of the list and the oldest version of the report is at the bottom of the list. It is important to understand and remember that the date/time stamp assigned to each report is the date and time that InfoPac report processing job processed the report and not the date and time the job originating the report ran. For reports, this time delay is usually only a few minutes, but system messages and program compiles may, by design, not come into InfoPac until a few days after they are created. The format of the date/time stamp is YYYYMMDD HHMMSS. If the message - END OF VERSIONS - does not appear on the system message line (at the top of the screen,) additional versions are listed on one or more screens. To Select a REPORT Version that is DISK AVAILABLE
Key an X in the OPTION field next to the version and press enter. The version is immediately available. NOTE: If you get the message NO PAGES AVAILABLE, (which will show at the top of the screen) this means that while the report was created, you have no pages in the section for which you are authorized to view.
To Select a REPORT Version that is RECALL REQUIRED
Key an X in the OPTION field next to the version and press enter. You will receive the message RECALL REQUEST ISSUED TRY AGAIN LATER on the system
message line (top of the page) It is best to exit this screen and come back to it later to give InfoPac time to make the version available for viewing (This may take 2 to 10 minutes) The version isn’t available for viewing until its status shows AVAILABLE. You may exit or press enter occasionally to refresh the screen, but do NOT submit another recall request! Once it says Available, you may place an X next to the report line, press enter and view your report.
If you select an AVAILABLE version and receive the message Recall in Progress, Try Later,
wait a minute or two and then select the version again.
DO NOT ISSUE THE RECALL REQUEST A SECOND TIME!! DOING SO ONLY SLOWS DOWN INFOPAC FOR EVERYONE ELSE!!!
To Select a REPORT Version that is CART NOT MOUNTED
When a Report has the status cart not mounted you have two choices available to you. The quickest and least expensive way to view this report would be to view the report from cartridge. To use this method:
1. Key an X in the OPTION field next to the version and press enter. The version will be available anywhere from 30 seconds to 2 minutes, depending on the present workload Automated Tape Library (ATL.) Press enter every so often to refresh your screen. The report will display when available. DO NOT RE-ENTER YOUR REQUEST!
The other way to view this report is to restore the report to disk. This method takes longer and is more expensive to use. It should ONLY be used when it is anticipated that a high amount of use will occur within the next few days either by one individual or multiple individuals. Once restored
8
to disk, this version of this report will revert back to CART NOT MOUNTED after 3 days of inactivity. To use this method:
1. Key and “R” for Restore in the OPTION field next to the version and press enter. Depending on the size of the report, the present workload of the ATL and other viewers of reports on this tape, the version will be available from 1 minute to 2 hours. It is best to exit this screen, give the system time to process your request, and come back later. If you do wish to wait, press enter every so often to refresh you screen. The report will display when available. DO NOT RE-ENTER YOUR REQUEST! Give the system time to perform your request!
Once you have selected the report and date desired there may be some reports that need further selections-such as in Child Support, where you need to know your FIPS number. Scroll down to your county’s FIPS, place and X in the Option column and press enter to see your report. Some reports simply require you to place an X next to your county’s 3 digit number.
VIEWING A REPORT VIEWING WINDOW: Most reports were written to fit on computer paper. Most screens cannot display a paper report. InfoPac creates a viewing window that displays as much of the report as will fit on the screen at one time. The size of the window depends on the type of monitor you are using. Generally you start out by viewing only the upper left hand quadrant of a report page. Use the scroll left (F11) to go back to the right use the scroll right (F10) keys. Scroll down (F8) to see more of your report and (F7) to go back up to the top. Do not let the appearance of a blank area in a report page fool you into thinking you are at the end of the report. InfoPac will display END OF REPORTS on its message line when you get there. Imagine your online report as consisting of pages on a roll of paper, with the bottom of each page connected to the top of the next page. The top three lines of the report display screen show InfoPac information: Top Line: The top line displays information from InfoPac. Line 2: The second line contains two fields: COMMAND is where you key InfoPac commands.
SCROLL indicates whether you move a screen, line, or page at a time when scrolling forward or backward through a report. The default is Screen. You can change the value by entering P (Page), L (Line), or S (Screen) in the scroll field.
Line 3: The third line contains six fields. Report ID indicates which report you’re viewing. Version is the date and time stamp of the report.
Section would show up after the version date/time stamp and indicates which section of the report you’re viewing. Some sections don’t have section names or codes.

9
Page is the number that InfoPac assigns to each page of the online report. A page number may appear elsewhere in the body of the report. But, it’s this “P” number you’ll use when printing in InfoPac.
Row is the line number of the first line of the report in the viewing window. Column is the first (leftmost) column in the viewing window. Helpful Hint: Be careful not to confuse the InfoPac assigned page numbers with those that may appear in the body of the report, they may be different. SCALE COMMAND: The SCALE command is used to determine row and column positions for the other commands. You can display a grid on the report screen. The Scale command works like a toggle switch, issuing it either turns the grid on or off.
1. To display the grid, key SC or Scale in the COMMAND field and press enter. Or key SC ON or Scale ON and press enter. When the grid appears, InfoPac information on the third line (the line below COMMAND) disappears. Normally, this line shows the report ID, version, section, page, row and column. Each grid row is numbered consecutively down the right side of the screen. Each dot on the scale across the top of the screen represents a column position, beginning with column one (grid numbers continue as you scroll right.) The grid stays on (from report to report) until you exit InfoPac or remove the grid. If you have a PC with a Rule key, using it can greatly assist you in determining row and column positions as it places a vertical and horizontal line on your screen which changes based on where your cursor is located.
2. To remove the grid, key SC or Scale on the COMMAND field and press enter. Or key SC OFF or Scale OFF and press enter.
VIEW COMMAND: Use the view command to temporarily rearrange a displayed report. You can change the order in which columns appear or exclude columns from appearing altogether. The View command simply changes how the report looks on your screen. It doesn’t change the report itself or how anyone else sees it. If you have a special view displayed, what you see is how it will print. The format is: V (or View) ss1-ee1- ss2-ee2…ss5-ee5
ss1, ss2, and so on are numbers that specify the starting screen position of a report column you wish to move. ee1, ee2 and so on are numbers that specify the ending screen position of a report column you wish to move. You may specify up to five starting and ending positions. To determine screen positions for starting and ending columns, use the Scale command. For these positions, give yourself an extra space or two so that you get all the data along with blank space to separate the columns. The View values that you enter remain in effect until you exit the report or change them with another View command.
10
View On or Off You can also key V (or View) On or Off. The effect of On and Off may vary among reports. In most instances, if you’ve rearranged a report using the View command, View Off removes those changes and displays the report in its original form. View On rearranges the report based on your last View command. If you’ve rearranged your view using the View command, and you want to rearrange it again, key View Off before using the View command again. Why? Because the View command always works against your original view.
View: If you just key V or View by itself, the system displays your most recent View command values. You can key over these values to change your view.
Secure View: A secure view gives you a special view and does not allow you to expand the view back to the full report. This is used to keep confidential data from reaching those who do not need to see it as a requirement of their job. You can still set special views within the secure view that was delivered to you, but you cannot expand your view to the full report.
SEARCHING IN A REPORT FIND COMMAND: The FIND command searches forward in a report from you current location in the report for an item or phrase up to 28 characters long (InfoPac calls this a “string.) Use ‘single quotes’ if the item or phrase contains blanks. The Find command begins its search from the current screen. It will not find occurrences in previous screens. (You must type TOP on the command line and press enter to start at the beginning of the report, if this is the result you wish.) If InfoPac finds the item or phrase, the cursor moves to the characters you were trying to find to help you identify the location, and depending on how you are connected to the mainframe the text may be highlighted as well. You can limit the search to specific columns by first specifying a view (see View Command) The Find command can find UPPERCASE A-Z, lowercase a-z, numbers and special characters. To identify the item or phrase you want to search for, you may key the characters in either upper or lower case. Find and Repeat Find-searches only 20,000 lines at a time. This is to allow for “sharing” of the report between users. If you have a large report, and InfoPac can’t find what you’re looking for in the first 20,000 lines, the message 20,000 Lines Searched will appear.
1. Press F5 (Repeat Find) to continue searching. InfoPac will search the next 20,000 lines. 2. Keep pressing F5 until InfoPac finds what you’re looking for or until the message String Not
Found appears. Which means that InfoPac searched to the end of the report and did not find the characters.
3. If you receive the String Not Found message, but you’re sure the information is somewhere on the report, check the following:
Are you searching the correct report? Did you start the search from the beginning of the report? Do you have typos in the Find characters?

11
FILTER COMMAND: The FILTER command is only available in the InfoPac product and is not available using DocumentDirect. Use the Filter command to locate every instance of a string of characters and display the corresponding report lines on the FILTER results screen. You may then select that page where the entry was found by placing any non-blank character in front of the line you wish to select, similar to how you would select a report or report version. The FILTER command must be typed on the command line when viewing a report and is keyed as follows: FIL xxxxxxx (or FILTER xxxxxxx will work as well) Where xxxxxxx is the string you wish to filter upon (Strings with spaces must include an ‘ at the start and end.) You can also add one space and one of the following elements below to the end of your string for the following results: ADD== RESULT ==============================================================================================================
ASIS Matches case sensitivity of inputed string FIRST Causes the search to start at the beginning of the report in a forward direction LAST Causes the search to start at the end of a report and search in a backward direction NEXT Causes the search to start from the current location in the report and search in a forward
direction. PREV Causes the search to start from the current location in the report and search in a backward
direction. Typing only word FILTER on the command line presents the most recently performed search. To exit the filter results screen, press F3 To scroll up on the filter results screen, press F7 To scroll down on the filter results screen, press F8 Multiple “finds” per page will result in more than one entry on the filter results screen for a given page. A non-blank character must be keyed in front of the selection desired on the filter results screen in order to view that report page. The 20,000 lines searched applies to the Filter command as it does with the Find command. One difference between continuing in the filter command is to press F8 to continue after encountering the 20,000 lines searched message. (Instead of F5 for the find command)
CUSTOMIZING A REPORT FREEZE COMMAND: As you scroll through a report, the report headings may move off the screen. Use the Freeze command to temporarily keep headings or other information on the screen as you scroll. The rows and columns that you freeze will be displayed in high intensity.
12
The Freeze command freezes the specified location on the page. When you scroll from page to page, InfoPac refreshes the screen with data found in the frozen location on each new page. The format is: FR Rsss-eee Csss-eee
Example: FR R004-009 R is for rows sss is the row or column to start the freeze C is for the columns eee is the row or column to end the freeze The Freeze values that you enter remain in effect until you exit the report or change them using another Freeze command. Freeze On or Off You can also key: FR On or FR Off If you’ve frozen rows or columns using the Freeze command, FR Off removes those changes and displays the report in its unfrozen form. FR On displays the frozen rows or columns based on your last Freeze command. If you just key Freeze by itself, the system displays your most recent Freeze command values. You can key over these values to change your freeze.
PRINTING This chapter discusses the Printing from online viewing, which lets you print selected pages, sections of a report, or the entire report on a printer in your work area. Remember that InfoPac lets you view and print only the pages or sections for which you’re authorized to view.
NOTES: Printing directly by keying on the print menu is NOT supported. We support marking pages from online viewing and then invoking the printing menu by pressing F2. Viewing and printing of reports that were generated using Advanced Function Printing (AFP) can only be done using Document Direct (eReports for Windows) and Document Direct for the Internet (DDI.) AFP generated reports must be directed to AFP capable printers to print correctly.
PRINT MENU: With InfoPac you can select and print any of the pages, sections or entire reports you wish to print while viewing them, and then send them to a printer in your work area or to a higher speed printer at MNITS. We do NOT support printing directly from the printing menu as most customers find it more difficult to
13
get the output they wish to request by this method. We recommend and support marking pages while actively viewing them, and then pressing F2 to print them. Once you have marked the pages you wish to print, it is time to go to the Printing Menu. To do this:
1. Press F2. The InfoPac printing menu will appear with the words Marked request pending - Press enter to print. Fields that you can change are at the bottom and appear in high intensity. InfoPac has filled in all of the entries for you. VERIFY that the printer locate, to the left of TO CHANGE PRINTER, is where you want the output to print. If the printer is correct, just press enter and the print job will be submitted.
Changing Your Printer: If you wish to change printers, you must know what type and the Device ID (DID) of printer you will change to. (The device ID is a four character ID usually posted on the top of all printers.) Do not press enter to move your cursor while changing the lines of print code, rather use your arrow or tab keys. If you are going to print to a laser printer, OVERTYPE the existing printer ID with the new ID and be sure the next line reads as follows:
OUT1 OUTPUT PAGEDEF=V06483,CHARS=CR17 This line of code rotates the page so that it prints in landscape mode and reduces the font type size to assure a wide report fits on the page. If you wish to print your report at the higher speed laser printers located at MNITS and have the output delivered to you, overtype the printer ID with REDUCE and DELETE the entire line:
OUT1 OUTPUT PAGEDEF=V06483,CHARS=CR17 After any change is made to your print JCL (Job Control Language) InfoPac will ask you to press enter a second time as verification of the change. The Job is Submitted message appears along with a job number each time you enter a print request. It means the system is processing your request. It is helpful to remember the print job number in case you want to call the help desk in case of an error. (You CANNOT delete a print job after is has been submitted.) In any case, your job name is always your logon ID (LID) with an “A” after it. To exit the Printing Menu, press F3 (return to the previous screen)
F4 (to return to the Viewing Menu) OR F12 (to quit and exit InfoPac)
TO PRINT YOUR VIEW;
Create your view using the View command and mark and print pages as previously instructed. 1. Press Enter. The message Marked Requests Deleted will appear, which means the report no
longer has any pages marked for printing. 2. Exit the Printing Menu, press F3 (return to the previous screen)
F4 (to return to the Viewing Menu) OR F12 (to quit and exit InfoPac)
14
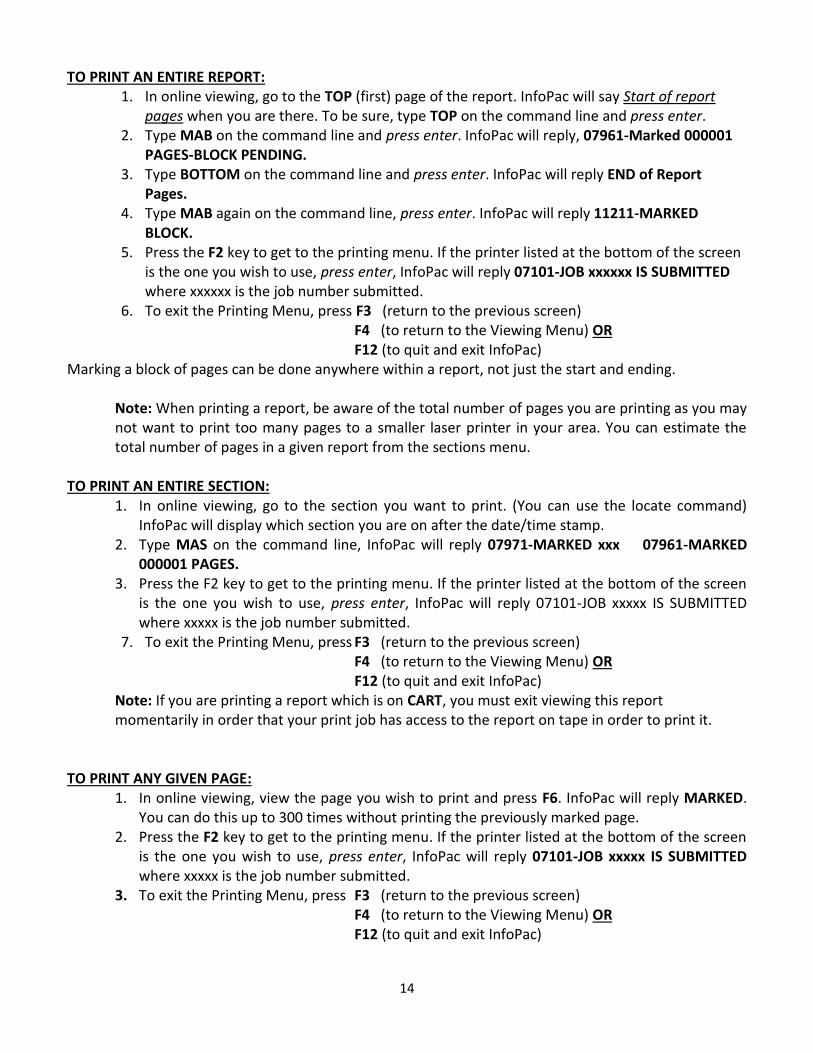
TO PRINT AN ENTIRE REPORT: 1. In online viewing, go to the TOP (first) page of the report. InfoPac will say Start of report
pages when you are there. To be sure, type TOP on the command line and press enter. 2. Type MAB on the command line and press enter. InfoPac will reply, 07961-Marked 000001
PAGES-BLOCK PENDING. 3. Type BOTTOM on the command line and press enter. InfoPac will reply END of Report
Pages. 4. Type MAB again on the command line, press enter. InfoPac will reply 11211-MARKED
BLOCK. 5. Press the F2 key to get to the printing menu. If the printer listed at the bottom of the screen
is the one you wish to use, press enter, InfoPac will reply 07101-JOB xxxxxx IS SUBMITTED where xxxxxx is the job number submitted.
6. To exit the Printing Menu, press F3 (return to the previous screen) F4 (to return to the Viewing Menu) OR F12 (to quit and exit InfoPac)
Marking a block of pages can be done anywhere within a report, not just the start and ending. Note: When printing a report, be aware of the total number of pages you are printing as you may not want to print too many pages to a smaller laser printer in your area. You can estimate the total number of pages in a given report from the sections menu.
TO PRINT AN ENTIRE SECTION:
1. In online viewing, go to the section you want to print. (You can use the locate command) InfoPac will display which section you are on after the date/time stamp.
2. Type MAS on the command line, InfoPac will reply 07971-MARKED xxx 07961-MARKED 000001 PAGES.
3. Press the F2 key to get to the printing menu. If the printer listed at the bottom of the screen is the one you wish to use, press enter, InfoPac will reply 07101-JOB xxxxx IS SUBMITTED where xxxxx is the job number submitted.
7. To exit the Printing Menu, press F3 (return to the previous screen) F4 (to return to the Viewing Menu) OR F12 (to quit and exit InfoPac)
Note: If you are printing a report which is on CART, you must exit viewing this report momentarily in order that your print job has access to the report on tape in order to print it.
TO PRINT ANY GIVEN PAGE: 1. In online viewing, view the page you wish to print and press F6. InfoPac will reply MARKED.
You can do this up to 300 times without printing the previously marked page. 2. Press the F2 key to get to the printing menu. If the printer listed at the bottom of the screen
is the one you wish to use, press enter, InfoPac will reply 07101-JOB xxxxx IS SUBMITTED where xxxxx is the job number submitted.
3. To exit the Printing Menu, press F3 (return to the previous screen) F4 (to return to the Viewing Menu) OR F12 (to quit and exit InfoPac)
15
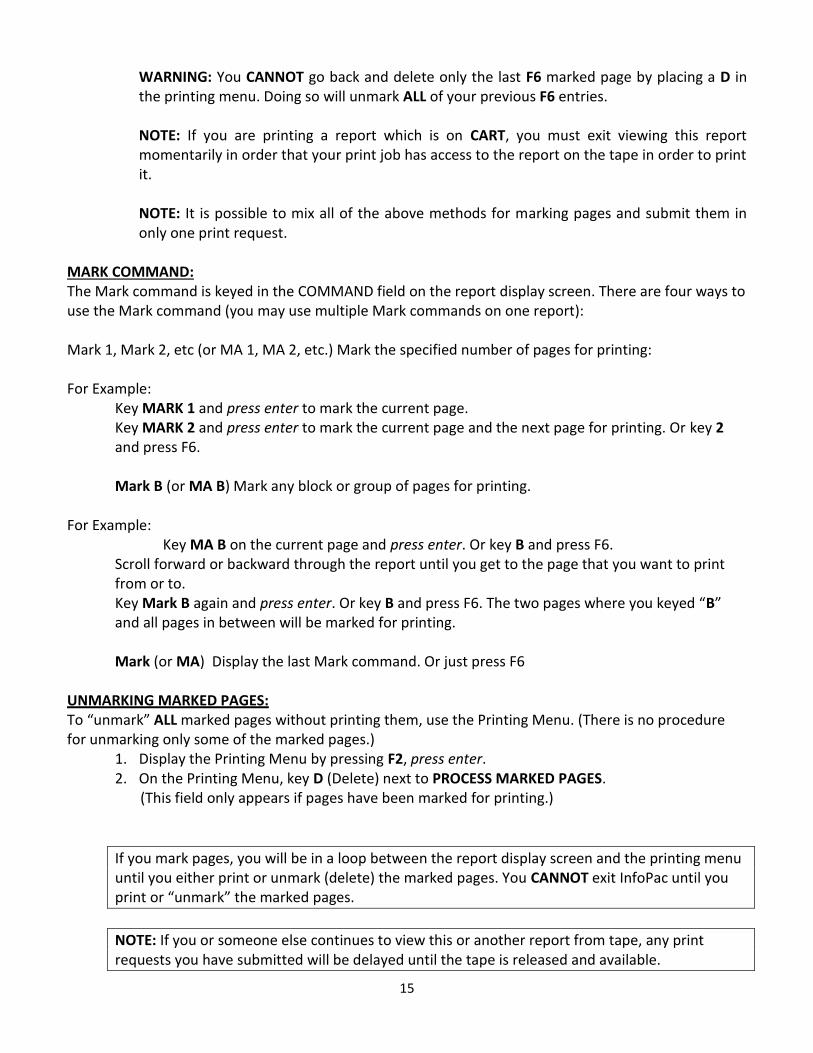
WARNING: You CANNOT go back and delete only the last F6 marked page by placing a D in the printing menu. Doing so will unmark ALL of your previous F6 entries. NOTE: If you are printing a report which is on CART, you must exit viewing this report momentarily in order that your print job has access to the report on the tape in order to print it. NOTE: It is possible to mix all of the above methods for marking pages and submit them in only one print request.
MARK COMMAND: The Mark command is keyed in the COMMAND field on the report display screen. There are four ways to use the Mark command (you may use multiple Mark commands on one report): Mark 1, Mark 2, etc (or MA 1, MA 2, etc.) Mark the specified number of pages for printing:
For Example: Key MARK 1 and press enter to mark the current page.
Key MARK 2 and press enter to mark the current page and the next page for printing. Or key 2 and press F6. Mark B (or MA B) Mark any block or group of pages for printing.
For Example: Key MA B on the current page and press enter. Or key B and press F6.
Scroll forward or backward through the report until you get to the page that you want to print from or to. Key Mark B again and press enter. Or key B and press F6. The two pages where you keyed “B” and all pages in between will be marked for printing. Mark (or MA) Display the last Mark command. Or just press F6
UNMARKING MARKED PAGES: To “unmark” ALL marked pages without printing them, use the Printing Menu. (There is no procedure for unmarking only some of the marked pages.)
1. Display the Printing Menu by pressing F2, press enter. 2. On the Printing Menu, key D (Delete) next to PROCESS MARKED PAGES.
(This field only appears if pages have been marked for printing.)
If you mark pages, you will be in a loop between the report display screen and the printing menu until you either print or unmark (delete) the marked pages. You CANNOT exit InfoPac until you print or “unmark” the marked pages.
NOTE: If you or someone else continues to view this or another report from tape, any print requests you have submitted will be delayed until the tape is released and available.
16
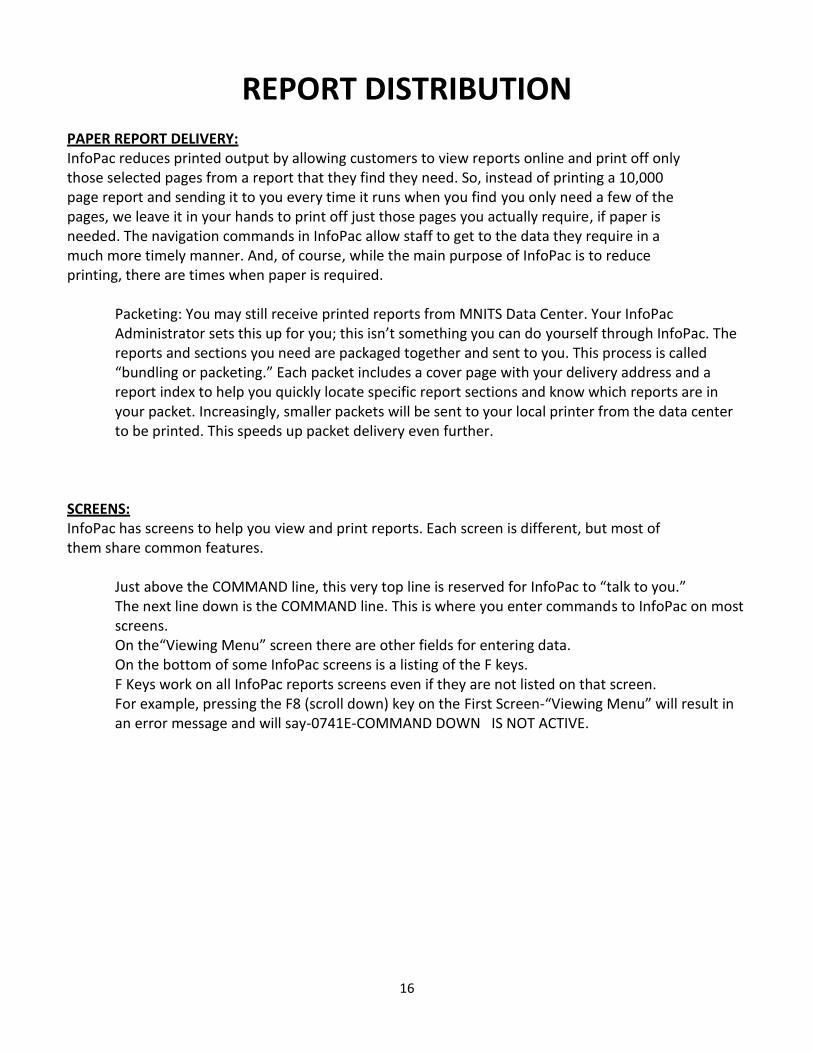
REPORT DISTRIBUTION PAPER REPORT DELIVERY: InfoPac reduces printed output by allowing customers to view reports online and print off only those selected pages from a report that they find they need. So, instead of printing a 10,000 page report and sending it to you every time it runs when you find you only need a few of the pages, we leave it in your hands to print off just those pages you actually require, if paper is needed. The navigation commands in InfoPac allow staff to get to the data they require in a much more timely manner. And, of course, while the main purpose of InfoPac is to reduce printing, there are times when paper is required. Packeting: You may still receive printed reports from MNITS Data Center. Your InfoPac
Administrator sets this up for you; this isn’t something you can do yourself through InfoPac. The reports and sections you need are packaged together and sent to you. This process is called “bundling or packeting.” Each packet includes a cover page with your delivery address and a report index to help you quickly locate specific report sections and know which reports are in your packet. Increasingly, smaller packets will be sent to your local printer from the data center to be printed. This speeds up packet delivery even further.
SCREENS: InfoPac has screens to help you view and print reports. Each screen is different, but most of them share common features. Just above the COMMAND line, this very top line is reserved for InfoPac to “talk to you.” The next line down is the COMMAND line. This is where you enter commands to InfoPac on most
screens. On the“Viewing Menu” screen there are other fields for entering data. On the bottom of some InfoPac screens is a listing of the F keys. F Keys work on all InfoPac reports screens even if they are not listed on that screen.
For example, pressing the F8 (scroll down) key on the First Screen-“Viewing Menu” will result in an error message and will say-0741E-COMMAND DOWN IS NOT ACTIVE.

17
APPENDIX
CHANGING YOUR PASSWORD: You may change your ACF2 password when logging on to InfoPac via the State of Minnesota screen. This will also change it for all of your other applications that use ACF2 Security, including TSO and CICS. ACF2 Password Guidelines
ACF2 passwords can be any combination of letters and numbers from four to ten characters long. ACF2 passwords cannot contain blanks, spaces, or special characters such as the hyphen, period, or comma (characters @, #, and $ are allowed.)
To Change Your ACF2 Password
1. On the State of Minnesota screen, key “I” for InfoPac and press enter. 2. On the InfoPac screen, key your current ACF2 ID in the Recipient ID field. 3. Use the Tab key (NOT enter) to move the cursor to the PASSWORD field and key your
current ACF2 password (it will not appear on the screen) 4. Use the tab key to move the cursor to the NEW PASSWORD field and key your new
ACF2 password (it won’t appear on the screen) 5. Press Enter. This message PASSWORD SUCCESSFULLY ALTERED will appear. 6. Press Enter. The InfoPac Viewing Menu will appear.
18
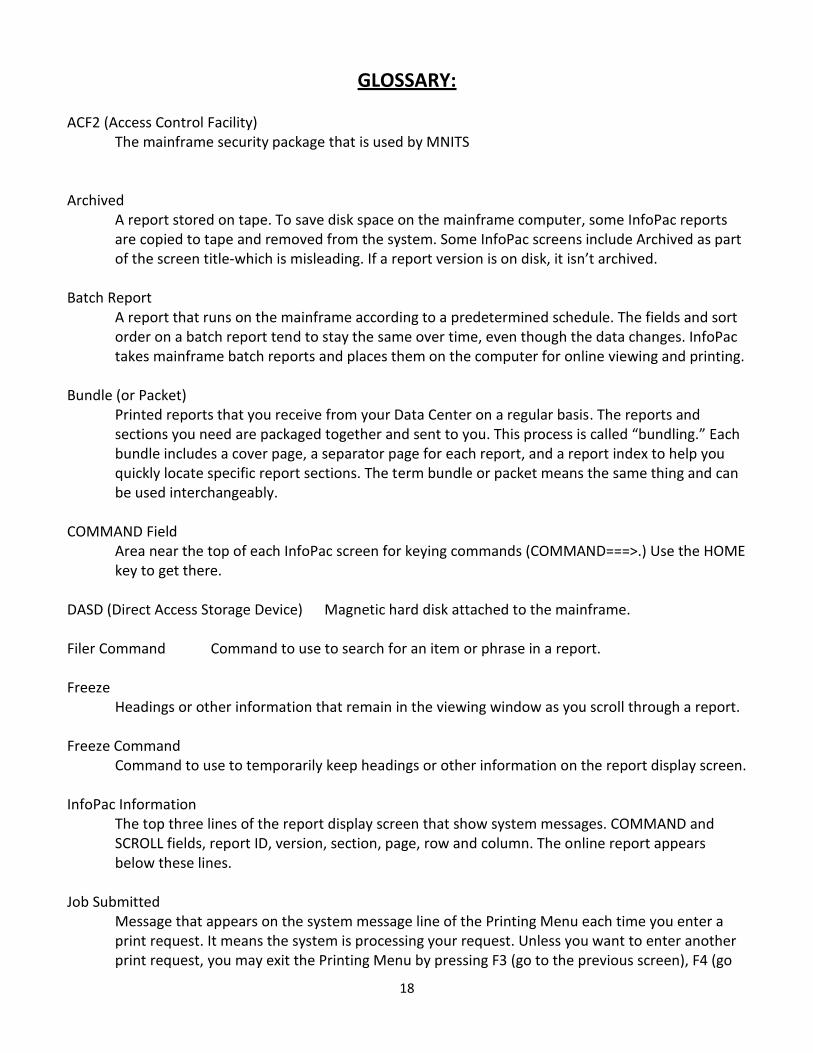
GLOSSARY: ACF2 (Access Control Facility) The mainframe security package that is used by MNITS Archived
A report stored on tape. To save disk space on the mainframe computer, some InfoPac reports are copied to tape and removed from the system. Some InfoPac screens include Archived as part of the screen title-which is misleading. If a report version is on disk, it isn’t archived.
Batch Report
A report that runs on the mainframe according to a predetermined schedule. The fields and sort order on a batch report tend to stay the same over time, even though the data changes. InfoPac takes mainframe batch reports and places them on the computer for online viewing and printing.
Bundle (or Packet)
Printed reports that you receive from your Data Center on a regular basis. The reports and sections you need are packaged together and sent to you. This process is called “bundling.” Each bundle includes a cover page, a separator page for each report, and a report index to help you quickly locate specific report sections. The term bundle or packet means the same thing and can be used interchangeably.
COMMAND Field Area near the top of each InfoPac screen for keying commands (COMMAND===>.) Use the HOME key to get there.
DASD (Direct Access Storage Device) Magnetic hard disk attached to the mainframe. Filer Command Command to use to search for an item or phrase in a report. Freeze
Headings or other information that remain in the viewing window as you scroll through a report. Freeze Command
Command to use to temporarily keep headings or other information on the report display screen. InfoPac Information
The top three lines of the report display screen that show system messages. COMMAND and SCROLL fields, report ID, version, section, page, row and column. The online report appears below these lines.
Job Submitted Message that appears on the system message line of the Printing Menu each time you enter a print request. It means the system is processing your request. Unless you want to enter another print request, you may exit the Printing Menu by pressing F3 (go to the previous screen), F4 (go

19
to the Viewing Menu) or F12 (EXIT InfoPac.) If you have marked pages pending, pressing F4 or F12 keeps returning you to the Printing Menu until you print or delete marked pages.
Locate Command Command used to search for a report ID, version or section. On the Reports menu, search for a report ID. On the Versions menu, search for a version (the format is YYYYMMDDHHMMSS, with no space between date and time.) On the Sections menu or on the report display screen, search for a section name or code.
Mark Command Command used to “mark” select pages or a section of a report for printing. Message Line The top line on every InfoPac screen where system messages appear. Nonblank Character
Anything you can key, including A-Z, 0-9, and punctuation (this does not include the space bar or cursor movement keys.) On the Report, Version, and Section menus, you can select a report version or section by keying a nonblank character in the OPTION field next to the one you want and pressing Enter.
Online Reports that you can view and print from your computer screen. Operand
Anything you can key in the COMMAND field that isn’t a command or its abbreviation. Operands can be used with the following commands (or their F-keys): Up, Down, Left, Right, View, Freeze, Find, Locate and Mark.
For Up, Down, Left, Right the operand is a value that specifies how far to scroll, or M or Max to scroll to the beginning or end. For example:
To scroll right 20 columns, key Right 20 or RI 20 in the COMMAND field and press enter. Or key 20 and press F11. The operand is 20. To scroll to the rightmost column, key Right Max or (RI M) in the COMMAND field and press enter. Or key MAX or M and press F11. The operand is MAX or M.
To View and Freeze. The row and column values are the operand. For Find and Locate, the characters you’re searching for are the operand.
For Mark, the operand is the specified number of pages to mark for printing, B to mark a block of pages or S to mark a section.
RDS Report Distribution System. This is another name for InfoPac Report Display Screen Screen that displays your online report. Report ID
The unique identifier for a report which is based on the name of the job that creates the report.
20
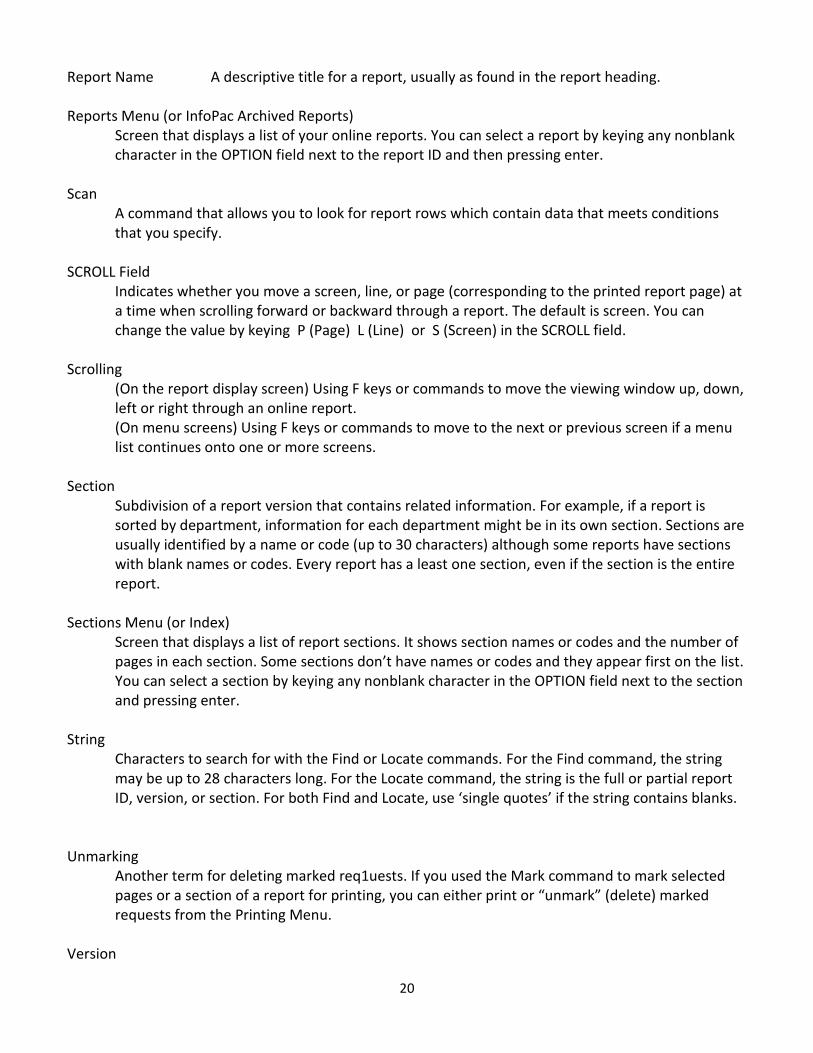
Report Name A descriptive title for a report, usually as found in the report heading. Reports Menu (or InfoPac Archived Reports)
Screen that displays a list of your online reports. You can select a report by keying any nonblank character in the OPTION field next to the report ID and then pressing enter.
Scan A command that allows you to look for report rows which contain data that meets conditions that you specify.
SCROLL Field
Indicates whether you move a screen, line, or page (corresponding to the printed report page) at a time when scrolling forward or backward through a report. The default is screen. You can change the value by keying P (Page) L (Line) or S (Screen) in the SCROLL field.
Scrolling
(On the report display screen) Using F keys or commands to move the viewing window up, down, left or right through an online report. (On menu screens) Using F keys or commands to move to the next or previous screen if a menu list continues onto one or more screens.
Section Subdivision of a report version that contains related information. For example, if a report is sorted by department, information for each department might be in its own section. Sections are usually identified by a name or code (up to 30 characters) although some reports have sections with blank names or codes. Every report has a least one section, even if the section is the entire report.
Sections Menu (or Index)
Screen that displays a list of report sections. It shows section names or codes and the number of pages in each section. Some sections don’t have names or codes and they appear first on the list. You can select a section by keying any nonblank character in the OPTION field next to the section and pressing enter.
String
Characters to search for with the Find or Locate commands. For the Find command, the string may be up to 28 characters long. For the Locate command, the string is the full or partial report ID, version, or section. For both Find and Locate, use ‘single quotes’ if the string contains blanks.
Unmarking
Another term for deleting marked req1uests. If you used the Mark command to mark selected pages or a section of a report for printing, you can either print or “unmark” (delete) marked requests from the Printing Menu.
Version
21
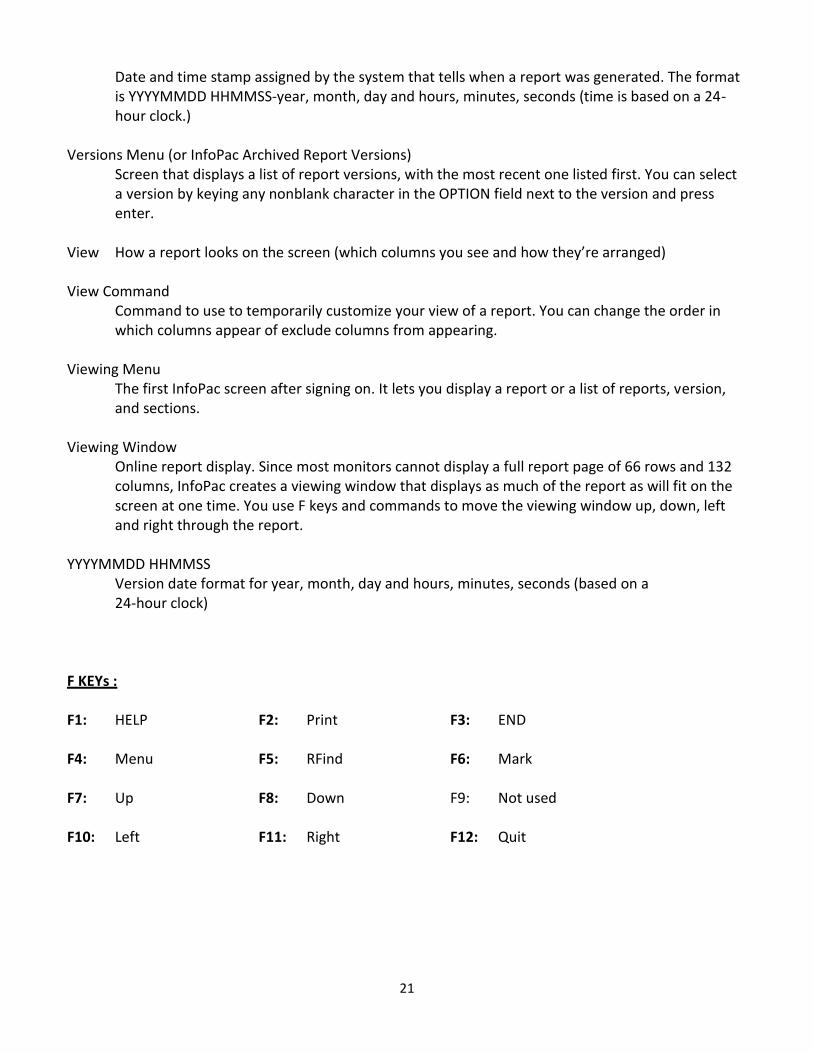
Date and time stamp assigned by the system that tells when a report was generated. The format is YYYYMMDD HHMMSS-year, month, day and hours, minutes, seconds (time is based on a 24-hour clock.)
Versions Menu (or InfoPac Archived Report Versions) Screen that displays a list of report versions, with the most recent one listed first. You can select a version by keying any nonblank character in the OPTION field next to the version and press enter.
View How a report looks on the screen (which columns you see and how they’re arranged) View Command
Command to use to temporarily customize your view of a report. You can change the order in which columns appear of exclude columns from appearing.
Viewing Menu The first InfoPac screen after signing on. It lets you display a report or a list of reports, version, and sections.
Viewing Window
Online report display. Since most monitors cannot display a full report page of 66 rows and 132 columns, InfoPac creates a viewing window that displays as much of the report as will fit on the screen at one time. You use F keys and commands to move the viewing window up, down, left and right through the report.
YYYYMMDD HHMMSS Version date format for year, month, day and hours, minutes, seconds (based on a 24-hour clock)
F KEYs : F1: HELP F2: Print F3: END F4: Menu F5: RFind F6: Mark F7: Up F8: Down F9: Not used F10: Left F11: Right F12: Quit

22
HELP DHS INFOPAC SUPPORT CONTACTS
Support Report Internet email Help Desk Phone Fax Number Group Prefix MAXIS FB [email protected] 800-383-7987 612-297-4066
FK FN FV
MMIS MW 800-366-7894 612-772-6100 PRISM QQ 612-297-4450 QW ONLINE HELP
To view online help in InfoPac, press PF1, or key H or HELP in the COMMAND field and press Enter. InfoPac’s on line help:
Describes the screen from which help was requested
Defines the fields on that screen
Provides additional information about using the screen
Note: :UG” in online help refers to the vendor’s user’s guide and not to this document.
To scroll forward and backward through the help screens, press PF8 and PF7. To exit online help, press PF3