Video Camera TimeLapse
20
www.brinno.com HD Video Camera TimeLapse TLC 200 f1.2 User Manual
Transcript of Video Camera TimeLapse

www.brinno.com
HD
Video Camera
TimeLa
pse
TLC 200 f1.2
User Manual

Brinno TimeLapse Camera TLC200 f1.2
Length of battery usage
ASAP5 Seconds
10 Seconds20 Seconds30 Seconds
1 Minute5 Minutes
10 Minutes1 Hour
4 Hours24 Hours
45000030000026000021000018000012000034560172802880720120
2.5 Days3.6 Days17 Days30 Days48 Days62 Days83 Days
120 Days
Time Interval Capture Frames Battery Life
Follow Brinno Now

1www.brinno.com
Thank you for purchasing a Brinno TimeLapse Camera!The Brinno TimeLapse Camera (TLC200 f1.2) uses unique Time Lapse and Power Saving technologies to capture images for days, weeks, or even months. The Brinno TimeLapse Camera TLC200 f1.2 captures photos and stores them as videos making them easy to view. Turn it on, set the time interval, frame your subject, let it run and you have a time lapse video! No fancy equipment, no intervalometer, no complicated gear setups, no time-controlling, no video-making headaches.
If you have any questions or problems setting up your Brinno TimeLapse Camera please contact the sales staff where you purchased our product or email us at Brinno Incorporated directly [email protected] Visit our website www.brinno.com
TLC200 f1.2 Output file format- [Video Mode] Format AVI. Resolution 1280x 720, 640x 480 Note: The maximum size of each single AVI file ranges between 8,192 to 20,480 frames, depending on the time interval setting.- Still Image Mode] Format JPEG. Resolution 1280x 720, 640x 480
Time Lapse Camera TLC200 f1.2 Features
Large Aperture Wide Angle View
Better low light recording and sharper images.
140˚Field of View.A wider area to be recorded creating panoramic images
Power SavingUnique Power Control, means 4 AA batteries can capture 300,000 frames.
LCD ViewfinderThe 1.44" LCD screen, allows you to easily frame your subject.
aperture
Rotatable LensProvides greater flexibility in targeting your subject!
Time Lapse VideoTLC200 f1.2 provides you a 1280x720 resolution video, yes, it’s HD video.

2 Brinno TimeLapse Camera
SD
AA
AAAA
AA
Front Back
Package Contents
Parts of the Camera
1
1
611
2
2
712
813
910
3
3
4
5
TimeLapseCam (TLC200 f1.2)
SD Card Cover
Strap EyeletPower Switch
4 AA Batteries
Connector for Extension Accessories (For ATS100, ATM100)
LCD ScreenLED Indicator
MENU ( ) ButtonTripod Screw Hole
TIME ( ) ButtonOK/ START Button
SD card** SD Card may or may not be included, please check the contents list on the package .
Connector for Micro USB cable(For extension power supplier, DC 5V)
Metal Ring(for ATM100, ATL045 )
Battery Door
1
17
8
10
11
4
5
126
9
2 3
13
TLC200 f1.2
2
3

3www.brinno.com
Set Up screen At Set Up screen
At Preview screen
Status iconBATTERYEMPTY
FULL
ERROR NO CARD
Preview screen
Display Icons
1
2
34
56
7
8
9
10
Capture modeNormal: Time Lapse modeShutter: Shutter Line modeMotion: Motion Activated modeTime intervalSelect the pre-set time interval or customize yourself.System date and timeBattery level
Video/ Image resolutionPreview image capture window
Battery EmptyPlease replace battery imediately.SD Card FullPlease download files to clear SD card space.
SD Card ErrorPlease replace SD card.No CardPlease Insert SD card.
OK/ START Button
Normal
ASAP2011/08/31
22:58:32
OK
1280x720
READY
1
2
5
3
6
4
Icon
(green)
(green)
(yellow)
(red)
Description
Battery fully charged.
Battery partially discharged.Low battery. Replace as soon as possible.Out of battery. Replace battery immediately.
7
8
9 10
SD
SD SD

4 Brinno TimeLapse Camera
1
2
123
Open battery door.Insert 4 AA batteries.Close battery door.
Be sure the battery cover is locked into place.
Initial Step-1 Install Batteries and SD Card
About Power Saving
1 2 3
TLC200 f1.2
At Set Up ScreenAfter 10 seconds without activity on the set up screen, the camera will go to Preview screen automatically. You can press the MENU or TIME button to go back to the set up screen.
Set up screen Preview screen Turn off LCD1280x720
READY
Normal
ASAP2011/08/31
22:58:32
OK
At Preview ScreenAfter 20 seconds without activity on the set up or preview screen, the LCD screen will turn off automatically to save power. You can press the OK button to wake up camera.
10 sec. 20 sec.

5www.brinno.com
Rotate the Power switch to ON position.Process screen It may display other information on screen, please refer to page 3. Set Up screenNow, you can set Date and Time and Time Interval before you use your TimeLapse Camera!
12
3
123
Open SD card cover.Insert SD card until it clicks into place.Close SD card cover.
Initial Step-2
Initial Step-3
Install SD Card
Turning the Camera on
1 2 3
1 2 3
READING..SD
Normal
ASAP2011/08/31
22:58:32
OK
on

6 Brinno TimeLapse Camera
TIME
10 MinOK
Press MENU ( ) and TIME ( ) to select a pre-set time interval or customize it by yourself. When complete, press the OK Button to confirm and return to the Set up screen. (ASAP option: everysecond can capture 2 photos)
Press TIME button to enter time interval set up.
Now you are back to the Set up screenNow, you are ready to go to Preview screen and start recording your Time Lapse Videos.
2
1
3
TIME
OK : Next
22 : 58 : 32
TIME
2 Sec
CUSTOM
OK
OK
1 32
Initial Step-5 Set Time Interval
Press MENU button.Press TIME ( ) to select Set Date & Time (MENU 5/10), and press OK.At the highlight field, press MENU ( ) to decrease value, press TIME ( ) to increase value, press OK to confirm and go to the next field. When finished press OK to exit set up.
32
123
Initial Step-4 Set Date and Time
MENU Date & Time
Set Date& Time
OK OK : Next
2011/ 08 /3122 : 58 : 32
1
Normal
2 Sec2011/08/31
22:58:32
OK
TLC200 f1.2

7www.brinno.com
Recording!
Turn off LCD
OK
Press TIME ( ) to select Set Date & Time (MENU 5/10), and press OK.
Adjust lens angle to frame subject.Turn on TLC200 f1.2, set time interval and press OK to Preview Screen.
At Preview screen, press OK button to start recording, during recording period the LCD panel will turn off to save power.
21
3
1 32
Start Recording
LED Indicator
Set up screen Preview screen1280x720
READY
Normal
ASAP2011/08/31
22:58:32
OK
Green LED light: indicates Image capture in processWhen the Green LED flashes, the Time Lapse Camera (TLC200 f1.2) is capturing photos.
Red LED light: Low battery level, Low recording space on your SD card
Stop Recording
Preview screen
While recording, hold the OK button until the LCD lights on and shows the Preview Screen, it will display text "Done!". This indicates the recording session is over .Remove the SD card from the camera, and plug it into your computer or notebook to enjoy your amazing Time Lapse Videos!
1
2
1 2
SD1280x720
Done!

8 Brinno TimeLapse Camera
Advanced Menu Setting
Select AVI Frame Rate.What frame rate should I use?Generally, use 10 FPS is suitable for Time Lapse video.1 FPS: The video plays 1 frame per second, so the video will look not smooth, and the video length will be longer.30 FPS: The video plays 30 frames per second, so the video will look smooth, and the video length will be shorter.
You can change the videos FPS (frames per second) playback with this setting.
12
1 2
AVI Playback Frame Rate
MENU Frame Rate
AVI FrameRate 10 FPS
10 FPS ( Frames Per Second ) means:10 frames are played in 1 second.
OK OK
Select Image Quality
Set the image quality for your camera.
12
1 2 3
Image Quality
ImageQuality
ImageQuality
ImageQuality
Best Better GoodOK OK OK
There are three options you can select: Best, Better, Good

9www.brinno.com
ONOFF
OK
Select Time Stamp.Select ON or OFF.
You can choose if you want to show the time stamp at bottom of your video.
12
1 2
Time Stamp
MENU Time Stamp
TimeStamp
OK
Select Low Light Recording.ON: Allows your camera to record video in a low light environment.OFF: Your camera will go to sleep in a low light environment.
You can choose to enable your camera to keep recording video in a low light environment (< 5 Lux).
12
1 2
Low Light Recording
MENU Low Light
Low LightRecording
ONOFF
OK OK

10 Brinno TimeLapse Camera
Select Set Date & Time.
Set the correct date and time for your camera.
12
1 2
Set Date and Time
MENU
Set Date & Time
OK
Date & Time
OK : Next
2011/ 08 /3122 : 58 : 32
At the highlight field, press MENU ( - ) to decrease the value, press TIME ( ) to increase the value, press OK to confirm and go to the next field. When finished, press OK to exit set up.
Select Output Resolution.There are two options you can select: 1280x720, 640x480.
You can change video resolution with this setting.
12
1 2
Output Resolution
MENU Resolution Resolution
OutputResolution 1280x720 640x480
OK OK OK

11www.brinno.com
ONOFF
OK
Select LED Display.ON: When the camera is capturing a frame, the LED indicator will flash once.OFF: During capture period the LED indicator will not flash .
You can choose if the LED indicator will flash while capturing each frame, or not flash at all.
12
1 2
LED Display
MENU LED Display
LEDDisplay
OK
None50 Hz60Hz
OK
Select Band Filter.None: For outdoor environment.50 Hz: USA60 Hz: Europe
Select the correct fluorescent lighting frequency to match your indoor lighting frequency.
12
1 2
Band Filter
MENU Band Filter
Band Filter
OK

12 Brinno TimeLapse Camera
X.XX.X
OK
Select Firmware Version.
Display the current firmware version of camera.
12
1 2
Firmware Version
MENU Firmware
Firmware Version
OK
Display the firmware version for 30 seconds, or press the OK button to exit.
NOYES
OK
Select Reset.Select YES and press the OK button to reset your camera.
Default Settings:
You can reset your camera back to the default setting.
1 2
Reset
MENU Reset
RESET
OK
Function Setting
Time Interval 2 Seconds
1280x720Output Resolution
10 FPSAVI Frame Rate
ONLow Light RecordingONTime Stamp
ONLED DisplayNoneBand Filter
BetterImage Quality

AccessoriesTime Lapse Camera

14 Brinno TimeLapse Camera
Accessories Wide-Angle Lens (ATL045)
MAGNET MOUNT CONVERSION LENS-0.45 WIDE-ANGLE-
Enlarge your vision with Wide-Angle Lens!Capture the changes of magnificent scenery, and discover the city in a differentway. You will capture an entirely new scene when you add the wide angle lens!
Easy way to secure your Time Lapse Camera and accessories.
Accessories Camera Pouch (ATP100)
15www.brinno.com
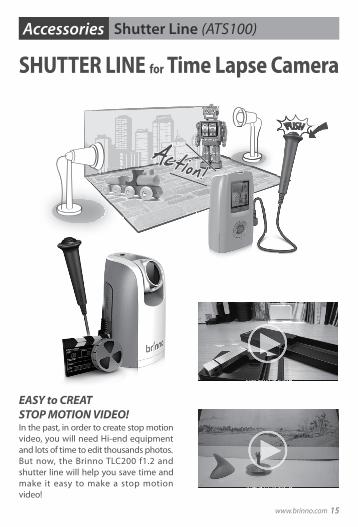
Accessories Shutter Line (ATS100)
SHUTTER LINE for Time Lapse Camera
EASY to CREAT STOP MOTION VIDEO!In the past, in order to create stop motion video, you will need Hi-end equipment and lots of time to edit thousands photos.But now, the Brinno TLC200 f1.2 and shutter line will help you save time and make it easy to make a stop motion video!

16 Brinno TimeLapse Camera
Accessories Weather Resistant Housing (ATH100)
Whether it is Natures Beauty, Plant Growth or a Construction ProjectThe Weather Resistant Housing (ATH100) allows the Time Lapse Camera (TLC200 f1.2) to function safely outdoors in any weather. Your Time Lapse Camera(TLC200 f1.2) will be protected against severe weather, so you can keep recording images in any season or location.
Waterproof: IP54For Outdoor Use
Accessories Motion Sensor (ATM100)
Perfect for HOME & PROPERTY SECURITY!Adding the Motion Sensor (ATM100) to Time Lapse camera (TLC200 f1.2), will allow the camera to detect any movement and wake up and take pictures automatically. It can take thousands of photos and convert them into a video, making them easy to review.
Motion Detected
the Movement Detecting Activated & Record
Waterproof: IP54
Detect Angle: 90ْDetect Distance: 4 meters

Specifications
Package Contents
* SD Card may or may not be included, please check the contents list on the package.
TimeLapse Camera (TLC200 f1.2)AA Battery
..1.............................................. 4
TLC200 f1.21.44" TFT LCD120°Optional, (In use with Weather Resistant Housing (ATH100))
Auto generate Time Lapse videoOptional, (In use with Shutter Line (ATS100))Optional, (In use with Motion Sensor (ATM100))
F1.2Aspherical Lens140°18 mm (35mm equivalent)30 cm (Minimum)
Format: AVIResolution: 1280x 720, 640x 480Format: JPEG (only for using Shutter Line)Resolution: 1280x 720, 640x 480SD Card (Supported up to 32 GB)
0.5 ~ 1 secondFrom 1 second to 24 hours
Battery: 4 AA BatteriesDC IN: 5V (Micro USB connector)3.6 Days, at 1 second time interval, captures 310,000 frames120 Days, at 24 hours time interval, captures 120 frames
64x 46x 106 mm120 g (without batteries)Green/ Black
4GB SD card*User Manual
........................................... 1.......................................... 1
CameraModel
LCD ScreenRotate LensWaterproof
Capture ModeTime Lapse
Stop MotionMotion Activated
Optics LensAperture
Lens typeField of ViewFocal Length
Focus Distance
RecordingTime Lapse Video
Still Image
Memory Storage
Time IntervalASAP
Custom
PowerPower source
Battery Life
DimensionSize (DxWxH)
WeightColor

7F, No. 75, Zhou Zi St., Taipei City 11493, TaiwanPhone: +886-2-8751-0306 Fax: +886-2-8751-0549Email: [email protected]
www.brinno.com
301-0014-20EN A1