USER MANUAL TABLE OF CONTENTS - Microsoft Azure · PDF fileUSER MANUAL: DynamicsPort -...
34
USER MANUAL DynamicsPort - Dynamics CRM Customer Portal for DotNetNuke Version: 1.1 DotNetNuke Compatibility: DotNetNuke 7 and above Dynamics CRM Compatibility: Dynamics CRM 2016(v8.0) and above TABLE OF CONTENTS Introduction ...................................................... 1 Benefits of Customer Portal ............................ 1 Prerequisites ..................................................... 1 Installation & Configuration ............................ 2 Dynamics CRM Plug-in Installation ............. 2 DotNetNuke Manual Plug-in Installation .... 5 Adding Module Definitions .......................... 6 Adding Extensions to Web Page .................. 9 Plug-in Configuration ..................................... 12 Dynamics CRM Configuration Settings ..... 12 Field Configuration ..................................... 20 DotNetNuke Configuration Settings .......... 21 Front Side Instructions ................................... 23 Un-installation Steps ...................................... 32 Contact Us ...................................................... 33
Transcript of USER MANUAL TABLE OF CONTENTS - Microsoft Azure · PDF fileUSER MANUAL: DynamicsPort -...

USER MANUAL
DynamicsPort -
Dynamics CRM Customer
Portal for DotNetNuke
Version: 1.1
DotNetNuke Compatibility:
DotNetNuke 7 and above
Dynamics CRM Compatibility:
Dynamics CRM 2016(v8.0) and above
TABLE OF CONTENTS
Introduction ...................................................... 1
Benefits of Customer Portal ............................ 1
Prerequisites..................................................... 1
Installation & Configuration ............................ 2
Dynamics CRM Plug-in Installation ............. 2
DotNetNuke Manual Plug-in Installation .... 5
Adding Module Definitions .......................... 6
Adding Extensions to Web Page .................. 9
Plug-in Configuration ..................................... 12
Dynamics CRM Configuration Settings ..... 12
Field Configuration ..................................... 20
DotNetNuke Configuration Settings.......... 21
Front Side Instructions................................... 23
Un-installation Steps ...................................... 32
Contact Us ...................................................... 33
USER MANUAL: DynamicsPort - Dynamics CRM Customer Portal for DotNetNuke
www.appjetty.com 1
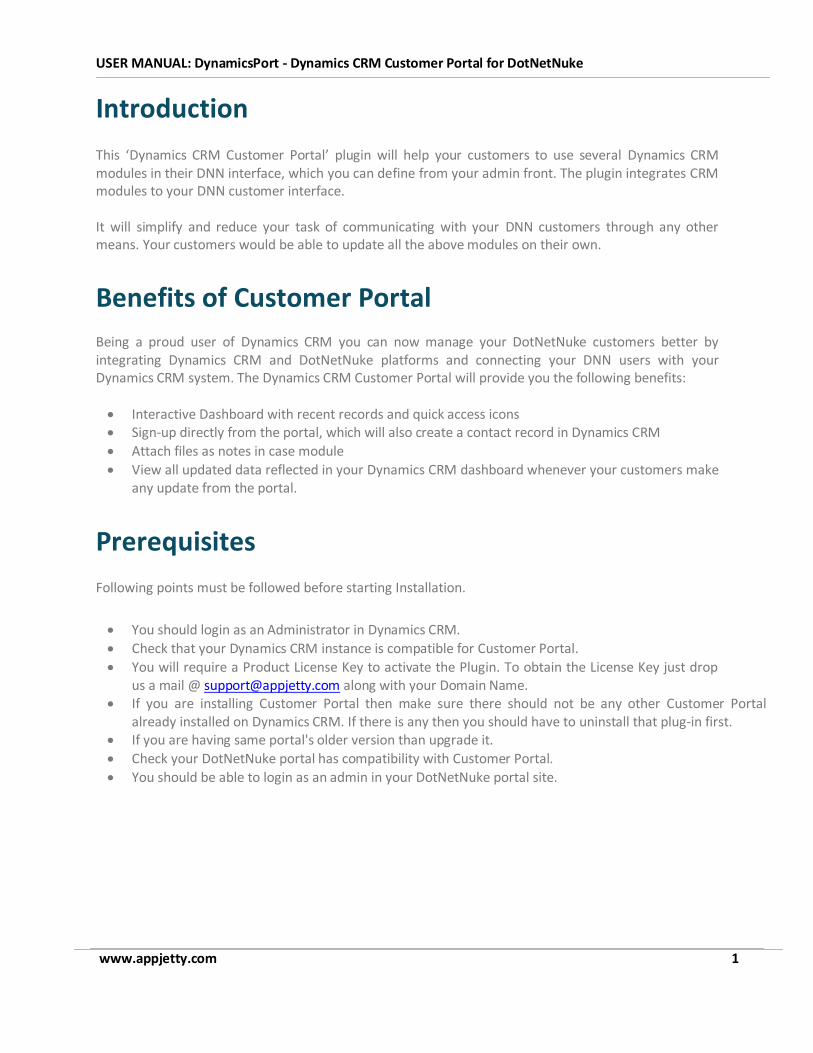
Introduction
This ‘Dynamics CRM Customer Portal’ plugin will help your customers to use several Dynamics CRM modules in their DNN interface, which you can define from your admin front. The plugin integrates CRM modules to your DNN customer interface. It will simplify and reduce your task of communicating with your DNN customers through any other means. Your customers would be able to update all the above modules on their own.
Benefits of Customer Portal Being a proud user of Dynamics CRM you can now manage your DotNetNuke customers better by integrating Dynamics CRM and DotNetNuke platforms and connecting your DNN users with your Dynamics CRM system. The Dynamics CRM Customer Portal will provide you the following benefits:
Interactive Dashboard with recent records and quick access icons Sign-up directly from the portal, which will also create a contact record in Dynamics CRM
Attach files as notes in case module
View all updated data reflected in your Dynamics CRM dashboard whenever your customers make any update from the portal.
Prerequisites
Following points must be followed before starting Installation.
You should login as an Administrator in Dynamics CRM.
Check that your Dynamics CRM instance is compatible for Customer Portal.
You will require a Product License Key to activate the Plugin. To obtain the License Key just drop us a mail @ [email protected] along with your Domain Name.
If you are installing Customer Portal then make sure there should not be any other Customer Portal already installed on Dynamics CRM. If there is any then you should have to uninstall that plug-in first.
If you are having same portal's older version than upgrade it.
Check your DotNetNuke portal has compatibility with Customer Portal.
You should be able to login as an admin in your DotNetNuke portal site.

USER MANUAL: DynamicsPort - Dynamics CRM Customer Portal for DotNetNuke
www.appjetty.com 2
Installation & Configuration
Dynamics CRM Plug-in Installation
To install ‘Dynamics CRM Customer Portal’ plugin, the following steps has to be followed:
On purchasing the plugin, you will get a zip file named DynamicsCRM Customer Portal.zip
DynamicsCRM Customer Portal.zip
Login into your CRM Account and click on settings ->solutions
Click on ‘Import’ to upload and install the Solution.
Click on Browse button and choose the Package Zip File for Dynamics CRM Customer Portal from
the Import Solution Window

USER MANUAL: DynamicsPort - Dynamics CRM Customer Portal for DotNetNuke
www.appjetty.com 3
Click on ‘Next’ for further processing.
Check the box to enable any SDK message processing steps included in the solution and click on
Import button to Import the Solution

USER MANUAL: DynamicsPort - Dynamics CRM Customer Portal for DotNetNuke
www.appjetty.com 4
Click on ‘Close’ after successful completion message is displayed
Once you import the solution, it will be displayed in the solutions grid view

USER MANUAL: DynamicsPort - Dynamics CRM Customer Portal for DotNetNuke
www.appjetty.com 5
DotNetNuke Manual Plug-in Installation
Login to your DotNetNuke portal as an admin and navigate to Host -> Extensions.
To Install the Extension, click on ‘Install Extension Wizard’ button.
Now to upload the package, click on ‘Choose File’ button and browse the zip file. Click on ‘Next’ to
continue and finish the installation.

USER MANUAL: DynamicsPort - Dynamics CRM Customer Portal for DotNetNuke
www.appjetty.com 6
Note: You need to install two zip files; one for Customer Portal and another for Customer Portal Admin
file.
Now, accept the license, continue through the Installation. When finished click on ‘Return’ button.
Adding Module Definitions (For Customer Portal)
Note : Adding Module Definition is only for CustomerPortal and not for CustomerPortalAdmin.
After the installation navigate to the Host -> Extensions for adding module definitions
Now, click on ‘Edit’ icon besides extension to edit the module definition.
Click on ‘Module Definitions’ to expand it. Select a definition from the dropdown or add a new
definition.

USER MANUAL: DynamicsPort - Dynamics CRM Customer Portal for DotNetNuke
www.appjetty.com 7
Now, add module control for each portal page by clicking on ‘Add Module Control’ button.

USER MANUAL: DynamicsPort - Dynamics CRM Customer Portal for DotNetNuke
www.appjetty.com 8
Follow below mentioned steps for each module control:
Set Key of Portal Page.
In Source Folder, select DesktopModules/CustomerPortal
In Source, select “.ascx” page as mentioned in the below table:
Click on ‘Update’ button.
Page Key File Name
Login Page portal_login Login.ascx
Forget Password
portal_forget_password ForgetPassword.ascx
Sign Up portal_profile PortalSignUp.ascx
Dashboard portal_dashboard PortalDashboard.ascx
Manage Page
portal_mainpage View.ascx

USER MANUAL: DynamicsPort - Dynamics CRM Customer Portal for DotNetNuke
www.appjetty.com 9
Now, click on ‘Update Definition’ and then click on ‘Update Extension’.
Adding Extensions to Web Page
Add Customer Portal Admin Configuration Page
To add web pages navigate to ‘Pages’ from admin Home Page and click on ‘Add New Page’.
Provide a Page Name, Title, Enter Page URL and other details.

USER MANUAL: DynamicsPort - Dynamics CRM Customer Portal for DotNetNuke
www.appjetty.com 10
Now, set visibility scope by clicking on the ‘Permissions’ tab.
Recommended: Do not to set visibility for All Users as it is Admin Configuration page.
Lastly to add the page click on ‘Add Page’ button. This will take you to the newly added page.

USER MANUAL: DynamicsPort - Dynamics CRM Customer Portal for DotNetNuke
www.appjetty.com 11
Add Module to Page Now add module to the page. To add the module, navigate to ‘Modules’ from admin Home Page
and click on ‘Add New Module’.
Drag & Drop the module for Customer Portal Admin to the content page.
Add Customer Portal User Page
Follow similar steps to add the web page for Customer Portal User page.
Add Module to Page To add Customer Portal module navigate to ‘Modules’ from admin Home Page and click on ‘Add
New Module’.
Drag & Drop the module for Customer Portal User to the content page.

USER MANUAL: DynamicsPort - Dynamics CRM Customer Portal for DotNetNuke
www.appjetty.com 12
Plug-in Configuration
Dynamics CRM Configuration Settings
Get activation key
Get the activation key from the Order Confirmation Mail. OR
Login to your AppJetty account then go to downloadable options and copy the activation key for
the Dynamics CRM Customer Portal plug-in.
Note: Applicable only when purchased from AppJetty.
Activate your plug-in
Once you import the solution, it will be displayed in the solutions grid view.
Double click on ‘DynamicsCRM Customer Portal’ solution to configure the Plugin with your license
key.
This will open up a new window. Click on ‘Configuration’ from the options provided on the left
side.
USER MANUAL: DynamicsPort - Dynamics CRM Customer Portal for DotNetNuke
www.appjetty.com 13
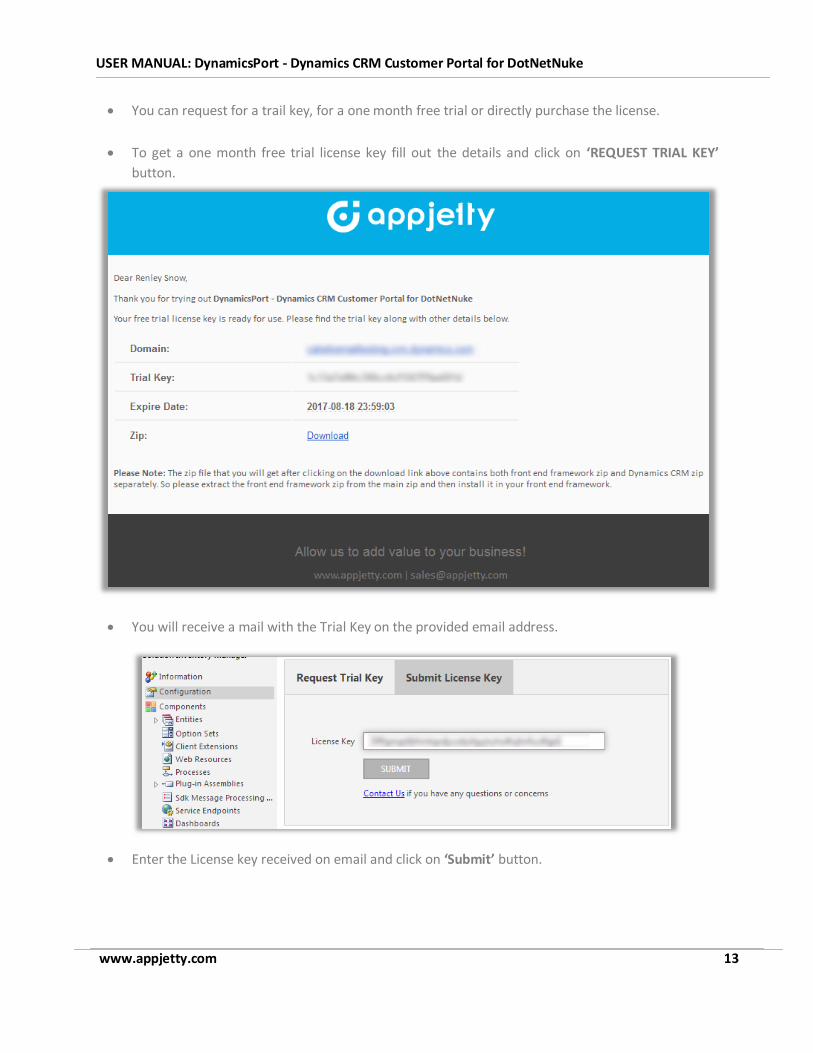
You can request for a trail key, for a one month free trial or directly purchase the license.
To get a one month free trial license key fill out the details and click on ‘REQUEST TRIAL KEY’
button.
You will receive a mail with the Trial Key on the provided email address.
Enter the License key received on email and click on ‘Submit’ button.

USER MANUAL: DynamicsPort - Dynamics CRM Customer Portal for DotNetNuke
www.appjetty.com 14
Once your trial period expires, a message will be displayed that “Your plugin is expired”. To renew
your license, click on ‘Renew’ and you will be redirected to our website. Purchase the plugin with
the same domain details and then click on ‘UPGRADE’ button.
You can directly purchase the license for paid version also. Click on the purchase license link and
purchase the paid version.
Note: Configuration process may take time to complete. Close the window only after configuring the
module layout.

USER MANUAL: DynamicsPort - Dynamics CRM Customer Portal for DotNetNuke
www.appjetty.com 15
Setting Email Template
Admin can create signup and forgot password template from CRM.
From "templates", user gets option to create "New" template and also select template type.
Select an email template type as "Contact" and create an email template filling the necessary details as per your requirement.
Note: User can also assign default "Email templates" for Sign-up and Forgot Password.
Setting Module Accessibility for Portal Users
Mention the URL of your WordPress Account which will be sent along with the credentials’ mail
and click on ‘Save’ button.

USER MANUAL: DynamicsPort - Dynamics CRM Customer Portal for DotNetNuke
www.appjetty.com 16
Use Dropdown caching to set up values of Look up fields (Related to other modules). Values
displayed in look up fields will remain old until it surpasses the time set here.
Select appropriate email template from drop-down for Sign-up and Forgot Password.
Note: Email template selection options are only for template type as "Contact".
You can create Roles and assign accessible modules to that role. To create a role click on ‘ROLES’
button. This will open up a page to add roles in a new window.
There will be a Default Role already existing along with default layout; you can create a new role by
clicking on the ‘NEW’ button.
Fill role details like Role name, Is Active, Description and Accessible Modules. Click "Save" to create the
role.
“Role” is created and modules are assigned to the role.
To disable a module select ‘Disable’ option from the status dropdown. To provide dynamic access
rights of ‘Create’ or ‘Delete’ check the boxes against each enabled module.

USER MANUAL: DynamicsPort - Dynamics CRM Customer Portal for DotNetNuke
www.appjetty.com 17
Note: By default ‘Default’ group will be assigned to a newly created contact record.
Setting Portal Layout
Customer portal provides feature to manage Dynamics CRM Module’s accessibility for their
WordPress portal users. You can decide access of which module should be provided to which
Customer by creating a role and assigning modules to that role.
USER MANUAL: DynamicsPort - Dynamics CRM Customer Portal for DotNetNuke
www.appjetty.com 18
To avail Dynamics CRM modules into your WordPress portal, it is mandatory to set Portal Layouts
for each accessible module. Customer Portal plug-in provides facility to set Portal Layouts for
Dynamics CRM modules.
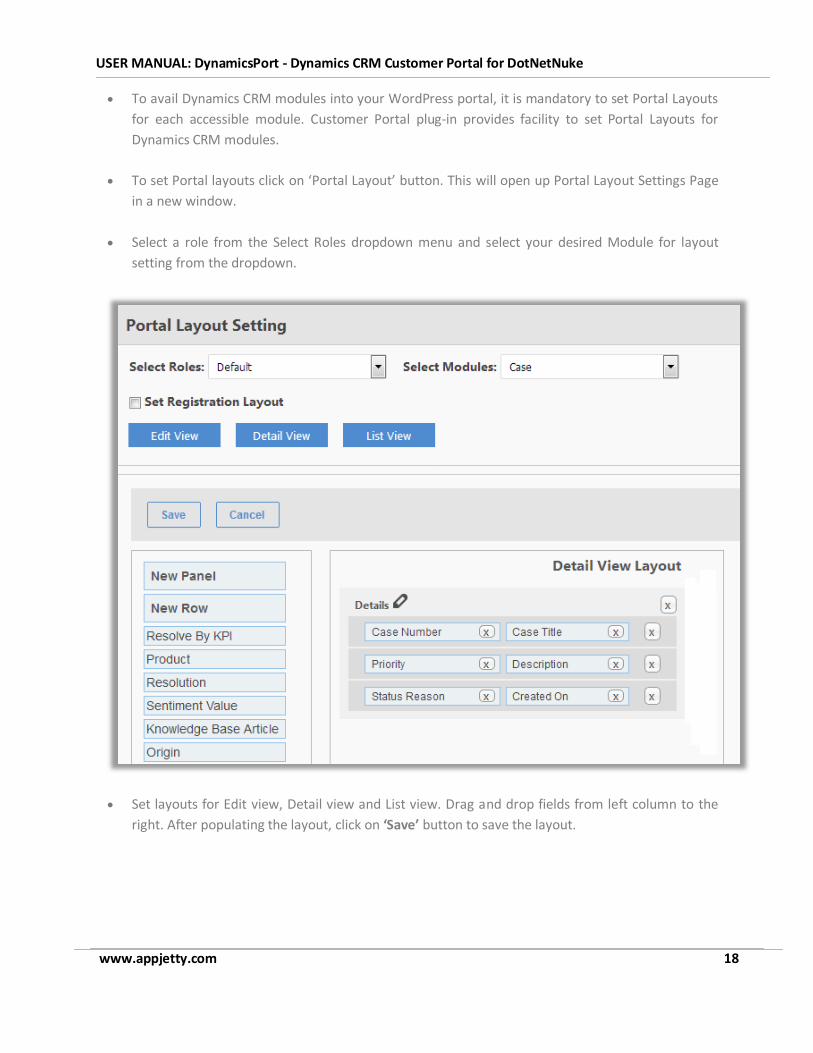
To set Portal layouts click on ‘Portal Layout’ button. This will open up Portal Layout Settings Page
in a new window.
Select a role from the Select Roles dropdown menu and select your desired Module for layout
setting from the dropdown.
Set layouts for Edit view, Detail view and List view. Drag and drop fields from left column to the
right. After populating the layout, click on ‘Save’ button to save the layout.

USER MANUAL: DynamicsPort - Dynamics CRM Customer Portal for DotNetNuke
www.appjetty.com 19
You can also set Detail view layout for reference module. A check box will appear on selecting a
module that has reference module associated to it. Check the box to set Detail view layout for
reference modules.
Generating Portal Credentials

USER MANUAL: DynamicsPort - Dynamics CRM Customer Portal for DotNetNuke
www.appjetty.com 20
To generate portal credentials for a particular contact enter into the detail view of that contact
and click on ‘Generate Credential & Send Email’. Credentials will be generated for that particular
contact and an email will be sent along with the credentials.
To mass generate portal credentials for CRM contacts, navigate to Contacts module and select the
contact records for which you want to generate credentials.
Now, click on ‘GENERATE CREDENTIAL’ button. This will generate credentials for all the selected
contacts and will be sent to their email address.
Field Configuration
For assigning any record to a particular portal user from CRM or to view the user in CRM to whom a record
is assigned from portal, you need to configure some fields in CRM.
Each module should have the below fields in its form. If no such field exists then you need to add a field
from Form Editor of that module.
The table below displays module-wise field name which needs to be configured.
SR NO. Module Field’s Display Name Field’s Name
1 Case Customer customerid
2 Order Customer customerid
3 Quote Potential Customer customerid
4 Invoice Customer customerid
5 Contract Customer customerid
6 Account Primary Contact primarycontactid
7 PhoneCall Regarding regardingobjectid
8 Appointment Regarding regardingobjectid

USER MANUAL: DynamicsPort - Dynamics CRM Customer Portal for DotNetNuke
www.appjetty.com 21
DotNetNuke Configuration Settings
Navigate to DotNetNuke Admin Home Page and click on the module name that you have created
for customer portal admin configuration to configure Dynamics CRM Customer Portal.
Enter your Dynamics CRM instance URL and Admin credentials (Username and Password).

USER MANUAL: DynamicsPort - Dynamics CRM Customer Portal for DotNetNuke
www.appjetty.com 22
You can add the number of records you wish to display on a page, upload a logo for your portal or
set a Default Avatar.
You can also set various other configuration options like:
Set color code for calendar activities like Phone Calls and Appointments.
Set Recent activities for modules you wish to display on Dashboard.
Choose a template for the Portal.
Choose theme for the Portal.

USER MANUAL: DynamicsPort - Dynamics CRM Customer Portal for DotNetNuke
www.appjetty.com 23
Front Side Instructions
After completing all configurations at Dynamics CRM and DotNetNuke portal for Customer Portal plug-
in, Customer can sign-up or login to Customer Portal and access Dynamics CRM modules.
Login:
Directly login to the portal using your portal credentials.

USER MANUAL: DynamicsPort - Dynamics CRM Customer Portal for DotNetNuke
www.appjetty.com 24
Sign Up:
Customer can sign-up to the DotNetNuke Portal by clicking on ‘Sign Up Now!’ link on the login
page. On click this link will redirect customer to sign up page.
A new user can directly sign-up from the portal. The credentials will be verified to check whether
any customer has been registered with same username and email address. If any such user does
not exist in the system then a user will be created in Dynamics CRM Contacts module.
Note: Already existing customers on both sides (DotNetNuke and Dynamics CRM) won’t get the
access for Customer Portal automatically on installation.
On Sign up, it will check if any customer is registered with same username and email address? If
no such user exists in the system then it will create a record in the Dynamics CRM’s Contacts
module. After successful registration user will be redirected to the login page. Now user can login
to portal with their Username and Password.

USER MANUAL: DynamicsPort - Dynamics CRM Customer Portal for DotNetNuke
www.appjetty.com 25
Forgot Password:
Portal user can retrieve their login password using the ‘Forgot Password’ Option. Click on ‘Forgot
Password’ option and enter your username and email address. Click on ‘Submit’ button and you
will receive your password on your email.

USER MANUAL: DynamicsPort - Dynamics CRM Customer Portal for DotNetNuke
www.appjetty.com 26
Portal Dashboard:
Quickly access any module using the module icons. DotNetNuke host can set the accessibility to
recently added records for portal users. Accordingly those modules with their recent records will
be displayed on the dashboard.

USER MANUAL: DynamicsPort - Dynamics CRM Customer Portal for DotNetNuke
www.appjetty.com 27
List View:
Navigate to any module and you will be able to see the list of records of that module. You can
search a record from the list view, delete it or update it.
You can also add a new record to that module. To add a new record click on the ‘Add’ button.

USER MANUAL: DynamicsPort - Dynamics CRM Customer Portal for DotNetNuke
www.appjetty.com 28
Add Record:
Add a new record in a module from the portal and it will get reflected in the Dynamics CRM.

USER MANUAL: DynamicsPort - Dynamics CRM Customer Portal for DotNetNuke
www.appjetty.com 29
Detail Page:
Click on the ‘View’ button from the List View and view the details of a record. You can edit that
record or delete it from the detail view.

USER MANUAL: DynamicsPort - Dynamics CRM Customer Portal for DotNetNuke
www.appjetty.com 30
Calendar Page:
You can view Phone Calls and Appointments on calendar for particular date with time.

USER MANUAL: DynamicsPort - Dynamics CRM Customer Portal for DotNetNuke
www.appjetty.com 31
Knowledge Base:
Access the Knowledge Base module of Dynamics CRM from portal to view question and answers
based on category.

USER MANUAL: DynamicsPort - Dynamics CRM Customer Portal for DotNetNuke
www.appjetty.com 32
Un-installation Steps
Navigate to Settings -> Templates -> Email Templates and "Delete", "Biztech Customer Portal Forgot
Password" Template and "Biztech Customer Portal Sign-Up" Template.
If you have created any template and used Username or Password field, then "Delete" that template also.
Now to uninstall the Solution, navigate to Settings - > Solutions
Check on the Plugin Name and click on ‘Delete’
Click on ‘OK’ to delete and uninstall the solution from CRM.

USER MANUAL: DynamicsPort - Dynamics CRM Customer Portal for DotNetNuke
www.appjetty.com 33
Contact Us We simplify your business, offer unique business solution in digital web and IT landscapes.
Customization: If you would like to customize or discuss about additional feature for Dynamics CRM Customer Portal,
please write to [email protected]
Live Chat
Get instant support with our Live Chat.
Visit our product page at:
https://www.appjetty.com/dynamicscrm-dotnetnuke-customer-portal.htm and click on the Live Chat button for instant support.
Tickets
Raise tickets for your specific question!
Send an email to [email protected] or
you can login to your account @
www.appjetty.com and click on My Support
Tickets on your account dashboard, to get
answers to your specific questions.