MINELAB. On the 22nd march, we went to Minelab to visit this factory. MINELAB.

iiXChange 2 User Manual
iiXChange 2 User Manual
4901-0127-3

Table of Contents
iiiXChange 2 User Manual
ContentsInstallation ................................................................................................................................. 4
XChange 2 Terms and Conditions ........................................................................................................................4
Setting User Preferences ......................................................................................................... 5
XChange 2 Overview ................................................................................................................ 6
Detector Items .......................................................................................................................... 7
Collections ................................................................................................................................. 8Collection Controls ........................................................................................................................................................8User Collections ...............................................................................................................................................................8System Collections .........................................................................................................................................................9
Detector.........................................................................................................................................................................9All .......................................................................................................................................................................................9File .....................................................................................................................................................................................9Recycle ...........................................................................................................................................................................9GeoHunt ........................................................................................................................................................................9
Item List .............................................................................................................................................................................. 10Item Summary ........................................................................................................................................................ 10Selecting/Deselecting items ......................................................................................................................... 10Moving/Copying/Deleting items ............................................................................................................... 10Edit Items ................................................................................................................................................................... 11
List Summary .................................................................................................................................................................. 11Sort Items .................................................................................................................................................................. 11Filter Items (Search Bar)..................................................................................................................................... 11Filter Items Advanced ........................................................................................................................................ 11
Using XChange 2 .....................................................................................................................13Logging In ........................................................................................................................................................................ 13Connecting your Detector ..................................................................................................................................... 14Collections ........................................................................................................................................................................ 15
Creating a Collection .......................................................................................................................................... 15Editing a Collection ............................................................................................................................................. 15
GeoHunt ............................................................................................................................................................................ 16Creating a GeoHunt ............................................................................................................................................ 16Editing a GeoHunt ............................................................................................................................................... 16
WayPoint ............................................................................................................................................................................ 17Creating a WayPoint ............................................................................................................................................ 17Editing a WayPoint ............................................................................................................................................... 18
FindPoint ........................................................................................................................................................................... 19Editing a FindPoint ............................................................................................................................................... 19
Detector Settings ......................................................................................................................................................... 20Editing Detector Settings ................................................................................................................................ 20
User Mode (CTX 3030 only) .................................................................................................................................21Creating a User Mode ........................................................................................................................................ 21Editing a User Mode ........................................................................................................................................... 21
Software Updates ...................................................................................................................23
Installation
4XChange 2 User Manual
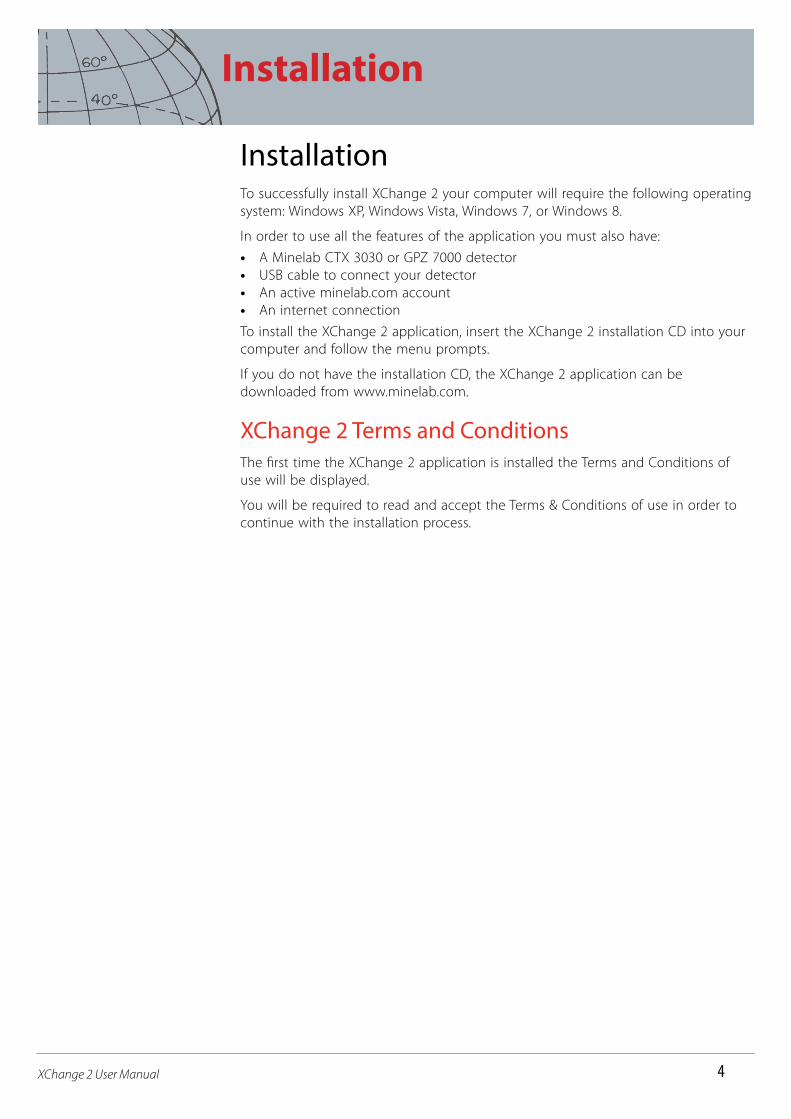
InstallationTo successfully install XChange 2 your computer will require the following operating system: Windows XP, Windows Vista, Windows 7, or Windows 8.
In order to use all the features of the application you must also have:
• A Minelab CTX 3030 or GPZ 7000 detector • USB cable to connect your detector • An active minelab.com account • An internet connection
To install the XChange 2 application, insert the XChange 2 installation CD into your computer and follow the menu prompts.
If you do not have the installation CD, the XChange 2 application can be downloaded from www.minelab.com.
XChange 2 Terms and ConditionsThe first time the XChange 2 application is installed the Terms and Conditions of use will be displayed.
You will be required to read and accept the Terms & Conditions of use in order to continue with the installation process.

Setting User Preferences
5XChange 2 User Manual
Setting User PreferencesWhen you install the XChange 2 application you will be required to set your User Preferences.
1. Set options for ‘Time’, ‘Position’, ‘Length Units’ and ‘Weight Units’
2. Click on the ‘SAVE’ button to save your preferences.
Changes to your User Preferences can be made within XChange 2 using the ‘Settings’ tab.

XChange 2 Overview
6XChange 2 User Manual
XChange 2 OverviewThis section provides an overview of the XChange 2 application and key areas of use.
Special Collections
Log in section
Settings pane
Language pane
Version numberHeader
Collection Controls
User Collections
Item Box
Item Summary
Item List
Item Controls

Detector Items
7XChange 2 User Manual
Detector ItemsDetector items are elements that can be copied to and from the detector.
Detector items include:
• Universal Settings (page 13) • User Modes – CTX 3030 only (page 21) • WayPoints (page 17) • FindPoints (page 18) • GeoHunts (page 15)
Please note that detector items created in one model of detector cannot be transferred to another model, with the exception of WayPoints.
For more information about these items, refer to the relevant pages in this manual.

Collections
8XChange 2 User Manual
CollectionsCollections are at the heart of the XChange 2 application. All items copied from the detector must reside in a collection. In fact, the detector itself is a special collection within the application. This allows items to be copied to and from the detector in the same way that items are moved from one collection to another.
Collections are groups of items similar to the folders on your computer, the main difference being that collections cannot contain other collections. Items can be moved around from one collection to another in order to collate them into appropriate categories.
Collections that you create should be given a name, and allocated an icon.
Collection ControlsThe collection controls perform the actions required to use and manipulate the collections.
Create CollectionCollection name
Items in Collection Add a WaypointRemove CollectionEdit Collection
User CollectionsIn order to move items into the application you need to create a User Collection. Once created, you may drag items from any collection to any User Collection.
You can create as many collections as you wish.

Collections
9XChange 2 User Manual
System Collections
System collections are special collections that provide specialist features for the application.
The available system collections are:
• Detector (e.g. CTX 3030) • All • File • Recycle • GeoHunt
DetectorWhen your detector is connected to your computer the ‘Detector Collection’ appears with the detector’s name next to the detector icon.
Click on the ‘Detector Collection’ to see the contents of the detector.
All‘All’ displays all items in all user collections. This collection is useful if you do not know the location of the items you are seeking.
The Search and Sort functions provide filters for viewing collection items (see page 11).
File‘File’ is a collection to which items can be copied and then exported to an alternate file for backup or sharing purposes. A previously saved ‘File’ can also be opened and items viewed and copied to other collections. In other words, ‘File’ provides an export/import feature.
‘File’ is a special Minelab format that can only be read and written by the XChange 2 application.
Recycle‘Recycle’ holds items that have been deleted from user collections. This provides a way to recover a deleted item until the ‘Recycle’ is emptied.
Any items that are dragged into ‘Recycle’ from the detector or the transfer file will be automatically deleted, and therefore will not be recoverable.
‘Recycle’ may be cleared using the Empty Trash icon
GeoHuntA GeoHunt contains all the items created while a GeoHunt was in progress, as well as the detector Mode in use at the time.

Collections
10XChange 2 User Manual
A GeoHunt records the detector Mode that was active when the GeoHunt was started, and displays a position trail of detector movements during the GeoHunt. The GeoHunt also contains any FindPoints and WayPoints while the GeoHunt was active.
Since these items may be moved to different user collections, the GeoHunt system collection allows you to view all the items associated with a GeoHunt in a single collection. It doesn’t move the items from their various user collections, it just temporarily creates a special collection containing all the GeoHunt items.
This system collection only appears when the ‘Show GeoHunt’ icon is selected in the Item Summary of any item that is part of a GeoHunt (page 10).
Item ListThe Item List shows a summary of each item in the selected collection. These can be from any collection, including the System Collections.
Item SummaryThe Item Summary contains a summary of the information for the item. The following figure shows the item summary for a GeoHunt:
Item collection iconItem iconAttachment icon
Item nameTime stampDescriptive text
Show GeohuntCenter on map
Edit Item
Distance to center of map
Selecting/Deselecting itemsTo select or deselect an item simply left click on the Item Summary. Multiple items can be selected by clicking on each Item Summary individually. When an item is selected the summary background will change color.
You can also select all the items by clicking on the ALL button at the top of the item list.
When an item is deselected the background will change back to white.
You can deselect everything by clicking on the NONE button at the top of the item list.
Moving/Copying/Deleting itemsItems in the application can be moved or copied by selecting and dragging the item. In order to delete an item, select the item and drag it to the recycle folder.
Whether an item is moved or copied is determined by the source and destination of the drag. The following table shows this relationship:
Collections
11XChange 2 User Manual
To
From
Detector All File Recycle GeoHunt User Collection
Detector Copy1 N/A Copy Delete N/A Copy
All Copy N/A Copy Move N/A Move
File Copy N/A N/A Delete N/A Copy
Recycle Copy N/A Delete N/A N/A Move
GeoHunt Copy N/A Copy Move N/A Move
User Collection
Copy N/A Copy Move N/A Move
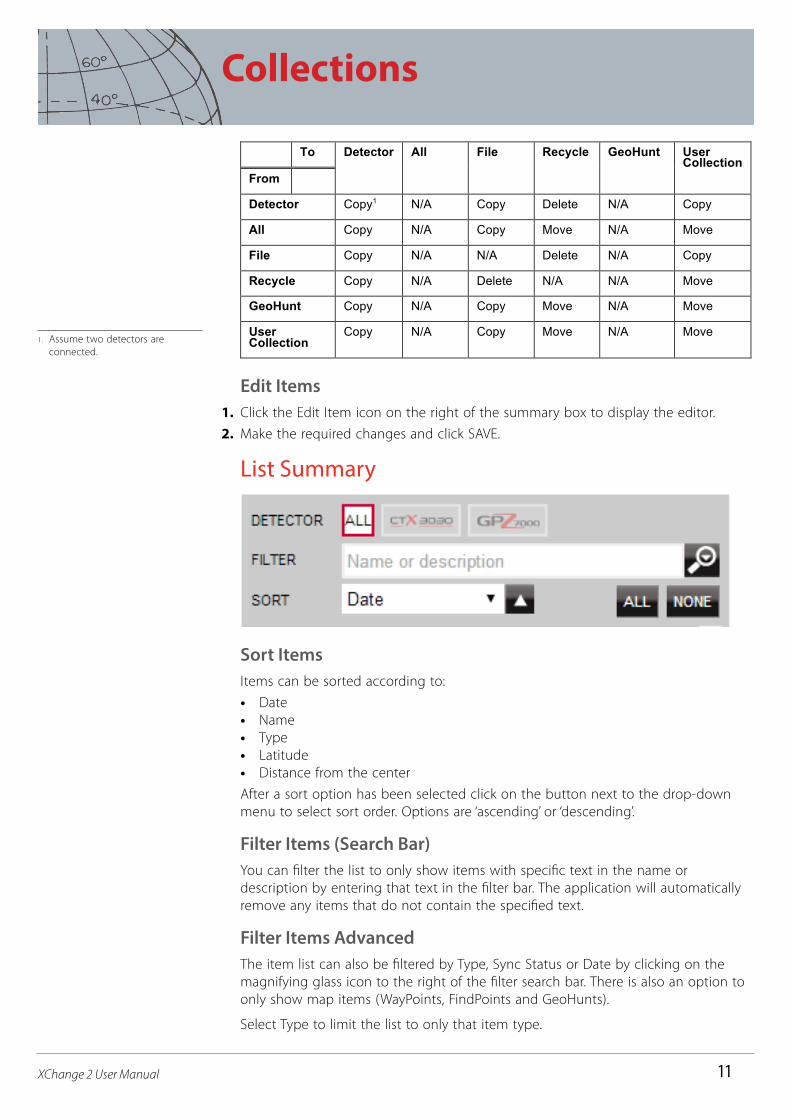
Edit Items1. Click the Edit Item icon on the right of the summary box to display the editor.
2. Make the required changes and click SAVE.
List Summary
Sort ItemsItems can be sorted according to:
• Date • Name • Type • Latitude • Distance from the center
After a sort option has been selected click on the button next to the drop-down menu to select sort order. Options are ‘ascending’ or ‘descending’.
Filter Items (Search Bar)You can filter the list to only show items with specific text in the name or description by entering that text in the filter bar. The application will automatically remove any items that do not contain the specified text.
Filter Items AdvancedThe item list can also be filtered by Type, Sync Status or Date by clicking on the magnifying glass icon to the right of the filter search bar. There is also an option to only show map items (WayPoints, FindPoints and GeoHunts).
Select Type to limit the list to only that item type.
1. Assume two detectors are connected.
Collections
12XChange 2 User Manual
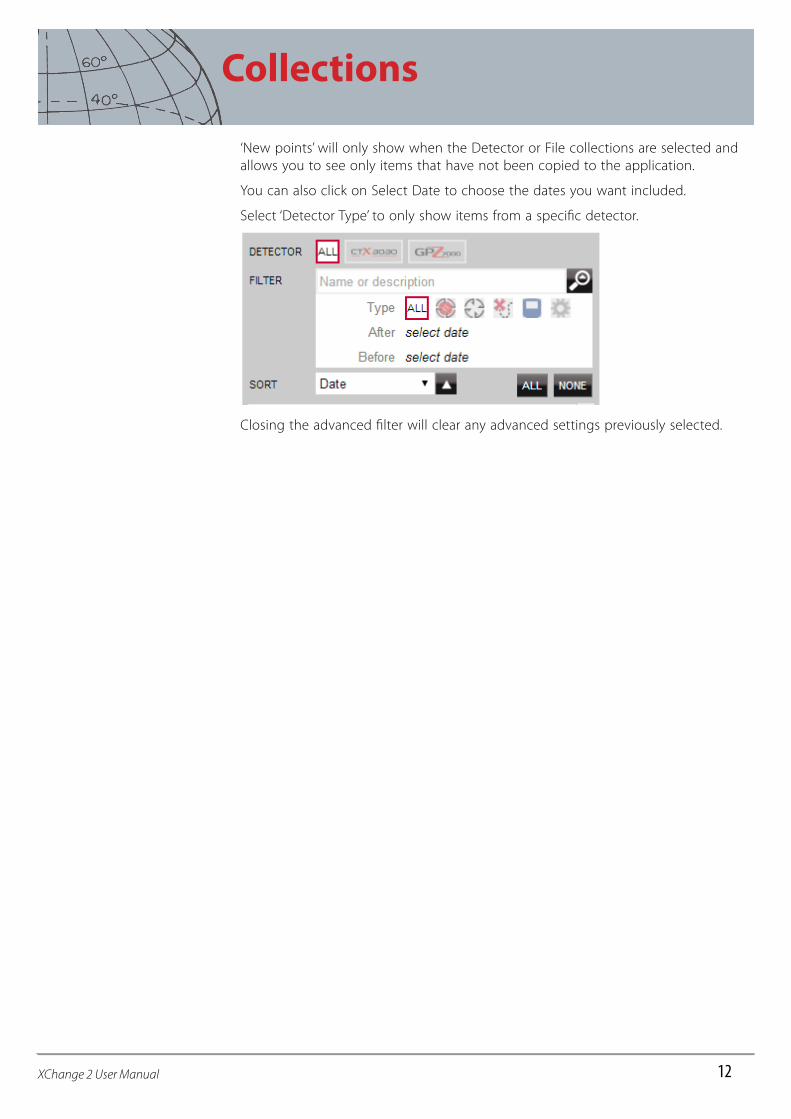
‘New points’ will only show when the Detector or File collections are selected and allows you to see only items that have not been copied to the application.
You can also click on Select Date to choose the dates you want included.
Select ‘Detector Type’ to only show items from a specific detector.
Closing the advanced filter will clear any advanced settings previously selected.

Using XChange 2
13XChange 2 User Manual
Using XChange 2
Logging InThe application can be used without logging on but mapping features will not be available for use.
If you already have a minelab.com account then you should use your existing Username and Password to login to the XChange 2 application.
If you do not have a minelab.com account create an account using the link provided or go to http://www.minelab.com/ and follow the instructions to create an account.
Enter your ‘minelab.com’ username and password into the XChange 2 application and click Login.
Once you have successfully logged into XChange 2 the mapping features will become available and you will be presented with a satellite map screen.
An example of the satellite map screen is provided on the next page.
Using XChange 2
14XChange 2 User Manual
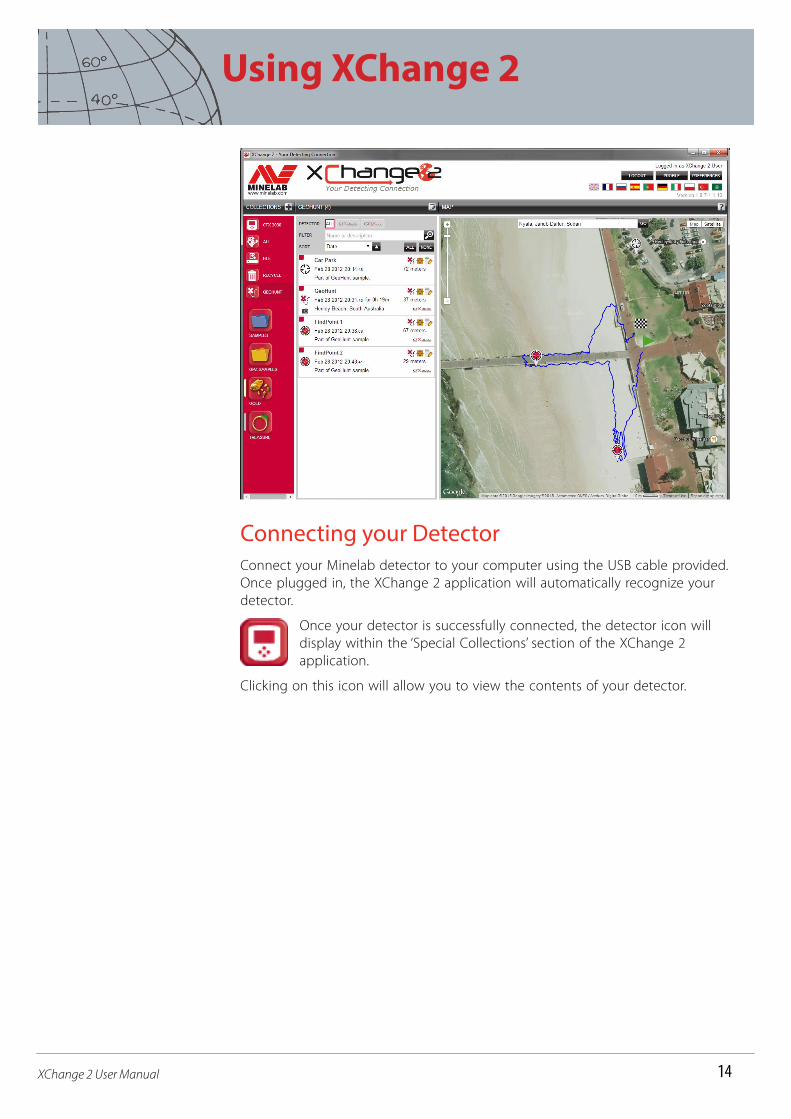
Connecting your DetectorConnect your Minelab detector to your computer using the USB cable provided. Once plugged in, the XChange 2 application will automatically recognize your detector.
Once your detector is successfully connected, the detector icon will display within the ‘Special Collections’ section of the XChange 2 application.
Clicking on this icon will allow you to view the contents of your detector.

Using XChange 2
15XChange 2 User Manual
Collections
Creating a Collection1. Click the ‘+’ next to Collections on the collection controls.
The Collection screen will be displayed.
2. Enter a name and select an image for the collection, and then click SAVE.
The newly created collection will appear in User Collections.
Editing a Collection1. Select the collection and click on the Edit Collection button on the List Summary
next to the collection name.
2. Change the details of the collection and click SAVE.

Using XChange 2
16XChange 2 User Manual
GeoHunt
Creating a GeoHuntGeoHunts are created on the detector and cannot be created by the application. Refer to the detector Instruction Manual provided on the CD for instructions on how to create a GeoHunt.
Editing a GeoHunt1. Click on the Edit button in the GeoHunt Item Summary; or
Click on the GeoHunt icon on the map and then click on the Edit link on the information box displayed.
The GeoHunt editor will appear.
2. Edit the GeoHunt details to your requirements, add an image if required, and click SAVE.
Your screen may vary depending on which detector model was used to capture the data.

Using XChange 2
17XChange 2 User Manual
WayPoint
Creating a WayPoint
1. Click on the button in the Collection Controls; or
Drag the WayPoint icon onto the map.
If you don’t currently have a user collection selected, you will be asked to select one for the WayPoint.
2. Choose a collection in which to insert the WayPoint and click OK.
The WayPoint editor will be displayed.
3. Enter the details for the WayPoint and click SAVE.

Using XChange 2
18XChange 2 User Manual
Editing a WayPoint1. Click on the Edit button in the WayPoint Item Summary; or
Click on the WayPoint icon on the map and then on the Edit link on the information box displayed.
The WayPoint editor will be displayed.
2. Edit the WayPoint details to your requirements, add an image if required, and click SAVE.

Using XChange 2
19XChange 2 User Manual
FindPointFindPoints are created on the detector and cannot be created by the application. Refer to the CTX 3030 Instruction Manual supplied on the CD for details on how to create a FindPoint.
Editing a FindPoint1. Click on the Edit button on the FindPoint Summary; or
Click on the FindPoint icon on the map.
The FindPoint editor will be displayed.
2. Edit the FindPoint details to your requirements, add an image if required, and click SAVE.
Your screen may vary depending which detector model was used to capture the data.

Using XChange 2
20XChange 2 User Manual
Detector Settings
Editing Detector Settings1. Click on the Edit Item button in the Universal Settings Item Summary.
The Universal Settings editor will be displayed.
2. Edit the settings to your requirements and click SAVE.
CTX 3030 Universal Settings
GPZ 7000 Settings

Using XChange 2
21XChange 2 User Manual
User Mode (CTX 3030 only)
Creating a User Mode
1. Click on the in the Collection Controls.
The User Mode editor will be displayed.
2. Type a name for your mode into the Name field and click SAVE.
NOTE: The User Mode MUST be given a name before it can be saved.
Editing a User ModeEach User Mode has two Discrimination Patterns and a Tone ID Map. Each of these can be edited by selecting the relevant tab in the User Mode editor.
Editing the Discrimination Patterns
1. Select the Discrimination Pattern tab to view the current pattern.
2. Click option 1 or 2 next to Active Discrimination Pattern to select the pattern you wish to edit.
3. Use the controls on the left to select mask or active and area fill, or a brush size.
4. Drag the mouse over the pattern area to draw the required pattern.

Using XChange 2
22XChange 2 User Manual
Editing the Tone ID Profile
1. Select the Tone ID Profile tab to view the current profile.
NOTE: The Tone ID Profile is overlaid on the currently active Discrimination Pattern.
2. Select the required Profile Type from the drop-down list and drag the lines to the required position.
3. Change the tone pitch by selecting the required zone and using the slider to select the pitch.
A visual indication of the pitch is shown by the level of grey in the active area.

Software Updates
23XChange 2 User Manual
Software UpdatesXChange 2 has an in-built software update feature. When connected to the internet, XChange 2 will check if there are any software updates available for the detectors or WM 12 modules that are plugged into the PC. A check will also be made for updates to the XChange 2 application.
If an update is found, the application will inform the user as follows:
• If the update is important the application presents the user with the following notification:
• If an update is available but not essential, the download link is displayed and no other notification is given. The download link is located at the top of the screen.
Update Available
To install the update, click on the notification and select the item to update.