User manual Manuele d'utilizzo Käyttäjän opas ... · Manuele d'utilizzo Käyttäjän opas...
45
User manual Manuele d'utilizzo Käyttäjän opas Bruksanvisning Manual del usuario Benutzerhandbuch DTR6610/00
Transcript of User manual Manuele d'utilizzo Käyttäjän opas ... · Manuele d'utilizzo Käyttäjän opas...

User manual
Manuele d'utilizzo
Käyttäjän opas
Bruksanvisning
Manual del usuario
Benutzerhandbuch
DTR6610/00
6610_A5_COV.qxd 01/09/2004 12:17 Page 1

WELCOME TO DIGITAL TELEVISIONCongratulations on choosing the Philips'DTR 6610 digital terrestrial receiver.This receiver will allow you to access free-to-viewdigital terrestrial television,radio interactive and dedicated scrambled channels.The embedded MHP feature makes yourreceiver compatible with the MHP interactive television applications that are carried on some of the channels.
Note:"Decoder"is used in all the menu screens.The term "decoder"also stands for "STB (Set Top Box)","Receiver"or "Digital receiver".In theuser manual all descriptions refer to "receiver".
BENVENUTI NEL MONDO DELLA TELEVISIONE DIGITALECongratulazioni per avere acquistato un ricevitore digitale terrestre Philips DTR 6610, che vi consentirà di accederegratuitamente a una vasta gamma di programmazioni su emittenti digitali terrestri, radio, canali interattivi e canali criptatidedicati. La funzione MHP integrata rende il ricevitore compatibile con le applicazioni televisive interattive MHP presenti sualcuni canali.
Nota: in tutte le schermate dei menu è utilizzato il termine "decoder". "Decoder" è anche sinonimo di "STB (Set Top Box)", "Ricevitore"o"Ricevitore digitale". Nel manuale di istruzioni tutte le descrizioni utilizzano invece la parola "ricevitore".
TERVETULOA DIGITAALISEN TELEVISION MAAILMAANKiitos, että olet valinnut Philipsin digitaalisen ETR 6610 -vastaanottimen. Laitteella voit vastaanottaa maanpäällisen verkonmaksuttomia digitaalisia tv- ja radiokanavia sekä interaktiivisia ja salattuja erikoiskanavia. Vastaanottimen MHP-toimintamahdollistaa tiettyjen tv-kanavien lähettämien vuorovaikutteisten MHP-sovellusten käytön.
Huomautus: Kaikissa valikkoteksteissä esiintyy termi "dekooderi". Dekooderi tarkoittaa samaa kuin "STB (Set Top Box)","vastaanotin" tai"digivastaanotin". Tässä käyttöohjeessa laitteesta käytetään nimitystä "vastaanotin".
VÄLKOMMEN TILL DEN DIGITALA TELEVISIONENGrattis till ditt köp av den digitala markmottagaren DTR 6610 från Philips. Denna mottagare ger dig tillgång till gratis digitalmarkbunden television, radio, interaktiva och utvalda kodade kanaler. Den inbyggda MHP-funktionen gör din mottagarekompatibel med de interaktiva MHP-applikationer som finns i vissa kanaler.
Observera: "Dekoder" används i alla menybilder. Termen "dekoder" är liktydig med "STB" ("Set Top Box" - "digitaldekoder"),"Mottagare" eller"Digital mottagare". I bruksanvisningen står i alla beskrivningar "digitalmottagare".
BIENVENIDO A LA TELEVISIÓN DIGITALEnhorabuena por su elección del receptor digital terrestre DTR 6610 de Philips, con el que podrá acceder en abierto aprogramas de televisión y radio interactiva, así como a canales codificados especializados. Al incluir la característica MHP, elreceptor es compatible con las aplicaciones MHP de televisión interactiva que ofrecen algunos canales.
Nota: El término "decodificador" aparece en todas las pantallas de menú. Este término también hace referencia al "STB (Dispositivoconvertidor-decodificador)", "Receptor" o "Receptor digital". En el manual de usuario todas las descripciones harán referencia al "receptor".
WILLKOMMEN IN DER WELT DES DIGITALEN FERNSEHENSHerzlichen Glückwunsch zum Kauf digitalen terrestrischen Receivers DTR 6610 von Philips. Mit dem Receiver können Sie freizugängliche digitale Fernseh- und Radioprogramme sowie interaktive und spezielle verschlüsselte Sender empfangen. Dank dereingebauten MHP-Funktion ist Ihr Receiver kompatibel mit den interaktiven MHP-Fernsehanwendungen, die über bestimmteKanäle übertragen werden.
Hinweis: In den Menüfenstern wird jeweils der Begriff "Decoder" benutzt. Darunter fallen auch die Bezeichnungen "STB" (Set Top Box),"Receiver" und "Digital Receiver". In der Bedienungsanleitung wird für diese Begriffe durchgängig die Bezeichnung "Receiver" verwendet.
6610_A5_COV.qxd 01/09/2004 12:17 Page 2

SAFETY INSTRUCTIONS 1
Safety Instructions
All the safety and operating Instructions
should be read and understood before the
receiver is operated.
For best results, position your receiver
away from radiators or other heat sources.
Leave a space of at least 3 cm around the
receiver for ventilation making sure that the
ventilation holes are not obstructed.
This receiver is intended for use in a
domestic environment only and should
never be operated or stored in excessively
hot, humid or damp conditions.
Make sure no objects or fluids enter the
housing through the ventilation slots. Should
this happen, disconnect your receiver from
the mains and consult your retailer.
For cleaning, use damp chamois leather.
Never use any abrasive cloth, sponge or
cleaner.
When connecting or disconnecting cables to
the receiver always ensure the receiver is
disconnected from the mains.
Do not disassemble the equipment. There
are no user serviceable parts.
Mains connection
Before connecting the receiver to the
mains, check that the mains supply voltage
corresponds to the voltage printed on the
rear of the receiver. If the mains voltage is
different, consult your dealer.
Please wait before connecting your
receiver - read on.
Unpacking
As you unpack your digital receiver, please
make sure the following accessories are
included:
- Remote control with separately packed
Philips alkaline batteries
- Mains cord
- One SCART cable
- One Phone cord (adapter not supplied)
- One RF coaxial cable
- User Manual
- Philips guarantee card
- Stand for using the receiver in the upright
position.
Warning: Plastic bags can be dangerous. Toavoid suffocation keep the bag away from babiesand children.
The symbol on the packaging and
user manual means that the materials are
recyclable.
Receiver in uprightposition
Your receiver can be integrated in different
ways within your existing Audio-Video
setup. The receiver can be used in the
horizontal or vertical position. If you decide
to use your receiver in the upright position,
follow the instructions below:
- Unpack the stand, place it on a horizontal
surface with click fit side on the left and
lug side on the right.
- Position the receiver as shown below
(rear panel on the left side / coaxial
connectors on the bottom side).
- Insert the stand lug in the slot located on
the front of the receiver, close to the
Philips badge.
- Rock the receiver to insert the stand lug
fully in the slot until it is locked by the
click fit.
Then your receiver can be used in the
upright position, rotating the rotary display
for use in this position.
Note: to remove the stand, unlock the click fit atthe rear side of the stand, rocking and pullingback the receiver to extract it from the standlug.
En
gli
sh
6610_A5_GB.qxd 01/09/2004 12:58 Page 1

En
glish
2 QUICK INSTALLATION GUIDE
Quick installation guide
Please refer to the safety section before connecting your receiver.
1 Integrate your receiver in your existing installation as
shown below.
2 Insert the two batteries supplied in your remote control.
3 Switch on the TV set and select a channel.
4 Plug the receiver's power supply cord to the mains. The
receiver front panel LED gets on, then the display.
5 Now you should see the Welcome screen on your TV
screen. After a few seconds, the Welcome screen
disappears.
TV set
Video recorder
Terrestrial receiver
6610_A5_GB.qxd 01/09/2004 12:58 Page 2

QUICK INSTALLATION GUIDE 3
6 Then, a screen appears that allows you to select the
language. Highlight the desired language by pressing
V/W and then press OK.
You are prompted to confirm your choice by pressing
OK again.
7 Next, highlight the country where you operate the
receiver by pressing V/W and then press OK.
You are prompted to confirm your choice by pressing
OK again.
8 A screen appears that allows you to select the TV screen
format corresponding to your TV set. Highlight the
appropriate format by pressing V/W. Press OK to
initiate the channel search.
Search operation is indicated by segments moving around
the display.
9 Once it has been completed, follow the prompts
displayed on the screen.
Press OK to store any found channels and tune the box
to the first found TV channel.
Now you are ready to enjoy viewing your terrestrial
receiver. Refer to chapter 4 Day to Day operation to
learn more about using your receiver.
En
gli
sh
6610_A5_GB.qxd 01/09/2004 12:58 Page 3

4 CONTENTS
Contents
Safety Instructions ___________________1
Unpacking ___________________________1
Receiver in upright position ___________1
Quick installation guide _______________2
Contents ____________________________4
1 Product description ______________6
1.1 Front view _____________________6
1.2 Rear view ______________________8
1.3 Smart card reader _______________9
2 Preparing, setting and using your
Remote Control _________________9
2.1 Installation of batteries ____________9
2.2 Setting of your remote control _____9
2.2.1 Mode setting ____________________9
2.2.2 Volume and mute control setting _____10
2.2.3 Changing the brand setting of your
remote control for TV, VCR, DVD or
Amplifier-Tuner __________________10
2.3 Using the remote to control your
digital receiver –The remote control
is set to STB mode ______________11
3 Connection and Installation ______12
3.1 Connections ___________________12
3.1.1 Connect the receiver to your TV and
VCR __________________________12
3.1.2 Connect your HiFi appliance ________13
3.1.3 Connect your receiver to the telephone
line ___________________________13
3.2 Receiver installation _____________13
3.3 Installation error ________________14
4 Day to Day operation ___________14
4.1 Connecting your receiver to the
mains ________________________14
4.2 Turn ON your receiver or switch to
low power ____________________14
4.3 Wake up your receiver or Switch to
standby _______________________15
4.4 Select TV or Radio mode _________15
4.5 How to switch between channels
in the list ______________________15
4.6 How to use the channel Banner ___16
4.6.1 Channel Banner Icons _____________16
4.6.2 How to Select Current /
Next Programs __________________17
4.6.3 How to Select Channels ____________17
4.7 How to Change momentarily the
current Program Options ________17
4.8 How to Display More Program
Info __________________________18
4.9 MHP Interactive Applications _____18
4.9.1 How to run MHP Applications _______18
4.9.2 Country specifics _________________19
4.10 Reminders and Timers ___________20
4.10.1 Difference Between Reminder and
Timer _________________________20
4.10.2 Viewing and Recording Reminders/
Timers ________________________20
4.10.3 Reminder/Timer Conflicts ___________21
4.10.4 Timer Manager __________________21
4.11 Program Guide _________________22
En
glish
6610_A5_GB.qxd 01/09/2004 12:58 Page 4

CONTENTS 5
5 Main Menu _____________________23
6 Change the setting of your
receiver _______________________24
6.1 Channel Manager _______________24
6.1.1 How to skip a channel _____________24
6.1.2 How to move a channel ___________24
6.1.3 How to rename a channel __________25
6.1.4 How to lock a channel _____________25
6.2 Specially for parents _____________25
6.2.1 Decoder Lock ___________________25
6.2.2 Parental Control _________________26
6.2.3 Change PIN code ________________26
6.3 Your Preferences _______________26
6.3.1 Display Options __________________26
6.3.2 Language Options ________________27
6.4 Installation ____________________28
6.4.1 Local Time _____________________28
6.4.2 Settings _______________________28
6.4.3 Installation / Signal Meter __________31
6.4.4 Installation / Channel Search ________32
6.4.5 Installation / Decoder Status ________32
6.4.6 Installation / Factory Reset __________32
7 Advanced Settings ______________33
7.1 Easy Recording _________________33
7.2 Change the Remote Control and
receiver "Device" Settings ________34
8 Programming the Remote Control for
your STB, TV, Video Recorder, DVD
and Tuner - Amplifier. ___________35
8.1 Setting up your remote control ____35
8.2 Using your remote control for your
TV ___________________________36
8.3 Using your remote control for your
VCR _________________________37
8.4 Using Remote Control For Your
DVD Player ___________________38
8.5 Using Remote Control For Your
Tuner / Amplifier _______________39
9 Troubleshooting guide __________40
10 Technical Specifications __________41
En
gli
sh
6610_A5_GB.qxd 01/09/2004 12:58 Page 5

En
glish
6 PRODUCT DESCRIPTION
1 Product description
1.1 Front view
1 Slot for stand positionning:
See Receiver in upright position on page 1.
2 Smart Card slot: See section 1.3.
3 LOW POWER button with red indicator:
Switch the receiver ON or to low power. Indicate low power
when lit.
4 Rotating display, including the following buttons:
PROG-/PROG+ In standby, wake up the receiver.
In normal viewing, Channel Banner, or Program Guide, switch
channels up/down.
From the Menu system, exit to normal viewing, and then switch
channels.
TV/RADIO In standby, wake up the receiver.
In normal viewing, Channel Banner, or Program Guide, switch
between digital TV and Radio.
From the Menu system, exit to normal viewing, and then switch
between digital TV and Radio.
INFO Display the channel banner, then program details, and then return
to normal viewing.
1 2 3 4
6610_A5_GB.qxd 01/09/2004 12:58 Page 6

En
gli
sh
PRODUCT DESCRIPTION 7
Front Panel Display
The front panel LED display gives you information about the current state of your receiver. Refer
to the table below.
Status indicator table
First installation setting.
Channel installation is in progress.
Current time displayed in 24-hour format when the box is in the
standby mode.
Receiver is tuned to one of the TV channels.
Receiver is tuned to one of the radio channels.
Recording is in progress.
The VCR connected to the VCR SCART of your receiver is
playing back a tape. Stop VCR play back to return to the viewing
mode.
Your decoder is switched into the TV mode. Press the TV/STB
remote control key to return to he STB mode.
Your decoder is switched into the STB mode.
Dot on the right-hand side blinks when you press remote control
keys.
Receiver update is in progress.
On the currently tuned channel, there is an interactive application
available. This icon blinks during mhp applications loading.
"c" letter on the left part of display indicates a modem
connection. It blinks during initialization of connection.
6610_A5_GB.qxd 01/09/2004 12:58 Page 7

En
glish
8 PRODUCT DESCRIPTION
1.2 Rear view
1 Telephone Line*** To connect the supplied telephone cord to be connected to
your telephone line using the appropriate adapter (adapter
not supplied).
2 VCR SCART* (1) To connect a SCART lead to be connected to the SCART
socket input (EXT1) of your VCR or DVD Recorder.
3 Digital Audio* To connect to one of the digital audio input of your HiFi /audio
receiver system.
4 Serial* Data interface used during servicing.
5 Aerial In* To connect the plug of your aerial cable.
6 230V~50Hz 15W max.** To connect the supplied mains cord to be connected to the
power socket.
7 TV SCART* (1)(2) To connect the supplied SCART lead to be connected to the
SCART socket input of your TV set.
8 L/R Audio Output* To connect to the Left/Right audio Cinch inputs of your
HIFI/audio receiver system.
9 RF Out* To connect the supplied RF coaxial cable to be connected to
the aerial input socket of your TV or VCR.
* SELV: Safety Extra Low Voltage.** HV: Hazardous Voltage.*** TNV 3: Telecommunication Network Voltage 3.(1) SCART is also called Euroconnector or Peritel.(2) The supply SCART lead is suited for RGB format which allows the best picture quality. Consult the
user manual of your TV set to select its RGB capable SCART socket input.
Note: The label showing the type and the serial number is underneath your receiver.
6 7 8 9
1 2 3 4 5
6610_A5_GB.qxd 01/09/2004 12:58 Page 8

En
gli
sh
PRODUCT DESCRIPTION 9
1.3 Smart card readerYour receiver is fitted with a smart card reader.
The smart card is intended for Pay TV channels or for
future applications.
Inserting your smart card shall be done on the front panel
left side.
Note: the smart card golden or Silver contacts shall be facingup at card insertion.
2 Preparing, setting and using your Remote
Control
2.1 Installation of batteries• Remove the remote control back cover.
• Insert the two batteries (type R06 /AA –1.5 V) supplied.
• Position them as shown in the diagram in the battery
compartment.
• Replace the cover.
The Philips batteries supplied with your receiver's remote
control do not contain heavy metals such as Mercury or
Nickel Cadmium.
Nevertheless in many countries exhausted batteries may
not be disposed of with your household waste. Please
ensure you dispose of exhausted batteries according to
local regulations.
2.2 Setting of your remote control
2.2.1 Mode settingYour 5 in 1 Remote control allows the control of most of
your Audio /Video equipment through various modes,
which are: Terrestrial receiver mode so called STB (Set
Top Box), TV, VCR, DVD and Amplifier-Tuner.
Pressing the MODE button once will remind you the
mode you are in through blinking lights: left for STB,
middle for TV, right for VCR, left-middle for DVD and
middle-right for Amplifier-Tuner.
To set a given mode press the MODE button several
times until the desired mode is signalled by the light(s).
The setting sequence is STB ➔ TV ➔ VCR ➔ DVD
➔ Amplifier-Tuner.
6610_A5_GB.qxd 01/09/2004 12:58 Page 9

En
glish
10 USING YOUR REMOTE CONTROL
2.2.2 Volume and mute control setting
When the remote control is set to STB mode the
Volume +/Volume -/Mute buttons can either control the
corresponding functions of your TV sets or the
corresponding function of your digital receiver. Refer to
chapters 2.2.2.1 or 2.2.2.2.
Note: we recommend Volume and mute control via your digitalreceiver. Refer to chapter 2.2.2.1 for setting.
2.2.2.1 You want the remote to control the volumeand mute via your digital receiver(recommanded).
To set the volume/mute control to STB.
1 Select the STB mode.
2 Press simultaneously 1 and 9 buttons until the LED blinks
twice then release the buttons.
3 Enter code 993, the LED is blinking once after each digit
entry.
4 Press the "green" button, the LED shall blink twice to
acknowledge the new setting.
2.2.2.2 You want the remote to control the volumeand mute of your TV set /Set volume controlto TV.
The factory setting of your remote is set to allow the
control of the volume /mute of a Philips TV set. If your TV
set has a different brand check in the TV brand list what
code(s) might apply then change the setting of your
remote control according to the method described in
chapter 9.1.
Note: to set or reset the volume/mute control to TV followprocedure below:1- Select the STB mode.2- Press simultaneously 1 and 9 buttons until the LED blinks
twice then release the buttons.3- Enter code 993, the LED is blinking once after each entry.4- Press the "yellow" button, the LED shall blink twice to
acknowledge the new setting.
2.2.3 Changing the brand setting of your
remote control for TV, VCR, DVD or
Amplifier-Tuner
Refer to chapter 9 for brand setting procedure.
6610_A5_GB.qxd 01/09/2004 12:58 Page 10

2.3 Using the remote to control your digital receiver –The remotecontrol is set to STB mode
En
gli
sh
USING YOUR REMOTE CONTROL 11
FAVOpen / close the current channellist.
GUIDEOpen / close the Program Guide
RADIOToggle between TV and Radiomodes. Wake up from standby.
Standby BBSwitches your receiver into thestandby mode.
EXITReturns to normal viewing mode.If [EXIT] is pressed and held forat least 2 seconds, the currentlylaunched application is killed andnormal viewing is resumed. Afterthat the "autostart" status isswitched off temporarily as long asthe box is tuned to this channel.
P+ / P-- In viewing mode: Tunes to the
higher/lower channel within thesame channel list.
- scrolls one page up or down inchannel list
- In standby Wakes up the DigitalReceiver.
44
Open the Options menu tochange momentarily soundtrack /subtitles / teletext / display formatsetting.
VW
- Switches the Channel Bannerin the browsing mode.
- Scrolls selection up/down in amenu or channel list.
CB
- In Channel Banner, switchbetween the current and nextprogram.
OK keyConfirms your choices.
RECOpen the Setting a Timerscreen.
MODESelects the remote control mode(STB, TV, VCR, DVD, AMP-TUNER).
AA +/-Change the volume level on yourTV or Digital Receiver (refer to2.2.2.2 for setting).
TV/STB aa
Toggles between watchingterrestrial digital programsvia your receiver andstandard analogueprograms via your TV set.
MENU Opens / Closes the Menu.
mm
Switches between viewing mode,Channel Banner, and ChannelBanner with Extended Info.
MUTE cMutes the sound on your TV orDigital Receiver (refer to 2.2.2.2for setting).
BACK- In viewing mode: Returns to the
previously tuned channel- In menu mode returns to the
previous screen.
WHITE/TEXTTXT button used in MHPapplications.
0-9- In viewing mode: Selects
channels- In menu; Selects directly menu
item or Sets new parametervalue
- In standby Wakes up the DigitalReceiver.
RED, GREEN, YELLOW, BLUE Contextual buttons used in MHPapplications.
6610_A5_GB.qxd 01/09/2004 12:58 Page 11

En
glish
3 Connection and Installation
3.1 Connections
3.1.1 Connect the receiver to your TV and VCR
Incorporate the receiver in your existing installation as shown below / decoder receiver.
1 Plug your aerial lead plug into the "AERIAL IN" socket of your digital receiver.
2 Connect the "RF OUT" socket of your digital receiver to the "Aerial input" socket of your VCR by
means of the RF coaxial lead supplied with your digital receiver.
3 Connect the "RF OUT" socket of your VCR to the "Aerial input" socket of your TV set by means
of a RF coaxial lead.
4 Connect the "TV" SCART socket of your digital receiver to the RGB capable SCART socket of
your TV set by means of the SCART lead supplied with your digital receiver.
5 Connect the "VCR" SCART socket of your digital receiver to the "EXT1" SCART socket of your
VCR (so called OUT) by means of a SCART lead.
6 Plug all your equipment, excluding your digital receiver, into the mains.
7 Go to chapter 3.2 to proceed with the channel scan of your digital receiver.
Notes:1- This connection also applies if your VCR has one SCART socket.2- With this connection set up you can:
- Watch digital TV while you record analogue TV.- Watch analogue TV while you record digital TV.- Record the digital TV channel you are watching.- Watch Play Back from your VCR.
TV set
Video recorder
Terrestrial receiver
12 CONNECTION AND INSTALLATION
6610_A5_GB.qxd 01/09/2004 12:58 Page 12

3.1.2 Connect your HiFi appliance
Depending on your HiFi /Audio receiver
equipment, you might have several options
to connect your digital receiver.
• Analogue connection
Connect the L/R audio output sockets to
the relevant L/R audio input sockets of your
audio equipment by means of a double
CINCH cable (not supplied). Consult the
user manual of your HiFi/Audio receiver
equipment to choose the proper analogue
audio inputs.
Note: With this connection set up you cancontrol the audio volume up/down and mutewith the remote control of your digital receiverand alternatively with your HiFi's remote control.
• Digital connection
Connect the audio "DIGITAL OUTPUT"
socket to the relevant digital audio input
socket of your audio equipment by means
of an appropriate connection (not supplied).
Consult the user manual of your HiFi/Audio
receiver equipment to choose the proper
digital audio input.
Note: With this connection set up you can onlycontrol the audio volume Up/Down and mutewith your Hifi /audio receiver remote control,refer to its User Manual.
3.1.3 Connect your receiver to the
telephone line
Connect the Telephone Line socket to the
wall telephone outlet by means of the
supplied telephone cord and appropriate
adapter (adapter not supplied).
Note: The equipment has been approvedpursuant to Commission Decision 99/303/EC forpan-European connection to the public switchedtelephone network (PSTN). However, due todifferences between the individual PSTNsprovided for in different countries, the approvaldoes not, of itself, give an unconditionalassurance of successful operation on every PSTNnetwork termination point. In the event of problems, you should contactyour equipment supplier in the first instance.
3.2 Receiver installation1 Switch on the TV set and select a channel.
2 Plug the Receiver's power supply cord to
the mains. The receiver front panel LED
gets on, then the display.
3 Now you should see the Welcome screen
on your TV screen. After a few seconds,
the Welcome screen disappears.
4 Then, a screen appears that allows you to
select the language. Highlight the desired
language by pressing W/V and then press
OK.
You are prompted to confirm your choice
by pressing OK again.
5 Next, highlight the country where you
operate the receiver by pressing W/V and
then press OK.
You are prompted to confirm your choice
by pressing OK again.
6 A screen appears that allows you to select
the TV screen format corresponding to
your TV set. Highlight the appropriate
format by pressing W/V. Press OK to
initiate the channel search.
Search operation is indicated by segments
moving around the display.
7 Once it has been completed, follow the
prompts displayed on the screen.
Press OK to store any found channels and
tune the box to the first found TV channel.
Now you are ready to enjoy viewing your
terrestrial receiver. Refer to chapter 4 Day
to Day operation to learn more about using
your receiver.
Note : If any of the WELCOME, Languageselection or Country selection screen is notdisplayed, press two times the TV/STB button toget the screen displayed.
En
gli
sh
CONNECTION AND INSTALLATION 13
6610_A5_GB.qxd 01/09/2004 12:58 Page 13

En
glish
14 CONNECTION AND INSTALLATION
3.3 Installation errorScanning failed. Before starting a new scanning, check:
• the aerial cable;
• the aerial cable connection to your digital receiver. Refer to the connection diagrams in chapter
3.1.1;
• channel(s) availability in the region corresponding to your area;
• signal quality, from the Signal Meter screen:
- press Menu from the First Time Installation screen to access the Main Menu;
- select the Installation submenu, and then the Signal Meter item. The Signal Meter;
- select the appropriate channel number (tuner Locked) using the C or B buttons and check
the corresponding signal strength and quality levels. If the signal is good enough, press BACK
three times to return to the First Time Installation screen, and then OK to launch a new
scanning. When scanning ends successfully, press OK.
Note: if you could still not install the channels after checking the quality of the signal delivered by youraerial, either your aerial is not pointing properly at the digital TV transmitter or your aerial installation needsto be upgraded, or you are not in the coverage area to correctly receive digital television.For a proper diagnosis, call your electrical retailer.
4 Day to Day operation
4.1 Connecting your receiver to themains
When you connect your receiver to the mains, the
receiver front panel indicator gets on, after a few seconds
the Welcome screen is shortly shown then after few
tenth of seconds the receiver is either in standby or in
viewing mode.
4.2 Turn ON your receiver or switch tolow power
You watch TV or listen to the radio; press the LOW
POWER button on the front panel to switch your
receiver to low power.
Your receiver is in low power. The only way to turn it on
is to press the LOW POWER button on the front panel.
6610_A5_GB.qxd 01/09/2004 12:58 Page 14

4.3 Wake up your receiver or Switch tostandby
• You watch TV or listen to radio, press the standby button
to switch your receiver to standby.
• Your receiver is in standby, to wake it up:
- Either press the P+, P-, RADIO or any digit button on
the remote control.
- Or press one digit button.
- Alternatively, press the PROG-/PROG+ or
TV/RADIO button on the front panel.
4.4 Select TV or Radio modeYour receiver may work in two modes: TV or radio. To
switch between these two modes, press the RADIO key.
If you are watching one of the TV channels, pressing
RADIO tunes to the last tuned radio channel belonging
to the previously selected channel list. Pressing RADIO
again returns to the TV mode -to the last tuned TV
channel. Alternatively, use the TV/RADIO front panel
button.
On switching the mode, the Channel Banner appears
for its timeout. In the radio mode, the radio label
appears/disappears at random positions on the screen to
avoid damaging your TV screen.
Radio Label
4.5 How to switch between channels inthe list
Your receiver gives you access to TV Channel List and to
Radio Channel List.
To display the currently selected channel list, press the
FAV key. To change the channel list press C or B keys.
Then select the channel by pressing V or W, or number
keys. Each time you highlight a non-current channel, the
icon appears in the Channel Banner. To tune to
this channel, press OK.
TV Channel ListNote: Channels lists allow you to work in so-called browsingmode. In this mode, the box remains tuned to the samechannel, while you browse through channels and programs.
En
gli
sh
DAY TO DAY OPERATION 15
6610_A5_GB.qxd 01/09/2004 12:58 Page 15

En
glish
4.6 How to use the channel BannerChannel Banner appears at the bottom of the screen when you tune your receiver to a new
channel or when you press the mm key. It offers you basic information about individual programs
and facilitates surfing through channels and programs. When you are in the Channel Banner, you
can only browse through channels belonging to the currently selected channel list. The Channel
Banner disappears automatically after a few seconds, or when you press EXIT.
4.6.1 Channel Banner Icons
This icon informs that some program information is available for the programdisplayed in Channel Banner.
This icon informs that the current channel is locked.
This icon informs that a viewing reminder has been set for a particular program.
This icon informs that a recording reminder has been set for a particular program.
This icon informs that a program with more than one soundtrack is broadcast.
This icon informs you that pressing OK tunes to the channel that the ChannelBanner refers to, or sets/cancels a reminder.
This icon informs you that the program is broadcast with AC3/Dolby Digital sound.
This icon informs you that the particular program is parentally locked.
This symbol informs that you may launch external applications by pressing OK.
This icon informs you that an mhp application is loading.
This icon informs that teletext is broadcast on the currently tuned channel.
This icon informs that you may select subtitles for the current program.
This icon informs that you may select subtitles intended for deaf or hard-of-hearingviewers for the current program.
This icon informs you that the current channel is scrambled.
LOAD
mhp
OK
16 DAY TO DAY OPERATION
Channel Number
Program Name
Channel Name
Channel Number
Current Time & Date
Icons
Progress BarEnd Time
Start Time
6610_A5_GB.qxd 01/09/2004 12:58 Page 16
4.6.2 How to Select Current /Next Programs
The Channel Banner allows you to display information
concerning the current program and the next program
broadcast on the selected channel. Press C/B to see
what is broadcast next on the currently selected channel.
If you select one of the future programs, pressing OK
allows you to set/cancel a reminder. For more
information on setting reminders, see the Reminders and
Timers section later in this manual.
Current Program Info
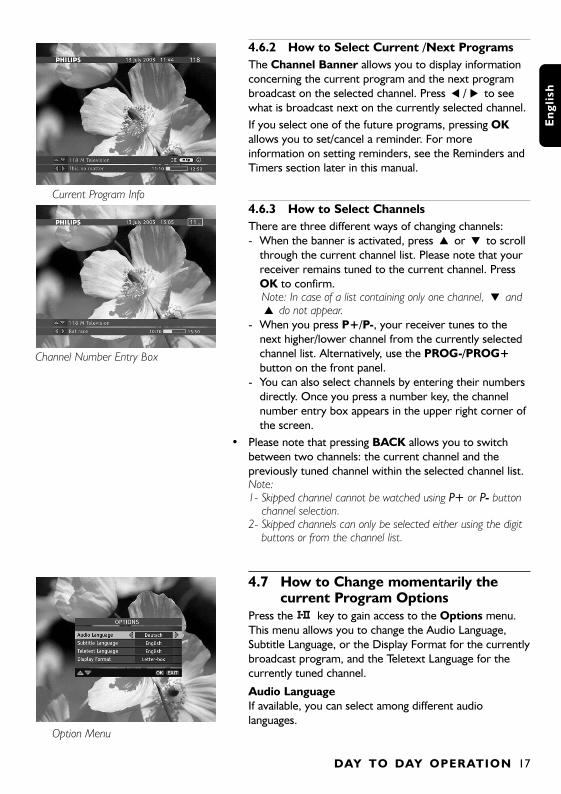
4.6.3 How to Select Channels
There are three different ways of changing channels:
- When the banner is activated, press V or W to scroll
through the current channel list. Please note that your
receiver remains tuned to the current channel. Press
OK to confirm.Note: In case of a list containing only one channel, W andV do not appear.
- When you press P+/P-, your receiver tunes to the
next higher/lower channel from the currently selected
channel list. Alternatively, use the PROG-/PROG+
button on the front panel.Channel Number Entry Box
- You can also select channels by entering their numbers
directly. Once you press a number key, the channel
number entry box appears in the upper right corner of
the screen.
• Please note that pressing BACK allows you to switch
between two channels: the current channel and the
previously tuned channel within the selected channel list. Note:1- Skipped channel cannot be watched using PP++ or PP- button
channel selection.2- Skipped channels can only be selected either using the digit
buttons or from the channel list.
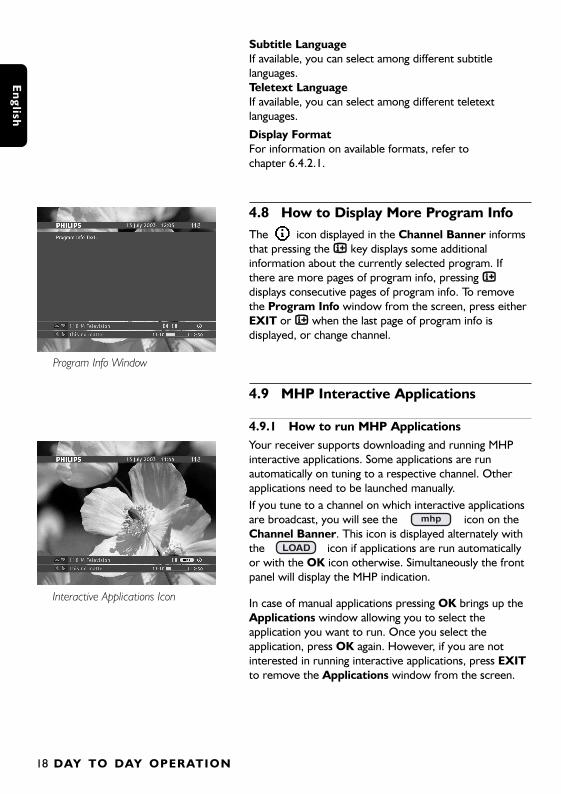
4.7 How to Change momentarily thecurrent Program Options
Press the 44 key to gain access to the Options menu.
This menu allows you to change the Audio Language,
Subtitle Language, or the Display Format for the currently
broadcast program, and the Teletext Language for the
currently tuned channel.
Audio Language
If available, you can select among different audio
languages.Option Menu
En
gli
sh
DAY TO DAY OPERATION 17
6610_A5_GB.qxd 01/09/2004 12:58 Page 17
En
glish
18 DAY TO DAY OPERATION
Subtitle Language
If available, you can select among different subtitle
languages.
Teletext Language
If available, you can select among different teletext
languages.
Display Format
For information on available formats, refer to
chapter 6.4.2.1.
4.8 How to Display More Program Info
The icon displayed in the Channel Banner informs
that pressing the mm key displays some additional
information about the currently selected program. If
there are more pages of program info, pressing mm
displays consecutive pages of program info. To remove
the Program Info window from the screen, press either
EXIT or mm when the last page of program info is
displayed, or change channel.
Program Info Window
4.9 MHP Interactive Applications
4.9.1 How to run MHP Applications
Your receiver supports downloading and running MHP
interactive applications. Some applications are run
automatically on tuning to a respective channel. Other
applications need to be launched manually.
If you tune to a channel on which interactive applications
are broadcast, you will see the icon on the
Channel Banner. This icon is displayed alternately with
the icon if applications are run automatically
or with the OK icon otherwise. Simultaneously the front
panel will display the MHP indication.
Interactive Applications IconIn case of manual applications pressing OK brings up the
Applications window allowing you to select the
application you want to run. Once you select the
application, press OK again. However, if you are not
interested in running interactive applications, press EXIT
to remove the Applications window from the screen.
LOAD
mhp
6610_A5_GB.qxd 01/09/2004 12:58 Page 18

Once the application is running follow the instruction
given by the application played on screen.
To quit the interactive application, press and hold the
EXIT key for at least 2 seconds. You can also quit the
application by following the on-screen descriptions
brought to you by the application itself or tuning to a
different channel by pressing P+/ P-
Please note that if you do not want any interactive
applications to be run automatically, set the Application
AutoSTART option in the Display Options screen to
NO.Applications Window
4.9.2 Country specifics
4.9.2.1 Finland
LAUNCHING / STOPPING MHP APPLICATION
- After selection of a program, if an MHP application is
available MHP will be shown on the receiver front
panel display.
- Press the BLUE button to show list of available
applications.
- Select desired application with arrow keys and press
OK to start application, then follow the instructions
given by the application played on screen.
- Alternatively, you can access directly to some
applications by pressing the following coloured keys:
- WHITE / TEXT key to access the SuperTeletext
application,
- YELLOW key to access the Program Guide
application,
- RED key to access interactive applications related to
current program. In that case, a red icon shall be
displayed on screen to inform viewer that an
interactive application is present.
- Pressing again the coloured key will hide the
application.
- If you want to remove the application, press the EXIT
button for more than 2 seconds or change program.
En
gli
sh
DAY TO DAY OPERATION 19
6610_A5_GB.qxd 01/09/2004 12:58 Page 19

En
glish
4.10 Reminders and Timers
4.10.1 Difference Between Reminder and Timer
The aim of the reminder/timer is to remind you that the
program you scheduled for viewing is about to start. The
main difference between a reminder and a timer is that
you set reminders from the Channel Banner or
Program Guide. To set a reminder, select one of the
future programs of the Channel Banner or Program
Guide, and press OK. Then you are prompted to decide
whether you want to set a viewing or a recording
reminder.
Setting a Reminder
Timers are independent from the broadcast schedule.
You will set timers from the Timer Manager. To get
access to the Timer Manager, either press the REC
button or select the Timer Manager item from the
Main Menu. Timer Manager contains all timers and
reminders defined so far. It allows you not only to set
timers but also to delete or modify selected
timers/reminders. You will be asked to enter Timer
Manager each time any conflicts between
reminders/timers occur. You will find more information
on Timer Manager later in this manual.Setting a Timer
4.10.2 Viewing and Recording Reminders/Timers
There are two types of reminders/timers: a viewing
reminder/timer and a recording reminder/timer. If
you have set a reminder/timer, its pop-up appears 1.5
minute before the program starts. If you do not respond
to the viewing reminder/timer pop-up, the
reminder/timer is canceled. If you do not respond to the
recording reminder/timer pop-up, the receiver tunes to
the appropriate channel at specified start time.
Viewing Timer Pop-up
Please note that when you set a recording
reminder/timer, the recording is protected from being
interrupted, which is indicated on the rotary display. If
you want to interrupt the recording, press EXIT. This
brings up a pop-up informing you how long the recording
will last. Then, you will be asked to press OK to interrupt
the recording or press EXIT to dismiss the pop-up from
the screen.
Recording Interruption Pop-up
20 DAY TO DAY OPERATION
6610_A5_GB.qxd 01/09/2004 12:58 Page 20

4.10.3 Reminder/Timer Conflicts
Your receiver allows you to set up to 8 reminders/timers.
Each subsequent reminder/timer is checked against any
conflicts with the previously set reminders/timers. If you
set a reminder or timer and such a conflict occurs, a
conflict pop-up appears. You will be prompted to press
EXIT to cancel the current reminder, or to press OK to
get access to Timer Manager. The currently set
reminder will be listed in the Timer Manager as a
disabled reminder (marked with the "?" sign).
Reminder Conflict Pop-up This reminder can only be accepted if you delete any
conflicting timers/reminders or you change some of its
data.
For more info, see the Timer Manager section below.
4.10.4 Timer Manager
Timer Manager contains a list of all reminders and
timers defined so far. In the Timer Manager you can
perform the following operations.
Setting a Timer
Press OK to set a new timer. This will bring up the
Setting a Timer screen. Fill in any required data and
press OK to confirm. If the data are valid and there are
no conflicts with the previous reminders/timers, you
return to the Timer Manager screen. The newly defined
timer appears in the Timer Manager list.Timer Manager
Modifying Reminders/Timers
In the Timer Manager screen, highlight the timer/
reminder you want to modify and then press B. This will
bring up either Modifying a Timer or Modifying a
Reminder screen. Change the reminder/timer data and
then press OK to confirm.
Deleting Timers/Reminders
Highlight the reminder/timer you are not interested in
and press C. Then you will be prompted to confirm the
delete operation.
Modifying a Timer
En
gli
sh
DAY TO DAY OPERATION 21
6610_A5_GB.qxd 01/09/2004 12:58 Page 21

En
glish
4.11 Program GuideYour receiver gives you access to a Program Guide.
To display all programs broadcast on the currently tuned
channel press the key. The displayed list
contains all programs of the current day and highlight is
on the currently broadcast program.
You can scroll through the program list using the V/W
or the RED / GREEN keys.
To display the program list of the next days, press the
C/B keys. Program list will be updated.
Program Guide Pressing P+ / P- allows you to display the program list of
subsequent channels from the currently selected channel
list. If no information are available it will be reported by
an "On Screen" message.
You can also filter the program list to display only
programs that belong to a selected category. Pressing the
YELLOW key allows you to access to the Category
filtering menu. Once you have selected the desired
Category and sub-category, press OK to update the
current program list accordingly.
Category selection
To set a viewing or recording reminder on one of the
future program, bring the highlight on the selected
program using the V/W keys. Then press OK to display
the setting/canceling reminder menu. The procedure of
setting a reminder in the Program Guide is the same as
for a program selected in the Channel Banner. Refer to
chapter 4.10 of this manual.
Setting a reminder in Program Guide
GUIDE
22 DAY TO DAY OPERATION
6610_A5_GB.qxd 01/09/2004 12:58 Page 22

5 Main Menu
Your receiver offers Menu System that allows you to change the way many of the features of
your receiver operate. To gain access to the Menu, press the MENU key. The Main Menu
consists of 7 submenus. To evoke one of the submenus, highlight its name using V or W keys
and then press OK. You may also press the number key to directly access the respective menu
item. To return to the Main Menu from one of its submenus, press BACK. To exit the Menu
System immediately, press MENU or EXIT.
Main Menu
Country
Change PIN Code
Factory Reset
1-Timer Manager(refer to chapter 4.10)
6-Installation(refer to chapter 6.4)
5-Your Preferences(refer to chapter 6.3)
4-Data Channels
3-For Parents(refer to chapter 6.2)
2-Channel Manager(refer to chapter 6.1)
Language Options
Parental ControlDecoder Lock
Display Options
Modem Connection
Modem Settings
System Settings
TV Settings
Upgrade Settings
Signal MeterSettingsLocal Time Decoder StatusChannel Search
Software UpgradeFor ParentsRemote ControlUsing Your Decoder MHP ApplicationsReminders And Timers
Smart Card
Decoder Upgrade
Loader Information
System Information
7-Help
En
gli
sh
MAIN MENU 23
6610_A5_GB.qxd 01/09/2004 12:58 Page 23

En
glish
6 Change the setting of your receiver
6.1 Channel ManagerAllows you to change the organization of the TV and
Radio channel lists. You will be able to skip, move, lock
and rename selected channels.
When you select the Channel Manager item from the
Main Menu, you get access to Channel Manager
submenu.
1 Select TV or RADIO respectively for TV and radio
channel lists.
2 Select the subset channel list you want to modify.Channel Manager
3 Select the Modify option you want to use.
4 Press OK to confirm.
6.1.1 How to skip a channel
The Skip Channels command allows you to mark any
channel to be skipped in the zapping and browsing mode.
Once you select the Skip Channels command in the
Modify option, the selected list of channels appears with
the highlight on the currently tuned channel. Simply select
the channel you want to skip and then press OK. This
marks the channel with symbol. You can remove the
"skipped" status by pressing OK on the skipped channel.
Skipping a Channel Note: 1- Skipped channel cannot be watched using P+ or P- button
channel selection.2- Skipped channels can only be watched using the digit button
channel selection.
6.1.2 How to move a channel
The Move Channels command allows you to mark any
channel to be moved. Once you select the Move
Channels command in the Modify option, the selected
list of channels appears. Simply select the channel you
want to move and then press OK. This marks the
channel with symbol. Then you can move this
channel by pressing V / W, P+ / P-, number buttons
and then press OK again to confirm its new position.
Moving a Channel Within a List
24 CHANGE THE SETTING OF YOUR RECEIVER
6610_A5_GB.qxd 01/09/2004 12:58 Page 24

6.1.3 How to rename a channel
The Rename Channels command allows you to rename
any channel on the list. Once you select the Rename
Channels command in the Modify option, the selected
list of channels appears. Simply select the channel you
want to rename and then press OK. This brings up the
virtual keyboard pop-up where you will be able to find
any characters you need. When you rename the selected
channel, pressing OK will confirm the change and close
the virtual keyboard pop-up.Renaming a Channel
6.1.4 How to lock a channel
The Lock Channels command allows you to mark any
channel to be locked. Once you select the Lock
Channels command in the Modify option, the selected
list of channels appears. Simply select the channel you
want to lock and then press OK. This marks the channel
with symbol. You can remove the "locked" status by
pressing OK on the locked channel. Note: channel locking is only enabled if the Decoder Lockoption is activated.
Locking a Channel
6.2 Specially for parentsThe For Parents submenu allows you restrict access to
your receiver using protection by PIN code. Here, you
can also change your current PIN code.
Press the MENU key and then select the For Parents
submenu to bring up a list of protection items. The
following protection levels are available:
- prevent access to locked channels (refer to 6.1.4);
- prevent access to programs unsuitable for the audience
younger than the selected Parental Control setting;
- prevent access to the Installation menu.For parents Submenu
6.2.1 Decoder Lock
This item is used to enable the various locking features of
your receiver. If you switch the Decoder Lock option to
No, you disable all locking features, and thus you will not
be prompted to enter your PIN code. If you switch the
Decoder Lock option to Yes, you enable all locking
features, i.e. channel locks, Parental Control, and
Installation, and thus you will be prompted to enter your
PIN code.
Receiver lock
En
gli
sh
CHANGE THE SETTING OF YOUR RECEIVER 25
6610_A5_GB.qxd 01/09/2004 12:58 Page 25

En
glish
6.2.2 Parental Control
The Parental Level option allows you to set the current
parental level, for example 13 Years. Then any programs
unsuitable for the audience younger than 13 years will be
blocked from viewing.
Parental Level
6.2.3 Change PIN code
Your PIN code is your personal 4-digit.
Initially, Your PIN code is assigned the value 1234. You
can change it using the Change PIN code item for the
For Parents submenu. Choose a value you can easily
remember. If you happen to forget your PIN code, refer
to the Troubleshooting chapter of this manual.
Enter PIN Code
6.3 Your PreferencesAllows you to define your preferences concerning on-
screen display as well as audio and subtitle languages.
Your Preferences submenu contains two items: Display
Options and Language Options.
6.3.1 Display Options
The Display Options screen allows you to define some
options related to displaying information on the screen.
Time and DateYour preferences Submenu
Blocks the current time and date from being displayed in
the Channel Banner.
Channel Number
Blocks the channel number from being displayed in the
Channel Banner.
26 CHANGE THE SETTING OF YOUR RECEIVER
6610_A5_GB.qxd 01/09/2004 12:58 Page 26

Channel Banner Duration
Specifies how long the Channel Banner remains displayed.
Volume Bar
Blocks the volume bar from being displayed.
Transparency
Changes the transparency of the on-screen display.
Application AutoSTART
Defines whether MHP applications are to be launched
automatically once you tune to a channel on which
external applications are broadcast.
Display Option Screen
Radio Label
Defines whether "radio labels" shall be displayed when
the box is tuned to one of the radio channels.
Text in Banner
Defines the font size used to display channel name and
program name as well as program info.
6.3.2 Language Options
The Language Options screen allows you to define
some options related to the menu language, audio
languages, subtitle languages, and teletext language.
Change any languages according to your preferences and
then press OK to confirm them.
Language Options Screen
En
gli
sh
CHANGE THE SETTING OF YOUR RECEIVER 27
6610_A5_GB.qxd 01/09/2004 12:58 Page 27

En
glish
6.4 InstallationAllows you to configure your system, set up your
modem, search for existing channels, check receiver's
status, set up local time, and restore factory settings of
your receiver.
Once your terrestrial receiver has been properly installed
and configured, you will rarely use the Installation
submenu. However, the Installation submenu will be
useful, if for example, you buy a new TV and you want to
make sure your receiver makes the best use of the new
TV's features, or if you change your antenna setup. Installation Submenu
Below, you will find description of some of the
Installation submenu screens.
Note: When the decoder is locked, access to the IInnssttaallllaattiioonnmenu is protected by PIN code.
6.4.1 Local Time
You may need to adjust your local time. Use the C / B
keys to change the Time Zone until the Local Time
setting corresponds to your local time. Then press the
OK key to confirm any changes.
Local Time Submenu
6.4.2 Settings
The Settings submenu allows you to change
TV/system/modem/upgrade/country settings.
Settings Submenu
28 CHANGE THE SETTING OF YOUR RECEIVER
6610_A5_GB.qxd 01/09/2004 12:58 Page 28

6.4.2.1 Installation / Settings / TV Settings
The TV Settings screen contains two options: TV
Screen Format and Display Format.
The TV Screen Format allows you to adapt your
receiver output to the aspect ratio of your TV set (4:3 or
16:9).
You can also modify the Display Format value to adapt
the way the video is transformed in case the broadcast
aspect ratio is different from your TV aspect ratio.
TV Settings ScreenIn such a case:
6.4.2.2 Installation / Settings / System Settings
The System Settings screen contains some of the
configuration parameters you may change.
Video Standard
This option is preconfigured depending on the Country
selection. There are two possible standards: PAL and
SECAM.
TV SCART Output, VCR SCART Output
Select the appropriate format of the output signals.
Note: to get the best picture quality and sharpness set the "TVSCART output" option to "RGB".
System Settings Screen
Dolby Digital
Default Dolby Digital setting is No. Do not modify this
setting if your audio receiver supports PCM only (Stereo
digital). If your audio receiver supports AC3 (multisound
system Dolby Digital 5.1), set Dolby Digital to Yes.
You will find detailed info concerning: the Easy
Recording, Recording Type and Device settings in the
Advanced Settings section later in this manual
(see chapter 7).
Default Volume level
This option is used to set the sound level at wake-up
from standby. It is recommended to set it close to the
maximum value.
En
gli
sh
CHANGE THE SETTING OF YOUR RECEIVER 29
Aspect TV screen format = 4:3 TV screen format = 16:9Display
ratio
formatbroadcast format = 16:9 broadcast format = 4:3
Letter-box full picture with black bars at the full picture with black bars on the left
top and bottom and right
Pan-Scan picture cut-off on the left and right picture cut-off at the top and bottom
Full screen full picture squeezed to fit full picture squeezed to fit
6610_A5_GB.qxd 01/09/2004 12:58 Page 29

En
glish
6.4.2.3 Installation / Settings / Modem Settings
Your receiver is equipped with an internal modem. To
configure your modem parameters use the remote
control keys presented in the help bar. Pressing RED
allows you to enter a virtual keyboard where you will be
able to find any characters you need.
Once you have configured your modem, press OK to
confirm its configuration.
Modem Settings Screen
Note: modem configuration is generally handled by the MHPapplications.
Virtual Keyboard
6.4.2.4 Installation / Settings / Modem Connection
The Modem Connection screen allows you to check
the modem connection as well as to check the parallel set
detection. If any problems are detected, the appropriate
message will be shown. In case no problems are
detected, you will be able to check if the modem is
connected by following the instructions on the screen.
Modem Connection
30 CHANGE THE SETTING OF YOUR RECEIVER
6610_A5_GB.qxd 01/09/2004 12:58 Page 30

6.4.2.5 Installation / Settings / Decoder UpgradeSettings
Select Upgrade Settings from the Settings submenu.
In this screen you can change the way your decoder is
upgraded.
If you set Auto Upgrade to Yes, your decoder will
automatically initiate the upgrade procedure when
available. Otherwise you will be asked for permission to
initiate the procedure.
If you want to be prompted to check for new upgrades
every time you switch your decoder on, the Upgrade
Check After Power On should be set to Yes.
Decoder Upgrade Settings
You can also set the exact time and frequency of checks
for new upgrades in Upgrade Check in Operate
Mode. Note that your decoder must be in running mode
in order to check for upgrade at the specified time.
6.4.2.6 Installation / Settings / Country
Selecting Country item allows you to change any presets
for a particular country. If you change the country and
confirm your choice, your decoder will be configured to
work in the country you selected.
Note that changing the country will initiate the channel
search and you will lose your current channel list.
Select Country
6.4.3 Installation / Signal Meter
Selecting the Signal Meter from the Installation
submenu brings up the Signal Meter screen. This screen
displays the signal strength/level as well as the quality
value of the signal broadcast at the specified frequency.
Signal Meter
En
gli
sh
CHANGE THE SETTING OF YOUR RECEIVER 31
6610_A5_GB.qxd 01/09/2004 12:58 Page 31

En
glish
6.4.4 Installation / Channel Search
Once you select the Channel Search item from the
Installation submenu, you will have two channel search
methods to choose from. You can either Search for
New Channels or Reinstall All Channel Lists. In the
first method only new channels will be added to your
existing list, whereas in the second one your current
channel list will be replaced by a new one. Pressing OK
initializes the channel searching procedure. You may
interrupt this procedure by pressing BACK. Follow the
prompts displayed on the screen. Channel Searching
6.4.5 Installation / Decoder Status
The Decoder Status submenu gives you access to some
system and loader information. It also allows you to
perform the receiver upgrade procedure.
To check whether a new software version is available for
your receiver, select the Decoder Upgrade item from
the Decoder Status submenu. If new software exists,
you will be prompted to press OK to initiate the
upgrading process.
Decoder Status Submenu Once the upgrade process is initiated, it takes complete
control of the receiver, so the receiver's normal operation
is suspended. You may interrupt this procedure by
pressing BACK.
Selecting the Smart Card item from the Decoder
Status submenu gives you access to information
concerning the inserted smart card.
Receiver Upgrade
6.4.6 Installation / Factory Reset
Once you select the Factory Reset option, the Restore
Settings option is set to No. If you decide to restore all
factory settings of the receiver, press C/B to change
the value of the Restore Settings option to Yes.
Pressing BACK returns to the Installation submenu.
Note that pressing OK restores factory settings of the
receiver and restarts the first-time installation process
(the Language screen appears).
Factory Reset
32 CHANGE THE SETTING OF YOUR RECEIVER
6610_A5_GB.qxd 01/09/2004 12:58 Page 32

7 Advanced Settings
7.1 Easy Recording
The Easy Recording feature allows you to perform recordings without the necessity to program
your video recorder (VCR or DVD recorder). When you set a recording reminder or timer from
the Channel Banner or Timer Manager, the VCR starts/ends recording at the correct time.
Please note, however, that you may only use the Easy Recording feature provided that your
recorder supports it.
• First of all, consult User Manual of your recorder equipment to check if it supports Easy
Recording. Please note that most Philips VCR/DVD recorders support one of the two Easy
Recording options: either Prepare Record (to be checked first) or Record Link.
• Also, both your TV and VCR shall be equipped with two SCART sockets.
If your equipment satisfies above two conditions, connect your receivers as shown in the
Connection diagram below.
Then, select the System Settings item from the Settings submenu, enable the Easy Recording
feature by setting its option to YES, and assign to the Recording Type an appropriate value:
either Prepare Record or Record Link. You might have to test both settings to find out the one
applicable for your recorder.
TV set
Video recorder
Terrestrial receiver
En
gli
sh
ADVANCED SETTINGS 33
6610_A5_GB.qxd 01/09/2004 12:58 Page 33

En
glish
Assuming the settings of your receiver and recorder (refer to your VCR or DVD recorder user
manual) are done, to perform a recording you shall:
- Program a timer with your receiver (refer to section 4.9)
- Put your recorder in the appropriate status to be controlled by your receiver (refer to the VCR
or DVD recorder user manual).
At timer occurrence your recorder shall start and stop recording automatically.
Note: While the recording is in progress, your receiver is protected from inadvertent action to disrupt therecording. Please note that during the recording the "rEc" label is displayed on the front panel display. Tocancel the running recording, press EEXXIITT. This brings up a small window prompting you for confirmation. Tocancel the recording, press OOKK.
7.2 Change the Remote Control and receiver "Device" SettingsIf you have other equipment in your home and the Philips remote control of your digital receiver
interferes with them, you can change the setting of your remote control and the setting of your
receiver as well. By default, your receiver is recognized as Device 1 and the remote control is set
to control Device 1. You may change this identifier to Device 2 using the System Settings screen
from the Settings submenu. Please note however, that you will also have to change the remote
control setting in order to be able to control Device 2.
To change the setting of your remote control, proceed as follows:
1 Make sure that the remote control is in the STB mode (Press Mode button, the STB LED shall
blink, if a different LED does, press the Mode button as many time as necessary to get STB LED
blinking).
2 Press number keys 1 and 3 simultaneously and hold them until LED blinks twice.
3 Release these two keys. The STB LED is still on to indicate that the remote control is in the
programming mode.
4 Enter the new code setting within 60 seconds (the LED is blinking once after each digit entry):
Either 0048 for Device 2 or 0038 for Device 1 (factory setting).
Alternatively you may reset your remote control to its default setting (Device 1) by removing the
batteries and waiting for more than 3 minutes to re-insert them.
34 ADVANCED SETTINGS
6610_A5_GB.qxd 01/09/2004 12:58 Page 34

8 Programming the Remote Control for your
STB, TV, Video Recorder, DVD and Tuner -
Amplifier
8.1 Setting up your remote controlBy default at power up, for instance at first installation or at battery replacememt, your remote
control is preset to control your terrestrial receiver as well as most of the Philips audio/video
appliances.
If you have other brands of appliances, or if the presets do not control your Philips appliance,
please follow the procedure here below.
Note: some of the functions described in the next pages may not be available or have the same behaviourfor all brand of the same appliances.
1 Press the MODE button to select the type of appliance you want to set up (TV, VCR, DVD or
Amp/Tuner). Pressing the MODE button once will remind you of the MODE you are in through
green light indicators: left for STB, middle for TV, right for VCR, left/middle for DVD, middle/right
for Amp/Tuner.
To set the MODE, press the MODE button several times until the desired mode is signaled by
the light(s). The sequence is: STB ➔ TV ➔ VCR ➔ DVD ➔ Amp/Tuner. At every key press, lights
blink to indicate in which MODE you are in.
2 Press digits 1 and 3 simultaneously until the lights corresponding to the selected mode blink twice
and remain on.
3 Enter the 4 digit code .The lights corresponding to the selected mode blink once at each digit
entry. You will find a list of codes at the end of this manual. (If several codes are possible, go
through this procedure with the 1st code and try your remote control. If you are not successful,
repeat the procedure with the second code, and so on).
4 If a valid 4-digit code has been entered, the lights will switch off and blink twice. If not, go back to
step 1. Pressing any key other than digit keys and standby button will automatically exit this
procedure.
We advice you to fill in the table below to remind your personal remote control settings, this will
be helpful the day you have to replace the remote control batteries (see NOTE 2 below).E
ng
lish
PROGRAMMING THE REMOTE CONTROL 35
Philips Brand Your appliance Your code
factory setting brand / type setting
TV set 0666
Video Recorder 1608
DVD player / Recorder 0566
Amplifier / Tuner 1316 (Philips tuner)
STB (Your Satellite Receiver) 0038 (Device 1)
Volume control
(see chapters 4.2.2.1 and 4.2.2.2)
6610_A5_GB.qxd 01/09/2004 12:58 Page 35

En
glish
Important Notes:1- You need to reset the STB mode to the factory mode.
If you have made a mistake changing the default setting of the STB mode resulting in the impossibility tocontrol your terrestrial receiver, then please refer to above description.
2- Battery change.If the battery change takes more than 1 minute the remote control may return to the "Philips brandfactory settings". Therefore you shall proceed with a new setting of your remote control, with the help ofthe table above, for your non Philips branded appliances.
3- All manufacturers are concerned about the constant improvement of their products. Although theremote control is compatible with most equipment of the brands mentionned at the end of this manual(see Brand Code List), Philips cannot guarantee its operation with the complete range of products onthe market.
8.2 Using your remote control for your TV
TV mode (TV)Note: Some of the functions described below may not be available or may not have the same behaviour forall appliances.
36 PROGRAMMING THE REMOTE CONTROL
44 / REC- Scroll one page up / down in
program list.VWCB
- Move the selection up, down andchange settings in menu.
OK key- Acknowledges a menu item
selection.
RED, GREEN, YELLOW, BLUE,WHITE- Contextual keys in teletext
mode.
bb
- Teletext On/Off.GUIDE- Selects between first and second
audio channel.ØØ
- Toggles between Teletext andTV/Teletext mix modes.
AA +/-- Adjusts TV volume.
TV/STB aa
- Toggles between the different TVset mode (TV, AV1,AV2,Front,…).
MENU Opens /Closes the Menu.
Standby BB- Power / Standby / On.
EXIT- Menu off.
P+ / P-- Selects the next or previous TV
program.
mm (Wide screen)- Selects the TV picture format
(16:9, 4:3,…).
MUTE c- Mutes the TV sound.
BACK- Selects the last watched TV
program.
0-9- Selects the relevant TV program.
6610_A5_GB.qxd 01/09/2004 12:58 Page 36

8.3 Using your remote control for your VCR
VCR mode (VCR)
Note: Some of the functions described below may not be available or may not have the same behaviour forall appliances. E
ng
lish
PROGRAMMING THE REMOTE CONTROL 37
Standby BB- Power / Standby / On.
EXIT- Menu off.
P+ / P-- Selects the next or previous
program for the VCR.
mm
- Displays On Screen Messages.
MUTE c- Mutes the TV sound.
RADIO- Selects between first and second
audio channels.
0-9- Selects the relevant TV program.
VWCB
- Move the selection up, down andchange settings in menu.
OK- Acknowledges a menu item
selection.
FAV- Subtitle On/Off.
AA +/-- Adjusts TV volume.
TV/STB aa
- Toggles between the different TV set mode (VCR, AUX 1, AUX 2,...).
MENU - Opens / Closes the Menu.
G
- Fast rewindK
- PauseL
- StopB
- PlayF
- Fast forward
6610_A5_GB.qxd 01/09/2004 12:58 Page 37

En
glish
8.4 Using Remote Control For Your DVD Player
DVD mode (DVD)
Note: Some of the functions described below may not be available or may not have the same behaviour forall appliances.
38 PROGRAMMING THE REMOTE CONTROL
Standby BB- Power / Standby / On.
EXIT- Menu off.
P+ / P-- Selects next previous chapter or
title.
mm
- Displays On Screen Messages.
MUTE c- Mutes the TV sound.
0-9- Selects directly DVD tracks.
VWCB
- Move the selection up, down andchange settings in menu.
OK- Acknowledges a menu item
selection.
G
- Search reverseK
- PauseL
- StopB
- PlayF
- Fast forward
bb
- Teletext On/Off.GUIDE- Selects, when available, the view
angle.RADIO- Selects when available, an
alternate audio track.
AA +/-- Adjusts TV volume.
TV/STB aa
- Toggles between DVD and TVwatching.
MENU - Opens / Closes the Menu.
6610_A5_GB.qxd 01/09/2004 12:58 Page 38

8.5 Using Remote Control For Your Tuner / Amplifier
TUNER-AMPLIFIER mode (AMP)
Note: Some of the functions described below may not be available or may not have the same behaviour forall appliances.(*) Indicates the commands which are only available for Philips Tuner / Amplifiers.
En
gli
sh
PROGRAMMING THE REMOTE CONTROL 39
Standby BB- Power / Standby / On.
P+ / P- (*)- Selects the next or previous TV
program.
MUTE c- Mutes the Amplifier - Tuner
sound.
0-9- Selects the relevant TV program.
VW
- Selects next / previous radiopreset.
AA +/-- Adjusts the Amplifier - Tuner
volume.
mm
- Displays On Screen Messages.
CB
- Searches radio programs down / up.
G (*)- Selects DVD source.K (*)- Selects STB receiver source.L
- Select TV source.B (*)- Selects VCR source.F (*)- Selects tuner source.
6610_A5_GB.qxd 01/09/2004 12:58 Page 39

En
glish
40 TROUBLESHOOTING GUIDE
Symptom
Nothing lights up on your receiver's frontpanel.
Your remote control fails to operate yourreceiver.
There is no sound/picture but the currenttime is displayed on the receiver's front panel.
There is no sound/picture. However, frontpanel display is correct.
Main Menu can be displayed but you cannotselect channels.
Main Menu and Channel Banner can bedisplayed, but there is no reception (blackscreen).
The picture is not sharp and text is difficult toread.
Intermittent reception ("mosaic" effect or"frozen" image).
You have forgotten your PIN code.
9 Troubleshooting guide
Check the guide below for a possible cause of the problem you are experiencing. The most
common problems that arise are related to cable connections. Make sure that your receiver is
properly connected.
Remedy
Check that the mains power cord is correctly connected. Disconnect this cord, and thenreconnect it to ensure it is in place.
Check that power is available at the wall socket.
Make sure your receiver is in the operate mode.
Make sure that you are pointing your remote control at the receiver front panel.
Make sure that the remote control is set to STB mode (see 2.2.1).
Check the batteries in your remote control.
Check if your remote is set to the "Device" (1 or 2) setting corresponding to your receiver(see 6.4.2 and 7.2).
Your receiver is in standby. Press P+ / P- button on your remote control to wake up yourreceiver. Alternatively, press PROG+ / PROG- button on the receiver's front panel.
You are viewing TV via your UHF aerial TV connection. Press the TV / STB remote controlbutton twice.
Make sure that the SCART connections are correct.
Connections are correct but the TV set is NOT switched to external AV source. Press twicethe TV / STB remote control button, if the problem is not fixed refer to the user manual ofyour TV set.
Your receiver has not been properly configured. Perform the Channel Search procedure.(Select the Installation submenu from the Main Menu.). Optionally return to factory setting.
Aerial is not receiving the signal. Check the installation and the aerial positioning (Check signalquality).
Transmitted signal is too weak. Check the installation and the aerial positioning. This effectmay also be produced by severe weather conditions.
The TV SCART output video format is not set to RGB. Change setting of the TV SCART itemto RGB in the System Settings menu.
The TV SCART lead is not connected to the RGB capable SCART socket of your TV set (referto TV set user manual for proper connection).
The SCART lead for TV connection is not RGB capable (not fully wired). Use the SCART cablesupplied with your receiver for the connection to the TV set.
You may have defective cable links. Check all connections and cables.
Poor signal due to the incorrect positioning of the aerial. Reorient the aerial and fasten itsecurely.
You have the possibility to reset it to its default PIN code (1234). To reset the PIN code, typein the so-called Master PIN Code (00799700). Type in the Master PIN code in quick successionon the level of the Main Menu. Before you enter the Master PIN code, press the mm key.Please keep this code secret to prevent your children from using it.
6610_A5_GB.qxd 01/09/2004 12:58 Page 40

TECHNICAL SPECIFICATIONS 41
En
gli
sh
Video Decoding
- MPEG-2 DVB compliant up to MP@ ML- Video bit rate: up to 15 Mbit /sec- Video format: 4:3 (letter box or
Pan & scan if source is in 16:9) and 16:9
- Resolution: up to 720x576 pixels
Audio Decoding
- MPEG layer I / II
Ease of installation
- Automatic program installation via scanning - Program editing for personalised installation
(delete, add, move)
Ease of use
- Automatic program list update- Direct access TV & Radio modes-Full remote
controlled- Multibrand remote control(TV, VCR, DVD,
Audio AMP-Tuner)- Automatic recording via:
Timer programming by tagging in banner andEasy recording for Philips VCR and DVD+RWrecoders
- Now & Next program in banner- EPG list per channel based on EIT schedule
Operation/Features
- Receiver compatible with services based onMHP
- 1000 presets- Skip program- Free to air reception- DVB Subtitles- Parental lock with PIN code- Channel lock with PIN code- Menu controlled installation and operation
using On Screen Display- 8 event VCR timer / Reminder- Automatic VCR play back: Audio L/R + CVBS
or RGB / Fast blanking- Full range RF loop-through- Software upgrade via over the air download- Rotary 4x7 digit LED display- Dolby Digital bit-stream audio out
Application SystemResources
Processor clock speed 180 MHzSDRAM - CPU/Video-Graphics 40 MBFlash memory 8 MBEEPROM 16 kBGraphics resolution 16 bits
Terrestrial antenna interface
- RF input: IEC 169-2 female connector
- RF output (bypass): IEC 169-2 male connector
Reception-Demodulation
- Demodulation type: COFDM 2K / 8K- Network: MFN /SFN - Input frequency range: VHF III & UHF IV / V- Loop-through frequency
range (MHz): 47 - 862 MHz
Secured transaction
For future application - Italy only Smart card type: Citizen cardInterface: OCF based
De-scrambling
Finland onlyType: DVBImplementation: EmbeddedSmart card (not supplied): 1 for CACA system: ConaxNote: Subscription is required to watch Pay-TV.
Connections
TV SCART:
Output: CVBS or RGB / Fast blankingVolume controlled audio L/R, Slowblanking outputs
VCR SCART- Input: CVBS or RGB / Fast blanking, Slow
blanking , Audio L/R- Output: CVBS , Audio L/R, Slow blanking
during timer if "Prepare Record"mode is activated
Audio CINCH- Analog audio output: L / R- Digital audio output: PCM or AC3
Serial interface:- Type RJ 9Modem- Type V90- interface RJ 11Smart card reader- Type: ISO 7816
Accessories
- Remote control - Scart cable- User manual- Worldwide Guarantee booklet- Batteries: 2 x 1.5V type AA/R06- RF cable- Telephone cord- Mains cord - Stand for using the receiver in the upright
position
Miscellaneous
- Temperature range (°C)Operating +5 to 45Storage -10 to +70
- Mains: 230 V ~ +/-10%50 Hz
- Power consumption: < 15W- Standby consumption: < 6 W- Low power < 1 W- Weight
Product 1.5 kg Including packaging 2.0 kg
- Dimensions: Product 260 x 225 x 60 mm Packaging 395 x 275 x 90 mm
Multi-language
Menu- English, Italian, Finnish, Swedish, Spanish,
French, German, Polish.User manual- English, Italian, Finnish, Swedish, Spanish,
French, German.
10 Technical Specifications
This product is in conformity with the requirements of the 95/47/EC and 2002/21/EC directives.
AC3® is a regisred trademark of Dolby LaboratotiesLicensing Corporation.
Dolby® is a regisred trademark of DolbyLaboratoties Licensing Corporation.
Due to continued product improvements, thisinformation is subject to change without notice.
6610_A5_GB.qxd 01/09/2004 12:58 Page 41

6610_A5_COV.qxd 01/09/2004 12:17 Page 3
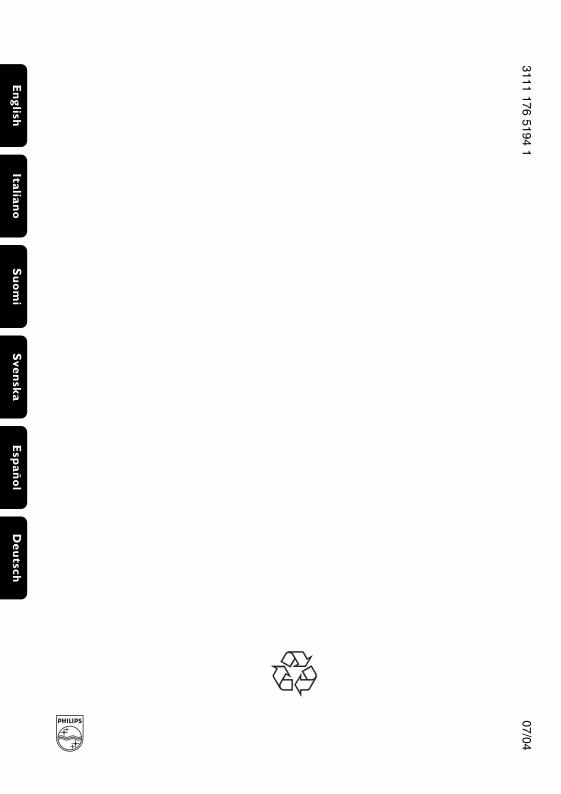
3111 176 5194 107/04
Italiano
En
glish
Su
om
iS
ven
ska
Esp
año
lD
eu
tsch
6610_A5_COV.qxd 01/09/2004 12:17 Page 4