USER MANUAL - DENTAL CMC · GIADENT User Manual ... (active) area is available in two formats: ......
24
Version: 15/04/2014 (r0) USER MANUAL
-
Upload
nguyenliem -
Category
Documents
-
view
215 -
download
0
Transcript of USER MANUAL - DENTAL CMC · GIADENT User Manual ... (active) area is available in two formats: ......
Version: 15/04/2014 (r0)
USER MANUAL
)

GIADENT User Manual
R0 dated: 15/04/2014 i
TABLE OF CONTENTS
1 INTRODUCTION ....................................................................................................................... 1
1.1 Icons used in this manual ............................................................................................... 1
1.2 Symbols used .................................................................................................................. 1
1.3 General introduction....................................................................................................... 2
2 GENERAL SYSTEM DESCRIPTION ....................................................................................... 3
2.1 Intended use .................................................................................................................... 3
2.2 Classification of the device in accordance with EC 93/42 ............................................ 3
2.3 Applicable Standards ..................................................................................................... 4
2.4 Type of Installation ........................................................................................................ 4
2.5 Address of manufacturer ................................................................................................ 4
2.6 Physical principles of operation ..................................................................................... 4
3 SYSTEM USABILITY ............................................................................................................... 5
3.1 User profile and knowledge requirements ..................................................................... 5
3.2 Training .......................................................................................................................... 5
3.3 Patient profile ................................................................................................................. 5
3.4 Usability ......................................................................................................................... 5
4 SAFETY ASPECTS .................................................................................................................... 6
4.1 General warnings ........................................................................................................... 6
4.1.1 Disposal hazards ............................................................................................................. 7
5 CLEANING AND DISINFECTING ........................................................................................... 8
5.1 Disinfection procedures ................................................................................................. 8
5.1.1 First level disinfection .................................................................................................... 8
5.1.2 Second level disinfection ............................................................................................... 9
5.1 Disinfection products compatible with GIADENT ....................................................... 9
6 IDENTIFICATION AND DESCRIPTION .............................................................................. 10
6.1 Nameplates ................................................................................................................... 10
7 TECHNICAL SPECIFICATIONS ............................................................................................ 11
7.1 General characteristics ................................................................................................. 11
7.2 Mechanical characteristics ........................................................................................... 11
7.3 Electrical characteristics .............................................................................................. 11
7.4 Electrical and optical charactyeristic ........................................................................... 12
7.5 Environmental characteristics ...................................................................................... 12
7.6 Connection characteristics ........................................................................................... 12
7.7 Computer specifications ............................................................................................... 12
7.8 Monitor specifications .................................................................................................. 13
7.9 Hardware Installation ................................................................................................... 13
8 PRECAUTIONS FOR USING THE SENSOR ........................................................................ 14
9 SOFTWARE INSTALLATION ................................................................................................ 16
9.1 Installation of program ................................................................................................. 16
9.2 Installation of the protection key drivers ..................................................................... 17
9.3 Installation of sensor drivers ........................................................................................ 17
9.4 End of installation process ........................................................................................... 17
GIADENT User Manual
R0 dated: 15/04/2014 ii
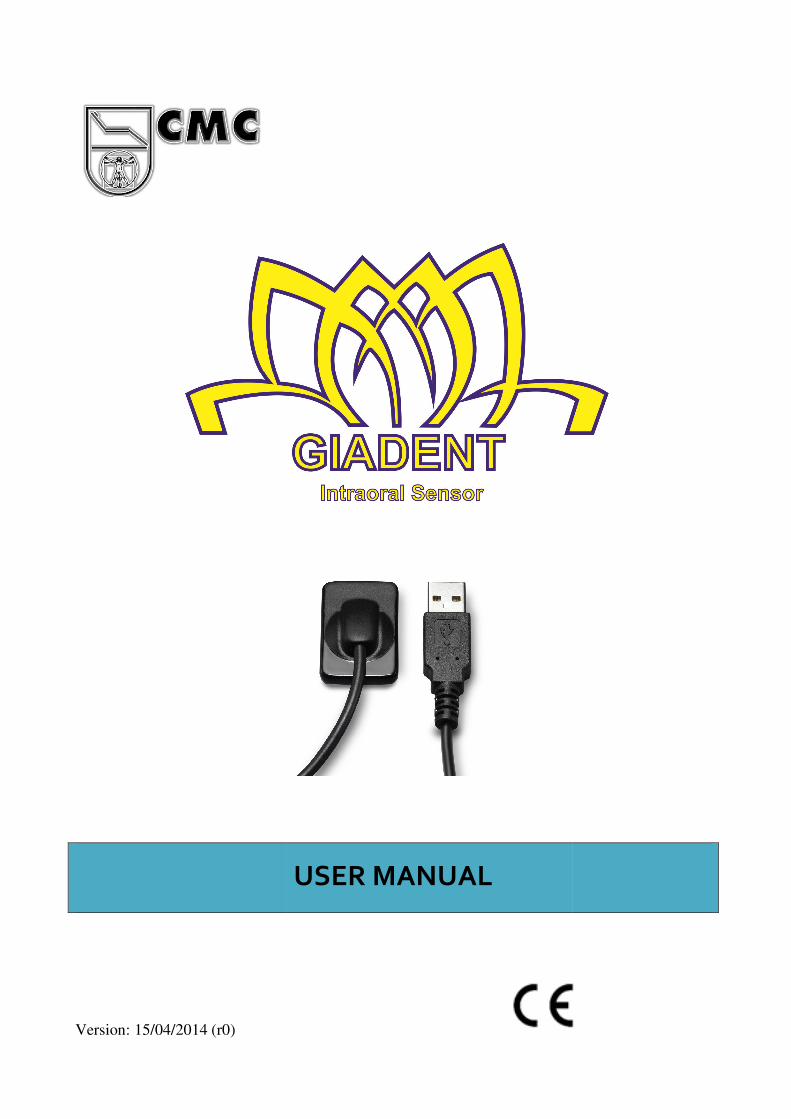
9.5 Using the ARCHIMED SUITE program ..................................................................... 17
10 INSTALLATION AND PERIODIC CHECKS ........................................................................ 18
10.1 Installation check ......................................................................................................... 18
10.2 Monitor quality test ...................................................................................................... 18
10.2.1 Frequency of monitor quality tests ................................................................ 19
10.3 Spatial resolution test ................................................................................................... 19
10.3.1 Frequency of spatial resolution test ............................................................... 20
10.4 Low contrast resolution test ......................................................................................... 20
10.4.1 Frequency of low contrast resolution test ...................................................... 21
10.5 Periodic maintenance ................................................................................................... 21

GIADENT User Manual
R0 dated: 15/04/2014
1 INTRODUCTION
1.1 Icons used in this
The following icons are used in this manual:
Indicates a "NOTE
be read carefully
Indicates a "WARNING
for the patient and/or operator
1.2 Symbols used
The following symbols are used in this in this
Symbol
Device with Type BF applied parts
This symbol indicates that the
sensitive electronic parts susceptible to damage by electrostatic
Refer to the section on
The device contains solid materials which, at the end of
be disposed of at authorised recovery centres according to local regulations
in order to prevent human health and environmental damages caused by
improper disposal.
NON-STERILE.
GIADENT is a non
Temperature limits
Product identification code
Serial number
Icons used in this manual
The following icons are used in this manual:
NOTE"; all text marked with this icon is very important and
be read carefully
WARNING"; all text marked with this icon relate to safety issues
for the patient and/or operator
d in this in this manual and on the GIADENT
Description
Device with Type BF applied parts
This symbol indicates that the GIADENT sensor contains
sensitive electronic parts susceptible to damage by electrostatic
section on Precautions for Use.
The device contains solid materials which, at the end of
be disposed of at authorised recovery centres according to local regulations
in order to prevent human health and environmental damages caused by
improper disposal.
STERILE.
is a non-sterile product and cannot be sterilised.
Temperature limits
Product identification code
Serial number
1
is very important and should
"; all text marked with this icon relate to safety issues
GIADENT packaging:
sensor contains electrostatic-
sensitive electronic parts susceptible to damage by electrostatic discharge.
The device contains solid materials which, at the end of its life cycle, must
be disposed of at authorised recovery centres according to local regulations
in order to prevent human health and environmental damages caused by
sterile product and cannot be sterilised.
GIADENT User Manual
R0 dated: 15/04/2014
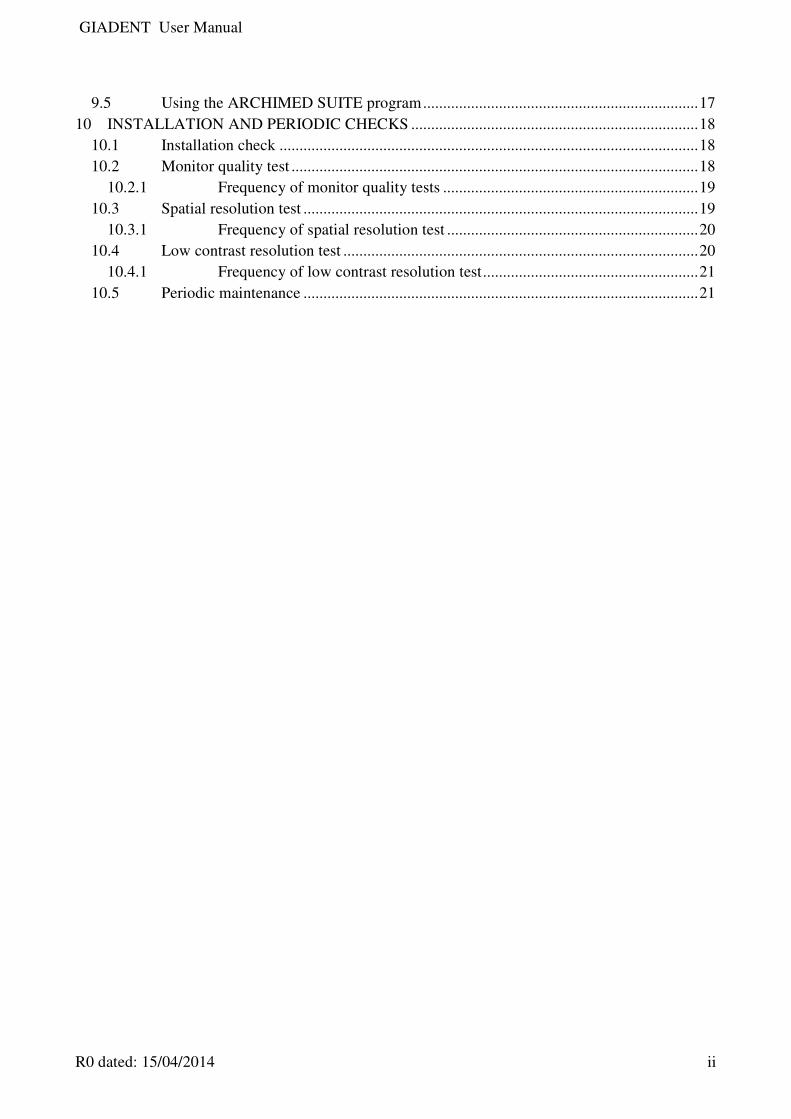
Symbol
Date of manufacture (year and month)
Name and address of manufacturer
Consult accompanying documents
Conforms with EC Directive 93/42 and its amendments and supplements
1.3 General introduction
The purpose of this manual is to provide the user with
and efficient operation of this device.
NOTE
This manual is updated
ensure that the user has appropri
safety-related aspects
This manual may not reflect
operating procedures and safe use.
WARNING
GIADENT is an electromedical
dentists, radiologists or other legally qualified professionals.
Proper operation requires that it be used in combination with radiographic
equipment and by persons with the necessary knowledge
protection.
The device must be used in compliance with the procedures included in this
manual and never
The user is responsible for fulfilling all
installation and use
Read this manual carefully before using the device
device for future reference.
Description
Date of manufacture (year and month)
Name and address of manufacturer
Consult accompanying documents
with EC Directive 93/42 and its amendments and supplements
General introduction
is to provide the user with the instructions necessary for safe, secure,
and efficient operation of this device.
is updated to correspond to the product status it is sold with,
ensure that the user has appropriate reference on operating the
related aspects.
may not reflect any product variation that has no
operating procedures and safe use.
is an electromedical device and, as such, it may only be used by
dentists, radiologists or other legally qualified professionals.
Proper operation requires that it be used in combination with radiographic
equipment and by persons with the necessary knowledge on radiation
The device must be used in compliance with the procedures included in this
and never be used for purposes other than those provided for
is responsible for fulfilling all legal requirements related to
use of the device.
Read this manual carefully before using the device. Keep this
device for future reference.
2
with EC Directive 93/42 and its amendments and supplements
the instructions necessary for safe, secure,
it is sold with, to
ate reference on operating the device and all
variation that has no impact on
device and, as such, it may only be used by
dentists, radiologists or other legally qualified professionals.
Proper operation requires that it be used in combination with radiographic
radiation (x-rays)
The device must be used in compliance with the procedures included in this
provided for herein.
related to the
Keep this manual near the
GIADENT User Manual
R0 dated: 15/04/2014 3
2 GENERAL SYSTEM DESCRIPTION
GIADENT, manufactured by CMC S.r.l. is an easy-to-use digital intraoral sensor.
The system has the following unique features:
• Rounded off edges
• Smooth casing
• Outstanding cable flexibility,
• Direct connection to personal computer for image acquisition via USB direct connector.
GIADENT is based on CMOS technology, allowing the user to obtain a small pixel size (20 µm),
thereby ensuring excellent spatial resolution; the use of a fiber optic plate (FOP) also helps to
ensure a high quality image and, at the same time, increases the life of the sensor by protecting it
against incident x-rays.
The scintillator layer can be supplied in either Cesium Iodide (CsI) or Gadolinium Oxy-Sulfide
(GOS) technology.
The sensitive (active) area is available in two formats: standard size 1 and size 2 for intraoral
film.
All of these features make GIADENT the perfect tool for any type of positioning, while ensuring
maximum patient comfort.
GIADENT uses ARCHIMED SUITE image capturing and management software which saves
images directly in DICOM format.
2.1 Intended use
The system is designed for taking intraoral x-rays of human teeth; the device can be used on all
patients, regardless of their type, gender or race.
The device is designed for both the dental and radiology market. It can be installed both in
dedicated facilities (hospitals or clinics) and in residential structures equipped with appropriate
shielding systems.
2.2 Classification of the device in accordance with EC 93/42
GIADENT, in all of its configurations, is an active medical device, invasive through natural
orifices, for temporary use, and intended for diagnostic purposes.
This device falls into Class I according to the classification directive of EC 93/42.

GIADENT User Manual
R0 dated: 15/04/2014 4
2.3 Applicable Standards
The standards applicable to the device mainly concern rules on general safety (for the patient and
operator) and electromagnetic compatibility.
The following standards apply:
Reference standard Description
CEI EN 60601-1:2005 Medical electrical equipment Part 1: General
requirements for basic safety and essential performance
EN 60601-1-2:2007
Medical electrical equipment Part 1: General
requirements for basic safety and essential performance –
Collateral standard: Electromagnetic compatibility –
Requirements and tests
2.4 Type of Installation
GIADENT is used as a temporary device and is not connected to the mains power source; power
is supplied directly from the computer via the USB connection.
2.5 Address of manufacturer
The address of manufacturer is as follows:
C.M.C. S.n.c. di Cocconcelli Lauro & C.
Via Caduti delle Reggiane, 50
42122 - REGGIO EMILIA (RE) - Italy
e.mail: [email protected]
2.6 Physical principles of operation
The GIADENT sensor works like a regular digital sensor, i.e. it transforms the measured dose
which strikes each element of the sensor (pixel) in an electric signal that can be processed
through an analog-digital converter.
The conversion process includes the following steps:
1) Conversion of incident x-rays into visible light; this conversion takes place in the CsI or GOS
sensitive layer.
2) The visible light is transferred, through the Optical Fibre, onto the sensitive layer of the CMOS.
3) The CMOS sensor converts the light rays into electric charges which are stored in special
structures until reading
In this way, each picture element (pixel) accumulates a number of charges proportional to both the
quantity of incident light beams and to the exposure time.

GIADENT User Manual
R0 dated: 15/04/2014 5
3 SYSTEM USABILITY
3.1 User profile and knowledge requirements
The GIADENT Medical System is designed to be used in radiography and dental facilities.
In both cases, the primary user is a professional who has the knowledge required to properly
weigh the risks and benefits associated with their radiological imaging technologies.
End users must have basic knowledge about:
• Use of ionising radiation emissions
• Harmful biological effects related to excessive use of ionising radiation
• Methods to reduce the risk of excessive exposure to radiation as a patient (use of lead
shields, etc.)
The operator should be familiar with using personal computers (PC) and the related programs, in
order to be able to use the functions on the PC easily.
3.2 Training
After the system has been installed the operator will receive training on using the system and the
image acquisition and viewing programs.
Training does not involve the use of special tools, only the digital sensor and related acquisition
program.
3.3 Patient profile
The machine is suitable for use on any type of patient.
The different procedures for carrying out each exam based on the type of patient depend on the x-
ray system used and are not included in this user manual.
3.4 Usability
All documentation supplied with the GIADENT system has been designed to help the operator in
performing the operations.
The information contained in this manual call upon the knowledge requirements described for the
user profile.
Information on using the acquisition, storage and processing system for images captured using
the GIADENT sensor is available in a specific manual, which should be read for further details.
Read this manual carefully before using the device. Keep this manual near the
device for future reference.

GIADENT User Manual
R0 dated: 15/04/2014 6
4 SAFETY ASPECTS
WARNING
This chapter contains very important information concerning system, operator
and patient safety.
Read this chapter very carefully.
CMC S.r.l. designs and manufactures these devices in compliance with all relevant safety
requirements. It also provides all necessary information for appropriate use and warnings on the
risks associated with using X-rays for diagnostic purposes.
CMC S.r.l. shall not be held liable for:
1. use of the GIADENT device for any purpose other those for which it has been designed,
2. damage to the device, injuries to the operator or patient caused by either incorrect
installation or maintenance that does not follow the procedures contained in the User and
Service Manuals provided with the device, as well as incorrect operating techniques,
3. mechanical and/or electrical changes, made during or after installation, that differ from
than those listed in the Service Manual,
4. only personnel authorised by CMC S.r.l. may install and perform technical work on the
device.
4.1 General warnings
WARNING
GIADENT must be used in radiography, dental or hospital facilities.
WARNING:
GIADENT and its accessories are supplied non-sterile and cannot be heat
sterilized.
Follow the instructions below to ensure proper protection of the patient and
operator.
WARNING:
Do not sterilize the GIADENT sensor in an autoclave or using dry heat as this
could cause serious damage to the sensor. Do not sterilize with UV units.
GIADENT User Manual
R0 dated: 15/04/2014 7
WARNING:
Do not immerse the USB connector of the sensor in cleaning fluids.
WARNING:
For GIADENT to work properly, it must be connected to a personal computer
designed for image acquisition and image processing. The dedicated software
must be installed on the personal computer.
4.1.1 Disposal hazards
Some parts of this device contain solid materials which, at the end of its life cycle, must be
disposed of at authorised recovery centres according to local regulations.
Specifically, the device contains the following materials and/or components:
• Plastic, lead, electronic boards, electronic components.
4.1.1.1 Information on proper disposal of the system or parts thereof
Applicable in the European Union and in other European countries with separate waste collection
systems
In accordance with Article 13 of Legislative Decree no. 151 of 25 July 2005 "Implementation of
Directives 2002/95/EC, 2002/96/EC and 2003/108/EC, on reducing the use of hazardous substances
in electrical and electronic equipment, and on the disposal of waste"
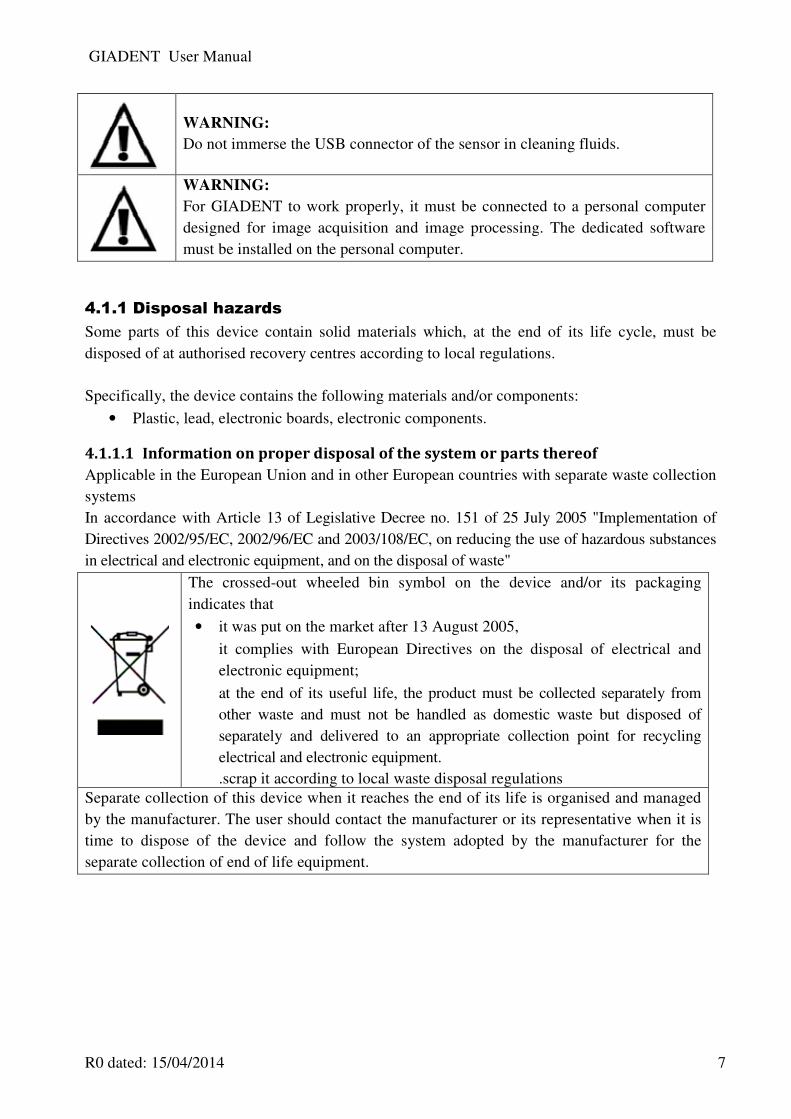
The crossed-out wheeled bin symbol on the device and/or its packaging
indicates that
• it was put on the market after 13 August 2005,
it complies with European Directives on the disposal of electrical and
electronic equipment;
at the end of its useful life, the product must be collected separately from
other waste and must not be handled as domestic waste but disposed of
separately and delivered to an appropriate collection point for recycling
electrical and electronic equipment.
.scrap it according to local waste disposal regulations
Separate collection of this device when it reaches the end of its life is organised and managed
by the manufacturer. The user should contact the manufacturer or its representative when it is
time to dispose of the device and follow the system adopted by the manufacturer for the
separate collection of end of life equipment.
GIADENT User Manual
R0 dated: 15/04/2014 8
5 CLEANING AND DISINFECTING
Scrupulously following the procedures provided below in order to ensure thorough cleaning and
hygiene.
WARNING Cleaning operations must be performed with the device disconnected from the
computer.
WARNING:
GIADENT and its accessories are supplied non-sterile and cannot be heat
sterilized.
To protect the health and safety of patients and prevent possible risks of
contamination and/or cross-infection, please read and carefully follow the
general guidelines provide below.
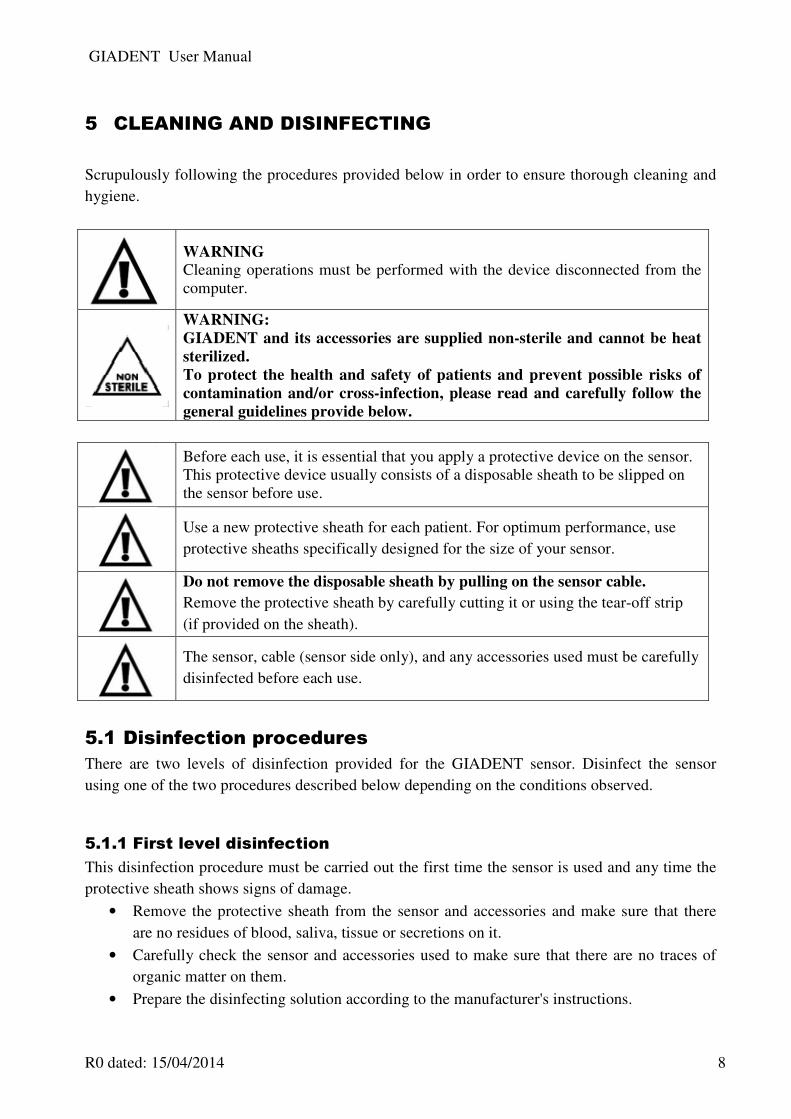
Before each use, it is essential that you apply a protective device on the sensor.
This protective device usually consists of a disposable sheath to be slipped on
the sensor before use.
Use a new protective sheath for each patient. For optimum performance, use
protective sheaths specifically designed for the size of your sensor.
Do not remove the disposable sheath by pulling on the sensor cable.
Remove the protective sheath by carefully cutting it or using the tear-off strip
(if provided on the sheath).
The sensor, cable (sensor side only), and any accessories used must be carefully
disinfected before each use.
5.1 Disinfection procedures
There are two levels of disinfection provided for the GIADENT sensor. Disinfect the sensor
using one of the two procedures described below depending on the conditions observed.
5.1.1 First level disinfection
This disinfection procedure must be carried out the first time the sensor is used and any time the
protective sheath shows signs of damage.
• Remove the protective sheath from the sensor and accessories and make sure that there
are no residues of blood, saliva, tissue or secretions on it.
• Carefully check the sensor and accessories used to make sure that there are no traces of
organic matter on them.
• Prepare the disinfecting solution according to the manufacturer's instructions.

GIADENT User Manual
R0 dated: 15/04/2014
• Carefully disinfect the sensor, following the instruction provided by the
the disinfectant.
5.1.2 Second level disinfection
This procedure is required when one or more of the following issues are noted during a visual
inspection:
1. the protective sheath is torn
2. residues of organic matter (blood, salvia, other types of
found on the sensor and/or
If any of these issues appear, follow the steps below for the
• Wash the sensor thoroughly
not to immerse the end part of the cable with the USB connection.
• Prepare the disinfecting solution according to the manufacturer's instructions.
• Carefully disinfect the sensor, following the instruction provided by the manufac
the disinfectant.
5.1 Disinfection products compatible with
GIADENT
Use 70% isopropyl alcohol to properly clean and disinfect the
Test carried out by the manufacture
the disinfection solution mentioned above without
WARNING
Do not use disinfection products containing aldehydes.
NOTE
CMC Dental recommends that you only use disinfectants that are in
compliance with E
CE marking.
Carefully disinfect the sensor, following the instruction provided by the
Second level disinfection
This procedure is required when one or more of the following issues are noted during a visual
the protective sheath is torn
residues of organic matter (blood, salvia, other types of secretions, residual tissues)
on the sensor and/or on the sensor-PC cable connection.
follow the steps below for the second level disinfection procedure
thoroughly with soap and water to remove all organic matter. Be careful
not to immerse the end part of the cable with the USB connection.
Prepare the disinfecting solution according to the manufacturer's instructions.
Carefully disinfect the sensor, following the instruction provided by the manufac
Disinfection products compatible with
GIADENT
l to properly clean and disinfect the GIADENT sensor
the manufacture have shown that the GIADENT sensor can be immersed in
the disinfection solution mentioned above without suffering any damage.
Do not use disinfection products containing aldehydes.
Dental recommends that you only use disinfectants that are in
compliance with EC Directive 93/42 on Medical Devices and that
9
Carefully disinfect the sensor, following the instruction provided by the manufacturer of
This procedure is required when one or more of the following issues are noted during a visual
tions, residual tissues) are
nd level disinfection procedure:
organic matter. Be careful
Prepare the disinfecting solution according to the manufacturer's instructions.
Carefully disinfect the sensor, following the instruction provided by the manufacturer of
Disinfection products compatible with
sensor.
sensor can be immersed in
Dental recommends that you only use disinfectants that are in
C Directive 93/42 on Medical Devices and that they bear the
GIADENT User Manual
R0 dated: 15/04/2014 10
6 IDENTIFICATION AND DESCRIPTION
GIADENT is a device designed for taking intraoral x-rays of the human tooth structure.
Normal use and operation of this device does not involve:
• the administration of biological substances
• the sterilisation of parts of the product, since only regular cleaning is required
• the interpretation of the final results
• the updating and modification of the control software.
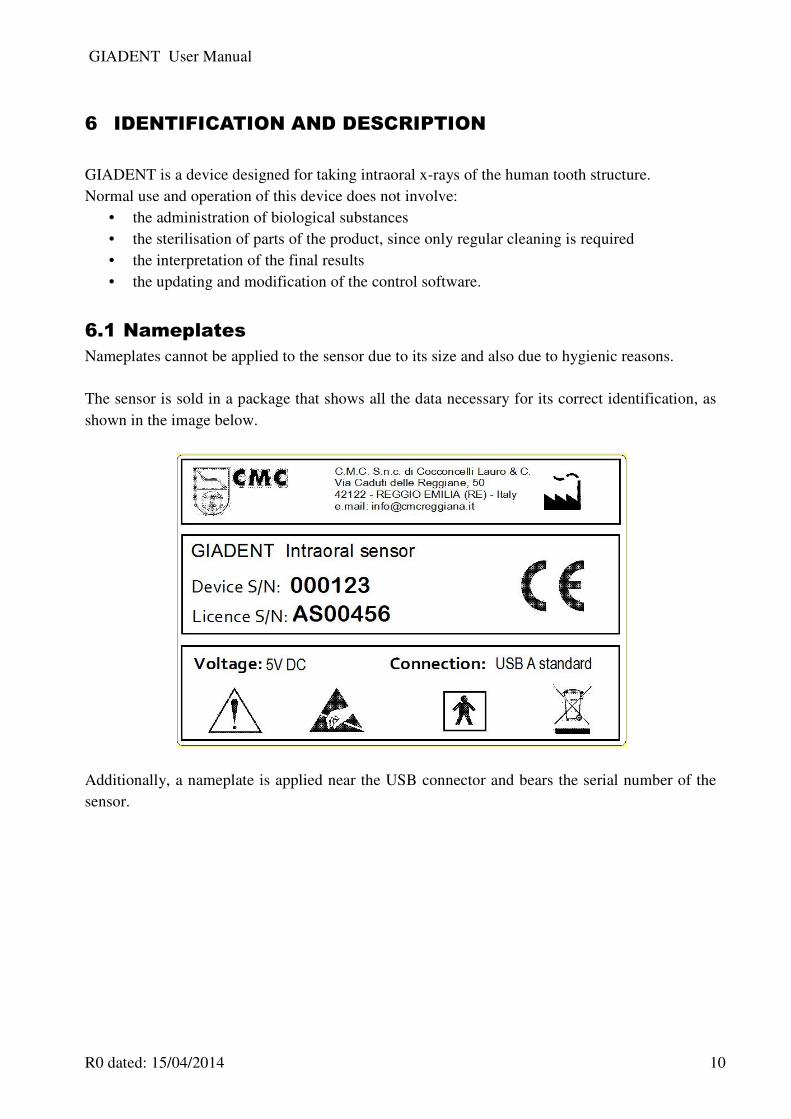
6.1 Nameplates
Nameplates cannot be applied to the sensor due to its size and also due to hygienic reasons.
The sensor is sold in a package that shows all the data necessary for its correct identification, as
shown in the image below.
Additionally, a nameplate is applied near the USB connector and bears the serial number of the
sensor.

GIADENT User Manual
R0 dated: 15/04/2014
7 TECHNICAL SPECIFICATIONS
7.1 General characteristics
Characteristic
Type of device
Manufacturer
Class
(according to IEC 60601-1 classification)
Degree of Protection
Sensitive (active) surface
Pixel size
Pixel shape
Number of Pixels
Distance between pixels
Spatial resolution
Dynamic range
Scintillator type:
Photodiode detectors
Maximum absorb. dose
7.2 Mechanical characteristics
Characteristic
Mechanical dimensions
USB cable length
7.3 Electrical characteristics
Characteristic
Supply voltage
Power Supply
Maximum absorbed current
Frame rate
TECHNICAL SPECIFICATIONS
General characteristics
Value
GIADENT
CMC Srl
1 classification)
Class I with Type BF applied
parts
Equivalent to IP67
30 x 20 mm (size 1)
33 x 25 mm (size 2)
20 x 20 µm
Square
1500 x 1000 (size 1)
1650 x 1250 (size 2)
20 µm
20 lp/mm typical (theoretical 25 lp/mm)
58 dB
CsI or GOS
Positioned outside of sensitive area
50 Gy
characteristics
Value
25 x 39 x 12.5 mm (size 1) (L x
2 m
Electrical characteristics
Characteristic Value
5 V DC
Directly via USB connection
275 mA
0.7 fps
11
Class I with Type BF applied
20 lp/mm typical (theoretical 25 lp/mm)
Positioned outside of sensitive area
5 mm (size 1) (L x W x H)
Value
5 V DC
Directly via USB connection
275 mA
0.7 fps
GIADENT User Manual
R0 dated: 15/04/2014 12
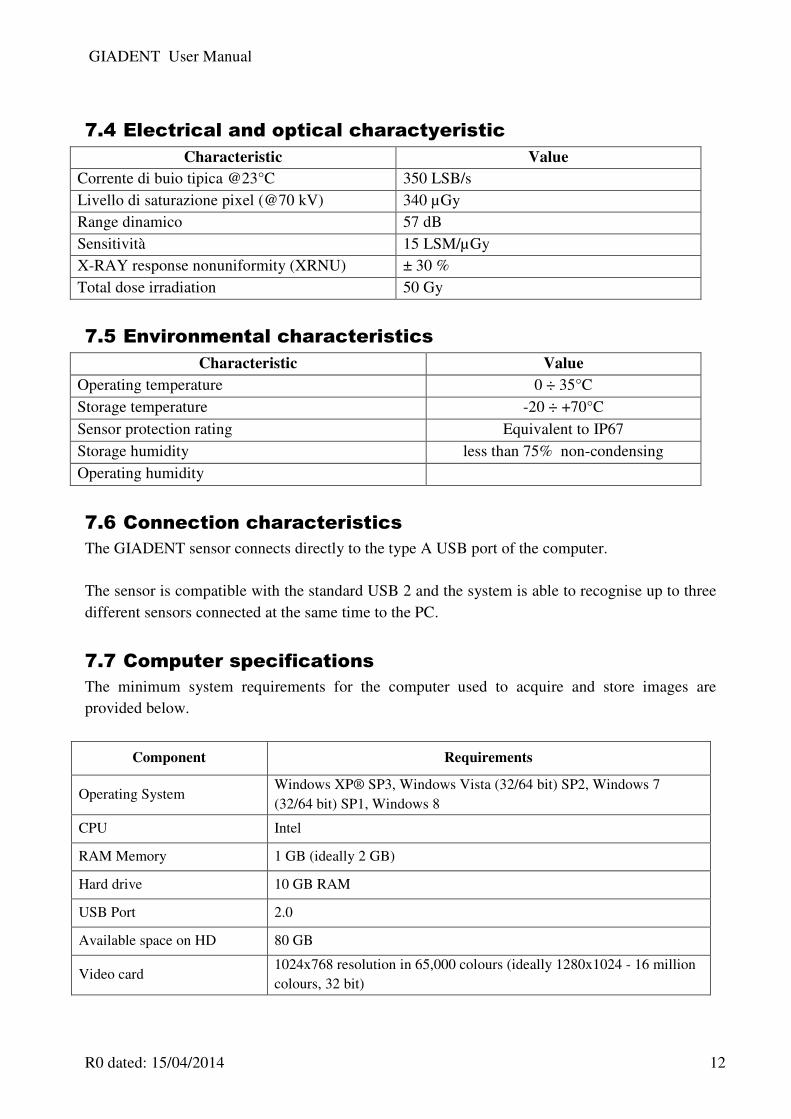
7.4 Electrical and optical charactyeristic
Characteristic Value
Corrente di buio tipica @23°C 350 LSB/s
Livello di saturazione pixel (@70 kV) 340 µGy
Range dinamico 57 dB
Sensitività 15 LSM/µGy
X-RAY response nonuniformity (XRNU) ± 30 %
Total dose irradiation 50 Gy
7.5 Environmental characteristics
Characteristic Value
Operating temperature 0 ÷ 35°C
Storage temperature -20 ÷ +70°C
Sensor protection rating Equivalent to IP67
Storage humidity less than 75% non-condensing
Operating humidity
7.6 Connection characteristics
The GIADENT sensor connects directly to the type A USB port of the computer.
The sensor is compatible with the standard USB 2 and the system is able to recognise up to three
different sensors connected at the same time to the PC.
7.7 Computer specifications
The minimum system requirements for the computer used to acquire and store images are
provided below.
Component Requirements
Operating System Windows XP® SP3, Windows Vista (32/64 bit) SP2, Windows 7
(32/64 bit) SP1, Windows 8
CPU Intel
RAM Memory 1 GB (ideally 2 GB)
Hard drive 10 GB RAM
USB Port 2.0
Available space on HD 80 GB
Video card 1024x768 resolution in 65,000 colours (ideally 1280x1024 - 16 million
colours, 32 bit)
GIADENT User Manual
R0 dated: 15/04/2014
The size of the hard drive must be proportionate to the size of the archive that is created
particular reference to the images
7.8 Monitor specifications
A good quality monitor is essential
monitor that does not pass the required
Using a non-diagnostic monitor will render the
A high contrast and high definition monitor that has
Check the quality of the monitor using specific images (see
7.9 Hardware Installation
After installation, the system must not pose any risk
Therefore, please follow the safety instructions provided below.
The computer where our imaging system
equipment connected to it
The computer and all other associated equipment must be placed outside of the
patient environment
Only the sensor and x
patient environment
Do not plug the
No additional ground receptacle is required because
compliance with safety standard EN 60601
type BF.
size of the hard drive must be proportionate to the size of the archive that is created
the images that will be stored it in.
Monitor specifications
good quality monitor is essential for a correct diagnosis of the exam by analysing the image
monitor that does not pass the required tests should not be considered a diagnostic
diagnostic monitor will render the GIADENT product non-diagnostic.
st and high definition monitor that has at least a 17" screen is preferable
Check the quality of the monitor using specific images (see paragraph 10.2)
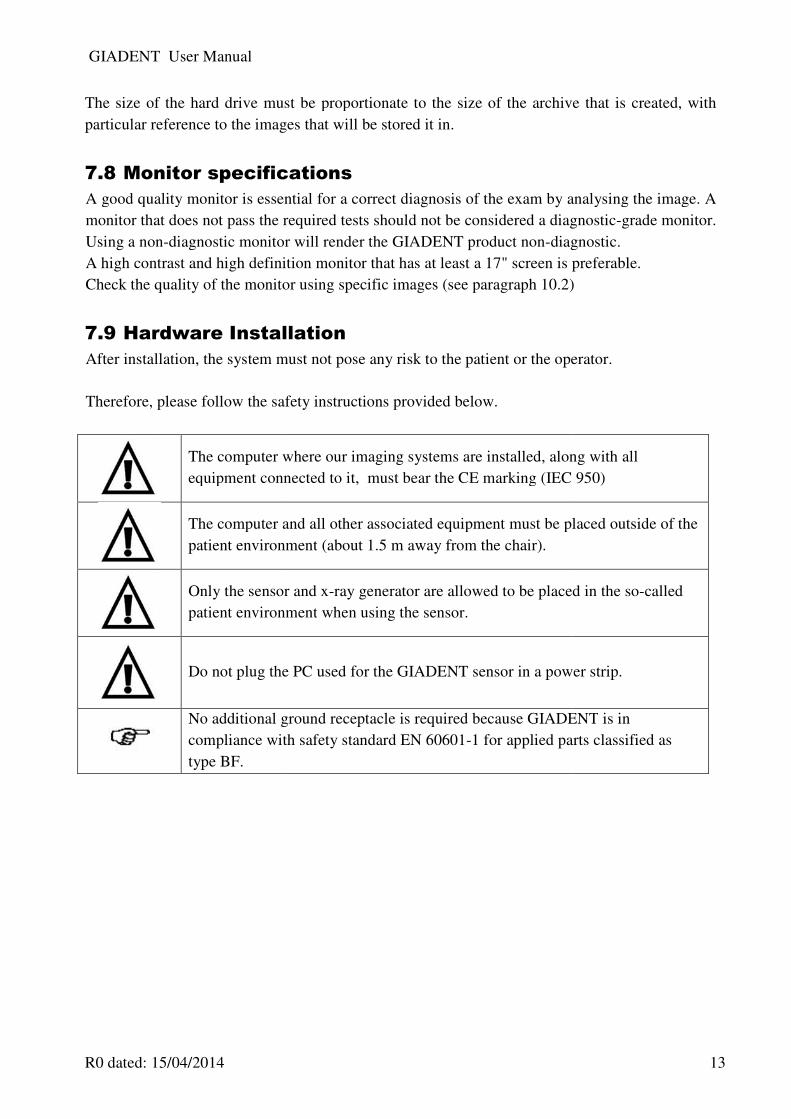
Hardware Installation
em must not pose any risk to the patient or the operator.
Therefore, please follow the safety instructions provided below.
The computer where our imaging systems are installed, along with
equipment connected to it, must bear the CE marking (IEC
The computer and all other associated equipment must be placed outside of the
patient environment (about 1.5 m away from the chair).
Only the sensor and x-ray generator are allowed to be placed in the so
environment when using the sensor.
Do not plug the PC used for the GIADENT sensor in a power strip.
No additional ground receptacle is required because GIADENT
compliance with safety standard EN 60601-1 for applied parts classified as
13
size of the hard drive must be proportionate to the size of the archive that is created, with
analysing the image. A
diagnostic-grade monitor.
diagnostic.
screen is preferable.
)
the patient or the operator.
along with all
CE marking (IEC 950)
The computer and all other associated equipment must be placed outside of the
ray generator are allowed to be placed in the so-called
a power strip.
GIADENT is in
1 for applied parts classified as

GIADENT User Manual
R0 dated: 15/04/2014
8 PRECAUTIONS FOR USING THE SENSOR
For correct use of the sensor, consult the user
Use a disposable protective device (not supplied) to prevent patients from
exposure to infections.
serious danger to the health of the patient.
Do not sterilize the product
Before using the sensor, make sure it is in good condition (no cracks in the
protective part of the sensor
Clean the sensor and the cable (at the output of the sensor) with a cloth
moistened with 70% isop
Do not use other liquids or disinfectants and do not use too much rubbing.
The GIADENT
observe the precautions for use.
at the same time.
When the sensor is not in use, store it away from static electricity
In case of any problems, do not use the product.
discontinue use of the sensor
Do not use USB connectors/port
Handle this product with care
If the sensor is not connected
connector.
Do not use a wet cloth or spray on the USB connector because it will
deteriorate with moisture and can cause harm to the patient and / or operator.
Do not attach or hang anything on the sensor, especially on the sensitive
PRECAUTIONS FOR USING THE SENSOR
For correct use of the sensor, consult the user manual.
Use a disposable protective device (not supplied) to prevent patients from
exposure to infections. Failure to use a disposable protective
serious danger to the health of the patient.
Do not sterilize the product using dry heat or autoclaving or UV devices.
Before using the sensor, make sure it is in good condition (no cracks in the
protective part of the sensor, cord ripped, etc..).
Clean the sensor and the cable (at the output of the sensor) with a cloth
moistened with 70% isopropyl alcohol for disinfection.
Do not use other liquids or disinfectants and do not use too much rubbing.
GIADENT sensor has some electro-static sensitive parts:
observe the precautions for use. Do not touch the sensor and computer screen
at the same time. Do not touch the USB connector.
When the sensor is not in use, store it away from static electricity
any problems, do not use the product. In case of any fault
discontinue use of the sensor
Do not use USB connectors/ports if they are dusty or damp.
Handle this product with care.
If the sensor is not connected to PC, be careful not to
Do not use a wet cloth or spray on the USB connector because it will
deteriorate with moisture and can cause harm to the patient and / or operator.
Do not attach or hang anything on the sensor, especially on the sensitive
14
Use a disposable protective device (not supplied) to prevent patients from
disposable protective device may cause
dry heat or autoclaving or UV devices.
Before using the sensor, make sure it is in good condition (no cracks in the
Clean the sensor and the cable (at the output of the sensor) with a cloth
Do not use other liquids or disinfectants and do not use too much rubbing.
static sensitive parts: make sure to
Do not touch the sensor and computer screen
When the sensor is not in use, store it away from static electricity.
any fault during use,
dusty or damp.
, be careful not to damage the USB
Do not use a wet cloth or spray on the USB connector because it will
deteriorate with moisture and can cause harm to the patient and / or operator.
Do not attach or hang anything on the sensor, especially on the sensitive part.

GIADENT User Manual
R0 dated: 15/04/2014
Do not exert pressure on the head of the sensor (tight sensor holders, clamps,
etc.)
Do not forcibly twist, bend, pull or pinch the cable
remove the disposable protective sheath.
When connecting/
pull on the cable.
The temperature of t
remains in operation for an extended period of time.
Take care to use it only when the temperature is below
Although the sensor has been designed and engineered to be resistant to the
entrance of liquids and powders, do not let the sensor immersed in liquid
disinfectant, water or other chemicals for a long time.
Do not exert pressure on the head of the sensor (tight sensor holders, clamps,
Do not forcibly twist, bend, pull or pinch the cable Do not pull the cable to
remove the disposable protective sheath.
When connecting/disconnecting the sensor, grasp the connector itself
pull on the cable.
The temperature of the sensor will rise considerably (even by 10°C) if it
remains in operation for an extended period of time.
Take care to use it only when the temperature is below 35° C.
Although the sensor has been designed and engineered to be resistant to the
entrance of liquids and powders, do not let the sensor immersed in liquid
disinfectant, water or other chemicals for a long time.
15
Do not exert pressure on the head of the sensor (tight sensor holders, clamps,
Do not pull the cable to
, grasp the connector itself—never
(even by 10°C) if it
5° C.
Although the sensor has been designed and engineered to be resistant to the
entrance of liquids and powders, do not let the sensor immersed in liquid

GIADENT User Manual
R0 dated: 15/04/2014 16
9 SOFTWARE INSTALLATION
The GIADENT sensor comes with ARCHIMED SUITE, an image acquisition and management
software program specially designed for GIADENT. ARCHIMED SUITE software is supplied
on a CD/DVD ROM.
The installation process for this system entails:
1) Installation of main program
2) Installation of the protection key drivers
3) Installation of sensor drivers
Insert the CD/DVD in the CD drive of the computer where the program is to be installed; wait a
few seconds until the start-up window shown below automatically appears.
In the main screen of the start-up procedure, it is possible to select the
language that will be used during the installation.
Please select your preferred language.
1
2
9.1 Installation of program
Select button "1" to install the ARCHIMED SUITE program on your computer; the installation
procedure involves a number of different steps, all of which are noted via special windows or
messages.
Press the "Next" button in each window to confirm the task to perform.
NOTE
During installation you will be asked if you would like to create a desktop
shortcut (to add a program icon on your desktop). We recommend that you
confirm the creation of this desktop shortcut for easy access to the
ARCHIMED SUITE program.

GIADENT User Manual
R0 dated: 15/04/2014 17
When the program is loading a progress bar will appear showing the percentage of completion of
installation; when installation is completed, a window will appear confirming that the installation
is complete; in this window you must select "End" to return to the main installation screen.
9.2 Installation of the protection key drivers
The ARCHIMED SUITE program is protected by a hardware protection key; without this key,
the program will not work will or remain in demo mode and it will not be possible to capture
images.
Install the drivers for the protection key by pressing button "2"; the installation procedure is
similar to that of the main program.
9.3 Installation of sensor drivers
The sensor requires a special program (driver) for it to work properly; follow the following
procedure:
1. Open the install disk with the command explores
2. Navigate to the folder I-View_H
3. Double click on the file "Driver Setup_32bit.exe" or "Driver Setup_64bit.exe" depending on
the type of PC available.
4. Follow the step by step procedure to install the drivers.
After pressing the button, a window will appear to select the type of sensor to install: I-View D or
I-View H. Select “I-View H”.
9.4 End of installation process
At the end of the installation process press the button "4" to exit the program and return to the
main screen of the operating system in use.
9.5 Using the ARCHIMED SUITE program
Instructions for using the ARCHIMED SUITE are available on the software CD/DVD.
The instructions are provided in PDF format and can be accessed using Adobe Reader. If this
software is not installed on your computer, you can download it for free at
http://get.adobe.com/it/reader/ .
Read the documentation on using the ARCHIMED SUITE software carefully
before you start to use it.

GIADENT User Manual
R0 dated: 15/04/2014
10 INSTALLATION AND PERIODIC CHECKS
After installing the GIADENT
everything is correctly installed and that the sensor
1) Installation check
2) Monitor quality test
3) Spatial resolution test
10.1 Installation checkThis check is performed by launching the
works properly and recognizes the
Read the documentation on using the
before you start to use it.
NOTE
The selection of the language to be used by
program's main screen and selecting "Utilities".
In the new window, you can choose the desired language.
10.2 Monitor quality
A good quality monitor is essential for a correct diagnosis of the exam by
analysing the image.
not be considered diagnostic.
render the GIADENT
The ARCHIMED SUITE program has a guided procedure to
We strongly recommend that you perform the functional test for the monitor t
is suitable for viewing radiographic images.
time you start the images module,
INSTALLATION AND PERIODIC CHECKS
GIADENT intraoral sensor, perform the following steps to ensure that
everything is correctly installed and that the sensor functions properly.
nstallation check This check is performed by launching the ARCHIMED SUITE software and verifying that it
works properly and recognizes the GIADENT sensor when it is connected to the computer
Read the documentation on using the ARCHIMED SUITE
before you start to use it.
The selection of the language to be used by ARCHIMED SUITE
program's main screen and selecting "Utilities".
window, you can choose the desired language.
Monitor quality test
A good quality monitor is essential for a correct diagnosis of the exam by
analysing the image. A monitor that does not pass the required checks should
not be considered diagnostic. Using a non-diagnostic quality monitor will
GIADENT product non-diagnostic.
program has a guided procedure to test the quality of the monitor used.
We strongly recommend that you perform the functional test for the monitor t
is suitable for viewing radiographic images. This procedure is automatically launched the first
time you start the images module, as shown in the following window
18
the following steps to ensure that
software and verifying that it
sensor when it is connected to the computer.
program carefully
ARCHIMED SUITE is possible in the
A good quality monitor is essential for a correct diagnosis of the exam by
A monitor that does not pass the required checks should
diagnostic quality monitor will
the quality of the monitor used.
We strongly recommend that you perform the functional test for the monitor to make sure that it
This procedure is automatically launched the first
GIADENT User Manual
R0 dated: 15/04/2014
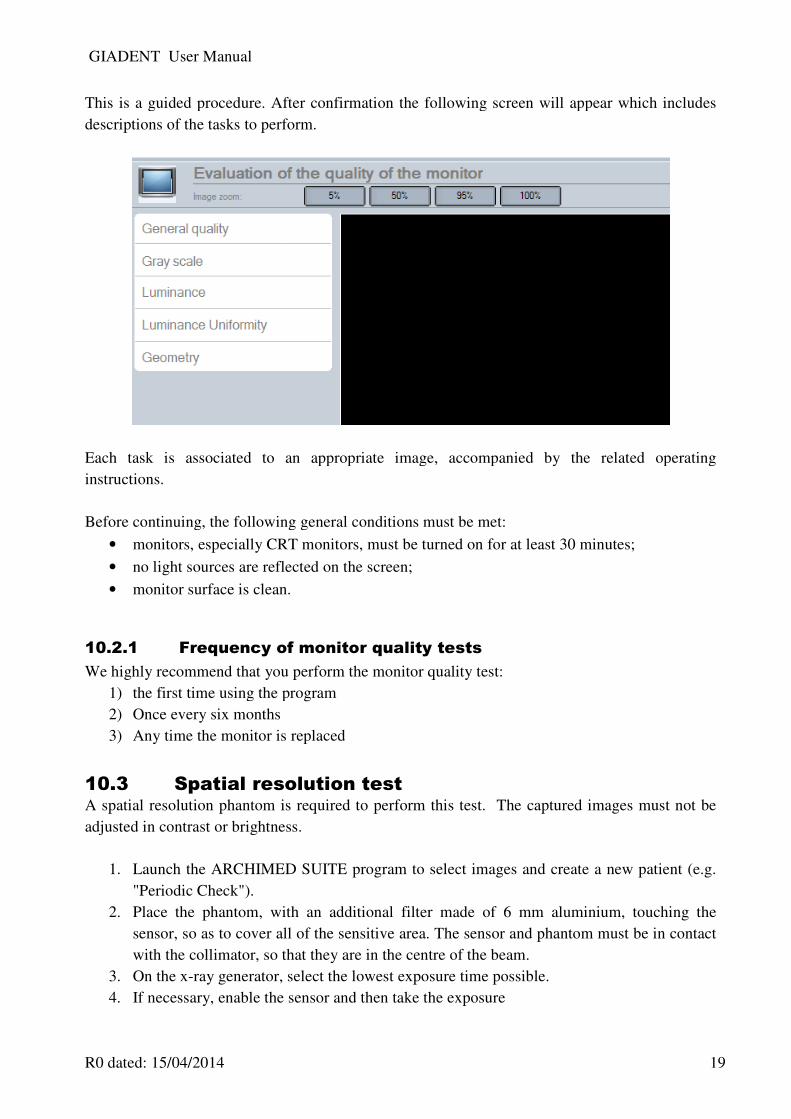
This is a guided procedure. After confirmation the following screen w
descriptions of the tasks to perform.
Each task is associated to an appropriate
instructions.
Before continuing, the following general conditions must be met:
• monitors, especially CRT monitors, must be turned on for at least 30 minutes;
• no light sources are reflected on the screen;
• monitor surface is clean.
10.2.1 Frequency of monitor
We highly recommend that you perform the monitor quality
1) the first time using the pro
2) Once every six months
3) Any time the monitor is replaced
10.3 Spatial resolution A spatial resolution phantom is required to perform this
adjusted in contrast or brightness.
1. Launch the ARCHIMED SUITE
"Periodic Check").
2. Place the phantom, with an additional filter made of 6 mm aluminium, touching the
sensor, so as to cover all of the sensitive area.
with the collimator, so that they are in the
3. On the x-ray generator, select the lowest exposure time possible.
4. If necessary, enable the sensor and
This is a guided procedure. After confirmation the following screen will appear which includes
descriptions of the tasks to perform.
Each task is associated to an appropriate image, accompanied by the related operating
Before continuing, the following general conditions must be met:
CRT monitors, must be turned on for at least 30 minutes;
reflected on the screen;
monitor surface is clean.
Frequency of monitor quality tests
We highly recommend that you perform the monitor quality test:
the first time using the program
Any time the monitor is replaced
Spatial resolution test A spatial resolution phantom is required to perform this test. The captured images must not be
adjusted in contrast or brightness.
ARCHIMED SUITE program to select images and create a new patient (e.g.
Place the phantom, with an additional filter made of 6 mm aluminium, touching the
sensor, so as to cover all of the sensitive area. The sensor and phantom must be in contact
with the collimator, so that they are in the centre of the beam.
ray generator, select the lowest exposure time possible.
If necessary, enable the sensor and then take the exposure
19
ill appear which includes
image, accompanied by the related operating
CRT monitors, must be turned on for at least 30 minutes;
The captured images must not be
elect images and create a new patient (e.g.
Place the phantom, with an additional filter made of 6 mm aluminium, touching the
The sensor and phantom must be in contact
GIADENT User Manual
R0 dated: 15/04/2014
5. Check that the image obt
and repeat acquisition.
sensor/phantom and collimator
6. Repeat the correct exposure test; if necessary repeat steps 4 and 5 above.
7. Once a correct image is obtained you should cancel the previous images
8. Zoom in on the image and check that the line pairs are clearly visible.
the contrast and brightness for optimal viewing.
9. Note the parameters used for exposure (date o
distance, any additional filters and their characteristics,
image.
The test is considered passed if the spatial resolution is greater than 10
This test must be carried
identifying the images for each sensor.
If two or more digital sensors are used, the test must be carried out on each
digital sensor, identifying the images for each sensor.
10.3.1 Frequency of spatia
The spatial resolution test must be performed once every 6 months.
To do so, follow the procedure described in the paragraph above; the following items must be
taken into consideration during the periodic tests:
1. The results must be the same as those described for the initial system check.
2. If the visual performance appears to be degraded:
a. perform the monitor test, checking that it corresponds to the initial quality
b. if the results of the monitor test are
they can check the performance of the sensor and/or x
10.4 Low contrast resolution testThe phantom used to test low contrast resolution also generates the image necessary to check
low-resolution contrast.
Use the same procedure described above, noting also the minimum value of the step when you
are able to distinguish it from the background.
1 Standard IEC 61223-3-4 Evaluation and routine testing in medical imaging departments
Acceptance tests –Imaging performance of dental Xrequired for the spatial resolution acceptance and constancy test.The sensor GIADENT has an intrinsic spatial resolution higherdepends also on the X-ray generator used.
age obtained is properly exposed; if it is not, adjust the exposure time
. In case of overexposure, increase the distance between the
sensor/phantom and collimator
Repeat the correct exposure test; if necessary repeat steps 4 and 5 above.
ce a correct image is obtained you should cancel the previous images
Zoom in on the image and check that the line pairs are clearly visible.
the contrast and brightness for optimal viewing.
the parameters used for exposure (date of execution, exposure time, focus
distance, any additional filters and their characteristics, spatial resolution detected)
The test is considered passed if the spatial resolution is greater than 10
This test must be carried out on all x-ray generators that use the digital sensor,
identifying the images for each sensor.
If two or more digital sensors are used, the test must be carried out on each
digital sensor, identifying the images for each sensor.
Frequency of spatial resolution test
must be performed once every 6 months.
To do so, follow the procedure described in the paragraph above; the following items must be
taken into consideration during the periodic tests:
The results must be the same as those described for the initial system check.
If the visual performance appears to be degraded:
perform the monitor test, checking that it corresponds to the initial quality
results of the monitor test are positive, call the Technical Service Centre so
they can check the performance of the sensor and/or x-ray generator.
Low contrast resolution test The phantom used to test low contrast resolution also generates the image necessary to check
Use the same procedure described above, noting also the minimum value of the step when you
are able to distinguish it from the background.
4 Evaluation and routine testing in medical imaging departments Imaging performance of dental X-ray equipment, a minimum value of 8 lp/mm is
d for the spatial resolution acceptance and constancy test. has an intrinsic spatial resolution higher than stated, but the value obtained
ray generator used.
20
; if it is not, adjust the exposure time
In case of overexposure, increase the distance between the
Repeat the correct exposure test; if necessary repeat steps 4 and 5 above.
ce a correct image is obtained you should cancel the previous images
Zoom in on the image and check that the line pairs are clearly visible. If necessary, adjust
f execution, exposure time, focus-sensor
resolution detected) of the
The test is considered passed if the spatial resolution is greater than 10 lp/mm1.
ray generators that use the digital sensor,
If two or more digital sensors are used, the test must be carried out on each
To do so, follow the procedure described in the paragraph above; the following items must be
The results must be the same as those described for the initial system check.
perform the monitor test, checking that it corresponds to the initial quality
call the Technical Service Centre so
ray generator.
The phantom used to test low contrast resolution also generates the image necessary to check
Use the same procedure described above, noting also the minimum value of the step when you
4 Evaluation and routine testing in medical imaging departments – Part 3-4: ray equipment, a minimum value of 8 lp/mm is
, but the value obtained
GIADENT User Manual
R0 dated: 15/04/2014
The test is passed if you are able to distinguish the step from 1.5 mm
10.4.1 Frequency of low contrast resolution test
This test must be performed with the same frequency as the spatial resolution test; the results
must be the same as those of the acceptance test.
If the periodic
considerations for the spatial resolution test apply.
10.5 Periodic maintenanceThe sensor GIADENT does not require special maintenance except for of the above controls.
It is recommended, however, perform the following checks on a monthly basis:
1. Check for presence and legibility of the
if it appears damaged or not readable, request a copy from the manufacturer.
2. Check the integrity of the USB cable and the
The test is passed if you are able to distinguish the step from 1.5 mm
Frequency of low contrast resolution test
is test must be performed with the same frequency as the spatial resolution test; the results
must be the same as those of the acceptance test.
periodic low contrast resolution test is not passed
considerations for the spatial resolution test apply.
Periodic maintenance does not require special maintenance except for of the above controls.
It is recommended, however, perform the following checks on a monthly basis:
Check for presence and legibility of the S/N on the plate located near the USB connector;
if it appears damaged or not readable, request a copy from the manufacturer.
Check the integrity of the USB cable and the connector.
21
is test must be performed with the same frequency as the spatial resolution test; the results
not passed, the same
does not require special maintenance except for of the above controls.
It is recommended, however, perform the following checks on a monthly basis:
located near the USB connector;
if it appears damaged or not readable, request a copy from the manufacturer.