USC Dornsife Spatial Sciences Institute Master’s...
31
1 USC Dornsife Spatial Sciences Institute Master’s Thesis Style Guide Effective for students in SSCI 594a as of Fall 2016 With a few minor exceptions, at the USC Dornsife Spatial Sciences Institute, Turabian’s 2013 edition of A Manual for Writers of Research Papers, Theses, and Dissertations is used as the standard reference for style and format for all theses. While it is based on the Chicago 16 th style, there are some minor differences between these styles, so use the rules as expressed in Turabian when there is a difference. A. Appendix: Paper Format and Submission The following section is derived from the Appendices in Turabian (2013). Section numbers used are consistent with the original so that cross references can be easily made. However, key changes have been made where necessary to specify SSI thesis format requirements. Follow rules specified here if they differ from Turabian. Sections indicated as “Not used in SSI” contain information in the Turabian text that is not relevant to SSI theses. Attached to this document is a print of the SSI Thesis Template illustrating the major components discussed below, some of which are included in Turabian as separate figures. Use the separate Word template to see the styles in action. A.1 General Format Requirements This section addresses general format issues that apply to your thesis as a whole. For discussion of specific elements and their individual format requirements, see A.2. A.1.1 Margins Leave a margin of one inch on all four edges of the page. Be sure that any material placed in headers or footers, including page numbers, falls within these margins. A.1.2 Typeface Unless approved otherwise by your advisor, use 12 point Times New Roman font for all text in the body of your document, including Table and Figure captions. A.1.3 Spacing and Indentation Double-space all text, with the following exceptions. The following should be single-spaced: block quotations (see 25.2.2) table titles and figure captions lists in appendices
-
Upload
trinhthien -
Category
Documents
-
view
221 -
download
0
Transcript of USC Dornsife Spatial Sciences Institute Master’s...

1
USC Dornsife Spatial Sciences Institute Master’s Thesis Style Guide
Effective for students in SSCI 594a as of Fall 2016
With a few minor exceptions, at the USC Dornsife Spatial Sciences Institute, Turabian’s 2013 edition of A Manual for Writers of Research Papers, Theses, and Dissertations is used as the standard reference for style and format for all theses. While it is based on the Chicago 16th style, there are some minor differences between these styles, so use the rules as expressed in Turabian when there is a difference.
A. Appendix: Paper Format and Submission The following section is derived from the Appendices in Turabian (2013). Section numbers used are consistent with the original so that cross references can be easily made. However, key changes have been made where necessary to specify SSI thesis format requirements. Follow rules specified here if they differ from Turabian. Sections indicated as “Not used in SSI” contain information in the Turabian text that is not relevant to SSI theses. Attached to this document is a print of the SSI Thesis Template illustrating the major components discussed below, some of which are included in Turabian as separate figures. Use the separate Word template to see the styles in action.
A.1 General Format Requirements This section addresses general format issues that apply to your thesis as a whole. For discussion of specific elements and their individual format requirements, see A.2.
A.1.1 Margins Leave a margin of one inch on all four edges of the page. Be sure that any material placed in headers or footers, including page numbers, falls within these margins.
A.1.2 Typeface Unless approved otherwise by your advisor, use 12 point Times New Roman font for all text in the body of your document, including Table and Figure captions.
A.1.3 Spacing and Indentation Double-space all text, with the following exceptions.
The following should be single-spaced: block quotations (see 25.2.2) table titles and figure captions lists in appendices

2
The following items should be single-spaced internally but with a blank line between items: certain elements in the front matter (see A.2.1), including the table of contents and
any list of figures, tables, or abbreviations bibliographies or reference lists
Put only one space, not two, following the terminal punctuation of a sentence.
Use paragraph format indents rather than spaces or tabs for paragraph indentation and other content requiring consistent alignment.
Block quotations have their own rules for indentation, depending on whether they are prose or poetry (see 25.2.2).
A.1.4 Pagination
A.1.4.1 NUMBERING. Number pages in the body of the paper and the back matter with arabic numerals, starting on the first page of text. Number front matter separately from the rest of the text. (Use a section break in Word to accomplish this task.) Front matter includes the title page and various other elements (see A.2.1). Number
these pages consecutively with lowercase roman numerals (i, ii, iii, etc.; see table 23.1). Every page of front matter including the title page is counted in numbering, but not all of these pages have numbers displayed on them.
The rest of the text, including back matter (see A.2.3), is numbered consecutively with arabic numerals (starting with page 1).
A.1.4.2 PLACEMENT. Page numbers are placed at the right margin in the footer (at the bottom of the page), a half inch from the bottom edge of the page.
A.1.4.3 (OTHER IDENTIFIERS. Not used in SSI.)
A.1.5 Titles Depending on its complexity, your paper may consist of many elements, as listed in A.2, and most of them should have a title.
Use the same typeface, type size, and formatting (boldface, italic, etc.) for the titles of like elements.
On the title page, center each element and use headline-style capitalization for all, including the title of your paper. (See 22.3.1 for a description of this style, as well as of sentence-style capitalization.)
Titles for the front and back matter are also typically centered, as are chapter number designations and chapter titles. For chapter titles, use headline-style capitalization.

3
All such elements may be in a larger type size than the text of your paper. For subheadings within chapters, see A.2.2.4.
Titles of larger divisions (parts, chapters) should be more visually prominent than subheadings. In general, titles are more prominent when larger or centered (or both), in boldface or italic type, or capitalized headline style than when flush left, in regular type, or capitalized sentence style.
The most efficient way to ensure consistency in titles is to use your word processor to define and apply a unique style (specifying typeface, size, position, line spacing, and so forth) for each type of title. The SSI Thesis Word Template provides a basic set of appropriate styles. See also A.3.1.2.
A.2 Format Requirements for Specific Elements In addition to the general requirements outlined in A.1, specific elements of the thesis have specific format requirements.
Most long papers and all theses and dissertations have three main divisions: (1) front matter, (2) the text of the paper itself, and (3) back matter. The front and back matter are also divided into elements that vary, depending on your paper.
A.2.1 Front Matter The front matter of your thesis may include some or all of the following elements.
A.2.1.1 (SUBMISSION PAGE. Not used at SSI.)
A.2.1.2 TITLE PAGE. Put the title and optional subtitle in 12-point font, headline-style capitalization, centered, three inches from the top of the page (2” from top margin). Separate the title and your name from the following text by two inches (5 single spaced blank lines). The date should be the month and year in which you expect your degree to be conferred–May, August or December only (note that unless you complete early in any semester, your conferral date will be at the end of the next semester).
Count the title page as page i, but do not put that number on it.
A.2.1.3 COPYRIGHT PAGE. In your thesis, insert a copyright page after the title page. Count this page as page ii, but do not put that number on it. Include the copyright notice two inches from the bottom edge, flush left to the left margin, in this form:
Copyright © 20XX by Your Name All rights reserved

4
A.2.1.4 DEDICATION. (Optional) You may include a brief dedication to acknowledge someone who has been especially important to you. Note that this is not the Acknowledgement element (see A.2.1.9). Count the dedication page in paginating the front matter, but do not put a page number on it. Place the dedication a third of the way down, usually centered, and set it in roman type with no terminal punctuation. You need not include the words dedication or dedicated; simply say To, as in:
To Grace Lenore
You may identify the person to whom you dedicate the work ("To my father,
Sebastian Wells") and give other information such as birth and death dates.
A.2.1.5 (EPIGRAPH. A short quotation or statement. Generally not included in the front matter in SSI.)
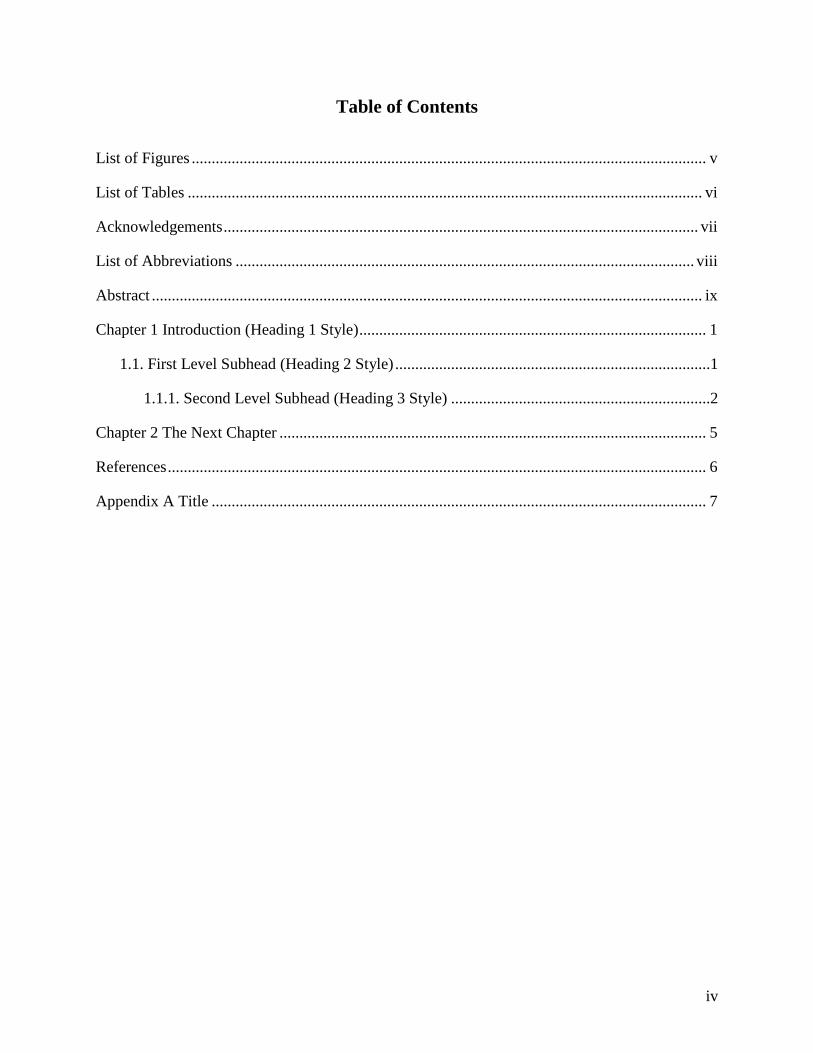
A.2.1.6 TABLE OF CONTENTS. All papers divided into chapters require a table of contents. Number all pages of this element with roman numerals. Label the first page Table of Contents in bold 14-point font at the center top of the page. If the table of contents is more than one page, do not repeat the title. Leave two blank lines between the title and the first item listed. Single-space individual items listed, but have a blank line after each item.
A table of contents does not list pages that precede it (title page, copyright or dedication) or the table of contents itself but should begin with the front matter pages that follow it. Following these items, list in order the chapters and first level sections of the text, and then the elements of the back matter. List only two levels of sub-headings unless further levels are useful to give readers an accurate overview of your paper. Be sure that the wording, capitalization, number style (arabic, roman, or spelled out), and punctuation of all titles and subheads (see A.1.5) match exactly those in the paper. If you have generated your table of contents automatically with your word processor, check the results and edit it directly if needed. If you have used paragraph styles correctly, these should all match the words used in the main body.
Give page numbers only for the first page of each element (not the full span of pages), and use lowercase roman or arabic numerals as on the pages themselves. List page numbers flush right and use a line of periods or dots (called leaders, a feature available from the tab setting of most word processors) to lead a reader's eye from each title to the page number.
A.2.1.7 LIST OF FIGURES OR TABLES. If your thesis includes figures, tables, or both, you will list them on separate elements in the front matter after the Table of

5
Contents. Number all pages of such a list with roman numerals. If your paper includes only figures (see Chapter 26 for definitions), label the first page List of Figures at the top of the page; if it includes only tables, label it List of Tables instead. If your paper includes both figures and tables, provide a separate list for each, with Figures as the first list. These page titles should be in bold 14-point font.
If the list is more than one page, do not repeat the title. Leave two blank lines between the title and the first item listed. Single-space individual items listed, but leave a blank line between items.
Figure captions and table titles should match the wording and capitalization of those in the paper itself, but if they are very long, shorten them in a logical way in this list. (See 26.2.2 and 26.3.2 for more on table titles and figure captions.) List page numbers flush right and use leader dots (see A.2.1.6) to connect the captions and titles to page numbers.
A.2.1.8 (PREFACE. Not generally included in SSI theses.)
A.2.1.9 ACKNOWLEDGEMENTS. In your thesis you may have a separate section of acknowledgments in which you thank mentors and colleagues or name the individuals or institutions that supported your research or provided special assistance (such as consultation on technical matters or aid in securing special equipment and source materials). You may also be required to acknowledge the owners of copyrighted material who have given you permission to reproduce their work.
Number all pages of the Acknowledgements with roman numerals. Label the page Acknowledgments in bold 14-point font at the top of the page. If the element is more than one page, do not repeat the title. Leave two blank lines between the title and the first line of text. Double-space the text of the acknowledgments, and format it to match the main text.
A.2.1.10 LIST OF ABBREVIATIONS. If your thesis includes an unusual number of abbreviations other than the common types discussed in Chapter 24, list them in the front matter. Examples of items to include would be abbreviations for sources cited frequently (see 16.4.3) or for organizations that are not widely known (24.1.2).
Number all pages of such a list with roman numerals. Label the first page Abbreviations in bold 14-point font at the top of the page. If the list is more than one page, do not repeat the title. Leave two blank lines between the title and the first item listed. Single-space individual items listed, but leave a blank line between items.
Note that the items are arranged alphabetically by the abbreviation, not by the spelled-out term. The abbreviations themselves are flush left; spelled-out terms are set on a consistent indent that allows about a half inch of space between

6
the longest abbreviation in the first column and the first word in the second column.
A.2.1.11 (GLOSSARY. For GIST theses, the Glossary, if included, is the back matter).
A.2.1.12 (EDITORIAL OR RESEARCH METHOD. Not used in SSI.)
A.2.1.13 ABSTRACT. Include a maximum one-page, double-spaced abstract summarizing the thesis contents, including a summary of the results. Number this element with a roman numeral. Label the page Abstract in bold 14-point font at the top center of the page. Leave two blank lines between the title and the first line of text. Double-space the text of the abstract, and format it to match the main text.
Do not include citations in your abstract. Break your abstract into two paragraphs if it improves readability.
A.2.2 Main Text The main text of a paper includes everything between the front matter and the back matter. It begins with your introduction and ends with your conclusion. The text is usually separated into chapters and sometimes into sections and subsections.
The body of the text is double-spaced and all paragraphs begin with a half inch indent, except for the one paragraph immediately under the title at the beginning of each chapter and front matter sections containing extended text, such as the Abstract or Acknowledgements. When using the SSI template, this normal paragraph style should be styled as normal indent dbl style. This will ensure that the style is used consistently and the use of spaces or tabs at the beginning of paragraphs is avoided.
Since most of the text consists of paragraphs laying out your findings, there are few additional format requirements for the body of the text. The only additional issues are how to begin divisions of the text, how to format parenthetical citations, and how to position tables and figures within the text.
Begin the arabic numbering of your paper with the first page of the main text (i.e. page 1; see A.1.4.1).
A.2.2.1 (INTRODUCTION. Not used at SSI.)
A.2.2.2 (PARTS. Not used at SSI.)
A.2.2.3 CHAPTERS. At SSI, theses generally consist of five or more chapters. Each chapter begins on a new page. Label this page Chapter followed by the chapter number at the top margin of the page, in bold 14-point font. Give the

7
chapter number as an arabic numeral. Follow the number with a space and the chapter’s descriptive title, written in headline-style capitalization. Do not repeat the number or the title on subsequent pages of the chapter. Leave two blank lines between the title and the first line of text.
A.2.2.4 SECTIONS AND SUBSECTIONS. Chapters are divided into sections, which in tum may be divided into subsections, and so on. Give each one its own title, called a subheading or subhead. You may have multiple levels of subheads, which are designated first-level, second level, and so on. Unless you are writing a very long and complex paper, think carefully before using more than two or three levels of subheads. Rather than being helpful, they can become distracting. You should have at least two subheads at any level within a chapter; if you do not, your divisions may not be logically structured.
Always include at least one paragraph following the chapter title before inserting a subhead. Also, have at least one sentence of text between every subhead. Never end a page with a subhead. Set your word processor to keep all headings attached to the ensuing paragraph. (Set your heading styles to “keep with next” paragraph by default.)
Each level of subhead should be consistent and different from all other levels, and higher-level subheads should be more visually prominent than lower-level ones. In general, subheads are more prominent when centered, in boldface or italic type, or capitalized headline style than when flush left, in regular type, or capitalized sentence style. Except for run-in subheads (see fourth level, below), put more space before a subhead than after (up to two blank lines before and one line, or double line spacing, after). Do not end a subhead with a period. To maintain consistency, use your word processor to define a style for each level.
Here is the general SSI style for four levels of subheads. Note that each level is numbered. This formatting is set in the SSI thesis default styles on the Word template.
First level: flush left, boldface, 14-point font, headline-style capitalization. It
should look like this: 1.1 Contemporary Art
Second level: flush left, italics, 12-point font, headline-style capitalization. It should look like this:
1.1.1 What Are the Major Styles?

8
Third level: flush left, sentence-style capitalization. It should look like this:
1.1.1.1 Major painters and practitioners
Fourth level: run in at beginning of normal indented paragraph (no blank line after), italic type, sentence-style capitalization, terminal period. Below is an example.
Pollock as the leader. The role of leading Abstract Expressionist painter was filled by
Jackson Pollock... Automatic numbering of chapters, sections and subheads is strongly
recommended. Use the word processor style sheet to enable this. If titles are styled correctly, the Table of Contents with page numbers can be automatically generated and updated as needed.
A.2.2.5 PARENTHETICAL CITATIONS. You will be using author-date citations. See Turabian 18.3 for a discussion of how to format these parenthetical citations.
A.2.2.6 TABLES AND FIGURES. If your paper includes tables or figures, see Chapter 26 of Turabian for a discussion of how to format tables and some types of figures, and A.3.1 for information about inserting these elements into your paper.
Figure captions should be centered below the figure, single spaced and sentence-style capitalization. Table captions should be centered above the table, single spaced and sentence-style capitalization. One blank line should separate the caption from the figure or table and two blank lines separate it from the adjacent text.
Automatic numbering of figures and tables is strongly recommended. Use the word processor caption and cross-reference functions to enable this. Using automatic captions allows for automatic generation of Lists of Tables and Figures when you are finished. Using automatic cross-references to your figures and tables in the text allows these references (such as, see Figure 14) to automatically track and renumber the referenced figure or table as you edit.
A.2.2.7 CONCLUSION. Theses generally end with a conclusion that is long enough to treat as a separate chapter. Label the conclusion as the last numbered chapter of your paper.

9
A.2.3 Back Matter The back matter of your paper may consist of all or some of the following elements. Number the back matter continuously with the text using arabic numerals.
A.2.3.1 (ILLUSTRATIONS. In SSI theses, most illustrations are included in the body, never in the back matter as a separate section.)
A.2.3.2 APPENDICES. If your thesis includes essential supporting material that cannot be easily worked into the body of your paper, put the material in one or more appendices in the back matter. (Do not put appendices at the ends of chapters.) Examples of such material would be tables and figures that are marginally relevant to your topic or too large to put in the text; schedules and forms used in collecting materials; copies of documents not available to the reader; and case studies too long to put into the text.
Make sure to include a brief description in the main body about the contents of every appendix, referring to them by letter in a manner similar to figures and tables.
If the appendix material is of different types—for example, a table and a case study—divide it among more than one appendix. Also, if you want to refer to sections of an appendix, consider making each section a separate appendix. Do not number tables or figures in appendices since you will refer to them collectively by the appendix letter only.
Label the first page of each Appendix, in bold 14-point font at the top of the page. If the appendix is more than one page, do not repeat the title. Leave two blank lines between the title and the first line of text or other material.
When there are multiple appendices, give each appendix a letter and a descriptive title. Use single, capitalized letters of the alphabet in sequential order (A, B). Put the number or letter following the word Appendix, follow with a space and the descriptive title in headline-style capitalization. (If your paper has only one appendix, you may also give it a descriptive title, but do not give it a letter.)
If the appendix consists of your own explanatory text, double-space it and format it to match the main text. If it is in list form or consists of a primary document or a case study, you may choose to single-space the text, especially if it is long.
Treat supporting material that cannot be included in the document, such as a large data set or a multimedia file, as an appendix. In the appendix, include a brief description of the material and its location, including a hyperlink (if relevant) so that readers could find it.
A.2.3.3 (ENDNOTES. Since you are using author-date citations, you will not have endnotes.)

10
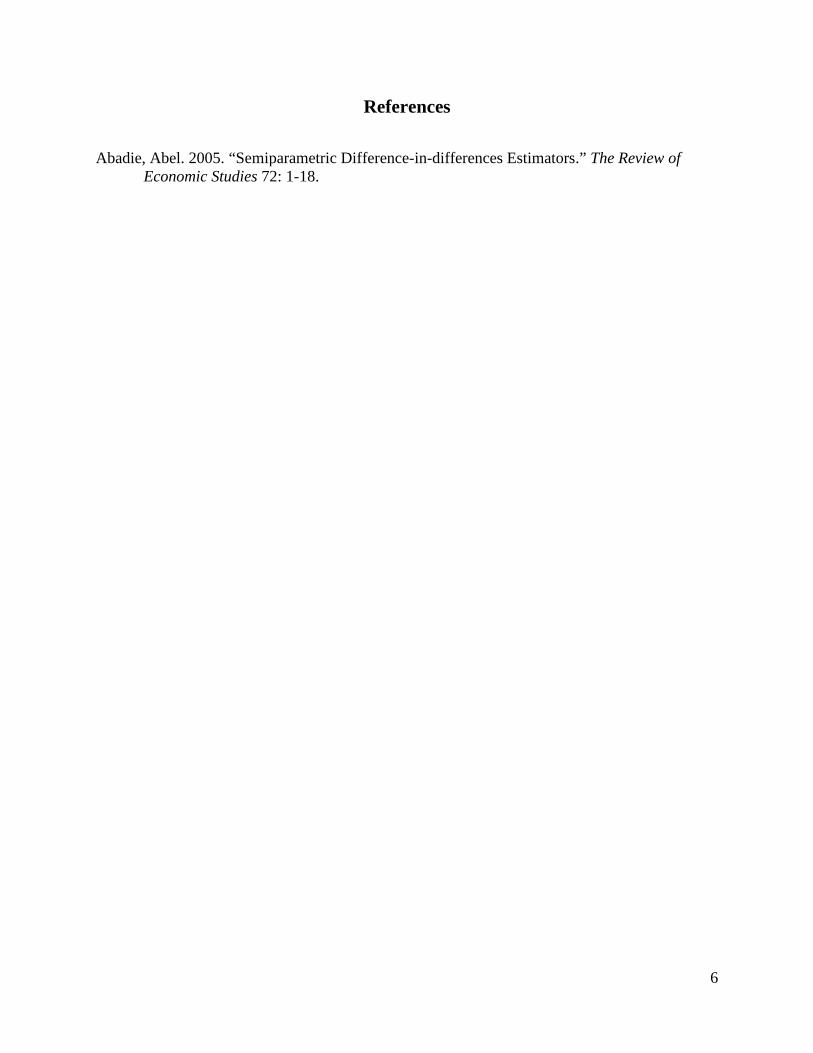
A.2.3.4 REFERENCE LIST. Since you are using author-date citations, you must include a reference list in the back matter. Label the first page of the list References in bold 14-point font at the top of the page. Do not repeat the title on subsequent pages of the reference list. Leave two blank lines between the title and the first entry, and one blank line between single-spaced entries. Indent run overs half an inch (i.e. hanging indent).
Chapters 18 and 19 provide extended detail on formatting citations and the reference list. These styles must be strictly adhered to. There are some minor differences between Chicago and Turabian styles, so use Turabian’s rules when there is a difference.
A.2.3.5 GLOSSARY. You may need a glossary if your thesis includes many foreign words or technical terms and phrases that may be unfamiliar to your readers. It must be placed after the references and appendices (if any). Label the first page Glossary in bold 14-point font at the top of the page. If the glossary is more than one page, do not repeat the title. Leave two blank lines between the title and the first item listed. Single-space individual items listed, but leave a blank line between items.
Note that the terms are arranged alphabetically, flush left and followed by a period. The translation or definition follows, with its first word capitalized and a terminal period. If, however, the definitions consist of only single words or brief phrases, do not use terminal periods. If a definition is more than one line, indent the run-overs by a half inch (i.e. a hanging indent).
A.3 Document Preparation
A.3.1 Preparing Your Files By following some basic practices for good electronic file management and preparation, you can avoid problems and produce a legible, properly formatted paper. These practices apply whether you will be submitting your paper electronically, as hard copy, or both.
A.3.1.1 FILE MANAGEMENT. Try to minimize the risk that your data will be lost or corrupted at some point. Prepare your paper as a single electronic file, regardless of its length. Working
with a single file allows you to search and make changes globally, to use your word processor's automated numbering functions accurately (for figures, pagination, and the like), and to define and apply styles consistently (see A.3.1.2). Papers submitted electronically must almost always be in a single file, but you will divide the file into sections using word processor functions for certain format requirements such as starting new chapters. Large databases or multimedia files may need to be submitted separately as supplemental files.

11
Name the file simply and logically. If you save different versions of the file over time, name them consistently (always ending in the date, for example) to avoid confusion of versions.
Save the file often during each writing session. Back up the file in more than one location after each writing session. In addition to
your local hard drive, save it to a network or file-hosting service such as Dropbox or Google Drive or to a removable storage medium, such as a flash drive.
A.3.1.2 TEXT COMPONENTS. Present all components of your text clearly and consistently. Format each text component consistently, including regular text, block quotations
(see 25.2.2), and each type of title and subhead. The most efficient way to ensure consistency is to use your word processor to define and apply a unique style (specifying typeface, size, position, line spacing, and so forth) for each component.
Set your word processor to align text flush left with a ragged right margin and do not use its automated hyphenation feature (see 20.4.1).
Use your word processor's menu for special characters (also called symbols) to insert letters with accents and other diacritics, characters from Greek and other non-Latin alphabets, mathematical operators (but see below), paragraph or section marks, and the like. If a particular character is not available, you may need to select a different typeface for that character.
Avoid color fonts. Even if you submit your paper as a PDF or print it on a color printer, it may be printed or copied later on a black-and-white machine, and the color might not reproduce well.
A.3.1.3 TABLES. Use your software to present tables that are clear, well formatted, and easily readable. For more information, see Chapter 8.3. Create tables with the table editor in your word processor, if possible. If not, create
them in a spreadsheet program and insert them into your file as unlinked (embedded) tables. Unless otherwise impossible, do not insert tables as graphic images. Format tables to match the surrounding text. See Chapter 26 for discussion of table structure, format, and placement in text.
Center tables on the page. Do not stretch tables the full page width unless necessary.
Put a table number and title on the line above a table, centered. Run the title the full width of the table if needed, and do not indent any run overs.
Put table footnotes and source (if any) under the bottom rule of a table, single spaced. Table footnotes may be presented in a smaller typeface than the text of your paper but no smaller than 9 points.

12
Leave at least one blank line (and preferably two) between the table title and any text above it on the page, and also between the bottom rule (or last footnote) and any text below it.
Use caution in employing shading or color to convey meaning. Even if you print the paper on a color printer or submit it as a PDF, it may be printed or copied later in black and white. Shading and color may not reproduce well in any of these forms. If you use shading, make sure it does not obscure the text of the table, and do not use multiple shades, which might not reproduce distinctly.
Repeat the stub column and all column heads (see 26.2.4 and 26.2.5) on every page of a multipage table. Omit the bottom rule on all pages except the last.
All tables must fit within the paper margins. Do not put any regular text on a page containing a landscape table. Set the table
title in either landscape or portrait orientation and include a page number at the bottom of portrait orientation (i.e. the narrow width). See notes below on adding a portrait page number to a landscape page.
Keep a table that cannot be presented in print form, such as one containing a large data set, as a separate file, and treat it as an appendix to your paper (see A.2.3.2).
A.3.1.4 FIGURES. Take care that your graphics are easy to read, accurate, and to the point. For more information, see 8.3. Create charts, graphs, and diagrams with your word processor, if possible. If not,
create them in the relevant program and insert them into your file as images. Format them to match the surrounding text. See Chapter 26 for discussion of figure types, format, and placement in text.
Insert photographs, maps, and other types of figures into your file as images. If the item is available to you only in hard copy, scan and insert it if possible.
Put a figure number and title on the line below a figure (see 26.3.2). Make this caption centered and normal type (i.e., not bold). Run the caption the full width of the figure, and do not indent any run overs. Title should be sentence-style capitalization. No period follows the title, unless there is additional descriptive sentence(s) following.
Leave at least one blank line (and preferably two) between the figure and any text above it on the page, and also between the caption and any text below it.
All figures must fit within the paper margins. Do not put any regular text on a page containing a landscape figure. Set the figure
title in either landscape or portrait orientation and include a page number at the right bottom in portrait orientation (i.e. the narrow width). See notes below on adding a portrait page number to a landscape page.

13
Keep a figure that cannot be presented in print form, such as a multimedia file, as a separate file, and treat it as an appendix to your paper (see A.2.3.2).
A.3.1.5 EQUATIONS. Create equations and formulas with the equation editor in your word processor, if possible. If not, create these items in the relevant program and insert them into your file as images (see A.3.1.3). Leave at least one blank line between the equation and the text both above and below. If you have only one or two equations, place them centered on the page with one
blank line above and below the equation and its variable descriptions, if included. No number is required.
If you have several equations, or you refer to them individually later in the text, number each equation sequentially with the number placed in parentheses, e.g. (3), and placed flush right to the margin. Discussion about numbered equations should be stated as, for example, Equation 3.
For detailed guidance on presenting mathematical expressions, see Chapter 12 of The Chicago Manual of Style, 16th edition (2010).
B. Key sections from Turabian and Chicago Manual of Style (CMS) An excellent list of word pairs that are often confused is given in CMS, Section
5.220 Good usage versus common usage. It is well worth reviewing this list from time to time.
There is always uncertainty about how to handle author’s first names in the References. Chicago 16th, section 15.12 says “use the form of authors’ names as they appear on the title page or at the head of an article or chapter” and “If an author uses his or her given name in one cited book and initials in another (e.g., “Mary L. Jones” versus “M. L. Jones”), the same form, preferably the fuller one, should be used in all references to that author. To assist alphabetization, middle initials should be given wherever known.” (Chicago 16th, section 14.72).
Where to put citations Turabian 18.3.1 says “Normally, the parenthetical citation should be placed at the
end of the sentence or clause containing the quotation or other material.” So, if there is additional material following the clause that is not from the cited author, then putting it in the middle of the sentence is correct.
Also, 18.3.1 says “if the author’s name is mentioned in the text, put the rest of the citation (in parentheses) immediately after the author’s name.”
According to Turabian, citations are put at the end of a block quotation, not before it in the main paragraph.
14
C. Important tips and hints from the SSI faculty Map and graphic design hints Generally, maps should have a legend, scale, compass arrow, key administrative
boundaries and, where appropriate, inset maps to show where the site is located. All of these elements should be enclosed in a single line frame that fits inside of the page margins.
All text within maps or other graphics must be legible. Do not use font smaller than 9 point. Be careful when you compress graphics to fit on the page to ensure that text does not become illegible.
In general, it is not good practice to include screen shots of output. Reformat numeric output into clean tables and make proper map layouts. Only use screen shots when demonstrating an application that you developed or a key software menu.
All charts must have labeled x and y axes and a legend. Map titles should be given only in the figure caption, not on the maps themselves. When possible, keep figure and table captions short and use the narration in the
main text to explain their meanings. Narrate each figure or table in the text, usually in the paragraph before it first
appears. This means you must explain what is in included figures or tables, or at the very least include a note such as (see Figure 1) placed at the end of a sentence. Note that the words Figure and Table are capitalized.
When the content of a figure comes from a secondary source, add a source statement to the end of the figure caption formatted as Source: Smith 1999. Where data in a table comes from a secondary source, include a source line below the table. When these captions are collected into the Lists of Tables or Figures, delete these source references from the final list contents to keep the list clean. When the table or figure is the result of your original work, then no source is required.
Other hints As a general rule, footnotes and endnotes are not permitted. Incorporate
explanatory information succinctly in the main text. For URLs, if the address is short enough you may incorporate it parenthetically in
the text such as (www.usc.edu). For longer URLs, such as those needed for data sources, try to incorporate the reference inside a table. Other URLs, for example for specific documents published online, should be included as author-date parenthetical citations following the format given in Turabian 15.4. Suppress the creation of live links for URLs in your Word document.

15
For citations to personal communication, follow Turabian 19.6.3. This means formal interviews are cited as author-date and other forms of personal communication are cited parenthetically such as (Maxine Green, April 23, 2012, email message to author).
Italicize all foreign terms unlikely to be familiar to readers (Turabian 22.2.1). At least one paragraph should follow a chapter title before the first subheading and
there should be at least one sentence between any subheadings. Direct quotes of longer than 60 words should be block indented 0.5 inch from both
left and right margins and single-spaced. Once indented, these quotes do not require quotation marks. Put a parenthetical citation immediately after the quote.
Direct quotations shorter than 60 words should simply be incorporated in the regular text formatting surrounded by quotation marks.
All direct quotes require that page numbers or other locating information be included in the parenthetical citation whenever possible. Otherwise, page numbers are not needed.
All secondary information is located in the appendices. Appendices must be legible and cited with sources if necessary.
D. How to format portrait page number on landscape page Go to the Insert tab. Select Footer, and click on Edit footer (at the bottom of the
long box that pops up). A new tool bar will appear across the top of your page so that you can edit the header and footer.
Make sure that the Link to Previous box is not highlighted. (If it is highlighted, click it, and the highlighting will disappear.) Delete any page number that may already be in the footer of the landscape page. In the same tool bar, select Go to Footer. Again, make sure that the Link to Previous box is not highlighted.
Your goal is to insert a page number in the top right corner of your new landscape page:
In the same tool bar, select Page Number. Click on Page Margins, and then choose Large, Right. A page number will then appear, in a large font size, in the right margin of your new landscape page.
Select that large page number, and change it to the same font and point size as the rest of the manuscript text (usually Times New Roman, 12 point), and align it to the right.
Select the Format tab (to the left of the Design tab on the toolbar), and click on Text Direction (you’ll see it to the left). This action will automatically change the orientation of the page number, which will roll over by 90 degrees.

Here Is the Title Which Begins Two Inches from the Top Margin: Include a Subtitle If You Wish
by
Your Full Name
A Thesis Presented to the Faculty of the USC Graduate School
University of Southern California In Partial Fulfillment of the
Requirements for the Degree Master of Science
(Geographic Information Science and Technology)
Month 20XX

Copyright © 20XX by Your Name

To a special person, my relative
iv
Table of Contents
List of Figures ................................................................................................................................. v
List of Tables ................................................................................................................................. vi
Acknowledgements ....................................................................................................................... vii
List of Abbreviations ................................................................................................................... viii
Abstract .......................................................................................................................................... ix
Chapter 1 Introduction (Heading 1 Style) ....................................................................................... 1
1.1. First Level Subhead (Heading 2 Style) ...............................................................................1
1.1.1. Second Level Subhead (Heading 3 Style) .................................................................2
Chapter 2 The Next Chapter ........................................................................................................... 5
References ....................................................................................................................................... 6
Appendix A Title ............................................................................................................................ 7

v
List of Figures
Figure 1 Conceptual framework of the research ............................................................................. 3
Figure 2 Work flow of the research ............................................................................................... 6

vi
List of Tables
Table 1 A short title ........................................................................................................................ 5
Table 2 Summary of previous research including examples of work completed by other scholars working around the world ......................................................................................... 5
Table 3 A title which has been shortened from the actual caption ................................................. 6

vii
Acknowledgements
I am grateful to my mentor, Professor Smith, for the direction I needed and my other faculty who
gave me assistance when I needed it. I would like to thank my employer, X Company, who
allowed me to complete some of this work using my office computer. I am grateful for the data
provided to me by Y Organization and the assistance in coding the analysis given my friend,
George Day.

viii
List of Abbreviations
GIS Geographic information system
GISci Geographic information science
SSI Spatial Sciences Institute
USC University of Southern California

ix
Abstract
The Traveler tradition began in 1961 with Traveler the First. From 1961 to 1988, the equestrian
mascots were selected, trained and ridden by Richard Saukko. After his death, the Saukko family
continued the tradition of raising the famous Trojan horses until 2003, when equestrian manager
Joanne Asman took over.
While abstracts are often formatted as a single paragraph, use additional paragraphs if it
would make your text more easily read. Format the abstract similar to the main text. Do not
include citations in the abstract since it will often be reproduced separately from the main
document.

1
Chapter 1 Introduction (Heading 1 Style)
This paragraph gives an overview of the contents of this document. It provides motivation for the
reader to continue reading. It also hints at the contents of this chapter. The text in the rest of this
chapter is not true introductory material, it is simply included to illustrate formatting.
1.1. First Level Subhead (Heading 2 Style)
Clustering methods were explored to show where armed-conflicts are concentrated and
whether there is evidence of heavy clustering. In a heavily clustered environment, there is the
potential to identify predictor variables that can be used to explain the highs and lows of the data.
Six kernel density maps were created to produce rasterized surfaces indicating concentrations of
the Lord’s Resistance Army (LRA) activity. Figure 1 reflects the kernel density of armed-
conflicts in 2008.
Figure 1. Heat map of armed conflicts in 2008

2
With conflict data spatially joined with the “Territories” feature class, Modelbuilder was
used to generate 15 new territory feature classes as shown in Table 1.
Table 1. Armed conflicts by territory during 2008-2012, normalized by population
Country Territory Name 2008 2009 2010 2011 2012
SSD Raja 0.00 0.04 0.00 0.07 0.00 Wau 0.00 0.00 0.01 0.00 0.00 Nahr Yew 0.01 0.01 0.00 0.00 0.00 Meridi 0.05 0.02 0.05 0.00 0.00 Mundri 0.00 0.02 0.00 0.00 0.00 Tombura 0.05 0.16 0.25 0.16 0.02 Yambio 0.02 0.02 0.10 0.10 0.00 DRC Ango 0.00 4.15 3.69 2.54 1.84 Bambesa 0.00 0.00 0.00 0.06 0.00 Bondo 0.00 0.00 0.05 0.00 0.16 Poko 0.00 0.42 0.21 0.00 0.00 Dungu 1.39 3.08 8.64 5.02 4.34 Faradje 0.20 0.44 0.36 0.96 0.80 Niangara 0.07 1.22 1.86 0.36 0.43 Watsa 0.00 0.06 0.03 0.06 0.00 CAR Djemah 0.00 2.18 0.00 0.00 0.00 Obo 0.08 1.05 0.31 0.39 0.14 Zémio 0.00 0.12 1.19 0.65 0.71 Yalinga 0.00 0.00 0.77 0.00 0.58 Bakouma 0.00 0.00 0.10 0.19 0.29 Bangassou 0.00 0.02 0.03 0.02 0.05 Rafaï 0.00 0.14 3.08 0.43 1.22 Birao 0.00 0.00 0.10 0.00 0.00
Source: Smith 1999
1.1.1. Second Level Subhead (Heading 3 Style)
The process of calculating the annual rates of change by territory is illustrated in
Figure 2. Included in this figure are the additional steps taken to compare changes between the
sample group of territories and the control group as represented by the analysis.
After the rate changes were coded to each feature class, the territories were divided into
two groups: the first group is the sample (n), which is composed of territories in which HF radios
are located. The second group is the control (m), which is composed of territories without HF

3
radios. HF radios were aggregated by territory and each territory was coded as either having or
not having one or more HF radios. The mean rate of change for the control group was then
subtracted from the mean rate of change for the sample group. Figure 4 is a conceptualization of
this method, illustrating comparative changes between a sample group and a control group.
1.1.1.1. Third level subhead (Heading 4 style)
The comparative changes between the two groups are calculated using Equation 1, which
is based on the Difference-in-Differences statistical method (Abadie 2005):
(1)
Resulting values indicate how the rate of violence in territories with HF radios changed in
comparison to territories without HF radios. The detailed flowchart for this approach is included
in Figure 16. Due to the low n, the significance at local scale of the true Difference-in-
Differences statistical analysis could not be established or validated. Therefore, the numerical
results derived from this method are shown in chapter four and described qualitatively focusing
on a comparative description of the results.
Fourth level section. Next, feature classes for the same category of violence were joined
from one year to the next using a table join and a common ObjectID (Territory_Name); Armed-
conflicts_2008 was joined with Armed-conflicts_2009, and Armed-conflicts_2009 was joined
with Armed-conflicts_2010, etc. Figure 2 shows the location of these administrative areas by
including a landscape formatted figure.
( )( ) ( )( ) ( ) ( )( )
−−
−=−
∑∑=
+=
+
m
zrr
n
zrrxx
n
territoryibiiyy
n
territoryiaiiyy 11
21

Figure 2. Administrative areas of the study area. Source: Jones 2010
4

5
Chapter 2 The Next Chapter
The next chapter starts here.
6
References
Abadie, Abel. 2005. “Semiparametric Difference-in-differences Estimators.” The Review of Economic Studies 72: 1-18.

7
Appendix A Title
1. Data Collection Reports are gathered from a variety of sources: • HF radio towers in DRC and CAR o Civilians report activity to HF radio tower operators o Over 30 HF radio operators call the Dungu hub twice daily to
report armed-group activity o Activity is entered into a spreadsheet and then sent to data
coders • UN & NGO reports • News & media outlets • Civil society contacts in local communities • Field research conducted by Resolve and Invisible Children staff 2. Database Entry Database entry: • Reports are divided between a team of coders from both
Invisible Children and Resolve. Coders determine if the source is reliable or unreliable (see section 4.2B of the codebook). Before an incident is reported, the coder reads through other incidents to check for duplicates.
Verification ratings: • After an incident is categorized, each incident is given a
verification rating (see section 4.2A of the codebook). • If a coder determines that an incident was potentially committed
by the LRA, the incident is rated on the LRA Actor Verification Scale (see section 4.2C of the codebook).
3. Data Review • A second data coder reviews each incident to catch human errors and duplicate reports (see section 4.1E).
• IC and Resolve staff with field experience review sensitive incidents immediately and review all incidents every three months. Should these staff members feel an incident was misreported, the incident is corrected. External LRA and regional experts are consulted as necessary.
4. Data Mapping & Sharing
• After an incident is entered and approved to be mapped, it appears on the LRA Crisis Tracker website.
• Data is regularly sent to UN agencies and humanitarian practitioners for comparison and collaboration.
5. Data Revamp • As the database grows and policies are updated to reflect best practices, data coders revisit and “revamp” the data when needed.
Source: Abadie 2005