
Upcycled turquoise skirt
9
UPCYCLED TURQUOISE SKIRT BY APRIL IRIS MCLEOD OF THERE CAN BE ONLY ONE
-
Upload
irismcleod -
Category
Design
-
view
182 -
download
0
Transcript of Upcycled turquoise skirt
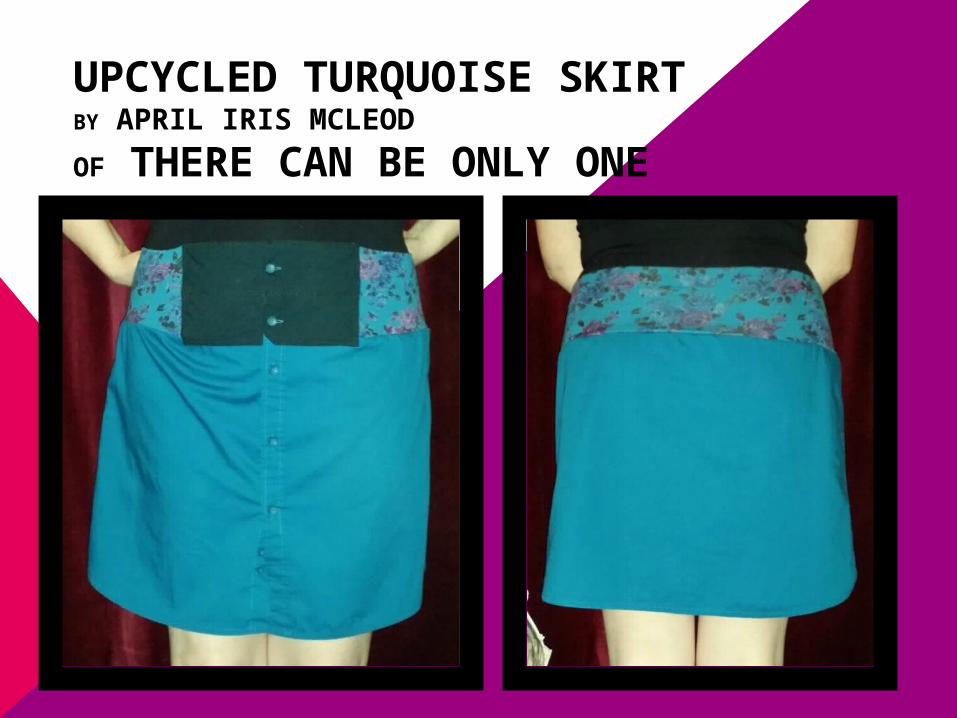
UPCYCLED TURQUOISE SKIRTBY APRIL IRIS MCLEOD
OF THERE CAN BE ONLY ONE
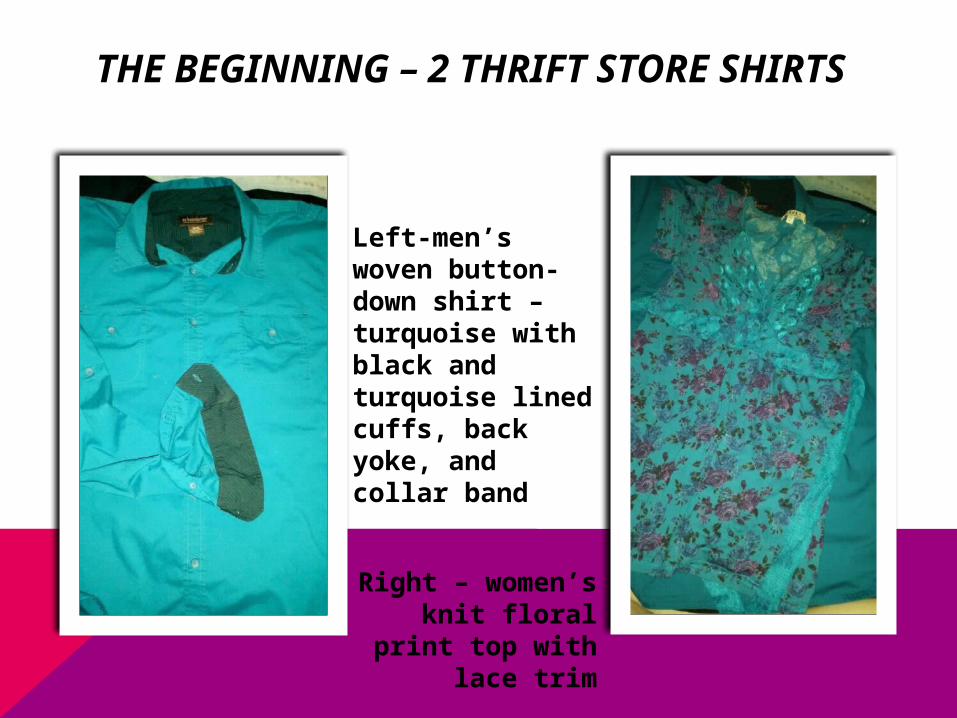
THE BEGINNING – 2 THRIFT STORE SHIRTS
Left-men’s woven button-down shirt – turquoise with black and turquoise lined cuffs, back yoke, and collar band
Right – women’s knit
floral print top with lace trim
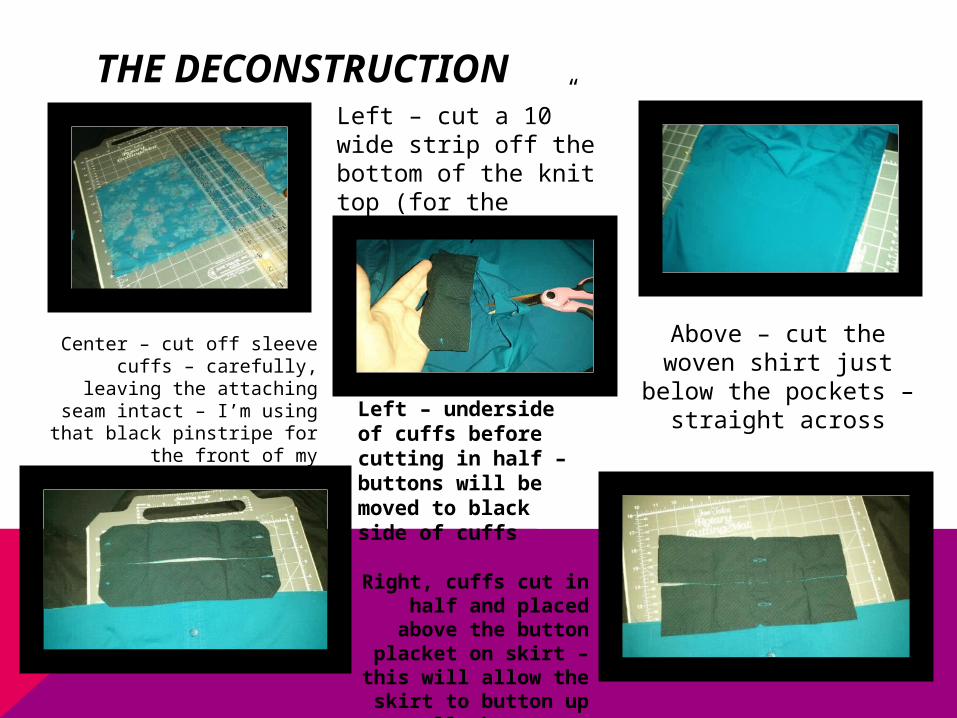
THE DECONSTRUCTIONLeft – cut a 10” wide strip off the bottom of the knit top (for the waistband)
Above – cut the woven shirt just below the pockets – straight
across
Center – cut off sleeve cuffs – carefully, leaving the
attaching seam intact – I’m using that black pinstripe for
the front of my waistband!Left – underside of cuffs before cutting in half – buttons will be moved to black side of cuffs
Right, cuffs cut in half and placed
above the button placket on skirt – this will allow the skirt to button up
all the way up
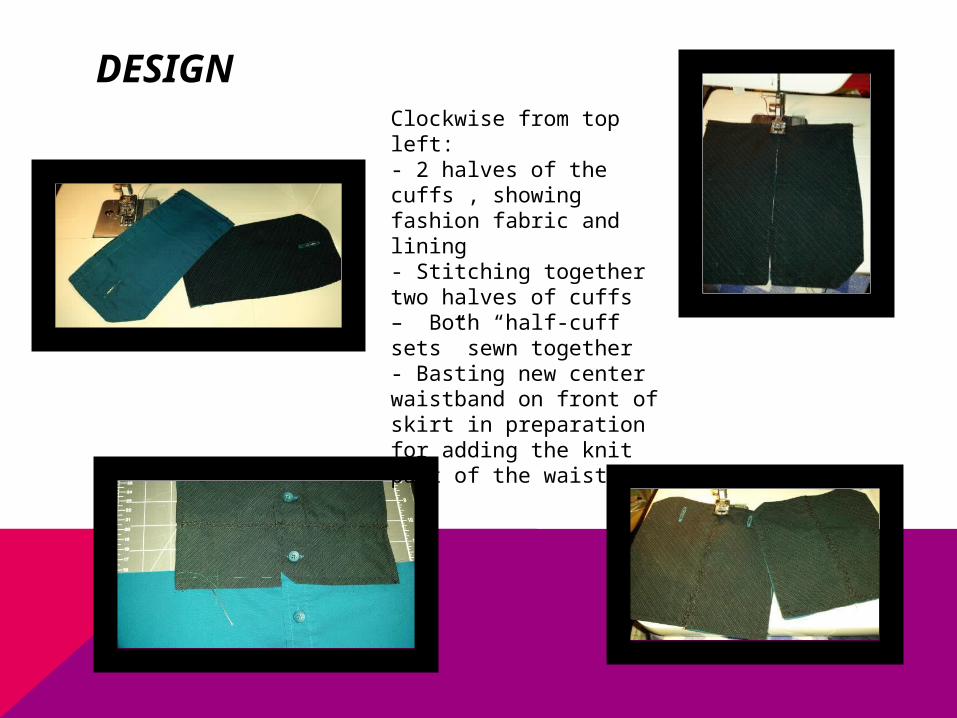
DESIGNClockwise from top left: - 2 halves of the cuffs , showing fashion fabric and lining- Stitching together two halves of cuffs – Both “half-cuff sets” sewn together- Basting new center waistband on front of skirt in preparation for adding the knit part of the waistband
DESIGN CONT.
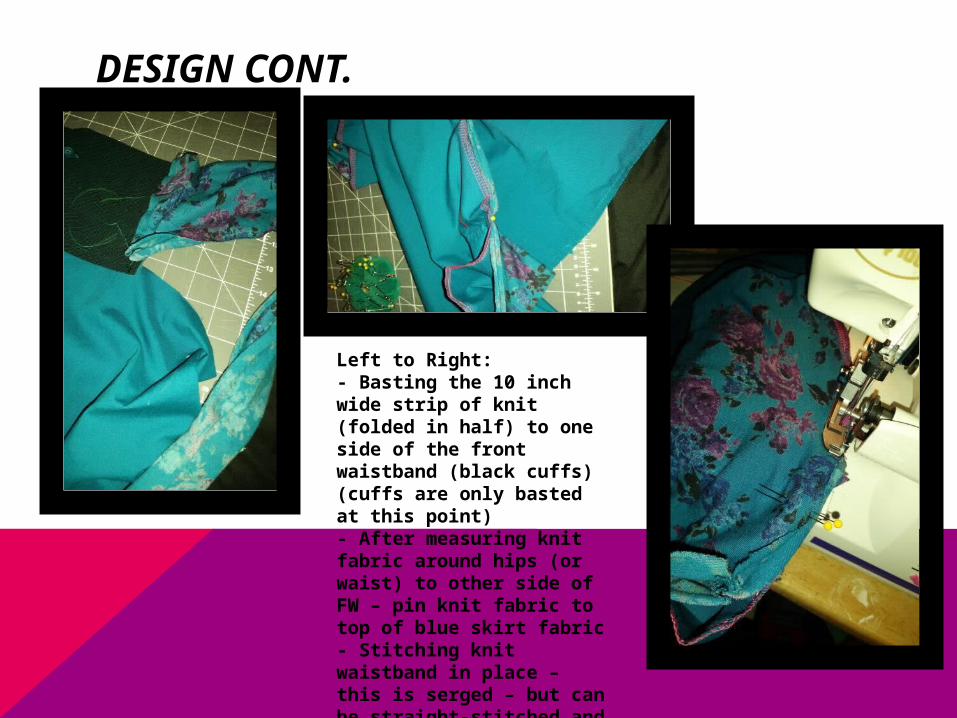
Left to Right:- Basting the 10 inch wide strip of knit (folded in half) to one side of the front waistband (black cuffs) (cuffs are only basted at this point)- After measuring knit fabric around hips (or waist) to other side of FW – pin knit fabric to top of blue skirt fabric- Stitching knit waistband in place – this is serged – but can be straight-stitched and zigzagged for strength
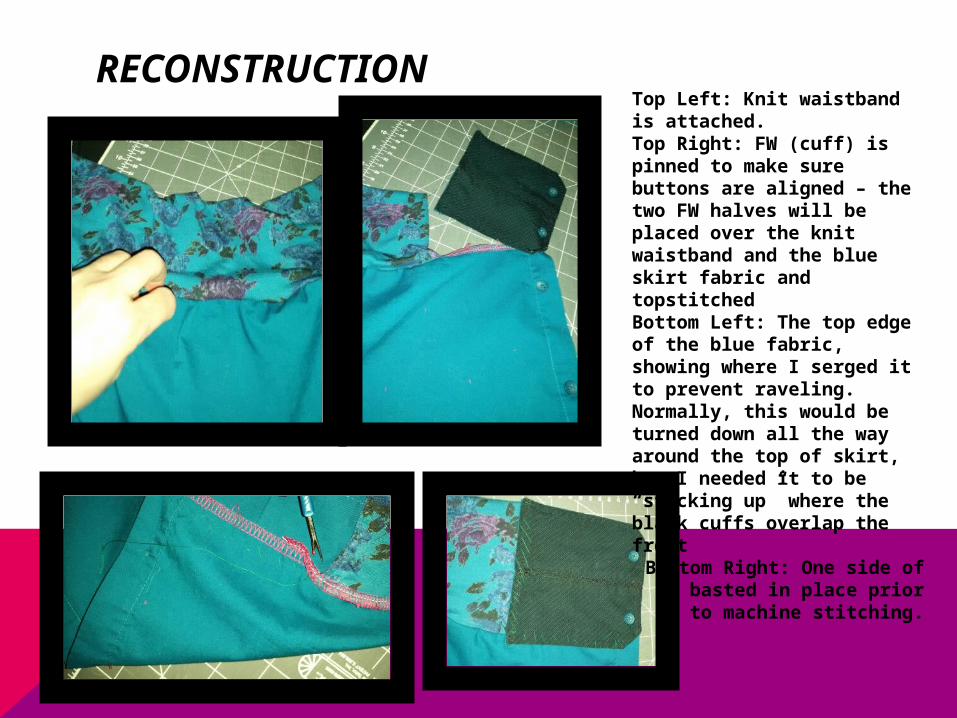
RECONSTRUCTIONTop Left: Knit waistbandis attached.Top Right: FW (cuff) is pinned to make sure buttons are aligned – the two FW halves will be placed over the knit waistband and the blue skirt fabric and topstitchedBottom Left: The top edge of the blue fabric, showing where I serged it to prevent raveling. Normally, this would be turned down all the way around the top of skirt, but I needed it to be “sticking up” where the black cuffs overlap the front
Bottom Right: One side of FW basted in place prior to
machine stitching.
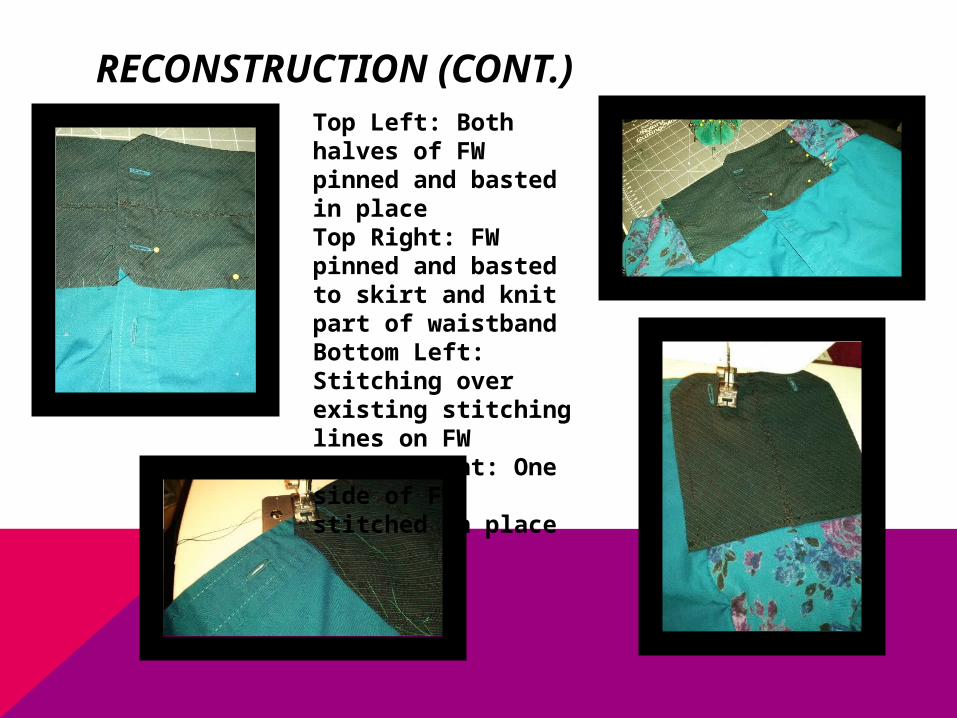
RECONSTRUCTION (CONT.)Top Left: Both halves of FW pinned and basted in placeTop Right: FW pinned and basted to skirt and knit part of waistbandBottom Left: Stitching over existing stitching lines on FWBottom Right: One side of FW stitched in place
RECONSTRUCTION (CONT.)
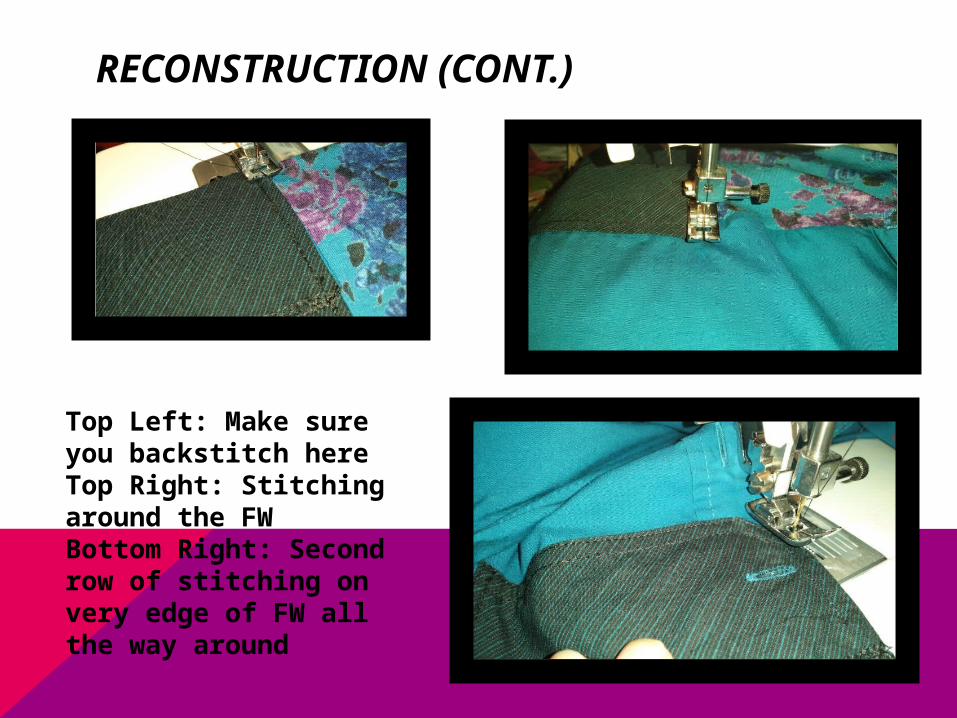
Top Left: Make sure you backstitch hereTop Right: Stitching around the FWBottom Right: Second row of stitching on very edge of FW all the way around
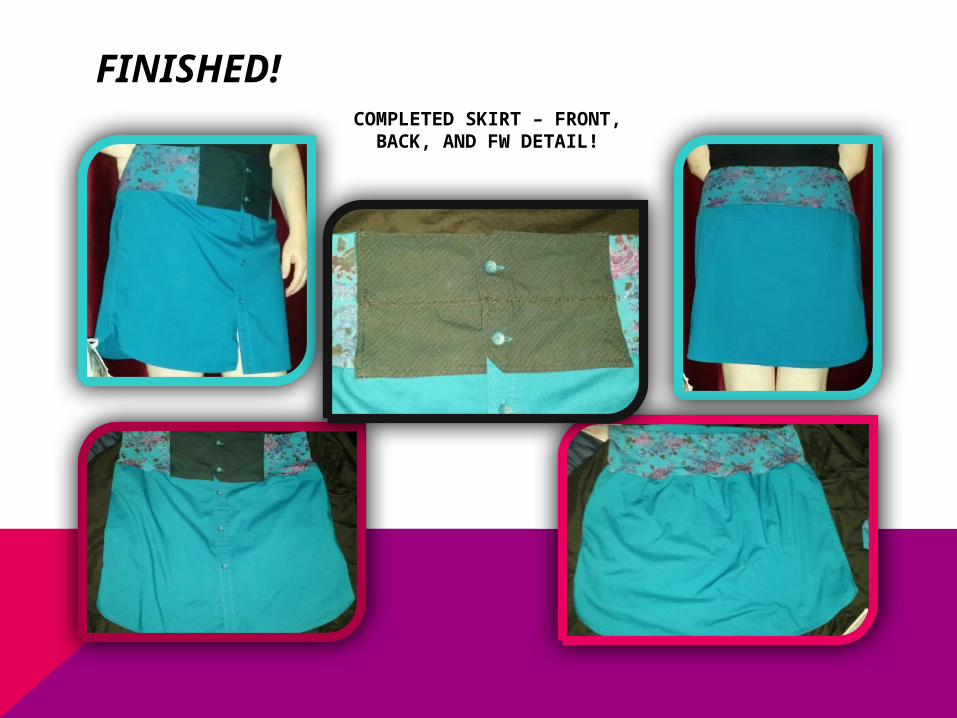
FINISHED!COMPLETED SKIRT –
FRONT, BACK, AND FW DETAIL!