Molecules and Dust 1 April 2003 Astronomy G9001 - Spring 2003 Prof. Mordecai-Mark Mac Low.
Upload
mikhail-morozovCategory
view
478download
1
OS X

Interface
New model
Remove selected element
Undo
Redo

Interface
Visualisation-(Cpk) spacefill

Interface
Visualisation-Ball and stick

Interface
Visualisation-Stick style
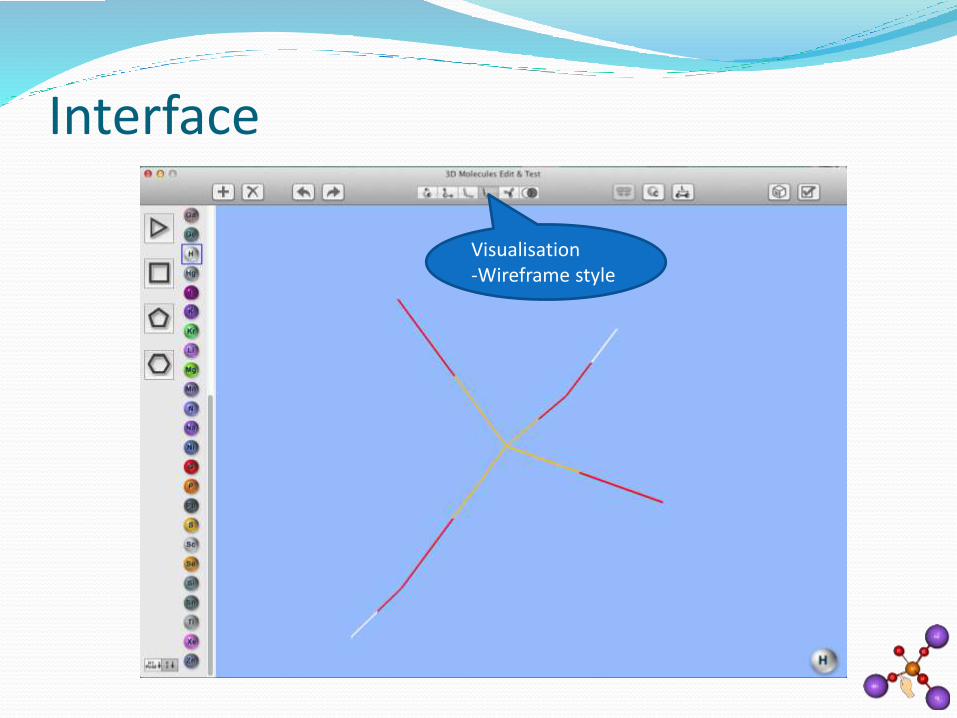
Interface
Visualisation-Wireframe style

Interface
Atomic orbitals
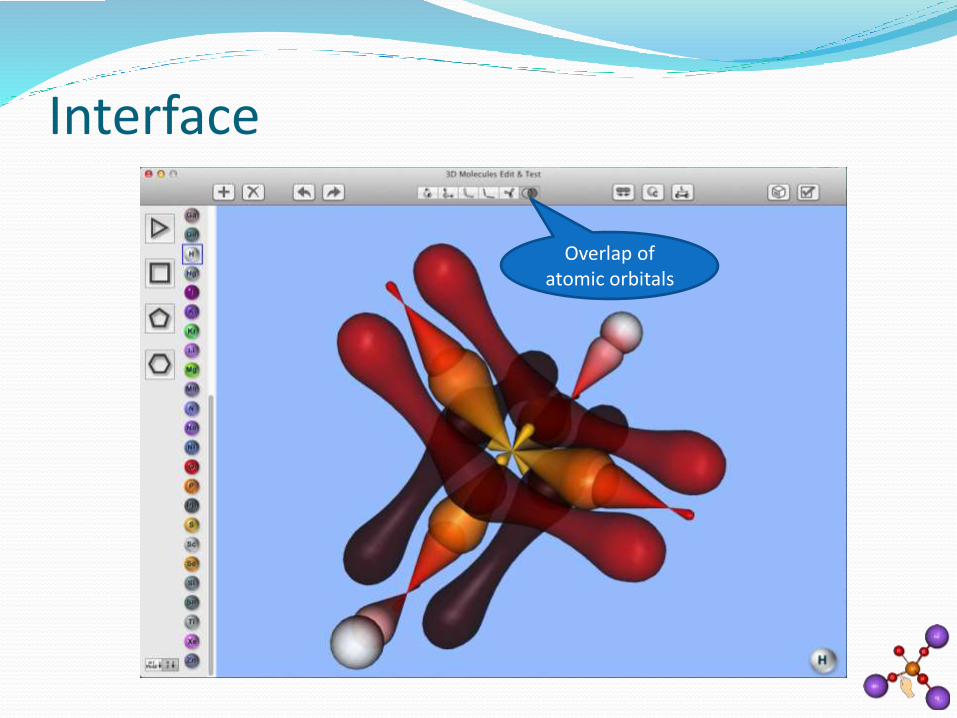
Interface
Overlap of atomic orbitals
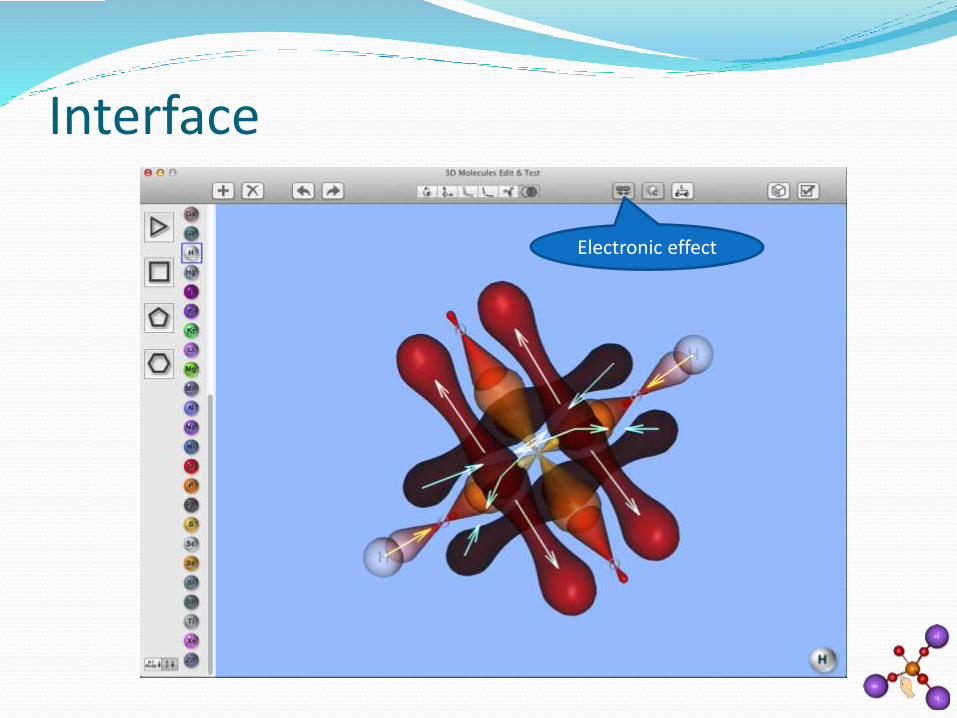
Interface
Electronic effect

Interface
Atomic symbols

Interface
Bond length

Interface
Scrolling
Chemical elements
Rings
Active element
Save the model for 3d
printing

How to create molecule
Click the button to create a model

How to create molecule
2. Click on a free space to add an atom
1. Choose the element from the collection
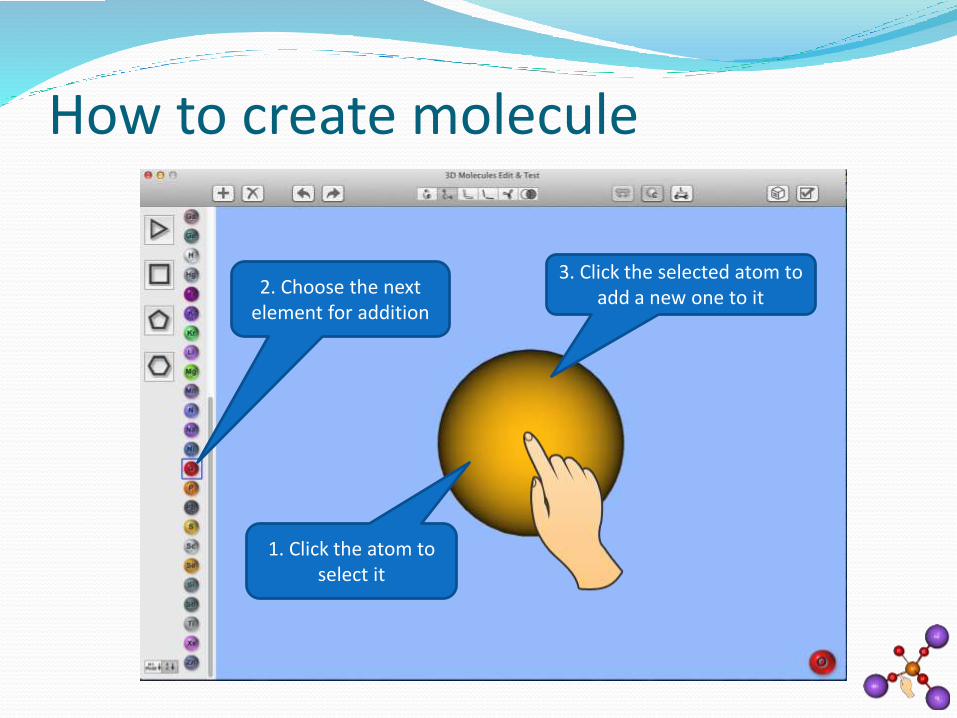
How to create molecule
3. Click the selected atom to add a new one to it2. Choose the next
element for addition
1. Click the atom to select it

How to create molecule
Result of addition
How to create molecule
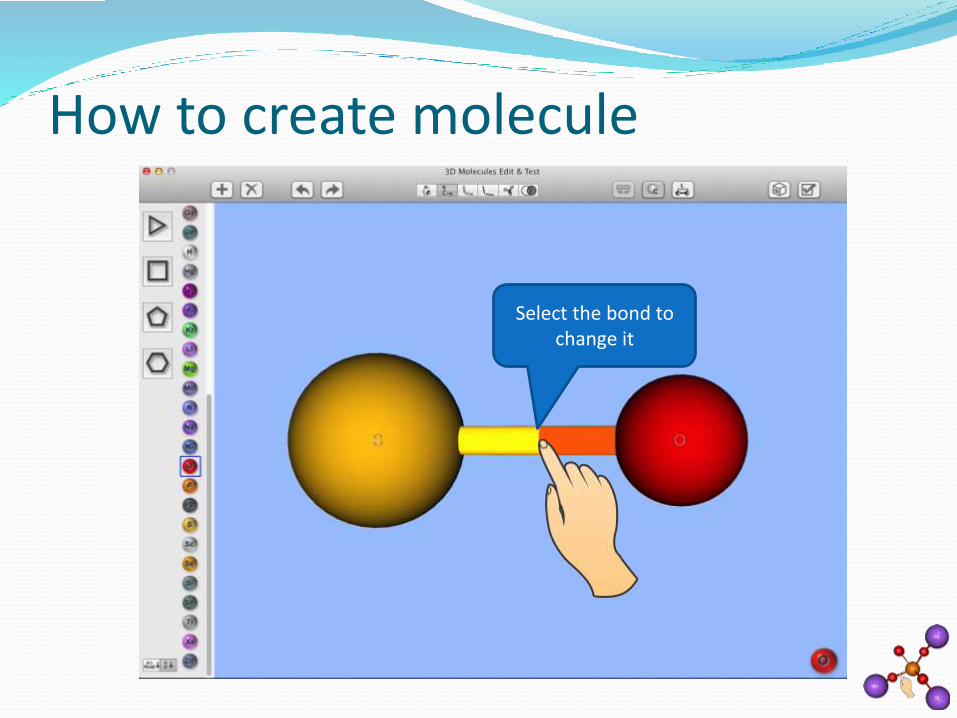
Select the bond to change it

How to create molecule
2. Select required bond type from the menu
1. Click the selected bond to choose required type
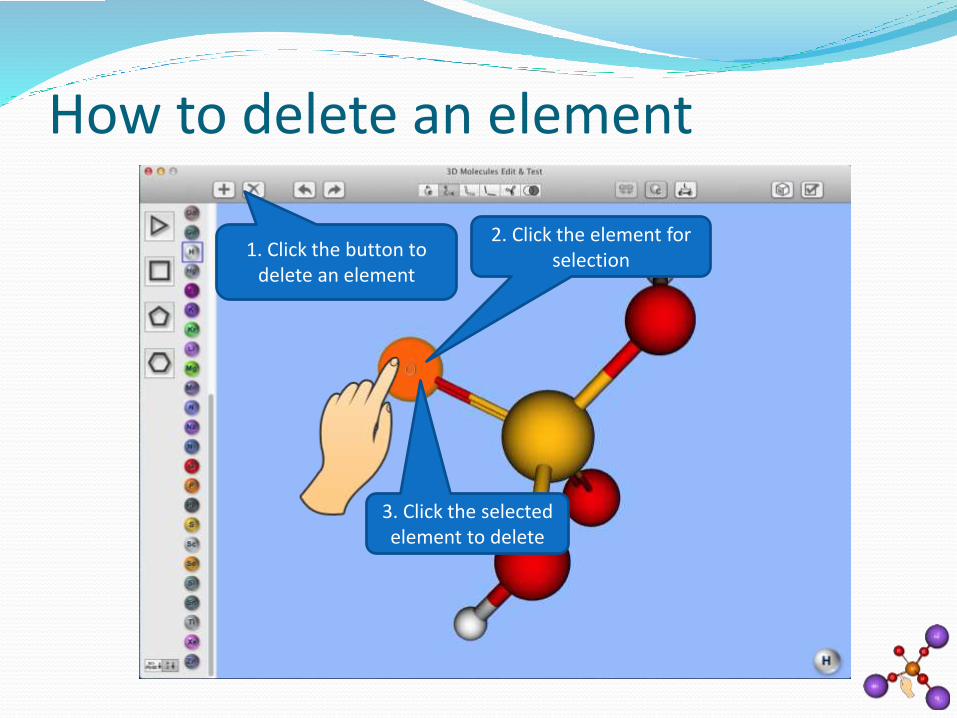
How to delete an element
1. Click the button to delete an element
3. Click the selected element to delete
2. Click the element for selection

How to create molecule
Click the button to create a model in the test yourself mode

How to create molecule
Choose the item and compound from it

How to create molecule
Click the button to check the correctness of the model
Compiled molecule
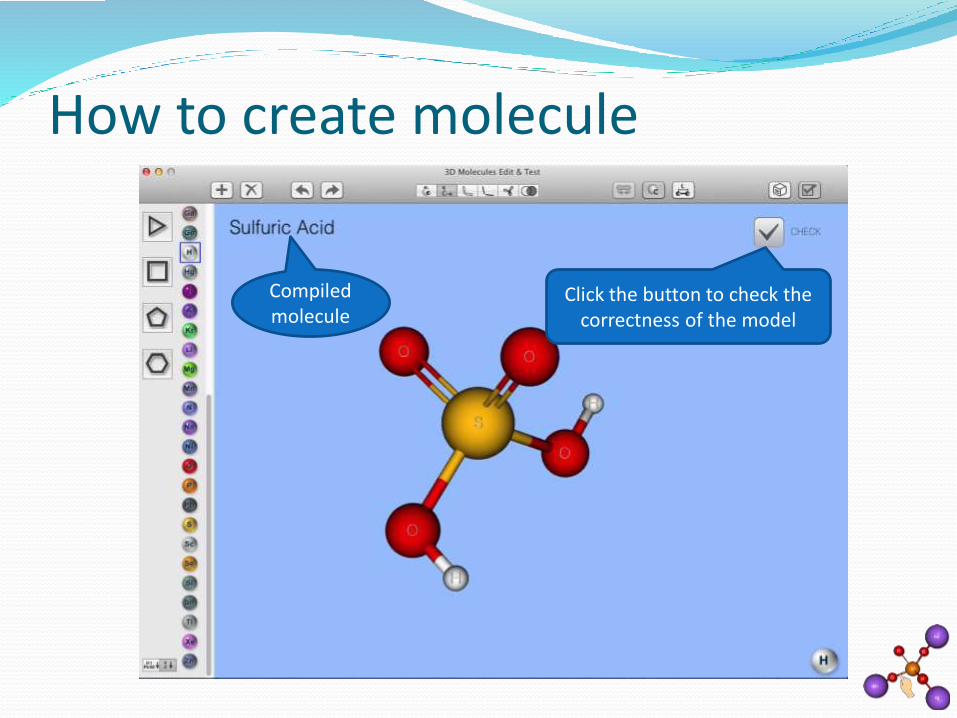
How to create molecule
Click the button to check the correctness of the model
Compiled molecule

How to create molecule

Export molecules for 3D Printing (STL file format)

Try “3D Molecules Editor” for Mac right now!
Contact with us:
E-mail: [email protected]
http://bit.ly/1DAzvWq