
Tutorial 3: Map control - Esridownloads.esri.com/resources/cityengine/tutorial_3_map_control.pdf ·...
13
Tutorial 3: Map control Copyright © 1995-2015 Esri. All rights reserved.
Transcript of Tutorial 3: Map control - Esridownloads.esri.com/resources/cityengine/tutorial_3_map_control.pdf ·...
Tutorial 3: Map control
Copyright © 1995-2015 Esri. All rights reserved.
Table of ContentsTutorial 3: Map control . . . . . . . . . . . . . . . . . . . . . . . . . . . . . . . . . . . . . . . . . . . 3
Tutorial 3: Map control
Copyright © 1995-2015 Esri. All rights reserved. 2
Tutorial 3: Map controlDownload items
• Tutorial data
• Tutorial PDF
CGA parameters
Cities consist of a large number of objects. Controlling these by setting attributes of single buildings is tedious and close toimpossible. In this tutorial, you'll first learn how CGA rule parameters are used.
Steps:
1. Open the mapcontrolTutorial_01.cej scene.The opened scene contains two map layers (Terrain and Water) and a street network layer with lots of shapes. If youselect a single lot now and check its attributes in the Inspector (Window > Inspector), there are no rule parametersassigned (the Rule Parameter pane is empty). This changes when you assign a rule file to the lot.
2. Select the Streetnetwork layer in the Scene Editor.
3. Click Shapes > Assign Rule File, and select the simpleBuildingShells_01.cga rule file.
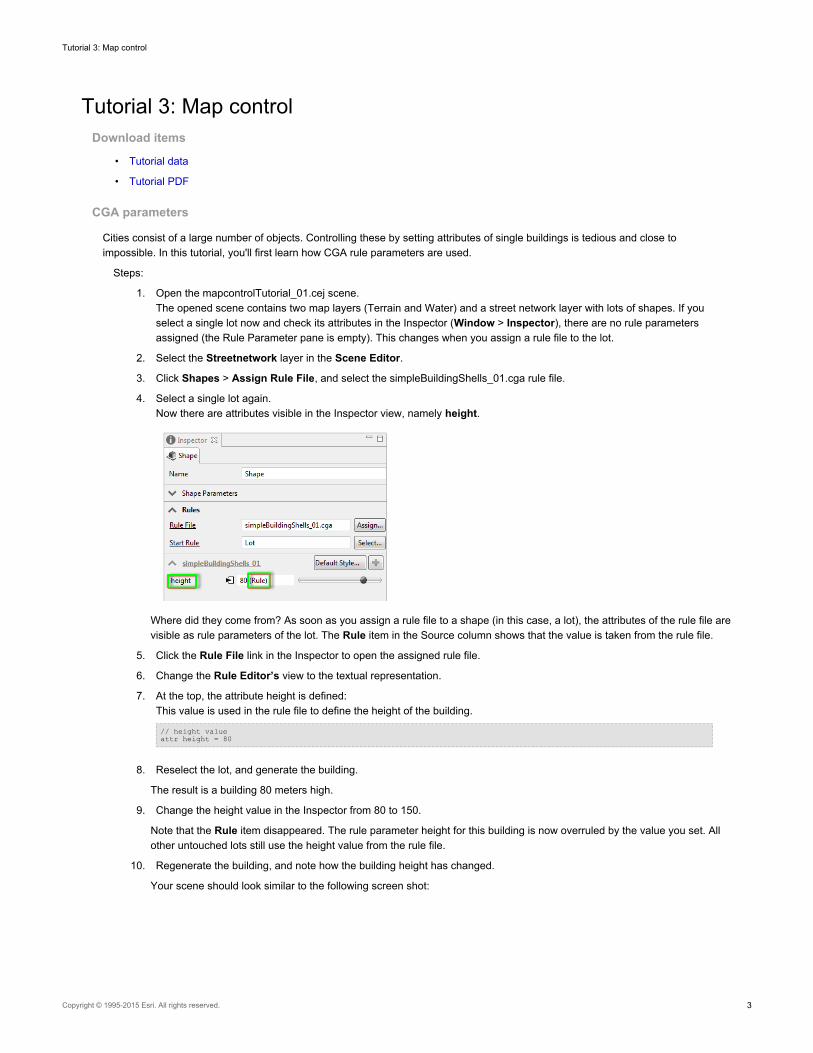
4. Select a single lot again.Now there are attributes visible in the Inspector view, namely height.
Where did they come from? As soon as you assign a rule file to a shape (in this case, a lot), the attributes of the rule file arevisible as rule parameters of the lot. The Rule item in the Source column shows that the value is taken from the rule file.
5. Click the Rule File link in the Inspector to open the assigned rule file.
6. Change the Rule Editor’s view to the textual representation.
7. At the top, the attribute height is defined:This value is used in the rule file to define the height of the building.
// height valueattr height = 80
8. Reselect the lot, and generate the building.
The result is a building 80 meters high.
9. Change the height value in the Inspector from 80 to 150.
Note that the Rule item disappeared. The rule parameter height for this building is now overruled by the value you set. Allother untouched lots still use the height value from the rule file.
10. Regenerate the building, and note how the building height has changed.
Your scene should look similar to the following screen shot:
Tutorial 3: Map control
Copyright © 1995-2015 Esri. All rights reserved. 3
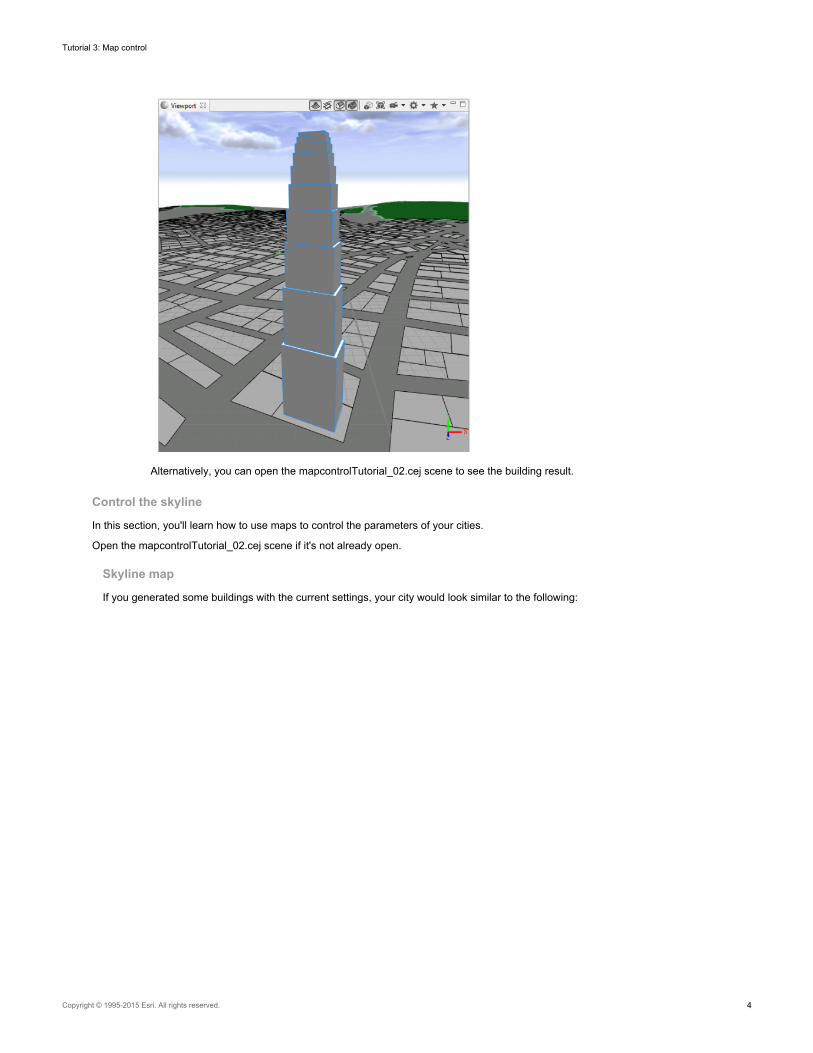
Alternatively, you can open the mapcontrolTutorial_02.cej scene to see the building result.
Control the skyline
In this section, you'll learn how to use maps to control the parameters of your cities.
Open the mapcontrolTutorial_02.cej scene if it's not already open.
Skyline map
If you generated some buildings with the current settings, your city would look similar to the following:
Tutorial 3: Map control
Copyright © 1995-2015 Esri. All rights reserved. 4

This is not very convincing, since all the buildings are the same height at 80 meters. A nice skyline would improve the look. Instead ofsetting the CGA shape attributes manually as you did in the first section, you'll use the red skyline map below to control the height ofall buildings at once. The smaller image is the topography map, which indicates a lake in blue.
Tutorial 3: Map control
Copyright © 1995-2015 Esri. All rights reserved. 5
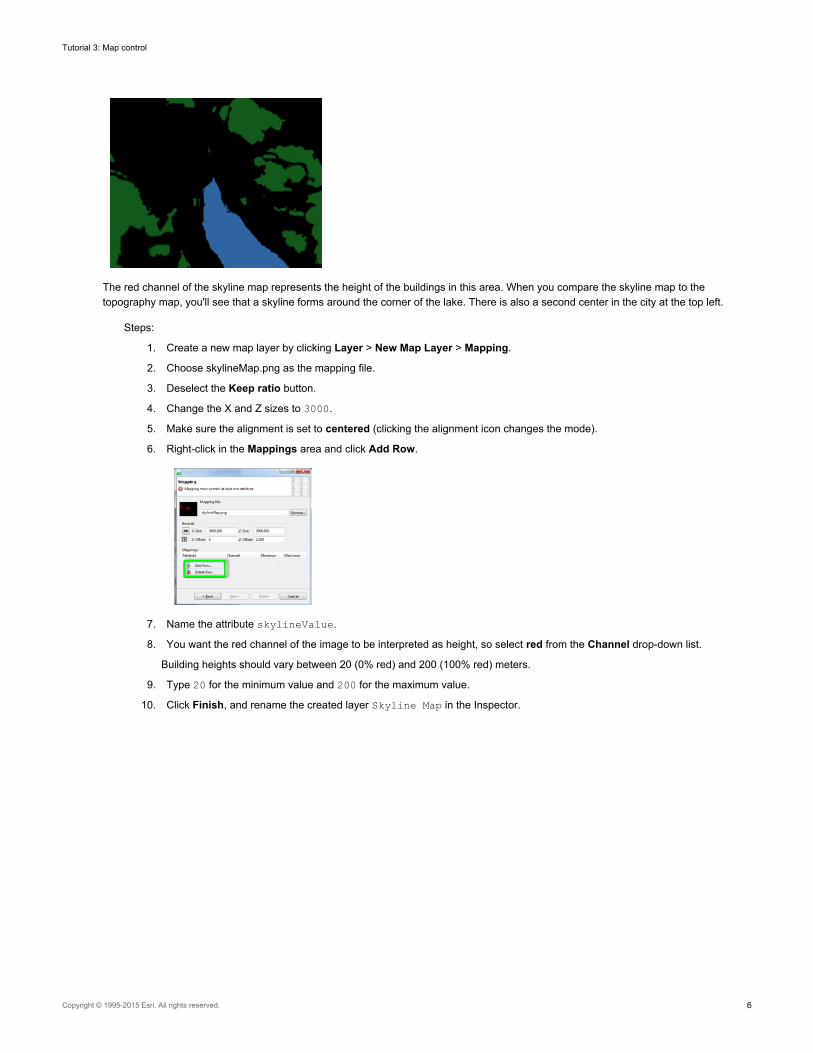
The red channel of the skyline map represents the height of the buildings in this area. When you compare the skyline map to thetopography map, you'll see that a skyline forms around the corner of the lake. There is also a second center in the city at the top left.
Steps:
1. Create a new map layer by clicking Layer > New Map Layer > Mapping.
2. Choose skylineMap.png as the mapping file.
3. Deselect the Keep ratio button.
4. Change the X and Z sizes to 3000.
5. Make sure the alignment is set to centered (clicking the alignment icon changes the mode).
6. Right-click in the Mappings area and click Add Row.
7. Name the attribute skylineValue.
8. You want the red channel of the image to be interpreted as height, so select red from the Channel drop-down list.
Building heights should vary between 20 (0% red) and 200 (100% red) meters.
9. Type 20 for the minimum value and 200 for the maximum value.
10. Click Finish, and rename the created layer Skyline Map in the Inspector.
Tutorial 3: Map control
Copyright © 1995-2015 Esri. All rights reserved. 6
11. Adjust the elevation offset of your new map layer in the Inspector to bring it to a position with better visibility. Use thealpha value to give it some transparency.
You can now control the rule parameter height with your skyline map.
12. Reassign the rule file to your lots so CityEngine can complete the connection.
13. Select all lots.
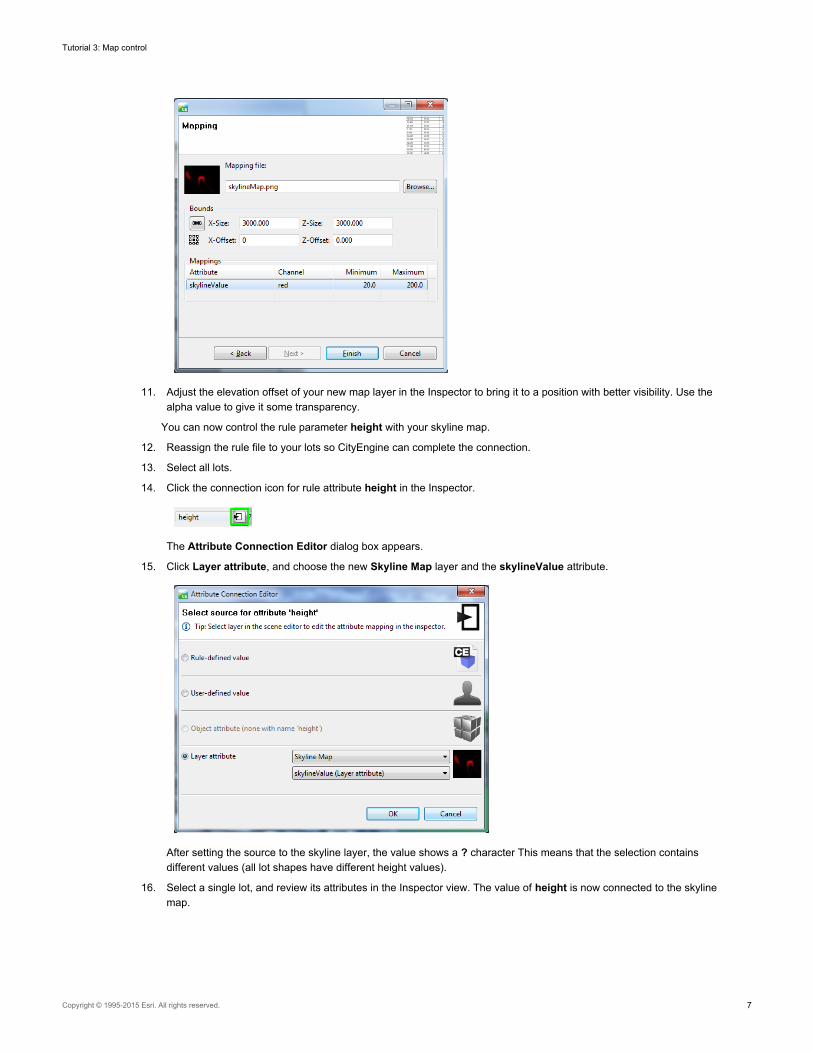
14. Click the connection icon for rule attribute height in the Inspector.
The Attribute Connection Editor dialog box appears.
15. Click Layer attribute, and choose the new Skyline Map layer and the skylineValue attribute.
After setting the source to the skyline layer, the value shows a ? character This means that the selection containsdifferent values (all lot shapes have different height values).
16. Select a single lot, and review its attributes in the Inspector view. The value of height is now connected to the skylinemap.
Tutorial 3: Map control
Copyright © 1995-2015 Esri. All rights reserved. 7
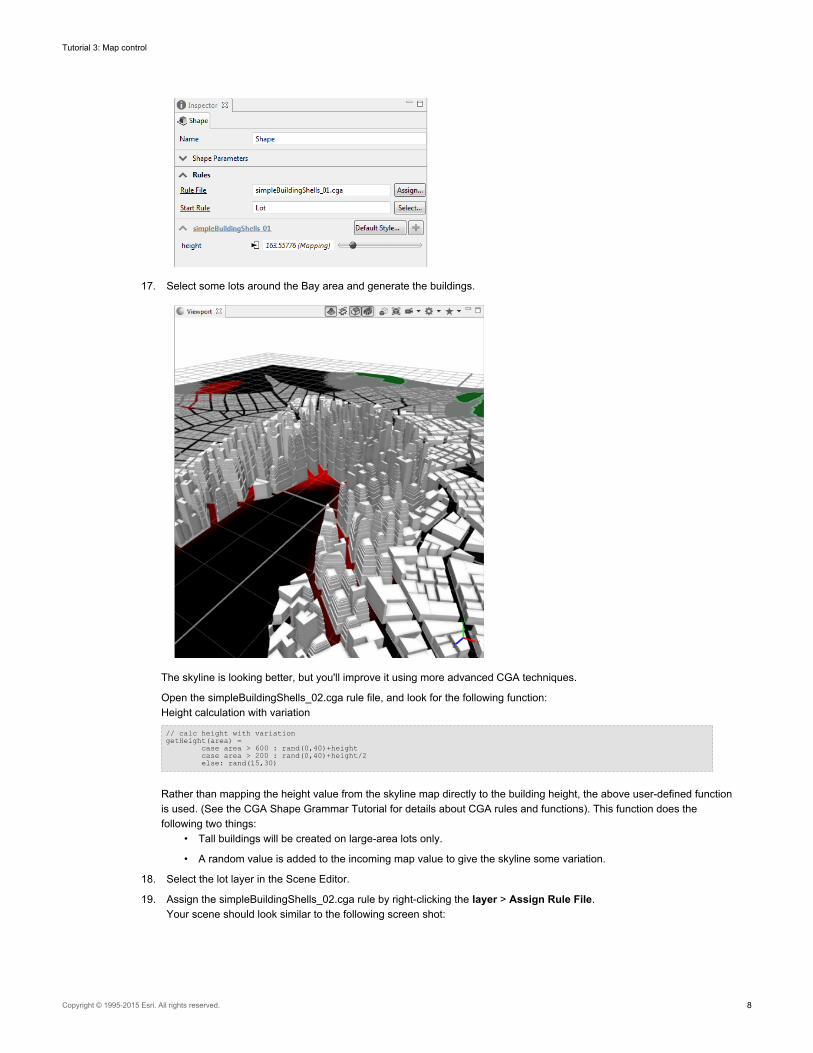
17. Select some lots around the Bay area and generate the buildings.
The skyline is looking better, but you'll improve it using more advanced CGA techniques.
Open the simpleBuildingShells_02.cga rule file, and look for the following function:Height calculation with variation
// calc height with variationgetHeight(area) =
case area > 600 : rand(0,40)+heightcase area > 200 : rand(0,40)+height/2else: rand(15,30)
Rather than mapping the height value from the skyline map directly to the building height, the above user-defined functionis used. (See the CGA Shape Grammar Tutorial for details about CGA rules and functions). This function does thefollowing two things:
• Tall buildings will be created on large-area lots only.
• A random value is added to the incoming map value to give the skyline some variation.
18. Select the lot layer in the Scene Editor.
19. Assign the simpleBuildingShells_02.cga rule by right-clicking the layer > Assign Rule File.Your scene should look similar to the following screen shot:
Tutorial 3: Map control
Copyright © 1995-2015 Esri. All rights reserved. 8
Control land-use types
You'll now learn how to use maps to control the land-use type of each building.
Open the mapcontrolTutorial_03.cej scene if it's not already open.
Control land-use types for buildings
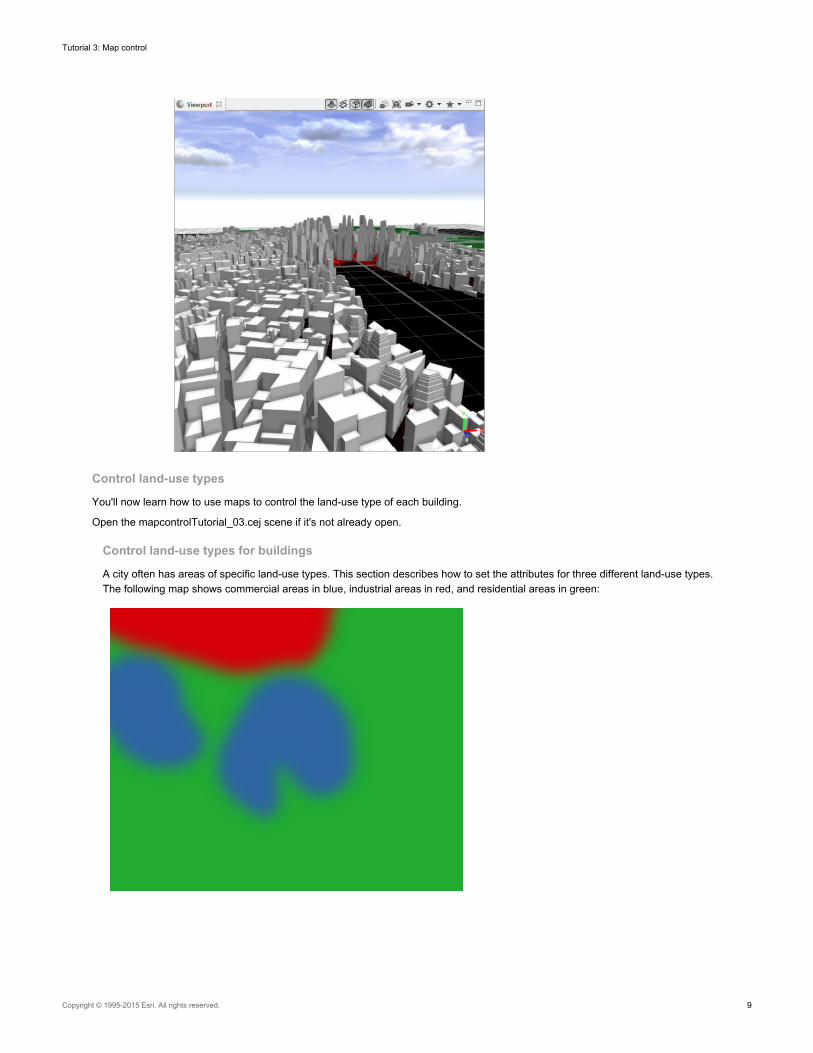
A city often has areas of specific land-use types. This section describes how to set the attributes for three different land-use types.The following map shows commercial areas in blue, industrial areas in red, and residential areas in green:
Tutorial 3: Map control
Copyright © 1995-2015 Esri. All rights reserved. 9
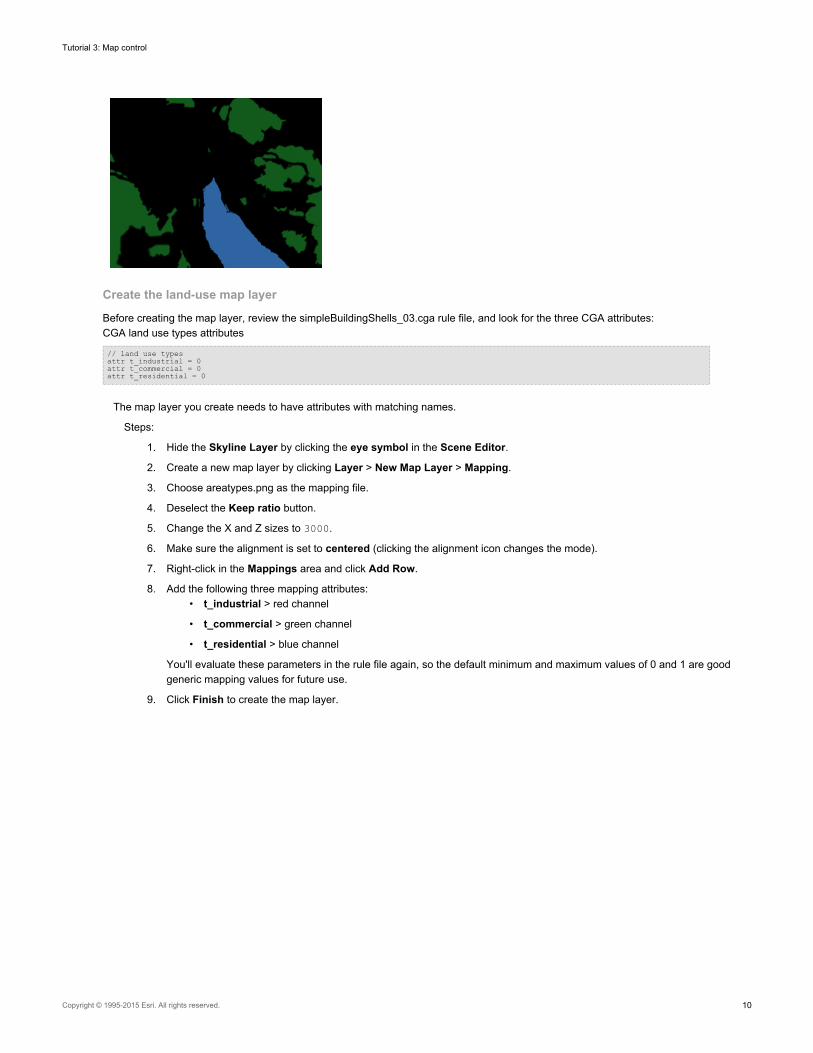
Create the land-use map layer
Before creating the map layer, review the simpleBuildingShells_03.cga rule file, and look for the three CGA attributes:CGA land use types attributes
// land use typesattr t_industrial = 0attr t_commercial = 0attr t_residential = 0
The map layer you create needs to have attributes with matching names.
Steps:
1. Hide the Skyline Layer by clicking the eye symbol in the Scene Editor.
2. Create a new map layer by clicking Layer > New Map Layer > Mapping.
3. Choose areatypes.png as the mapping file.
4. Deselect the Keep ratio button.
5. Change the X and Z sizes to 3000.
6. Make sure the alignment is set to centered (clicking the alignment icon changes the mode).
7. Right-click in the Mappings area and click Add Row.
8. Add the following three mapping attributes:• t_industrial > red channel
• t_commercial > green channel
• t_residential > blue channel
You'll evaluate these parameters in the rule file again, so the default minimum and maximum values of 0 and 1 are goodgeneric mapping values for future use.
9. Click Finish to create the map layer.
Tutorial 3: Map control
Copyright © 1995-2015 Esri. All rights reserved. 10
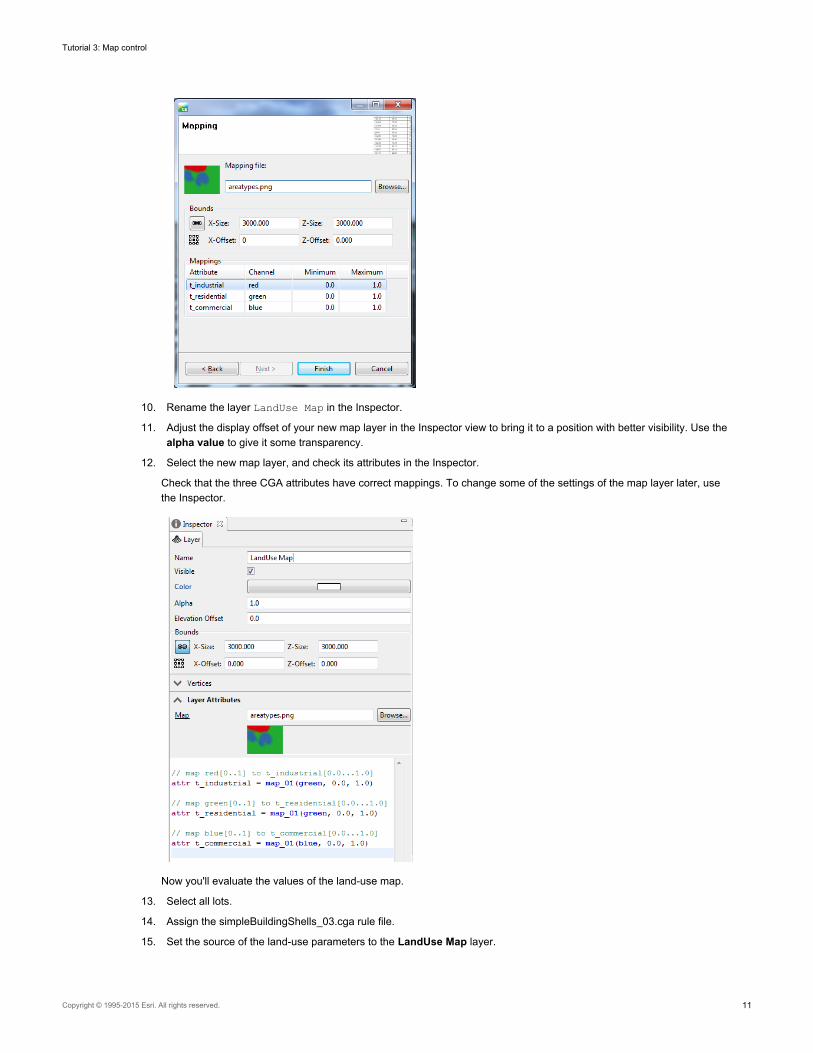
10. Rename the layer LandUse Map in the Inspector.
11. Adjust the display offset of your new map layer in the Inspector view to bring it to a position with better visibility. Use thealpha value to give it some transparency.
12. Select the new map layer, and check its attributes in the Inspector.
Check that the three CGA attributes have correct mappings. To change some of the settings of the map layer later, usethe Inspector.
Now you'll evaluate the values of the land-use map.
13. Select all lots.
14. Assign the simpleBuildingShells_03.cga rule file.
15. Set the source of the land-use parameters to the LandUse Map layer.
Tutorial 3: Map control
Copyright © 1995-2015 Esri. All rights reserved. 11
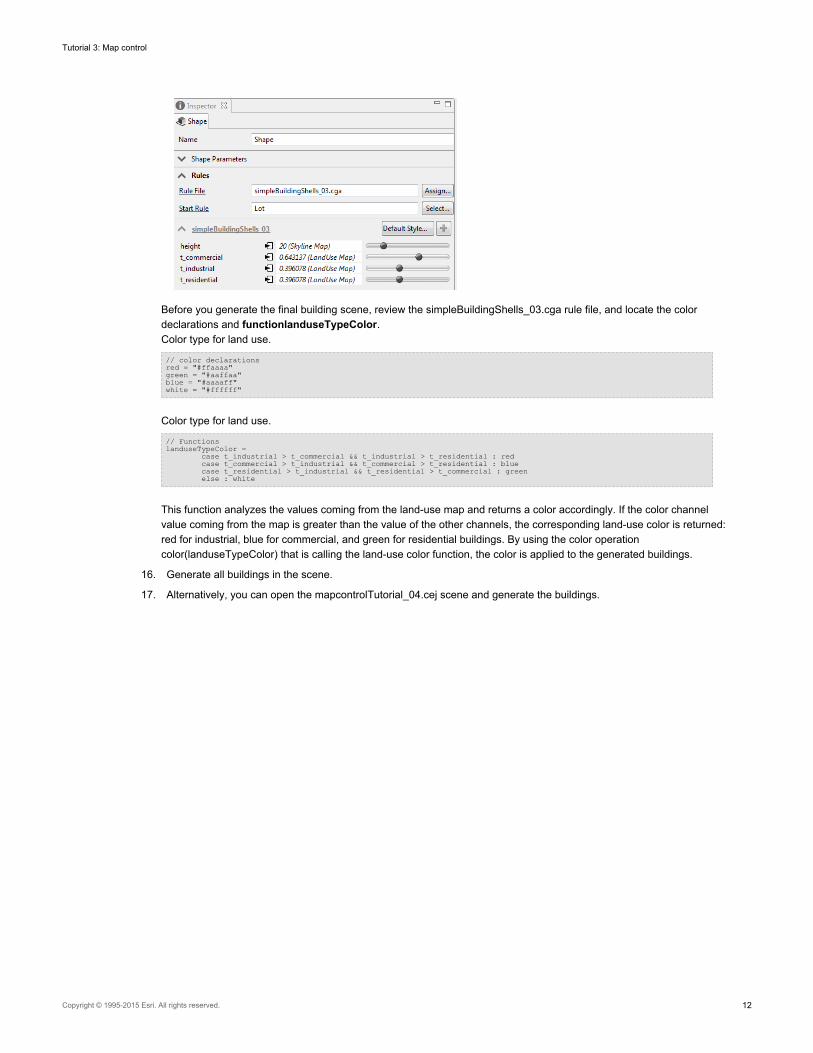
Before you generate the final building scene, review the simpleBuildingShells_03.cga rule file, and locate the colordeclarations and functionlanduseTypeColor.Color type for land use.
// color declarationsred = "#ffaaaa"green = "#aaffaa"blue = "#aaaaff"white = "#ffffff"
Color type for land use.
// FunctionslanduseTypeColor =
case t_industrial > t_commercial && t_industrial > t_residential : redcase t_commercial > t_industrial && t_commercial > t_residential : bluecase t_residential > t_industrial && t_residential > t_commercial : greenelse : white
This function analyzes the values coming from the land-use map and returns a color accordingly. If the color channelvalue coming from the map is greater than the value of the other channels, the corresponding land-use color is returned:red for industrial, blue for commercial, and green for residential buildings. By using the color operationcolor(landuseTypeColor) that is calling the land-use color function, the color is applied to the generated buildings.
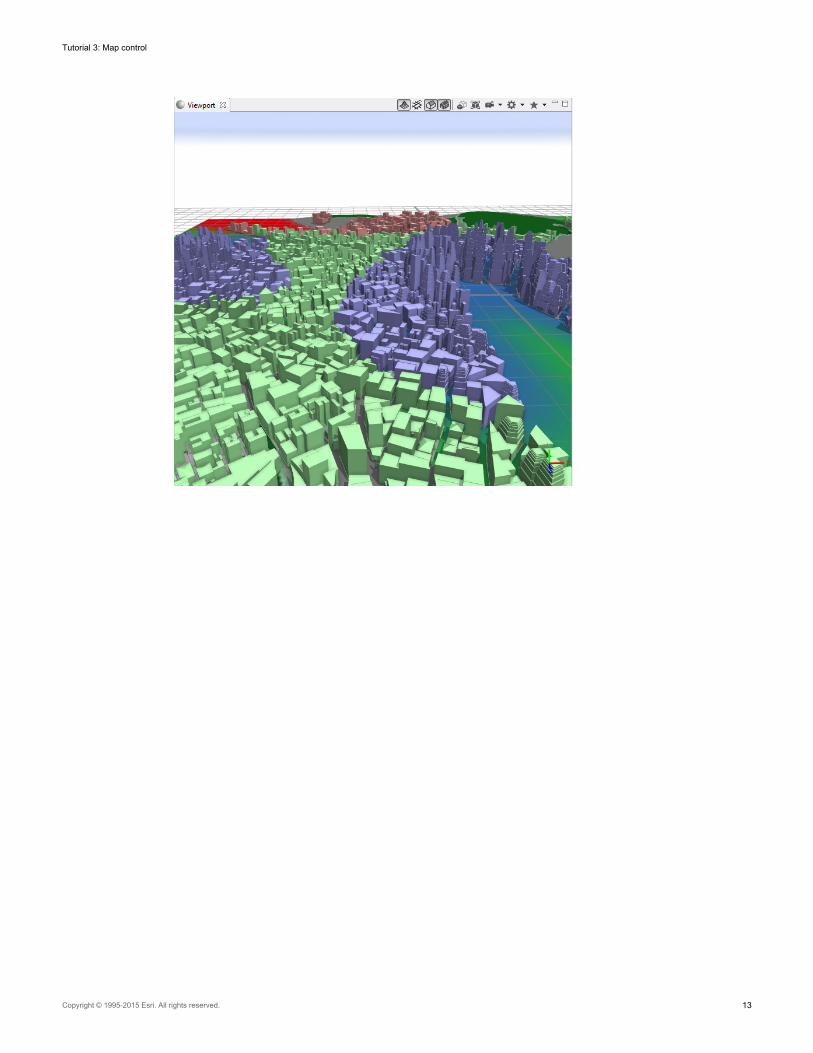
16. Generate all buildings in the scene.
17. Alternatively, you can open the mapcontrolTutorial_04.cej scene and generate the buildings.
Tutorial 3: Map control
Copyright © 1995-2015 Esri. All rights reserved. 12
Tutorial 3: Map control
Copyright © 1995-2015 Esri. All rights reserved. 13


![[React-Native Tutorial] Map](https://static.fdocuments.net/doc/165x107/58728d3f1a28ab36118b57e9/react-native-tutorial-map.jpg)
