
Trainers Manual for Wheelchair Service Training Package ...
260
WHEELCHAIR SERVICE TRAINING PACKAGE BASIC LEVEL Trainer’s Manual
Transcript of Trainers Manual for Wheelchair Service Training Package ...

Wheelchair
Service Training Package
Basic LeveL
Trainer’s Manual


Wheelchair
Service Training Package
Trainer's Manual
Basic LeveL

WheelchairService Training Package
Basic LeveL
Contributors:Editors: Chapal Khasnabis and Kylie Mines Authors: Sarah Frost, Kylie Mines, Jamie Noon, Elsje Scheffler, and Rebecca Jackson StoecklePeer reviewers: Natasha Altin, Jo Armstrong, William Armstrong, Johan Borg, Jocelyn Campbell, Nelja Essaafi, Robert G. Horvath,
Lauren Houpapa, Mohamed El Khadiri, R. Lee Kirby, Penny Knudson, Mark Kruizak, Bigboy Madzivanzira, Rob Mattingly, Cindy Mosher, Ritu Ghosh Moulick, Alana Officer, Andrew Rose, Allan Siekman, Sue Steel Smith, Michiel Steenbeek, Claude Tardif, and Isabelle Urseau
Illustrator: Melissa PuustPhoto credits: Chapal Khasnabis and Jesse MossVideo credits: Chapal Khasnabis, Amanda McBaine, and Jesse MossPilot trainers: Lauren Houpapa, Charles Kanyi, Norah Keitany, Seraphine Ongogo, M. Vennila Palanivelu Sama Raju, and
Elsie Taloafiri Financial support: US Agency for International Development and Australian Agency for International DevelopmentPartner organizations:
ASSERT East Timor, Association for the Physically Disabled of Kenya (APDK), Community Based Rehabilitation Unit of Solomon Islands Ministry of Health and Medical Services, Education Development Center (EDC), Handicap International, International Committee of the Red Cross (ICRC), International Society for Prosthetics and Orthotics (ISPO), Kilimanjaro Association of the Spinally Injured (KASI), Mobility India, Motivation Australia, Motivation Charitable Trust (Motivation), Motivation Romania, and Tanzania Training Centre for Orthopaedic Technologists (TATCOT)
WHO Library Cataloguing-in-Publication DataWheelchair service training package / edited by Chapal Khasnabis and Kylie Mines.Contents: Trainer’s manual, basic level–Reference manual for participants, basic level – Participant’s workbook, basic level – Posters and slides, basic level.Trainer’s manual and slides available on DVD only.1.Wheelchairs – standards. 2.Disabled persons – rehabilitation. 3.Teaching materials. I.Khasnabis, Chapal. II.Mines, Kylie. III.World Health Organization.ISBN 978 92 4 150347 1 (package) (NLM classification: WB 320) ISBN 978 92 4 150348 8 (DVD)
© World Health Organization 2012
All rights reserved. Publications of the World Health Organization are available on the WHO web site (www.who.int) or can be purchased from WHO Press, World Health Organization, 20 Avenue Appia, 1211 Geneva 27, Switzerland (tel.: +41 22 791 3264; fax: +41 22 791 4857; e-mail: [email protected]). Requests for permission to reproduce or translate WHO publications – whether for sale or for noncommercial distribution – should be addressed to WHO Press through the WHO web site (http://www.who.int/about/licensing/copyright_form/en/index.html).The designations employed and the presentation of the material in this publication do not imply the expression of any opinion whatsoever on the part of the World Health Organization concerning the legal status of any country, territory, city or area or of its authorities, or concerning the delimitation of its frontiers or boundaries. Dotted lines on maps represent approximate border lines for which there may not yet be full agreement.The mention of specific companies or of certain manufacturers’ products does not imply that they are endorsed or recommended by the World Health Organization in preference to others of a similar nature that are not mentioned. Errors and omissions excepted, the names of proprietary products are distinguished by initial capital letters.All reasonable precautions have been taken by the World Health Organization to verify the information contained in this publication. However, the published material is being distributed without warranty of any kind, either expressed or implied. The responsibility for the interpretation and use of the material lies with the reader. In no event shall the World Health Organization be liable for damages arising from its use.Cover photo credits (clockwise, from top): Mile End Films /Jesse Moss; WHO /Chapal Khasnabis; Mile End Films / Jesse Moss; Panos /Dieter Telemans; WHO /Chapal Khasnabis.Printed in MaltaDesign by Inís Communication – www.iniscommunication.com

Terminology
The following terms used throughout the training package are defined below.
appropriate wheelchair A wheelchair that meets the user’s needs and environmental conditions; provides proper fit and postural support and is safe and durable; is available in the country; and can be obtained and maintained and services sustained in the country at the most economical and affordable price.
Manual wheelchair A wheelchair that is propelled by the user or pushed by another person.
Wheelchair A device providing wheeled mobility and seating support for a person who has difficulty in walking or moving around.
Wheelchair provision An overall term for wheelchair design, production, supply and service delivery.
Wheelchair service That part of wheelchair provision concerned with ensuring that each user receives an appropriate wheelchair.
Wheelchair service personnel
Persons skilled in the provision of an appropriate wheelchair.
Wheelchair user A person who has difficulty in walking or moving around and uses a wheelchair for mobility.

cO
NT
eNT
s 1 about the Wheelchair service Training Package: Basic Level
1 introduction
1 Target audience
2 Purpose
2 scope
3 Trainers
4 How to get started
5 1. guidance notes for trainers
5 1.1 Training overview
6 1.2 Training package timetable and duration
6 1.3 session plans
7 1.4 PowerPoint presentations
7 1.5 Observing/monitoring participants’ progress
8 1.6 evaluating the training programme after each delivery
8 1.7 Good practice training tips
10 2. how to prepare to deliver the training package
10 2.1 Know the participants’ wheelchair service network
10 2.2 clarify the participants’ role in wheelchair service delivery
10 2.3 Review each session plan and adjust if necessary
11 2.4 identify the wheelchairs that will be used
11 2.5 invite wheelchair users for practical sessions
13 2.6 Plan groups for practical sessions
13 2.7 Prepare facilities
14 2.8 Prepare the training resources and materials
19 3. Detailed session plans
20 introduction
23 a: core knowledge

1 about the Wheelchair service Training Package: Basic Level
1 introduction
1 Target audience
2 Purpose
2 scope
3 Trainers
4 How to get started
5 1. guidance notes for trainers
5 1.1 Training overview
6 1.2 Training package timetable and duration
6 1.3 session plans
7 1.4 PowerPoint presentations
7 1.5 Observing/monitoring participants’ progress
8 1.6 evaluating the training programme after each delivery
8 1.7 Good practice training tips
10 2. how to prepare to deliver the training package
10 2.1 Know the participants’ wheelchair service network
10 2.2 clarify the participants’ role in wheelchair service delivery
10 2.3 Review each session plan and adjust if necessary
11 2.4 identify the wheelchairs that will be used
11 2.5 invite wheelchair users for practical sessions
13 2.6 Plan groups for practical sessions
13 2.7 Prepare facilities
14 2.8 Prepare the training resources and materials
19 3. Detailed session plans
20 introduction
23 a: core knowledge
24 a.1: Wheelchair users
30 a.2: Wheelchair services
37 a.3: Wheelchair mobility
44 a.4: sitting upright
54 a.5: Pressure sores
67 a.6: appropriate wheelchair
87 a.7: cushions
99 a.8: Transfers
108 B: Wheelchair service steps
109 B.1: Referral and appointment
113 B.2: assessment
118 B.3: assessment interview
131 B.4: Physical assessment
144 B.5: Prescription (selection)
156 B.6: Funding and ordering
159 Practical One: assessment and prescription (selection)
162 B.7: Product (wheelchair) preparation
169 B.8: cushion fabrication
178 B.9: Fitting
185 B.10: Problem solving
195 B.11: User training
201 B.12: Maintenance and repairs
207 Practical Two: Fitting and user training
212 B.13: Follow up
217 Practical Three: Follow up
220 Practical Four: assessment, prescription (selection), product (wheelchair) preparation, fitting and user training
224 B.14: Putting it all together

VIII
228 annexes
228 annex 1: Timetable for basic wheelchair service training package
230 annex 2: Wheelchair service referral form
231 annex 3: Wheelchair assessment form
234 annex 4: Wheelchair prescription (selection) form
235 annex 5: Wheelchair summary form
236 annex 6: Wheelchair safe and ready checklist
237 annex 7: Wheelchair fitting checklist
239 annex 8: Wheelchair user training checklist
240 annex 9: Wheelchair follow up form
242 annex 10: Trainer’s observation checklists

1
about the Wheelchair Service Training Package: Basic level
introductionTo ensure better implementation of the guidelines on the provision of manual wheelchairs in less resourced settings, WHO has developed this Wheelchair service Training Package – Basic Level. The need for wheelchair personnel is universal. The wheelchair is one of the most commonly used assistive devices for enabling personal mobility, but there are very few training opportunities for service providers to ensure that wheelchair users can attain personal mobility with the greatest possible independence, be productive and enjoy a high quality of life. This basic level training package is the first part of the wheelchair service training series.
The Wheelchair service Training Package – Basic Level comprises a number of documents and presentations for delivering the wheelchair training. The most important of these is this Trainer’s Manual. For practical reasons, the Trainer’s Manual is available only in electronic form (there is no printed version). The disk includes the Trainer’s Manual and all other information materials required to deliver a basic level training programme for wheelchair service provision.
Target audienceThis training package is for all personnel or volunteers who are expected to carry out wheelchair service delivery in their place of work. This may include health, rehabilitation or technical personnel, community health care workers, community-based rehabilitation (cBR) workers, occupational therapists, physiotherapists, prosthetists, orthotists, local craftsmen, technicians and wheelchair users.
The training programme has been designed assuming that participants will have the following knowledge and skills:
• participants will be able to read and write in the language of the training programme;
• participants will have a basic knowledge of the common physical impairments which may affect people who use wheelchairs, including cerebral palsy, lower-limb amputation, poliomyelitis (polio), spinal cord injury, and stroke.
WheelchairService Training Package
Basic LeveL
WheelchairService Training Package
2
BASIC LEVEL
Where participants do not already have information about common physical impairments, trainers should include this information as an additional core knowledge session.
PurposeThe Basic Level training package is designed to support the training of personnel or volunteers to provide an appropriate manual wheelchair and cushion for girls, boys, women and men who have mobility impairments but can sit upright without additional postural support.
The main purpose of this training package is to develop the skills and knowledge of personnel involved in the wheelchair service delivery. Delivery of this training package will help to:
• increase the number of wheelchair users who receive a wheelchair which meets their needs;
• increase the number of wheelchair users who receive training in the use and maintenance of wheelchairs and how to stay healthy in a wheelchair;
• increase the number of personnel trained in basic level wheelchair service delivery;
• improve the competencies of wheelchair service delivery personnel;• increase the quality of wheelchair service delivery; and• achieve greater integration of wheelchair service delivery within rehabilitation
services.
ScopeThe training package includes:
• core knowledge required for wheelchair service delivery;• an overview of the key steps of wheelchair service delivery described in the
WHO guidelines on the provision of manual wheelchairs in less resourced settings (Table 1);
• working with wheelchair users to assess their mobility needs and identify the best possible mobility solution;
• providing an appropriate wheelchair with an appropriate cushion;• problem solving to find simple modifications to the wheelchair that can help
ensure the best fit for the user;• wheelchair repairs and maintenance;• training of wheelchair users to make the best use of their wheelchair; and• fabrication of a foam contoured cushion.

3
The inclusion of simple wheelchair modifications is particularly relevant in contexts where there are limitations in the range and sizes of available manual wheelchairs. it is often necessary to make simple modifications to ensure a wheelchair fits correctly.
The provision of tricycles is not covered in detail in this training package, although the value of a tricycle for wheelchair users who need to travel longer distances is noted.
Table 1. Key steps of wheelchair service delivery:
Step 1 Referral and appointment
Step 2 Assessment
Step 3 Prescription (selection)
Step 4 Funding and ordering
Step 5 Product (wheelchair) preparation
Step 6 Fitting
Step 7 User training
Step 8 Maintenance, repairs and follow up
TrainersSkills: This training package relies on the availability of trainers who are skilled in basic wheelchair service delivery and can confidently demonstrate the competencies taught in this training programme. Previous experience as a trainer will also be beneficial.
Wheelchair users: inclusion of a wheelchair user on the training team is highly recommended. Wheelchair users are able to draw on their own experiences to teach others. Wheelchair users are also able to provide demonstrations of many of the techniques taught during the training programme. Being trained by a wheelchair user will help the participants to appreciate the central role that wheelchair users play in the selection of their own wheelchair.
number of trainers: it is recommended that there are two trainers for every 8–10 participants. This ratio is particularly important for practical sessions, so that trainers can give participants good support and feedback and ensure that all involved can practise safely. Having an experienced wheelchair user, who knows the subject and training package well, can be an asset during the training programme.

WheelchairService Training Package
4
BASIC LEVEL
how to get startedBefore carrying out the training programme, you must copy the disc (inside the back of the folder) to your hard drive. You need about 8Gb storage space and a DvD player to make use of this training disc. The simplest way to deliver the training programme is:
1. Open the Trainer’s Manual from the manual folder.
1.1 read sections about the Wheelchair service Training Package and Guidance Notes for Trainers;
1.2 print and bind one copy of the Trainer’s Manual for each trainer;
1.3 print a timetable and trainer’s observation checklists;
1.4 print training programme forms, training programme evaluation forms and wheelchair service forms, including service checklists.
2. Make all the necessary arrangements, as suggested in the section How to Pre-pare to Deliver the Training Package.
3. Give the participants a full set of training materials including: the Reference Manual (1 per participant), Participant’s Workbook (1 per participant) and a set of posters (1 set per participant). if you do not have these in stock, they can be printed from the disc.
4. Open the timetable and click the hyperlinks of each session, which will take you to the exact slides and video location. The best way to deliver the training is to proceed through the lessons in sequential order with respect to the timing allotted for each session, as much as possible.

5
1. guidance notes for trainers
1.1 Training overview
minutesWelcome, introduction and overview. Introduction 60a: core knowledgeSessions which give participants the background knowledge needed to undertake the wheelchair service steps sessions.
A.1 Wheelchair users 45A.2 Wheelchair services 30A.3 Wheelchair mobility 90A.4 Sitting upright 60A.5 Pressure sores 60A.6 Appropriate wheelchair 120A.7 Cushions 75A.8 Transfers 120
B: Wheelchair service stepsReferral and appointment B.1 Referral and appointment 30Assessment B.2 Assessment 30
B.3 Assessment interview 90B.4 Physical assessment 90
Prescription (selection) B.5 Prescription (selection) 120Funding and ordering B.6 Funding and ordering 15
Practical One assessment and prescription (selection) 90
Product (wheelchair) preparation B.7 Product (wheelchair) preparation 75B.8 Cushion fabrication 120
Fitting B.9 Fitting 60B.10 Problem solving 45
User training B.11 User training 60Maintenance, repairs and follow up B.12 Maintenance and repairs 120
Practical Two Fitting and user training 120
Maintenance, repairs and follow up B.13 Follow up 45
Practical Three Follow up 90
Practical Four assessment, prescription (selection), product (wheelchair) preparation, fitting and user training
240
B.14 Putting it all together 105

WheelchairService Training Package
6
BASIC LEVEL
1.2 Training package timetable and duration
This training package may be delivered on consecutive days or in blocks over a period of time. The minimum length of time needed to teach the complete basic level training package is 35–40 hours. an estimate of the time needed to teach each session is included in the session plan.
Note – the actual time taken to teach each session will vary depending on the following factors:
• the experience and skills of participants;• the overall number of participants;• the number of locally available wheelchairs;• whether there is a need for translation during sessions;• whether additional material is included.
Depending on these factors, more or less time may be required to complete the training programme.
a sample five day timetable is provided in annex 1. This timetable and a blank timetable template are also available on the DvD.
Trainers are strongly encouraged to adapt and modify the timetable to suit the local context and the learning needs of participants. For example:
• sessions from the training package may be incorporated into existing health or rehabilitation training programmes;
• wherever rehabilitation personnel already have training in some aspects of the training programme, the corresponding sessions may not be required;
• where wheelchairs require additional preparation time (for example full assembly is required), it may be necessary to reduce the number of wheelchair users seen in the practical sessions or increase the time allowed.
1.3 Session plans
For each session there is a session plan which guides trainers in delivering the session. at the beginning of each session plan is the following information:
• Objectives: what the participant should be able to do at the end of the session;• Resources: what resources are needed for the session;• context: how the session may need to be adapted for different contexts or
situations;• To prepare: how to prepare for the session;• Outline: an outline of the main parts of the session.

7
The rest of the session plan is divided into topics. For each topic, the session plan gives instructions about how to communicate the information for that topic. Note:
• words in bold are actions for the trainers (for example: ask, demonstrate, explain, show DvD);
• shaded boxes give answers to questions asked by the trainers – but encourage participants to think of the answers themselves.
at the end of every session plan is a summary of the key points. instead of reading the key points, trainers may ask participants questions so that they identify the key points themselves.
By following the session plans carefully, trainers will be able to teach each session well and on time. session plans provide all the necessary key points and practical skills that should be covered. Trainers are encouraged to bring their own knowledge, skills and style to the session. However, it is important not to move away from the topics and methods provided in the plans.
1.4 PowerPoint presentations
There are PowerPoint (PPT) slide presentations for almost every session. Trainers should note that only the key points are written on the slides. Trainers should provide the information given next to each slide in the Trainer’s Manual to make sure that every point is covered. Try to avoid reading out the slides. instead refer to the Trainer’s Manual.
1.5 Observing/monitoring participants’ progress
Trainers should observe closely the progress of each participant. The best opportunity to observe progress is during practical sessions.
a trainer’s observation checklist for each practical session can be found on the cD.
Trainers should use this checklist to:
• Help them observe the progress of each group of participants during each practical session.
• Record examples of good practice and practice needing improvement – to be discussed during each feedback session.
The trainer’s observation checklist may be modified and/or further developed by trainers wishing to gather more detailed information about the progress of each participant.

WheelchairService Training Package
8
BASIC LEVEL
1.6 evaluating the training programme after each delivery
it is a good practice to evaluate the training programme after it has been delivered. Trainers can gather feedback from participants regularly throughout the training programme. Trainers may also record their own thoughts about the training programme as it is delivered. This information can help them to evaluate the training programme at the end, including identifying strengths and weaknesses. This will help trainers to improve both the training package itself and their own skills for delivery in their context for the future.
a training programme evaluation form is available on the DvD. Trainers may wish to adapt or build on this form in order to meet their needs.
1.7 good practice training tips
Be prepared •read each session plan carefully before training starts;•make sure you are confident of the material you are delivering;•gather training resources and prepare the training room well.
Model good practice for a wheelchair service
•respect participants and wheelchair users;•show care in your work;•be aware at all times of safety in the training room;•be punctual and run sessions according to the timetable.
Present information clearly
•speak clearly and calmly;•check to make sure everyone in the room can hear you;•ask questions to check that you have been understood;•make sure your writing on the whiteboard can be read by
everyone;•repeat important points to reinforce them.
Manage session time
•note the time allowed for each session and work to keep to time;•if it is likely that additional time will be needed, plan for this at the
beginning;•be sure to complete all the sessions planned for a given day.
give clear and careful demonstrations
•make sure everyone can see clearly;•explain what will happen and describe what you are going to do;•demonstrate slowly and repeat if necessary.
Build participants’ skills
•always follow demonstrations with an opportunity for participants to practise;
•remember that new learners need time to understand new information.

9
Build success in the small group activities
•observe group activities closely and give help if needed;•ensure that you circulate between the small groups and check the
progress of each.
Be aware of language differences
•if participants are learning in their second language, check they understand -slow down if necessary;
•be aware of language differences among wheelchair users and their carers;
•use interpreters where necessary.
encourage participants to be active and engaged throughout the training
•Use the different training styles and methods given in the session plans;
•avoid talking too much – encourage participants to speak and discuss themselves;
•ask questions to encourage participants to think about the answers themselves, rather than always telling them the answer;
•encourage everyone to speak, don’t let one participant dominate;•praise good work from participants and give positive feedback;•let participants know they can ask questions at any time;•link learning to real examples that the participants will recognize;•keep the training fun!
Use short “warm up” activities/games
•Use short warm-up activities (5–10 minutes) to help focus attention. Use activities that are inclusive of participants with disabilities. A selection of warm-up games is included in the training programme tools folder.
consider the needs of people with different abilities
•Think about the needs of any participants with visual, hearing or mobility difficulties. Some activities and teaching approaches may need to be adapted accordingly.

WheelchairService Training Package
10
BASIC LEVEL
2. how to prepare to deliver the training package
2.1 know the participants’ wheelchair service network
Trainers need to be familiar with the wheelchair provision system at their place of work. This includes:
• the types of wheelchairs available locally and who supplies them;• the wheelchair services in the area, including the level of service they offer;• referral networks in the area;• resource people in the area, including wheelchair users who can assist in
delivering the training;• other rehabilitation services to which wheelchair service personnel may refer
wheelchair users as required.
2.2 clarify the participants’ role in wheelchair service delivery
Find out how wheelchair service delivery fits into the participants’ overall duties at their place of work. For example, will participants be working only in wheelchair service delivery, or do they have other duties as well?
Define the role participants will play in wheelchair service delivery. For example, some personnel may be required to carry out only the clinical or the technical aspects covered in the training. Others may fulfil both the clinical and the technical roles.
The expected role should be made clear before training begins. Trainers can then relate the training directly to the duties expected of participants. Prior to delivering the training, local trainers may need to adapt the training to fit the role participants will carry out within their wheelchair service.
2.3 review each session plan and adjust if necessary
Review each session plan and allocate a lead trainer for each session.
a number of the training sessions may need to be adjusted to suit the local context. suggestions for adjusting sessions to different contexts are provided at the beginning of each session plan under the heading “context”.

11
2.4 identify the wheelchairs that will be used
identify which wheelchair types will be used for the training.
These should be the wheelchairs available at the participants’ place of work. if there is a large range of wheelchairs, select the best examples of different types and those that are most commonly available. Do not include wheelchairs with “intermediate” level features such as adjustable postural support devices (e.g. shoulder harness, spinal supports).
Make sure you are very familiar with the features of each wheelchair. complete a wheelchair summary form (see DvD: wheelchair service forms) for each wheelchair and gather product information from the supplier.
2.5 invite wheelchair users for practical sessions
To give participants practice in the skills taught in this training package, it is necessary for them to practise with wheelchair users. Before the training programme, trainers need to identify and invite wheelchair users who are willing and able to attend the practical sessions.
Below is a checklist to help identify wheelchair users.
checklist for wheelchair users for participation in practical sessions:
Agree willingly to attend the training to assist in practical sessions
Are able to sit well and do not require modifications or additional postural support in their wheelchair, as this is not covered in this training programme
Are fit and healthy enough to tolerate comfortably attending the training programme
Do not have a pressure sore
Live close enough to attend the practical session without having to travel far
Have time available to attend the practical session
Live close enough for the host organization to follow them up after the training
Equal number of male and female wheelchair users
A range of different physical needs represented
Different ages represented
For wheelchair users attending the follow up session – have used a wheelchair for at least three months

WheelchairService Training Package
12
BASIC LEVEL
how many wheelchair users are needed?
The number of wheelchair users needed for the practical sessions depends on the number of participants. However, a minimum of two to four wheelchair users are needed for any size of training programme. Usually participants will work in groups of two or three with one wheelchair user. it is better not to have more than four wheelchair users for any one practical session, as this would become difficult for trainers to manage, monitor and observe.
What do wheelchair users attending practical sessions need to know?
Wheelchair users attending the practical sessions need to know:
• what will happen when they attend the session;• when they will need to attend and for how long;• that they are welcome to attend with a family member/personal assistant;• whether they will receive a wheelchair through their attendance of the training.
Trainers and host organizations are encouraged to ensure that all wheelchair users attending practical sessions are offered transport or money to cover transport and participation costs. Meals and refreshments should be available while they are on the training programme. Trainers and host organizations may also provide wheelchair users with a daily allowance for the time that they spend participating in the training.
a sample invitation letter and consent form for wheelchair users is available in the training programme forms folder in the DvD. This should be adapted for the specific context, translated and sent to each wheelchair user (volunteer) to help him/her to make an informed choice about participating in the training.
Follow up
• The trainers or host organization need to plan for immediate follow up for any wheelchair user seen during the training, as it is possible that not everything will be complete by the end of the training programme for each wheelchair user.
• any wheelchair users who receive a wheelchair during the training should then be followed up by the host organization/trainers within 6–8 weeks of receiving their wheelchair.

13
2.6 Plan groups for practical sessions
each group should consist of no more than three participants. it is better to have two groups of two than one group of four. This ensures that participants have a good opportunity to apply their learning and develop their skills.
Trainers need to decide who is in which group. Do not leave this to participants to decide. Depending on the skills of participants and the context, trainers may choose their groups as follows.
• Team up more confident participants with less confident participants. The more confident participants may help to guide the less confident participants. Monitor/observe the groups closely to ensure that everyone is participating.
• Team together people who will work together in the future, so that they can develop their skills as a team.
For Practicals ‘One and Two’, keep the same participants in the same groups. For Practicals ‘Three and Four’ the groups may be changed around, depending on how well they are working together.
For each practical session, appoint a “lead” person from the group. Make sure that every participant has an opportunity to be the lead person. ask the lead person to be responsible for making sure that all steps are carried out. The lead person should be the main person communicating with the wheelchair user and his/her family/carer if needed.
2.7 Prepare facilities
To run the training, one large training room (or space) may be used. The space needs to be large enough to allow participants and wheelchair users participating in practical sessions to move around comfortably and to break into small groups. also required is an outdoor area for wheelchair mobility skills practice; a separate space for lunch and refreshments; and clean toilets. all areas, including toilets, must be wheelchair accessible.

WheelchairService Training Package
14
BASIC LEVEL
The following checklist can be used to assess and prepare training facilities.
Facilities checklist:
Training room
Lecture area
Chairs for each participant – with facility for participants to write notes
Space for participants to break into small groups of 2–3
Space to display and move around at least three wheelchairs
Screens to provide wheelchair users with privacy during practical sessions
Large tables or benches for cushion fabrication session
Adequate lighting & ventilation
Lockable/secure
Wheelchair mobility training areaSmooth flat surfaces Single step Short flight of stairs Rough surface Sloped surface
lunch/refreshment areaClean area for eating Tables and chairs Nearby space for washing hands – clean towels and soap
ToiletsClean toilets supplied with water, toilet paper, hand washing facilities and bins
2.8 Prepare the training resources and materials
Printed resources
resource Quantity comment/instructions
Manuals, workbook and posters:
Trainer’s Manual 1 per trainer Order from WHO or print and bind.
Reference Manual 1 per participant Order from WHO or print and bind.
Participant’s Workbook 1 per participant Order from WHO or print and bind.
Set of posters 1 per participant Order from WHO or print and bind.

15
Supplementary material:WHO Guidelines on the provision of manual wheelchairs in less resourced settings
At least 1 copy per trainer
Provide a soft copy for participants if possible; for soft copies or different language versions, see: http://www.who.int/disabilities/en/
United Nations Convention on the Rights of Persons with Disabilities (UNCRPD)
1 copy per participant
For different language versions: http://www.un.org/disabilities/default.asp?id=150
http://uncrpdindia.org/about/text/
Training programme forms:Participant register form
1 per programme Use this form to keep a record of participants attending.
Name tags 1 per participant & per trainer
Timetable 1 per participant Samples available on DVD; adjust to suit local context.
Photo consent form 1 per participant and 1 per wheelchair user (volunteer)
Adapt this form for the training/host organization; translate into local language; ensure any person who is photographed signs this form.
Invitation letter and consent for wheelchair users
1 per wheelchair user
Adapt the sample letter provided to invite each wheelchair user for the practical sessions.
Wheelchair user list for practical sessions
1 per trainer Use this form to plan wheelchair users’ attendance at practical sessions and to keep a record of who is attending and when.
Participant certificate 1 per participant Prepare participant certificates or adapt the template provided.
Training programme evaluation forms:Training programme evaluation form for participants
1 per participant
Sample training programme evaluation forms; these may be adapted by trainers as needed.
Training programme session evaluation form for trainers
1 per session
Training programme evaluation form for trainers
1 per trainer

WheelchairService Training Package
16
BASIC LEVEL
Trainer’s observation checklists for practical sessions:
Practical One
1 per trainer
Print.Practical Two
Practical Three
Practical Four
Wheelchair service forms:Wheelchair service referral form
1 per participant Adapt to suit local context or use local referral form if available.
Wheelchair assessment form
1 per wheelchair user
Adapt to suit local context – for example add wheelchair service name or additional information required by local service.
Wheelchair prescription (selection) form
1 per wheelchair user
Finalize depending on available wheelchair sizes and options.
Wheelchair summary form 1 per wheelchair user
Complete one for each locally available wheelchair before the training programme begins.
Wheelchair follow up form 1 per wheelchair user
Adapt to suit local context – for example, add wheelchair service name or additional information required by local service.
checklists:
Wheelchair fitting checklist
1 per participant
Checklists can be found in the printed resources under “Wheelchair service forms”.
Wheelchair user training checklist
Wheelchair safe and ready checklist
Posters:Wheelchair service steps 1
1 per participant.Wheelchair mobility skills 1 Pressure sores 1 How to care for a wheelchair at home 1
Optional form (please note this form is not included the package, use only if it is locally available):Wheelchair order form 1 per participant Trainer to use order form if it is
locally available.

17
Materials
item QuantityWhiteboard marker pens 3–4 Foam pieces 4–5 Sample pieces for demonstration
approximately 100 x 110 x 50 mm).Ankle/calf straps 2–3 sets If available.
equipment
item QuantityLarge whiteboard 1 Data projector 1 Computer 1 Portable speakers 1 set To assist with hearing the DVD.
Digital camera 1 If available – for different sessions.
Assessment bed 1 per wheelchair user for practical sessions
A bench/assessment bed or plinth. The height should be level with average wheelchair seat height.
Avoid a hard surface if possible – if using benches provide a thin foam layer and cover, or yoga mat.
Set of foot blocks Wooden blocks to provide support for wheelchair user’s feet when sitting on the assessment bed. A few different heights are needed.
Transfer board 1 per 3 participants
If available.
Tape measure 1 per participant ½ anatomical skeleton with spine, pelvis and femurs
1 If available.
Wheelchairs and cushions for training
At least 1 of each locally available wheelchair and cushion; ideally 1 wheelchair and cushion per 2 participants
Ensure all wheelchairs are in good working order and have a cushion; ensure there is at least one good example of a pressure relief cushion.

WheelchairService Training Package
18
BASIC LEVEL
Wheelchairs and cushions for supply to wheelchair user volunteers
1 per wheelchair user attending the practical sessions
There should be enough wheelchairs and cushions for wheelchair users to be prescribed the wheelchair and cushion most appropriate for them.
Home maintenance toolkit 1 per 3 participants
Includes: adjustable spanner, Allen keys, screwdriver, tyre pump, lubricating oil, bucket, soap, cloth, sandpaper.
Post-it notes or notepaper 1 per participant
cushion fabrication – materials and tools
item QuantitySample contoured foam pressure relief cushion and cover
1 If not already available, trainers will need to make these before the training programme.
Sample cushion lift 1 Cushion fabrication toolkit 1 toolkit
per 2 participants
Includes:
•1 x sharpened hacksaw blade or long knife;
•1 x black marker pen;•foam glue/contact adhesive and
cardboard pieces to spread glue.Cushion materials 1 set per 2
participants Includes 1 piece each of:
•firm foam (e.g. chip foam) – 50 x 400 x 400 mm;
•soft foam – 50 x 400 x 400 mm.Sample pieces of available fabric that could be used to make a cushion cover
1 each See cushion fabrication session for more information about suitable fabrics.
19
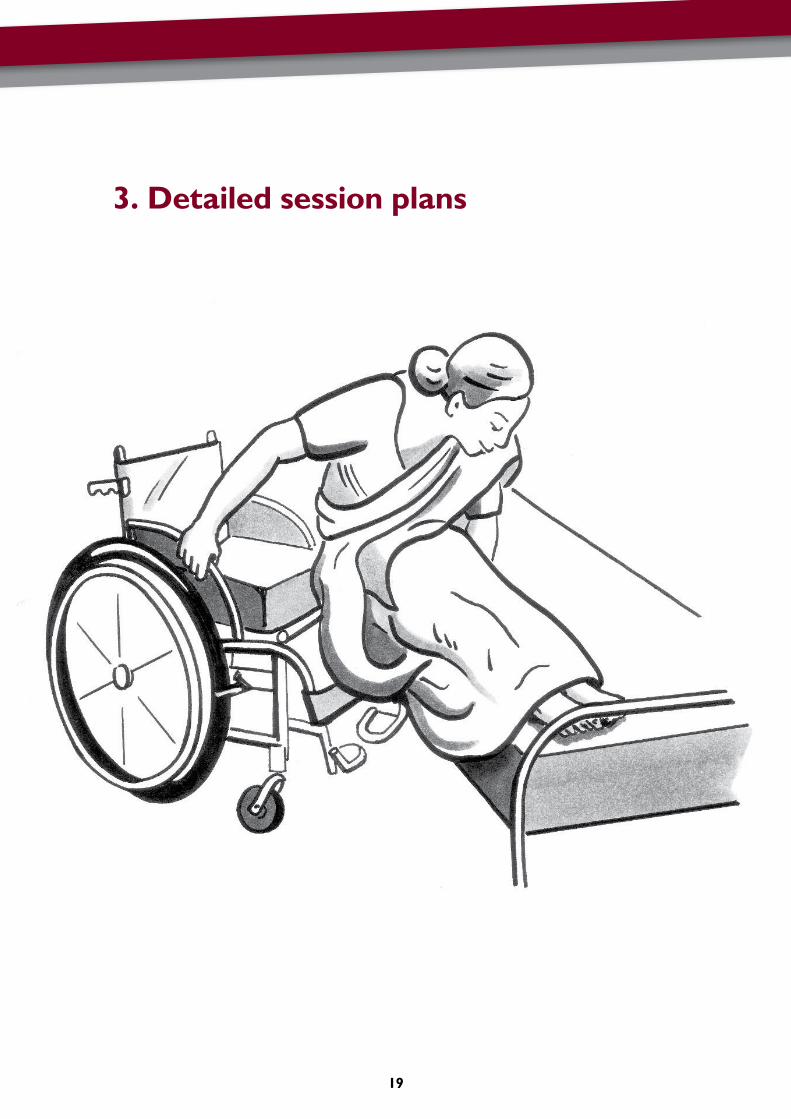
3. Detailed session plans

WheelchairService Training Package
20
BASIC LEVEL
introduction
OB
Jec
Tiv
eS By the end of this session, participants will:
know the objectives of the training programme;
know the names of trainers and participants;
have an overview of the training programme timetable;
know any important rules to remember during the training programme.
re
SO
Ur
ce
S
For the session:
PPT slides: Introduction;
Reference Manual for each participant;
Participant’s Workbook for each participant;
DVD: Introduction
copy of the timetable for each participant;
name tags for each trainer and each participant.
cO
nT
eX
T
Adapt this session to suit the local context in which the training is being given. For example:
include an opening ceremony appropriate to the culture/context;
change or adapt the section “Introduction of trainers and participants” to suit the trainers and participants;
change, adapt and/or add to the list of “housekeeping” and expectations of participants as required – examples are provided in the training programme outline;
change the training programme overview slide if the training programme has been modified (e.g. objectives added or deleted).
TO
Pr
ePa
re Gather resources, review PPT slides, watch DVD and read through the
session plan.
OU
Tl
ine
1. Opening ceremony (if any)
2. Introduction of trainers and participants
3. Training programme overview
4. Training programme timetable, Reference Manual and Participant’s Workbook
5. “Housekeeping” and expectations of participants
15
15
10
10
10
Total session time 60
21
VIDEO
1. Opening ceremony (estimated length 15 minutes)
2. introduction of trainers and participants (15 minutes)
Trainers: introduce yourself/yourselves. Provide a brief overview of your background and experience of wheelchair provision.
ask participants in turn to introduce themselves, stating their name, the organization they come from, and what they hope to learn from the training programme.
give out name tags, if these have not already been provided during registration.
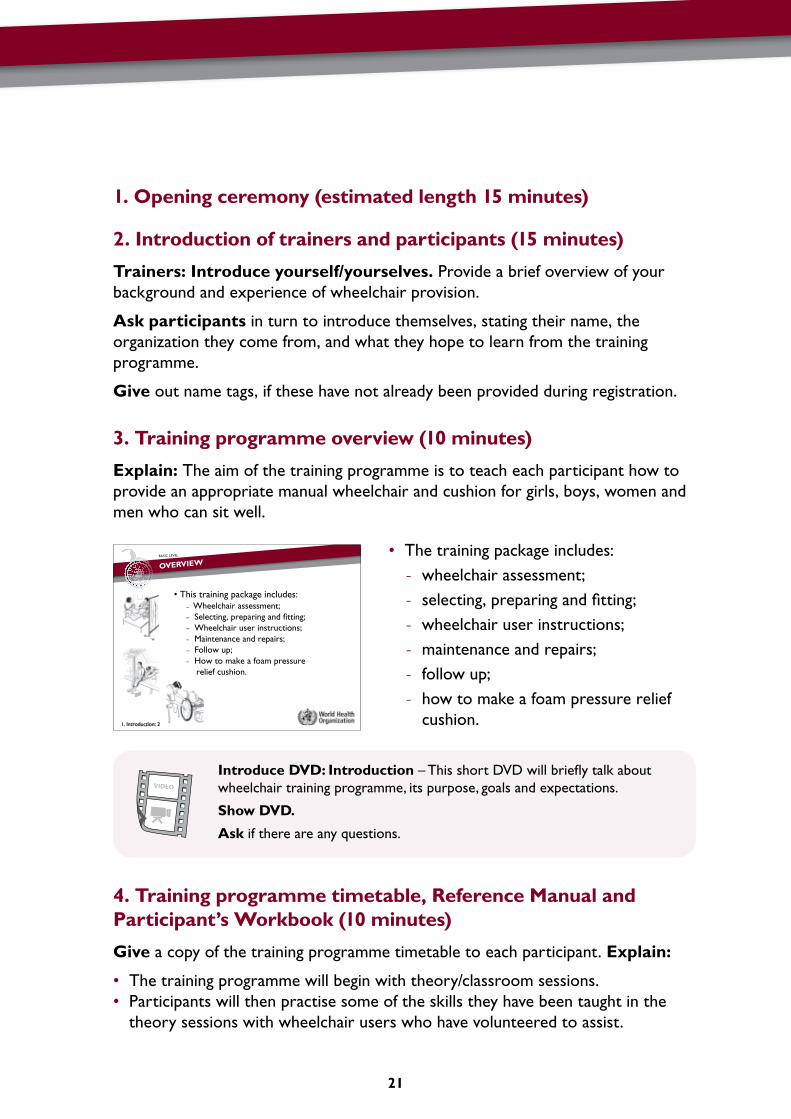
3. Training programme overview (10 minutes)
explain: The aim of the training programme is to teach each participant how to provide an appropriate manual wheelchair and cushion for girls, boys, women and men who can sit well.
• The training package includes: - wheelchair assessment; - selecting, preparing and fitting; - wheelchair user instructions; - maintenance and repairs; - follow up; - how to make a foam pressure relief
cushion.
introduce DvD: introduction – This short DvD will briefly talk about wheelchair training programme, its purpose, goals and expectations.
Show DvD.
ask if there are any questions.
4. Training programme timetable, reference Manual and Participant’s Workbook (10 minutes)
give a copy of the training programme timetable to each participant. explain:
• The training programme will begin with theory/classroom sessions.• Participants will then practise some of the skills they have been taught in the
theory sessions with wheelchair users who have volunteered to assist.
Th k l d• This training package includes:– Wheelchair assessment;
S l i i d fi i– Selecting, preparing and fitting;– Wheelchair user instructions;
Maintenance and repairs;– Maintenance and repairs;– Follow up;
How to make a foam pressure – How to make a foam pressure relief cushion.
1. Introduction: 2
BASIC LEVEL
Overview
WheelchairService Training Package
22
BASIC LEVEL
give a copy of the Reference Manual to each participant. ask participants to write their name on the manual. explain that they may write any additional notes in this manual.
give a copy of the Participant’s Workbook to each participant. ask participants to write their name in the workbook. explain that they will use this Workbook throughout the training and they should bring it to each session.
5. housekeeping and expectations (10 minutes)
explain the following, as required:
• location of toilets;• who to talk to about accommodation;• who to talk to about return travel for individual participants (do not go into details);• what to do if there is an emergency.
explain the expectations placed on training programme participants, as required:
• each session will begin on time – participants need to make sure that they arrive on time at the beginning of each day, and return back to sessions on time after breaks;
• participants should always ask questions if they are not sure of something;• treat all wheelchair users equally and respect their dignity;• turn off mobile phones during the sessions;• have fun!
explain: Throughout the training programme, participants will be riding in and pushing wheelchairs. Whenever using the wheelchairs, remember the following safety rules:
• do not stand on footrests when getting in and out of the wheelchair;• keep fingers clear of the wheel spokes and brakes;• when riding the wheelchair up or down slopes, have an assistant behind you in
case you tip backwards.

23
a: core knowledge

WheelchairService Training Package
24
BASIC LEVEL
a.1: Wheelchair users
OB
Jec
Tiv
eS By the end of this session, participants will be able to:
list at least seven benefits of an appropriate wheelchair for a wheelchair user ;
explain how wheelchair service personnel can support a wheelchair user’s right to personal mobility;
list at least five ways wheelchair users can be actively involved in wheelchair provision.
re
SO
Ur
ce
S
For the session:
PPT slides A.1 Wheelchair users;
Reference Manual;
DVD: The benefits of an appropriate wheelchair ;
copies of the United Nations Convention on the Rights of Persons with Disabilities (UNCRPD) if available;
additional reference material (for trainers):
•WHO Guidelines on the provision of manual wheelchairs in less resourced settings (page 23).
cO
nT
eX
T Adapt this session to suit the context participants come from. For example:
participants may already be familiar with the UNCRPD – in this case, you may ask what they already know about the UNCRPD;
be aware whether the UNCRPD has been signed/ratified in the participants’ country.
TO
Pr
ePa
re Gather resources, review PPT slides, watch DVD and read through the
session plan.
OU
Tl
ine
1. Introduction
2. What are the benefits of a wheelchair?
3. What is an ``appropriate wheelchair``?
4. The United Nations Convention on the Rights of Persons with Disabilities
5. Wheelchair users are equal partners in wheelchair service delivery
6. Key point summary
2
10
5
5
20
3
Total session time 45

25
VIDEO
1. introduction (2 minutes)
explain: in this session, talk about how wheelchair users benefit from an appropriate wheelchair.
Think about how participants can actively involve wheelchair users in the process of providing a wheelchair, and why this is important.
also we will look briefly at the United Nations convention on the Rights of Persons with Disabilities (cRPD) especially article 1, article 3 and article 20.
2. What are the benefits of a wheelchair? (10 minutes)
read the definition of an appropriate wheelchair
explain:
• This definition comes from the WHO Guidelines on the provision of manual wheelchairs in less resourced settings. in this training programme, we will refer to the Guidelines often.
• The “appropriate wheelchair” for each wheelchair user will always depend on his/her individual needs and the environmental conditions (where he/she lives and works).
introduce DvD: The benefits of an appropriate wheelchair – This short DvD will show many different wheelchair users involved in different activities. Watch closely, as afterwards we will talk about how a wheelchair has benefited the different wheelchair users.
Show DvD.
ask if there are any questions.
• In this session participants will:
Talk about how wheelchair users benefit from an – Talk about how wheelchair users benefit from an appropriate wheelchair;
Talk about how wheelchair users can be actively – Talk about how wheelchair users can be actively involved in the process of receiving a wheelchair and why this is important;y p ;
– Talk about the United Nations Convention on the Rights of Persons with a Disability.the Rights of Persons with a Disability.
A.1. Wheelchair users: 2
BASIC LEVEL
INTRODUCTION
• An appropriate wheelchair: An appropriate wheelchair: – meets the user’s needs and environmental conditions;
provides proper fit and postural support; – provides proper fit and postural support; – is safe and durable;
is available in the country; and – is available in the country; and – can be obtained and maintained and services sustained in
the country at an affordable cost.the country at an affordable cost.
A.1. Wheelchair users: 3
BASIC LEVEL
WHAT IS AN APPROPRIATE WHEELCHAIR?
WheelchairService Training Package
26
BASIC LEVEL
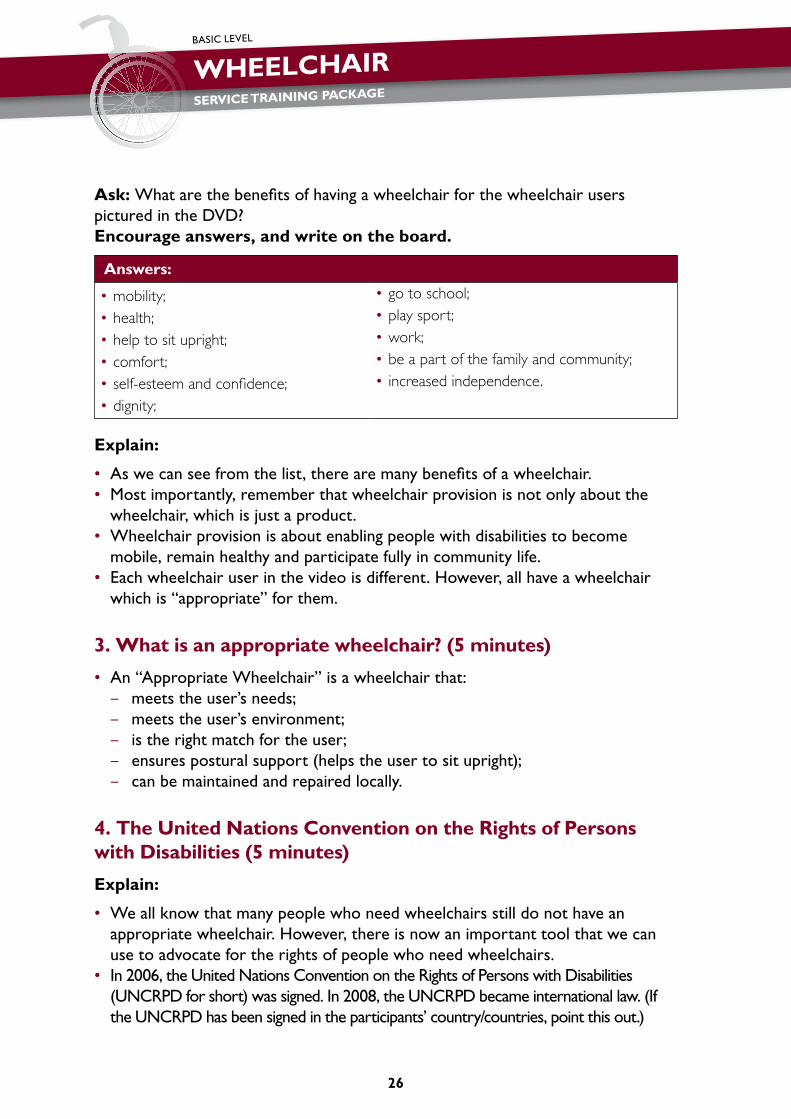
ask: What are the benefits of having a wheelchair for the wheelchair users pictured in the DvD? encourage answers, and write on the board.
answers:
•mobility;•health;•help to sit upright;•comfort;•self-esteem and confidence;•dignity;
•go to school;•play sport;•work;•be a part of the family and community;•increased independence.
explain:
• as we can see from the list, there are many benefits of a wheelchair.• Most importantly, remember that wheelchair provision is not only about the
wheelchair, which is just a product.• Wheelchair provision is about enabling people with disabilities to become
mobile, remain healthy and participate fully in community life.• each wheelchair user in the video is different. However, all have a wheelchair
which is “appropriate” for them.
3. What is an appropriate wheelchair? (5 minutes)
• an “appropriate Wheelchair” is a wheelchair that: – meets the user’s needs; – meets the user’s environment; – is the right match for the user; – ensures postural support (helps the user to sit upright); – can be maintained and repaired locally.
4. The United nations convention on the rights of Persons with Disabilities (5 minutes)
explain:
• We all know that many people who need wheelchairs still do not have an appropriate wheelchair. However, there is now an important tool that we can use to advocate for the rights of people who need wheelchairs.
• in 2006, the United Nations convention on the Rights of Persons with Disabilities (UNcRPD for short) was signed. in 2008, the UNcRPD became international law. (if the UNcRPD has been signed in the participants’ country/countries, point this out.)

27
ask: Has anyone heard of this convention?
acknowledge those who have heard of it.
explain: There are human rights that apply to everybody. The focus of the UNcRPD is to make sure that everybody recognizes that these rights also apply to people with a disability.
explain:
• There are 50 different articles in the convention.
• article number 20 is about personal mobility.
• Personal mobility means:• the ability to move in a manner and at the
time of one’s own choice.
ask: How can participants, in their role in a wheelchair service, support a wheelchair user’s right to personal mobility? encourage answers and write on the board.
Most important answers:
•involve wheelchair users in the decisions about their wheelchair ;•understand the needs of the wheelchair user and help meet those needs;•help to provide an appropriate wheelchair ;•help wheelchair users learn how to get in and out of their wheelchair themselves;•help wheelchair users to learn how to propel themselves;•encourage family members to support the wheelchair user in being more independent;•advocate for increased availability of improved mobility products in the country;•advocate for a barrier-free environment in the country.
ask: can anyone think of any other human rights that someone with a mobility impairment can more easily access if they have an appropriate wheelchair? encourage answers and write on the board (give examples of rights if needed).
•The United Nations Convention on the Rights of Persons with a Disability (CRPD) says:Persons with a Disability (CRPD) says:
– All people have a right to personal mobility.
•Personal mobility means:
– The ability to move in a manner and at the time of The ability to move in a manner and at the time of one’s own choice.
A.1. Wheelchair users: 5
BASIC LEVEL
WHAT DOES ‘PERSONAL MOBILITY’ MEAN?

WheelchairService Training Package
28
BASIC LEVEL
answers (it is not necessary to name the articles of the convention):
•living independently and being included in the community (article 19);•right to education (article 24);•right to the enjoyment of the highest attainable standard of health (article 25);•right to work and employment (article 27);•right to participate in political and public life (article 29);•right to participate in cultural life, recreation, leisure and sport (article 30).
5. Wheelchair users are equal partners in service delivery (20 minutes)
explain: Wheelchair users often know what will be “an appropriate wheelchair” for them. if they have used a wheelchair already, they will have ideas about what works for them, and what they would like to change. Wheelchair users who have not used a wheelchair before will need more information.
Wheelchair service personnel should work with the wheelchair user as an equal participant.
Small-group activity
groups: have 2–3 people in each group.
instructions: ask each group to spend five minutes making up a two-minute role-play in which a wheelchair user asks for a wheelchair. One participant will be the wheelchair user, one the wheelchair service personnel, and the other participant is a family member.
ask half the groups to role-play a wheelchair service personnel who DOES NOT respect the wheelchair user’s right to have an appropriate wheelchair and DOES NOT treat the wheelchair user as an active par ticipant in wheelchair service delivery.
ask the other half of the groups to role play wheelchair service personnel who DOES respect the wheelchair user’s right to have an appropriate wheelchair and DOES treat the wheelchair user as an active participant in wheelchair service delivery.
Monitor: Monitor/observe the groups, and assist as needed.
Time: 5 minutes to prepare; 10 minutes to perform in front of the other group and 5 minutes for feedback.

29
Feedback: ask at least one group that plays a wheelchair service personnel who DOES NOT respect the wheelchair user’s rights and one group that DOES to perform their role-plays.
Feedback discussion:
•discuss the differences in the way the wheelchair service personnel communicates with the wheelchair user and his/her family;
•ask the wheelchair user in each group how he/she felt;•if there are wheelchair users present in the training, ask if they
have had positive or negative experiences similar to those in the role play.
ask: From the role play activity, what are some ways that wheelchair service personnel can actively involve wheelchair users in the process of providing a wheelchair? encourage answers.
Most important answers:
• speak directly to the wheelchair user;• ask the wheelchair user for his/her opinion;• give the wheelchair user choices wherever possible and respect his/her choice;• give the wheelchair user information to help him/her make a choice;• gather information from wheelchair users about their lives, the things they want to
do in their wheelchair and the environment in which they live and work.
6. key point summary (3 minutes)
read the key points.
ask whether there are any questions.• Wheelchair users are all different, and have different needs.
• An appropriate wheelchair meets the wheelchair user’s needs pp pand environmental conditions, and provides proper fit and support.
• Wheelchairs provide people who have a mobility disability with many benefits including mobility, postural support, comfort, independence, freedom and dignity.
• Importantly – personal mobility is a right – and for many people with a mobility disability, a wheelchair is the way that they can have personal mobility.
A.1. Wheelchair users: 6
BASIC LEVEL
KEY POINT SUMMARY

WheelchairService Training Package
30
BASIC LEVEL
a.2: Wheelchair services
OB
Jec
Tiv
eS By the end of this session, participants will be able to:
explain what a wheelchair service is;
identify their role in a basic wheelchair service;
define “basic level service” in wheelchair service delivery.
re
SO
Ur
ce
S
For the session:
PPT slides: A.2: Wheelchair services;
Reference Manual;
poster : Wheelchair service steps.
Additional reference material (for trainers):
WHO Guidelines on the provision of manual wheelchairs in less resourced settings (pages 71–72, 76–77).
cO
nT
eX
T Adapt this session to suit the context participants will be working in. Think about the following:
The roles of each participant in wheelchair service delivery at his/her place of work. For example, will each participant be responsible for each of the eight steps of wheelchair service delivery? Use this session to clarify for participants what their role will be.
TO
Pr
ePa
re Gather resources, review slides, read through the session plan.
Prepare information about the role of participants in each service step.
OU
Tl
ine
1. Introduction
2. Wheelchair services
3. Wheelchair service personnel roles
4. What does “basic level service” mean?
5. Key point summary
2
10
10
5
3
Total session time 30

31
1. introduction (2 minutes)
explain: in this session, we will:
• explain what a wheelchair service is and the difference between a “basic” level service and “intermediate” level service;
• talk about the key steps in wheelchair service delivery;
• discuss the role that each participant will carry out in providing a wheelchair in a basic level wheelchair service.
2. Wheelchair services (10 minutes)
explain: a wheelchair service works with wheelchair users to provide the most suitable wheelchair (from those available) for that wheelchair user.
ask: What should wheelchair service personnel do to help provide the most appropriate wheelchair for each wheelchair user? encourage answers, and write on the board.
Most important answers:
•find out what a wheelchair user needs from a wheelchair (assess);•help to select the best wheelchair for the wheelchair user (prescribe);•provide a wheelchair (order, possibly assemble, adjust and fit).
ask: What should wheelchair service personnel do to help a wheelchair user benefit as much as possible from his/her wheelchair? encourage answers, and write on the board.
Most important answers:
•teach wheelchair users how to use their wheelchair and look after it (user training);•help wheelchair users to manage repairs (home maintenance, repairs and follow up);•provide support and follow up to make sure the wheelchair continues to meet the
user’s needs;•refer wheelchair users to other services that may help them.
• In this session participants will:– Explain what a wheelchair service is and the Explain what a wheelchair service is and the
difference between a ‘basic’ level service and an ‘intermediate’ level service;
– Talk about the eight steps in wheelchair service delivery;
– Discuss the role that each participant will carry out in providing a wheelchair in a basic level wheelchair service.
A.2. Wheelchair services: 2
BASIC LEVEL
INTRODUCTION

WheelchairService Training Package
32
BASIC LEVEL
3. Wheelchair service personnel roles (10 minutes)
Pin up the Wheelchair service steps poster.
explain: The role of basic wheelchair service personnel is to provide wheelchair users who can sit upright (without extra postural support) with the best wheelchair available.
To do this, the personnel work with each wheelchair user and his/her family, following key wheelchair service steps.
explain each step as follows.
referral and appointment:
• Referral is the way that wheelchair users come to the wheelchair service.
• The way that wheelchair users are referred will vary.
• Users may refer themselves or be referred through networks made up of governmental or nongovernmental health and rehabilitation workers or volunteers working at community, district or regional level.
• each service needs to have a system for managing appointments.
assessment:
• each user needs an individual assessment.• This includes gathering information
about the wheelchair user's lifestyle, the work they do, where they live and their physical condition, and taking their measurements.
•Wheelchair personnel:
P id h l h i h it i ht– Provide wheelchair users who can sit upright(without extra postural support) with the best wheelchair availablebest wheelchair available.
•To do this, the wheelchair personnel work h h h l h d h f l with each wheelchair user and their family,
following the eight steps.
A.2. Wheelchair services: 3
BASIC LEVEL
THE ROLE OF A WHEELCHAIR PERSONNEL
A.2. Wheelchair services: 4
BASIC LEVEL
STEP 1: REFERRAL AND APPOINTMENT
A.2. Wheelchair services: 5
BASIC LEVEL
STEP 2: ASSESSMENT
33
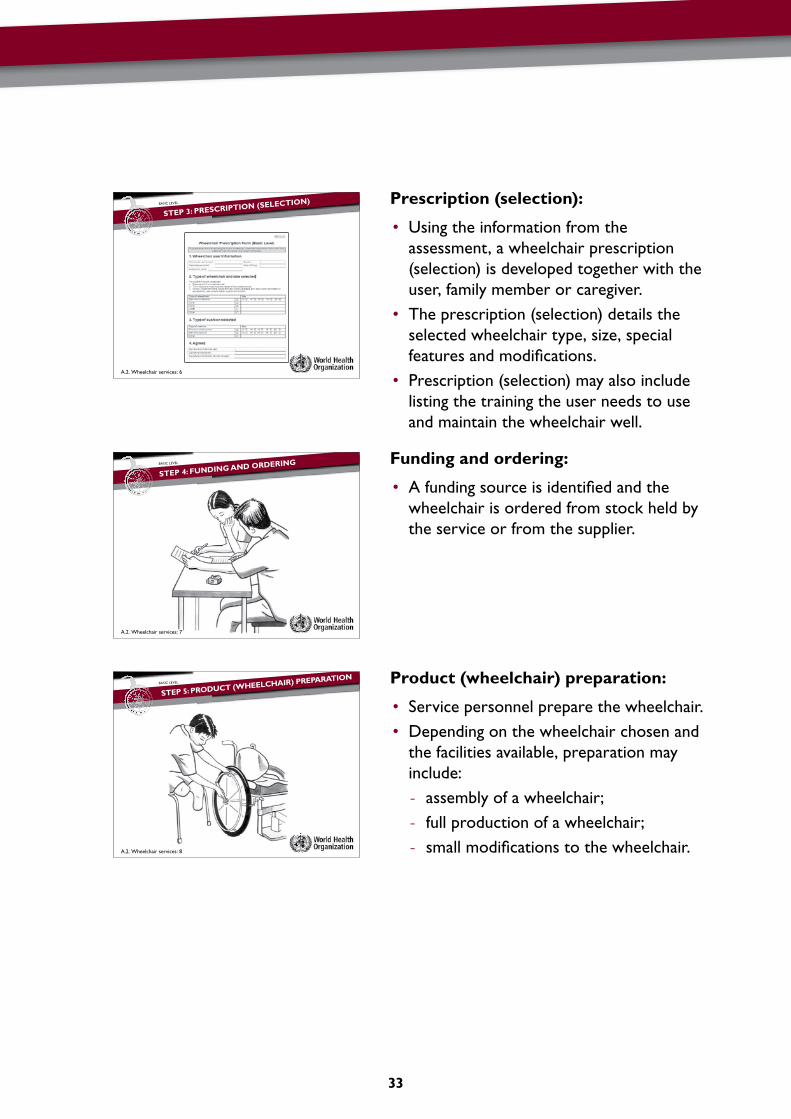
Prescription (selection):
• Using the information from the assessment, a wheelchair prescription (selection) is developed together with the user, family member or caregiver.
• The prescription (selection) details the selected wheelchair type, size, special features and modifications.
• Prescription (selection) may also include listing the training the user needs to use and maintain the wheelchair well.
Funding and ordering:
• a funding source is identified and the wheelchair is ordered from stock held by the service or from the supplier.
Product (wheelchair) preparation:
• service personnel prepare the wheelchair.• Depending on the wheelchair chosen and
the facilities available, preparation may include: - assembly of a wheelchair; - full production of a wheelchair; - small modifications to the wheelchair.
A.2. Wheelchair services: 6
BASIC LEVEL
STEP 3: PRESCRIPTION (SELECTION)
A.2. Wheelchair services: 7
BASIC LEVEL
STEP 4: FUNDING AND ORDERING
A.2. Wheelchair services: 8
BASIC LEVEL
STEP 5: PRODUCT (WHEELCHAIR) PREPARATION

WheelchairService Training Package
34
BASIC LEVEL
Fitting:
• The user tries the wheelchair.• Final adjustments are made to make sure
the wheelchair is correctly assembled and set up.
• if modifications or postural support components are required, additional fittings may be needed.
User training:
• The wheelchair service personnel checks what the wheelchair user and caregivers already know about using and maintaining the wheelchair and finds out what they need to know.
• The service personnel provide any instruction needed. some of the key topics include: - how to handle the wheelchair; - how to get in and out of the
wheelchair; - wheelchair mobility; - how to maintain the wheelchair; - how to prevent pressure sores; - what to do if there is a problem.
• some services may also be able to assist with advice on how to modify the wheelchair user’s home, school or workplace to make wheelchair access easier. This is not covered in this training programme.
A.2. Wheelchair services: 9
BASIC LEVEL
STEP 6: FITTING
How to handle the wheelchair
Getting in and out of the wheelchair
Wheelchair mobility
Ways to prevent pressure sores
Looking after the wheelchair
A.2. Wheelchair services: 10
BASIC LEVEL
STEP 7: USER TRAINING

35
Maintenance, repairs and follow up:
• Provide maintenance and repairs services for technical problems that cannot be solved in the community.
• Follow up appointments are an important step in wheelchair service delivery.
• During a follow up, service personnel check wheelchair fit and provide further training and support.
• if the wheelchair is found to be no longer appropriate, a new wheelchair needs to be supplied, starting again from step 1.
explain: Participants will learn in this training programme how to carry out each step. However, in some services, different people may be responsible for different steps. For example, making appointments may be the responsibility of an administrator or user training may be carried out by a peer trainer.
ask: Does anyone have a question about their role as a wheelchair service provider?
4. What does “basic level” service mean? (5 minutes)
explain
• Wheelchair users have different physical needs. it takes more knowledge and skill to provide a wheelchair for someone who has problems with the way that he/she sits, or who has difficulty in balancing, than if the wheelchair user can sit and balance well.
• a basic level service can meet the physical needs of wheelchair users who are able to sit up well. in this basic level training programme, participants learn how to provide a wheelchair for a person who can sit well.
• in more advanced training, participants learn to provide a wheelchair for a person who cannot sit upright and may have postural problems.
• it is very important to have more training before providing a wheelchair for someone with postural problems. This is because it is necessary to understand more about posture, the reasons people have postural problems, and how to provide support safely for a wheelchair user who has postural problems.
A.2. Wheelchair services: 11
BASIC LEVEL
STEP 8: MAINTENANCE, REPAIRS AND FOLLOW UP

WheelchairService Training Package
36
BASIC LEVEL
explain: clara lives in east Timor. she works in her family’s shop, which is at the front of their house. clara has polio, and needs a wheelchair to move inside the house, to work in the shop, and to move around her village. she can sit upright without any support, and uses a manual wheelchair which has been adjusted and fitted to suit her.
clara is an example of someone who can be supplied with a wheelchair through a basic level service.
explain: ishade is eight years old and lives in sri Lanka. she has cerebral palsy. For ishade, this means she has trouble controlling her arms, legs, head and neck. she cannot sit upright without support.
ishade is an example of someone who needs extra postural support in her wheelchair. This is not taught in this basic wheelchair service training programme. ishade should be supplied with a wheelchair through an intermediate or advanced service.
5. key point summary (3 minutes)
read the key points.
ask whether there are any questions.
A.2. Wheelchair services: 12
BASIC LEVEL
CLARA
A.2. Wheelchair services: 13
BASIC LEVEL
ISHADE
Wh l h h l h l h f d h •Wheelchair services help wheelchair users find the most suitable wheelchair from those available.
• There are eight steps in wheelchair service delivery.
•Wheelchair users have needs for different service levels, depending on their posture and ability to balance.
• The role of a basic wheelchair service provider is to provide wheelchair users who can sit well with the best wheelchair available.
A.2. Wheelchair services: 14
BASIC LEVEL
KEY POINT SUMMARY

37
a.3: Wheelchair mobility
OB
Jec
Tiv
eS By the end of this session, participants will be able to:
use basic wheelchair mobility skills safely, including pushing, turning, going up and down slopes, going up and down steps with assistance, and a partial wheelie.
re
SO
Ur
ce
S
For the session:
PPT slides A.3: Wheelchair mobility;
Reference Manual;
DVD: Learning to use my wheelchair ;
DVD: Wheelchair mobility skills;
poster : Wheelchair mobility skills;
one wheelchair for each pair of participants.
cO
nT
eX
T Adapt this session to suit the context participants will be working in.
Trainers should only teach the partial wheelie included in this session, if the trainer is confident in carrying out this skill and supervising participants as they learn.
TO
Pr
ePa
re
Gather resources, review PPT slides, watch DVDs and read through the session plan.
Select a suitable location for wheelchair mobility skills practice – a flat area, some sloped areas, one or two steps and some rough ground will be needed.
Invite a wheelchair user who has good wheelchair mobility skills to assist in teaching these skills.
Practise the wheelchair mobility skills yourself, using the DVD as a reference, to ensure that you can demonstrate the techniques.
Make sure the wheelchairs are all in good working order with tyres pumped up.
OU
Tl
ine
1. Introduction
2. Why are wheelchair mobility skills important?
3. Wheelchair mobility skills – safety
4. Wheelchair mobility skills – demonstration and practice
5. Key point summary
2
15
5
65
3
Total session time 90
WheelchairService Training Package
38
BASIC LEVEL
VIDEO
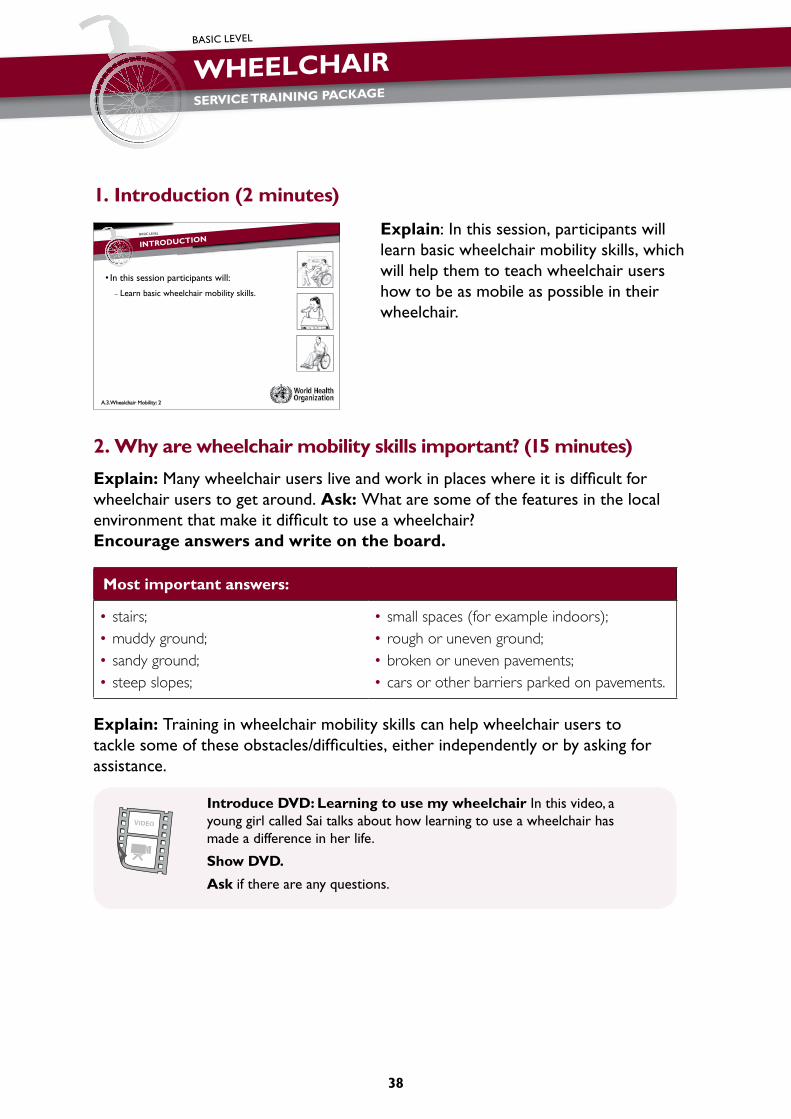
1. introduction (2 minutes)
explain: in this session, participants will learn basic wheelchair mobility skills, which will help them to teach wheelchair users how to be as mobile as possible in their wheelchair.
2. Why are wheelchair mobility skills important? (15 minutes)
explain: Many wheelchair users live and work in places where it is difficult for wheelchair users to get around. ask: What are some of the features in the local environment that make it difficult to use a wheelchair? encourage answers and write on the board.
Most important answers:
•stairs;•muddy ground;•sandy ground;•steep slopes;
•small spaces (for example indoors);•rough or uneven ground;•broken or uneven pavements;•cars or other barriers parked on pavements.
explain: Training in wheelchair mobility skills can help wheelchair users to tackle some of these obstacles/difficulties, either independently or by asking for assistance.
introduce DvD: learning to use my wheelchair in this video, a young girl called sai talks about how learning to use a wheelchair has made a difference in her life.
Show DvD.
ask if there are any questions.
• In this session participants will:
Learn basic wheelchair mobility skills– Learn basic wheelchair mobility skills.
A.3.Wheelchair Mobility: 2
BASIC LEVEL
INTRODUCTION

39
ask: What were some of the wheelchair skills that sai learnt?
Most important answers:
•getting into and out of the wheelchair ;•going over a kerb/bump – to get into and out of her house;•going up and down slopes;•pushing.
ask: What difference did having those skills make to sai’s life?
Most important answers:
•she is more independent;•she has more confidence;•she can go out, go to school, make friends and play.
3. Wheelchair mobility skills – safety (5 minutes)
Pin up the Wheelchair Mobility Skills poster.
explain: safety is very important when learning and teaching wheelchair mobility skills.
ask participants – what are the main safety points we have already talked about when working with wheelchairs?
Most important answers:
•do not stand on footrests when getting in and out of the wheelchair ;•keep fingers clear of the wheel spokes and brakes;•when learning to go up or down slopes, ALWAYS have an assistant stand behind you in
case you tip backwards.
explain
• in this session, you will be practising different skills, including going up and down slopes and doing a partial wheelie (i.e. balancing the wheelchair on the rear wheels only).

WheelchairService Training Package
40
BASIC LEVEL
VIDEO
explain
• always make sure that you have an assistant standing behind the person in the wheelchair who is learning these skills.
• The assistant should stay close to the back of the wheelchair.
• The assistant should be ready to steady the wheelchair if it begins to tip backwards. He/she should not hold the push handles.
• Do not assist a wheelchair user up and down steps unless you feel very sure that you are able to control the wheelchair safely. if unsure, get help.
4. Wheelchair mobility skills – demonstration and practice (65 minutes)
introduce DvD: Wheelchair mobility skills. ask participants to watch the DvD demonstration of the different mobility skills carefully. They should pay attention to the different skills, as they will practise them after watching the DvD.
Show DvD.ask if there are any questions.
explain
• Participants will now practise the wheelchair mobility skills shown in the video, except for the full wheelie.
• a full wheelie is a more advanced skill, which takes practice. Once a wheelchair user can balance on the back wheels, he/she can use this skill to roll over rough ground and to roll down slopes, kerbs and steps. Do not try this without an experienced trainer with you.
• Learning the mobility skills we are going to practise today is very useful for anyone who works with wheelchair users. it will be easier to teach wheelchair users if you can do these things yourself.
•Have an assistant stand behind you when practising:p g
– going up and down slopes;
– half wheelies.
•Only assist a wheelchair user up and down y psteps if you are sure you can control the wheelchair safely.y
A.3.Wheelchair Mobility: 4
BASIC LEVEL
SAFETY

41
activity
groups: Organize participants into groups of two. Match people who are of a similar height, weight and strength. Give each pair a wheelchair.
instructions: ask participants to refer to the wheelchair mobility section of their Reference Manual. explain that they need to work in pairs to practise:
1. pushing and turning;
2. going up and down slopes;
3. going up and down stairs with assistance;
4. partial wheelie.
Remind participants:
•practise using the techniques shown in the video and described in the Reference Manual;
•ALWAYS ensure that they have a person behind them when going up and down slopes, up and down stairs or trying a partial wheelie;
•when practising stairs, ensure that only those who feel comfortable with lifting carry out this manoeuvre. Monitor/observe closely to ensure safety.
Monitor: Move around the groups and monitor closely to ensure that the techniques are practised safely and correctly.
stop the groups to re-explain safety procedures if at any time you see unsafe practice.
Demonstrate and correct the techniques as needed (see Techniques below).
Time: Allow 50 minutes for practice and 15 minutes for feedback.
Feedback: Bring the groups together.
correct any common errors in technique that trainers noted during the practice (demonstrate correct technique).
ask: What have participants learnt from practising mobility skills?
explain: During the training programme, participants are welcome to practise further with the wheelchairs before sessions start or during lunch breaks. They must always ensure that they practise with someone behind them if going up and down slopes or doing a partial wheelie, until they are very confident.

WheelchairService Training Package
42
BASIC LEVEL
Notes for trainers – reinforce these points during practice.
Pus
hing
•Pushing correctly means less effort.•Push from 10 o’clock to 2 o’clock position.•Use a long smooth action to push.
Turn
ing
•Hold one push rim towards the front and the other towards the back.
•Pull the forward hand backwards and push the backward hand forwards at the same time.
Up
slo
pes
•Lean forward – this helps stop the wheelchair tipping.•When practising, have an assistant stand behind for safety.•To stop or rest – park the wheelchair sideways.
Dow
n sl
ope
s •Lean backwards.•Let the push rim slide slowly through the hands.•Experienced wheelchair users who are able to do a
“wheelie” (i.e. balance the wheelchair on the rear wheels only) may roll down a slope on their back wheels. This is very efficient.
Up
step
s w
ith
assi
stan
ce
•Go up backwards.•Tilt wheelchair on to the back wheels, positioned against
the first step.•Assistant pulls backwards and upwards – rolling the
wheelchair up.•Wheelchair user can assist by pulling the push rims
backwards.•A second assistant can assist by holding on to the wheelchair
frame from the front (not footrests).

43
Dow
n st
eps
wit
h as
sist
ance
•Go down forwards.•Tilt the wheelchair on to the back wheels.•Assistant lets the back wheels slowly roll down one step at a time.•Wheelchair user can assist by controlling the wheelchair with
the push rims.•A second assistant can help by steadying the wheelchair from
the front, holding on to the wheelchair frame (not footrests).
Par
tial
whe
elie
•Being able to do a partial wheelie is very useful for a wheelchair user.
•The wheelchair user can lift the front wheels to clear small kerbs, stones and bumps.
•Roll the wheelchair backwards until hands are at 10 o’clock, then push forwards quickly.
•The castor wheels should come up.•With practice, it is possible to lift the castor wheels at the
right time to clear small obstacles.•Always make sure there is a person standing behind the
wheelchair user when he/she begin to practise this skill.
5. key point summary (3 minutes)
read the key points.
ask whether there are any questions.•Wheelchair mobility skills help wheelchair users to be more active.
• It is particularly important for wheelchair users to know how to manage their gwheelchairs in environments where there are no smooth paths and gentle slopes.
•When practising wheelchair mobility skills it is important to always remember safety first.p y y
A.3.Wheelchair Mobility: 6
BASIC LEVEL
KEY POINT SUMMARY
WheelchairService Training Package
44
BASIC LEVEL
a.4: Sitting upright
OB
Jec
Tiv
eS
By the end of this session, participants will be able to:
list at least 10 features of “sitting upright” (neutral sitting posture);
list at least six benefits of sitting upright;
demonstrate four ways that the pelvis can move;
explain how movement of the pelvis can change sitting posture;
recognize different sitting postures and how these are different from upright sitting.
re
SO
Ur
ce
S For the session:
PPT: A.4 Sitting upright;
Reference Manual;
Participant’s Workbook;
a half-skeleton with pelvis, spine and femurs (if available).
cO
nT
eX
T Adapt this session to suit the context participants will be working in and their learning needs.
This session assumes basic knowledge of the pelvis. If participants do not already know the bony landmarks of the pelvis, include this in the session or before the training programme.
TO
Pr
ePa
re Gather resources, review PPT slides and read through the session plan.
OU
Tl
ine
1. Introduction
2. Sitting upright/neutral sitting posture
3. How the pelvis affects the way we sit
4. Different sitting postures
5. Key point summary
2
20
10
25
3
Total session time 60

45
1. introduction (2 minutes)
explain: Most wheelchair users spend many hours sitting. Their wheelchair is not just a mobility aid. it also helps to support them in sitting upright comfortably.
in this session, we will focus on sitting.
We will talk about what “sitting upright” means, and what it looks like. We will think about the benefits of sitting upright. Participants will practise identifying the difference between upright sitting and other postures. We will also discuss problems caused by not sitting upright.
2. Sitting upright/neutral sitting posture (20 minutes)
ask: can anyone explain what the word “posture” means? encourage responses.
explain: There are many different “sitting postures”.
Point out the different ways participants around the room are sitting.
explain:
• when providing a wheelchair, it is important to encourage wheelchair users to “sit upright”;
• “sitting upright” is sometimes called “neutral sitting posture”.
ask a volunteer from the group to sit in a chair at the front of the group. ask him/her to “sit upright”. (ensure that he/she sits with an upright/neutral posture).
ask the group to describe the volunteer’s posture. encourage responses.
• In this session participants will:
Describe what ‘sitting upright’ means and – Describe what sitting upright means, and what it looks like;
L h b f f h– List the benefits of sitting upright;
– Practise identifying the difference between upright sitting and other postures;
– Discuss problems caused by not sitting scuss p ob e s cause by ot s tt g upright.
A.4.Sitting upright: 2
BASIC LEVEL
INTRODUCTION
Posture is the way a person's body ostu e s t e ay a pe so s bo y parts are arranged
A.4.Sitting upright: 3
BASIC LEVEL
WHAT IS POSTURE?

WheelchairService Training Package
46
BASIC LEVEL
Most important answers:
•pelvis upright and level;•shoulders level, arms free to move;•trunk upright;•back following the three natural curves;•head upright and balanced over the body;•hips flexed near 90 degrees;
•legs slightly open (abducted);•knees and ankles flexed near 90
degrees;•heels directly below the knees or
slightly forward or back;•feet flat on the floor.
how to tell if a person is sitting upright
Look from the side and check:
pelvis upright;
trunk upright, back following the three natural curves;
hips flexed near 90 degrees;
knees and ankles flexed near 90 degrees;
heels directly below the knees or slightly forward or back;
feet flat on the floor or footrests.
Look from the front and check:
pelvis level;
shoulders level, relaxed and arms free to move;
legs slightly open (abducted);
head upright and balanced over the body.
explain:
• Upright sitting is not exactly the same for every person.• The following slides will show the key things to look for – however, these are
only a guide.• The most important thing about upright sitting is that the person is relaxed,
comfortable and well balanced.

47
click through the slide to show the key points.
explain:
• Hips, knees and ankles may be a little more open or a little more flexed – this is OK.
• The person should feel balanced and comfortable.
click through the slide to show the key points.
ask all participants to sit upright in a neutral sitting posture.
ask: could participants sit like this all day without any support (for example a backrest)?
answer for most will be nO.
explain:
• Without good support in your chair, it would be very hard to sit like this all day.
This is why people frequently change the way they are sitting.
• a wheelchair user who sits in the wheelchair all day will need good support in the wheelchair seat, cushion, backrest and footrests to maintain an upright sitting posture.
ask: What are the benefits of sitting upright? encourage answers and write on the board.
Most important answers:
•health;•stability;•weight distribution;•comfort;
•more active;•can help prevent problems with posture;•self-esteem and confidence.
• Pelvis upright;p g
•Trunk upright, back following the three natural curves;three natural curves;
•Hips flexed near 90 degrees;
•Knees and ankles flexed near 90 degrees;g
•Heels directly below the knees or slightly forward or back;slightly forward or back;
• Feet flat on the floor or footrests.
A.4.Sitting upright: 4
BASIC LEVEL
UPRIGHT SITTING – SIDE VIEW:
• P l i l l d• Pelvis leveled;
• Shoulders leveled, relaxed and arms free to move;
• Legs slightly open (abducted);g g y p ( );
•Head upright and balanced over the bodythe body.
A.4.Sitting upright: 5
BASIC LEVEL
UPRIGHT SITTING – FRONT VIEW:
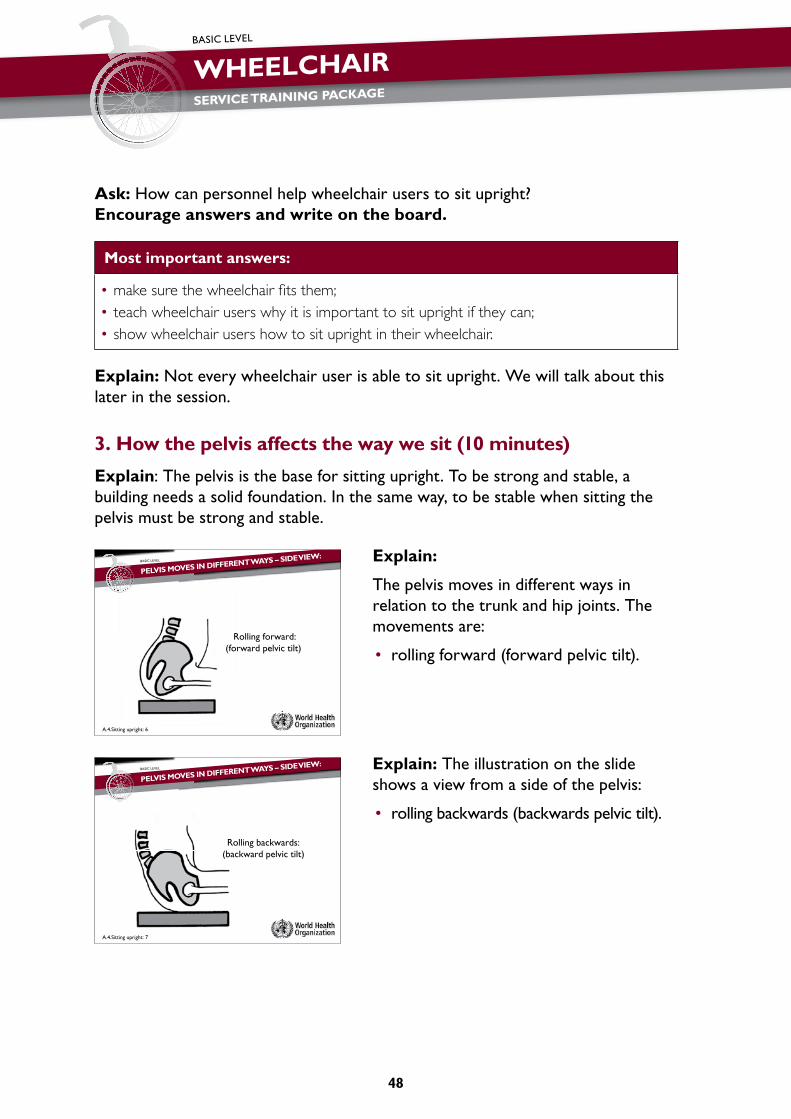
WheelchairService Training Package
48
BASIC LEVEL
ask: How can personnel help wheelchair users to sit upright? encourage answers and write on the board.
Most important answers:
•make sure the wheelchair fits them;•teach wheelchair users why it is important to sit upright if they can;•show wheelchair users how to sit upright in their wheelchair.
explain: Not every wheelchair user is able to sit upright. We will talk about this later in the session.
3. how the pelvis affects the way we sit (10 minutes)
explain: The pelvis is the base for sitting upright. To be strong and stable, a building needs a solid foundation. in the same way, to be stable when sitting the pelvis must be strong and stable.
explain:
The pelvis moves in different ways in relation to the trunk and hip joints. The movements are:
• rolling forward (forward pelvic tilt).
explain: The illustration on the slide shows a view from a side of the pelvis:
• rolling backwards (backwards pelvic tilt).
Rolling forward: (forward pelvic tilt)
A.4.Sitting upright: 6
BASIC LEVEL
PELVIS MOVES IN DIFFERENT WAYS – SIDE VIEW:
Rolling backwards: (b k d l l )(backward pelvic tilt)
A.4.Sitting upright: 7
BASIC LEVEL
PELVIS MOVES IN DIFFERENT WAYS – SIDE VIEW:

49
explain: The illustration on the slide shows a view from a back of the pelvis:• tilting sideways (lateral tilt).
explain: The illustration on the slideshows a view from above the pelvis:• rotation.
ask each person to place his/her hands on the top of the pelvis (over the iliac crest). Place your hands on your iliac crest and demonstrate each pelvis movement. ask participants to copy.
Tilting sideways: (l l l )(lateral tilt)
A.4.Sitting upright: 8
BASIC LEVEL
PELVIS MOVES IN DIFFERENT WAYS – BACK VIEW:
Rotation
A.4.Sitting upright: 9
BASIC LEVEL
PELVIS MOVES IN DIFFERENT WAYS – VIEW FROM ABOVE

WheelchairService Training Package
50
BASIC LEVEL
after each movement, ask participants to describe what they feel in their body.
Movement illustration changes in the body
Rolling forward:
(forward pelvic tilt).
Side view of pelvis
•The body straightens out with the shoulders pulled back;
•there is an increase in the curve of the spine above the pelvis.
Rolling backwards:
(backward pelvic tilt).
Side view of pelvis
•The body becomes rounded with the shoulders forward.
Tilting sideways:
(lateral tilt).
Back view of pelvis
•The body bends sideways.
Rotation.
View from above
•The rest of the body also rotates.
ask: How did it feel holding the different postures? if participants are unsure, ask them to repeat the movements, and hold the posture to feel what it is like. encourage answers.

51
Most important answers:
•Not comfortable;•hard to move;•uneven weight-bearing;•difficult to use arms to carry out activities;
•hard to breathe;•tiring;•pressure on insides;•difficult to balance.
explain: When sitting upright, the pelvis is also upright (or slightly tilted forward) and levelled. if the pelvis is not upright, it is not possible to sit upright.
4. Different sitting postures (25 minutes)
activity
groups: Have 2–3 people in each group.
instructions: Ask each group to:
•look closely at each example of a different posture in the worksheet in their workbook;
•write down how the posture is different from sitting upright;•think about the features of upright sitting from the front and side.
Monitor: Monitor the groups, and assist as needed.
Time: Allow 10 minutes.
Feedback: Project slide of each posture one at a time. ask each group (in turn) to report back the differences between one posture shown and sitting upright. ask participants to add any points they do not already have to their worksheet.
notes for trainers – most important answers:
• pelvis not level (higher on right side);• shoulders not level (higher on left side);• trunk curved to one side;• right leg turned in;• right ankle turned in;• left ankle turned in.A.4.Sitting upright: 10
BASIC LEVEL
POSTURE 1
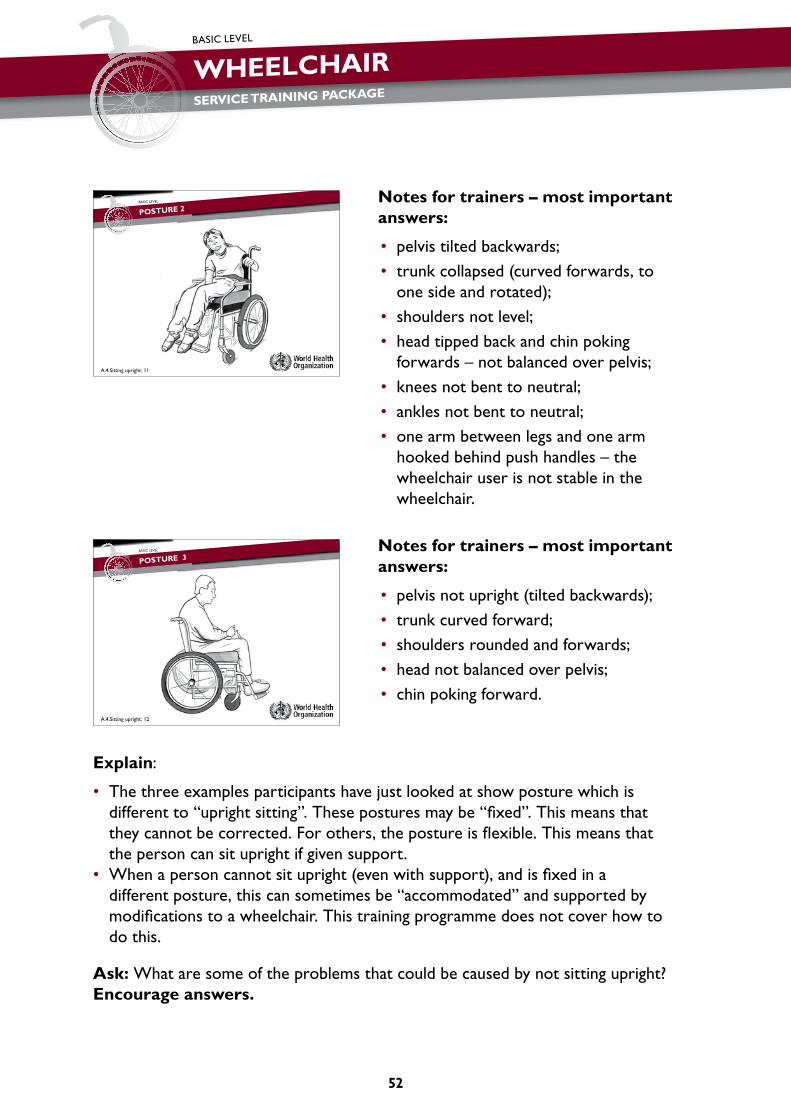
WheelchairService Training Package
52
BASIC LEVEL
notes for trainers – most important answers:
• pelvis tilted backwards;• trunk collapsed (curved forwards, to
one side and rotated);• shoulders not level;• head tipped back and chin poking
forwards – not balanced over pelvis;• knees not bent to neutral;• ankles not bent to neutral;• one arm between legs and one arm
hooked behind push handles – the wheelchair user is not stable in the wheelchair.
notes for trainers – most important answers:
• pelvis not upright (tilted backwards);• trunk curved forward;• shoulders rounded and forwards;• head not balanced over pelvis;• chin poking forward.
explain:
• The three examples participants have just looked at show posture which is different to “upright sitting”. These postures may be “fixed”. This means that they cannot be corrected. For others, the posture is flexible. This means that the person can sit upright if given support.
• When a person cannot sit upright (even with support), and is fixed in a different posture, this can sometimes be “accommodated” and supported by modifications to a wheelchair. This training programme does not cover how to do this.
ask: What are some of the problems that could be caused by not sitting upright? encourage answers.
A.4.Sitting upright: 11
BASIC LEVEL
POSTURE 2
A.4.Sitting upright: 12
BASIC LEVEL
POSTURE 3
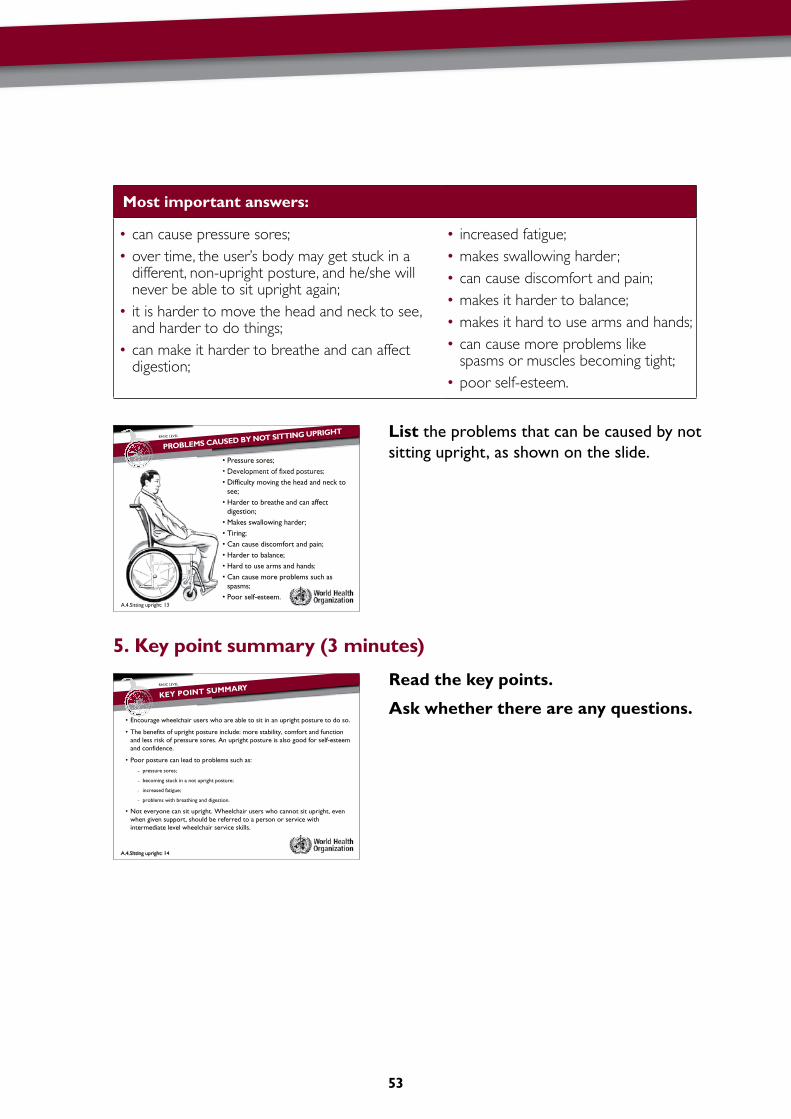
53
Most important answers:
•can cause pressure sores;•over time, the user’s body may get stuck in a
different, non-upright posture, and he/she will never be able to sit upright again;
•it is harder to move the head and neck to see, and harder to do things;
•can make it harder to breathe and can affect digestion;
•increased fatigue;•makes swallowing harder;•can cause discomfort and pain;•makes it harder to balance;•makes it hard to use arms and hands;•can cause more problems like
spasms or muscles becoming tight;•poor self-esteem.
list the problems that can be caused by not sitting upright, as shown on the slide.
5. key point summary (3 minutes)
read the key points.
ask whether there are any questions.
• Pressure sores;• Development of fixed postures;• Development of fixed postures;• Difficulty moving the head and neck to
see;• Harder to breathe and can affect
digestion;• Makes swallowing harder;• Tiring;
C d f d • Can cause discomfort and pain;• Harder to balance;• Hard to se arms and hands;• Hard to use arms and hands;• Can cause more problems such as
spasms;spasms;• Poor self-esteem.
A.4.Sitting upright: 13
BASIC LEVEL
PROBLEMS CAUSED BY NOT SITTING UPRIGHT
• Encourage wheelchair users who are able to sit in an upright posture to do so. Encourage wheelchair users who are able to sit in an upright posture to do so.
• The benefits of upright posture include: more stability, comfort and function and less risk of pressure sores. An upright posture is also good for self-esteem and confidence.
• Poor posture can lead to problems such as:
– pressure sores;
– becoming stuck in a not upright posture;
– increased fatigue; – increased fatigue;
– problems with breathing and digestion.
• Not everyone can sit upright. Wheelchair users who cannot sit upright, even y p g p g ,when given support, should be referred to a person or service with intermediate level wheelchair service skills.
A.4.Sitting upright: 14
BASIC LEVEL
KEY POINT SUMMARY

WheelchairService Training Package
54
BASIC LEVEL
a.5: Pressure sores
OB
Jec
Tiv
eS
By the end of this session, participants will be able to:
list the four stages of a pressure sore;
recognize when a person with a pressure sore should be referred for specialist help;
list local services where wheelchair users can be treated for pressure sores;
list the three main causes of pressure sores;
identify the main pressure sore problem areas for wheelchair users;
list risk factors for pressure sores;
list ways a wheelchair user can prevent pressure sores;
demonstrate two pressure relief techniques.
re
SO
Ur
ce
S
For the session:
PPT slides: A.5 Pressure sores;
Reference Manual;
DVD: Pressure sore testimonial;
Poster : Pressure sores;
one wheelchair (fitted with a cushion) for every two participants (one per pair).
cO
nT
eX
T Adapt this session to suit the context in which participants will be working. Think about:
inviting a wheelchair user who has had a pressure sore to share his/her story with the participants.
TO
Pr
ePa
re
Gather resources, review PPT slides, watch DVD and read through the session plan.
Prepare a list of local services where wheelchair users can get treatment for a pressure sore. If participants are attending training from distant locations, you may ask participants to bring this information with them.
Invite a wheelchair user who has experienced a pressure sore to share his/her story.
Type the list of resources into slide 6 of the slides for this session.

55
OU
Tl
ine
1. Introduction
2. Pressure sores
3. When and where to get help
4. What causes pressure sores?
5. Pressure sore risk factors
6. How can pressure sores be prevented?
7. Pressure sore testimonial
8. Pressure relief techniques
9. Key point summary
2
5
5
10
10
10
5
10
3
Total session time 60
1. introduction (2 minutes)
explain: in this session, we will learn about pressure sores. Not every wheelchair user is at risk of developing a pressure sore. However for people who do develop pressure sores, the consequences are very serious.
2. Pressure sores (5 minutes)
Pin up the Pressure Sores poster.
ask: Has anyone seen a pressure sore? Discuss briefly.
• In this session participants will:
• Talk about pressure sores.p
•Not every wheelchair user is at risk of developing a pressure soredeveloping a pressure sore.
•However, for people who do develop a pressure sore, the result can be very serious.
•Pressure sores can cause death.Pressure sores can cause death.
A.5. Pressure Sores: 2
BASIC LEVEL
INTRODUCTION

WheelchairService Training Package
56
BASIC LEVEL
explain:
• The bigger the sore, the greater the problem for the wheelchair user.
• Pressure sores can require long periods of bed rest.
• if a pressure sore becomes infected, the infection can spread to the blood, heart or bone. This can lead to serious illness and death.
explain: There are four stages in the development of a pressure sore.
explain:
• stage 1 is a red or dark mark on the person’s skin. The redness or change in colour does not fade within 30 minutes after pressure is removed.
• stage 2 is a shallow wound, and the top layer of skin may start to peel away or blister.
• stage 3 is a deep wound; the whole layer of skin is lost.
• stage 4 is very deep, extending through the muscle and possibly right down to the bone.
ask: Where are pressure sores most likely to occur? encourage answers.
Most important answers:• seat bones;• tail bone (coccyx);• base of spine
(sacrum);
• hip bones;• shoulder
blades;• spine.
•A pressure sore is an area of damaged skin and flesh. A d l i f h b h l •A pressure sore can develop in a few hours, but the results can last for many months and may cause death.
A.5. Pressure Sores: 3
BASIC LEVEL
WHAT IS A PRESSURE SORE?
Stage 1 Stage 2 Stage 3 Stage 4
A.5. Pressure Sores: 4
BASIC LEVEL
STAGES OF PRESSURE SORES
A.5. Pressure Sores: 5
BASIC LEVEL
WHERE ARE PRESSURE SORES LIKELY TO OCCUR?

57
3. When and where to get help (5 minutes)
ask: What advice should personnel give a wheelchair user with a stage 1 pressure sore?
encourage answers. reinforce (or give) the correct answer.
Most important answers:
•Anyone with a stage 1 pressure sore should: - remove pressure from that area immediately; - keep pressure off until the skin has fully recovered.
•This may mean bed rest (depending on where the sore is).
•Identify the cause and address this.
•Teach the wheelchair user how pressure sores are formed and how to prevent them in future.
ask: What advice should personnel give a wheelchair user with a stage 2, 3 or 4 pressure sore? encourage answers. reinforce (or give) the correct answer.
Most important answers:
•Follow the actions for stage 1.and
•Refer for treatment of the pressure sore by an experienced health care worker.
Open pressure sores will need cleaning, dressing and close monitoring to ensure they are healing and do not become infected.
Stage 4 wounds may require surgery.

WheelchairService Training Package
58
BASIC LEVEL
4. What causes pressure sores? (10 minutes)
explain: The three main causes of pressure sores are the following.
read the slide.
explain: We will look at each cause in more detail.
explain:
• Pressure sores caused by pressure on skin from sitting or lying in the same position for too long without moving.
• Pressure sores are a major cause of death for people who have a spinal cord injury.
ask participants to sit on their hands and feel the pressure from their seat bones. ask: What would happen if you stayed in this position for a long time without moving?
answer:
•You would soon become uncomfortable because of always having pressure on the same part of the body.
explain:
• Friction is constant rubbing on the skin. For example, an arm rubbing on a wheel/armrest as a wheelchair is moved can cause a pressure sore.
• Friction is particularly a problem for wheelchair users who cannot feel.
• Bumps can happen when wheelchair users are transferring or moving around in their wheelchair.
1. Pressure
3. Shear
2. Friction2. Friction
A.5. Pressure Sores: 7
BASIC LEVEL
WHAT CAUSES PRESSURE SORES?
1. Pressure
3. Shear
2. Friction2. Friction
A.5. Pressure Sores: 7
BASIC LEVEL
WHAT CAUSES PRESSURE SORES?
1. Pressure
3. Shear
2. Friction2. Friction
A.5. Pressure Sores: 7
BASIC LEVEL
WHAT CAUSES PRESSURE SORES?

59
explain:
• shear is when the skin stays still and is stretched or pinched as muscles or bones move.
ask participants to sit on their hands again and rock their pelvis backwards. Note the feeling of their seat bones moving over their hand.
For example, when a wheelchair user sits “slumped” in the wheelchair, skin may be damaged by shear by the seat bones as the pelvis rocks backwards, or by bones in the back squeezing the skin against the backrest.
5. Pressure sore risk factors (10 minutes)
explain:
• as well as the three main causes of pressure sores, there are a number of things that increase the chance that a person will get a pressure sore. These are called: pressure sore risk factors.
ask: can anyone suggest pressure sore risk factors?
encourage answers.
Most important answers:
•cannot feel (decreased sensation);•cannot move;•moisture from sweat, water or incontinence;•poor diet and not drinking enough water ;•ageing;•weight – underweight or overweight;
•poor posture;•previous or current pressure sore;•trauma, bumps or knocks;•heat/fever ;•insect bite.
1. Pressure
3. Shear
2. Friction2. Friction
A.5. Pressure Sores: 7
BASIC LEVEL
WHAT CAUSES PRESSURE SORES?
•What are things that increase thelikelihood that someone will get a pressure sore?
A.5. Pressure Sores: 8
BASIC LEVEL
PRESSURE SORE RISK FACTORS:

WheelchairService Training Package
60
BASIC LEVEL
explain: The most important risk factors to remember are:
• cannot feel (decreased sensation);• cannot move;• moisture from sweat, water or
incontinence;• poor posture;• previous or current pressure sore;• poor diet and not drinking enough water;• ageing;• weight – underweight or overweight.
explain:
• The most important risk factor is not being able to feel. a person who cannot feel does not feel pressure. This means he/she is less likely to change position to relieve pressure.
• anyone who cannot feel, or has difficulty feeling touch on his/her buttocks, seat or legs is at risk of developing a pressure sore.
• Most people with a spinal cord injury will not be able to feel below the level of their injury. This means they are at risk of developing a pressure sore. People with a spinal cord injury may also not have bowel or bladder control. if they do not have a way of managing incontinence, their risk is increased because of the increase in moisture.
explain:
• Wheelchair service personnel need to know the pressure sore risk factors so that they can identify wheelchair users who are at risk of developing a pressure sore.
• checking for risk factors is part of the wheelchair assessment: - anyone who cannot feel is at risk of
developing a pressure sore; - anyone with three or more other
risk factors is at risk of developing a pressure sore.
•Cannot feel (decreased sensation);•Cannot move;•Moisture from sweat, water or incontinence;•Poor posture;•Poor posture;•Previous or current pressure sore;•Poor diet and not drinking enough water;•Ageing;g g•Weight: underweight or overweight.
A.5. Pressure Sores: 9
BASIC LEVEL
PRESSURE SORE RISK FACTORS:
•Checking for risk factors is a part of wheelchair assessmentwheelchair assessment.•Anyone who cannot feel is at risk of developing a pressure soredeveloping a pressure sore.•Anyone with three or more other risk factors i i k f d l i is at risk of developing a pressure sore.
A.5. Pressure Sores: 10
BASIC LEVEL
PRESSURE SORE RISK FACTORS:

61
Common pressure sensitive areas:
side view Back view
6. how can pressure sores be prevented? (10 minutes)
explain:
• Wheelchair service personnel can help wheelchair users to prevent pressure sores.• Prevention avoids long hospital stays and wheelchair users being unable to use
their wheelchair, and can prevent death.• Different ways that pressure sores can be prevented include the following.

WheelchairService Training Package
62
BASIC LEVEL
explain: Use a pressure relief cushion
• a pressure relief cushion will help to reduce pressure.
• anyone at risk of developing a pressure sore should be given a pressure relief cushion.
explain: sit upright
• sitting upright helps to distribute weight evenly. This reduces pressure under bony parts and helps to reduce pressure sores caused by pressure.
• sitting upright also helps to avoid pressure sores caused by shear.
• Make sure the wheelchair fits correctly. This helps wheelchair users to sit upright.
• Teach wheelchair users why it is important to sit upright.
explain: Use pressure relief techniques
• Regular pressure relief can be effective in preventing pressure sores.
• We will cover this in more detail later in this session.
A.5. Pressure Sores: 12
BASIC LEVEL
USE A PRESSURE RELIEF CUSHION
A.5. Pressure Sores: 13
BASIC LEVEL
SIT UPRIGHT
BASIC LEVEL
A.5. Pressure Sores: 14
USE PRESSURE RELIEF TECHNIQUES

63
explain: eat well and drink plenty of water
• a well balanced diet with fresh vegetables, fruit and meat can help to prevent pressure sores.
• Drinking lots of water will help to keep the skin healthy and prevent pressure sores.
• if you are concerned about a wheelchair user’s diet – consider referring him/her to a service that can help.
explain: avoid friction
• Make sure the wheelchair fits correctly and has no rough edges.
• Teach wheelchair users who cannot feel to check that no parts of their body are being rubbed by the wheelchair.
• Teach wheelchair users to take care when getting in and out of the wheelchair.
explain: avoid moisture
• Wheelchair users need to be advised to change wet or soiled clothing straight away, and not to use a wet cushion.
• a bowel and bladder management programme can reduce problems with moisture.
• Refer wheelchair users who have a problem with incontinence to a service that can help them.
A.5. Pressure Sores: 15
BASIC LEVEL
EAT WELL AND DRINK LOTS OF WATER
BASIC LEVEL
A.5. Pressure Sores: 16
AVOID FRICTION
BASIC LEVEL
A.5. Pressure Sores: 17
AVOID MOISTURE

WheelchairService Training Package
64
BASIC LEVEL
VIDEO
explain: check skin every day
• Pressure sores can develop quickly. it is important to identify a pressure sore quickly and take action.
• encourage wheelchair users who are at risk to check their skin every day. They can check themselves using a mirror, or ask a family member to check.
• if they see a red or dark area of the skin (stage 1), they should relieve pressure on that spot immediately.
explain: While lying down or sitting, change positions regularly
• changing position regularly helps to relieve pressure.
• For example, change position from sitting to lying.
• This is particularly important for someone who has a number of pressure sore risk factors, or has a recently healed pressure sore.
• People who cannot change position by themselves are at risk.
7. Pressure sore testimonial (5 minutes)
introduce DvD Pressure sore testimonial video.
Show DvD.
ask if there are any questions.
8. Pressure relief techniques (10 minutes)
explain:
• Wheelchair users can relieve pressure from their seat bones while in their wheelchair.
BASIC LEVEL
A.5. Pressure Sores: 18
CHECK SKIN EVERYDAY
A.5. Pressure Sores: 19
BASIC LEVEL
WHILE LYING OR SITTING, CHANGE POSITION REGULARLY

65
• How the wheelchair user does this will vary, depending on how much strength and balance he/she has.
• in this training programme, two safe methods of relieving pressure are taught. These are bending forward and side to side leaning.
• Wheelchair service personnel should teach all wheelchair users who are at risk of developing a pressure sore at least one way to relieve pressure.
activity
groups: ask participants to break into pairs.
instructions: Give each pair a wheelchair.
ask the pairs to position themselves so that they can see you.
Demonstrate each method, and explain that different methods will work for different users.
ask participants to practise each method straight after each demonstration.
Monitor: Monitor closely and correct techniques as necessary.
Time: Allow 10 minutes.
Notes for trainers: Some wheelchair users relieve pressure by lifting themselves up with both arms. For enough blood flow to return to the skin, the wheelchair user must hold this position for two minutes. This requires a lot of strength and puts strain on the shoulders. In addition, wheelchair users must be able to control their weight carefully as they sit back down. If they sit down hard, they can cause damage to their skin. For this reason, this method is not taught in this training programme.
Bending forward: a method suitable for all wheelchair users. Strongly encourage all wheelchair users to use this method frequently during the day
Independent: for people with good balance and strength.
With assistance: For people with poor balance and strength.

WheelchairService Training Package
66
BASIC LEVEL
Side to side leaning: a method suitable for wheelchair users with limited strength and balance
Hook arm over push handle for support.
9. key point summary (3 minutes)
read the key points.
ask whether there are any questions.P i i If l ft t t d • Pressure sores are a serious issue. If left untreated, pressure sores can lead to death.
Wh l h i i h 2 •Wheelchair users with a stage 2 or more pressure sore should be referred for specialist help immediately to treat their pressure soretheir pressure sore.
•The three main causes of pressure sores are pressure, friction or shear friction or shear.
•The main pressure sores risk factors are: inability to move, moisture poor posture previous or current pressure sore moisture, poor posture, previous or current pressure sore, poor diet, ageing, underweight or overweight.
A.5. Pressure Sores: 21
BASIC LEVEL
KEY POINT SUMMARY
BASIC LEVEL
•Wheelchair personnel can help wheelchair users at risk to avoid pressure sores by:p y
– Providing a pressure relief cushion;
– Providing a wheelchair that fits – and helps the user to sit upright;
– Teaching wheelchair users simple ways to avoid pressure sores.
A.5. Pressure Sores: 22
KEY POINT SUMMARY (CONTINUED)

67
a.6: appropriate wheelchair
OB
Jec
Tiv
eS
By the end of this session, participants will be able to: describe at least four things that make a wheelchair “appropriate”; identify the parts of the wheelchair which affect how the user sits; explain how different parts of the wheelchair support specific needs of the
wheelchair user ; identify wheelchairs which are more suited to outdoor/rough terrain than others; suggest the most suitable wheelchair to a wheelchair user, considering his/
her needs.
re
SO
Ur
ce
S
For the session:
PPT slides: A.6: Appropriate wheelchair ; Reference Manual; Participant’s Workbook; DVD: What an appropriate wheelchair means to me; DVD: Meeting the wheelchair user’s needs; DVD: Meeting the wheelchair user’s environment; at least one sample of each of the locally available wheelchairs.
cO
nT
eX
T
Adapt this session to suit the context participants will be working in. If there are only one or two different types of wheelchair available in the
participants’ location, have a number of wheelchairs of the same type available, so that each small group has a wheelchair to work with. A broader range of wheelchairs may be represented by putting up posters of different wheelchairs.
Adapt the case studies to suit the local context if required.
TO
Pr
ePa
re
Gather resources, review PPT slides, watch DVDs and read through the session plan.
Select an area outside which has some rough terrain (for example gravel, sand, bumps) and enough space for participants to watch one other as they propel themselves along the rough terrain. If it is hot, a shady place is ideal.
Check all wheelchairs are in working condition and each wheelchair has a cushion. Adjust one wheelchair to fit one of the participants. Arrange wheelchairs neatly at the front of the training room.
OU
Tl
ine
1. Introduction.2. Definition of an ``appropriate wheelchair``.3. Meeting the wheelchair user’s needs.4. Meeting the wheelchair user’s environment.5. Providing proper fit and postural support.6. Matching wheelchairs to the needs of wheelchair users.7. Key point summary.
210303015303
Total session time 120

WheelchairService Training Package
68
BASIC LEVEL
VIDEO
1. introduction (2 minutes)
explain: in this session, we will look at the main types of wheelchairs, and some of the different features that can be found on wheelchairs.
We will have a better understanding of an “appropriate wheelchair”.
a wheelchair that:
• meets the user’s needs;• meets the user’s environment;• is the right match for the user;• ensures postural support (helps the user
to sit upright);• can be maintained and repaired locally.
2. Definition of the ``appropriate wheelchair`` (10 minutes)
introduce DvD: What an appropriate wheelchair means to me. in this short DvD, experienced wheelchair user Faustina explains what an appropriate wheelchair means to her.
Show DvD.ask if there are any questions.
3. Meeting the wheelchair users’ needs (30 minutes)
ask: What are the things that wheelchair users need to do in their wheelchair?
encourage answers
Most important answers:
•get in and out of the wheelchair (transferring);•push their wheelchair ;•fold the wheelchair to store or transport;•carry out activities (for example: work, house-work, spend time with friends, go to the
toilet, wash, get dressed, go through doorways, get under tables or desks).
• In this session participants will look at the main In this session participants will look at the main types of wheelchairs, and some of the different features the wheelchairs have. • Participants will have a better understanding of an ‘appropriate wheelchair’. A wheelchair that:– meets the user’s needs;– meets the user’s environment;– is the right match for the user;– ensures postural support (helps the user to sit
upright);upright);– can be maintained and repaired locally.
A.6. Appropriate wheelchair: 2
BASIC LEVEL
INTRODUCTION

69
explain: an appropriate wheelchair should make it easy for a wheelchair user to do the things they want to do. Let’s look at some of the features of a wheelchair that affect how easily a wheelchair user can do the things they want to do.
3.1 Transfers
getting in and out of the wheelchair
explain: Wheelchair users get in and out of the wheelchair in different ways. Three parts of the wheelchair which affect how people get in and out of the wheelchair are:
explain: (click to show arrow on each component)
• brakes;• footrests;• armrests.
explain:
• Removable armrests or armrests which follow the line of the rear wheels are easier for people who get in and out of the wheelchair sideways.
Three important components:
1 b k
3
1. brakes;2. footrests;
33. armrests.
1 22
A.6. Appropriate wheelchair: 5
BASIC LEVEL
TRANSFERS
Armrest
A.6. Appropriate wheelchair: 6
BASIC LEVEL
TRANSFERS

WheelchairService Training Package
70
BASIC LEVEL
explain:
• People who stand up to get in and out of the wheelchair may need armrests to help them stand up.
• Footrests which can be moved out of the way are helpful for people who stand up to get in and out of the wheelchair.
• People who want to transfer to the floor may prefer a wheelchair with removable footrests.
explain:
• Brakes are important for all wheelchair users. They are essential for keeping wheelchair still while the person gets in and out.
3.2 Pushing the wheelchair
explain: The parts of the wheelchair which affect how well the user can push are the:
explain: (click to show arrow on each component)
• armrests;• backrest;• push rims;• push handles;• the overall weight of the wheelchair may
also affect how well the user can push it.
Armrest
Footrest
A.6. Appropriate wheelchair: 7
BASIC LEVEL
TRANSFERS
BrakesBrakes
A.6. Appropriate wheelchair: 8
BASIC LEVEL
TRANSFERS
Push handles
Backrest Armrest
Push rim
Backrest
Push rim
A.6. Appropriate wheelchair: 9
BASIC LEVEL
PUSHING THE WHEELCHAIR

71
explain:
• To reach the push rim to push comfortably, the wheelchair user needs to be able to reach over the armrests comfortably.
• The wheelchair user in this slide cannot easily reach the push rims because the armrests are too high.
explain:
• The height of the backrest can affect how easy it is to push the wheelchair.
• if the backrest is too high it is difficult for a wheelchair user to move their arms and shoulders to push.
• The wheelchair user in this slide will find it difficult to push himself because the backrest is high.
explain:
• When the backrest is lower, the wheelchair user has freedom to move their shoulders to push.
• For a wheelchair user who can sit well and has good balance, this is a good height backrest.
explain:
• For wheelchair users who push with their arms – how easy it is for them to reach the wheels (push rims) affects how easy it is for them to push.
• This woman is shown mid-push. Notice how easily she can reach the wheels (push rims).
To reach the push rim to pushp pcomfortably, the wheelchair user needs to be able to reach over the armrests comfortably.
A.6. Appropriate wheelchair: 10
BASIC LEVEL
PUSHING THE WHEELCHAIR
The height of the backrest can The height of the backrest can affect how easy it is to push the wheelchairwheelchair.
A.6. Appropriate wheelchair: 11
BASIC LEVEL
PUSHING THE WHEELCHAIR
When the backrest is lower When the backrest is lower, the wheelchair user has a freedom to move their freedom to move their shoulders to push.
A.6. Appropriate wheelchair: 12
BASIC LEVEL
PUSHING THE WHEELCHAIR
For wheelchair users who push For wheelchair users who push with their arms - how easy it is for them to reach the wheels for them to reach the wheels affects how easy it is for them to pushto push.
A.6. Appropriate wheelchair: 13
BASIC LEVEL
PUSHING THE WHEELCHAIR
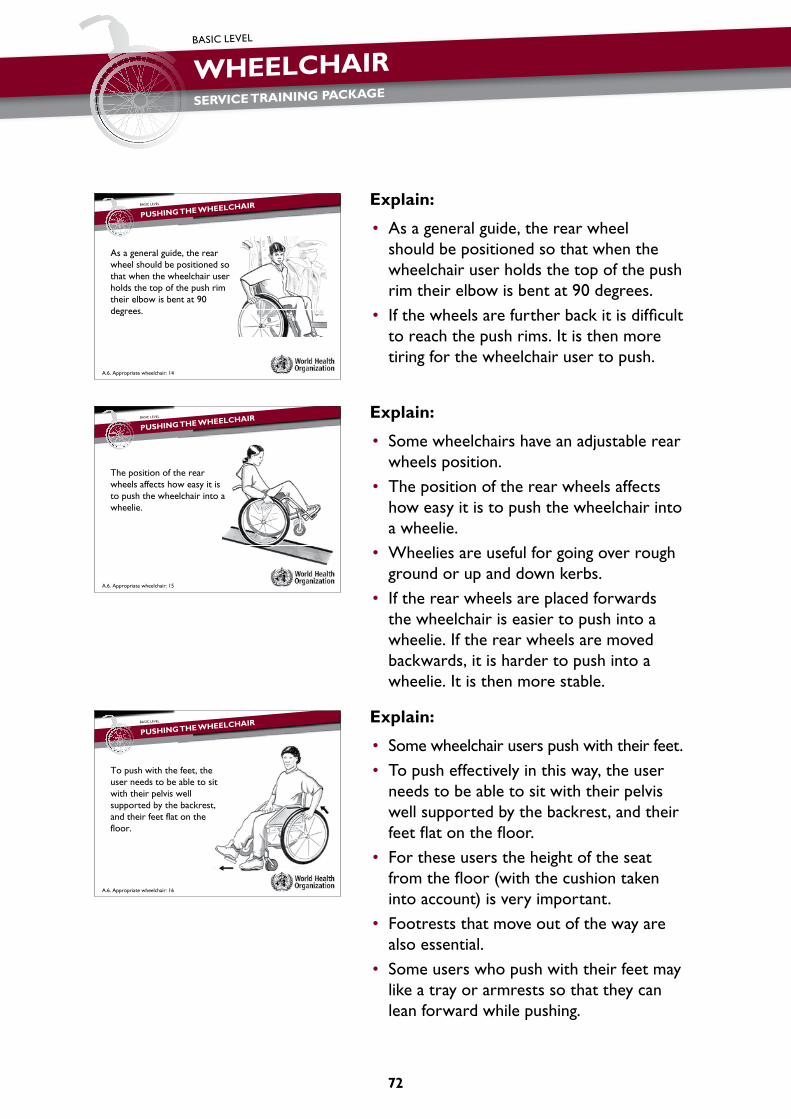
WheelchairService Training Package
72
BASIC LEVEL
explain:
• as a general guide, the rear wheel should be positioned so that when the wheelchair user holds the top of the push rim their elbow is bent at 90 degrees.
• if the wheels are further back it is difficult to reach the push rims. it is then more tiring for the wheelchair user to push.
explain:
• some wheelchairs have an adjustable rear wheels position.
• The position of the rear wheels affects how easy it is to push the wheelchair into a wheelie.
• Wheelies are useful for going over rough ground or up and down kerbs.
• if the rear wheels are placed forwards the wheelchair is easier to push into a wheelie. if the rear wheels are moved backwards, it is harder to push into a wheelie. it is then more stable.
explain:
• some wheelchair users push with their feet.• To push effectively in this way, the user
needs to be able to sit with their pelvis well supported by the backrest, and their feet flat on the floor.
• For these users the height of the seat from the floor (with the cushion taken into account) is very important.
• Footrests that move out of the way are also essential.
• some users who push with their feet may like a tray or armrests so that they can lean forward while pushing.
As a general guide, the rear h l h ld b iti d wheel should be positioned so
that when the wheelchair user holds the to of the sh rim holds the top of the push rim their elbow is bent at 90 degrees degrees.
A.6. Appropriate wheelchair: 14
BASIC LEVEL
PUSHING THE WHEELCHAIR
The position of the rear pwheels affects how easy it is to push the wheelchair into a pwheelie.
A.6. Appropriate wheelchair: 15
BASIC LEVEL
PUSHING THE WHEELCHAIR
To push with the feet, the d t b bl t it user needs to be able to sit
with their pelvis well s orted b the backrest supported by the backrest, and their feet flat on the floorfloor.
A.6. Appropriate wheelchair: 16
BASIC LEVEL
PUSHING THE WHEELCHAIR

73
explain:
• a heavy wheelchair takes more energy to push. if the wheelchair is well designed, and well balanced, the effect of the weight may not be so bad.
• The weight of the wheelchair is particularly important for children. if the wheelchair is heavy this may make the chair hard for the child to control.
explain:
• some wheelchair users are unable to push themselves, and need to be assisted.
• Other wheelchair users may push themselves most of the time, needing help occasionally. For example to go up and down steps, or to go over rough ground.
• strong push handles will help others to assist the user. For child users, high push handles will be easier for adults who are helping the child.
3.3 Folding the wheelchair
explain: a folding wheelchair is useful for storage or transport. Wheelchairs fold in two main ways.
explain:
• Wheelchairs with a cross-folding frame fold so that both sides come together. sometimes it is possible to remove the wheels as well.
• cross-folding wheelchairs can be helpful for wheelchair users needing to ‘squeeze’ through narrow doorways.
• For transporting the wheelchair, some people prefer a cross-folding wheelchair.
• a disadvantage with some cross-folding frames is that the folding mechanism can weaken, making the wheelchair feel unstable. it then becomes harder to push.
Some wheelchair users are Some wheelchair users are unable to push themselves and need to be assisted need to be assisted.
A.6. Appropriate wheelchair: 17
BASIC LEVEL
PUSHING THE WHEELCHAIR
Wheelchairs with a cross Wheelchairs with a cross folding frame fold so that both sides come together sides come together. Sometimes it is possible to remove the wheels as well remove the wheels as well.
A.6. Appropriate wheelchair: 18
BASIC LEVEL
FOLDING THE WHEELCHAIR

WheelchairService Training Package
74
BASIC LEVEL
explain:
• some rigid frame wheelchairs also fold. The backrest folds down towards the seat and the rear wheels come off.
• Both rigid frame and cross-folding wheelchairs have advantages and disadvantages. The best choice will depend on the wheelchair users lifestyle, how they transfer in and out of transport and their personal preference.
activity
groups: Have 3 people in each group.
instructions: Ask each group to work out how each of the different wheelchairs in the room fold.
Monitor: Check that everyone is able fold and unfold the different wheelchairs. Correct methods if necessary.
Time: Allow 5 minutes.
3.4 Carrying out activities
explain: There are several features of a wheelchair which affect how easily a wheelchair user can carry out activities. We have talked about some already. For example how easy a wheelchair is for the user to push will affect how easily they can participate in activities. Here are some other examples.
explain:
• The overall length of a wheelchair can affect how easy or difficult it is to use in small spaces.
• The length is from the furthest back part of the wheelchair to the furthest front part.
ask participants: What is the wheelchair with the longest overall length in the room?
Some rigid frame wheelchairs also fold The backrest folds also fold. The backrest folds down towards the seat and the rear wheels come offrear wheels come off.
A.6. Appropriate wheelchair: 19
BASIC LEVEL
FOLDING THE WHEELCHAIR
The overall length of a h l h ff h wheelchair can affect how
easy or difficult it is to use ll in small spaces.
Overall length
A.6. Appropriate wheelchair: 20
BASIC LEVEL
CARRYING OUT ACTIVITIES

75
VIDEO
explain:
• High armrests may make it difficult for the user to pull up close to a table or desk.
explain: The main thing to remember is that it is important to think about what the user needs to do when choosing the most appropriate wheelchair.
introduce the DvD: Meeting the wheelchair user’s needs.
ask participants to watch closely, to see the different features of wheelchairs that help the people in the DvD carry out their work or activities. explain that we will discuss this after the DvD.
Show DvD.
explain: in the DvD there were many different wheelchair users, using different types of wheelchairs, to carry out different activities. ask: What were some of the activities?
answers include:
•working (in an office, supermarket, upholstery workshop);•dancing;•getting in and out of a car ;•walking (with Mum and dog);•playing basketball.
ask: What were some of the wheelchair features that helped Roger carry out his work in the supermarket? encourage answers (see Notes for trainers below).
ask: can someone give another example from the video of how the features of a wheelchair were well suited to the needs of the wheelchair user? encourage answers – remind people of the different people in the clips and re-show if necessary.
ask: can someone give one more example? encourage answers.
High armrests may make it difficult for the user to pull pup close to a table or a desk.
High armrest
A.6. Appropriate wheelchair: 21
BASIC LEVEL
CARRYING OUT ACTIVITIES

WheelchairService Training Package
76
BASIC LEVEL
notes for trainers:
• it is not necessary to review every wheelchair user;
• notes are provided below for each wheelchair user in the clip to assist trainers to answer any questions that participants may have;
Wheelchair user
activity he/she was carrying out
Wheelchair features that helped
Roger Working in a supermarket; stocking shelves.
•Short wheelbase – helped him to get closer to the shelves and manoeuvre his wheelchair in smaller spaces.
•Rear wheels positioned well for propelling and low backrest (Roger does not need support any higher) makes it easier for Roger to propel efficiently.
•No armrests – easier for Roger to place things on his lap and to move actively.
Ruan Walking with his Mum and dog.
•Push handles – at a good height for Mum to push.
•Ruan’s wheelchair has extra postural support (do not go into details) which helps him to sit more comfortably and securely.
James (number 14) and team mates
Playing wheelchair basketball.
James and his team mates are using specialized Sports Wheelchairs. Features include:
•Rear wheels angled apart (which increases stability);
•thin rear wheels (which help to increase speed);•small front castors
(reduces weight and increase speed);•calf and or thigh straps – help to provide the
wheelchair users with stability and security;•low backrest – allows for lots of freedom of
movement while playing sport;•rear wheels positioned well for propelling.
Mark Working in an upholstery workshop.
Mark can propel with one foot – which means he does not have to use both arms. In the workshop, this can free up one arm to carry things.
•The wheelchair enables this by having swing away footrests.

77
Dawid and Pinky
Working as security guards in a supermarket.
•Both have a relatively short wheelbase – which helps them to move around the store.
•Both move their wheelchair independently – however Dawid uses rear wheels; Pinky uses an electric wheelchair.
Faizel Works in an office. •Rear wheels positioned well for propelling.•Backrest low enough to allow shoulder
movement however high enough to provide correct support.
•Uses pushing gloves – which help him to push on the rear wheels and push rims more easily.
•No armrests – which makes it easier for Faizel to pull his wheelchair under the desk.
Keith (three-wheel wheelchair) and Ralph (four-wheel wheelchair)
Work in a wheelchair assembly workshop.
•Ralph and Keith: No arm rests – easy to work with tools and at work bench, easy to carry things on their lap.
•Keith’s three-wheel wheelchair allows him to get close to objects he needs to pick up as the boom fits easily between other items and equipment.
•Ralph has a wheelchair with a short wheelbase, which allows him to get close to the working surface.
•Ralph and Keith: Rear wheels positioned well for propelling and low backrest allowing freedom of movement.
Ryan Getting in and out of a car.
•Ryan’s wheelchair folds and the rear wheels come off (quick release wheels) – which enable him to lift the wheelchair into the car himself. Without this feature he would not be able to get in and out of the car independently.
Jenee Dancing. •Short overall wheelchair length – enables very small turning circle.
•Short overall wheelbase – improves manoeuvrability.
•Low backrest allows for good freedom of movement.
•Anti-tip bar – prevents wheelchair from tipping back (which is more likely with such a short wheelbase).

WheelchairService Training Package
78
BASIC LEVEL
4. Meeting the wheelchair user’s environment (30 minutes)
explain: Different types of wheelchairs are suited to different environments. The main features which affect how a wheelchair works in a different environment are:
• the distance between the front and rear wheels;• the diameter and width of the wheels.
Here are some examples:
explain:
• The distance between the front and rear wheels is important.
• When the wheels are further apart, this is called ‘long wheelbase’.
• When the wheels are closer together, this is called ‘short wheelbase’.
explain:
• Long wheelbase wheelchairs are more stable and less likely to tip forward.• Long wheelbase wheelchairs are good for a person who will spend most of their
time outdoors and moving over rough or uneven surfaces.
• Three-wheel wheelchairs are an example of a long wheelbase wheelchair. They are usually very stable and suitable for outdoors on rough terrain.
• Three-wheel wheelchairs do not suit everyone.
• For example a three-wheel wheelchair may not suit a person who wants to stand up to transfer in and out of their wheelchair as the footrest is fixed and the front beam may get in the way.
The distance between the front and rear wheels is important.
Wheel base
A.6. Appropriate wheelchair: 23
BASIC LEVEL
THE WHEELCHAIR USER’S ENVIRONMENT
Three-wheel wheelchairs are a classical example of a long wheelbase.
Th ll bl These are usually very stable and suitable foroutdoors on rough terrain
Long wheelbase
outdoors on rough terrain.
A.6. Appropriate wheelchair: 24
BASIC LEVEL
THE WHEELCHAIR USER’S ENVIRONMENT

79
• Four-wheel wheelchairs with a long wheelbase can also be successfully used on uneven surfaces.
• in this example the front castor wheels are under the footrests instead of behind the footrests. This gives the wheelchair a longer wheelbase and makes it more stable.
explain:
• shorter wheelbase wheelchairs are more suitable where the ground is flat and reasonably smooth.
• short wheelbase wheelchairs are more likely to tip forward if going downhill, or if the front wheels hit a bump.
explain:
• This is an example of an orthopaedic style wheelchair with a short wheelbase.
• This chair would not be easy to push over rough terrain.
explain:
• short wheelbase wheelchairs are a good choice for a person who spends a lot of time indoors.
This is an example of an orthopaedic style wheelchair
i h h h lb with a short wheelbase.
Short wheelbase
A.6. Appropriate wheelchair: 25
BASIC LEVEL
THE WHEELCHAIR USER’S ENVIRONMENT
BASIC LEVEL
Short wheelbase wheelchairs are good choice for a person who spends a lot of time indoors.
A.6. Appropriate wheelchair: 26
THE WHEELCHAIR USER’S ENVIRONMENT
Long wheel base wheelchairs can be successfully used on uneven ysurfaces.
Long wheelbase
A.6. Appropriate wheelchair: 24a
BASIC LEVEL
THE WHEELCHAIR USER’S ENVIRONMENT

WheelchairService Training Package
80
BASIC LEVEL
explain:
• ‘active’ style four-wheel wheelchairs often have a short wheelbase.
• some wheelchair users with good wheelchair mobility skills may successfully use short wheelbase wheelchairs on uneven surfaces – for example by balancing on the back wheels to go down hills and over rough ground.
explain:
• The larger a wheel, the easier it is to push over uneven ground and over obstacles such as rocks and sticks.
• Wide rear wheels and front castors help prevent the wheelchair from sinking into sandy or muddy ground.
• standard rear wheels are 24". However in many places 24" wheels are hard to find. For this reason some producers make wheelchairs with 26" wheels.
• children’s wheelchairs may have 20" or 22" wheels.
• Rear and front wheels may be filled with air (pneumatic tyres) or solid.• Pneumatic tyres must be pumped up to work well.• in some locations punctures are common. People living in such locations need to
be able to repair punctures themselves, or be able to easily find someone who can fix puncture repairs.
• solid tyres are a possible alternative. solid tyres do not need to be pumped up and do not puncture. However over bumpy ground solid tyres feel ‘hard’ for the wheelchair user.
• Not all solid tyres last very long when used outdoors. Poor quality solid tyres may ‘peel off’ the rim of the wheels.
• There are two types of solid tyres: – solid rubber tyres – which are heavy, quite hard, and can be very durable if
good quality. – Polyurethane (PU) tyres – which are light. However unless very good quality,
these tyres wear quickly outdoors and become unusable.
‘Active’ style four wheel h l h f h wheelchairs often have a
short wheelbase.
A.6. Appropriate wheelchair: 27
BASIC LEVEL
THE WHEELCHAIR USER’S ENVIRONMENT
Wide rear wheels and front Wide rear wheels and front castors help prevent the wheelchair from sinking into wheelchair from sinking into sandy or muddy ground.
Wid f Wide front castor
A.6. Appropriate wheelchair: 28
BASIC LEVEL
THE WHEELCHAIR USER’S ENVIRONMENT

81
VIDEO
introduce the DvD: Meeting the wheelchair user’s environment.
ask participants to watch closely, to see the different features of wheelchairs that help the people to be mobile in different environments. explain that we will discuss this after the DvD.
Show DvD.
ask if there are any questions.
explain: in the DvD there are a number of wheelchair users moving around quite different terrain including indoors, outdoors on paths and over rough/muddy ground.
ask: Two wheelchair users – venkamarantu and sione travelled over fairly rough and muddy ground. What were the features of their wheelchair that helped them to do this more easily?
answers:
•Three-wheel wheelchair – which gave them stability over uneven ground.•Wide front castor wheels – which roll over obstacles and are less likely to sink into
mud/sand.•Rear wheels in a good position for propelling – making it easier for them to push their
wheelchair.
ask: Jean, who was cooking in her kitchen and Jacques, the trainer working in the gym – were both indoors. What are the features of their wheelchairs which make it easier for them to move around indoors?
answers include:
•Short wheelbase and short overall length.•Smaller/thinner front castors – move easily on smooth surfaces.
ask: One other wheelchair user (Lalithamma) was propelling outdoors. The paths she was pushing over were smoother; however she did need to go over a drain. What were the features of her wheelchair that made this easier?

WheelchairService Training Package
82
BASIC LEVEL
answers include:
•Long wheelbase four-wheel wheelchair – long wheelbase gives good stability (which also helped Lalithamma to carry the water).
•Wide front castor wheels.•Rear wheels in a good position for propelling – making it easier for them to push their
wheelchair.
Small group activity
groups: Take everyone to the area of rough terrain, with three different types of wheelchair
instructions: Remind participants of the safety rules: do not stand on footrests, keep fingers clear of the wheel spokes and brakes; if riding the wheelchair up or down slopes, have an assistant behind you in case you tip backwards.
ask for two volunteers:
•Ask one volunteer to select a wheelchair they think will be the easiest to propel over the rough terrain;
•Ask another volunteer to select the wheelchair they think will be the hardest to propel over the rough terrain;
•Ask each volunteer to travel across the rough terrain for 5 metres and return;
•Repeat with two more volunteers until everyone has had a turn.
Monitor: Ensure this activity is carried out safely. Do not encourage participants to race as this could be dangerous.
Time: Allow 20 minutes
Feedback: ask: Which wheelchair proved to be the easiest to push over the rough terrain?
• Why? encourage participants to think about the wheel size and width; wheelbase length; ease of accessing the wheels to push; backrest height.
explain: some participants would have found it easier than others, if they were lucky enough to have a wheelchair which fitted them!

83
5. Providing proper fit and postural support (15 minutes)
explain:
• Wheelchair users are all different sizes. The wheelchair must fit the user correctly to provide proper support. Fortunately, many wheelchairs come in a range of sizes, or have size adjustments. it is easier to make sure these wheelchairs fit the user than if there is only one size available.
• The following components or features of a wheelchair will affect how well the wheelchair fits and how well it helps the user to sit upright.
Seat
Show slides: also point out features on the wheelchairs in the room.
explain:
• Wheelchair seats may be either slung or solid.• solid seats may be made from wood or
plastic. solid seats should always have a cushion over the top.
• slung seats (shown in this slide) are usually made from canvas.
• The “size” of a wheelchair is often described by the width of the seat.
explain:
• slung seats are made from canvas and usually attached to each side of the frame.
• Poor-quality slung seats will stretch and sag more quickly. The seat does not then provide good support.
• in this slide the wheelchair user cannot sit upright because the seat does not provide good support. This makes it difficult for him to sit upright.
Wheelchair seats may Seat
Wheelchair seats may be either slung or solid.
A.6. Appropriate wheelchair: 30
BASIC LEVEL
PROVIDING PROPER FIT AND POSTURAL SUPPORT
Slung seats are made Slung seats are made from canvas and usually attached to each side of attached to each side of the frame. Slung seat
A.6. Appropriate wheelchair: 31
BASIC LEVEL
PROVIDING PROPER FIT AND POSTURAL SUPPORT

WheelchairService Training Package
84
BASIC LEVEL
explain:
• The cushion provides comfort and helps to relieve pressure.
• cushions also can help to stop a wheelchair user from sliding into a slumped posture.
• We will talk about cushions in detail in the next session.
explain:
• Backrests may be slung or solid. all solid backrests should have some padding/cushioning.
• Wheelchairs come with different backrest heights. some wheelchairs have adjustable backrest heights. The correct backrest height needs to be selected for the user. This is discussed later.
• some wheelchairs have adjustable angles on the backrest as well.
explain:
• Footrests help to support the user. it is very important that footrests are adjusted correctly. For this reason, the height of the footrests is usually adjustable.
• some footrests can also be adjusted by the angle and the distance away from the wheelchair.
explain:
• armrests can also be used to provide support.
• some armrests are height-adjustable.• if they are not, they can sometimes be
modified to give more support for a user who needs it.
The cushion provides The cushion provides comfort and helps to relieve pressure
Cushionrelieve pressure.
A.6. Appropriate wheelchair: 32
BASIC LEVEL
PROVIDING PROPER FIT AND POSTURAL SUPPORT
Backrests may be slung Backrest
Backrests may be slung or solid.
A.6. Appropriate wheelchair: 33
BASIC LEVEL
PROVIDING PROPER FIT AND POSTURAL SUPPORT
Footrests help to support the user. pp
FootrestFootrest
A.6. Appropriate wheelchair: 34
BASIC LEVEL
PROVIDING PROPER FIT AND POSTURAL SUPPORT
Armrests also help to support the user.pp
Armrest
A.6. Appropriate wheelchair: 35
BASIC LEVEL
PROVIDING PROPER FIT AND POSTURAL SUPPORT

85
6. Matching wheelchairs to the needs of wheelchair users (30 minutes)
activity
groups: Have two to three people in each group.
instructions: Ask each group to:
•read the user’s stories in the worksheet in their workbook;•discuss which available wheelchairs best suit each user’s needs and why;•write down their answers.
Monitor: Monitor the groups and assist if necessary.
Time: Allow 20 minutes and 10 minutes for feedback.
Feedback: One at a time, ask each group to come forward and:
•state for one wheelchair user which of the available wheelchairs they think would most suit that user ;
•provide at least three reasons why they think this is the most appropriate choice;
•ask the rest of the participants if they agree with the group’s decision.•(Allow 2–3 minutes for each feedback).At the end of the feedback, remind participants that their decision is a recommendation to be discussed with the wheelchair user. The final decision should be the wheelchair user’s.
User’s story learning points
Bao lives in a rural village. He is a bilateral above-knee amputee. Before his accident, he ran a shop on the road which runs past his village, selling general groceries. Now he can only reach the shop with help, as the pathway leading from his village to the road is long (almost 1 km), bumpy and often muddy. This has made it difficult for him and his family to keep the shop going.
A long time ago, he received a donated orthopaedic-style wheelchair. The chair is rusted and the seat upholstery has ripped. The front castor wheels are small, and the rear wheel tyres are very thin and worn. He cannot push this wheelchair along the track from his hut to the village, as the wheels dig into the path. He would like to be able to get to the shop on his own, so that he is not relying on his wife or others to help him.
•Bao needs a wheelchair which can be independently pushed over rough, soft ground.
•Good access to the wheels to push is important.
•Good postural support will help him, as he will spend a long time in his wheelchair each day at his shop.
•Where tricycles are available, trainers may point out that a tricycle can be a very efficient means of mobility for wheelchair users who have good strength and need to travel longer distances.

WheelchairService Training Package
86
BASIC LEVEL
User’s story learning points
amanthi is 24 and lives with her family in a small town. She was involved in a car accident when she was 18, and became a paraplegic. Amanthi recently had a pressure ulcer, which took six months to heal.
She has an orthopaedic wheelchair, but it does not give her good support and she gets very tired in it. It does not have a cushion. Amanthi thinks this is probably why she developed a pressure sore.
Amanthi has been invited to attend a secretarial course and wants to go. However, she is worried that she will not be able to sit up all day in her current wheelchair.
•Amanthi needs a wheelchair which allows her to transfer easily, gives good postural support and has a pressure relief cushion.
•A wheelchair that can fit under a desk is important.
•The size of the front castor depends on the type of roads she will travel on.
Phillip is 62 years old and lives in a small island community. Six months ago, he had a stroke. He returned to his home after one month in hospital without a wheelchair. He has been lying in bed or sitting on a chair on the veranda of his home.
Phillip cannot move his left arm or left leg. However, he is getting stronger each day and can now stand upright with help from a family member. He is exercising his right arm, and is very keen to have a wheelchair so that he can be more mobile and less reliant on his family.
He wants to be able to move around his small home, which is all on one level, and around his local community. The terrain is very sandy. One of his grandsons owns a car and says that he will take him out if he has a wheelchair.
•Philip needs a wheelchair which allows him to do a standing transfer. Flip-up footrests would make this easier.
•Larger front castor wheels and thick rear wheels would make pushing around his community easier.
•He may be able to propel himself short distances with his right arm and leg – so the height of the wheelchair seat (with cushion) should allow him to sit with his feet flat on the floor.
•A wheelchair that cross-folds, or one in which the backrest folds down and rear wheels come off, will make it easier for him to travel in his grandson’s car.
sabina is 56 years old and lives in a small island community. After the birth of her fourth child many years ago, she lost most of the use of her legs. She can stand a little, but she cannot walk. She has never had a wheelchair.
Sabina lives in a small village near the sea – and the surface around her home and the village is rough and sandy. She spends her time helping to care for her grandchildren, cooking and weaving. There is no room inside her home for a wheelchair, but it can be stored underneath, as her home is raised on stilts (columns).
•Sabina needs a wheelchair she can propel easily over rough and sandy soil. Large front castor wheels will be important. A long wheelbase will help with wheelchair stability.
•Because she can stand, she may prefer footrests that move out of the way so that she can stand up to transfer in and out of the wheelchair.
•The chair should be strong and robust to suit her outdoor lifestyle.
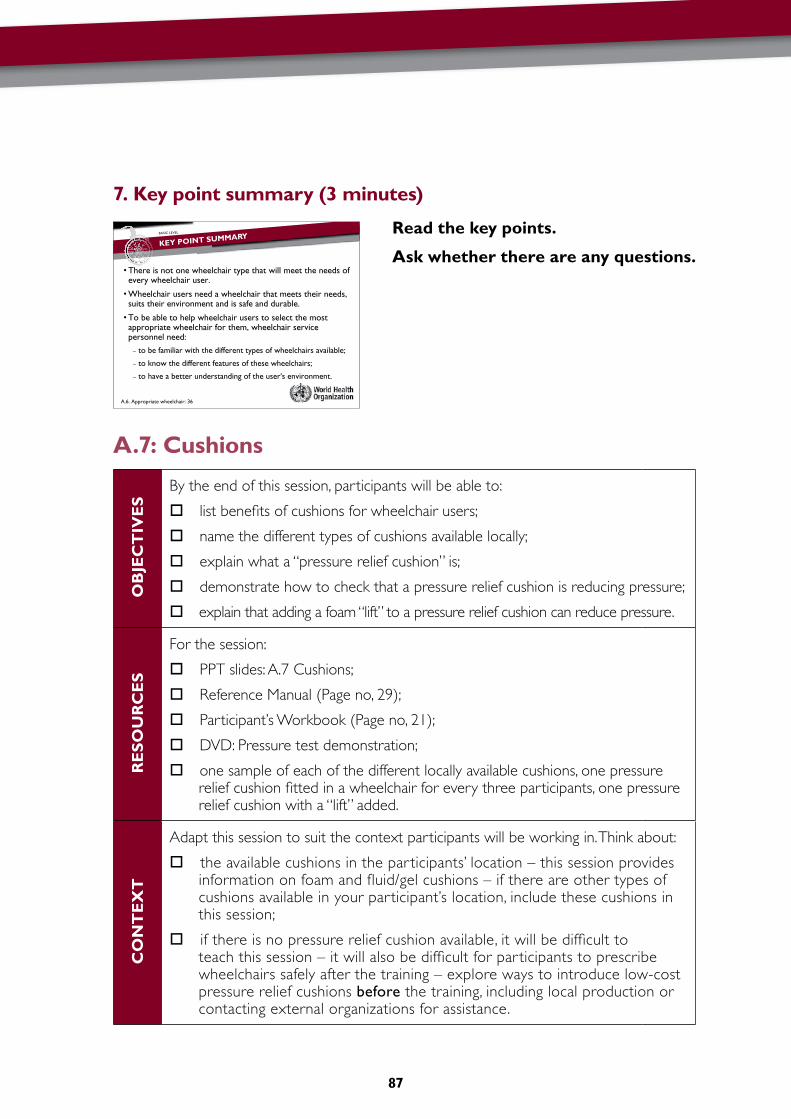
87
7. key point summary (3 minutes)
read the key points.
ask whether there are any questions.
a.7: cushions
OB
Jec
Tiv
eS
By the end of this session, participants will be able to:
list benefits of cushions for wheelchair users;
name the different types of cushions available locally;
explain what a “pressure relief cushion” is;
demonstrate how to check that a pressure relief cushion is reducing pressure;
explain that adding a foam “lift” to a pressure relief cushion can reduce pressure.
re
SO
Ur
ce
S
For the session:
PPT slides: A.7 Cushions;
Reference Manual (Page no, 29);
Participant’s Workbook (Page no, 21);
DVD: Pressure test demonstration;
one sample of each of the different locally available cushions, one pressure relief cushion fitted in a wheelchair for every three participants, one pressure relief cushion with a “lift” added.
cO
nT
eX
T
Adapt this session to suit the context participants will be working in. Think about:
the available cushions in the participants’ location – this session provides information on foam and fluid/gel cushions – if there are other types of cushions available in your participant’s location, include these cushions in this session;
if there is no pressure relief cushion available, it will be difficult to teach this session – it will also be difficult for participants to prescribe wheelchairs safely after the training – explore ways to introduce low-cost pressure relief cushions before the training, including local production or contacting external organizations for assistance.
Th i t h l h i t th t ill t th d f •There is not one wheelchair type that will meet the needs of every wheelchair user.
Wh l h i d h l h i h h i d •Wheelchair users need a wheelchair that meets their needs, suits their environment and is safe and durable.
T b bl h l h l h i l h •To be able to help wheelchair users to select the most appropriate wheelchair for them, wheelchair service personnel need:personnel need:– to be familiar with the different types of wheelchairs available;
t k th diff t f t f th h l h i– to know the different features of these wheelchairs;
– to have a better understanding of the user's environment.
A.6. Appropriate wheelchair: 36
BASIC LEVEL
KEY POINT SUMMARY

WheelchairService Training Package
88
BASIC LEVEL
TO
P
re
Par
e
Gather resources, review PPT slides, watch DVD and read through the session plan.
Ensure some of the available wheelchairs are fitted with a pressure relief cushion.
Have one of each locally available cushion and a cushion lift ready at the front of the training room.
OU
Tl
ine
1. Introduction.
2. What are cushions for?
3. Different types of cushions.
4. Pressure relief cushions.
5. How to test if a pressure relief cushion is working.
6. What action can be taken to reduce pressure?
7. Key point summary.
2
5
5
25
30
5
3
Total session time 75
1. introduction (2 minutes)
explain: in this session, we will talk about wheelchair cushions. We will learn why cushions are important, the different types of cushions, and how to check whether a cushion is fitting correctly.
2. What are cushions for? (5 minutes)
ask: What are the benefits of a wheelchair cushion for wheelchair users?
encourage answers.
Most important answers:
•pressure relief;•posture support;
•comfort.
• In this session participants will:
– Discuss why cushions are important;y
– Look at the different types of cushions;
– Practise how to check whether a cushion is fitting correctly.
A.7. Cushions: 2
BASIC LEVEL
INTRODUCTION

89
explain:
• a cushion is a very essential part of every wheelchair, for every wheelchair user.
• The type of cushion best suited to the user will depend on his/her needs.
• People who are at risk of developing a pressure sore should always use a pressure relief cushion.
• Not every wheelchair user needs a pressure relief cushion.
• However, all wheelchair users should be comfortable in the wheelchair, and all wheelchair users will benefit from support to help them to sit upright easily.
3. Different types of cushions (5 minutes)
explain: There are many different wheelchair cushion types.
ask: What are the different cushions participants have seen, or heard of?
encourage answers and write on the board.
answers may include:
•foam cushions;•cushions made from coconut fibre (coir);•cushions filled with air ;•cushions filled with fluid or gel;
•flat cushions;•contoured cushions;•moulded cushions;•layered cushions.
• Wheelchair cushions can provide:• Wheelchair cushions can provide:– comfort;
– postural support (help people to sit more upright);
– pressure relief.
• Every wheelchair user should use a cushion.
• The type of cushion best suited to the user will • The type of cushion best suited to the user will
depend on their needs.
• Any person at risk of developing a pressure sore
needs a pressure relief cushion.p
A.7. Cushions: 3
BASIC LEVEL
THE BENEFITS OF A WHEELCHAIR CUSHION

WheelchairService Training Package
90
BASIC LEVEL
explain: There are many different types of cushion. cushions can be described in different ways, including:
• the material they are made from (for example foam, coir);
• the material they are filled with (for example air, fluid or gel);
• their main function (for example pressure relief, comfort, posture support);
• their shape (for example flat or contoured);• how they are made (for example foam
cushions may be “moulded” from one piece of foam or “layered” – made from different layers of foam).
hold up the locally available cushions one by one. Describe each cushion by the material, main function, shape and whether the cushion is moulded or layered.
Pass each example cushion around the group.
4. Pressure relief cushions (25 minutes)
explain: in the session on pressure sores, we talked about making sure that any wheelchair user who is at risk of developing a pressure sore has a pressure relief cushion. in this session, we will look at what a pressure relief cushion is.
ask: Which of the sample cushions could act as a pressure relief cushion?
answer:
•any contoured foam cushions;•any air-filled or fluid-filled cushions.
C h b d b d • Cushions may be described in different ways including:
– the material they are made from or filled with;
– the main function of the cushion;
the cushion’s shape;– the cushion s shape;
– how the cushion is made.
A.7. Cushions: 4
BASIC LEVEL
THERE ARE MANY DIFFERENT TYPES OF CUSHIONS

91
Pressure relief cushions help to reduce pressure by:
• distributing a wheelchair user’s weight as evenly as possible across the seat surface;
• reducing pressure under high-pressure risk areas (seat bones, hip bones, coccyx/tail bone);
• reducing shear by assisting the wheelchair user to sit upright.
Foam pressure relief cushions
explain: We will talk first about foam pressure relief cushions.
explain: Firm stable base:
• The base of a pressure relief cushion should be firm.
• This will make sure the cushion provides good support for the user and does not move when the user moves.
explain: Top layer
• This is a layer (or more than one layer) of softer foam.
• The top layer should be soft enough to allow the seat bones to sink into it, but should not be so soft that the seat bones can sink all the way to the bottom and rest on the solid base or seat of the wheelchair.
explain:
Many foam pressure relief cushions have some shaping (contours) in the seat. shaping can:
• help to support the user;• help to distribute the user’s weight more evenly across the seat surface;• help to relieve pressure under the seat bones and at the coccyx.
• Distributing the user’s weight evenly across the seat g ysurface.
•Reducing pressure under high Reducing pressure under high pressure risk areas.
P ti h b ti • Preventing shear by creating a shelf in front of the seat bones and it can assist users bones and it can assist users to sit upright.
A.7. Cushions: 5
BASIC LEVEL
PRESSURE RELIEF CUSHIONS REDUCE PRESSURE BY:
A.7. Cushions: 6
BASIC LEVEL
FOAM PRESSURE RELIEF CUSHION: BASE LAYER
A.7. Cushions: 7
BASIC LEVEL
FOAM PRESSURE RELIEF CUSHION: WITH TOP LAYER

WheelchairService Training Package
92
BASIC LEVEL
shaping that you may see on a pressure relief cushion may include the following (click to show arrows on the slide):
• a “well” under the seat bones – to reduce pressure;
• a shelf in front of the seat bones – to keep the pelvis more upright and prevent sliding forward;
• support under the upper part of the thigh bones to help distribute weight;
• grooves or gutters for the rest of the thighs.
air/fluid/gel pressure relief cushions
explain: Now we will look at air/fluid/gel cushions.
explain:
• Flotation cushions include those filled with air and those that have a fluid or gel pack.
• Gel pack cushions should have a firm foam base, very similar to a foam contoured cushion.
• Over the base layer there is a gel/fluid pack.• The gel pack automatically matches the
shape of the wheelchair user’s body. This helps to distribute the wheelchair user’s weight evenly and reduces pressure under bony areas.
Which cushion to use?
explain: There are advantages and disadvantages of both foam contoured cushions and air/gel/fluid cushions. Draw the table below on the board (without the answers).
ask: What are some of the advantages and disadvantages? Write in the advantages and disadvantages that participants suggest. ensure that all in the list below are covered.
A.7. Cushions: 8
BASIC LEVEL
FOAM PRESSURE RELIEF CUSHION: CONTOURS
A.7. Cushions: 9
BASIC LEVEL
AIR/FLUID/GEL PRESSURE RELIEF CUSHION

93
advantages Disadvantages
Foam contoured cushion
•Can be made locally (where there is high-quality foam).
•Can be modified locally to accommodate different needs.
•Not subject to “sudden collapse” (a puncture which releases the air or fluid can stop the cushion from relieving pressure, causing “sudden collapse” of the cushion).
•The top layer of a layered foam cushion can be replaced easily and at a low cost (rather than replacing the whole cushion).
•Foam compresses (becomes flatter and firmer) over time. For this reason, foam cushions should be checked regularly and replaced every 1–2 years.
•Can take a while to dry out (a problem for people who are incontinent).
•Foam insulates and can cause an increase in tissue temperature.
air/fluid/gel cushions
•Pressure is distributed evenly over the seat surface.
•The gel pad automatically adapts to the body when the wheelchair user moves or changes position.
• Air/fluid/gel cushions are often more expensive and less readily available than foam cushions.
•Some wheelchair users find air/fluid/gel -filled cushions make them feel unstable.
•Subject to “sudden collapse”. In any context where a wheelchair user is not able to get a replacement cushion quickly, this can be a problem.
cushion covers
explain: all cushions should have a cushion cover. The type of cover is important.
Pass around one of each different cushion cover available.
ask participants to look closely at the covers and consider the questions on the slide.
• is the cover water-resistant or waterproof?
• is the cover likely to be durable (long-lasting)?
• is the cover stretchy?• is the cover made of thin material or
thick material?• can the cover be easily removed and
replaced for washing?
Is the cover:
• water resistant or waterproof?
• likely to be durable (long lasting)?
• stretchy?stretchy?
• made of thin material or thick material?
A.7. Cushions:10
BASIC LEVEL
CUSHION COVER QUESTIONS:

WheelchairService Training Package
94
BASIC LEVEL
ask:
• Which (if any) of the cushion covers is water-resistant or waterproof?• When would this be a useful feature?
answer:
•for wheelchair users who are incontinent;•for wheelchair users who may need to leave their wheelchair outdoors, or who are
outdoors themselves a lot.
explain:•Moisture is one risk factor that can increase the chance of a wheelchair user developing a
pressure sore. So keeping a cushion dry is very important.•Always advise wheelchair users to dry their cushion immediately if it becomes wet. Dry the
cushion away from direct sunlight, with the cover off.•Consider providing two cushions if a wheelchair user is incontinent.
Notes for trainers: Participants may ask what to do if there is no water-resistant or waterproof cushion cover available and a wheelchair user is incontinent. Options include:
• investigate what help can be given to help the wheelchair user reduce incontinence;• provide a second cushion – so that one can be drying while the user sits on the other;• protect the cushion with a very thin plastic bag inside the cover;
If using a plastic bag: – check that the plastic bag does not cause the user to “slide” on the cushion; – the wheelchair user must ensure that fluid does not “pool” over the plastic – this
increases the risk of a pressure sore. – the wheelchair user should ensure that the cover is dried out if it becomes wet and
the plastic bag cleaned or replaced.
ask:
• Which (if any) of the cushion covers is likely to be durable (long-lasting)?
explain: a durable cover is an important feature of any cushion.
ask:
• Which (if any) of the cushion covers is stretchy?• Why would this be a useful feature?

95
VIDEO
answer:
•a stretchy cover is more likely to follow the contours of a cushion – if a cover is not stretchy, there needs to be more “room” for the cover to fit into the contours.
ask:
• Which is the thinnest fabric? Which is the thickest fabric?• Why is the thickness/thinness of the fabric important?
answer:
•thick fabrics may last a long time, but they may not follow the contours of the cushion easily –folds in thick fabric can potentially cause a pressure sore;
•thin fabrics are more likely to follow the contours of the cushion and are less likely to cause a pressure sore, but they may not last as long – this depends on the quality of the fabric.
ask: Which covers are designed to come on and off for washing?
explain: This is an important feature for any wheelchair user who may be incontinent, spends a lot of time outdoors, or has to store their wheelchair outdoors.
explain: as for wheelchairs, cushions come in different sizes. it is important that the cushion which is selected for each wheelchair user matches the size of the wheelchair seat, which should be the right size for the wheelchair user.
5. how to test if a pressure relief cushion is working (30 minutes)
explain: Whenever a wheelchair user is provided with a pressure relief cushion, it is essential to check whether the cushion is actually working to relieve pressure.
ask: What is the part of the wheelchair user’s body which is most at risk of developing a pressure sore when sitting? encourage answers.
Most important answers:
•seat bones;•tail bone – particularly if the wheelchair user is sitting in a slumped posture.
introduce DvD: Pressure test demonstration. The DvD shows a simple test to check if a pressure relief cushion is reducing pressure under the user’s seat bones. Watch closely as you will practise this after the DvD.
Show DvD.ask if there are any questions.

WheelchairService Training Package
96
BASIC LEVEL
explain the levels of pressure:
level 1: •Finger tips can wriggle up and down. There is some compression of tissue but the bones in your finger tips are able to move 5 mm or more.
level 2: •Finger tips cannot wriggle, but can easily slide out from under the seat bones.
level 3: •Finger tips are squeezed firmly. It is difficult to slide fingers out of position.
explain: always check one seat bone at a time.
level Pressure action
1 Safe No
2 Warning Yes, if several pressure risk factors
3 Unsafe Yes
explain: We will talk about the action needed later in the session.
activity
groups: Have 2–3 people in each group.
Try to pair people of the same gender.
Give each group a wheelchair with a pressure relief cushion.
instructions: Ask each group to:
•practise checking the pressure under each seat bone;•record the level of pressure for each person in the group in their
workbook.Make sure everyone gets to practise being the “tester” and the “wheelchair user”.
Monitor: •Move around the groups and monitor/observe closely.•Correct techniques if needed.
Time: Allow 15 minutes plus 5 minutes for feedback.
Feedback: ask: What did it feel like being the wheelchair user?
explain: It is important to explain clearly to the user what you are doing, why it is important, and to check he/she is OK with doing this test.
ask: Does anyone have any questions about this technique?

97
notes for trainers: When monitoring the small groups – ensure the following steps are followed
a
•Explain simply to the wheelchair user what you are going to do, and why it is important.
B
•Ask the wheelchair user to push up or lean forward to allow you to place your finger tips under their left or right seat bone (palm up).
•This is best done from behind the wheelchair by reaching under the back upholstery with one hand.
c
•Ask the wheelchair user to sit back down on your fingers.•He/she should sit upright, face forward, and place the
hands on the thighs. This will ensure that he/she sits in the same position each time you move to check another location.
•If your fingers are not in a good position to feel the pressure under the bone, then ask the user to push up again and reposition your fingers.
D
•Identify the pressure under the first seat bone as level 1, 2 or 3.
Level 1 = safe: Fingertips can wriggle up and down 5 mm or more.
Level 2 = warning: Fingertips cannot wriggle, but can easily slide out.
Level 3 = unsafe: Fingertips are squeezed firmly. It is difficult to slide fingers out.
e
Repeat under the second seat bone.
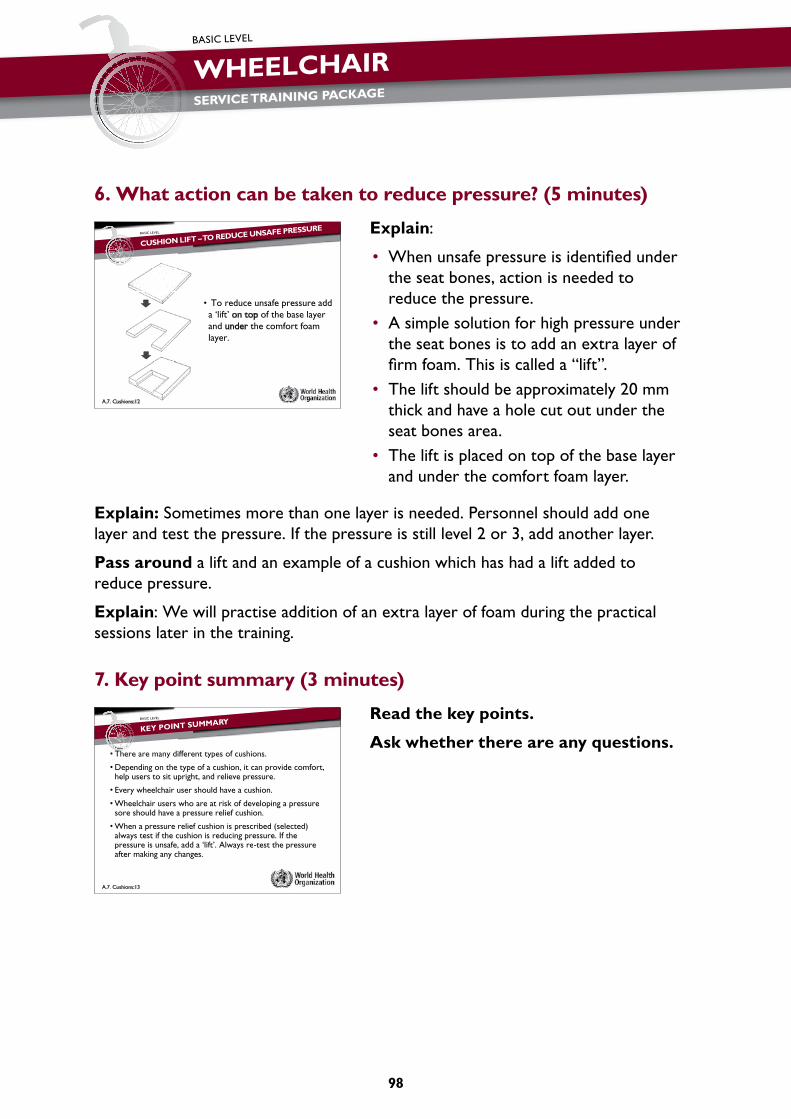
WheelchairService Training Package
98
BASIC LEVEL
6. What action can be taken to reduce pressure? (5 minutes)
explain:
• When unsafe pressure is identified under the seat bones, action is needed to reduce the pressure.
• a simple solution for high pressure under the seat bones is to add an extra layer of firm foam. This is called a “lift”.
• The lift should be approximately 20 mm thick and have a hole cut out under the seat bones area.
• The lift is placed on top of the base layer and under the comfort foam layer.
explain: sometimes more than one layer is needed. Personnel should add one layer and test the pressure. if the pressure is still level 2 or 3, add another layer.
Pass around a lift and an example of a cushion which has had a lift added to reduce pressure.
explain: We will practise addition of an extra layer of foam during the practical sessions later in the training.
7. key point summary (3 minutes)
read the key points.
ask whether there are any questions.
• To reduce unsafe pressure add a ‘lift’ on top of the base layer a lift on top of the base layer and under the comfort foam layerlayer.
A.7. Cushions:12
BASIC LEVEL
CUSHION LIFT – TO REDUCE UNSAFE PRESSURE
• There are many different types of cushions • There are many different types of cushions.
•Depending on the type of a cushion, it can provide comfort, help users to sit upright and relieve pressurehelp users to sit upright, and relieve pressure.
• Every wheelchair user should have a cushion.
Wh l h h k f d l •Wheelchair users who are at risk of developing a pressure sore should have a pressure relief cushion.
Wh li f hi i ib d ( l d) •When a pressure relief cushion is prescribed (selected) always test if the cushion is reducing pressure. If the pressure is unsafe, add a ‘lift’. Always re-test the pressure pressure is unsafe, add a lift . Always re test the pressure after making any changes.
A.7. Cushions:13
BASIC LEVEL
KEY POINT SUMMARY

99
a.8: Transfers
Getting in and out of the wheelchair
OB
Jec
Tiv
eS By the end of this session, participants will be able to:
list safety points to think about when getting in and out of a wheelchair ;
demonstrate different ways to get in and out of a wheelchair ;
select at least one transfer method that is best suited for a particular wheelchair user.
re
SO
Ur
ce
S
For the session:
PPT slides: A.8: Transfers;
Reference Manual;
Participant’s Workbook;
DVD: Transfer demonstration;
wheelchairs – one for each group of three.
assessment bed for transfer practice – one for each group of three;
transfer sliding board (if available);
cO
nT
eX
T
Adapt this session to suit the context participants will be working in. Think about:
the wheelchairs available locally, which may affect the transfer techniques taught – for example, a standing transfer with a three-wheel wheelchair instead of a four-wheel wheelchair with flip-up footrests requires changes to the method;
what transfer methods are most commonly used in the participants’ location – trainers may choose to change the methods taught or add more methods;
if teaching more than three transfer methods, allow 20–25 minutes for each additional transfer to be taught.
TO
P
re
P ar
e
Gather resources, review PPT slides, watch DVD and read through the session plan.
Practise each method of getting in and out of the wheelchair so that you are comfortable demonstrating it.
If possible, invite a wheelchair user who can demonstrate the transfers and assist in practice.

WheelchairService Training Package
100
BASIC LEVEL
OU
Tl
ine
1. Introduction
2. Why do wheelchair users need to learn how to transfer?
3. Getting in and out of a wheelchair safely
4. Three ways to get in and out of a wheelchair and individual feedback
5. Independent transfer from floor to wheelchair
6. Selecting transfers
7. Key point summary
2
5
10
60
20
20
3
Total session time 120
1. introduction (2 minutes)
explain:
• The ability to get in and out of the wheelchair easily and safely, with or without assistance, will help a wheelchair user in daily life.
• Getting in and out of the wheelchair can sometimes be called “transferring”.
• in this session, participants will practise four different ways wheelchair users may transfer in and out of their wheelchair.
2. Why do wheelchair users need to learn how to transfer? (5 minutes)
ask: What are some examples of times when wheelchair users have to transfer in and out of their wheelchair? encourage answers and write on the board.
answers may include:
•getting in and out of bed;•going to the toilet;•moving to and from a chair/bed/tricycle/the floor, etc.;•getting in and out of a car/bus/taxi/mini-cab/rickshaw, etc.
• In this session participants will:
– Talk about why knowing how to get in y g gand out of a wheelchair easily is important for users;
– Practise four different ways that wheelchair users may transfer in and
t f th i h l h iout of their wheelchair.
A.8. Transfers: 2
BASIC LEVEL
INTRODUCTION

101
explain:
• Wheelchair users may need to get in and out of their wheelchair several times a day.
• For this reason, wheelchair users need a method which is safe, quick and does not use much energy.
• Wheelchair users use different methods, depending on their abilities. some wheelchair users can get in and out of the chair themselves, and others need help. some users can stand up to transfer, and for others this is not possible.
• Personnel can help wheelchair users learn a method which suits them.
3. getting in and out of a wheelchair safely (10 minutes)
explain: safety when transferring is important. ask: What are some of the safety points that should be considered when transferring? encourage answers and write on the board.
Most important answers:
•put the brakes on;•check where you are going – make sure there is nothing in the way;•always lift – don’t bump or drag – this could cause skin damage and lead to a pressure sore;•before assisting someone, make sure you can support his/her weight;•do not assist if you are pregnant or have a back problem.
reinforce the three main safety points:
• put the brakes on;• check where you are going;• always lift – do not bump or drag.
• Wheelchair users may get in and out of their wheelchair Wheelchair users may get in and out of their wheelchair several times a day.
• Wheelchair users need a method which is:Wheelchair users need a method which is:– safe;
– quick; andq ;
– does not use much energy.
• Different methods suit different wheelchair users.
• Wheelchair personnel can help wheelchair users to learn a method that suits them best.
A.8. Transfers: 3
BASIC LEVEL
TRANSFERS ARE IMPORTANT
• Put the brakes on.• Check where you are going• Check where you are going.• Always lift – do not bump or drag.
A.8. Transfers: 4
BASIC LEVEL
SAFETY WHEN TRANSFERRING

WheelchairService Training Package
102
BASIC LEVEL
4. Three ways to get in and out of the wheelchair and individual feedback (60 minutes)
explain:
• We will now watch and practise three different ways to get in and out of a wheelchair.
• One transfer is an “independent” transfer, and the other two transfers are “assisted”.
Before recommending or practising a transfer with a wheelchair user, you need to know whether he/she can transfer independently or needs help. if you are not sure, check or test with the wheelchair user.
• To transfer independently through sitting, check that the wheelchair user can lift his/her weight upwards by pushing with the arms. if he/she cannot do this, he/she needs assistance to transfer.
• To transfer independently through standing, check that the wheelchair user can stand up and take his/her own weight through the legs. if he/she cannot do this, he/she needs assistance to transfer.
explain: For every transfer, participants should always remember the following:
• check if the wheelchair user can transfer independently or needs assistance;
• position the wheelchair close to the bed/surface the wheelchair user is transferring to;
• apply brakes;• if the wheelchair has armrests which are
in the way – check if they are removable.
• For standing transfers, move footrests out of the way (if possible).• always lift – do not drag. Dragging can cause skin damage which may lead to a
pressure sore.• During assisted transfers, encourage the wheelchair user to do as much of the
transfer independently as possible.• When assisting to lift a wheelchair user – do not grip clothes or belt loops.
Pulling on clothes can be very uncomfortable for the wheelchair user.
•Check whether the wheelchair user can transfer alone or needs help;
•To transfer independently through sitting – check that the user can lift gtheir weight upwards with their arms by pushing;y p g
•To transfer independently through standing – check that the user can standing – check that the user can stand up and take their weight through their legs. their legs.
A.8. Transfers: 5
BASIC LEVEL
BEFORE PRACTISING A TRANSFER – CHECK:
Ch k if h h l h i f l d h l• Check if the wheelchair user can transfer alone or needs help.
• Position the wheelchair.
• Apply brakes.
• Remove armrests if they are in the way (if armrests are removable).
• For standing transfers – move footrests out of the way (if possible).
• Always lift do not drag• Always lift – do not drag.
• During assisted transfers, encourage the wheelchair user to do as much of the transfer themselves as they are able to.y
• When helping to lift a wheelchair user – do not grip clothes or belt loops.
A.8. Transfers: 6
BASIC LEVEL
FOR EVERY TRANSFER REMEMBER:

103
activity
groups: Have three people in each group. Give each group a wheelchair and a bed.
instructions: explain – participants will watch the DVD demonstration of three different transfers. After each transfer demonstration, the video will be paused. Participants will practise the transfer they have just seen in pairs. They may refer to their Reference Manual if they like.
show DvDask if there are any questions.
Monitor: After each part of DVD demonstration highlight the key points outlined below.
Monitor and correct techniques if needed.
Make sure everyone has a chance both to transfer and to assist.Time: Allow 60 minutes.
Feedback: ask whether anyone has any questions.
clarify any common problems or mistakes that groups may have made in their practice.
1. independent transfer through sitting (wheelchair to bed)
Highlight these key points after the DVD demonstration and before practice.
•Position wheelchair close to the bed, apply brakes.•Take feet off and swing away or remove (where applicable) the footrests.•Remove armrest closest to the bed.•Push up on hands and move to the front of the wheelchair.•With one hand on the bed and the other on the wheelchair, push up and lift on to the bed.•If the user has poor balance or cannot lift high enough or move sideways far enough, he/
she may use a transfer board, if necessary.
explain:
•If transferring to a bed, some wheelchair users prefer to place their legs on to the bed before transferring.
VIDEO

WheelchairService Training Package
104
BASIC LEVEL
2. assisted transfer through sitting with a transfer board (wheelchair to bed)
highlight these key points after the DvD demonstration and before practice
•Position the wheelchair close to bed, apply brakes.
•Take feet off and swing or remove (where applicable) the footrests.
•Remove armrest closest to the bed.•Assist user to move forward.•Put a transfer board under the buttocks
across the wheelchair and bed.•User to assist as much as possible by
pushing up on the wheelchair and bed to take own weight.
•Assistant stands behind user, and moves user’s pelvis over to the bed.
3. assisted standing transfer (bed to wheelchair)
highlight these key points after the DvD demonstration and before practice
•Position the wheelchair close to bed, apply brakes.
•Take feet off and swing away or remove (where applicable) the footrests.
•Remove armrest closest to the bed.•Assist user to move forward on the
bed and place feet on the floor.•Support the user’s knees from the
side (do not push against knees from the front).
•Bring user’s body forwards and upwards by supporting around the shoulder blades.
•Twist the user towards the wheelchair and allow him/her to sit down gently.
5. independent transfer from floor to wheelchair (20 minutes)
explain:
• This transfer requires the wheelchair user to have strong arms and good balance.
Wheelchair users at risk of developing a pressure sore should always sit on their pressure relief cushion when sitting on the floor.

105
activity
groups: Have two people in each group. Give each pair a wheelchair.
instructions: Demonstrate the transfer if you are able (or ask a wheelchair user who can do this transfer to demonstrate). Highlight the key points outlined below.
ask participants to practise in pairs.
Monitor: Monitor and correct techniques if needed.
Make sure everyone has a chance to practise.
Time: Allow 10 minutes.
Feedback: ask: How many people were able to do this transfer?
acknowledge that it takes good upper body strength. For active and fit wheelchair users with good arm strength, it is a skill worth practising.
independent transfer from floor to wheelchair
explain: When transferring from the floor to the wheelchair :
•sit in front of the wheelchair and draw knees up close to the body;•look down and keep looking down throughout the lift;•place one hand on the floor and one hand on the front of the wheelchair seat;•push down with shoulders and arms to lift buttocks up and on to the front of the
wheelchair seat;•sit back into the wheelchair and reach down to pick up wheelchair cushion;•shifting your weight to one side, push the wheelchair cushion into place.
explain: When transferring from the wheelchair to the floor:
•sit at the front of the wheelchair ;•lift feet off the footrests in front of you and slightly to the side (away from the direction
you are transferring);•place your cushion on the floor;•with one hand on the wheelchair seat, reach down to the floor with the other hand;•using shoulders and arms, control the buttocks down on to the cushion placed on the
floor in a controlled movement.

WheelchairService Training Package
106
BASIC LEVEL
6. Selecting transfers (20 minutes)
explain:
• When wheelchair service personnel provide a wheelchair user with a wheelchair, it is part of their role to make sure the wheelchair user is able to transfer safely and easily.
• Many users will already have a way of transferring.• always ask users to demonstrate how they usually get in and out of the
wheelchair.• if the transfer method they are using is safe and effective, no further action is
necessary.• if not, wheelchair service personnel can teach wheelchair users how to get in
and out of the wheelchair more safely and easily.• The first step is to decide which transfer method will best suit the user.
This next activity is to help participants practise thinking about the method of transfer which will best suit different users.
activity
groups: Have three people in each group.
instructions: Ask each group to:
•read the user stories in their workbook;•decide for each wheelchair user which transfer method will best suit them.
Monitor: Monitor the groups and assist if necessary.
Time: Allow 10 minutes.
Feedback: Ask each group to feed back which transfer method they selected for each wheelchair user, and briefly explain why.

107
User’s story learning points
Faridah is 60 years old. She was referred to the wheelchair service by the local hospital. She has recently had a stroke, and needs a wheelchair as she cannot walk. She can stand up a little and take her own weight. However she is very unsteady on her feet. Faridah lives with her daughter and her family. Her daughter does not work and is able to help her mother at home. She has a four-wheel wheelchair with swing-away footrests.
•Faridah should be able to transfer through standing with assistance.
•Her daughter is at home and able to assist. She should be involved in transfer education.
Jose is 45 years old and has been using a wheelchair for 10 years. He is a double above-knee amputee, and works in a radio repair workshop in the local market. Jose has come to the wheelchair service to get a new wheelchair, as his old one is very worn.
•Jose should be able to transfer through sitting independently.
Tahir is 14 years old and has recently been referred to the wheelchair service for a wheelchair after falling from a tree and suffering a spinal cord injury. Tahir has good use of his arms but he is not yet very strong. He cannot use his legs at all.
•Tahir should be able to transfer through sitting with assistance or a transfer board. With practice, he may be able to transfer on his own.
7. key point summary (3 minutes)
read the key points.
ask whether there are any questions.•Wheelchair users need to be able to get in and out of •Wheelchair users need to be able to get in and out of their wheelchair safely, quickly and without too much effort.•When getting in and out of a wheelchair, users need to remember three main safety points:– use the brakes;
– check the area;
– lift – do not bump or drag.
•Wheelchair personnel play an important role in helping Wheelchair personnel play an important role in helping wheelchair users to learn a safe and effective way to get in and out of their wheelchair.
A.8. Transfers: 8
BASIC LEVEL
KEY POINT SUMMARY

WheelchairService Training Package
108
BASIC LEVEL
B: Wheelchair service steps

109
B.1: referral and appointment
OB
Jec
Tiv
eS By the end of this session, participants will be able to:
describe how wheelchair users may be referred to a wheelchair service;
describe the appointment system used in the local wheelchair service.
re
SO
Ur
ce
S For the session:
PPT slides: B.1 Referral and appointment;
Reference Manual;
Wheelchair service referral form (if available).
cO
nT
eX
T
Adapt this session to suit the context participants will be working in. Think about:
how wheelchair users are referred to services in the participants’ area;
if the wheelchair services that participants come from have a defined method of referral and an appointment system, teach this as a part of this session – introduce any forms in use and give participants a chance to practise using them.
TO
Pr
ePa
re Gather resources, review PPT slides and read through the session plan.
Prepare OR ask participants to bring a list of the different ways that wheelchair users are referred to their wheelchair service.
OU
Tl
ine
1. Introduction.
2. Referral.
3. Appointment.
4. Key point summary.
2
12
13
3
Total session time 30

WheelchairService Training Package
110
BASIC LEVEL
1. introduction (2 minutes)
explain: Referral and appointment is the first step in wheelchair service delivery. in this session, we will discuss the different ways that wheelchair users may be referred to a wheelchair service, and different appointment systems.
2. referral (12 minutes)
ask: What does “referral” mean? encourage answers.
Most important answer:
•sending or directing a person to the right place for care or help.
Show slide.
explain: There are different ways that wheelchair users may be referred to a wheelchair service. For example, wheelchair users may:
• hear about the service and come themselves;• be directed to the service by the local hospital, community health centre,
community-based rehabilitation service, village/council/church leaders, disabled people’s organizations, other wheelchair users.
ask: What other organizations, services or people may refer wheelchair users to a wheelchair service? encourage answers.
Step 1Referral and appointment
• In this session participants will:
Referral and appointment
– Discuss the different ways that the wheelchair users may be referred to a wheelchair service;
– Discuss different appointment systems.
B.1. Referral and appointment: 2
BASIC LEVEL
INTRODUCTION
•Referral means: Sending or directing a person to the right place for care or assistance.g p
B.1. Referral and appointment: 3
BASIC LEVEL
WHAT IS REFERRAL?

111
answers may include:
•doctors;•village/council/church leaders;•rehabilitation centres;
•disabled people’s organizations;•other wheelchair users;•nongovernmental organizations.
explain: These organizations, services or people are all “referral sources”. Wheelchair services can help increase the number of wheelchair users who are referred to the service by making sure that all possible referral sources know about the service.
ask participants to look at the sample wheelchair service referral form in the participant’s Reference Manual Or
hand out local wheelchair service referral form, if there is one.
explain:
• Providing referral sources with a wheelchair service referral form can help to give the wheelchair service some simple initial information about the wheelchair user.
• each wheelchair service needs to decide whether a wheelchair service referral form is useful for that service, what information to include and how the form will be used (for example, posted to the service or handed to the wheelchair user to bring).
•Different ways that wheelchair users may be referred to a •Different ways that wheelchair users may be referred to a wheelchair service are:
d / / h l h l / h b l – doctors / nurses / health clinics / rehabilitation centres;
– village / council / church leaders;
– disabled persons organizations;
– other wheelchair users;other wheelchair users;
– nongovernmental organizations.
• Increase the number of wheelchair users referred to a service by telling referral sources about the service.
B.1. Referral and appointment: 4
BASIC LEVEL
REFERRAL SOURCES
B.1. Referral and appointment: 5
BASIC LEVEL
SAMPLE REFERRAL FORM

WheelchairService Training Package
112
BASIC LEVEL
3. appointment (13 minutes)
explain:
• When a wheelchair user is referred to a wheelchair service, he/she should be given an appointment for an assessment. The appointment may be for the wheelchair user to visit the service/centre, or for wheelchair service personnel to visit the user.
• an appointment system helps wheelchair service personnel organize their time. it also helps wheelchair users avoid having to wait around to see wheelchair service personnel.
• The way the appointment is made depends on how easy it is to get a message to the wheelchair user.
ask: What are some of the ways that a wheelchair service could get a message to a wheelchair user? encourage answers.
answers may include:
•telephone;•post;•send a message with a community worker;•radio;
•send a message back to the referral source, asking it to contact the wheelchair user ;
•send a message through a friend/family member.
explain: sometimes wheelchair users will arrive without an appointment. if the wheelchair user has travelled a long way, it is important to try and arrange a way to see him/her.
if there is a specific appointment system in the participant’s local wheelchair service, explain the system.
• When a wheelchair user is referred to a wheelchair service, he or she should be given an appointment for an assessmentan assessment.
• An appointment system helps:
– wheelchair personnel to organize their time;
– wheelchair users to avoid having to wait around gfor wheelchair personnel to see them.
• Appointment systems need to be practical for pp y pwheelchair users and the wheelchair service personnel.
B.1. Referral and appointment: 6
BASIC LEVEL
APPOINTMENT

113
4. key point summary (3 minutes)
read the key points.
ask whether there are any questions.
B.2: assessment
OB
Jec
Tiv
eS By the end of this session, participants will be able to:
explain the purpose of assessment;
list the two parts of a wheelchair assessment;
list information that is gathered during an assessment.
re
SO
Ur
ce
S For the session:
PPT slides: B.2 Assessment;
Reference Manual.
cO
nT
eX
T Adapt this session to suit the context participants will be working in. Think about:
how assessment is carried out in the participants’ service.
TO
Pr
ePa
re Gather resources, review PPT slides and read through the session plan.
• It is important to tell referral sources about the service• It is important to tell referral sources about the service.
•A wheelchair referral form can help to give a wheelchair service some initial information about the wheelchair user.
•An appointment system can help wheelchair personnel pp y p porganize their time; and reduces waiting times for wheelchair users.
•Referral systems and appointment systems need to be practical for the wheelchair users and wheelchair services. pThis includes considering how easily people can travel and the different ways that messages can be send.
B.1. Referral and appointment: 7
BASIC LEVEL
KEY POINT SUMMARY

WheelchairService Training Package
114
BASIC LEVEL
OU
Tl
ine
1. Introduction.
2. Who needs a wheelchair?
3. Why do you need an assessment?
4. Where to carry out assessment.
5. Two parts of basic assessment.
6. Key point summary.
2
5
10
5
5
3
Total session time 30
1. introduction (2 minutes)
explain:
• assessment is the second step in wheelchair service delivery.
• in this session, we will explain why assessment is important and introduce the two parts of the assessment.
• During the assessment sessions, remember that wheelchair users need to be actively involved in the assessment – ask and listen to their answers and opinions.
2. Who needs a wheelchair? (5 minutes)
explain: When someone comes to a wheelchair service for a wheelchair, it is important to be sure that a wheelchair is really what they need.
ask: How do you know if someone needs a wheelchair?
encourage answers and write on the board.
Most important answers:
•the person cannot walk;•the person can walk – however, walking is difficult or he/she can walk only for a short
distance.
Step 2Assessment
• In this session participants will:
Assessment
– Explain why assessment is important;
– Introduce the two parts of a basic wheelchair passessment.
B.2. Assessment: 2
BASIC LEVEL
INTRODUCTION

115
explain:
• even if a person can walk for a short distance, he/she may need a wheelchair for longer distances.
• Using a wheelchair will not usually stop someone from using his/her ability to walk.
• The right choice is the one that helps the user to be as mobile as possible and have the best quality of life. it is the user’s right to choose.
3. Why do you need an assessment? (10 minutes)
ask: Why do you need an assessment?
encourage answers and write on the board.
Most important answers:
•to help choose the most appropriate wheelchair for the wheelchair user from those available;•to help choose the most appropriate wheelchair components from those available ;•to find out what training the wheelchair user and/or the family need to make the most of
the wheelchair.
ask: What information do participants think should be gathered in an assessment?
encourage answers and write on the board.
answers may include:
•name, age, address;•where the user lives – type of ground,
size of house, steps, etc.;•where the user works or goes to school;•the things the wheelchair user does, or
wants to do (lifestyle);•how far the wheelchair user may need
to travel each day;•how the wheelchair user gets in and out
of the wheelchair (transfers);•who the person lives with;
•the wheelchair user’s impairment or disability;
•his/her physical abilities;•how long the wheelchair user spends in the
wheelchair every day;•health – including risk of pressure sores;•physical dimension;•whether the user already has a wheelchair
and whether it meets his/her needs;•how the wheelchair user travels around
– for example, does he/she use public transport?
• People usually need a wheelchair because:
– they cannot walk;y
– they can walk, but with difficulty or only for a short distances.
• E if lk f h t di t th d • Even if a person can walk for a short distance they may need a wheelchair for longer distances.
•Using a wheelchair will not usually stop someone from using their ability to walk.
•The right choice is the one that assists the user to be as mobile as possible and have the best quality of life.
B.2. Assessment: 3
BASIC LEVEL
WHO NEEDS A WHEELCHAIR?

WheelchairService Training Package
116
BASIC LEVEL
explain:
• all of this information helps the wheelchair user and personnel to: - choose the most appropriate
wheelchair and cushion; - choose the most appropriate
wheelchair parts/features and; - identify what training or support the
wheelchair user may need.• For example:
- a wheelchair user who spends all day in the wheelchair and travels long distances will need a wheelchair that is comfortable, supports him/her well, and is strong and good for pushing outdoors;
- a wheelchair user who does not have an efficient way of getting in and out of the wheelchair may need help to learn ways to transfer.
4. Where to carry out assessment (5 minutes)
explain:
• assessments should always be carried out in a quiet and clean space.
• This may be a space within the wheelchair service, at another health-care or community facility, or at the user’s home.
ask: Where will participants carry out assessments in their wheelchair service?
acknowledge answers. if participants do not know, remind them that they will need to make sure there is a quiet and clean space they can use to carry out wheelchair assessments.
•The information gained from an •The information gained from an assessment helps the wheelchair user and wheelchair personnel to: and wheelchair personnel to:
– choose the most appropriate wheelchair for the wheelchair user wheelchair for the wheelchair user from those available;
– choose the most appropriate choose the most appropriate wheelchair components from those available;
– find out what training the wheelchair user and/or the family need to make the best use of the wheelchair.
B.2. Assessment: 4
BASIC LEVEL
WHY DO YOU NEED AN ASSESSMENT?
A t h ld l b •Assessments should always be carried out in a quiet and clean space.
•This may be a space within the wheelchair service, at another health care or community facility, or at the user's home.
B.2. Assessment: 5
BASIC LEVEL
WHERE TO CARRY OUT AN ASSESSMENT?

117
5. Two parts of basic assessment (5 minutes)
explain:
assessment is carried out in two parts:
• assessment interview;• physical assessment.
information is recorded on a wheelchair assessment form. in the next few sessions, participants will begin practising carrying out a wheelchair assessment.
6. key point summary (3 minutes)
read the key points.
ask whether there are any questions.
•Assessment is carried out in two parts:parts:– interview assessment;
– physical assessment.
B.2. Assessment: 6
BASIC LEVEL
TWO PARTS OF A BASIC ASSESSMENT
•Wheelchair users should be an equal participants in their wheelchair assessment.
•Assessment means gathering information to help choose the most appropriate wheelchair for the wheelchair user from
those available.
•Assessment also helps to identify what type of training the wheelchair user may need.
•Assessment should be done in a quiet and clean space.
•Assessment is carried out in two parts – interview assessment and physical assessment.
B.2. Assessment: 7
BASIC LEVEL
KEY POINT SUMMARY

WheelchairService Training Package
118
BASIC LEVEL
B.3: assessment interview
OB
Jec
Tiv
eS
By the end of this session, participants will be able to:
demonstrate an assessment interview;
record information from an assessment interview on a wheelchair assessment form;
explain how questions in the assessment interview help to choose the most appropriate wheelchair and to identify what a wheelchair user may need to learn.
re
SO
Ur
ce
S For the session:
PPT slides: B.3 Assessment interview;
Reference Manual;
Participant’s Workbook;
one wheelchair for each group of three.
cO
nT
eX
T Adapt this session to suit the context participants will be working in.
If there is a disability type which is very common in the local context, and is not covered in the wheelchair assessment form, add this to the wheelchair assessment form and include in the session.
Change the user’s stories if these do not suit the local context.
TO
Pr
ePa
re Gather resources, review PPT slides and read through the session plan.
OU
Tl
ine
1. Introduction.
2. Information about the wheelchair user.
3. Physical condition.
4. Lifestyle and environment.
5. Existing wheelchair.
6. Assessment interview practice.
7. Key point summary.
2
10
15
15
5
40
3
Total session time 90

119
1. introduction (2 minutes)
explain:
in this session, participants will:• learn how to carry out the first part of
the assessment – the interview;• look at each part of the assessment
interview and learn how the answers to the questions in the assessment interview affect the choice of wheelchair.
each participant will have a chance to practise being the interviewer.
2. information about the wheelchair user (10 minutes)
explain: Before we begin looking at the interview questions, there are a few things to remember when asking questions.
• always explain to the wheelchair user before you begin that the questions you are going to ask will help you and the wheelchair user choose the most appropriate wheelchair.
• always address the wheelchair user (not the assistant/family member) unless he/she is a small child or unable to understand or answer your questions.
• Use good communication techniques.
ask: What are some examples of good communication techniques?
encourage answers and write on the board.
Most important answers:
•speak clearly;•use straightforward terms;•explain what is going to happen before it happens;•after explaining something, check that the wheelchair user understands;• listen carefully and check to make sure you have understood the wheelchair user correctly;•make eye contact (where appropriate);•be respectful;•don’t assume you know best;•show you are interested.
Step 2Assessment
• In this session participants will:
Assessment
– Learn how to carry out the first part of the assessment – the interview.
– Look at each part of the interview and learn how the answers to the questions in the assessment interview answers to the questions in the assessment interview affect the choice of the type of the wheelchair.
B.3. Assessment interview: 2
BASIC LEVEL
INTRODUCTION

WheelchairService Training Package
120
BASIC LEVEL
Give a wheelchair assessment form to each participant. Start PPT slides B.3 assessment interview.
explain:
• information from four areas is collected in the assessment interview.
• We will look at each area now, and explain how the answers to the questions in the assessment interview affect the choice of wheelchair.
• Questions do not need to be asked in the order given on the form. sometimes wheelchair users will volunteer information before they are asked, or it may be more natural to ask questions in a different order.
explain:
• The “information about the wheelchair user” questions ensure that the wheelchair user can be contacted for follow up in the future.
• They also help the service to gather statistics about wheelchair users seen at the service.
3. Physical condition (15 minutes)
explain:
• Under the heading “physical condition”, personnel will name the wheelchair user’s condition if this is known, and note whether the wheelchair user has any physical conditions which will affect the choice of a wheelchair.
• some of the most common conditions are listed with a tick box. These are: cerebral palsy, polio, spinal cord injury and stroke.
• There is also a tick box for “others”. if you tick “others”, you can write the condition next to the tick box.
• information about the wheelchair user;•physical condition;physical condition;• lifestyle and environment;
•existing wheelchair.
•Questions do not need to be asked in the order shown on the assessment form.
B.3. Assessment interview: 3
BASIC LEVEL
ASSESSMENT INTERVIEW
Information about the wheelchair user
Number:Name:
Male Female Age:
Address:Phone no.:
Goals:
B.3. Assessment interview: 4
BASIC LEVEL
INFORMATION ABOUT THE WHEELCHAIR USER
Physical conditionyCerebral palsy Polio Spinal cord injury Stroke
Frail Spasms or uncontrolled movements
Amputation: R above knee R below knee L above knee L below knee
Bladder problems Bowel problems
If h h l h i h bl dd b l bl i hi d? Y N If the wheelchair user has bladder or bowel problems, is this managed? Yes No
Others: ________________________________________________________________
B.3. Assessment interview: 5
BASIC LEVEL
PHYSICAL CONDITION

121
explain:
• it is helpful (although not always necessary) to know which condition a wheelchair user has.
• This is because some of the features of different conditions can affect the choice of wheelchair.
• We will now look at the most important things to remember for the different conditions when prescribing (selecting) a wheelchair.
• This information is in the reference manual.
explain:
• cerebral palsy affects people very differently.
• For a person with cerebral palsy who can sit upright, it is important to remember that they may have difficulty keeping their sitting position because they get tired. This makes doing things harder and more tiring.
• Good support is very important.• People with cerebral palsy may
need additional postural support in a wheelchair. To do this safely and effectively, intermediate-level training is needed.
click through the slide to emphasize the key points to remember.
•Remember:
People with cerebral palsy – People with cerebral palsy usually need very good support in their support in their wheelchair;
Refer an erson who – Refer any person who needs extra support to sit upright to an intermediate upright to an intermediate level training.
B.3. Assessment interview: 6
BASIC LEVEL
CEREBRAL PALSY

WheelchairService Training Package
122
BASIC LEVEL
explain:
• People who have poliomyelitis may have weakness or “floppiness” of body parts. Poliomyelitis can affect legs, arms or trunk, but most commonly it affects the legs.
• The muscles and bones become thinner and the limb does not grow so fast and so is shorter.
• When the trunk is affected, it may appear shorter.
• although people with poliomyelitis have sensation, a cushion is important for comfort.
• a higher cushion may provide a more comfortable pushing position.
click through the slide to emphasize the key points to remember.
explain:
• People with a spinal cord injury are very likely to be at risk of developing a pressure sore.
• This is because most people with a spinal cord injury cannot feel below the level of their injury.
• always prescribe a pressure relief cushion.
click through the slide to emphasize the key points to remember.
•Remember:
A cushion can be important – A cushion can be important for comfort;
C k – Contractures can make sitting upright difficult;
– Work out an individual solution for each person;
– A higher/thicker cushion may provide a more comfortable ppushing position.
B.3. Assessment interview: 7
BASIC LEVEL
POLIOMYELITIS
•Remember:– Always prescribe a Always prescribe a pressure relief cushion.
B.3. Assessment interview: 8
BASIC LEVEL
SPINAL CORD INJURY

123
explain:
• People who have had a stroke are usually affected on one side of their body. This means they may fall to one side in the wheelchair.
• People who have had a stroke may not be able to feel normally on the affected side of their body.
• People who have had a stroke may be able to get in and out of the wheelchair by standing up.
• Good support is important.• check if the person can feel – he/she may
need a pressure relief cushion.• a person with a stroke may prefer a
wheelchair with footrests which move out of the way so that he/she can do a standing transfer.
click through the slide to emphasize the key points to remember.
explain:
• We will now look at how other conditions may affect the choice of wheelchair.
explain:
• People who are double amputees do not have the weight of their legs to stop their wheelchair from tipping backwards.
• always be careful when an amputee first tries a wheelchair.
• check the wheelchair balance. The rear wheel may need to move backwards to provide extra stability.
click through the slide to emphasize the key points to remember.
•Remember:
Good support is important;– Good support is important;
– Footrests that move away for d f b a standing transfer may be
important;
– Think about how the wheelchair user will propel themselves.
B.3. Assessment interview: 9
BASIC LEVEL
STROKE
•Remember:
Check wheelchair balance;– Check wheelchair balance;
– Teach mobility skills carefully;
– Always be careful when an amputee first tries a wheelchair;
– The rear wheels may need to e ea w ee s ay ee to move backwards to provide extra stability.y
B.3. Assessment interview: 10
BASIC LEVEL
LOWER LIMB AMPUTATION

WheelchairService Training Package
124
BASIC LEVEL
explain:
• elderly people may need a wheelchair for different reasons. Usually it is because they are having difficulty walking. The wheelchair will make it easier for them to continue to be a part of family and community life.
• elderly people may be able to do a standing transfer, and will prefer a wheelchair with flip-up or swing-away footrests.
• elderly people should always be given a wheelchair which provides good comfort and support. This will help them to sit well and avoid problems caused by poor posture.
• Flip-up or swing-away footrests may be the best choice.
click through the slide to emphasize the key points to remember.explain:
• some people have problems with sudden, jerking movements that they cannot control (spasms).
• spasms can throw the person’s weight backwards, which could cause the wheelchair to tip over. in this case, a safe back wheel position should be considered.
• spasms can cause feet to “jump” off the footrests. This can be dangerous when propelling. a calf strap may help keep the foot in position. a lap strap may also help.
• straps should fasten with velcro so the strap will release if the user falls out of the wheelchair.
click through the slide to emphasize the key points to remember.
•Remember:– Provide good comfort and Provide good comfort and support;
– Flip-up or swing-away – Flip-up or swing-away footrests may be the best choice.
B.3. Assessment interview: 11
BASIC LEVEL
FRAIL
•Remember:
Safe back wheel position;– Safe back wheel position;
– Straps may be helpful.
B.3. Assessment interview: 12
BASIC LEVEL
SPASMS OR JERKY MOVEMENTS

125
explain:
• some people have difficulty controlling their bladder or bowels. This is very commonly a problem for people with a spinal cord injury.
• These problems can be overcome with the right equipment, medication and a bladder and bowel training programme. identify who in your area, e.g. specialist doctors and nurses, can offer advice and training on bowel and bladder management.
• People with bladder or bowel problems must not sit on a damp or soiled cushion, as the skin can rapidly break down. in addition, the bugs present in faeces rapidly lead to infected pressure sores.
• Provide a cushion with a waterproof cover. Teach the user how to wash and dry the cushion.
• a second cushion is often needed to enable the wheelchair user to continue with day-to-day activities while waiting for the cushion to dry.
click through the slide to emphasize the key points to remember.
4. lifestyle and environment (15 minutes)
explain:
• The lifestyle and environment questions gather information about where the wheelchair user lives and the things that he/she needs to do in the wheelchair.
read out each question/point and ask: How will answers to this question help in choosing the most appropriate wheelchair, or identify what the wheelchair user may need to learn?
acknowledge answers and give examples if necessary.
•Remember:– Refer wheelchair user to Refer wheelchair user to someone who can help resolve bowel or bladder problems;
– Prescribe a waterproof cushion cover if available;
– Teach how to wash and dry the cushion,
– Prescribe two cushions if possible.
B.3. Assessment interview: 13
BASIC LEVEL
LIFESTYLE AND ENVIRONMENT
Describe where the wheelchair user will use their wheelchair: ____________________________________________________________________________
D ll d d U 1 k 1 5 k M h 5 k Distance travelled per day: Up to 1 km 1–5 km More than 5 km
Hours per day using wheelchair? Less than 1 1-3 3-5 5-8 more than 8 hours
When out of the wheelchair where does the user sit or lie down and how (posture and the surface? When out of the wheelchair, where does the user sit or lie down and how (posture and the surface? ____________________________________________________________________________
Transfer: Independent Assisted Standing Non Standing Lifted Other
Type of toilet (if transferring to a toilet): Squat Western Adapted
Does the wheelchair user often use public/private transport? Yes No
If yes, then what kind: Car Taxi Bus Other _____________________________
B.3. Assessment interview: 14
BASIC LEVEL
LIFESTYLE AND ENVIRONMENT

WheelchairService Training Package
126
BASIC LEVEL
Question: Most important answers
Describe where the wheelchair user will use their wheelchair
•The wheelchair needs to be practical for the wheelchair user’s home, work or school. For example: - if the wheelchair will be used at home, the wheelchair user needs to be able to move about the home easily to carry out important day-to-day activities;
- a wheelchair user who works in an office will need a wheelchair which can fit easily into the office space;
- a wheelchair user who goes to school will need the wheelchair to fit comfortably in the classroom and under a desk, or will need a tray built on to the wheelchair ;
- a wheelchair user who needs to travel to the market to work on a rough track needs a wheelchair which works well on rough terrain.
Distance travelled per day?
•Just as someone may walk if going a shor t distance, but use a bicycle for longer distances, a wheelchair user may use a wheelchair for shor ter distances and a tricycle for longer distances.
•A tricycle takes less energy to cover the same distance and is faster.
hours per day using wheelchair?
•The longer the person sits in the wheelchair, the greater the risk of fatigue or a pressure sore. Think about how much support the person needs and whether the cushion provides enough pressure relief and comfort.
•For any person who is “active” in their wheelchair during the day, the wheelchair should be set up to make pushing and other activities as efficient as possible. The wheels position is impor tant. It is also impor tant to check that the backrest suppor ts the user, but does not restrict freedom of movement of the shoulders.
Transfer used •Armrests and footrests can affect how a wheelchair user gets in and out of the wheelchair : - for standing transfers, it is helpful to have footrests which move out of the way and armrests that the user can use to push up;
- for non-standing transfers, removable armrests or armrests which follow the profile of the wheels can make the transfer easier.
Type of toilet The type of toilet and physical access to the toilet will affect how easy it is for the wheelchair user to use it.
It may not be possible to use the toilet because of the design. For example, most wheelchair users find it very difficult to use squat toilets.
By asking about the toilet and where the toilet is, the personnel can offer advice on how to transfer to and from the toilet. Personnel may also offer advice on how to adapt the toilet.

127
Does the wheelchair user often use public/private transport?
If a wheelchair user frequently uses transport, he/she will need to be able to transport the wheelchair easily. Different features of a wheelchair which make transporting it easier include the following:
•lighter wheelchairs are easier to lift in and out;•removable wheels and folding frame/backrest make a
wheelchair easier to transport.
If using public transport, removable parts can be an advantage, as this makes the wheelchair easier to load. However, removable parts can also be a disadvantage, as parts may become separated and lost or stolen.
5. existing wheelchair (5 minutes)
explain:
• if a wheelchair user already has a wheelchair, it is important that this wheelchair is assessed to see why it is not meeting his/her needs.
• Read each of the questions on the wheelchair assessment form “existing wheelchair”.
if the answer to any of these questions is “no”, wheelchair personnel should describe the problem under “comments”. Depending on the resources available, a way to modify or repair the existing wheelchair may be considered during prescription.
if the answer to every question is “yes”, it is very likely that the wheelchair user does not need a new wheelchair. This should be discussed with the wheelchair user.
6. assessment interview practice (40 minutes)
activity
groups: Have three people in each group.
instructions: Ask each group to role-play carrying out the assessment interview – using the wheelchair user stories in their workbook.
Emphasize – if possible only the person role-playing the wheelchair user should read that story.
Each time, a different person should take the role of the wheelchair user and use the information from their user story to answer the interview questions. The wheelchair user should not read the story out loud. The other two participants work together to carry out the interview and record the information on the wheelchair assessment interview forms in the workbook.
• Existing wheelchair (if a person already has a wheelchair)– Does the wheelchair meet the user’s needs? Yes � No �
Does the wheelchair meet the user’s environmental conditions? Yes � No �– Does the wheelchair meet the user s environmental conditions? Yes � No �– Does the wheelchair provide proper fit and postural support? Yes � No �– Is the wheelchair safe and durable? (Consider whether there is a cushion) Yes � No �– Does the cushion provide proper pressure relief (if user has pressure sore risk)? Yes � No �p p p p ( p )– Comments: _____________________________________________________________________
If yes to all questions, the user may not need a new wheelchair. If no to any of these questions, the user needs a different wheelchair or cushion; or the existing wheelchair or cushion needs repair or modifications.
B.3. Assessment interview: 15
BASIC LEVEL
EXISTING WHEELCHAIR

WheelchairService Training Package
128
BASIC LEVEL
Monitor: Monitor the groups and assist if necessary.
Time: Allow 10 minutes for each interview and 10 minutes for whole group feedback.
Feedback: Briefly discuss each wheelchair user represented in the stories.
show the slide for each user and ask participants the questions on the slide.
•What did interviewers find out that would help choose the most appropriate wheelchair for Felicia/Anton/Chantou?
•What did interviewers find out that would help identify things that Felicia/Anton/Chantou may need to learn to be able to use the wheelchair?
•Are Anton’s and Chantou’s existing wheelchairs meeting their needs? Why/why not?
Trainers may refer to the suggested learning points below.
User’s story Suggested learning points
Felicia is an elderly woman with severe arthritis. She has pain in her arms, hands and legs. She is unable to walk more than a few steps because of the pain and finds it difficult to look after herself.
Felicia has attended the assessment with her daughter who also helps her at home. She lives in a small town and her house has three steps at the front entrance. She does not have any health problems apart from the arthritis. She used to go to church regularly, but is no longer able to do so.
Her family do not own a car, and rely on public transport. To come to the assessment, the family hired a taxi. However, this is expensive for them. She does not currently have a wheelchair.
Information to help choose the most appropriate wheelchair.
•Felicia is in a lot of pain – she is likely to need to be attendant-propelled because of her pain.
•Felicia can walk a few steps – she is likely to use a standing transfer and would benefit from a wheelchair with footrests that swing away.
•Felicia’s family does not own a car – she may need to take the wheelchair on public transport, so folding capacity could be helpful.
Information to help identify what Felicia needs to learn.
•Felicia’s daughter helps her at home – both Felicia and her daughter need to learn safe transfer techniques and how to go up and down steps in a wheelchair.

129
User’s story Suggested learning points
anton has polio. He is 26 years old and lives in a small town. He is studying computer skills and wants very much to start his own business in the future. He has attended the assessment with his wife.
A long time ago he received a donated orthopaedic-style wheelchair. The chair is rusted and the seat upholstery has ripped. The front castor wheels are small and thin. The rear wheel tyres are very thin and worn. The wheelchair is uncomfortable and difficult to push.
The paths in the town are very rough and his wheelchair gets stuck often. However, he would like to be able to travel from his home to the vocational training centre on his own. The distance is about 1½ km. At present, he needs help from his younger brother – who cannot always take him on time.
Information to help choose the most appropriate wheelchair.
•Anton lives in a place where the paths are rough and he wants to be able to travel between his home and where he studies – he needs a wheelchair which he can push himself over rough ground.
•Anton spends a lot of time in his wheelchair – good postural support is important, as he will spend a long time in his wheelchair each day while training.
Information to help identify what Anton needs to learn.
•Anton needs to be very mobile over difficult terrain – training in wheelchair mobility skills could really help him.
•Anton uses his wheelchair a lot over rough ground – learning how to maintain his wheelchair to keep it working well would be very helpful.
Anton’s existing wheelchair.
•Anton’s existing wheelchair is in poor repair and is not meeting his environmental or physical needs.
Special note: Where tricycles are available, trainers may point out that a tricycle could be a good solution for this wheelchair user to help him travel the distance to the training centre each day.

WheelchairService Training Package
130
BASIC LEVEL
User’s story Suggested learning points
chantou is 13 years old. She lost both of her legs (above the knee) during an earthquake. She lives with her family in an apartment in a nearby town. She has attended the assessment with her mother and older sister. She has a wheelchair which was donated to her. It is an adult size orthopaedic-style wheelchair. The wheelchair is too big for Chantou. She has to reach up over the armrests to reach the push rims. This is difficult for her. The backrest is also very high and there is no cushion.
chantou would like to go back to school, but she feels physically uncomfor table in the wheelchair. She also feels embarrassed that she cannot move herself around. She would like a wheelchair that she can push herself, and which gives her more suppor t. She says she would use the school bus if her wheelchair could travel with her.
Information to help choose the most appropriate wheelchair.
•Chantou is uncomfortable in her current chair and needs to spend a lot of time in her chair – Chantou needs a wheelchair which fits her correctly so that she is well supported – good postural support will help her to have more stamina during the day, which she will need to attend school.
•Chantou needs to go on the school bus – she needs a wheelchair which can travel with her.
Chantou’s existing wheelchair.
•Her existing wheelchair is too large, and does not help her to move around on her own; a lightweight wheelchair with good postural support would be more suited to her needs than her current wheelchair.
7. key point summary (3 minutes)
read the key points.
ask whether there are any questions.• The assessment interview is an opportunity to gather information about:
– the wheelchair user;
physical condition;– physical condition;
– lifestyle and environment;
– existing wheelchair.
• Relevant information gathered in the assessment interview Relevant information gathered in the assessment interview should be accurately recorded in the wheelchair assessment form.
B.3. Assessment interview: 19
BASIC LEVEL
KEY POINT SUMMARY

131
B.4: Physical assessment
OB
Jec
Tiv
eS
By the end of this session, participants will be able to:
record the presence, risk of or history of pressure sores;
explain what action should be taken if a wheelchair user has a pressure sore or is at risk of developing a pressure sore;
identify and record how a wheelchair user will push the wheelchair ;
demonstrate the correct way to take measurements from a wheelchair user for a wheelchair (seat width, seat depth, calf length, back height);
describe how body measurements relate to wheelchair size.
re
SO
Ur
ce
S
For the session:
PPT slides B.4: Physical assessment;
Reference Manual;
Participant’s Workbook;
DVD: Measurement demonstration;
wheelchairs with footrests that move out of the way (if available) – 1 per 3 participants;
wheelchair assessment forms – 1 per wheelchair user ;
tape measures for measurement practice – 1 per participant.
Foot blocks
cO
nT
eX
T Adapt this session to suit the context participants will be working in. Think about:
where participants are most likely to carry out assessment – for example in wheelchair users’ homes, community clinics or a dedicated wheelchair service space.
TO
P
re
P ar
e Gather resources, review PPT slides, watch DVD and read through the session plan.
Arrange the wheelchairs around the room.
Ensure at least one wheelchair has flip-up or swing away footrests (for the foot propulsion exercise).
OU
Tl
ine
1. Introduction.
2. Prepare.
3. Presence, risk of or history of pressure sores.
4. Method of pushing.
5. Taking measurements.
6. How to take body measurements.
7. Key point summary.
2
5
10
20
30
20
3
Total session time 90

WheelchairService Training Package
132
BASIC LEVEL
1. introduction (2 minutes)
explain: in this session, we will practise the physical part of a wheelchair assessment. We will:
• learn how to record the presence, risk of, or history of, pressure sores for a wheelchair user;
• discuss the different ways that wheelchair users may propel their wheelchairs and practise foot propelling;
• learn how to take the most important body measurements to help choose the correct size wheelchair for a wheelchair user.
2. Prepare (5 minutes)
explain: For the physical assessment, ask the wheelchair user to transfer from the wheelchair (if sitting in one) to an assessment bed.
This will make it easier to observe the wheelchair user’s posture and carry out measurements. it is also a chance to see how the wheelchair user transfers. some things to remember are listed below.
Step 2Assessment
• In this session participants will practise the physical part of In this session participants will practise the physical part of an assessment. Participants will:
Learn how to record the presence risk of or history of – Learn how to record the presence, risk of or history of pressure sores for a wheelchair user;
Di th diff t th t h l h i l – Discuss the different ways that wheelchair users may propel their wheelchairs and practise foot propelling;
L h k h i b d – Learn how to take the most important body measurements to help select the correct size wheelchair for a wheelchair useruser.
B.4. Physical assessment: 2
BASIC LEVEL
INTRODUCTION

133
explain:
• as with the interview, the assessment should be carried out in a clean and quiet space.
• Privacy is important if it is necessary to assess for pressure sores.
• always explain to the wheelchair user what you are going to do, and why.
• When the wheelchair user does transfer, be ready to offer assistance if you can see that he/she is not able to transfer safely and easily alone.
• When the wheelchair user is on the assessment bed: - provide foot blocks if the feet do not
comfortably reach the floor; - always stay close by until you are sure
that the wheelchair use is safe and comfortable sitting upright alone.
3. Presence, risk of, or history of, pressure sores (10 minutes)
explain: We have already talked in detail about the importance of preventing pressure sores.
ask: can anyone recall the most important risk factors – those things that make it more likely that a person may develop a pressure sore? encourage answers. Try to elicit all the pressure sore risks listed below.
Most important answers:
•cannot feel (decreased sensation);•cannot move;•moisture from sweat, water or incontinence;•poor diet and not drinking enough water ;
•ageing;•poor posture;•previous or current pressure sore;•weight – underweight or overweight.
•Carry out assessment in a clean and quiet space.
• Explain what you are going to do and why.y
•Make sure the wheelchair user is safe:user is safe:
– when they transfer;
h h – when sitting on the assessment bed/plinth.
B.4. Physical assessment: 3
BASIC LEVEL
PREPARE
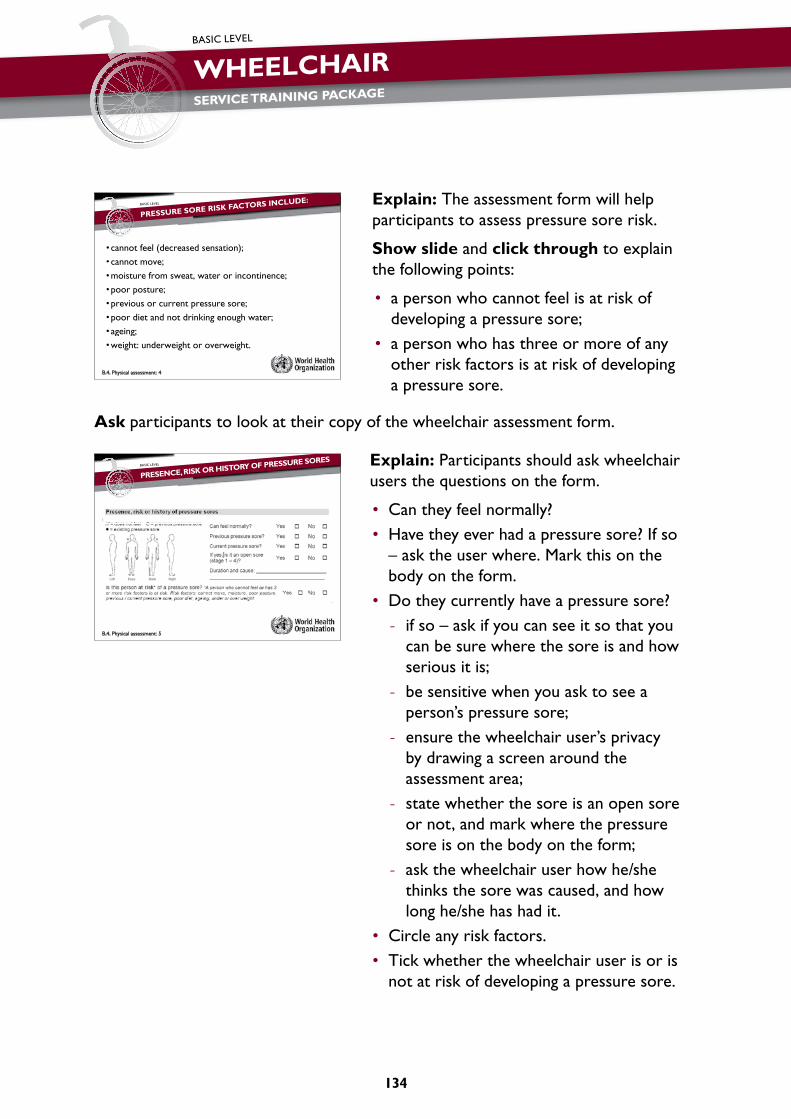
WheelchairService Training Package
134
BASIC LEVEL
explain: The assessment form will help participants to assess pressure sore risk.
Show slide and click through to explain the following points:
• a person who cannot feel is at risk of developing a pressure sore;
• a person who has three or more of any other risk factors is at risk of developing a pressure sore.
ask participants to look at their copy of the wheelchair assessment form.
explain: Participants should ask wheelchair users the questions on the form.
• can they feel normally?• Have they ever had a pressure sore? if so
– ask the user where. Mark this on the body on the form.
• Do they currently have a pressure sore? - if so – ask if you can see it so that you
can be sure where the sore is and how serious it is;
- be sensitive when you ask to see a person’s pressure sore;
- ensure the wheelchair user’s privacy by drawing a screen around the assessment area;
- state whether the sore is an open sore or not, and mark where the pressure sore is on the body on the form;
- ask the wheelchair user how he/she thinks the sore was caused, and how long he/she has had it.
• circle any risk factors.• Tick whether the wheelchair user is or is
not at risk of developing a pressure sore.
• cannot feel (decreased sensation);• cannot move;cannot move;•moisture from sweat, water or incontinence;
•poor posture;•previous or current pressure sore;•poor diet and not drinking enough water; • ageing;ageing;•weight: underweight or overweight.
B.4. Physical assessment: 4
BASIC LEVEL
PRESSURE SORE RISK FACTORS INCLUDE:
B.4. Physical assessment: 5
BASIC LEVEL
PRESENCE, RISK OR HISTORY OF PRESSURE SORES

135
ask: What action should be taken if the wheelchair user has an open pressure sore of stage 2 or higher? encourage answers.
Most important answers:
•refer for treatment;•advise the wheelchair user to take pressure off the sore – this may mean not using the
wheelchair.
ask: What action should be taken if a wheelchair user is at risk of developing a pressure sore?
encourage answers.
Most important answers:
•provide pressure relief cushion – check whether the cushion is effective by carrying out the seat bones test;
•provide education on prevention – teach pressure relief techniques and importance of being active and changing position regularly; check skin daily for marks.
Notes for trainers: This question relates to whether a person is “at risk” of developing a pressure sore. If someone actually has a pressure sore, the actions are different.
4. Method of pushing (20 minutes)
explain:
• it is important to find out how the wheelchair user will push. This can affect the choice of wheelchair.
• Wheelchair users push their wheelchairs in different ways.
• some push with their arms, some with their legs, and some have a helper to push them.
ask: What physical abilities will affect how a wheelchair user pushes?
encourage answers.
B.4. Physical assessment: 6
BASIC LEVEL
METHOD OF PUSHING

WheelchairService Training Package
136
BASIC LEVEL
answers:
•strength and control of arms;•strength and control of legs;•ability to sit upright;
•overall stability and control – if someone is not stable or has poor balance they may need to use their arms to “hold on”, then they cannot push.
• strength and control over arms and legs is important as well as overall stability. a wheelchair which fits correctly and gives good postural support can make it easier for a person with poor balance or stability to push the wheelchair.
ask: What is the ideal position of the rear wheel in relation to the wheelchair user for pushing with arms?
answer:
• When the wheelchair user holds the top of the push rim, the elbow should be bent at around 90 degrees.
explain:
• To propel with the feet, the wheelchair needs to be set up so that the wheelchair user’s heels comfortably reach the floor, while the pelvis is supported by the backrest.
• it is important to have footrests that move out of the way. The wheelchair user may still need footrests for being pushed by someone else over a longer distance.
• armrests can also be useful, as the wheelchair user may lean on these when bending forward to propel.
• if a wheelchair user needs to push with the feet and the wheelchair is not set up correctly for foot propelling, the wheelchair user will have to change posture in order to push. This will be very tiring, and may cause long-term postural problems.
B.4. Physical assessment: 7
BASIC LEVEL
PUSHING WITH ARMS
• People who push with their feet need:feet need:
– their pelvis to be well supported by the backrest;supported by the backrest;
– their feet to be able to sit flat h flon the floor.
B.4. Physical assessment: 8
BASIC LEVEL
PUSHING WITH FEET

137
explain: We have practised pushing with arms during the wheelchair mobility session. Now everyone will have an opportunity to experience pushing with the legs.
activity
groups: Have three people in each group (ideally of varied height, as this will bring up issues of being able to reach the ground). Give one wheelchair to each group.
instructions: ask each group to take it in turns to try moving the wheelchair with the feet. Ideally, they should sit with the pelvis touching the backrest. If this is not possible, they should experiment to see how they can reach the floor to propel. This will help them to feel what happens if the wheelchair is not correctly set up for pushing with feet.
ask participants to experiment pushing with their feet while leaning forwards, while leaning backwards, with their heel and with their toe.
Monitor: Monitor the groups. Ensure the activity is carried out safely.
Time: Allow 10 minutes for practice and 5 minutes for feedback.
Feedback: Ask the groups:
•for those who could not easily reach the floor – what did they have to do to get their foot on the floor? (Answer: either slouch, or sit further forward);
•was it easier to propel while leaning forwards or backwards? (Answer: leaning forwards – ideally with pelvis against the backrest);
•what would encourage someone to lean forwards? (Answer: armrests or a tray which provide a surface to lean forward on);
•was it easier to propel with the toe or heel? (Answer: with the heel).
explain:
• Through the activity, participants will have seen how pushing with feet can be difficult and tiring if the wheelchair is not set up to be pushed with the feet.
• setting the wheelchair up correctly means ensuring that the height of the seat from the ground is correct for the wheelchair user. some ways to do this include: – selecting a wheelchair which has the correct seat-to-floor height for the user
(take into account the cushion height); – making the cushion thinner – which can reduce the overall height; – attaching a solid seat lower than the original seat.
• if the user is going to push with the feet, wheelchair personnel should show him/her how to sit with the pelvis against the backrest, lean forward, and “pull” forward by placing the heel down first.
• always teach pushing forwards, not backwards.
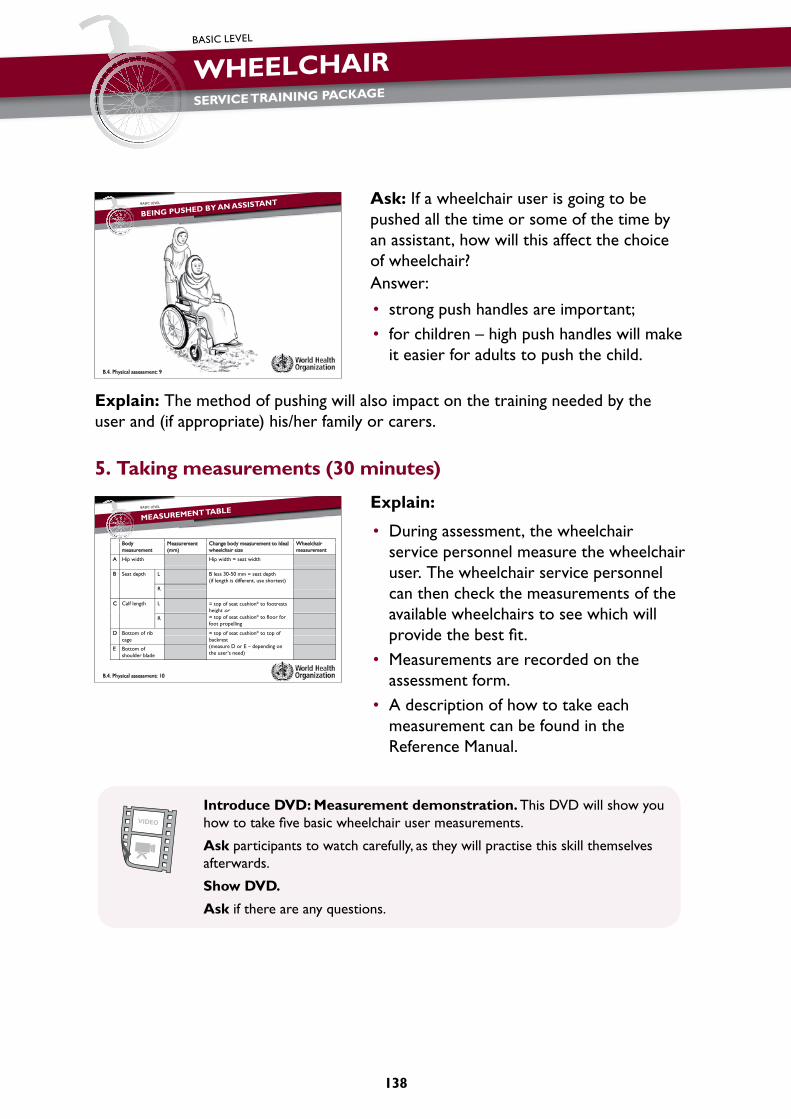
WheelchairService Training Package
138
BASIC LEVEL
VIDEO
ask: if a wheelchair user is going to be pushed all the time or some of the time by an assistant, how will this affect the choice of wheelchair?answer:
• strong push handles are important;• for children – high push handles will make
it easier for adults to push the child.
explain: The method of pushing will also impact on the training needed by the user and (if appropriate) his/her family or carers.
5. Taking measurements (30 minutes)
explain:
• During assessment, the wheelchair service personnel measure the wheelchair user. The wheelchair service personnel can then check the measurements of the available wheelchairs to see which will provide the best fit.
• Measurements are recorded on the assessment form.
• a description of how to take each measurement can be found in the Reference Manual.
introduce DvD: Measurement demonstration. This DvD will show you how to take five basic wheelchair user measurements.
ask participants to watch carefully, as they will practise this skill themselves afterwards.
Show DvD.
ask if there are any questions.
B.4. Physical assessment: 9
BASIC LEVEL
BEING PUSHED BY AN ASSISTANT
Wh l h i Ch b d t t id l M t B d Wheelchair measurement
Change body measurement to ideal wheelchair size
Measurement (mm)
Body measurement
Hip width = seat widthHip widthA
B less 30-50 mm = seat depth(if length is different, use shortest)
LSeat depthB
RR
= top of seat cushion* to footrests height or
LCalf lengthCg
= top of seat cushion* to floor for foot propelling
R
= top of seat cushion* to top of Bottom of rib D p pbackrest(measure D or E – depending on the user’s need)
cage
Bottom of shoulder blade
E
B.4. Physical assessment: 10
BASIC LEVEL
MEASUREMENT TABLE

139
activity
groups: Have three people in each group.
instructions: Ask each group to:
•measure each person and record the measurements;•every member of the group should measure every other person – so
that the measurements can be compared at the end of the exercise;•record the measurements in the space provided in the workbook.
Monitor: Move around the groups and monitor closely. Use the guide below to check that the participants use the correct techniques.
check measurements to assess how accurately participants are taking the measurements.
Trainer may record measurements on a whiteboard so that any differences are highlighted.
Time: Allow 15 minutes (5 minutes per person) for practice and 15 minutes for feedback.
Feedback: • ask: Were all measurements of the same person the same?• ask: What may cause differences? (Answer: not using the correct
technique – for example not asking the wheelchair user to sit upright, not placing the tape measure in the correct position, not reading the tape measure correctly).
• ask: What problems might be caused if the wrong measurement is taken? (Answer: the wheelchair may not fit the user).
Trainers – use this guide to check that participants are using correct techniques
For all measurements, make sure the tape measure is held straight and the wheelchair user is sitting upright. The feet should be supported on the floor or on foot blocks if he/she cannot reach the floor comfortably.
A Check there is nothing in wheelchair user’s pockets before measuring. Measure hips or widest part of thighs. Holding two clipboards/books against each side of the wheelchair user can help to get an accurate measurement.
B Place a clipboard/book at the back of the wheelchair user to help get an accurate measurement. Measure from the back of the pelvis to the back of the knee in a straight line.
Always measure both legs. If there is a difference between the two legs, check that the wheelchair user is sitting up with their pelvis level. If there is still a difference, make the wheelchair prescription for the shorter side.

WheelchairService Training Package
140
BASIC LEVEL
C Measure from the back of the knee to the base of the heel. Make sure the wheelchair user’s ankles are bent at 90 degrees (if possible). Always measure both legs. If the wheelchair user wears shoes, measure with the shoes they wear most days (if any).
D Measure the seat to the bottom of the rib cage. To help find the bottom of the rib cage, place hands on both sides of the pelvis. Gently squeeze hands inwards and slide hands upwards. The bottom of the rib cage is just above the waist.
E Measure from the seat to the bottom of the shoulder blade in a vertical line. To help find the bottom of the shoulder blade, ask the wheelchair user to shrug his/her shoulders.
6. how to take body measurements (20 minutes)
explain: We have now practised taking measurements from the wheelchair user. Now we will see how these measurements relate to the wheelchair.
ask participants to look at their copy of the wheelchair assessment form.
Point out the third column on the measurement table.
explain: This explains how the body measurement relates to the wheelchair. We will look at each one now.
explain:
• Measurement a: Hip width equals the width of the wheelchair seat.
• The wheelchair seat width should be as close to the user’s hip width as possible, but should never be smaller.
• if a wheelchair user has no sensation, it is important to make sure that the sides of the wheelchair are not pressing on the pelvis or thighs.
Wh l h i Ch b d M B d Wheelchair measurement
Change body measurement to ideal wheelchair size
Measurement (mm)
Body measurement
Hip width = seat widthHip widthA Hip width seat widthHip widthA
B less 30-50 mm = seat depth(if length is different, use shortest)
LSeat depthB
RR
= top of seat cushion* to footrests height or
LCalf lengthCg
= top of seat cushion* to floor for foot propelling
R
= top of seat cushion* to top of Bottom of rib D p pbackrest(measure D or E – depending on the user’s need)
cage
Bottom of shoulder blade
E
B.4. Physical assessment: 12
BASIC LEVEL
MEASUREMENT TABLE
•Hip width = seat width.•Correct fit:
– should fit closely.
B.4. Physical assessment: 13
BASIC LEVEL
HIP WIDTH
30-60

141
explain:
• Measurement B: seat depth less approximately 30-60 mm is the ideal wheelchair seat depth.
• correct fit gives the thigh good support. This will reduce pressure under the seat bones and help to stop pressure sores.
• For wheelchair users with long legs, there may be a bigger gap. Up to 60 mm is acceptable.
• if the seat length is too long, the user will not be able to sit upright. The back of the calf may also rub on the front edge of the seat, causing discomfort and/or a pressure sore.
• if there is a difference between right and left sides, use the shorter leg measurement to make prescription choices.
explain:
• Measurement c equals either: - the measurement from the top of the
seat cushion to the footrests; or - the measurement from the top of
the cushion to the floor (for foot propelling).
• The correct footrests height is important as this ensures that the thighs are well supported and the feet are fully supported by the footrests.
• The footrests height almost always needs final adjustment at fitting, as it is hard to estimate how much the cushion will compress when the user sits on it.
• The correct seat height for someone propelling with their feet is important to ensure they are well supported in the wheelchair and can reach the floor comfortably to propel efficiently.
•The user’s seat depth = Measurement B minus 30 50 mmB minus 30-50 mm.
– Up to 60 mm is acceptable for users with long legs. g g
• Correct fit:– Check the wheelchair user is sitting Check the wheelchair user is sitting
upright, their hips are all the way back and their back is touching the backrest;
– Two fingers (at least) clearance between the seat and the back of the kneeknee.
B.4. Physical assessment: 14
BASIC LEVEL
SEAT DEPTH
• Measurement C = either:
– The top of the seat cushion to the The top of the seat cushion to the footrests; OR
– The top of the cushion to the floor (for foot propelling)(for foot propelling).
• Correct fit:Correct fit:
– The thigh fully supported on the cushion with no gaps;
– The foot fully supported on the footrests with no gaps.
• Always re-check at fitting and adjust as Always re-check at fitting and adjust as necessary.
B.4. Physical assessment: 15
BASIC LEVEL
CALF LENGTH
30-60

WheelchairService Training Package
142
BASIC LEVEL
explain:
• Measurement D or e equals the distance between the top of the seat cushion and the top of the backrest.
• The correct fit should give the wheelchair user the support he/she needs and allow an active wheelchair user the freedom to move the shoulders to push.
explain:
• Measurement D – will give a backrest height which comes level with the bottom of the wheelchair user’s rib cage.
• This is a good height if the wheelchair user: - is fit and active; - can sit upright easily with good balance.
• Measurement e – will give a backrest height level with the bottom of the wheelchair user’s shoulder blades.
• This is a good height if the wheelchair user: - is likely to get tired quickly; - has difficulty sitting upright.
• explain: always take both back height measurements, as sometimes it is not clear during the assessment which height backrest will be most comfortable for the user.
•Measurement D or E = the top of Measurement D or E the top of the seat cushion to the top of the backrest.
•Correct fit:– Depends on the needs of the user;Depends on the needs of the user;
– Should give the wheelchair user the support they need;pp y ;
– Should allow an active wheelchair user the freedom to move their shoulders to push.
B.4. Physical assessment: 16
BASIC LEVEL
BACKREST HEIGHT
• This is a good height if the This is a good height if the wheelchair user:
i fit d ti– is fit and active;
– can sit upright easily with good balance.
B.4. Physical assessment: 17
BASIC LEVEL
BACKREST LEVEL AT THE BOTTOM OF THE RIB CAGE
• This is a good height if the This is a good height if the wheelchair user:
i lik l t t ti d i kl– is likely to get tired quickly;
– has difficulty sitting upright.
B.4. Physical assessment: 18
BASIC LEVEL
BACKREST LEVEL AT THE BOTTOM OF SHOULDER BLADES

143
explain: We will now look at how to complete the measurement table.
Show measurement table with measurements completed for the user.
ask: for this person, what would be the:
• wheelchair seat width? (click to show answer);
• wheelchair seat depth? (click to show answer);
• footrests height? (click to show answer);• backrest height for bottom of rib cage
(click to show answer);• backrest height for bottom of shoulder
blade (click to show answer).
ask: What would participants do if the wheelchair user had a different seat depth on the left and right? encourage answers.
Most important answers:
•when there is a difference in seat depth on one side, the wheelchair seat depth should be as needed for the shortest side.
explain: Remember – these are all ideal measurements. Personnel need to know the measurements of the wheelchairs available so that they can select the size that matches the user most closely. We will talk about this more in the next session.
7. key point summary (3 minutes)
read the key points.
ask whether there are any questions.
Wheelchair Change body measurement to Measurement Body measurement
g yideal wheelchair size(mm)
ymeasurement
360mmHip width = seat width360mmHip widthA
370mmB less 30-50 mm = seat depth400mmLSeat depthB 370mmB less 30-50 mm = seat depth(if length is different, use shortest)
400mmLSeat depth
400mmR
330mm= top of seat cushion* to footrests height or= top of seat cushion* to floor for foot propelling
380mmLCalf lengthC
330mm380mmR
for foot propelling
360mm= top of seat cushion* to top of backrest(measure D or E – depending
310mmBottom of rib cage
D
420B f E (measure D or E depending on the user’s need)
420mmBottom of shoulder blade
E470mm
* Cushion in this case is 50mm high
B.4. Physical assessment: 19
BASIC LEVEL
BODY MEASUREMENT TO WHEELCHAIR SIZE
• Physical assessment includes finding out: • Physical assessment includes finding out:
– If the wheelchair user is at risk of developing a pressure sore;
– How the wheelchair user will be pushing the wheelchair;
– Taking the wheelchair user’s measurements. g
• Wheelchair users push in different ways. The choice of wheelchair and wheelchair set up will change depending on p g p gwhether the user pushes with their arms, feet or is assisted.
• Accurate measuring is essential to ensure a good fitted, ccu ate easu g s esse t a to e su e a goo tte , comfortable wheelchair. Mistakes in measuring can cause delays in providing the wheelchair.
B.4. Physical assessment: 20
BASIC LEVEL
KEY POINT SUMMARY

WheelchairService Training Package
144
BASIC LEVEL
B.5: Prescription (selection)
OB
Jec
Tiv
eS
By the end of this session, participants will be able to:
list what is included in the prescription (selection) process;
describe the main features of the wheelchairs that are available locally;
match wheelchair user needs with the most suitable locally available wheelchair;
select the correct size of wheelchair for a wheelchair user ;
write down prescription decisions on a wheelchair prescription (selection) form.
re
SO
Ur
ce
S
For the session:
PPT slides: B.5 Prescription (selection);
Reference Manual;
Participant’s Workbook, please note there are two B5 sections in the Participant’s Workbook);
at least one example of each locally available wheelchair, with cushion, and the wheelchair brochure or specification summary, if available;
tape measures and any tools needed to loosen adjustable parts (e.g. footrests).
cO
nT
eX
T Adapt this session to suit the context participants will be working in. Think about:
adjusting the time depending on the number of locally available wheelchairs;
preparing and including any wheelchair-specific prescription (selection) forms – a wheelchair-specific prescription (selection) form is helpful for any wheelchair which offers a range of options or adjustments.
TO
Pr
ePa
re
Gather resources, review PPT slides and read through the session plan.
Complete a wheelchair summary form for each available wheelchair as a reference.
Go over each available wheelchair and be fully familiar with features, adjustment range, options and how the chair is adjusted.
Adapt the wheelchair prescription (selection) form to include any options or adjustments for locally available wheelchairs (unless there is a specific wheelchair prescription (selection) form for that product).
Arrange the wheelchairs around the room, with any material about that wheelchair which is provided by the manufacturer (for example, brochure or product information).

145
OU
Tl
ine
1. Introduction.2. What is ‘prescription/selection’?3. Locally available wheelchairs and cushions.4. Selecting the right wheelchair and wheelchair parts.5. Selecting the right wheelchair size.6. Recording the prescription.7. Key point summary.
25
601525103
Total session time 120
1. introduction (2 minutes)
explain:
• Prescription (selection) is the third step in the eight steps of service delivery.
• in this session, participants will learn how to prescribe (select) a wheelchair, using the information gained in the assessment.
2. What is prescription (selection)? (5 minutes)
explain:
• Prescription (selection) means finding the best match possible between the wheelchairs and cushions available and the needs of the user.
• The prescription (selection) should always be decided with the wheelchair user, including the family member or caregiver if appropriate.
• Prescription (selection) includes: - selecting the right wheelchair and
cushion size; - selecting the right wheelchair, cushion
and wheelchair parts; - agreeing with the wheelchair user what
training they need to help them use and care for their wheelchair and cushion.
Step 3Prescription (selection)
• In this session participants will:
Prescription (selection)
• In this session participants will:
– Learn how to prescribe (select) a wheelchair, using the i f i i d i h information gained in the assessment.
B.5. Prescription (Selection): 2
BASIC LEVEL
INTRODUCTION
P i ti ( l ti ) • Prescription (selection) means:– Selecting the best match possible between the
wheelchairs available and the needs of the userwheelchairs available and the needs of the user.
• Prescription (selection) includes:Selecting the right wheelchair cushion and – Selecting the right wheelchair, cushion and wheelchair parts;
– Selecting the right wheelchair and cushion size;– Selecting the right wheelchair and cushion size;
– Agreeing with the wheelchair user what training they need to help them use and care for their they need to help them use and care for their wheelchair and cushion.
B.5. Prescription (Selection): 3
BASIC LEVEL
WHAT IS ‘PRESCRIPTION/SELECTION’?

WheelchairService Training Package
146
BASIC LEVEL
explain: To do this, personnel first need to:
• understand the wheelchair user’s needs – by carrying out a wheelchair assessment and listening carefully to what the user says;
• know about the different wheelchairs and cushions available;• discuss options with the wheelchair user.
3. locally available wheelchairs and cushions (60 minutes)
explain: Personnel need to be very knowledgeable about the locally available wheelchairs and cushions. They need to know about the following:
• Frame – for example, whether it is a long or short wheelbase; the frame length; whether it is a cross-folding or rigid frame.
• Features – including the type of seat, backrest, footrests, armrests, castor wheels, rear wheels.
• Wheelchair size: This is usually described by the wheelchair seat width and sometimes also the depth. The seat height from the floor is also useful to know.
• adjustability options: Which components are adjustable and what is the range of adjustment? adjustment is usually possible to two or more different positions. For example, most wheelchairs have footrests which can be adjusted to different heights spaced evenly apart. The “range” of adjustment is from the smallest to the largest measurement.
• cushion: What type of cushion (if any) is provided with the wheelchair or is available separately?
Wh l h l d k h d l •Wheelchair personnel need to know the details and features of each locally available wheelchair
d hiand cushion.
•Wheelchair personnel need to know about wheelchair:– frame;
– features;
– cushion;
– size range;
– adjustability options.j y p
B.5. Prescription (Selection): 4
BASIC LEVEL
LOCALLY AVAILABLE WHEELCHAIRS AND CUSHIONS

147
• some wheelchair suppliers provide: a. brochures or a product summary; b. product (wheelchair) specifications.
• Wheelchair measurements, weights, features and sometimes optional parts are often listed in this information.
• always check whether there is information available about the wheelchairs you are prescribing (selecting). Read this information so that you are familiar with the products.
• if suppliers do not give this information – ask for it.
explain: in this session, participants will be able to look very closely at some of the locally available wheelchairs. Participants will complete the wheelchair summary form in their workbook. This will include measuring the wheelchairs. This is how to measure a wheelchair.
explain
• Measure the seat width from the outside of one seat rail to the outside of the other.
• if the armrests sit on top of the seat rail, measure between the armrests.
• Measure seat depth from the base of the backrest to the front of the seat.
S h l h l d• Some wheelchair suppliers provide:– brochures;
– product specifications;
– product summaries.
•Wheelchair measurements, weights, features and sometimes optional parts are often listed in this p pinformation.
• If suppliers do not give this information ask for If suppliers do not give this information, ask for it.
B.5. Prescription (Selection): 5
BASIC LEVEL
CHECK WHEELCHAIR BROCHURES OR INFORMATION
B.5. Prescription (Selection): 6
BASIC LEVEL
WHEELCHAIR MEASUREMENTS – SEAT WIDTH
B.5. Prescription (Selection): 7
BASIC LEVEL
WHEELCHAIR MEASUREMENTS – SEAT DEPTH
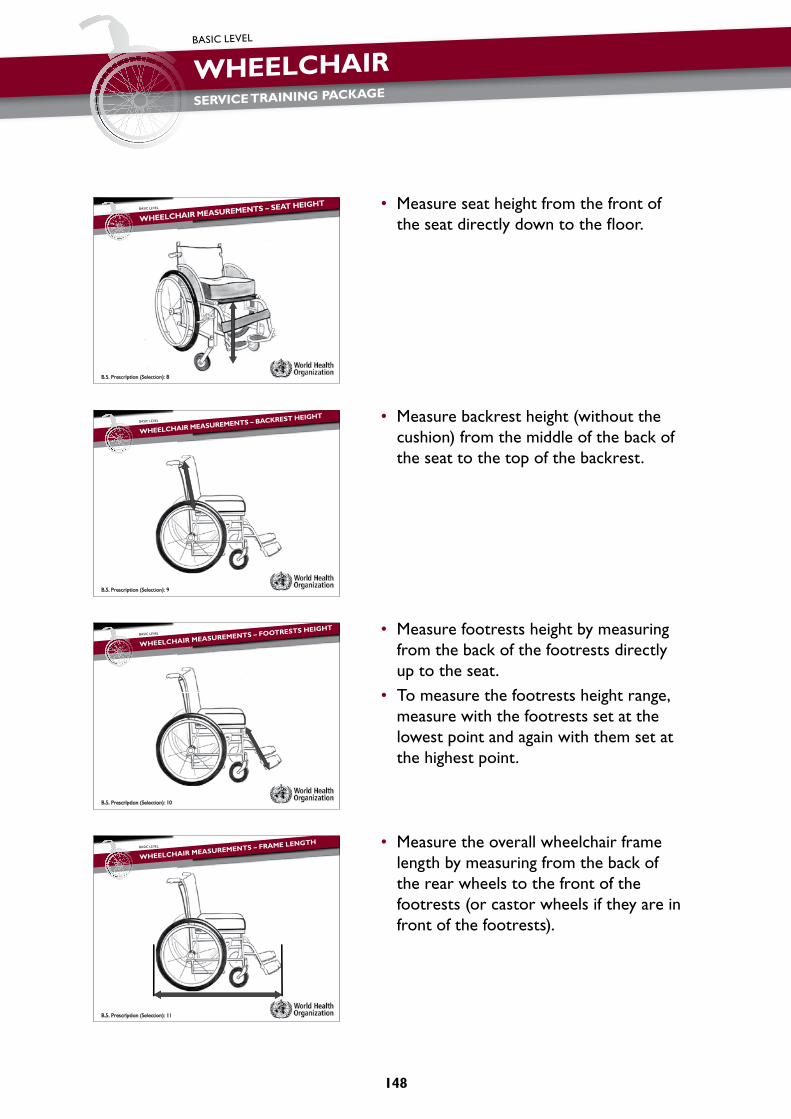
WheelchairService Training Package
148
BASIC LEVEL
• Measure seat height from the front of the seat directly down to the floor.
• Measure backrest height (without the cushion) from the middle of the back of the seat to the top of the backrest.
• Measure footrests height by measuring from the back of the footrests directly up to the seat.
• To measure the footrests height range, measure with the footrests set at the lowest point and again with them set at the highest point.
• Measure the overall wheelchair frame length by measuring from the back of the rear wheels to the front of the footrests (or castor wheels if they are in front of the footrests).
B.5. Prescription (Selection): 8
BASIC LEVEL
WHEELCHAIR MEASUREMENTS – SEAT HEIGHT
B.5. Prescription (Selection): 9
BASIC LEVEL
WHEELCHAIR MEASUREMENTS – BACKREST HEIGHT
B.5. Prescription (Selection): 10
BASIC LEVEL
WHEELCHAIR MEASUREMENTS – FOOTRESTS HEIGHT
B.5. Prescription (Selection): 11
BASIC LEVEL
WHEELCHAIR MEASUREMENTS – FRAME LENGTH

149
• Measure the wheelbase by measuring from the middle of the rear wheel to the middle of the front wheel.
explain:
• Wheelchair measurements and adjustment ranges can often be found on the printed material about the products.
• it is still good to know how to measure yourself though, as the information is not always available.
• always check whether a particular wheelchair is available from the supplier in different sizes.
activity
groups: Have three people in each group. Assign each group one of the locally available wheelchairs. If there are not enough different types of wheelchairs, some groups may have the same type of wheelchair.
instructions: ask each group to:
•study carefully the wheelchair they have been given;•complete the wheelchair summary form in their workbook for that
wheelchair (this will include measuring the wheelchair);•find out the adjustment ranges they will need to adjust the wheelchair to
the largest setting and then the smallest setting for each adjustable part.
Monitor: Move around the groups and monitor closely.
Point out any features/components participants have not noticed.
Ensure participants work out the range of adjustments. Answer any questions.
Time: Allow 20 minutes, plus 20 minutes for whole group feedback. If there are only one or two available wheelchairs, this session will not require so much time.
B.5. Prescription (Selection): 12
BASIC LEVEL
WHEELCHAIR MEASUREMENTS – WHEELBASE
•Remember:
Wheelchair measurements and adjustment – Wheelchair measurements and adjustment ranges can often be found on the printed material about the products material about the products.
– Always check whether a particular wheelchair is available from the supplier in different sizesis available from the supplier in different sizes.
B.5. Prescription (Selection): 13
BASIC LEVEL
CHECK THE PRODUCT INFORMATION

WheelchairService Training Package
150
BASIC LEVEL
Feedback: •Ask each group to present the wheelchair they have reviewed (5 minutes maximum). Ensure they point out the key features, components, size options, the components which are adjustable and their range. It is not necessary to give the actual measurements.
•Reinforce the advantages and disadvantages of different features, and add any information not covered by the group.
•For example – if a wheelchair has a canvas slung seat and no cushion – explain that this wheelchair is not suitable for a person with a spinal cord injury, although it may be suitable for a temporary or short-term user.
explain: Participants may wish to complete a wheelchair summary form for each wheelchair in their workbook (three summary forms are provided in total).
Notes for trainers: It is a good idea to pin up a copy of a completed summary form for each wheelchair after this session. This can then be referred to during the practical sessions with wheelchair users.
4. Selecting the right wheelchair and wheelchair parts (15 minutes)
explain:
• Participants have now practised finding out information about the wheelchair user, and have information about the wheelchairs available locally. it is now time to practise matching the best wheelchair to the wheelchair user.
• There are two wheelchair user stories that we will look at now. We will work together to match the best wheelchair and components to each wheelchair user.
• Remember – in a real situation, the wheelchair user would be a part of the team choosing the wheelchair.
read the first wheelchair user story (and project the slide of this story if you wish).
ask: What type of wheelchair and what components will best suit Peter?
Why? encourage answers.

151
Peter Wheelchair and components
reason
Peter lives in a rural village. He is very active and strong. He has good balance. Every day Peter travels nearly 1 km on a dirt path to get to and from work. When it rains, the path is very muddy.
Long wheelbase (front and rear wheels far apart)
Where available: tricycle
Good for outdoors
Tricycles are a good option for longer distances
Wide front castor wheels
Good for dirt/mud/sand
Active rear wheel position
Easier to lift front wheels over rough ground/small obstacles
He has good balanceLow backrest Will not restrict
propelling
read the second wheelchair user story (and project the slide of this story if you wish).
ask: What type of wheelchair and what components will best suit Natasha?
Why? encourage answers.
natasha Wheelchair and components
reason
Natasha lives in an apartment in a town. She has had a stroke, and is able to stand up to transfer. She is unable to push a wheelchair herself as her arms are very weak. Natasha sometimes slides to the side of the seat and her family members are worried that she is uncomfortable.
Footrests which move out of the way
To allow standing transfer May allow/encourage foot propelling
Seat height from floor – not too high
To allow Natasha to reach the floor comfortably when sitting forwards in the seat, ready to stand
Pressure relief cushion
Relieve pressure, provide comfort and postural support
Firm backrest To give good postural support
High armrests May help posture
Push handles To make it easier for family/carer to push
•Peter lives in a rural village. He is very active and strong. He has good balance. g g
•Every day Peter travels nearly 1 km on a dirt path to get to and from work When it rains the path is to get to and from work. When it rains the path is very muddy.
B.5. Prescription (Selection): 15
BASIC LEVEL
PETER
•Natasha lives in an apartment in a town. She has had a stroke, and is able to stand up to transfer. , p
• She is unable to push a wheelchair herself as her arms are very weak arms are very weak.
•Natasha sometimes slides to the side of the seat and her family members are worried that she is uncomfortable.
B.5. Prescription (Selection): 16
BASIC LEVEL
NATASHA

WheelchairService Training Package
152
BASIC LEVEL
explain: sometimes it is not possible to find a wheelchair which meets all the wheelchair user’s needs. in this case, discuss with the wheelchair user and try to meet the most important needs.
5. Selecting the right wheelchair size (25 minutes)
ask: Why is it important that the wheelchair is the correct size? encourage answers.
Most important answers:
•the correct size allows the wheelchair user to sit correctly in the wheelchair ;•with the correct size wheelchair, the wheelchair user’s weight is evenly distributed;•the wheelchair will be more comfortable and easier for the wheelchair user to push.
activity
groups: Have two to three people in each group.
instructions: Ask each group to:
•look at the wheelchair user measurements on the worksheet in their workbook;
•decide what would be the ideal wheelchair size for each user and then;•select the best fit from the available wheelchairs.
Explain:
•They can use 50 mm as the height of the cushion.•They should assume that the wheelchair user is propelling with his/
her arms, not feet.
Monitor: Monitor the groups, and assist as needed.
Time: Allow 25 minutes.
Feedback: Check with each group that they selected the correct “ideal size”, and the best size match of wheelchair from the wheelchairs available.
ask:
If the second wheelchair user wanted to propel the wheelchair with his/her feet; what would be the ideal height of the wheelchair seat from the floor?
(Answer: 310 mm.)
ask: If the wheelchairs available have a larger seat-to-floor height than that, what can they do?
(Answer: reduce the height of the cushion.)

153
explain: as well as checking the seat depth, seat width and backrest height, personnel must check the range of adjustment in the footrests height to fit the wheelchair user. sometimes a wheelchair user may have particularly long or particularly short calves. if these are outside the range within which the wheelchair can be adjusted, a modification may be necessary and possible. This is discussed in the next section.
Answers for the trainers:
1 Body measurement
Measurement (mm)
change body measurement to ideal wheelchair size
Wheelchair measurement
A Hip width 380 mm Hip width = seat width 380 mm
B Seat depth L 400 mm B less 30-60 mm = seat depth
(if lengths are different, use shorter)
370 mmR400 mm
C Calf length L 420 mm = top of seat cushion to footrests height or
= top of seat cushion to floor for foot propelling
370 mm (50 mm cushion)R
420 mm
D Bottom of ribcage -
= top of seat cushion to top of backrest
(measure D or E – depending on the user’s needs)
-
E Bottom of shoulder blade 380 mm 430 mm
(50 mm cushion)
Ideal wheelchair size for this wheelchair user :
Seat width: 380 mm
Seat depth: 370 mm
Backrest height: 430 mm
From the available wheelchairs, which wheelchair and size best fits the user?

WheelchairService Training Package
154
BASIC LEVEL
2 Body measurement
Measurement (mm)
change body measurement to ideal wheelchair size
Wheelchair measurement
A Hip width 420 mm Hip width = seat width 420 mm
B Seat depth L 460 mm B less 30–60 mm = seat depth
(if lengths are different, use shorter)
430 mmR460 mm
C Calf length L 360 mm = top of seat cushion to footrests height or
= top of seat cushion to floor for foot propelling
310 mm (50 mm cushion)R
360 mm
D Bottom of ribcage 260 mm = top of seat cushion to
top of backrest
(measure D or E – depending on the user’s needs)
310 mm (50 mm cushion)
E Bottom of shoulder blade – –
Ideal wheelchair size for this wheelchair user :
Seat width: 420 mm
Seat depth: 430 mm
Backrest height: 310 mm
From the available wheelchairs, which wheelchair and size best fits the user?
6. recording the prescription (selection) (10 minutes)
explain: The wheelchair prescription (selection) needs to be written down. Wheelchair services need a form for writing down prescription (selection) decisions. The wheelchair prescription (selection) form used in this training package is an example, which may need to be adapted for different wheelchair services.

155
explain:
• The wheelchair prescription (selection) form is in four parts.
• The first part is information about the wheelchair user. This information can be taken from the assessment form.
• There is also space to write the planned date of the fitting.
explain:
• The second part records the type of the wheelchair and size selected.
• When a wheelchair has options (for example adjustable backrest or different types of footrests), the option chosen should be recorded.
• some wheelchair suppliers have a detailed wheelchair prescription (selection) form for their wheelchair. This should be completed as well, and attached to the general prescription form.
explain:
• The third part records the type of cushion selected.
B.5. Prescription (Selection): 17
BASIC LEVEL
WHEELCHAIR USER INFORMATION
2 Type of wheelchair and size selected2. Type of wheelchair and size selected
To select the type of a wheelchair:•Discuss with the wheelchair user;Discuss with the wheelchair user;•Think about the most important needs of the wheelchair user;•Check: wheelchair frame, castor and rear wheels, footrests, armrests, backrest height (or adjustability), rear wheels position, support and comfort.
SizeType of wheelchair
B.5. Prescription (Selection): 18
BASIC LEVEL
TYPE OF WHEELCHAIR AND SIZE
B.5. Prescription (Selection): 19
BASIC LEVEL
TYPE OF CUSHION

WheelchairService Training Package
156
BASIC LEVEL
explain:
• Finally, there is space for everyone involved to sign that they have agreed to the prescription (selection) of wheelchair.
• The list of people who sign will depend on the service. However, it is very important that the wheelchair user signs, and the person who has made the assessment.
ask: Does anyone have any questions about filling in the wheelchair prescription (selection) form?
answer any questions.
explain: Prescription (selection) also includes agreeing with the wheelchair user what training or advice he/she needs to use and care for their wheelchair.
7. key point summary (3 minutes)
read the key points.
ask whether there are any questions.
B.6: Funding and ordering
OB
Jec
Tiv
eS By the end of this session, participants will be able to:
order the prescribed wheelchair according to the ordering system of their service.
4. AgreedSignature of the user: Signature of the user: _____________Signature of the assessor: _____________Signature of the manager: _____________
B.5. Prescription (Selection): 20
BASIC LEVEL
AGREEMENT
• Prescription (selection) means finding the best match possible between the wheelchairs available and the needs of the user.
• Prescription (selection) includes:
– Selecting the right wheelchair, cushion and wheelchair parts;
– Selecting the right wheelchair and cushion size;
– Agreeing with the wheelchair user what training or advice they need g g g yto help them use and care for their wheelchair.
• The prescription (selection) should always be made with the ywheelchair user.
B.5. Prescription (Selection): 21
BASIC LEVEL
KEY POINT SUMMARY

157
re
SO
Ur
ce
S For the session:
Reference Manual;
order form (not included in the training package, use only if one is locally available).
cO
nT
eX
T
Adapt this session to suit the context participants will be working in.
Use this session to teach participants the steps in ordering a wheelchair in the service they will be working in.
Where there is no clear system for ordering a wheelchair, trainers are encouraged to work with services to establish an ordering process.
Give participants an opportunity to practise ordering. This may include getting them to complete an order form (if there is one locally available).
TO
Pr
ePa
re Gather resources and read through the session plan.
OU
Tl
ine 1. Introduction
2. Funding
3. Ordering
2
3
10
Total session time 15
1. introduction (2 minutes)
explain: Funding and ordering is the fourth step in wheelchair service delivery.
2. Funding (3 minutes)
explain:
When the wheelchair has been prescribed, the cost of the recommended product can be accurately estimated. it is essential to know who will fund the wheelchair – it could be funded by an out-of-pocket payment, a subsidy from a government, nongovernmental organization or donor agency, or a payment by an insurance company. in the developing world, many people who need a wheelchair cannot afford to buy one. Nevertheless, everyone who needs a wheelchair is entitled to one, regardless of his/her ability to pay. Thus, funds will need to be made available

WheelchairService Training Package
158
BASIC LEVEL
for users who need financial assistance. For most services, it will be essential to identify the funding source before the wheelchair can be ordered.
Often, this responsibility lies with administrative personnel or programme managers rather than clinical or technical personnel. include any system for identifying how the wheelchair will be paid for, if this is part of the role of the wheelchair service personnel.
Participants can write down the different possibilities for funding wheelchair services in their programme.
3. Ordering (10 minutes)
When the best wheelchair for the wheelchair user has been selected and the prescription (selection) prepared, the wheelchair needs to be ordered.
if a wheelchair service keeps wheelchairs in stock, this may mean completing an order form to be authorized by the service manager. The wheelchair may then be prepared by the staff responsible for wheelchair preparation.
if the wheelchair service does not keep wheelchairs in stock, this may mean ordering from an external supplier.
The system for ordering wheelchairs will vary in different wheelchair services. Write down below the things that you need to remember to order wheelchairs in your local wheelchair service.
explain:
after selecting the best wheelchair for the wheelchair user and preparing a prescription, the wheelchair service personnel should order the wheelchair.
an order should always be placed as quickly as possible to avoid delays.
explain the different systems for ordering the wheelchair. Participants may write down the ordering system in their referenceManual in the space provided.
159
Practical One: assessment and prescription (selection)
OB
Jec
Tiv
eS By the end of this session, participants will be able to:
Demonstrate a basic wheelchair assessment working in a group and with assistance.
Demonstrate making a basic level wheelchair prescription (selection) working in a group and with assistance.
re
SO
Ur
ce
S trainer’s Observation Checklist: Practical One; blank wheelchair assessment and wheelchair prescription (selection) forms; clean and private assessment space with assessment bed for each wheelchair user ; sample wheelchairs (unless assessment is carried out in the community); tape measure, foot blocks.
cO
nT
eX
T
Adapt this session to suit the context participants will be working in. Think about:
cultural factors – for example, whether it is appropriate to have mixed-gender groups doing the assessment;
language factors – for example, whether wheelchair users attending speak a common language with all participants;
any documentation that the service may need when assessing and prescribing a wheelchair – for example, any additional information that services need to collect about wheelchair users accessing their service (e.g. referral source);
how trainers will manage issues that may arise during the assessment that cannot be addressed within the session or training.
TO
Pr
ePa
re
Confirm time and travel arrangements with wheelchair user volunteers. Ensure there are refreshments available for wheelchair users and their family/supporters.
Assign one person to greet wheelchair users as they arrive and show them where they can wait until the session begins.
Prepare an assessment bed with a privacy screen for each pair of participants and wheelchair user volunteer. Place all equipment needed for each assessment, including wheelchair assessment and wheelchair prescription (selection) forms, on the assessment bed.
Ensure that sample wheelchairs and cushions that may be shown to wheelchair users are in good working order.
If there are more than three pairs of participants, ask for another trainer to assist with monitoring the groups.
Decide which participants will work together, and with which wheelchair user.
OU
Tl
ine
1. Assessment and prescription practice:•Instructions and set-up•Assessment•Prescription•Feedback
5453010
Total session time 90

WheelchairService Training Package
160
BASIC LEVEL
1. assessment and prescription practice (90 minutes)
Notes for trainers: Use the “Trainer’s Observation Checklist” for Practical One to ensure that groups perform all the steps in the practical and to note common examples of good or bad practice that should be highlighted in the feedback session on the checklist (box provided).
activity
groups: •Arrange the participants into groups (no more than three people in each group).
•Appoint a leader for each group.•Tell each group the name of the wheelchair user they will be
working with.•Assign each group a place to work in.•Explain that all equipment has been laid out for them on the
assessment bed.
explain all of the following:
session aim:
•The aim of this practical session is to carry out an assessment and prescribe a wheelchair for a wheelchair user.
•Participants will work with the same wheelchair user they work with today, later on in the course, to fit the wheelchair selected today and to give user training.
•If it is not possible during the course to complete the wheelchair user’s wheelchair, arrangements will be made with the wheelchair user to ensure that their wheelchair is completed. Participants should try however to get as much of the work done as possible.
Lead person:
•The lead person is responsible for making sure that all steps are carried out.
•The lead person should be the main person talking with the wheelchair user and the family/carer. This is to avoid having too many people speaking at once, which can be confusing for everyone.

161
instructions: service forms:
•Hand out an assessment and prescription form to each group’s team leader.
Trainer's observation and support:
•Participants may ask for assistance or clarification at any time.•Throughout the session, trainers will monitor each group and give as
much support and advice as needed.•After completing the assessment, par ticipants should ask one
trainer to come and check their assessment and wheelchair assessment form.
•After completing the wheelchair prescription (selection), participants should ask one trainer to come and check their prescription (selection) and wheelchair prescription (selection) form.
Time allowed:
•They should aim to complete the assessment in 40 minutes, and the prescription (selection) in 20 minutes.
ask participants: What are the steps for assessment? acknowledge correct answers.
ask participants: What are the steps for prescription? acknowledge correct answers.
Remind participants that they should actively involve the wheelchair user in every step of the process.
ask: Are there any questions?
answer any questions.
ask each group to prepare the area they are going to work in; then introduce themselves to the wheelchair user they will work with and begin.
Monitor and support:
closely monitor the groups, ensure safe practice, observe and evaluate the skills of participants.
Use the Trainer’s observation checklist to record your observations of each group.
Throughout the session:
•Give time warnings to help participants manage their time.•Ensure wheelchair users are actively involved.
at the end of this session, ask participants to thank the wheelchair users for their participation and explain that the wheelchair prescribed (selected) will now be prepared for them and will be ready for them to try in the next practical session.

WheelchairService Training Package
162
BASIC LEVEL
Time: Allow 45 minutes to complete the assessment; 30 minutes to complete the prescription (selection), 10 minutes for feedback.
Track time using the Trainer’s Observation Checklist.
Feedback: comment on examples of good practice that you saw during the practical sessions.
Note any particular areas that participants could improve – do not highlight individuals.
ask: Are there any questions?
B.7: Product (wheelchair) preparation
OB
Jec
Tiv
eS By the end of this session, participants will be able to:
adjust a wheelchair to match the wheelchair prescription (selection);
use the “wheelchair safe and ready” checklist to check that a wheelchair is safe to use and all parts are working.
re
SO
Ur
ce
S
For the session:
PPT slides: B.7 Product (wheelchair) preparation;
Reference Manual;
Participant’s Workbook;
DVD: Wheelchair safe and ready checklist demonstration;
the wheelchairs selected for each wheelchair user, as assessed during Practical One;
completed wheelchair prescription (selection) forms (from Practical One);
wheelchair safe and ready checklist (1 copy per participant);
tape measures and any hand tools needed to carry out adjustments (1 per pair).
cO
nT
eX
T
Adapt this session to suit the context participants will be working in. Think about the following.
The time that is needed to adjust the locally available wheelchairs. If the locally available wheelchairs have few adjustment options, the time needed to set them up is shorter. If there are many adjustment options, the time needed will be longer.
If any locally available wheelchairs require assembly before they can be prepared, time needs to be allowed for the assembly to be carried out, ahead of this session.
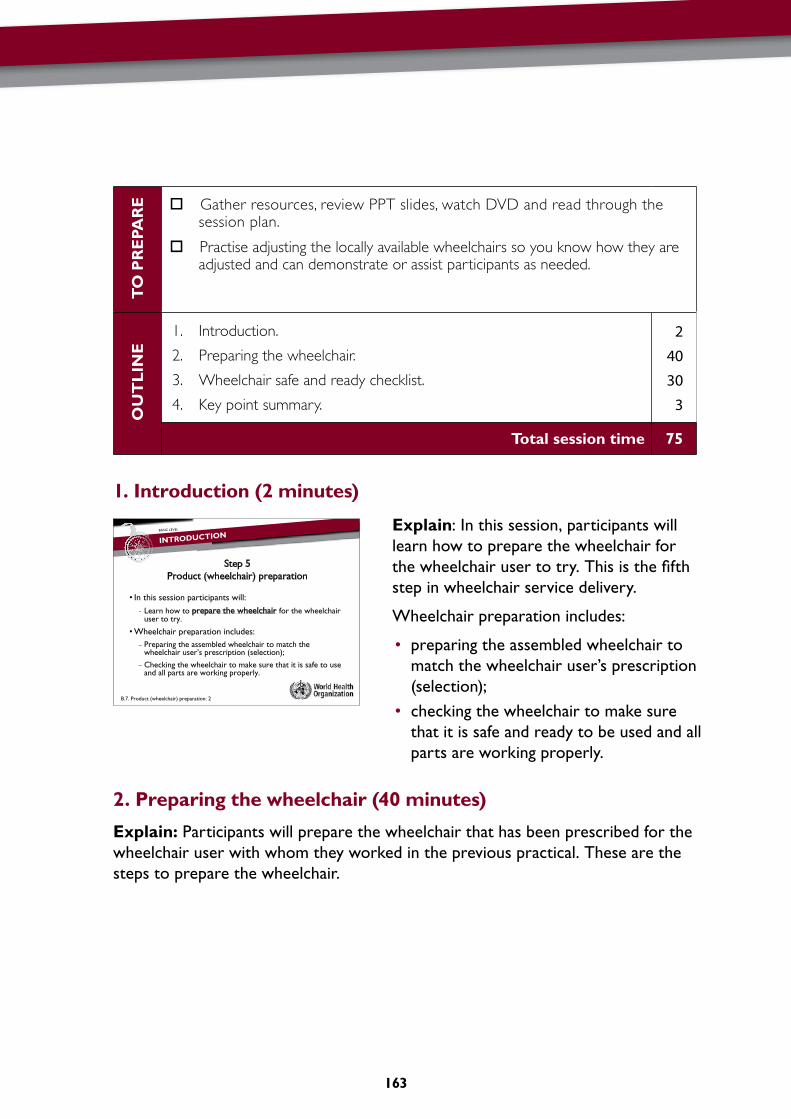
163
TO
Pr
ePa
re Gather resources, review PPT slides, watch DVD and read through the
session plan.
Practise adjusting the locally available wheelchairs so you know how they are adjusted and can demonstrate or assist participants as needed.
OU
Tl
ine
1. Introduction.
2. Preparing the wheelchair.
3. Wheelchair safe and ready checklist.
4. Key point summary.
2
40
30
3
Total session time 75
1. introduction (2 minutes)
explain: in this session, participants will learn how to prepare the wheelchair for the wheelchair user to try. This is the fifth step in wheelchair service delivery.
Wheelchair preparation includes:
• preparing the assembled wheelchair to match the wheelchair user’s prescription (selection);
• checking the wheelchair to make sure that it is safe and ready to be used and all parts are working properly.
2. Preparing the wheelchair (40 minutes)
explain: Participants will prepare the wheelchair that has been prescribed for the wheelchair user with whom they worked in the previous practical. These are the steps to prepare the wheelchair.
Step 5Step 5Product (wheelchair) preparation
• In this session participants will:– Learn how to prepare the wheelchair for the wheelchair – Learn how to prepare the wheelchair for the wheelchair
user to try.
•Wheelchair preparation includes:p p– Preparing the assembled wheelchair to match the
wheelchair user’s prescription (selection);
– Checking the wheelchair to make sure that it is safe to use and all parts are working properly.
B.7. Product (wheelchair) preparation: 2
BASIC LEVEL
INTRODUCTION

WheelchairService Training Package
164
BASIC LEVEL
explain:
• check that the wheelchair seat width and depth measurements are correct for the prescription (selection).
• check that the cushion width and depth match the seat.
adjust (where possible):
• backrest height;• armrests height;• rear wheels position;• brakes position (always reposition brakes
after changing the rear wheels position);• footrests height;• push handles height;• any other adjustments that are possible.
•Check the wheelchair seat •Check the wheelchair seat width and depth measurements are correct measurements are correct for the wheelchair user’s prescription (selection)prescription (selection).
B.7. Product (wheelchair) preparation: 3
BASIC LEVEL
PREPARING THE WHEELCHAIR
•Check that the cushion •Check that the cushion width and depth match the seatthe seat.
B.7. Product (wheelchair) preparation: 4
BASIC LEVEL
PREPARING THE WHEELCHAIR
•Adjust (where possible):•Adjust (where possible):
– backrest height and angle;
– armrests height;
– rear wheels position;rear wheels position;
– brakes position;
– footrests height;
– push handles height;p g ;
– any other adjustments.
B.7. Product (wheelchair) preparation: 5
BASIC LEVEL
PREPARING THE WHEELCHAIR

165
activity
groups: Ask the same groups that worked together in Practical One to work together now.
Give each group:
•the wheelchair prescription (selection) form they completed for their wheelchair user ;
•a tape measure;• the wheelchair they have prescribed (selected) for their wheelchair user.
Ensure that any tools needed to adjust the wheelchairs are available at the front of the training room.
instructions: Ask each group to look at the prescription (selection), and prepare the wheelchair.
Remind them to follow each step:
•check the wheelchair seat width and depth;•check the cushion fits;•make any adjustments to set the wheelchair up for their wheelchair user.
Remind them that any tools they need are at the front of the training room.
explain: If any group needs to make any small modifications to meet their wheelchair user’s needs, this will be done in a later session.
Monitor: Monitor the groups closely.
Check that each step is carried out.
When each group has finished, check that they have set the wheelchair up as closely as possible to match their wheelchair user’s prescription (selection).
If there are any small modifications needed, discuss with the group what is needed. Explain that this will be talked about further in a later session.
Time: Allow 20 or more minutes, depending on adjustments that are needed and can be carried out, and 10 minutes for feedback.
Feedback: ask:
•Was each group able to prepare the wheelchair to match their wheelchair user’s prescription (selection)?
•If not – what was the problem? Ask the group what solutions there may be for this problem. Clarify until everyone understands.
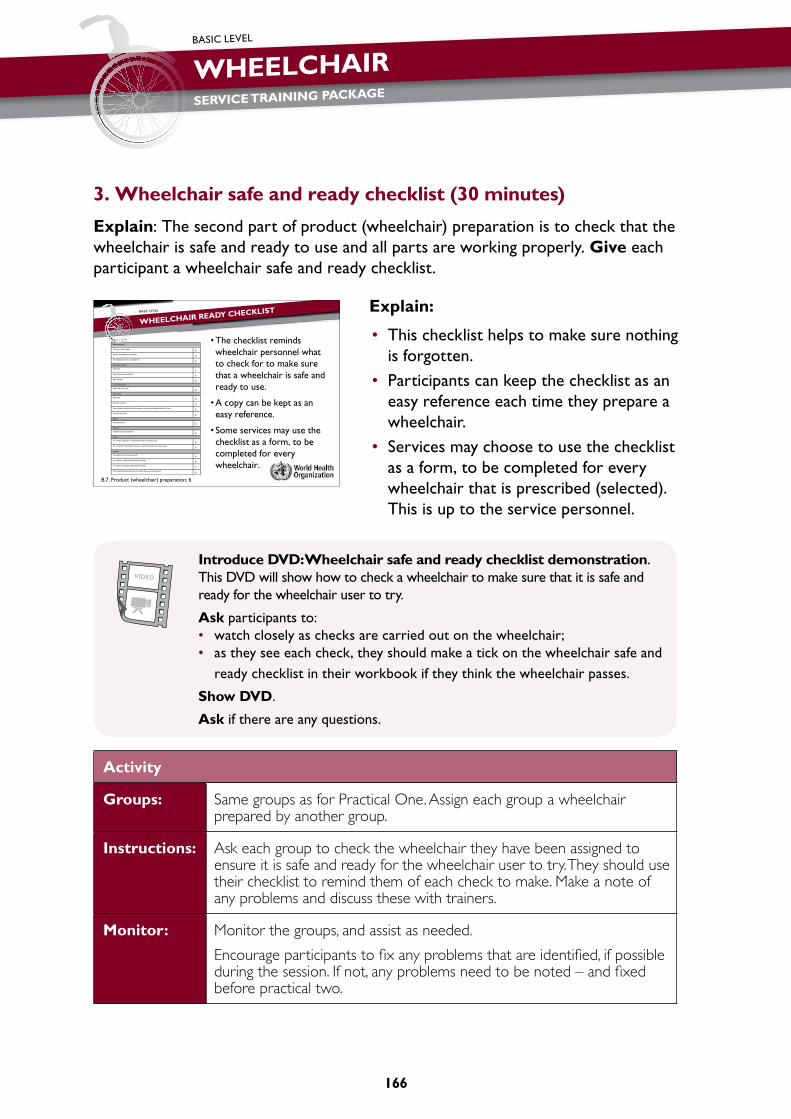
WheelchairService Training Package
166
BASIC LEVEL
VIDEO
3. Wheelchair safe and ready checklist (30 minutes)
explain: The second part of product (wheelchair) preparation is to check that the wheelchair is safe and ready to use and all parts are working properly. give each participant a wheelchair safe and ready checklist.
explain:
• This checklist helps to make sure nothing is forgotten.
• Participants can keep the checklist as an easy reference each time they prepare a wheelchair.
• services may choose to use the checklist as a form, to be completed for every wheelchair that is prescribed (selected). This is up to the service personnel.
introduce DvD: Wheelchair safe and ready checklist demonstration. This DvD will show how to check a wheelchair to make sure that it is safe and ready for the wheelchair user to try.
ask participants to:• watch closely as checks are carried out on the wheelchair;• as they see each check, they should make a tick on the wheelchair safe and
ready checklist in their workbook if they think the wheelchair passes.
Show DvD.
ask if there are any questions.
activity
groups: Same groups as for Practical One. Assign each group a wheelchair prepared by another group.
instructions: Ask each group to check the wheelchair they have been assigned to ensure it is safe and ready for the wheelchair user to try. They should use their checklist to remind them of each check to make. Make a note of any problems and discuss these with trainers.
Monitor: Monitor the groups, and assist as needed.
Encourage participants to fix any problems that are identified, if possible during the session. If not, any problems need to be noted – and fixed before practical two.
•The checklist reminds Whole wheelchair
wheelchair personnel what to check for to make sure
qThere are no sharp edges
qNo parts are damaged or scratched
qThe wheelchair travels in a straight line
Front castor wheels
qSpin freely
that a wheelchair is safe and ready to use.
q
qSpin without touching the fork
qBolts are tight
Front castor barrels
qCastor fork spins freely
•A copy can be kept as an easy reference.
Rear wheels
qSpin freely
qAxle bolts are tight
qTyres inflated correctly (with thumb pressure, wheel can be depressed less than 5 mm)
qPush rims are secure easy reference.
• Some services may use the h kli t f t b
Brakes
qFunction properly
Footrests
qFootrests is securely attached
Frame
checklist as a form, to be completed for every
h l h i
qFor a folding wheelchair – the wheelchair folds and un-folds easily
qFor a wheelchair with fold down backrest – the backrest folds and un-folds easily
Cushion
qThe cushion is in the cover correctly
qThe cushion is sitting on the wheelchair correctly
wheelchair.qThe cushion cover fabric is tight but not too tight
qIf the wheelchair has a solid seat: the cushion fully covers the solid seat
B.7. Product (wheelchair) preparation: 6
BASIC LEVEL
WHEELCHAIR READY CHECKLIST

167
Time: Allow 15 minutes.
Feedback: Ask each group to report back to the whole group whether their wheelchair was safe and ready for the wheelchair user to use (allow 2–3 minutes per group).
ask: if there was a problem, what would they do? encourage answers.
Most important answers:•repair/fix the problem;•return the wheelchair to the wheelchair workshop to be fixed;•contact the supplier of the wheelchair and ask for help with fixing the problem.
4. key point summary (3 minutes)
read the key points.
ask whether there are any questions.
Checklist: Is the wheelchair safe and ready to use?
For the whole wheelchair: notes for trainers:
There are no sharp edges Check all over the wheelchair with eyes and hands.No parts are damaged or scratched
The wheelchair travels in a straight line Push the wheelchair away from you, making sure the castor wheels are in the “trail” position.
Front castor wheels:
Spin freely Tip the wheelchair on to the back wheels. Spin the castor wheels.Spin without touching the fork
Bolts are tight Check. They should feel firm. Do not over tighten.
•Wheelchair preparation includes:
– Adjusting the selected wheelchair to match each j gwheelchair user’s prescription;
Checking the wheelchair to make sure that it is safe to – Checking the wheelchair to make sure that it is safe to use and all parts are working properly.
Th dj t t ti d f dj t t •The adjustment options and range of adjustments vary on different wheelchairs.
• Participants need to be familiar with the adjustment options and range on the wheelchairs available in their area.
B.7. Product (wheelchair) preparation: 8
BASIC LEVEL
KEY POINT SUMMARY

WheelchairService Training Package
168
BASIC LEVEL
Front castor barrels:
Castor fork spins freely Tip the wheelchair on to the back wheels. Spin the castor fork around.
rear wheels:
Spin freely Tip the wheelchair sideways on to one rear wheel. Spin the other wheel. Check the other side.
Axle bolts are tight Check. They should feel firm. Do not over tighten.
Tyres (if these are pneumatic)are inflated correctly
Press on the tyres with your thumb. The tyre should depress a little, but no more than 5 mm.
Push rims are secure Check.
Brakes:
Function properly Apply brakes. Check that the wheelchair cannot be moved.
Footrests:
Footrests are securely attached Check.
Frame:
Cross-folding wheelchair folds and unfolds easily
Fold the wheelchair to check the folding mechanism is working properly.Fold-down backrest – the backrest
folds and unfolds easily
cushion:
The cushion is in the cover correctly Usually the cushion cover is done up at the back of the cushion, underneath.
The cushion is sitting on the wheelchair correctly.
If the cushion is contoured, the “well” for the seat bones should be at the back of the seat.
The cushion cover fabric is tight but not too tight.
The cushion cover should not stretch tightly over any contours of the cushion.
The cushion fully covers the seat Check there is no part of the seat visible from under the cushion. This is particularly important for solid seats.

169
B.8: cushion fabrication
OB
Jec
Tiv
eS By the end of this session, participants will be able to:
point out features of a basic foam pressure relief cushion.
make a basic foam pressure relief cushion
describe how to insert a cushion “lift” for users with unsafe pressure at the seat bones.
re
SO
Ur
ce
S
PPT slides: B.8 Cushion fabrication;
Reference Manual;
Participant’s Workbook;
DVD: Cushion fabrication;
sample pressure relief cushion, cushion cover and cushion lift;
cushion fabrication toolkit (see “Cushion fabrication – materials and tools” above for full details);
sample fabrics available locally that are suitable for use as a cushion cover.
cO
nT
eX
T
Adapt this session to suit the context participants will be working in. For example:
make and fit a cushion for a wheelchair user ;
adapt the dimensions and design of the cushion presented, depending on availability of recommended materials and their performance or based on the average size of people in the local population;
prepare a list of locally available cushions and alternative materials – participants may be asked to bring samples from their home locations.
TO
Pr
ePa
re Gather resources, review PPT slides, watch DVD and read through the
session plan.
Set up a workbench/table for each group of three participants, with the materials and tools needed to test the firmness of foam samples; cut and glue a cushion base.
OU
Tl
ine
1. Introduction.
2. Cushion features and dimensions.
3. How to make a cushion base – demonstration.
4. How to make a cushion base – practice.
5. Looking after the cushion.
6. Frequently asked questions about foam pressure relief cushions.
7. Key point summary.
5
20
20
60
5
5
5
Total session time 120
WheelchairService Training Package
170
BASIC LEVEL
1. introduction (5 minutes)
explain:
• in this session, participants will learn how to make a basic foam pressure relief cushion. if made and fitted correctly, this cushion can help to relieve pressure for many wheelchair users.
• it is important to remember that no one cushion is appropriate for all users.
• When providing a pressure relief cushion, always check the pressure under the wheelchair user’s seat bones during fitting. some adjustments may be necessary to ensure that the seat bones well is the correct width, depth and height.
ask: Has anyone had any previous experience in making and providing pressure relief cushions?
encourage and acknowledge answers.
2. cushion features and dimensions (20 minutes)
Pass around the sample pressure relief cushion base. Have the top layer and cover close by.
For each cushion feature shown on the slides, ask participants: What is the purpose of this feature of the cushion? Remind participants that this was covered in the session “cushions” at the beginning of the training programme. encourage answers.
For each feature shown on the slide, point out this feature on the sample cushion.
Step 5Product (wheelchair) preparation
• In this session participants will:
Product (wheelchair) preparation
– Learn how to make a basic foam pressure relief cushion. If made and fitted correctly, this cushion can help to relieve pressure for many wheelchair users.
B.8. Cushion fabrication: 2
BASIC LEVEL
INTRODUCTION

171
Feature Trainer̀ s notes: What does the feature do? • Gives the cushion its shape.
seat bones well
• Relieves pressure under the seat bones and coccyx (tail bone).
• Helps to hold the pelvis upright at the back of the cushion.
explain:
• The wheelchair user’s seat bones should sit inside the well – not on the edge or on top of the cushion.
• always check that the seat bones well fits correctly during the fitting. Place your hands under the wheelchair user and feel where the seat bones are. check pressure using the pressure test taught in this training programme.
• if the cushion is to be used on a slung wheelchair seat, a bevel cut is made on the base of the cushion.
• This allows the cushion to take up the shape of a slung wheelchair seat so that the top of the cushion remains flat.
• The “bevel” cut is only made when a cushion is to be used on a slung seat.
• For solid seats, the base of the cushion is flat.
B.8. Cushion fabrication: 3
BASIC LEVEL
FIRM FOAM BASE
B.8. Cushion fabrication: 4
BASIC LEVEL
SEAT BONES WELL
B.8. Cushion fabrication: 5
BASIC LEVEL
SLUNG SEAT BASE

WheelchairService Training Package
172
BASIC LEVEL
• The top foam layer provides comfort.• Pass around the sample top layer.
• sometimes more pressure relief is needed.
• in this case, personnel can make a “lift” from the same foam that is used to make the base.
• The lift is placed on top of the base layer of the cushion and under the foam comfort layer. This will increase the pressure relief provided by the seat bones well.
• always physically check the pressure after adding a lift, using the seat bones pressure test.
• Pass around the sample cushion lift.
explain: The final feature of the cushion is the cover. The cover is essential to protect the cushion.
ask: What type of fabric could be used to make a cushion cover? encourage answers and write on the board the fabrics which would be “good” and “ok”. explain which ones would be best (good) and which would be used if there is no alternative.
Possible answers:
•thin nylon/umbrella fabric (good);•stretchy fabric/Lycra (good);•“T” shirt fabric/knit cotton (OK);•neoprene/wet suit (OK);•taffeta (OK);
•vinyl/imitation leather (bad);•heavy canvas or nylon (bad);•terry cloth/towels (bad);•linen/sheets (bad);•plastic bag/polyethylene (bad).
B.8. Cushion fabrication: 6
BASIC LEVEL
TOP FOAM LAYER
Pl th lift t f • Place the lift on top of the base layer of the
hi d d th cushion and under the comfort layer.
B.8. Cushion fabrication: 7
BASIC LEVEL
LIFT

173
explain:
• a good fabric for a pressure relief cushion cover is usually either water-resistant or stretchy.
• a water-resistant cover fabric should be very thin (like parachute or umbrella fabric) so that folds will not cause marks on the skin.
• if using a stretchy fabric which is not water-resistant, a thin piece of plastic (plastic bag) can be used over the top of the foam and underneath the cushion cover to protect the cushion.
• The cover should be looser at the back of the cushion to prevent a “drum” effect across the seat bones well.
Pass around the sample cushion cover.
explain:
• The seat bones well must be the correct width, depth and height to work correctly. To calculate the size of the seat bones well, participants can use the following rules.
explain each seat bones well dimension as shown on the slide.
• Look for either water resistant or stretchy fabric.
• Ensure the fabric is thin (like parachute or umbrella fabric) ( p )so that folds will not cause marks on the skin.
• If using a fabric that is not water resistant a thin piece of • If using a fabric that is not water resistant, a thin piece of plastic can be used over the top of the foam and underneath the cushion cover to protect the cushion. the cushion cover to protect the cushion.
• The cover should be looser at the back of the cushion to prevent a “drum” effect across the seat bones well prevent a drum effect across the seat bones well.
B.8. Cushion fabrication: 8
BASIC LEVEL
CUSHION COVER FABRIC
B.8. Cushion fabrication: 9
BASIC LEVEL
SEAT BONES WELL DIMENSIONS
1. Width = ½ the user’s 1. Width ½ the user s seat width or 200mm (whichever is less).( )
2. Depth = ½ the user’s seat width or 200mm seat width or 200mm (whichever is less).
3 Height = 35mm for 3. Height = 35mm for adults and 20 – 25mm for childrenfor children.
B.8. Cushion fabrication: 10
BASIC LEVEL
SEAT BONES WELL DIMENSIONS

WheelchairService Training Package
174
BASIC LEVEL
VIDEO
Small-group activity
groups: Have two people in each group.
instructions: ask each group to:
•complete the table at the beginning of the worksheet in their workbooks.
explain they need to calculate the seat bones well width, depth and height for three wheelchair users with different seat widths.
Monitor: Monitor the groups, and assist as needed. While they work, draw the table below on the whiteboard – without including the answers.
Width Depth Height
adult wheelchair user – 360 mm seat width 180 mm 180 mm 35 mm
adult wheelchair user – 460 mm seat width 200 mm 200 mm 35 mm
child wheelchair user – 280 mm seat width 140 mm 140 mm 20–25 mm
Time: 5 minutes.
Feedback: Draw the table on the whiteboard.
ask: What is the width, depth and height of the seat bones well for each wheelchair user? Write the correct answers into the table on the board.
ask: How can participants tell whether the dimension is correct for that wheelchair user?
Answer: Always check that the seat bones well fits correctly at the fitting. Place your hands under the wheelchair user and feel where the seat bones are. Check pressure using the pressure test taught in this training programme. Make sure the seat bones are sitting inside the seat bones well, and not on the edge or on top of the cushion.
3. how to make a cushion base – demonstration (20 minutes)
introduce DvD: cushion fabrication. it is a short presentation of making a basic foam pressure relief cushion.
Show DvD
ask if there are any questions.
175
Pass around the sample firm foam and soft foam. ask participants to place the foam on a solid surface (for example a workbench) and feel the different firmness of the two pieces of foam by making a fist and pushing their knuckles into the foam.
explain:
• Both the base and top layer are placed in the cushion cover together.• The two layers do not need to be glued together.• if the top layer becomes soiled or worn out, it can be washed and dried, or
replaced.• show how a lift can be added within the cover to increase the depth of the
pelvic well.
4. how to make a cushion base – practice (60 minutes)
explain: Participants will now practise cutting the cushion base.
activity
groups: Have two to three people in each group. Assign each group to a workbench/table with the materials and tools required to cut a foam base.
instructions: ask each group to:
•work together to cut the cushion base;•use the worksheet in their workbook to remember each step.
Highlight safety points:
•remind participants that the foam cutting tools are very sharp and must be handled carefully.
Monitor: Monitor the groups, and assist as needed.
Time: 50 minutes and 10 minutes for feedback.
Feedback: Ask groups:
•What helpful techniques for cutting or gluing foam did you discover?•What happens if you cut a segment from two directions? (Answer: The
two cuts may not meet, leaving a step in the surface.)

WheelchairService Training Package
176
BASIC LEVEL
5. looking after the cushion (5 minutes)
explain: Wheelchair users need to know how to look after their cushion. This includes the following.
• Keep the cushion clean – the cushion can be washed with warm, slightly soapy water. it should be dried away from direct sunlight before being replaced.
• check the top layer – the top layer should “spring back” when pressed. if it does not spring back and has become hard and flat, it needs to be replaced.
• check the base layer – check that the base still holds its shape and is not chipped or wearing away. if it is, it may need to be replaced.
• The top layer may be replaced two or three times before the base needs replacing.
6. Frequently asked questions about foam pressure relief cushions (5 minutes)
ask: are there any questions about this cushion? answer any questions.
Possible questions answers
how do you decide what fabric to use for the cushion cover?
•Choose a fabric which is stretchy if possible. Water-resistant fabric is very good, if available. If the fabric is water-resistant, make sure it is not too thick or the folds may cause marking on the wheelchair user’s skin, which can lead to a pressure sore.
•The choice will depend on the fabric available. Sometimes the choice is limited.
•If there is a choice and you are not sure, ask wheelchair users to trial different options.
•Wheelchair service personnel will develop experience as different fabrics are tried.
• Keep the cushion clean and dry:
• wash with warm soapy water;wash with warm soapy water;
• dry away from direct sunlight.
• Check the top layer:• Check the top layer:
• replace if it does not spring back when pressed or is hard.
• Check the base layer:
• replace if it has lost its shape or is chipped.
• The top layer may be replaced two or three times before the base needs replacing.
B.8. Cushion fabrication: 12
BASIC LEVEL
HOW TO LOOK AFTER A FOAM PRESSURE RELIEF CUSHION
177
Does this cushion work for all users?
•No – this cushion will not work for all wheelchair users.•However, one advantage of this cushion is that it can be easily
adapted.
is this cushion hot or does it cause sweating?
•Foam cushions can be hot and can cause sweating. However, the cushion performs well in many other ways, so the warmth is a compromise.
Do all wheelchair users need a pressure relief cushion?
•No – not all wheelchair users need a pressure relief cushion but every hard-seat wheelchair needs a seat cushion.
•Consider the pressure risk factors taught in this training programme to decide whether a wheelchair user is at risk of developing a pressure sore.
•Although this cushion may not be needed for pressure relief, the cushion can also improve comfort and posture, even for wheelchair users who are not at risk of developing pressure sores.
What happens if the cushion is used back-to-front or upside down?
•It will not work properly and may even increase the risk of developing pressure sores.
•Always make sure that wheelchair users, and family members (where relevant), understand how to use and care for the cushion correctly.
•Mark the cushion “front” and “back” or “up” and “down” if necessary.
Does this cushion work for children?
•Yes, this cushion would work for children who are able to sit well and who are at risk of developing a pressure sore.
•Many children who use a wheelchair need extra postural support – which is not provided by this cushion alone.
7. key point summary (5 minutes)
read the key points.
ask whether there are any questions.If d d f d l h h l l • If made and fitted correctly, cushions can help to relieve pressure for many wheelchair users.
• It is important to remember that no one cushion is appropriate for all users. pp p
•Whenever providing a pressure relief cushion for a wheelchair user physically check the pressure under the wheelchair user physically check the pressure under the wheelchair user’s seat bones during fitting. Some adjustments may be necessary to ensure that the seat adjustments may be necessary to ensure that the seat bone well is the correct width, depth and height.
B.8. Cushion fabrication: 13
BASIC LEVEL
KEY POINT SUMMARY

WheelchairService Training Package
178
BASIC LEVEL
B.9: Fitting
OB
Jec
Tiv
eS By the end of this session, participants will be able to:
list the steps of fitting in the correct order;
demonstrate how to check the size and common adjustments of a wheelchair for an individual wheelchair user.
re
SO
Ur
ce
S
For the session:
PPT slides: B.9 Fitting;
Reference Manual;
DVD: Fitting demonstration;
one wheelchair for each group of three;
wheelchair fitting checklist (1 per participant).
cO
nT
eX
T Adapt this session to suit the context participants will be working in. Think about the following.
Where fitting will be carried out. If participants will be carrying out fitting in the community, trainers may include advice on tools that should be taken on the fitting visit and any other considerations.
TO
Pr
ePa
re Gather resources, review PPT slides, watch DVD and read through the
session plan.
OU
Tl
ine
1. Introduction.
2. Good practice in fitting.
3. Fitting practice.
4. Key point summary.
2
30
25
3
Total session time 60

179
1. introduction (2 minutes)
explain:
• Fitting is the sixth step in the eight steps of wheelchair service delivery. in this session, participants will learn what to do during the fitting.
2. good practice in fitting (30 minutes)
explain: During fitting, the wheelchair user and personnel together check that:
• the wheelchair is the correct size and has been adjusted correctly;
• the wheelchair and cushion support the wheelchair user in sitting upright;
• if a pressure relief cushion has been prescribed (selected), the cushion relieves pressure.
explain: Good practice in fitting is:
• checking size and adjustments;• checking posture;• checking pressure;• checking fit while the wheelchair user is
moving.
check if the wheelchair is ready
explain:
• Make sure the wheelchair has been checked, it is safe to use and all parts are working.
Step 6Fitting
• In this session participants will:
Fitting
– Learn what to do during the fitting.
B.9. Fitting: 2
BASIC LEVEL
INTRODUCTION
•During the fitting the wheelchair user and personnel check that:
– The wheelchair is the correct size and all the necessary modifications and adjustments have y jbeen made to ensure an optimum fit.
– The wheelchair and cushion support the – The wheelchair and cushion support the wheelchair user to sit upright.
If li f hi h b – If a pressure relief cushion has been prescribed – the cushion relieves pressure.
B.9. Fitting: 3
BASIC LEVEL
FITTING
•Fitting is carried out in the following order:
– check size and adjustments;check size and adjustments;
– check posture;
– check pressure;
– check fit while the wheelchair user is moving.g
B.9. Fitting: 4
BASIC LEVEL
GOOD PRACTICE IN FITTING

WheelchairService Training Package
180
BASIC LEVEL
Check size and adjustments
explain:
• We have already talked a little about how the wheelchair should fit. During fitting, you need to check physically that the wheelchair fit is correct. This is how it is done.
explain:
To check the seat width:
• Run your fingers between the outside of the wheelchair user’s thighs and the sides of the wheelchair. Your fingers should fit comfortably without being pinched.
To check seat depth:
• check the wheelchair user is sitting upright.
• slide hand between the cushion and the back of the knee. There should be a gap large enough to admit two fingers (30 mm). There may be a bigger gap for wheelchair users with long legs. Up to 60 mm is acceptable.
• slide hand down the back of the calf and make sure it is not touching the seat or cushion.
• always check both sides.
To check footrests height:
• slide the hand between the thigh and the cushion – there should be even pressure along the thigh and no gaps;
• look at the foot on the footrests – the foot should be supported at the front and the back with no gaps.
•Run your fingers between Run your fingers between the outside of the wheelchair user's thighs wheelchair user s thighs and the sides of the wheelchair. wheelchair.
•Your fingers should fit f t bl ith t b i comfortably without being
pinched.
B.9. Fitting: 5
BASIC LEVEL
CHECK SEAT WIDTH
•Check the wheelchair user is sitting upright, with the back of their pelvis touching the backrest.
• Slide hand between the cushion and back of the knee. Count how
fi ll i h ld many fingers – usually it should be a two finger gap.
Sl d h d d h b k f h • Slide hand down the back of the calf and make sure it is not touching the seat or cushiontouching the seat or cushion.
•Check both sides.
B.9. Fitting: 6
BASIC LEVEL
CHECK SEAT DEPTH
• Slide the hand between the Slide the hand between the thigh and the cushion. There should be even pressure along should be even pressure along the thigh and no gaps.
L k t th f t th •Look at the foot on the footrest. The foot should be
t d t th f t d th supported at the front and the back with no gaps.
B.9. Fitting: 7
BASIC LEVEL
CHECK FOOTRESTS HEIGHT

181
To check backrest height:
• ask the wheelchair user if the backrest is comfortable;
• observe whether the trunk is balanced over the hips;
• is the wheelchair user able to push the wheelchair without the backrest interfering?
To check the rear wheels position for hand propelling:
• ask the wheelchair user to grip the push rims at the top of the wheels – the elbow should be bent at 90 degrees;
• also check with the user if the rear wheels are positioned correctly for balance (forward for active, back for safe).
To check the seat height for foot propelling:
• ask the wheelchair user to sit with the back of their pelvis against the backrest with the pushing foot flat on the floor. check whether the feet can sit flat on the floor.
• if the seat height is too high, personnel can try: - reducing the height of the cushion; - attaching a solid seat lower than the
original seat (get technical advice or support to do this).
For a user who is propelling with only one foot, with the other foot resting on the footrest:
• check that the pressure under the seat bone of the side that is resting on the footrest is not at level 3.
•Ask the wheelchair user if the Ask the wheelchair user if the backrest is comfortable.
Ob h th th t k i •Observe whether the trunk is balanced over the hips.
• Is the wheelchair user able to push the wheelchair without the backrest interfering?
B.9. Fitting: 8
BASIC LEVEL
CHECK BACKREST HEIGHT
•Are the wheelchair user’s Are the wheelchair user s hands in a comfortable position to push the wheelchair?to push the wheelchair?
•Also check the position for b l (f d f ti balance (forward for active, backwards for safe).
•Always re-check the brakes if the rear wheels are moved.
B.9. Fitting: 9
BASIC LEVEL
CHECK REAR WHEELS POSITION (FOR HAND PROPELLING)
•Can the wheelchair user sit with the back of their pelvis against the backrest and the gpushing foot flat on the floor?
B.9. Fitting: 10
BASIC LEVEL
CHECK SEAT HEIGHT (FOR FOOT PROPELLING)

WheelchairService Training Package
182
BASIC LEVEL
check posture
explain: after checking the size and adjustments, personnel should then check that the wheelchair user’s posture is as upright as is possible for them.
ask: What are some of the things they would look for to check whether a person is sitting upright? encourage answers.
Most important answers:
•pelvis upright and level;•shoulders level, arms free to move;•trunk upright;•back following the three natural curves;•head upright and balanced over the body;•hips flexed near 90 degrees;
•legs slightly open (abducted);•knees and ankles flexed near 90 degrees;•heels directly below the knees or slightly
forward or back;•feet flat on the floor.
explain: Remember that not everyone sits in exactly the same way. For example – some wheelchair users like to have their feet tucked back, with their knees bent more than 90 degrees.
B.9. Fitting: 11
BASIC LEVEL
POSTURE
B.9. Fitting: 12
BASIC LEVEL
NOT EVERYONE SITS EXACTLY THE SAME WAY

183
VIDEO
check pressure
explain:
• For every wheelchair user at risk of developing a pressure sore – check if the pressure under the seat bones is safe.
check fit while the wheelchair user is moving
explain:
The final part of fitting is to check when the wheelchair user is moving.
The things to look for include:
• does the backrest allow the wheelchair user freedom to move the shoulders to push?
• does the backrest give the wheelchair user enough support?
• do the wheelchair user’s feet stay on the footrests?• is the rear wheels position correct for the user?
explain: if a wheelchair user cannot push the wheelchair themselves, ask a family member/carer to push them.
introduce the DvD: We will now watch the whole fitting sequence. This includes checking the fit, checking posture, and checking while the wheelchair user is moving.
hand out the wheelchair fitting checklist. explain: Participants can keep the checklist, and this will help to remind them of the steps in fitting.
ask participants to watch the video, and see if they can see each of the fitting checks being carried out as shown on their checklist.
Show DvD.ask if there are any questions.
check if there are any further actions that need to take place
• For every wheelchair user at risk of developing a pressure sore – check if the pressure under the seat bones is safe.p
B.9. Fitting: 13
BASIC LEVEL
FITTING
• Finally – check that the wheelchair fits when the wheelchair user is moving.
B.9. Fitting: 14
BASIC LEVEL
FITTING

WheelchairService Training Package
184
BASIC LEVEL
3. Fitting practice (25 minutes)
activity
groups: Have two to three people in each group. Give each group a wheelchair and a wheelchair fitting checklist.
instructions: •Ask each group to elect one person to be the wheelchair user. The other members of the group work with the wheelchair user to check that the wheelchair fits.
•Remind participants to check the wheelchair user at rest and then moving. They should look at the “fit”, user’s posture and check pressure.
Monitor: Monitor the groups, and assist as needed.
Time: Allow 10 minutes for feedback.
Feedback: ask each group to report back briefly to the whole group:
•whether the wheelchair fitted or did not fit the wheelchair user ;•if the wheelchair did not fit, ask what part did not fit;•would it be possible to adjust the wheelchair to fit, or would they need
to change the wheelchair?
explain: if a wheelchair does not fit even after adjustment, there may be simple ways to modify it. This is explained in the next session.
4. key point summary (3 minutes)
read the key points.
ask whether there are any questions.•Always involve the wheelchair user in the fitting. Ask and listen to their opinion. Discuss and explain any changes or p p y gadjustments that you would like to make.
•Fitting should check size posture and pressure•Fitting should check size, posture and pressure.
•Check with the wheelchair user both still and moving.
B.9. Fitting: 16
BASIC LEVEL
KEY POINT SUMMARY

185
B.10: Problem solving
OB
Jec
Tiv
eS By the end of this session, participants will be able to:
list common wheelchair fit or adjustment problems
describe simple solutions for common wheelchair fit or adjustment problems.
re
SO
Ur
ce
S
For the session:
PPT slides: B.10 Problem solving;
Reference Manual;
DVD: Problem solving fit or adjustment (parts 1 and 2);
one wheelchair ;
two blocks of foam (approximately 100 mm x 100 mm x 50 mm) for demonstration;
ankle/calf straps (if available).
cO
nT
eX
T Adapt this session to suit the context participants will be working in. Think about:
the locally available wheelchairs – and any particular solutions that can be applied to these wheelchairs;
the materials and facilities participants have in their workplace.
TO
Pr
ePa
re Gather resources, review PPT slides, watch DVD and read through the session plan.
Prepare photographs or slides of any local examples of the solutions described in this session.
OU
Tl
ine
1. Introduction.
2. Seat depth too short or too long.
3. Footrests height too low or too high.
4. Legs tend to roll inwards or outwards.
5. Feet tend to slide off the footrests.
6. Wheelchair is too wide.
7. Key point summary.
3
10
5
10
10
5
2
Total session time 45

WheelchairService Training Package
186
BASIC LEVEL
1. introduction (3 minutes)
explain: sometimes personnel will find a problem with making the available wheelchair fit the wheelchair user correctly. The problem may be because:
• there is a limited range of wheelchairs and sizes available;• the wheelchair user needs extra support to sit upright comfortably.
• in this session, we will look at some simple solutions to some of the common problems caused by limitation in the sizes and range of wheelchairs available.
• Making modifications and providing more postural support is covered in much more detail in the intermediate-level training.
all of the solutions we will discuss in this session assume that the closest size wheelchair for the wheelchair user has already been selected. always check this before modifying a wheelchair.
ask: What are some common fitting problems personnel have already seen, or think may happen?
Most important answers:
•seat depth is too long or too short;•footrests height cannot go up high enough or
does not go down low enough;•legs tend to roll inwards or outwards;
•feet tend to slide off footrests;•wheelchair is too wide.
explain: in this session, we will look at five possible problems.
Step 6Fitting
• In this session participants will:
Fitting
– Look at some simple solutions to some of the common fitting problems caused by limitations in the sizes and range of wheelchairs available.
– Making modifications and providing more postural Making modifications and providing more postural support is covered in much more detail in the intermediate level training. g
B.10. Problem solving: 2
BASIC LEVEL
INTRODUCTION
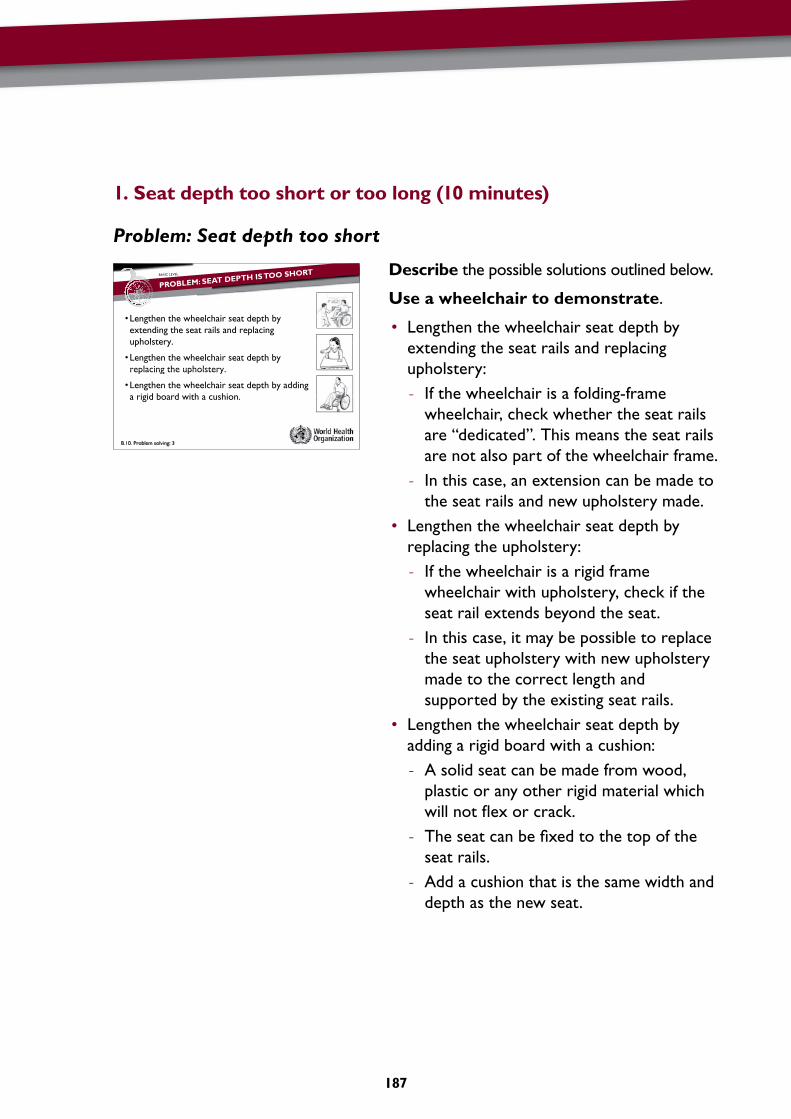
187
1. Seat depth too short or too long (10 minutes)
Problem: Seat depth too short
Describe the possible solutions outlined below.
Use a wheelchair to demonstrate.
• Lengthen the wheelchair seat depth by extending the seat rails and replacing upholstery: - if the wheelchair is a folding-frame
wheelchair, check whether the seat rails are “dedicated”. This means the seat rails are not also part of the wheelchair frame.
- in this case, an extension can be made to the seat rails and new upholstery made.
• Lengthen the wheelchair seat depth by replacing the upholstery: - if the wheelchair is a rigid frame
wheelchair with upholstery, check if the seat rail extends beyond the seat.
- in this case, it may be possible to replace the seat upholstery with new upholstery made to the correct length and supported by the existing seat rails.
• Lengthen the wheelchair seat depth by adding a rigid board with a cushion: - a solid seat can be made from wood,
plastic or any other rigid material which will not flex or crack.
- The seat can be fixed to the top of the seat rails.
- add a cushion that is the same width and depth as the new seat.
L th th h l h i t d th b •Lengthen the wheelchair seat depth by extending the seat rails and replacing upholsteryupholstery.
•Lengthen the wheelchair seat depth by replacing the upholsteryreplacing the upholstery.
•Lengthen the wheelchair seat depth by adding a rigid board with a cushiona rigid board with a cushion.
B.10. Problem solving: 3
BASIC LEVEL
PROBLEM: SEAT DEPTH IS TOO SHORT

WheelchairService Training Package
188
BASIC LEVEL
explain: When replacing a wheelchair seat, remember the following.
• Make sure the new seat is strong enough to carry the weight of the user.
• if it is a rigid (solid) seat: - check that the seat does not flex or crack
beyond the existing wheelchair seat; - always ensure a rigid seat is provided with
a cushion – for every wheelchair user; - check during fitting that the backrest and
footrests are the correct height – a solid seat and cushion will raise the wheelchair user in the wheelchair.
Problem: Seat depth too long
explain: if the shortest available seat depth is too long for the wheelchair user, it will be impossible for him/her to sit upright. The seat depth must be shortened.
Describe the possible solutions outlined below.
Use a wheelchair to demonstrate.
• Mark the seat depth that is needed on the existing seat and reduce it.
• if the seat is upholstered – remove the upholstery, shorten it (using an industrial sewing machine) and replace.
• if the seat is rigid – remove the seat, shorten and replace.
• shorten the cushion to match the new seat depth.
explain: When shortening a seat depth, remember:
• when cutting a rigid seat – always ensure that all edges are smooth and splinter-free;
• when cutting a cushion – always cut from the front so that pressure relief at the back of the cushion stays the same.
•Mark the seat depth that is needed on the •Mark the seat depth that is needed on the existing seat and reduce it.
• If the seat is upholstered – remove the • If the seat is upholstered – remove the upholstery, shorten it (using an industrial sewing machine) and replace.
• If the seat is rigid – remove the seat, shorten and replace.
• Shorten the cushion to match the new seat depth.
B.10. Problem solving: 5
BASIC LEVEL
PROBLEM: SEAT DEPTH IS TOO LONG
Wh tti i id t l •When cutting a rigid seat – always ensure that all edges are smooth and splinter free.
Wh i hi l f h •When cutting a cushion – always cut from the front so that pressure relief at the back of the cushion stays the same cushion stays the same.
B.10. Problem solving: 6
BASIC LEVEL
CAUTION
•When replacing a wheelchair seat, make sure the h h h f new seat is strong enough to carry the weight of
the user. • If it is a rigid seat:If it is a rigid seat:
– Check that the seat does not flex or crack beyond where it extends beyond the existing wheelchair seat;seat;
– Always ensure a rigid seat is provided with a cushion for every wheelchair user;
– Check during fitting that the backrest and footrests are the correct height. A solid seat and cushion will raise the wheelchair user in the wheelchair.
B.10. Problem solving: 4
BASIC LEVEL
CAUTION
4

189
explain: if the wheelchair seat depth is more than 60 mm shorter (for an adult) than the wheelchair user’s seat depth, this can be a problem. The wheelchair user will not have enough support from the seat to be able to sit comfortably. There is also an increased risk of pressure on high-risk areas such as the seat bones.
3. Footrests height too low or too high (5 minutes)
Problem: Footrests height is too low
explain: if the footrests height is too low, the wheelchair user will not be able to rest the feet comfortably on the footrests. This can cause him/her to slide forward in the wheelchair, or to feel unstable. He/she will not have the support needed to sit upright comfortably.
Describe the possible solutions outlined below.
Use a wheelchair to demonstrate.
• Raise the footrests height by shortening the footrests hanger: - on most four-wheel wheelchairs, the
footrests hanger may be cut shorter.• Raise the footrests height by building up
the footrests: - use wood or another sturdy material
to add height to the footrests.
explain:
• When changing the footrests hanger: – always check that the adjustment mechanism still working.
• if building up footrests – check the build-up does not stop footrests that move out of the way from working.
•Raise the footrests height gby shortening the footrest hangers.
•Raise the footrests height by building up the footrestsby building up the footrests.
B.10. Problem solving: 7
BASIC LEVEL
PROBLEM: FOOTRESTS ARE TOO LOW
•When changing the footrest hangers – always check that the adjustment mechanism still jworks.
• If building up footrests check that the build• If building up footrests – check that the build-up does not stop footrests that move out of the way from workingthe way from working.
B.10. Problem solving: 8
BASIC LEVEL
CAUTION

WheelchairService Training Package
190
BASIC LEVEL
Problem: Footrests height is too high
explain: if the footrests height is too high, the wheelchair user’s thighs will not rest comfortably on the seat. Footrests that are too high can increase pressure on the seat bones.
Describe the possible solutions outlined below.
Use a wheelchair to demonstrate.
1. Lower the footrests height by lengthening the inner extension tube: - check if the inner extension tube can
be replaced with a longer tube; - if so – replace it with a similar tube of
the same diameter and strength.2. increase the height of the cushion:
- increase the height of the cushion, or raise the cushion by adding something solid underneath.
explain:
• if lowering the footrests – make sure the footrests do not become so low that they catch on the ground. if this happens, try option 2 instead. if that does not work, the wheelchair is not suitable for the wheelchair user.
• When raising the height of a cushion: - do not use soft foam to increase
the height of the cushion – this will compress, and will also feel unstable;
- check during fitting that the backrest and armrests are the correct height – the higher cushion will raise the wheelchair user in the wheelchair;
- check that there are no functional problems with raising the cushion – for example, the wheelchair user may then not be able to fit under tables or desks.
•Lower the footrests by lengthening the inner extension tube.
• Increase the height of the cushion.
B.10. Problem solving: 9
BASIC LEVEL
PROBLEM: FOOTRESTS ARE TOO HIGH
If l i h f k h • If lowering the footrests - make sure the footrests do not become so low that it catch on the ground on the ground.
• If raising the height of a cushion:– Do not use soft foam to increase the height of
the cushion.
– Check during fitting that the backrest and armrests are the correct height.
– Check that there are not functional problems with raising the cushion.
B.10. Problem solving: 10
BASIC LEVEL
CAUTION

191
VIDEO
4. legs tend to roll inwards or outwards (10 minutes)
explain:
• sometimes the wheelchair user’s legs roll inwards or outwards. This may be because of the way he/she is used to sitting, or have a physical reason (for example muscle weakness).
• simple adjustments to the wheelchair seat or cushion can help to reduce this problem.
introduce DvD: Problem solving fit or adjustment. This short video shows a wheelchair user called Gary, whose legs tend to roll outwards.
Show DvD: (part 1 – gary)
after the video ask: What was the solution that the therapist provided? encourage answers.
explain that in this example the solution was to add wedges to the cushion to support the thighs in neutral. The rise on the outside of the legs was increased. a contoured cushion could have also been added to solve this problem. if legs were rolling inwards, the rise on the inside could have been increased.
Describe the other possible solutions outlined below.
Use a wheelchair to demonstrate.
• Double check the footrests height: - make sure the footrests height is
supporting the wheelchair user correctly (even pressure should be felt under the feet and under the thighs).
• check the wheelchair seat is properly tensioned: - if the wheelchair has an upholstered
seat – make sure that the seat is tensioned firmly;
- if the seat is saggy, this will encourage the wheelchair user’s legs to roll inwards.
• add wedges to the cushion to support the thighs in neutral (as in DvD and illustration) or provide a contoured cushion, modify cushion if necessary.
•Double check the footrests height.
•Check that the wheelchair seat (if canvas/slung) is properly tensioned.
•Add wedges to the cushion to support the thighs in neutral (as in pp g (DVD and illustration) or provide a contoured cushion, modify if , ynecessary.
B.10. Problem solving: 12
BASIC LEVEL
PROBLEM: LEGS TEND TO ROLL INWARDS OR OUTWARDS

WheelchairService Training Package
192
BASIC LEVEL
5. Feet tend to slide off the footrests (10 minutes)
explain:
• sometimes the wheelchair user’s feet slide off the footrests. This often has a physical reason (for example muscle weakness or muscle spasms).
• The simple addition of straps can help to reduce this problem.
Describe the possible solutions outlined below.
Use a wheelchair to demonstrate.
• Double check the footrests height: - make sure the footrests height is
supporting the wheelchair user correctly (even pressure should be felt under the feet and under the thighs).
• adjust the footrests angle (if possible): - check if the footrests angle can be
adjusted; - if so – try increasing the angle of the
footrests. This may help to hold the wheelchair user’s feet in place.
• add a strap: - attach a strap to the footrests
hangers at the level of the ankles; - if the feet tend to slide off backwards,
the strap goes behind the legs; - if the feet tend to slide off forwards,
the strap goes in front of the legs.explain:
• Make sure the strap is easy to remove, so that the wheelchair user can get in and out of the wheelchair without effort.
• check that the wheelchair user can reach the strap without assistance, and can do it up and undo it easily.
D bl h k h f •Double check the footrests height.
•Adjust the footrests angle (if possible).p )
•Add a strap.
B.10. Problem solving: 13
BASIC LEVEL
PROBLEM: FEET TEND TO SLIDE OFF THE FOOTRESTS
Wh l h f•Whenever altering the footrests:
– Try to ensure there is even pressure under y pthe foot.
•When adding a strap:When adding a strap:
– Make sure the strap is easy to remove so that th h l h i t i d t f th the wheelchair user can get in and out of the wheelchair without effort.
– Check that the wheelchair user can reach the strap without assistance, and can do it up and
d i ilundo it easily.
B.10. Problem solving: 14
BASIC LEVEL
CAUTION

193
VIDEO
explain: another problem can be that the feet are not evenly supported on the footrests. This is often caused by the wheelchair user’s feet not being able to reach a neutral posture.
introduce the DvD: Problem solving fit or adjustment. This short DvD shows arun, a wheelchair user whose feet are not evenly supported on the footrest.
Show DvD: (part 2 – arun)
after the video ask: What was the solution that the therapist provided?
encourage answers.
6. Wheelchair is too wide (5 minutes)
explain: sometimes the smallest wheelchair available is still too wide for the wheelchair user. if the wheelchair seat is too wide, the wheelchair user will find it difficult to sit upright, and is likely to collapse to one side.
some simple foam inserts can help to provide the wheelchair user with support to sit upright.
Describe the possible solutions outlined below.
Use a wheelchair to demonstrate.
• add foam pads on each side of the pelvis: - measure the space between the
wheelchair user (when he/she is sitting central in the wheelchair with the back against the backrest) and the side of the armrests;
- cut and add foam inserts to fill the space between each side of the wheelchair user and the side of the wheelchair;
- check fit; - upholster and attach the foam inserts.
if the armrests are solid, the inserts may be attached to the armrests. They may also be attached to the top of the cushion.
•To reduce wheelchair idth dd f i t width, add foam inserts on
each side of the pelvis.
B.10. Problem solving: 16
BASIC LEVEL
PROBLEM: WHEELCHAIR IS TOO WIDE

WheelchairService Training Package
194
BASIC LEVEL
explain:
• The inserts only need to come as far forward as the user’s trunk.
• ensure the cushion matches the seat width.
• if the wheelchair is very wide, the wheelchair user will also have trouble reaching the push rims.
• Over-reaching for the push rims can cause a shoulder injury. consider carefully whether the wheelchair is safe for the wheelchair user before prescribing it.
7. key point summary (2 minutes)
read the key points.
ask whether there are any questions.
If d i h l h i t idth b ddi id d• If reducing a wheelchair seat width by adding side pads:
– Remember - The pads only need to come as far forward as th ’ t kthe user’s trunk.
– Ensure the cushion matches the wheelchair seat width.
• If the wheelchair is very wide, the wheelchair user will also have trouble reaching the push rims.
•Over-reaching for the push rims can cause a shoulder injury. Consider carefully whether the wheelchair is safe for the
h l h i b f ibi iwheelchair user before prescribing it.
B.10. Problem solving: 17
BASIC LEVEL
CAUTION
• Problems with the wheelchair fit may be due to:• Problems with the wheelchair fit may be due to:– Limitations in the sizes and ranges of wheelchairs available;
Th h l h i di t t t b bl t it i ht – The wheelchair user needing extra support to be able to sit upright comfortably.
• Simple solutions can sometimes solve these problems.Simple solutions can sometimes solve these problems.
• Before making any modifications, always check that you have the best size of the wheelchair available for the wheelchair user, and i i dj d ll i b it is adjusted as well as it can be.
• Whenever making any modifications to a wheelchair:– Re-check the wheelchair to make sure it is safe to use;
– Carry out a complete fitting again with the wheelchair user, as changes to one thing can affect otherschanges to one thing can affect others.
B.10. Problem solving: 18
BASIC LEVEL
KEY POINT SUMMARY

195
B.11: User training
OB
Jec
Tiv
eS By the end of this session, participants will be able to:
list skills wheelchair service personnel can teach wheelchair users when they receive a new wheelchair ;
list “good practice training methods”;
demonstrate teaching a colleague one wheelchair skill.
re
SO
Ur
ce
S
For the session:
PPT slides: B.11 User training;
Reference Manual;
Participant’s Workbook;
one wheelchair for each group of three;
wheelchair user training checklist (1 per participant).
cO
nT
eX
T Adapt this session to suit the context participants will be working in. Think about:
local groups that can offer more training or advice to wheelchair users.
TO
Pr
ePa
re Gather resources, review PPT slides and read through the session plan.
OU
Tl
ine
1. Introduction.
2. What are helpful skills for wheelchair users?
3. Wheelchair user training practice.
4. Key point summary.
2
10
45
3
Total session time 60

WheelchairService Training Package
196
BASIC LEVEL
1. introduction (2 minutes)
explain:
• User training is the seventh step in wheelchair service delivery. information and training about the wheelchair can help many wheelchair users benefit more fully from their wheelchair.
• Without this step, it is possible a wheelchair will not help a wheelchair user as much as it could.
• in this session, we will talk about the skills that personnel can teach wheelchair users when they first receive a wheelchair. We will introduce the wheelchair user training checklist and practise giving user training.
2. What are helpful skills for wheelchair users? (10 minutes)
ask: What have participants learnt on this training programme that they can teach to wheelchair users? Think about things that will help wheelchair users:
• stay healthy;• use their wheelchair inside and outside their home;• care for their wheelchair so that it lasts as long as possible.
remind participants of the video of sai, talking about the things that helped her to get to school.
encourage answers.
Most important answers:
•ways to stop pressure sores developing;•how to handle the wheelchair ;•how to get in and out of the wheelchair ;•wheelchair mobility;•what to do if there is a problem;•how to look after the wheelchair and cushion;•what other organizations or services there are that may be helpful to them.
Step 7User training
• In this session participants will:
User training
– Discuss the skills that wheelchair personnel can teach wheelchair users when they first receive a wheelchair;
– Introduce the user instruction checklist;
P ti i i i t ti– Practise giving user instructions.
B.11. User training: 2
BASIC LEVEL
INTRODUCTION

197
explain: The six most important things to remember to teach users are:
• How to handle the wheelchair.
• How to prevent pressure sores and what to do if a pressure sore develops.
• How to get in and out of the wheelchair (transfer).
• Wheelchair mobility – match the user’s needs.
B.11. User training: 3
BASIC LEVEL
HOW TO HANDLE THE WHEELCHAIR
B.11. User training: 4
BASIC LEVEL
HOW TO PREVENT PRESSURE SORES
B.11. User training: 5
BASIC LEVEL
HOW TO GET IN AND OUT OF THE WHEELCHAIR
B.11. User training: 6
BASIC LEVEL
WHEELCHAIR MOBILITY

WheelchairService Training Package
198
BASIC LEVEL
• How to care for a wheelchair and cushion at home.
explain: We will talk more about this in the next session.
• What to do if there is a problem.
give each participant a wheelchair user training checklist.
explain:
• The checklist lists specific skills that may be helpful for a wheelchair user to learn. However, some wheelchair users will already know how to carry out these skills, and not all skills are important for all wheelchair users.
• some services may use this checklist as a form, kept in the wheelchair user’s file. Personnel can record on the checklist what instruction the wheelchair user needs. This is decided through the assessment, and through talking to the wheelchair user. The checklist can also be used to record the training which has been given.
• check with the wheelchair user whether he/she would like caregivers to learn the skills you are teaching as well. Many wheelchair users are supported by their family or a carer, and it is helpful for everyone involved to learn the skills involved in using and caring for the wheelchair.
3. Wheelchair user training practice (45 minutes)
ask: What are some things that can make training successful? Participants can think about some good teaching methods they have experienced (maybe during the training!).
encourage answers.
B.11. User training: 7
BASIC LEVEL
HOW TO CARE FOR THE WHEELCHAIR AND CUSHION
•Who the wheelchair user should ask if there is a problem.p
•How they can contact the wheelchair service if they need helpif they need help.
B.11. User training: 8
BASIC LEVEL
WHAT TO DO IF THERE IS A PROBLEM

199
Most important answers:
•Find out what the wheelchair user already knows.•Explain, demonstrate and then allow the wheelchair user to practise.•Use language that everyone can understand.•Have wheelchair users teach other wheelchair users.•Use good communication skills.•Be encouraging.
explain: Practice is important when learning any new skill. always try to teach a skill first by demonstrating, and then giving the learner an opportunity to practise.
Small-group activity
groups: Have two to three people in each group.
instructions: • ask each group to read the stories in their workbook. They should identify at least three skills that each wheelchair user in the story could benefit from learning.
•For each user, the group should practise teaching at least one of those skills. The group should take turns being the wheelchair user, family member and teacher.
• Remind participants to think about “good communication” and “good ways to teach”. stress the importance of “demonstration” followed by “practice”.
Monitor: • Monitor the groups, assist as needed.
Time: Allow 30 minutes and 15 minutes for feedback.
Feedback: • ask each group to highlight one good way of teaching they have tried or observed.
Moses notes for trainers: Moses is 23 years old. He fell from the back of a truck two years ago and became a paraplegic. He spent one year in hospital and then returned to his home village with an old donated wheelchair. The wheelchair broke very quickly and he was unable to move around. He developed a pressure sore which has now healed.
Moses has just received a new wheelchair with a pressure relief cushion through the wheelchair service. This wheelchair is designed to go over rough ground. He is very excited about going home with this wheelchair and is hopeful that he will be more independent.
Most important skills:
•wheelchair handling and how to use the pressure relief cushion – particularly as Moses is new to having a wheelchair ;
•how to prevent pressure sores;•how to get in and out of the
wheelchair (transfer);•wheelchair mobility skills;•how to care for a wheelchair
and cushion at home;•other organizations or services
which may be helpful.

WheelchairService Training Package
200
BASIC LEVEL
Sian notes for trainers:
sian is 40 years old and is a bilateral above-knee amputee. He has been a wheelchair user for 20 years and has had five wheelchairs over that time. He finds that the wheelchairs he has break down quickly.
He is very active and works in a local shop. He travels from his home to the shop every day – on rough, bumpy and often muddy paths. He demonstrated for the wheelchair service personnel how he can do wheelies.
He has just been prescribed a new wheelchair. He is hoping that this wheelchair will last longer than his last one, which broke down after six months.
Most important skills:
•how to care for a wheelchair and cushion at home – regular maintenance may help Sian to keep his wheelchair working for longer.
Zoe notes for trainers:
Zoe is 16 years old. She had polio as a young girl, and now cannot walk. She is very shy, and has not been to school. Her mother has given her lessons at home and she can read and write well.
She has just received a new wheelchair and has shown the wheelchair service personnel how she can transfer easily into and out of the chair.
Zoe is interested in attending a local vocational school – however, she does not think that she can manage getting to the school and back. There are a few steps into the school building. She is also worried about how she would go to the toilet while at the school.
Most important skills:
•wheelchair mobility skills – particularly how to get up and down steps;
•transfers – how to transfer to and from the toilet.
4. key point summary (3 minutes)
read the key points.
ask whether there are any questions.I f i d i i b h d f • Information and training about how to use and care for a wheelchair can help many users benefit from their wheelchair.
• When teaching new skills – provide lots of opportunity for the person learning to practise.
• The six most important things to teach are:
– How to stop pressure sores;– How to get in and out of the wheelchair;– Wheelchair mobility – matched to the user’s needs;– How to care for the wheelchair and cushion;– What to do if there is a problem.
B.11. User training: 9
BASIC LEVEL
KEY POINT SUMMARY

201
B.12: Maintenance and repairs
OB
Jec
Tiv
eS By the end of this session, participants will be able to:
demonstrate how to care for a wheelchair at home;
identify common technical problems with a wheelchair and explain how these problems can be solved within the local community/context.
re
SO
Ur
ce
S
For the session:
PPT slides: B.12 Maintenance and repairs;
Reference Manual;
Participant’s Workbook;
DVD: How to care for a wheelchair at home;
poster : How to care for a wheelchair at home;
wheelchairs needing repair including: punctured tyre, brakes not working, damaged cushion, corrosion, loose upholstery, loose bolts, loose or missing spokes, damaged bearings, damaged push rims. More than one repair may be required on any one wheelchair ;
1 home maintenance toolkit (see equipment list above).
cO
nT
eX
T
Adapt this session to suit the context participants will be working in. Think about:
where wheelchairs can be repaired in the participants’ locations;
any specific repairs or maintenance needs for locally available wheelchairs which should be highlighted;
whether the participants’ wheelchair service provides wheelchair repairs – if so, how wheelchair users can access the repairs service, and whether there is a charge.
TO
Pr
ePa
re
Gather resources, review PPT slides, watch DVD and read through the session plan.
Pin up How to Care for a Wheelchair at Home poster where it can be seen by all participants.
Prepare the wheelchairs for repairs and label them A, B, C, etc. Arrange them around the room.
Arrange to have someone with technical experience join the session to assist in answering detailed questions about wheelchair repairs (if trainers do not feel confident with this).
OU
Tl
ine
1. Introduction.
2. Prevent repairs: home maintenance.
3. Common wheelchair and cushion repairs.
4. Key point summary.
2
60
55
3
Total session time 120

WheelchairService Training Package
202
BASIC LEVEL
1. introduction (2 minutes)
explain:
• Regular care of a wheelchair and cushion will save repair costs and prevent injuries and long-term damage to the user’s body.
• a wheelchair which is cared for will be more comfortable and easier to use.
• a cushion which is cared for will continue to provide pressure relief and support.
• Wheelchair service personnel have a responsibility to teach wheelchair users how to care for their wheelchair and cushion at home.
• in this session, we will learn about what can be done to care for a wheelchair and cushion at home, and what to do when a wheelchair or cushion needs repairs.
2. Prevent repairs: home maintenance (60 minutes)
Pin up the how to care for a wheelchair at home poster.
Notes for trainers: The slides below explain how to care for a wheelchair at home. Each slide explains why the task is important, how to do it and how often. Trainers should add the additional points listed below.
explain:
• There are six things that wheelchair users can do at home to maintain their wheelchair and cushion.
• list (see slide).
Step 8Maintenance, repairs and follow up
• In this session participants will:
Maintenance, repairs and follow up
– Learn about what can be done to care for a wheelchair and cushion at home;
– What to do when a wheelchair or cushion needs repairs. repairs.
B.12. Maintenance and repairs: 2
BASIC LEVEL
INTRODUCTION
•Clean the wheelchair and cushion.
Oil i t•Oil moving parts.
•Pump up the tyres (if pneumatic).y
•Tighten nuts and bolts (if loose).
T h k ( f l )•Tighten spokes (if loose).
•Make regular checks.g
B.12. Maintenance and repairs: 3
BASIC LEVEL
HOW TO CARE FOR A WHEELCHAIR AT HOME

203
explain:
• Why, how often and how (see slide).
add:
• Pay attention to moving parts and places where upholstery joins the frame.
explain:
• Why, how often and how (see slide).
add:
• Do not spray lubricants on the bearings, as this may wash away the grease which helps to keep the bearing working well.
• Do not use a penetrating oil to oil the wheelchair, as this can cause damage to the wheelchair.
ask: What oil is available in participants’ local area?
explain:
• Why, how often and how (see slide).
add:
• check if tyres are pneumatic.• When checking pressure – press down
firmly on the tyre with your thumb. it should be possible to depress the tyre very slightly (about 5 mm).
• Pressure should be the same on each tyre.
• Why?St t l t f ti– Stops metal parts from rusting;
– Stops wooden parts and upholstery rotting;g;
– Stops damage caused by dirt scraping against moving parts.
• How often?– Monthly.
• How?– Use warm water with a little soap;
– Rinse and dry;
– Always dry the cushion in the shade - not i di in direct sun.
B.12. Maintenance and repairs: 4
BASIC LEVEL
CLEAN THE WHEELCHAIR AND CUSHION
•Why?– Keeps parts moving smoothly;
Helps stop rust– Helps stop rust.
•How often?– Every three months.
•How?– Dry wheelchair thoroughly;
Use lubricating oil;– Use lubricating oil;
– Apply to all moving parts.
B.12. Maintenance and repairs: 5
BASIC LEVEL
OIL MOVING PARTS
• Why?T ll l l– Tyres will last longer;
– It is easier to push the wheelchair;T k l – Takes less energy;
– Brakes will work correctly.
• How often?• How often?– Once a week or if the tyre is flat.
• How?• How?– Check pressure;
Pump up using a bicycle pump;– Pump up using a bicycle pump;– Reduce pressure by releasing air
through the valve.
B.12. Maintenance and repairs: 6
BASIC LEVEL
PUMP UP TYRES (IF PNEUMATIC)
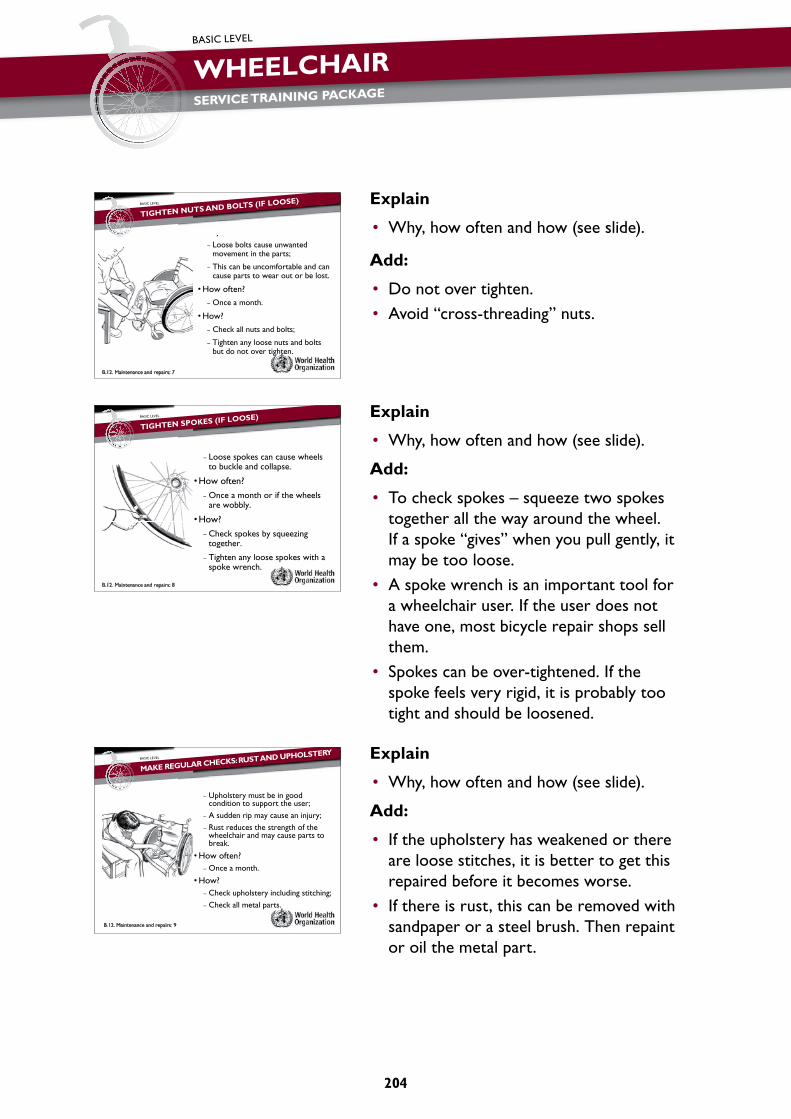
WheelchairService Training Package
204
BASIC LEVEL
explain
• Why, how often and how (see slide).
add:
• Do not over tighten.• avoid “cross-threading” nuts.
explain
• Why, how often and how (see slide).
add:
• To check spokes – squeeze two spokes together all the way around the wheel. if a spoke “gives” when you pull gently, it may be too loose.
• a spoke wrench is an important tool for a wheelchair user. if the user does not have one, most bicycle repair shops sell them.
• spokes can be over-tightened. if the spoke feels very rigid, it is probably too tight and should be loosened.
explain
• Why, how often and how (see slide).
add:
• if the upholstery has weakened or there are loose stitches, it is better to get this repaired before it becomes worse.
• if there is rust, this can be removed with sandpaper or a steel brush. Then repaint or oil the metal part.
•Why?– Loose bolts cause unwanted
movement in the parts;
– This can be uncomfortable and can cause parts to wear out or be lost.
•How often?– Once a month.
•How?– Check all nuts and bolts;;
– Tighten any loose nuts and bolts but do not over tighten.g
B.12. Maintenance and repairs: 7
BASIC LEVEL
TIGHTEN NUTS AND BOLTS (IF LOOSE)
•Why?– Loose spokes can cause wheels
to buckle and collapse.
•How often?– Once a month or if the wheels
are wobbly.
•How?How?– Check spokes by squeezing
togethertogether.
– Tighten any loose spokes with a spoke wrenchspoke wrench.
B.12. Maintenance and repairs: 8
BASIC LEVEL
TIGHTEN SPOKES (IF LOOSE)
•Why?U h l t t b i d – Upholstery must be in good condition to support the user;
– A sudden rip may cause an injury;A sudden rip may cause an injury;– Rust reduces the strength of the
wheelchair and may cause parts to b kbreak.
•How often?– Once a month.
•How?– Check upholstery including stitching;– Check all metal parts.
B.12. Maintenance and repairs: 9
BASIC LEVEL
MAKE REGULAR CHECKS: RUST AND UPHOLSTERY

205
VIDEO
explain
• Why, how often and how (see slide).
add:
• check for worn spots, dirt and holes in the cover and/or foam.
• if the cushion is worn, it should be checked by the wheelchair service personnel. it may need to be replaced.
introduce DvD: how to care for a wheelchair at home. This short video will show a wheelchair user carrying out for the wheelchair at home. Teaching wheelchair users how to carry out these tasks is important.
Show DvD.
ask if there are any questions.
activity
groups: Have three people in each group. Give each group a wheelchair. Place sufficient tools and equipment for home maintenance in a central location for each group to share.
instructions: Ask each group to carry out ``How to care for a wheelchair at home`` tasks.
Point out the How to care for a wheelchair at home poster and remind participants to follow each step.
Monitor: Monitor the groups. Answer any questions and explain the techniques in more detail as necessary.
Time: Allow 30 minutes.
Feedback: ask: Does anyone have any questions about the home maintenance tasks?
3. common wheelchair and cushion repairs (55 minutes)
explain: Wheelchairs will sometimes need to be repaired. Wheelchair service personnel need to be able either to carry out a repair themselves, or tell wheelchair users where they can get help. some wheelchair users will be very good at organizing their own repairs. Other wheelchair users may need help. all wheelchair users will benefit from knowing where they can get their wheelchairs repaired.
ask: Where can wheelchair users get their wheelchairs repaired?
• Why?C hi h ld b l d d t – Cushion should be clean and dry to protect skin;
– Cushion do not last as long as the gwheelchairs;
– A regular check will help wheelchair user to recognize when the cushion user to recognize when the cushion needs to be replaced.
• How often?– Once a month.
• How?– Remove cover and check cushion and
cover for worn spots, dirt and holes.
B.12. Maintenance and repairs: 10
BASIC LEVEL
MAKE REGULAR CHECKS - CUSHION
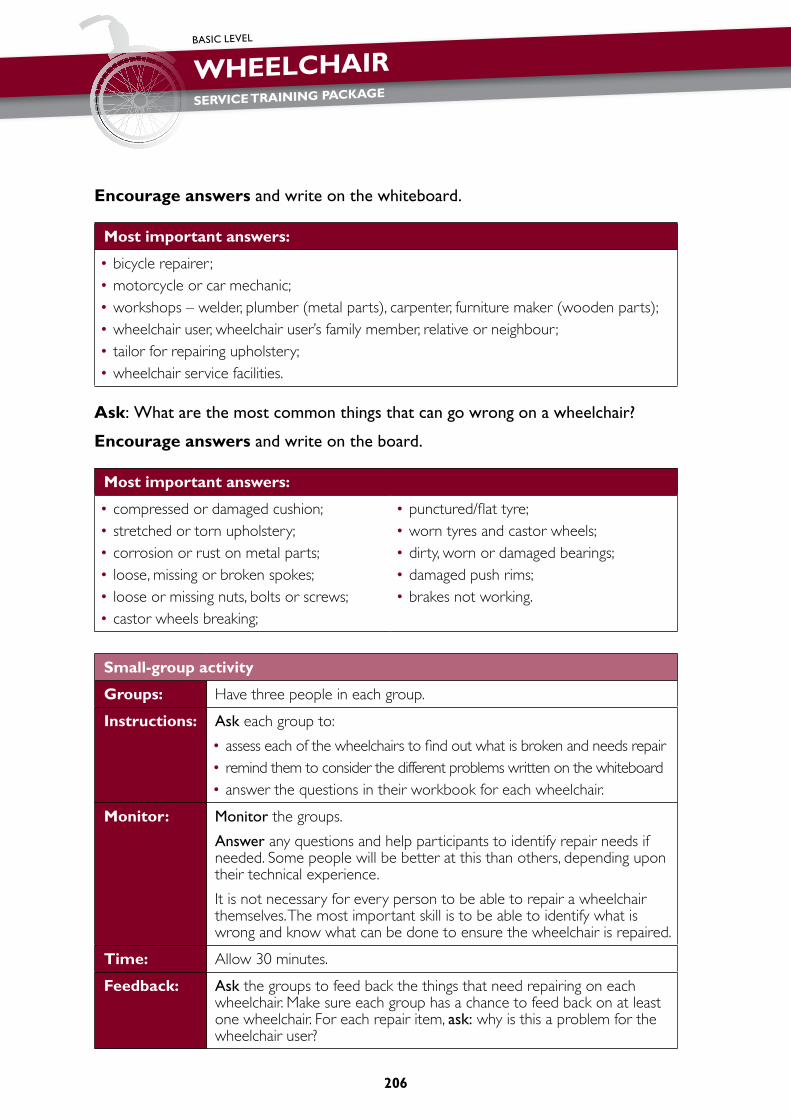
WheelchairService Training Package
206
BASIC LEVEL
encourage answers and write on the whiteboard.
Most important answers:
•bicycle repairer ;•motorcycle or car mechanic;•workshops – welder, plumber (metal parts), carpenter, furniture maker (wooden parts);•wheelchair user, wheelchair user’s family member, relative or neighbour;•tailor for repairing upholstery;•wheelchair service facilities.
ask: What are the most common things that can go wrong on a wheelchair?
encourage answers and write on the board.
Most important answers:
•compressed or damaged cushion;•stretched or torn upholstery;•corrosion or rust on metal parts;•loose, missing or broken spokes;•loose or missing nuts, bolts or screws;•castor wheels breaking;
•punctured/flat tyre;•worn tyres and castor wheels;•dirty, worn or damaged bearings;•damaged push rims;•brakes not working.
Small-group activity
groups: Have three people in each group.
instructions: ask each group to:
•assess each of the wheelchairs to find out what is broken and needs repair•remind them to consider the different problems written on the whiteboard•answer the questions in their workbook for each wheelchair.
Monitor: Monitor the groups.
answer any questions and help participants to identify repair needs if needed. Some people will be better at this than others, depending upon their technical experience.
It is not necessary for every person to be able to repair a wheelchair themselves. The most important skill is to be able to identify what is wrong and know what can be done to ensure the wheelchair is repaired.
Time: Allow 30 minutes.
Feedback: ask the groups to feed back the things that need repairing on each wheelchair. Make sure each group has a chance to feed back on at least one wheelchair. For each repair item, ask: why is this a problem for the wheelchair user?
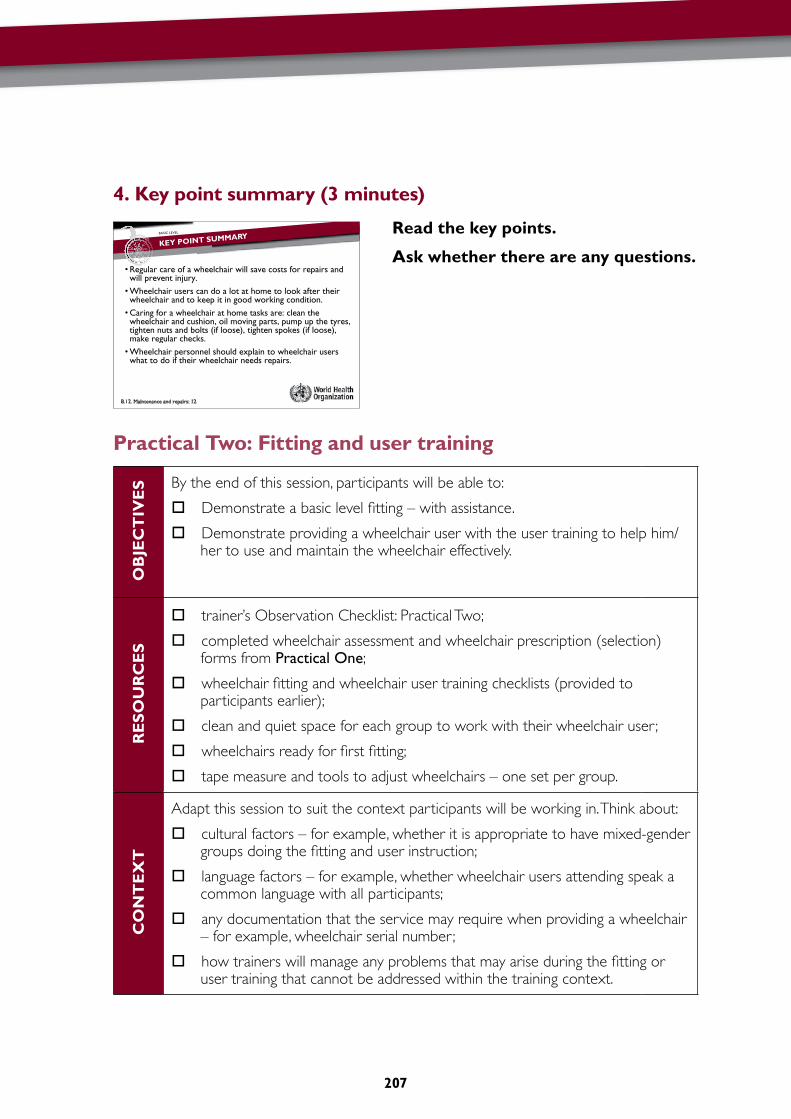
207
4. key point summary (3 minutes)
read the key points.
ask whether there are any questions.
Practical Two: Fitting and user training
OB
Jec
Tiv
eS By the end of this session, participants will be able to:
Demonstrate a basic level fitting – with assistance.
Demonstrate providing a wheelchair user with the user training to help him/her to use and maintain the wheelchair effectively.
re
SO
Ur
ce
S
trainer’s Observation Checklist: Practical Two;
completed wheelchair assessment and wheelchair prescription (selection) forms from Practical One;
wheelchair fitting and wheelchair user training checklists (provided to participants earlier);
clean and quiet space for each group to work with their wheelchair user ;
wheelchairs ready for first fitting;
tape measure and tools to adjust wheelchairs – one set per group.
cO
nT
eX
T
Adapt this session to suit the context participants will be working in. Think about:
cultural factors – for example, whether it is appropriate to have mixed-gender groups doing the fitting and user instruction;
language factors – for example, whether wheelchair users attending speak a common language with all participants;
any documentation that the service may require when providing a wheelchair – for example, wheelchair serial number;
how trainers will manage any problems that may arise during the fitting or user training that cannot be addressed within the training context.
•Regular care of a wheelchair will save costs for repairs and •Regular care of a wheelchair will save costs for repairs and will prevent injury.•Wheelchair users can do a lot at home to look after their •Wheelchair users can do a lot at home to look after their wheelchair and to keep it in good working condition.•Caring for a wheelchair at home tasks are: clean the Caring for a wheelchair at home tasks are: clean the wheelchair and cushion, oil moving parts, pump up the tyres, tighten nuts and bolts (if loose), tighten spokes (if loose), make regular checksmake regular checks.•Wheelchair personnel should explain to wheelchair users what to do if their wheelchair needs repairswhat to do if their wheelchair needs repairs.
B.12. Maintenance and repairs: 12
BASIC LEVEL
KEY POINT SUMMARY
WheelchairService Training Package
208
BASIC LEVEL
TO
Pr
ePa
re
If there are more than three pairs of participants, ask for another trainer to assist with monitoring the groups.
Confirm time and travel arrangements with wheelchair user volunteers. Ensure there are refreshments available for wheelchair users and their family/supporters.
Assign one person to greet wheelchair users as they arrive and show them where they can wait until the session begins.
Prepare a fitting area for each group (assessment bed and privacy screen). Place all equipment needed for fitting on the assessment bed. (Or make travel arrangements if carried out in the community).
Ensure that the wheelchairs to be fitted are fully prepared (check them against the prescription forms and confirm that wheelchair safe and ready checks have been completed).
OU
Tl
ine
1. Fitting and user training:
•Instructions and set up•Fitting•User training•Feedback.
5455020
Total session time 120
2. Wheelchair user feedback (optional – depending on wheelchair users and time availability).
30
1. Fitting and user training including feedback (120 minutes)
Notes for trainers: Use the trainer’s observation checklist for Practical Two to guide you as you observe participants during the practical session. Write any common examples of good or bad practice that should be highlighted in the feedback session on the checklist (box provided).
activity
groups: •Groups should be the same as for Practical One.•Appoint a leader for each group (this may be the same leader as
for Practical One or a different leader).•Assign each group a place to work.•Explain where to find materials and tools.•Check that each group has wheelchair fitting and wheelchair user
training checklists.
209
instructions: explain all of the following:
session aim:•The aim of this practical session is to carry out steps six and
seven of the eight steps of wheelchair service delivery – fitting and user training – working with the wheelchair user from the previous practical session.
•It is possible that participants may not be able to complete the wheelchair for the wheelchair user during the time available. This will depend on the first fitting, and what modifications / adjustments may be necessary. However, participants should use the session time as well as possible to get as much done as possible. If the wheelchair cannot be completed, arrangements will be made with the wheelchair user to ensure that their wheelchair is completed after the course.
Lead person:•The lead person for each group is responsible for making sure
that all steps are carried out.•The lead person should be the main person talking with the
wheelchair user and his/her family/carer. This is to avoid having too many people speaking at once, which can be confusing for everyone.
Trainer's observation and support:•Participants may ask for assistance or clarification at any time.•Throughout the session, trainers will monitor each group and give
as much support and advice as needed.•If any problems with the fit are identified, please ask for the
trainer to come and check this, and discuss what modifications/adjustments may be needed.
•After completing the fitting, participants should ask one trainer to come and check the fitting. DO NOT BEGIN USER TRAINING until the fit has been checked by one of the trainers.
•After completing the user training, participants should ask one trainer to come and discuss with the group and the wheelchair user what training was provided.

WheelchairService Training Package
210
BASIC LEVEL
Time allowed:•They should aim to complete the fitting in 45 minutes, and the
user training in a further 50 minutes.
service forms:•Hand out the wheelchair assessment and wheelchair prescription
(selection) forms from Practical One (used in Practical Two) to each group leader.
•Check that each group has at least one copy of the wheelchair fitting and wheelchair user training checklists.
ask participants: What are the steps for fitting? Acknowledge correct answers.
Remind participants: they should only teach the wheelchair user the skills that are relevant to them. For example – it is not necessary to teach pressure relief techniques to a person who is not at risk of developing a pressure sore.
Remind participants that they should actively involve the wheelchair user in every step of the process.
ask: Are there any questions? Answer any questions.
ask each group to prepare the area they are going to work in; then introduce themselves to the wheelchair user they will work with and begin.
Monitor and support:
closely monitor the groups, ensure safe practice, observe and evaluate the skills of participants.
Use the trainer's observation checklist to record your observations of each group.
Throughout the session:•Give time warnings (verbally and/or write on a white board where
all participants can see) to help participants manage their time.•Ensure wheelchair users are actively involved.
at the end of this session, ask participants to thank the wheelchair users for their participation and ask whether they would like to stay and provide feedback to the whole group about their experiences during assessment, prescription (selection), fitting and user training.

211
Time: Allow 45 minutes to complete the fitting, 50 minutes to complete the user training, 20 minutes for feedback.
Feedback: comment on examples of good practice that you saw during the practical session. Note any particular areas that participants could improve – do not highlight individuals.
ask each group to summarize briefly any changes they had to make to the wheelchair to ensure it fitted the user correctly (allow 3 minutes for each group).
ask: Are there any questions?
2. Wheelchair user feedback (optional – depending on the wheelchair users and time availability) (30 minutes)
notes for trainers:
If the wheelchair users who have attended Practicals One and Two are willing, invite each one to offer some feedback to participants about the process they have just gone through. This could be done informally – for example with refreshments/cake to celebrate the completion of the first two practicals. Sample questions to ask wheelchair users are shown below.
ask wheelchair users to provide feedback in the following areas.
• How did they feel during the assessment? (For example – did they feel involved, how did they feel about answering the interview questions, did they feel that the questions would help them to get a better wheelchair?)
• are they happy with the wheelchair they have been prescribed?• Have they learnt anything new from the user training? Will they use this at
home/work in the future?

WheelchairService Training Package
212
BASIC LEVEL
B.13: Follow up
OB
Jec
Tiv
eS By the end of this session, participants will be able to:
explain what “follow up” means and how it happens;
complete a wheelchair follow up form.
re
SO
Ur
ce
S For the session:
PPT slides: B.13 Follow up;
Reference Manual;
Participant’s Workbook;
cO
nT
eX
T
All wheelchair users will benefit from follow up visits, preferably at the place where they live. Adapt this session to suit the context participants will be working in. Think about the following:
How follow up will be managed in the services participants come from (home visits, centre-based, managed by community-based rehabilitation (CBR) personnel) and adapt the training accordingly. For example, if participants come from a wheelchair service which has a follow up plan, this plan should be explained to the participants.
TO
Pr
ePa
re Gather resources, review PPT slides and read through the session plan.
OU
Tl
ine
1. Introduction.
2. What is follow up and how does it happen?
3. Introducing the follow up form.
4. Practising follow up.
5. Key point summary.
2
10
5
25
3
Total session time 45

213
1. introduction (2 minutes)
explain: “Follow up” is part of the eighth step in wheelchair service delivery. in this session, we will talk about what follow up includes. We will introduce the wheelchair follow up form and practise using it.
2. What is follow up and how does it happen? (10 minutes)
ask: What do participants think “follow up” includes? encourage answers.
Most important answers:
•gather information from the wheelchair user ;•check that the wheelchair is in good working order;•check the fitting of the wheelchair.
explain:
• all wheelchair users will benefit from follow up. However, follow up is most important for: - children; - wheelchair users at risk of developing a
pressure sore; - wheelchair users who have a
progressive condition; - wheelchair users who have had
difficulty with any of the training given to them.
Step 8Step 8Maintenance, repairs and follow up
• In this session participants will:– Talk about what follow up includes;– Introduce the follow up form and
practise using it.
B.13. Follow up: 2
BASIC LEVEL
INTRODUCTION
• All wheelchair users will benefit from follow up.• Follow up is most important for:
– children;c e ;
– wheelchair users at risk of developing a pressure sore;
– wheelchair users who have a progressive condition;
– wheelchair users who have had difficulty with training in transfers, mobility, health or wheelchair maintenance.
B.13. Follow up: 3
BASIC LEVEL
WHO NEEDS FOLLOW UP?

WheelchairService Training Package
214
BASIC LEVEL
• There is no rule about when follow up should happen though one follow up session within six weeks of the date of delivery is often found to be useful. it will depend on the needs of the user. However, for children, it is ideal if follow up occurs every six months. This is because the needs of children change quickly as they grow.
• Follow up appointments can be: - at the wheelchair user’s home; - at the wheelchair service; - at any other location that suits the user
and the wheelchair personnel.
ask: How could follow up be managed (or how is it managed) in the participants’ wheelchair service?
encourage answers and write on the board.
Most important answers:
•give wheelchair users a follow up appointment when they receive their wheelchair ;•visit wheelchair users at home for follow up (where possible);•make follow up visits part of routine visits to communities by community-based
personnel who have been trained to carry out follow up;•arrange a follow up phone call where transport is difficult and the wheelchair user has
access to a phone.
3. introducing the wheelchair follow up form (5 minutes)
explain: The knowledge and skills needed to do a follow up visit have already been covered in the training. To do a follow up visit, personnel need to:
• gather information from the wheelchair user;• check that the wheelchair is in good working order;• check the fit of the wheelchair.
• Follow up frequency depends on the • Follow up frequency depends on the needs of the user.Id ll hild h ld b f ll d t • Ideally children should be followed up at least once every 6 months.
B.13. Follow up: 4
BASIC LEVEL
HOW OFTEN SHOULD FOLLOW UP BE?
• Follow up visits can be at:Follow up visits can be at:
– the wheelchair user’s home;
– the wheelchair service centre;
– any other location that suits the user and any other location that suits the user and the wheelchair personnel.
B.13. Follow up: 5
BASIC LEVEL
WHERE SHOULD FOLLOW UP VISITS BE?
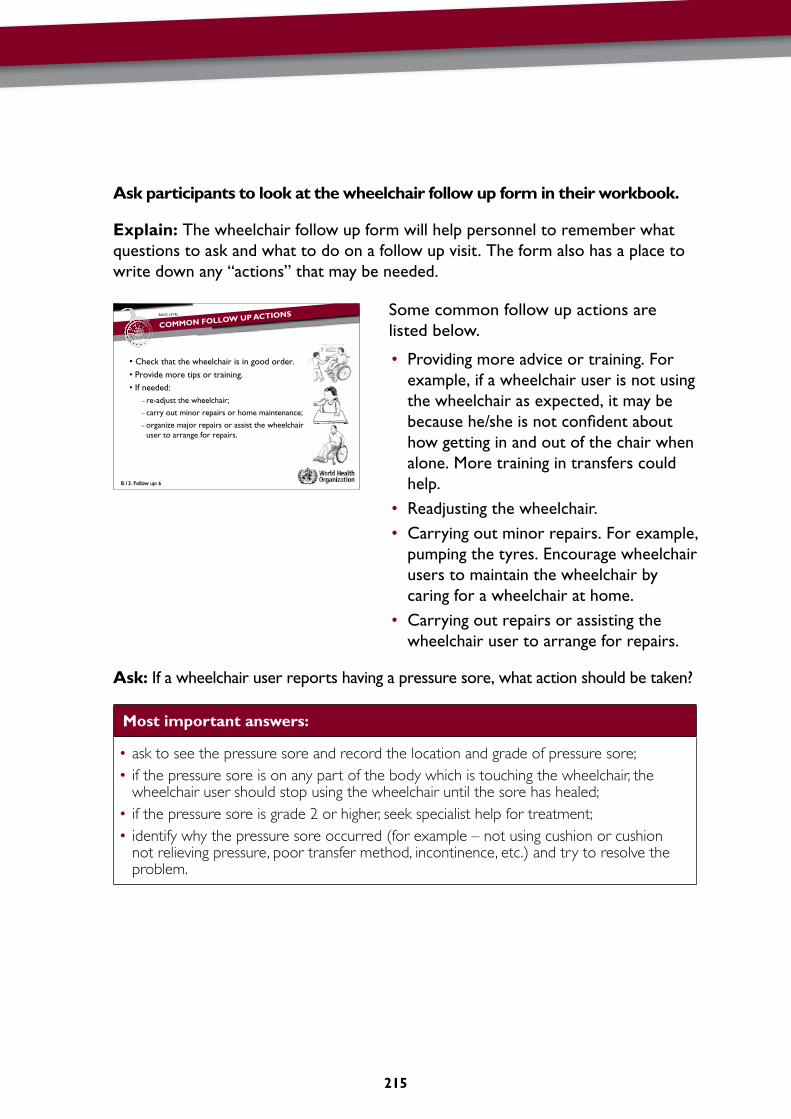
215
ask participants to look at the wheelchair follow up form in their workbook.
explain: The wheelchair follow up form will help personnel to remember what questions to ask and what to do on a follow up visit. The form also has a place to write down any “actions” that may be needed.
some common follow up actions are listed below.
• Providing more advice or training. For example, if a wheelchair user is not using the wheelchair as expected, it may be because he/she is not confident about how getting in and out of the chair when alone. More training in transfers could help.
• Readjusting the wheelchair.• carrying out minor repairs. For example,
pumping the tyres. encourage wheelchair users to maintain the wheelchair by caring for a wheelchair at home.
• carrying out repairs or assisting the wheelchair user to arrange for repairs.
ask: if a wheelchair user reports having a pressure sore, what action should be taken?
Most important answers:
•ask to see the pressure sore and record the location and grade of pressure sore;•if the pressure sore is on any part of the body which is touching the wheelchair, the
wheelchair user should stop using the wheelchair until the sore has healed;•if the pressure sore is grade 2 or higher, seek specialist help for treatment;•identify why the pressure sore occurred (for example – not using cushion or cushion
not relieving pressure, poor transfer method, incontinence, etc.) and try to resolve the problem.
• Check that the wheelchair is in good order.• P id ti t i i• Provide more tips or training.• If needed:
– re-adjust the wheelchair;
– carry out minor repairs or home maintenance;
– organize major repairs or assist the wheelchair user to arrange for repairs.
B.13. Follow up: 6
BASIC LEVEL
COMMON FOLLOW UP ACTIONS

WheelchairService Training Package
216
BASIC LEVEL
4. Practising follow up (25 minutes)
activity
groups: Have three people in each group.
instructions: Ask each group to:
•read each user’s story in their workbook and discuss what actions should be taken;
•complete a wheelchair follow up form for each user (there are three follow up forms in the workbook).
Monitor: Monitor the groups and assist as needed.
Time: 20 minutes and 5 minutes for feedback.
Feedback: ask: What actions did participants suggest for Hala, Daarun and Talha?
learning points
Hala lives at home with her grown up daughter and her family. She received her wheelchair six months ago. She had a stroke just over a year ago, and is unable to walk. When she received her wheelchair she learnt how to transfer by standing up with help from her daughter. She said she wanted a wheelchair so that she could be more help in the home and be able to go to church.
At the follow up visit, Hala said she has not left her house for some months. The path to her house is rough, and there is a step leading up to the house from the path. She is, however, using the wheelchair in her home, and has been able to help her daughter by helping to look after her grandchildren. She sits upright in the wheelchair and the wheelchair has been well cared for. She is now able to transfer from the chair herself.
•Find out why Hala is not attending church as she had hoped.
•If this is because of the step and rough ground – provide advice and training for Hala and her daughter on how to manage the step and the path safely.
Daarun has a spinal cord injury. He works in a radio repair workshop in the local market. He received his wheelchair and pressure relief cushion two years ago. At the follow up visit, he said that he uses his wheelchair every day to get to and from the market. He does not have any pressure sores.
He has had two flat tyres and has repaired them himself. When checking the wheelchair, the service personnel notice that the spokes are loose and two bolts are missing on the seat base. The soft foam on his cushion is now flat. He sits well in the wheelchair and says that he is very satisfied with the chair.
•Arrange to replace the top soft foam layer of the cushion.
•Give advice on caring for a wheelchair at home, including checking spokes and tightening bolts.

217
learning points
Talha is 10 years old. He has mild cerebral palsy and goes to the local school. He was prescribed a wheelchair with a postural support cushion one year ago.
At the follow up visit, Talha said he uses his wheelchair every day to go to school. His father pushes him as he is not strong enough to push himself. The wheelchair is in good repair. His father says that he has repaired the tyre once. The wheelchair service personnel notice that Talha has grown, and his legs are now not properly supported by the wheelchair seat as the footrests are too high for him.
•Follow up visits for children should take place every 3–6 months if at all possible.
•Children can grow quickly. It is important to educate parents or carers to bring their child for review if the service cannot visit them.
•Talha needs to be reassessed and the wheelchair adjusted or replaced with a larger size.
5. key point summary (3 minutes)
read the key points.
ask whether there are any questions.
Practical Three: Follow up
OB
Jec
Tiv
eS By the end of this session, participants will be able to:
demonstrate follow up.
re
SO
Ur
ce
S
clean and private assessment space and assessment bed (unless session is carried out in the community);
previous wheelchair assessment and wheelchair prescription (selection) forms for each wheelchair user ;
wheelchair follow up form (1 per wheelchair user);
wheelchair safe and ready checklist;
trainer’s observation checklist;
tape measure and tools to adjust wheelchairs.
• Follow up is a:
– review of the wheelchair user’s needs;
– review of the wheelchair;
– a chance to find out if the wheelchair user has questions or requires more information. more information.
•For many wheelchair users a follow up visit can make a big difference in how much benefit they get from their wheelchair.
•Follow up may be done at the user’s home or at a centre.
•Ideally every wheelchair service will have a plan for how follow up will b i d t be carried out.
•Use the follow up form to remember the main steps in follow up.
B.13. Follow up: 7
BASIC LEVEL
KEY POINT SUMMARY

WheelchairService Training Package
218
BASIC LEVEL
cO
nT
eX
T
Adapt this session to suit the context participants will be working in. Think about:
cultural factors that need to be considered;
language factors – for example, whether wheelchair users attending speak a common language with all participants;
any documentation that the service may require when carrying out follow up;
how trainers will manage any actions identified during the follow up that cannot be addressed within the session, for example if the wheelchair needs to be replaced.
TO
Pr
ePa
re
Consider carrying out this session in the community.
Contact wheelchair users who have received a wheelchair within the last 3–6 months and need follow up. Invite them to schedule a follow up visit either in the user’s home or at the clinic.
Confirm time and travel arrangements. Ensure there are refreshments available for wheelchair users and their family/supporters if they have travelled to the training venue.
If follow up is carried out at the training venue, prepare an assessment bed with a privacy screen for each pair of participants and wheelchair user volunteer. Place all equipment needed on the assessment bed.
If there are more than three pairs of participants, ask for another trainer to assist with monitoring the groups.
Decide which participants will work together, and with which wheelchair user.
OU
Tl
ine
1. Follow up:
•Instructions.•Follow up.•Feedback.
5
60
25
Total session time 90
1. Follow up (90 minutes)
Notes for trainers: Use the Trainer’s Observation Checklist for Practical Three to guide you as you observe participants during the practical session. Write any common examples of good or bad practice that should be highlighted in the feedback session on the checklist (box provided).

219
activity
groups: •Arrange the participants into the same groups (no more than 3 people in each group).
•Appoint a leader for each group.•Tell participants the name of the wheelchair user they will be working
with and provide any relevant notes – for example, previous wheelchair assessment form.
•Assign each group a place to work in and explain that all equipment has been laid out for them on the assessment bed (or explain transport arrangements if carried out in the community).
instructions: explain all of the following:
session aim:
•The aim of this session is to carry out a follow up.
Lead person:
•The lead person for each group is responsible for making sure that all steps are carried out.
•The lead person should be the main person talking with the wheelchair user and his/her family/carer. This is to avoid having too many people speaking at once, which can be confusing for everyone.
Trainer's observation and support:
•Participants may ask for assistance or clarification at any time.
Time allowed:
•They should aim to complete the follow up in 60 minutes.
service forms:
•Hand out a wheelchair follow up form to each group leader.•Make sure that each group has at least one copy of the wheelchair safe
and ready checklist.
Remind participants that they should actively involve the wheelchair user in every step of the process.
ask: Are there any questions?
answer any questions.
ask each group to prepare the area they are going to work in; then introduce themselves to the wheelchair user they will work with and invite them in.

WheelchairService Training Package
220
BASIC LEVEL
Monitor and support:
closely monitor the groups, ensure safe practice, observe and evaluate the skills of participants.Use the trainer’s observation checklist to record your observations of each group.Throughout the session:•Give time warnings (verbally and/or write on a white board where all
participants can see) to help participants manage their time.•Ensure wheelchair users are actively involved.
at the end of this session, ask participants to thank the wheelchair users for their participation and explain how any actions identified (and not yet addressed) will be followed up.
Time: Allow 60 minutes to complete the follow up and 25 minutes for feedback.
Feedback: comment on examples of good practice that you saw during the practical sessions.Note any particular areas that participants could improve – do not highlight individuals.ask each group to summarize briefly what they found during the follow up appointment, including:•how well the wheelchair has met the wheelchair user’s needs;•any issues/concerns;•any recommended follow up actions (allow 5 minutes for each group).
ask: Are there any questions?
Practical Four: assessment, prescription (selection), product (wheelchair) preparation, fitting and user training.
OB
Jec
Tiv
eS By the end of this session, participants will be able to work as a team member to:
demonstrate wheelchair assessment, prescription (selection), product (wheelchair) preparation, fitting and user training at a basic level.
re
SO
Ur
ce
S
locally available wheelchairs; clean and private assessment space and assessment bed (1 per wheelchair user); forms: wheelchair assessment form, wheelchair prescription (selection) form,
wheelchair safe and ready checklist, wheelchair fitting checklist, wheelchair user training checklist (1 set per wheelchair user);
trainer’s observation checklist; digital camera and photo consent forms; tape measure.

221
cO
nT
eX
T
Adapt this session to suit the context participants will be working in. Think about the following:
cultural and language factors;
the types of wheelchairs available – and the length of time taken to prepare them;
any documentation the service requires in addition to information collected on the wheelchair assessment and wheelchair prescription (selection) forms;
how trainers will manage any actions identified during the practical that cannot be addressed within the session;
how follow up will be managed for each wheelchair user after the training programme.
TO
Pr
ePa
re
Invite a new group of wheelchair user volunteers, one for each group. Confirm time and travel arrangements with wheelchair user ; ensure there are refreshments available.
Assign one person to greet wheelchair users as they arrive.
Ensure there is somewhere for wheelchair users and their families to wait after the assessment and prescription (selection), while they wait for their wheelchair to be prepared.
Ensure sample wheelchairs and cushions are in good working order.
Prepare the training room (or make travel arrangements if carried out in the community).
If there are more than three pairs of participants, ask for another trainer to assist with monitoring the groups.
Decide which participants will work together, and with which wheelchair user.
OU
Tl
ine
1. Assessment, prescription (selection), product (wheelchair) preparation, fitting and user training:
•Instructions and set up.•Assessment.•Prescription (selection).•Product (wheelchair) preparation.•Fitting.•User training.•Feedback.•Additional time.
530206030453020
Total session time 240

WheelchairService Training Package
222
BASIC LEVEL
1. assessment, prescription (selection), product (wheelchair) preparation, fitting and user training (240 minutes).
Notes for trainers:
1. Photographs:
• check that each wheelchair user has been asked for their signed permission to take their photograph. ensure that wheelchair users understand that their permission is voluntary and that the photographs will be used for further training during this course.
• Take photographs during the practical of each wheelchair user who has given permission as follows: – in their existing wheelchair (if they have one) (front and the side view); – during assessment (postural observation); – in the wheelchair prescribed after fitting (front and side view).
2. Meeting the needs of the wheelchair users participating in the practical session:
• Not all wheelchairs may be completed during the time available in the practical session.
• if another appointment is required for any wheelchair users seen during the practical session, the trainer should ensure that an appointment is made by the host organization/service and all assessment, prescription (selection) and fitting information is handed over.
3. Observing participants̀ practice:
Use the “Trainer’s Observation Checklist” for Practical Four to ensure that groups perform all the steps in the practical and to note common examples of good or bad practice that should be highlighted in the feedback session on the checklist (box provided).
• These photographs can be used in the final session B.14: Putting it all together (if time permits).
activity
groups: •Arrange the participants into groups (2 or 3 people in each group).•Appoint a leader for each group.•Tell each group the name of the wheelchair user they will be
working with.•Assign each group a place to work in and explain that all equipment
has been laid out for them on the assessment bed.

223
instructions: explain all of the following:
session aim:
•The aim of this practical session is to work with a wheelchair user to carry out an assessment, prescription (selection), product (wheelchair) preparation, fitting and user training.
•If it is not possible during the session time to complete the wheelchair user’s wheelchair, arrangements will be made with the wheelchair user to ensure that their wheelchair is completed. Participants should try however to get as much of the work done as possible.
Lead person:
•The lead person for each group is responsible for making sure that all steps are carried out.
•The lead person should be the main person talking with the wheelchair user and his/her family/carer. This is to avoid having too many people speaking at once, which can be confusing for everyone.
Trainer’s observation and support:
•Participants may ask for assistance or clarification at any time.•Throughout the session trainers will monitor each group and give as
much support and advice as needed.•After completing EACH SERVICE STEP participants should ask a
trainer to come and check BEFORE beginning the next step.
Remind participants that they should actively involve the wheelchair user in every step of the process.
ask: Are there any questions? answer any questions.
ask each group to prepare the area they are going to work in; then introduce themselves to the wheelchair user they will work with and begin.
Monitor and support:
closely monitor the groups throughout the whole practical session.
Use the trainer’s observation checklist to record your observations of each group.
Throughout the session:
•Give time warnings (verbally and/or write on a white board where all participants can see) to help participants manage their time.
•Ensure wheelchair users are actively involved.•Check participants work at each step.
at the end of this session, ask participants to thank the wheelchair user for their participation and explain that the wheelchair prescribed (selected) will now be prepared for them and will be ready for them to try in the next practical session.

WheelchairService Training Package
224
BASIC LEVEL
Time: Allow the following time:
•assessment – 30 minutes;•prescription (selection) – 20 minutes;•product (wheelchair) preparation – 60 minutes;•fitting – 30 minutes;•user training – 45 minutes;•feedback – 30 minutes.
Notes for trainers: It is important to keep a close eye on the clock during the practical session. The times given above are a guide – however, they may vary depending on the experience of participants, the needs of the wheelchair users or the time required setting up products. Trainers may need to make adjustments.•an additional 20 minutes for any problems to be resolved and for
trainers to check each step.
Feedback: comment on examples of good practice that you saw during the practical sessions.
Note any particular areas that participants could improve – do not highlight individuals.
ask: Are there any questions?
B.14: Putting it all together
OB
Jec
Tiv
eS By the end of this session, participants will be able to:
Provide a summary of the wheelchair user they worked with in the last practical session (Practical Four) including: assessment, prescription (selection), product (wheelchair) preparation, fitting, user training and maintenance, repairs and follow up.
re
SO
Ur
ce
S Participant’s Workbook;
DVD: Take home message
Post-it notes or notepaper.

225
TO
Pr
ePa
re Gather resources, watch DVD and read through the session plan.
OU
Tl
ine
1. Introduction and instructions.
2. Participants’ questions.
3. Participants’ preparation.
4. Participants’ presentations.
5. Question-and-answer session.
6. Key points.
2
5
25
40
20
13
Total session time 105
1. introduction and instructions (2 minutes)
explain:
• in this session, participants will have an opportunity to: – share with everyone else what they have learnt through the last practical
session; – ask any questions that they still may have about basic wheelchair service
delivery.
2. Participants’ questions (5 minutes)
Small-group activity
groups: Have three people in each group. Give each group a block of “Post-it” notes or a number of small pieces of notepad paper (for example A4 paper cut into four pieces)
instructions: ask each group to discuss together whether they have any questions remaining about basic wheelchair service delivery. They should write down any questions that either one person or the whole group has.
Monitor: Monitor the groups.
Time: Allow 10 minutes in total.
Feedback: ask each group to hand their questions to the trainers.

WheelchairService Training Package
226
BASIC LEVEL
3. Participants’ preparation (25 minutes)
Small-group activity
groups: Ask the groups who worked together for the last two practical sessions to work together again.
instructions: Ask each group to prepare a 10-minute presentation about the wheelchair user they worked with and what they learnt.
They should aim to answer the questions on the worksheet in their workbook.
Explain that pictures of the wheelchair users are on the computer, which they can use to illustrate their story when they present.
Notes for trainers: If participants are not comfortable using the computer, explain that the trainers will arrange the pictures for them and show them when needed.
Monitor: While the groups prepare, trainers should review the questions that have been written down by the groups. Some questions may be the same. Order the questions in a logical sequence (for example, in order of the service steps they relate to). Prepare answers to the questions.
Time: Allow participants 25 minutes to prepare.
Feedback: see 4. Participant presentations.
4. Participants̀ presentations (40 minutes)
ask each group to present in turn.
encourage the whole group to ask questions at the end of the presentation.
allow 10 minutes for each presentation and 5 minutes for questions.
Thank each participant for his/her presentation.
5. Questions-and-answers session (20 minutes)
read out each participant’s question (see 2. Participants’ questions). DO nOT say who asked the question. either provide an answer or clarification, or ask whether there are others in the group who would like to answer the question.
if more than one person/group has asked the same question – explain that this is a question that a few people have asked.

227
VIDEO
explain:
• Providing a wheelchair which truly meets the wheelchair user’s needs is a skill that requires practice, good teamwork (between personnel and the wheelchair user) and at least some basic resources.
• This training programme has given an overview of the steps involved. However, every wheelchair user is different – so it is hard to cover every possibility in a training programme such as this.
• Participants will learn something from every new wheelchair user they work with. They will also learn from their mistakes, as well as the things they do well.
• They will find that the process becomes quicker for them the more they practise.• The important thing is to keep practising, and keep listening to the wheelchair user!
6. key points (13 minutes)
introduce DvD: Take home message. This short video will emphasize the importance of the wheelchair training programme.
Show DvD.
ask if there are any questions.
closing ceremony and presentation of certificates.

WheelchairService Training Package
228
BASIC LEVEL
annexes
annex 1: Timetable for basic wheelchair service training package
Five full days
Day 1 Day 2 Day 3 Day 4 Day 5
8:30 a.m. Introduction A.6 Appropriate wheelchair
B.4 Physical assessment
B.9 Fitting Practical Three: Follow up8:45
9:00 A.7 Cushions B.5 Prescription (selection)
9:15
9:30 A.1 Wheelchair users
B.10 Problem solving9:45
10:00 Practical Four:Assessment, prescription (selection), product (wheelchair) preparation, fitting and user training
10:15 A.2 Wheelchair services
A.8 Transfers B.11 User training
10:30
10:45 A.3 Wheelchair mobility
11:00 – 11:15: Morning tea (adjust time to suit local context and to fit with session plan)
11:15 A.3 Wheelchair mobility
A.8 Transfers B.6 Funding and ordering
B.11 User training
Practical Four:Assessment, prescription (selection), product (wheelchair) preparation, fitting and user training
11:30 Practical One: Assessment and prescription (selection)
B.12 Maintenance and repairs11:45
12:00
12:15 p.m.
12:30 A.4 Sitting upright
B.1 Referral and appointment12:45

229
1:00 – 2:00 lunch (adjust time to suit local context and to fit with session plan)
2:00 A.4 Sitting upright
B.2 Assessment
B.7 Product (wheelchair) preparation
B.12 Maintenance and repairs
Practical Four:Assessment, prescription (selection), product (wheelchair) preparation, fitting and user training
2:15
2:30 A.5 Pressure sores
B.3 Assessment interview
Practical Two: Fitting and user training
2:45
3:00
3:15 – 3:30: afternoon tea (adjust time to suit local context and to fit with session plan)
3:30 A.5 Pressure sores
B.3 Assessment interview
B.8 Cushion fabrication
Practical Two:Fitting and user training
B.14 Putting it all together
3:45 A.6 Appropriate wheelchair4:00
4:15 B.4 Physical assessment
4:30
4:45 B.13 Follow up
5:00
5:15 Presentation of certificates

WheelchairService Training Package
230
BASIC LEVEL
annex 2: Wheelchair service referral form
A referral form is needed to run session B.1. Where there is no wheelchair service referral form already, trainers may use or adapt this one. A Word version of this form
is available on the training package CD.
With this referral form, the service will contact the wheelchair user to make an appointment. This may not always be possible, in which case the service may accept referrals without an appointment.
a referral form should have clear contact details for the service, including service name, postal address and telephone.
it is important that the wheelchair user has been fully informed about the service, and agrees to a referral being made.

231
annex 3: Wheelchair assessment form
For assessment of wheelchair users who can sit upright easily. Wheelchair users who cannot sit upright easily may need assessment by a person with “intermediate” level
training. Keep this form in the wheelchair user’s file.
assessor’s name: Date of assessment:
1: interview assessment
Information about the wheelchair user
Name: Number:age: Male Female Phone no.: address:
Goals:
Physical condition
cerebral palsy Polio spinal cord injury stroke
Frail spasms or uncontrolled movements
amputation: R above knee R below knee L above knee L below knee
Bladder problems Bowel problems
if the wheelchair user has bladder or bowel problems, are these managed? Yes No
Others: _______________________________________________________
Lifestyle and environment
Describe where the wheelchair user will use their wheelchair:
_____________________________________________________________
Distance travelled per day: Up to 1 km 1–5 km More than 5 km
Hours per day using wheelchair? Less than 1 1–3 3–5 5–8 More than 8 hours

WheelchairService Training Package
232
BASIC LEVEL
When out of the wheelchair, where does the user sit or lie down and how (posture and the surface?)
_____________________________________________________________
Transfer: independent assisted standing Non-standing Lifted Other
Type of toilet (if transferring to a toilet): squat Western adapted
Does the wheelchair user often use public/private transport? Yes No
if yes, then what kind: car Taxi Bus Other _______________________
Existing wheelchair (if a person already has a wheelchair)
Does the wheelchair meet the user’s needs? Yes No
Does the wheelchair meet the user’s environmental conditions? Yes No
Does the wheelchair provide proper fit and postural support? Yes No
is the wheelchair safe and durable? (consider whether there is a cushion) Yes No
Does the cushion provide proper pressure relief (if user has pressure sore risk)? Yes No
comments: ____________________________________________________
If yes to all questions, the user may not need a new wheelchair. If no to any of these questions, the user needs a different wheelchair or cushion; or the existing wheelchair or cushion needs repair or modifications.
2: Physical assessment
Presence, risk of or history of pressure sores
/// = does not feel O = previous pressure sore •=existingpressuresore
can feel normally? Yes No
Previous pressure sore? Yes No
current pressure sore? Yes No
if yes, is it an open sore (stage 1–4)?
Yes No
Duration and cause:________________
_______________________________

233
is this person at risk* of a pressure sore? *A person who cannot feel or has 3 or more risk factors is at risk. Risk factors: cannot move, moisture, poor posture, previous/current pressure sore, poor diet, ageing, under or over weight.
Yes No
Method of pushing
How will the wheelchair user push their wheelchair? Both arms Left arm Right arm
Both legs Left leg Right leg Pushed by a helper
comment: _____________________________________________________
Measurements
Body Measurement
Measurement (mm)
change body measurement to ideal wheelchair size
Wheelchair measurement
A Hip width Hip width = seat width
B Seat depth L B less 30–60 mm = seat depth
(if lengths are different, use shorter)R
C Calf length L = top of seat cushion* to footrests height or
= top of seat cushion* to floor for foot propelling
R
D Bottom of rib cage
= top of seat cushion* to top of backrest
(measure D or E – depending on the user’s need)E Bottom of
shoulder blade
*Check the height of the cushion that the wheelchair user will use.

WheelchairService Training Package
234
BASIC LEVEL
annex 4: Wheelchair prescription (selection) form
This prescription form is for recording the choice of wheelchair, wheelchair components and cushion for a wheelchair user who is able to sit upright comfortably.
1. Wheelchair user information
Wheelchair user’s name: Number:Date of assessment: Date of fitting:assessor’s name:
2. Type of wheelchair and size selected
To select the type of wheelchair:
• Discuss with the wheelchair user.• Think about the most important needs of the wheelchair user.• check: wheelchair frame, castor and rear wheels, footrests, armrests, backrest
height (or adjustability), rear wheels position, support and comfort.
Type of wheelchair Size
3. Type of cushion selected
Type of cushion SizeE.g. Foam pressure relief cushion E.g. Flat foam cushion
4. agreed
signature of the user:signature of the assessor:signature of the manager:

235
annex 5: Wheelchair summary form
Name of wheelchair : Insert picture hereManufacturer/supplier :
Sizes available:Overall weight:
Description:
Frame: Folding Fixed/rigid Frame length
Backrest: Slung/canvas Solid Tension adjustable Seat: Slung/canvas Solid Tension adjustable Cushion: No cushion Flat foam Foam contoured Footrests: Swing away Fixed Other:
Castor wheels:
Diameter:
Width:
Rear wheels: Pneumatic Diameter: Push rims
Solid Width: Adjustable axle
Solid inner tube Removable Brakes: Short lever Long lever Other:
Armrests: Fixed Removable Other:
Push handles: Push handles Extra parts/options:
Calf strap Anti-tip bars Tray Other:
Measurements, adjustment options and range of adjustment:
Measurement (if the wheelchair is available in different sizes, list all sizes)
is this adjustable?
range of adjustment (adjustment range that is possible for this chair)Yes no
Seat width: Seat depth: Seat height: Backrest height: Backrest angle: Footrests height: Footrests angle: Push handle height: Frame length: Wheelbase length:

WheelchairService Training Package
236
BASIC LEVEL
annex 6: Wheelchair safe and ready checklist
name of wheelchair service:
name of wheelchair user:
Wheelchair type: Wheelchair serial number:
Whole wheelchairThere are no sharp edges No parts are damaged or scratched The wheelchair travels in a straight line
Front castor wheelsSpin freely Spin without touching the fork Bolts are tight
Front castor barrelsCastor fork spins freely
rear wheelsSpin freely Axle bolts are tight Tyres inflated correctly (with thumb pressure, wheel can be depressed less than 5 mm) Push rims are secure
BrakesFunction properly
FootrestsFootrests are securely attached
FrameFor a folding wheelchair – the wheelchair folds and unfolds easily For a wheelchair with fold-down backrest – the backrest folds and unfolds easily
cushionThe cushion is in the cover correctly The cushion is sitting on the wheelchair correctly The cushion cover fabric is tight but not too tight If the wheelchair has a solid seat: the cushion fully covers the solid seat
name of person who has checked the wheelchair:
Signature: Date:

237
annex 7: Wheelchair fitting checklist
1. is the wheelchair ready?
Has the wheelchair been checked to make sure it is safe to use and all parts are working?
2. check size and adjustments
seat width:Should fit closely.
seat depth:Two fingers’ gap between the back of the knee and the seat/cushion.
Footrests height:The thighs are fully supported on the cushion with no gaps. The feet are fully supported on the footrests with no gaps.
Backrest height:The wheelchair user has the support they need and freedom to move their shoulders to push (if self-propelling).
Rear wheels position (for hand propelling):The wheelchair user’s arm should be in line with the rear axle when hanging down.
When hands are placed on the push rim, the user’s elbow should be at a right angle.
Brakes: Are the brakes working?
seat height (for foot propelling):With the wheelchair user sitting upright, the wheelchair user’s back should be comfortably supported by the backrest, with feet resting flat on the floor.

WheelchairService Training Package
238
BASIC LEVEL
3. check posture
Is the wheelchair user able to sit upright comfortably?
Check posture from the side.
Check posture from front/back.
4. check pressure
check pressure under seat bones for all wheelchair users at risk of developing a pressure soreA Explain the test to the wheelchair user.
B Ask wheelchair user to lean forward or push up.
Place finger tips under wheelchair user’s seat bone.
C Ask the wheelchair user to sit back down on your fingers.
Make sure they sit upright with hands on thighs.
D Identify the pressure:
Level 1 = safe: Finger tips can wriggle up and down 5 mm or more.
Level 2 = warning: Finger tips cannot wriggle, but can easily slide out.
Level 3 = unsafe: Finger tips are squeezed firmly. It is difficult to slide fingers out.E Repeat under the second seat bone.

239
5. check fit while the wheelchair is moving
Does the backrest allow the wheelchair user freedom to move shoulders to push?
Does the backrest give the wheelchair user enough support?
Do the wheelchair user’s feet stay on the footrests?
Is the rear wheel position correct for the user?
6. action?
Is there any further action necessary? Write any actions in the wheelchair user’s file.
remember: The next step after fitting is user instruction.
annex 8: Wheelchair user training checklist
Skills to Teach Skills TaughtWheelchair handlingFolding the wheelchair Lifting the wheelchair Using quick release wheels Using the brakes Using the cushion, including positioning correctly
TransfersIndependent transfer Assisted transfer Other
Wheelchair mobilityPushing correctly Up and down a slopes Up and down a steps On rough ground Partial wheelie
Preventing pressure soresChecking for pressure sores Pressure relief lifts Eat well and drink lots of water What to do if a pressure sore develops

WheelchairService Training Package
240
BASIC LEVEL
looking after the wheelchair at homeClean the wheelchair ; wash and dry the cushion and cushion cover
Oil moving parts Pump the tyres Tighten nuts and bolts (if loose) Tighten spokes (if loose) Check upholstery Check for rust Check the cushion
What to do if there is a problemWheelchair needs repair The wheelchair does not fit or is not comfortable
annex 9: Wheelchair follow up form
This form is for recording information from a follow up visit.
1. Wheelchair user information
Wheelchair user name: Number:
Date of fitting: Date of follow up:
Name of person carrying out follow up:Follow up carried out at:Wheelchair user’s home Wheelchair service centre
Other
2. interview Record action to be taken:
Are you using your wheelchair as much as you would like?
Yes No
If no – why not?
Do you have any problems using your wheelchair? Yes No If yes – what are the problems?Do you have any questions about using your wheelchair? Yes No If yes – what questions? Is further training needed?Does the wheelchair user have any pressure sores? Yes No Describe (location and grade)

241
How would you rate your satisfaction with your wheelchair from 1–5? (1 is not satisfied and 5 is very satisfied)
Rate:
Comment:
3. Wheelchair and cushion checkIs the wheelchair in good working order and safe to use? Yes No
Is the cushion in good working order and safe to use? Yes No If no for either, what is the problem?
4. Fitting checkDoes the wheelchair fit correctly? Yes No If no – what is the problem?Pressure test level (1 = safe, 2 = warning, 3 = unsafe)
(if user at risk of developing a pressure sore)
Left: Right:
Is the wheelchair user sitting upright comfortably when still, moving, and through the day?
Yes No
If no – what is the problem?

242
ann
ex 1
0: T
rain
er’s
obs
erva
tion
che
cklis
ts
Thes
e fo
rms
are
desig
ned
to a
ssist
trai
ners
in o
bser
ving
each
pra
ctica
l ses
sion.
Tra
iner
’s O
bser
vati
on c
heck
list:
Pra
ctic
al O
ne: a
sses
smen
t an
d P
resc
ript
ion
(sel
ecti
on)
Trai
ner’s
Nam
e: _
____
____
____
____
____
____
____
____
____
____
____
____
____
____
____
____
____
____
____
____
___
Dat
e of
Pra
ctic
al: _
____
____
____
____
____
____
____
____
____
____
____
____
____
____
____
____
____
____
____
____
__
Mo
nito
r th
e se
ssio
n ti
me:
Wri
te e
xam
ples
of g
oo
d pr
acti
ce fo
r fe
edba
ck:
Wri
te e
xam
ples
of p
ract
ice
need
ing
impr
ovem
ent
for
feed
back
:
Min
A
sses
smen
t45
Pr
escr
iptio
n (s
elec
tion)
30
Feed
back
10
che
ck e
ach
skill
bel
ow a
s yo
u ob
serv
e th
e gr
oup
dem
onst
rate
it. W
rite
any
com
men
ts y
ou h
ave
for
grou
p fe
edba
ck.
Gro
up:
One
Two
Thre
e
Part
icip
ants
’ nam
es:
Whe
elch
air
user
’s na
me:
c
om
men
ts
co
mm
ents
c
om
men
ts
gen
eral
obs
erva
tio
ns:
Goo
d co
mm
unic
atio
n sk
ills w
ith w
heel
chai
r us
er a
nd fa
mily
Whe
elch
air
user
act
ivel
y in
volv
ed in
eac
h st
ep a
nd d
ecisi
ons
Prac
tical
com
plet
ed o
n tim
e
Wh
ee
lc
ha
irS
er
vic
e T
ra
inin
g P
ac
ka
ge
Ba
sic
Lev
eL

243
ass
essm
ent:
Key
rele
vant
info
rmat
ion
gath
ered
thr
ough
inte
rvie
w
Mon
itors
the
user
’s tr
ansfe
rs to
ass
essm
ent b
ed to
ens
ure
safe
ty
Pres
ence
, risk
of o
r hi
stor
y of
pre
ssur
e so
res
iden
tified
M
etho
d of
pus
hing
cor
rect
ly id
entifi
ed
Mea
sure
men
ts t
aken
acc
urat
ely
W
heel
chai
r as
sess
men
t fo
rm c
ompl
eted
acc
urat
ely
Pre
scri
ptio
n (s
elec
tio
n):
The
mos
t app
ropr
iate
whe
elch
air a
nd c
ushi
on ty
pe a
nd si
ze c
hose
n
Any
min
or m
odifi
catio
ns /
prob
lem
-sol
ving
nee
ded
iden
tified
W
heel
chai
r pr
escr
iptio
n (s
elec
tion)
form
com
plet
ed a
ccur
atel
y
Tra
iner
’s O
bser
vati
on c
heck
list:
Pra
ctic
al T
wo:
Fit
ting
and
Use
r T
rain
ing
Trai
ner’s
Nam
e: _
____
____
____
____
____
____
____
____
____
___
Dat
e of
Pra
ctic
al: _
____
____
____
____
____
____
____
__
Mo
nito
r th
e se
ssio
n ti
me
clo
sely
:W
rite
exa
mpl
es o
f go
od
prac
tice
for
feed
back
:W
rite
exa
mpl
es o
f pra
ctic
e ne
edin
g im
prov
emen
t fo
r fe
edba
ck:
Min
Fi
ttin
g45
U
ser
trai
ning
50
Feed
back
20
Opt
iona
l use
r fee
dbac
k30
Wh
ee
lc
ha
irS
er
vic
e T
ra
inin
g P
ac
ka
ge
Ba
sic
Lev
eL

244
che
ck e
ach
skill
bel
ow a
s yo
u ob
serv
e th
e gr
oup
dem
onst
rate
it. W
rite
any
com
men
ts y
ou h
ave
for
grou
p fe
edba
ck.
Gro
up:
One
Two
Thre
ePa
rtic
ipan
ts’ n
ames
:W
heel
chai
r us
er’s
nam
e:
c
om
men
ts
co
mm
ents
c
om
men
ts
gen
eral
obs
erva
tio
ns:
Goo
d co
mm
unic
atio
n sk
ills w
ith w
heel
chai
r us
er a
nd fa
mily
W
heel
chai
r us
er a
ctiv
ely
invo
lved
in e
ach
step
and
all
deci
sions
Pr
actic
al c
ompl
eted
on
time
Fit
ting
:Ea
ch s
tep
of t
he fi
ttin
g pr
oces
s co
mpl
eted
saf
ely
(e.g
. saf
e tr
ansf
ers)
and
acc
urat
ely,
follo
win
g th
e fit
ting
chec
klist
Any
pro
blem
s w
ith t
he fi
t id
entifi
ed a
nd a
ddre
ssed
cor
rect
ly
Gro
up p
robl
em-s
olve
and
adj
ust
the
whe
elch
air
to a
chie
ve t
he
corr
ect
fit
Use
r tr
aini
ng:
Gro
up s
elec
ted
the
mos
t app
ropr
iate
ski
lls to
teac
h th
e w
heel
chai
r us
er a
nd th
eir f
amily
usin
g th
e tr
aini
ng c
heck
list a
s a
guid
e.
Goo
d te
achi
ng t
echn
ique
s de
mon
stra
ted
whe
n te
achi
ng s
kills
(e
.g. e
xpla
in, d
emon
stra
te, p
ract
ise)
Trai
ning
car
ried
out s
afel
y (e
.g. a
ssist
ant b
ehin
d w
heel
chai
r usin
g m
obilit
y sk
ills; t
rans
fers
taug
ht s
afel
y)
Wh
ee
lc
ha
irS
er
vic
e T
ra
inin
g P
ac
ka
ge
Ba
sic
Lev
eL

245
Tra
iner
’s O
bser
vati
on c
heck
list:
Pra
ctic
al T
hree
: Fol
low
Up
Trai
ner’s
Nam
e: _
____
____
____
____
____
____
____
_ D
ate
of P
ract
ical
: ___
____
____
____
____
____
____
____
____
____
__
Mo
nito
r th
e se
ssio
n ti
me
clo
sely
:W
rite
exa
mp
les
of g
ood
pra
ctic
e fo
r fe
edba
ck:
Wri
te e
xam
ple
s of
pra
ctic
e ne
edin
g im
pro
vem
ent
for
feed
back
:
Min
Fo
llow
up
60
Feed
back
25
che
ck e
ach
skill
bel
ow a
s yo
u o
bser
ve t
he g
roup
dem
ons
trat
e it
. Wri
te a
ny c
om
men
ts y
ou
have
for
gro
up fe
edba
ck.
Gro
up:
One
Two
Thre
e
Part
icip
ants
’ nam
es:
Whe
elch
air
user
’s na
me:
c
om
men
ts
co
mm
ents
c
om
men
ts
gen
eral
obs
erva
tio
ns:
Goo
d co
mm
unic
atio
n sk
ills w
ith w
heel
chai
r us
er a
nd fa
mily
Whe
elch
air
user
act
ivel
y in
volv
ed in
eac
h st
ep a
nd a
ll de
cisio
ns
Prac
tical
com
plet
ed o
n tim
e
Wh
ee
lc
ha
irS
er
vic
e T
ra
inin
g P
ac
ka
ge
Ba
sic
Lev
eL

246
Follo
w u
p:Th
e co
nditi
on o
f the
whe
elch
air p
hysic
ally
chec
ked
by th
e gr
oup
How
wel
l the
whe
elch
air
fits
the
whe
elch
air
user
is p
hysic
ally
ch
ecke
d
App
ropr
iate
follo
w u
p ac
tions
are
iden
tified
and
rec
orde
d
Any
follo
w u
p ac
tions
tha
t ca
n be
car
ried
out
durin
g th
e se
ssio
n ar
e ca
rrie
d ou
t
Tra
iner
’s O
bser
vati
on c
heck
list:
Pra
ctic
al F
our:
Whe
elch
air
Use
r a
sses
smen
t, P
resc
ript
ion
(sel
ecti
on),
P
rodu
ct (w
heel
chai
r) P
repa
rati
on, F
itti
ng a
nd U
ser
Tra
inin
g.
Trai
ner’s
Nam
e: _
____
____
____
____
____
____
____
____
____
_ D
ate
of P
ract
ical
: ___
____
____
____
____
____
____
____
_
Mo
nito
r th
e se
ssio
n ti
me
clo
sely
:W
rite
exa
mpl
es o
f go
od
prac
tice
for
feed
back
:W
rite
exa
mpl
es o
f pra
ctic
e ne
edin
g im
prov
emen
t fo
r fe
edba
ck:
Min
utes
1
Ass
essm
ent
30
Pres
crip
tion
(sel
ectio
n)20
Pr
oduc
t (w
heel
chai
r)
prep
arat
ion
60
Fitt
ing
30
Use
r tr
aini
ng45
Fe
edba
ck30
1 Pl
ease
not
e –
an a
dditi
onal
20
min
utes
is a
llow
ed fo
r an
y pr
oble
ms
to b
e re
solv
ed a
nd fo
r tr
aine
rs t
o ch
eck
each
ste
p.
Wh
ee
lc
ha
irS
er
vic
e T
ra
inin
g P
ac
ka
ge
Ba
sic
Lev
eL
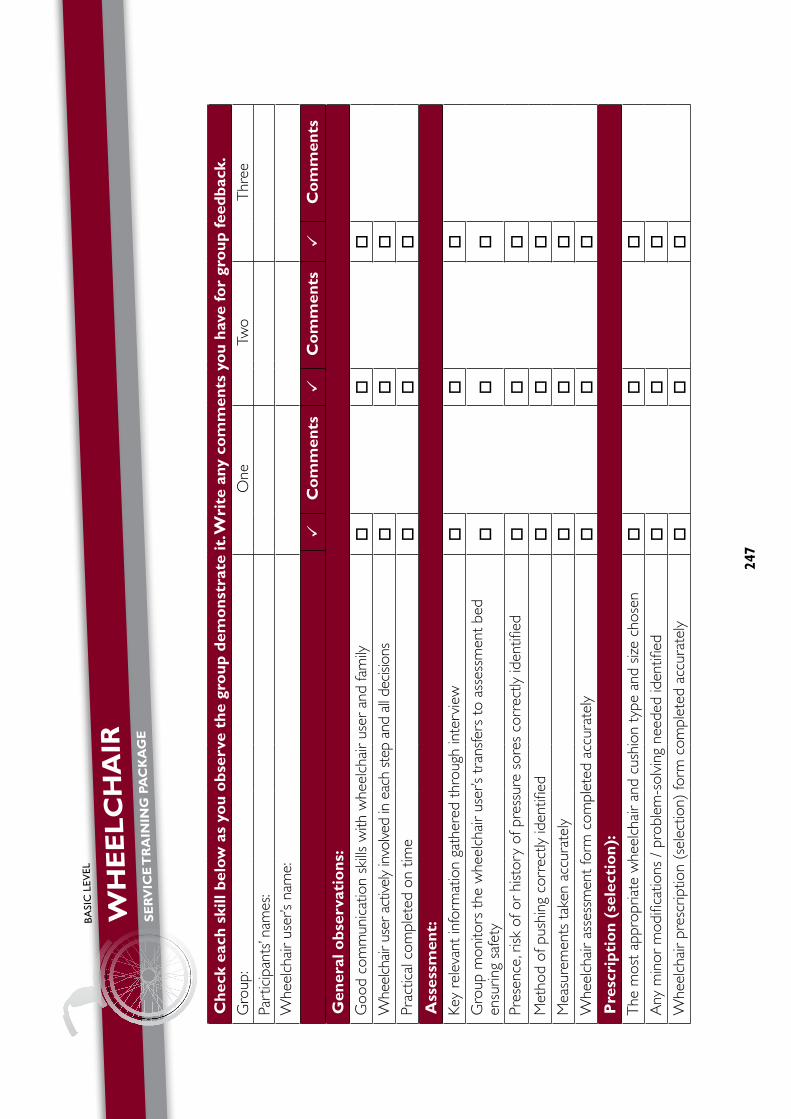
247
che
ck e
ach
skill
bel
ow a
s yo
u o
bser
ve t
he g
roup
dem
ons
trat
e it
. Wri
te a
ny c
om
men
ts y
ou
have
for
gro
up fe
edba
ck.
Gro
up:
One
Two
Thre
ePa
rtic
ipan
ts’ n
ames
:W
heel
chai
r us
er’s
nam
e:
c
om
men
ts
co
mm
ents
c
om
men
ts
gen
eral
obs
erva
tio
ns:
Goo
d co
mm
unic
atio
n sk
ills w
ith w
heel
chai
r us
er a
nd fa
mily
W
heel
chai
r use
r act
ively
invo
lved
in e
ach
step
and
all
decis
ions
Pr
actic
al c
ompl
eted
on
time
ass
essm
ent:
Key
rele
vant
info
rmat
ion
gath
ered
thr
ough
inte
rvie
w
Gro
up m
onito
rs t
he w
heel
chai
r us
er’s
tran
sfer
s to
ass
essm
ent
bed
ensu
ring
safe
ty
Pres
ence
, risk
of o
r hi
stor
y of
pre
ssur
e so
res
corr
ectly
iden
tified
Met
hod
of p
ushi
ng c
orre
ctly
iden
tified
M
easu
rem
ents
tak
en a
ccur
atel
y
Whe
elch
air
asse
ssm
ent
form
com
plet
ed a
ccur
atel
y
Pre
scri
ptio
n (s
elec
tio
n):
The
mos
t ap
prop
riate
whe
elch
air
and
cush
ion
type
and
size
cho
sen
A
ny m
inor
mod
ifica
tions
/ pr
oble
m-s
olvi
ng n
eede
d id
entifi
ed
Whe
elch
air
pres
crip
tion
(sel
ectio
n) fo
rm c
ompl
eted
acc
urat
ely
Wh
ee
lc
ha
irS
er
vic
e T
ra
inin
g P
ac
ka
ge
Ba
sic
Lev
eL
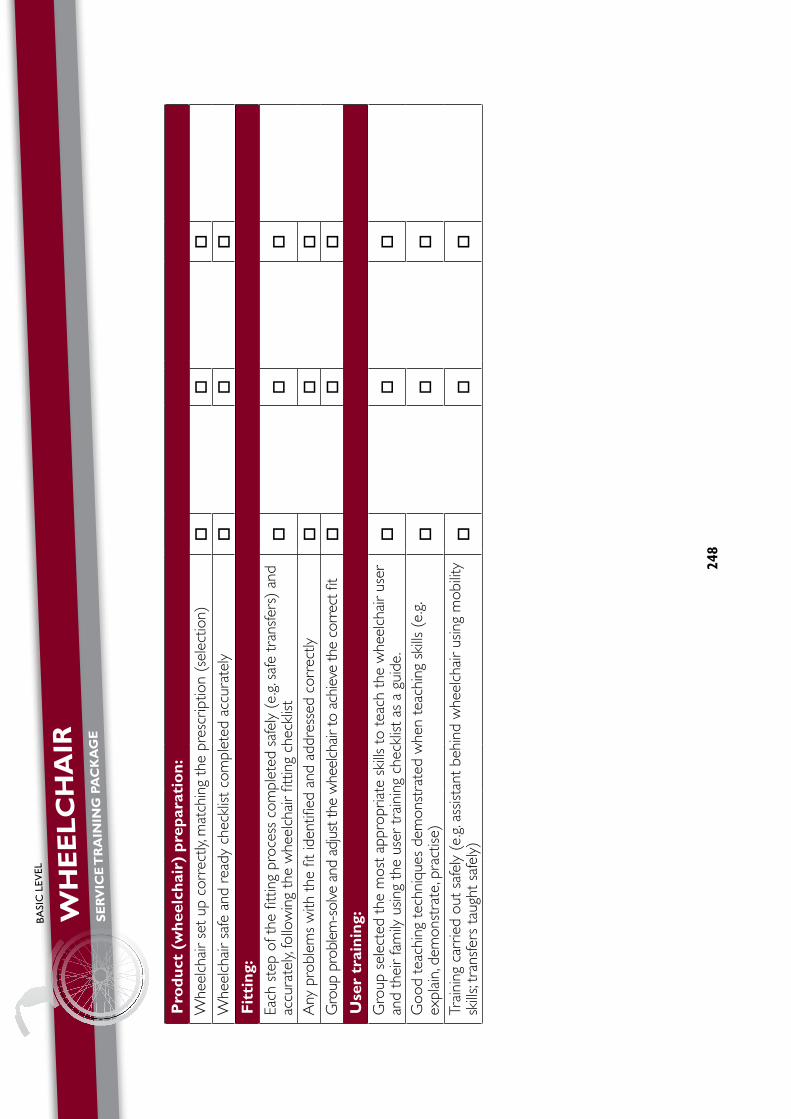
248
Pro
duct
(w
heel
chai
r) p
repa
rati
on:
Whe
elch
air
set
up c
orre
ctly,
mat
chin
g th
e pr
escr
iptio
n (s
elec
tion)
W
heel
chai
r sa
fe a
nd r
eady
che
cklis
t co
mpl
eted
acc
urat
ely
Fit
ting
:Ea
ch s
tep
of t
he fi
ttin
g pr
oces
s co
mpl
eted
saf
ely
(e.g
. saf
e tr
ansf
ers)
and
ac
cura
tely,
follo
win
g th
e w
heel
chai
r fit
ting
chec
klist
Any
pro
blem
s w
ith t
he fi
t id
entifi
ed a
nd a
ddre
ssed
cor
rect
ly
Gro
up p
robl
em-s
olve
and
adj
ust t
he w
heel
chai
r to
achi
eve
the
corr
ect fi
t
Use
r tr
aini
ng:
Gro
up s
elec
ted
the
mos
t ap
prop
riate
ski
lls t
o te
ach
the
whe
elch
air
user
an
d th
eir
fam
ily u
sing
the
user
tra
inin
g ch
eckl
ist a
s a
guid
e.
Goo
d te
achi
ng t
echn
ique
s de
mon
stra
ted
whe
n te
achi
ng s
kills
(e.
g. ex
plai
n, d
emon
stra
te, p
ract
ise)
Trai
ning
car
ried
out
safe
ly (
e.g.
assis
tant
beh
ind
whe
elch
air
usin
g m
obilit
y sk
ills; t
rans
fers
tau
ght
safe
ly)
Wh
ee
lc
ha
irS
er
vic
e T
ra
inin
g P
ac
ka
ge
Ba
sic
Lev
eL


For more information, contact.
World Health Organization20, Avenue AppiaCH-1211 Geneva 27Switzerland
Tel.: (+ 41 22) 791-2715Fax: (+ 41 22) 791-4874
www.who.int/disabilities/en/
ISBN 978 92 4 150347 1