TM Conjugation Kit - search.cosmobio.co.jp
39
Antibody-Oligonucleotide All-in-One TM Kit V.06.18.10 Antibody-Oligonucleotide All-in-One TM Conjugation Kit User Manual Catalog No. A-9202-001 www.solulink.com
Transcript of TM Conjugation Kit - search.cosmobio.co.jp

Antibody-Oligonucleotide All-in-OneTM Kit V.06.18.10
Antibody-Oligonucleotide All-in-OneTM Conjugation Kit
User Manual Catalog No. A-9202-001 www.solulink.com

www.Solulink.com i
The products offered here are for research use only. Any commercial application will require a license from Solulink. The Solulink Conjugation System is patented and has multiple patents pending. Please contact Solulink for information regarding licensing information. Solulink products and methods may be covered by one or more of the following United States patents Nos. 6,686, 461, 6,800,728, 7,102,024, 7, 173, 125, 7, 462, 689 and other pending patent applications. No license is granted or implied to any patents to technologies for which the end user applies our products. Information in this manual is subject to change without notice and does not constitute a commitment on the part of Solulink, Inc. It is supplied on an “as is” basis without any warranty of any kind, either explicit or implied. Information may be changed or updated in this manual at any time. This document may not be copied, transferred, reproduced, disclosed, or duplicated, in whole or in part, without the prior written consent of Solulink, Inc. This documentation is proprietary information and protected by the copyright laws of the United States and international treaties. The manufacturer of this documentation is Solulink, Inc. 2009 Solulink - The Conjugation Company, 9853 Pacific Heights Blvd. Suite H, San Diego, California 92121. All trademarks, trade names, service marks or logos referenced herein belong to their respective companies. For research purposes only. Not for diagnostic use.

www.Solulink.com ii
Safety Information WARNING – CHEMICAL HAZARD. Some chemicals used can be potentially hazardous, and can cause injury or illness.
• Read and understand the Material Safety Data Sheets (MSDS) before you store, handle, or work with any chemicals or hazardous materials.
• Minimize contact with and inhalation of chemicals. Wear appropriate personal protective equipment when handling chemicals (e.g. safety glasses, gloves, or clothing). For additional safety guidelines consult the MSDS.
• Check regularly for chemical leaks or spills. If a leak or spill occurs, follow the manufacturer’s clean-up procedures as recommended in the MSDS.
• Comply with all local, state/provincial, or national laws and regulations related to chemical storage, handling and disposal

Antibody-Oligonucleotide All-in-OneTM Conjugation Kit
www.Solulink.com 1
Table of Contents Chapter 1: Introduction ......................................................................................... 2
A. User Manual .............................................................................................. 2 B. Purpose of Manual ..................................................................................... 2 C. Intended Users .......................................................................................... 2 D. Customer Service and Technical Support .................................................. 2
Chapter 2: Overview of Conjugation ..................................................................... 3 A. Product Description ................................................................................... 4 B. All-in-OneTM Conjugation Technology ........................................................ 4 C. All-in-OneTM Conjugation Process ............................................................. 6 D. Starting Antibody Requirements .............................................................. 10 E. Starting Amino-Oligonucleotide Requirements ........................................ 10 F. Kit Components ....................................................................................... 11 G. Materials to be Provided by the User ....................................................... 11 H. Component Storage Conditions ............................................................... 11
Chapter 3: Conjugation Protocol ......................................................................... 12 Stage 1: Modification of Amino-Oligonucleotide with Sulfo-S-4FB ........ 12 A. Enter Amino-Oligo Information into Conjugation Calculator ..................... 12 B. Resuspend Amino-Oligo .......................................................................... 13 C. Measure Amino-Oligo Concentration on a Spectrophotometer ................ 14 D. Buffer Exchange Amino-Oligo .................................................................. 15 E. Dissolve Sulfo-S-4FB Reagent ................................................................ 16 F. Modify Amino-Oligo with Sulfo-S-4FB Reagent ....................................... 16 G. Buffer Exchange and Concentrate 4FB-Oligo .......................................... 17 H. Measure 4FB-Oligo Concentration .......................................................... 19 I. Measure and Quantify 4FB Molar Substitution Ratio ............................... 21 Stage 2: Modification of Antibody with S-HyNic ...................................... 24 A. Antibody Preparation ............................................................................... 24 B. Confirm Antibody Concentration on a Spectrophotometer ....................... 25 C. Buffer Exchange Antibody ....................................................................... 27 D. Dissolve S-HyNic Reagent ....................................................................... 28 E. Modify IgG with S-HyNic Reagent and Buffer Exchange ......................... 28 Stage 3: Formation of Conjugate and Purification ................................... 29 A. Conjugate Formation ............................................................................... 29 B. Conjugate Purification .............................................................................. 29 C. Buffer Exchange into Storage Buffer ....................................................... 31
Chapter 4: Appendix ........................................................................................... 32 A. Bradford Protein Assay ............................................................................ 32 B. Antibody-Oligonucleotide Conjugates: Some Examples .......................... 34 C. Troubleshooting Guide............................................................................. 35

Antibody-Oligonucleotide All-in-OneTM Conjugation Kit
www.Solulink.com 2
Chapter 1: Introduction
A. User Manual This manual provides instructions for using the Antibody-Oligonucleotide All-in-OneTM Conjugation Kit. This chapter contains the following sections:
Purpose of Manual Intended Users Customer Service and Technical Support
B. Purpose of Manual Each Antibody-Oligonucleotide All-in-OneTM Kit provides all the necessary reagents and components to produce one (1) antibody-oligonucleotide conjugate. Use of the kit results in:
• The modification of one user-supplied antibody and one amino-oligonucleotide with HyNic and 4-FB moieties, respectively.
• The conjugation of HyNic-modified antibody with 4FB-oligonucleotide, resulting in the formation of an antibody-oligonucleotide conjugate.
• The affinity purification of an antibody-oligonucleotide conjugate that is stable for up to 1 year when stored at 4oC.
C. Intended Users The Antibody-Oligonucleotide All-in-OneTM Kit is designed for users with minimal or no conjugation experience allowing them to prepare a single customized, high purity, ready-to-use antibody-oligonucleotide conjugate in a single day.
D. Customer Service and Technical Support Additional technical information can be found at: Telephone Email 1-888-625-0670 (Toll Free) [email protected] Fax Address 1-858-625-0770 Solulink-The Conjugation Company 9853 Pacific Heights Blvd, Ste H
San Diego, CA 92121

Antibody-Oligonucleotide All-in-OneTM Conjugation Kit
www.Solulink.com 3
Chapter 2: Overview of Conjugation This chapter provides:
• An introduction to the Antibody-Oligonucleotide All-in-OneTM Conjugation Kit.
• An overview of the bioconjugation technology used to prepare antibody-oligonucleotide conjugates.
• Starting antibody and oligonucleotide requirements
• A list of required components and those to be provided by the user along with storage conditions.
This chapter contains the following sections:
A. Product Description
B. All-in-OneTM Conjugation Technology
C. All-in-OneTM Conjugation Process
D. Starting Antibody Requirements
E. Starting Oligonucleotide Requirements
F. Kit Components
G. Materials Provided by the User
H. Component Storage Conditions

Antibody-Oligonucleotide All-in-OneTM Conjugation Kit
www.Solulink.com 4
A. Product Description Each Antibody-Oligonucleotide All-in-OneTM Conjugation Kit provides all the necessary components to generate one (1) antibody-oligonucleotide conjugate in just over 10 hours (~4 hr. hands on). The kit requires the user to supply the antibody (polyclonal or monoclonal, 100 µg) and one HPLC purified amino-modified oligonucleotide (10-40 OD260 units). Kit instructions are specifically designed for researchers with limited or no conjugation experience. A special conjugation calculator (located on a flash drive) is directly integrated with the protocol and avoids the need to perform numerical calculations throughout the procedure. Each kit yields between 20-60 µg of highly purified, ready-to-use antibody-oligonucleotide conjugate. Yield is dependent on both the specific antibody and oligo size. Final conjugate concentrations typically range from 0.1-0.3 mg/ml.
B. All-in-OneTM Conjugation Technology
1) Conjugation Chemistry The Antibody-Oligonucleotide All-in-OneTM Conjugation kit uses proprietary HydraLink™ chemistry to link an antibody to an oligonucleotide as illustrated in Figure 1. The first stage of the process begins with the modification of a 3’ or 5’- amino-modified oligonucleotide using an excess of a HydraLinkTM linker called Sulfo-S-4FB. This reactive NHS-ester incorporates an aromatic aldehyde functional group, formylbenzamide (4FB) at the desired terminus of the oligonucleotide.
Figure 1. Reaction of HyNic-modified IgG with 4FB-modified oligo leads to the rapid formation of a stable antibody-oligonucleotide conjugate.
NH2
3’-or 5’- amino modified oligonucleotide
N
O
NH
NH
N
N
O
NH
O
N
N
O
O
O
O
NH
H
N
O
NH
NH
N
O
NH
H
IgG
S-HyNic
4FB-oligo
HyNic-IgG
Sulfo-S-4FB
S-HyNic Sulfo-S-4FB
Aniline catalyst
Conjugate

Antibody-Oligonucleotide All-in-OneTM Conjugation Kit
www.Solulink.com 5
In a second stage of the process, a polyclonal or monoclonal antibody (100 µg) is modified using another HydraLinkTM linker called S-HyNic. This NHS-ester reacts with lysine residues, incorporating HyNic functional groups (hydrazinonicotinamide) onto the antibody. In the third and final stage, the two modified biomolecules are mixed together in the presence of a reaction catalyst (i.e. aniline) to form the conjugate after which purification is carried out using a magnetic affinity solid phase.
2) Conjugate Purification Antibody-oligonucleotide conjugates produced with the All-in-OneTM kit are ready to be used in the most demanding and sensitive downstream applications. The kit delivers high purity conjugate virtually free of residual antibody or oligonucleotide (>98%). Reaction conditions are optimized to convert nearly 100% of the antibody into conjugate leaving only free, excess 4FB-oligo to be removed. Complete conversion of antibody to conjugate simplifies conjugate purification as illustrated in Figure 2. Antibody-oligonucleotide conjugate is purified to near homogeneity by selectively binding the conjugate to a magnetic affinity matrix allowing excess 4FB-oligonucleotide to be washed away. Affinity bound conjugate is then gently eluted from the matrix and buffer exchanged into long term storage buffer. Antibody-oligonucleotide conjugates produced with the All-in-OneTM are stable for up to 1 year when kept at 4oC in storage buffer.
Figure 2. All-in-OneTM conjugate purification strategy.
4-FB
4-FB
4-FB
+HyNic
+4-FB
4-FB
4-FB
excess 4FB-oligoHyNic-modifiedIgG
excess 4FB-oligoconjugate
Capture conjugate
Wash 4-FB
Antibody-oligonucleotide conjugate
Elute
Form conjugate
magnetic affinity beads
excess 4FB-oligo

Antibody-Oligonucleotide All-in-OneTM Conjugation Kit
www.Solulink.com 6
C. All-in-OneTM Conjugation Process
The three stages of the conjugation process as summarized below. Additional details are illustrated in Figures 3, 4, and 5.
* 4FB MSR is an acronym for 4-formylbenzamide molar substitution ratio
Stage 1Modification of Amino-Oligonucleotide
with Sulfo-S-4FB(4 h)
1. Resuspend and verify oligo concentration (spectrophotometer)2. Buffer exchange oligo on spin column3. Modify amino-oligo with Sulfo-S-4FB and spin filter concentrate4. Verify oligo concentration and determine 4FB MSR* (spectrophotometer)
Stage 2Modification of Antibody with S-HyNic
(2.5 h)
1. Prepare antibody and verify concentration (spectrophotometer)2. Buffer exchange on spin column3. Modify antibody with S-HyNic4. Buffer exchange on spin column
Stage 3Conjugate Formation and Purification
(4 h)
1. Conjugate 4FB-labeled oligo to HyNic- labeled IgG 2. Affinity purify conjugate

Antibody-Oligonucleotide All-in-OneTM Conjugation Kit
www.Solulink.com 7
Figure 3. Stage One (1) of the All-in-OneTM conjugation process illustrates the modification of an amino-oligonucleotide using Sulfo-S-4FB linker.
H2N- Resuspend amino-oligo
Confirm OD260/µL concentrationon spectrophotometer
Buffer exchange amino-oligo
Confirm OD260/µL on spectrophotometer and determine 4FB MSR
Modify amino-oligo w/Sulfo-S-4FB linker Sulfo-S-4FB
Buffer exchange & concentrate 4FB-modified oligo
H2N-
4FB-
Modification of Amino-Oligonucleotide
With Sulfo-S-4FB
STAGE 1

Antibody-Oligonucleotide All-in-OneTM Conjugation Kit
www.Solulink.com 8
Figure 4. Stage Two (2) of the All-in-OneTM process illustrates the modification of IgG using S-HyNic linker.
Resuspend IgG (100 μg) at 1.0 mg/mLConfirm IgG concentration on spectrophotometer
Modification of Antibody with S-HyNic
Buffer exchange intomodification buffer
HyNic-modify
S-HyNic
HyNicHyNic
HyNicHyNic
Buffer exchange intoconjugation buffer
STAGE 2

Antibody-Oligonucleotide All-in-OneTM Conjugation Kit
www.Solulink.com 9
Figure 5. Stage Three (3) of the All-in-OneTM process illustrates both the formation and purification of the conjugate.
Conjugate 4FB-oligo to HyNic-IgG4FB-
Conjugate Formation and Purification
excess 4FB-oligo+4FB-
4FB-
conjugate
HyNicHyNic
Bind conjugateto affinity magnetic beads
Wash away excess oligo on magnet
Elute conjugate & buffer exchange
4-FB
STAGE 3

Antibody-Oligonucleotide All-in-OneTM Conjugation Kit
www.Solulink.com 10
D. Starting Antibody Requirements The Antibody-Oligonucleotide All-in-OneTM Conjugation Kit is designed to produce one (1) antibody-oligonucleotide conjugate starting with 100 µg of any mammalian antibody regardless of IgG subclass and one amino-modified oligonucleotide (10-40 OD260 units). The quality and quantity of both the starting antibody and oligonucleotide are critical to the success of the conjugation protocol. We recommend using only the highest quality antibodies and oligonucleotides from trusted sources and reputable vendors. This kit is not compatible with commercial antibody preparation containing added BSA or gelatin stabilizers. If present these additives must be removed before proceeding.
E. Starting Amino-Oligonucleotide Requirements The Antibody-Oligonucleotide All-in-OneTM kit is designed to conjugate any high purity 5’ or 3’ amino-modified oligonucleotide (20-60 nucleotides in length) to any monoclonal or polyclonal IgG-class antibody. The protocol requires a minimum quantity of 10 OD260 and a maximum of 40 OD260 units of HPLC purified amino-oligonucleotide. Solulink recommends that longer oligo sequences (e.g. > 49-mer) be synthesized with a 5’-amino group and shorter oligos (< 49-mer) with a 3’-amino group if the specific application permits. Oligonucleotides < 49-mer can be either reverse phase (RP) or ion exchange purified (IEX) while longer oligos (> 49-mer) can be IEX or double HPLC purified depending on the specific services offered by each vendor. Some vendors offer these purification options on a custom basis while others offer them as a standard service, albeit at additional cost. Be advised that unpurified 3’-amino oligos contain a significant quantity of truncated failure sequences that lead to undesirable conjugation products while unpurified 5’-amino oligos contain up to 50% of A260 units in the form of shorter unmodified failure sequences that never form conjugate and thereby alter the stoichiometry of the conjugation reaction. For best results always use the highest quality, HPLC purified amino-oligonucleotide available. Note: Please be advised that some oligo vendors will not HPLC purify amino-modified oligos or in some cases longer oligonucleotide sequences (modified or unmodified) except as a custom service. However some oligo suppliers do offer these services as a standard option. Solulink recommends that customers always use HPLC purified amino-oligonucleotides in this protocol. We recommend requesting a mass spectrum to confirm the final quality when available. The mass spectrum confirms percent full-length purity as well as molecular weight (unambiguous confirmation of amino group). As a general rule, we do not recommend using crude oligonucleotide preparations to make a conjugate. Use barrier pipette tips and good laboratory practices at all times to avoid potential contamination and/or cross-talk between different oligonucleotide sequences.

Antibody-Oligonucleotide All-in-OneTM Conjugation Kit
www.Solulink.com 11
F. Kit Components
G. Materials to be Provided by the User Variable high speed microcentrifuge (e.g. Eppendorf 5415D or equivalent)
Magnetic single 1.5 ml tube stand (e.g. Ambion #AM10026) UV-VIS Scanning Spectrophotometer or ND-1000 NanoDrop™ UV-VIS scanning plate reader (Bradford Assay) (Optional) Micro-volume quartz cuvette (50-100 µL) if a NanoDropTM is not available 1.5 mL microfuge tubes Bradford protein assay reagents (Bio-Rad, #500-0006) Bovine IgG concentration standards (Pierce, #23212) Calibrated pipettes (P-2, P-10, P-200 and P-1000) and barrier tips
Table-Top Centrifuge (holds 50 mL conical tubes)(Optional)
H. Component Storage Conditions
Component Storage Kit 2-8°C
S-HyNic Reagent - Desiccated 2-8°C
Sulfo-S-4FB Reagent- Desiccated 2-8°C
All other components and buffers 2-8°C
HyNic-modified antibody 2-8°C
Antibody-oligonucleotide conjugate 2-8°C
4FB-modified oligonucleotide -20oC
Flash Drive Ambient
Component Size Storage S-HyNic Linker 1 x 100 µg Keep desiccated at 4°C
Sulfo-S-4FB Linker 1 x 1.5 mg Keep desiccated at 4°C
Solution A 10 mL 4°C
Solution B 10 mL 4°C
Solution C 10 mL 4°C
Solution D 10 mL 4°C
Solution E 0.25 mL 4°C
Spin Column (Red Cap) 2 x 0.5 mL 4°C
Spin Column (Yellow Cap) 1 x 0.5 mL 4°C
Spin Column (Blue Cap) 2 x 0.5 mL 4°C
DMF 1 x 1.0 mL 4°C
Conjugate Quench Reagent 1 mL 4°C
2-HP Reagent 1 mL 4°C
Affinity Magnetic Beads 1 x 75 µL 4°C
Oligo Spin Filter 1 Room Temperature (18-25°C)
Collection Tubes 10 Room Temperature (18-25°C)
Flash Drive 1 Room Temperature (18-25°C)

Antibody-Oligonucleotide All-in-OneTM Conjugation Kit
www.Solulink.com 12
Chapter 3: Conjugation Protocol Prior to Starting The conjugation protocol is a three stage process (~10.5 hours in duration) where each step takes several hours to complete. If desirable, the end-user can complete Stage 1 on the first day (~4 hr) then proceed with Stages 2 and 3 on day two (6.5 hr). Keep in mind that we do not recommend stopping the procedure after Stage 2. The only convenient stopping point throughout the entire protocol is immediately after Stage 1 so we recommend that you schedule and plan your time accordingly. Total hands-on is approximately 4 hrs. If the starting amino-oligo is in dry pellet form If the amino-oligo to be modified with Sulfo-S-4FB is in dry pellet form and contains a minimum of 10 OD260 units and no more than 40 OD260 units, proceed to Stage 1. If more than 40 OD260 units are provided by the vendor in a dry pellet form do not make adjustments to the OD260 units at this time and proceed to Stage 1. If the starting amino-oligo is in a liquid form If the amino-oligonucleotide to be modified with Sulfo-S-4FB is already in liquid form and its concentration is known (units of OD260/µL), then transfer to another tube a volume equivalent to a minimum of 10 OD260 units and no more than 40 OD260 units and concentrate into a dry pellet form using a vacuum concentrator (e.g. SpeedVacTM from Savant Instruments) then proceed to Stage 1. If the initial amino-oligo to be modified is already in liquid form and its concentration is unknown (units of OD260/µL), then measure its concentration as described in this Chapter (Section C). Transfer into another tube a volume equivalent to a minimum of 10 OD260 units and no more than 40 OD260 units and concentrate into a dry pellet form using a vacuum concentrator then proceed to Stage 1.
Stage 1: Modification of Amino-Oligonucleotide with Sulfo-S-4FB
A. Enter Amino-Oligo Information into Conjugation Calculator
1. Enter the following amino-oligo parameters directly from the Oligo vendor’s Certificate of Analysis into the Conjugation Calculator (Section A, green cells).
a) Oligonucleotide name as listed on the Certificate of Analysis b) Total OD260 units as listed on the Certificate of Analysis

Antibody-Oligonucleotide All-in-OneTM Conjugation Kit
www.Solulink.com 13
c) Oligonucleotide molar extinction coefficient (liter cm-1 mol-1) as listed on the Certificate of Analysis
d) Oligonucleotide molecular weight (Daltons) as listed on the Certificate of Analysis
e) Nanomoles of amino-oligonucleotide as listed by vendor on Certificate of Analysis
Important- Enter the total OD260 units and the number of nanomoles provided by the vendor on the Certificate of Analysis even if only a portion of the total OD260 units provided are going to be modified. The calculator requires the total values provided on the Certificate of Analysis to determine the number of nanomoles/OD260.
Important- If the original Certificate of Analysis is not available for whatever reason, the required information can still be generated by pasting and analyzing the known oligo sequence (including modifications) on Integrated DNA Technologies website using their commercial Oligo Analyzer (see link below). In these cases, since the total OD260 units and nanomoles provided by the vendor on their original Certificate of Analysis is no longer available, you must enter the number of OD260 units actually being modified as well as the number of nanomoles represented by that OD260 units into the Conjugation Calculator.
http://www.idtdna.com/analyzer/Applications/OligoAnalyzer/Default.aspx#
Important- Failure to enter all the required information into the conjugation calculator as stated on the vendor’s Certificate of Analysis will disrupt and void subsequent calculator functions. Always save the calculator spreadsheet after data entry.
B. Resuspend Amino-Oligo
1. Resuspend the amino-oligo provided (e.g. minimum of 10 OD260 units) into 100 µL Solution A. Pipette the solution up and down 30 times using a P-200 pipette (barrier tip) to completely resuspend the oligo pellet. Also rinse the wall of the container with pipette action to insure that any and all oligo pellet material has been resuspended completely.
2. If more than 40 OD260 units are resuspended, transfer a volume equivalent to 40 OD260 units into another tube and adjust the final volume to 100 µL with Solution A. Store the remaining unused portion of the resuspended amino-oligonucleotide at -20oC.
3. Vortex the oligo solution for 60 seconds then centrifuge the amino-oligonucleotide for 10 seconds at 1,000 x g to collect the full liquid contents at the bottom of the vial. Proceed to measure the oligo concentration.

Antibody-Oligonucleotide All-in-OneTM Conjugation Kit
www.Solulink.com 14
C. Measure Amino-Oligo Concentration on a Spectrophotometer
The amino-oligo concentration can measured either on a conventional or micro-volume UV-VIS scanning spectrophotometer (e.g. NanoDropTM ND-1000). When using a conventional spectrophotometer a quartz micro-cuvette (50-100 µL) is required. Follow the corresponding instructions for each type of spectrophotometer as summarized below.
Micro-Volume Spectrophotometer (e.g. NanoDropTM ND-1000)
1. Determine the concentration (OD260/µL) of the resuspended amino-oligo on a NanoDropTM as follows (remember to use barrier tips).
a) Prepare a 1:250 dilution of the dissolved amino-oligo by transferring 1 µL with a calibrated P-2 pipette into 249 µL molecular grade H2O.
b) Select the “Nucleic Acid” menu option on the NanoDropTM and initialize the instrument using molecular grade water.
c) Clean the sample pedestal and blank the instrument with 2µL molecular grade H2O. Check the baseline and reblank if necessary to insure that it is flat.
d) Measure the A260 of the 1:250 amino-oligo as displayed in the 10 mm path length window. Record the A260 value.
2. Enter the recorded A260 into the Conjugation Calculator (Section B, green cell). The calculator determines the A260/µL as well as the total OD260 oligo units available for conjugation (Section B, yellow cells). A minimum of 10 OD260 and a maximum of 40 OD260 units are required.
Important- If less than 10 OD260 units are recovered after resuspension obtain additional amino-oligo. If greater than 40 OD260 are resupended transfer an aliquot equivalent to 40 OD260 units into another tube and bring the final volume to 100 µL with Solution A, then proceed with the protocol.

Antibody-Oligonucleotide All-in-OneTM Conjugation Kit
www.Solulink.com 15
Conventional UV-VIS Spectrophotometer
1. Determine the concentration (OD260/µL) of the resuspended amino-oligo using a quartz micro-cuvette (50-100 µL, 1-cm path length) and a spectrophotometer as follows (remember to use barrier tips).
a) In a 1.5 mL tube prepare a 1:250 dilution of the resuspended amino-oligo by transferring 1 µL with a calibrated P-2 pipette into 249 µL molecular grade H2O.
b) Blank the spectrophotometer at 260 nm using molecular grade H2O.
c) Measure the A260 of the 1:250 amino-oligo. Record the A260 value.
2. Enter the recorded A260 into the Conjugation Calculator (Section B, green cell). The calculator determines the A260/µL as well as the total OD260 oligo units available for conjugation (Section B, yellow cells). A minimum of 10 OD260 and a maximum of 40 OD260 units are required.
Important- If less than 10 OD260 units are recovered after resuspension obtain additional amino-oligo. If greater than 40 OD260 are resupended transfer an aliquot equivalent to 40 OD260 units into another tube and bring the final volume to 100 µL with Solution A, then proceed with the protocol.
D. Buffer Exchange Amino-Oligo
1. Prepare a buffer exchange spin column (red cap) by twisting off the bottom closure and loosening the red cap (do not remove the cap). Place the spin column into a collection tube (provided).
2. Mark the top of the spin column (red cap) using an indelible pen to identify the oligo sequence. Using the same marker pen place a single vertical mark anywhere on the side of the spin column as illustrated below.
Label lid w/oligo ID
Place pen mark onSide of spin column
Collection tube

Antibody-Oligonucleotide All-in-OneTM Conjugation Kit
www.Solulink.com 16
3. Place the spin column assembly into the centrifuge and balance appropriately with an opposing balance tube. Orient the vertical mark on the side of the spin column by aiming it outward and away from the center of the rotor.
4. Centrifuge at 1,500 x g for 1 minute. Discard the flow through from the bottom of the collection tube. The column matrix will appear white in color. Place the column back into a new empty collection tube (provided).
5. Apply the dissolved amino-oligo (10-40 OD260 units per 100 µL) in Solution A to the top of the dry resin bed. Place the spin column into the empty collection tube. Loosely recap and properly orient the spin column in the centrifuge. Centrifuge at 1,500 x g for 2 min.
Important- Rotor speed must be set to 1500 x g (RCF) and not 1500 x rpm (RPM). The volume of oligo recovered in the collection tube should always be approximately the same volume that is loaded on the spin column. For example, when 100 µL of amino-oligo is loaded, 100 + 10 µL should be recovered. If the recovered volume is low it is likely that rotor speed is not calibrated. If this happens, re-centrifuge the spin column at 1,500 x g speed for an additional minute to recover any trapped solution the spin column.
6. Measure the recovered volume (µL) of amino-oligo at the bottom of the collection tube using a P-200 pipette and transfer it to a new 1.5 mL tube.
Note- Yield in A260 units through a spin column is generally >90% for amino-oligos ranging in size from 35-60 bases. Recovery yields from smaller oligos (e.g. 20-mers) are somewhat lower (e.g. 75%) due to the size exclusion limit of the spin column matrix. Never spin oligos smaller than 20-mers through a spin column to avoid oligo loss.
7. Label the tube with the corresponding oligo ID and volume (µL) recovered. The amino-oligo is now ready for 4FB modification.
E. Dissolve Sulfo-S-4FB Reagent
1. Add 25 µL DMF to the vial of Sulfo-S-4FB reagent; vortex for 30 seconds to resuspend. Pipette the DMF solution up and down if necessary to fully resuspend the material adhered to the wall of the vial.
F. Modify Amino-Oligo with Sulfo-S-4FB Reagent
1. Enter the volume of amino-oligo to be modified with Sulfo-S-4FB into the Conjugation Calculator (Section C, green cell).

Antibody-Oligonucleotide All-in-OneTM Conjugation Kit
www.Solulink.com 17
2. Add the indicated volume (µL) of dissolved Sulfo-S-4FB reagent as displayed in the Conjugation Calculator (Section C, yellow cell) to the amino-oligo; vortex to mix. Centrifuge at 1000 x g for 10 seconds to collect the entire liquid contents at the bottom of the tube.
3. Incubate at room temperature for 2 hours to modify the oligo.
G. Buffer Exchange and Concentrate 4FB-Oligo
Five minutes prior to the end of the 4FB/oligo modification reaction, pre-wet an Oligo Spin Filter as described in this section.
Pre-Wet Spin Filter
1. Open the lid of an assembled filter unit; pre-wet the filter membrane inside the concentrator body (see image below) by adding 500 µL Solution C to the filter membrane.
2. Pipette the solution up and down using a P-1000 pipette several times without touching or damaging the filter membrane.
3. Open the lid to the filter unit and with gloved hands remove the concentrator body from the collection tube and with a rapid inverted flick of the wrist discard the entire volume of Solution C from the concentrator body into a suitable waste receptacle. Place the empty concentrator body back into the collection tube.
Buffer Exchange 4FB-Oligo
1. Transfer the completed Sulfo-S-4FB/amino-oligo modification reaction into the empty concentrator body (~ 100-125 µL).
2. Add 400 µL Solution C to the concentrator body to bring the total volume to approximately 500 µL.

Antibody-Oligonucleotide All-in-OneTM Conjugation Kit
www.Solulink.com 18
3. Using a P-1000 pipette, mix the solution in the concentrator body up and down with pipette action ~10-15 times without touching or damaging the filter surface.
4. Close the lid and mark the filter unit with an identifying name or ID.
5. Orient the oligo spin filter in the centrifuge so the volume calibration numbers face toward the center of the rotor. Remember to use an appropriate balance tube opposite the oligo spin filter unit.
6. Centrifuge at 15,000 x g for 12 min. After centrifugation, the volume in the concentrator body will generally be between 25 and 50 µL; some translucent color may be associated the concentrated solution (e.g. light brown).
Note- We recommend as a precautionary measure, after the first spin that you may wish to retain the flow-through from the bottom of the collection tube just in case the filter membrane is defective or has been damaged.
7. Repeat steps–2 through 6 four (4) additional times to completely buffer exchange and concentrate the 4FB-oligo. Do not skip any of the spin steps.
Important- Although five spin cycles are time consuming and tedious (total time ~ 1 h) proper execution of this step is critical to the success of the conjugation reaction by removing excess Sulfo-S-4FB.
8. After the final spin, check the volume in the concentrator unit. If the final volume is less than 25 µL simply adjust the volume to 25 µL by adding a small aliquot of Solution C. If the final volume is greater than 25 µL, continue to centrifuge the spin filter for a few more minutes until the volume reaches 25 µL.
9. Open the lid of the filter unit and using a P-20 pipette carefully pipette the solution up and down 15 times to fully resuspend the 4FB-oligo.
10. Using the same pipette, rinse the filter’s surface 5 or 6 times with the oligo solution by repeatedly pipetting the 4FB-oligo solution over the entire surface of the filter. This rinsing process insures that any filter bound 4FB-oligo is brought back into solution.
11. Close the lid of the filter unit and insert it back into the collection tube. Briefly centrifuge for 10 seconds at 1,000 x g to collect the full 25 µL of 4FB-oligo back at the bottom of the concentrator unit.

Antibody-Oligonucleotide All-in-OneTM Conjugation Kit
www.Solulink.com 19
12. Leave the 4FB-modified oligo inside the concentrator unit at this time and proceed to measure the 4FB-oligo concentration on a spectrophotometer.
Note- If the filter is not sufficiently or properly rinsed some 4FB-oligo can remain bound to the filter surface. Leave the 4FB-oligo solution in the filter unit until the 4FB-oligo concentration (OD260/µL) is confirmed on the spectrophotometer.
H. Measure 4FB-Oligo Concentration
Measure the concentration of 4FB-modified oligonucleotide (OD260/µL) within the filter concentrator body using a micro-volume UV-VIS scanning spectrophotometer (e.g. NanoDropTM ND-1000) or a conventional spectrophotometer. When using a conventional spectrophotometer a quartz micro-cuvette (50-100 µL, 1-cm path length) is required. Use the instructions below depending on the specific type of spectrophotometer available to you (NanoDropTM or Conventional).
Concentration Using a Micro-Volume NanoDropTM Spectrophotometer 1. Prepare a 1:1000 dilution of the 4FB-modified oligo by transferring 1
µL (calibrated P-2 pipette) from inside the spin filter concentrator body to a 1.5 mL tube containing 999 µL molecular grade H2O. Label the tube with the appropriate oligo ID.
2. Select the “Nucleic Acid” menu option on the NanoDropTM and initialize the instrument.
3. Clean the sample pedestal and blank the instrument with molecular grade H2O. Confirm a flat baseline by clicking on the “Re-blank” icon and reblank if necessary. Clean the sample pedestal dry.
4. Measure the A260 of a 2 µL aliquot of the 1:1000 4FB-oligo dilution as displayed in the 10 mm path length window.
5. Enter the resulting A260 into Conjugation Calculator (Section D, green cell). The calculator will then display the concentration of the 4FB-oligo in units of A260/µL (Section D, 1st yellow cell). If the calculator displays ‘YES’ (Section D, 2nd yellow cell) then proceed to step 6 below. If the calculator displays “FALSE” (Section D, 2nd
yellow cell) proceed to step 7 below. 6. When the measured 4FB-oligo concentration is in the required range
(0.3 to 0.6 OD260/µL), proceed to measure the oligo 4FB Molar Substitution Ratio as described in Section I of this protocol. Leave the 4FB-Oligo solution in the concentrator unit until after Section I is complete.
7. If the 4FB-oligo concentration displayed is greater than 0.6 OD260//µL, dilute the 4FB-oligo in the filter unit by adding the

Antibody-Oligonucleotide All-in-OneTM Conjugation Kit
www.Solulink.com 20
indicated volume of Solution C (µL) from the Conjugation Calculator (Section D, 3rd yellow cell) to obtain 0.6 OD260/µL. Then re-enter the adjusted value (0.6 OD260/µL) into the Conjugation Calculator (Section D, green cell). Once the 4FB-oligo is adjusted to 0.6 OD260/µL, proceed to measure the oligo 4FB Molar Substitution Ratio as described in Section I of this protocol. Leave the 4FB-Oligo solution in the concentrator unit until after Section I is complete. Important- If the oligo concentration is less than 0.3 OD260/µL at this juncture, re-concentrate the 4FB-oligo in the concentrator unit with additional centrifugation time at 15,000 x g until a volume of ~15-20 µL is reached and then re-confirm OD260/µL. When the required 4FB-oligo concentration is obtained, re-enter the measured value into the Conjugation Calculator (Section D, green cell) and proceed to Section I of this protocol. Leave the 4FB-Oligo solution in the concentrator unit until after Section I is complete.
Concentration Using a Conventional UV-VIS Spectrophotometer 1. Prepare a 1:1000 dilution of the 4FB-modified oligo by transferring 1
µL (calibrated P-2 pipette) from inside the spin filter concentrator body to a tube containing 999 µL molecular grade H2O. Label the tube with the appropriate 4FB-oligo ID.
2. Using a quartz micro-cuvette, blank the spectrophotometer at 260 nm with molecular grade H2O. Discard the blank solution from the cuvette.
3. Measure the A260 of 1:1000 oligo dilution. 4. Enter the resulting A260 into the Conjugation Calculator (Section D,
green cell). The calculator will then display the concentration of the 4FB-oligo in units of A260/µL Conjugation Calculator (Section D, 1st yellow cell). If the calculator displays ‘YES’ (Section D, 2nd yellow cell) then proceed to step 5 below. If the calculator displays “FALSE” (Section D, 2nd yellow cell) proceed to step 6 below.
5. When the measured 4FB-oligo concentration is in the required range (0.3 to 0.6 OD260/µL), proceed to measure the oligo 4FB Molar Substitution Ratio as described in Section I of this protocol. Leave the 4FB-Oligo solution in the concentrator unit until after Section I is complete.
6. If the 4FB-oligo concentration displayed is greater than 0.6 OD260//µL, dilute the 4FB-oligo in the concentrator unit by adding the indicated volume of Solution C (µL) Conjugation Calculator (Section D, 3rd yellow cell) to obtain 0.6 OD260/µL then re-enter this adjusted value into the Conjugation Calculator (Section D, green cell). Once the 4FB-oligo is adjusted to 0.6 OD260/µL, proceed to measure the oligo 4FB Molar Substitution Ratio as described in

Antibody-Oligonucleotide All-in-OneTM Conjugation Kit
www.Solulink.com 21
Section I of this protocol. Leave the 4FB-Oligo solution in the concentrator unit until after Section I is complete. Important- If the oligo concentration is less than 0.3 OD260/µL at this juncture, re-concentrate the 4FB-oligo in the concentrator unit with additional centrifugation time at 15,000 x g until a volume of ~15-20 µL is reached and re-confirm the OD260/µL. When the required 4FB-oligo concentration is obtained, re-enter the measured value into the Conjugation Calculator (Section D, green cell) and proceed to Section I of this protocol. Leave the concentration adjusted 4FB-Oligo solution in the concentrator unit until after Section I is complete.
I. Measure and Quantify 4FB Molar Substitution Ratio
The following 4FB Molar Substitution Assay quantifies the amount of 4FB attached to the oligonucleotide. The assay is performed by reaction of an aliquot (2 µL) of the 4FB-oligo solution (0.3 to 0.6 OD260/µL) with 2-HP reagent at 37oC for 30 minutes after which the A260 and A360 of the sample is measured on a spectrophotometer. This assay insures that the oligo is both 4FB-modified and properly buffer exchanged (removal of excess Sulfo-S-4FB). Use the appropriate instructions below depending on the specific type of spectrophotometer available to you (e.g. NanoDropTM or Conventional).
4FB Molar Substitution Assay (NanoDropTM)
1. Prepare a 2-HP blank solution by adding 2 µL Solution C to 18 µL 2-HP Reagent; label ‘2-HP Blank’.
2. Prepare a 4FB-oligo sample by adding 2 µL 4FB-modified oligo (0.3-0.6 OD260/µL) to 18 µL 2-HP reagent; label ‘4FB-Oligo’.
3. Incubate 2-HP blank and 4FB-Oligo reactions at 37oC for 30 minutes.
4. Launch the NanoDropTM software and select the UV-VIS menu option.
5. Initialize the instrument with 2 µL molecular grade water.
6. When the scanning window appears make sure the ‘HiAbs’ feature is clicked “on” with a check mark in the appropriate box.
7. Blank the NanoDropTM with 2 µL 2-HP blank solution. ‘Reblank’ to validate a flat baseline. If necessary, clean the pedestal and re-

Antibody-Oligonucleotide All-in-OneTM Conjugation Kit
www.Solulink.com 22
blank until a suitable baseline is obtained. Clean the pedestal dry with a Kimwipe.
8. Scan a 2 µL drop 4FB-Oligo sample on the pedestal by clicking the ‘Measure’ icon. Both black (1 mm) and red trace (0.1 mm) scans should appear.
9. Read the displayed absorbance at A360 (black trace) by toggling the ‘λ2 toggle switch’ with the mouse until it reaches 360 nm. Record the A360 (black trace-1 mm path length) as displayed in the λ2 window.
10. Obtain the A260 value (red trace- 0.1 mm path length) by toggling the ‘Max Absorbance toggle switch’ downward until the A260 from the red trace is just under full scale in the scan window. Then using the mouse, click the cursor inside the ‘Max Absorbance’ window and enter a new, slightly higher value until the red trace just reaches full scale in the scan window. When the red trace is adjusted to full scale, read the A260 value displayed in the ‘Max Absorbance’ window. Record the A260.
Note- numerical entries in the ‘Max Absorbance’ window can be made in increments of 0.01A units until the red trace exactly reaches full scale.
11. Enter the resulting A360 and A260 values into the Conjugation Calculator (Section E, green cells). The calculator then displays the 4FB molar substitution ratio or MSR (Section E, yellow cell). The calculator also displays a warning if the 4FB MSR is too low or too high (e.g. less than 0.5 and greater than 1.1). Do not proceed if the measured 4FB ratio is outside the required range.
12. If 4FB-MSR of the oligo is determined to be in the acceptable range (e.g. greater than 0.5 and less than 1.1), transfer the 4FB-oligonucleotide still in the concentrator unit to a new 1.5 mL tube. Label the tube with the MSR and the OD260/µL and store at 4oC for 1 month or up to 1 year at -20oC. This is the end of Stage 1 and a convenient stopping place.
Note- An “ACCEPTABLE MSR” is displayed if the oligo is at least 50% 4FB-modified (i.e. MSR = 0.5). MSR values lower than 50% can occur for various reasons including the absence of the amino-group or insufficient purity of the oligo. Do not proceed if the calculated 4FB MSR is lower than 0.5. A value greater than 1.0 is occasionally observed and is usually the result of incomplete desalting (slight excess of Sulfo-S-4FB carryover). Values up to 1.1 are acceptable but an additional desalting/concentration cycle as

Antibody-Oligonucleotide All-in-OneTM Conjugation Kit
www.Solulink.com 23
previously described (Section G) is recommended when values greater than 1.1 are observed.
4FB Molar Substitution Assay (Conventional Spectrophotometer)
1. Prepare the 2-HP blank solution by adding 2 µL Solution C to 18 µL 2-HP Reagent; label ‘2-HP Blank’.
2. Prepare a 4FB-oligo sample by adding 2 µL 4FB-modified oligo (0.3-0.6 OD260/µL) to 18 µL 2-HP reagent; label ‘4FB-Oligo’.
3. Incubate the 2-HP blank and 4FB-Oligo reactions at 37oC for 30 minutes.
4. Prepare a 1:10 dilution of the 2-HP blank by transferring 10 µL from the completed reaction mixture into 90 µL molecular grade H2O then prepare a 1:100 dilution of the 2-HP blank by transferring 10 µL from the 1:10 2-HP blank dilution into a second tube containing 90 µL molecular grade H2O. Label both tubes appropriately.
5. Prepare a 1:10 dilution of the 4FB-oligo by transferring 10 µL from the completed reaction mixture into 90 µL molecular grade H2O then prepare a 1:100 dilution of the 4FB-oligo by transferring 10 µL from the 1:10 4FB-oligo dilution into a second tube containing 90 µL molecular grade H2O. Label both tubes appropriately.
6. In a quartz micro-cuvette blank the spectrophotometer with 90 µL 1:10 2-HP blank at 360 nm. Remove the blank solution from the cuvette.
7. Measure the A360 of the 1:10 4FB-Oligo sample in the cuvette. Record the A360. Clean the cuvette.
8. Reblank the spectrophotometer using the 1:100 2-HP blank at 260 nm. Remove the blank solution from the cuvette.
9. Measure the A260 of the 1:100 4FB-oligo sample. Record the A260. Clean the cuvette.
10. Enter the resulting A360 and A260 values into the Conjugation Calculator (Section E, green cells). The calculator then displays the 4FB molar substitution ratio or MSR (Section E, yellow cell). The calculator will display a warning if the 4FB MSR is too low or too high (e.g. less than 0.5 and greater than 1.1).
11. If 4FB-MSR of the oligo is determined to be in the acceptable range (e.g. greater than 0.5 and less than 1.1), transfer the 4FB-

Antibody-Oligonucleotide All-in-OneTM Conjugation Kit
www.Solulink.com 24
oligonucleotide still in the concentrator unit to a new 1.5 mL tube. Label the tube with the MSR and the OD260/µL and store at 4oC for 1 month or up to 1 year at -20oC. This is the end of Stage 1 and a convenient stopping place.
Note- An “ACCEPTABLE MSR” is displayed if the oligo is at least 50% 4FB-modified (i.e. MSR = 0.5). MSR values lower than 50% can occur for various reasons including the absence of the amino-group or insufficient purity of the oligo. Do not proceed if the calculated 4FB MSR is lower than 0.5. A value greater than 1.0 is occasionally observed and is usually the result of incomplete desalting (slight excess of Sulfo-S-4FB carryover). Values up to 1.1 are acceptable but an additional desalting/concentration cycle as previously described (Section G) are recommended when values greater than 1.1 are observed.
Stage 2: Modification of Antibody with S-HyNic
Antibodies are packaged in two different physical forms, solids and liquids. Individual samples can vary greatly from vendor to vendor and are often sold in a variety of different sizes and/or concentrations. In all cases, Solulink highly recommends starting with the highest quality/purity antibody available. Depending on the initial form (solid or liquid) follow the instructions that apply to your particular sample.
A. Antibody Preparation
If the IgG is in a solid lyophilized form (100 µg)
1. Add 100 µL Solution B to lyophilized antibody (100 µg solid). Cap the sample vial and vortex for 1 minute.
2. Open the lid and using a P-100 gently pipette the solution up and down while rinsing the wall of the container from top to bottom. Lyophilized antibody can often adhere to the upper walls of a product vial. Visually inspect the vial and lid for any residual lyophilized antibody residue that may have become trapped during the vendor packaging process in order to maximize sample recovery.
Important: although careful resuspension of the antibody is tedious notwithstanding it remains a critical step in the conjugation process. Antibody vendors rarely overfill product vials, so to achieve efficient
Antibody-Oligonucleotide All-in-OneTM Conjugation Kit
www.Solulink.com 25
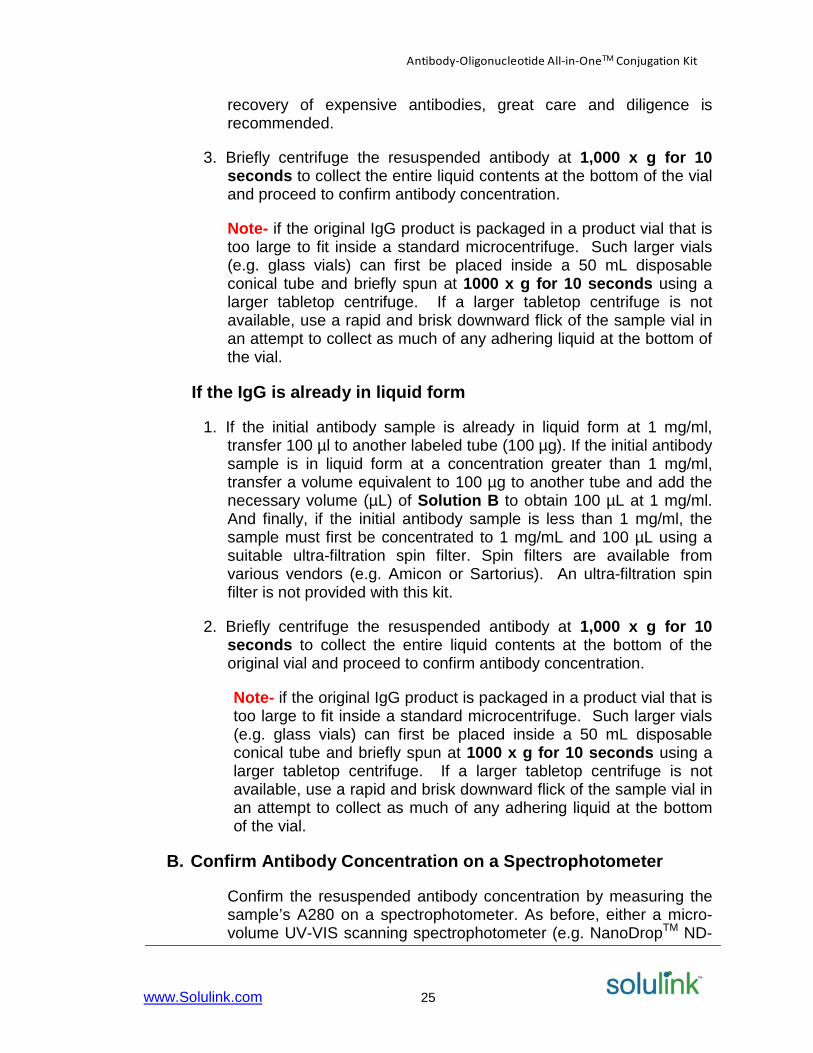
recovery of expensive antibodies, great care and diligence is recommended.
3. Briefly centrifuge the resuspended antibody at 1,000 x g for 10 seconds to collect the entire liquid contents at the bottom of the vial and proceed to confirm antibody concentration.
Note- if the original IgG product is packaged in a product vial that is too large to fit inside a standard microcentrifuge. Such larger vials (e.g. glass vials) can first be placed inside a 50 mL disposable conical tube and briefly spun at 1000 x g for 10 seconds using a larger tabletop centrifuge. If a larger tabletop centrifuge is not available, use a rapid and brisk downward flick of the sample vial in an attempt to collect as much of any adhering liquid at the bottom of the vial.
If the IgG is already in liquid form
1. If the initial antibody sample is already in liquid form at 1 mg/ml, transfer 100 µl to another labeled tube (100 µg). If the initial antibody sample is in liquid form at a concentration greater than 1 mg/ml, transfer a volume equivalent to 100 µg to another tube and add the necessary volume (µL) of Solution B to obtain 100 µL at 1 mg/ml. And finally, if the initial antibody sample is less than 1 mg/ml, the sample must first be concentrated to 1 mg/mL and 100 µL using a suitable ultra-filtration spin filter. Spin filters are available from various vendors (e.g. Amicon or Sartorius). An ultra-filtration spin filter is not provided with this kit.
2. Briefly centrifuge the resuspended antibody at 1,000 x g for 10 seconds to collect the entire liquid contents at the bottom of the original vial and proceed to confirm antibody concentration.
Note- if the original IgG product is packaged in a product vial that is too large to fit inside a standard microcentrifuge. Such larger vials (e.g. glass vials) can first be placed inside a 50 mL disposable conical tube and briefly spun at 1000 x g for 10 seconds using a larger tabletop centrifuge. If a larger tabletop centrifuge is not available, use a rapid and brisk downward flick of the sample vial in an attempt to collect as much of any adhering liquid at the bottom of the vial.
B. Confirm Antibody Concentration on a Spectrophotometer
Confirm the resuspended antibody concentration by measuring the sample’s A280 on a spectrophotometer. As before, either a micro-volume UV-VIS scanning spectrophotometer (e.g. NanoDropTM ND-

Antibody-Oligonucleotide All-in-OneTM Conjugation Kit
www.Solulink.com 26
1000) or conventional spectrophotometer can be used. When using a conventional spectrophotometer a quartz micro-cuvette (50-100 µL, 1-cm path length) is required. Use the appropriate instructions that follow depending on the specific type of spectrophotometer available to you (NanoDropTM or Conventional).
Antibody Concentration on a NanoDropTM Spectrophotometer
1. Launch the NanoDropTM software by clicking the desktop icon.
2. Select the A280 menu option.
3. Initialize the instrument with 2 µL molecular grade water on a clean pedestal.
4. When the scan window appears turn off the 340 nm normalization feature by clicking the appropriate box. Note: some NanoDropTM instruments do not have a 340 nm normalization feature and ignored for those instruments.
5. Blank the spectrophotometer using 2 µL of the appropriate buffer blank solution (e.g. the solution used to resuspend the antibody). Click the “Reblank” icon to verify a flat baseline (i.e. no offsets).
6. Clean the pedestal and measure the A280 of the antibody sample with a 2 µL aliquot of antibody sample. Record the A280.
7. Enter the name of the antibody, the measured A280 (10 mm path length) and the total volume of antibody solution into the Conjugation Calculator (Section F, green cells). The calculator displays the protein concentration (mg/mL) and the total mass of antibody to be conjugated into the Conjugation Calculator (Section F, yellow cells). A concentration of 1 + 0.2 mg/mL is required to proceed, otherwise obtain additional IgG or adjust the concentration to 1 mg/mL. Note-the calculator uses the “average” known mass extinction coefficient (E1%) of IgG to calculate protein concentration (e.g. E1% = 14)
Antibody Concentration on a Conventional Spectrophotometer
1. Blank the spectrophotometer at 280 nm using an appropriate blank solution (e.g. the solution used to resuspend the antibody) with a quartz micro-cuvette (50-100 µL, 1-cm path length). Empty the cuvette.
Antibody-Oligonucleotide All-in-OneTM Conjugation Kit
www.Solulink.com 27
2. Measure the A280 of the antibody sample. Record the A280 and recover the antibody sample from the cuvette back to its sample tube.
3. Enter the name of the antibody, the A280 (1-cm path length) and the volume of antibody solution (e.g. 100 µL) into the Conjugation Calculator (Section F, green cells). The calculator then displays the protein concentration (mg/mL) and total mass of antibody available to be conjugated into the Conjugation Calculator (Section F, yellow cells). A concentration of 1 + 0.2 mg/mL is required to proceed, otherwise obtain additional IgG or adjust the concentration to 1 mg/mL. Note-The calculator uses the “average” known mass extinction coefficient (E1%) of IgG to calculate protein concentration (E1% = 14).
C. Buffer Exchange Antibody
1. Prepare a spin column (red cap) by twisting off the bottom closure and loosening the red cap (do not remove). Place the spin column into a collection tube (provided).
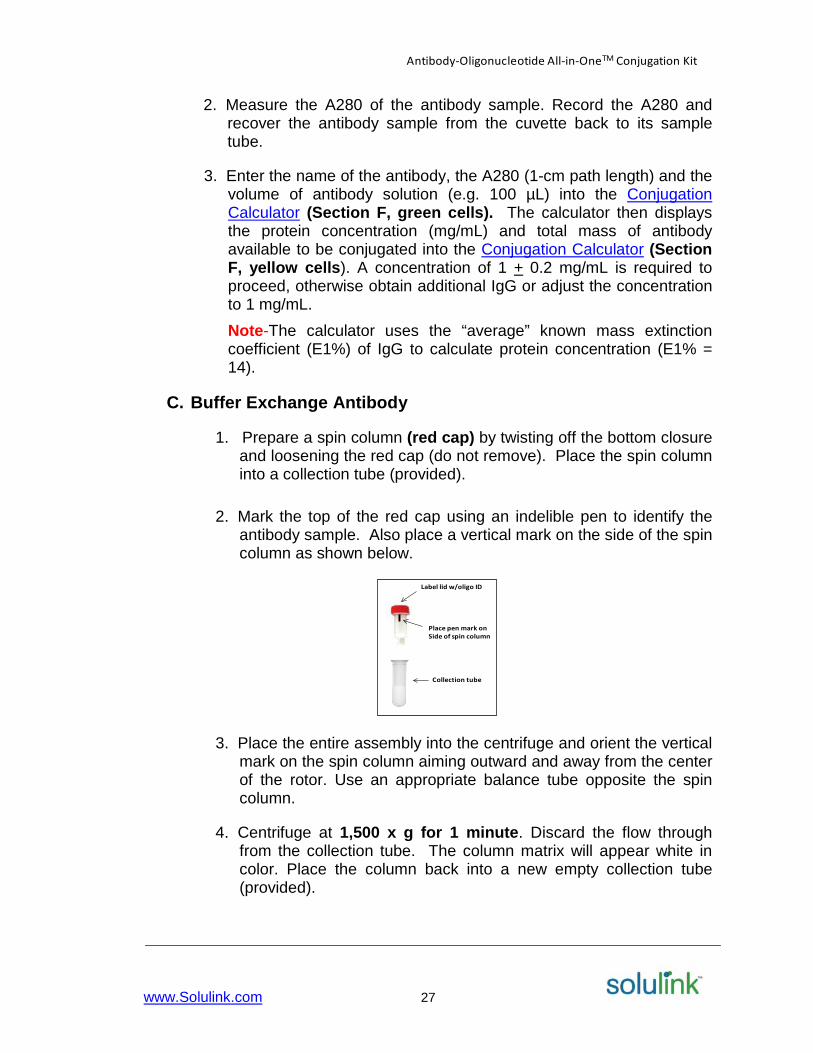
2. Mark the top of the red cap using an indelible pen to identify the antibody sample. Also place a vertical mark on the side of the spin column as shown below.
3. Place the entire assembly into the centrifuge and orient the vertical mark on the spin column aiming outward and away from the center of the rotor. Use an appropriate balance tube opposite the spin column.
4. Centrifuge at 1,500 x g for 1 minute. Discard the flow through from the collection tube. The column matrix will appear white in color. Place the column back into a new empty collection tube (provided).
Label lid w/oligo ID
Place pen mark onSide of spin column
Collection tube

Antibody-Oligonucleotide All-in-OneTM Conjugation Kit
www.Solulink.com 28
5. Open the red cap; load the antibody sample (~ 100 µL at 1 mg/mL) to the top of the dry resin bed; loosely cap and place the column back into the collection tube.
6. Orient the spin column mark outward as before and centrifuge at 1,500 x g for 2 minutes.
7. Transfer the eluate from the bottom of the collection tube to a new labeled 1.5 mL tube; measure the volume (µL) recovered from the collection tube with a P-200 pipette. Label the tube with the appropriate volume (µL) recovered.
D. Dissolve S-HyNic Reagent 1. Add 35 µL DMF to a vial of S-HyNic reagent. Pipette the solution
up and down for 60 seconds to dissolve the pellet.
E. Modify IgG with S-HyNic Reagent and Buffer Exchange 1. Add 2.0 µL of dissolved S-HyNic modification reagent to the
antibody sample. Gently pipette the solution to mix. 2. Incubate the antibody/HyNic modification reaction at room
temperature for 2 hours. 3. Exactly five minutes prior to the end of the HyNic modification
reaction, prepare a spin column (yellow cap) by twisting off the bottom closure and loosening the cap (do not remove). Place the spin column into a collection tube and mark the top of the yellow cap with an indelible pen to identify the antibody sample. Also place a vertical mark on the side of the spin column as shown on below.
4. Place the assembly into the centrifuge and balance appropriately. Orient the mark on the side of the spin column aiming outward and away from the center of the rotor. Use an appropriate balance tube opposite the spin column.
5. Centrifuge at 1,500 x g for 1 minute. Discard the flow through from the bottom of the collection tube. The column matrix will
Label lid w/oligo ID
Place pen mark onSide of spin column
Collection tube

Antibody-Oligonucleotide All-in-OneTM Conjugation Kit
www.Solulink.com 29
appear white in color. Place the column back into a new empty collection tube (provided).
6. After the HyNic modification reaction is complete, apply the HyNic/IgG reaction mixture (~100 µL) to the top of the dry resin bed. Loosely recap and orient the spin column in the centrifuge. Centrifuge at 1,500 x g for 2 minutes.
7. Transfer the recovered volume (µL) of HyNic-modified IgG using a P-200 pipette from the bottom of the collection tube to a new 1.5 mL tube. Measure and record the volume recovered and immediately proceed to conjugate formation.
Stage 3: Formation of Conjugate and Purification
A. Conjugate Formation 1. Enter the name of the antibody, the name of the 4FB-
oligonucleotide, and the volume of HyNic-IgG to be conjugated into the Conjugation Calculator (Section G, green cells).
2. Add the indicated volume (µL) of 4FB-modified oligonucleotide displayed in the Conjugation Calculator (Section G, yellow cell) to the HyNic-modified antibody. Pipette the solution up and down to mix.
3. Incubate the antibody-oligo conjugation reaction for 2 hr at room temperature.
4. At the end of the conjugation reaction, quench the reaction by adding 10 µL Conjugate Quench Reagent and incubate for 10 minutes at room temperature.
B. Conjugate Purification 1. Centrifuge the vial containing affinity magnetic beads (black slurry)
at 1000 x g for 5 seconds to collect the bead contents at the bottom of the tube.
2. Add 500 µL Solution C to the bead slurry; using a P-1000 pipette, pipette the solution up and down several times to mix the slurry. Quickly before the beads resettle place the tube on the magnet for 10 seconds; carefully remove and discard the supernatant using a P-200 pipette without disturbing the pellet.
3. Repeat step 2 three (3) additional times to fully wash the beads; removing the supernatant after each wash.
4. Immediately add the quenched conjugation reaction (~115 µL) directly to the washed bead pellet.

Antibody-Oligonucleotide All-in-OneTM Conjugation Kit
www.Solulink.com 30
5. Gently pipette the slurry/conjugate mix up and down 3-4 times with a P-1000 (barrier tips). Set a timer and allow the settled slurry to incubate for 10 minutes away from a magnet. Never vortex beads after conjugate addition. Set P-1000 to 90 µL when mixing slurry.
6. Repeat step five three (3) additional times for a total conjugate binding time of 40 minutes. Some minor but unavoidable bead loss can occur due to non-specific binding of beads inside the pipette tip.
7. Gently pipette the settled slurry up and down one last time and immediately place the slurry on the magnet for 10 seconds before the beads have a chance to resettle.
8. The conjugate is now bound to the affinity matrix. With a P-200 pipette, carefully remove and discard the supernatant without disturbing the magnetized bead pellet.
9. Immediately add 500 µl Solution D to the bead pellet, remove the tube from the magnet and pipette the slurry up and down with a P-1000 several times to wash. Never vortex the beads. Before the beads resettle; place them back on the magnet for 10 seconds. Remove and discard the supernatant without disturbing the pellet.
10. Repeat step 9 three (3) additional times; discarding the wash supernatant between washes.
11. Remove the tube from the magnet and add 100 µL Solution E directly to the bead pellet.
12. Using a P-1000, pipette the slurry up and down until the bead pellet adhered to the wall is rinsed to the bottom of the vial. Never vortex the beads. Set P-1000 to 90 µL when mixing slurry.
13. Incubate the settled slurry for 5 minutes away from the magnet. 14. Mix the slurry up and down and incubate for another 5 minutes
away from the magnet. 15. Repeat step 14 one (1) additional time. Total conjugate elution
time for these three elution/incubation periods is 15 minutes. 16. Pipette the settled slurry up and down with the P-1000 one last
time and immediately place the slurry on the magnet for 10 seconds before the beads have a chance to resettle
17. Without disturbing the pellet, carefully transfer the clarified supernatant (~100 µl) containing the eluted conjugate to a new labeled 1.5 mL tube.
Antibody-Oligonucleotide All-in-OneTM Conjugation Kit
www.Solulink.com 31
18. Repeat step 11-17 one (1) additional time; pooling the two 100 µL conjugate fractions together in the same tube (200 µL final volume). Buffer exchange the eluted conjugate into storage buffer.
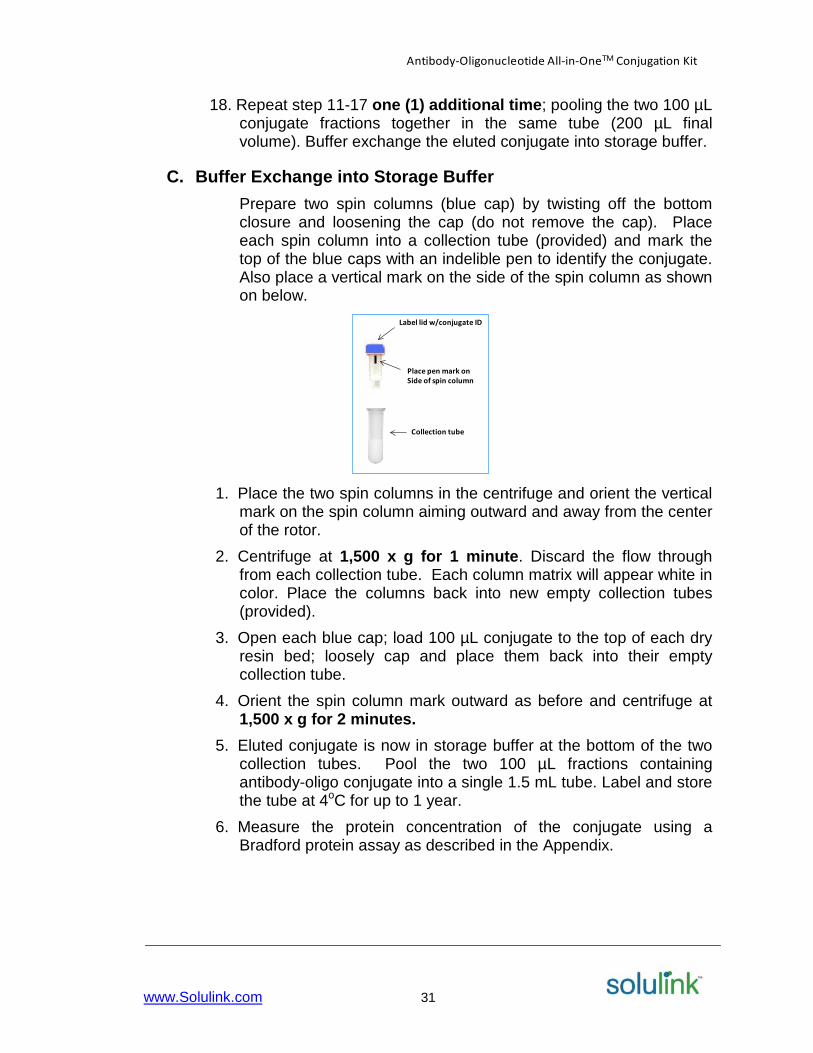
C. Buffer Exchange into Storage Buffer Prepare two spin columns (blue cap) by twisting off the bottom closure and loosening the cap (do not remove the cap). Place each spin column into a collection tube (provided) and mark the top of the blue caps with an indelible pen to identify the conjugate. Also place a vertical mark on the side of the spin column as shown on below.
1. Place the two spin columns in the centrifuge and orient the vertical
mark on the spin column aiming outward and away from the center of the rotor.
2. Centrifuge at 1,500 x g for 1 minute. Discard the flow through from each collection tube. Each column matrix will appear white in color. Place the columns back into new empty collection tubes (provided).
3. Open each blue cap; load 100 µL conjugate to the top of each dry resin bed; loosely cap and place them back into their empty collection tube.
4. Orient the spin column mark outward as before and centrifuge at 1,500 x g for 2 minutes.
5. Eluted conjugate is now in storage buffer at the bottom of the two collection tubes. Pool the two 100 µL fractions containing antibody-oligo conjugate into a single 1.5 mL tube. Label and store the tube at 4oC for up to 1 year.
6. Measure the protein concentration of the conjugate using a Bradford protein assay as described in the Appendix.
Label lid w/conjugate ID
Place pen mark onSide of spin column
Collection tube

Antibody-Oligonucleotide All-in-OneTM Conjugation Kit
www.Solulink.com 32
Chapter 4: Appendix
A. Bradford Protein Assay A Bradford or BCA Protein Assay is used to determine the final antibody-oligonucleotide conjugate concentration. A reference protocol is provided for each procedure. Bradford 96-Well Procedure Required Materials Bradford Reagent (Bio-Rad, Hercules, CA, Cat. #500-0006) 96-well plate (polystyrene flat bottom) PBS (Phosphate Buffered Saline) P-200 and P-1000 pipettes and sterile tips Bovine IgG Antibody Standard: 2 mg/ml (Pierce/ThermoFisher, Cat. # #23212) Molecular grade water Assay Protocol 1. Prepare 2 mL of Bradford working solution by adding 400 µL Bradford
dye reagent to 1600 µL molecular grade water (1:4 ratios). Prepare IgG standards and a blank in 1.5 mL tubes as follows:
Add 100 µL 2 mg/mL bovine IgG standard to 300 µL PBS (0.5 mg/mL standard) Add 200 µL 0.5 mg/ml standard to 200 µL PBS (0.25 mg/mL standard) Add 200 µL 0.25 mg/mL standard to 200 µL PBS (0.125 mg/mL standard) Add 200 µL 0.125 mg/mL standard to 200 µL PBS (0.0.0625 mg/mL standard) 100 µL PBS (buffer blank)
2. In a flat-bottom 96-well plate, prepare standards by pipetting 10 µL of each standard (and a blank) into 100 µL Bradford working solution; mix. Replace pipette tips between additions.
3. In an adjacent well containing 100 µL Bradford working solution add 10 µL of the conjugate.
4. Incubate at room temperature (18-25°C) for 15 min (do not exceed 60 min).
5. Measure absorbance at 595 nm using pre-programmed Bradford assay software.
6. Data from a typical Bradford assay is provided as an illustration only in Figure 6.

Antibody-Oligonucleotide All-in-OneTM Conjugation Kit
www.Solulink.com 33
Figure 6. Bradford output from a commercial plate reader.

Antibody-Oligonucleotide All-in-OneTM Conjugation Kit
www.Solulink.com 34
B. Antibody-Oligonucleotide Conjugates: Some Examples Mouse mAb/oligonucleotide conjugates (44-mer and 22-mer)
Hamster mAb/oligonucleotide conjugate (60-mer)

Antibody-Oligonucleotide All-in-OneTM Conjugation Kit
www.Solulink.com 35
C. Troubleshooting Guide
Problem Possible Cause Recommended Action •Poor conjugate yield •Poor or undetectable conjugate yield
•Amino-oligonucleotide may not be sufficiently 4FB-modified •Quality and/or purity of starting antibody is poor
•Verify 4FB MSR to insure proper conjugation. •Concentrate 4FB-oligo into the required range (0.3-0.6 OD260/µL). •If antibody quality or source are undetermined, perform suitable test such as SDS-gel page analysis and/or a Bradford protein assay to confirm the purity and quantity of the starting material
•Poor HyNic modification
•Presence of protein carriers such as BSA or gelatin may be contaminating antibody sample.
•Remove and purify the antibody sample of all protein carriers such as BSA or gelatin using affinity chromatography or other method before proceeding.
•Poor HyNic modification
•Concentration of S- HyNic modification reagent
•Make sure to thoroughly dissolve S-HyNic reagent before adding it to the
1 2 3 4 5
250150100
75
50
37.5
25
20
15
1. Protein molecular weight marker2. 60-mer 4FB-oligonucleotide standard3. Hamster mAb anti-CD3 145-C211 standard (250 ng) 4. All-in-OneTM crude conjugation reaction (60-mer/anti-CD3 mAb) 900 ng protein5. Af f inity purified anti-CD3-60-mer antibody-oligonucleotide conjugate 900 ng protein
Silver Stain GelMOPS/SDS Buf fer12% NU-PAGE SDS-Gel

Antibody-Oligonucleotide All-in-OneTM Conjugation Kit
www.Solulink.com 36
Problem Possible Cause Recommended Action •Poor HyNic modification
•Presence of non-protein amine contaminants •Improper storage of S-HyNic reagent can lead to hydrolysis of the NHS ester •initial antibody concentration is low
antibody. •Use a calibrated pipette to insure accuracy in small volume additions. •Remove all non-protein amine contaminants such as glycine or Tris before modifying the antibody with S-HyNic reagent. •Keep and store the S-HyNic reagent sealed in the pouch provided below 4oC. •Confirm initial antibody concentration prior to S-HyNic modification on the spectrophotometer. If in doubt perform a Bradford • Dissolve the antibody sample carefully in the original product vial.
•Low conjugate and/or antibody recovery
•Low buffer exchange spin column recovery volume •Low yield during affinity purification of conjugate
•Use a properly calibrated variable-speed centrifuge and follow recommended spin speed/time. Altered spin speeds will adversely compromise recovery. • Make sure to follow all the incubation times for binding and elution of conjugate.