throwing techniques - WordPress.com€¦ · 2013-08-05 · Pottery wheel throwing techniques...
22
tips on throwing complex pottery forms using basic throwing skills five great pottery wheel throwing techniques ceramicarts dail y .org | Fourth Edition | This special report is brought to you with the support of Skutt Ceramic Products We help you make great things.
Transcript of throwing techniques - WordPress.com€¦ · 2013-08-05 · Pottery wheel throwing techniques...

tips on throwing complex pottery forms
using basic throwing skills
five great pottery wheel
throwing techniques
ceramic artsdaily.org
| Fourth Edition |
This special report is brought to you with the support of Skutt Ceramic ProductsWe help you make great things.

www.ceramicartsdaily.org | Copyright © 2013, Ceramic Publications Company | five great pottery wheel throwing techniques | 1
Using Templates to Throw on the Pottery Wheelby William SchranIf you’ve ever tried to make sets (or even if you’re good at them already), you know how hard it can be to get things matched. Templates provide a quick way to establish dimensions even if you alter each pot a bit differently.
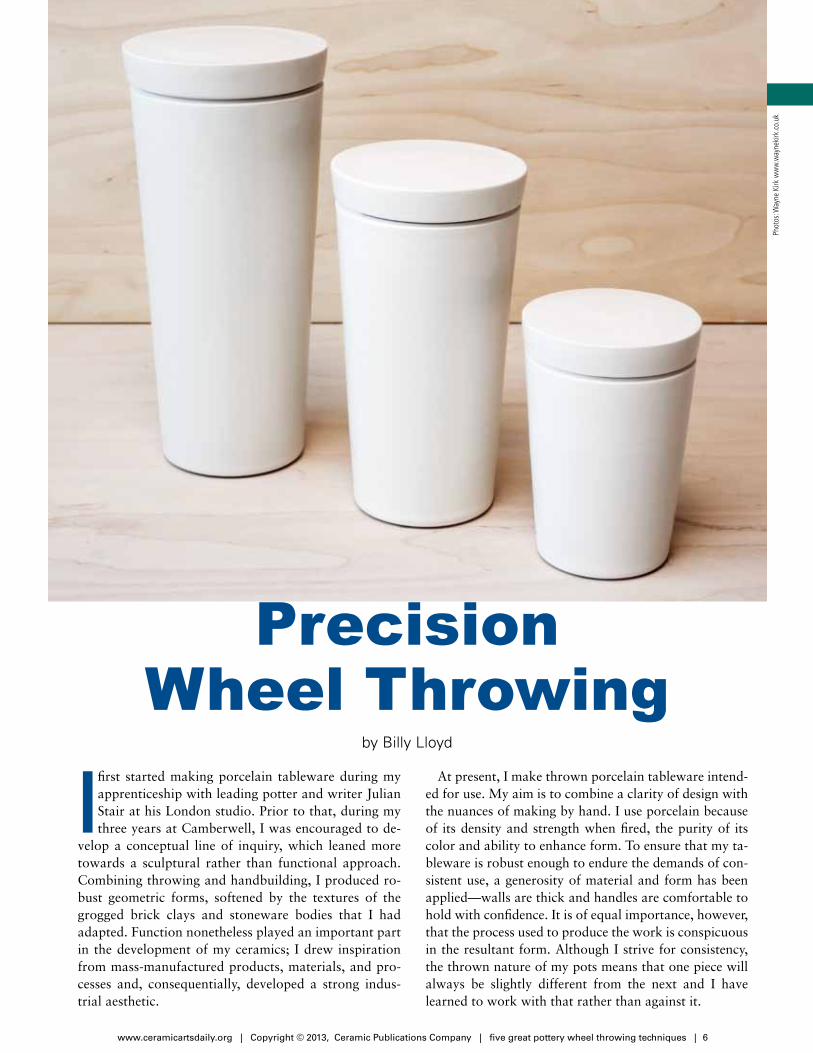
Precision Wheel Throwingby Billy LloydThe new aesthetic in ceramics is highly-refined, elegant tableware. Billy Lloyd demonstrates his step-by-step technique for throwing remarkable streamlined porcelain jars—many simple steps with lots of attention to details.
Throwing a Cup and Saucerby Lyla GoldsteinThrowing pots on the wheel is one thing but to throw two pieces that work together is a skill every potter should have. Lyla Goldstein loves the experience of drinking from a cup with a saucer and demonstrates her wheel throwing technique for making this classic combo.
An Easy Pottery Technique for Making Big Plattersby Yoko Sekino-BovèThrowing large pieces is an exciting challenge for any potter, and the reactions from non-potters is worth every bit of the effort. Yoko shows how even the smallest potters can make really impressive wheel-thrown platters.
How to Throw a Teapotby Doug PeltzmanThe teapot form is one of the most challenging projects to throw on a potters wheel. Doug Peltzman creates beautiful teapots and he demonstrates his complex technique that is sure to take your pottery skills up a notch.
Five Great Pottery Wheel Throwing TechniquesTips on Throwing Complex Pottery Forms Using Basic Throwing SkillsFull of great pottery techniques, as well as ideas you can apply to any pottery project, these step-by-step wheel-throwing instructions will help you improve your pottery throwing skills from concept through completion. For a tool that really does one thing (spins in a circle), the number of techniques and results possible on the pottery wheel are just astounding.
William Schran explains how to make, use, and effectively repeat large and complex forms on the pottery wheel using templates. Billy Lloyd throws porcelain that look like it’s machine made, but the techniques you acquire trying to duplicate this technique means you’ll be able to tackle most any form in any style. Lyla Goldstein loves the concept of saucers and how they elevate the cup to a new level . A great gift idea! And if you saw Yoko Sekino-Bové you’d admire how someone of small stature can make such large pieces, but that’s the secret she has to share. Finally, Doug Peltzman demostrates throwing a great teapot form, one of the most difficult challenges for potters.
Pottery wheel throwing techniques included in Five Great Pottery Wheel Throwing Techniques: Tips on Throwing Complex Pottery Forms Using Basic Throwing Skills.

www.ceramicartsdaily.org | Copyright © 2013, Ceramic Publications Company | five great pottery wheel throwing techniques | 2
Using Templates to Throw on the Pottery Wheel
by William Schran
hen my beginning wheel-throwing stu-dents have developed sufficient facility with
clay, they’re assigned the project of creating a set of four matching cups. Though I’ve demonstrated how to measure their forms using calipers and other devices, I continue to ob-serve them experiencing difficulties. In an effort to overcome this stum-bling block, I showed them a tech-nique successfully used by students in a beginning handbuilding class.
This technique involves using templates to repeatedly create an even, symmetrical form. In the coil-building exercise, you position the template next to the pot as coils are added, making certain the pot con-forms to the profile of the template. The template is then used as a rib to scrape the surface as it's rotated, creating a smooth, uniform surface.
Making a TemplateAny number of objects can be em-ployed to design templates that have a variety of shapes. French and ships curves, found in drafting or me-chanical drawing sets, are excellent tools for creating profiles for wheel-thrown vessels. A variety of calipers can be taken apart to create any number curved forms. Lids of vari-ous sizes can be combined to create a mixture of curves. This process can also be used to produce templates with more complicated and com-pound profiles with relative ease.
W
Assortment of bottle forms made with templates.
Some of the shapes used to create design templates.

www.ceramicartsdaily.org | Copyright © 2013, Ceramic Publications Company | five great pottery wheel throwing techniques | 3
To incorporate this technique into wheel-throwing, I began testing various materials that might serve the function of a template. Sheet plastic, a durable material that can easily be cut and shaped, turned out to be the best material. Searching through scraps available at lo-cal glass supply and repair shops, I found pieces of ¼ in. and 3/16 in. sheets that could be readily shaped into the desired profiles by cutting them with a power saw and handsaw. The edges can then be smoothed with fine sandpaper.
Creating the FormTo use a template, as in the wheel-throwing project for the set of cups, prepare several balls of clay weighing between ¾–1 lb. each. Throw a basic wide cylinder. Check the interior diameter, height and width of this basic form with calipers.Tip: Make a template for the basic cylinder form as well as the finished piece. The first template, showing the right width and shape of the ideal starting cylinder, can help you get the right basic shape.
Once you have your cylinder ready, lubricate the inte-rior of the pot, but do not lubricate the outside. Avoid-ing excess water results in a stronger form that can bet-ter withstand manipulation and alteration when using the template. Position the bottom of the template so that it’s just touching the bottom of the pot and rests on the wheel head. The template should contact the wheel but should not be pressed against it. Hold the template at approximately a 45° angle, abutting the rotating clay, such that the clay moves away from the edge of the template. The template should not be held at a 90° angle to the pot as this may lead to inadvertently shift-ing the template into the movement of the clay.
The fingers of the interior hand slowly move up, pushing the clay out to the curve of the template. As the pot widens, the hand must move up along the interior of the form more slowly so that it remains symmetrical. After reaching the top, the profile of the pot and tem-
plate should be compared. If the pot does not match the template, move the fingers of the interior hand down from the top to the bottom, pushing out where neces-sary, to conform to the profile of the template. This is of-ten necessary for shapes with wider diameters. Refine the rim with a sponge or chamois and the cup is complete.
Large or Complex FormsTemplates are also useful in creating larger pots, partic-ularly bottle shapes. This provides a method to quickly create multiples of the same form, but also the oppor-tunity to explore changes to certain areas, such as the neck and rim. The process of working with larger forms follows the same steps as you would for cups, except the neck and rim are made without the template.
Make another cylindrical shaped pot, leaving the top portions of the wall, including the rim, thicker than the rest of the pot. Position the template and push the clay out to conform to the shape, moving fingers on the interior up and down as necessary. After creating the desired curve, pull up the upper portion of the wall to thin it out and narrow it in using a collaring move-ment. Note: It is very important to continue moving your hands up while collaring in to maintain a curve or arch in the shape of the wall. A wall that becomes too horizontal or flat may collapse. In order to collar in the pot, Using the middle fingers and thumbs to constrict the neck, As you create the neck, pressing down on the rim with the first finger of the right hand helps to main-tain a level top.
Use a flexible rib after each collaring process to refine the shape and maintain the desired curve. Using the rib also removes excess water and compresses the clay. Af-ter narrowing the diameter of the pot, the wall has been thickened and can now be pulled up thinner. As the top becomes too narrow to insert a sponge to remove lubri-cating water from the interior, switch to using slurry to lubricate the clay instead. This allows your fingers and tools to continue shaping the clay without building up
Template shapes used to throw bottle forms. Templates used to throw cups.

www.ceramicartsdaily.org | Copyright © 2013, Ceramic Publications Company | five great pottery wheel throwing techniques | 4
Template held against basic cylindrical form. Pushing clay out to the template.
Hold template at an angle against surface during forming. Larger forms also begin with a basic cylinder form.
The interior hand slowly moves up, pushing the clay against the template.
The interior hand moves from the top to the bottom, mak-ing certain the pot conforms to the template.
1 2
3 4
5 6

excess torque that might twist or tear the clay wall. Us-ing slurry on the exterior, instead of water, provides a stronger clay wall.
William Schran is Assistant Dean of Fine Arts at Northern Vir-ginia Community College, Alexandria Campus. Visit his website, www.creativecreekartisans.com, for more information.
Set of cups made with a template, iron matte glaze, fired to cone 10.
Set of cups made with a template, shino and turquoise glazes, fired to cone 10.
Collaring the neck. The middle fingers confine the shape, thumbs push in, first finger of right hand presses down on the rim keeping it level.
A flexible rib removes water and slurry while compressing and refining the wall.
When the top becomes narrower, use slurry rather than water to lubricate the interior of the pot.
Use slurry to lubricate the exterior to maintain a stronger clay wall.
7 8
9 10
www.ceramicartsdaily.org | Copyright © 2013, Ceramic Publications Company | five great pottery wheel throwing techniques | 5
www.ceramicartsdaily.org | Copyright © 2013, Ceramic Publications Company | five great pottery wheel throwing techniques | 6
by Billy Lloyd
Precision Wheel Throwing
I first started making porcelain tableware during my apprenticeship with leading potter and writer Julian Stair at his London studio. Prior to that, during my three years at Camberwell, I was encouraged to de-
velop a conceptual line of inquiry, which leaned more towards a sculptural rather than functional approach. Combining throwing and handbuilding, I produced ro-bust geometric forms, softened by the textures of the grogged brick clays and stoneware bodies that I had adapted. Function nonetheless played an important part in the development of my ceramics; I drew inspiration from mass-manufactured products, materials, and pro-cesses and, consequentially, developed a strong indus-trial aesthetic.
At present, I make thrown porcelain tableware intend-ed for use. My aim is to combine a clarity of design with the nuances of making by hand. I use porcelain because of its density and strength when fired, the purity of its color and ability to enhance form. To ensure that my ta-bleware is robust enough to endure the demands of con-sistent use, a generosity of material and form has been applied—walls are thick and handles are comfortable to hold with confidence. It is of equal importance, however, that the process used to produce the work is conspicuous in the resultant form. Although I strive for consistency, the thrown nature of my pots means that one piece will always be slightly different from the next and I have learned to work with that rather than against it.
Phot
os: W
ayne
Kirk
ww
w.w
ayne
kirk
.co.
uk

Reductive DesignOne of the defining features of my ceramics is its clar-ity of design. Balancing material, form, and function is a fascinating objective. My pots are stripped of any superfluous embellishments that would detract from the graphic profile I aim to achieve. This notion is echoed in the collective use of form—currently, I use one shape from which a whole range of tableware emerges—a conical form that can be inverted to flare. In applying this economy, a positive coherency and structure is apparent throughout the range.
Questions and AssociationsWhile a distinct reduction of form is apparent in my design aesthetic, I am intrigued by the seemingly end-less possibilities of combining material, form, and function. Take a simple everyday object, such as a mug for example. It is a vessel that contains a vol-ume. It has an interior and an exterior, a base, a foot, a handle, and a rim. The wall is of a certain thick-ness, and so the mug is a certain weight. It could be cylindrical, oval, square or triangular in form. Is it symmetrical? Does it have a curved or straight-sided profile? It is colored, patterned, rough, or smooth? Only when you start to deconstruct an object do you realize the multifaceted nature of designing and mak-ing functional work.
I hope that my pots encourage people to re-exam-ine our associations with the belongings we choose. What is its purpose? What is it made of? How is it made? What does that mean to me? These are some key questions that shape my understanding of the material world we live in.
The glazed porcelain lidded jars illustrated here embody reoccurring themes within my tableware—a concern for scale, proportion, and repetition. The notion and delivery of scale can be complex, but if you can design and make an object that has as much impact on a small scale as it does upon enlargement you will have achieved a refined object of elegant pro-portions. I often create and display small groups of pots (jugs, bowls, or lidded jars for example) ascend-ing in scale as a means of demonstrating this. This arrangement also refers, not entirely but in part, to a modular format I have adopted with some of my pieces—mugs stack on top of each other and bowls nest inside one another. In doing so, the pieces echo the collective use of a singular form and the repetitive nature of batch production.
ThrowingCenter a ball of porcelain for the jar. When throw-ing the jar, an appropriate height is usually achieved in three pulls (figure 1). Throw the gallery by pressing down on half of the rim with a straight-sided steel kidney rib (figure 2). This should be done at a relatively slower pace compared to the throwing of the ves-sel. Measure the width of the jar’s gallery with cali-pers (figure 3) and save the measurement for use when throwing the lid.
Throw the lid as a low, thick cylinder. Use the caliper measurement as a guide for the diameter of the flange that sits down inside the pot. With a wooden rib, press down on the outer half of the thick rim, defining the flange (figure 4). Ensure the width of the flange is the same width as the jar’s gallery, checking with the cali-pers again (figure 5). Remove excess clay from the sides of the lid, using the outside diameter of the jar’s rim as a guide. The closer the lid is to being finished at this stage, the less trimming there is to do later on. Refine the lid’s flange with a steel kidney (figure 6).
Throwing the jar. An ap-propriate height is usually achieved in three pulls.
1
Remove excess clay from the lid and refine the lid’s flange with a steel rib.
Trim the exterior wall of the leather-hard jar using a ribbon trimming tool.
76
making a lidded jar
www.ceramicartsdaily.org | Copyright © 2013, Ceramic Publications Company | five great pottery wheel throwing techniques | 7
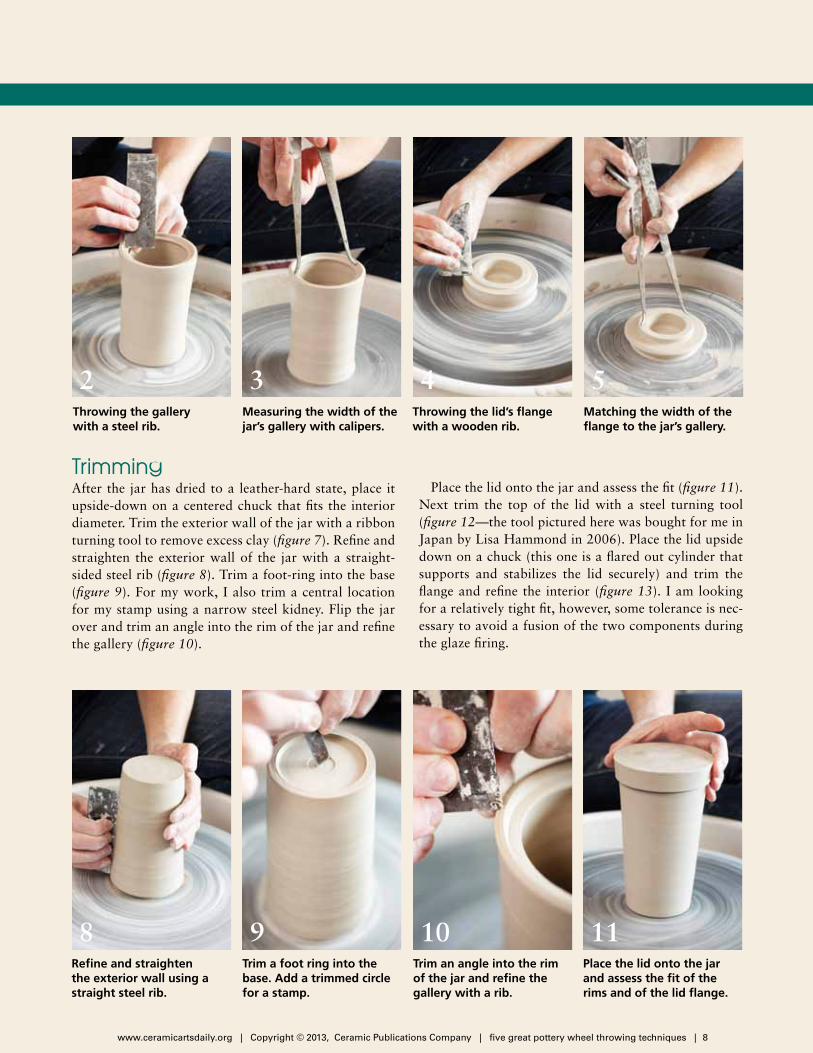
TrimmingAfter the jar has dried to a leather-hard state, place it upside-down on a centered chuck that fits the interior diameter. Trim the exterior wall of the jar with a ribbon turning tool to remove excess clay (figure 7). Refine and straighten the exterior wall of the jar with a straight-sided steel rib (figure 8). Trim a foot-ring into the base (figure 9). For my work, I also trim a central location for my stamp using a narrow steel kidney. Flip the jar over and trim an angle into the rim of the jar and refine the gallery (figure 10).
Place the lid onto the jar and assess the fit (figure 11). Next trim the top of the lid with a steel turning tool (figure 12 —the tool pictured here was bought for me in Japan by Lisa Hammond in 2006). Place the lid upside down on a chuck (this one is a flared out cylinder that supports and stabilizes the lid securely) and trim the flange and refine the interior (figure 13). I am looking for a relatively tight fit, however, some tolerance is nec-essary to avoid a fusion of the two components during the glaze firing.
Throwing the lid’s flange with a wooden rib.
4Matching the width of the flange to the jar’s gallery.
5
Refine and straighten the exterior wall using a straight steel rib.
8Trim a foot ring into the base. Add a trimmed circle for a stamp.
9Trim an angle into the rim of the jar and refine the gallery with a rib.
10Place the lid onto the jar and assess the fit of the rims and of the lid flange.
11
Throwing the gallery with a steel rib.
2Measuring the width of the jar’s gallery with calipers.
3
www.ceramicartsdaily.org | Copyright © 2013, Ceramic Publications Company | five great pottery wheel throwing techniques | 8

to brace the interior of the base to ensure the clay does not crack when I press down into the clay with the stamp.
Lastly, place the lid onto the jar, and clean up the exterior surface with a wet sponge. The lidded jar is now complete and ready to dry slowly over the course of a week.
Trim excess clay from the top of the lid with a steel turning/trimming tool.
12Using a flared chuck for support, trim the lid flange and refine the interior.
13Align the lid and jar, trim-ming the exterior walls using a steel kidney.
14Stamping my B (a metal let-terpress) onto the trimmed circle on the base.
15
Align the lid and jar, this time placing the jar upside down onto the lid, supported by the chuck. Trim the exterior walls using a steel rib (figure 14). It is important that the exterior profile, spanning the jar and the lid, is continuous. The last step for me is stamping my B (a metal letterpress) onto the central location (figure 15). A flat-ended rolling pin is used
9www.ceramicartsdaily.org | Copyright © 2013, Ceramic Publications Company | five great pottery wheel throwing techniques |

www.ceramicartsdaily.org | Copyright © 2013, Ceramic Publications Company | five great pottery wheel throwing techniques | 10
by Lyla Goldstein
and saucers. Layering the pieces with colorful slips and glaze adds depth to the surface.
Throwing the CupMy cups start as small low bowls with a tall foot. Begin with a 1¼–1½-pound ball of wedged clay. Place a bat on the wheel head and center the ball of clay to the approxi-mate width of the desired cup form. With your middle and index finger, open the ball (figure 1) and establish the interior floor of the cup. Be sure to leave enough thick-ness in the floor to trim a ¼–1/8-inch foot. Define the in-terior curve using a small rib and compress the floor as you move from the center toward the walls. Use one hand on the interior and one on the exterior and push fingers
Throwing a Cup and Saucer on the Potters
WheelThe act of drinking from a cup with a saucer is a differ-ent experience than drinking from a cup alone. It can be slower and more contemplative. The saucer enhances the significance of the cup by elevating it off the table and giving it a place to return to. My cup and saucer forms reference cups and saucers that became popular in 17th and 18th century Europe. I enjoy making these pots that can function independently, and come together to form a relationship.
My pieces also contain an ongoing investigation of dec-oration. Through the use of color and line, the cup is unit-ed to the saucer through shared decorative patterns that convey a sense of movement. I incise drawings of plants and flowers through brushwork on the outside of my cups
Cup and Saucer, 5 in. (13 cm) in height, wheel-thrown earthen-ware, slip, glaze, fired to cone 1 electric.

www.ceramicartsdaily.org | Copyright © 2013, Ceramic Publications Company | five great pottery wheel throwing techniques | 11
towards one another to pull up the walls (figure 2). Com-press and steady the lip in between each pull (figure 3).
When the walls are the appropriate thickness and height, use a stiff rib against the interior floor and wall to add volume to the inside. Take a measurement of the untrimmed foot with a pair of calipers. Push the calipers in slightly smaller to gauge the width of the cup’s trimmed foot. Hold a wire tool taut between two hands to cut the cup off the bat.
Throwing the SaucerFor the saucer use another 1¼–1½-pound ball of wedged clay. Again using a bat, center the ball of clay, keeping it slightly smaller than that of your desired saucer form. Open the ball up by pushing down in the middle and pulling clay from the bottom exterior up and outwards. Form a low sloping curve. Pull again until you have formed a small plate with a good thickness in the floor to trim a foot. Reference the measurement from the cali-
pers to gauge the diameter of the space where your cup will sit. To open this seat, use your pointer and middle finger starting in the center and pull the clay towards yourself until you’ve reached the measured size. Use a rubber rib to smooth this seat to a flat horizon. The seat should have a similar depth to the height of your cup’s trimmed foot. Rib the surface of the plate into a low curve (figure 4). Hold a small piece of chamois or thin plastic bag and, while the wheel is in motion, cup the lip of the saucer to compress the lip (figure 5). Use your wire tool to cut the saucer off of the bat.
TrimmingWhen the cup and saucer have dried to a leather-hard state and the rims are no longer tacky, they’re ready to trim. Turn the cup upside down and tap the side of the cup or use your pointer finger to put the cup on center. Secure the cup in place with three coils of soft clay and use a trimming tool to remove clay from the outside of
Open the ball of clay with your fingertips.
1
Compress the lip using your index finger.
3
Pull up the walls to gain some height.
2
Use a stiff rib to define the surface.
4

www.ceramicartsdaily.org | Copyright © 2013, Ceramic Publications Company | five great pottery wheel throwing techniques | 12
the cup (figure 6). Start at the top and move down along-side the cup towards the wheel head. Change the angle of the tool to come inwards and take off clay between the bottom of the curve and the beginning of the foot. After you have trimmed the outside of the cup, move to the inside of the foot ring. Trim away a line that marks your outermost point. Hold your trimming tool horizontal and take away clay from the center to your established line. Repeat this trimming procedure with the saucer.
Pulling a HandleWedge or roll a small ball of soft clay into a carrot shape with two flat sides. Hold the thick end of the carrot in one hand and with your other hand, put your index fin-ger and thumb together creating an almond or eye shape. Wet this hand and pull on the carrot form, keeping your hands in this position. You will form a piece that serves as a skeleton of your handle. Cut the thick top end of the form across and pat flat with one finger. Hold the han-
Compress the lip using a piece of plastic or chamois.
5
Pull a handle off the cup.
7Finished cup and saucer, prior to decorating.
8
Trim away excess clay to define the foot ring.
6
dle skeleton to the cup and decide the two spots where you would like the handle to attach. Use a needle tool to mark these areas. With a scoring tool, score and slip your marks. Score and slip the flat part of the handle. Push the handle onto the cup, supporting with one hand on the interior. Wiggle in place to secure the connection. Use your index finger to smear down the clay from the handle along the seam.
When the two are connected, you may begin pulling the handle off the cup (figure 7). Hold the cup, handle facing down in one hand. Get your other hand wet and begin pulling the handle gently while orienting your hands in the eye or almond shape. After a few pulls, the handle will move fluidly. You can orient your fingers in different posi-tions to create a flat handle with tapered edges. When the handle reaches the desired length, cut a clean edge with a knife. Gently but firmly secure the bottom of the handle in place. Place the finished cup onto the saucer to check fit, scale, and proportions (figure 8).

www.ceramicartsdaily.org | Copyright © 2013, Ceramic Publications Company | five great pottery wheel throwing techniques | 13
Throwing large pieces (generally more than 10 pounds (4 kg)) is an exciting challenge for any potter; however, many people of smaller stature hesitate to muscle out big pieces. It feels like an emotional, as well as a physical, chal-lenge. I felt the same way until learning how to produce large serving platters in an effective way at a tableware studio where I worked as an apprentice. Following their instructions, and some techniques from my own experi-ence, I found that throwing large flatware, such as plates, platters, and shallow bowls, demands less physical strength and promises a higher success rate compared to making tall shapes because you don’t have to lift a high wall of clay on the wheel.
4 Tips to SuccessTo reduce the physical work and hassle, there are four things you can do when getting ready to throw a large platter. 1 Make sure that the clay you’re using is soft. You don’t
need the clay to be firmer like you would for throwing a tall form, and it’s less of a burden on your wrists while expanding the clay if it’s soft. When using a fresh bag of commercially prepared clay that’s too big to wedge, slam the bag on the floor a dozen times from different angles to condition the clay.
2 When you place the clay on the wheel, make sure to lay it on its side in relation to the spiral created from wedging (figure 1). You will want to make the clay into more of a circular mound, but the illustration shows the orientation of the spiral.
3 The larger the plate, the greater the chance of an S crack appearing. Allow freshly wedged clay to rest for at least a few weeks be-fore using it to create big platters.
4 Check the inside diameter of your kiln. You can throw a plate or platter up to the exact size of the kiln and, as it dries, it shrinks and then fits inside.
Throwing ProcessTo make the wide platter shown here, I used 25 pounds of clay and a 24-inch-diameter
bat. Place a bat on the wheel head then wet the surface. Place a circle cut out from a shower curtain on top of the wheel head. Make sure the curtain fits tightly and there are no trapped air bubbles (figure 2). The shower curtain layer removes the need for using a wire tool to separate the platter from the bat, al-lowing the clay to release more easily when it’s flipped over and ready to trim.
Place the clay on the bat and start beating it down to a mound shape while slowly turning the wheel. Use dry hands (figure 3) or a wooden paddle (figure 4) and apply even pressure.
Flatten the mound to create a cake shape about 3 inches high. If you want to have a high rim for a bowl shape, keep the mound about 4–5 inches high. The diameter of the cake shape will be the size of the foot ring of the piece (figure 5).
Using a wet sponge and wet hands, open the form. Leave about 1 inch of clay between your
Tools 2 large smooth bats A smooth shower curtain
cut to the shape and size of your bat
Sponge Ribs 2–3-inch-thick stiff foam Wooden paddle (optional)
Yoko Sekino-Bové may not be brawny, but she’s definitely brainy. She developed techniques to make larger pieces while working as an apprentice at a tableware studio.
by Yoko Sekino-Bové
An Easy Pottery Technique for Making Big Platters

www.ceramicartsdaily.org | Copyright © 2013, Ceramic Publications Company | five great pottery wheel throwing techniques | 14
fingers and the bat. Once the center hole is created, pull out toward you while also pressing down lightly with both hands to create a flat bottom (figure 6). While you expand and com-press the bottom, move your hands from the center to the rim, then from the rim to the center several times. This throwing back motion can redistribute the clay and make it even (figure 7). It takes several passes to fully open up the form. Finally, use a rib to smooth and compress the flat surface.
Once the bottom is open and compressed, start forming the wall. Pull up, compress the top, then move your fingers
Place the ball of clay onto the bat and pound it down into a mound with your hands while the wheel spins.
Finish the process by pounding the clay with your hands again until you get to the diameter you want.
Dampen a large bat and smooth the cutout shower cur-tain on top of the bat.
As the wheel spins, use a wooden paddle to further compress and flatten the mound until it’s between 3–5 inches tall.
Wet your hands and hold a wet sponge in your dominant hand. Press down with both hands to open the form.
Place the clay on the wheel so that the spiral pattern from wedging or from pugging the clay is not facing up.
1 2
3 4
5 6
back down the vertical wall, compressing and essentially pull-ing down to keep it even. Keep the wall straight (figure 8). Leave enough clay on the rim, which will support the struc-ture by tension.
Using a very wet sponge, slowly open the rim (figure 9). When you flare the wall out, start from the rim and move your hands down the wall toward the center to keep the de-sired angle and prevent collapsing. When deciding on the final angle, factor in that the rim will move upward as it dries. The opening angle will be 10 to 20 degrees steeper when dry.
Once the form is thrown, leave it uncovered for a day or two, depending on the humidity. In drier regions it may be necessary to cover the rim with a ring of plastic to keep it from drying too quickly.
Phot
os: J
im B
ové.

www.ceramicartsdaily.org | Copyright © 2013, Ceramic Publications Company | five great pottery wheel throwing techniques | 15
Flatten ridges in the bottom of the platter by pressing down as you move your hands from the center to the edge and back again, from the edge to the center.
Using a very wet sponge, slowly open the rim. As you angle the wall out, work from the rim down to the center.
Pull the wall straight up using your index finger on the inside and a sponge and the knuckles of your other hand on the outside. Compress the rim after the pull.
Place a foam sheet onto the center of the plate for sup-port while flipping it over.
Peel the shower curtain sheet off of the platter.
7
9
8
12
Rest one edge of the bat on a table or your wheel head as a pivot point, hold the bats tightly, then flip them over.
11
10
TrimmingTo trim the platter, you’ll need to flip it over. If it’s a low, wide form, trying to lift it off of the bat directly and flip it would cause extreme distortion, so sandwiching the piece between two bats works better. Tip: You may need another person to help flip the big platter onto the second bat to pre-pare for trimming. It’s better to ask someone to help you, rather than trying to do it alone and ruining the platter.
Place a foam sheet on the center of the platter for support while flipping it over. The foam should be taller than your platter rim in order to support it. Cover it with a second bat that’s larger than the diameter of the platter (figure 10).
Use a flat surface to help with flipping. Create a pivot point by having one edge of the bat remain in contact with the table. Hold the bats together tightly to prevent slipping, lift one side up and flip the bat sandwich over as quickly as pos-sible, maintaining contact with the pivot point to help steady the process and take off some of the weight (figure 11). This works better than trying to flip it in the air. Peel the shower curtain sheet off (figure 12).
Center the platter on the bat. Its own weight keeps it secured to the bat, so you don’t need to place clay coils around the edge.
Trim the outside of the foot ring first to define the platter’s silhouette. The foot ring itself should be almost as wide as

www.ceramicartsdaily.org | Copyright © 2013, Ceramic Publications Company | five great pottery wheel throwing techniques | 16
the rim, to allow for support. Sharp tools can reduce both the physical burden on your hands and the trimming time signifi-cantly. A center ring prevents potential sagging of the center part, so define that area, then trim away the excess clay be-tween the two rings. The amount you trim away depends on the thickness of the bottom of your platter. For this platter, which started with a bottom thickness of 1 inch, I trim away about 2⁄3 of an inch of clay inside of each foot ring, leaving a bottom thickness of just over 1⁄3 of an inch. Make sure the in-ner ring(s) are not taller than the outer ring by checking with a straight edge (figure 13 and 14).
For hanging, carve a deep groove into the outside of the foot ring (figure 15). This is less stressful to the foot ring than puncturing holes. After firing, use a loop of picture hanging wire placed in this groove to hang it.
Flip the platter right-side-up using two bats and the sand-wich method again and check the weight and appearance of the foot ring. Before the platter reaches the bone-dry stage, flip the platter occasionally to let it dry out evenly and to pre-vent warpage. Always move the platter by picking it up with the bat while it dries. Don’t pick up the platter by the rim; it may cause warpage or cracks (figure 16).
Firing tipsn Always place a big platter in the center of the kiln for even
heat distribution. The foot of the platter should be com-pletely supported on a level, smooth shelf, otherwise, crack-
ing and warping can occur. Don’t place the platter so the base spans two shelves. It may help to fire the platter on a thin layer of fine grog or on a waster slab made out of the same clay body to allow for lateral shrinkage during the firing. To prevent the rim from cooling off faster than the center part, which can lead to cracking as the rim contracts more quickly than the rest of the platter, evenly surround the rim with kiln posts. Alternately, when firing low, wide work, make sure there is adequate airspace between the rim of the platter and the shelf above it. Allowing air to flow freely helps to minimize the temperature difference between the middle of the shelf and the outer edge.
n Do not place objects on the platter during a bisque firing. This can cause it to warp or crack.
n Most of the center cracks happen during the cooling pro-cess, not in the heating process. It will help big platters survive the thermal shock if you can slow down the kiln’s cooling process, either by ensuring the kiln is fully load-ed, or by including a down-firing ramp schedule in your firing program.
n The weight sometimes makes a big platter stick to the kiln shelf during the glaze firing. Make sure the kiln shelf is covered with kiln wash, and apply a thin layer of alu-mina hydrate solution to the unglazed foot ring.
Yoko Sekino-Bové is an artist and instructor living in Washing-ton, Pennsylvania. To see more of her work, visit her website http://yokosekinobove.com.
Trim the outside of the foot ring, mark the interior sup-port ring, then trim away the clay between the two rings.
If you plan to hang the plate on the wall, carve a deep groove into the outside of the foot ring so you can wrap picture hanging wire around the foot after it’s fired.
Use a ruler or a level to check that the second foot ring is not taller than the outer ring.
Carefully flip the plate back onto a clean, dry bat, and always transport it by carrying it as shown prior to firing to avoid warpage and cracking.
13
15
14
16
www.ceramicartsdaily.org | Copyright © 2013, Ceramic Publications Company | five great pottery wheel throwing techniques | 17
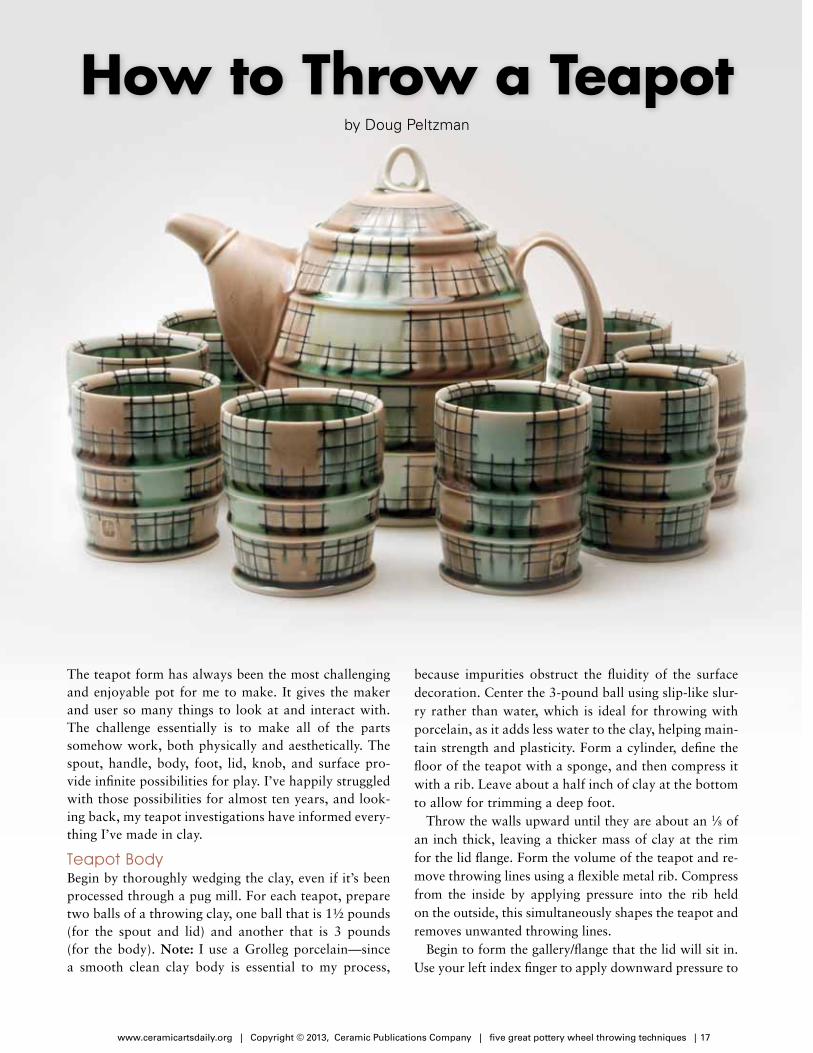
How to Throw a Teapotby Doug Peltzman
The teapot form has always been the most challenging and enjoyable pot for me to make. It gives the maker and user so many things to look at and interact with. The challenge essentially is to make all of the parts somehow work, both physically and aesthetically. The spout, handle, body, foot, lid, knob, and surface pro-vide infinite possibilities for play. I’ve happily struggled with those possibilities for almost ten years, and look-ing back, my teapot investigations have informed every-thing I’ve made in clay.
Teapot Body Begin by thoroughly wedging the clay, even if it’s been processed through a pug mill. For each teapot, prepare two balls of a throwing clay, one ball that is 1½ pounds (for the spout and lid) and another that is 3 pounds (for the body). Note: I use a Grolleg porcelain—since a smooth clean clay body is essential to my process,
because impurities obstruct the fluidity of the surface decoration. Center the 3-pound ball using slip-like slur-ry rather than water, which is ideal for throwing with porcelain, as it adds less water to the clay, helping main-tain strength and plasticity. Form a cylinder, define the floor of the teapot with a sponge, and then compress it with a rib. Leave about a half inch of clay at the bottom to allow for trimming a deep foot.
Throw the walls upward until they are about an 1⁄8 of an inch thick, leaving a thicker mass of clay at the rim for the lid flange. Form the volume of the teapot and re-move throwing lines using a flexible metal rib. Compress from the inside by applying pressure into the rib held on the outside, this simultaneously shapes the teapot and removes unwanted throwing lines.
Begin to form the gallery/flange that the lid will sit in. Use your left index finger to apply downward pressure to

www.ceramicartsdaily.org | Copyright © 2013, Ceramic Publications Company | five great pottery wheel throwing techniques | 18
Throw and form the body. Leave a thick rim to create the flange for the lid.
Start the spout by throwing a 3–4 inch collared, bottomless cylinder off the hump.
1
4
Using a modified rib, create horizon-tal decorative rings.
Apply decorative rings, and add a kink to the spout by lightly touching the tip.
2
5
Using another modified rib, remove any throwing marks. Clean up the rim and foot.
Place the teapot body into a chuck with pieces of cut foam to cushion the pot.
3
6
the inner half of the rim area, and your left middle finger to provide resistance, hence squeezing out the flange (figure 1).
Next, add decorative rings to the pot. This is a good time to decide how you want to break up the form; in this case it will be three rings. I use a modified rib with a half circle ground out, and apply equal pressure from the inside and the outside to create horizontal rings (figure 2). Using another custom-shaped metal rib, remove marks made from applying the rings and clean up the rim and foot area (figure 3).
Use the tip of a modified butter knife to refine the gallery, which creates a clean rounded space for the lid to sit into. Then use a small piece of plastic or chamois and a cosmetic sponge to compress and clean up the flange and the foot.
Lastly, take a measurement of the inside of the flange with calipers. Cut the pot off the wheel, and allow the body to dry evenly until it’s ready for trimming.
Spout and LidThrow both the lid and the spout off the hump from the same 1½ pound ball of clay (figure 4). Start the spout by throwing a 3–4 inch collared cylinder about an 1⁄8 of an inch thick. Swell out the bottom and slowly collar into a cone shape. Allow enough space to get a finger in the spout. Once formed, repeat the steps for making the rings on the body. After the rings are applied, bend the tip by inserting a wooden tool that is small-er than a finger into the spout and pulling gently downward. Lightly touch the tip of the spout so it holds its form when pressure is applied (figure 5). Cut the spout off the hump and set aside to stiffen up.
With the remaining clay, make the lid. Throw the lid upside down in the shape of a small dish. Use your calipers to mea-sure the lid so it conforms to the flange on the body. Consider the profile of the teapot body, and how it transitions with the profile of the lid.

www.ceramicartsdaily.org | Copyright © 2013, Ceramic Publications Company | five great pottery wheel throwing techniques | 19
Attach the spout to the teapot body and secure the join with a soft coil of clay.
9
Trim the lid and apply a handle or knob. Use clay to fill in where the handle attaches to the lid.
7Use a drill bit to manually make holes in the area where the spout will cover. Score and slip the two parts before joining.
8
While waiting for the thrown parts to stiffen, pull the handles for the lid and body, and pull a few extras to get a desired fit. Bend the handle for the lid into a circle shape. Allow these to stiffen evenly with the rest of the parts.
TrimmingPlace the teapot body into a chuck centered on a foam bat, and use additional pieces of cut foam to center and cush-ion the pot upside down in the chuck (figure 6). This setup allows the piece to be trimmed without having to fasten it to the bat. Once fully centered, trim out the foot and shape the outside of the pot until all of the excess clay has been removed and the body is consistently about an eighth of an inch thick.
Next, trim the lid on the foam bat, applying pressure so it doesn’t move. Follow the inside shape and trim a ring at the top, so you can later attach the knob. Check and make sure the lid fits snuggly, it’s better to be a little tight then loose, you can trim it to fit as needed.
ConstructionScore and slip the handle to the lid—use a small piece of clay to fill in the circle where the handle attaches to create a fluid connection (figure 7).
Next, cut the spout at an angle to fit the body, I use a knife and a Surform rasp to get the fit just right. Make sure the tip of the spout is close to the height of the body so the teapot can be fully filled with tea. Place the spout on the body and outline its placement. Use a drill bit to manually drill holes in the body to allow for flow and tea infusion. Score, slip, and attach the spout to the teapot body (figure 8). Add a small coil to smooth the transition from the spout to the body and to secure the join (figure 9).
Next, determine the position of the handle, and outline its placement. Prepare the pulled handle prior to attachment by adding and smoothing coils to the top and bottom. This adds mass to the connection areas and allows for a tapered ergonomic handle. Similar to the spout, add a coil or two to define the negative space and create a smooth transition be-tween the two parts. With a rubber tipped tool and cosmetic sponge, clean up connections and blemishes made during construction.
www.ceramicartsdaily.org | Copyright © 2013, Ceramic Publications Company | five great pottery wheel throwing techniques | 20
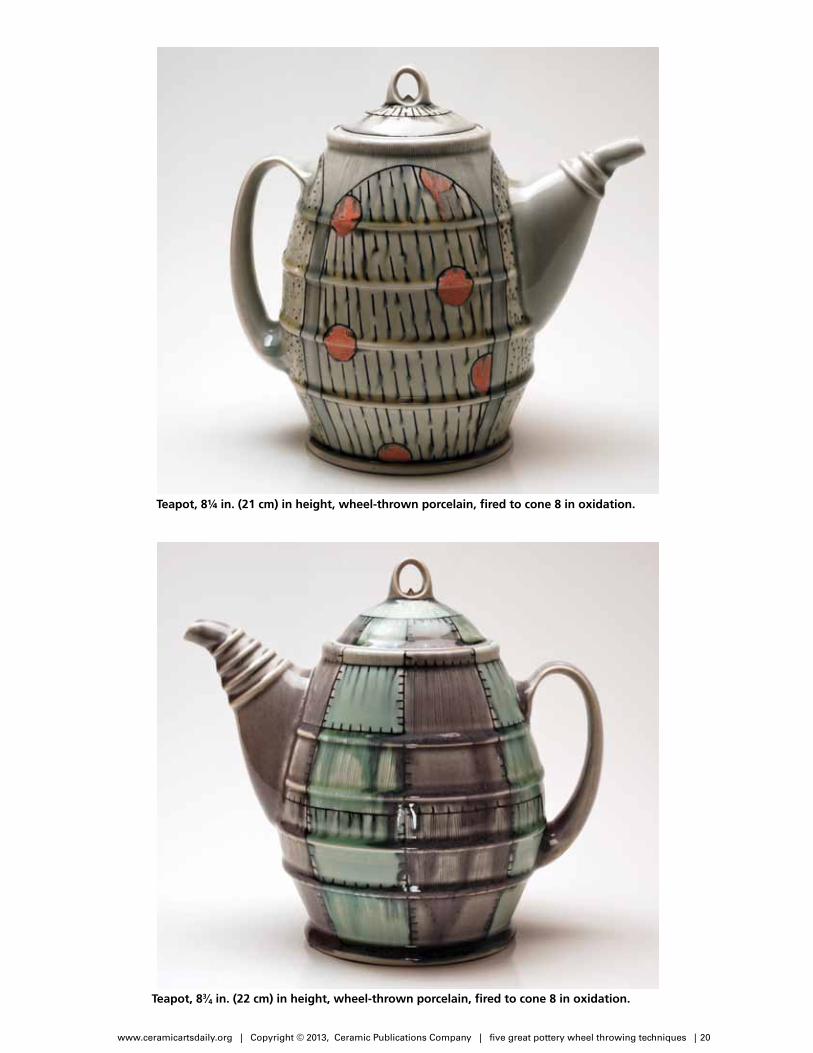
Teapot, 8¼ in. (21 cm) in height, wheel-thrown porcelain, fired to cone 8 in oxidation.
Teapot, 83⁄4 in. (22 cm) in height, wheel-thrown porcelain, fired to cone 8 in oxidation.
www.ceramicartsdaily.org | Copyright © 2013, Ceramic Publications Company | five great pottery wheel throwing techniques | 21
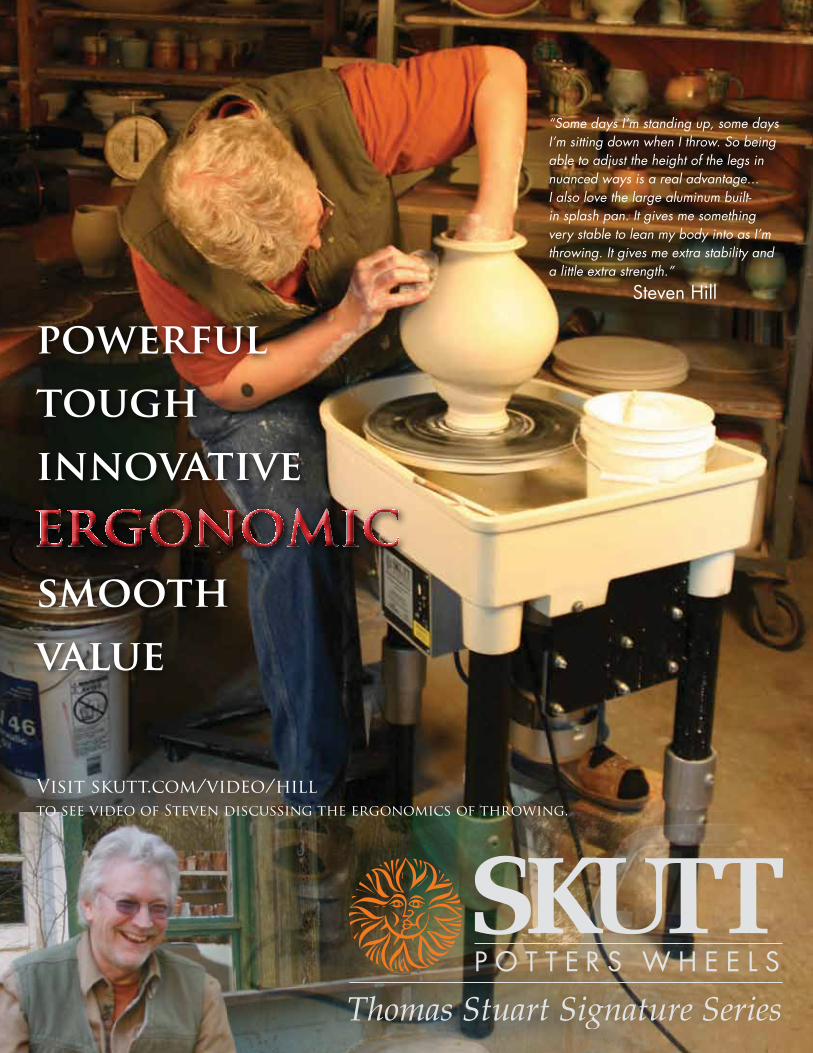
powerfultoughinnovative
smoothvalue
ergonomic
to see video of Steven discussing the ergonomics of throwing.
“Some days I’m standing up, some days I’m sitting down when I throw. So being able to adjust the height of the legs in nuanced ways is a real advantage... I also love the large aluminum built-in splash pan. It gives me something very stable to lean my body into as I’m throwing. It gives me extra stability and a little extra strength.”
Steven Hill
Visit skutt.com/video/hill