The Wiltshire School of Beauty and Holistic Therapy · School of Beauty and Holistic Therapy...
53
+ The Wiltshire School of Beauty and Holistic Therapy Diploma in Nail Enhancements Practitioner’s Training Manual W: www.wsbht.co.uk E: [email protected] T: 01793 73 77 33 M: 07767 79 44 22
Transcript of The Wiltshire School of Beauty and Holistic Therapy · School of Beauty and Holistic Therapy...

+
The Wiltshire School of
Beauty and Holistic Therapy
Diploma in Nail Enhancements
Practitioner’s Training Manual
W: www.wsbht.co.uk E: [email protected]
T: 01793 73 77 33 M: 07767 79 44 22

The Wiltshire School of Beauty and Holistic Therapy
Diploma in Nail Enhancements Training Manual © 2
CONTENTS 1. Course Details Page 3 2. Introduction .. 4 3. Hygiene, Health and Safety .. 5 4. Sterilising Equipment .. 9 5. Professional Ethics .. 11 6. Anatomy and Physiology .. 14
The Skin Bones Muscles The Circulatory System Nail Structure Nail Growth Nail Shapes
7. Client Consultation .. 25 8. Contra-Indications .. 30 9. Treatable Non-Medical Conditions .. 34 10. Contra-Actions .. 35 11. After Care .. 36 12. Storage and Insurance .. 37 13. Liquid & Powder .. 38 14. UV Gel .. 39 15. Nail Files .. 40 16. Nail Preparation .. 41 17. Step By Step Guide .. 42 18. Infill Procedure .. 46 19. Removal of Nail Enhancements .. 47 20. List of Required Items and Suppliers .. 48 21. What Happens Next .. 49 22. Contact Details and Recommended Reading .. 50 23. Self Assessment .. 51 24. Notes .. 52 25. Course Accreditation .. 53
Course Objective To provide the Student with sufficient knowledge in all of the above aspects, as well as the practical skills required to apply a set of Nail Enhancements in a professional, safe and hygienic manner and in a commercially acceptable time.
WSHBT advise you to read this training manual thoroughly prior to attending the Course.

The Wiltshire School of Beauty and Holistic Therapy
Diploma in Nail Enhancements Training Manual © 3
1. COURSE DETAILS You will learn how to:- Prepare the Treatment Area Prepare the Client for Treatment Carry out a Client Consultation File and Shape the Nails Maintain Cuticles Apply Nail Enhancements You will also study:- Related Hygiene, Health and Safety Sterilising Equipment Anatomy and Physiology Client Consultation Contra-Indications Non-Medical Conditions Contra-Actions Aftercare You will attend up to a 7.5 hour training session to study the theory and practical elements required to apply a set of Nail Enhancements.
You will then be required to do some home study and practice the treatments until you are confident in providing the treatment to a high standard, in a commercially acceptable time. You will then return to the School for a further 3 hours to discuss your practical work, File of Evidence and carry out a Practical Assessment. Once you have successfully completed all of the above, you will receive The Wiltshire School of Beauty and Holistic Therapy Diploma in Nail Enhancements.
Good luck and enjoy!

The Wiltshire School of Beauty and Holistic Therapy
Diploma in Nail Enhancements Training Manual © 4
2. INTRODUCTION
What are Nail Enhancements? Beauty is not just about the hair and face, but also the nails and other parts of the body. There are many women who have a problem with growing their nails to a fashionable length due to various reasons. This may include brittle nails, working conditions, lifestyle, or inability to overcome their habit of biting their nails. Whatever the reason, long nails remain an envy for many. However, to help them overcome this, and to enjoy the beauty of long nails, Nail Technicians have been able to provide the Client with the beautiful nails their desire. A Nail Enhancement is basically an artificial nail that is fixed on top of the natural nail which is then overlaid with a choice of products, as listed below. As the Natural Nail is constantly growing, the Nail Enhancement will then need to be maintained on a fortnightly basis. There are varied Nail Enhancement options:- Liquid & Powder (otherwise referred to as Acrylic) UV Gel Fibreglass/Silk Of these, the most natural and durable option is Liquid & Powder.

The Wiltshire School of Beauty and Holistic Therapy
Diploma in Nail Enhancements Training Manual © 5
3. HYGIENE, HEALTH & SAFETY
Maintaining a high standard of hygiene is essential. Not only from a health and safety perspective, but clients will not return if the salon, treatment area, or equipment are not clean. It is a legal requirement for employers to display an approved health and safety poster or to supply employees with an equivalent leaflet or information. It is recommended that you get copies of the following from your local council:
Health and Safety in the Workplace
Trade Descriptions Act
Data Protection Act
Sales of Goods Act
COSSH Regulations and Risk Assessment (Control of Substances Hazardous to Health)
Local Government (Miscellaneous Provisions) Act 1982
The Management of Health and Safety at Work Regulations 1992
The Workplace Regulations 1992
The Manual Handling Regulations 1992
The Personal Protective Equipment at Work Regulations 1992
The Health and Safety (Display Screen Equipment) Regulations 1992
The Electricity at Work Regulations 1992
Health and Safety (First Aid) Regulations 1981
RIDDOR – The Reporting of Injuries, Diseases & Dangerous Occurrences Regulations 1995
Fire Precautions (Workplace) Regulations 1997
Consumer Protection Act 1987.
All businesses are required by law to comply with the following health and safety acts, which are monitored and managed by The Health & Safety Executive (HSE) www.hse.gov.uk
Health and Safety at Work Act 1974 This protects your rights either as an employer or employee. The law states that the employer must provide a safe working environment, provide health and safety training for staff, produce a written policy of the company’s health and safety policy, and ensure that anyone on their premises is not exposed to any health or safety risks.

The Wiltshire School of Beauty and Holistic Therapy
Diploma in Nail Enhancements Training Manual © 6
Trade Descriptions Act 1972
This act is particularly relevant to therapists as it relates to how the goods or services are described in any kind of advertising or promotional material. The act makes it illegal to mislead the public in any way or make any false claims about what you are able to do.
Data Protection Act 1984 This is only relevant if you are storing information about your clients on a computer. If so, you must register your business on the Data Protection register.
Sale of Goods Act 1994 This act protects your clients’ rights by insisting that any goods or services sold must be of a satisfactory standard, be suitable for the purpose described, accurately described, and provided in a reasonable time and for a reasonable price.
Control of Substances Hazardous to Health Act (COSHH) 1989 This act provides guidance on dealing with chemical substances that could enter the body and cause skin irritations, allergies, burns etc.
Local Government (Miscellaneous Provisions) Act 1982 The local authority is responsible for registering and licensing any businesses where invasive treatments, ie body piercing, epilation, acupuncture take place on the premises. This is to ensure that all equipment is sterilised, only fully qualified therapists are carrying out the treatments, waste products (especially needles) are disposed of correctly.
The Management of Health & Safety at Work Regulations 1992 This act outlines the responsibilities of the owner/manager of the business to protect the well-being of all who visit the premises, to keep a record of all checks they have made and also of any first aid treatments carried out on their premises.
The Workplace Regulations 1992 These regulations govern the appearance of all parts of the workplace, not just the treatment rooms. This would include suitable toilet facilities which are kept clean and tidy with adequate soap, towels, hot & cold running water etc. Proper ventilation, the areas are well lit, the area is at a comfortable temperature, is clear of all waste material (keep the walk ways clear of clutter), has up to date fire fighting equipment, has drinking water available.
The Manual Handling Regulations 1992 This relates to the appropriate posture when lifting to reduce the risk of injury and to safely carry out manual tasks required in the workplace.

The Wiltshire School of Beauty and Holistic Therapy
Diploma in Nail Enhancements Training Manual © 7
The Personal Protective Equipment at Work Regulations 1992 This act requires you to provide the correct safety/protective equipment to carry out a particular task.
The Health & Safety (Display Screen Equipment) Regulations 1992
These regulations are relevant to anyone using a computer and require you to get regular eye tests, take regular breaks, and use the correct height adjusted chair.
The Electricity at Work Regulations 1992 This governs the use of electrical equipment in the workplace and ensures that any equipment is checked at least once a year by a qualified electrician. Any faulty equipment is removed from service, and written records are kept should an inspector wish to see them.
Health and Safety (First Aid) Regulations 1981 No matter how small your business is there must be first aid treatment available should an injury take place.
RIDDOR – The Reporting of Injuries, Diseases & Dangerous Occurrences
Regulations 1995 This outlines the correct procedure to adopt if a workplace accident occurs. An accident book is a must.
Fire Precautions (Workplace) Regulations 1997 This ensures that the safety of all those present is considered and planned for should a fire take place.
Consumer Protection Act 1987 This is designed to look after your clients’ interests and protect them from any product deemed unsafe.
Reporting Accidents The reporting of all accidents and near misses should be recorded in the Accident Book, which should be kept with a first aid kit on the work premises. The following information should be recorded:
Full name and address of the person(s) involved in the accident.
Circumstances of the accident.
Date and time of the accident.
All details of what may have contributed to the accident.

The Wiltshire School of Beauty and Holistic Therapy
Diploma in Nail Enhancements Training Manual © 8
Salon/Treatment Area Hygiene
Clean the salon thoroughly, daily.
Clean the treatment area before and after every client.
Use clean fresh smelling towels for each client, (dirty linen must be laundered at a minimum of 60◦C).
Creams, lotion and sprays should be dispensed from purpose-specific pump or spray bottles where possible, otherwise use a clean disposable spatula to remove products from bottles/jars.
Replace all lids after removing products from the bottles/jars.
Sterilise all tools.
Empty bins and dispose of contents accordingly.
Check all the plugs and wires on electrical equipment and make sure they conform to British Standards, and are professionally checked annually.
Make sure all fire exits are clear and accessible.
Make sure your client’s personal belongings are safe.
Protect client’s clothing by using towels. The towels may also be used to preserve the client’s modesty during the treatment.
Read all labels and follow all manufacturer’s instructions.
Know the hazardous warning signs.
Store products safely and in accordance with safety data sheets.
Report any faulty equipment/goods to your supervisor or supplier.
Have a first aid kit that complies with the Health and Safety (First Aid) Regulations 1981.

The Wiltshire School of Beauty and Holistic Therapy
Diploma in Nail Enhancements Training Manual © 9
4. STERILISING EQUIPMENT Micro-organisms that may cause disease must be controlled through cleaning, disinfection or sterilisation. Sanitation
This greatly reduces the number of pathogenic bacteria. It is the lowest form of decontamination and is safe to use on the skin. This process will remove soil, dust, dirt and organic matter along with a large proportion of micro-organisms from an object. Sanitation/cleaning is essential before disinfection or sterilisation of instruments and equipment. This process can be carried out by applying sanitising sprays, soaps and gels directly onto the skin and equipment. Disinfection
This greatly reduces the pathogenic bacteria on work surfaces. This method is not suitable for the skin, hair or nails. Disinfection is used on floors, any work surfaces/station, walls and bowls etc. This process does not remove bacteria spores. Sterilisation
This process kills all living organisms; sterile, in this context, means free living disease-causing micro-organisms and their spores. This is a difficult process to maintain but should be carried out on all tools, especially if they have been in contact with blood. Several ways to sterilise the equipment:
UV light An enclosed steel cabinet that emits UV light when closed to kill off any bacteria
Autoclave This works in a similar way to a pressure cooker by heating the water under pressure to a temperature of 100°C, which kills all germs, and is one of the most efficient methods.
Barbicide This is a liquid used to soak instruments; ammonia can be used as the liquid within the barbicide.

The Wiltshire School of Beauty and Holistic Therapy
Diploma in Nail Enhancements Training Manual © 10
Methods of Hygiene and Sterilisation for Specific Tools
Trolley Always disinfect with surgical spirit at the end of the working day. Always cover with couch roll.
Nail File File-disinfectant spray.
Orange Stick Disposable or re-usable when covered with cotton wool, but not indefinitely.
Hoof Stick If plastic, chemical sterilisation. If wooden, see 'Orange stick'.
Cuticle Knife Any sterilisation method is fine.
Cuticle Nippers Any sterilisation method is fine.
Nail Clippers Any sterilisation method is fine.
Nail Brush Chemical sterilising, eg Barbicide.
Manicure Bowl Chemical and Ultraviolet methods. Disinfect between clients with surgical spirit.
Scissors Any sterilisation method is fine.

The Wiltshire School of Beauty and Holistic Therapy
Diploma in Nail Enhancements Training Manual © 11
5. PROFESSIONAL ETHICS & STANDARDS OF PRACTICE
A Therapist should:
maintain the highest standard of professional conduct.
provide services in an ethical and professional manner in relation to clientele, business associates, health care professionals and the public.
practice within the professional boundaries of the practitioners training.
ensure client comfort and safety.
protect client privacy.
respect client confidentiality.
maintain anonymity of the client when discussing the client’s case with other professionals, unless written consent is obtained.
have adequate professional insurance.
never claim to cure a condition.
never treat a client with a condition that is contra-indicated to the treatment.
keep all records of treatments complete and up to date.
explain the treatment and answer any questions and queries prior to carrying out the treatment on the client.
never treat a minor or disabled person without prior consent from a parent or carer.
treat all clients in a professional manner at all times regardless of their colour, sex or religion.
refer clients to other professionals/GP where required.

The Wiltshire School of Beauty and Holistic Therapy
Diploma in Nail Enhancements Training Manual © 12
Standards of Practice
The practice of good ethics is essential to the reputation of the field of beauty therapists and the welfare of the clients and practitioners of the therapies. The following is a statement of standards and ethics for therapists, including standards of ethical and proper behaviour.
A Therapist should:
conduct herself/himself in a professional, honest, and ethical manner.
promote professionalism.
establish goals with each client and evaluate the outcome at the end of each session.
promote the therapies within the community.
promote therapies with healthcare professionals and other practitioners.
truthfully and accurately represent their credentials, qualifications, education, experience, training and competence relevant to the practice.
maintain confidentiality of the client.
undertake continual professional development to enhance their skills.
A Therapist will:
take a full medical history on the client's first visit.
discuss and record any health problems, contra-indications, symptoms or diagnosis from a conventional medical practitioner.
use this information to decide whether treatment is suitable for the client.
explain the treatment to the client.
give a full and professional treatment.
give full and correct aftercare advice.
write up full details of the treatment on the client's record card.
on the client's next visit, discuss and record any changes that they may have noticed in their symptoms.
refer the client to their GP if necessary.

The Wiltshire School of Beauty and Holistic Therapy
Diploma in Nail Enhancements Training Manual © 13
Skills and Personal Qualities
A Therapist should:
be comfortable touching people.
be a good communicator, able to explain treatments to clients and ask appropriate questions.
have good listening skills.
be able to make clients feel relaxed and comfortable.
have empathy with clients.
be able to respect professional boundaries.
know when to advise clients to seek conventional medical advice.
keep accurate written records.
respect confidentiality.
have business skills if they are self-employed.

The Wiltshire School of Beauty and Holistic Therapy
Diploma in Nail Enhancements Training Manual © 14
6. RELATED ANATOMY & PHYSIOLOGY
THE SKIN
The Skin Structure
Skin makes up around 12% of an adult’s body weight. It’s very adaptable and able to mould into different shapes, covering bones and muscles to perform various functions of the body’s make up. The functions of skin (Shapes) are:
Sensation - Main sensory organ for temperature, pressure, touch and pain.
Heat Regulation - Regulates the body temperature by sweating to cool the body down when it overheats, and shivering when the body is cold.
Absorption – Some creams, essential oils and some medication can be absorbed through the skin.
Protection – Too much UV light may harm the skin, so the skin protects itself by producing a pigment, seen in a tan, called melanin. Bacteria and germs are prevented from entering the skin by a protective barrier called the Acid Mantle. This barrier also helps protect against moisture loss.
Excretion – Waste products and toxins are eliminated from the body through the sweat glands.
Secretion – Sebum and sweat are secreted onto the skin’s surface. The sebum keeps the skin lubricated and soft and the sweat combines with the sebum to form the acid mantle.
Vitamin D production - Absorption of UV rays from the sun helps formation of vitamin D, which the body needs for the formation of strong bones and good eyesight.
There are 3 major layers of the skin, the Epidermis, Dermis and the Subcutaneous.
The Epidermis Layer
The outermost layer of the skin is called the epidermis layer. There are no blood vessels in the epidermis but it’s the deepest layer and is supplied with lymph fluid. It is thickest in the palms and on the bottom of the feet. There are various layers of cells within the epidermis, the outermost of which is called the stratum corneum (or horny layer). The layers can be seen clearly in the diagram of the skin. The surface layer is composed of twenty-five to thirty sub-layers of flattened scale-like cells, which are continually being cast off by friction and replaced by the cells of the deeper epidermal layers.

The Wiltshire School of Beauty and Holistic Therapy
Diploma in Nail Enhancements Training Manual © 15
The surface layer is considered the real protective layer of the skin. The cells are commonly called keratinised cells because the living matter within the cell (termed protoplasm) is changed to a protein (keratin) which helps to give the skin its protective properties.
New skin cells are formed in the deepest layer within the epidermis. This area is called the stratum basale (or basal/germinative layer). The new cells will gradually move towards the outer layers of the skin as the stratum corneum is shed. The new cells gradually change in form as they move upward to the outer layers, becoming keratinized in the process.
Names of the Layers of the Epidermis
English Name Latin Name Horny Layer Stratum Corneum Clear Layer Stratum Lucidum Granular Layer Stratum Granulosum Prickle Cell Layer Stratum Spinosum Basal/Germinative Layer Stratum Basale

The Wiltshire School of Beauty and Holistic Therapy
Diploma in Nail Enhancements Training Manual © 16
The Dermis Layer
The dermis is a tough and elastic layer containing white fibrous tissue interlaced with yellow elastic fibres. Many structures are embedded in the dermis including:
blood vessels
lymphatic capillaries and vessels
sweat glands and their ducts
sebaceous glands
sensory nerve endings
the erector pili - involuntary muscles are sometimes activated in cold weather to give 'goose bumps’
hair follicles, hair bulbs and hair roots.
The Subcutaneous Layer
This is the deepest of the layers of skin and is located on the bottom of the skin diagram. It connects or binds the dermis above it to the underlying organs. The subcutaneous layer is mainly composed of loose fibrous connective tissue and fat (adipose) cells interlaced with blood vessels. The hypodermis (subcutaneous layer) is generally about 8% thicker in females than in males. The main functions of the hypodermis are insulation, storage of lipids, cushioning of the body and temperature regulation.
Diagram of the Skin

The Wiltshire School of Beauty and Holistic Therapy
Diploma in Nail Enhancements Training Manual © 17
BONES Bones of the Arm and Hand
The forearm is made up of two bones: the radius and ulna. The ulna is the larger of these two bones. The radius and ulna on the forearm form a hinge with the upper arm bone called the humerus and this enables the arm to flex and extend.
The wrist is made up of eight individual bones called the carpals and are named: trapezium, trapezoid, scaphoid, lunate, triquetral, pisiform, capitate and hamate.
The palm of the hand is made up of bones called the metacarpals and the finger bones are called the phalanges. The fingers are made up of three bones except for the thumb, which has two.

The Wiltshire School of Beauty and Holistic Therapy
Diploma in Nail Enhancements Training Manual © 18
MUSCLES Muscles of the Arm and Hand Many of the muscles in the forearm and hand are termed according to their action. They are grouped as flexors and extensors. The muscles flex, extend, supinate and pronate the hand and arm, and spread apart/close together the fingers. There are 12 muscles that allow movement in the forearm, hands and fingers, and there are bands of tendons which hold the muscles together at the wrist. Here are some definitions of the terminology:
Pronate - palm down
Supinate – palm up Abduction – to take away
Adduction - to bring together

The Wiltshire School of Beauty and Holistic Therapy
Diploma in Nail Enhancements Training Manual © 19
THE CIRCULATORY SYSTEM The circulatory system is the system that is involved with passing vital substances around the body in order for cells to survive. Blood is pumped by the heart; a fist-sized muscular structure, to every cell in the body via a complex network of vessels. These vessels consist of arteries, veins and capillaries and carry blood around the body delivering nutrients, oxygen, heat, hormones and removing carbon dioxide and waste. The heart consists of four chambers, ie a right and left atrium, and a right and left ventricle. It is separated by a septum, which prevents oxygenated and deoxygenated blood from meeting. Deoxygenated blood enters the right side of the heart and is pumped to the lungs where the deoxygenated blood is removed and replaced with oxygen. Here the richly oxygenated blood is returned to the heart in order for it to be pumped around the body.

The Wiltshire School of Beauty and Holistic Therapy
Diploma in Nail Enhancements Training Manual © 20
NAIL STRUCTURE The nail is made up from the following:
Nail Wall Folds of skin that overlap the sides of the nail. It holds the nail in place and protects the nail plate edges.
Matrix The only living reproducing part of the nail. It is situated directly below the cuticle. New cells form here and continually push upwards to produce the nail plate. It also contains blood vessels and nerves. Blood supply provides the cells with nourishment. If the matrix is damaged the nail will grow deformed.
Lunula
(Half-moon)
Meeting point for the matrix and nail bed. Pearly coloured and crescent shaped due to the cells being pushed closely together, the blood capillaries cannot be seen through the lunula because of this.
Nail Plate Visible nail that rests on the nail bed up to the free edge. This is made up from dead cells (that have been pushed up from the matrix) and are held together with a minimum amount of moisture. The nail is semi-transparent, allowing the colour of blood supply of the dermis to show through (pink colour).
Nail Bed Part of the nail that the nail plate rests on, also a continuation of the matrix. It is abundantly supplied with blood vessels and nerves, having numerous parallel ridges which dovetail exactly with the ridges on the under surface of the nail plate.
Free Edge This is an extension of the nail plate. It overlaps the hyponichium. This part of the nail can be filed and shaped.
Cuticle This is the overlapping epidermis surrounding the nail. It protects the matrix from invading bacterial and physical damage.
Eponychium Base of the nail.
Peronychium Sides of the nail.
Hyponichium The portion of the skin at the end of the finger which is underneath the free edge.
Nail Grooves
(or furrows)
Side of the nails upon which the nail moves, and acts as a guideline for the nail to follow.
Mantle This is the skin over the matrix that protects it.

The Wiltshire School of Beauty and Holistic Therapy
Diploma in Nail Enhancements Training Manual © 21
Diagrams of the Nail Structure

The Wiltshire School of Beauty and Holistic Therapy
Diploma in Nail Enhancements Training Manual © 22
NAIL GROWTH The Process of Nail Growth The nail plate is formed by the cells in the matrix reproducing. As the cells multiply they are pushed up before they die and therefore harden. This process is keratinisation. The nail plate grows at approximately 3mm per month for the fingernail and 1mm per month for the toenail. The matrix needs a good supply of oxygen and nutrients for the cells to reproduce. The growth of the nail can differ due to:
diet
illness
medication
age
time of the year (they grow quicker in the summer)
injury to the matrix or nail bed
neglect overall.
If cells in the matrix are damaged by illness or injury, the thickness of the nail plate can vary, such as having a ridge in the nail or overgrowth of the nail plate.
A healthy nail takes approximately six months to grow from matrix to free edge. It is known that nails grow faster in the summer than in the winter due to vitamin D production. A healthy nail should show:
no inflammation
a natural sheen
a supple unbroken cuticle
a pink glow from underneath the nail bed
no ridges or spots
an unbroken free edge.

The Wiltshire School of Beauty and Holistic Therapy
Diploma in Nail Enhancements Training Manual © 23
NAIL SHAPES There are many different nail shapes, and it is important to consider the shape of the nail. You must always discuss what nail shape is required before the treatment starts. Here are some common nail shapes:
Square This shape is most suitable to give strength to the nail. It suits longer fingers and narrow nails. Corners can be rounded slightly to counteract breakage. Highly fashionable at the present time.
Oval This shape can appear to lengthen the fingers. Recommended for shorter fingers and wider nails. Very feminine and flattering.
Round This shape is good for a larger hand. Good for clients who work in positions where nails should be short and neat, eg Nurses and Therapists.
Pointed This shape nail can be prone breaking quickly. Rather old fashioned.

The Wiltshire School of Beauty and Holistic Therapy
Diploma in Nail Enhancements Training Manual © 24
Problematic Natural Nail Shapes
Ski Jump or Spoon/Concave This is defined as a nail plate that curves up as it grows out from the free edge. To rectify this problem when performing enhancements on the nail, trim out the well of the tip to an absolute minimum, then checking the side views place the tip at a downward angle. Use a strong gel adhesive.
Hook or Claw/Convex This type of nail shape is defined as growing in from the free edge giving a claw like effect. To solve this problem trim the free edge leaving a small amount exposed. Then, use a sculpting form to create the correct angle of the upper arch. Do not use tips as this will emphasise the hook shape.
Severely Bitten Nails This shape is where the client has bitten nails down to the nail bed or beyond. The cuticles and sidewalls may also be torn and bitten. If the nails are able to be worked on, use a tip with a reinforced stress area and sidewalls. A saddle will need to be cut into the sidewalls so the tip fits over the skin. Use a strong gel adhesive.

The Wiltshire School of Beauty and Holistic Therapy
Diploma in Nail Enhancements Training Manual © 25
7. CLIENT CONSULTATION A consultation is a one-to-one talk with your client. Here you will find out very important and confidential information that will help you to advise and give clients the best treatment. Always introduce yourself to your client. The consultation is often carried out in the room in which you are working and should be carried out before the client gets undressed in case there is any reason that they cannot be treated. There are three skills required as part of the consultation:
1. Observation - what can you observe about the client? Are they nervous, extrovert, holding their body in such a way that might give indications for treatments, poor posture etc?
2. Verbal Questioning – gain the information required.
3. Physical Examination – what can you physically see and feel on the client? This third part is only carried out once you have assessed that, so far, the client is suitable for treatment.
Approximately 15 minutes should be allocated to carry out the initial consultation. Ideally you should be sitting face to face or next to your client to create an open atmosphere. Avoid barriers such as a couch or a table coming between you. Holistic treatments treat the individual as a whole, taking into consideration general well-being, ie health, emotional, physical and mental states. You need to explain carefully to the client why you are carrying out a consultation. Use open questions to tactfully encourage the client to give you information that you need rather than interrogating them and asking lots of direct and often personal questions. Use the record card as a prompt rather than a list to tick off.
Record Keeping Records must be maintained for a number of reasons:
They provide contact details in case you have to alter or cancel an appointment.
So that you can monitor the client’s progression.
To track any aftercare advice that you have given the client.
As a backup in case the client has an adverse reaction to a treatment.
Another therapist should be aware of what treatments and products the client has had.
The Wiltshire School of Beauty and Holistic Therapy
Diploma in Nail Enhancements Training Manual © 26
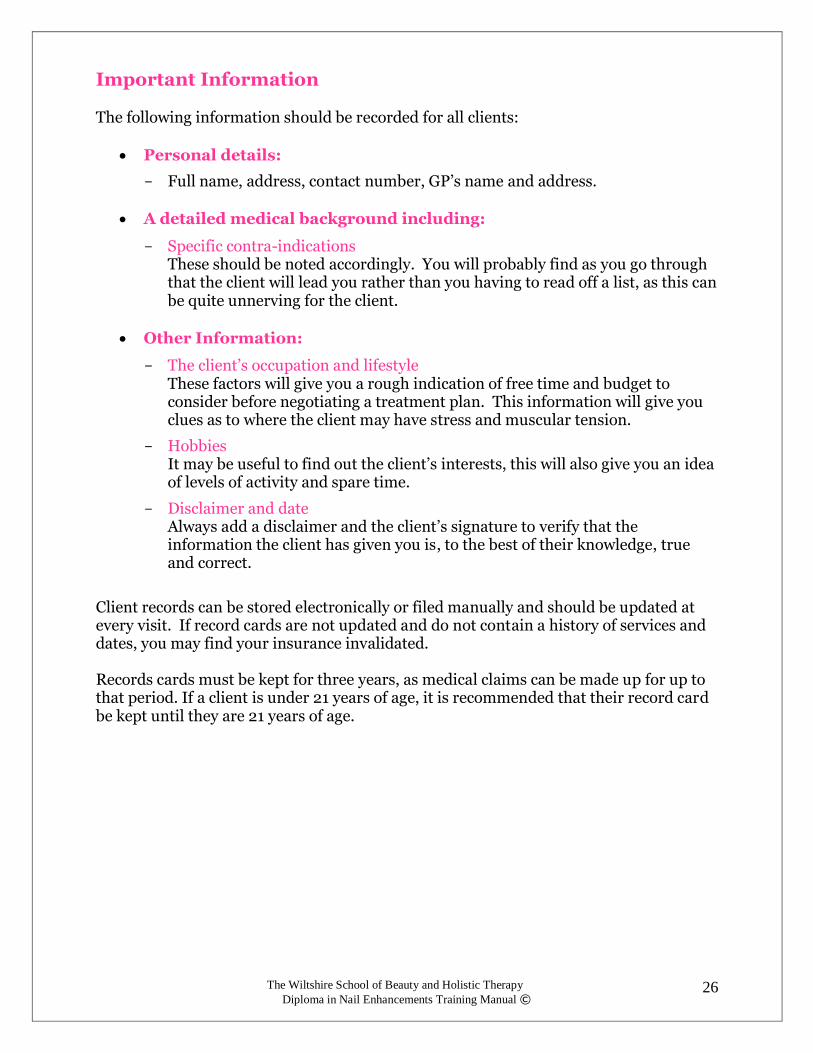
Important Information The following information should be recorded for all clients:
Personal details:
Full name, address, contact number, GP’s name and address.
A detailed medical background including:
Specific contra-indications These should be noted accordingly. You will probably find as you go through that the client will lead you rather than you having to read off a list, as this can be quite unnerving for the client.
Other Information:
The client’s occupation and lifestyle These factors will give you a rough indication of free time and budget to consider before negotiating a treatment plan. This information will give you clues as to where the client may have stress and muscular tension.
Hobbies It may be useful to find out the client’s interests, this will also give you an idea of levels of activity and spare time.
Disclaimer and date Always add a disclaimer and the client’s signature to verify that the information the client has given you is, to the best of their knowledge, true and correct.
Client records can be stored electronically or filed manually and should be updated at every visit. If record cards are not updated and do not contain a history of services and dates, you may find your insurance invalidated. Records cards must be kept for three years, as medical claims can be made up for up to that period. If a client is under 21 years of age, it is recommended that their record card be kept until they are 21 years of age.

The Wiltshire School of Beauty and Holistic Therapy
Diploma in Nail Enhancements Training Manual © 27
Client Confidentiality Client confidentiality must be protected at all times. If a salon holds computerised records, they must register with the Data Protection Register. If a salon only holds written records, this does not apply, but they must uphold the principles of the Data Protection Act and comply with the following:
All info information must be accurate and necessary to the service or treatment to be performed.
Individual client records must be available for the clients to view if requested.
All information must be stored securely by password protected computer file.
Any contra-indications and possible contra-actions must be identified and discussed prior to the service. In the case of medical referral, the practitioner should keep a copy of the GP’s letter with the client’s record card.
Always allow the client the opportunity to question and clarify any points before signing the record card.
On the following pages are examples of consultation forms which you can adapt to suit you.

The Wiltshire School of Beauty and Holistic Therapy
Diploma in Nail Enhancements Training Manual © 28
BBuuss.. NNaammee
Name: _______________________________________________________ Telephone Number: ___________________________________________ Date of first Treatment: _________________________________________
Treatment Date Treatment Date Treatment Date Treatment Date
BBuuss.. NNaammee
Name: _______________________________________________________ Telephone Number: ___________________________________________ Date of first Treatment: _________________________________________
Treatment Date Treatment Date Treatment Date Treatment Date

The Wiltshire School of Beauty and Holistic Therapy
Diploma in Nail Enhancements Training Manual © 29
Client Card Bus. NameBus. NameAre you currently takingany medication?
AntibioticsDiabeticAnti-CoagulantsOther – please describe:
_____________________________
Do you suffer from:Warts CutsAllergies MolesDermatitis Nail BruisingEczema SwellingRecent Sprain Recent OperationCuticle Inflammation Loss of Tactile Sensation
Please provide any further information related to your general health that would be useful for us to know:______________________________________________________________________
INDEMNITY: I confirm that the above information is true and knowing that you rely on this in the treatment you carry out, that you cannot accept responsibility for any injury suffered by me, attributable to my not giving full and true answers to the questions above. I understand that the Nails applied are not guaranteed against loss or breakages.
Signed _____________________________________________ Date _______________
Client Card Bus. NameBus. NameAre you currently takingany medication?
AntibioticsDiabeticAnti-CoagulantsOther – please describe:
_____________________________
Do you suffer from:Warts CutsAllergies MolesDermatitis Nail BruisingEczema SwellingRecent Sprain Recent OperationCuticle Inflammation Loss of Tactile Sensation
Please provide any further information related to your general health that would be useful for us to know:______________________________________________________________________INDEMNITY: I confirm that the above information is true and knowing that you rely on this in the treatment you carry out, that you cannot accept responsibility for any injury suffered by me, attributable to my not giving full and true answers to the questions above. I understand that the Nails applied are not guaranteed against loss or breakages.
Signed _____________________________________________ Date _______________
Client Card Bus. NameBus. NameAre you currently takingany medication?
AntibioticsDiabeticAnti-CoagulantsOther – please describe:
_____________________________
Do you suffer from:Warts CutsAllergies MolesDermatitis Nail BruisingEczema SwellingRecent Sprain Recent OperationCuticle Inflammation Loss of Tactile Sensation
Please provide any further information related to your general health that would be useful for us to know:______________________________________________________________________
INDEMNITY: I confirm that the above information is true and knowing that you rely on this in the treatment you carry out, that you cannot accept responsibility for any injury suffered by me, attributable to my not giving full and true answers to the questions above. I understand that the Nails applied are not guaranteed against loss or breakages.
Signed _____________________________________________ Date _______________
Client Card Bus. NameBus. NameAre you currently takingany medication?
AntibioticsDiabeticAnti-CoagulantsOther – please describe:
_____________________________
Do you suffer from:Warts CutsAllergies MolesDermatitis Nail BruisingEczema SwellingRecent Sprain Recent OperationCuticle Inflammation Loss of Tactile Sensation
Please provide any further information related to your general health that would be useful for us to know:______________________________________________________________________INDEMNITY: I confirm that the above information is true and knowing that you rely on this in the treatment you carry out, that you cannot accept responsibility for any injury suffered by me, attributable to my not giving full and true answers to the questions above. I understand that the Nails applied are not guaranteed against loss or breakages.
Signed _____________________________________________ Date _______________

The Wiltshire School of Beauty and Holistic Therapy
Diploma in Nail Enhancements Training Manual © 30
8. CONTRA-INDICATIONS
A contra-indication is the presence of a condition which may make the client unsuitable for a treatment. The treatment may not be able to take place, or it may need to be adapted.
When treating a client, if they show signs of any contra-indication, tactfully refer them to their GP for treatment/advice. Never tell your client what contra-indication they may have even if you are sure you know what it is. You may be wrong! If you are ever unsure about a contra-indication then do not treat the client, refer them to their GP. This way you are always protecting yourself and the client.
Be very careful when dealing with contra-indications. It is a controversial subject and you never want to leave yourself open for further implications. We also have to consider other clients, so always make sure that your place of work, implements, and you, are very clean to avoid cross infection.
Name Description Cause GP Approval Treatment
Paronychia
Red, inflamed and swollen skin. Can often weep.
Picking or biting of the skin around the nail, or pulling on a hang nail.
Yes.
Nail Enhancements
must not be applied to the
nail in question.
Onycholysis
(Nail Separation)
Painless separation of the nail plate from
the nail bed.
Trauma or poor health.
No, unless there is a risk of a
fungal infection.
Nail Enhancement must not be applied until
nail plate rebonded with
nail bed.
Pseudomona
Green mark that starts off small that can grow if left unattended.
Lifting of the product from the nail plate
or the nail plate
separating from the nail
bed.
No.
If the Pseudomona
occurs between the nail plate
and the product,
remove Nail Enhancement and reapply.

The Wiltshire School of Beauty and Holistic Therapy
Diploma in Nail Enhancements Training Manual © 31
Name Description Cause GP Approval Treatment
Fungal Infection
Debris under the nail plate which
normally appears white or
yellowish in colour.
Nail separation.
Yes.
Nail Enhancement must not be
applied and can be contagious!
Tinea Unguis
(Ringworm of the Nail)
Thickening and deformity of the
nail plate that eventually results in nail plate loss.
Long term fungal
infection that is very difficult
to treat.
Yes.
Nail Enhancements
must not be applied and can be contagious!
Habit Tic
Grooves and indentations often up the
centre of the nail plate.
Repeated picking of the cuticle, which
causes damage to the
matrix.
No.
Nail Enhancement
can be applied, but client should be
notified of the cause as they
are often unaware of their habit!
Contact Dermatitis
Inflamation of the cuticle and
the skin around. Skin can often
look very dry and flaky.
Allergic reaction.
No, if confident that it is a
reaction to the product.
Nail Enhancements
must be removed, but oil/cream the
skin before immersing in
Acetone.

The Wiltshire School of Beauty and Holistic Therapy
Diploma in Nail Enhancements Training Manual © 32
Name Description Cause GP Approval Treatment
Splinter Haemorrhage
Red/Black lines on the nail plate.
Trauma to the nail bed,
resulting in a bruise.
No.
Nail Enhancement can be applied or remain on
the nail.
Scabies
A common skin infection that causes short,
wavy, reddish or darkened lines on the skin’s surface, especially around
the wrists and inbetween the
fingers.
Tiny mites that burrow
into the skin’s surface and
lay their eggs.
Yes.
Nail Enhancements
must not applied as
contagious!
Loss of sensation. Unable to feel
pain or pressure.
Could be diabetes or
MS. Yes.
Could perform a treatment, but be very careful with cuticle work.
Scar Tissue, Bruising, Lumps, Bumps, Cuts or Swelling to the Hands.
Varied. Varied. No.
Nail Enhancements can be applied
if it is comfortable for the Client to be
worked on.
Melanonychia
(Nail Moles)
Vertical pigmented bands.
It could
signify a
malignant
melanoma or
lesion.
However, dark
streaks can be
a normal
occurrence in
dark-skinned
individuals.
Yes, if at risk of former cause.
For latter cause, Nail
Enhancements may be applied.

The Wiltshire School of Beauty and Holistic Therapy
Diploma in Nail Enhancements Training Manual © 33
Name Description Cause GP Approval Treatment
Recent broken bones, fractures and sprains
Broken or fractured bones.
Unknown. Only if not been
treated.
No treatment to be done within six months as
this can hinder the natural
healing process and be painful to
the Client.
Eczema
Red itchy rash and/or scaly, blistered or
cracked skin that may weep.
Varied. Yes, if not being
treated.
Nail Enhancements
may be applied if skin is not
broken or close to the nail plate.
Psoriasis
Pitted, dry and crumbly nail plate.
Nail plate can separate and can also appear red, orange or brown with red spots in
the lunula.
Poor immune system.
Yes.
Nail Enhancements
must not be applied if
Psoriasis is present in the
nail plate.
Severely bitten nails
Very short nail plate with
overgrown cuticle and no free edge.
Habit or nervous disorder.
No.
Nail Enhancements
can be applied if there is enough
nail plate to adhere the tip to.
Leuconychia
(White Spotting)
White lines or spots in the nail
plate.
Tiny bubbles
of air that are
trapped in the
nail plate
layers due to
trauma to the
lunula.
No, as it will grow out.
Nail Enhancements can be applied
but may exacerbate the
problem.

The Wiltshire School of Beauty and Holistic Therapy
Diploma in Nail Enhancements Training Manual © 34
9. TREATABLE NON-MEDICAL CONDITIONS Here are some nail conditions that you will come across, which are treatable.
Name Description Cause Course of
Action GP
Approval
Weak/Fine Nails
Very flexible and bendy nails
Genetic or over use of nail extensions.
Regular manicures and
daily oiling. No.
Dry/Brittle/ Flaky Nails
Lacking in moisture that
can result in the nails becoming
brittle.
No application of oil; overuse
of harsh detergents and
cleaners; gardening; use
of paper.
Regular manicures and
daily oiling. No
Ridged Nails
Vertical grooves on the nail plate.
Trauma to the matrix, poor
health, medication or
stress.
Gentle buffing during regular
manicures. No.
Hang Nails
Thin slivers of nail plate that appear in the
side wall.
Genetic. Trim by
professional; do not tear away.
No.
Overgrown Cuticles
Cuticle skin attached to nail plate and being pulled up as the
nail grows.
Cuticles have not been
pushed back or removed.
Regular manicures and
daily oiling. No

The Wiltshire School of Beauty and Holistic Therapy
Diploma in Nail Enhancements Training Manual © 35
10. CONTRA-ACTIONS Contra-actions are reactions of a client caused by a treatment taking place. You must explain to your client what/if any reactions to expect during/after a treatment. It is always advisable to do a patch test with products that you are using for the first time to make sure that you are not allergic to anything in them. With all contra-actions, tell your client to get in touch with their GP for advice if they do not improve within 24 hours. Below is a list of contra-actions that could occur during a treatment.
Name Description Cause Course of Action
Allergic Rash Red itchy rash. Allergic reaction.
Remove product, apply a cold
compress and advise client to consult their
GP if no improvement with 24
hours.
Excessive
Perspiration
Perspiration of the skin
Allergic reaction.
As above.
Thinning of the natural plate
Thin, sore, red nail plate
Constant filing. Make sure you do not
over file.
Lifting of Nail Enhancements
Edges of Nail Enhancements
lifting.
Natural nail is not dehydrated;
product overlaps onto skin/cuticle; products too
thick at cuticle area.
Carry out correct preparation to make
sure all oils and moisture is removed;
make sure product does not overhang
any part of the skin; thin product out
before it dries; file the product thin at
the edges.

The Wiltshire School of Beauty and Holistic Therapy
Diploma in Nail Enhancements Training Manual © 36
11. AFTERCARE It is very important to give your client clear instructions about what to expect and what to do at home in order to get the best from their treatment, as it will prolong the effects of the treatment. Explain to the client the following points: Avoid using nails as tools.
Wear gloves to protect nails and hands when: o gardening o using strong chemicals o washing up o in cold conditions.
Use cuticle oil at every opportunity Do not use your Nail Enhancements as tools, treat them like jewels! Use an acetone free nail polish remover Do not use products containing lanolin, as this causes lifting Avoid hand creams - only use oils Do not pick around the cuticles, as this will cause lifting Return to your nail technician for regular maintenance appointments Every 2 weeks for infill’s If lifting occurs, do not pick the acrylic. Instead, buff the acrylic down with a 3-
way polishing block. If anything else was used, overfilling could occur. Apply oil, then return to your nail technician for professional maintenance and repair.
Removal of nail enhancements should never be performed by the client. Enhancements must be removed by a qualified nail professional for health and safety reasons.
Nail Enhancements are flammable and should be kept away from sources of direct heat, and flames.
If a reaction occurs and does not clear up in 24 hours then please consult your GP.
Finally, ask the client for feedback on the treatment, fill in their record card on your findings, and ask if they would like to rebook. In the unlikely event that your client is unhappy with their treatment, find out why and try to rectify it. Try not to let your client leave feeling dissatisfied with their treatment. Depending on the situation, you can offer to re-do part of the treatment, offer them a free treatment, eg an eyebrow shape, or rebook the treatment again at a discounted price or even free of charge.

The Wiltshire School of Beauty and Holistic Therapy
Diploma in Nail Enhancements Training Manual © 37
12. STORAGE & INSURANCE STORAGE Make sure you receive a copy of Material Safety Data Sheets (MSDS) from your suppliers. All staff must be trained on the use of products and equipment. Training manuals and information leaflets should be accessible to all staff.
Store your products correctly by following the guidance on the MSDS.
Carry out a risk assessment on each product or COSHH report if required.
Keep products in original containers where possible and ensure any decanted products are fully labelled in smaller, purpose built containers.
Keep all flammable products out of direct sunlight and at room temperature or below.
Mobile therapists must make suitable travel arrangements to avoid spillage and ensure safe working practice, and be professional in appearance.
INSURANCE
There are several types of insurance that are potentially relevant to you as a therapist. The most important are the ‘Professional Indemnity Insurance’ and ‘Public Liability Insurance’. Both of these are necessary in the unlikely event that a client decided to sue you.
Public Liability Insurance - This covers you if a member of the public, ie a client or passerby is injured on your premises or if their personal property is damaged in any way.
Professional Indemnity Insurance - This protects you should a client decide to sue you claiming personal injury or damage as a result of treatments carried out by you.
Employer’s Liability Insurance - This is only necessary if you hire others to work for you. This type of insurance would cover you should a member of your staff have an injury on your premises.
Product Liability Insurance - This insurance is important if you plan to use, manufacture or sell products as part of your business. This will protect you in the event that a client is dissatisfied with the product or experiences a reaction to using the product.
Car Insurance - If a car is used for business purposes, ensure that this is covered
by the policy and that theft of equipment is included.

The Wiltshire School of Beauty and Holistic Therapy
Diploma in Nail Enhancements Training Manual © 38
13. LIQUID & POWDER The liquid and powder is the original nail extension system, an advanced nail enhancement providing unparalleled strength with some flexibility. Plastic tips are applied over your own nail, then cut to size and blended in before having a layer of Acrylic placed over them. Available in both natural or bright white, Acrylic Tip and overlay continues to be the most popular choice with Nail Technicians and their clients worldwide.
Care of your brushes
It is always worth having a good quality brush and looking after it. The best quality brush is a Kolinsky Sable brush. The size of the brush is up to the technician.
The brush should only ever come into contact with monomer and polymer. It should never come into contact with dust, and should never be touched with the hands. Contamination is to be avoided.
In between every acrylic application to each nail the brush must be wiped, cleaned in the monomer and then wiped again on clean tissue. This is to ensure that no product remains in the brush. If left, the product will harden and render the brush useless and permanently damaged.
The brush should be stored horizontally or upright with the bristles hanging down. This ensures that if there is any product left in the brush, it will gather at the tip and be easier to remove.
Brush cleaning products should not be used, as they can shorten the life of the brush. Only use them when absolutely necessary.
It is very important to care for your brush. If not, product control is lost, nails can discolour and replacement brushes can be needlessly expensive.

The Wiltshire School of Beauty and Holistic Therapy
Diploma in Nail Enhancements Training Manual © 39
14. UV GEL Gel nails are an extremely natural-looking enhancement, thin, clear, flexible, non-yellowing, non-porous and they resist lifting. They can also be used for natural nail overlays to strengthen your own nails. They are applied in an acrylic paste like form and cured under a special UV lamp, they are much lighter in weight than conventional acrylic nails. The ultimate long-term goal with gels is for the client to end up growing out and wearing her own long, strong, beautiful, healthy nails under the gel; so that she is no longer to be considered wearing artificial nails, but with the gel becoming essentially just a very strong, bonded base coat to protect her own nails from cracking, splitting, peeling or chipping

The Wiltshire School of Beauty and Holistic Therapy
Diploma in Nail Enhancements Training Manual © 40
15. NAIL FILES
Nail Files are allocated a number and this number is based on how coarse the nail file is, for example; the lower the number, the coarser the file, the higher the number, the smoother the file. The Edge Duraboard File that is contained within your Kit is a 100/180. This means that on one side the grit is 100, which is very coarse and on the other side the grit is 180 which is the smoother side and is the side that should be used for most of your work. The 100 side should only be used to lengthen and shape the nail enhancement. When carrying out a Manicure it is recommended to use a 240 grit file. It is suggested that you do not use anything courser than a 150 file for filing the nail or product or blending. Therefore, you may prefer to use a file that has the same grit on both sides. Your preference of nail file is personal to you and it is always recommended to try out different files until you find the one that is right for you as it is the tool of your trade! Nail Files also come in different shapes and colours and come in a choice of either disposable or sanitisable. Some are straight and some are curved, or both - straight on one side and curved on the other. In terms of colours, some are grey, white, black or even peach! Once again, there is no right or wrong file, it is just what you prefer to use.

The Wiltshire School of Beauty and Holistic Therapy
Diploma in Nail Enhancements Training Manual © 41
16. NAIL PREPARATION
For a nail technician, a good set of nail extensions requires that proper preparation is carried out. The most common cause of client complaints comes from poor preparation of the nail plate, resulting in lifting and infection.
The nail plate must be completely free of dirt, grime, oil, and bacteria. If not, enhancements will lift, bacterial infections will grow and surrounding tissue may be damaged. To remove dirt, oil and bacteria, wipe the nails with a nail dehydrator/cleanser.
Cuticles must be removed from the nail plate or enhancements will lift due to failure of the product bonding with the nail plate. To remove dead cuticle tissue, use a double ended pusher

The Wiltshire School of Beauty and Holistic Therapy
Diploma in Nail Enhancements Training Manual © 42
17. STEP BY STEP GUIDE
Health, Safety & Hygiene
Complete a Client Card with your Client as per the example in your Manual.
Sanitise your Clients’ Hands, as well as your own, and then check the hands and nails for any Contra-Indications.
Discuss with your Client what sort of Nail Enhancements she would like, taking into account the length and condition of her nails.
Stage One – Tip Application
Applying a Natural Tip with a Full Well Area
Check with your Client that she is happy for her natural nails to be taken down to the smile line. The finished appearance will always be better if any length on the natural nail is removed. However, if all of the Clients’ nails are a good length and they insist that they want them extending, then I would recommend using a Half Well Tip, thus retaining the length on their Nail Plate.
Using the rounded end of a Dual Tool (Orange Stick), lift and separate the cuticle. Using the blade end of the Dual Tool remove any dead cuticle skin that may have attached itself onto the Nail Plate and then using Cuticle Nippers; remove any dead cuticle.
With your Nail File remove the glaze from the Nail Plate. It is important not to take too much, but enough to key the surface sufficiently to ensure adhesion of the tip and product to the nail.
Take a Nail Wipe, soak it in Acetone and wipe it over all of the nails. At this point
ask the Client to leave her nails on the table and not to use her nails to scratch her face/body. If any oil, makeup or moisture is passed on to the nail after this point it can affect the adhesion of the products.
Always work left to right. Starting with the little finger on your clients’ right hand, start to size up the tips. Always ensure that the tip is not too small. If your Client is in-between sizes, take the larger and file the sides down until it fits. As most people’s nails are the same size on each hand, as you are sizing up each finger, take another tip and place it to one side ready for the other hand. In some cases, the lead hand nails may come up a little wider.
Before attaching the tip to the nail, ensure that the base of the tip is approximately halfway down the nail. If you have a client with a shallow nail bed or bitten down

The Wiltshire School of Beauty and Holistic Therapy
Diploma in Nail Enhancements Training Manual © 43
nails, you may need to file away some of the well area, so you won’t be blending too close to the cuticle.
Place a small amount of either Glue or Resin onto the end of the nail plate. Take your tip and holding it at a slight upwards angle, place the smile line of the tip to the smile line of the natural nail and push forward and down on to the nail. You will need to press very firmly ensuring that you get no air bubbles. Wipe away any surplus Glue or Resin with a cotton bud. Move on to the next nail.
The tips can then be cut down. Always ensure that the blade of the tip cutters is facing you and the guard is facing the client. Check with your client first what length and shape she would like. In the cast of oval, you can remove the corners to reduce filing.
Using your nail file, remove the glaze from the tip and then apply some Tip Blender to the blending line, leave for a few moments and then file across the blending line using a diagonal sweep. Repeat until the tip is as one with the nail plate and the blending line is no longer visible.
Apply Primer to the natural nail only. You are now ready for Stage Two.
Applying a Natural Tip with a Half Well Area
Same as above, but no blending is required. Instead, use your White Sanding Block to key the surface of the tip.
Applying a French Tip
When using French Tips, it is important to remember that they need to be placed a little way below the smile line, or they will grow out before the first infill appointment. Therefore, if the nail bed is very shallow, advise your Client that the Natural Tips will look better, but you can finish with a French Polish, or when more proficient you can do a Pink & White.
As with a Half Well Area Tip, no blending is required. Just use your White Sanding Block to key the surface of the tip.
Stage Two – Overlay
Liquid & Powder
Place some Acrylic Liquid in a Dappen Dish and immerse your Acrylic Brush completely in the liquid, rolling it side to side to ensure that all of the sable hairs are covered. Remove the brush from the liquid, wiping it on the side of the dappen dish until you have removed the surplus liquid.

The Wiltshire School of Beauty and Holistic Therapy
Diploma in Nail Enhancements Training Manual © 44
Using only the very tip of the brush, drag it across the surface of the powder, stopping when you have picked up enough product.
Place the ball of product on the Stress Area (mid-section) of the nail, leave for a few
second to allow the product to polymerise and then using the flags of the brush pat down, working the product towards the cuticle and out to the sides of the nail and then brush back. Always ensure that you leave a 1/16” gap around the edge of the nail.
If the ball of product sinks down on to the nail very quickly, you have used too much liquid. If the powder is still visible after a couple of seconds, the product is too dry.
Now pick up a smaller ball of product, place this at the cuticle end of the nail and leave for a few seconds to polymerise. Using the flags of the brush pat down, working the product towards the cuticle and out to the sides of the nail and then brush back. Always ensure that you leave a 1/16” gap around the edge of the nail.
Finally, pick up another ball of product and wipe off on the end of the nail. Then
take your brush and brushing in the opposite direction, work the product down the nail.
Repeat for the remaining nine nails.
When the product has set hard, you are ready for Stage Three.
UV Gel
Take your Gel Brush and using the tip of the brush pick up some UV Gel, wiping the brush on the edge of the pot to remove any surplus gel. Place your brush in the centre of the nail and using a circular motion, push the gel into the nail, covering the entire nail with a thin layer of gel.
Apply a second layer of gel using a brushing technique, rather than stippling, always ensuring that you leave a small gap around the edge of the nails as it is important to remember that gel self-levels so it spreads.
Applying a few thin layers is much better than applying one thick layer.
Move on to the next nail.
When you have finished the first four fingers, place them under the UV Lamp and start working on the four fingers of the other hand.
When you have finished the four fingers on the second hand, remove the first hand from the UV Lamp and place the second hand under.

The Wiltshire School of Beauty and Holistic Therapy
Diploma in Nail Enhancements Training Manual © 45
You can then put a second coat of UV Gel on the first hand and repeat the process for the second hand. When all eight fingers have been gelled, these can be placed under the UV Lamp for two minutes.
Lastly, do the two thumbs using the same process; working on one whilst the under
is under the Lamp and then swapping over. In the case of Infills, you will only need one layer.
When all ten nails have been cured, wipe over the nails with a Finishing Wipe.
You are now ready for Stage Three.
Stage Three - Smoothing, Buffing and Polishing
Liquid & Powder
Using your nail file, file over the product, smoothing over any lumps and bumps, paying particular attention to the cuticle area. You will also need to re-shape the nail; filing the ends and the sides.
Take your White Sanding Block and buff over all of the nails, paying, once again, particular attention to the cuticle area.
You can then oil the nails and using a 3-Way Polishing Block, buff the nails into a shine, using first the black, then the white and finally the grey side.
UV Gel
If the Gel has been applied correctly, you need only oil at this stage. However, if it a little lumpy, then you can use your White Sanding Block to smooth over the gel and then finish with a UV Gel Topcoat or a thin layer of clear gel, cure and oil.
Nail Polish
Remove any residual oil from the nail using either Non-Acetone Polish Remover or Surgical Spirit.
Polish the nails using two layers.
Finish with a quick drying Top Coat.

The Wiltshire School of Beauty and Holistic Therapy
Diploma in Nail Enhancements Training Manual © 46
18. INFILL PROCEDURE Step One – Preparation Wash hands; technician and client.
Sanitise with Nail Sanitizing Spray (or Surgical Spirit).
Remove nail enamel using Polish Remover.
Consultation - check for contra indications.
Lift, push back and separate cuticle and remove if necessary. Step Two – Filing and Product Application
Adjust the length of the nail after checking with the client first. It is always recommended to remove a little or the nail can become too long.
Blend regrowth into Natural Nail and buff away any lifted product.
File over the entire nail to recapture the shape. Apply Acid Free Nail Primer to the natural nail only.
Apply Liquid & Powder to the three Zones but in smaller quantities, thus ensuring that the nail does not become too thick.
Step Three – Finishing
File over the Acrylic using your Nail File to remove any bumps and to smooth.
Using your White Sanding Block, buff over the nails.
Oil and using a 3-way Buffer, polish the nails to a shine.

The Wiltshire School of Beauty and Holistic Therapy
Diploma in Nail Enhancements Training Manual © 47
19. REMOVAL OF NAIL ENHANCEMENTS When removing enhancements the client MUST return to the nail technician to have them removed professionally.
Take 2 Acetone Resistant Manicure Bowls and fill them with Acetone, applying a few drops of oil to each bowl.
Apply some oil to your client’s hands and ask them to immerse their nails in the acetone.
Every 5/10 minutes, remove the hands and wipe over the nails with Couch Roll. Do not scrape. Continue until all product has been removed.
To speed up the process you can stand the acetone bowls in hot water, but always cover the clients hands with a towel as this can create a lot of fumes which is unpleasant for the client.
If the client is having another set of Nail Enhancements applied, then prepare as necessary. If not, carry out a Manicure on the nails and recommend that the nails are oiled daily.
Acrylic Nails take approximately 45 minutes to remove.

The Wiltshire School of Beauty and Holistic Therapy
Diploma in Nail Enhancements Training Manual © 48
20. LIST OF REQUIRED ITEMS AND SUPPLIERS
Required Items:
Lint Free Nail Wipes
Couch Roll
Acetone
Non-Acetone Polish Remover
Surgical Spirit
Nail Files
White Sanding Block
3-Way Buffer
Acrylic Liquid
Acrylic Powder (Clear, Pink and White)
Glue or Resin
Nozzle Extenders Tip Blender
Barbicide
Orange Stick or Cuticle Tool Acrylic Brush
Nail Primer
Dappen Dishes
Nail Tips (Full Well, Half Well and French)
Tip Cutters
Online Suppliers: The Edge 01256 840840 www.edgenails.co.uk The Nail Company 01932 851505 www.thenailcompany.co.uk Salons Direct 0844 875 7775 www.salonsdirect.com Galaxy Nails Internet Only www.galaxynails.co.uk
Local Suppliers in Swindon: Aston & Fincher Westmead Industrial Estate 01793 542349 Sally Salon Services Stratton St Margaret 01793 829825

The Wiltshire School of Beauty and Holistic Therapy
Diploma in Nail Enhancements Training Manual © 49
21. WHAT HAPPENS NEXT? Well done, you now have the knowledge to practice your nail enhancements at home. Practice on as many different clients as possible to gain experience and confidence. Please make sure that you complete the following:-
Completed consultation forms for at least 4 different clients
Evidence of the application of 4 different clients To include – Full well Half Well Natural Overlay French
Evidence of infill’s for 2 different clients
Evidence of tip removals for 1 client
Photographic evidence for each client – Good quality photos either printed or emailed
Completed diary sheet
Complete the assignment for your underpinning knowledge. You will be required to come back to the school to carry out a practical assessment. On your assessment day please make sure:-
You are totally prepared, you must bring your own kit with enough products and tips
You have a reliable model who is ready for infill’s – you will be required to complete infill’s on one hand, remove the infill’s on the other hand and then apply tips and overlay
You have your completed file of evidence with your completed assignment, client consultation forms and photographic evidence
When you have passed you will then receive your Diploma in Nail Enhancements. This will allow you to obtain insurance and carry out professional treatments. The school is available for support and guidance during and after your training. Further training or refresher sessions are available if required.
Well done and enjoy!

The Wiltshire School of Beauty and Holistic Therapy
Diploma in Nail Enhancements Training Manual © 50
22. CONTACT DETAILS AND RECOMMENDED READING
Contact Details. Nail Tutor: Sarah Selwood T: 01793 602445 M: 07968 206154 E: [email protected] W: www.totallydivine.net The Principal: Tia Dowman T: 01793 73 77 33 M: 07767 79 44 22 E: [email protected] W: www.wsbht.co.uk
Recommended Reading.
Encyclopaedia of Nails (Habia City & Guilds) by Jacqui Jefford
The Complete Nail Technician (Hairdressing and Beauty Industry Authority) By (author) Marian Newman ISBN 13: 9781844801398

The Wiltshire School of Beauty and Holistic Therapy
Diploma in Nail Enhancements Training Manual © 51
23. SELF ASSESSMENT Do I have a good understanding of:- The different types of Nail Enhancements □ Hygiene, Health & Safety □ Sterilisation □ Professional Ethics □ Anatomy and Physiology □ How to carry out a Client Consultation □ Contra-Indications □ Treatable Non-Medical Conditions □ Contra-Actions □ After Care □ Storage and Insurance □ Liquid & Powder □ UV Gel □ Nail Files □ Nail Preparation □ Infill Procedure □ Removal of Nail Enhancements □ Required Items and Suppliers □ MMA □
Well done!

The Wiltshire School of Beauty and Holistic Therapy
Diploma in Nail Enhancements Training Manual © 52
24. NOTES

The Wiltshire School of Beauty and Holistic Therapy
Diploma in Nail Enhancements Training Manual © 53
25. ACCREDITATION
This course is accredited by:
The Guild of Nail Technicians
Professional Beauty Direct
Associated Beauty Therapists
WSBHT is registered with UKRPL
UK Register of Learning Providers No: 10027055
Medical Disclaimer It is advised that you take medical advice if you or any of your clients have a health problem. Any qualification from WSBHT will not qualify you to advise on any medical condition or to diagnose a condition.
Liability WSBHT will accept NO liability for any person for any type of loss or damage whatsoever resulting from the use of materials within any course held by WSBHT. Copyright All copyright and other intellectual property rights in these materials are owned by or licensed by WSBHT. Copyright, adapting or other use of all or part of these materials without written permission of WSBHT is strictly prohibited.