The Python tutorial - Roberto Alsinaralsina.me/static/tutorial-2.pdf · The Python tutorial...
114
The Python tutorial Release: 2.5.2 Date: July 01, 2009 Python is an easy to learn, powerful programming language. It has efficient high-level data structures and a simple but effective approach to object-oriented programming. Python's elegant syntax and dynamic typing, together with its interpreted nature, make it an ideal language for scripting and rapid application development in many areas on most platforms. The Python interpreter and the extensive standard library are freely available in source or binary form for all major platforms from the Python Web site, http://www.python.org/, and may be freely distributed. The same site also contains distributions of and pointers to many free third party Python modules, programs and tools, and additional documentation. The Python interpreter is easily extended with new functions and data types implemented in C or C++ (or other languages callable from C). Python is also suitable as an extension language for customizable applications. This tutorial introduces the reader informally to the basic concepts and features of the Python language and system. It helps to have a Python interpreter handy for hands-on experience, but all examples are self-contained, so the tutorial can be read off-line as well. For a description of standard objects and modules, see the Python Library Reference document. The Python Reference Manual gives a more formal definition of the language. To write extensions in C or C++, read Extending and Embedding the Python Interpreter and Python/C API Reference. There are also several books covering Python in depth. This tutorial does not attempt to be comprehensive and cover every single feature, or even every commonly used feature. Instead, it introduces many of Python's most noteworthy features, and will give you a good idea of the language's flavor and style. After reading it, you will be able to read and write Python modules and programs, and you will be ready to learn more about the various Python library modules described in the Python Library Reference. The glossary is also worth going through. Saciando tu apetito Si trabajas mucho con computadoras, eventualmente encontrarás que te gustaría automatizar alguna tarea. Por ejemplo, podrías desear realizar una búsqueda y reemplazo en un gran número de archivos de texto, o renombrar y reorganizar un montón de archivos con fotos de una manera compleja. Tal vez quieras escribir alguna pequeña base de datos personalizada, personalizada, o una aplicación especializada con interfaz gráfica, o un juego simple. Si eres un desarrollador de software profesional, tal vez necesites trabajar con varias bibliotecas de Tutorial de Python 1
Transcript of The Python tutorial - Roberto Alsinaralsina.me/static/tutorial-2.pdf · The Python tutorial...

The Python tutorialRelease: 2.5.2
Date: July 01, 2009
Python is an easy to learn, powerful programming language. It has efficient high-level data structures
and a simple but effective approach to object-oriented programming. Python's elegant syntax and
dynamic typing, together with its interpreted nature, make it an ideal language for scripting and rapid
application development in many areas on most platforms.
The Python interpreter and the extensive standard library are freely available in source or binary form
for all major platforms from the Python Web site, http://www.python.org/, and may be freely distributed.
The same site also contains distributions of and pointers to many free third party Python modules,
programs and tools, and additional documentation.
The Python interpreter is easily extended with new functions and data types implemented in C or C++
(or other languages callable from C). Python is also suitable as an extension language for customizable
applications.
This tutorial introduces the reader informally to the basic concepts and features of the Python language
and system. It helps to have a Python interpreter handy for hands-on experience, but all examples are
self-contained, so the tutorial can be read off-line as well.
For a description of standard objects and modules, see the Python Library Reference document. The
Python Reference Manual gives a more formal definition of the language. To write extensions in C or
C++, read Extending and Embedding the Python Interpreter and Python/C API Reference. There are
also several books covering Python in depth.
This tutorial does not attempt to be comprehensive and cover every single feature, or even every
commonly used feature. Instead, it introduces many of Python's most noteworthy features, and will
give you a good idea of the language's flavor and style. After reading it, you will be able to read and
write Python modules and programs, and you will be ready to learn more about the various Python
library modules described in the Python Library Reference.
The glossary is also worth going through.
Saciando tu apetitoSi trabajas mucho con computadoras, eventualmente encontrarás que te gustaría automatizar alguna
tarea. Por ejemplo, podrías desear realizar una búsqueda y reemplazo en un gran número de archivos
de texto, o renombrar y reorganizar un montón de archivos con fotos de una manera compleja. Tal vez
quieras escribir alguna pequeña base de datos personalizada, personalizada, o una aplicación
especializada con interfaz gráfica, o un juego simple.
Si eres un desarrollador de software profesional, tal vez necesites trabajar con varias bibliotecas de
Tutorial de Python
1

C/C++/Java pero encuentres que se hace lento el ciclo usual de escribir/compilar/testear/recompilar.
Tal vez estás escribiendo una batería de pruebas para una de esas bibliotecas y encuentres que
escribir el código de testeo se hace una tarea tediosa. O tal vez has escrito un programa al que le
vendría bien un lenguaje de extensión, y no quieres diseñar/implementar todo un nuevo lenguaje para
tu aplicación.
Python es el lenguaje justo para ti.
Podrías escribir un script en el interprete de comandos o un archivo por lotes de Windows para algunas
de estas tareas, pero los scripts se lucen para mover archivos de un lado a otro y para modificar datos
de texto, no para aplicaciones con interfaz de usuario o juegos. Podrías escribir un programa en
C/C++/Java, pero puede tomar mucho tiempo de desarrollo obtener al menos un primer borrador del
programa. Python es más fácil de usar, está disponible para sistemas operativos Windows, MacOS X
y Unix, y te ayudará a realizar tu tarea más velozmente.
Python es fácil de usar, pero es un lenguaje de programación de verdad, ofreciendo mucho mucho
mayor estructura y soporte para programas grandes que lo que lo que pueden ofrecer los scripts de
Unix o archivos por lotes. Por otro lado, Python ofrece mucho más chequeo de error que C, y siendo
un lenguaje de muy alto nivel, tiene tipos de datos de alto nivel incorporados como ser arreglos de
tamaño flexible y diccionarios. Debido a sus tipos de datos más generales Python puede aplicarse a
un dominio de problemas mayor que Awk o incluso Perl, y aún así muchas cosas siguen siendo al
menos igual de fácil en Python que en esos lenguajes.
Python te permite separar tu programa en módulos que pueden reusarse en otros programas en
Python. Viene con una gran colección de módulos estándar que puedes usar como base de tus
programas --- o como ejemplos para empezar a aprender a programar en Python. Algunos de estos
módulos proveen cosas como entrada/salida a archivos, llamadas al sistema, sockets, e incluso
interfaces a sistemas de interfaz gráfica de usuario como Tk.
Python es un lenguaje interpretado, lo cual puede ahorrarte mucho tiempo durante el desarrollo ya
que no es necesario compilar ni enlazar. El interprete puede usarse interactivamente, lo que facilita
experimentar con características del lenguaje, escribir programas descartables, o probar funciones
cuando se hace desarrollo de programas de abajo hacia arriba. Es también una calculadora de
escritorio práctica.
Python permite escribir programas compactos y legibles. Los programas en Python son típicamente
más cortos que sus programas equivalentes en C, C++ o Java por varios motivos:
• los tipos de datos de alto nivel permiten expresar operaciones complejas en una sola
instrucción;
• la agrupación de instrucciones se hace por indentación en vez de llaves de apertura y cierre.
• no es necesario declarar variables ni argumentos.
Python es extensible: si ya sabes programar en C es fácil agregar una nueva función o módulo al
intérprete, ya sea para realizar operaciones críticas a velocidad máxima, o para enlazar programas
Python con bibliotecas que tal vez sólo estén disponibles en forma binaria (por ejemplo bibliotecas
Tutorial de Python
2

gráficas específicas de un fabricante). Una vez que estés realmente entusiasmado, puedes enlazar el
intérprete Python en una aplicación hecha en C y usarlo como lenguaje de extensión o de comando
para esa aplicación.
Por cierto, el lenguaje recibe su nombre del programa de televisión de la BBC "Monty Python's Flying
Circus" y no tiene nada que ver con reptiles. Hacer referencias a sketches de Monty Python en la
documentación no sólo esta permitido, sino que también está bien visto!
Ahora que ya estás emocionada con Python, querrás verlo en más detalle. Cómo la mejor forma de
aprender un lenguaje es usarlo, el tutorial te invita a que juegues con el intérprete Python a medida
que vas leyendo.
En el próximo capítulo se explicará la mecánica de uso del intérprete. Ésta es información bastante
mundana, pero es esencial para poder probar los ejemplos que aparecerán más adelante.
El resto del tutorial introduce varias características del lenguaje y el sistema Python a través de
ejemplos, empezando con expresiones, instrucciones y tipos de datos simples, pasando por funciones
y módulos, y finalmente tocando conceptos avanzados como excepciones y clases definidas por el
usuario.
Using the Python Interpreter
Invoking the InterpreterThe Python interpreter is usually installed as /usr/local/bin/python on those machines where it
is available; putting /usr/local/bin in your Unix shell's search path makes it possible to start it by
typing the command
python
to the shell. Since the choice of the directory where the interpreter lives is an installation option, other
places are possible; check with your local Python guru or system administrator. (E.g.,
/usr/local/python is a popular alternative location.)
On Windows machines, the Python installation is usually placed in C:\Python26, though you can
change this when you're running the installer. To add this directory to your path, you can type the
following command into the command prompt in a DOS box:
set path=%path%;C:\python26
Typing an end-of-file character (Control-D on Unix, Control-Z on Windows) at the primary prompt
causes the interpreter to exit with a zero exit status. If that doesn't work, you can exit the interpreter by
Tutorial de Python
3

typing the following commands: import sys; sys.exit().
The interpreter's line-editing features usually aren't very sophisticated. On Unix, whoever installed the
interpreter may have enabled support for the GNU readline library, which adds more elaborate
interactive editing and history features. Perhaps the quickest check to see whether command line
editing is supported is typing Control-P to the first Python prompt you get. If it beeps, you have
command line editing; see Appendix tut-interacting for an introduction to the keys. If nothing appears
to happen, or if ^P is echoed, command line editing isn't available; you'll only be able to use backspace
to remove characters from the current line.
The interpreter operates somewhat like the Unix shell: when called with standard input connected to a
tty device, it reads and executes commands interactively; when called with a file name argument or
with a file as standard input, it reads and executes a script from that file.
A second way of starting the interpreter is python -c command [arg] ..., which executes the
statement(s) in command, analogous to the shell's -c option. Since Python statements often contain
spaces or other characters that are special to the shell, it is best to quote command in its entirety with
double quotes.
Some Python modules are also useful as scripts. These can be invoked using python -m module
[arg] ..., which executes the source file for module as if you had spelled out its full name on the
command line.
Note that there is a difference between python file and python <file. In the latter case, input
requests from the program, such as calls to input() and raw_input(), are satisfied from file. Since
this file has already been read until the end by the parser before the program starts executing, the
program will encounter end-of-file immediately. In the former case (which is usually what you want)
they are satisfied from whatever file or device is connected to standard input of the Python interpreter.
When a script file is used, it is sometimes useful to be able to run the script and enter interactive mode
afterwards. This can be done by passing -i before the script. (This does not work if the script is read
from standard input, for the same reason as explained in the previous paragraph.)
Argument Passing
When known to the interpreter, the script name and additional arguments thereafter are passed to the
script in the variable sys.argv, which is a list of strings. Its length is at least one; when no script and
no arguments are given, sys.argv[0] is an empty string. When the script name is given as '-'
(meaning standard input), sys.argv[0] is set to '-'. When -c command is used, sys.argv[0] is
set to '-c'. When -m module is used, sys.argv[0] is set to the full name of the located module.
Options found after -c command or -m module are not consumed by the Python interpreter's option
processing but left in sys.argv for the command or module to handle.
Tutorial de Python
4

Interactive Mode
When commands are read from a tty, the interpreter is said to be in interactive mode. In this mode it
prompts for the next command with the primary prompt, usually three greater-than signs (>>>); for
continuation lines it prompts with the secondary prompt, by default three dots (...). The interpreter
prints a welcome message stating its version number and a copyright notice before printing the first
prompt:
python
Python 2.6 (#1, Feb 28 2007, 00:02:06)
Type "help", "copyright", "credits" or "license" for more information.
>>>
Continuation lines are needed when entering a multi-line construct. As an example, take a look at this
if statement:
>>> the_world_is_flat = 1
>>> if the_world_is_flat:
... print "Be careful not to fall off!"
...
Be careful not to fall off!
The Interpreter and Its Environment
Error Handling
When an error occurs, the interpreter prints an error message and a stack trace. In interactive mode, it
then returns to the primary prompt; when input came from a file, it exits with a nonzero exit status after
printing the stack trace. (Exceptions handled by an except clause in a try statement are not errors
in this context.) Some errors are unconditionally fatal and cause an exit with a nonzero exit; this applies
to internal inconsistencies and some cases of running out of memory. All error messages are written
to the standard error stream; normal output from executed commands is written to standard output.
Typing the interrupt character (usually Control-C or DEL) to the primary or secondary prompt cancels
the input and returns to the primary prompt. 1 Typing an interrupt while a command is executing raises
the KeyboardInterrupt exception, which may be handled by a try statement.
Tutorial de Python
5

Executable Python Scripts
On BSD'ish Unix systems, Python scripts can be made directly executable, like shell scripts, by putting
the line
#! /usr/bin/env python
(assuming that the interpreter is on the user's PATH) at the beginning of the script and giving the file
an executable mode. The #! must be the first two characters of the file. On some platforms, this first
line must end with a Unix-style line ending ('\n'), not a Mac OS ('\r') or Windows ('\r\n') line
ending. Note that the hash, or pound, character, '#', is used to start a comment in Python.
The script can be given an executable mode, or permission, using the chmod command:
$ chmod +x myscript.py
On Windows systems, there is no notion of an "executable mode". The Python installer automatically
associates .py files with python.exe so that a double-click on a Python file will run it as a script. The
extension can also be .pyw, in that case, the console window that normally appears is suppressed.
Source Code Encoding
It is possible to use encodings different than ASCII in Python source files. The best way to do it is to
put one more special comment line right after the #! line to define the source file encoding:
# -*- coding: encoding -*-
With that declaration, all characters in the source file will be treated as having the encoding encoding,
and it will be possible to directly write Unicode string literals in the selected encoding. The list of
possible encodings can be found in the Python Library Reference, in the section on codecs.
For example, to write Unicode literals including the Euro currency symbol, the ISO-8859-15 encoding
can be used, with the Euro symbol having the ordinal value 164. This script will print the value 8364
(the Unicode codepoint corresponding to the Euro symbol) and then exit:
# -*- coding: iso-8859-15 -*-
currency = u"€"
print ord(currency)
If your editor supports saving files as UTF-8 with a UTF-8 byte order mark (aka BOM), you can use
that instead of an encoding declaration. IDLE supports this capability if
Tutorial de Python
6

Options/General/Default Source Encoding/UTF-8 is set. Notice that this signature is not
understood in older Python releases (2.2 and earlier), and also not understood by the operating system
for script files with #! lines (only used on Unix systems).
By using UTF-8 (either through the signature or an encoding declaration), characters of most languages
in the world can be used simultaneously in string literals and comments. Using non-ASCII characters
in identifiers is not supported. To display all these characters properly, your editor must recognize that
the file is UTF-8, and it must use a font that supports all the characters in the file.
The Interactive Startup File
When you use Python interactively, it is frequently handy to have some standard commands executed
every time the interpreter is started. You can do this by setting an environment variable named
PYTHONSTARTUP to the name of a file containing your start-up commands. This is similar to the
.profile feature of the Unix shells.
This file is only read in interactive sessions, not when Python reads commands from a script, and not
when /dev/tty is given as the explicit source of commands (which otherwise behaves like an
interactive session). It is executed in the same namespace where interactive commands are executed,
so that objects that it defines or imports can be used without qualification in the interactive session.
You can also change the prompts sys.ps1 and sys.ps2 in this file.
If you want to read an additional start-up file from the current directory, you can program this in the
global start-up file using code like if os.path.isfile('.pythonrc.py'):
execfile('.pythonrc.py'). If you want to use the startup file in a script, you must do this explicitly
in the script:
import os
filename = os.environ.get('PYTHONSTARTUP')
if filename and os.path.isfile(filename):
execfile(filename)
Footnotes
1 A problem with the GNU Readline package may prevent this.
Tutorial de Python
7

Una Introducción Informal a PythonEn los siguientes ejemplos, las entradas y salidas son distinguidas por la presencia o ausencia de los
prompts (`>>>` and `...`): para reproducir los ejemplos, debes escribir todo lo que esté después
del prompt, cuando este aparezca; las líneas que no comiencen con el prompt son las salidas del
intérprete. Tenga en cuenta que el prompt secundario que aparece por sí sólo en una línea de un
ejemplo significa que debe escribir una línea en blanco; esto es usado para terminar un comando
multilínea.
Muchos de los ejemplos de este manual, incluso aquellos ingresados en el prompt interactivo, incluyen
comentarios. Los comentarios en Python comienzan con el caracter numeral, #, y se extienden hasta
el final físico de la línea. Un comentario quizás aparezca al comiendo de la línea o seguidos de
espacios blancos o código, pero sin una cadena de caracteres. Un caracter numeral dentro de una
cadena de caracteres es sólo un caracter numeral.
Algunos ejemplos:
# este es el primer comentario
SPAM = 1 # y este es el segundo comentario
# ... y ahora un tercero!
STRING = "# Este no es un comentario".
Usar Python como una CalculadoraVamos a probar algunos comandos simples en Python. Inicia un intérprete y espera por el prompt
primario, >>>. (No debería demorar tanto).
Números
El intérprete actúa como una simple calculadora; puedes tipear una expresión y este escribirá los
valores. La sintaxis es sencilla: los operadores +, -, * y / funcionan como en la mayoría de los
lenguajes (por ejemplo, Pascal o C); los paréntesis pueden ser usados para agrupar. Por ejemplo:
>>> 2+2
4
>>> # Este es un comentario
... 2+2
4
>>> 2+2 # y un comentario en la misma línea que el código
4
Tutorial de Python
8

>>> (50-5*6)/4
5
>>> # La división entera retorna el piso:
... 7/3
2
>>> 7/-3
-3
El signo igual (=) es usado para asignar un valor a una variable. Luego, ningún resultado es mostrado
antes del próximo prompt:
>>> width = 20
>>> height = 5*9
>>> width * height
900
Un valor puede ser asignado a varias variables simultáneamente:
>>> x = y = z = 0 # Zero x, y and z
>>> x
0
>>> y
0
>>> z
0
Los números de punto flotante tiene soporte completo; las operaciones con mezclas en los tipos de
los operandos convierte los enteros a punto flotante:
>>> 3 * 3.75 / 1.5
7.5
>>> 7.0 / 2
3.5
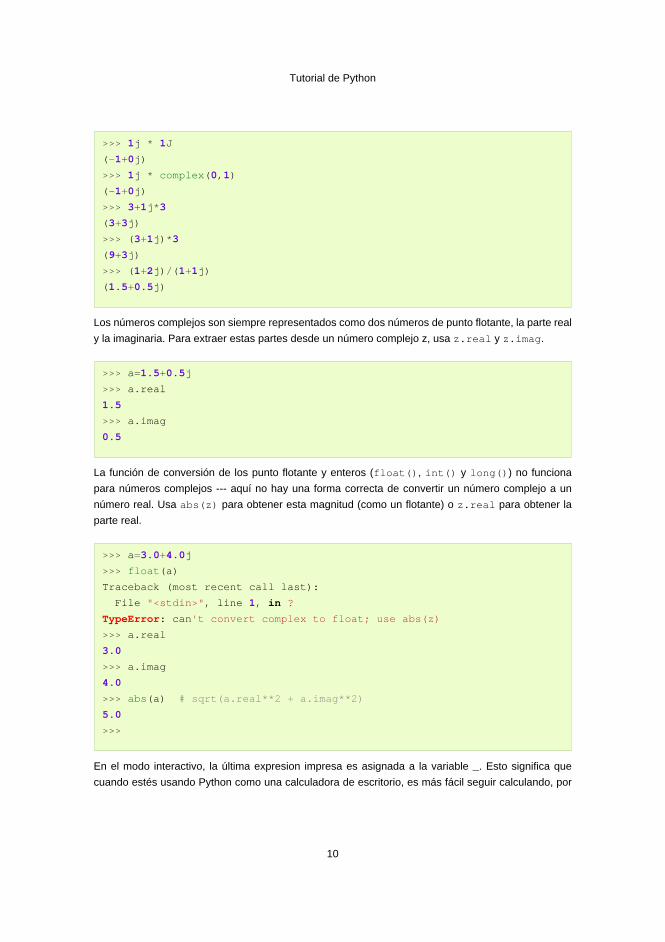
Los números complejos también están soportados; los números imaginarios son escritos con el sufijo
de j o J. Los números complejos con un componente real que no sea cero son escritos como
(real+imagj), o pueden ser escrito con la función complex(real, imag).
Tutorial de Python
9
>>> 1j * 1J
(-1+0j)
>>> 1j * complex(0,1)
(-1+0j)
>>> 3+1j*3
(3+3j)
>>> (3+1j)*3
(9+3j)
>>> (1+2j)/(1+1j)
(1.5+0.5j)
Los números complejos son siempre representados como dos números de punto flotante, la parte real
y la imaginaria. Para extraer estas partes desde un número complejo z, usa z.real y z.imag.
>>> a=1.5+0.5j
>>> a.real
1.5
>>> a.imag
0.5
La función de conversión de los punto flotante y enteros (float(), int() y long()) no funciona
para números complejos --- aquí no hay una forma correcta de convertir un número complejo a un
número real. Usa abs(z) para obtener esta magnitud (como un flotante) o z.real para obtener la
parte real.
>>> a=3.0+4.0j
>>> float(a)
Traceback (most recent call last):
File "<stdin>", line 1, in ?
TypeError: can't convert complex to float; use abs(z)
>>> a.real
3.0
>>> a.imag
4.0
>>> abs(a) # sqrt(a.real**2 + a.imag**2)
5.0
>>>
En el modo interactivo, la última expresion impresa es asignada a la variable _. Esto significa que
cuando estés usando Python como una calculadora de escritorio, es más fácil seguir calculando, por
Tutorial de Python
10
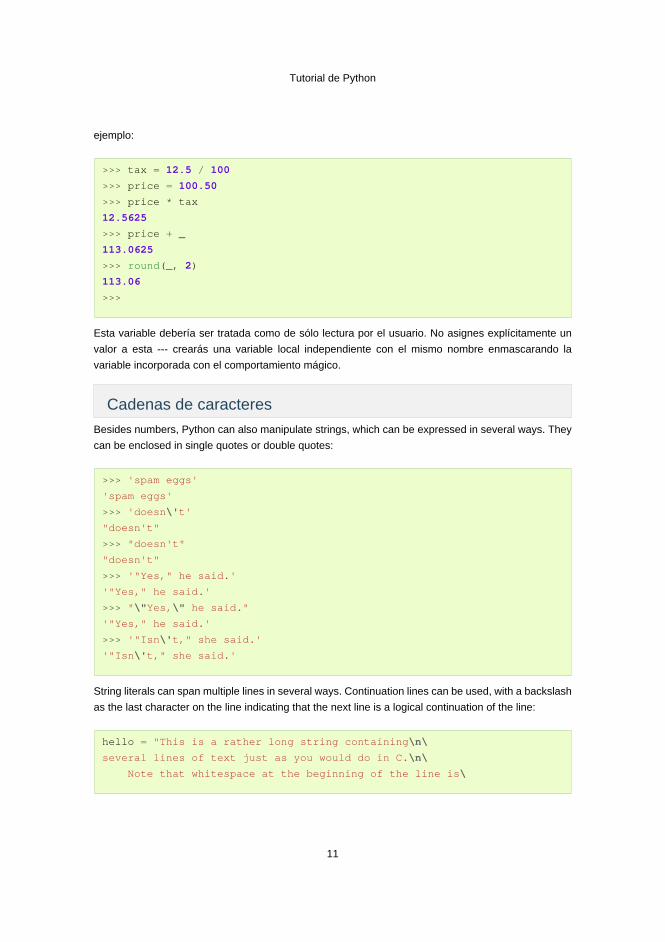
ejemplo:
>>> tax = 12.5 / 100
>>> price = 100.50
>>> price * tax
12.5625
>>> price + _
113.0625
>>> round(_, 2)
113.06
>>>
Esta variable debería ser tratada como de sólo lectura por el usuario. No asignes explícitamente un
valor a esta --- crearás una variable local independiente con el mismo nombre enmascarando la
variable incorporada con el comportamiento mágico.
Cadenas de caracteres
Besides numbers, Python can also manipulate strings, which can be expressed in several ways. They
can be enclosed in single quotes or double quotes:
>>> 'spam eggs'
'spam eggs'
>>> 'doesn\'t'
"doesn't"
>>> "doesn't"
"doesn't"
>>> '"Yes," he said.'
'"Yes," he said.'
>>> "\"Yes,\" he said."
'"Yes," he said.'
>>> '"Isn\'t," she said.'
'"Isn\'t," she said.'
String literals can span multiple lines in several ways. Continuation lines can be used, with a backslash
as the last character on the line indicating that the next line is a logical continuation of the line:
hello = "This is a rather long string containing\n\
several lines of text just as you would do in C.\n\
Note that whitespace at the beginning of the line is\
Tutorial de Python
11

significant."
print hello
Note that newlines still need to be embedded in the string using \n; the newline following the trailing
backslash is discarded. This example would print the following:
This is a rather long string containing
several lines of text just as you would do in C.
Note that whitespace at the beginning of the line is significant.
If we make the string literal a "raw" string, however, the \n sequences are not converted to newlines,
but the backslash at the end of the line, and the newline character in the source, are both included in
the string as data. Thus, the example:
hello = r"This is a rather long string containing\n\
several lines of text much as you would do in C."
print hello
would print:
This is a rather long string containing\n\
several lines of text much as you would do in C.
Or, strings can be surrounded in a pair of matching triple-quotes: """ or '''. End of lines do not need
to be escaped when using triple-quotes, but they will be included in the string.
print """
Usage: thingy [OPTIONS]
-h Display this usage message
-H hostname Hostname to connect to
"""
produces the following output:
Usage: thingy [OPTIONS]
-h Display this usage message
-H hostname Hostname to connect to
Tutorial de Python
12

The interpreter prints the result of string operations in the same way as they are typed for input: inside
quotes, and with quotes and other funny characters escaped by backslashes, to show the precise
value. The string is enclosed in double quotes if the string contains a single quote and no double
quotes, else it's enclosed in single quotes. (The print statement, described later, can be used to write
strings without quotes or escapes.)
Strings can be concatenated (glued together) with the + operator, and repeated with *:
>>> word = 'Help' + 'A'
>>> word
'HelpA'
>>> '<' + word*5 + '>'
'<HelpAHelpAHelpAHelpAHelpA>'
Two string literals next to each other are automatically concatenated; the first line above could also
have been written word = 'Help' 'A'; this only works with two literals, not with arbitrary string
expressions:
>>> 'str' 'ing' # <- This is ok
'string'
>>> 'str'.strip() + 'ing' # <- This is ok
'string'
>>> 'str'.strip() 'ing' # <- This is invalid
File "<stdin>", line 1, in ?
'str'.strip() 'ing'
^
SyntaxError: invalid syntax
Strings can be subscripted (indexed); like in C, the first character of a string has subscript (index) 0.
There is no separate character type; a character is simply a string of size one. Like in Icon, substrings
can be specified with the slice notation: two indices separated by a colon.
>>> word[4]
'A'
>>> word[0:2]
'He'
>>> word[2:4]
'lp'
Slice indices have useful defaults; an omitted first index defaults to zero, an omitted second index
defaults to the size of the string being sliced.
Tutorial de Python
13

>>> word[:2] # The first two characters
'He'
>>> word[2:] # Everything except the first two characters
'lpA'
Unlike a C string, Python strings cannot be changed. Assigning to an indexed position in the string
results in an error:
>>> word[0] = 'x'
Traceback (most recent call last):
File "<stdin>", line 1, in ?
TypeError: object doesn't support item assignment
>>> word[:1] = 'Splat'
Traceback (most recent call last):
File "<stdin>", line 1, in ?
TypeError: object doesn't support slice assignment
However, creating a new string with the combined content is easy and efficient:
>>> 'x' + word[1:]
'xelpA'
>>> 'Splat' + word[4]
'SplatA'
Here's a useful invariant of slice operations: s[:i] + s[i:] equals s.
>>> word[:2] + word[2:]
'HelpA'
>>> word[:3] + word[3:]
'HelpA'
Degenerate slice indices are handled gracefully: an index that is too large is replaced by the string size,
an upper bound smaller than the lower bound returns an empty string.
>>> word[1:100]
'elpA'
>>> word[10:]
''
>>> word[2:1]
Tutorial de Python
14

''
Indices may be negative numbers, to start counting from the right. For example:
>>> word[-1] # The last character
'A'
>>> word[-2] # The last-but-one character
'p'
>>> word[-2:] # The last two characters
'pA'
>>> word[:-2] # Everything except the last two characters
'Hel'
But note that -0 is really the same as 0, so it does not count from the right!
>>> word[-0] # (since -0 equals 0)
'H'
Out-of-range negative slice indices are truncated, but don't try this for single-element (non-slice)
indices:
>>> word[-100:]
'HelpA'
>>> word[-10] # error
Traceback (most recent call last):
File "<stdin>", line 1, in ?
IndexError: string index out of range
One way to remember how slices work is to think of the indices as pointing between characters, with
the left edge of the first character numbered 0. Then the right edge of the last character of a string of n
characters has index n, for example:
+---+---+---+---+---+
| H | e | l | p | A |
+---+---+---+---+---+
0 1 2 3 4 5
-5 -4 -3 -2 -1
The first row of numbers gives the position of the indices 0...5 in the string; the second row gives the
corresponding negative indices. The slice from i to j consists of all characters between the edges
Tutorial de Python
15
labeled i and j, respectively.
For non-negative indices, the length of a slice is the difference of the indices, if both are within bounds.
For example, the length of word[1:3] is 2.
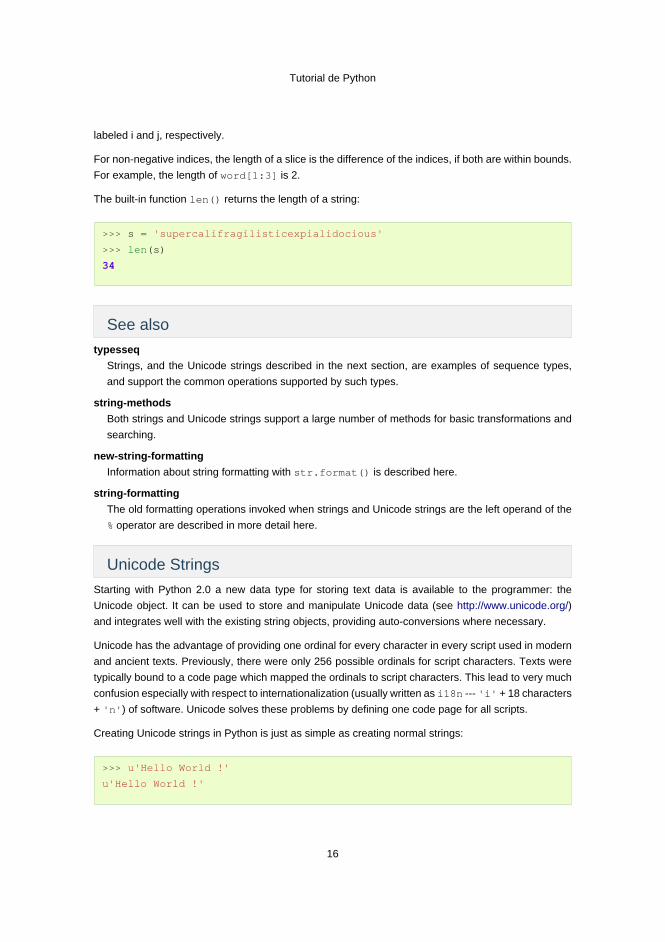
The built-in function len() returns the length of a string:
>>> s = 'supercalifragilisticexpialidocious'
>>> len(s)
34
See also
typesseq
Strings, and the Unicode strings described in the next section, are examples of sequence types,
and support the common operations supported by such types.
string-methods
Both strings and Unicode strings support a large number of methods for basic transformations and
searching.
new-string-formatting
Information about string formatting with str.format() is described here.
string-formatting
The old formatting operations invoked when strings and Unicode strings are the left operand of the
% operator are described in more detail here.
Unicode Strings
Starting with Python 2.0 a new data type for storing text data is available to the programmer: the
Unicode object. It can be used to store and manipulate Unicode data (see http://www.unicode.org/)
and integrates well with the existing string objects, providing auto-conversions where necessary.
Unicode has the advantage of providing one ordinal for every character in every script used in modern
and ancient texts. Previously, there were only 256 possible ordinals for script characters. Texts were
typically bound to a code page which mapped the ordinals to script characters. This lead to very much
confusion especially with respect to internationalization (usually written as i18n --- 'i' + 18 characters
+ 'n') of software. Unicode solves these problems by defining one code page for all scripts.
Creating Unicode strings in Python is just as simple as creating normal strings:
>>> u'Hello World !'
u'Hello World !'
Tutorial de Python
16

The small 'u' in front of the quote indicates that a Unicode string is supposed to be created. If you
want to include special characters in the string, you can do so by using the Python Unicode-Escape
encoding. The following example shows how:
>>> u'Hello\u0020World !'
u'Hello World !'
The escape sequence \u0020 indicates to insert the Unicode character with the ordinal value 0x0020
(the space character) at the given position.
Other characters are interpreted by using their respective ordinal values directly as Unicode ordinals.
If you have literal strings in the standard Latin-1 encoding that is used in many Western countries, you
will find it convenient that the lower 256 characters of Unicode are the same as the 256 characters of
Latin-1.
For experts, there is also a raw mode just like the one for normal strings. You have to prefix the opening
quote with 'ur' to have Python use the Raw-Unicode-Escape encoding. It will only apply the above
\uXXXX conversion if there is an uneven number of backslashes in front of the small 'u'.
>>> ur'Hello\u0020World !'
u'Hello World !'
>>> ur'Hello\\u0020World !'
u'Hello\\\\u0020World !'
The raw mode is most useful when you have to enter lots of backslashes, as can be necessary in
regular expressions.
Apart from these standard encodings, Python provides a whole set of other ways of creating Unicode
strings on the basis of a known encoding.
The built-in function unicode() provides access to all registered Unicode codecs (COders and
DECoders). Some of the more well known encodings which these codecs can convert are Latin-1,
ASCII, UTF-8, and UTF-16. The latter two are variable-length encodings that store each Unicode
character in one or more bytes. The default encoding is normally set to ASCII, which passes through
characters in the range 0 to 127 and rejects any other characters with an error. When a Unicode string
is printed, written to a file, or converted with str(), conversion takes place using this default encoding.
>>> u"abc"
u'abc'
>>> str(u"abc")
'abc'
>>> u"äöü"
Tutorial de Python
17

u'\xe4\xf6\xfc'
>>> str(u"äöü")
Traceback (most recent call last):
File "<stdin>", line 1, in ?
UnicodeEncodeError: 'ascii' codec can't encode characters in position 0-2: ordinal not in range(128)
To convert a Unicode string into an 8-bit string using a specific encoding, Unicode objects provide an
encode() method that takes one argument, the name of the encoding. Lowercase names for encod
ings are preferred.
>>> u"äöü".encode('utf-8')
'\xc3\xa4\xc3\xb6\xc3\xbc'
If you have data in a specific encoding and want to produce a corresponding Unicode string from it,
you can use the unicode() function with the encoding name as the second argument.
>>> unicode('\xc3\xa4\xc3\xb6\xc3\xbc', 'utf-8')
u'\xe4\xf6\xfc'
Lists
Python knows a number of compound data types, used to group together other values. The most
versatile is the list, which can be written as a list of comma-separated values (items) between square
brackets. List items need not all have the same type.
>>> a = ['spam', 'eggs', 100, 1234]
>>> a
['spam', 'eggs', 100, 1234]
Like string indices, list indices start at 0, and lists can be sliced, concatenated and so on:
>>> a[0]
'spam'
>>> a[3]
1234
>>> a[-2]
100
>>> a[1:-1]
['eggs', 100]
>>> a[:2] + ['bacon', 2*2]
Tutorial de Python
18

['spam', 'eggs', 'bacon', 4]
>>> 3*a[:3] + ['Boo!']
['spam', 'eggs', 100, 'spam', 'eggs', 100, 'spam', 'eggs', 100, 'Boo!']
Unlike strings, which are immutable, it is possible to change individual elements of a list:
>>> a
['spam', 'eggs', 100, 1234]
>>> a[2] = a[2] + 23
>>> a
['spam', 'eggs', 123, 1234]
Assignment to slices is also possible, and this can even change the size of the list or clear it entirely:
>>> # Replace some items:
... a[0:2] = [1, 12]
>>> a
[1, 12, 123, 1234]
>>> # Remove some:
... a[0:2] = []
>>> a
[123, 1234]
>>> # Insert some:
... a[1:1] = ['bletch', 'xyzzy']
>>> a
[123, 'bletch', 'xyzzy', 1234]
>>> # Insert (a copy of) itself at the beginning
>>> a[:0] = a
>>> a
[123, 'bletch', 'xyzzy', 1234, 123, 'bletch', 'xyzzy', 1234]
>>> # Clear the list: replace all items with an empty list
>>> a[:] = []
>>> a
[]
The built-in function len() also applies to lists:
>>> a = ['a', 'b', 'c', 'd']
>>> len(a)
4
Tutorial de Python
19

It is possible to nest lists (create lists containing other lists), for example:
>>> q = [2, 3]
>>> p = [1, q, 4]
>>> len(p)
3
>>> p[1]
[2, 3]
>>> p[1][0]
2
>>> p[1].append('xtra') # See section 5.1
>>> p
[1, [2, 3, 'xtra'], 4]
>>> q
[2, 3, 'xtra']
Note that in the last example, p[1] and q really refer to the same object! We'll come back to object
semantics later.
First Steps Towards ProgrammingOf course, we can use Python for more complicated tasks than adding two and two together. For
instance, we can write an initial sub-sequence of the Fibonacci series as follows:
>>> # Fibonacci series:
... # the sum of two elements defines the next
... a, b = 0, 1
>>> while b < 10:
... print b
... a, b = b, a+b
...
1
1
2
3
5
8
This example introduces several new features.
Tutorial de Python
20

• The first line contains a multiple assignment: the variables a and b simultaneously get the new
values 0 and 1. On the last line this is used again, demonstrating that the expressions on the
right-hand side are all evaluated first before any of the assignments take place. The
right-hand side expressions are evaluated from the left to the right.
• The while loop executes as long as the condition (here: b < 10) remains true. In Python,
like in C, any non-zero integer value is true; zero is false. The condition may also be a string
or list value, in fact any sequence; anything with a non-zero length is true, empty sequences
are false. The test used in the example is a simple comparison. The standard comparison
operators are written the same as in C: < (less than), > (greater than), == (equal to), <= (less
than or equal to), >= (greater than or equal to) and != (not equal to).
• The body of the loop is indented: indentation is Python's way of grouping statements. Python
does not (yet!) provide an intelligent input line editing facility, so you have to type a tab or
space(s) for each indented line. In practice you will prepare more complicated input for Python
with a text editor; most text editors have an auto-indent facility. When a compound statement
is entered interactively, it must be followed by a blank line to indicate completion (since the
parser cannot guess when you have typed the last line). Note that each line within a basic
block must be indented by the same amount.
• The print statement writes the value of the expression(s) it is given. It differs from just
writing the expression you want to write (as we did earlier in the calculator examples) in the
way it handles multiple expressions and strings. Strings are printed without quotes, and a
space is inserted between items, so you can format things nicely, like this:
>>> i = 256*256
>>> print 'The value of i is', i
The value of i is 65536
A trailing comma avoids the newline after the output:
>>> a, b = 0, 1
>>> while b < 1000:
... print b,
... a, b = b, a+b
...
1 1 2 3 5 8 13 21 34 55 89 144 233 377 610 987
Note that the interpreter inserts a newline before it prints the next prompt if the last line was
not completed.
Tutorial de Python
21

More Control Flow ToolsBesides the while statement just introduced, Python knows the usual control flow statements known
from other languages, with some twists.
if StatementsPerhaps the most well-known statement type is the if statement. For example:
>>> x = int(raw_input("Please enter an integer: "))
>>> if x < 0:
... x = 0
... print 'Negative changed to zero'
... elif x == 0:
... print 'Zero'
... elif x == 1:
... print 'Single'
... else:
... print 'More'
...
There can be zero or more elif parts, and the else part is optional. The keyword 'elif' is short for
'else if', and is useful to avoid excessive indentation. An if ... elif ... elif ... sequence is a substitute
for the switch or case statements found in other languages.
for Statements
The for statement in Python differs a bit from what you may be used to in C or Pascal. Rather than
always iterating over an arithmetic progression of numbers (like in Pascal), or giving the user the ability
to define both the iteration step and halting condition (as C), Python's for statement iterates over the
items of any sequence (a list or a string), in the order that they appear in the sequence. For example
(no pun intended):
>>> # Measure some strings:
... a = ['cat', 'window', 'defenestrate']
>>> for x in a:
... print x, len(x)
...
cat 3
window 6
Tutorial de Python
22

defenestrate 12
It is not safe to modify the sequence being iterated over in the loop (this can only happen for mutable
sequence types, such as lists). If you need to modify the list you are iterating over (for example, to
duplicate selected items) you must iterate over a copy. The slice notation makes this particularly
convenient:
>>> for x in a[:]: # make a slice copy of the entire list
... if len(x) > 6: a.insert(0, x)
...
>>> a
['defenestrate', 'cat', 'window', 'defenestrate']
The range() FunctionIf you do need to iterate over a sequence of numbers, the built-in function range() comes in handy.
It generates lists containing arithmetic progressions:
>>> range(10)
[0, 1, 2, 3, 4, 5, 6, 7, 8, 9]
The given end point is never part of the generated list; range(10) generates a list of 10 values, the
legal indices for items of a sequence of length 10. It is possible to let the range start at another number,
or to specify a different increment (even negative; sometimes this is called the 'step'):
>>> range(5, 10)
[5, 6, 7, 8, 9]
>>> range(0, 10, 3)
[0, 3, 6, 9]
>>> range(-10, -100, -30)
[-10, -40, -70]
To iterate over the indices of a sequence, combine range() and len() as follows:
>>> a = ['Mary', 'had', 'a', 'little', 'lamb']
>>> for i in range(len(a)):
... print i, a[i]
...
Tutorial de Python
23

0 Mary
1 had
2 a
3 little
4 lamb
break and continue Statements, and else Clauseson Loops
The break statement, like in C, breaks out of the smallest enclosing for or while loop.
The continue statement, also borrowed from C, continues with the next iteration of the loop.
Loop statements may have an else clause; it is executed when the loop terminates through exhaustion
of the list (with for) or when the condition becomes false (with while), but not when the loop is
terminated by a break statement. This is exemplified by the following loop, which searches for prime
numbers:
>>> for n in range(2, 10):
... for x in range(2, n):
... if n % x == 0:
... print n, 'equals', x, '*', n/x
... break
... else:
... # loop fell through without finding a factor
... print n, 'is a prime number'
...
2 is a prime number
3 is a prime number
4 equals 2 * 2
5 is a prime number
6 equals 2 * 3
7 is a prime number
8 equals 2 * 4
9 equals 3 * 3
Tutorial de Python
24

pass StatementsThe pass statement does nothing. It can be used when a statement is required syntactically but the
program requires no action. For example:
>>> while True:
... pass # Busy-wait for keyboard interrupt
...
Defining FunctionsWe can create a function that writes the Fibonacci series to an arbitrary boundary:
>>> def fib(n): # write Fibonacci series up to n
... """Print a Fibonacci series up to n."""
... a, b = 0, 1
... while b < n:
... print b,
... a, b = b, a+b
...
>>> # Now call the function we just defined:
... fib(2000)
1 1 2 3 5 8 13 21 34 55 89 144 233 377 610 987 1597
The keyword def introduces a function definition. It must be followed by the function name and the
parenthesized list of formal parameters. The statements that form the body of the function start at the
next line, and must be indented. The first statement of the function body can optionally be a string
literal; this string literal is the function's documentation string, or docstring.
There are tools which use docstrings to automatically produce online or printed documentation, or to
let the user interactively browse through code; it's good practice to include docstrings in code that you
write, so try to make a habit of it.
The execution of a function introduces a new symbol table used for the local variables of the function.
More precisely, all variable assignments in a function store the value in the local symbol table; whereas
variable references first look in the local symbol table, then in the local symbol tables of enclosing
functions, then in the global symbol table, and finally in the table of built-in names. Thus, global
variables cannot be directly assigned a value within a function (unless named in a global statement),
although they may be referenced.
The actual parameters (arguments) to a function call are introduced in the local symbol table of the
Tutorial de Python
25

called function when it is called; thus, arguments are passed using call by value (where the value is
always an object reference, not the value of the object). 1 When a function calls another function, a
new local symbol table is created for that call.
A function definition introduces the function name in the current symbol table. The value of the function
name has a type that is recognized by the interpreter as a user-defined function. This value can be
assigned to another name which can then also be used as a function. This serves as a general
renaming mechanism:
>>> fib
<function fib at 10042ed0>
>>> f = fib
>>> f(100)
1 1 2 3 5 8 13 21 34 55 89
You might object that fib is not a function but a procedure. In Python, like in C, procedures are just
functions that don't return a value. In fact, technically speaking, procedures do return a value, albeit a
rather boring one. This value is called None (it's a built-in name). Writing the value None is normally
suppressed by the interpreter if it would be the only value written. You can see it if you really want to
using print:
>>> fib(0)
>>> print fib(0)
None
It is simple to write a function that returns a list of the numbers of the Fibonacci series, instead of
printing it:
>>> def fib2(n): # return Fibonacci series up to n
... """Return a list containing the Fibonacci series up to n."""
... result = []
... a, b = 0, 1
... while b < n:
... result.append(b) # see below
... a, b = b, a+b
... return result
...
>>> f100 = fib2(100) # call it
>>> f100 # write the result
[1, 1, 2, 3, 5, 8, 13, 21, 34, 55, 89]
Tutorial de Python
26

This example, as usual, demonstrates some new Python features:
• The return statement returns with a value from a function. return without an expression
argument returns None. Falling off the end of a procedure also returns None.
• The statement result.append(b) calls a method of the list object result. A method is a
function that 'belongs' to an object and is named obj.methodname, where obj is some
object (this may be an expression), and methodname is the name of a method that is defined
by the object's type. Different types define different methods. Methods of different types may
have the same name without causing ambiguity. (It is possible to define your own object types
and methods, using classes, as discussed later in this tutorial.) The method append() shown
in the example is defined for list objects; it adds a new element at the end of the list. In this
example it is equivalent to result = result + [b], but more efficient.
More on Defining FunctionsIt is also possible to define functions with a variable number of arguments. There are three forms,
which can be combined.
Default Argument Values
The most useful form is to specify a default value for one or more arguments. This creates a function
that can be called with fewer arguments than it is defined to allow. For example:
def ask_ok(prompt, retries=4, complaint='Yes or no, please!'):
while True:
ok = raw_input(prompt)
if ok in ('y', 'ye', 'yes'): return True
if ok in ('n', 'no', 'nop', 'nope'): return False
retries = retries - 1
if retries < 0: raise IOError, 'refusenik user'
print complaint
This function can be called either like this: ask_ok('Do you really want to quit?') or like
this: ask_ok('OK to overwrite the file?', 2).
This example also introduces the in keyword. This tests whether or not a sequence contains a certain
value.
The default values are evaluated at the point of function definition in the defining scope, so that
i = 5
Tutorial de Python
27

def f(arg=i):
print arg
i = 6
f()
will print 5.
Important warning: The default value is evaluated only once. This makes a difference when the
default is a mutable object such as a list, dictionary, or instances of most classes. For example, the
following function accumulates the arguments passed to it on subsequent calls:
def f(a, L=[]):
L.append(a)
return L
print f(1)
print f(2)
print f(3)
This will print
[1]
[1, 2]
[1, 2, 3]
If you don't want the default to be shared between subsequent calls, you can write the function like this
instead:
def f(a, L=None):
if L is None:
L = []
L.append(a)
return L
Keyword Arguments
Functions can also be called using keyword arguments of the form keyword = value. For instance,
the following function:
Tutorial de Python
28

def parrot(voltage, state='a stiff', action='voom', type='Norwegian Blue'):
print "-- This parrot wouldn't", action,
print "if you put", voltage, "volts through it."
print "-- Lovely plumage, the", type
print "-- It's", state, "!"
could be called in any of the following ways:
parrot(1000)
parrot(action = 'VOOOOOM', voltage = 1000000)
parrot('a thousand', state = 'pushing up the daisies')
parrot('a million', 'bereft of life', 'jump')
but the following calls would all be invalid:
parrot() # required argument missing
parrot(voltage=5.0, 'dead') # non-keyword argument following keyword
parrot(110, voltage=220) # duplicate value for argument
parrot(actor='John Cleese') # unknown keyword
In general, an argument list must have any positional arguments followed by any keyword arguments,
where the keywords must be chosen from the formal parameter names. It's not important whether a
formal parameter has a default value or not. No argument may receive a value more than once ---
formal parameter names corresponding to positional arguments cannot be used as keywords in the
same calls. Here's an example that fails due to this restriction:
>>> def function(a):
... pass
...
>>> function(0, a=0)
Traceback (most recent call last):
File "<stdin>", line 1, in ?
TypeError: function() got multiple values for keyword argument 'a'
When a final formal parameter of the form **name is present, it receives a dictionary (see typesmap
ping) containing all keyword arguments except for those corresponding to a formal parameter. This
may be combined with a formal parameter of the form *name (described in the next subsection) which
receives a tuple containing the positional arguments beyond the formal parameter list. (*name must
occur before **name.) For example, if we define a function like this:
Tutorial de Python
29

def cheeseshop(kind, *arguments, **keywords):
print "-- Do you have any", kind, '?'
print "-- I'm sorry, we're all out of", kind
for arg in arguments: print arg
print '-'*40
keys = keywords.keys()
keys.sort()
for kw in keys: print kw, ':', keywords[kw]
It could be called like this:
cheeseshop('Limburger', "It's very runny, sir.",
"It's really very, VERY runny, sir.",
client='John Cleese',
shopkeeper='Michael Palin',
sketch='Cheese Shop Sketch')
and of course it would print:
-- Do you have any Limburger ?
-- I'm sorry, we're all out of Limburger
It's very runny, sir.
It's really very, VERY runny, sir.
----------------------------------------
client : John Cleese
shopkeeper : Michael Palin
sketch : Cheese Shop Sketch
Note that the sort() method of the list of keyword argument names is called before printing the
contents of the keywords dictionary; if this is not done, the order in which the arguments are printed
is undefined.
Arbitrary Argument Lists
Finally, the least frequently used option is to specify that a function can be called with an arbitrary
number of arguments. These arguments will be wrapped up in a tuple. Before the variable number of
arguments, zero or more normal arguments may occur.
Tutorial de Python
30

def fprintf(file, template, *args):
file.write(template.format(args))
Unpacking Argument Lists
The reverse situation occurs when the arguments are already in a list or tuple but need to be unpacked
for a function call requiring separate positional arguments. For instance, the built-in range() function
expects separate start and stop arguments. If they are not available separately, write the function call
with the *-operator to unpack the arguments out of a list or tuple:
>>> range(3, 6) # normal call with separate arguments
[3, 4, 5]
>>> args = [3, 6]
>>> range(*args) # call with arguments unpacked from a list
[3, 4, 5]
In the same fashion, dictionaries can deliver keyword arguments with the **-operator:
>>> def parrot(voltage, state='a stiff', action='voom'):
... print "-- This parrot wouldn't", action,
... print "if you put", voltage, "volts through it.",
... print "E's", state, "!"
...
>>> d = {"voltage": "four million", "state": "bleedin' demised", "action": "VOOM"}
>>> parrot(**d)
-- This parrot wouldn't VOOM if you put four million volts through it. E's bleedin' demised !
Lambda Forms
By popular demand, a few features commonly found in functional programming languages like Lisp
have been added to Python. With the lambda keyword, small anonymous functions can be created.
Here's a function that returns the sum of its two arguments: lambda a, b: a+b. Lambda forms can
be used wherever function objects are required. They are syntactically restricted to a single expression.
Semantically, they are just syntactic sugar for a normal function definition. Like nested function
definitions, lambda forms can reference variables from the containing scope:
>>> def make_incrementor(n):
... return lambda x: x + n
...
Tutorial de Python
31

>>> f = make_incrementor(42)
>>> f(0)
42
>>> f(1)
43
Documentation Strings
There are emerging conventions about the content and formatting of documentation strings.
The first line should always be a short, concise summary of the object's purpose. For brevity, it should
not explicitly state the object's name or type, since these are available by other means (except if the
name happens to be a verb describing a function's operation). This line should begin with a capital
letter and end with a period.
If there are more lines in the documentation string, the second line should be blank, visually separating
the summary from the rest of the description. The following lines should be one or more paragraphs
describing the object's calling conventions, its side effects, etc.
The Python parser does not strip indentation from multi-line string literals in Python, so tools that
process documentation have to strip indentation if desired. This is done using the following convention.
The first non-blank line after the first line of the string determines the amount of indentation for the
entire documentation string. (We can't use the first line since it is generally adjacent to the string's
opening quotes so its indentation is not apparent in the string literal.) Whitespace "equivalent" to this
indentation is then stripped from the start of all lines of the string. Lines that are indented less should
not occur, but if they occur all their leading whitespace should be stripped. Equivalence of whitespace
should be tested after expansion of tabs (to 8 spaces, normally).
Here is an example of a multi-line docstring:
>>> def my_function():
... """Do nothing, but document it.
...
... No, really, it doesn't do anything.
... """
... pass
...
>>> print my_function.__doc__
Do nothing, but document it.
No, really, it doesn't do anything.
Tutorial de Python
32

Intermezzo: Coding Style
Now that you are about to write longer, more complex pieces of Python, it is a good time to talk about
coding style. Most languages can be written (or more concise, formatted) in different styles; some are
more readable than others. Making it easy for others to read your code is always a good idea, and
adopting a nice coding style helps tremendously for that.
For Python, PEP 8 has emerged as the style guide that most projects adhere to; it promotes a very
readable and eye-pleasing coding style. Every Python developer should read it at some point; here are
the most important points extracted for you:
• Use 4-space indentation, and no tabs.
4 spaces are a good compromise between small indentation (allows greater nesting depth)
and large indentation (easier to read). Tabs introduce confusion, and are best left out.
• Wrap lines so that they don't exceed 79 characters.
This helps users with small displays and makes it possible to have several code files
side-by-side on larger displays.
• Use blank lines to separate functions and classes, and larger blocks of code inside functions.
• When possible, put comments on a line of their own.
• Use docstrings.
• Use spaces around operators and after commas, but not directly inside bracketing constructs:
a = f(1, 2) + g(3, 4).
• Name your classes and functions consistently; the convention is to use CamelCase for
classes and lower_case_with_underscores for functions and methods. Always use
self as the name for the first method argument.
• Don't use fancy encodings if your code is meant to be used in international environments.
Plain ASCII works best in any case.
Footnotes
1 Actually, call by object reference would be a better description, since if a
mutable object is passed, the caller will see any changes the callee makes
to it (items inserted into a list).
Data StructuresThis chapter describes some things you've learned about already in more detail, and adds some new
things as well.
More on ListsThe list data type has some more methods. Here are all of the methods of list objects:
Tutorial de Python
33

Add an item to the end of the list; equivalent to a[len(a):] = [x].
Extend the list by appending all the items in the given list; equivalent to a[len(a):] = L.
Insert an item at a given position. The first argument is the index of the element before which to insert,
so a.insert(0, x) inserts at the front of the list, and a.insert(len(a), x) is equivalent to
a.append(x).
Remove the first item from the list whose value is x. It is an error if there is no such item.
Remove the item at the given position in the list, and return it. If no index is specified, a.pop()
removes and returns the last item in the list. (The square brackets around the i in the method signature
denote that the parameter is optional, not that you should type square brackets at that position. You
will see this notation frequently in the Python Library Reference.)
Return the index in the list of the first item whose value is x. It is an error if there is no such item.
Tutorial de Python
34

Return the number of times x appears in the list.
Sort the items of the list, in place.
Reverse the elements of the list, in place.
An example that uses most of the list methods:
>>> a = [66.25, 333, 333, 1, 1234.5]
>>> print a.count(333), a.count(66.25), a.count('x')
2 1 0
>>> a.insert(2, -1)
>>> a.append(333)
>>> a
[66.25, 333, -1, 333, 1, 1234.5, 333]
>>> a.index(333)
1
>>> a.remove(333)
>>> a
[66.25, -1, 333, 1, 1234.5, 333]
>>> a.reverse()
>>> a
[333, 1234.5, 1, 333, -1, 66.25]
>>> a.sort()
>>> a
[-1, 1, 66.25, 333, 333, 1234.5]
Using Lists as Stacks
The list methods make it very easy to use a list as a stack, where the last element added is the first
element retrieved ("last-in, first-out"). To add an item to the top of the stack, use append(). To retrieve
an item from the top of the stack, use pop() without an explicit index. For example:
Tutorial de Python
35

>>> stack = [3, 4, 5]
>>> stack.append(6)
>>> stack.append(7)
>>> stack
[3, 4, 5, 6, 7]
>>> stack.pop()
7
>>> stack
[3, 4, 5, 6]
>>> stack.pop()
6
>>> stack.pop()
5
>>> stack
[3, 4]
Using Lists as Queues
You can also use a list conveniently as a queue, where the first element added is the first element
retrieved ("first-in, first-out"). To add an item to the back of the queue, use append(). To retrieve an
item from the front of the queue, use pop() with 0 as the index. For example:
>>> queue = ["Eric", "John", "Michael"]
>>> queue.append("Terry") # Terry arrives
>>> queue.append("Graham") # Graham arrives
>>> queue.pop(0)
'Eric'
>>> queue.pop(0)
'John'
>>> queue
['Michael', 'Terry', 'Graham']
Functional Programming Tools
There are three built-in functions that are very useful when used with lists: filter(), map(), and
reduce().
filter(function, sequence) returns a sequence consisting of those items from the sequence
for which function(item) is true. If sequence is a string or tuple, the result will be of the same
Tutorial de Python
36

type; otherwise, it is always a list. For example, to compute some primes:
>>> def f(x): return x % 2 != 0 and x % 3 != 0
...
>>> filter(f, range(2, 25))
[5, 7, 11, 13, 17, 19, 23]
map(function, sequence) calls function(item) for each of the sequence's items and returns
a list of the return values. For example, to compute some cubes:
>>> def cube(x): return x*x*x
...
>>> map(cube, range(1, 11))
[1, 8, 27, 64, 125, 216, 343, 512, 729, 1000]
More than one sequence may be passed; the function must then have as many arguments as there
are sequences and is called with the corresponding item from each sequence (or None if some
sequence is shorter than another). For example:
>>> seq = range(8)
>>> def add(x, y): return x+y
...
>>> map(add, seq, seq)
[0, 2, 4, 6, 8, 10, 12, 14]
reduce(function, sequence) returns a single value constructed by calling the binary function
function on the first two items of the sequence, then on the result and the next item, and so on. For
example, to compute the sum of the numbers 1 through 10:
>>> def add(x,y): return x+y
...
>>> reduce(add, range(1, 11))
55
If there's only one item in the sequence, its value is returned; if the sequence is empty, an exception is
raised.
A third argument can be passed to indicate the starting value. In this case the starting value is returned
for an empty sequence, and the function is first applied to the starting value and the first sequence
item, then to the result and the next item, and so on. For example,
Tutorial de Python
37

>>> def sum(seq):
... def add(x,y): return x+y
... return reduce(add, seq, 0)
...
>>> sum(range(1, 11))
55
>>> sum([])
0
Don't use this example's definition of sum(): since summing numbers is such a common need, a
built-in function sum(sequence) is already provided, and works exactly like this.
List Comprehensions
List comprehensions provide a concise way to create lists without resorting to use of map(),
filter() and/or lambda. The resulting list definition tends often to be clearer than lists built using
those constructs. Each list comprehension consists of an expression followed by a for clause, then
zero or more for or if clauses. The result will be a list resulting from evaluating the expression in the
context of the for and if clauses which follow it. If the expression would evaluate to a tuple, it must
be parenthesized.
>>> freshfruit = [' banana', ' loganberry ', 'passion fruit ']
>>> [weapon.strip() for weapon in freshfruit]
['banana', 'loganberry', 'passion fruit']
>>> vec = [2, 4, 6]
>>> [3*x for x in vec]
[6, 12, 18]
>>> [3*x for x in vec if x > 3]
[12, 18]
>>> [3*x for x in vec if x < 2]
[]
>>> [[x,x**2] for x in vec]
[[2, 4], [4, 16], [6, 36]]
>>> [x, x**2 for x in vec] # error - parens required for tuples
File "<stdin>", line 1, in ?
[x, x**2 for x in vec]
^
SyntaxError: invalid syntax
>>> [(x, x**2) for x in vec]
[(2, 4), (4, 16), (6, 36)]
Tutorial de Python
38

>>> vec1 = [2, 4, 6]
>>> vec2 = [4, 3, -9]
>>> [x*y for x in vec1 for y in vec2]
[8, 6, -18, 16, 12, -36, 24, 18, -54]
>>> [x+y for x in vec1 for y in vec2]
[6, 5, -7, 8, 7, -5, 10, 9, -3]
>>> [vec1[i]*vec2[i] for i in range(len(vec1))]
[8, 12, -54]
List comprehensions are much more flexible than map() and can be applied to complex expressions
and nested functions:
>>> [str(round(355/113.0, i)) for i in range(1,6)]
['3.1', '3.14', '3.142', '3.1416', '3.14159']
Nested List Comprehensions
If you've got the stomach for it, list comprehensions can be nested. They are a powerful tool but -- like
all powerful tools -- they need to be used carefully, if at all.
Consider the following example of a 3x3 matrix held as a list containing three lists, one list per row:
>>> mat = [
... [1, 2, 3],
... [4, 5, 6],
... [7, 8, 9],
... ]
Now, if you wanted to swap rows and columns, you could use a list comprehension:
>>> print [[row[i] for row in mat] for i in [0, 1, 2]]
[[1, 4, 7], [2, 5, 8], [3, 6, 9]]
Special care has to be taken for the nested list comprehension:
To avoid apprehension when nesting list comprehensions, read from right to left.
A more verbose version of this snippet shows the flow explicitly:
Tutorial de Python
39

for i in [0, 1, 2]:
for row in mat:
print row[i],
In real world, you should prefer builtin functions to complex flow statements. The zip() function would
do a great job for this use case:
>>> zip(*mat)
[(1, 4, 7), (2, 5, 8), (3, 6, 9)]
See tut-unpacking-arguments for details on the asterisk in this line.
The del statementThere is a way to remove an item from a list given its index instead of its value: the del statement.
This differs from the pop() method which returns a value. The del statement can also be used to
remove slices from a list or clear the entire list (which we did earlier by assignment of an empty list to
the slice). For example:
>>> a = [-1, 1, 66.25, 333, 333, 1234.5]
>>> del a[0]
>>> a
[1, 66.25, 333, 333, 1234.5]
>>> del a[2:4]
>>> a
[1, 66.25, 1234.5]
>>> del a[:]
>>> a
[]
del can also be used to delete entire variables:
>>> del a
Referencing the name a hereafter is an error (at least until another value is assigned to it). We'll find
other uses for del later.
Tutorial de Python
40

Tuples and SequencesWe saw that lists and strings have many common properties, such as indexing and slicing operations.
They are two examples of sequence data types (see typesseq). Since Python is an evolving language,
other sequence data types may be added. There is also another standard sequence data type: the
tuple.
A tuple consists of a number of values separated by commas, for instance:
>>> t = 12345, 54321, 'hello!'
>>> t[0]
12345
>>> t
(12345, 54321, 'hello!')
>>> # Tuples may be nested:
... u = t, (1, 2, 3, 4, 5)
>>> u
((12345, 54321, 'hello!'), (1, 2, 3, 4, 5))
As you see, on output tuples are always enclosed in parentheses, so that nested tuples are interpreted
correctly; they may be input with or without surrounding parentheses, although often parentheses are
necessary anyway (if the tuple is part of a larger expression).
Tuples have many uses. For example: (x, y) coordinate pairs, employee records from a database, etc.
Tuples, like strings, are immutable: it is not possible to assign to the individual items of a tuple (you can
simulate much of the same effect with slicing and concatenation, though). It is also possible to create
tuples which contain mutable objects, such as lists.
A special problem is the construction of tuples containing 0 or 1 items: the syntax has some extra
quirks to accommodate these. Empty tuples are constructed by an empty pair of parentheses; a tuple
with one item is constructed by following a value with a comma (it is not sufficient to enclose a single
value in parentheses). Ugly, but effective. For example:
>>> empty = ()
>>> singleton = 'hello', # <-- note trailing comma
>>> len(empty)
0
>>> len(singleton)
1
>>> singleton
('hello',)
The statement t = 12345, 54321, 'hello!' is an example of tuple packing: the values 12345,
Tutorial de Python
41

54321 and 'hello!' are packed together in a tuple. The reverse operation is also possible:
>>> x, y, z = t
This is called, appropriately enough, sequence unpacking. Sequence unpacking requires the list of
variables on the left to have the same number of elements as the length of the sequence. Note that
multiple assignment is really just a combination of tuple packing and sequence unpacking!
There is a small bit of asymmetry here: packing multiple values always creates a tuple, and unpacking
works for any sequence.
SetsPython also includes a data type for sets. A set is an unordered collection with no duplicate elements.
Basic uses include membership testing and eliminating duplicate entries. Set objects also support
mathematical operations like union, intersection, difference, and symmetric difference.
Here is a brief demonstration:
>>> basket = ['apple', 'orange', 'apple', 'pear', 'orange', 'banana']
>>> fruit = set(basket) # create a set without duplicates
>>> fruit
set(['orange', 'pear', 'apple', 'banana'])
>>> 'orange' in fruit # fast membership testing
True
>>> 'crabgrass' in fruit
False
>>> # Demonstrate set operations on unique letters from two words
...
>>> a = set('abracadabra')
>>> b = set('alacazam')
>>> a # unique letters in a
set(['a', 'r', 'b', 'c', 'd'])
>>> a - b # letters in a but not in b
set(['r', 'd', 'b'])
>>> a | b # letters in either a or b
set(['a', 'c', 'r', 'd', 'b', 'm', 'z', 'l'])
>>> a & b # letters in both a and b
set(['a', 'c'])
>>> a ^ b # letters in a or b but not both
set(['r', 'd', 'b', 'm', 'z', 'l'])
Tutorial de Python
42

DictionariesAnother useful data type built into Python is the dictionary (see typesmapping). Dictionaries are
sometimes found in other languages as "associative memories" or "associative arrays". Unlike
sequences, which are indexed by a range of numbers, dictionaries are indexed by keys, which can be
any immutable type; strings and numbers can always be keys. Tuples can be used as keys if they
contain only strings, numbers, or tuples; if a tuple contains any mutable object either directly or
indirectly, it cannot be used as a key. You can't use lists as keys, since lists can be modified in place
using index assignments, slice assignments, or methods like append() and extend().
It is best to think of a dictionary as an unordered set of key: value pairs, with the requirement that the
keys are unique (within one dictionary). A pair of braces creates an empty dictionary: {}. Placing a
comma-separated list of key:value pairs within the braces adds initial key:value pairs to the dictionary;
this is also the way dictionaries are written on output.
The main operations on a dictionary are storing a value with some key and extracting the value given
the key. It is also possible to delete a key:value pair with del. If you store using a key that is already in
use, the old value associated with that key is forgotten. It is an error to extract a value using a
non-existent key.
The keys() method of a dictionary object returns a list of all the keys used in the dictionary, in arbitrary
order (if you want it sorted, just apply the sort() method to the list of keys). To check whether a single
key is in the dictionary, use the in keyword.
Here is a small example using a dictionary:
>>> tel = {'jack': 4098, 'sape': 4139}
>>> tel['guido'] = 4127
>>> tel
{'sape': 4139, 'guido': 4127, 'jack': 4098}
>>> tel['jack']
4098
>>> del tel['sape']
>>> tel['irv'] = 4127
>>> tel
{'guido': 4127, 'irv': 4127, 'jack': 4098}
>>> tel.keys()
['guido', 'irv', 'jack']
>>> 'guido' in tel
True
The dict() constructor builds dictionaries directly from lists of key-value pairs stored as tuples. When
the pairs form a pattern, list comprehensions can compactly specify the key-value list.
Tutorial de Python
43

>>> dict([('sape', 4139), ('guido', 4127), ('jack', 4098)])
{'sape': 4139, 'jack': 4098, 'guido': 4127}
>>> dict([(x, x**2) for x in (2, 4, 6)]) # use a list comprehension
{2: 4, 4: 16, 6: 36}
Later in the tutorial, we will learn about Generator Expressions which are even better suited for the task
of supplying key-values pairs to the dict() constructor.
When the keys are simple strings, it is sometimes easier to specify pairs using keyword arguments:
>>> dict(sape=4139, guido=4127, jack=4098)
{'sape': 4139, 'jack': 4098, 'guido': 4127}
Looping TechniquesWhen looping through dictionaries, the key and corresponding value can be retrieved at the same time
using the iteritems() method.
>>> knights = {'gallahad': 'the pure', 'robin': 'the brave'}
>>> for k, v in knights.iteritems():
... print k, v
...
gallahad the pure
robin the brave
When looping through a sequence, the position index and corresponding value can be retrieved at the
same time using the enumerate() function.
>>> for i, v in enumerate(['tic', 'tac', 'toe']):
... print i, v
...
0 tic
1 tac
2 toe
To loop over two or more sequences at the same time, the entries can be paired with the zip()
function.
Tutorial de Python
44

>>> questions = ['name', 'quest', 'favorite color']
>>> answers = ['lancelot', 'the holy grail', 'blue']
>>> for q, a in zip(questions, answers):
... print 'What is your {0}? It is {1}.'.format(q, a)
...
What is your name? It is lancelot.
What is your quest? It is the holy grail.
What is your favorite color? It is blue.
To loop over a sequence in reverse, first specify the sequence in a forward direction and then call the
reversed() function.
>>> for i in reversed(xrange(1,10,2)):
... print i
...
9
7
5
3
1
To loop over a sequence in sorted order, use the sorted() function which returns a new sorted list
while leaving the source unaltered.
>>> basket = ['apple', 'orange', 'apple', 'pear', 'orange', 'banana']
>>> for f in sorted(set(basket)):
... print f
...
apple
banana
orange
pear
More on ConditionsThe conditions used in while and if statements can contain any operators, not just comparisons.
The comparison operators in and not in check whether a value occurs (does not occur) in a
sequence. The operators is and is not compare whether two objects are really the same object;
this only matters for mutable objects like lists. All comparison operators have the same priority, which
Tutorial de Python
45

is lower than that of all numerical operators.
Comparisons can be chained. For example, a < b == c tests whether a is less than b and moreover
b equals c.
Comparisons may be combined using the Boolean operators and and or, and the outcome of a
comparison (or of any other Boolean expression) may be negated with not. These have lower priorities
than comparison operators; between them, not has the highest priority and or the lowest, so that A
and not B or C is equivalent to (A and (not B)) or C. As always, parentheses can be used
to express the desired composition.
The Boolean operators and and or are so-called short-circuit operators: their arguments are evaluated
from left to right, and evaluation stops as soon as the outcome is determined. For example, if A and C
are true but B is false, A and B and C does not evaluate the expression C. When used as a general
value and not as a Boolean, the return value of a short-circuit operator is the last evaluated argument.
It is possible to assign the result of a comparison or other Boolean expression to a variable. For
example,
>>> string1, string2, string3 = '', 'Trondheim', 'Hammer Dance'
>>> non_null = string1 or string2 or string3
>>> non_null
'Trondheim'
Note that in Python, unlike C, assignment cannot occur inside expressions. C programmers may
grumble about this, but it avoids a common class of problems encountered in C programs: typing = in
an expression when == was intended.
Comparing Sequences and Other TypesSequence objects may be compared to other objects with the same sequence type. The comparison
uses lexicographical ordering: first the first two items are compared, and if they differ this determines
the outcome of the comparison; if they are equal, the next two items are compared, and so on, until
either sequence is exhausted. If two items to be compared are themselves sequences of the same
type, the lexicographical comparison is carried out recursively. If all items of two sequences compare
equal, the sequences are considered equal. If one sequence is an initial sub-sequence of the other,
the shorter sequence is the smaller (lesser) one. Lexicographical ordering for strings uses the ASCII
ordering for individual characters. Some examples of comparisons between sequences of the same
type:
(1, 2, 3) < (1, 2, 4)
[1, 2, 3] < [1, 2, 4]
'ABC' < 'C' < 'Pascal' < 'Python'
Tutorial de Python
46

(1, 2, 3, 4) < (1, 2, 4)
(1, 2) < (1, 2, -1)
(1, 2, 3) == (1.0, 2.0, 3.0)
(1, 2, ('aa', 'ab')) < (1, 2, ('abc', 'a'), 4)
Note that comparing objects of different types is legal. The outcome is deterministic but arbitrary: the
types are ordered by their name. Thus, a list is always smaller than a string, a string is always smaller
than a tuple, etc. 1 Mixed numeric types are compared according to their numeric value, so 0 equals
0.0, etc.
Footnotes
1 The rules for comparing objects of different types should not be relied upon;
they may change in a future version of the language.
MódulosSi salís del intérprete de Python y entrás de nuevo, las definiciones que hiciste (funciones y variables)
se pierden. Por lo tanto, si querés escribir un programa más o menos largo, es mejor que uses un
editor de texto para preparar la entrada para el interprete y ejecutarlo con ese archivo como entrada.
Esto es conocido como crear un guión, o script. Si tu programa se vuelve más largo, quizás quieras
separarlo en distintos archivos para un mantenimiento más fácil. Quizás también quieras usar una
función útil que escribiste desde distintos programas sin copiar su definición a cada programa.
Para soportar esto, Python tiene una manera de poner definiciones en un archivo y usarlos en un
script o en una instancia interactiva del intérprete. Tal archivo es llamado módulo; las definiciones de
un módulo pueden ser importadas a otros módulos o al módulo principal (la colección de variables a
las que tenés acceso en un script ejecutado en el nivel superior y en el modo calculadora).
Un módulo es una archivo conteniendo definiciones y declaraciones de Python. El nombre del archivo
es el nombre del módulo con el sufijo .py agregado. Dentro de un módulo, el nombre del mismo
(como una cadena) está disponible en el valor de la variable global __name__. Por ejemplo, usá tu
editor de textos favorito para crear un archivo llamado fibo.py en el directorio actual, con el siguiente
contenido:
# módulo de números Fibonacci
def fib(n): # escribe la serie Fibonacci hasta n
a, b = 0, 1
while b < n:
print b,
a, b = b, a+b
Tutorial de Python
47

def fib2(n): # devuelve la serie Fibonacci hasta n
resultado = []
a, b = 0, 1
while b < n:
resultado.append(b)
a, b = b, a+b
return resultado
Ahora entrá al intérprete de Python e importá este módulo con la siguiente orden:
>>> import fibo
Esto no mete los nombres de las funciones definidas en fibo directamente en el espacio de nombres
actual; sólo mete ahí el nombre del módulo, fibo. Usando el nombre del módulo podés acceder a las
funciones:
>>> fibo.fib(1000)
1 1 2 3 5 8 13 21 34 55 89 144 233 377 610 987
>>> fibo.fib2(100)
[1, 1, 2, 3, 5, 8, 13, 21, 34, 55, 89]
>>> fibo.__name__
'fibo'
Si pensás usar la función frecuentemente, podés asignarla a un nombre local:
>>> fib = fibo.fib
>>> fib(500)
1 1 2 3 5 8 13 21 34 55 89 144 233 377
Más sobre los módulosUn módulo puede contener tanto declaraciones ejecutables como definiciones de funciones. Estas
declaraciones están pensadas para inicializar el módulo. Se ejecutan solamente la primera vez que el
módulo se importa en algún lado. 1
Cada módulo tiene su propio espacio de nombres, el que es usado como espacio de nombres global
por todas las funciones definidas en el módulo. Por lo tanto, el autor de un módulo puede usar
variables globales en el módulo sin preocuparse acerca de conflictos con una variable global del
Tutorial de Python
48

usuario. Por otro lado, si sabés lo que estás haciendo podés tocar las variables globales de un módulo
con la misma notación usada para referirte a sus funciones, nombremodulo.nombreitem.
Los módulos pueden importar otros módulos. Es costumbre pero no obligatorio el ubicar todas las
declaraciones import al principio del módulo (o script, para el caso). Los nombres de los módulos
importados se ubican en el espacio de nombres global del módulo que hace la importación.
Hay una variante de la declaración import que importa los nombres de un módulo directamente al
espacio de nombres del módulo que hace la importación. Por ejemplo:
>>> from fibo import fib, fib2
>>> fib(500)
1 1 2 3 5 8 13 21 34 55 89 144 233 377
Esto no introduce en el espacio de nombres local el nombre del módulo desde el cual se está
importando (entonces, en el ejemplo, fibo no se define).
Hay incluso una variante para importar todos los nombres que un módulo define:
>>> from fibo import *
>>> fib(500)
1 1 2 3 5 8 13 21 34 55 89 144 233 377
Esto importa todos los nombres excepto aquellos que comienzan con un subrayado (_).
NotePor razones de eficiencia, cada módulo se importa una vez por sesión del intérprete. Por lo tanto,
si cambiás los módulos, tenés que reiniciar el intérprete -- o, si es sólo un módulo que querés
probar interactivamente, usá reload(), por ejemplo reload(nombremodulo).
Ejecutando módulos como scripts
Cuando ejecutás un módulo de Python con
python fibo.py <argumentos>
...el código en el módulo será ejecutado, tal como si lo hubieses importado, pero con __name__ con
el valor de "__main__". Eso significa que agregando este código al final de tu módulo:
Tutorial de Python
49

if __name__ == "__main__":
import sys
fib(int(sys.argv[1]))
...podés hacer que el archivo sea utilizable tanto como script como un módulo importable, porque el
código que analiza la linea de órdenes sólo se ejecuta si el módulo es ejecutado como archivo
principal:
$ python fibo.py 50
1 1 2 3 5 8 13 21 34
Si el módulo se importa, ese código no se ejecuta:
>>> import fibo
>>>
Esto es frecuentemente usado para proveer al módulo una interfaz de usuario conveniente, o para
propósitos de prueba (ejecutar el módulo como un script ejecuta el juego de pruebas).
El camino de búsqueda de los módulos
Cuando se importa un módulo llamado spam, el intérprete busca un archivo llamado spam.py en el
directorio actual, y luego en la lista de directorios especificada por la variable de entorno PYTHON
PATH. Esta tiene la misma sintáxis que la variable de shell PATH, o sea, una lista de nombres de
directorios. Cuando PYTHONPATH no está configurada, o cuando el archivo no se encuentra allí, la
búsqueda continua en un camino por default que depende de la instalación; en Unix, este es
normalmente .:/usr/lib/python.
En realidad, los módulos se buscan en la lista de directorios dada por la variable sys.path, la cual
se inicializa con el directorio que contiene al script de entrada (o el directorio actual), PYTHONPATH,
y el directorio default dependiente de la instalación. Esto permite que los programas en Python que
saben lo que están haciendo modifiquen o reemplacen el camino de búsqueda de los módulos. Notar
que como el directorio que contiene el script que se ejecuta está en el camino de búsqueda, es
importante que el script no tenga el mismo nombre que un módulo estándar, o Python intentará cargar
el script como un módulo cuando ese módulo se importe. Esto generalmente será un error. Mirá la
sección tut-standardmodules para más información.
Tutorial de Python
50

Archivos "compilados" de Python
Como una importante aceleración del tiempo de arranque para programas cortos que usan un montón
de los módulos estándar, si un archivo llamado spam.pyc existe en el directorio donde se encuentra
spam.py, se asume que contiene una versión ya "compilada a byte" del módulo spam (lo que se
denomina bytecode). La fecha y hora de modificación del archivo spam.py usado para crear
spam.pyc se graba en este último, y el .pyc se ignora si estos no coinciden.
Normalmente, no necesitás hacer nada para crear el archivo spam.pyc. Siempre que el se compile
satisfactoriamente el spam.py, se hace un intento de escribir la versión compilada al spam.pyc. No
es un error si este intento falla, si por cualquier razón el archivo no se escribe completamente, el
archivo spam.pyc resultante se reconocerá como inválido luego. El contenido del archivo
spam.pyc es independiente de la plataforma, por lo que un directorio de módulos puede ser
compartido por máquinas de diferentes arquitecturas.
Algunos consejos para expertos:
• Cuando se invoca el intérprete de Python con la opción -O, se genera código optimizado que
se almacena en archivos .pyo. El optimizador actualmente no ayuda mucho; sólo remueve
las declaraciones assert. Cuando se usa -O, se optimiza todo el bytecode; se ignoran los
archivos .pyc y los archivos .py se compilan a bytecode optimizado.
• Pasando dos opciones -O al intérprete de Python (-OO) causará que el compilador realice
optimizaciones que en algunos raros casos podría resultar en programas que funcionen
incorrectamente. Actualmente, solamente se remueven del bytecode a las cadenas __doc__,
resultando en archivos .pyo más compactos. Ya que algunos programan necesitan tener
disponibles estas cadenas, sólo deberías usar esta opción si sabés lo que estás haciendo.
• Un programa no corre más rápido cuando se lee de un archivo .pyc o .pyo que cuando se
lee del .py; lo único que es más rápido en los archivos .pyc o .pyo es la velocidad con que
se cargan.
• Cuando se ejecuta un script desde la linea de órdenes, nunca se escribe el bytecode del
script a los archivos .pyc o .pyo. Por lo tanto, el tiempo de comienzo de un script puede
reducirse moviendo la mayor parte de su códugo a un módulo y usando un pequeño script de
arranque que importe el módulo. También es posible nombrar a los archivos .pyc o .pyo
directamente desde la linea de órdenes.
• Es posible tener archivos llamados spam.pyc (o spam.pyo cuando se usa la opción -O) sin
un archivo spam.py para el mismo módulo. Esto puede usarse para distribuir el código de
una biblioteca de python en una forma que es moderadamente difícil de hacerle ingeniería
inversa.
• El módulo compileall puede crear archivos .pyc (o archivos .pyo cuando se usa la
opción -O) para todos los módulos en un directorio.
Módulos estándar
Tutorial de Python
51

Python viene con una biblioteca de módulos estándar, descrita en un documento separado, la
Referencia de la Biblioteca de Python (de aquí en más, "Referencia de la Biblioteca"). Algunos
módulos se integran en el intérprete; estos proveen acceso a operaciones que no son parte del núcleo
del lenguaje pero que sin embargo están integrados, tanto por eficiencia como para proveer acceso a
primitivas del sistema operativo, como llamadas al sistema. El conjunto de tales módulos es una
opción de configuración el cual también depende de la plataforma subyacente. Por ejemplo, el módulo
winreg sólo se provee en sistemas Windows. Un módulo en particular merece algo de atención:
sys, el que está integrado en todos los intérpretes de Python. Las variables sys.ps1 y sys.ps2
definen las cadenas usadas como cursores primarios y secundarios:
>>> import sys
>>> sys.ps1
'>>> '
>>> sys.ps2
'... '
>>> sys.ps1 = 'C> '
C> print 'Yuck!'
Yuck!
C>
Estas dos variables están solamente definidas si el intérprete está en modo interactivo.
La variable sys.path es una lista de cadenas que determinan el camino de búsqueda del intérprete
para los módulos. Se inicializa por omisión a un camino tomado de la variable de entorno PYTHON
PATH, o a un valor predefinido en el intérprete si PYTHONPATH no está configurada. Lo podés
modificar usando las operaciones estándar de listas:
>>> import sys
>>> sys.path.append('/ufs/guido/lib/python')
La función dir()La función integrada dir() se usa par encontrar que nombres define un módulo. Devuelve una lista
ordenada de cadenas:
>>> import fibo, sys
>>> dir(fibo)
['__name__', 'fib', 'fib2']
>>> dir(sys)
['__displayhook__', '__doc__', '__excepthook__', '__name__', '__stderr__',
Tutorial de Python
52
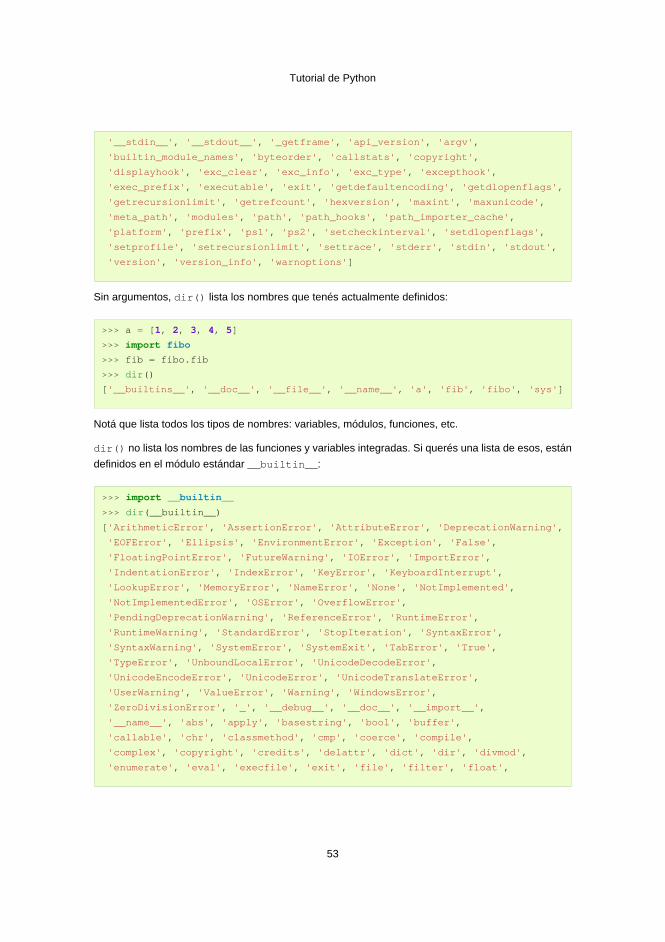
'__stdin__', '__stdout__', '_getframe', 'api_version', 'argv',
'builtin_module_names', 'byteorder', 'callstats', 'copyright',
'displayhook', 'exc_clear', 'exc_info', 'exc_type', 'excepthook',
'exec_prefix', 'executable', 'exit', 'getdefaultencoding', 'getdlopenflags',
'getrecursionlimit', 'getrefcount', 'hexversion', 'maxint', 'maxunicode',
'meta_path', 'modules', 'path', 'path_hooks', 'path_importer_cache',
'platform', 'prefix', 'ps1', 'ps2', 'setcheckinterval', 'setdlopenflags',
'setprofile', 'setrecursionlimit', 'settrace', 'stderr', 'stdin', 'stdout',
'version', 'version_info', 'warnoptions']
Sin argumentos, dir() lista los nombres que tenés actualmente definidos:
>>> a = [1, 2, 3, 4, 5]
>>> import fibo
>>> fib = fibo.fib
>>> dir()
['__builtins__', '__doc__', '__file__', '__name__', 'a', 'fib', 'fibo', 'sys']
Notá que lista todos los tipos de nombres: variables, módulos, funciones, etc.
dir() no lista los nombres de las funciones y variables integradas. Si querés una lista de esos, están
definidos en el módulo estándar __builtin__:
>>> import __builtin__
>>> dir(__builtin__)
['ArithmeticError', 'AssertionError', 'AttributeError', 'DeprecationWarning',
'EOFError', 'Ellipsis', 'EnvironmentError', 'Exception', 'False',
'FloatingPointError', 'FutureWarning', 'IOError', 'ImportError',
'IndentationError', 'IndexError', 'KeyError', 'KeyboardInterrupt',
'LookupError', 'MemoryError', 'NameError', 'None', 'NotImplemented',
'NotImplementedError', 'OSError', 'OverflowError',
'PendingDeprecationWarning', 'ReferenceError', 'RuntimeError',
'RuntimeWarning', 'StandardError', 'StopIteration', 'SyntaxError',
'SyntaxWarning', 'SystemError', 'SystemExit', 'TabError', 'True',
'TypeError', 'UnboundLocalError', 'UnicodeDecodeError',
'UnicodeEncodeError', 'UnicodeError', 'UnicodeTranslateError',
'UserWarning', 'ValueError', 'Warning', 'WindowsError',
'ZeroDivisionError', '_', '__debug__', '__doc__', '__import__',
'__name__', 'abs', 'apply', 'basestring', 'bool', 'buffer',
'callable', 'chr', 'classmethod', 'cmp', 'coerce', 'compile',
'complex', 'copyright', 'credits', 'delattr', 'dict', 'dir', 'divmod',
'enumerate', 'eval', 'execfile', 'exit', 'file', 'filter', 'float',
Tutorial de Python
53

'frozenset', 'getattr', 'globals', 'hasattr', 'hash', 'help', 'hex',
'id', 'input', 'int', 'intern', 'isinstance', 'issubclass', 'iter',
'len', 'license', 'list', 'locals', 'long', 'map', 'max', 'min',
'object', 'oct', 'open', 'ord', 'pow', 'property', 'quit', 'range',
'raw_input', 'reduce', 'reload', 'repr', 'reversed', 'round', 'set',
'setattr', 'slice', 'sorted', 'staticmethod', 'str', 'sum', 'super',
'tuple', 'type', 'unichr', 'unicode', 'vars', 'xrange', 'zip']
PaquetesLos paquetes son una manera de estructurar los espacios de nombres de Python usando "nombres
de módulos con puntos". Por ejemplo, el nombre de módulo A.B designa un submódulo llamado B en
un paquete llamado A. Tal como el uso de módulos evita que los autores de diferentes módulos tengan
que preocuparse de los respectivos nombres de variables globales, el uso de nombres de módulos
con puntos evita que los autores de paquetes de muchos módulos, como NumPy o la Biblioteca de
Imágenes de Python (Python Imaging Library, o PIL), tengan que preocuparse de los respectivos
nombres de módulos.
Suponete que querés designar una colección de módulos (un "paquete") para el manejo uniforme de
archivos y datos de sonidos. Hay diferentes formatos de archivos de sonido (normalmente reconocidos
por su extensión, por ejemplo: .wav, .aiff, .au), por lo que tenés que crear y mantener una
colección siempre creciente de módulos para la conversión entre los distintos formatos de archivos.
Hay muchas operaciones diferentes que quizás quieras ejecutar en los datos de sonido (como
mezclarlos, añadir eco, aplicar una función ecualizadora, crear un efecto estéreo artificial), por lo que
ademas estarás escribiendo una lista sin fin de módulos para realizar estas operaciones. Aquí hay una
posible estructura para tu paquete (expresados en términos de un sistema jerárquico de archivos):
sound/ Paquete superior
__init__.py Inicializa el paquete de sonido
formats/ Subpaquete para conversiones de formato
__init__.py
wavread.py
wavwrite.py
aiffread.py
aiffwrite.py
auread.py
auwrite.py
...
effects/ Subpaquete para efectos de sonido
__init__.py
Tutorial de Python
54

echo.py
surround.py
reverse.py
...
filters/ Subpaquete para filtros
__init__.py
equalizer.py
vocoder.py
karaoke.py
...
Al importar el paquete, Python busca a través de los directorios en sys.path, buscando el subdir
ectorio del paquete.
Los archivos __init__.py se necesitan para hacer que Python trate los directorios como que
contienen paquetes; esto se hace para prevenir directorios con un nombre común, como string, de
esconder sin intención a módulos válidos que se suceden luego en el camino de búsqueda de
módulos. En el caso más simple, __init__.py puede ser solamente un archivo vacío, pero también
puede ejecutar código de inicialización para el paquete o configurar la variable __all__, descrita
luego.
Los usuarios del paquete pueden importar módulos individuales del mismo, por ejemplo:
import sound.effects.echo
Esto carga el submódulo sound.effects.echo. Debe hacerse referencia al mismo con el nombre
completo.
sound.effects.echo.echofilter(input, output, delay=0.7, atten=4)
Otra alternativa para importar el submódulos es:
from sound.effects import echo
Esto también carga el submódulo echo, lo deja disponible sin su prefijo de paquete, por lo que puede
usarse así:
echo.echofilter(input, output, delay=0.7, atten=4)
Otra variación más es importar la función o variable deseadas directamente:
Tutorial de Python
55

from sound.effects.echo import echofilter
De nuevo, esto carga el submódulo echo, pero deja directamente disponible a la función
echofilter():
echofilter(input, output, delay=0.7, atten=4)
Notá que al usar from package import item el ítem puede ser tanto un submódulo (o subpaquete)
del paquete, o algún otro nombre definido en el paquete, como una función, clase, o variable. La
declaración import primero verifica si el ítem está definido en el paquete; si no, asume que es un
módulo y trata de cargarlo. Si no lo puede encontrar, se genera una excepción ImportError.
Por otro lado, cuando se usa la sintaxis como import item.subitem.subsubitem, cada ítem
excepto el último debe ser un paquete; el mismo puede ser un módulo o un paquete pero no puede
ser una clase, función o variable definida en el ítem previo.
Importando * desde un paquete
Ahora, ¿qué sucede cuando el usuario escribe from sound.effects import *? Idealmente, uno
esperaría que esto de alguna manera vaya al sistema de archivos, encuentre cuales submódulos
están presentes en el paquete, y los importe a todos. Desafortunadamente, esta operación no trabaja
muy bien en las plataformas Windows, donde el sistema de archivos no siempre tiene información
precisa sobre mayúsculas y minúsculas. En estas plataformas, no hay una manera garantizada de
saber si el archivo ECHO.PY debería importarse como el módulo echo, Echo o ECHO. (Por ejemplo,
Windows 95 tiene la molesta costumbre de mostrar todos los nombres de archivos con la primer letra
en mayúsculas.) La restricción de DOS de los nombres de archivos con la forma 8+3 agrega otro
problema interesante para los nombres de módulos largos.
La única solución es que el autor del paquete provea un índice explícito del paquete. La declaración
import usa la siguiente convención: si el código del __init__.py de un paquete define una lista
llamada __all__, se toma como la lista de los nombres de módulos que deberían ser importados
cuando se hace from package import *. Es tarea del autor del paquete mantener actualizada
esta lista cuando se libera una nueva versión del paquete. Los autores de paquetes podrían decidir no
soportarlo, si no ven un uso para importar * en sus paquetes. Por ejemplo, el archivo
sounds/effects/__init__.py podría contener el siguiente código:
__all__ = ["echo", "surround", "reverse"]
Esto significaría que from sound.effects import * importaría esos tres submódulos del paquete
sound.
Tutorial de Python
56

Si no se define __all__, la declaración from sound.effects import * no importa todos los
submódulos del paquete sound.effects al espacio de nombres actual; sólo se asegura que se haya
importado el paquete sound.effects (posiblemente ejecutando algún código de inicialización que
haya en __init__.py) y luego importa aquellos nombres que estén definidos en el paquete. Esto
incluye cualquier nombre definido (y submódulos explícitamente cargados) por __init__.py. Tam
bién incluye cualquier submódulo del paquete que pudiera haber sido explícitamente cargado por
declaraciones import previas. Considerá este código:
import sound.effects.echo
import sound.effects.surround
from sound.effects import *
En este ejemplo, los módulos echo y surround se importan en el espacio de nombre actual porque
están definidos en el paquete sound.effects cuando se ejecuta la declaración from...import.
(Esto también funciona cuando se define __all__).
Notá que en general la práctica de importar * desde un módulo o paquete no se recomienda, ya que
frecuentemente genera un código con mala legibilidad. Sin embargo, está bien usarlo para ahorrar
tecleo en sesiones interactivas, y algunos módulos están diseñados para exportar sólo nombres que
siguen ciertos patrones.
Recordá que no está mal usar from Package import specific_submodule! De hecho, esta
notación se recomienda a menos que el módulo que estás importando necesite usar submódulos con
el mismo nombre desde otros paquetes.
Referencias internas en paquetes
Los submódulos frecuentemente necesitan referirse unos a otros. Por ejemplo, el módulo surround
quizás necesite usar el módulo echo module. De hecho, tales referencias son tan comunes que la
declaración import primero mira en el paquete actual antes de mirar en el camino estándar de
búsqueda de módulos. Por lo tanto, el módulo surround puede simplemente hacer import echo o
from echo import echofilter. Si el módulo importado no se encuentra en el paquete actual (el
paquete del cual el módulo actual es un submódulo), la declaración import busca en el nivel superior
por un módulo con el nombre dado.
Cuando se estructuran los paquetes en subpaquetes (como en el ejemplo sound), podés usar
import absolutos para referirte a submódulos de paquetes hermanos. Por ejemplo, si el módulo
sound.filters.vocoder necesita usar el módulo echo en el paquete sound.effects, puede
hacer from sound.effects import echo.
Desde Python 2.5, además de los import relativos implícitos descritos arriba, podés escribir
import relativos explícitos con la declaración de la forma from module import name. Estos
import relativos explícitos usan puntos adelante para indicar los paquetes actual o padres involucra
dos en el import relativo. En el ejemplo surround, podrías hacer:
Tutorial de Python
57

from . import echo
from .. import formats
from ..filters import equalizer
Notá que ambos import, relativos explícitos e implícitos, se basan en el nombre del módulo actual.
Ya que el nombre del módulo principal es siempre "__main__", los módulos pensados para usarse
como módulo principal de una aplicación Python siempre deberían usar import absolutos.
Paquetes en múltiple directorios
Los paquetes soportan un atributo especial más, __path__. Este se inicializa, antes de que el código
en ese archivo se ejecute, a una lista que contiene el nombre del directorio donde está el paquete.
Esta variable puede modificarse, afectando búsquedas futuras de módulos y subpaquetes contenidos
en el paquete.
Aunque esta característica no se necesita frecuentemente, puede usarse para extender el conjunto de
módulos que se encuentran en el paquete.
Footnotes
1 De hecho las definiciones de función son también 'declaraciones' que se
'ejecutan'; la ejecución mete el nombre de la función en el espacio de
nombres global.
Entrada y salidaHay diferentes métodos de presentar la salida de un programa; los datos pueden ser impresos de una
forma legible por humanos, o escritos a un archivo para uso futuro. Este capítulo discutirá algunas de
las posibilidades.
Formateo elegante de la salidaHasta ahora encontramos dos maneras de escribir valores: declaraciones de expresión y la declara
ción print. (Una tercer manera es usando el método write() de los objetos tipo archivo; el archivo
de salida estándar puede referenciarse como sys.stdout. Mirá la Referencia de la Biblioteca para
más información sobre esto.)
Frecuentemente querrás más control sobre el formateo de tu salida que simplemente imprimir valores
separados por espacios. Hay dos maneras de formatear tu salida; la primera es hacer todo el manejo
de las cadenas vos mismo, usando rebanado de cadenas y operaciones de concatenado podés crear
cualquier forma que puedas imaginar. El módulo string contiene algunas operaciones útiles para
emparejar cadenas a un determinado ancho; estas las discutiremos en breve. La otra forma es usar el
método str.format().
Tutorial de Python
58
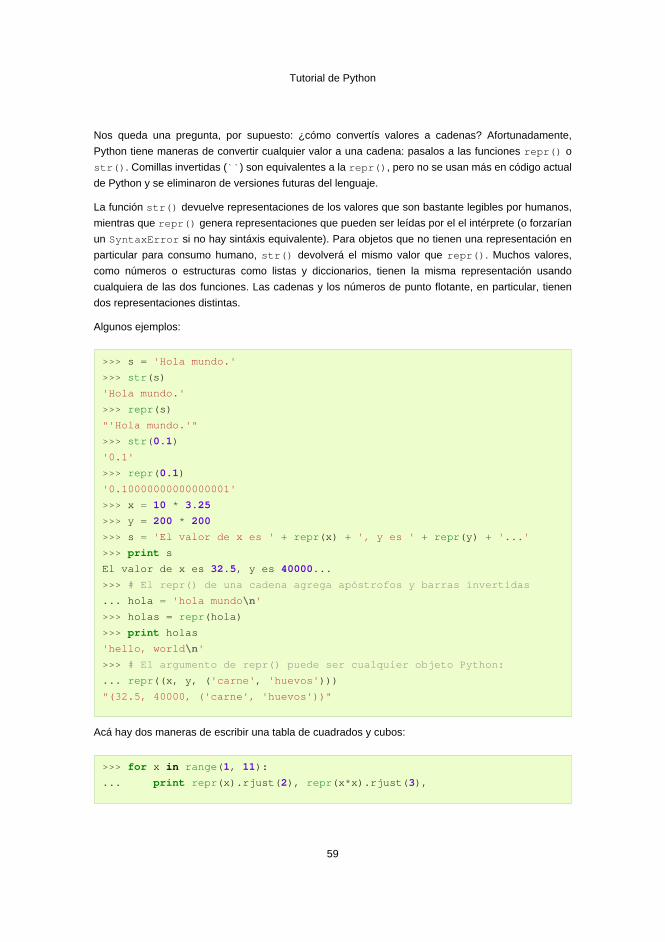
Nos queda una pregunta, por supuesto: ¿cómo convertís valores a cadenas? Afortunadamente,
Python tiene maneras de convertir cualquier valor a una cadena: pasalos a las funciones repr() o
str(). Comillas invertidas (``) son equivalentes a la repr(), pero no se usan más en código actual
de Python y se eliminaron de versiones futuras del lenguaje.
La función str() devuelve representaciones de los valores que son bastante legibles por humanos,
mientras que repr() genera representaciones que pueden ser leídas por el el intérprete (o forzarían
un SyntaxError si no hay sintáxis equivalente). Para objetos que no tienen una representación en
particular para consumo humano, str() devolverá el mismo valor que repr(). Muchos valores,
como números o estructuras como listas y diccionarios, tienen la misma representación usando
cualquiera de las dos funciones. Las cadenas y los números de punto flotante, en particular, tienen
dos representaciones distintas.
Algunos ejemplos:
>>> s = 'Hola mundo.'
>>> str(s)
'Hola mundo.'
>>> repr(s)
"'Hola mundo.'"
>>> str(0.1)
'0.1'
>>> repr(0.1)
'0.10000000000000001'
>>> x = 10 * 3.25
>>> y = 200 * 200
>>> s = 'El valor de x es ' + repr(x) + ', y es ' + repr(y) + '...'
>>> print s
El valor de x es 32.5, y es 40000...
>>> # El repr() de una cadena agrega apóstrofos y barras invertidas
... hola = 'hola mundo\n'
>>> holas = repr(hola)
>>> print holas
'hello, world\n'
>>> # El argumento de repr() puede ser cualquier objeto Python:
... repr((x, y, ('carne', 'huevos')))
"(32.5, 40000, ('carne', 'huevos'))"
Acá hay dos maneras de escribir una tabla de cuadrados y cubos:
>>> for x in range(1, 11):
... print repr(x).rjust(2), repr(x*x).rjust(3),
Tutorial de Python
59

... # notar la coma al final de la linea anterior
... print repr(x*x*x).rjust(4)
...
1 1 1
2 4 8
3 9 27
4 16 64
5 25 125
6 36 216
7 49 343
8 64 512
9 81 729
10 100 1000
>>> for x in range(1,11):
... print '{0:2d} {1:3d} {2:4d}'.format(x, x*x, x*x*x)
...
1 1 1
2 4 8
3 9 27
4 16 64
5 25 125
6 36 216
7 49 343
8 64 512
9 81 729
10 100 1000
(Notar que en el primer ejemplo, un espacio entre cada columna fue agregado por la manera en que
print trabaja: siempre agrega espacios entre sus argumentos)
Este ejemplo muestra el método rjust() de los objetos cadena, el cual ordena una cadena a la
derecha en un campo del ancho dado llenándolo con espacios a la izquierda. Hay métodos similares
ljust() y center(). Estos métodos no escriben nada, sólo devuelven una nueva cadena. Si la
cadena de entrada es demasiado larga, no la truncan, sino la devuelven intacta; esto te romperá la
alineación de tus columnas pero es normalmente mejor que la alternativa, que te estaría mintiendo
sobre el valor. (Si realmente querés que se recorte, siempre podés agregarle una operación de
rebanado, como en x.ljust(n)[:n].)
Hay otro método, zfill(), el cual rellena una cadena numérica a la izquierda con ceros. Entiendo
acerca de signos positivos y negativos:
Tutorial de Python
60

>>> '12'.zfill(5)
'00012'
>>> '-3.14'.zfill(7)
'-003.14'
>>> '3.14159265359'.zfill(5)
'3.14159265359'
El uso básico del método str.format() es como esto:
>>> print 'Somos los {0} quienes decimos "{1}!"'.format('caballeros', 'Nop')
Somos los caballeros quienes decimos "Nop!"
Las llaves y caracteres dentro de las mismas (llamados campos de formato) son reemplazadas con
los objetos pasados en el método format(). El número en las llaves se refiere a la posición del objeto
pasado en el método.
>>> print '{0} y {1}'.format('carne', 'huevos')
carne y huevos
>>> print '{1} y {0}'.format('carne', 'huevos')
huevos y carne
Si se usan argumentos nombrados en el método format(), sus valores serán referidos usando el
nombre del argumento.
>>> print 'Esta {comida} es {adjetivo}.'.format(comida='carne', adjetivo='espantosa')
Esta carne es espantosa.
Se pueden combinar arbitrariamente argumentos posicionales y nombrados:
>>> print 'La historia de {0}, {1}, y {otro}.'.format('Bill', 'Manfred', otro='Georg')
La hostoria de Bill, Manfred, y Georg.
Un ':` y especificador de formato opcionales pueden ir luego del nombre del campo. Esto aumenta
el control sobre cómo el valor es formateado. El siguiente ejemplo trunca Pi a tres lugares luego del
punto decimal.
>>> import math
>>> print 'El valor de PI es aproximadamente {0:.3f}.'.format(math.pi)
El valor de PI es aproximadamente 3.142.
Tutorial de Python
61

Pasando un entero luego del ':' causará que que el campo sea de un mínimo número de caracteres
de ancho. Esto es útil para hacer tablas lindas.
>>> tabla = {'Sjoerd': 4127, 'Jack': 4098, 'Dcab': 7678}
>>> for nombre, telefono in tabla.items():
... print '{0:10} ==> {1:10d}'.format(nombre, telefono)
...
Jack ==> 4098
Dcab ==> 7678
Sjoerd ==> 4127
Si tenés una cadena de formateo realmente larga que no querés separar, podría ser bueno que
puedas hacer referencia a las variables a ser formateadas por el nombre en vez de la posición. Esto
puede hacerse simplemente pasando el diccionario y usando corchetes '[]' para acceder a las
claves
>>> tabla = {'Sjoerd': 4127, 'Jack': 4098, 'Dcab': 8637678}
>>> print 'Jack: {0[Jack]:d}; Sjoerd: {0[Sjoerd]:d}; Dcab: {0[Dcab]:d}'.format(tabla)
Jack: 4098; Sjoerd: 4127; Dcab: 8637678
Esto se podría también hacer pasando la tabla como argumentos nombrados con la notación '**'.:
>>> tabla = {'Sjoerd': 4127, 'Jack': 4098, 'Dcab': 8637678}
>>> print 'Jack: {Jack:d}; Sjoerd: {Sjoerd:d}; Dcab: {Dcab:d}'.format(**tabla)
Jack: 4098; Sjoerd: 4127; Dcab: 8637678
Esto es particularmente útil en combinación con la nueva función integrada vars(), que devuelve un
diccionario conteniendo todas las variables locales.
Para una completa descripción del formateo de cadenas con str.format(), mirá en formatstrings.
Viejo formateo de cadenas
El operador % también puede usarse para formateo de cadenas. Interpreta el argumento de la izquierda
con el estilo de formateo de sprintf para ser aplicado al argumento de la derecha, y devuelve la
cadena resultante de esta operación de formateo. Por ejemplo:
>>> import math
>>> print 'El valor de PI es aproximadamente %5.3f.' % math.pi
El valor de PI es aproximadamente 3.142.
Ya que str.format() es bastante nuevo, un montón de código Python todavía usa el operador %.
Tutorial de Python
62

Sin embargo, ya que este viejo estilo de formateo será eventualmente eliminado del lenguaje, en
general debería usarse str.format().
Podés encontrar más información en la sección string-formatting.
Leyendo y escribiendo archivos
La función open() devuelve un objeto archivo, y es normalmente usado con dos argumentos:
open(nombre_de_archivo, modo).
>>> f = open('/tmp/workfile', 'w')
>>> print f
<open file '/tmp/workfile', mode 'w' at 80a0960>
El primer argumento es una cadena conteniendo el nombre de archivo. El segundo argumento es otra
cadena conteniendo unos pocos caracteres que describen la forma en que el archivo será usado. El
modo puede ser 'r' cuando el archivo será solamente leído, 'w' para sólo escribirlo (un archivo
existente con el mismo nombre será borrado), y 'a' abre el archivo para agregarle información;
cualquier dato escrito al archivo será automáticamente agregado al final. 'r+' abre el archivo tanto
para leerlo como para escribirlo. El argumento modo es opcional; si se omite se asume 'r'.
En Windows y la Macintosh, agregando 'b' al modo abre al archivo en modo binario, por lo que
también hay modos como 'rb', 'wb', y 'r+b'. Windows hace una distinción entre archivos binarios
y de texto; los caracteres de fin de linea en los archivos de texto son automáticamente apenas
alterados cuando los datos son leídos o escritos. Esta modificación en bambalinas para guardar datos
está bien con archivos de texto ASCII, pero corromperá datos binarios como en archivos JPEG o
EXE. Se muy cuidadoso en usar el modo binario al leer y escribir tales archivos. En Unix, no hay
problema en agregarle una 'b' al modo, por lo que podés usarlo independientemente de la plataforma
para todos los archivos binarios.
Métodos de los objetos Archivo
El resto de los ejemplos en esta sección asumirán que ya se creó un objeto archivo llamado f.
Para leer el contenido de una archivo llamá a f.read(cantidad), el cual lee alguna cantidad de
datos y los devuelve como una cadena. cantidad es un argumento numérico opcional. Cuando se
omite cantidad o es negativo, el contenido entero del archivo será leido y devuelto; es tu problema si
el archivo es el doble de grande que la memoria de tu máquina. De otra manera, a lo sumo una
cantidad de bytes son leídos y devueltos. Si se alcanzó el fin del archivo, f.read() devolverá una
cadena vacía ("").
Tutorial de Python
63

>>> f.read()
'Este es el archivo entero.\n'
>>> f.read()
''
f.readline() lee una sola linea del archivo; el caracter de fin de linea (\n) se deja al final de la
cadena, y sólo se omite en la última linea del archivo si el mismo no termina en un fin de linea. Esto
hace que el valor de retorno no se ambiguo; si f.readline() devuelve una cadena vacía, es que se
alcanzó el fin del archivo, mientras que una linea en blanco es representada por '\n', una cadena
conteniendo sólo un único fin de linea.
>>> f.readline()
'Esta es la primer linea del archivo.\n'
>>> f.readline()
'Segunda linea del archivo\n'
>>> f.readline()
''
f.readlines() devuelve una lista conteniendo todos las lineas de datos en el archivo. Si se da un
parámetro opcional pista_tamaño, lee esa cantidad de bytes del archivo y lo suficientemente más
como para completar una linea, y devuelve las lineas de eso. Esto se usa frecuentemente para permitir
una lectura por lineas de forma eficiente en archivos grandes, sin tener que cargar el archivo entero
en memoria. Sólo lineas completas serán devueltas.
>>> f.readlines()
['Esta es la primer linea del archivo.\n', 'Segunda linea del archivo\n']
Una forma alternativa a leer lineas es ciclar sobre el objeto archivo. Esto es eficiente en memoria,
rápido, y conduce a un código más simple:
>>> for linea in f:
print linea,
Esta es la primer linea del archivo
Segunda linea del archivo
El enfoque alternativo es mucho más simple peor no permite un control fino. Ya que los dos enfoques
manejan diferente el buffer de lineas, no deberían mezclarse.
f.write(cadena) escribe el contenido de la cadena al archivo, devolviendo None.
Tutorial de Python
64

>>> f.write('Esto es una prueba\n')
Para escribir algo más que una cadena, necesita convertirse primero a una cadena:
>>> valor = ('la respuesta', 42)
>>> s = str(valor)
>>> f.write(s)
f.tell() devuelve un entero que indica la posición actual en el archivo, medida en bytes desde el
comienzo del archivo. Para cambiar la posición use f.seek(desplazamiento, desde_donde).
La posición es calculada agregando el desplazamiento a un punto de referencia; el punto de referencia
se selecciona del argumento desde_donde. Un valor desde_donde de 0 mide desde el comienzo del
archivo, 1 usa la posición actual del archivo, y 2 usa el fin del archivo como punto de referencia.
desde_donde puede omitirse, el default es 0, usando el comienzo del archivo como punto de referen
cia.
>>> f = open('/tmp/archivodetrabajo', 'r+')
>>> f.write('0123456789abcdef')
>>> f.seek(5) # Va al sexto byte en el archivo
>>> f.read(1)
'5'
>>> f.seek(-3, 2) # Va al tercer byte antes del final
>>> f.read(1)
'd'
Cuando hayas terminado con un archivo, llamá a f.close() para cerrarlo y liberar cualquier recurso
del sistema tomado por el archivo abierto. Luego de llamar f.close(), los intentos de usar el objeto
archivo fallarán automáticamente.
>>> f.close()
>>> f.read()
Traceback (most recent call last):
File "<stdin>", line 1, in ?
ValueError: I/O operation on closed file
Los objetos archivo tienen algunos métodos más, como isatty() y truncate`() que son usados
menos frecuentemente; consultá la Referencia de la Biblioteca para una guía completa sobre los
objetos archivo.
Tutorial de Python
65

El módulo The pickle
Las cadenas pueden facilmente escribirse y leerse de un archivo. Los números toman algo más de
esfuerzo, ya que el método read() sólo devuelve cadenas, que tendrán que ser pasadas a una
función como int(), que toma una cadena como '123' y devuelve su valor numérico 123. Sin
embargo, cuando querés grabar tipos de datos más complejos como listas, diccionarios, o instancias
de clases, las cosas se ponen más complicadas.
En lugar de tener a los usuarios constantemente escribiendo y debugueando código para grabar tipos
de datos complicados, Python provee un módulo estándar llamado pickle. Este es un asombroso
módulo que puede tomar casi cualquier objeto Python (¡incluso algunas formas de código Python!), y
convertirlo a una representación de cadena; este proceso se llama picklear. Reconstruir los objetos
desde la representación en cadena se llama despicklear. Entre que se picklea y se despicklear, la
cadena que representa al objeto puede almacenarse en un archivo, o enviarse a una máquina distante
por una conexión de red.
Si tenés un objeto x, y un objeto archivo f que fue abierto para escritura, la manera más simple de
picklear el objeto toma una sola linea de código:
pickle.dump(x, f)
Para despicklear el objeto nuevamente, si f es un objeto archivo que fue abierto para lectura:
x = pickle.load(f)
(Hay otras variantes de esto, usadas al picklear muchos objetos o cuando no querés escribir los datos
pickleados a un archivo; consultá la documentación completa para pickle en la Referencia de la
Biblioteca de Python.)
pickle es la manera estándar de hacer que los objetos Python puedan almacenarse y reusarse por
otros programas o por una futura invocación al mismo programa; el término técnido de esto es un
objeto persistente. Ya que pickle es tan ampliamente usado, muchos autores que escriben exten
siones de Python toman el cuidado de asegurarse que los nuevos tipos de datos como matrices
puedan ser adecuadamente pickleados y despickleados.
Errors and ExceptionsUntil now error messages haven't been more than mentioned, but if you have tried out the examples
you have probably seen some. There are (at least) two distinguishable kinds of errors: syntax errors
and exceptions.
Tutorial de Python
66

Syntax ErrorsSyntax errors, also known as parsing errors, are perhaps the most common kind of complaint you get
while you are still learning Python:
>>> while True print 'Hello world'
File "<stdin>", line 1, in ?
while True print 'Hello world'
^
SyntaxError: invalid syntax
The parser repeats the offending line and displays a little 'arrow' pointing at the earliest point in the line
where the error was detected. The error is caused by (or at least detected at) the token preceding the
arrow: in the example, the error is detected at the keyword print, since a colon (':') is missing
before it. File name and line number are printed so you know where to look in case the input came
from a script.
ExceptionsEven if a statement or expression is syntactically correct, it may cause an error when an attempt is
made to execute it. Errors detected during execution are called exceptions and are not unconditionally
fatal: you will soon learn how to handle them in Python programs. Most exceptions are not handled by
programs, however, and result in error messages as shown here:
>>> 10 * (1/0)
Traceback (most recent call last):
File "<stdin>", line 1, in ?
ZeroDivisionError: integer division or modulo by zero
>>> 4 + spam*3
Traceback (most recent call last):
File "<stdin>", line 1, in ?
NameError: name 'spam' is not defined
>>> '2' + 2
Traceback (most recent call last):
File "<stdin>", line 1, in ?
TypeError: cannot concatenate 'str' and 'int' objects
The last line of the error message indicates what happened. Exceptions come in different types, and
the type is printed as part of the message: the types in the example are ZeroDivisionError,
NameError and TypeError. The string printed as the exception type is the name of the built-in
exception that occurred. This is true for all built-in exceptions, but need not be true for user-defined
Tutorial de Python
67

exceptions (although it is a useful convention). Standard exception names are built-in identifiers (not
reserved keywords).
The rest of the line provides detail based on the type of exception and what caused it.
The preceding part of the error message shows the context where the exception happened, in the form
of a stack traceback. In general it contains a stack traceback listing source lines; however, it will not
display lines read from standard input.
bltin-exceptions lists the built-in exceptions and their meanings.
Handling ExceptionsIt is possible to write programs that handle selected exceptions. Look at the following example, which
asks the user for input until a valid integer has been entered, but allows the user to interrupt the
program (using Control-C or whatever the operating system supports); note that a user-generated
interruption is signalled by raising the KeyboardInterrupt exception.
>>> while True:
... try:
... x = int(raw_input("Please enter a number: "))
... break
... except ValueError:
... print "Oops! That was no valid number. Try again..."
...
The try statement works as follows.
• First, the try clause (the statement(s) between the try and except keywords) is executed.
• If no exception occurs, the except clause is skipped and execution of the try statement is
finished.
• If an exception occurs during execution of the try clause, the rest of the clause is skipped.
Then if its type matches the exception named after the except keyword, the except clause is
executed, and then execution continues after the try statement.
• If an exception occurs which does not match the exception named in the except clause, it is
passed on to outer try statements; if no handler is found, it is an unhandled exception and
execution stops with a message as shown above.
A try statement may have more than one except clause, to specify handlers for different exceptions.
At most one handler will be executed. Handlers only handle exceptions that occur in the corresponding
try clause, not in other handlers of the same try statement. An except clause may name multiple
exceptions as a parenthesized tuple, for example:
Tutorial de Python
68

... except (RuntimeError, TypeError, NameError):
... pass
The last except clause may omit the exception name(s), to serve as a wildcard. Use this with extreme
caution, since it is easy to mask a real programming error in this way! It can also be used to print an
error message and then re-raise the exception (allowing a caller to handle the exception as well):
import sys
try:
f = open('myfile.txt')
s = f.readline()
i = int(s.strip())
except IOError as (errno, strerror):
print "I/O error({0}): {1}".format(errno, strerror)
except ValueError:
print "Could not convert data to an integer."
except:
print "Unexpected error:", sys.exc_info()[0]
raise
The try ... except statement has an optional else clause, which, when present, must follow all except
clauses. It is useful for code that must be executed if the try clause does not raise an exception. For
example:
for arg in sys.argv[1:]:
try:
f = open(arg, 'r')
except IOError:
print 'cannot open', arg
else:
print arg, 'has', len(f.readlines()), 'lines'
f.close()
The use of the else clause is better than adding additional code to the try clause because it avoids
accidentally catching an exception that wasn't raised by the code being protected by the try ...
except statement.
When an exception occurs, it may have an associated value, also known as the exception's argument.
The presence and type of the argument depend on the exception type.
Tutorial de Python
69

The except clause may specify a variable after the exception name (or tuple). The variable is bound to
an exception instance with the arguments stored in instance.args. For convenience, the exception
instance defines __getitem__() and __str__() so the arguments can be accessed or printed
directly without having to reference .args.
But use of .args is discouraged. Instead, the preferred use is to pass a single argument to an
exception (which can be a tuple if multiple arguments are needed) and have it bound to the message
attribute. One may also instantiate an exception first before raising it and add any attributes to it as
desired.
>>> try:
... raise Exception('spam', 'eggs')
... except Exception as inst:
... print type(inst) # the exception instance
... print inst.args # arguments stored in .args
... print inst # __str__ allows args to printed directly
... x, y = inst # __getitem__ allows args to be unpacked directly
... print 'x =', x
... print 'y =', y
...
<type 'exceptions.Exception'>
('spam', 'eggs')
('spam', 'eggs')
x = spam
y = eggs
If an exception has an argument, it is printed as the last part ('detail') of the message for unhandled
exceptions.
Exception handlers don't just handle exceptions if they occur immediately in the try clause, but also if
they occur inside functions that are called (even indirectly) in the try clause. For example:
>>> def this_fails():
... x = 1/0
...
>>> try:
... this_fails()
... except ZeroDivisionError as detail:
... print 'Handling run-time error:', detail
...
Handling run-time error: integer division or modulo by zero
Tutorial de Python
70
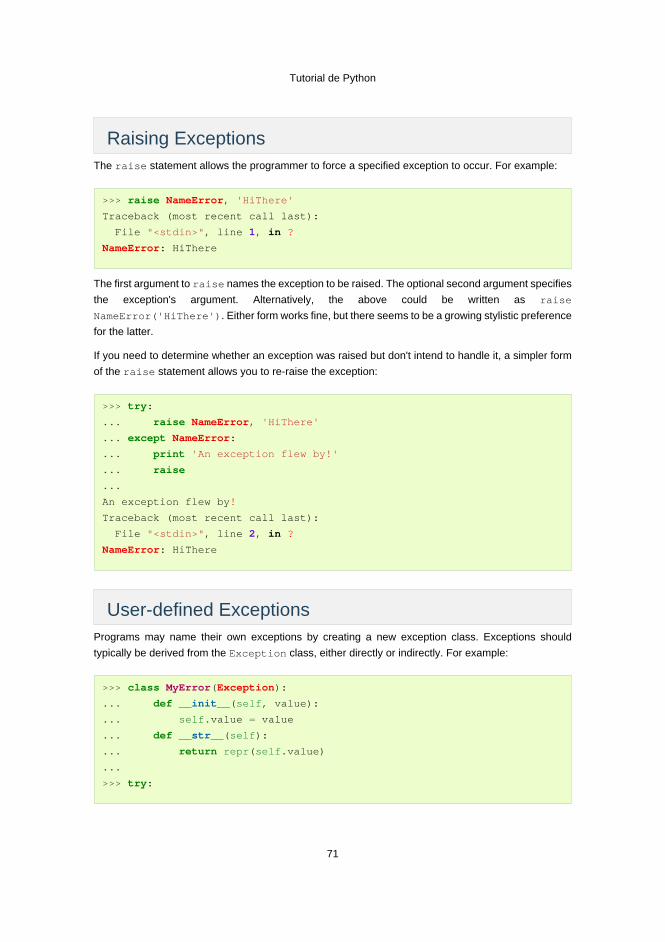
Raising ExceptionsThe raise statement allows the programmer to force a specified exception to occur. For example:
>>> raise NameError, 'HiThere'
Traceback (most recent call last):
File "<stdin>", line 1, in ?
NameError: HiThere
The first argument to raise names the exception to be raised. The optional second argument specifies
the exception's argument. Alternatively, the above could be written as raise
NameError('HiThere'). Either form works fine, but there seems to be a growing stylistic preference
for the latter.
If you need to determine whether an exception was raised but don't intend to handle it, a simpler form
of the raise statement allows you to re-raise the exception:
>>> try:
... raise NameError, 'HiThere'
... except NameError:
... print 'An exception flew by!'
... raise
...
An exception flew by!
Traceback (most recent call last):
File "<stdin>", line 2, in ?
NameError: HiThere
User-defined ExceptionsPrograms may name their own exceptions by creating a new exception class. Exceptions should
typically be derived from the Exception class, either directly or indirectly. For example:
>>> class MyError(Exception):
... def __init__(self, value):
... self.value = value
... def __str__(self):
... return repr(self.value)
...
>>> try:
Tutorial de Python
71

... raise MyError(2*2)
... except MyError as e:
... print 'My exception occurred, value:', e.value
...
My exception occurred, value: 4
>>> raise MyError, 'oops!'
Traceback (most recent call last):
File "<stdin>", line 1, in ?
__main__.MyError: 'oops!'
In this example, the default __init__() of Exception has been overridden. The new behavior
simply creates the value attribute. This replaces the default behavior of creating the args attribute.
Exception classes can be defined which do anything any other class can do, but are usually kept
simple, often only offering a number of attributes that allow information about the error to be extracted
by handlers for the exception. When creating a module that can raise several distinct errors, a common
practice is to create a base class for exceptions defined by that module, and subclass that to create
specific exception classes for different error conditions:
class Error(Exception):
"""Base class for exceptions in this module."""
pass
class InputError(Error):
"""Exception raised for errors in the input.
Attributes:
expression -- input expression in which the error occurred
message -- explanation of the error
"""
def __init__(self, expression, message):
self.expression = expression
self.message = message
class TransitionError(Error):
"""Raised when an operation attempts a state transition that's not
allowed.
Attributes:
previous -- state at beginning of transition
Tutorial de Python
72

next -- attempted new state
message -- explanation of why the specific transition is not allowed
"""
def __init__(self, previous, next, message):
self.previous = previous
self.next = next
self.message = message
Most exceptions are defined with names that end in "Error," similar to the naming of the standard
exceptions.
Many standard modules define their own exceptions to report errors that may occur in functions they
define. More information on classes is presented in chapter tut-classes.
Defining Clean-up ActionsThe try statement has another optional clause which is intended to define clean-up actions that must
be executed under all circumstances. For example:
>>> try:
... raise KeyboardInterrupt
... finally:
... print 'Goodbye, world!'
...
Goodbye, world!
Traceback (most recent call last):
File "<stdin>", line 2, in ?
KeyboardInterrupt
A finally clause is always executed before leaving the try statement, whether an exception has
occurred or not. When an exception has occurred in the try clause and has not been handled by an
except clause (or it has occurred in a except or else clause), it is re-raised after the finally
clause has been executed. The finally clause is also executed "on the way out" when any other
clause of the try statement is left via a break, continue or return statement. A more complicated
example (having except and finally clauses in the same try statement works as of Python 2.5):
>>> def divide(x, y):
... try:
... result = x / y
... except ZeroDivisionError:
Tutorial de Python
73

... print "division by zero!"
... else:
... print "result is", result
... finally:
... print "executing finally clause"
...
>>> divide(2, 1)
result is 2
executing finally clause
>>> divide(2, 0)
division by zero!
executing finally clause
>>> divide("2", "1")
executing finally clause
Traceback (most recent call last):
File "<stdin>", line 1, in ?
File "<stdin>", line 3, in divide
TypeError: unsupported operand type(s) for /: 'str' and 'str'
As you can see, the finally clause is executed in any event. The TypeError raised by dividing two
strings is not handled by the except clause and therefore re-raised after the finally clauses has
been executed.
In real world applications, the finally clause is useful for releasing external resources (such as files
or network connections), regardless of whether the use of the resource was successful.
Predefined Clean-up ActionsSome objects define standard clean-up actions to be undertaken when the object is no longer needed,
regardless of whether or not the operation using the object succeeded or failed. Look at the following
example, which tries to open a file and print its contents to the screen.
for line in open("myfile.txt"):
print line
The problem with this code is that it leaves the file open for an indeterminate amount of time after the
code has finished executing. This is not an issue in simple scripts, but can be a problem for larger
applications. The with statement allows objects like files to be used in a way that ensures they are
always cleaned up promptly and correctly.
Tutorial de Python
74

with open("myfile.txt") as f:
for line in f:
print line
After the statement is executed, the file f is always closed, even if a problem was encountered while
processing the lines. Other objects which provide predefined clean-up actions will indicate this in their
documentation.
ClasesEl mecanismo de clases de Python agrega clases al lenguaje con un mínimo de nuevas sintáxis y
semánticas. Es una mezcla de los mecanismos de clase encontrados en C++ y Modula-3. Como es
cierto para los módulos, las clases en Python no ponen una barrera absoluta entre la definición y el
usuario, sino que más bien se apoya en la cortesía del usuario de no "forzar la definición". Sin
embargo, se mantiene el poder completo de las características más importantes de las clases: el
mecanismo de la herencia de clases permite múltiples clases base, una clase derivada puede
sobreescribir cualquier método de su(s) clase(s) base, y un método puede llamar al método de la clase
base con el mismo nombre. Los objetos pueden tener una cantidad arbitraria de datos privados.
En terminología de C++, todos los miembros de las clases (incluyendo los miembros de datos), son
públicos, y todas las funciones miembro son virtuales. No hay constructores o destructores especiales.
Como en Modula-3, no hay atajos para hacer referencia a los miembros del objeto desde sus métodos:
la función método se declara con un primer argumento explícito que representa al objeto, el cual se
provee implícitamente por la llamada. Como en Smalltalk, las clases mismas son objetos, aunque en
un más amplio sentido de la palabra: en Python, todos los tipos de datos son objetos. Esto provee una
semántica para importar y renombrar. A diferencia de C++ y Modula-3, los tipos de datos integrados
pueden usarse como clases base para que el usuario los extienda. También, como en C++ pero a
diferencia de Modula-3, la mayoría de los operadores integrados con sintáxis especial (operadores
aritméticos, de subíndice, etc.) pueden ser redefinidos por instancias de la clase.
Unas palabras sobre terminologíaSin haber una terminología universalmente aceptada sobre clases, haré uso ocasional de términos de
Smalltalk y C++. (Usaría términos de Modula-3, ya que su semántica orientada a objetos es más
cercanas a Python que C++, pero no espero que muchos lectores hayan escuchado hablar de él).
Los objetos tienen individualidad, y múltiples nombres (en muchos ámbitos) pueden vincularse al
mismo objeto. Esto se conoce como aliasing en otros lenguajes. Normalmente no se aprecia esto a
primera vista en Python, y puede ignorarse sin problemas cuando se maneja tipos básicos inmutables
(números, cadenas, tuplas). Sin embargo, el aliasing, o renombrado, tiene un efecto (intencional!)
sobre la semántica de código Python que involucra objetos mutables como listas, diccionarios, y la
mayoría de tipos que representan entidades afuera del programa (archivos, ventanas, etc.). Esto se
Tutorial de Python
75

usa normalmente para beneficio del programa, ya que los renombres funcionan como punteros en
algunos aspectos. Por ejemplo, pasar un objeto es barato ya que la implementación solamente pasa
el puntero; y si una función modifica el objeto que fue pasado, el que la llama verá el cambio; esto
elimina la necesidad de tener dos formas diferentes de pasar argumentos, como en Pascal.
Python Scopes and Name SpacesBefore introducing classes, I first have to tell you something about Python's scope rules. Class
definitions play some neat tricks with namespaces, and you need to know how scopes and namespaces
work to fully understand what's going on. Incidentally, knowledge about this subject is useful for any
advanced Python programmer.
Let's begin with some definitions.
A namespace is a mapping from names to objects. Most namespaces are currently implemented as
Python dictionaries, but that's normally not noticeable in any way (except for performance), and it may
change in the future. Examples of namespaces are: the set of built-in names (functions such as
abs(), and built-in exception names); the global names in a module; and the local names in a function
invocation. In a sense the set of attributes of an object also form a namespace. The important thing to
know about namespaces is that there is absolutely no relation between names in different namespaces;
for instance, two different modules may both define a function "maximize" without confusion --- users
of the modules must prefix it with the module name.
By the way, I use the word attribute for any name following a dot --- for example, in the expression
z.real, real is an attribute of the object z. Strictly speaking, references to names in modules are
attribute references: in the expression modname.funcname, modname is a module object and
funcname is an attribute of it. In this case there happens to be a straightforward mapping between the
module's attributes and the global names defined in the module: they share the same namespace! 1
Attributes may be read-only or writable. In the latter case, assignment to attributes is possible. Module
attributes are writable: you can write modname.the_answer = 42. Writable attributes may also be
deleted with the del statement. For example, del modname.the_answer will remove the attribute
the_answer from the object named by modname.
Name spaces are created at different moments and have different lifetimes. The namespace containing
the built-in names is created when the Python interpreter starts up, and is never deleted. The global
namespace for a module is created when the module definition is read in; normally, module
namespaces also last until the interpreter quits. The statements executed by the top-level invocation
of the interpreter, either read from a script file or interactively, are considered part of a module called
__main__, so they have their own global namespace. (The built-in names actually also live in a
module; this is called __builtin__.)
The local namespace for a function is created when the function is called, and deleted when the
function returns or raises an exception that is not handled within the function. (Actually, forgetting would
be a better way to describe what actually happens.) Of course, recursive invocations each have their
Tutorial de Python
76

own local namespace.
A scope is a textual region of a Python program where a namespace is directly accessible. "Directly
accessible" here means that an unqualified reference to a name attempts to find the name in the
namespace.
Although scopes are determined statically, they are used dynamically. At any time during execution,
there are at least three nested scopes whose namespaces are directly accessible: the innermost
scope, which is searched first, contains the local names; the namespaces of any enclosing functions,
which are searched starting with the nearest enclosing scope; the middle scope, searched next,
contains the current module's global names; and the outermost scope (searched last) is the namespace
containing built-in names.
If a name is declared global, then all references and assignments go directly to the middle scope
containing the module's global names. Otherwise, all variables found outside of the innermost scope
are read-only (an attempt to write to such a variable will simply create a new local variable in the
innermost scope, leaving the identically named outer variable unchanged).
Usually, the local scope references the local names of the (textually) current function. Outside functions,
the local scope references the same namespace as the global scope: the module's namespace. Class
definitions place yet another namespace in the local scope.
It is important to realize that scopes are determined textually: the global scope of a function defined in
a module is that module's namespace, no matter from where or by what alias the function is called. On
the other hand, the actual search for names is done dynamically, at run time --- however, the language
definition is evolving towards static name resolution, at "compile" time, so don't rely on dynamic name
resolution! (In fact, local variables are already determined statically.)
A special quirk of Python is that -- if no global or nonlocal statement is in effect -- assignments to
names always go into the innermost scope. Assignments do not copy data --- they just bind names to
objects. The same is true for deletions: the statement del x removes the binding of x from the
namespace referenced by the local scope. In fact, all operations that introduce new names use the
local scope: in particular, import statements and function definitions bind the module or function name
in the local scope. (The global statement can be used to indicate that particular variables live in the
global scope.)
A First Look at ClassesClasses introduce a little bit of new syntax, three new object types, and some new semantics.
Class Definition Syntax
The simplest form of class definition looks like this:
Tutorial de Python
77

class ClassName:
<statement-1>
.
.
.
<statement-N>
Class definitions, like function definitions (def statements) must be executed before they have any
effect. (You could conceivably place a class definition in a branch of an if statement, or inside a
function.)
In practice, the statements inside a class definition will usually be function definitions, but other
statements are allowed, and sometimes useful --- we'll come back to this later. The function definitions
inside a class normally have a peculiar form of argument list, dictated by the calling conventions for
methods --- again, this is explained later.
When a class definition is entered, a new namespace is created, and used as the local scope --- thus,
all assignments to local variables go into this new namespace. In particular, function definitions bind
the name of the new function here.
When a class definition is left normally (via the end), a class object is created. This is basically a
wrapper around the contents of the namespace created by the class definition; we'll learn more about
class objects in the next section. The original local scope (the one in effect just before the class
definition was entered) is reinstated, and the class object is bound here to the class name given in the
class definition header (ClassName in the example).
Class Objects
Class objects support two kinds of operations: attribute references and instantiation.
Attribute references use the standard syntax used for all attribute references in Python: obj.name.
Valid attribute names are all the names that were in the class's namespace when the class object was
created. So, if the class definition looked like this:
class MyClass:
"A simple example class"
i = 12345
def f(self):
return 'hello world'
then MyClass.i and MyClass.f are valid attribute references, returning an integer and a function
object, respectively. Class attributes can also be assigned to, so you can change the value of
MyClass.i by assignment. __doc__ is also a valid attribute, returning the docstring belonging to the
Tutorial de Python
78

class: "A simple example class".
Class instantiation uses function notation. Just pretend that the class object is a parameterless function
that returns a new instance of the class. For example (assuming the above class):
x = MyClass()
creates a new instance of the class and assigns this object to the local variable x.
The instantiation operation ("calling" a class object) creates an empty object. Many classes like to
create objects with instances customized to a specific initial state. Therefore a class may define a
special method named __init__(), like this:
def __init__(self):
self.data = []
When a class defines an __init__() method, class instantiation automatically invokes
__init__() for the newly-created class instance. So in this example, a new, initialized instance can
be obtained by:
x = MyClass()
Of course, the __init__() method may have arguments for greater flexibility. In that case, arguments
given to the class instantiation operator are passed on to __init__(). For example,
>>> class Complex:
... def __init__(self, realpart, imagpart):
... self.r = realpart
... self.i = imagpart
...
>>> x = Complex(3.0, -4.5)
>>> x.r, x.i
(3.0, -4.5)
Instance Objects
Now what can we do with instance objects? The only operations understood by instance objects are
attribute references. There are two kinds of valid attribute names, data attributes and methods.
data attributes correspond to "instance variables" in Smalltalk, and to "data members" in C++. Data
attributes need not be declared; like local variables, they spring into existence when they are first
Tutorial de Python
79

assigned to. For example, if x is the instance of MyClass created above, the following piece of code
will print the value 16, without leaving a trace:
x.counter = 1
while x.counter < 10:
x.counter = x.counter * 2
print x.counter
del x.counter
The other kind of instance attribute reference is a method. A method is a function that "belongs to" an
object. (In Python, the term method is not unique to class instances: other object types can have
methods as well. For example, list objects have methods called append, insert, remove, sort, and so
on. However, in the following discussion, we'll use the term method exclusively to mean methods of
class instance objects, unless explicitly stated otherwise.)
Valid method names of an instance object depend on its class. By definition, all attributes of a class
that are function objects define corresponding methods of its instances. So in our example, x.f is a
valid method reference, since MyClass.f is a function, but x.i is not, since MyClass.i is not. But
x.f is not the same thing as MyClass.f --- it is a method object, not a function object.
Method Objects
Usually, a method is called right after it is bound:
x.f()
In the MyClass example, this will return the string 'hello world'. However, it is not necessary to
call a method right away: x.f is a method object, and can be stored away and called at a later time.
For example:
xf = x.f
while True:
print xf()
will continue to print hello world until the end of time.
What exactly happens when a method is called? You may have noticed that x.f() was called without
an argument above, even though the function definition for f() specified an argument. What happened
to the argument? Surely Python raises an exception when a function that requires an argument is
called without any --- even if the argument isn't actually used...
Actually, you may have guessed the answer: the special thing about methods is that the object is
Tutorial de Python
80

passed as the first argument of the function. In our example, the call x.f() is exactly equivalent to
MyClass.f(x). In general, calling a method with a list of n arguments is equivalent to calling the
corresponding function with an argument list that is created by inserting the method's object before the
first argument.
If you still don't understand how methods work, a look at the implementation can perhaps clarify
matters. When an instance attribute is referenced that isn't a data attribute, its class is searched. If the
name denotes a valid class attribute that is a function object, a method object is created by packing
(pointers to) the instance object and the function object just found together in an abstract object: this is
the method object. When the method object is called with an argument list, it is unpacked again, a new
argument list is constructed from the instance object and the original argument list, and the function
object is called with this new argument list.
Random RemarksData attributes override method attributes with the same name; to avoid accidental name conflicts,
which may cause hard-to-find bugs in large programs, it is wise to use some kind of convention that
minimizes the chance of conflicts. Possible conventions include capitalizing method names, prefixing
data attribute names with a small unique string (perhaps just an underscore), or using verbs for
methods and nouns for data attributes.
Data attributes may be referenced by methods as well as by ordinary users ("clients") of an object. In
other words, classes are not usable to implement pure abstract data types. In fact, nothing in Python
makes it possible to enforce data hiding --- it is all based upon convention. (On the other hand, the
Python implementation, written in C, can completely hide implementation details and control access to
an object if necessary; this can be used by extensions to Python written in C.)
Clients should use data attributes with care --- clients may mess up invariants maintained by the
methods by stamping on their data attributes. Note that clients may add data attributes of their own to
an instance object without affecting the validity of the methods, as long as name conflicts are avoided
--- again, a naming convention can save a lot of headaches here.
There is no shorthand for referencing data attributes (or other methods!) from within methods. I find
that this actually increases the readability of methods: there is no chance of confusing local variables
and instance variables when glancing through a method.
Often, the first argument of a method is called self. This is nothing more than a convention: the name
self has absolutely no special meaning to Python. (Note, however, that by not following the convention
your code may be less readable to other Python programmers, and it is also conceivable that a class
browser program might be written that relies upon such a convention.)
Any function object that is a class attribute defines a method for instances of that class. It is not
necessary that the function definition is textually enclosed in the class definition: assigning a function
object to a local variable in the class is also ok. For example:
Tutorial de Python
81

# Function defined outside the class
def f1(self, x, y):
return min(x, x+y)
class C:
f = f1
def g(self):
return 'hello world'
h = g
Now f, g and h are all attributes of class C that refer to function objects, and consequently they are all
methods of instances of C --- h being exactly equivalent to g. Note that this practice usually only serves
to confuse the reader of a program.
Methods may call other methods by using method attributes of the self argument:
class Bag:
def __init__(self):
self.data = []
def add(self, x):
self.data.append(x)
def addtwice(self, x):
self.add(x)
self.add(x)
Methods may reference global names in the same way as ordinary functions. The global scope
associated with a method is the module containing the class definition. (The class itself is never used
as a global scope!) While one rarely encounters a good reason for using global data in a method, there
are many legitimate uses of the global scope: for one thing, functions and modules imported into the
global scope can be used by methods, as well as functions and classes defined in it. Usually, the class
containing the method is itself defined in this global scope, and in the next section we'll find some good
reasons why a method would want to reference its own class!
Each value is an object, and therefore has a class (also called its type). It is stored as
object.__class__.
InheritanceOf course, a language feature would not be worthy of the name "class" without supporting inheritance.
The syntax for a derived class definition looks like this:
Tutorial de Python
82

class DerivedClassName(BaseClassName):
<statement-1>
.
.
.
<statement-N>
The name BaseClassName must be defined in a scope containing the derived class definition. In
place of a base class name, other arbitrary expressions are also allowed. This can be useful, for
example, when the base class is defined in another module:
class DerivedClassName(modname.BaseClassName):
Execution of a derived class definition proceeds the same as for a base class. When the class object
is constructed, the base class is remembered. This is used for resolving attribute references: if a
requested attribute is not found in the class, the search proceeds to look in the base class. This rule is
applied recursively if the base class itself is derived from some other class.
There's nothing special about instantiation of derived classes: DerivedClassName() creates a new
instance of the class. Method references are resolved as follows: the corresponding class attribute is
searched, descending down the chain of base classes if necessary, and the method reference is valid
if this yields a function object.
Derived classes may override methods of their base classes. Because methods have no special
privileges when calling other methods of the same object, a method of a base class that calls another
method defined in the same base class may end up calling a method of a derived class that overrides
it. (For C++ programmers: all methods in Python are effectively virtual.)
An overriding method in a derived class may in fact want to extend rather than simply replace the base
class method of the same name. There is a simple way to call the base class method directly: just call
BaseClassName.methodname(self, arguments). This is occasionally useful to clients as well.
(Note that this only works if the base class is defined or imported directly in the global scope.)
Python has two builtin functions that work with inheritance:
• Use isinstance() to check an object's type: isinstance(obj, int) will be True only if
obj.__class__ is int or some class derived from int.
• Use issubclass() to check class inheritance: issubclass(bool, int) is True since
bool is a subclass of int. However, issubclass(unicode, str) is False since
unicode is not a subclass of str (they only share a common ancestor, basestring).
Tutorial de Python
83

Multiple Inheritance
Python supports a limited form of multiple inheritance as well. A class definition with multiple base
classes looks like this:
class DerivedClassName(Base1, Base2, Base3):
<statement-1>
.
.
.
<statement-N>
For old-style classes, the only rule is depth-first, left-to-right. Thus, if an attribute is not found in
DerivedClassName, it is searched in Base1, then (recursively) in the base classes of Base1, and
only if it is not found there, it is searched in Base2, and so on.
(To some people breadth first --- searching Base2 and Base3 before the base classes of Base1 ---
looks more natural. However, this would require you to know whether a particular attribute of Base1 is
actually defined in Base1 or in one of its base classes before you can figure out the consequences of
a name conflict with an attribute of Base2. The depth-first rule makes no differences between direct
and inherited attributes of Base1.)
For new-style classes, the method resolution order changes dynamically to support cooperative calls
to super(). This approach is known in some other multiple-inheritance languages as call-next-method
and is more powerful than the super call found in single-inheritance languages.
With new-style classes, dynamic ordering is necessary because all cases of multiple inheritance exhibit
one or more diamond relationships (where one at least one of the parent classes can be accessed
through multiple paths from the bottommost class). For example, all new-style classes inherit from
object, so any case of multiple inheritance provides more than one path to reach object. To keep
the base classes from being accessed more than once, the dynamic algorithm linearizes the search
order in a way that preserves the left-to-right ordering specified in each class, that calls each parent
only once, and that is monotonic (meaning that a class can be subclassed without affecting the
precedence order of its parents). Taken together, these properties make it possible to design reliable
and extensible classes with multiple inheritance. For more detail, see http://www.python.org/down
load/releases/2.3/mro/.
Tutorial de Python
84

Private VariablesThere is limited support for class-private identifiers. Any identifier of the form __spam (at least two
leading underscores, at most one trailing underscore) is textually replaced with _classname__spam,
where classname is the current class name with leading underscore(s) stripped. This mangling is
done without regard to the syntactic position of the identifier, so it can be used to define class-private
instance and class variables, methods, variables stored in globals, and even variables stored in
instances. private to this class on instances of other classes. Truncation may occur when the mangled
name would be longer than 255 characters. Outside classes, or when the class name consists of only
underscores, no mangling occurs.
Name mangling is intended to give classes an easy way to define "private" instance variables and
methods, without having to worry about instance variables defined by derived classes, or mucking with
instance variables by code outside the class. Note that the mangling rules are designed mostly to avoid
accidents; it still is possible for a determined soul to access or modify a variable that is considered
private. This can even be useful in special circumstances, such as in the debugger, and that's one
reason why this loophole is not closed. (Buglet: derivation of a class with the same name as the base
class makes use of private variables of the base class possible.)
Notice that code passed to exec, eval() or execfile() does not consider the classname of the
invoking class to be the current class; this is similar to the effect of the global statement, the effect of
which is likewise restricted to code that is byte-compiled together. The same restriction applies to
getattr(), setattr() and delattr(), as well as when referencing __dict__ directly.
Odds and EndsSometimes it is useful to have a data type similar to the Pascal "record" or C "struct", bundling together
a few named data items. An empty class definition will do nicely:
class Employee:
pass
john = Employee() # Create an empty employee record
# Fill the fields of the record
john.name = 'John Doe'
john.dept = 'computer lab'
john.salary = 1000
A piece of Python code that expects a particular abstract data type can often be passed a class that
emulates the methods of that data type instead. For instance, if you have a function that formats some
data from a file object, you can define a class with methods read() and readline() that get the
Tutorial de Python
85

data from a string buffer instead, and pass it as an argument.
Instance method objects have attributes, too: m.im_self is the instance object with the method m(),
and m.im_func is the function object corresponding to the method.
Exceptions Are Classes TooUser-defined exceptions are identified by classes as well. Using this mechanism it is possible to create
extensible hierarchies of exceptions.
There are two new valid (semantic) forms for the raise statement:
raise Class, instance
raise instance
In the first form, instance must be an instance of Class or of a class derived from it. The second
form is a shorthand for:
raise instance.__class__, instance
A class in an except clause is compatible with an exception if it is the same class or a base class
thereof (but not the other way around --- an except clause listing a derived class is not compatible with
a base class). For example, the following code will print B, C, D in that order:
class B:
pass
class C(B):
pass
class D(C):
pass
for c in [B, C, D]:
try:
raise c()
except D:
print "D"
except C:
print "C"
except B:
print "B"
Tutorial de Python
86

Note that if the except clauses were reversed (with except B first), it would have printed B, B, B ---
the first matching except clause is triggered.
When an error message is printed for an unhandled exception, the exception's class name is printed,
then a colon and a space, and finally the instance converted to a string using the built-in function
str().
IteratorsBy now you have probably noticed that most container objects can be looped over using a for
statement:
for element in [1, 2, 3]:
print element
for element in (1, 2, 3):
print element
for key in {'one':1, 'two':2}:
print key
for char in "123":
print char
for line in open("myfile.txt"):
print line
This style of access is clear, concise, and convenient. The use of iterators pervades and unifies Python.
Behind the scenes, the for statement calls iter() on the container object. The function returns an
iterator object that defines the method next() which accesses elements in the container one at a
time. When there are no more elements, next() raises a StopIteration exception which tells the
for loop to terminate. This example shows how it all works:
>>> s = 'abc'
>>> it = iter(s)
>>> it
<iterator object at 0x00A1DB50>
>>> it.next()
'a'
>>> it.next()
'b'
>>> it.next()
'c'
>>> it.next()
Tutorial de Python
87

Traceback (most recent call last):
File "<stdin>", line 1, in ?
it.next()
StopIteration
Having seen the mechanics behind the iterator protocol, it is easy to add iterator behavior to your
classes. Define a __iter__() method which returns an object with a next() method. If the class
defines next(), then __iter__() can just return self:
class Reverse:
"Iterator for looping over a sequence backwards"
def __init__(self, data):
self.data = data
self.index = len(data)
def __iter__(self):
return self
def next(self):
if self.index == 0:
raise StopIteration
self.index = self.index - 1
return self.data[self.index]
>>> for char in Reverse('spam'):
... print char
...
m
a
p
s
GeneratorsGenerators are a simple and powerful tool for creating iterators. They are written like regular functions
but use the yield statement whenever they want to return data. Each time next() is called, the
generator resumes where it left-off (it remembers all the data values and which statement was last
executed). An example shows that generators can be trivially easy to create:
def reverse(data):
for index in range(len(data)-1, -1, -1):
Tutorial de Python
88

yield data[index]
>>> for char in reverse('golf'):
... print char
...
f
l
o
g
Anything that can be done with generators can also be done with class based iterators as described in
the previous section. What makes generators so compact is that the __iter__() and next()
methods are created automatically.
Another key feature is that the local variables and execution state are automatically saved between
calls. This made the function easier to write and much more clear than an approach using instance
variables like self.index and self.data.
In addition to automatic method creation and saving program state, when generators terminate, they
automatically raise StopIteration. In combination, these features make it easy to create iterators
with no more effort than writing a regular function.
Generator ExpressionsSome simple generators can be coded succinctly as expressions using a syntax similar to list compre
hensions but with parentheses instead of brackets. These expressions are designed for situations
where the generator is used right away by an enclosing function. Generator expressions are more
compact but less versatile than full generator definitions and tend to be more memory friendly than
equivalent list comprehensions.
Examples:
>>> sum(i*i for i in range(10)) # sum of squares
285
>>> xvec = [10, 20, 30]
>>> yvec = [7, 5, 3]
>>> sum(x*y for x,y in zip(xvec, yvec)) # dot product
260
>>> from math import pi, sin
>>> sine_table = dict((x, sin(x*pi/180)) for x in range(0, 91))
Tutorial de Python
89

>>> unique_words = set(word for line in page for word in line.split())
>>> valedictorian = max((student.gpa, student.name) for student in graduates)
>>> data = 'golf'
>>> list(data[i] for i in range(len(data)-1,-1,-1))
['f', 'l', 'o', 'g']
Footnotes
1 Except for one thing. Module objects have a secret read-only attribute
called __dict__ which returns the dictionary used to implement the
module's namespace; the name __dict__ is an attribute but not a global
name. Obviously, using this violates the abstraction of namespace imple
mentation, and should be restricted to things like post-mortem debuggers.
Brief Tour of the Standard Library
Operating System InterfaceThe os module provides dozens of functions for interacting with the operating system:
>>> import os
>>> os.system('time 0:02')
0
>>> os.getcwd() # Return the current working directory
'C:\\Python26'
>>> os.chdir('/server/accesslogs')
Be sure to use the import os style instead of from os import *. This will keep os.open() from
shadowing the builtin open() function which operates much differently.
The builtin dir() and help() functions are useful as interactive aids for working with large modules
like os:
>>> import os
>>> dir(os)
<returns a list of all module functions>
>>> help(os)
Tutorial de Python
90

<returns an extensive manual page created from the module's docstrings>
For daily file and directory management tasks, the shutil module provides a higher level interface
that is easier to use:
>>> import shutil
>>> shutil.copyfile('data.db', 'archive.db')
>>> shutil.move('/build/executables', 'installdir')
File WildcardsThe glob module provides a function for making file lists from directory wildcard searches:
>>> import glob
>>> glob.glob('*.py')
['primes.py', 'random.py', 'quote.py']
Command Line ArgumentsCommon utility scripts often need to process command line arguments. These arguments are stored
in the sys module's argv attribute as a list. For instance the following output results from running
python demo.py one two three at the command line:
>>> import sys
>>> print sys.argv
['demo.py', 'one', 'two', 'three']
The getopt module processes sys.argv using the conventions of the Unix getopt() function. More
powerful and flexible command line processing is provided by the optparse module.
Error Output Redirection and Program TerminationThe sys module also has attributes for stdin, stdout, and stderr. The latter is useful for emitting
warnings and error messages to make them visible even when stdout has been redirected:
>>> sys.stderr.write('Warning, log file not found starting a new one\n')
Warning, log file not found starting a new one
Tutorial de Python
91

The most direct way to terminate a script is to use sys.exit().
String Pattern MatchingThe re module provides regular expression tools for advanced string processing. For complex match
ing and manipulation, regular expressions offer succinct, optimized solutions:
>>> import re
>>> re.findall(r'\bf[a-z]*', 'which foot or hand fell fastest')
['foot', 'fell', 'fastest']
>>> re.sub(r'(\b[a-z]+) \1', r'\1', 'cat in the the hat')
'cat in the hat'
When only simple capabilities are needed, string methods are preferred because they are easier to
read and debug:
>>> 'tea for too'.replace('too', 'two')
'tea for two'
MathematicsThe math module gives access to the underlying C library functions for floating point math:
>>> import math
>>> math.cos(math.pi / 4.0)
0.70710678118654757
>>> math.log(1024, 2)
10.0
The random module provides tools for making random selections:
>>> import random
>>> random.choice(['apple', 'pear', 'banana'])
'apple'
>>> random.sample(xrange(100), 10) # sampling without replacement
[30, 83, 16, 4, 8, 81, 41, 50, 18, 33]
>>> random.random() # random float
0.17970987693706186
>>> random.randrange(6) # random integer chosen from range(6)
Tutorial de Python
92

4
Internet AccessThere are a number of modules for accessing the internet and processing internet protocols. Two of
the simplest are urllib2 for retrieving data from urls and smtplib for sending mail:
>>> import urllib2
>>> for line in urllib2.urlopen('http://tycho.usno.navy.mil/cgi-bin/timer.pl'):
... if 'EST' in line or 'EDT' in line: # look for Eastern Time
... print line
<BR>Nov. 25, 09:43:32 PM EST
>>> import smtplib
>>> server = smtplib.SMTP('localhost')
>>> server.sendmail('[email protected]', '[email protected]',
... """To: [email protected]
... From: [email protected]
...
... Beware the Ides of March.
... """)
>>> server.quit()
(Note that the second example needs a mailserver running on localhost.)
Dates and TimesThe datetime module supplies classes for manipulating dates and times in both simple and complex
ways. While date and time arithmetic is supported, the focus of the implementation is on efficient
member extraction for output formatting and manipulation. The module also supports objects that are
timezone aware.
# dates are easily constructed and formatted
>>> from datetime import date
>>> now = date.today()
>>> now
datetime.date(2003, 12, 2)
>>> now.strftime("%m-%d-%y. %d %b %Y is a %A on the %d day of %B.")
'12-02-03. 02 Dec 2003 is a Tuesday on the 02 day of December.'
Tutorial de Python
93

# dates support calendar arithmetic
>>> birthday = date(1964, 7, 31)
>>> age = now - birthday
>>> age.days
14368
Data CompressionCommon data archiving and compression formats are directly supported by modules including: zlib,
gzip, bz2, zipfile and tarfile.
>>> import zlib
>>> s = 'witch which has which witches wrist watch'
>>> len(s)
41
>>> t = zlib.compress(s)
>>> len(t)
37
>>> zlib.decompress(t)
'witch which has which witches wrist watch'
>>> zlib.crc32(s)
226805979
Performance MeasurementSome Python users develop a deep interest in knowing the relative performance of different approaches
to the same problem. Python provides a measurement tool that answers those questions immediately.
For example, it may be tempting to use the tuple packing and unpacking feature instead of the
traditional approach to swapping arguments. The timeit module quickly demonstrates a modest
performance advantage:
>>> from timeit import Timer
>>> Timer('t=a; a=b; b=t', 'a=1; b=2').timeit()
0.57535828626024577
>>> Timer('a,b = b,a', 'a=1; b=2').timeit()
0.54962537085770791
Tutorial de Python
94

In contrast to timeit's fine level of granularity, the profile and pstats modules provide tools for
identifying time critical sections in larger blocks of code.
Quality ControlOne approach for developing high quality software is to write tests for each function as it is developed
and to run those tests frequently during the development process.
The doctest module provides a tool for scanning a module and validating tests embedded in a
program's docstrings. Test construction is as simple as cutting-and-pasting a typical call along with its
results into the docstring. This improves the documentation by providing the user with an example and
it allows the doctest module to make sure the code remains true to the documentation:
def average(values):
"""Computes the arithmetic mean of a list of numbers.
>>> print average([20, 30, 70])
40.0
"""
return sum(values, 0.0) / len(values)
import doctest
doctest.testmod() # automatically validate the embedded tests
The unittest module is not as effortless as the doctest module, but it allows a more comprehensive
set of tests to be maintained in a separate file:
import unittest
class TestStatisticalFunctions(unittest.TestCase):
def test_average(self):
self.assertEqual(average([20, 30, 70]), 40.0)
self.assertEqual(round(average([1, 5, 7]), 1), 4.3)
self.assertRaises(ZeroDivisionError, average, [])
self.assertRaises(TypeError, average, 20, 30, 70)
unittest.main() # Calling from the command line invokes all tests
Tutorial de Python
95

Batteries IncludedPython has a "batteries included" philosophy. This is best seen through the sophisticated and robust
capabilities of its larger packages. For example:
• The xmlrpclib and SimpleXMLRPCServer modules make implementing remote procedure
calls into an almost trivial task. Despite the modules names, no direct knowledge or handling
of XML is needed.
• The email package is a library for managing email messages, including MIME and other
RFC 2822-based message documents. Unlike smtplib and poplib which actually send and
receive messages, the email package has a complete toolset for building or decoding
complex message structures (including attachments) and for implementing internet encoding
and header protocols.
• The xml.dom and xml.sax packages provide robust support for parsing this popular data
interchange format. Likewise, the csv module supports direct reads and writes in a common
database format. Together, these modules and packages greatly simplify data interchange
between python applications and other tools.
• Internationalization is supported by a number of modules including gettext, locale, and
the codecs package.
Brief Tour of the Standard Library -- Part IIThis second tour covers more advanced modules that support professional programming needs. These
modules rarely occur in small scripts.
Output FormattingThe repr module provides a version of repr() customized for abbreviated displays of large or deeply
nested containers:
>>> import repr
>>> repr.repr(set('supercalifragilisticexpialidocious'))
"set(['a', 'c', 'd', 'e', 'f', 'g', ...])"
The pprint module offers more sophisticated control over printing both built-in and user defined
objects in a way that is readable by the interpreter. When the result is longer than one line, the "pretty
printer" adds line breaks and indentation to more clearly reveal data structure:
>>> import pprint
>>> t = [[[['black', 'cyan'], 'white', ['green', 'red']], [['magenta',
... 'yellow'], 'blue']]]
Tutorial de Python
96

...
>>> pprint.pprint(t, width=30)
[[[['black', 'cyan'],
'white',
['green', 'red']],
[['magenta', 'yellow'],
'blue']]]
The textwrap module formats paragraphs of text to fit a given screen width:
>>> import textwrap
>>> doc = """The wrap() method is just like fill() except that it returns
... a list of strings instead of one big string with newlines to separate
... the wrapped lines."""
...
>>> print textwrap.fill(doc, width=40)
The wrap() method is just like fill()
except that it returns a list of strings
instead of one big string with newlines
to separate the wrapped lines.
The locale module accesses a database of culture specific data formats. The grouping attribute of
locale's format function provides a direct way of formatting numbers with group separators:
>>> import locale
>>> locale.setlocale(locale.LC_ALL, 'English_United States.1252')
'English_United States.1252'
>>> conv = locale.localeconv() # get a mapping of conventions
>>> x = 1234567.8
>>> locale.format("%d", x, grouping=True)
'1,234,567'
>>> locale.format("%s%.*f", (conv['currency_symbol'],
... conv['frac_digits'], x), grouping=True)
'$1,234,567.80'
TemplatingThe string module includes a versatile Template class with a simplified syntax suitable for editing
by end-users. This allows users to customize their applications without having to alter the application.
Tutorial de Python
97

The format uses placeholder names formed by $ with valid Python identifiers (alphanumeric characters
and underscores). Surrounding the placeholder with braces allows it to be followed by more alphanu
meric letters with no intervening spaces. Writing $$ creates a single escaped $:
>>> from string import Template
>>> t = Template('${village}folk send $$10 to $cause.')
>>> t.substitute(village='Nottingham', cause='the ditch fund')
'Nottinghamfolk send $10 to the ditch fund.'
The substitute() method raises a KeyError when a placeholder is not supplied in a dictionary or
a keyword argument. For mail-merge style applications, user supplied data may be incomplete and the
safe_substitute() method may be more appropriate --- it will leave placeholders unchanged if
data is missing:
>>> t = Template('Return the $item to $owner.')
>>> d = dict(item='unladen swallow')
>>> t.substitute(d)
Traceback (most recent call last):
. . .
KeyError: 'owner'
>>> t.safe_substitute(d)
'Return the unladen swallow to $owner.'
Template subclasses can specify a custom delimiter. For example, a batch renaming utility for a photo
browser may elect to use percent signs for placeholders such as the current date, image sequence
number, or file format:
>>> import time, os.path
>>> photofiles = ['img_1074.jpg', 'img_1076.jpg', 'img_1077.jpg']
>>> class BatchRename(Template):
... delimiter = '%'
>>> fmt = raw_input('Enter rename style (%d-date %n-seqnum %f-format): ')
Enter rename style (%d-date %n-seqnum %f-format): Ashley_%n%f
>>> t = BatchRename(fmt)
>>> date = time.strftime('%d%b%y')
>>> for i, filename in enumerate(photofiles):
... base, ext = os.path.splitext(filename)
... newname = t.substitute(d=date, n=i, f=ext)
... print '{0} --> {1}'.format(filename, newname)
Tutorial de Python
98

img_1074.jpg --> Ashley_0.jpg
img_1076.jpg --> Ashley_1.jpg
img_1077.jpg --> Ashley_2.jpg
Another application for templating is separating program logic from the details of multiple output
formats. This makes it possible to substitute custom templates for XML files, plain text reports, and
HTML web reports.
Working with Binary Data Record LayoutsThe struct module provides pack() and unpack() functions for working with variable length binary
record formats. The following example shows how to loop through header information in a ZIP file
without using the zipfile module. Pack codes "H" and "I" represent two and four byte unsigned
numbers respectively. The "<" indicates that they are standard size and in little-endian byte order:
import struct
data = open('myfile.zip', 'rb').read()
start = 0
for i in range(3): # show the first 3 file headers
start += 14
fields = struct.unpack('<IIIHH', data[start:start+16])
crc32, comp_size, uncomp_size, filenamesize, extra_size = fields
start += 16
filename = data[start:start+filenamesize]
start += filenamesize
extra = data[start:start+extra_size]
print filename, hex(crc32), comp_size, uncomp_size
start += extra_size + comp_size # skip to the next header
Multi-threadingThreading is a technique for decoupling tasks which are not sequentially dependent. Threads can be
used to improve the responsiveness of applications that accept user input while other tasks run in the
background. A related use case is running I/O in parallel with computations in another thread.
The following code shows how the high level threading module can run tasks in background while
Tutorial de Python
99

the main program continues to run:
import threading, zipfile
class AsyncZip(threading.Thread):
def __init__(self, infile, outfile):
threading.Thread.__init__(self)
self.infile = infile
self.outfile = outfile
def run(self):
f = zipfile.ZipFile(self.outfile, 'w', zipfile.ZIP_DEFLATED)
f.write(self.infile)
f.close()
print 'Finished background zip of: ', self.infile
background = AsyncZip('mydata.txt', 'myarchive.zip')
background.start()
print 'The main program continues to run in foreground.'
background.join() # Wait for the background task to finish
print 'Main program waited until background was done.'
The principal challenge of multi-threaded applications is coordinating threads that share data or other
resources. To that end, the threading module provides a number of synchronization primitives including
locks, events, condition variables, and semaphores.
While those tools are powerful, minor design errors can result in problems that are difficult to reproduce.
So, the preferred approach to task coordination is to concentrate all access to a resource in a single
thread and then use the Queue module to feed that thread with requests from other threads. Applica
tions using Queue.Queue objects for inter-thread communication and coordination are easier to
design, more readable, and more reliable.
LoggingThe logging module offers a full featured and flexible logging system. At its simplest, log messages
are sent to a file or to sys.stderr:
import logging
logging.debug('Debugging information')
logging.info('Informational message')
logging.warning('Warning:config file %s not found', 'server.conf')
Tutorial de Python
100

logging.error('Error occurred')
logging.critical('Critical error -- shutting down')
This produces the following output:
WARNING:root:Warning:config file server.conf not found
ERROR:root:Error occurred
CRITICAL:root:Critical error -- shutting down
By default, informational and debugging messages are suppressed and the output is sent to standard
error. Other output options include routing messages through email, datagrams, sockets, or to an
HTTP Server. New filters can select different routing based on message priority: DEBUG, INFO,
WARNING, ERROR, and CRITICAL.
The logging system can be configured directly from Python or can be loaded from a user editable
configuration file for customized logging without altering the application.
Weak ReferencesPython does automatic memory management (reference counting for most objects and garbage
collection to eliminate cycles). The memory is freed shortly after the last reference to it has been
eliminated.
This approach works fine for most applications but occasionally there is a need to track objects only as
long as they are being used by something else. Unfortunately, just tracking them creates a reference
that makes them permanent. The weakref module provides tools for tracking objects without creating
a reference. When the object is no longer needed, it is automatically removed from a weakref table and
a callback is triggered for weakref objects. Typical applications include caching objects that are
expensive to create:
>>> import weakref, gc
>>> class A:
... def __init__(self, value):
... self.value = value
... def __repr__(self):
... return str(self.value)
...
>>> a = A(10) # create a reference
>>> d = weakref.WeakValueDictionary()
>>> d['primary'] = a # does not create a reference
>>> d['primary'] # fetch the object if it is still alive
Tutorial de Python
101

10
>>> del a # remove the one reference
>>> gc.collect() # run garbage collection right away
0
>>> d['primary'] # entry was automatically removed
Traceback (most recent call last):
File "<stdin>", line 1, in <module>
d['primary'] # entry was automatically removed
File "C:/python26/lib/weakref.py", line 46, in __getitem__
o = self.data[key]()
KeyError: 'primary'
Tools for Working with ListsMany data structure needs can be met with the built-in list type. However, sometimes there is a need
for alternative implementations with different performance trade-offs.
The array module provides an array() object that is like a list that stores only homogenous data
and stores it more compactly. The following example shows an array of numbers stored as two byte
unsigned binary numbers (typecode "H") rather than the usual 16 bytes per entry for regular lists of
python int objects:
>>> from array import array
>>> a = array('H', [4000, 10, 700, 22222])
>>> sum(a)
26932
>>> a[1:3]
array('H', [10, 700])
The collections module provides a deque() object that is like a list with faster appends and pops
from the left side but slower lookups in the middle. These objects are well suited for implementing
queues and breadth first tree searches:
>>> from collections import deque
>>> d = deque(["task1", "task2", "task3"])
>>> d.append("task4")
>>> print "Handling", d.popleft()
Handling task1
Tutorial de Python
102
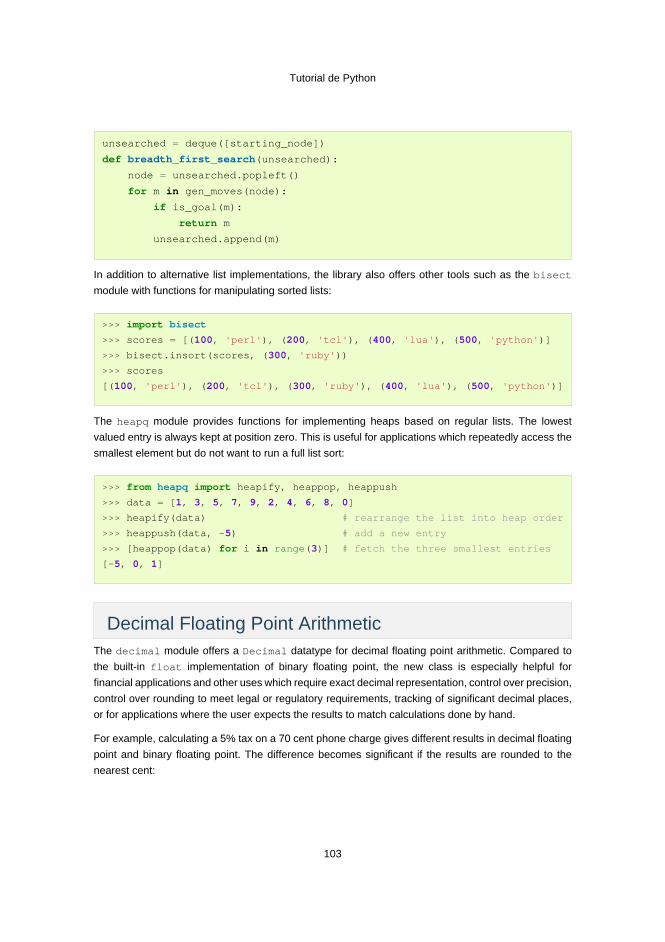
unsearched = deque([starting_node])
def breadth_first_search(unsearched):
node = unsearched.popleft()
for m in gen_moves(node):
if is_goal(m):
return m
unsearched.append(m)
In addition to alternative list implementations, the library also offers other tools such as the bisect
module with functions for manipulating sorted lists:
>>> import bisect
>>> scores = [(100, 'perl'), (200, 'tcl'), (400, 'lua'), (500, 'python')]
>>> bisect.insort(scores, (300, 'ruby'))
>>> scores
[(100, 'perl'), (200, 'tcl'), (300, 'ruby'), (400, 'lua'), (500, 'python')]
The heapq module provides functions for implementing heaps based on regular lists. The lowest
valued entry is always kept at position zero. This is useful for applications which repeatedly access the
smallest element but do not want to run a full list sort:
>>> from heapq import heapify, heappop, heappush
>>> data = [1, 3, 5, 7, 9, 2, 4, 6, 8, 0]
>>> heapify(data) # rearrange the list into heap order
>>> heappush(data, -5) # add a new entry
>>> [heappop(data) for i in range(3)] # fetch the three smallest entries
[-5, 0, 1]
Decimal Floating Point ArithmeticThe decimal module offers a Decimal datatype for decimal floating point arithmetic. Compared to
the built-in float implementation of binary floating point, the new class is especially helpful for
financial applications and other uses which require exact decimal representation, control over precision,
control over rounding to meet legal or regulatory requirements, tracking of significant decimal places,
or for applications where the user expects the results to match calculations done by hand.
For example, calculating a 5% tax on a 70 cent phone charge gives different results in decimal floating
point and binary floating point. The difference becomes significant if the results are rounded to the
nearest cent:
Tutorial de Python
103

>>> from decimal import *
>>> Decimal('0.70') * Decimal('1.05')
Decimal("0.7350")
>>> .70 * 1.05
0.73499999999999999
The Decimal result keeps a trailing zero, automatically inferring four place significance from multiplic
ands with two place significance. Decimal reproduces mathematics as done by hand and avoids issues
that can arise when binary floating point cannot exactly represent decimal quantities.
Exact representation enables the Decimal class to perform modulo calculations and equality tests
that are unsuitable for binary floating point:
>>> Decimal('1.00') % Decimal('.10')
Decimal("0.00")
>>> 1.00 % 0.10
0.09999999999999995
>>> sum([Decimal('0.1')]*10) == Decimal('1.0')
True
>>> sum([0.1]*10) == 1.0
False
The decimal module provides arithmetic with as much precision as needed:
>>> getcontext().prec = 36
>>> Decimal(1) / Decimal(7)
Decimal("0.142857142857142857142857142857142857")
¿Y ahora qué?Leer este tutorial probablemente reforzó tu interés por usar Python --- deberías estar ansioso por
aplicar Python a la resolución de tus problemas reales. ¿A dónde deberías ir para aprender más?
Este tutorial forma parte del juego de documentación de Python. Algunos otros documentos que
encontrarás en este juego son:
Tutorial de Python
104

• library-index:
Deberías hojear este manual, que tiene material de referencia completo (si bien breve) sobre
tipos, funciones y módulos de la biblioteca estándar. La distribución de Python estándar
incluye un montón de código adicional. Hay módulos para leer archivos de correo de Unix,
obtener documentos via HTTP, generar números aleatorios, interpretar opciones de línea de
comandos, escribir programas CGI, comprimir datos, y muchas otras tareas. Un vistazo por la
Referencia de Biblioteca te dará una idea de lo que hay disponible.
• install-index explica cómo instalar módulos externos escritos por otros usuarios de Python.
• reference-index: Una descripción en detalle de la sintaxis y semántica de Python. Es una
lectura pesada, pero útil como guía completa al lenguaje en sí.
Más recursos sobre Python:
• http://www.python.org: El sitio web principal sobre Python. Contiene código, documentación, y
referencias a páginas relacionadas con Python en la Web. Este sitio web tiene copias espejo
en varios lugares del mundo cómo Europa, Japón y Australia; una copia espejo puede
funcionar más rápido que el sitio principal, dependiendo de tu ubicación geográfica.
• http://docs.python.org: Acceso rápido a la documentación de Python.
• http://pypi.python.org: El Índice de Paquetes de Python, antes también apodado "El Negocio
de Quesos", es un listado de módulos de Python disponibles para descargar hechos por otros
usuarios. Cuándo comiences a publicar código, puedes registrarlo aquí así los demás pueden
encontrarlo.
• http://aspn.activestate.com/ASPN/Python/Cookbook/: El Recetario de Python es una
colección de tamaño considerable de ejemplos de código, módulos más grandes, y scripts
útiles. Las contribuciones particularmente notorias están recolectadas en un libro también
titulado Recetario de Python (O'Reilly & Associates, ISBN 0-596-00797-3.)
Para preguntas relacionadas con Python y reportes de problemas puedes escribir al grupo de noticias
comp.lang.python, o enviarlas a la lista de correo que hay en [email protected]. El grupo de
noticias y la lista de correo están interconectadas, por lo que los mensajes enviados a uno serán
retransmitidos al otro. Hay alrededor de 120 mensajes diarios (con picos de hasta varios cientos),
haciendo (y respondiendo) preguntas, sugiriendo nuevas características, y anunciando nuevos módu
los. Antes de escribir, asegúrate de haber revisado la lista de Preguntas Frecuentes (también llamado
el FAQ), o búscalo en el directorio Misc/ de la distribución en código fuente de Python. Hay archivos
de la lista de correo disponibles en http://mail.python.org/pipermail/. El FAQ responde a muchas de las
preguntas que aparecen una y otra vez, y puede que ya contenga la solución a tu problema.
Tutorial de Python
105

Edición de Entrada Interactiva y Sustitución deHistorial
Algunas versiones del intérprete de Python permiten editar la línea de entrada actual, y sustituir en
base al historial, de forma similar a las capacidades del intérprete de comandos Korn y el GNU bash.
Esto se implementa con la biblioteca GNU Readline, que soporta edición al estilo de Emacs y al estilo
de vi. Esta biblioteca tiene su propia documentación que no duplicaré aquí; pero la funcionalidad
básica es fácil de explicar. La edición interactiva y el historial aquí descriptos están disponibles como
opcionales en las versiones para Unix y Cygwin del intérprete.
Este capítulo no documenta las capacidades de edición del paquete PythonWin de Mark Hammond,
ni del entorno IDLE basado en Tk que se distribuye con Python. El historial de línea de comandos que
funciona en pantallas de DOS en NT y algunas otras variantes de DOS y Windows es también una
criatura diferente.
Edición de LíneaDe estar soportada, la edición de línea de entrada se activa en cuanto el intérprete muestra un símbolo
de espera de ordenes primario o secundario. La línea activa puede editarse usando los caracteres de
control convencionales de Emacs. De estos, los más importantes son: C-A (Ctrl-A) mueve el cursor al
comienzo de la línea, C-E al final, C-B lo mueve una posición a la izquierda, C-F a la derecha. La tecla
de retroceso (Backspace) borra el caracter a la izquierda del cursor, C-D el caracter a su derecha.
C-K corta el resto de la línea a la derecha del cursor, C-Y pega de vuelta la última cadena cortada.
C-underscore deshace el último cambio hecho; puede repetirse para obtener un efecto acumulativo.
Sustitución de historialLa sustitución de historial funciona de la siguiente manera: todas las líneas ingresadas y no vacías se
almacenan en una memoria intermedia, y cuando se te pide una nueva línea, estás posicionado en
una linea nueva al final de esta memoria. C-P se mueve una línea hacia arriba (es decir, hacia atrás)
en el historial, C-N se mueve una línea hacia abajo. Cualquier línea en el historial puede editarse;
aparecerá un asterisco adelante del indicador de entrada para marcar una línea como editada.
Presionando la tecla Return (Intro) se pasa la línea activa al intérprete. C-R inicia una búsqueda
incremental hacia atrás, C-S inicia una búsqueda hacia adelante.
Atajos de tecladoLos atajos de teclado y algunos otros parámetros de la biblioteca Readline se pueden personalizar
poniendo comandos en un archivo de inicialización llamado ~/.inputrc. Los atajos de teclado tienen
la forma
Tutorial de Python
106
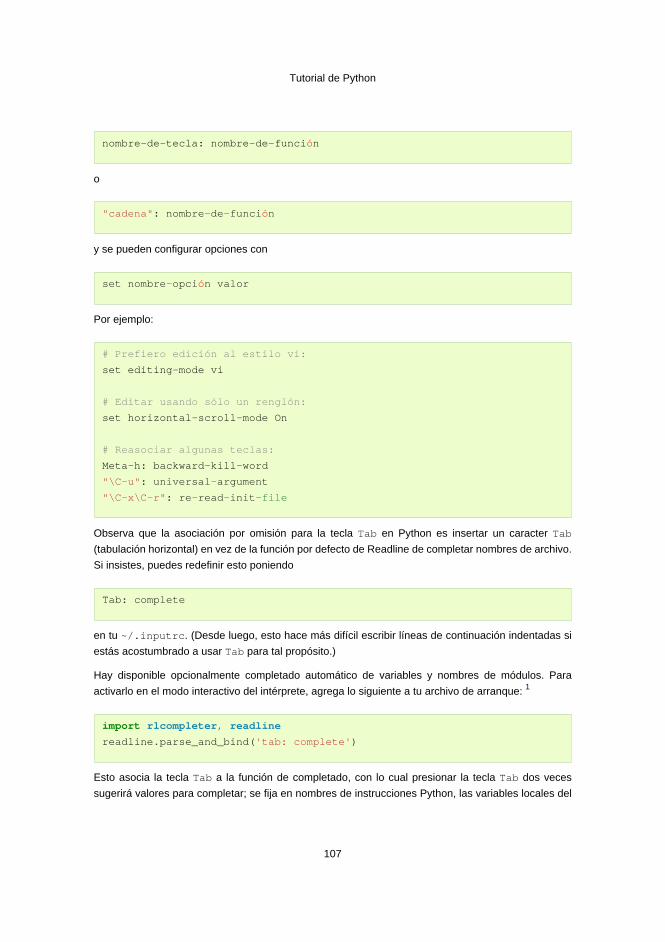
nombre-de-tecla: nombre-de-función
o
"cadena": nombre-de-función
y se pueden configurar opciones con
set nombre-opción valor
Por ejemplo:
# Prefiero edición al estilo vi:
set editing-mode vi
# Editar usando sólo un renglón:
set horizontal-scroll-mode On
# Reasociar algunas teclas:
Meta-h: backward-kill-word
"\C-u": universal-argument
"\C-x\C-r": re-read-init-file
Observa que la asociación por omisión para la tecla Tab en Python es insertar un caracter Tab
(tabulación horizontal) en vez de la función por defecto de Readline de completar nombres de archivo.
Si insistes, puedes redefinir esto poniendo
Tab: complete
en tu ~/.inputrc. (Desde luego, esto hace más difícil escribir líneas de continuación indentadas si
estás acostumbrado a usar Tab para tal propósito.)
Hay disponible opcionalmente completado automático de variables y nombres de módulos. Para
activarlo en el modo interactivo del intérprete, agrega lo siguiente a tu archivo de arranque: 1
import rlcompleter, readline
readline.parse_and_bind('tab: complete')
Esto asocia la tecla Tab a la función de completado, con lo cual presionar la tecla Tab dos veces
sugerirá valores para completar; se fija en nombres de instrucciones Python, las variables locales del
Tutorial de Python
107

momento, y los nombres de módulos disponibles. Para expresiones con puntos como string.a,
evaluará la expresión hasta el último '.' y luego sugerirá opciones a completar de los atributos de el
objeto resultante. Tenga en cuenta que esto puede ejecutar código definido por la aplicación si un
objeto con un método __getattr__() forma parte de la expresión.
Un archivo de inicialización con más capacidades podría ser como este ejemplo. Observa que éste
borra los nombres que crea una vez que no se necesitan más; esto se hace debido a que el archivo
de inicialización se ejecuta en el mismo espacio de nombres que los comandos interactivos, y borrar
los nombres evita que se produzcan efectos colaterales en el entorno interactivo. Tal vez te resulte
cómodo mantener algunos de los módulos importados, tales como os, que usualmente acaban siendo
necesarios en la mayoría de las sesiones con el intérprete.
# Añadir auto-completado y almacenamiento de archivo de histórico a tu
# intérprete de Python interactivo. Requiere Python 2.0+, y readline.
# El autocompletado esta ligado a la tecla Esc por defecto (puedes
# modificarlo - lee la documentación de readline).
#
# Guarda este archivo en ~/.pystartup, y configura una variable de inicio
# para que lo apunte: en bash "export PYTHONSTARTUP=/home/usuario/.pystartup".
#
# Ten en cuenta que PYTHONSTARTUP *no* expande "~", así que debes poner
# la ruta completa a tu directorio personal.
import atexit
import os
import readline
import rlcompleter
historyPath = os.path.expanduser("~/.pyhistory")
def save_history(historyPath=historyPath):
import readline
readline.write_history_file(historyPath)
if os.path.exists(historyPath):
readline.read_history_file(historyPath)
atexit.register(save_history)
del os, atexit, readline, rlcompleter, save_history, historyPath
Tutorial de Python
108

ComentarioEsta funcionalidad es un paso enorme hacia adelante comparado con versiones anteriores del
interprete; de todos modos, quedan pendientes algunos deseos: sería bueno si la indentación correcta
se sugiriera en las lineas de continuación (el parser sabe si se requiere una indentación a continua
ción). El mecanismo de completado podría usar la tabla de símbolos del intérprete. Un comando para
verificar (o incluso sugerir) coincidencia de paréntesis, comillas, etc. también sería útil.
Notas
1 Python ejecutará el contenido de un archivo indicado por la variable de
entorno PYTHONSTARTUP cuando inicies un intérprete interactivo.
Aritmética de Punto Flotante: Problemas yLimitaciones
Los números de punto flotante se representan en el hardware de la computadora en fracciones en
base 2 (binario). Por ejemplo, la fracción decimal
0.125
tiene el valor 1/10 + 2/100 + 5/1000, y de la misma manera la fracción binaria
0.001
tiene el valor 0/2 + 0/4 + 1/8. Estas dos fracciones tienen valores idénticos, la única diferencia real es
que la primera está escrita en notación fraccional en base 10 y la segunda en base 2.
Desafortunadamente, la mayoría de las fracciones decimales no pueden representarse exactamente
como fracciones binarias. Como consecuencia, en general los números de punto flotante decimal que
ingresás en la computadora son sólo aproximados por los números de punto flotante binario que
realmente se guardan en la máquina.
El problema es más fácil de entender primero en base 10. Considerá la fracción 1/3. Podés aproximarla
como una fracción de base 10
0.3
o, mejor,
0.33
Tutorial de Python
109

o, mejor,
0.333
y así. No importa cuantos dígitos desees escribir, el resultado nunca será exactamente 1/3, pero será
una aproximación cada vez mejor de 1/3.
De la misma manera, no importa cuantos dígitos en base 2 quieras usar, el valor decimal 0.1 no puede
representarse exactamente como una fracción en base 2. En base 2, 1/10 es la siguiente fracción que
se repite infinitamente:
0.0001100110011001100110011001100110011001100110011...
Frená en cualquier número finito de bits, y tendrás una aproximación. Es por esto que ves cosas como:
>>> 0.1
0.10000000000000001
En la mayoría de las máquinas de hoy en día, eso es lo que verás si ingresás 0.1 en un prompt de
Python. Quizás no, sin embargo, porque la cantidad de bits usados por el hardware para almacenar
valores de punto flotante puede variar en las distintas máquinas, y Python sólo muestra una aproxim
ación del valor decimal verdadero de la aproximación binaria guardada por la máquina. En la mayoría
de las máquinas, si Python fuera a mostrar el verdadero valor decimal de la aproximación almacenada
por 0.1, tendría que mostrar sin embargo
>>> 0.1
0.1000000000000000055511151231257827021181583404541015625
El prompt de Python usa la función integrada repr() para obtener una versión en cadena de
caracteres de todo lo que muestra. Para flotantes, repr(float) redondea el valor decimal verdadero
a 17 dígitos significativos, dando
0.10000000000000001
repr(float) produce 17 dígitos significativos porque esto es suficiente (en la mayoría de las
máquinas) para que se cumpla eval(repr(x)) == x exactamente para todos los flotantes finitos
X, pero redondeando a 16 dígitos no es suficiente para que sea verdadero.
Notá que esta es la verdadera naturaleza del punto flotante binario: no es un bug de Python, y tampoco
es un bug en tu código. Verás lo mismo en todos los lenguajes que soportan la aritmética de punto
flotante de tu hardware (a pesar de que en algunos lenguajes por default no muestren la diferencia, o
Tutorial de Python
110

no lo hagan en todos los modos de salida).
La función integrada :func: str de Python produce sólo 12 dígitos significativos, y quizás quieras usar
esa. Normalmente eval(str(x)) no reproducirá x, pero la salida quizás sea más placentera de ver:
>>> print str(0.1)
0.1
Es importante darse cuenta de que esto es, realmente, una ilusión: el valor en la máquina no es
exactamente 1/10, simplemente estás redondeando el valor que se muestra del valor verdadero de la
máquina.
A esta se siguen otras sorpresas. Por ejemplo, luego de ver:
>>> 0.1
0.10000000000000001
quizás estés tentado de usar la función round() para recortar el resultado al dígito que esperabas.
Pero es lo mismo:
>>> round(0.1, 1)
0.10000000000000001
El problema es que el valor de punto flotante binario almacenado para "0.1" ya era la mejor aproxim
ación binaria posible de 1/10, de manera que intentar redondearla nuevamente no puede mejorarla:
ya era la mejor posible.
Otra consecuencia es que como 0.1 no es exactamente 1/10, sumar diez valores de 0.1 quizás
tampoco dé exactamente 1.0:
>>> suma = 0.0
>>> for i in range(10):
... suma += 0.1
...
>>> suma
0.99999999999999989
La aritmética de punto flotante binaria tiene varias sorpresas como esta. El problema con "0.1" es
explicado con detalle abajo, en la sección "Error de Representación". Mirá los Peligros del Punto
Flotante (en inglés, The Perils of Floating Point) para una más completa recopilación de otras
sorpresas normales.
Tutorial de Python
111

Como dice cerca del final, "no hay respuestas fáciles". A pesar de eso, ¡no le tengas mucho miedo al
punto flotante! Los errores en las operaciones flotantes de Python se heredan del hardware de punto
flotante, y en la mayoría de las máquinas están en el orden de no más de una 1 parte en 2**53 por
operación. Eso es más que adecuado para la mayoría de las tareas, pero necesitás tener en cuenta
que no es aritmética decimal, y que cada operación de punto flotante sufre un nuevo error de redondeo.
A pesar de que existen casos patológicos, para la mayoría de usos casuales de la aritmética de punto
flotante al final verás el resultado que esperás si simplemente redondeás lo que mostrás de tus
resultados finales al número de dígitos decimales que esperás. str() es normalmente suficiente, y
para un control más fino mirá los parámetros del método de formateo str.format() en formatstrings.
Error de RepresentaciónEsta sección explica el ejemplo "0.1" en detalle, y muestra como en la mayoría de los casos vos mismo
podés realizar un análisis exacto como este. Se asume un conocimiento básico de la representación
de punto flotante binario.
Error de representación se refiere al hecho de que algunas (la mayoría) de las fracciones decimales
no pueden representarse exactamente como fracciones binarias (en base 2). Esta es la razón principal
de por qué Python (o Perl, C, C++, Java, Fortran, y tantos otros) frecuentemente no mostrarán el
número decimal exacto que esperás:
>>> 0.1
0.10000000000000001
¿Por qué es eso? 1/10 no es representable exactamente como una fracción binaria. Casi todas las
máquinas de hoy en día (Noviembre del 2000) usan aritmética de punto flotante IEEE-754, y casi
todas las plataformas mapean los flotantes de Python al "doble precisión" de IEEE-754. Estos "dobles"
tienen 53 bits de precisión, por lo tanto en la entrada la computadora intenta convertir 0.1 a la fracción
más cercana que puede de la forma J/2***N* donde J es un entero que contiene exactamente 53 bits.
Reescribiendo
1 / 10 ~= J / (2**N)
como
J ~= 2**N / 10
y recordando que J tiene exactamente 53 bits (es >= 2**52 pero < 2**53), el mejor valor para N es
56:
Tutorial de Python
112

>>> 2**52
4503599627370496L
>>> 2**53
9007199254740992L
>>> 2**56/10
7205759403792793L
O sea, 56 es el único valor para N que deja J con exactamente 53 bits. El mejor valor posible para J
es entonces el cociente redondeado:
>>> q, r = divmod(2**56, 10)
>>> r
6L
Ya que el resto es más que la mitad de 10, la mejor aproximación se obtiene redondeándolo:
>>> q+1
7205759403792794L
Por lo tanto la mejor aproximación a 1/10 en doble precisión 754 es eso sobre 2**56, o
7205759403792794 / 72057594037927936
Notá que como lo redondeamos, esto es un poquito más grande que 1/10; si no lo hubiéramos
redondeado, el cociente hubiese sido un poquito menor que 1/10. ¡Pero no hay caso en que sea
exactamente 1/10!
Entonces la computadora nunca "ve" 1/10: lo que ve es la fracción exacta de arriba, la mejor
aproximación al flotante doble de 754 que puede obtener:
>>> .1 * 2**56
7205759403792794.0
Si multiplicamos esa fracción por 10**30, podemos ver el valor (truncado) de sus 30 dígitos más
significativos:
>>> 7205759403792794 * 10**30 / 2**56
100000000000000005551115123125L
lo que significa que el valor exacto almacenado en la computadora es aproximadamente igual al valor
Tutorial de Python
113

decimal 0.100000000000000005551115123125. Redondeando eso a 17 dígitos significativos da el
0.10000000000000001 que Python muestra (bueno, mostraría en cualquier plataforma que cumpla
con 754 cuya biblioteca en C haga la mejor conversión posible en entrada y salida... ¡la tuya quizás
no!).
Tutorial de Python
114