The Fall Into Ruffles Jacket - Riley Blake Designs · The "Fall Into Ruffles" Jacket Printer...
13
The "Fall Into Ruffles" Jacket Printer Friendly Version Jessica Abbott Hi everyone! I am Jessica from Me Sew Crazy, and I am so happy to be here at Cutting Corners College showing off my new 'Fall Into Ruffles' Jacket made for Riley Blake Designs! With the temperatures getting cooler and my girls getting bigger, I knew it was time to whip up some new fun Fall jackets for the two little ladies in my life. When I was asked to choose from their new fabric collections coming out, I was stumped because I love them all! Knowing my daughter's have distinctly different styles (and personalities - lol), I was lucky enough to be able to choose from two of their new lines! The new Delighted Collection was perfect for my youngest who adores reds and blues, while the Indian Summer collection absolutely screamed my eldest daughter's name who demands everything she wears include pink.
Transcript of The Fall Into Ruffles Jacket - Riley Blake Designs · The "Fall Into Ruffles" Jacket Printer...
The "Fall Into Ruffles" Jacket
Printer Friendly Version
Jessica Abbott
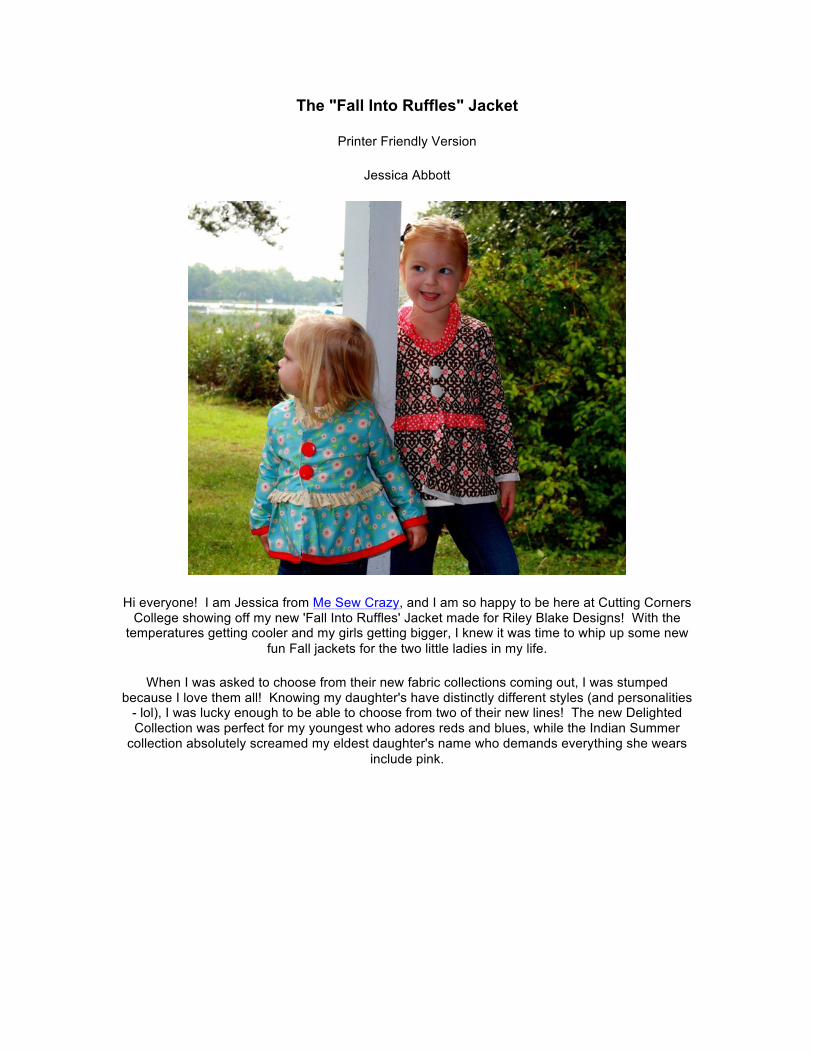
Hi everyone! I am Jessica from Me Sew Crazy, and I am so happy to be here at Cutting Corners College showing off my new 'Fall Into Ruffles' Jacket made for Riley Blake Designs! With the
temperatures getting cooler and my girls getting bigger, I knew it was time to whip up some new fun Fall jackets for the two little ladies in my life.
When I was asked to choose from their new fabric collections coming out, I was stumped because I love them all! Knowing my daughter's have distinctly different styles (and personalities
- lol), I was lucky enough to be able to choose from two of their new lines! The new Delighted Collection was perfect for my youngest who adores reds and blues, while the Indian Summer
collection absolutely screamed my eldest daughter's name who demands everything she wears include pink.
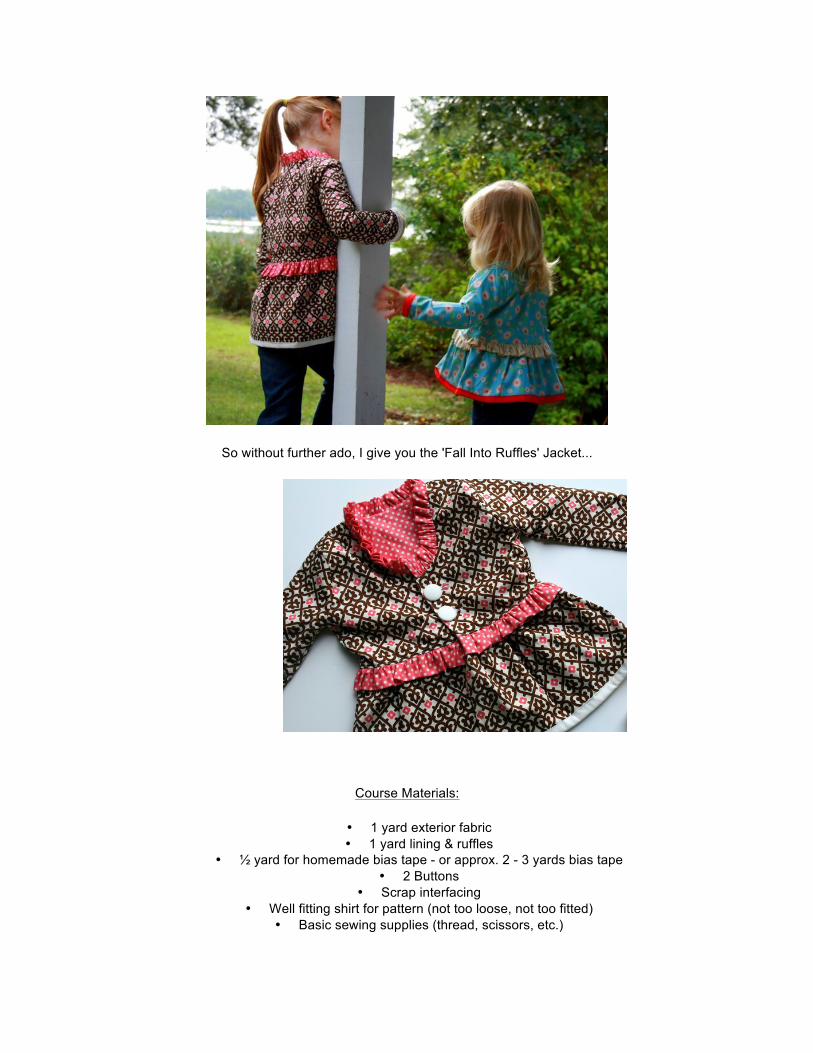
So without further ado, I give you the 'Fall Into Ruffles' Jacket...
Course Materials:
• 1 yard exterior fabric • 1 yard lining & ruffles
• ½ yard for homemade bias tape - or approx. 2 - 3 yards bias tape • 2 Buttons
• Scrap interfacing • Well fitting shirt for pattern (not too loose, not too fitted)
• Basic sewing supplies (thread, scissors, etc.)
Cutting the Pattern:
We will be cutting the following pattern pieces:
• Back Jacket • Front Jacket • Sleeves
• Lower Jacket Ruffle • Mid ruffle • Neck Ruffle • Interfacing
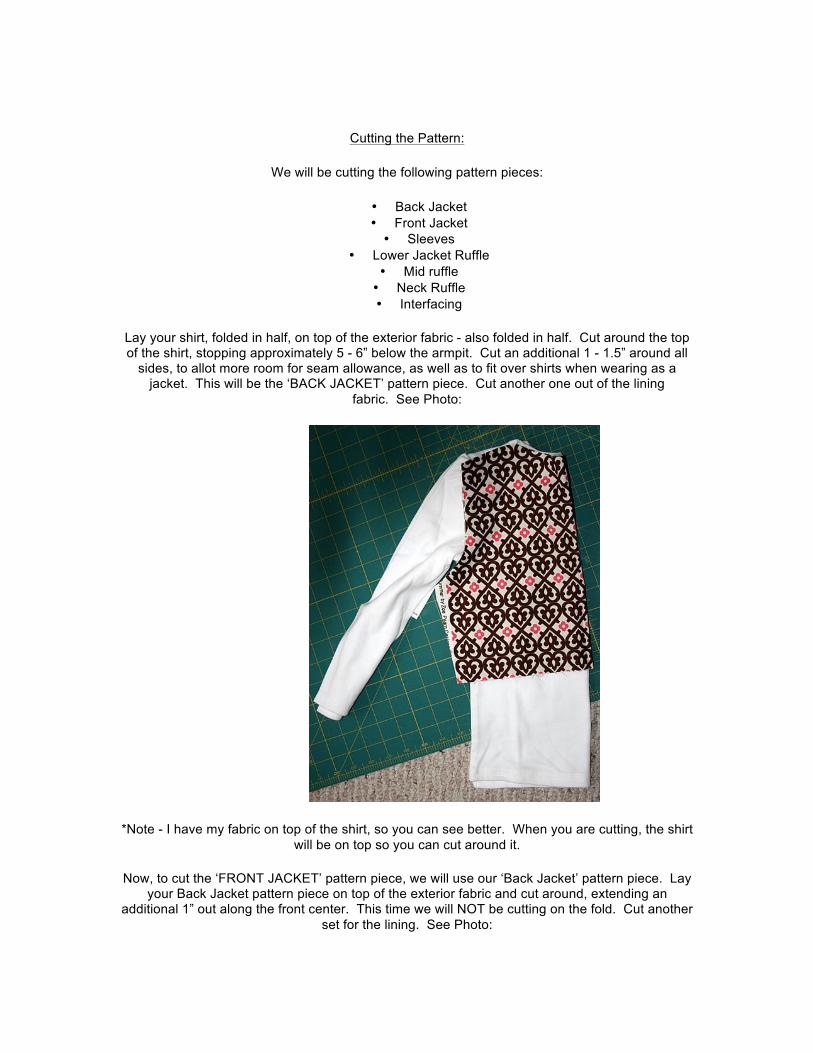
Lay your shirt, folded in half, on top of the exterior fabric - also folded in half. Cut around the top of the shirt, stopping approximately 5 - 6” below the armpit. Cut an additional 1 - 1.5” around all
sides, to allot more room for seam allowance, as well as to fit over shirts when wearing as a jacket. This will be the ‘BACK JACKET’ pattern piece. Cut another one out of the lining
fabric. See Photo:
*Note - I have my fabric on top of the shirt, so you can see better. When you are cutting, the shirt will be on top so you can cut around it.
Now, to cut the ‘FRONT JACKET’ pattern piece, we will use our ‘Back Jacket’ pattern piece. Lay your Back Jacket pattern piece on top of the exterior fabric and cut around, extending an
additional 1” out along the front center. This time we will NOT be cutting on the fold. Cut another set for the lining. See Photo:
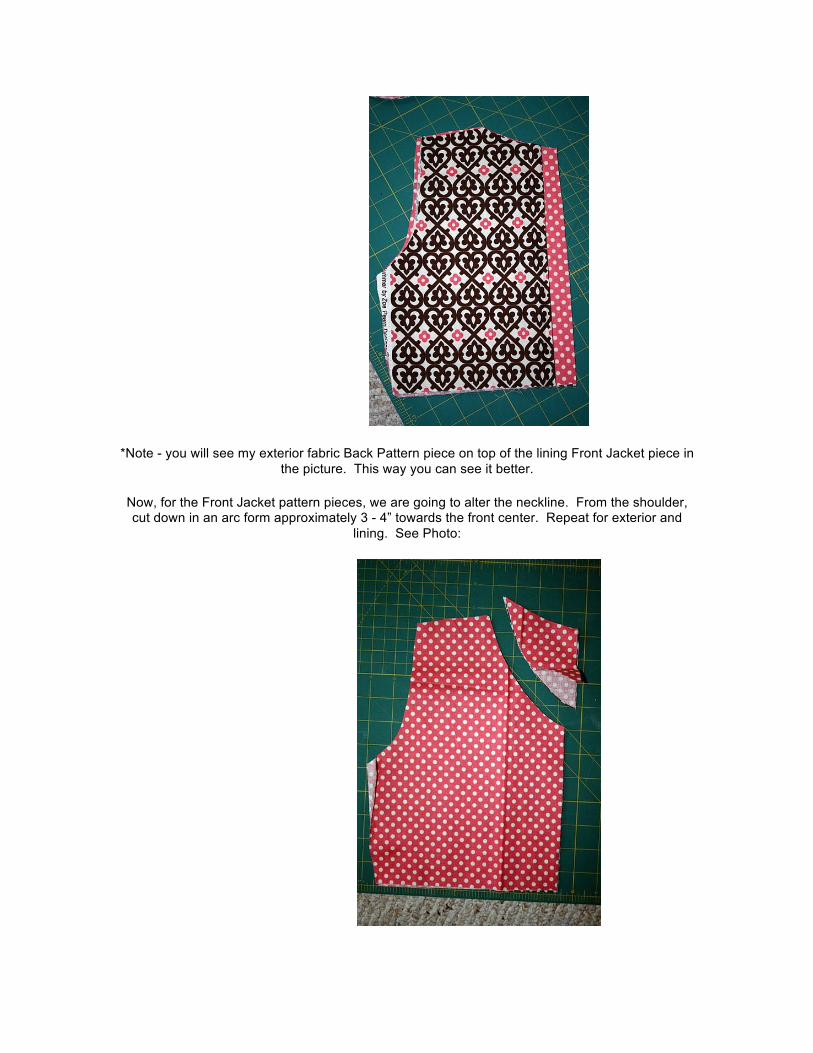
*Note - you will see my exterior fabric Back Pattern piece on top of the lining Front Jacket piece in the picture. This way you can see it better.
Now, for the Front Jacket pattern pieces, we are going to alter the neckline. From the shoulder, cut down in an arc form approximately 3 - 4” towards the front center. Repeat for exterior and
lining. See Photo:
We now have our Front Jacket and Back Jacket pattern pieces of exterior and lining fabric. Let’s keep cutting...
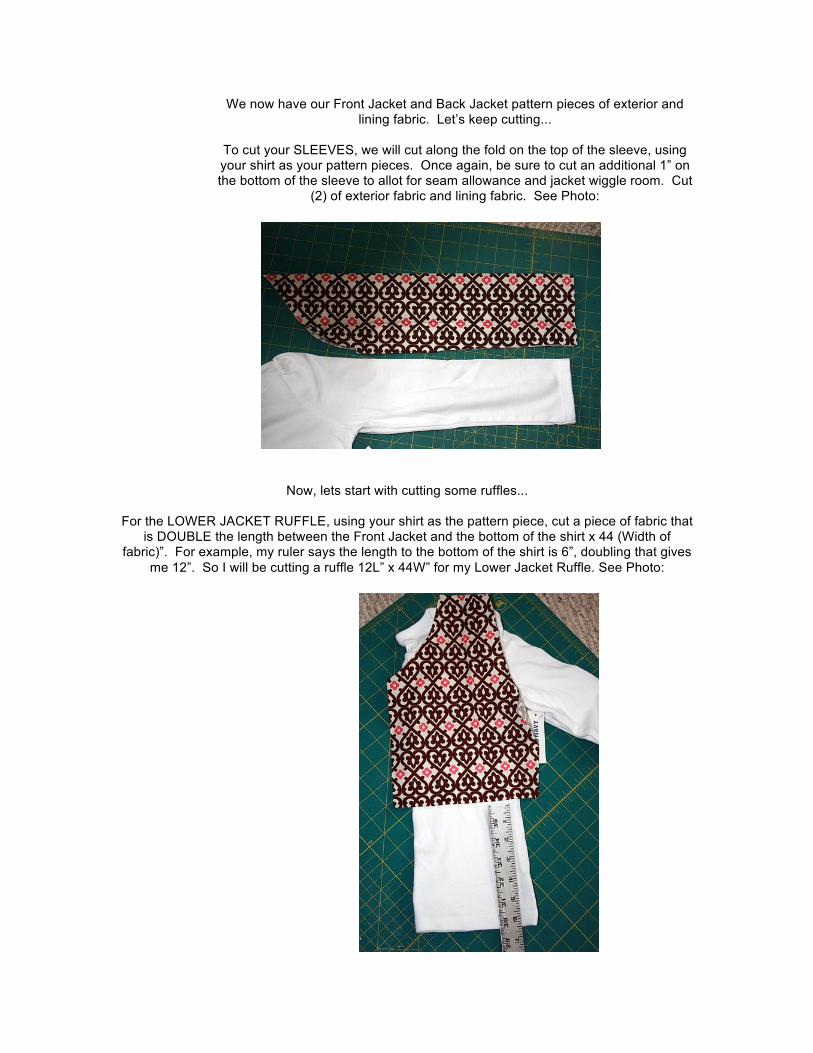
To cut your SLEEVES, we will cut along the fold on the top of the sleeve, using your shirt as your pattern pieces. Once again, be sure to cut an additional 1” on the bottom of the sleeve to allot for seam allowance and jacket wiggle room. Cut
(2) of exterior fabric and lining fabric. See Photo:
Now, lets start with cutting some ruffles...
For the LOWER JACKET RUFFLE, using your shirt as the pattern piece, cut a piece of fabric that
is DOUBLE the length between the Front Jacket and the bottom of the shirt x 44 (Width of fabric)”. For example, my ruler says the length to the bottom of the shirt is 6”, doubling that gives
me 12”. So I will be cutting a ruffle 12L” x 44W” for my Lower Jacket Ruffle. See Photo:
For the MID RUFFLE - cut a strip of fabric that is 3.5L” x 70W”.
For the NECK RUFFLE - cut a strip of fabric that is 3L” x 60W”
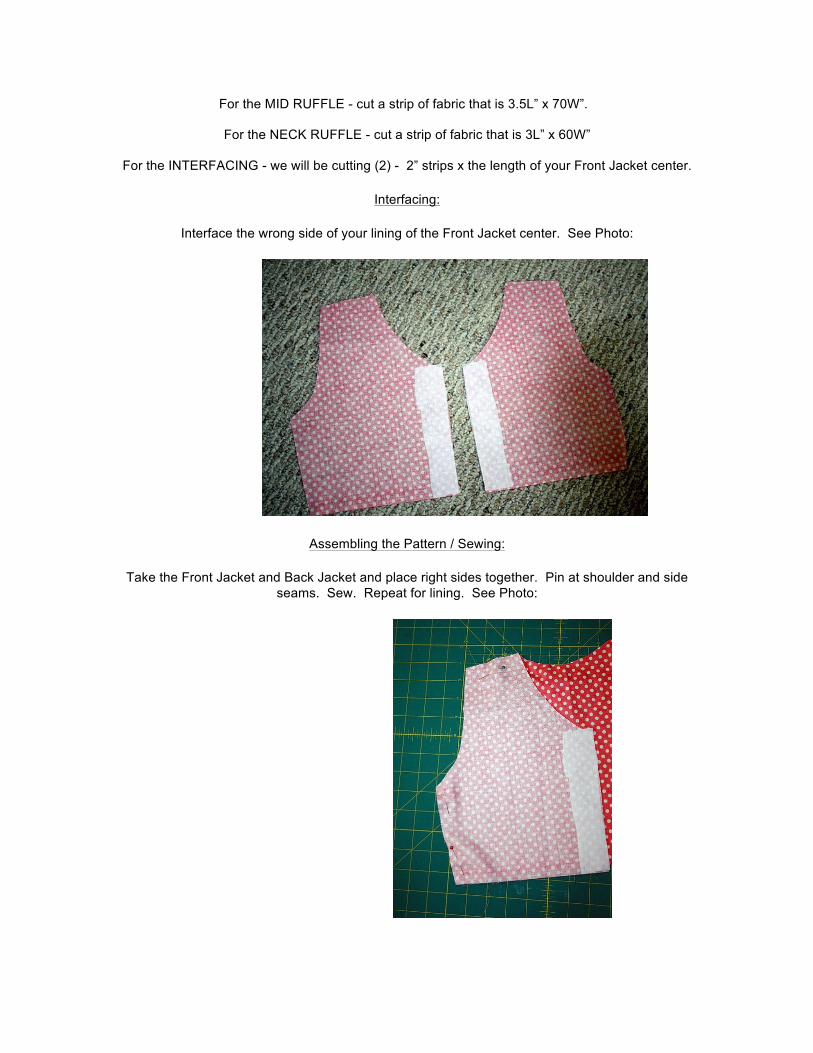
For the INTERFACING - we will be cutting (2) - 2” strips x the length of your Front Jacket center.
Interfacing:
Interface the wrong side of your lining of the Front Jacket center. See Photo:
Assembling the Pattern / Sewing:
Take the Front Jacket and Back Jacket and place right sides together. Pin at shoulder and side seams. Sew. Repeat for lining. See Photo:
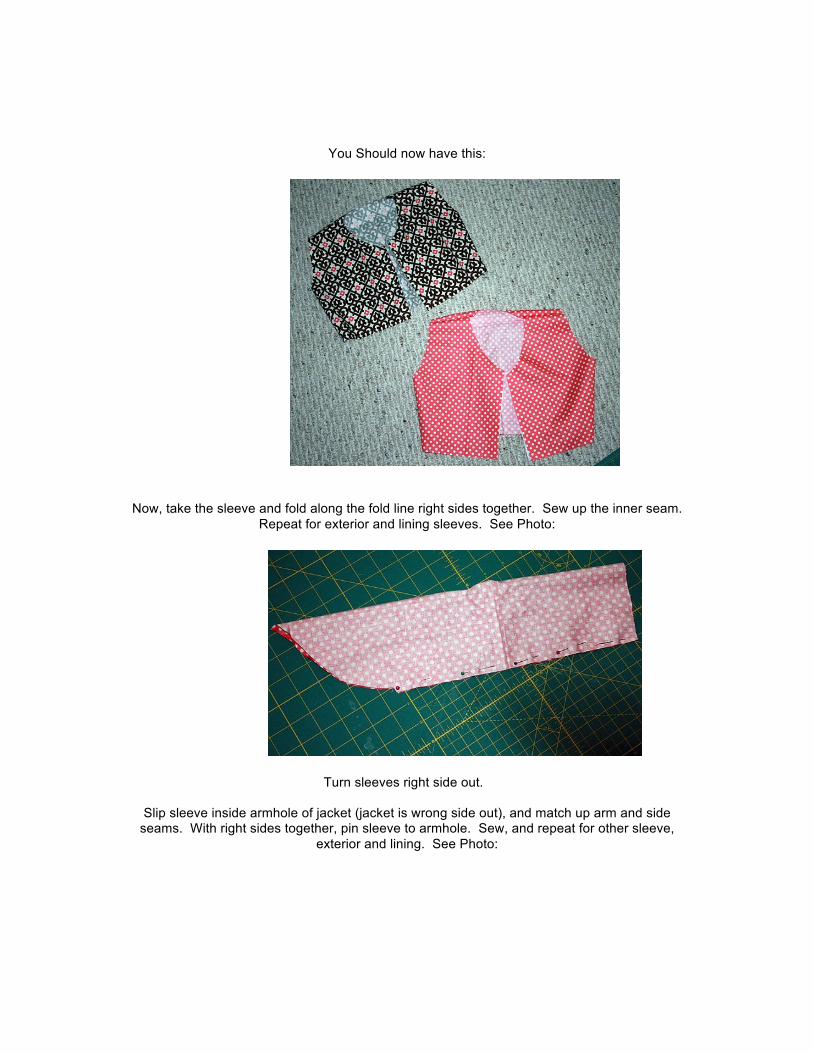
You Should now have this:
Now, take the sleeve and fold along the fold line right sides together. Sew up the inner seam.
Repeat for exterior and lining sleeves. See Photo:
Turn sleeves right side out.
Slip sleeve inside armhole of jacket (jacket is wrong side out), and match up arm and side seams. With right sides together, pin sleeve to armhole. Sew, and repeat for other sleeve,
exterior and lining. See Photo:
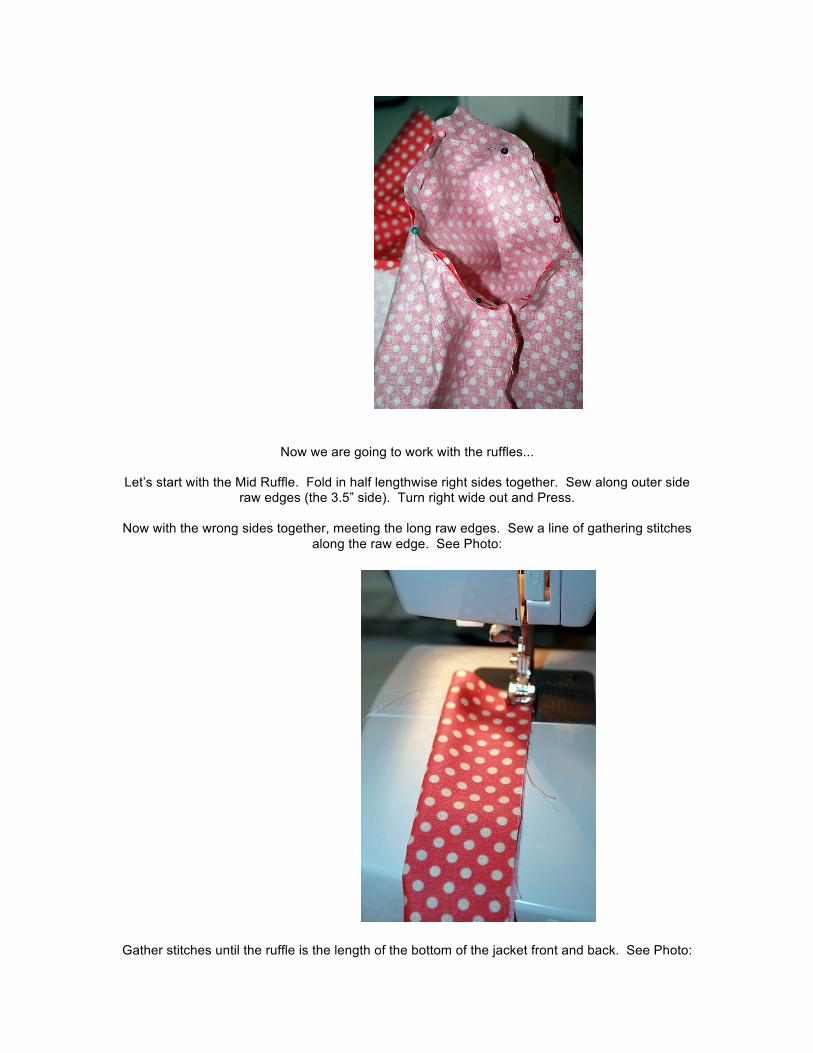
Now we are going to work with the ruffles...
Let’s start with the Mid Ruffle. Fold in half lengthwise right sides together. Sew along outer side
raw edges (the 3.5” side). Turn right wide out and Press.
Now with the wrong sides together, meeting the long raw edges. Sew a line of gathering stitches along the raw edge. See Photo:
Gather stitches until the ruffle is the length of the bottom of the jacket front and back. See Photo:
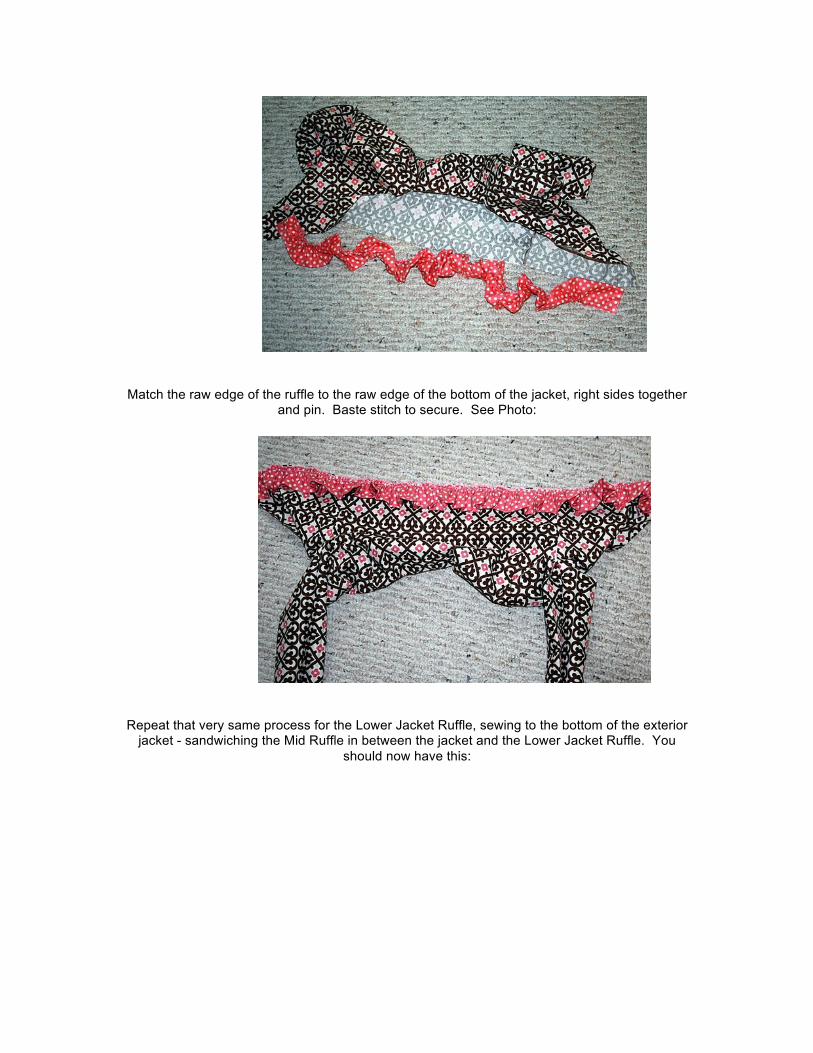
Match the raw edge of the ruffle to the raw edge of the bottom of the jacket, right sides together
and pin. Baste stitch to secure. See Photo:
Repeat that very same process for the Lower Jacket Ruffle, sewing to the bottom of the exterior
jacket - sandwiching the Mid Ruffle in between the jacket and the Lower Jacket Ruffle. You should now have this:
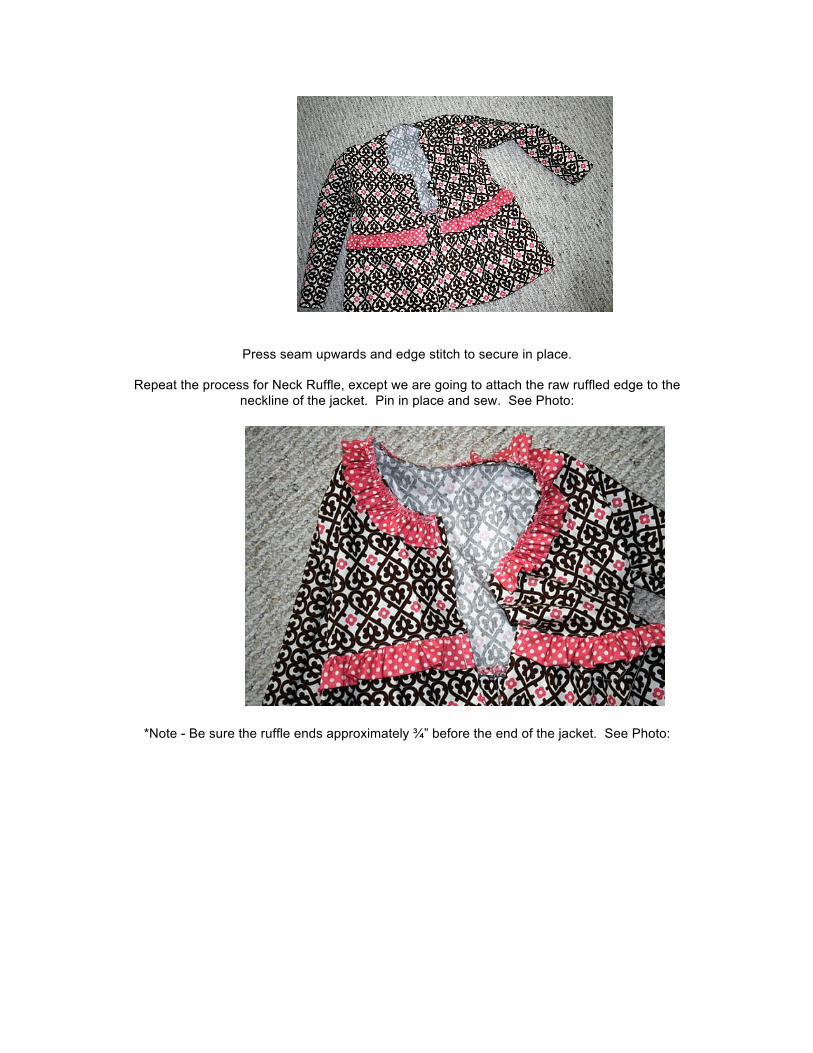
Press seam upwards and edge stitch to secure in place.
Repeat the process for Neck Ruffle, except we are going to attach the raw ruffled edge to the
neckline of the jacket. Pin in place and sew. See Photo:
*Note - Be sure the ruffle ends approximately ¾” before the end of the jacket. See Photo:
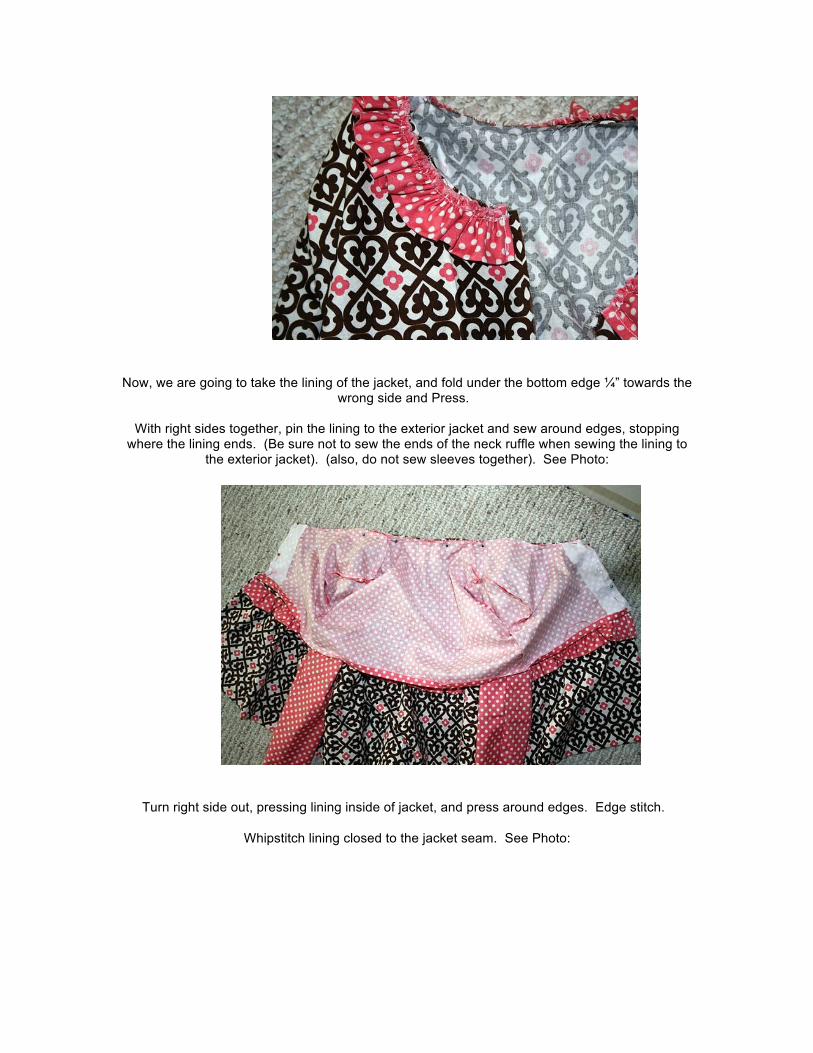
Now, we are going to take the lining of the jacket, and fold under the bottom edge ¼” towards the
wrong side and Press.
With right sides together, pin the lining to the exterior jacket and sew around edges, stopping where the lining ends. (Be sure not to sew the ends of the neck ruffle when sewing the lining to
the exterior jacket). (also, do not sew sleeves together). See Photo:
Turn right side out, pressing lining inside of jacket, and press around edges. Edge stitch.
Whipstitch lining closed to the jacket seam. See Photo:
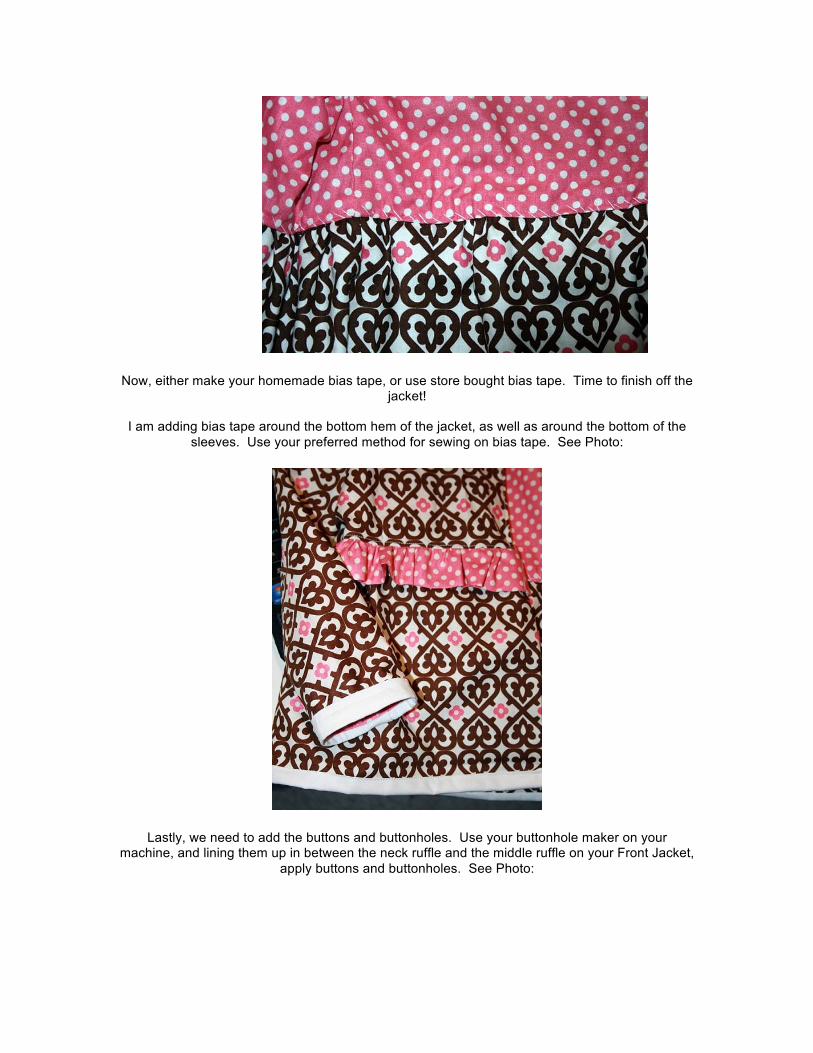
Now, either make your homemade bias tape, or use store bought bias tape. Time to finish off the jacket!
I am adding bias tape around the bottom hem of the jacket, as well as around the bottom of the
sleeves. Use your preferred method for sewing on bias tape. See Photo:
Lastly, we need to add the buttons and buttonholes. Use your buttonhole maker on your machine, and lining them up in between the neck ruffle and the middle ruffle on your Front Jacket,
apply buttons and buttonholes. See Photo:

And that's it! You now have an adorable ruffly jacket for the little lady in your life!
I hope you will stop by and visit me sometime at Me Sew Crazy. You'll find me sewing up new things for the little people in my life weekly, and teaching you how to do it! Thanks so much!