
Temporary Seeding Permanent Seeding · 2018-11-20 · Temporary Seeding Permanent Seeding Mulching...
3
Temporary Seeding Permanent Seeding Mulching Erosion Control Blanket Use the type of Erosion Control Blanket specified in the SWPPP. Prepare the area by removing rocks or clods over 1-½” in diameter. Anchor blankets in place. Install mulch within 24 hours of seeding. After spreading, no more than 25% of ground should be visible. Anchor/ secure mulch immediately after application. Use the seed mix specified in the SWPPP. Roughen slopes; loosen soil to a depth of 2" to 3" prior to seeding. Do not cover seed with more than ½” of soil. Loosen/till topsoil to a minimum depth of 3". Add fertilizer per SWPPP. Apply seed. Apply mulch or erosion control blanket to protect permanent seeding. Source: Indiana Storm Water Quality Manual Source: Indiana Storm Water Quality Manual Source: INDOT Storm Water Management Field Guide 327 IAC 15-5-7(b)(16): Unvegetated areas that are scheduled or likely to be left inactive for fifteen (15) days or more must be temporarily or permanently stabilized with measures appropriate for the season to minimize erosion potential. STORMWATER FACT SHEET: CONSTRUCTION SITE STORMWATER BMP INSTALLATION TIPS The Installation of Erosion & Sediment Control BMPs on Construction Sites Quick facts on... PURPOSE: Provide a quick reference guide for the installation of several commonly used construction site erosion and sediment control BMPs. HOW TO USE THIS GUIDE: For a particular BMP, review the photo and read the accompanying caption for key points on the proper installation of the BMP. Refer to your SWPPP for actual installatoin guidelines. Page 1 of 3
Transcript of Temporary Seeding Permanent Seeding · 2018-11-20 · Temporary Seeding Permanent Seeding Mulching...
Temporary Seeding Permanent Seeding
Mulching Erosion Control Blanket
Use the type of Erosion Control Blanket specified in the SWPPP. Prepare the area by removing rocks or clods over 1-½” in diameter. Anchor blankets in place.
Install mulch within 24 hours of seeding. After spreading, no more than 25% of ground should be visible. Anchor/secure mulch immediately after application.
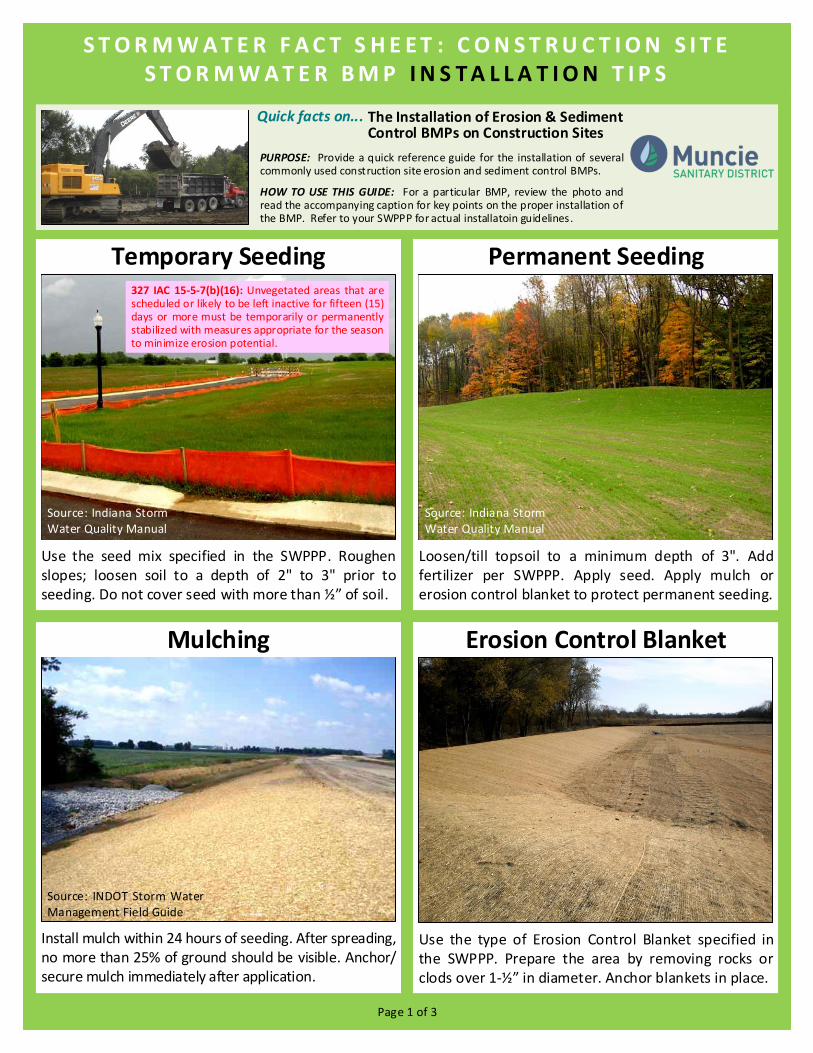
Use the seed mix specified in the SWPPP. Roughen slopes; loosen soil to a depth of 2" to 3" prior to seeding. Do not cover seed with more than ½” of soil.
Loosen/till topsoil to a minimum depth of 3". Add fertilizer per SWPPP. Apply seed. Apply mulch or erosion control blanket to protect permanent seeding.
Source: Indiana Storm Water Quality Manual
Source: Indiana Storm Water Quality Manual
Source: INDOT Storm Water Management Field Guide
327 IAC 15-5-7(b)(16): Unvegetated areas that are scheduled or likely to be left inactive for fifteen (15) days or more must be temporarily or permanently stabilized with measures appropriate for the season to minimize erosion potential.
S T O R M W A T E R F A C T S H E E T : C O N S T R U C T I O N S I T E S T O R M W A T E R B M P I N S T A L L A T I O N T I P S
The Installation of Erosion & Sediment Control BMPs on Construction Sites
Quick facts on...
PURPOSE: Provide a quick reference guide for the installation of several commonly used construction site erosion and sediment control BMPs.
HOW TO USE THIS GUIDE: For a particular BMP, review the photo and read the accompanying caption for key points on the proper installation of the BMP. Refer to your SWPPP for actual installatoin guidelines.
Page 1 of 3
Vegetative Buffer
Concrete WashoutRock Check Dam
Dewatering
Locate concrete washout per SWPPP. Place bales. Use one continuous liner: DO NOT OVERLAP multiple sheets. Secure with stakes or stone. Install “Concrete Washout” sign.
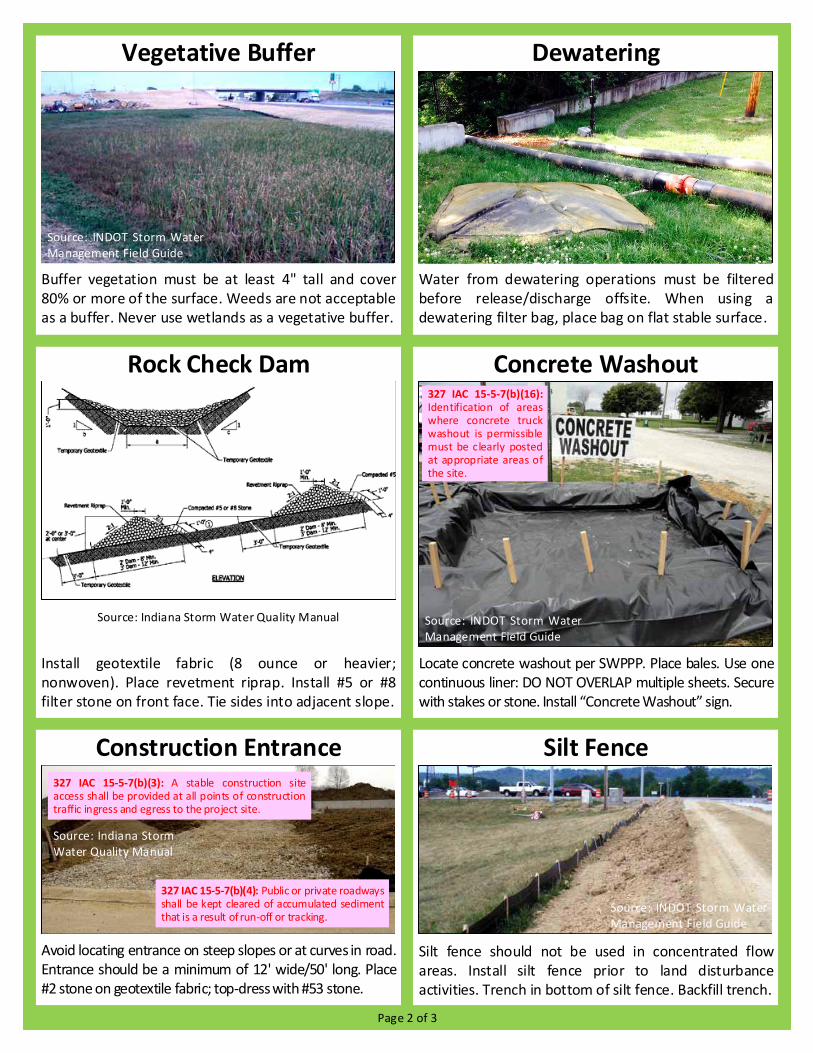
Install geotextile fabric (8 ounce or heavier; nonwoven). Place revetment riprap. Install #5 or #8 filter stone on front face. Tie sides into adjacent slope.
Buffer vegetation must be at least 4" tall and cover 80% or more of the surface. Weeds are not acceptable as a buffer. Never use wetlands as a vegetative buffer.
Water from dewatering operations must be filtered before release/discharge offsite. When using a dewatering filter bag, place bag on flat stable surface.
Source: Indiana Storm Water Quality Manual
Source: INDOT Storm Water Management Field Guide
Source: INDOT Storm Water Management Field Guide
327 IAC 15-5-7(b)(16): Identification of areas where concrete truck washout is permissible must be clearly posted at appropriate areas of the site.
Construction Entrance Silt Fence
Avoid locating entrance on steep slopes or at curves in road. Entrance should be a minimum of 12' wide/50' long. Place #2 stone on geotextile fabric; top-dress with #53 stone.
Silt fence should not be used in concentrated flow areas. Install silt fence prior to land disturbance activities. Trench in bottom of silt fence. Backfill trench.
Source: INDOT Storm Water Management Field Guide
Source: Indiana Storm Water Quality Manual
327 IAC 15-5-7(b)(3): A stable construction site access shall be provided at all points of construction traffic ingress and egress to the project site.
327 IAC 15-5-7(b)(4): Public or private roadways shall be kept cleared of accumulated sediment that is a result of run-off or tracking.
Page 2 of 3
Page 3 of 3
Filter Sock Filter Berm
Filter berms can be made of rock, compost or filter sock. When using rock, place riprap on geotextile fabric with filter stone (#5 or #8) on the upslope slide.
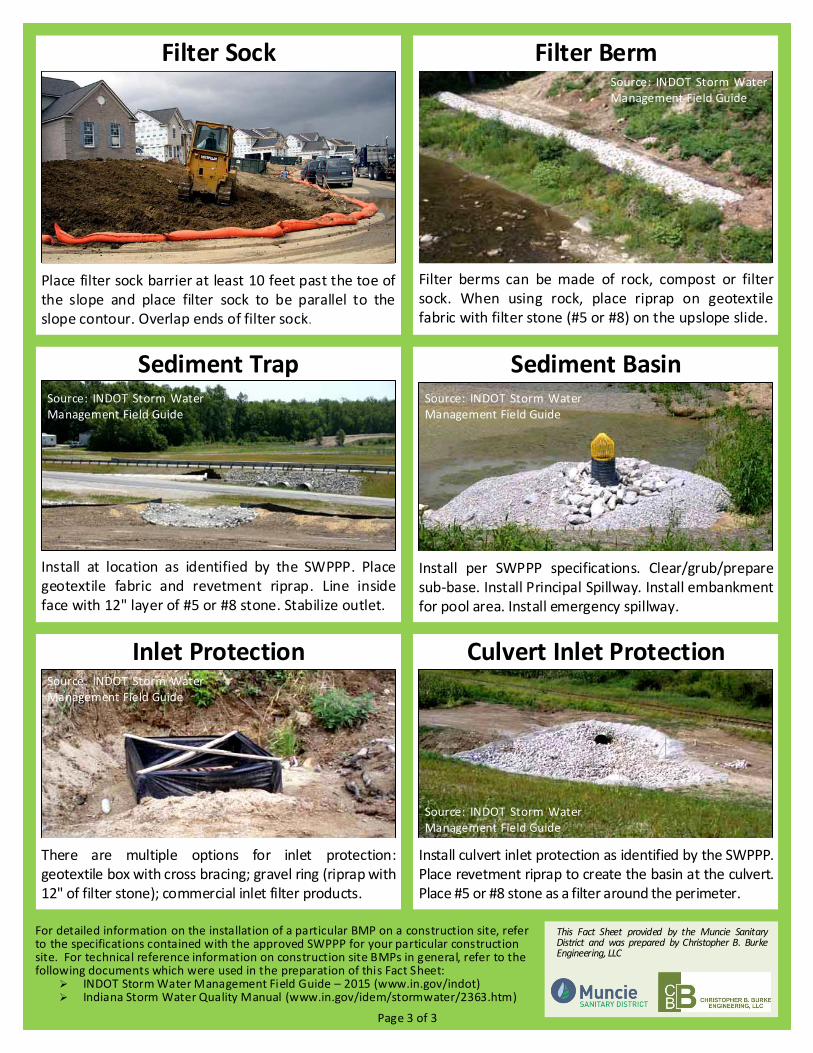
Place filter sock barrier at least 10 feet past the toe of the slope and place filter sock to be parallel to the slope contour. Overlap ends of filter sock.
Source: Indiana Storm Water Quality Manual
Source: INDOT Storm Water Management Field Guide
Sediment Trap
Culvert Inlet ProtectionInlet Protection
Sediment Basin
Install culvert inlet protection as identified by the SWPPP. Place revetment riprap to create the basin at the culvert. Place #5 or #8 stone as a filter around the perimeter.
There are multiple options for inlet protection: geotextile box with cross bracing; gravel ring (riprap with 12" of filter stone); commercial inlet filter products.
Install at location as identified by the SWPPP. Place geotextile fabric and revetment riprap. Line inside face with 12" layer of #5 or #8 stone. Stabilize outlet.
Install per SWPPP specifications. Clear/grub/prepare sub-base. Install Principal Spillway. Install embankment for pool area. Install emergency spillway.
Source: INDOT Storm Water Management Field Guide
Source: INDOT Storm Water Management Field Guide
Source: INDOT Storm Water Management Field Guide
Source: INDOT Storm Water Management Field Guide
For detailed information on the installation of a particular BMP on a construction site, refer to the specifications contained with the approved SWPPP for your particular construction site. For technical reference information on construction site BMPs in general, refer to the following documents which were used in the preparation of this Fact Sheet:
INDOT Storm Water Management Field Guide – 2015 (www.in.gov/indot) Indiana Storm Water Quality Manual (www.in.gov/idem/stormwater/2363.htm)
This Fact Sheet provided by the Muncie Sanitary District and was prepared by Christopher B. Burke Engineering, LLC


![H]Material Properties and Dimensions IECA GEI Western Excelsior manufactures a full line of Rolled Erosion Control Products (RECPs). Excel R-l temporary Erosion Control Blanket is](https://static.fdocuments.net/doc/165x107/6000e4c5209ea57bca036b6e/h-material-properties-and-dimensions-ieca-gei-western-excelsior-manufactures-a.jpg)