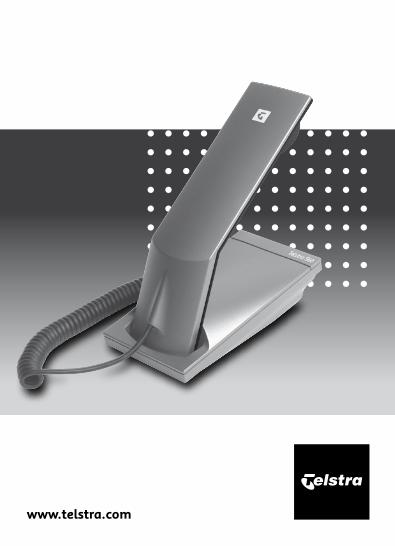
Telstra S60
16
Telstra S60 Telephone User Guide If you have any problems with your phone, refer to the Help section of this User Guide or call TecHelp on 1300 369 193.
Transcript of Telstra S60
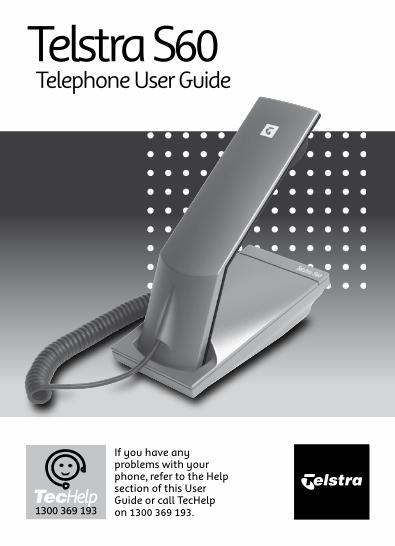
Telstra S60 Telephone User Guide
If you have any problems with your phone, refer to the Help section of this User Guide or call TecHelp on 1300 369 193.
� 3
In this guide
Key features 3Telstra S60 parts checklist 4Setting up your Telstra S60 5Safety instructions 6Wall mounting your Telstra S60 7Getting to know your Telstra S60 8Using your Telstra S60 9Adjusting the ringer volume 9Answering a call 10Making a call 10Mute 10Storing numbers for one-touch memory 10 One-touch memory dialling 11Storing numbers for two-touch memory dialling 1�Two-touch memory dialling 1�Help 13Customer service & Product warranty 14Wall mounting template 15
© COPYRIGHT �006 Telstra Corporation LimitedThis work is copyright. All rights reserved. Other than for purposes and subject to conditions prescribed under the Copyright Act, no part of it may in any form or by any means (electronic, mechanical, photo copying, microcopying, scanning, recording or otherwise) be reproduced, stored in a retrieval system or transmitted without prior permission from Telstra Corporation Limited ABN 33 051 775 556.™ Trade Mark of Telstra Corporation Limited® Registered Trade Mark of Telstra Corporation Limited
� 3
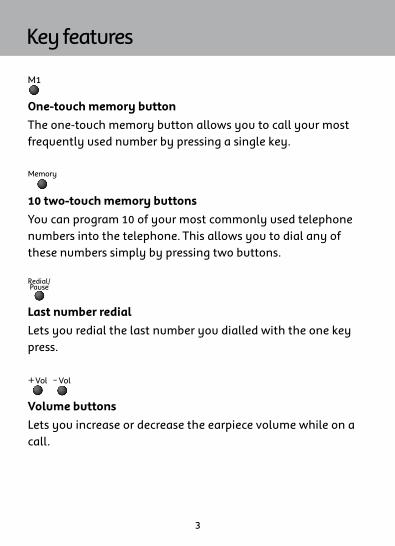
Key features
One-touch memory button
The one-touch memory button allows you to call your most frequently used number by pressing a single key.
10 two-touch memory buttons
You can program 10 of your most commonly used telephone numbers into the telephone. This allows you to dial any of these numbers simply by pressing two buttons.
Last number redial
Lets you redial the last number you dialled with the one key press.
Volume buttons
Lets you increase or decrease the earpiece volume while on a call.

� 5
Telstra S60 parts checklist
Your Telstra S60 has been designed for ease of use and made to the high standards set by Telstra. Please read the instructions carefully and keep this User Guide for future reference. If anything is missing, please contact TecHelp on 1300 369 193 immediately.
Telephone Base Unit
Telephone Handset
Handset Cord
(Shown here assembled)
Wall Mount Bracket & Screws
Telephone Line Cord & Adaptor Plug
� 5
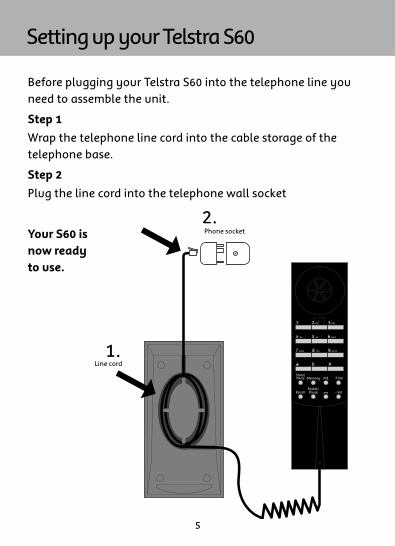
Setting up your Telstra S60
Before plugging your Telstra S60 into the telephone line you need to assemble the unit.
Step 1
Wrap the telephone line cord into the cable storage of the telephone base.
Step 2
Plug the line cord into the telephone wall socket
Your S60 is now ready to use.
6 7
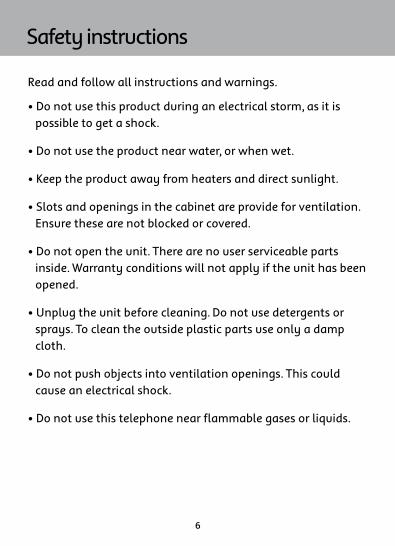
Safety instructions
Read and follow all instructions and warnings.
• Do not use this product during an electrical storm, as it is possible to get a shock.
• Do not use the product near water, or when wet.
• Keep the product away from heaters and direct sunlight.
• Slots and openings in the cabinet are provide for ventilation. Ensure these are not blocked or covered.
• Do not open the unit. There are no user serviceable parts inside. Warranty conditions will not apply if the unit has been opened.
• Unplug the unit before cleaning. Do not use detergents or sprays. To clean the outside plastic parts use only a damp cloth.
• Do not push objects into ventilation openings. This could cause an electrical shock.
• Do not use this telephone near flammable gases or liquids.
6 7
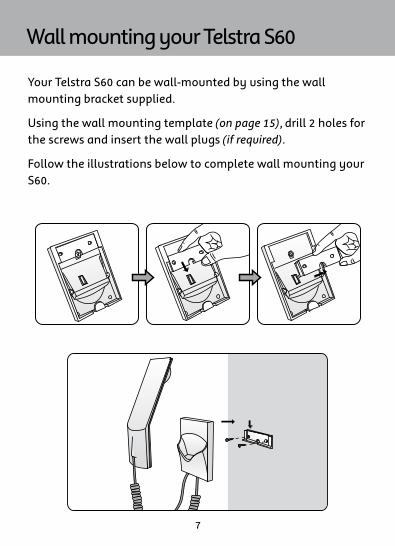
Wall mounting your Telstra S60
Your Telstra S60 can be wall-mounted by using the wall mounting bracket supplied.
Using the wall mounting template (on page 15), drill � holes for the screws and insert the wall plugs (if required).
Follow the illustrations below to complete wall mounting your S60.
� 9
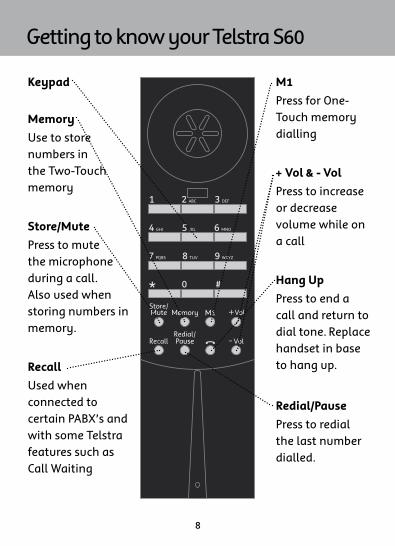
Getting to know your Telstra S60
Keypad
Memory
Use to store numbers in the Two-Touch memory
Store/Mute
Press to mute the microphone during a call. Also used when storing numbers in memory.
Recall
Used when connected to certain PABX’s and with some Telstra features such as Call Waiting
M1
Press for One-Touch memory dialling
+ Vol & - Vol
Press to increase or decrease volume while on a call
Hang Up
Press to end a call and return to dial tone. Replace handset in base to hang up.
Redial/Pause
Press to redial the last number dialled.

� 9
Using your Telstra S60
Adjusting the ringer volume
Your phone is built with 3 preset ringer melodies and loudness levels. To change the melodies and loudness level, follow the instructions listed below:-
1. Pick up the handset.
�. Press and release button.
3. Press and release the button.
�. Use the numbered button (keypad) to make your selection of ringer melodies and loudness level combination.
Numbered button Ringer melody Loudness level
1 A Low
� A Normal
3 A High
� B Low
5 B Normal
6 B High
7 C Low
� C Normal
9 C High
0 Off Off
5. Hang up to store the new setting.

10 1110
Answering a call
Lift the handset to answer the call.
Making a call
1. Lift the handset.
�. Listen for a dial tone then enter the number you wish to call.
Ending a call
Replace the handset in the base to hang up. To end a call and return to dial tone press
Mute
To prevent the other party from hearing you while on a call press the button. To resume speaking press the button again.

10 1110
Storing numbers for one-touch memory
One-touch memory provides you with the easiest way to make a call to a frequently used number. Follow the instructions listed below to store a number (�1 digits maximum) into the one-touch memory bank:
1. Lift the handset.
�. Press the button.
3. Press the button, followed by the desired phone number that you which to store.
�. Press the button or replace handset in base.
If your phone is connected to a PABX, you may need to insert a PAUSE after the PABX access code. To do this, press thebutton.
One-touch memory dialling
To make a call with one-touch memory, simply pick up the handset and wait for a dial tone, press the button. The stored phone number will be dialled.
Besides the one-touch memory, this phone is also equipped with 10 two-touch memory banks.
Follow the instructions listed below to store a number (�1 digits maximum) into the two-touch memory dialling.
Storing numbers for two-touch memory dialling
1. Lift the handset.
�. Press the button.
3. Press the button followed by the desired memory button, 0 to 9.
�. Enter the number to be stored.
5. Press the button again.
6. Press the button or replace handset in base.
If your phone is connected to a PABX, you may need to insert a PAUSE after the PABX access code. To do this, press thebutton.
Two-touch memory dialling
To make a call with two-touch memory dialling, simply pick up the handset and wait for dialling tone, press the button followed by the corresponding numbered button. The stored phone number sequence will be dialled.
1�
Help
No dial tone
Check that the telephone line cord is firmly connected to the wall socket. Push it in firmly until it clicks.
Telephone does not ring
Check that the programmed ring setting is not set to OFF. Refer to page 9. You may have too many devices on your telephone line. Note the REN number that is written on the base of all your devices, the total should not be more than three.
If the other person cannot hear you
Check that the button was not pressed by mistake.
Maintenance
There is no regular maintenance required for your Telstra S60 telephone.
To clean the outside plastic, first unplug the unit and use only a damp cloth. Do not use detergents or sprays.
Wall mounting template
Refer to page 7 on ‘Wall mounting your Telstra S60’ for how to use this template which is located on page 15.
1� 13
1� 15
Customer service & Product warranty
IMPORTANTPlease retain this booklet with your sales receipt as proof of the date of purchase
Customer ServiceIf you require assistance in operating this product please call the TecHelp Information Line on 1300 369 193 or contact us by e-mail at: [email protected]
If you are trying to access a Telstra Network Service and require assistance specifically related to the network service or would like to subscribe to the service, contact Telstra on 13��00 for residential or 13�000 for business.
Product WarrantySubject to the conditions below, Telstra guarantees this product against any defect in materials or workmanship under conditions of normal use for a period of 13 months from date of purchase.The benefits conferred by this warranty are in addition to other warranties and remedies that are implied under the Trade Practices Act and similar State and Territory laws (Statutory Rights).Subject to your Statutory Rights, the goods will not be eligible for service under this warranty if:
a) Proof of purchase cannot be provided;b) The defect was caused by an accident, misuse, abuse, improper installation or operation, vermin infestation, lack of reasonable care, unauthorised modification, loss of parts, tampering
or attempted repair by a person not authorised by Telstra; orc) The product has been damaged by lightning or a mains power surge.
To obtain service during the terms of this warranty call the TecHelp Information Line on 1300 369 193 or contact us by e-mail at: [email protected]
If it is necessary to have the product serviced, the Customer Service Representative will inform you of the product return process.
Please ensure that:a) You provide proof of purchase;b) Your product is suitably packaged; andc) You have included all components from the original purchase.
Subject to your Statutory Rights:a) Any claim under this warranty is limited to the cost of repair or replacement of the product; andb) If the goods are found to be in sound working order by the authorised service centre, you may be charged a fee for service and for any other direct costs associated with having the product delivered for service.
1� 15
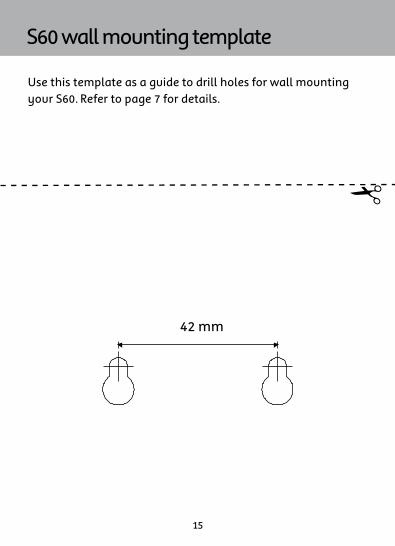
S60 wall mounting template
Use this template as a guide to drill holes for wall mounting your S60. Refer to page 7 for details.
!
www.telstra.com