TECHNOLOGY TEACHER’S GUIDE - Ministry of … 8... · 2017-02-22 · TECHNOLOGY TEACHER’S GUIDE...
50
TECHNOLOGY TEACHER’S GUIDE Year 8
Transcript of TECHNOLOGY TEACHER’S GUIDE - Ministry of … 8... · 2017-02-22 · TECHNOLOGY TEACHER’S GUIDE...

TECHNOLOGY
TEACHER’S GUIDE
Year 8

TECHNOLOGY
TEACHER’S GUIDE
Year 8
Ministry of EducationPort Vila
Republic of Vanuatu2000

First Published 2001
© Ministry of Education
All rights reserved. No part of this publication may be reproduced, stored in a retrieval system or
transmitted, in any form or by any means, without written permission from the publisher.

3
ContentsSkills learnt in Year 7 continue through next three years plus ........... 4
Aims of Technology............................................................................ 5
Courses of Study ................................................................................. 6
P.R.I.S.M.E. ........................................................................................ 6
Note to the Teacher ........................................................................... 12
Design Brief: Food Grater ................................................................ 13
Design Brief: Tea Tray ...................................................................... 15
Design Brief: Pencil Case ................................................................. 17
Design Brief: Shopping Container.................................................... 18
Design Brief: Item from Wool and/or Pandanus .............................. 20
Design Brief: Tablecloth ................................................................... 22
Design Brief: Item of Clothing ......................................................... 26
Design Brief: Fish or Meat for Supper ............................................. 28
Design Brief: Making a Healthy Lunch ............................................ 30
Design Brief: A Fruit or Vegetable Dish .......................................... 34
Design Brief: Cereals ........................................................................ 36
Design Brief: Papier Mâché.............................................................. 38
Design Brief: Money Container ........................................................ 40
Design Brief: Bone Carving ............................................................. 42
Design Brief: Clothes Hanger ........................................................... 44
Design Brief: A fruit container ......................................................... 45
Design Brief: Plastic Storage ............................................................ 46
Evaluation Form ............................................................................... 47

4
Skills learnt in Year 7 continue through next threeyears plus
Woodwork
Year 7 Year 8 Year 9 Year 10
Measure timber etc. Joints: Joints: Pop Revets:Plane Butt Mortise and StaplerChisel Halving and Tenons StaplesTenon Saw Housing Wood Turning Bolts and nutsHammer - nailing Reboute Wood carving Electric SanderMallet Mitre Joint Technical Drawing RipsawTrysquare Metal Screw driverSandpaper Tinstrips ScrewingFinishing Boring and drilling Tool sharpeningDecoration Electric drill Setting a planeButt Joint Panel saw Crosscut sawHalvingHousingMarking gaugeSketchingDesignSafetyGluingPreparation of timber
Sewing
Year 7 Year 8 Year 9 Year 10
Sewing equipment Textile fibres - Textile fibres: CompleteStitches animal Man-made Year 9 workSetting up sewing Applying designs -Patterns Internalmachine Basic seams Fastenings AssessmentBasic fabric Cleaning agents Sleeves Taskconstruction and equipment PocketsTextile fibres - Collarsvegetable Hems
5
AIMS OF TECHNOLOGY
The Aims of Technology are:
• to present courses in Years 7 to 10 which require students to expressideas in practical terms, by using selected materials and processes andthrough the application of the principles of good design anddevelopment of effective craft skills.
• to encourage and exercise equity in developing skills and knowledgein technology.
Objectives
Students in Years 7 to 10 will:
• develop design skills that will allow the translation of knowledge andideas into practical realities.
• be encouraged to obtain a sense of achievement and satisfactionthrough success in craft skills through multidisciplinary courses.
• gain experience in decision-making through practicalproblemsolving.
• develop self discipline and a range of practical skills which permit thesafe and successful use of tools and equipment with soft and hardmaterials.
• be encouraged to use appropriate locally available materials and tomaintain ethnic and cultural skills.
• develop the ability to recognise the properties of a range of materialsand apply them correctly in a range of contexts.
• practice the skills of reading, measurement, calculation, reasoningand experimentation in solving practical problems.
• develop skills in researching information on an individual basis andpresenting the findings in a logical and informative manner.
• develop the ability to make an honest appraisal of the quality ofcompleted projects in relationship to their original design solution.
• learn how to maintain the projects made in their courses and extendthis skill into their daily life.

6
Courses of StudyCourses of study at each year level are based on a number of units throughdesign briefs.
The choice of design briefs in each course will ensure that studentsdevelop a range of design and practical skills, and investigate a range ofmaterials and processes.
The number of projects will be determined by the complexity of the designbrief and the workload that each imposes.
The course at each level will ensure that students are fully extended by theyear of study.
A typical course will consist of six units each comprising practical,research and design aspects.
P.R.I.S.M.E.P - Problem: The problem is presented to the students in the form of
a design brief.
R - Restrictions: on the design brief. Any restrictions on materials,(Requirements) size or items which must be included are given.
I - Investigation: The students will list and investigate the knowledgeand skills required to assist them in designing asolution to the problem.
S - Solution: The design process is used to find a solution to theproblem.
M - Manufacture: The final solution is manufactured.
E - Evaluation: The product is evaluated against the criteria set in thedesign brief to see if it meets or betters them.

7
Investigation is the first step
• Investigate a range of materials which might be suitable for theproject.
• Investigate the processes which might be useful in manufacturing theproject.
• Investigate the needs of different people for this product. Some mayprefer one idea, some another.
• Investigate the effects that the product is likely to have on otherpeople and the environment.
• Investigate existing examples and look at how they could bemodified.
• Investigate whether there are other possible ways of addressing theproblem other than that initiated.
Investigation• Read the design brief
carefully.
• Investigate suitablematerials.
• Investigate a range ofpossible processes whichmay be used.
• Investigate the skillswhich may be required inmaking the project.
• Investigate existingproducts and look forpossible modifications.
• Investigate how theproduct was made in thepast or in other countries.
Problem Design
KN
OW
LE
DG
E

8
Design is the second step
This process is broken down into aspects which should be covered.
• Concept ideas and Experiment - draw a range of possible ideas.
• Design development - develop the best idea by drawing details ofeach component and how joins are made, how seams are constructed,how materials meet and other details.
• Working drawings - drawings give measurements and information onmaterial types.
• Design principles - form, aesthetics, proportion, function, ergonomicsand balance.
• Design innovation - interesting solutions should be attempted.
• Decision making and problem solving - explanation of reasons forchoice are given.
• Evaluation of final design - information on how the final designmeets the brief is given.
Investigation Manufacture
SO
LU
TIO
N
Design• Draw concept ideas
and experiment.
• Make models toexamine ideas.
• Draw designdevelopments.
• Draw workingdrawings.
• Use designprinciples.
• Encourage designinnovation.
• Involve students indecision making andproblem solving.
• Evaluate completeddesign against thedesign brief.
• A good projectshould allow for arange of process.

9
Manufacture
The following questions should be taken into consideration duringmanufacture.
• Does the product show a range of processes?
• Is there a better way to do this now I have begun?
• How will I fit this together?
• Will this assemble correctly if I change something?
• Do I need to make a drawing to clarify?
• Is the completed product the best I can make?
• Is it functioning well?
Design Evaluation
PR
OD
UC
T
Manufacture• The plans and model
allow manufacture.
• The materials areavailable.
• The processes areunderstood.
• A plan of action ismade.
• Materials areshaped, joined andfinished correctly.
• Emerging problemsare overcome.
• Components areready for assembly.
• Work is assembledand fitted togethercorrectly.
10
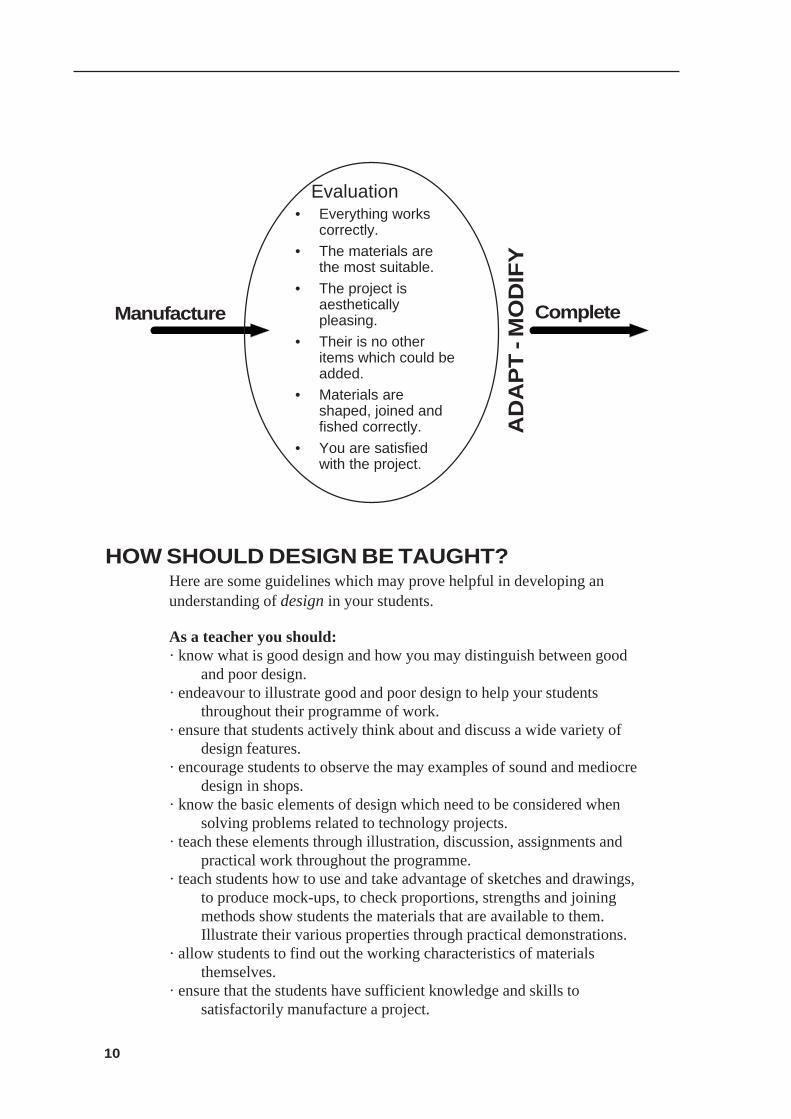
HOW SHOULD DESIGN BE TAUGHT?Here are some guidelines which may prove helpful in developing anunderstanding of design in your students.
As a teacher you should:· know what is good design and how you may distinguish between good
and poor design.· endeavour to illustrate good and poor design to help your students
throughout their programme of work.· ensure that students actively think about and discuss a wide variety of
design features.· encourage students to observe the may examples of sound and mediocre
design in shops.· know the basic elements of design which need to be considered when
solving problems related to technology projects.· teach these elements through illustration, discussion, assignments and
practical work throughout the programme.· teach students how to use and take advantage of sketches and drawings,
to produce mock-ups, to check proportions, strengths and joiningmethods show students the materials that are available to them.Illustrate their various properties through practical demonstrations.
· allow students to find out the working characteristics of materialsthemselves.
· ensure that the students have sufficient knowledge and skills tosatisfactorily manufacture a project.
CompleteManufacture
AD
AP
T - M
OD
IFY
Evaluation• Everything works
correctly.
• The materials arethe most suitable.
• The project isaestheticallypleasing.
• Their is no otheritems which could beadded.
• Materials areshaped, joined andfished correctly.
• You are satisfiedwith the project.

11
TECHNOLOGY EVALUATIONWhen students have completed their projects they should go through aprocess of evaluation. This will help them to recognise and learn from anyskills or knowledge that they gained in the process of making the project. Insome cases it is possible that the first attempt to make the project can beconsidered a prototype and a further example can be manufacturedincorporating the changes or improvements which have been discovered inmaking the first.
What should be evaluated?
There are four areas:1. Performance against the brief. Does the completed article meet all the
criteria of the problem?2. Appearance and aesthetics. Does the completed article look as good as
was hoped?3. Accuracy of the final article against the original design. Any problems
which arose during the manufacture which led to change and how theywere solved.
4. How the student felt about the process gone through and whether he/ sheis satisfied with the end result.
Note: When self evaluating students should try to answer using the 4headings given above - using sketches to help explain where possible.
Some checklist questions that could help evaluation
• Have you tested your project for its intended use?• Does it work in the way intended?• What difficulties and solutions have been met in the manufacturing
process?• How could you improve the function or appearance?• Did you use the best materials for the project?• State the best and worst features of your construction. List comments
made by another person you asked for a peer evaluation.• Does the completed project look like your final design drawing? If not
then why?• Did you complete the project within the time - if not why?• Where did you need the most help in completing the project?• Which parts of the project did you: (a) enjoy most? (b) enjoy least?
Self evaluation is part of developing critical awareness of good design andmanufacturing processes. Students will develop the ability to question theirdesigns before proceeding into the manufacturing stages, resulting in fewermistakes and more efficient processes.
A further stage in this development is the introduction or peer assessment orpeer critical appraisal of work. This would be appropriate at Year 11 and 12levels.

12
Note to the TeacherThe design briefs at this level are to be used as a guide, and it is hoped theteacher will encourage the students to use their creative talents to improvethe design brief by the use of alternative materials. Teachers should beprepared to help and assist students in all their endeavours.

13
Design Brief: Food Grater
Problem
Design a device to make it possible to grate any kind of food.
Restrictions
Its size - between 15 and 25 cm in width and 30 and 35 cm in lengthEasy to washMust be portableMust be able to be hung upMust be able to be used for a long timeShould be strong and not breakable
Investigations
MaterialsWood/wire, nails, iron sheeting, glue, sandpaper, wood putty, varnish1 inch or 2 inch nails for punchpurchase 1 piece of 2m x 1m timber
ProcessThe following is a possible process:
Step 1Select a piece of iron sheet.Mark and cut out a piece 15 x 25 cm.Mark out grater holes 1 cm apart.Use a 1 inch nail to punch holes along the marks on the iron sheet.

14
Step 2From the selected piece of timber cut five pieces to the right length.Plane the pieces of timber to the right size.Mark out the three different joints on the pieces of timber.Cut the joints.Assemble the pieces together with glue and nails.Fix the iron sheet over the frame with cloud nails.Put putty over nail heads.Sandpaper.Varnish.
Solution
Draw a range of possible ideas on a manioc grater.Complete the best idea by drawing other details.Draw different parts of the grater and give details.Measurements or dimension.
Manufacture
Follow the information above for design and procedure.

15
Design Brief: Tea Tray
Problem
Design and make a tray to hold drinking cups.
Restrictions
It must be waterproof.The handle should fit the hand well.It must not be too heavy.
Investigation
MaterialsNakatambol, White wood, Plywood, MasoniteJolt head nails, screws, panel pins, glues (a number of types should beidentified and described.)
ProcessesMarking, cutting and shaping joints.Marking, cutting and shaping pins.Marking, cutting and shaping handles.Assembling rails, ends and base.
ToolsTenon saw, coping saw, various files (e.g. rasp), chisels, sandpaper.
SafetyStudents must note that:• Tools should be sharp.• Care must be taken when using band saw.• Files should have handles.
Solution
A range of possibilities must be drawn showing different types of joints,finishes, decoration and handles in combination.A final design solution should be drawn in three dimensions. Studentsshould be encouraged to use coloured pencils (or other colouring methods,see graphic information in teachers booklet) where possible to make thisdrawing as real as possible.

16
Manufacture
Students should be encouraged to make a detailed sequence of work list.This ensures that thought is given to what needs to be done to make theirtray. It can reduce mistakes in cutting and shaping and therefore costs.
Evaluation
Evaluation is an important part of the process. All students must evaluatetheir own work against the restrictions and requirements of the designbrief. In this brief the tray must be waterproof, the handle should fitperfectly and it must not be too heavy. If their design does not includesome or any of these features then they must be able to give reasons forthis. They also need to be able to explain any changes they would make asa result of knowing more about making this type of item, and how theskills learnt could be applied to another project.

17
Design Brief: Pencil Case
Problem
Design and make a container to hold pencils, pens, erasers and othermaterials to be used in school (pencil box or bag).
Restrictions
Investigation
This container can be constructed with any materials that are available orconvenient, such as wood, metal, plywood, cloth and plastic.
MethodsDepending on the materials available, the teacher will need to help andguide the student in the appropriate methods of construction. Students willneed to take the measurements of the pens and pencils, so that thecontainer is the right size.
DesignThis will also depend on the material used.

18
Design Brief: Shopping Container
(This is a project using a combination of materials.)
Problem
Design and make a portable container suitable for carrying shopping.
Restrictions
It should have rigid or strong handles.It should be lightweight.It should have decorative features making it look attractive.It should use a combination of soft and hard materials.
Investigation
MaterialsWood/bamboo (In timbers, which is stronger – cross grain or straightgrain?)Fabric/weavingShell for eye (pig, fish, cat, dog)Cane, string, rope etc. etc.
SizeLarge enough to carry shopping.The handle in correct proportion to the container.
CostIt can be made from local materials with minimum cost or from purchasedmaterials if available.
ManufactureIf using timber, use the straight grain.If using a template to cut handles, they must be smooth, well finished andcome together neatly.If using bamboo, it needs to be heated to make it curved, and the roughedges sanded smooth.Holes must be made in the handle to allow it to be attached to thecontainer.If fabric or pandanus weaving us used, the sewing can be done by hand ormachine. Both handle and bag need to be complete before assembling withstitching. Fibres, cord, rope or thread can be used. If so, they must be securely tiedand finished.When the work is assembled it should fit neatly together, be well finishedand look good.

19
PlanMake handles.Make bag.Assemble: join bag and handle.Decorations can be used: stitches, shells, patchwork, tie-dyeing, paint,appliqué, seeds.Allow for change and adaptation if any problems emerge with the design.
Evaluation
Does your container do the job for which it was intended?Have you used the most suitable materials?Is it of appropriate strength and weight?Does it look good? What features make it look good?What changes would you make if you repeated the project?Are you proud of your achievement? Why?
20
Design Brief: Item from Wool and/or Pandanus
(How materials are made)
Problem
You have in your classroom wool and/or pandanus leaves. You have tomake an item out of these.
Restrictions
It must be functional.It must be completed in four lessons.
Investigation
ItemSome items they can make are:Wool - Doll, purse, scarf, place mat, flower, wall hanger, etc.Pandanus - basket, fan, place mat, purse, etc.
ProcessesSome examples are weaving knitting, crocheting, etc.
TimeEach student must make an item that will need a maximum of four lessonsto complete.
MaterialsWool: The woollen cloth is made from hair or fleece of the sheep.
Processes for producing the cloth are as follows:Shearing - fleece is cut from sheep.Sorting- fleece is sorted or graded according to quality.Scouring- raw wool is washed in soapy water to remove grease, dirt, etc.Carding- wool is brushed to untangle the fibres.Combing- wool is combed to lie fibres parallel, also to separate the short
fibres from the long ones.Spinning- fibres are twisted together to form longer and stronger threads.Weaving and knitting - threads or fibres are made into cloth.Dying- addition of colour. This occurs before or after weaving.
Solution
Each student will have to make three designs. Develop a final design withall the details you wish to have on it.

21
Manufacture
Each student will have to produce a time plan to work according to whenmaking up the item.
Evaluation
Discuss with each student the following points:Whether they completed the item according to their time plan. If not, findreason why.If they include on it the details they had on their final design. If not, whynot?Whether they are satisfied with the completed item. If not, find reasonwhy.

22
Design Brief: Tablecloth
(Making decorations on cloth)
Note: The Design Brief in the Student’s Book refers only to aTablecloth. If desired, the students could consider making anotherarticle in its place, as suggested under Investigation (below).
Problem
You have to make decorations on plain cloth.
Restrictions
The amount of cloth should not be more than one metre long.The cloth must be plain.The item must be completed in a maximum of eight lessons.
Investigation
ItemSome examples of articles that may be suitable are:an apron, a tablecloth, a scarf, a pillow case, a stuffed toy, a cushion cover,etc.
MaterialsHelp the students to investigate the different types of material available,their properties and their suitability.
CottonThis dyes easily.It is not harmed by high temperatures.It burns easily.It is cool to wear.It is cool to wear.It is easy to handle when sewing.It is cheap to buy.It does not stretch.It shrinks unless treated.
LinenProperties are the same as those for cotton, but also:It does not lint.It is naturally stiff.It is more expensive to buy than cotton.

23
WoolIt will stretch.It repels water drops.It is weaker when wet.It is absorbent.It is non-flammable (does not burn easily).It is warm to wear.It is expensive to buy.It is easily damaged by chemicals.
SyntheticsVery strong.
NylonHas elasticity and will stretch.Crease resistant.Can be heat-set to form permanent pleats.Not absorbent.
RayonResembles silk but cheaper to buy.Drapes well.Is damaged by strong chemicals.Acetate rayon can be washed easily.Viscose rayon can be blended with other fibres, such as wool orcotton.
SilkHas a smooth, shiny surface.It is crease resistant.It is warm to wear.It will dye easily.It is very expensive to buy.It is non-inflammable.It is light to wear, soft to touch and drapes well.
ProcessesSome examples are:
Tie DyeingBlock PrintingStencillingEmbroideryAppliqué
SizeStudents decide on the measurements for their chosen item. For example, apillowcase would need to be 35 x 50 cm., which allows enough for thepiece of material that is turned in to keep the pillow in place.

24
CostRecord the amount and cost of cloth and thread used. Calculate the costaccordingly.
Safety and HealthIf a pillow:Do not allow a baby to use a pillow.Wash the pillowcase regularly.Keep the pillow off the floor.Discourage young children from sucking a corner of the pillow.Keep away from fire.
If a tablecloth:Watch that young children do not pull on its corners.
Solution
Each student decides on what he or she is going to make.
Manufacture
If the students are using a machine to make up their item, make sure thatthey know how to use and care for it correctly.Help students produce in correct work sequence, the steps that they wouldfollow to complete their item.Help them to produce time plans to follow when making up their items.This should show what processes they intend to complete each lesson.
Evaluation
Check to see if item is completed according to time plan. If not, find outwhy not.Find out if all details illustrated on final design are shown on the finisheditem. If not, find out why not.Ask if the student is happy with the completed work. If not, find out whyand work out a solution

25

26
Design Brief: Item of Clothing
(Sewing seams)
Problem
Design and make an item of clothing.
Restrictions
Amount of cloth should not be more then two metres.Should illustrate the use of two seams.Should be completed in about fourteen lessons.
Investigation
ItemDiscuss with the students what garments could be made, using twodifferent types of seams. Help each student to prepare the pattern he or sheneeds.
MaterialIt should be absorbent. Cotton cloth is best. Pale colours are best. Whetherthey are plain or have designs, and size of designs depends on the selectedgarment. Discuss this with your class.
SizeDiscuss this with your class.Help them to find their own body size, or, if they are making a garment fora child, how to take his/her measurements.
CostHelp your class find out the cost of the materials they need to make uptheir garments. If too expensive, to reduce this, get second hand cloth(garments) from second hand shop, to use.
ProcessesSeams to introduce here are French, flat and plain or open seams.Get the students to each make a sample of each seam.For decoration they could use appliqué, fancy pockets, embroiderystitches, etc.
Safety and HealthCloth has to be absorbent to keep body cool and fresh.
27
Solution
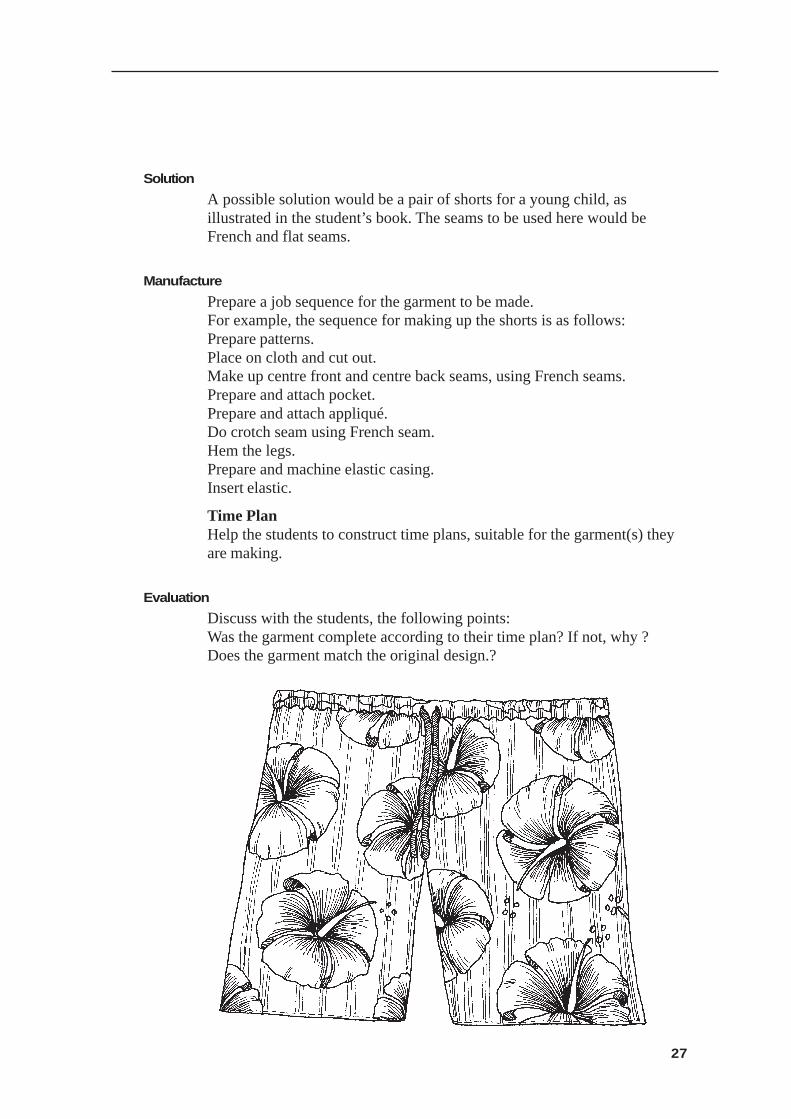
A possible solution would be a pair of shorts for a young child, asillustrated in the student’s book. The seams to be used here would beFrench and flat seams.
Manufacture
Prepare a job sequence for the garment to be made.For example, the sequence for making up the shorts is as follows:Prepare patterns.Place on cloth and cut out.Make up centre front and centre back seams, using French seams.Prepare and attach pocket.Prepare and attach appliqué.Do crotch seam using French seam.Hem the legs.Prepare and machine elastic casing.Insert elastic.
Time PlanHelp the students to construct time plans, suitable for the garment(s) theyare making.
Evaluation
Discuss with the students, the following points:Was the garment complete according to their time plan? If not, why ?Does the garment match the original design.?

28
Design Brief: Fish or Meat for Supper
Problem
You are cooking supper.
Restrictions
The protein foods you have in your kitchen are meat and fish.You have to prepare, cook and clean up during one lesson.
Investigations
Choice of foodDiscuss with each little group. Find out what they want to cook, fish ormeat.
Discuss the types of fish available in Vanuatu and their nutritive value,how to select fresh fish and store it. Also discuss the problem of fishpoisoning, and how to avoid using poisonous fish.
Do the same with meat. Discuss also why meat is sometimes tough.
Cooking methodDiscuss with each group the cooking method they are using. Find outreasons for choice.
IngredientsGo through the recipes with class and make sure they are familiar withfoodstuffs they will be using in their dishes.
TimeDiscuss with then their selected recipes and guide them to find out if theywill be able to complete their dish and cleaning up during the one lesson.
CostHelp them calculate roughly the cost of their dishes. To cut down on thecost, they may be able to omit expensive ingredients or use cheaper onesin their place.
Safety and healthRemind class of safety and hygiene rules to be observed while cooking.

29
Solution
Study your recipe and see if you are happy with it or whether you wish toomit some of the ingredients you are not happy with or use something elsein their place.
Manufacture
Make sure each small group works out a plan of work. Keep it as realisticas possible.
Evaluation
Discuss with each group such points as whether:• they finished on time according to their plan of work.• their dish was well cooked, if not, find out why not.• they liked the taste. If not, why not?• each member of the group participated in the practical. If not, find out
why not.
30
Design Brief: Making a Healthy Lunch
Problem
You have a small brother who attends primary school. Your mother is sickand you have to prepare your brother’s lunch.
Restriction
You can use either all or some of the following foods: cheese, milk andeggs.You may also use some other food that you have available in your kitchen.The cost of the dish must be less than VT 500.You have to prepare, cook and clean up in one lesson.
Investigations
FoodThe students may use one or all of the following three foods: cheese, milkand egg. The students decide:
a. Cheese - cheese is a protein food. It is made from milk as follows:
i. Milk is put into a larger container and lactic acid is added.This causes the milk to go sour.
ii. Enzyme rennet is then added to the sour milk. This causes themilk to separate out into solid (curds) and liquid (whey).
iii. Salt is added to curds for flavour and preservation.
iv. The curds are put into moulds to squeeze out excess liquid.
v. Cheese is stored to ripen or mature.
Cheese contains the following food nutrients; protein, fat, water, salt,vitamins A, B and D.
Cheese need to be stored in a cool place, but away from delicatefoods like eggs and milk.
b. Milk - most milk we use comes from cows, although other animals,eg. goats will also supply us with milk.
It is advisable that milk is treated before we use it to make sure it issafe.

31
Treatment Explanation
Pasteurisation Milk is heated up to 72oC for 15 seconds, thencooled down.
Sterilisation Milk is put into bottles and is sealed. It is thenheated up to 11oC for 30 minutes, then cooled.
Homegenisation Warm milk is passed through fine tubes to breakup fat particles in milk and to distribute them evenlythroughout the milk. This causes milk to be moreeasily digestible.
Ultra Heat Treated Milk Milk is heated up to 132oC for a second, then it iscooled down quickly.
Milk is available in a wide variety. Some types of milk you can find in theshops are as follows:
Types of Milk Descriptions
Condensed Milk In thick liquid form and has a sweet taste because4% of liquid has been removed and sugar is added.
Evaporated Milk In thick liquid form and has a high percentage of fat.
Sunshine Milk In powder form and has a high percentage of fat.
Lactogen In powder form. A special type of milk for babies.
Skim Milk Milk is in liquid or powdered from. Most fat hasbeen removed.
Full Cream Milk Milk is in liquid or powdered form. Contains plentyof fat.
Milk contains the food nutrients, fat, sugar, water, calcium, vitamin A andvitamin B.
Milk should be stored as follows:1. Liquid milk - keep in clean containers with tight fitting lids.2. Store in a cool place, away from strong smelling foods.3. Powdered milk - keep in clean dry containers with tight fitting lids.
C. EggsMost eggs that we use in cooking are hen’s eggs. Some other eggs thatpeople eat are from ducks, turtles, scrub ducks and birds.
Eggs are popular in the kitchen because they are easy to use in a widevariety of dishes.

32
If you are not sure whether eggs are fresh or not, the simplest test to use isto put them in a bowl of water:- if the eggs sink, they are fresh.- if the eggs float, they are stale.
Eggs should be stored as follows:- keep in a cool place away from strong smelling foods.- store away from heavy objects in case they get crushed.
Cooking methodYou have to guide your students into identifying simple recipes to use.This is to make sure they choose dishes that are not too difficult for themto prepare and to cook.
IngredientsGuide the students through in their choice of recipes and identifyingredients they are going to use. Make sure they are aware of amounts.
CostGuide them through the recipe and help them to cost each item of food, toensure the total cost is less than VT 500.
Safety and HealthRemind the students about the usual:a. Hygiene andb. safety rules to observe when preparing and cooking food.
Solution
Help students to produce a work plan to follow or use during the practical,to make sure that:a. everyone participates well.b. the practical finishes on time.
Manufacture
Make sure students follow their:a. recipe during the practicalb. work plan or programme during the practical.
Evaluation
Find out if the:a. Students followed the work plan during the practical. If not, why?b. Students participated fairly in the practical. If not, why?c. Dish was cooked according to plan. If not, why?d. Students enjoyed their dish. If not, why?

33

34
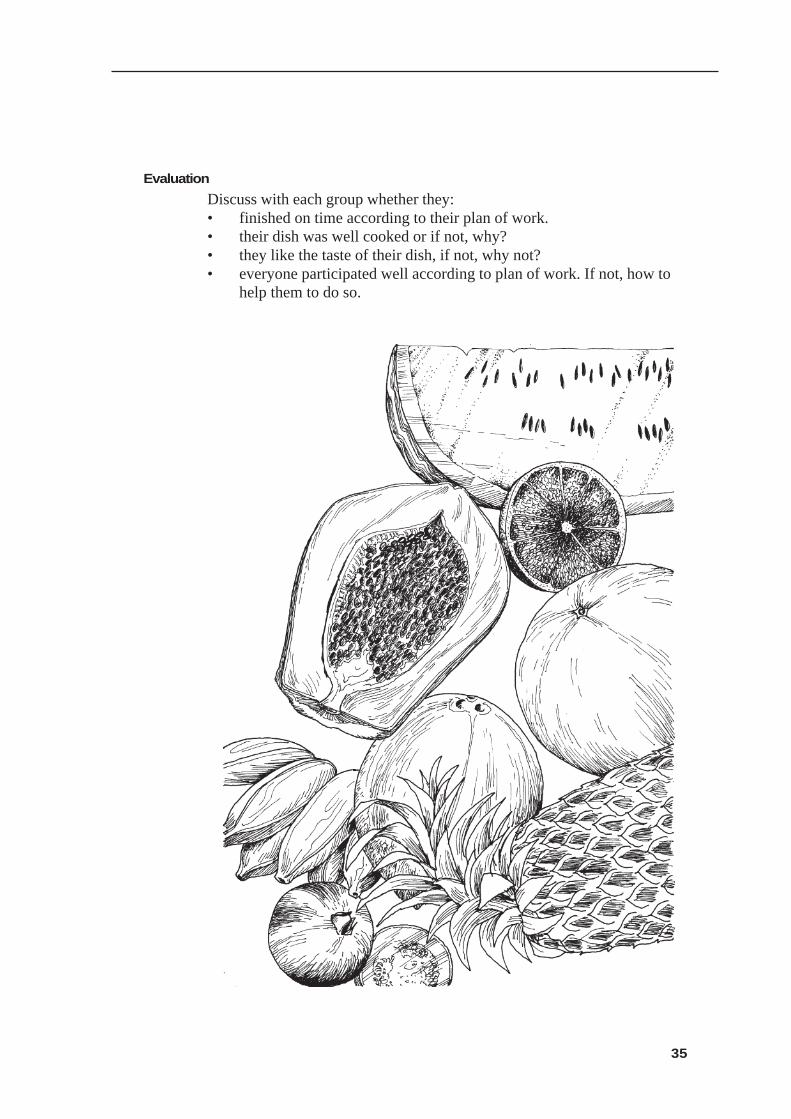
Design Brief: A Fruit or Vegetable Dish
Problem
You are helping to prepare and/or cook lunch.
Restrictions
You are using fruits and/or vegetable only.You are preparing and/or cooking only one dishYou have to complete this dish in only one lesson
Investigations
FoodDiscuss with each small group and find out which foods they are using.Discuss the different types of fruit and vegetable, their nutritive value,their choice, storage and use.
Cooking methodDiscuss with each group to find out what dish they are making, andtherefore the cooking method, if they are cooking their dish.
IngredientsCheck through recipes and help them identify ingredients and amounts forthe chosen recipe. Check that they are familiar with the method.
TimeDiscuss with them and find out if they have enough time to complete theirdish and clean up after cooking, during the one lesson.
CostHelp them calculate the cost of their dish.Ways for cutting down on prices would be by:• using cheap food stuffs• growing your own vegetables and fruits.• omitting some ingredients.
Safety and healthRemind class on rules to observe with regards to safety and cleanlinessduring a practical lesson.
Solution
Help students, especially the “lost” ones to find a suitable recipe to use.
Manufacture
Each group should produce a plan of work to use during the practicalactivity.
35
Evaluation
Discuss with each group whether they:• finished on time according to their plan of work.• their dish was well cooked or if not, why?• they like the taste of their dish, if not, why not?• everyone participated well according to plan of work. If not, how to
help them to do so.

36
Design Brief: Cereals
Problem
You are helping to cook the family meal.
Restriction
You are cooking the cereal dish.You have to prepare and cook this dish in one lesson.
Investigation
FoodDiscuss to fund out what cereal each group is cooking.Make sure the students have sufficient information on the different typesof cereal, where they come, from their nutritive value, and how they aremarketed, selected, stored and prepared.
Cooking methodDiscuss each recipe with students and help them identify the cookingmethods.
IngredientsDirect them to ingredients and amounts for each recipe.
TimeFind or identify those recipes that are suitable and those that are not due totime factor.
CostDiscuss the cost of selected dishes. Identify ways for cutting cost down.
Safety and healthRemind class about precautions or rules to observe regarding safety andhealth, during a practical lesson.
Solution
Go through each group’s chosen recipes and make sure it is the best recipeto do.
Manufacture
Help each group to produce a plan of work to ensure that each member ofthe group participates fairly during the practical lesson.

37
Evaluation
Discuss the following points with each group.If they finished on time according to their plan of work. How realistic wastheir plan?If the dish was well cooked. If not, identify reasons why not.If they liked the taste of their dish. If not, why not?If each member of the group followed the plan of work faithfully. If not,identify those who did not do their share of the work.

38
Design Brief: Papier Mâché
Problem
Most schools have lots of scrap paper that can be used to create somethingelse. How can we recycle it?
Restriction
Use of only scrap paper.
Investigation
1. Types of paper which can be used:- old letters, envelopes, paper bags, wrapping paper, old photocopiedwork.
What types of paper cannot be used:- already recycled, anything with cellophane and plastics.
2. How to soften/breakdown/make a mulch.3. Time it will take.4. How to colour it with crepe paper/dyes.5. How to bind it with glue to make a hard surface. (PVA glue works
well).6. What to use for a base eg. oldcardboard cartons, cardboard from old
books, files etc, egg cartons.
Solution
A picture frame.A book cover (eg. Diary/Notebook)(Designs, shapes)
Manufacture
Egg Carton - Animals
1. Tearing the paper scraps into small pieces.2. Soaking in water for at least 24 hours: softens and breaks down the
paper fibre.3. Using hands and fingers to break it down further into a pulp.4. Squeezing out excess water.5. Colouring.6. Adding some glue to bind.7. Cut the egg carton to suit the animal designed.
xxxxx
39
8. Put a thin coat of glue on the pieces of carton and build up layers ofpaper mâché to shape the animal.
9. To avoid taking too long to dry leave time between layers.10. Use poster paints to give base colour to suit animal and a small paint
brush to put detail of eyes, nose, other features.11. Spray with polynethane clear varnish to set colours.
xxxxx
Evaluation
Types of paper usedMethod of colouringDesigns createdCan this be done again?Would you change anything?How does this benefit us? (The environment - recycling)
40
Design Brief: Money Container
Problem
Design and make a container to save your money in.
Restrictions
It must be strong.It must be portable and able to stand on its own.It could be made from any available materials.It must be attractive.It must be people proof.
Investigation
MaterialsSuggested materials for use in this project are:
coconut shellbambootimberrecycled containers (tins, plastic)super glue, wood gluenailsvarnish, paint
ToolsCross cut or tenon sawHack sawHammerHand planeHand drill (hot metal rod)ChiselSand paper, broken bottleKnife
SafetyCorrect use of knives, broken glass, hand tools must be taught before thestudents attempt this project.
Size of the openingThe width of the opening should not be wider than the thickness of ahundred vatu coin and the length should not be longer than the diameter ofa fifty vatu coin.

41
Manufacture
Safe working practices must be encourage. Students should have theirinvestigation notes handy to refer to when working and write down anythings about the processes they discover during the making of theirproject.
Evaluation
Let the students check their own projects to see:• That the materials used are the most suitable.• That the project looks like their final design solution drawing or not.• That the project is functional.• That they are satisfied with the finish project.• What changes might be required.
42
Design Brief: Bone Carving
Problem
There are a lot of beef bones lying in the paddock.What could you make from them?Design a bone carved pendant for a friend.
Restrictions
The teacher should pre-cut pieces of bone to a size suitable to use,approximately 100mm long by whatever width the bone is.
Students should make a pendant as their first project as it doesn’t have tobe restricted by shape.
Investigation
Information on how bone is used in carving by other countries should beavailable so students can understand that there are cultural aspects andtabu’s in its carving in some places. Also that patterns have meanings forsome people.
Information on how to prepare the bone is required so students can plantheir own work sequence.
Safety considerations must be taught. Bone should be carved outside or ina well ventilated room. Bone can be dangerous for lungs if breathed in toomuch.
It is possible to make tools to carve bone. The tools that are often used are:files and rasps (which must be well cleaned after each use), a piece ofcarpet (for polishing). A marking knife can be used to scrap the bone toshape it.
Solution
Students should be encourage to examine as many shapes and ideas aspossible. For example:
XXX
When students picks a final solution he/she should draw it in pencil on thebone to see if it works. If not then it should be altered to make it fit well. Apresentation drawing of this altered idea should be drawn and coloured.
43
Manufacture
The coping saw should have a metal cutting blade in it.A bone carving stand can be made to hold the bone while cutting.The bone can be wedged into the V to help hold it still while filing orcutting.The bone should then be smoothed with sand paper.
xxxxxA scrap of carpet makes the best polishing equipment. If used long enoughthere is no need for use of agents for polishing.

44
Design Brief: Clothes Hanger
Materials
The teaching should concentrate on:Timber – commercial sizes eg. 100 x 30Hard/soft wood – Grain and characterWire - Steel/galvanisedNails - Panel pins/brad nailsGlue – P.V.A Araldite
Material sizes
These are approximate sizes for a good hanger.Top – 1 pc 400 x 80 x 25 mmRails – 2 pcs 400 x 30 x 30 mmDowelling pieces – 2 pcs 400 x 30 x 30 dia.Hook wire – 1 pc 160 mm x 5 mm dia.
Tools
Students should consult the resource books for information on the tools.Hand brace and bitSpokeshave (categories of toolsPlanes (numbers, etc.Saws (safe use of these tools)SquareRuler
Steps in to construction
1. Find enough pieces of timber and a hook wire appropriate for ahanger.
2. Cut timber to size and plane to actual finish sizes.3. Set up according to diagram of hanger.4. Construct the job including the boring of holes.5. Assemble and leave to day, plus the fitting of hook wire.6. Apply smoothing plane and smoothing files and sandpaper to clear
rough marks.7. Apply first coat, second coat and final coat or varnish or paint.

45
Design Brief: A fruit container
Material
Coconut shells/husksGlue
Materials sizes required
Can be of any larger coconut obtained.
Tools required
Coconut huskerBushknifeHack sawDrills and bits
Steps into construction
1. Find a large coconut seed.2. Husk every fibre or leave some on.3. Cut open the nut and remove all the flesh.4. Scrub all the left over fibres.5. Glue and joint to details.6. Final scrubbing or sanding.7. Apply coat of varnish.
46
Design Brief: Plastic Storage
Problem
Design and make a plastic storage bag.
Restrictions
The maximum amount of material allowed should be 1/2 x 90cm width.
Investigation
ClothOld cloth could be used.Plastics could be used.Old tea towels could be used.Other local materials could be used.Scrap materials could be used to make a patchwork.
MaterialsThread - stitch the bag.Pins - to hold pieces together before machining.Scissors - to cut cloth and thread.Pencil - to design bag on paper.
Work ProcedureDesign bag. Draw final design on paper to scale. Cut shape(s) out. Placecut pieces on cloth and cut out (depending on material used, it would bebetter to deal with each pupil individually).
CostHelp them to work out rough cost of the bag by supplying them withinformation on costs for amount of cloth thread, etc. that was used on theirbag.

47

48
EVALUATION FORM
1. What do you think of the level of language?
too hard
correct
too easy
Tick the correct box.
2. What do you think of the activities?
a. too many
sufficient
not sufficient
b. too difficult
okay
too easy
Tick the correct box.
3. What do you think of the book set up?
4. Did you complete the given activities in the year? Give reasons foryour answer.
5. Other suggestions/comments.

49