Tank Closure Without Tears: An Inspection’s Safety...
21
Tank Closure Without Tears: An Inspection’s Safety Guide Companion Booklet for Underground Tank Closure Video MAY 1988 (Reprinted August 1990) New England Interstate Water Pollution Control Commission 85 Merrimac Street, Boston, Massachusetts 02114
Transcript of Tank Closure Without Tears: An Inspection’s Safety...
Tank Closure Without Tears:An Inspection’s Safety Guide
Companion Booklet forUnderground Tank Closure Video
MAY 1988(Reprinted August 1990)
New England Interstate Water Pollution Control Commission85 Merrimac Street, Boston, Massachusetts 02114
Written and Illustrated byJennie Bridge, Environmental Scientist, NEIWPCC
with special thanks for technical guidance toGuy Colonna, Marine Field Service Engineer, NFPA
and for technical review toBruce Bauman, Marketing Dept., API
This booklet was prepared with a grant from US EPA, Office of UndergroundStorage Tanks, as a companion for a 30 minute videotape, Tank Closure Without Tears: An Inspector’s Safety Guide.
NEIWPCC is distributing two copies of the video/booklet set to each of EPA’sregional offices, and one free copy to the lead agency responsible for the UST program ineach state.
Copies of the video and companion booklet can also be:• borrowed from NEIETC, 2 Fort Road, South Portland, ME 04106, for the prepaidcharge of $15.00, or• purchased from NEIWPCC, 85 Merrimac Street, Boston, MA 02114 for the prepaidcost of $35.00 for the set, or $5.00 for the booklet alone.
Widespread copying and distribution of this material is encouraged.
1
Background
Underground storage tank (UST) regulations are being adopted at federal, state, and local levelsof government. Inspectors representing fire departments, environmental and health agencies are facedwith a need to know more about tank closure, more about procedures for both tank removal andabandonment in place that promote:
• environmental protection,• public health, and• personal safety.
The following is a companion booklet to the NEIWPCC video on closure safety, Tank ClosureWithout Tears: An Inspector’s Safety Guide. Please realize that this material is being presentedas a training guide for inspectors, not a how-to manual on tank closure for contractors. Inspectorsneed to be aware of the different practices that might be encountered during site visits. These writtenmaterials provide general outlines of procedures (some more appropriate than others) that are nowused during tank closures.
Tank closure is a task for which no definitive guidelines have been established. People involvedwith this work should be knowledgeable of reference materials published by API, NFPA, NIOSH,OSHA, etc. as well as applicable federal, state or local regulations. These published materials do notalways agree on the best procedures to use. Any safety and testing equipment used during tankclosure should be operated by qualified people who understand how to use and maintain theequipment.
Introduction to Tank Closure
The UST inspector should focus on the following major objectives during the inspection of atank closure.
• See if there has been an previous or current contamination,
• Make sure the tank, if abandoned in place, is cleaned and filled properly to prevent futurecontamination, and
• Recognize the potential dangers of explosion - and stop a bad situation, if necessary.
For training purposes, we are presenting the two major tank closure issues of safety and siteassessment separately. As an inspector, you will have to be concerned with both issues at the sametime. Both are essential to a successful tank closure.
2
SAFETY During TANK CLOSURE
GATHER TANK AND SITE INFORMATION
Inspectors should gather as much information onthe tank and site as possible, before the site visit. Muchof the following list is necessary for an environmentalsite assessment. Knowledge of some items, such astank age, type of material stored, location ofunderground utilities, and the contractor’s plannedremoval procedure are especially important from asafety perspective, too.
• Tank data: Age, size (diameter, length & capacity),material, type & internal configuration ( are thereinternal baffles?), substances store, is the tankanchored?, any tightness test results, probability orevidence of failure.• Site Information: Plot plan, blueprints, and/orcontact person with knowledge of the tank installationand location, depth of installation, depth of water table,proximity to street, buildings & basements (houses?,schools?, hospitals?), store drains, utilities (electric,gas, water, sewer), drinking water supply watersheds,public or private wells.• Contacts: contractor’s name, tank owner’s name,addresses & telephone numbers.• Logistics: plans for removal procedure (purging orinerting?), plans for soil disposal or on-site treatment (ifnecessary), plans for tank disposal.The local fire department needs to be aware of all tankremovals.
WHAT CAUSES FIRES AND EXPLOSIONS?
Most UST removals will involve flammable vaporsfrom products stored in the tank and from accumulatedresidues left in the tank even after it has been pumpeddry. Be aware of the basic fire triangle: fuel, oxygen,ignition source. All three points of the triangle arenecessary to support combustion. These three elementsneed to be recognized, evaluated, and controlled tomake a safe work place and a void disaster. Safe tankremoval requires continuous attention to these potentialhazards to eliminate or reduce the risk of explosion.
3
PREPARE A SAFE WORK PLACE - before thetank is approached or excavation begins.
1. An inspector needs to make sure that the contractorprepares a safe work place by eliminating allpotential sources of ignition before heavy equipmentis used for handling the tank, or used in the surroundingarea of the tank (vapor hazard area). Sources ofignition include any heat, flame, or spark-producingaction: • Ban smoking in the area
• Shut down all open flame and spark-producing equipment within the vapor hazardarea. (Orange County, CA, specifies a 50' setbackdistance from the tank.)
• Remove electrical and internal combustionequipment unless it is designed to be “explosion-proof”. This special apparatus is enclosed in acase which is capable of withstanding an explosionfrom within, and of preventing ignition of thevapor surrounding the enclosure.
• Make sure only non-sparking tools are usedto expose tank fittings and prepare for the vapor-freeing procedures. (Caution: even these toolsare not risk free; pieces of metal imbedded duringprevious use may cause a spark!)
• Control static electricity: a. Minimize agitation or static-producingmovement if possible. Static electricity isgenerated by moving liquids, air, or solids. Forexample, static results from: liquid dropping intoa tank during product deliveries, from liquidflowing through a hose when product is pumpedfrom the tank, from compressed gas or air beingreleased into the tank atmosphere, from the highspeed rolling of pneumatic rubber tires on apavement under dry conditions. If eliminating thestatic-producing movement is not possible, then...
b. Provide a conductive path for thecontinuous, “safe” discharge of static electricity byeither bonding or grounding equipment andvehicles. Equipment is “bonded” by connecting itwith a wire to something that is grounded (such asthe tank, if the tank is still in contact with theearth). Equipment is “grounded” by connecting itto earth or some conducting body which servicesin place of the earth.
4
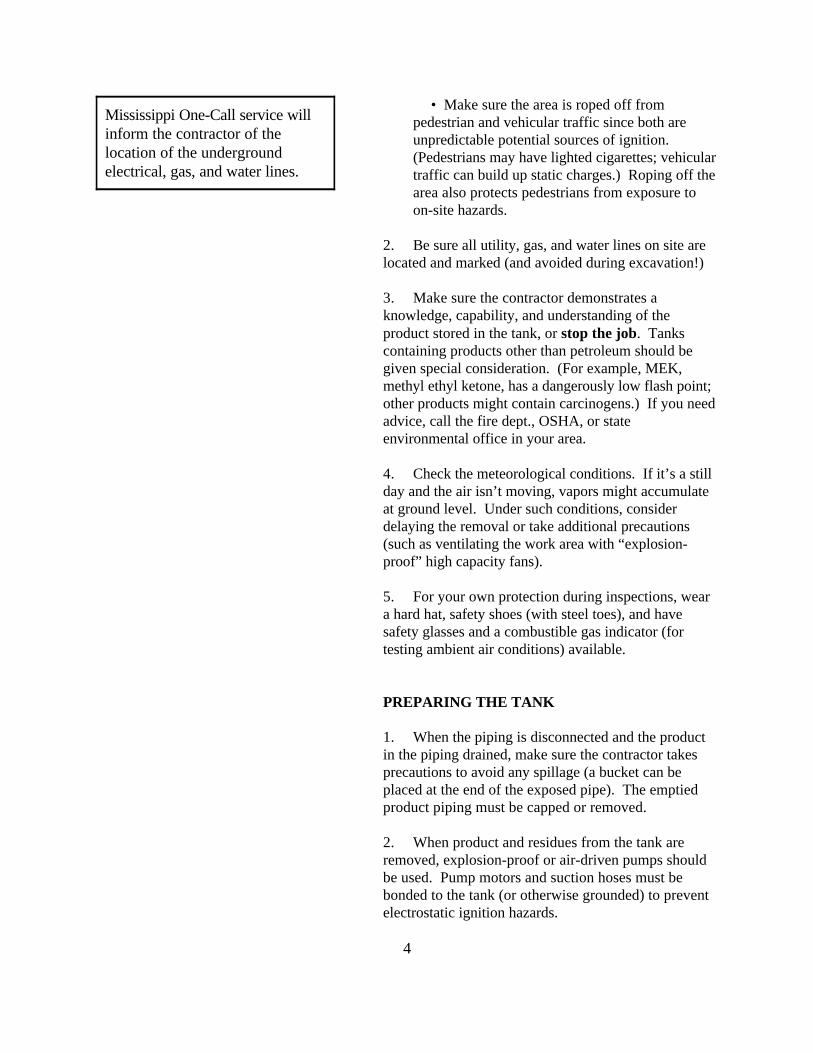
Mississippi One-Call service willinform the contractor of thelocation of the undergroundelectrical, gas, and water lines.
• Make sure the area is roped off frompedestrian and vehicular traffic since both areunpredictable potential sources of ignition. (Pedestrians may have lighted cigarettes; vehiculartraffic can build up static charges.) Roping off thearea also protects pedestrians from exposure toon-site hazards.
2. Be sure all utility, gas, and water lines on site arelocated and marked (and avoided during excavation!)
3. Make sure the contractor demonstrates aknowledge, capability, and understanding of theproduct stored in the tank, or stop the job. Tankscontaining products other than petroleum should begiven special consideration. (For example, MEK,methyl ethyl ketone, has a dangerously low flash point;other products might contain carcinogens.) If you needadvice, call the fire dept., OSHA, or stateenvironmental office in your area.
4. Check the meteorological conditions. If it’s a stillday and the air isn’t moving, vapors might accumulateat ground level. Under such conditions, considerdelaying the removal or take additional precautions(such as ventilating the work area with “explosion-proof” high capacity fans).
5. For your own protection during inspections, weara hard hat, safety shoes (with steel toes), and havesafety glasses and a combustible gas indicator (fortesting ambient air conditions) available.
PREPARING THE TANK
1. When the piping is disconnected and the productin the piping drained, make sure the contractor takesprecautions to avoid any spillage (a bucket can beplaced at the end of the exposed pipe). The emptiedproduct piping must be capped or removed.
2. When product and residues from the tank areremoved, explosion-proof or air-driven pumps shouldbe used. Pump motors and suction hoses must bebonded to the tank (or otherwise grounded) to preventelectrostatic ignition hazards.
5
Caution: Avoid using plastic (PVC) pick-up tubes onthe stripping lines of vacuum trucks. The plastic tubesare especially prone to accumulating static charges;explosions from their use have resulted in major loss oflife and property.Although vacuum trucks are usually used duringproduct removal, it may be necessary to use a handpump to remove the bottom few inches of liquid. Again, make sure the contractor observes groundingand bonding procedures.
3. If a vacuum truck is used for removal of liquid orresidues, the area of operation for the vacuum truckmust be vapor-free, and the truck should be locatedupwind from the tank and outside the probable path ofvapor dispersion. The vacuum pump exhaust gasesshould be discharged through hose of adequate size andlength, downwind of the truck and tank area. (See APIPublication 2219).
4. Residual product and solid must be disposed ofproperly.
5. Air is roughly 21% oxygen and 79% nitrogen byvolume. Once the tank is emptied and exposed to theair, the atmosphere inside the tank is a mixture ofproduct vapor and air. As long as no source of ignitionis introduced, combustion cannot occur with thispotentially dangerous mix of flammable vapors andoxygen. However, it is difficult at an excavation siteto eliminate all potential sources of ignition (striking thetank with the backhoe could produce a spark). Beforethe tank is handled with large equipment, flammablevapors in the tank must be controlled.
GETTING RID OF FLAMMABLE VAPORS
The tank can be made “safe” either by purging orinerting the potentially explosive atmosphere in thetank. These two methods control different points of thefire triangle. These methods and the appropriatemonitoring equipment will be discussed in greaterdetail following this brief description:
6
Purging or ventilating the tank replaces or dilutesthe flammable vapors in the tank with air, reducing theflammable mixture of fuel and oxygen by dealing withthe fuel point of the triangle.
Remember, it is the flammable vapor given off bythe liquid fuel, rather than the liquid fuel itself, thatcombusts. Most petroleum products (gasoline,kerosene, fuel oil) have a flammable range of 1-10%by volume in air. This range is imply the amount offuel vapor necessary to become flammable in thepresence of oxygen and an ignition source. Below thefuel vapor level of 1% (the lower explosive limit orLEL), the mixture of fuel and oxygen is too lean tosupport combustion (above 10%, the mixture is toorich). The goal of purging a tank is to reduceflammable vapors in the tank is to reduce theflammable vapors in the tank well below the lowerexplosive limit.
Inerting displaces the oxygen (and some of thefuel vapor) in the tank with an inert or non-reactive gassuch as nitrogen or carbon dioxide. This reduces theflammable mixture of fuel and oxygen by dealing withthe oxygen point of the triangle. The goal of inerting atank is to reduce the level of oxygen in the tank tobelow the 12-14% oxygen by volume needed by mostpetroleum products to support combustion.
The success of these two vapor-freeing methodsmust be checked with different types of monitoringequipment. Read on for details...
Caution: In air purging, with plenty of oxygenpresent, the concentration of vapors in the tank maystart out in the flammable range, or may go from toorich, down through the flammable range before a safeatmosphere is reached. It is especially important toensure that all ignition sources have been removedfrom the area before this process begins!
Purging - controlling the fuel in the fire triangle
1. After the tank is empties of product, theconcentration of flammable vapors in the tank can bereduced or eliminated by purging the tank with air,using the following two methods:
7
• A diffused-air blower pumps air into thetank through the extended fill pipe (drop tube). Since petroleum vapors are heavier than air, airmust be introduced as low into the tank aspossible so that product vapors are stirred upsufficiently to be moved out of the tank.
If the drop tube is removed, air can be pumpedthrough an air-diffusing pipe. This new pipe mustbe properly bonded (to the tank, for example) toprevent static build-up.
To avoid rupturing the tank, air pressure in thetank must not exceed 5 psi, so the contractor musttake into account the size of the vent opening aswell as the rate at which air is pumped into thetank.
• An eductor-type air mover, typically drivenby compressed air, draws vapors out of the tankand fresh air into the tank. The fill (drop) tubeshould remain in place to ensure ventilation of thetank bottom. For this reason, the eductor-typemethod is good for tanks with nonremovable fill(drop) tubes. The air mover should be bondedproperly to prevent the generation and dischargeof static electricity.
• Not recommended: The use of steam (asopposed to hot water sprays) to purge & clean thetank is not recommended. Steam, under greaterpressure than hot water, is more likely to createstatic electricity. Charges can build up on thesteam nozzle, and on insulated objects on whichthe steam impinges or condenses.
If steam is to be used for either purging orcleaning a tank or other equipment, all isolatedconductors and objects subject to impingement orcondensation, as well as the discharging hose ornozzle, should be properly bonded (to the tank orequipment) or grounded. (See NFPA 327, API2015).
2. Exhaust fumes from purging should be vented at aminimum height of 12 feet above grade and 3 feetabove any adjacent roof lines. The atmosphere atground level should be tested periodically whilepurging is in progress to be sure the vapors are beingvented effectively into the upper atmosphere, and arenot collecting at ground level.
8
Caution: Purging is a temporary procedure. Producttrapped in bottom sludge and wall scale regeneratesflammable vapors inside the tank. TEST the %LELFREQUENTLY inside the tank, in the excavation andany other below grades areas, and at ground level,especially near the vent!
Test with a Combustible Gas Indicator (CGI) - tomeasure the reduction in the concentration offlammable vapors when purging:
1. Readings from most combustible gas indicators(CGIs), or explosion meters, give the percentage ofthe lower explosive limit (%LEL) of the vaporspresent in an atmosphere. The meter reads from 0 to100% of the LEL.
As mentioned before, the lower explosive limit(LEL) depends on the product’s flammable range, orthe mixture of product and oxygen necessary toproduce fire or explosive in the presence of an ignitionsource. LEL is expressed as the percent of productvapor by volume in air.
For example, gasoline’s flammable range is 1.4 -7.6% by volume in air. Therefore, 1.4% is the LEL forgasoline. (Below 1.4%, not enough fuel vapors areavailable to burn.) Therefore, 100% LEL on the CGImeter corresponds to 1.4% gasoline vapor by volume.
2. When purging a tank, the goal is to reduce theconcentration of flammable vapors to zero, or as closeto zero as possible. The lowest reading possible gives amargin of safety in the time it will take for flammablevapors to regenerate from product trapped in the sludgeand the walls of the tank. CGI readings of 10-20% areconsidered within the petroleum industry to be practicaltarget readings. For readings above 10-20% LEL, keeppurging and testing!
3. After the tank has been purged for a while, thecontractor should test the tank vapor space by placingthe CGI probe into the fill opening with the drop tuberemoved. Readings should be taken at the bottom,middle, and upper levels of the tank. If the tank isequipped with a non-removable fill tube, readingsshould be taken through another opening.

9
The instrument should be cleared after eachreading. Move away from the vapor hazard area, movefresh air through the instrument, and reinitiate the start-up procedure (calibrate the instrument). If you can’tzero the LEL, consider the possibility that you havepoisoned the sensor (see below).
The CGI should not be used to test the tankatmosphere before the tank has been emptied ofproduct and purged, at least partially. Liquid productwill foul the probe. If the sensor becomes coated witha high concentration of vapor in the flammable range,calibration of the meter may be affected, although thetemporary coating may eventually burn off. Substancessuch as tetra-ethyl lead and silicon can “poison” thesensors by permanently coating the wire (and will notburn off). Volatile substances containing halogens canaffect the sensitivity and calibration of the instrument.
4. The CGI needs to be calibrated, checked andmaintained according to the manufacturer’sinstructions. If the sensor won’t calibrate, replace it orsend it back to the manufacturer! Inaccurate CGIreadings can give a false sense of security and lead toaccidents!
Inerting - controlling the oxygen in the fire triangle
1. The concentration of oxygen in the tank can bereduced to a level insufficient to support combustion byreplacing the oxygen with an inert gas such as thefollowing:
• Carbon Dioxide gas can be generated bycrushing and distributing dry ice evenly over thegreatest possible area in the bottom of the tank,before the openings are plugged. Recommendedamounts vary (from 15-20 pounds per 1,000gallons of tank capacity). The dry ice will releasecarbon dioxide gas as it warms. With this method,there is no momentum for vapors in the tank tomove toward the vent, so inerting takes longer andmay be less effective than inerting with nitrogen. Avoid skin contact with dry ice because it mayproduce burns.
10
• Nitrogen gas can be pumped into the tankfrom a hose that passes through the fill hole to thebottom of tank. Nitrogen is lighter than air, so itsintroduction low in the tank is essential to effectiveinerting. Care must be taken handling the bottle ofcompressed nitrogen. Bonding or grounding thenozzle or hose to prevent static build-up isrecommended.
In some cases, this alternative of inerting maybe more expensive than using dry ice, but betterdistribution of the inert gas within the tank can beachieved by pumping in nitrogen than by the dryice method.
• Not recommended: Inerting withcompressed carbon dioxide gas may bedangerous. The contents are under pressure andstatic electricity can build up during discharge ofthe gas. More importantly, the compressed CO2
has a much larger temperature difference with theoutside atmosphere than bottled nitrogen. Thisdifference leads to condensation which increasesthe generation of static electricity. If CO2
cylinders are used, the nozzle should be properlybonded or grounded, and the gas should beintroduced slowly to reduce static.
CO fire extinguishers should definitely not be2
used for inerting flammable atmospheres. Sincesolid as well as gaseous CO is discharged from2
the nozzle, this “two phase flow” generates staticelectrical charges.
2. It is important to understand that the inert gas(whether CO or nitrogen), does not “neutralize” the2
flammable vapors; the inert gas displaces the oxygen,and perhaps some of the flammable vapors. Anyvapors remaining in the sludge or trapped in the wallscale will still present an explosion hazard if oxygen isreintroduced into the tank.
3. Oxygen may be reintroduced into the tank unlessall holes are effectively plugged except for the ventline.
4. How fast and how effectively oxygen in the tank isreplaced by the inert gas will depend on how well
11
the inert gas is distributed throughout the tank; howmuch gas flow or movement and mixing occurs.
5. Since the inert gas displaces some of theflammable vapors along with the oxygen in the tank,the same venting precautions for the exhaust must befollowed as for a purging operation:Exhaust fumes from inerting should be vented at aminimum height of 12 feet above grade and 3 feetabove any adjacent roof lines. The atmosphere atground level should be tested periodically to be sureany vapors are being vented effectively into the upper atmosphere, and are not collecting at ground level.
Test with an Oxygen Indicator - to measure theeffectiveness of the inerting procedure.
1. An oxygen meter should be used to determinewhen a tank has been successfully inerted. Testing isimportant because the time required to inert a tankvaries a great deal and depends on many factors(method of inerting, extent of inert gas mixing &distribution within the tank, temperature, etc.). Readings from most oxygen meters give the percentoxygen by volume.
2. When inerting a tank, the goal is to reduce theoxygen to below the level necessary to supportcombustion. The theoretical limit below whichcombustion will not occur is 11% oxygen. Mostpetroleum products need at least 12-14% oxygen byvolume for combustion. Oxygen readings of 1-10%are safe for most petroleum products. A moreconservative safety rule of thumb is to target a readingthat represents 50% of the lowest level of oxygennecessary to support combustion. This would give atarget meter reading of 6-7% oxygen for inerted tankshaving contained most petroleum products. (To put allthis in perspective, the normal atmosphere is 21%oxygen; the safe breathing range is 19.5-21%.)
3. Readings should be taken at three levels in thetank (bottom, middle, and top), and at the ends as wellas the middle.
4. After inerting, the tank should not be enteredunless very specific safety procedures for working in
12
confined spaces are followed. If the tank is to beentered later for any reason, such as cleaning, breathingapparatus for workers must be provided since the tankwill be oxygen deficient. Sometimes, the tank isinerted, excavated, and pulled from the ground, thenventilated with air before and during entry.
5. The oxygen meter must be calibrated, orrecalibrated, appropriately, depending on its intendeduse. To judge the effectiveness of inerting the tank, themeter should be calibrated for the low range (1-10%). To determine if enough oxygen is present for breathing,the meter should be calibrated for the breathing range(19.5-21%).
Vapor-Freeing a Tank with Water
Besides purging or inerting, a tank can be madetemporarily “safe” by filling the tank completely withwater which will displace flammable vapors and mayremove some of the liquid gasoline left in the tank. Since the water must be pumped from the tank beforethe tank is removed from the ground, sludge and vaporregeneration are still a problem.Caution: Once the water is removed, and air isreintroduced into the tank, flammable vapors mayregenerate over time. Keep testing with a CGI!
This method may be impractical for larger tanksbecause the water must be disposed of properly;treatment and disposal of large volumes of wastewateris costly. Some states may consider the waste water ahazardous waste. Check state or local requirements.
This method is inappropriate for suspected leakersbecause the water may force contamination further intothe soil through holes in the tank.
Interchanging Control Mechanisms
So far, we have been working with the fire triangleto avoid fire & explosion by making sure at least onepoint of the triangle is controlled at a time. First,sources of ignition were removed or controlled soproduct could be pumped from the tank. Then, the
13
mixture of flammable vapors was controlled (bycontrolling either the fuel or oxygen point of thetriangle) so potential ignition sources such as heavyequipment could be moved into the hazard area fortank excavation and removal.
Throughout the tank closure, the contractor shouldbe interchanging, or switching back and forth amongthese control mechanisms appropriately, depending onwhat work needs to be done. The bottom line injudging when to use which control mechanism is tokeep testing, and...
Know When and How to Use MonitoringEquipment
1. Once the tank is “safe” for handling, the tank canbe approached by heavy equipment for excavation,removal, cutting and cleaning...but KEEP TESTINGfor the flammable concentration of vapors both in andaround the tank until the tank has been cleaned on-site, or loaded for transport to be cleaned off-site!
2. Remember, a combustible gas indicator (CGI)measures the concentration of flammable vapors in theatmosphere; an oxygen meter is used to measure thesuccess of an inerting procedure. A CGI should not beused to test the effectiveness of the inerting process,even though the inerting process displaced flammablevapors as well as oxygen. The CGI is designed tofunction at normal atmospheric levels of oxygen (21%). The CGI burns a sample, creating resistance which isconverted to electrical energy, which is calibratedagainst the LEL scale. The %LEL readings may bemisleading where the atmosphere contains less thanabout 5-10 percent by volume of oxygen (as in aninerted container). In general, the readings in anyoxygen-lean atmosphere will be on the high or safe sidebecause the inefficient burning of the sample createshigher resistance.
Relative Risk of Explosion for Different Products
You may be asking, “If the lower explosive limits(LEL’s) for most petroleum products are so similar(1% by volume), why does gasoline present
14
more of an explosion hazard than fuel oil?” Therelative risk of explosion for different products alsodepends on their flashpoints: the lowest temperatureat which the liquid product gives off sufficient vaporsto support combustion (in the presence of enoughoxygen and an ignition source).
Gasoline gives off vapors sufficient to supportcombustion at -40EF; fuel oil must be heated to a
temperature between 110-190EF (depending on thegrade of oil) before sufficient vapors are released toreach the LEL of the flammable range.
While the flashpoint of diesel and heating oils ismuch higher than gasoline, vapors from these fuels canstill accumulate in confined spaces at temperatures wellbelow their flashpoints. If an ignition source ofsufficient energy is present, an explosion may occur.
Furthermore, sun beating down on a small blacktank can easily raise the temperature within the tank to 140EF, turning a potential risk into a real hazard. Within the confined space of a tank, factors such astemperature and pressure are much too difficult tocontrol.
CLEAN OUT SLUDGE
1. Remember, any vapor-freeing technique istemporary! If the tank is to be removed from theground, product trapped in the sludge at the bottom ofthe tank, or absorbed in the tank walls, or trappedunder the scale, is a continuous source of flammablevapor regeneration. Cleaning the tank will decrease theamount of vapor regeneration. If the tank is to beclosed in place, cleaning the tank will minimize the riskof release and future environmental contamination.
2. Deciding whether the tank should be cleaned on-or off-site can be approached as a risk assessment. Thebenefits of having a clean, safe tank during transportneed to be weighed against the risks of additionalvapors being released into the environment, and theeffect of an explosion at the site location. The primarysafety considerations have to do with physicalsurroundings, air flow and population in the area. Isthe air flow on that day sufficient to allow dilution anddispersion of explosive vapors? Are buildings and
15
people far enough away to minimize the risk of damageif an explosion were to occur? There may be localrequirements on this issue.
3. If cleaning is done on-site:• After the tank is purged or inerted to make it
safe for handling, the tank can be tipped, jet rinsed withwater, and the sludge can be washed to one end of thetank and pumped out while the tank is still in theexcavation.
• If the scale is stubbornly caked on, thecontractor may have to enter the tank for manualcleaning. Make sure appropriate safety procedures arefollowed (breathing support, safety line, buddy system),and a continuous stream of fresh air is introduced intothe tank.
• Make sure the contractor blocks the tank toprevent any movement.
• Make sure the contractor rechecks theatmosphere in the tank.
• Make sure the contractor disposes of the sludgeand rinse water properly.
CLOSING IN PLACE
1. Check state and local regulations regardingclosure in place. Concerns over past and futureenvironmental contamination, and potential cleanupliability are prompting more and more states to requiretank removal with few exceptions (i.e. structuraldamage to an overlying building would be caused bythe tank removal). Requirements for environmentaltesting, fill material, etc., also vary state-to-state. Someareas require that documentation of an in-place closurebe recorded in the property deed, with a description ofthe exact location of the closed tank (including itsdepth), product contained, and the closure method.
2. The tank and piping are initially prepared forclosure in place in the same manner as for a tankremoval. (See the sections on preparing a safe workplace, preparing the tank, getting rid of flammablevapors, and cleaning out sludge). After thorough tankcleaning and an effort to make sure that the site is freefrom contamination, one or more holes may have to be
16
cut in the tank top if existing tank openings are not bigenough for the introduction of the inert fill material(cement slurry, sand, etc.). The tank should be filled asfull as possible to minimize any subsequent settling ofthe fill material.
3. After filling, all tank openings should be pluggedor capped unless it was necessary to cut open the tanktop.
4. The vent line should be disconnected and cappedor removed. The tank can then be backfilled.
THINK SAFETY WHILE INSPECTING
1. Before excavation:• Make sure the contractor demonstrates
sufficient knowledge of tank removal procedures,including vapor-freeing techniques.
• Make sure the monitoring equipment has beenwarmed up and zeroed in an uncontaminatedatmosphere.
• Make sure the contractor monitors routinely forvapors in the excavation and other below grade areason-site, at ground level, especially near the vent, and inthe tank (after vapor freeing procedures have begun).
• After the tank has been purged or inerted, andbefore it is removed from the excavation, make sure allaccessible h oles are plugged or capped. One plugshould have a 1/8 inch vent hole to compensate forexcessive pressure differential caused by thetemperature changes.
2. During excavation:• Stay out of reach of the machine arm’s swing by
standing at the end of the excavation, not the sides; thisarea is also less likely to cave in.
• There is no need for you to enter the excavation;ask the machine operator to dig down for a soil sampleand place it at ground level for inspection. Be awarethat OSHA is preparing new trenching guidelines.
17
3. During removal:• Make sure that the equipment available is
appropriate for the tank pull.• Sand well out of the way and behind stable
objects until the tank has been lifted onto the groundand blocked, or onto the transport truck and secured. Cables and chains can snap and fly out in any direction.
• Tanks should not be dragged at any time.• If a tank explodes, the weakest points of steel
tanks are the ends, so stay away from them.
4. Safety concerns in case of a leak:• Determine nearby potential destinations of
dangerous vapors or product: buildings, houses,basements, storm drains, sewers.
• Evaluate the potential for explosion, and makesure the local fire department is notified.
READY TO TRAVEL
1. Before the tank is removed from the site, the tankatmosphere should be rechecked to ensure that theflammable vapor concentration does not exceed safelevels for transport.
2. Recheck to make sure any corrosion holes in thetank are plugged with screwed (boiler) plugs fortransport, and that the 1/8 inch vent plug is on the topof the tank for transport and storage.
3. Tanks should be labeled with information aboutthe former contents, present vapor state, vapor-freeingtreatment and date, warning against certain types ofreuse (See API 1604). Check for state and locallabeling and transportation requirements.
4. Tanks should be secured and removed from thesite as soon as possible, preferably on the day the tankis removed from the excavation. If a tank remains at asite overnight or longer, vapor may be regeneratedfrom residues in an uncleaned tank.

18
TANK DISPOSAL
1. Make sure you know that the tank will be safelyand properly disposed of. Check state and localdisposal requirements. Whether sold to a scrap dealeror disposed of at an acceptable tank yard, some areasrequire an unprotected steel tank to be cut, orpunctured sufficiently to render it unfit for future use asan underground storage tank.
2. If reuse of tanks is permitted, make sure there areplans to certify that the tank is tight, structurally sound,and will meet all the requirements for a newinstallation.
CHECKING FOR SOIL & GROUNDWATERCONTAMINATION
A second video and companion booklet for stateand local UST inspectors will be produced which willcover assessing a tank closure site for signs ofcontamination. The set should be available fromNEIWPCC during the winter of 1988.
SAFE REMOVAL CHECKLIST
U Gather preliminary tank & site history.U Think safety on the site - stop a bad situation!U Check the contractor’s procedures.U Be familiar with the need for and use of
product vapor and oxygen monitoringequipment.
U Know when to call in other experts.U Check the tank disposal plan, and state and
local regulations.

19
REFERENCES
Other resources to check for information related to safety during tank closure include:
1. American Petroleum Institute’s (API) Recommended Practice 1604, Removal and disposal ofUsed Underground Petroleum Storage Tanks, 1987.
2. API’s Recommended Practice 1631, Interior Lining of Underground Storage Tanks, 1987.
3. API Publication 2015, Cleaning Petroleum Storage Tanks, 1985.
4. API Publication 2217A, Guidelines for Work in Inert Confined Spaces in the PetroleumIndustry, 1987.
5. API Publication 2219, Safe Operating Guidelines for Vacuum Trucks in petroleum Service,1986.
6. Occupational Safety & Health Administration (OSHA) 2226, Excavation & TrenchingOperation, 1990.
7. National Institute for Occupational Safety and Health (NIOSH), Criteria for RecommendedStandard... Working in Confined Spaces, 1979.
8. NIOSH Publication 87-113, A Guide to Safety in Confined Spaces, 1987.
9. National Fire Protection Association (NFPA) 69, Explosion Prevention Systems, 1986.(table with minimum oxygen levels necessary to support combustion for various products)
10. NFPA 7, Static Electricity, 1988.
11. NFPA 327, Cleaning or Safeguarding Small Tanks and Containers, 1987.
12. NFPA 306, Control of Gas Hazards on Vessels, 1988.(practical procedures for vapor-freeing tanks and testing guidance)
13. National Leak Prevention Association (NLPA) Standard 631, Spill Prevention, Minimum TenYear Life Extension of Existing Steel Underground Tanks by Lining Without the Additionof Cathodic Protection.(Cleaning procedures)