Sun Ultra 45 Workstation Installation Guide · 2011-01-26 · The Sun Ultra 45 and Ultra 25...
68
Sun Microsystems, Inc. www.sun.com Submit comments about this document at: http://www.sun.com/hwdocs/feedback Sun TM Ultra TM 45 and Ultra 25 Workstations TM Installation Guide Part No. 819-1892-11 May 2006, Revision A
Transcript of Sun Ultra 45 Workstation Installation Guide · 2011-01-26 · The Sun Ultra 45 and Ultra 25...

Sun Microsystems, Inc.www.sun.com
Submit comments about this document at: http://www.sun.com/hwdocs/feedback
SunTM UltraTM 45 and Ultra 25WorkstationsTM Installation Guide
Part No. 819-1892-11May 2006, Revision A

Copyright 2006 Sun Microsystems, Inc., 4150 Network Circle, Santa Clara, California 95054, U.S.A. All rights reserved.
Sun Microsystems, Inc. has intellectual property rights relating to technology embodied in the product that is described in this document. Inparticular, and without limitation, these intellectual property rights may include one or more of the U.S. patents listed athttp://www.sun.com/patents and one or more additional patents or pending patent applications in the U.S. and in other countries.
This document and the product to which it pertains are distributed under licenses restricting their use, copying, distribution, anddecompilation. No part of the product or of this document may be reproduced in any form by any means without prior written authorization ofSun and its licensors, if any. Third-party software, including font technology, is copyrighted and licensed from Sun suppliers.
Parts of the product may be derived from Berkeley BSD systems, licensed from the University of California. UNIX is a registered trademark inthe U.S. and in other countries, exclusively licensed through X/Open Company, Ltd. Mozilla is a trademarks or registered trademarks ofNetscape Communications Corporation in the United States and other countries
Sun, Sun Microsystems, the Sun logo, Ultra, AnswerBook2, docs.sun.com, OpenBoot, Power Management, Java, Java Coffee Cup logo,SunSolve, SunVTS, and Solaris are trademarks or registered trademarks of Sun Microsystems, Inc. in the U.S. and in other countries.
All SPARC trademarks are used under license and are trademarks or registered trademarks of SPARC International, Inc. in the U.S. and in othercountries. Products bearing SPARC trademarks are based upon an architecture developed by Sun Microsystems, Inc.
The OPEN LOOK and Sun™ Graphical User Interface was developed by Sun Microsystems, Inc. for its users and licensees. Sun acknowledgesthe pioneering efforts of Xerox in researching and developing the concept of visual or graphical user interfaces for the computer industry. Sunholds a non-exclusive license from Xerox to the Xerox Graphical User Interface, which license also covers Sun’s licensees who implement OPENLOOK GUIs and otherwise comply with Sun’s written license agreements.
Use, duplication, or disclosure by the U.S. Government is subject to restrictions set forth in the Sun Microsystems, Inc. license agreements and asprovided in DFARS 227.7202-1(a) and 227.7202-3(a) (1995), DFARS 252.227-7013(c)(1)(ii) (Oct. 1998), FAR 12.212(a) (1995), FAR 52.227-19, orFAR 52.227-14 (ALT III), as applicable.
DOCUMENTATION IS PROVIDED "AS IS" AND ALL EXPRESS OR IMPLIED CONDITIONS, REPRESENTATIONS, AND WARRANTIES,INCLUDING ANY IMPLIED WARRANTY OF MERCHANTABILITY, FITNESS FOR A PARTICULAR PURPOSE OR NON-INFRINGEMENT,ARE DISCLAIMED, EXCEPT TO THE EXTENT THAT SUCH DISCLAIMERS ARE HELD TO BE LEGALLY INVALID.
Copyright 2006 Sun Microsystems, Inc., 4150 Network Circle, Santa Clara, California 95054, Etats-Unis. Tous droits réservés.
Sun Microsystems, Inc. a les droits de propriété intellectuels relatants à la technologie incorporée dans le produit qui est décrit dans cedocument. En particulier, et sans la limitation, ces droits de propriété intellectuels peuvent inclure un ou plus des brevets américains énumérésà http://www.sun.com/patents et un ou les brevets plus supplémentaires ou les applications de brevet en attente dans les Etats-Unis et dansles autres pays.
Ce produit ou document est protégé par un copyright et distribué avec des licences qui en restreignent l’utilisation, la copie, la distribution, et ladécompilation. Aucune partie de ce produit ou document ne peut être reproduite sous aucune forme, parquelque moyen que ce soit, sansl’autorisation préalable et écrite de Sun et de ses bailleurs de licence, s’il y ena.
Le logiciel détenu par des tiers, et qui comprend la technologie relative aux polices de caractères, est protégé par un copyright et licencié par desfournisseurs de Sun.
Des parties de ce produit pourront être dérivées des systèmes Berkeley BSD licenciés par l’Université de Californie. UNIX est une marquedéposée aux Etats-Unis et dans d’autres pays et licenciée exclusivement par X/Open Company, Ltd. Mozilla sont marques de NetscapeCommunications Corporation aux Etats-Unis et à d’autres pays.
Sun, Sun Microsystems, le logo Sun, Ultra, AnswerBook2, docs.sun.com, OpenBoot, Power Management, Java, le logo Java Coffee Cup,SunSolve, SunVTS et Solaris sont des marques de fabrique ou des marques déposées de Sun Microsystems, Inc. aux Etats-Unis et dans d’autrespays.
Toutes les marques SPARC sont utilisées sous licence et sont des marques de fabrique ou des marques déposées de SPARC International, Inc.aux Etats-Unis et dans d’autres pays. Les produits protant les marques SPARC sont basés sur une architecture développée par SunMicrosystems, Inc.
L’interface d’utilisation graphique OPEN LOOK et Sun™ a été développée par Sun Microsystems, Inc. pour ses utilisateurs et licenciés. Sunreconnaît les efforts de pionniers de Xerox pour la recherche et le développment du concept des interfaces d’utilisation visuelle ou graphiquepour l’industrie de l’informatique. Sun détient une license non exclusive do Xerox sur l’interface d’utilisation graphique Xerox, cette licencecouvrant également les licenciées de Sun qui mettent en place l’interface d ’utilisation graphique OPEN LOOK et qui en outre se conformentaux licences écrites de Sun.
LA DOCUMENTATION EST FOURNIE "EN L’ÉTAT" ET TOUTES AUTRES CONDITIONS, DECLARATIONS, ET GARANTIES EXPRESSESOU TACITES SONT FORMELLEMENT EXCLUES, DANS LA MESURE AUTORISEE PAR LA LOI APPLICABLE, Y COMPRIS NOTAMMENTTOUTE GARANTIE IMPLICITE RELATIVE A LA QUALITE MARCHANDE, A L’APTITUDE A UNE UTILISATION PARTICULIERE OU AL’ABSENCE DE CONTREFAÇON.
Sun Microsystems is an ENERGY STAR partner. Those configurations of this productthat bear the ENERGY STAR mark meet or exceed the ENERGY STAR guidelines.
ENERGY STAR

Contents
Preface xi
1. Setting Up the Sun Ultra 45 and Ultra 25 Workstations 1
Safety and Compliance 1
Planning Your Workstation Installation 2
Verifying Workstation Requirements 2
Sun Ultra 45 and Ultra 25 Workstations Installation Process 4
Verifying Shipping Kit Contents 5
Front Panel Overview 6
Back Panel Overview 8
Side Cover Overview 10
Keyboard and Mouse Overview 11
Installing Optional Hardware Components 12
Setting Up the System Stabilizer 13
Cabling Your Workstation 14
Powering On the Workstation 15
Powering Off the Workstation 18
2. Installing and Configuring Preinstalled Solaris Operating System Software 19
Planning Your Solaris Operating System Software Installation 19
iii
Solaris Operating System Installation Process 21
Installing and Configuring Your Solaris Operating System Software 21
Power Management 26
Power LED 27
Placing the Workstation Into Low-Power Mode 27
Activating the Workstation From Low-Power Mode 28
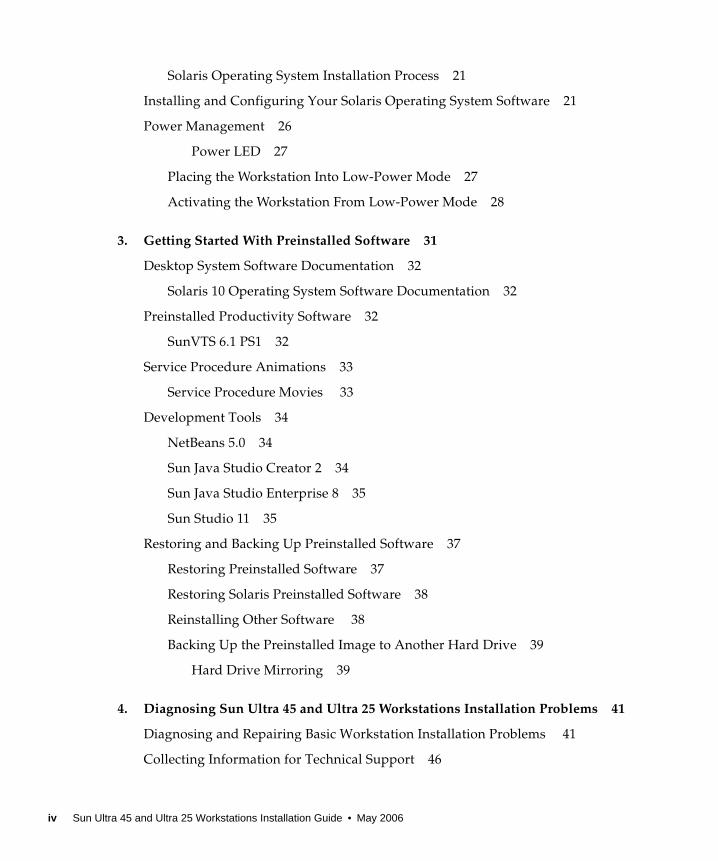
3. Getting Started With Preinstalled Software 31
Desktop System Software Documentation 32
Solaris 10 Operating System Software Documentation 32
Preinstalled Productivity Software 32
SunVTS 6.1 PS1 32
Service Procedure Animations 33
Service Procedure Movies 33
Development Tools 34
NetBeans 5.0 34
Sun Java Studio Creator 2 34
Sun Java Studio Enterprise 8 35
Sun Studio 11 35
Restoring and Backing Up Preinstalled Software 37
Restoring Preinstalled Software 37
Restoring Solaris Preinstalled Software 38
Reinstalling Other Software 38
Backing Up the Preinstalled Image to Another Hard Drive 39
Hard Drive Mirroring 39
4. Diagnosing Sun Ultra 45 and Ultra 25 Workstations Installation Problems 41
Diagnosing and Repairing Basic Workstation Installation Problems 41
Collecting Information for Technical Support 46
iv Sun Ultra 45 and Ultra 25 Workstations Installation Guide • May 2006

How to Get Technical Support 47
Index 49
Contents v

vi Sun Ultra 45 and Ultra 25 Workstations Installation Guide • May 2006

Figures
FIGURE 1-1 Sun Ultra 45 and Ultra 25 Workstations Installation Process Diagram 4
FIGURE 1-2 Front Panel Overview—Sun Ultra 45 and Ultra 25 workstations 6
FIGURE 1-3 Back Panel Overview—Sun Ultra 45 and Ultra 25 workstations 8
FIGURE 1-4 Side Cover Overview—Sun Ultra 45 and Ultra 25 Workstations 10
FIGURE 1-5 Type 7 Keyboard and Mouse Overview—Sun Ultra 45 and Ultra 25 Workstations 11
FIGURE 1-6 Setting Up the System Stabilizer—Sun Ultra 45 and Ultra 25 Workstations 13
FIGURE 1-7 Cabling the Sun Ultra 45 and Ultra 25 workstations 14
FIGURE 1-8 Powering On the Workstation 16
FIGURE 1-9 Solaris Installer (Configuration) Window (enlarged) 17
FIGURE 2-1 Solaris Operating System Software—Installation Process Diagram 21
FIGURE 2-2 Solaris 10 Installer (Configuration) Window 22
FIGURE 2-3 Entitlement and Software License Agreement 23
FIGURE 2-4 Sun USB Type-7 Keyboard, Java DS keys, Sleep Key, and Power Off Selection Menu 28
vii

viii Sun Ultra 45 and Ultra 25 Workstations Installation Guide • May 2006

Tables
TABLE 1-1 Electrical Specifications – Sun Ultra 45 and Ultra 25 Workstations 2
TABLE 1-2 Operating Temperature Specifications—Sun Ultra 45 and Ultra 25 Workstations 3
TABLE 1-3 Verifying Shipping Kit Contents—Sun Ultra 45 and Ultra 25 Workstations 5
TABLE 1-4 Front Panel Overview—Sun Ultra 45 and Ultra 25 Workstations 6
TABLE 1-5 Back Panel Overview—Sun Ultra 45 and Ultra 25 Workstation 8
TABLE 1-6 Side Cover Overview—Sun Ultra 45 and Ultra 25 Workstations 10
TABLE 1-7 Type 7 Keyboard and Mouse Overview—Sun Ultra 45 and Ultra 25 Workstations 11
TABLE 1-8 Powering Off the Workstation 18
TABLE 2-1 Preinstalled Hard Drive Image—Partition Configuration 20
TABLE 2-2 Information to Collect Before Installing and Configuring—A Networked SolarisOperating System 24
TABLE 2-3 Information to Collect Before Installing and Configuring—A Nonnetworked Solaris DesktopOperating System 25
TABLE 2-4 Power LED Status 27
TABLE 3-1 ShowMe How Movies 33
TABLE 4-1 Diagnosing and Repairing Basic Workstation Installation Problems 42
TABLE 4-2 Information to Collect Before Calling a Sun Service Support Center 46
TABLE 4-3 Useful Sun Technical Support Web Sites and Phone Numbers 47
ix

x Sun Ultra 45 and Ultra 25 Workstations Installation Guide • May 2006

Preface
The Sun Ultra 45 and Ultra 25 Workstations Installation Guide (819-1891) describes howto set up and operate your workstation. This document is written for users who haveexperience installing and configuring workstation hardware and software.
The Sun Ultra 45 and Ultra 25 Workstations Installation Guide is translated into French,German, Italian, Spanish, Swedish, Japanese, Korean, Simplified Chinese, andTraditional Chinese. The translated documentation is located on the SunTM UltraTM 45and Ultra 25 Hardware Documentation CD (705-1341). The Sun Ultra 45 and Ultra 25Workstations Installation Guide and its translations are also located at:
http://www.sun.com/documentation/
Before You Read This DocumentBefore following any of the procedures described in this document, ensure that youhave read the Sun Ultra 45 and Ultra 25 Workstations Safety and Compliance Guide (819-2785) and Important Safety Information for Sun Hardware Systems (816-7190).
xi

How This Document Is OrganizedThis document is organized into chapters as follows:
Chapter 1 includes information about the following topics:
■ Safety and compliance■ Planning your workstation installation■ Verifying workstation requirements■ Installing optional hardware components■ Setting up the stabilizer■ Cabling your workstation■ Powering on the workstation■ Powering off the workstation
Chapter 2 includes information about the following topics:
■ Planning your SolarisTM Operating System software installation■ Installing and configuring your Solaris Operating System software■ Power management
Chapter 3 includes information about the following topics:
■ Desktop system software documentation■ Preinstalled productivity software■ Development tools■ Multimedia software■ Restoring and backing up preinstalled software
Chapter 4 includes information about the following topics:
■ Diagnosing and repairing basic workstation installation problems■ How to get technical support
xii Sun Ultra 45 and Ultra 25 Workstations Installation Guide • May 2006

Using UNIX CommandsThe Sun Ultra 45 and Ultra 25 Workstations Installation Guide might not contain all ofthe information needed to perform basic UNIX® commands and procedures such asshutting down the system, booting the system, and configuring devices.
See one or more of the following documents for additional UNIX commands:
■ Solaris 10 Sun Hardware Platform Guide (817-6337)
■ Solaris Operating System documentation, which is at:http://docs.sun.com
■ Sun Ultra 45 and Ultra 25 Workstations Service and Diagnostics Manual (819-1892)
■ Other software documentation that you received with your system
Shell Prompts
Shell Prompt
C shell machine-name%
C shell superuser machine-name#
Bourne shell and Korn shell $
Bourne shell and Korn shell superuser #
ALOM shell sc>
OpenBootTM PROM shell ok
Preface xiii
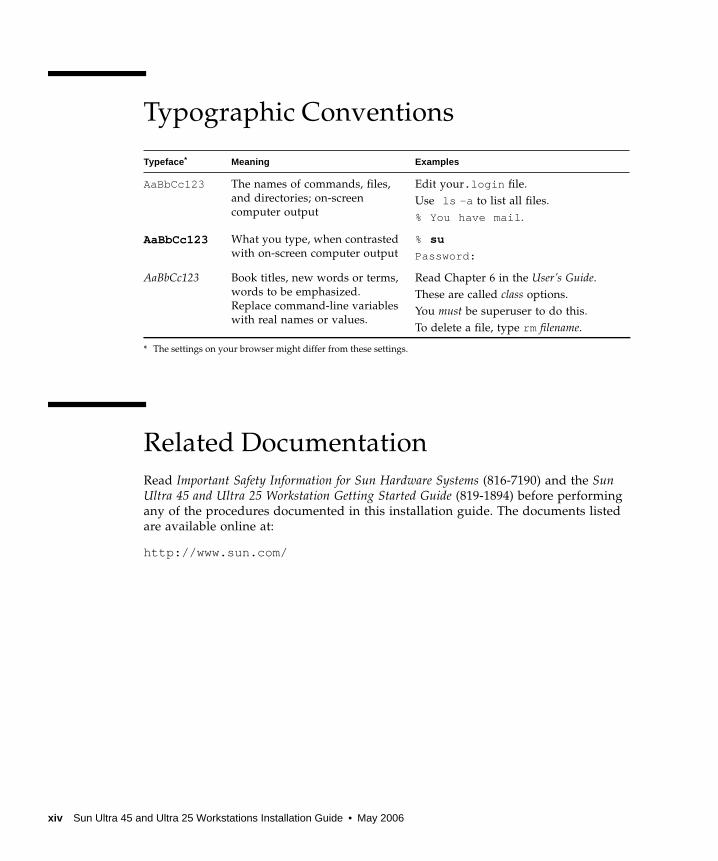
Typographic Conventions
Related DocumentationRead Important Safety Information for Sun Hardware Systems (816-7190) and the SunUltra 45 and Ultra 25 Workstation Getting Started Guide (819-1894) before performingany of the procedures documented in this installation guide. The documents listedare available online at:
http://www.sun.com/
Typeface*
* The settings on your browser might differ from these settings.
Meaning Examples
AaBbCc123 The names of commands, files,and directories; on-screencomputer output
Edit your.login file.Use ls -a to list all files.% You have mail.
AaBbCc123 What you type, when contrastedwith on-screen computer output
% su
Password:
AaBbCc123 Book titles, new words or terms,words to be emphasized.Replace command-line variableswith real names or values.
Read Chapter 6 in the User’s Guide.These are called class options.You must be superuser to do this.To delete a file, type rm filename.
xiv Sun Ultra 45 and Ultra 25 Workstations Installation Guide • May 2006

Sun Ultra 45 and Ultra 25Documentation on CD-ROMThe Sun Ultra 45 and Ultra 25 Hardware Documentation CD (705-1341) that shippedwith your workstation includes HTML or PDF versions of:
■ How To Use This CD (HTML document on Hardware Documentation CD)■ Sun Ultra 45 and Ultra 25 Workstations Installation Guide■ Sun Ultra 45 and Ultra 25 Workstations Service and Diagnostics Manual■ Service procedure animated movies
TABLE P-1 describes the content of the Sun Ultra 45 and Ultra 25 HardwareDocumentation CD.
TABLE P-1 Sun Ultra 45 and Ultra 25 Hardware Documentation CD
Document Content Where Located Part Number
How to use the Sun Ultra 45 and Ultra25 Hardware Documentation CD
How To Use This CD (HTML document onHardware Documentation CD)
819-2786
Basic workstation setup and diagnosticinformation
Sun Ultra 45 and Ultra 25 WorkstationsInstallation Guide
819-1892
Detailed service and diagnosticsprocedures for the workstation
Sun Ultra 45 and Ultra 25 WorkstationsService and Diagnostics Manual
819-1892
Video animations that demonstrateinstallation and removal procedures forworkstation hardware
MPEG-1 movies located on the Sun Ultra 45and Ultra 25 Hardware Documentation CD
705-1341
Where to find all Sun Ultra 45 andUltra 25 workstation documentation
Where to Find Sun Ultra 45 and Ultra 25Workstations Documentation
819-2788
Preface xv

Sun Ultra 45 and Ultra 25 WorkstationsOnline Documentation
TABLE P-2
Document Content Where Located Part Number
Basic hardwaresetup andSolaris OS installation
Sun Ultra 45 and Ultra 25 Workstations GettingStarted Guide
819-1894
Workstation hardware andsoftware setup and basicdiagnostic information
Sun Ultra 45 and Ultra 25 WorkstationsInstallation Guide
819-1892 English819-3102 French819-3103 German819-3104 Italian819-3105 Spanish819-3106 Swedish819-3107 Japanese819-3108 Korean819-3109 Simplified Chinese819-3110 Traditional Chinese
Detailed service anddiagnostics procedures
Sun Ultra 45 and Ultra 25 Workstations Serviceand Diagnostics Manual
819-1892
Late-breaking informationabout changes to thehardware, software, anddocumentation.
Sun Ultra 45 and Ultra 25 WorkstationsProduct Notes
819-1893
Safety and complianceinformation
Sun Ultra 45 and Ultra 25 Workstations Safetyand Compliance GuideImportant Safety Information for Sun HardwareSystems
817-5120
816-7190
Solaris 10 1/06 OperatingSystem information
Solaris 10 1/06 Sun Hardware Platform Guide 817-6337
Graphics accelerators Sun XVR-100 Graphics Accelerator InstallationGuideSun XVR-2500 Graphics AcceleratorInstallation and User’s Guide
816-7560
817-7517
xvi Sun Ultra 45 and Ultra 25 Workstations Installation Guide • May 2006
Accessing Sun Documentation OnlineYou can view, print, or purchase a broad selection of Sun documentation, includinglocalized versions of Sun publications, at:
http://www.sun.com/documentation/
TABLE P-2 describes the content of the Sun Ultra 45 workstation onlinedocumentation.
Note – For useful Sun technical support web sites and phone numbers see, “How to GetTechnical Support” on page 47.
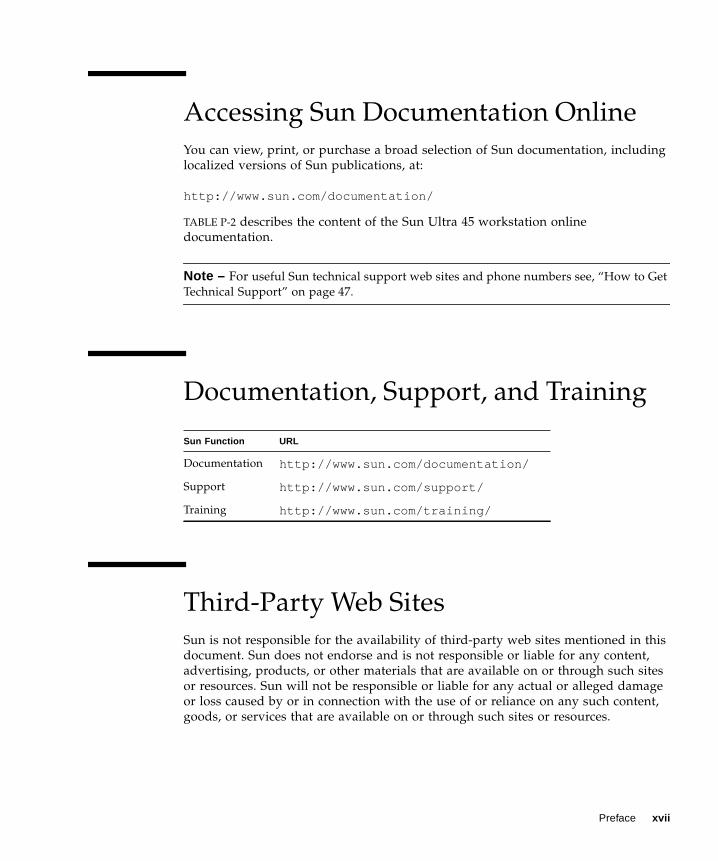
Documentation, Support, and Training
Third-Party Web SitesSun is not responsible for the availability of third-party web sites mentioned in thisdocument. Sun does not endorse and is not responsible or liable for any content,advertising, products, or other materials that are available on or through such sitesor resources. Sun will not be responsible or liable for any actual or alleged damageor loss caused by or in connection with the use of or reliance on any such content,goods, or services that are available on or through such sites or resources.
Sun Function URL
Documentation http://www.sun.com/documentation/
Support http://www.sun.com/support/
Training http://www.sun.com/training/
Preface xvii

Sun Welcomes Your CommentsSun is interested in improving its documentation and welcomes your comments andsuggestions. You can submit your comments by going to:
http://www.sun.com/hwdocs/feedback
Please include the title and part number of your document with your feedback:
Sun Ultra 45 and Ultra 25 Workstations Installation Guide, part number 819-1892
xviii Sun Ultra 45 and Ultra 25 Workstations Installation Guide • May 2006

CHAPTER 1
Setting Up the Sun Ultra 45 andUltra 25 Workstations
This chapter includes information about the following topics:
■ “Safety and Compliance” on page 1■ “Planning Your Workstation Installation” on page 2■ “Verifying Shipping Kit Contents” on page 5■ “Installing Optional Hardware Components” on page 12■ “Setting Up the System Stabilizer” on page 13■ “Cabling Your Workstation” on page 14■ “Powering On the Workstation” on page 15■ “Powering Off the Workstation” on page 18
Safety and ComplianceRead the Important Safety Information for Sun Hardware Systems (816-7190) document.This document is included with Sun Ultra 45 or Ultra 25 workstations.
Additional safety and compliance information can be found in the Sun Ultra 45 andUltra 25 Workstations Safety and Compliance Guide (817-5120). This guide is installedon the Sun Ultra 45 and Ultra 25 Workstations Documentation CD (704-7736) and isalso available online at:
http://www.sun.com/documentation/
1

Planning Your Workstation InstallationSuccessful installation of the Sun Ultra 45 and Ultra 25 workstations consists of thefollowing steps:
■ Verifying workstation requirements
■ Unpacking the workstation and identifying your workstation’s hardware,software, and documentation components
■ Installing optional components
■ Cabling your workstation, monitor, keyboard, mouse, and network interface
■ Powering on the workstation
■ Powering off the workstation
Use FIGURE 1-1 as a process tool to assist you with installation of the Sun Ultra 45and Ultra 25 workstations.
Verifying Workstation RequirementsBefore unpacking the Sun Ultra 45 or Ultra 25 workstation for setup and installation,verify that the electrical power and the temperature of the operating environmentare correct.
1. Verify that the AC power supplied to the workstation is correct (TABLE 1-1).
If necessary, correct the supplied electrical power to the workstation.
TABLE 1-1 Electrical Specifications – Sun Ultra 45 and Ultra 25 Workstations
Maximum AC input Voltage Current Frequency
Range 1 100 Vac 12A 50—60 Hz
Range 2 110 – 127 Vac 10A 50—60 Hz
Range 3 200 – 240 Vac 6A 50—60 Hz
2 Sun Ultra 45 and Ultra 25 Workstations Installation Guide • May 2006
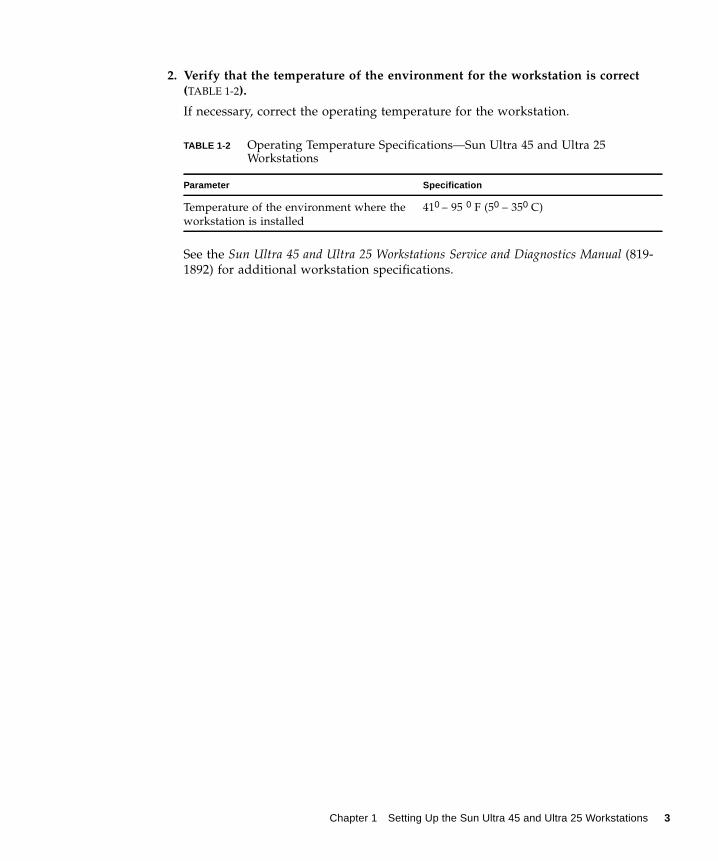
2. Verify that the temperature of the environment for the workstation is correct(TABLE 1-2).
If necessary, correct the operating temperature for the workstation.
See the Sun Ultra 45 and Ultra 25 Workstations Service and Diagnostics Manual (819-1892) for additional workstation specifications.
TABLE 1-2 Operating Temperature Specifications—Sun Ultra 45 and Ultra 25Workstations
Parameter Specification
Temperature of the environment where theworkstation is installed
410 – 95 0 F (50 – 350 C)
Chapter 1 Setting Up the Sun Ultra 45 and Ultra 25 Workstations 3

Sun Ultra 45 and Ultra 25 WorkstationsInstallation Process
FIGURE 1-1 Sun Ultra 45 and Ultra 25 Workstations Installation Process Diagram
Ready To Work!
Unpack the workstation and familiarize yourselfwith the workstation hardware, software, anddocumentation.
Adjust stabilizer, connect the workstation,monitor, keyboard, mouse, and network cables.
Power on the workstation.
Install the preinstalled Solaris 10 OperatingSystem software.
Start
See, “Verifying Shipping Kit Contents” on page 5,“Front Panel Overview” on page 6, “Back PanelOverview” on page 8, “Side Cover Overview” onpage 10, “Keyboard and Mouse Overview” onpage 11.
See, “Setting Up the System Stabilizer” on page 13See, “Cabling Your Workstation” on page 14.
See, “Powering On the Workstation” on page 15.
Answer the Solaris software prompts. See,“Planning Your Solaris Operating System SoftwareInstallation” on page 19 and “Installing andConfiguring Your Solaris Operating SystemSoftware” on page 21.
See, “Getting Started With Preinstalled Software” onpage 31.
Installoptionalcomponents?
Installoptionalcomponents.
Yes
No
To install dual inline memory modules (DIMMs),graphic accelerators, peripheral componentinterface (PCI) cards, hard, or tape drives, see theSun Ultra 45 and Ultra 25 Workstations Service andDiagnostics Manual(819-1892) and the documentsthat ship with the optional component that you areinstalling.
Verify workstation requirements. See, “Verifying Workstation Requirements” onpage 2.
4 Sun Ultra 45 and Ultra 25 Workstations Installation Guide • May 2006

Note – Solaris 10 Operating System software is the only Sun supported operatingsystem for the Sun Ultra 45 and Ultra 25 workstations. The workstations might notcorrectly operate if other versions of Solaris software are installed.
Verifying Shipping Kit ContentsCarefully unpack all of the workstation components from the packing cartons. Verifythat your workstation has all of the components listed in TABLE 1-3. If any of thecomponents are missing, contact your Sun sales representative for replacements.
TABLE 1-3 Verifying Shipping Kit Contents—Sun Ultra 45 and Ultra 25 Workstations
Item Component Description
1 Sun Ultra 45 and Ultra 25 Workstations Getting Started Guide (819-1894)
2 Sun Ultra 45 and Ultra 25 Workstations Product Notes (819-1893)
3 Antistatic wrist strap
4 Sun Ultra 45 or Ultra 25 Workstation
5 Sun Ultra 45 and Ultra 25 Hardware Documentation CD (705-1341)
6 Sun Ultra 45 and Ultra 25 Workstations Where to Find Doclette (819-2788)
7 Important Safety Information for Sun Hardware Systems (816-7190)
Chapter 1 Setting Up the Sun Ultra 45 and Ultra 25 Workstations 5

Front Panel Overview
FIGURE 1-2 Front Panel Overview—Sun Ultra 45 and Ultra 25 workstations
TABLE 1-4 Front Panel Overview—Sun Ultra 45 and Ultra 25 Workstations
Item Description
1 Power button
2 Power LED
3 Fault LED
4 DVD dual drive slotNote: Behind this slot is the removable I/O module. This modulecontains a power button, power LED, fault LED, DVD dual drive,USB, microphone, and headphone connectors.
5 DVD dual drive eject button
6 USB V2.x connector
1
2 3 4 5 6
78
9
6 Sun Ultra 45 and Ultra 25 Workstations Installation Guide • May 2006
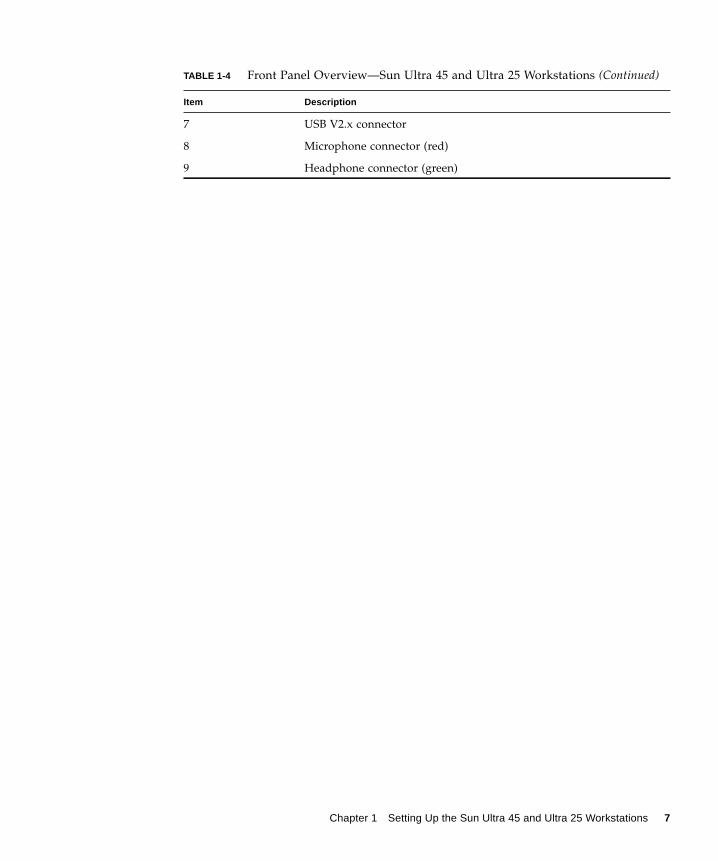
7 USB V2.x connector
8 Microphone connector (red)
9 Headphone connector (green)
TABLE 1-4 Front Panel Overview—Sun Ultra 45 and Ultra 25 Workstations (Continued)
Item Description
Chapter 1 Setting Up the Sun Ultra 45 and Ultra 25 Workstations 7

Back Panel Overview
FIGURE 1-3 Back Panel Overview—Sun Ultra 45 and Ultra 25 workstations
TABLE 1-5 Back Panel Overview—Sun Ultra 45 and Ultra 25 Workstation
Item Description
1 Power connector
2 Filler panel shown, peripheral component interconnect extended(PCI-X0) 100 MHz (Slot 0) behind this panel
3 Filler panel shown, peripheral component interconnect extended(PCI-X1) 100 MHz (Slot 1) behind this panel
4 Filler panel shown, peripheral component interconnect express(PCI-E0 x8) (Slot 2) behind this panel
5 Filler panel shown, peripheral component interconnect express(PCI-E1 x16) (Slot 3) behind this panel
6 Filler panel shown, no peripheral component interface slot behindthis filler panel
1
2
3
4
5
7
8
9
12
13
14 15
11
10
6
16
8 Sun Ultra 45 and Ultra 25 Workstations Installation Guide • May 2006

Note – Only place Sun XVR-100 graphics accelerators in PCI-X slots 0 or 1.
For information about connectors refer to the Sun Ultra 45 and Ultra 25 WorkstationsService and Diagnostics Manual (819-1892).
7 Sun XVR-2500 graphics accelerator shown, peripheral componentinterconnect express (PCI-E2 x16) (Slot 4) behind this graphicsaccelerator
8 Twisted-pair Ethernet (TPE 1) 10/100/1000 Mbit/second
9 Twisted-pair Ethernet (TPE 0) 10/100/1000 Mbit/second
10 Universal serial bus (USB) V2.x (2)
11 Universal serial bus (USB) V2.x (2)
12 Serial connector, DB9 (RS-432) TTYA
13 Serial connector, DB9 (RS-432) TTYB
14 Audio line-out (green)
15 Audio line-in (blue)
16 Lock hasp
TABLE 1-5 Back Panel Overview—Sun Ultra 45 and Ultra 25 Workstation (Continued)
Item Description
Chapter 1 Setting Up the Sun Ultra 45 and Ultra 25 Workstations 9
Side Cover Overview
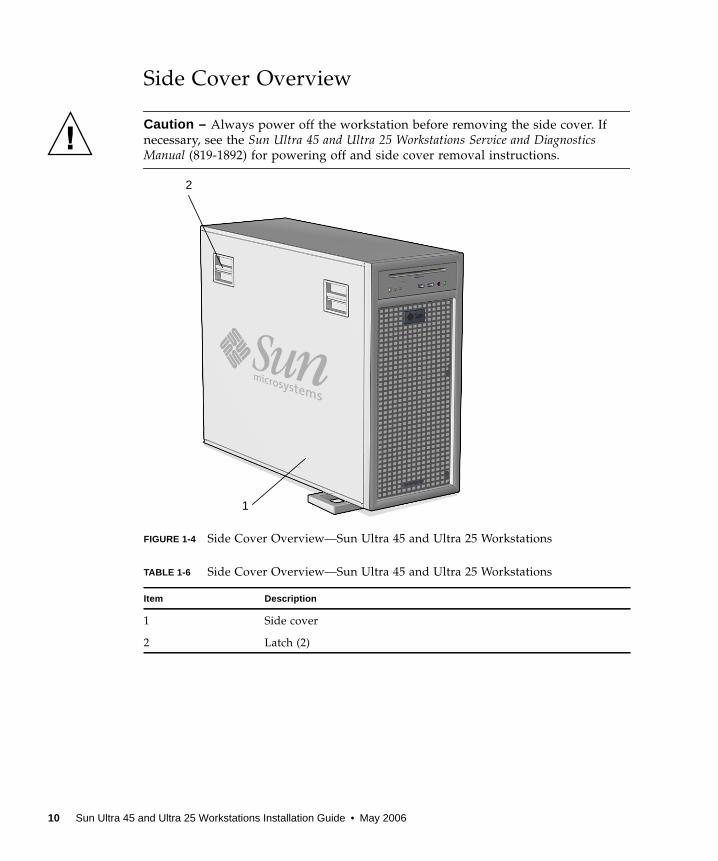
Caution – Always power off the workstation before removing the side cover. Ifnecessary, see the Sun Ultra 45 and Ultra 25 Workstations Service and DiagnosticsManual (819-1892) for powering off and side cover removal instructions.
FIGURE 1-4 Side Cover Overview—Sun Ultra 45 and Ultra 25 Workstations
TABLE 1-6 Side Cover Overview—Sun Ultra 45 and Ultra 25 Workstations
Item Description
1 Side cover
2 Latch (2)
1
2
10 Sun Ultra 45 and Ultra 25 Workstations Installation Guide • May 2006
Keyboard and Mouse Overview
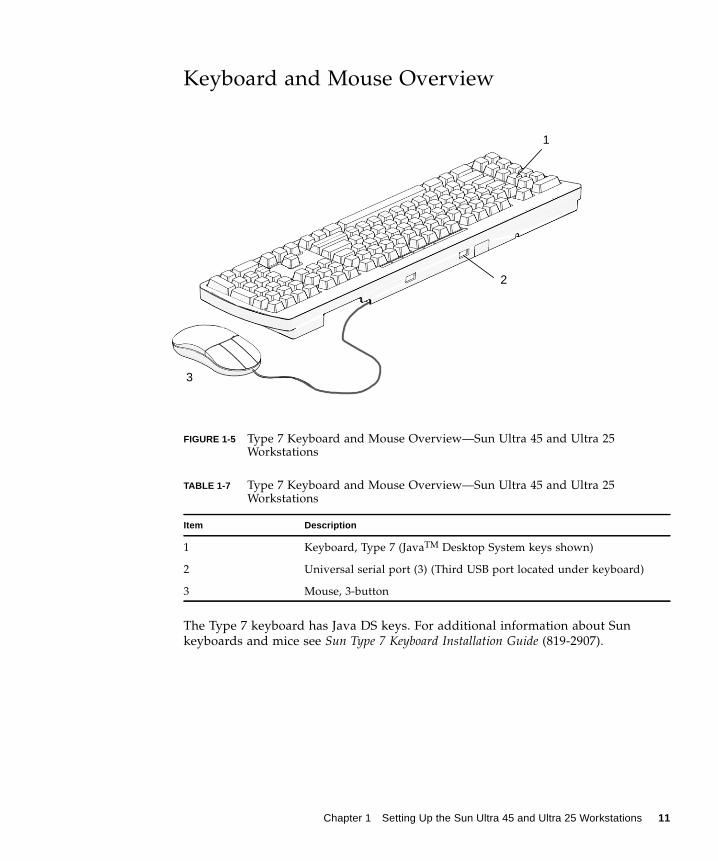
FIGURE 1-5 Type 7 Keyboard and Mouse Overview—Sun Ultra 45 and Ultra 25Workstations
The Type 7 keyboard has Java DS keys. For additional information about Sunkeyboards and mice see Sun Type 7 Keyboard Installation Guide (819-2907).
TABLE 1-7 Type 7 Keyboard and Mouse Overview—Sun Ultra 45 and Ultra 25Workstations
Item Description
1 Keyboard, Type 7 (JavaTM Desktop System keys shown)
2 Universal serial port (3) (Third USB port located under keyboard)
3 Mouse, 3-button
3
2
1
Chapter 1 Setting Up the Sun Ultra 45 and Ultra 25 Workstations 11
Installing Optional HardwareComponentsIf you are installing optional internal components such as DIMMs, PCI cards,graphics accelerators, or hard drives, see the Sun Ultra 45 and Ultra 25 WorkstationsService and Diagnostics Manual (819-1892) and the installation documentation thatwas provided with the optional hardware component.
Caution – Optional components such as DIMMs, PCI cards, graphics accelerators,and hard drives are sensitive to static electricity. Always wear an antistatic wriststrap when handling hardware components.
Service procedure animated movies are located on the Sun Ultra 45 and Ultra 25Hardware Documentation CD (705-1341). These movies demonstrate installation andremoval procedures for optional hardware components such as motherboards,power supplies, removable I/O modules, dual drives, DIMMs, PCI cards, graphicsaccelerators, and hard drives. For additional information see, “Service ProcedureMovies” on page 33.
12 Sun Ultra 45 and Ultra 25 Workstations Installation Guide • May 2006

Setting Up the System Stabilizer
FIGURE 1-6 Setting Up the System Stabilizer—Sun Ultra 45 and Ultra 25 Workstations
2
1
Chapter 1 Setting Up the Sun Ultra 45 and Ultra 25 Workstations 13

Cabling Your WorkstationPerform the following procedure to cable your workstation.
1. Connect the mouse to the USB port under the keyboard (FIGURE 1-7).
Turn the keyboard over and locate the USB port. Connect the mouse to this port.FIGURE 1-7 illustrates the cable connections for the workstation.
2. Connect the keyboard to a back panel USB port.
Note – Do not connect the keyboard or mouse to the front panel USB ports.
FIGURE 1-7 Cabling the Sun Ultra 45 and Ultra 25 workstations
Step 6
Step 5Step 4
Step 3
Step 2
Step 1
14 Sun Ultra 45 and Ultra 25 Workstations Installation Guide • May 2006

3. Connect the monitor cable to the video connector on the graphics accelerator.
The graphics accelerator shown in FIGURE 1-7 is a Sun XVR-2500. Your Sun Ultra 45or Ultra 25 workstation might contain a different graphics accelerator than shown.
Note – Monitors that have 13W3 connectors require a Sun DB13W3-to-15 HD/Madapter cable for proper connection. This adapter cable (Sun store part no. X471A)can be obtained from your Sun sales representative or the Sun store at:http://store.sun.com/To find the cable, search for both the part number and the cable by description.
Caution – High voltage present.
4. Connect the monitor power cord to a grounded electrical outlet.
5. Connect the Ethernet cable to one of the two TPE connectors.
A Sun Ultra 45 or Ultra 25 workstation has two Gigabit Ethernet ports.
Caution – High voltage present.
6. Connect the workstation power cord to a grounded electrical outlet.
7. Connect any additional external devices to the workstation’s other connectors.
Powering On the WorkstationInstall all optional internal components before powering on the workstation. Foradditional information see the Sun Ultra 45 and Ultra 25 Workstations Service andDiagnostics Manual (819-1892) and the documents that shipped with the optionalcomponent that your are installing.
1. Power on the monitor and all external devices (FIGURE 1-8).
See the Sun Ultra 45 and Ultra 25 Workstations Service and Diagnostics Manual (819-1892) for power on instructions.
2. Press and release the workstation Power button on the front panel (FIGURE 1-8).
Verify that the power LED illuminates after the Power button is pressed.
3. Allow the workstation to boot to the Solaris installer (configuration) window(FIGURE 1-8 and FIGURE 1-9).
Chapter 1 Setting Up the Sun Ultra 45 and Ultra 25 Workstations 15

FIGURE 1-8 Powering On the Workstation
1
2
3
16 Sun Ultra 45 and Ultra 25 Workstations Installation Guide • May 2006

FIGURE 1-9 Solaris Installer (Configuration) Window (enlarged)
Note – Some details of the configuration window may be different from what isshown above.
4. Configure the Solaris Operating System software for your workstation.
See “Planning Your Solaris Operating System Software Installation” on page 19 foradditional instructions.
Note – If the Solaris 10 Operating System is already configured on your system, theworkstation will boot to the Solaris Welcome window. Enter your user name andpassword to log in and begin using the workstation.
If you experience problems during power on, see “Diagnosing and Repairing BasicWorkstation Installation Problems” on page 41.
Chapter 1 Setting Up the Sun Ultra 45 and Ultra 25 Workstations 17

Powering Off the WorkstationTABLE 1-8 describes three methods for powering off the workstation.
Caution – After powering off the workstation, always wait at least six secondsbefore powering on the workstation again.
TABLE 1-8 Powering Off the Workstation
Method Instructions
Method 1 1. Close and save any open applications.2. Press the Sleep key (located on the keyboard). You can also
press and release the Power button.3. Select Shutdown.
Method 2 1. Close and save any open applications.2. As superuser, type: shutdown
Method 3 1. Press and hold the power button for four seconds—theworkstation powers off.This is a forced shutdown. All open applications and filesare closed abruptly without saving any changes. Theworkstation file system might be corrupted.
18 Sun Ultra 45 and Ultra 25 Workstations Installation Guide • May 2006

CHAPTER 2
Installing and ConfiguringPreinstalled Solaris OperatingSystem Software
This chapter includes information about the following topics:
■ “Planning Your Solaris Operating System Software Installation” on page 19■ “Installing and Configuring Your Solaris Operating System Software” on page 21■ “Power Management” on page 26
Planning Your Solaris Operating SystemSoftware InstallationYour workstation has a single-boot image. During system setup you can choose tofinish configuring the preinstalled Solaris 10 Operating System software or you canchoose to install another operating system such as Linux.
This procedure describes how to complete installation of the preinstalled Solaris 10Operating System software. Earlier versions of Solaris software are not supported onSun Ultra 45 or Ultra 25 workstations.
Note – The preinstalled Solaris 10 01/06 OS software, requires no licensing fee. Ifyou install a different version of Solaris software, you might be required to pay alicensing fee for the additional software. For more information, refer to the followingweb site:
http://www.sun.com/software/
19

The exact configuration that has been preinstalled on the primary hard drive is(TABLE 2-1):
Use FIGURE 2-1 to assist you with installation of the Solaris OS.
TABLE 2-1 Preinstalled Hard Drive Image—Partition Configuration
Slice Name Size
0 / (root) 20 GB
1 swap partition 2 GB
2 backup entire disk
3 /space remainder
4 – 7 unused
20 Sun Ultra 45 and Ultra 25 Workstations Installation Guide • May 2006

Solaris Operating System Installation Process
FIGURE 2-1 Solaris Operating System Software—Installation Process Diagram
Installing and Configuring Your SolarisOperating System Software
1. If necessary, power on the workstation.
See “Powering On the Workstation” on page 15.
Power on the workstation.
Choose the preinstalled version of Solaris 10.Accept the license. Answer Solaris softwareprompts using information specific to your sitethat your system administrator provides. If nec-essary, refer to “TABLE 2-2, Information toCollect Before Installing and Configuring—ANetworked Solaris Operating System” orTABLE 2-3, “Information to Collect Before In-stalling and Configuring—A NonnetworkedSolaris Desktop Operating System” onpage 25.
Ready To Work!
START
Yes
See, “Powering On the Workstation” on page 15.
The workstation will halt and power off if No isselected. For instructions, refer to your operat-ing system software documentation.
See, “Installing and Configuring Your SolarisOperating System Software” on page 21.
See, “Getting Started With Preinstalled Software”on page 31.
NoInstall a differentoperating systemsoftware from othermedia.
Use thepreinstalledversion ofsoftware?
Chapter 2 Installing and Configuring Preinstalled Solaris Operating System Software 21
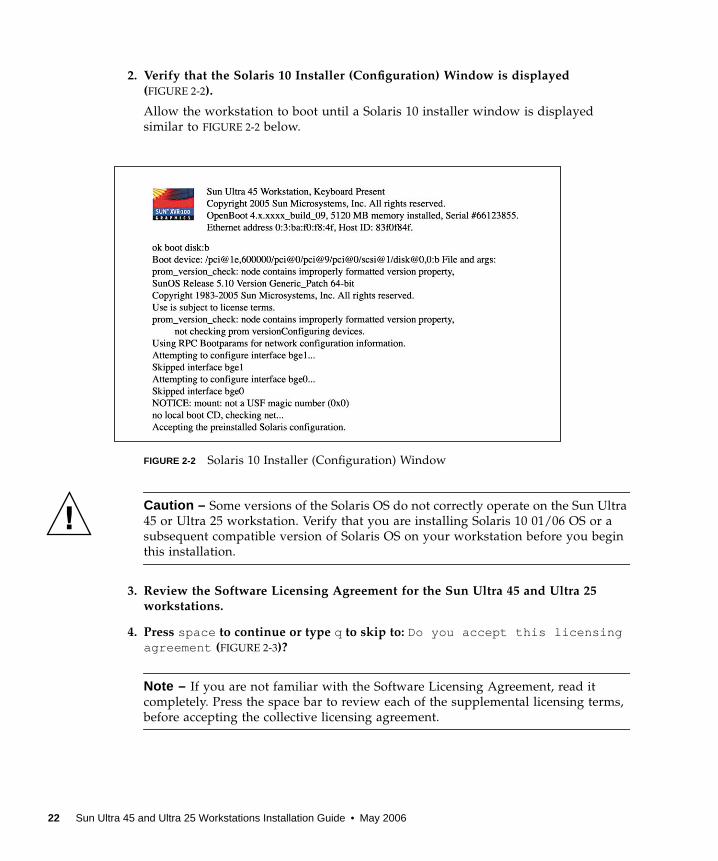
2. Verify that the Solaris 10 Installer (Configuration) Window is displayed(FIGURE 2-2).
Allow the workstation to boot until a Solaris 10 installer window is displayedsimilar to FIGURE 2-2 below.
FIGURE 2-2 Solaris 10 Installer (Configuration) Window
Caution – Some versions of the Solaris OS do not correctly operate on the Sun Ultra45 or Ultra 25 workstation. Verify that you are installing Solaris 10 01/06 OS or asubsequent compatible version of Solaris OS on your workstation before you beginthis installation.
3. Review the Software Licensing Agreement for the Sun Ultra 45 and Ultra 25workstations.
4. Press space to continue or type q to skip to: Do you accept this licensingagreement (FIGURE 2-3)?
Note – If you are not familiar with the Software Licensing Agreement, read itcompletely. Press the space bar to review each of the supplemental licensing terms,before accepting the collective licensing agreement.
22 Sun Ultra 45 and Ultra 25 Workstations Installation Guide • May 2006

FIGURE 2-3 Entitlement and Software License Agreement
5. Answer the Solaris Operating System setup prompts by following the on-screeninstructions.
Note – Use TABLE 2-2 as a guide for collecting installation and configurationinformation for networked workstations. Use TABLE 2-3 as a guide for collectinginstallation and configuration information for nonnetworked workstations.
Note – To help you answer the workstation setup prompts, your systemadministrator (SA) should provide you with information specific to your site beforeyou begin the Solaris installation.
For additional information about Solaris 10 configuration and setup see:http://docs.sun.com/
Chapter 2 Installing and Configuring Preinstalled Solaris Operating System Software 23

Note – Collect this network information (TABLE 2-2) before installing andconfiguring your Solaris 10 Operating System.
TABLE 2-2 Information to Collect Before Installing and Configuring—A Networked SolarisOperating System
Solaris 10 Installation Window Explanation and Notes Your Information
Solaris License Accept or decline the SolarisOperating System license.
Solaris Release Choose Solaris 10 OperatingSystem Operating System release.
Select Language and Locale Native language and locale to usefor the workstation.
Host Name of Your Workstation Select a name for the workstation.
Host Name of Your Server Obtain this information fromyour system administrator.
Host IP Address of Your NameServer
Network Connectivity Protocols:bgeDHCPIPv6
Network or stand-aloneworkstation protocols. A systemadministrator might be requiredto complete this section.
Note: Depending on how youanswer the network connectivityprompts and what information isprovided by your network, youmight be prompted for theworkstation’s host IP address.
Kerberos Security Decline, or accept to setupKerberos security.
Name Service (type) Select a name service to use:NIS+, NIS, DNS, LDAP, or none.Note: This window is notdisplayed if the workstation isnot connected to a network.
Domain Name Select NIS or NIS+ domain forthis workstation.Note: This window is notdisplayed if the workstation isnot using the NIS or NIS+service.
24 Sun Ultra 45 and Ultra 25 Workstations Installation Guide • May 2006

Note – Collect this nonnetwork information (TABLE 2-3) before installing andconfiguring your Solaris 10 Operating System.
6. When you reach the setup window titled Confirmation Information, confirm yourworkstation’s selection summary and click the Confirm button.
After clicking the Confirm button, the workstation reboots and the operating systemis reconfigured.
The workstation now displays the Solaris 10 Welcome screen.
Name Server/Subnet/Subnet Mask
Specify the name server or havethe workstation find a nameserver on a local subnet.Note: This window is notdisplayed if the workstation isnot connected to a network.
Time Zone Select a local time zone bygeographic region, GMT offset, ora time zone file.
Date and Time Select the current date and time(or accept the default or enter thecurrent date and time).
Root and Password Enter root and password
TABLE 2-3 Information to Collect Before Installing and Configuring—A Nonnetworked Solaris DesktopOperating System
Solaris 10 Installation Window Explanation and Notes Your Information
Host Name of Your Workstation Select a name for the workstation.
Select Language and Locale Native language and locale to usefor the workstation.
Time Zone Select a local time zone bygeographic region, GMT offset, ora time zone file.
Date and Time Select the current date and time(or accept the default or enter thecurrent date and time).
Root and Password Enter a (superuser ID) andpassword.
TABLE 2-2 Information to Collect Before Installing and Configuring—A Networked SolarisOperating System (Continued)
Solaris 10 Installation Window Explanation and Notes Your Information
Chapter 2 Installing and Configuring Preinstalled Solaris Operating System Software 25

7. Enter your user name and password to log in and begin using the workstation.
Note – A number of other useful software packages are preinstalled on yourworkstation’s hard drive. For information about these applications, see “GettingStarted With Preinstalled Software” on page 31.
8. Review the latest Solaris 10 release notes for any late-breaking information aboutyour preinstalled software.
The Solaris 10 Release Notes can be found at:
http://docs.sun.com
Power ManagementSun Microsystems is an Energy Star® partner. Configurations of this product thatbear the Energy Star mark meet or exceed the Energy Star guidelines.
For information about Energy Star compliance, go to:
http://www.energystar.gov/
The Power Management™ software that is integrated with Solaris improves theenergy efficiency of your workstation by placing the internal subsystems into low-power mode.
Note – The Sun Ultra 25 workstation meets or exceeds Energy Star guidelines inoperation only when using the Java Desktop System windowing system, rather thanusing the CDE windowing system.
If you are currently using CDE, you can switch to the Java Desktop System bylogging out from a CDE session, then logging back in after selecting Java DesktopSystem instead of CDE.
Note – Power is returned to your workstation’s subsystems on an as-needed basis.The default period of inactivity is 30 minutes.
While in low-power mode, your workstation retains network awareness andresponds to network traffic. For details and information on how to change the powermanagement settings on your workstation, refer to:http://docs.sun.com/app/docs/prod/Solaris10/
26 Sun Ultra 45 and Ultra 25 Workstations Installation Guide • May 2006

Search for the Solaris Common Desktop Environment: User’s Guide and locate theinformation on Power Management. If necessary, you can download or purchase theuser’s guide.
Power LED
The power LED located on the front panel has three states that indicate the powerstatus of the workstation, as described in TABLE 2-4.
Placing the Workstation Into Low-Power ModeAfter a predetermined period of inactivity, the workstation might automaticallyenter low-power mode. You can manually put the workstation into low-power modeby performing the following procedure.
1. Press the Sun Type 7 USB keyboard Sleep key (FIGURE 2-4).
The Power Off Selection dialog box is displayed.
Note – Type 7 keyboards have Java Desktop System (Java DS) keys.
2. Select LowPower from the Power Off Selection dialog box.
The workstation completes any in-process activities, then enters low-power modeafter a short time-out period.
Note – You can use the keyboard Sleep key to place the workstation in low-powermode or to shut down the workstation. See FIGURE 2-4.
TABLE 2-4 Power LED Status
LED Activity Meaning
LED off System power is off or the workstation is booting up.
LED blinking All internal subsystems are in the lowest possible powerconsumption mode for this workstation.Note: Some hardware components and software drivers might notsupport the workstation’s lowest possible power consumptionmode. When this occurs, the power LED does not blink.
LED on Full power is on in one or more of the internal subsystems.Note: The power LED energizes when the power button is pressed.This occurs before system self-test has completed successfully.
Chapter 2 Installing and Configuring Preinstalled Solaris Operating System Software 27

Note – The Sleep key cannot be used to power on the workstation. Press the Powerbutton on the front panel to power on the workstation.
FIGURE 2-4 Sun USB Type-7 Keyboard, Java DS keys, Sleep Key, and Power Off SelectionMenu
Activating the Workstation From Low-PowerModeTo activate a workstation that is in low-power mode, move the mouse or press anykey on your keyboard. The monitor display, if blank, refreshes, and the CPU andhard drives return to full power as needed.
Sleep key
Type 7 keyboard
Power off selection menu
Java DS keys
28 Sun Ultra 45 and Ultra 25 Workstations Installation Guide • May 2006
Note – By default, the internal disks of the hard drive are stopped when theworkstation is in low-power mode. The internal drive(s) can take as long as 30seconds to restart and reach the correct speed. To change hard drive powermanagement settings, refer to:
http://docs.sun.com/app/docs/prod/Solaris10/
Search for the Solaris Common Desktop Environment: User’s Guide and locate theinformation on Power Management. If necessary, you can download or purchase theuser’s guide.
Chapter 2 Installing and Configuring Preinstalled Solaris Operating System Software 29

30 Sun Ultra 45 and Ultra 25 Workstations Installation Guide • May 2006

CHAPTER 3
Getting Started With PreinstalledSoftware
This chapter includes information about your Solaris 10 Operating System and thesoftware installed on your workstation’s hard drive image and the Sun Ultra 45 andUltra 25 Hardware Documentation CD. This chapter includes information about thefollowing topics:
Desktop System Software Documentation■ “Solaris 10 Operating System Software Documentation” on page 32
Preinstalled Productivity Software■ “SunVTS 6.1 PS1” on page 32
Preinstalled Developer Tools■ “NetBeans 5.0” on page 34■ “Sun Java Studio Creator 2” on page 34■ “Sun Java Studio Enterprise 8” on page 35■ “Sun Studio 11” on page 35
Service Procedure Animated Multimedia■ “Service Procedure Movies” on page 33
Restoring and Backing Up Preinstalled Software■ “Restoring Preinstalled Software” on page 37■ “Backing Up the Preinstalled Image to Another Hard Drive” on page 39
31

Desktop System SoftwareDocumentation
Solaris 10 Operating System SoftwareDocumentationFor Solaris Operating System documentation, refer to the following web site:
http://docs.sun.com/
Select: Solaris 10→Solaris 10 User Collection→Solaris 10 README
The Solaris 10 on Sun Hardware collection documentation is also located at:
http://docs.sun.com/
To access the hardware collection select: Solaris 10→Solaris 10 on Sun HardwareCollection:
http://www.sun.com/documentation/
For a summary of Solaris preinstalled content refer to the following website:
http://www.sun.com/software/preinstall/
Preinstalled Productivity Software
SunVTS 6.1 PS1SunVTSTM software is available as part of the preinstalled software on the hard diskincluded with your Sun Ultra 45 or Ultra 25 workstation. SunVTS software isoperating-system specific. Use only version 6.1 (or subsequent compatible version ofSunVTS), which supports the Sun Ultra 45 and Ultra 25 workstations.
You can find the latest revision of SunVTS software on the web at:
32 Sun Ultra 45 and Ultra 25 Workstations Installation Guide • May 2006

http://www.sun.com/oem/
The web site can also provide you with SunVTS installation instructions. Theinstallation and removal instructions for SunVTS are located in the SunVTS 6.1 User’sGuide.
You can find the latest revision of the SunVTS documentation on the web at:
http://www.sun.com/oem/vts
Service Procedure Animations
Service Procedure MoviesService procedure tutorial movies are located on the Sun Ultra 45 and Ultra 25Hardware Documentation CD (705-1341). These movies demonstrate installation andremoval procedures for the Sun Ultra 45 workstation (TABLE 3-1). The procedurescovered also apply to the Ultra 25 workstation.
View these movies before installing optional hardware components in your SunUltra 45 or Ultra 25 workstations. Instructions for viewing these movies on Solaris,Microsoft Windows XP/2000, and MacOS based systems are located on the SunUltra 45 and Ultra 25 Hardware Documentation CD.
TABLE 3-1 ShowMe How Movies
Workstation Component ShowMe How Video Title
Power Powering Off the System
Powering On the System
Power supply Replacing the Power Supply
Hard drive Installing and Replacing a Hard Drive
Replacing the Hard Drive Backplane
Motherboard Replacing the Motherboard
PCI Installing and Replacing PCI Boards
DIMM Installing and Replacing Memory (Ultra 25memory procedures may be slightlydifferent from what is shown.)
DVD dual drive Replacing the DVD Dual Drive
Chapter 3 Getting Started With Preinstalled Software 33

Development ToolsThe following Sun development tools for the Java platform are preinstalled on yourworkstation’s hard disk image.
Note – If you need to restore the Java products, you can download the latestversions by selecting links from the following web site:http://java.sun.com/
NetBeans 5.0NetBeansTM 5.0 is an open source applications development tool that allowsdevelopers to produce Java applications in the web tier. Information about NetBeans5.0 is located at:
http://www.netbeans.org/
Downloads are available at:http://www.netbeans.org/downloads/index.html
NetBeans IDE 5.0 installation location: /opt/netbeans-5.0
To run the IDE, launch: /opt/netbeans-5.0/bin/netbeans
To uninstall the IDE, launch: /opt/netbeans-5.0/_uninst/uninstaller
Sun Java Studio Creator 2Sun Java Studio Creator 2 is a front end, web applications builder that runs onWindows XP/2000, Linux, Solaris, and the MacOS platforms. Information about SunStudio Creator 2 is located at:
http://developers.sun.com/prodtech/javatools/jscreator/reference/docs/
Java Studio Creator 2 includes the following:
■ Sun Java Studio Creator development environment■ Sun Java System Application Server Platform Edition■ Point Base Embedded Database
34 Sun Ultra 45 and Ultra 25 Workstations Installation Guide • May 2006
Installation location: /opt/Creator
Installation log: /opt/Creator/install.log
ApplicationServerInformation:
■ Adminusername: admin■ Adminuserpassword: adminadmin■ Adminport: 14848
More port information: /opt/Creator/system/install.properties
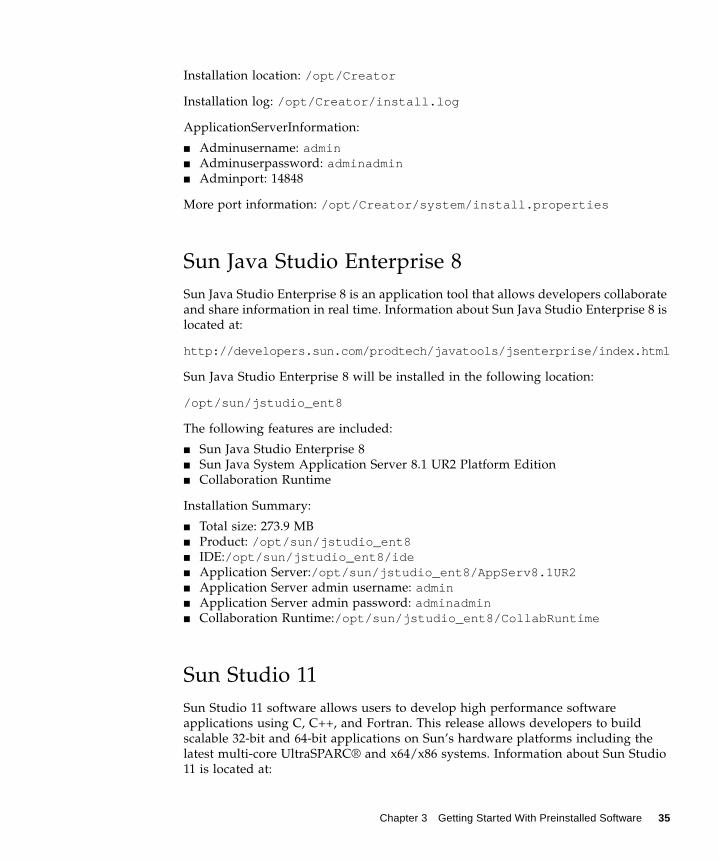
Sun Java Studio Enterprise 8Sun Java Studio Enterprise 8 is an application tool that allows developers collaborateand share information in real time. Information about Sun Java Studio Enterprise 8 islocated at:
http://developers.sun.com/prodtech/javatools/jsenterprise/index.html
Sun Java Studio Enterprise 8 will be installed in the following location:
/opt/sun/jstudio_ent8
The following features are included:
■ Sun Java Studio Enterprise 8■ Sun Java System Application Server 8.1 UR2 Platform Edition■ Collaboration Runtime
Installation Summary:
■ Total size: 273.9 MB■ Product: /opt/sun/jstudio_ent8■ IDE:/opt/sun/jstudio_ent8/ide■ Application Server:/opt/sun/jstudio_ent8/AppServ8.1UR2■ Application Server admin username: admin■ Application Server admin password: adminadmin■ Collaboration Runtime:/opt/sun/jstudio_ent8/CollabRuntime
Sun Studio 11Sun Studio 11 software allows users to develop high performance softwareapplications using C, C++, and Fortran. This release allows developers to buildscalable 32-bit and 64-bit applications on Sun’s hardware platforms including thelatest multi-core UltraSPARC® and x64/x86 systems. Information about Sun Studio11 is located at:
Chapter 3 Getting Started With Preinstalled Software 35

Solaris platforms:http://developers.sun.com/prodtech/cc/documentation/ss11/index.htmlLinux platforms:http://developers.sun.com/prodtech/cc/documentation/ss11/indexLinux.html
The installation and licensing log files are located at: /var/sadm/install/logs
To view a log file, type at the prompt:
% cd /var/sadm/install/logs;more filename
The installed product contains Update Notification, a feature that checks a webservice at Sun Microsystems and informs you of relevant updates. Refer to theRelease Notes for further information.
If you installed any component of the Sun Studio 11 developer tools on a networkserver, to send getting started information to the developers who use the network-installed software, you can use the email template:
/install-directory/SUNWspro/READMEs/email_template.txt
You should now set your PATH to include:/opt/SUNWspro/bin
For Bourne-family shells (sh, bash, ksh):$ PATH=/opt/SUNWspro/bin:$PATH; export PATH
For C-family shells (csh, tcsh):% setenv PATH /opt/SUNWspro/bin:$PATH
Then, to run the IDE, type at the prompt: % sunstudio
36 Sun Ultra 45 and Ultra 25 Workstations Installation Guide • May 2006

Restoring and Backing Up PreinstalledSoftware
Restoring Preinstalled Software
Note – All Solaris 10 and Java Desktop System (Java DS) components are availablethrough download of the Solaris 10 Operating System or through the Solaris 10media kit. For information about obtaining Solaris 10 and Java DS components see:
http://www.sun.com/software/
Your workstation comes preconfigured with the Solaris 10 Operating System andother preinstalled software. However, if you replace your hard drive for any reason,the replacement drive does not come preconfigured with the Solaris 10 OperatingSystem and other preinstalled software.
You should make and keep a full backup of the operating system, which can be usedto restore your system if it is ever needed. Instructions for backing up yourOperating System are included in the Solaris 10 System Administration Collection.For information about the Solaris 10 System Administration Collection see:
http:/docs.sun.com/
You can also restore some of the software that is preinstalled on your hard driveimage from the CD-ROMs included in the appropriate version of the Solaris MediaKit. The Solaris Media Kit contains some of the same software that is preinstalled onyour workstation. To reinstall some software, you might need to download thesoftware from the web sites provided throughout this document. Some softwareproduct companies, such as Mozilla, offer different versions of software on theirrespective web sites.
Chapter 3 Getting Started With Preinstalled Software 37

Restoring Solaris Preinstalled Software
Note – You must use Solaris 10 Operating System OS or a subsequent compatibleversion on the Sun Ultra 45 or Ultra 25 workstations.
1. Get the Solaris Media Kit for your workstation.
You might already have the Solaris Media Kit if you ordered it with yourworkstation. If you did not order the kit with your system, contact your Sun salesrepresentative and order the Solaris Media Kit for your language and version ofSolaris. For more information, refer to the following web site:
http://www.sun.com/software/
2. Follow the installation instructions in the Start Here document that comes withthe kit.
You can install the Solaris Operating System and as much of the additional softwareas you want.
You can also download patches from the SunSolveSM web site:
http://sunsolve.sun.com/
The Sun Ultra 45 and Ultra 25 Workstations Product Notes (819-1893) might alsocontain patch and software version information. To obtain the latest Sun Ultra 45 andUltra 25 Workstations Product Notes, refer to the following web site:
http://www.sun.com/documentation/
Reinstalling Other SoftwareIf you must reinstall other software packages, ensure that you have the latestsoftware version. For more information on the latest software versions, refer to theweb sites listed throughout this guide.
38 Sun Ultra 45 and Ultra 25 Workstations Installation Guide • May 2006

Backing Up the Preinstalled Image to AnotherHard DriveInformation about hard drive backups can be found in the Solaris 10 SystemAdministration Guide. To obtain this guide, refer to the following web site:
http://docs.sun.com/
Hard Drive Mirroring
Use Solaris Volume Manager to perform hard drive mirroring using the Solaris 10OS.
For information about Solaris Volume Manager, see the Solaris Volume ManagerAdministration Guide at:
http://www.sun.com/documentation/
Chapter 3 Getting Started With Preinstalled Software 39

40 Sun Ultra 45 and Ultra 25 Workstations Installation Guide • May 2006

CHAPTER 4
Diagnosing Sun Ultra 45 andUltra 25 Workstations InstallationProblems
This chapter contains information to help you diagnose basic workstationinstallation problems. Topics include:
■ “Diagnosing and Repairing Basic Workstation Installation Problems” on page 41■ “How to Get Technical Support” on page 47
Diagnosing and Repairing BasicWorkstation Installation ProblemsThe diagnostics described within this section are intended to help you diagnose andrepair simple problems that might occur after you cable, power on, and configurethe workstation for the first time. Detailed basic and advanced diagnosticprocedures are described in Sun Ultra 45 and Ultra 25 Workstations Service andDiagnostics Manual (819-1892).
Note – As you diagnose workstation malfunctions, always compare normaloperation with observed operation and document the differences. This informationmight be useful if you need to contact Sun technical support.
If you experience problems after cabling, powering on, and configuring yourworkstation, refer to the diagnostic information in TABLE 4-1.
41

Note – Advanced diagnostic procedures are described in the Sun Ultra 45 and Ultra25 Workstations Service and Diagnostics Manual (819-1892).
TABLE 4-1 Diagnosing and Repairing Basic Workstation Installation Problems
Symptom Diagnostic Procedures
Workstation does notpower on when thepower button ispressed.
1. Is the power LED for the workstation illuminated? In normal operation the powerLED illuminates after the Power button is pressed and the workstation beeps. If thisdoes not occur, verify that the power cord for the workstation is connected to acorrectly operating AC outlet (TABLE 1-1) and that the power cord is connected tothe workstation’s power connector.
2. After the power button is pressed, does the power LED for the workstationilluminate? If not, replace the power cord.
3. Does the power LED illuminate? If not, does the system beep when the system ispowered on? Verify that the keyboard and mouse are correctly connected to the USBports. See “Cabling Your Workstation” on page 14.
4. Test with another keyboard and mouse that you know are functional. Does thesystem beep when you connect the keyboard and power on the system?
5. Does the monitor sync (The green LED on the monitor stops flashing and remainsilluminated.) within 5 minutes after power on?
Note: If the monitor syncs but does not display an ok prompt or a login window, thesystem might not be passing POST. See the Sun Ultra 45 and Ultra 25 WorkstationsService and Diagnostics Manual.If the system passes POST and displays the ok prompt but does not boot Solaris,type: boot -r
Workstation powers on,but the monitor doesnot power on.
1. Is the power LED for the monitor illuminated? In normal operation the monitor’spower LED is green when a signal is received from a graphics accelerator and ACpower is supplied from the workstation. In sleep mode the LED is flashing or isamber (yellow) in color. The monitor wakes from sleep mode when you tap thekeyboard space bar or move the mouse. If the power LED does not respond to theseactions, verify that the power cord for the monitor is connected to a correctlyoperating AC outlet (TABLE 1-1) and that the power cord is connected to themonitor’s power connector.
2. Is the power LED for the monitor illuminated? If not, verify that the monitor cable isproperly connected and seated to the graphics accelerator and the monitor.
3. Does the power LED for the monitor illuminate? If not, see the Sun Ultra 45 and Ultra25 Workstations Service and Diagnostics Manual.
42 Sun Ultra 45 and Ultra 25 Workstations Installation Guide • May 2006

Workstation powers on,monitor powers on butno image displayed.
1. Is an image displayed? In normal operation an image is displayed when themonitor’s power LED is green, a signal is received from a connected graphicsaccelerator, and AC power is supplied to the workstation. In sleep mode the powerLED is flashing or is amber (yellow) in color. The monitor wakes from the sleepmode when you tap the keyboard, spacebar, or move the mouse. If an image is notdisplayed after tapping the keyboard, space bar, or moving the mouse, verify thatthe monitor’s brightness and contrast controls are adjusted correctly.
2. Is an image displayed? If not, is the monitor cable attached to the correct port on thegraphics accelerator?
3. Does the monitor work when connected to another system?4. If you have another monitor, does it work when connected to the original system?5. Verify that OpenBoot PROM defaults are set properly:
a. Press and hold the Power button for 4 seconds to power off the system.b. Wait 30 seconds and power on the system.c. As soon as the Power LED blinks, quickly press the Power button twice. The okprompt is displayed and the system enters a safe NVRAM mode.d. Verify the following, OpenBoot PROM parameters: output-device is set toscreen and input-device is set to keyboard.
e. If the ok prompt does not display, or if changing the output-device settingdoes not help, contact a Sun technical support. See “How to Get Technical Support”on page 47.
Workstation appears tobe in low-power mode,but the power LEDdoes not blink.
The power-indicator LED only blinks when all workstation components are in low-power mode.Note: Some hardware components and software drivers might not support yourworkstation’s lowest possible power consumption mode. When this occurs, the powerLED does not blink.
Keyboard does notwork.
1. Is the keyboard correctly connected to one of the four USB ports on the back panel?In normal operation after the workstation is powered on the workstation beeps if theUSB connector for the keyboard is correctly installed in one for the four USB portson the back panel of the workstation. If the USB connector for the keyboard is notproperly installed remove and reinstall the USB connector.
2. Does the keyboard work? If not, replace the keyboard with a known workingkeyboard. If the known working replacement keyboard works, replace the defectivekeyboard.
3. Does the keyboard work? If the keyboard does not work, you might have a defectivemotherboard, see Sun Ultra 45 and Ultra 25 Workstations Service and DiagnosticsManual (819-1892).
TABLE 4-1 Diagnosing and Repairing Basic Workstation Installation Problems (Continued)
Symptom Diagnostic Procedures
Chapter 4 Diagnosing Sun Ultra 45 and Ultra 25 Workstations Installation Problems 43

Mouse does not work. 1. Is the mouse correctly connected to one of the three USB ports on the keyboard? Innormal operation the workstation beeps if the USB connector for the mouse isconnected to one of the three USB ports on the Sun keyboard and the keyboard isconnected to one of the four USB ports on the rear panel. If the USB connector forthe mouse is not properly installed remove and reinstall the USB connector.
2. Does the mouse work? If not, verify that the mouse track ball and internal rollers areare clean.
3. Does the mouse work? If not, replace the mouse with a known working mouse. Ifthe known working replacement mouse works, replace the defective mouse.
4. Does the mouse work? If the mouse does not work, you may have a defectivekeyboard or motherboard, see the keyboard does not work diagnostic. If theproblems still exists, see Sun Ultra 45 and Ultra 25 Workstations Service and DiagnosticsManual (819-1892).
Network error messageoccurs during bootprocess.
Use this procedure if the system displays these error messages:Warning: timed out waiting for NIS to come up:Timeout waiting for ARP/RARP packet
1. Try connecting another Ethernet cable from the workstation to your network. Doesthe new cable work?
2. If this cable change does not help, bring the system to the ok prompt and verify theOpenBoot PROM settings. Most systems should be set to diag-switch? = falseand boot-device set to disk net. For more information on OpenBoot PROMsettings, see the Sun Ultra 45 and Ultra 25 Workstations Service and Diagnostics Manual,819-1892, or contact a Sun technical support center.
3. From a remote system, ping the system with this command: ping hostname4. Verify with your system administrator that the network is operational.5. Contact Sun technical support, see “How to Get Technical Support” on page 47.
TABLE 4-1 Diagnosing and Repairing Basic Workstation Installation Problems (Continued)
Symptom Diagnostic Procedures
44 Sun Ultra 45 and Ultra 25 Workstations Installation Guide • May 2006

CD or DVD does noteject from the mediatray when you pressthe Eject button.
User-Level Procedures
1. Move the mouse or press any key on the keyboard. The drive might be in low-powermode.
2. Attempt to eject the CD using the Eject button on the media drive.3. In a terminal window type: eject cdrom
4. If Step 3 does not work, verify that the CD is not mounted. In a terminal window,type: df | grep cdromIf the CD is mounted, text similar to this example will be displayed:/cdrom/wzi-2230 (/vol/dev/dsk/c0t2d0/wzi-2230): 0 blocks 0 files
5. Unmount the CD by typing: umount and the command output shown in parenthesesabove. In the example above, the mount point is wzi-2230 and you would type:umount /vol/dev/dsk/c0t2d0/wzi-2230
6. Type the command: eject cdrom
Alternate Procedure for Ejecting Media CDs
1. Right-click the mouse and select Workspace Menu→Folders→Open CDROM.A File Manager window should open.
2. Select File→Eject.3. If the CD does not eject, use a terminal window to exit the CD directory by typing:cd
4. Try again to eject the CD from the File Manager window.If you need further assistance, contact your system administrator or a Sun ServiceSupport Center.
System Administrator Emergency Procedures for All CDs
As superuser, stop the vold daemon:1. Open a terminal window.2. As superuser, type: /etc/init.d/volmgt stop
3. Press the Eject button on the media player.Note: To mount another CD, you need to start vold by typing:/etc/init.d/volmgt start
If the CD has not ejected using Step 3 above, complete these steps:1. Go to the ok prompt.2. Press the Eject button.If the CD still does not eject using the two processes above, there might be a cableproblem or other hardware problem. Call a SunServiceSM Support Center for furtherassistance.
TABLE 4-1 Diagnosing and Repairing Basic Workstation Installation Problems (Continued)
Symptom Diagnostic Procedures
Chapter 4 Diagnosing Sun Ultra 45 and Ultra 25 Workstations Installation Problems 45

Collecting Information for TechnicalSupportBefore contacting Sun technical support, note any change in the workstation’spower-on sequence. This information might help Sun technical support quicklydiagnose the error. See the Sun Ultra 45 and Ultra 25 Workstations Service andDiagnostics Manual (819-1892) for additional information.
TABLE 4-2 Information to Collect Before Calling a Sun Service Support Center
System Configuration Information Write Your Information Here
SunServiceSM contract number
System model (Example: Sun Ultra 45 Workstation)
Solaris Operating System and release that you are usingIn a terminal window, type: cat /etc/release
System serial number
Peripherals attached to the system (Example: printer, externalhard drive)
Email address and phone number for you and a secondarycontactStreet address where the system is located
Superuser password (Do not write your password.)
Summary of problem and the work being done when theproblem occurred
IP address
Workstation name (System host name)
Network or internet domain name
Proxy server configuration
46 Sun Ultra 45 and Ultra 25 Workstations Installation Guide • May 2006

How to Get Technical SupportIf you have technical questions about this product that are not answered in thisdocument, see TABLE 4-3.
TABLE 4-3 Useful Sun Technical Support Web Sites and Phone Numbers
Sun Ultra 45 and Ultra 25 workstations Documents and SupportResources URL or Telephone Number
Sun Ultra 45 and Ultra 25 workstations documents:
Sun Ultra 45 and Ultra 25 Workstations Service andDiagnostics Manual, 819-1892
Sun Ultra 45 and Ultra 25 Workstations Installation Guide,819-1891-10
Sun Ultra 45 and Ultra 25 Workstations Product Notes, 819-1893
http://www.sun.com/documentation/
Find Solaris and other software documents here. This isalso an alternative web site for some Sun Ultra 45 andUltra 25 workstations documents. This web site has fullsearch capabilities.
http://docs.sun.com/
Warranty and Contract Support contacts. Links to otherservice tools.
http://www.sun.com/service/
Discussion and diagnostics forums. http://supportforum.sun.com/
Technical Support, diagnostic tools, and alerts for all Sunproducts.
http://www.sun.com/supporthttp://www.sun.com/bigadmin/
SunSolve: Contains links to software patches. Lists somesystem specifications, diagnostics, maintenanceinformation, and other tools.
http://sunsolve.sun.com/
SunService Support phone numbers. 1-800-872-4786 (1-800-USA-4Sun)Select Option 1
This web site lists international telephone numbers forSunService Support.
http://www.sun.com/servicesolutions/
Chapter 4 Diagnosing Sun Ultra 45 and Ultra 25 Workstations Installation Problems 47

48 Sun Ultra 45 and Ultra 25 Workstations Installation Guide • May 2006

Index
Bbacking up, preinstalled image, 39
Ddiagnosing installation problems, 41documentation, accessing, xiv
Online, xviidocumentation, CD-ROM
How to Use This CD, xvShowMe How, xvShowMe How movies, xvSun Ultra 45 Workstation and Diagnostics
Manual, xvSun Ultra 45 Workstation Installation Guide, xvSun Ultra 45 Workstation Service and
Diagnostics Manual, xvWhere to Find Doclette, xv
documentation, OnlineGetting Started Guide, xviImportant Safety Information, xviService and Diagnositics Manual, xviSolaris 10, xviSolaris Operating System Software, 32Sun Ultra 45 Installation Guide, xviSun XVR 100 Installation Guide, xviSun XVR 2500 Installation and Users Guide, xviWorkstation Safety and Compliance Guide, xvi
DVD dual slot, 6
Hhard drive mirroring, 39
Ppreinstalled development tools
Net Beans 5.0, 34Sun Java Studio Creator 2, 34Sun Java Studio Enterprise 8, 35Sun Studio 11, 35
preinstalled productivity softwareSunVTS 6.1, 32
preinstalled software, 31restoring, 37restoring Solaris software, 38
Rreinstalling non-OS software, 38
SSafety and compliance information, 1Service procedure movies, 33specifications
electrical, 2temperature, 3
Sun, xv
Ttechnical support
collecting information, 46getting support, 47
Wworkstation installation problems
CD or DVD, 45diagnosing and reparing, 41
49
keyboard, 43low power mode, 43monitor, 42mouse, 44network, 44power on, 42
workstation, installation process, 4
50 Sun Ultra 45 and Ultra 25 Workstations Installation Guide • May 2006