
Study Unit Harley-Davidson Maintenance - · PDF fileprocedures as they pertain to the...
52
Study Unit Harley-Davidson Maintenance By Ed Abdo
Transcript of Study Unit Harley-Davidson Maintenance - · PDF fileprocedures as they pertain to the...

Study Unit
Harley-DavidsonMaintenance
By
Ed Abdo

About the Author
Edward Abdo has been actively involved in the motorcycle and ATV industry for over 25years. He received factory training from Honda, Kawasaki, Suzuki, and Yamaha trainingschools. He has worked as a motorcycle technician, service manager, and Service/Partsdepartment director.
After being a chief instructor for several years, Ed is now the Curriculum DevelopmentManager for the Motorcycle Mechanics Institute in Phoenix, Arizona. He is also a contractinstructor and administrator for American Honda’s Motorcycle Service EducationDepartment.
All terms mentioned in this text that are known to be trademarks or servicemarks have been appropriately capitalized. Use of a term in this text shouldnot be regarded as affecting the validity of any trademark or service mark.
Copyright © 1999 by Thomson Education Direct
All rights reserved. No part of the material protected by this copyright may bereproduced or utilized in any form or by any means, electronic or mechanical,including photocopying, recording, or by any information storage and retrievalsystem, without permission in writing from the copyright owner.
Requests for permission to make copies of any part of the work should be mailedto Copyright Permissions, Thomson Education Direct, 925 Oak Street, Scranton,Pennsylvania 18515.
Printed in the United States of America
In this study unit, you’ll learn about the engine design, drive system, and maintenanceprocedures as they pertain to the Harley-Davidson V-twin motorcycle. Included in this studyunit is a brief history of this motorcycle, and an explanation of the current basic engine design,primary drive, clutch, and final drive system. Also included is a section covering thetransmissions found on this increasingly popular motorcycle.
When you complete this study unit, you’ll be able to
� Identify the different engine designs used by Harley-Davidson
� Identify the engine components specific to the V-twin engine
� Describe how the direct-drive transmission operates on the V-twin motorcycle
� Understand how the drive systems operate on the V-twin motorcycle
Previewiii
INTRODUCTION . . . . . . . . . . . . . . . . . . . . . . . . . . . . . . 1
HISTORY OF THE HARLEY-DAVIDSON MOTOR COMPANY . . . . . . . . 1The Early Years (1903–1929)
The Middle Years (1930–1949)
The Modern Years (1950–Today)
V-TWIN MOTORCYCLE ENGINE DESIGN . . . . . . . . . . . . . . . . . . 6Four-Stroke Engine Combustion
Four-Stroke Engine Operation
Four-Stroke Engine Components
Dry-Sump Engine Lubrication System
Carburetors
V-TWIN MOTORCYCLE DIRECT-DRIVE TRANSMISSIONS . . . . . . . . . 20Direct-Drive Transmissions
Direct-Drive Transmission Components
Direct-Drive Transmission Theory of Operation
Direct-Drive Transmission Power Flow (5-Speed)
Direct-Drive Transmission Power Flow (4-Speed)
Transmission Problem Symptoms
V-TWIN MOTORCYCLE DRIVE SYSTEMS . . . . . . . . . . . . . . . . . . 31Primary Drives
Clutch System
Final Drives
V-TWIN MAINTENANCE . . . . . . . . . . . . . . . . . . . . . . . . . . 42Spark Plugs
Carburetor
Oil Levels
Chassis
ROAD TEST ANSWERS . . . . . . . . . . . . . . . . . . . . . . . . . . . 47
EXAMINATION . . . . . . . . . . . . . . . . . . . . . . . . . . . . . . 49
v
Contents

INTRODUCTIONThe American V-twin motorcycle has been around for a longtime—since the early 1900s—and includes many different brands.Because of their popularity, when most people hear the words“American V-twin,” they automatically assume that you’re referringto a Harley-Davidson motorcycle. There are, however, a variety offoreign manufacturers building V-twins in the United States, such asHonda and Kawasaki, as well as American companies, such asPolaris.
In this study unit, we’ll discuss many of the aspects of the V-twinmotorcycle including engine design, drive systems, and maintenanceprocedures. Before we get too involved discussing the current modeldesign, we’ll give you a brief history of a legendary Americanmotorcycle manufacturer, the Harley-Davidson Motor Company.
HISTORY OF THE HARLEY-DAVIDSON MOTOR COMPANYThe Harley-Davidson Motor Company was founded in 1903 byWilliam S. Harley and Davidson family members William, Walter,and Arthur. These four men started their company in a small toolshed in Milwaukee, Wisconsin. Today, their story has become alegend among motorcycle enthusiasts.
The Early Years (1903–1929)The first Harley-Davidson motorcycle was a belt-driven,bicycle-based model with a 3 hp single-cylinder engine. Thismotorcycle lacked suspension and had an engine that was based on aFrench design. There was no clutch or transmission (it was a truedirect drive), and lubrication of the moving engine parts wasprovided solely by gravity! In 1906, the company increased thehorsepower of this motorcycle from 3 to 4 by increasing the cylinderbore.
The first Harley-Davidson V-twin was offered publicly in 1907, inresponse to the multicylinder models offered from the companiesThor, Indian, and other marquees that are no longer in business. Thefirst versions of this motorcycle used what were known as “suctionvalves,” which used the suction created by the movement of thepiston. Because this design was impractical, later V-twins usedmechanically operated spring valves.
Harley-Davidson Maintenance1
In 1912, the first chain-driven model Harley-Davidson was offered. In1915, the company introduced the first 3-speed transmission as wellas the first Harley with a headlight. The 1920 Harley-Davidson sportmodel had a horizontally-opposed twin-cylinder engine (similar tothe BMW Boxer). This engine boasted 584 cc of displacement andcame with a fully enclosed chain drive system. In 1922, two newV-twin engines were introduced—the 986 and 1208 cc. In 1926, a 348 ccsingle-cylinder overhead-valve engine was introduced. This enginehad a 73 mm bore and 82.5 mm stroke. A special overhead-valvespeedway racing model called the “Peashooter” was also introducedin 1926.
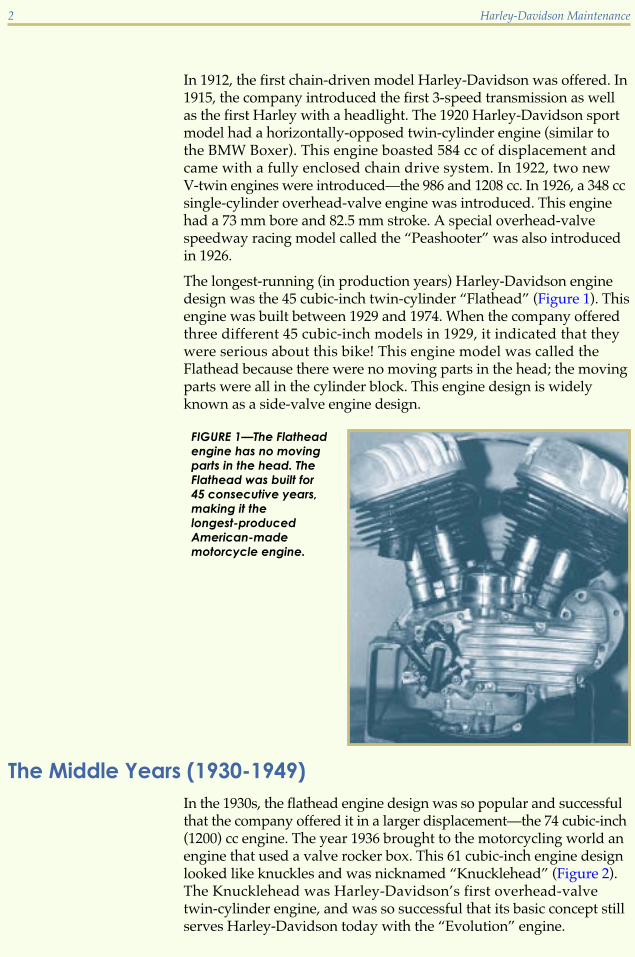
The longest-running (in production years) Harley-Davidson enginedesign was the 45 cubic-inch twin-cylinder “Flathead” (Figure 1). Thisengine was built between 1929 and 1974. When the company offeredthree different 45 cubic-inch models in 1929, it indicated that theywere serious about this bike! This engine model was called theFlathead because there were no moving parts in the head; the movingparts were all in the cylinder block. This engine design is widelyknown as a side-valve engine design.
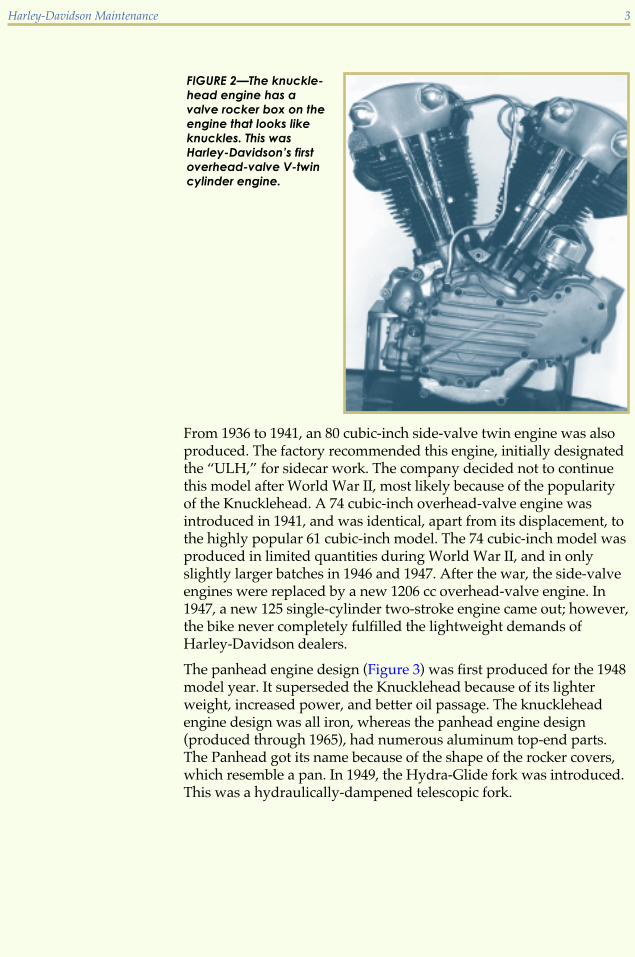
The Middle Years (1930-1949)In the 1930s, the flathead engine design was so popular and successfulthat the company offered it in a larger displacement—the 74 cubic-inch(1200) cc engine. The year 1936 brought to the motorcycling world anengine that used a valve rocker box. This 61 cubic-inch engine designlooked like knuckles and was nicknamed “Knucklehead” (Figure 2).The Knucklehead was Harley-Davidson’s first overhead-valvetwin-cylinder engine, and was so successful that its basic concept stillserves Harley-Davidson today with the “Evolution” engine.
2 Harley-Davidson Maintenance
FIGURE 1—The Flathead
engine has no moving
parts in the head. The
Flathead was built for
45 consecutive years,
making it the
longest-produced
American-made
motorcycle engine.
From 1936 to 1941, an 80 cubic-inch side-valve twin engine was alsoproduced. The factory recommended this engine, initially designatedthe “ULH,” for sidecar work. The company decided not to continuethis model after World War II, most likely because of the popularityof the Knucklehead. A 74 cubic-inch overhead-valve engine wasintroduced in 1941, and was identical, apart from its displacement, tothe highly popular 61 cubic-inch model. The 74 cubic-inch model wasproduced in limited quantities during World War II, and in onlyslightly larger batches in 1946 and 1947. After the war, the side-valveengines were replaced by a new 1206 cc overhead-valve engine. In1947, a new 125 single-cylinder two-stroke engine came out; however,the bike never completely fulfilled the lightweight demands ofHarley-Davidson dealers.
The panhead engine design (Figure 3) was first produced for the 1948model year. It superseded the Knucklehead because of its lighterweight, increased power, and better oil passage. The knuckleheadengine design was all iron, whereas the panhead engine design(produced through 1965), had numerous aluminum top-end parts.The Panhead got its name because of the shape of the rocker covers,which resemble a pan. In 1949, the Hydra-Glide fork was introduced.This was a hydraulically-dampened telescopic fork.
Harley-Davidson Maintenance 3
FIGURE 2—The knuckle-
head engine has a
valve rocker box on the
engine that looks like
knuckles. This was
Harley-Davidson’s first
overhead-valve V-twin
cylinder engine.

The Modern Years (1950–Today)The Harley-Davidson model K was introduced in 1952. This modelfeatured rear suspension and a combination foot shift and handclutch. This model is considered the father of the Sportster. TheSportster was introduced in 1957 and was successful beyond themanufacturer’s wildest dreams! Larger by 10 cubic inches than theoriginal model K, the 55 cubic-inch machine boasted overhead valves.In only its second year of production, an increase in performance wasobtained through higher compression, larger valves, and aluminumtappets. The Sportster set the stage for the XLCH model. Some saythat the “CH” in “XLCH” stood for “competition hot” and stylebecame as important as speed. The staggered, short dual exhaustsfirst seen in 1962 have become classic Sportster equipment.
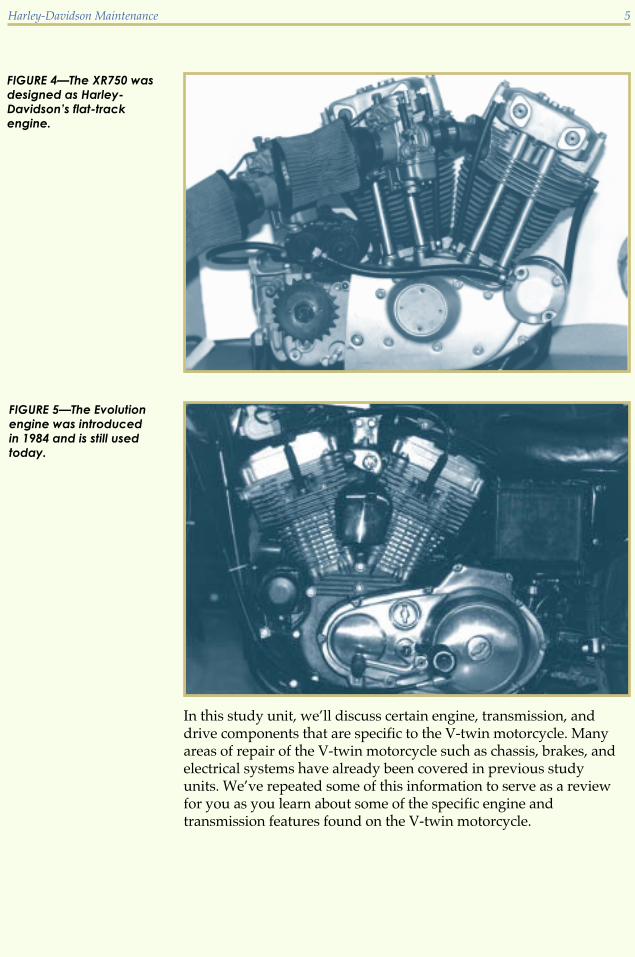
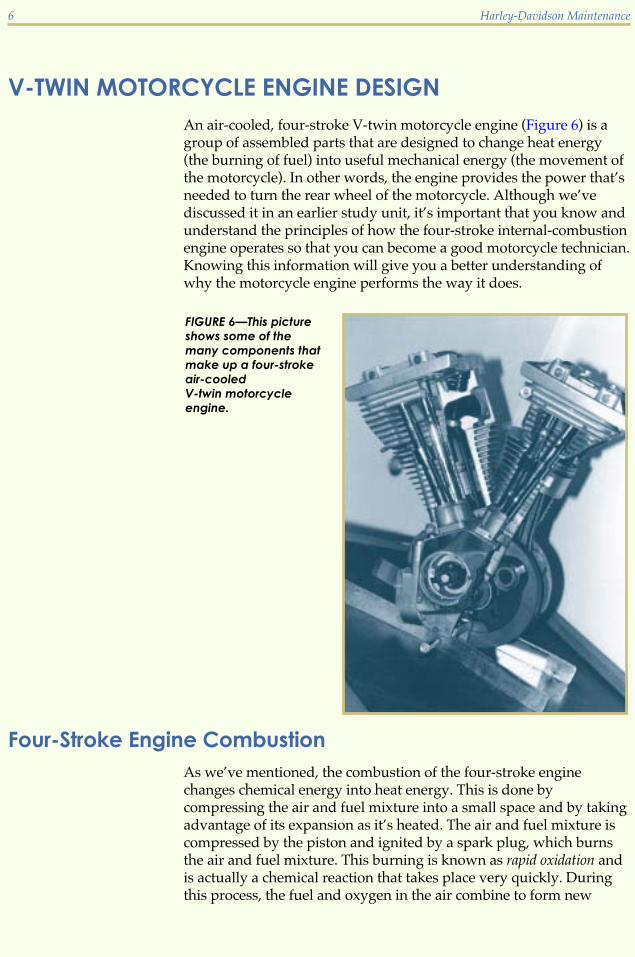
Also developed during this modern period of design was the XR750,Harley-Davidson’s flat-track racing engine (Figure 4). Electric startingwas introduced in 1965 on the Panhead (which received rearsuspension in 1953). And a motor known as the “Shovelhead” madeits debut in 1966. The Shovelhead got its name because of the space inthe center of the rocker box and because the rocker box looks like anupturned shovel. This engine lasted 18 years until 1984 and was madein 76 and 80 cubic-inch designs. Harley-Davidson introduced the“Evolution” engine design (Figure 5) in the new Softail lineup for the1984 model year. The Evolution engine uses an aluminum alloy,whereas past engine designs used primarily iron.
4 Harley-Davidson Maintenance
FIGURE 3—The Panhead
engine superseded the
Knucklehead engine
because of its light weight,
power, and better oiling
system.
In this study unit, we’ll discuss certain engine, transmission, anddrive components that are specific to the V-twin motorcycle. Manyareas of repair of the V-twin motorcycle such as chassis, brakes, andelectrical systems have already been covered in previous studyunits. We’ve repeated some of this information to serve as a reviewfor you as you learn about some of the specific engine andtransmission features found on the V-twin motorcycle.
Harley-Davidson Maintenance 5
FIGURE 4—The XR750 was
designed as Harley-
Davidson’s flat-track
engine.
FIGURE 5—The Evolution
engine was introduced
in 1984 and is still used
today.
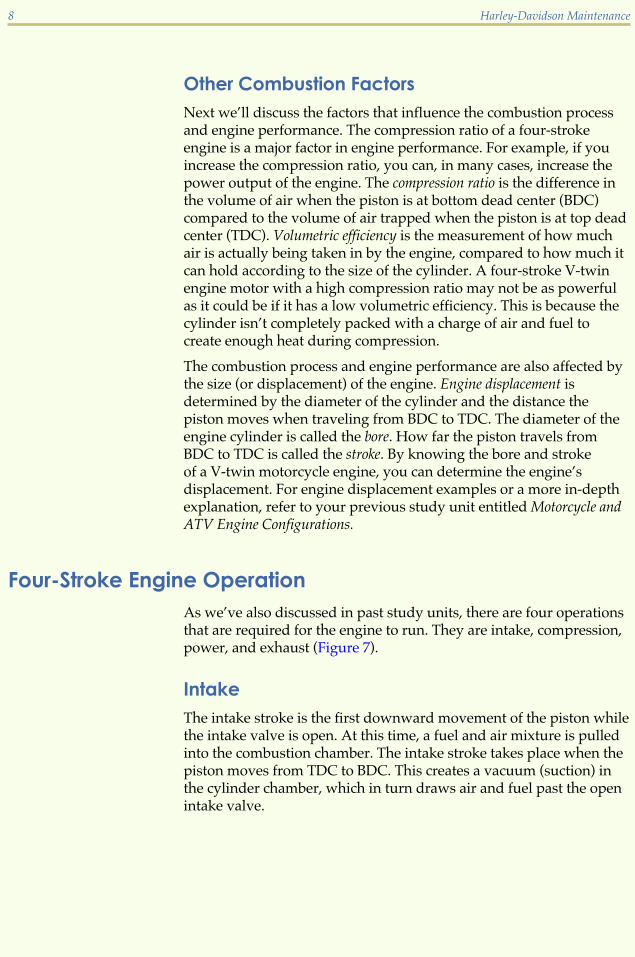
V-TWIN MOTORCYCLE ENGINE DESIGNAn air-cooled, four-stroke V-twin motorcycle engine (Figure 6) is agroup of assembled parts that are designed to change heat energy(the burning of fuel) into useful mechanical energy (the movement ofthe motorcycle). In other words, the engine provides the power that’sneeded to turn the rear wheel of the motorcycle. Although we’vediscussed it in an earlier study unit, it’s important that you know andunderstand the principles of how the four-stroke internal-combustionengine operates so that you can become a good motorcycle technician.Knowing this information will give you a better understanding ofwhy the motorcycle engine performs the way it does.
Four-Stroke Engine CombustionAs we’ve mentioned, the combustion of the four-stroke enginechanges chemical energy into heat energy. This is done bycompressing the air and fuel mixture into a small space and by takingadvantage of its expansion as it’s heated. The air and fuel mixture iscompressed by the piston and ignited by a spark plug, which burnsthe air and fuel mixture. This burning is known as rapid oxidation andis actually a chemical reaction that takes place very quickly. Duringthis process, the fuel and oxygen in the air combine to form new
6 Harley-Davidson Maintenance
FIGURE 6—This picture
shows some of the
many components that
make up a four-stroke
air-cooled
V-twin motorcycle
engine.

molecules. These combustion molecules are carbon dioxide (CO2) andwater (H2O). While the fuel and oxygen molecules are converting,they lose some of their internal energy. This energy is released asheat. This heat then causes an increase in the pressure inside thecylinder’s combustion chamber, which then forces the pistondownward. There are three phases involved in the internal enginecombustion process—combustion lag, active combustion, and postcombustion.
Combustion LagThe first phase of combustion occurs as the piston compresses the airand fuel mixture. During this compression, the spark plug ignites asmall portion of the air and fuel mixture and a ball of fire spreadsoutward and begins to consume the remaining mixture. The burninginside the cylinder is a chain reaction that spreads throughout thecombustion chamber. Before the chain reaction is completed, there’s ashort period of slow burning in the combustion chamber. This slowburning process is known as combustion lag.
Active CombustionThe second phase of combustion occurs as the initial lag is overcomeand the chain reaction begins to speed outward in the combustionchamber. A rapid temperature and pressure build-up occurs as thecharge is consumed. The chain reaction of burning moleculesaccelerates and the chemical conversion causes heat to be quicklyreleased. This increase in heat causes the pressure in the combustionchamber to increase dramatically. This phase is known as activecombustion.
Post CombustionThe third phase of combustion occurs as the piston begins movingdownward. At this time, most of the charge has been consumed sothe remaining burning doesn’t contribute much towards producingmore power. As the piston continues its downward movement, thevolume inside the combustion chamber increases. This increase involume allows the pressure to drop and the remaining power to beabsorbed by the piston. The combustion chamber and cylindereliminate the spent gases and start the next cycle of fresh air and fuelmixture burning. This phase is known as the post-combustion phase.
Harley-Davidson Maintenance 7
Other Combustion FactorsNext we’ll discuss the factors that influence the combustion processand engine performance. The compression ratio of a four-strokeengine is a major factor in engine performance. For example, if youincrease the compression ratio, you can, in many cases, increase thepower output of the engine. The compression ratio is the difference inthe volume of air when the piston is at bottom dead center (BDC)compared to the volume of air trapped when the piston is at top deadcenter (TDC). Volumetric efficiency is the measurement of how muchair is actually being taken in by the engine, compared to how much itcan hold according to the size of the cylinder. A four-stroke V-twinengine motor with a high compression ratio may not be as powerfulas it could be if it has a low volumetric efficiency. This is because thecylinder isn’t completely packed with a charge of air and fuel tocreate enough heat during compression.
The combustion process and engine performance are also affected bythe size (or displacement) of the engine. Engine displacement isdetermined by the diameter of the cylinder and the distance thepiston moves when traveling from BDC to TDC. The diameter of theengine cylinder is called the bore. How far the piston travels fromBDC to TDC is called the stroke. By knowing the bore and strokeof a V-twin motorcycle engine, you can determine the engine’sdisplacement. For engine displacement examples or a more in-depthexplanation, refer to your previous study unit entitled Motorcycle andATV Engine Configurations.
Four-Stroke Engine OperationAs we’ve also discussed in past study units, there are four operationsthat are required for the engine to run. They are intake, compression,power, and exhaust (Figure 7).
IntakeThe intake stroke is the first downward movement of the piston whilethe intake valve is open. At this time, a fuel and air mixture is pulledinto the combustion chamber. The intake stroke takes place when thepiston moves from TDC to BDC. This creates a vacuum (suction) inthe cylinder chamber, which in turn draws air and fuel past the openintake valve.
8 Harley-Davidson Maintenance
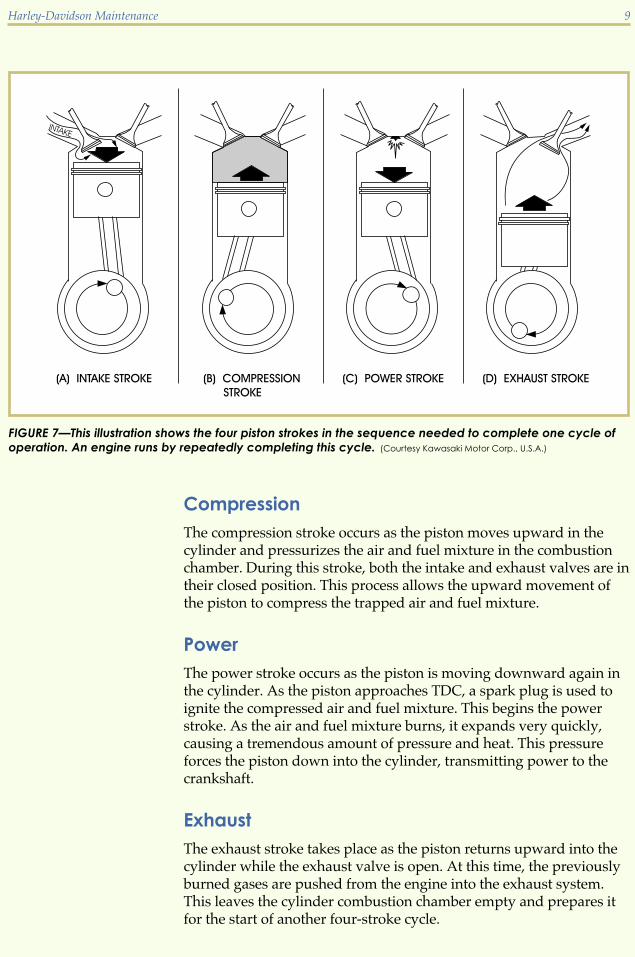
CompressionThe compression stroke occurs as the piston moves upward in thecylinder and pressurizes the air and fuel mixture in the combustionchamber. During this stroke, both the intake and exhaust valves are intheir closed position. This process allows the upward movement ofthe piston to compress the trapped air and fuel mixture.
PowerThe power stroke occurs as the piston is moving downward again inthe cylinder. As the piston approaches TDC, a spark plug is used toignite the compressed air and fuel mixture. This begins the powerstroke. As the air and fuel mixture burns, it expands very quickly,causing a tremendous amount of pressure and heat. This pressureforces the piston down into the cylinder, transmitting power to thecrankshaft.
ExhaustThe exhaust stroke takes place as the piston returns upward into thecylinder while the exhaust valve is open. At this time, the previouslyburned gases are pushed from the engine into the exhaust system.This leaves the cylinder combustion chamber empty and prepares itfor the start of another four-stroke cycle.
Harley-Davidson Maintenance 9
FIGURE 7—This illustration shows the four piston strokes in the sequence needed to complete one cycle of
operation. An engine runs by repeatedly completing this cycle. (Courtesy Kawasaki Motor Corp., U.S.A.)
Each stroke of the four-stroke engine moves the crankshaft one-half ofa complete revolution. To complete one full cycle, the crankshaft mustmake two complete revolutions, or rotate 720�. The intake, compres-sion, power, and exhaust strokes repeat and continue during theoperation of the four-stroke engine.
The crankshaft has a flywheel assembly, which is a large, round,disc-shaped weight. It’s intended to help keep the engine spinningduring the three non-power-producing strokes of the four-strokeengine. Because there’s only one power stroke for every twocrankshaft revolutions, the inertia produced by the crankshaftflywheel assembly aids in smoothing abrupt crankshaft movementduring the power stroke. The flywheels that are used on large-displacement, V-twin four-stroke motorcycle engines are large tokeep the engine running smoothly.
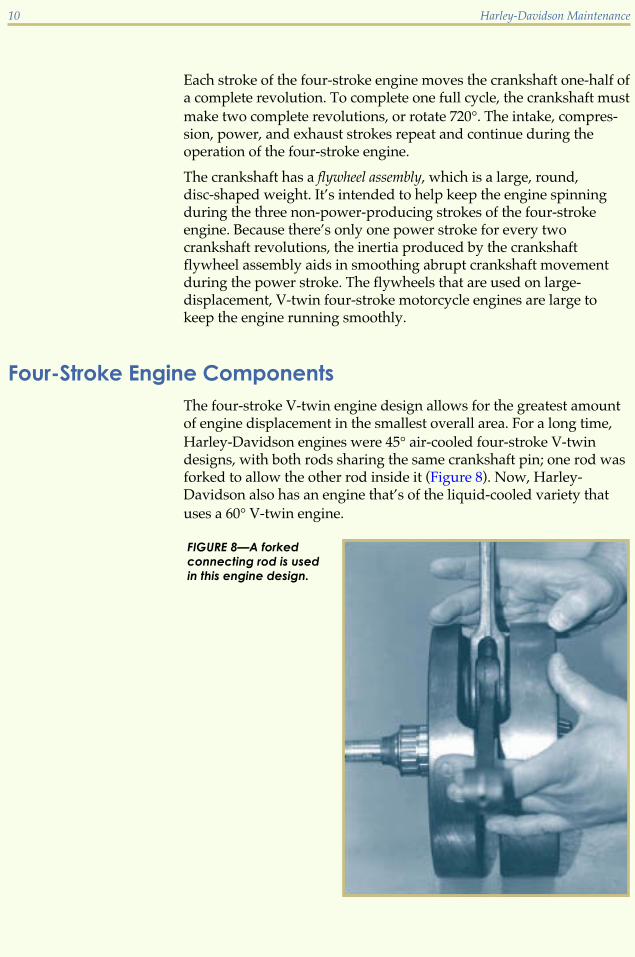
Four-Stroke Engine ComponentsThe four-stroke V-twin engine design allows for the greatest amountof engine displacement in the smallest overall area. For a long time,Harley-Davidson engines were 45� air-cooled four-stroke V-twindesigns, with both rods sharing the same crankshaft pin; one rod wasforked to allow the other rod inside it (Figure 8). Now, Harley-Davidson also has an engine that’s of the liquid-cooled variety thatuses a 60� V-twin engine.
10 Harley-Davidson Maintenance
FIGURE 8—A forked
connecting rod is used
in this engine design.
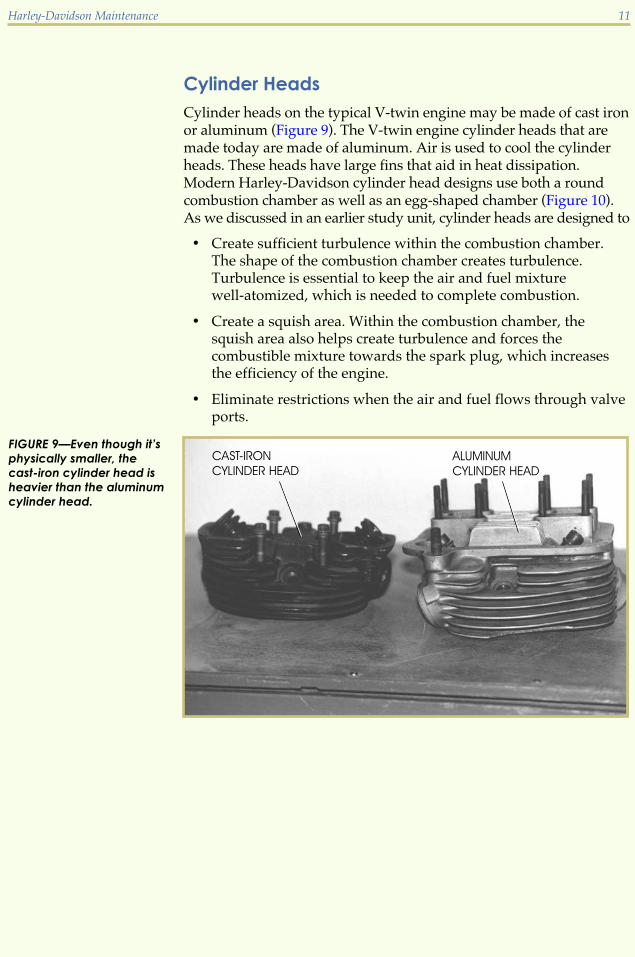
Cylinder HeadsCylinder heads on the typical V-twin engine may be made of cast ironor aluminum (Figure 9). The V-twin engine cylinder heads that aremade today are made of aluminum. Air is used to cool the cylinderheads. These heads have large fins that aid in heat dissipation.Modern Harley-Davidson cylinder head designs use both a roundcombustion chamber as well as an egg-shaped chamber (Figure 10).As we discussed in an earlier study unit, cylinder heads are designed to
� Create sufficient turbulence within the combustion chamber.The shape of the combustion chamber creates turbulence.Turbulence is essential to keep the air and fuel mixturewell-atomized, which is needed to complete combustion.
� Create a squish area. Within the combustion chamber, thesquish area also helps create turbulence and forces thecombustible mixture towards the spark plug, which increasesthe efficiency of the engine.
� Eliminate restrictions when the air and fuel flows through valveports.
Harley-Davidson Maintenance 11
FIGURE 9—Even though it’s
physically smaller, the
cast-iron cylinder head is
heavier than the aluminum
cylinder head.

CylindersThe modern V-twin cylinder assembly is usually made of aluminumwith a liner of cast iron or steel that’s poured into the cylinder(Figure 11). These liners have a cylinder finish that’s designed tocreate a good piston-ring seal while providing sufficient oil forlubrication.
12 Harley-Davidson Maintenance
FIGURE 10—This photo
shows two different com-
bustion chamber designs
used in V-twin air-cooled
engines. The egg-shaped
chamber is more efficient
than the round chamber,
because the shape helps
force the fuel charge into
the spark plug area.
FIGURE 11—An aluminum
cylinder has a liner made
of cast iron or steel.
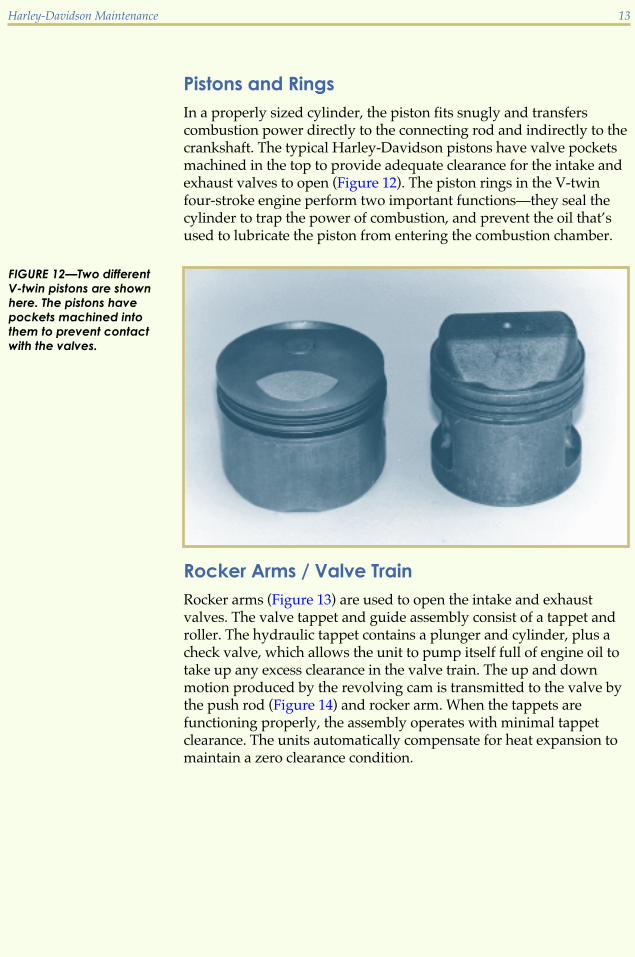
Pistons and RingsIn a properly sized cylinder, the piston fits snugly and transferscombustion power directly to the connecting rod and indirectly to thecrankshaft. The typical Harley-Davidson pistons have valve pocketsmachined in the top to provide adequate clearance for the intake andexhaust valves to open (Figure 12). The piston rings in the V-twinfour-stroke engine perform two important functions—they seal thecylinder to trap the power of combustion, and prevent the oil that’sused to lubricate the piston from entering the combustion chamber.
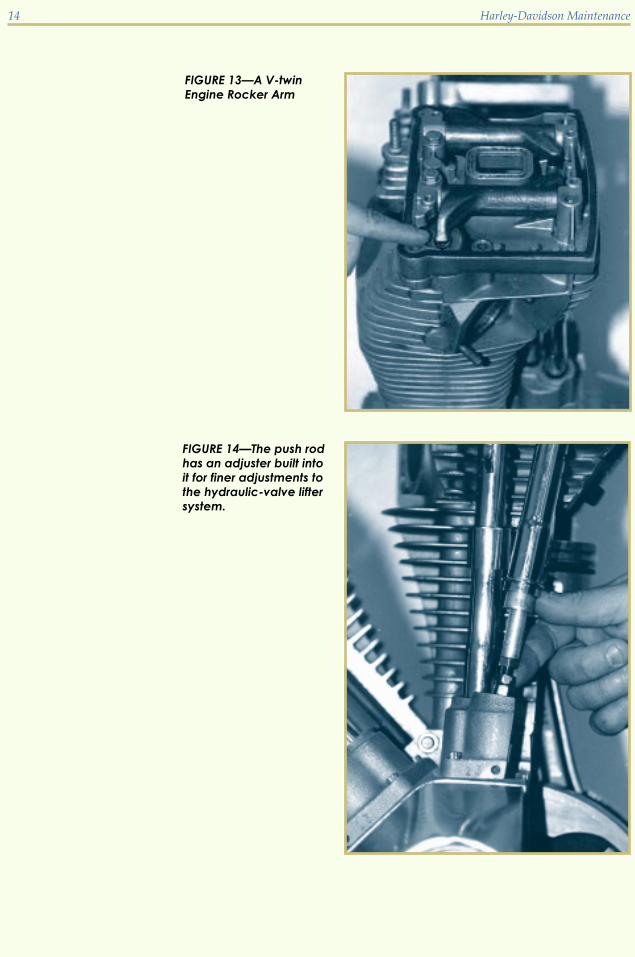
Rocker Arms / Valve TrainRocker arms (Figure 13) are used to open the intake and exhaustvalves. The valve tappet and guide assembly consist of a tappet androller. The hydraulic tappet contains a plunger and cylinder, plus acheck valve, which allows the unit to pump itself full of engine oil totake up any excess clearance in the valve train. The up and downmotion produced by the revolving cam is transmitted to the valve bythe push rod (Figure 14) and rocker arm. When the tappets arefunctioning properly, the assembly operates with minimal tappetclearance. The units automatically compensate for heat expansion tomaintain a zero clearance condition.
Harley-Davidson Maintenance 13
FIGURE 12—Two different
V-twin pistons are shown
here. The pistons have
pockets machined into
them to prevent contact
with the valves.
14 Harley-Davidson Maintenance
FIGURE 13—A V-twin
Engine Rocker Arm
FIGURE 14—The push rod
has an adjuster built into
it for finer adjustments to
the hydraulic-valve lifter
system.

Engine Crankcases and CrankshaftThe gear case is located behind the timing cover on the right side of aV-twin motorcycle engine crankcase assembly. The gear case containsa series of gears, which transmit engine power to the camshaft,ignition timing device, and to the oil pump. Figure 15 shows acutaway view of a V-twin engine that shows this area in greaterdetail. This area of the crankcase is lubricated with engine oil througha breather valve from the engine crankcase. The vertically splitcrankcase supports the crankshaft, cylinders, and cylinder headassemblies.
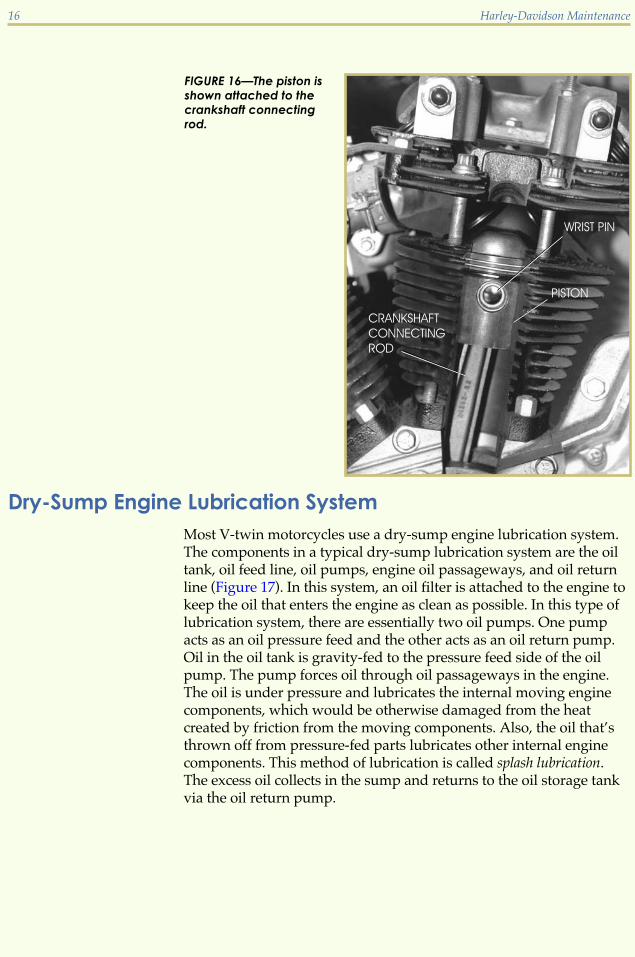
The crankshaft changes the reciprocating (up and down) motion ofthe piston into rotating motion, which turns the gears to producemovement of the motorcycle. The piston is connected to thecrankshaft by the wrist pin and connecting rod (Figure 16).
Harley-Davidson Maintenance 15
FIGURE 15—This
cutaway view shows
some of the gears and
engine components
found in the gear case
of a V-twin engine.
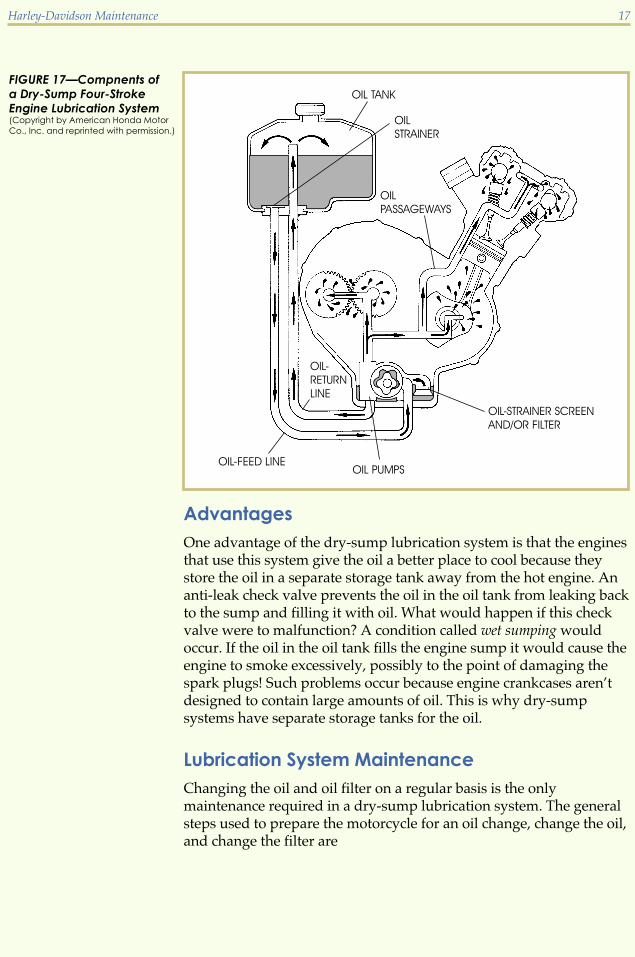
Dry-Sump Engine Lubrication SystemMost V-twin motorcycles use a dry-sump engine lubrication system.The components in a typical dry-sump lubrication system are the oiltank, oil feed line, oil pumps, engine oil passageways, and oil returnline (Figure 17). In this system, an oil filter is attached to the engine tokeep the oil that enters the engine as clean as possible. In this type oflubrication system, there are essentially two oil pumps. One pumpacts as an oil pressure feed and the other acts as an oil return pump.Oil in the oil tank is gravity-fed to the pressure feed side of the oilpump. The pump forces oil through oil passageways in the engine.The oil is under pressure and lubricates the internal moving enginecomponents, which would be otherwise damaged from the heatcreated by friction from the moving components. Also, the oil that’sthrown off from pressure-fed parts lubricates other internal enginecomponents. This method of lubrication is called splash lubrication.The excess oil collects in the sump and returns to the oil storage tankvia the oil return pump.
16 Harley-Davidson Maintenance
FIGURE 16—The piston is
shown attached to the
crankshaft connecting
rod.
AdvantagesOne advantage of the dry-sump lubrication system is that the enginesthat use this system give the oil a better place to cool because theystore the oil in a separate storage tank away from the hot engine. Ananti-leak check valve prevents the oil in the oil tank from leaking backto the sump and filling it with oil. What would happen if this checkvalve were to malfunction? A condition called wet sumping wouldoccur. If the oil in the oil tank fills the engine sump it would cause theengine to smoke excessively, possibly to the point of damaging thespark plugs! Such problems occur because engine crankcases aren’tdesigned to contain large amounts of oil. This is why dry-sumpsystems have separate storage tanks for the oil.
Lubrication System MaintenanceChanging the oil and oil filter on a regular basis is the onlymaintenance required in a dry-sump lubrication system. The generalsteps used to prepare the motorcycle for an oil change, change the oil,and change the filter are
Harley-Davidson Maintenance 17
FIGURE 17—Compnents of
a Dry-Sump Four-Stroke
Engine Lubrication System(Copyright by American Honda Motor
Co., Inc. and reprinted with permission.)
1. Run the engine until its normal engine temperature is obtained.
2. Remove the drain plug that’s attached to the oil tank or oil tankdrain hose and let the oil completely drain from the oil tank intoan approved container.
3. Carefully remove and discard the oil filter.
4. Use a clean, lint-free cloth/shop rag to clean the area aroundwhere the filter attaches.
5. Lubricate the gasket of a new oil filter with the same engine oilthat you’ll be using to fill the oil tank.
6. Reinstall the oil filter onto the engine.
7. Be sure to tighten the oil filter to the manufacturer’s specifications(usually 1
4 to 12 turn after the gasket surface makes contact with
the filter mounting surface).
8. Reinstall the oil tank drain plug and tighten properly.
9. Pour the specified amount of engine oil into the oil tank. Themanufacturer will have suggestions for the type of oil that shouldbe used in the engine for different weather and riding conditions.This information can be found in the model’s service or owner’smanual.
10. Start the engine and carefully check for oil leaks at all points ofthe oiling system where components were removed andreplaced.
11. Run the engine to allow it to warm up.
12. Turn off the engine and add oil to the tank.
13. With the motorcycle in the upright position, check the oil leveland add oil to the tank if the engine oil dipstick shows that the oillevel is low. Be sure to avoid overfilling the oil supply tank. Thetank requires air space for heat expansion as the oil heats up.
CarburetorsThe carburetor is positioned between the intake valve and the airfilter. You’ve learned that basic carburetor operation occurs becauseof the negative pressure that results from the downward motion ofthe piston during the intake stroke. As the air passes through thecarburetor venturi, the venturi creates an increase in velocity and adrop in pressure. To review how carburetors operate, refer to yourstudy unit on Fuel Systems.
18 Harley-Davidson Maintenance
CV Carburetor OperationThe modern V-twin motorcycle uses a constant velocity (CV)carburetor, which is usually gravity-fed. CV carburetors use a fuel-enrichment system for cold starting. The CV carburetor on most ofthese machines is equipped with an accelerator pump. The acceleratorpump system uses sudden throttle openings to quickly inject fuel intothe carburetor venturi. This provides extra fuel for smootheracceleration.
CV Carburetor AdjustmentsSince the V-twin motorcycle uses only one carburetor to feed the airand fuel mixture into the engine, external adjustments include onlyan idle adjustment. The idle adjustment entails adjusting a simpleexternal adjusting screw. The low-speed fuel mixture screw is presetand shouldn’t be tampered with once it has been properly set to themanufacturer’s specification which can be found in the appropriateservice manual.
Road Test 1
At the end of each section of Harley-Davidson Maintenance, you’ll be asked to check yourunderstanding of what you’ve just read by completing a “Road Test.” Writing the answersto these questions will help you review what you’ve learned so far. Please complete Road Test1 now.
1. The combustion in a four stroke engine changes _______ energy into _______ energy.
2. Most air-cooled V-twin motorcycles use a/an _______ sump lubrication system.
3. The three phases of the internal combustion process in their order of occurrence are_______, _______, and _______.
4. A/An ______ prevents oil drainage from the oil tank back into the engine.
5. Fuel is _______ -fed to the V-twin motorcycle carburetor.
6. The modern V-twin motorcycle uses a _______ type carburetor.(Continued)
Harley-Davidson Maintenance 19
Road Test 1
7. True or False? By increasing the compression ratio of an engine, you’ll usually increase thepower output.
8. The four strokes of the engine used in the American V-twin in order of occurrence are_______, _______, ______, and _______.
Check your answers with those on page 47.
V-TWIN MOTORCYCLE DIRECT-DRIVE TRANSMISSIONSThis section of your study unit provides you with informationspecific to V-twin motorcycle transmissions. We’ll also review somegeneral information on transmissions, including theory of operation,component identification, and direct-drive power flow.
A transmission gives us the ability to shift gears, which allows forincreases in rear wheel speed without overworking the engine. Both4-speed and 5-speed V-twin motorcycles use a direct-drivetransmission system. A direct-drive 4-speed or 5-speed transmissioncase contains a series of gears on different shafts, which are poweredby the engine primary drive system. The transmission in this style ofmotorcycle may be separate from, or combined with, the engineassembly. A gear shifter is used to shift the transmission into thedesired ratios by sliding shifting forks that move the gears into andout of mesh along the main shaft and countershaft.
Direct-Drive TransmissionsWith a constant-mesh direct-drive transmission, the power from theengine enters on one shaft and leaves on another shaft of the sameaxis. As you probably remember, “constant mesh” means that eachgear on one shaft has a matching gear on the opposing shaft. In otherwords, the gears are meshed with each other at all times.
With a direct-drive transmission, top (or high) gear always has a ratioof 1:1, hence the name, “direct drive.” This type of transmission waswidely used on older European motorcycles as with many older andcurrent V-twin motorcycles.
20 Harley-Davidson Maintenance
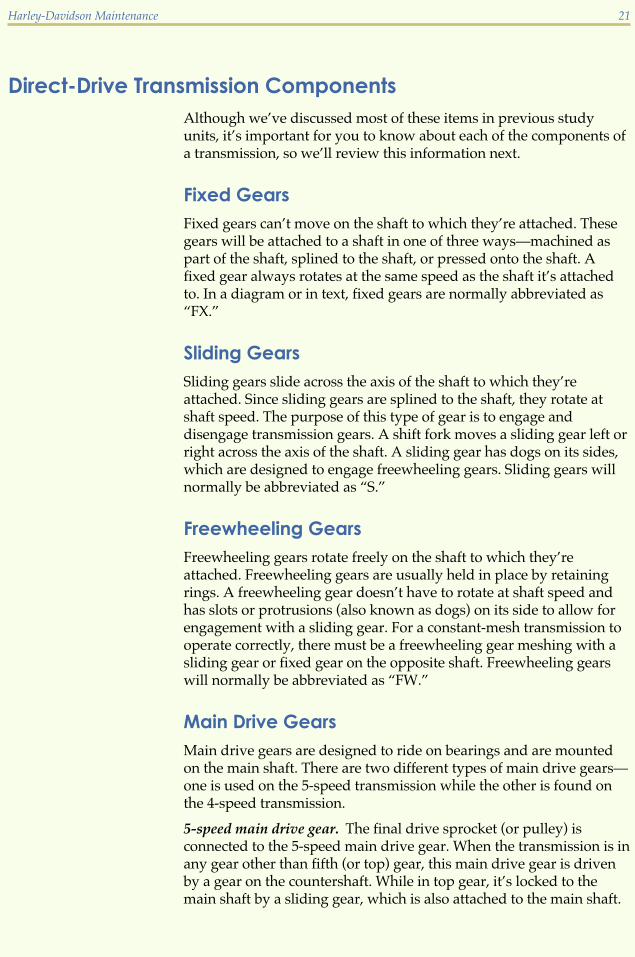
Direct-Drive Transmission ComponentsAlthough we’ve discussed most of these items in previous studyunits, it’s important for you to know about each of the components ofa transmission, so we’ll review this information next.
Fixed GearsFixed gears can’t move on the shaft to which they’re attached. Thesegears will be attached to a shaft in one of three ways—machined aspart of the shaft, splined to the shaft, or pressed onto the shaft. Afixed gear always rotates at the same speed as the shaft it’s attachedto. In a diagram or in text, fixed gears are normally abbreviated as“FX.”
Sliding GearsSliding gears slide across the axis of the shaft to which they’reattached. Since sliding gears are splined to the shaft, they rotate atshaft speed. The purpose of this type of gear is to engage anddisengage transmission gears. A shift fork moves a sliding gear left orright across the axis of the shaft. A sliding gear has dogs on its sides,which are designed to engage freewheeling gears. Sliding gears willnormally be abbreviated as “S.”
Freewheeling GearsFreewheeling gears rotate freely on the shaft to which they’reattached. Freewheeling gears are usually held in place by retainingrings. A freewheeling gear doesn’t have to rotate at shaft speed andhas slots or protrusions (also known as dogs) on its side to allow forengagement with a sliding gear. For a constant-mesh transmission tooperate correctly, there must be a freewheeling gear meshing with asliding gear or fixed gear on the opposite shaft. Freewheeling gearswill normally be abbreviated as “FW.”
Main Drive GearsMain drive gears are designed to ride on bearings and are mountedon the main shaft. There are two different types of main drive gears—one is used on the 5-speed transmission while the other is found onthe 4-speed transmission.
5-speed main drive gear. The final drive sprocket (or pulley) isconnected to the 5-speed main drive gear. When the transmission is inany gear other than fifth (or top) gear, this main drive gear is drivenby a gear on the countershaft. While in top gear, it’s locked to themain shaft by a sliding gear, which is also attached to the main shaft.
Harley-Davidson Maintenance 21
4-speed main drive gear. In the 4-speed transmission, the main drivegear is attached directly to the clutch and slides over the main shaft.As with its 5-speed counterpart, when the transmission is in any gearother than fourth (top) gear, the main drive gear is driven by a gearon the countershaft.
Main ShaftThe main shaft in a direct-drive transmission is connected to theclutch. Both rotate at the same speed. The main shaft rotateswhenever the engine is running and the clutch is engaged.
CountershaftThe countershaft is used to transfer the power coming into the mainshaft to the main drive gear. The countershaft rotates only when thetransmission is engaged, and rotates at the speed that the engagedgear-set ratio permits.
Shift DrumThe shift drum controls the movement of sliding gears using shiftforks. The shift forks have pins that set into grooves. The grooves aremachined into the drum and allow the gears to slide from side-to-sideto move them into and out of transmission engagement. The shiftdrum is rotated by a shifting mechanism that’s operated by a shiftlever on the left side of the motorcycle.
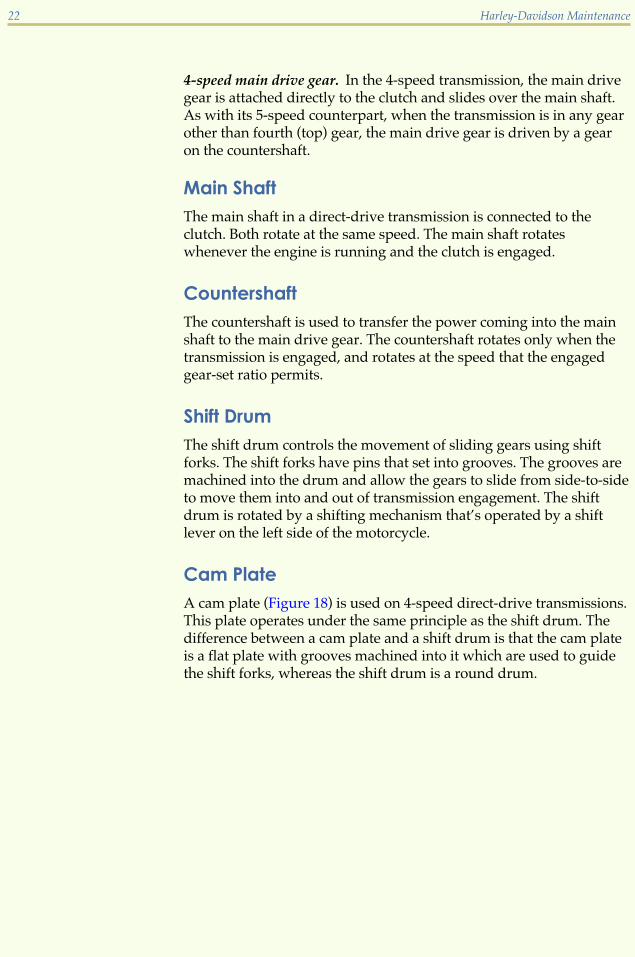
Cam PlateA cam plate (Figure 18) is used on 4-speed direct-drive transmissions.This plate operates under the same principle as the shift drum. Thedifference between a cam plate and a shift drum is that the cam plateis a flat plate with grooves machined into it which are used to guidethe shift forks, whereas the shift drum is a round drum.
22 Harley-Davidson Maintenance

Direct-Drive Transmission Theory of OperationWith a direct-drive transmission, the rear wheel rotates in the samedirection as the engine when a primary chain or belt is used. Toaccomplish this, the transmission must allow the power from theengine to come into one shaft, make any necessary gear ratio changes,and then transmit the power to the rear wheel without reversingrotation. This is the purpose of direct-drive transmissions.
In a direct-drive transmission, the power from the engine enters onthe main shaft from the primary drive and is transferred to thecountershaft, which determines the gear ratio for the lower gears.The power is transferred from the countershaft through the maindrive gear, which directs the power through the main shaft. The drivesprocket is splined to the main drive gear, which as mentionedearlier, fits on the main shaft. The drive sprocket rides on bearings onthe 5-speed direct-drive transmission. On the 4-speed system, thedrive sprocket is attached directly to the main shaft. In top gear, themain shaft is directly connected to the main drive gear and powerdoesn’t flow through the countershaft. Instead, power flows directlyfrom the engine’s primary drive system to the rear wheel.
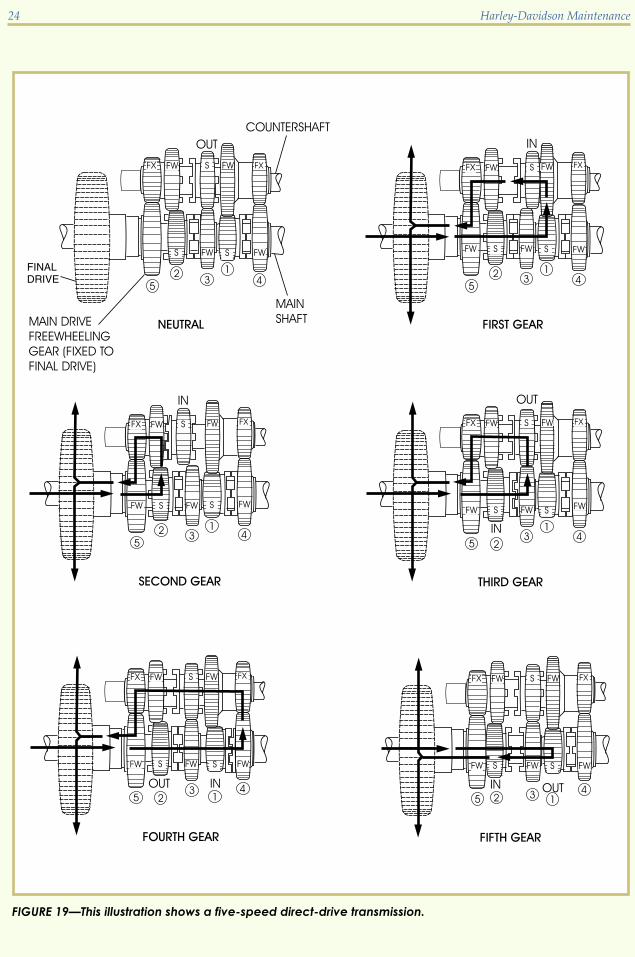
Direct-Drive Transmission Power Flow (5-Speed)You should now have a basic understanding of the theory ofoperation of a direct-drive transmission and its component parts.Next, we’ll discuss the power flow in a 5-speed direct-drivetransmission (Figure 19).
Harley-Davidson Maintenance 23
FIGURE 18—The 4-speed
direct-drive transmission
uses a cam plate to
move the shifting forks
to engage and disengage
the transmission.
24 Harley-Davidson Maintenance
FIGURE 19—This illustration shows a five-speed direct-drive transmission.
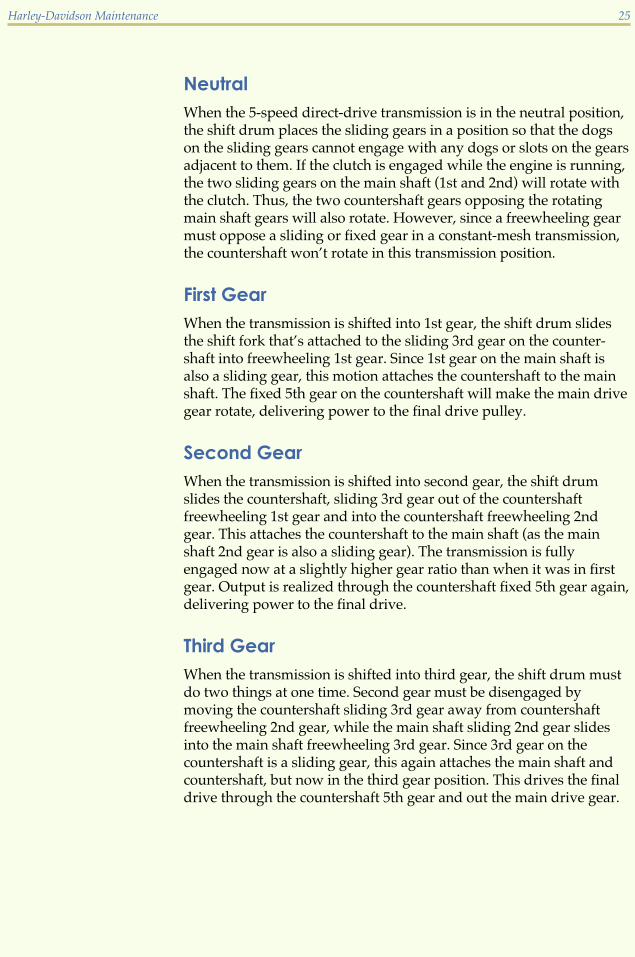
NeutralWhen the 5-speed direct-drive transmission is in the neutral position,the shift drum places the sliding gears in a position so that the dogson the sliding gears cannot engage with any dogs or slots on the gearsadjacent to them. If the clutch is engaged while the engine is running,the two sliding gears on the main shaft (1st and 2nd) will rotate withthe clutch. Thus, the two countershaft gears opposing the rotatingmain shaft gears will also rotate. However, since a freewheeling gearmust oppose a sliding or fixed gear in a constant-mesh transmission,the countershaft won’t rotate in this transmission position.
First GearWhen the transmission is shifted into 1st gear, the shift drum slidesthe shift fork that’s attached to the sliding 3rd gear on the counter-shaft into freewheeling 1st gear. Since 1st gear on the main shaft isalso a sliding gear, this motion attaches the countershaft to the mainshaft. The fixed 5th gear on the countershaft will make the main drivegear rotate, delivering power to the final drive pulley.
Second GearWhen the transmission is shifted into second gear, the shift drumslides the countershaft, sliding 3rd gear out of the countershaftfreewheeling 1st gear and into the countershaft freewheeling 2ndgear. This attaches the countershaft to the main shaft (as the mainshaft 2nd gear is also a sliding gear). The transmission is fullyengaged now at a slightly higher gear ratio than when it was in firstgear. Output is realized through the countershaft fixed 5th gear again,delivering power to the final drive.
Third GearWhen the transmission is shifted into third gear, the shift drum mustdo two things at one time. Second gear must be disengaged bymoving the countershaft sliding 3rd gear away from countershaftfreewheeling 2nd gear, while the main shaft sliding 2nd gear slidesinto the main shaft freewheeling 3rd gear. Since 3rd gear on thecountershaft is a sliding gear, this again attaches the main shaft andcountershaft, but now in the third gear position. This drives the finaldrive through the countershaft 5th gear and out the main drive gear.
Harley-Davidson Maintenance 25
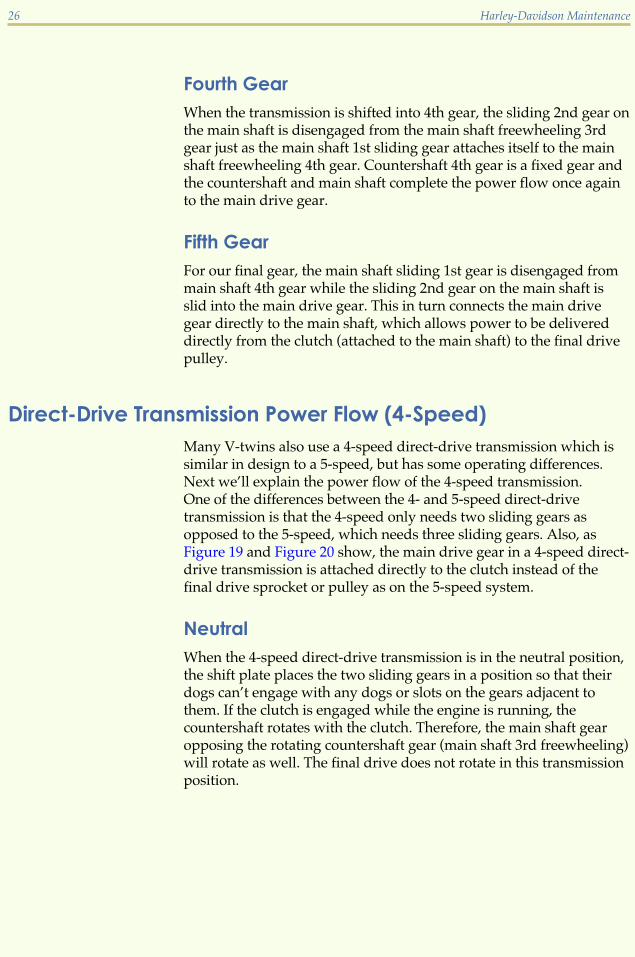
Fourth GearWhen the transmission is shifted into 4th gear, the sliding 2nd gear onthe main shaft is disengaged from the main shaft freewheeling 3rdgear just as the main shaft 1st sliding gear attaches itself to the mainshaft freewheeling 4th gear. Countershaft 4th gear is a fixed gear andthe countershaft and main shaft complete the power flow once againto the main drive gear.
Fifth GearFor our final gear, the main shaft sliding 1st gear is disengaged frommain shaft 4th gear while the sliding 2nd gear on the main shaft isslid into the main drive gear. This in turn connects the main drivegear directly to the main shaft, which allows power to be delivereddirectly from the clutch (attached to the main shaft) to the final drivepulley.
Direct-Drive Transmission Power Flow (4-Speed)Many V-twins also use a 4-speed direct-drive transmission which issimilar in design to a 5-speed, but has some operating differences.Next we’ll explain the power flow of the 4-speed transmission.One of the differences between the 4- and 5-speed direct-drivetransmission is that the 4-speed only needs two sliding gears asopposed to the 5-speed, which needs three sliding gears. Also, asFigure 19 and Figure 20 show, the main drive gear in a 4-speed direct-drive transmission is attached directly to the clutch instead of thefinal drive sprocket or pulley as on the 5-speed system.
NeutralWhen the 4-speed direct-drive transmission is in the neutral position,the shift plate places the two sliding gears in a position so that theirdogs can’t engage with any dogs or slots on the gears adjacent tothem. If the clutch is engaged while the engine is running, thecountershaft rotates with the clutch. Therefore, the main shaft gearopposing the rotating countershaft gear (main shaft 3rd freewheeling)will rotate as well. The final drive does not rotate in this transmissionposition.
26 Harley-Davidson Maintenance
Harley-Davidson Maintenance 27
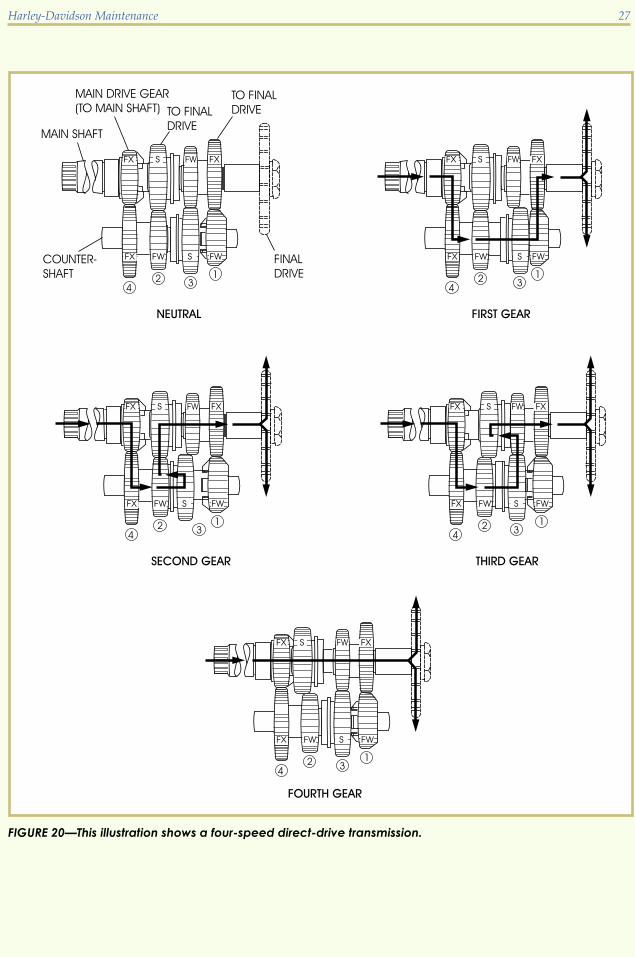
FIGURE 20—This illustration shows a four-speed direct-drive transmission.
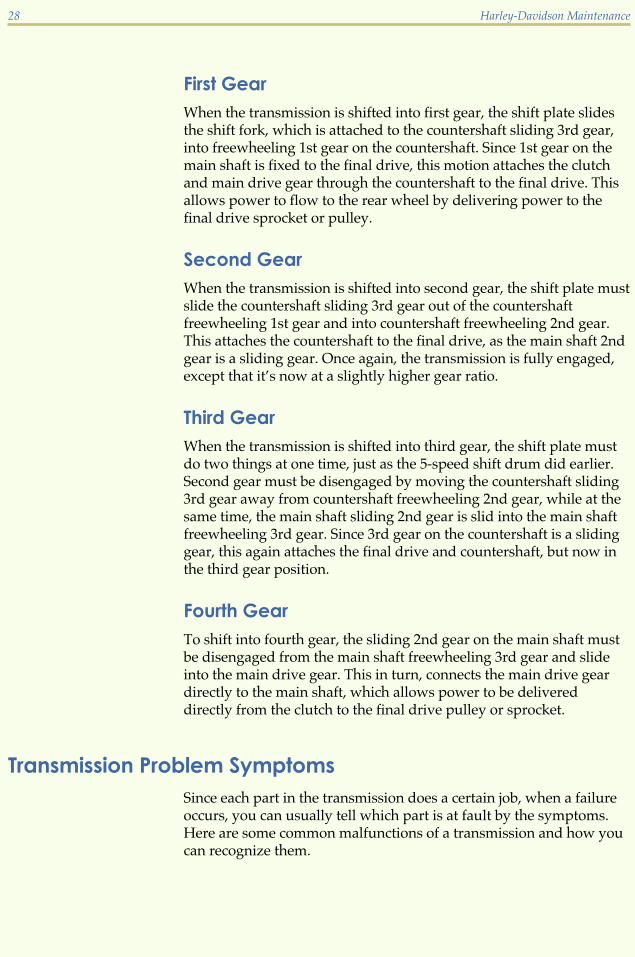
First GearWhen the transmission is shifted into first gear, the shift plate slidesthe shift fork, which is attached to the countershaft sliding 3rd gear,into freewheeling 1st gear on the countershaft. Since 1st gear on themain shaft is fixed to the final drive, this motion attaches the clutchand main drive gear through the countershaft to the final drive. Thisallows power to flow to the rear wheel by delivering power to thefinal drive sprocket or pulley.
Second GearWhen the transmission is shifted into second gear, the shift plate mustslide the countershaft sliding 3rd gear out of the countershaftfreewheeling 1st gear and into countershaft freewheeling 2nd gear.This attaches the countershaft to the final drive, as the main shaft 2ndgear is a sliding gear. Once again, the transmission is fully engaged,except that it’s now at a slightly higher gear ratio.
Third GearWhen the transmission is shifted into third gear, the shift plate mustdo two things at one time, just as the 5-speed shift drum did earlier.Second gear must be disengaged by moving the countershaft sliding3rd gear away from countershaft freewheeling 2nd gear, while at thesame time, the main shaft sliding 2nd gear is slid into the main shaftfreewheeling 3rd gear. Since 3rd gear on the countershaft is a slidinggear, this again attaches the final drive and countershaft, but now inthe third gear position.
Fourth GearTo shift into fourth gear, the sliding 2nd gear on the main shaft mustbe disengaged from the main shaft freewheeling 3rd gear and slideinto the main drive gear. This in turn, connects the main drive geardirectly to the main shaft, which allows power to be delivereddirectly from the clutch to the final drive pulley or sprocket.
Transmission Problem SymptomsSince each part in the transmission does a certain job, when a failureoccurs, you can usually tell which part is at fault by the symptoms.Here are some common malfunctions of a transmission and how youcan recognize them.
28 Harley-Davidson Maintenance
Difficult ShiftingWhen excessive clutch lever pressure is required to shift gears, it mayindicate either a clutch problem or a transmission problem. If theclutch is at fault, the symptom of grinding gears when shifting intolow or first gear will be evident. In most cases, if the clutch is at fault,a simple adjustment may solve the problem. When difficult shiftingoccurs between other gears while the motorcycle is moving, it’susually caused by a bent shift fork. When a shift fork has beendamaged, it no longer fits properly in the grooves of the gear. Thisproblem requires disassembly of the transmission and replacement ofthe shift fork. Difficult shifting can also be caused by a partially seizedgear on a transmission shaft. This problem is generally caused by thelack of proper lubrication and, as with the shift fork, disassembly ofthe transmission is required to repair this type of condition
Inability to Shift GearsSometimes you’ll find a machine that will shift into one gear, butwon‘t shift into the next gear. This problem is often caused by theshift return spring, which returns the shifting lever to its originalposition. This problem can usually be repaired by replacing thespring and in most cases won’t require the complete disassembly ofthe transmission. The spring is usually located near the clutchassembly.
Strange SoundsOccasionally you’ll have customers who will complain of strangesounds coming from the transmission of their motorcycle. Strangetransmission sounds can range from a low growl to a high-pitchedwhine. Next we’ll describe the most common noises that can usuallybe attributed to a problem with the transmission. Any unusual noisewhich is coming from the transmission will require you to disassem-ble and carefully inspect for and replace any worn or broken parts.
Constant growling sound. A low growling sound usually indicates abearing failure. When a bearing failure occurs, it may cause atransmission shaft to move slightly out of position. When this occurs,the gears won’t mesh properly and produce a low growling noise. Inthis case, not only does the bearing need replacing, but often the gearsneed replacing as well.
Clunking noises. Another characteristic sound which indicates atransmission problem is an excessive clunking sound when theengine is in a particular gear while under a load. Usually, thisindicates broken teeth on one or more gears. This condition requires acomplete disassembly as well as a complete inspection of all of thetransmission components as broken teeth will normally damage otherparts within the transmission.
Harley-Davidson Maintenance 29

Jumping Out of GearA transmission that jumps out of gear usually indicates that there areworn dogs or slots on the transmission gears. When dogs and slotsbecome excessively rounded, the gears tend to slip out of the holeswhen engine rpm increases, causing the engine to jump out of gear.In this situation, the gears as well as the shift forks need replacing.The shift forks need to be replaced because they become damagedfrom the excessive pressure caused from the gear jumping out of gear.
Road Test 2
1. The transmission provides gear shifting to allow increases in speed without overworkingthe _______.
2. True or False? The 4-speed direct-drive transmission is identical in design to the 5-speeddirect drive transmission except for the extra gear in the 5-speed system.
3. The _______-speed direct-drive transmission uses a shift drum to move the shift forks.
4. The _______-speed direct-drive transmission uses a cam plate to move the shift forks.
5. Define a constant-mesh transmission.
6. The letter “S” stands for which type of transmission gear?
7. A low growling sound in a transmission will usually indicate a _______ failure.
8. If you are working on a motorcycle that has a symptom of difficult shifting, what shouldyou adjust first to try to correct the problem?
Check your answers with those on page 47.
30 Harley-Davidson Maintenance
V-TWIN MOTORCYCLE DRIVE SYSTEMSAs with any motorcycle, the V-twin motorcycle uses three systems totransmit the power made at the engine to the rear wheel. Thesesystems are the primary drive system, the clutch system, and the finaldrive system.
Primary DrivesAll motorcycle engines require a gear-reduction system that’s used totransfer the power from the crankshaft to the transmission, and thenfrom the transmission to the rear wheel. The gear-reduction systemused for transferring the power from the crankshaft to the clutch iscalled the primary drive. As you already know, gear reduction isnecessary to allow the engine to remain in the appropriate rpm rangewhile maintaining various speeds at the rear wheel. In other words,we need gear reduction systems so that the engine can revolve at onespeed, while the rear wheel turns at another speed. A clutch is neededto engage and disengage the power from the crankshaft to thetransmission. Before we discuss and learn about the type of clutchused in V-twin motorcycles, we’ll first discuss the types of primarydrive systems found in this type of motorcycle engine.
There are two basic methods of connecting the engine to the clutchand transmission. A V-twin motorcycle primary drive systemtransfers power from the crankshaft to the clutch by using a chain or abelt.
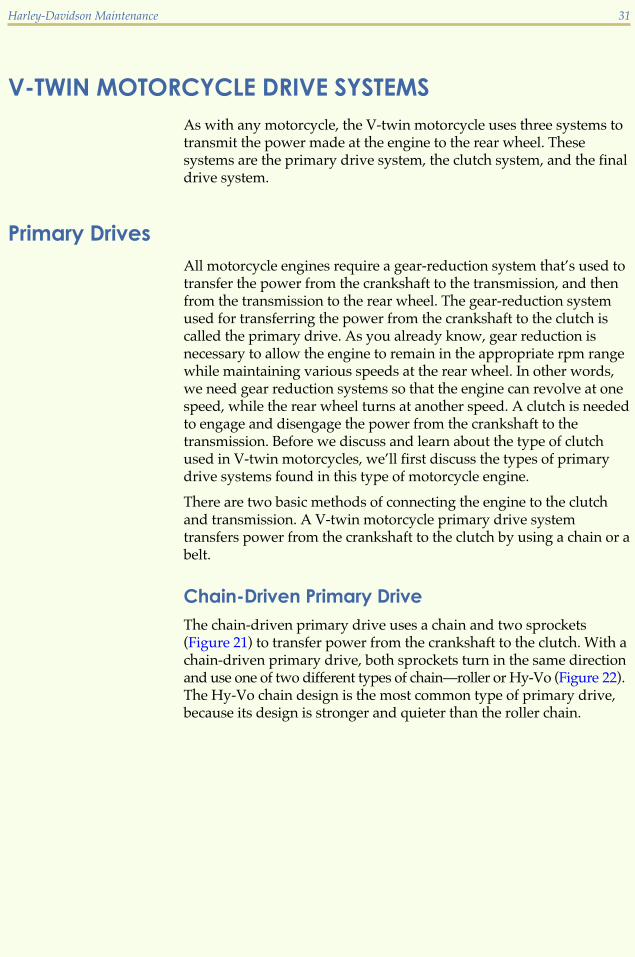
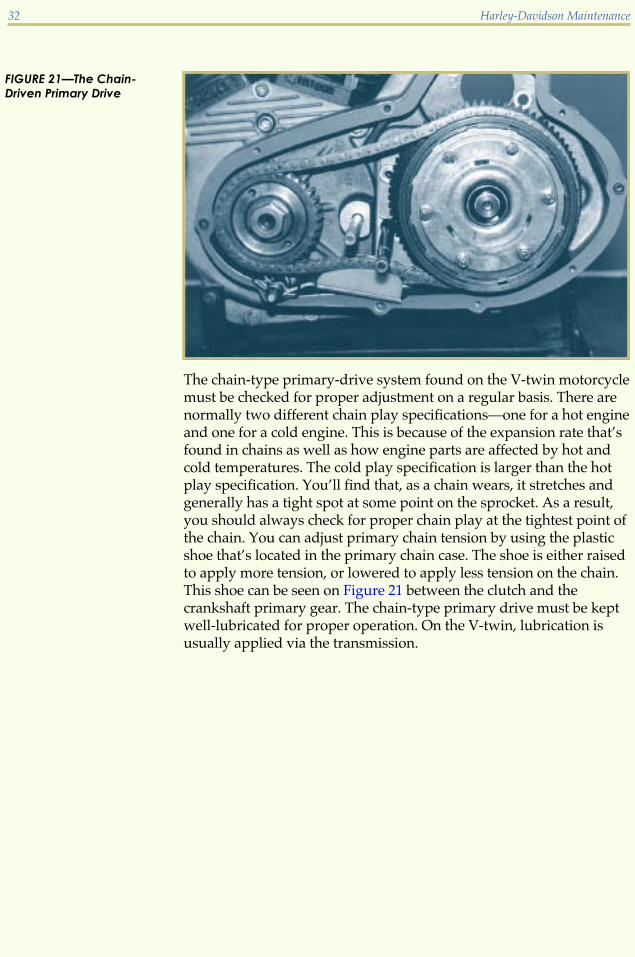
Chain-Driven Primary DriveThe chain-driven primary drive uses a chain and two sprockets(Figure 21) to transfer power from the crankshaft to the clutch. With achain-driven primary drive, both sprockets turn in the same directionand use one of two different types of chain—roller or Hy-Vo (Figure 22).The Hy-Vo chain design is the most common type of primary drive,because its design is stronger and quieter than the roller chain.
Harley-Davidson Maintenance 31
The chain-type primary-drive system found on the V-twin motorcyclemust be checked for proper adjustment on a regular basis. There arenormally two different chain play specifications—one for a hot engineand one for a cold engine. This is because of the expansion rate that’sfound in chains as well as how engine parts are affected by hot andcold temperatures. The cold play specification is larger than the hotplay specification. You’ll find that, as a chain wears, it stretches andgenerally has a tight spot at some point on the sprocket. As a result,you should always check for proper chain play at the tightest point ofthe chain. You can adjust primary chain tension by using the plasticshoe that’s located in the primary chain case. The shoe is either raisedto apply more tension, or lowered to apply less tension on the chain.This shoe can be seen on Figure 21 between the clutch and thecrankshaft primary gear. The chain-type primary drive must be keptwell-lubricated for proper operation. On the V-twin, lubrication isusually applied via the transmission.
32 Harley-Davidson Maintenance
FIGURE 21—The Chain-
Driven Primary Drive
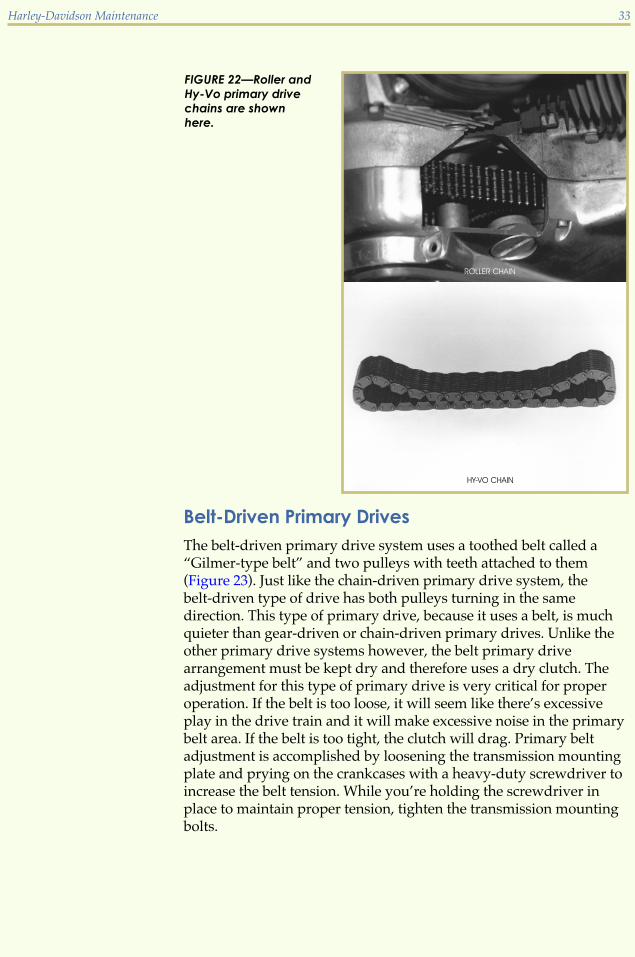
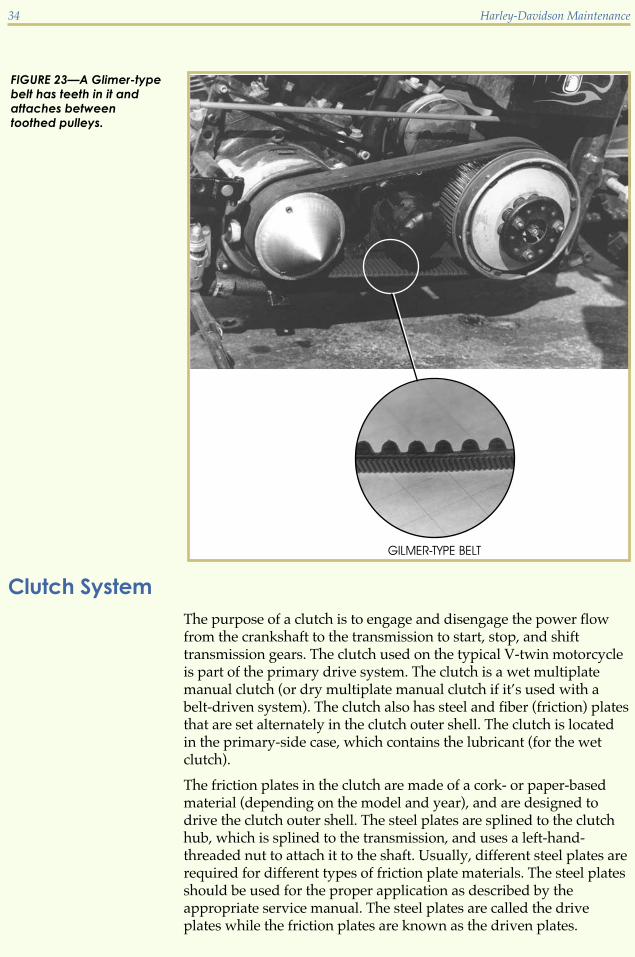
Belt-Driven Primary DrivesThe belt-driven primary drive system uses a toothed belt called a“Gilmer-type belt” and two pulleys with teeth attached to them(Figure 23). Just like the chain-driven primary drive system, thebelt-driven type of drive has both pulleys turning in the samedirection. This type of primary drive, because it uses a belt, is muchquieter than gear-driven or chain-driven primary drives. Unlike theother primary drive systems however, the belt primary drivearrangement must be kept dry and therefore uses a dry clutch. Theadjustment for this type of primary drive is very critical for properoperation. If the belt is too loose, it will seem like there’s excessiveplay in the drive train and it will make excessive noise in the primarybelt area. If the belt is too tight, the clutch will drag. Primary beltadjustment is accomplished by loosening the transmission mountingplate and prying on the crankcases with a heavy-duty screwdriver toincrease the belt tension. While you’re holding the screwdriver inplace to maintain proper tension, tighten the transmission mountingbolts.
Harley-Davidson Maintenance 33
FIGURE 22—Roller and
Hy-Vo primary drive
chains are shown
here.
Clutch SystemThe purpose of a clutch is to engage and disengage the power flowfrom the crankshaft to the transmission to start, stop, and shifttransmission gears. The clutch used on the typical V-twin motorcycleis part of the primary drive system. The clutch is a wet multiplatemanual clutch (or dry multiplate manual clutch if it’s used with abelt-driven system). The clutch also has steel and fiber (friction) platesthat are set alternately in the clutch outer shell. The clutch is locatedin the primary-side case, which contains the lubricant (for the wetclutch).
The friction plates in the clutch are made of a cork- or paper-basedmaterial (depending on the model and year), and are designed todrive the clutch outer shell. The steel plates are splined to the clutchhub, which is splined to the transmission, and uses a left-hand-threaded nut to attach it to the shaft. Usually, different steel plates arerequired for different types of friction plate materials. The steel platesshould be used for the proper application as described by theappropriate service manual. The steel plates are called the driveplates while the friction plates are known as the driven plates.
34 Harley-Davidson Maintenance
FIGURE 23—A Glimer-type
belt has teeth in it and
attaches between
toothed pulleys.
The clutch outer shell is made up of pieces riveted together thatcontain the outer shell, the primary drive sprocket, and the electricstarter gear. Some models even include the charging system rotor onthe clutch outer shell. These clutches contain multiple coil springs or adiaphragm-type spring that applies pressure against the friction andsteel plates to ensure a positive clutch engagement.
Clutch LubricationThe primary chain-case lubricant (which again, is used to lubricatethe clutch) should be changed in accordance with the manufacturer’srecommendations. You can drain the lubricant into a suitablecontainer by removing the drain plug at the bottom of the primarychain case. After draining the oil and installing the drain plug, youcan refill the chain case through the clutch cover opening with therecommended amount of oil. When you have the correct amount oflubricant in the case, the lubricant is level with the bottom of the outerdiameter of the diaphragm spring, or the lubricant overflows out ofthe oil level screw hole (depending on the model). Refilling the oilshould be done when the motorcycle is standing in an upright andlevel position.
Clutch AdjustmentTo obtain the maximum life from the clutch on a V-twin motorcycle,it’s very important to perform the correct clutch adjustmentprocedure at every service interval. Also, if any clutch componentsare replaced during normal servicing, the clutch must be adjusted.
Clutch adjustment should be performed with the motorcycle at roomtemperature, since the clearance at the adjuster screw will increase asthe power train temperature increases. If the clutch is adjusted whilethe engine is hot, clearance at the push rod bearing will be insufficientand clutch slippage will occur. The clutch cable adjuster is locatedmidway between the clutch cable ends.
As with the previous study units, the procedures in this study unitare general in nature and not intended to be used for actualdisassembly and repair. Their purpose is to familiarize you with thetypes of activities you’ll encounter. Always refer to the appropriatemotorcycle or ATV service guide for maintenance information. Theservice guide contains all the information to do the job correctly,including: detailed instructions for the specific make and model ofmotorcycle or ATV, special tools, and service tips. Above all, theservice guide contains the appropriate safety information.
The following example steps will help you to understand how toadjust the clutch.
Harley-Davidson Maintenance 35
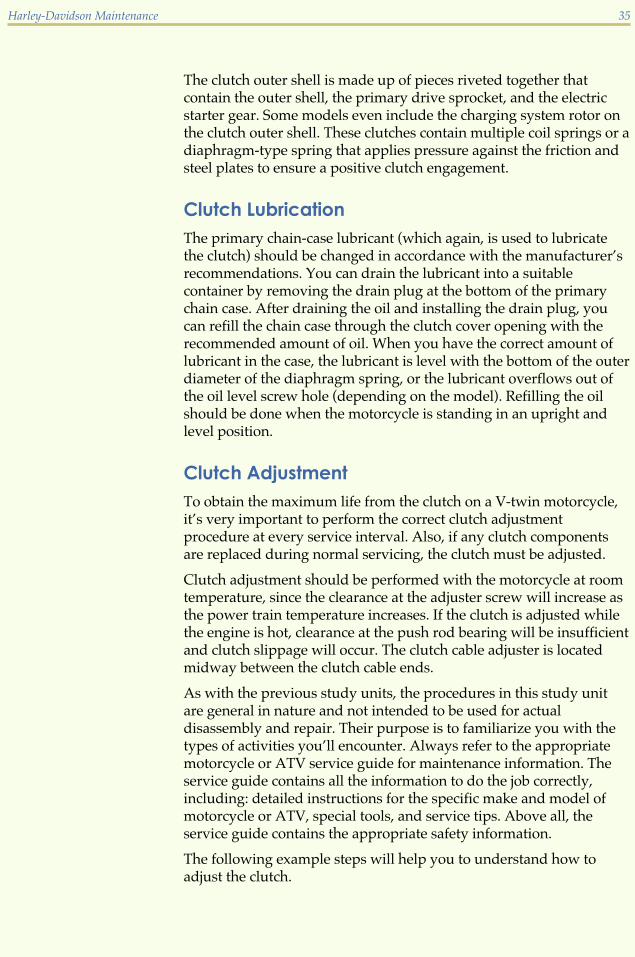
1 Loosen the lock nut and turn theadjuster in all the way to providemaximum play in the cable at theclutch lever.
2 Loosen the clutch adjuster screwlock nut (which is located underthe clutch access plug) and turnthe push rod adjusting screwinward (clockwise) to take up anyof the play in the push rods.
3 Back out the adjusting screw 12 to
1 full turn and tighten the lock nutwhile holding the adjusting screwwith an Allen wrench.
36 Harley-Davidson Maintenance

4 Pull the clutch lever in all the way(you may have to do this multipletimes) to set the ball and ramprelease mechanism.
5 Adjust the cable adjuster toprovide 1
16 - 18 inch play at the
clutch lever, then tighten the cablelock nut and return the adjusterboot over the adjuster.
Common Clutch ProblemsThere are two common clutch problems found with the V-twinmultiplate manual clutch. The first is a clutch that “slips.” Clutchslippage occurs when the clutch doesn’t have the ability to transfer allof the engine’s power flow. The clutch will slip if the rider releases theclutch lever and the motorcycle engine revs up without any powergoing to the rear wheel. This problem may be caused by improperclutch adjustment, a weak clutch spring, or worn clutch plates.
The second common problem that may be found with a clutch isknown as clutch “drag.” Clutch drag occurs when the clutch is unableto fully disengage. Clutch drag will be evident when the enginepower can’t be disengaged from the rear wheel. An example of thiscondition is when the clutch lever is squeezed in and the motorcycleis still trying to move forward. This condition may be caused bywarped or binding clutch plates, a worn clutch outer shell or clutchhub, improper clutch adjustment, or a worn release mechanism.
Manual Clutch OperationWe’ll now review the operation of a multiplate manual clutch as it’sused on the V-twin motorcycle. It may also be helpful to review thematerial that was presented in the study unit Clutches, Transmissions,and Drives.
Clutch disengaged. When the clutch lever is pulled, the clutch pushrod pushes against the clutch lifter rod. The clutch lifter appliespressure to the clutch pressure plate, resulting in a gap between theclutch discs and clutch plates. This separates the power of thecrankshaft from the rear wheel.
Harley-Davidson Maintenance 37
Clutch engaged. When the transmission is shifted into gear, and theclutch lever is gradually released, the discs and plates become caughtbetween the pressure plate and the clutch center. This now preventsthe clutch from slipping and the power of the crankshaft is againcompletely transmitted to the rear wheel.
Final DrivesThere are two common final drive systems used on V-twinmotorcycles—chain and belt.
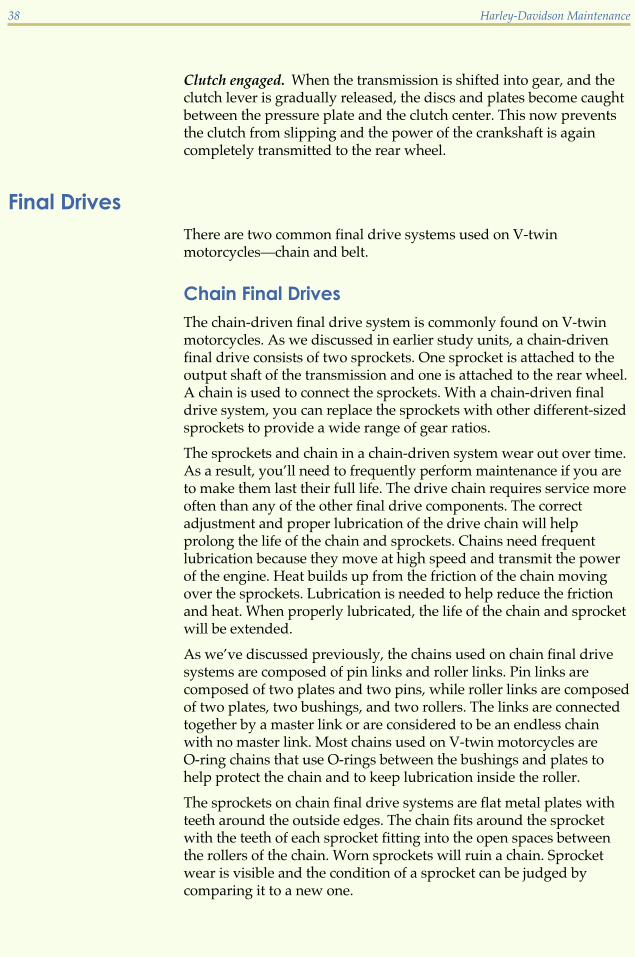
Chain Final DrivesThe chain-driven final drive system is commonly found on V-twinmotorcycles. As we discussed in earlier study units, a chain-drivenfinal drive consists of two sprockets. One sprocket is attached to theoutput shaft of the transmission and one is attached to the rear wheel.A chain is used to connect the sprockets. With a chain-driven finaldrive system, you can replace the sprockets with other different-sizedsprockets to provide a wide range of gear ratios.
The sprockets and chain in a chain-driven system wear out over time.As a result, you’ll need to frequently perform maintenance if you areto make them last their full life. The drive chain requires service moreoften than any of the other final drive components. The correctadjustment and proper lubrication of the drive chain will helpprolong the life of the chain and sprockets. Chains need frequentlubrication because they move at high speed and transmit the powerof the engine. Heat builds up from the friction of the chain movingover the sprockets. Lubrication is needed to help reduce the frictionand heat. When properly lubricated, the life of the chain and sprocketwill be extended.
As we’ve discussed previously, the chains used on chain final drivesystems are composed of pin links and roller links. Pin links arecomposed of two plates and two pins, while roller links are composedof two plates, two bushings, and two rollers. The links are connectedtogether by a master link or are considered to be an endless chainwith no master link. Most chains used on V-twin motorcycles areO-ring chains that use O-rings between the bushings and plates tohelp protect the chain and to keep lubrication inside the roller.
The sprockets on chain final drive systems are flat metal plates withteeth around the outside edges. The chain fits around the sprocketwith the teeth of each sprocket fitting into the open spaces betweenthe rollers of the chain. Worn sprockets will ruin a chain. Sprocketwear is visible and the condition of a sprocket can be judged bycomparing it to a new one.
38 Harley-Davidson Maintenance
As we mentioned, the largest benefit of using the chain-type finaldrive system is the wide variety of available sprocket sizes that allowyou to change the gear ratio for the final drive to match your ridingconditions.
Chain maintenance. To properly lubricate the chain, first brush offany dirt and grime using a soft hand brush. Then lubricate the chainusing a high-quality chain lubricant. It’s important to lubricate thechain between the side plates and rollers to allow for maximumlubrication. To clean an excessively dirty chain, you must remove thechain from the motorcycle. To do this, you must locate and removethe spring clip on the chain master link, then press the master linkfrom the side plate using a special tool which is available at mostmotorcycle dealership parts departments. Once removed, you’ll needto soak and wash the chain thoroughly in a pan of solvent, such askerosene. Be sure to wear eye protection when performing thisprocedure. After you’ve thoroughly cleaned the chain, you canremove it from the solvent and dry it using compressed air or wipe itclean and dry with a clean shop rag. If using compressed air to drythe chain, eye protection is a must. After the chain is clean and dry,you’ll need to apply chain lubricant, wipe all excess lubricant fromthe chain surface, and then reinstall the chain onto the motorcycle.
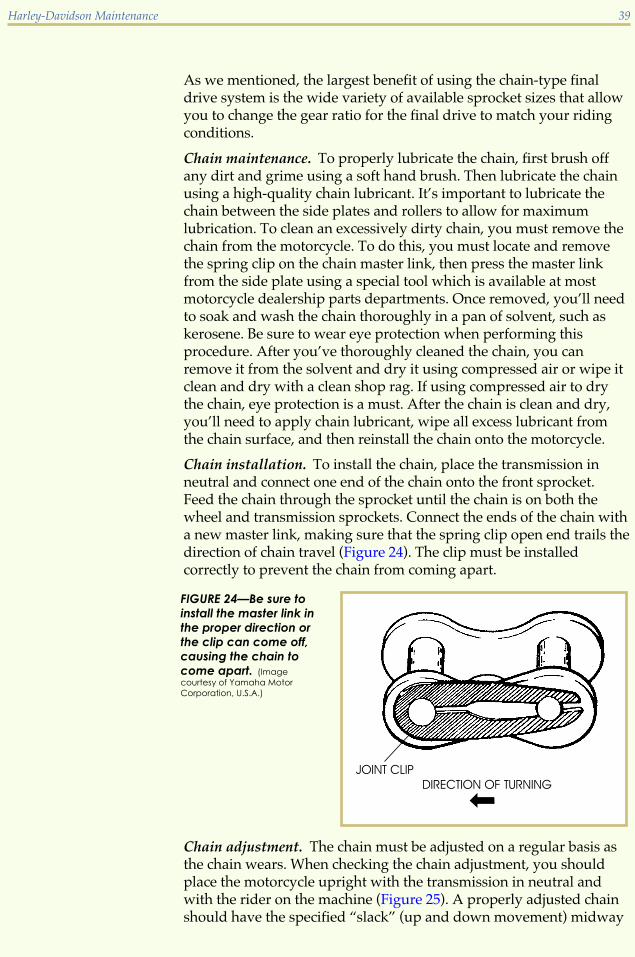
Chain installation. To install the chain, place the transmission inneutral and connect one end of the chain onto the front sprocket.Feed the chain through the sprocket until the chain is on both thewheel and transmission sprockets. Connect the ends of the chain witha new master link, making sure that the spring clip open end trails thedirection of chain travel (Figure 24). The clip must be installedcorrectly to prevent the chain from coming apart.
Chain adjustment. The chain must be adjusted on a regular basis asthe chain wears. When checking the chain adjustment, you shouldplace the motorcycle upright with the transmission in neutral andwith the rider on the machine (Figure 25). A properly adjusted chainshould have the specified “slack” (up and down movement) midway
Harley-Davidson Maintenance 39
FIGURE 24—Be sure to
install the master link in
the proper direction or
the clip can come off,
causing the chain to
come apart. (Image
courtesy of Yamaha Motor
Corporation, U.S.A.)
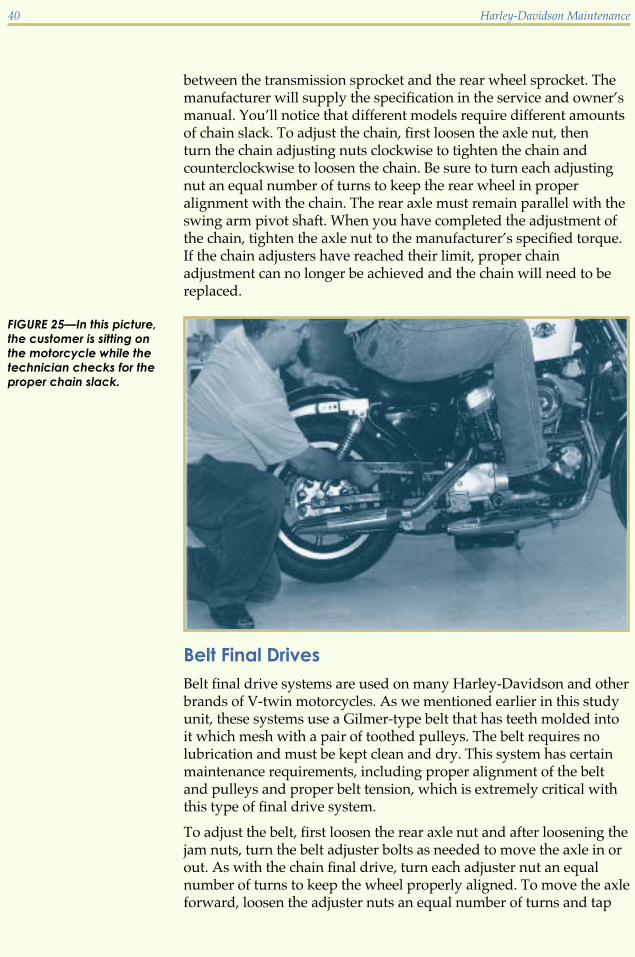
between the transmission sprocket and the rear wheel sprocket. Themanufacturer will supply the specification in the service and owner’smanual. You’ll notice that different models require different amountsof chain slack. To adjust the chain, first loosen the axle nut, thenturn the chain adjusting nuts clockwise to tighten the chain andcounterclockwise to loosen the chain. Be sure to turn each adjustingnut an equal number of turns to keep the rear wheel in properalignment with the chain. The rear axle must remain parallel with theswing arm pivot shaft. When you have completed the adjustment ofthe chain, tighten the axle nut to the manufacturer’s specified torque.If the chain adjusters have reached their limit, proper chainadjustment can no longer be achieved and the chain will need to bereplaced.
Belt Final DrivesBelt final drive systems are used on many Harley-Davidson and otherbrands of V-twin motorcycles. As we mentioned earlier in this studyunit, these systems use a Gilmer-type belt that has teeth molded intoit which mesh with a pair of toothed pulleys. The belt requires nolubrication and must be kept clean and dry. This system has certainmaintenance requirements, including proper alignment of the beltand pulleys and proper belt tension, which is extremely critical withthis type of final drive system.
To adjust the belt, first loosen the rear axle nut and after loosening thejam nuts, turn the belt adjuster bolts as needed to move the axle in orout. As with the chain final drive, turn each adjuster nut an equalnumber of turns to keep the wheel properly aligned. To move the axleforward, loosen the adjuster nuts an equal number of turns and tap
40 Harley-Davidson Maintenance
FIGURE 25—In this picture,
the customer is sitting on
the motorcycle while the
technician checks for the
proper chain slack.
lightly on the ends of the adjuster studs using a soft-tipped hammer.In most cases, to get the proper belt tension required by themanufacturer, a belt tension tool is required. This special tool isavailable from your local dealer. After verifying the belt tension,tighten the rear axle nut to the specified torque given by themanufacturer. On some models, you aren’t required to loosen the axlenut to adjust the belt tension. The service or owner’s manual willspecify this when necessary.
Road Test 3
1. The clutch found on V-twin motorcycles is part of the _______ drive system.
2. On motorcycles that use a primary drive with a chain, what type of clutch design is used?
3. The clutch outer shell contains pieces that are _______ together.
4. The V-twin motorcycle has a primary drive system that uses a chain or _______ to transmitpower from the crankshaft to the transmission.
5. Primary chain tension is adjusted by a shoe located in the _______.
6. True or False? The clutch outer shell may also include the charging system rotor as part ofthe component.
7. Which chain used in a primary drive system is the most common?
8. The friction plate material used in a clutch is made of a _______ or _______ material.
9. True or False? Adjustments to a clutch should be made while the engine is at its normaloperating temperature.
10. True or False? When the clutch is engaged, the power of the crankshaft to the rear wheel isseparated.
Check your answers with those on page 47.
Harley-Davidson Maintenance 41
V-TWIN MAINTENANCEThe reliability and longevity of any engine is dependent on the routinemaintenance it receives. The valve trains on Harley-Davidson V-twinsrequire specific and careful attention in order to run long and strong.First we’ll discuss routine maintenance on engines like the Shovelheadand the Evolution; then we’ll go over some points specific toHarley-Davidson chassis maintenance.
The first step in any tune up is to obtain the proper factory workshopmanual for the motorcycle in question and follow it carefully. Now isa good time to put into practice all of the concepts and methods youlearned in previous chapters.
The Shovelhead engine uses hydraulic valve adjusters, or tappets, muchlike those found in American automobiles. Although they’re designedto maintain valve clearance, these adjusters encounter heat and wearand therefore require periodic adjustment.
Remember that the engine must be cold before you can set the valves.Begin the procedure for setting the valve clearance by removing thespark plugs. This makes it much easier to turn the engine over whileyou find top dead-center compression. You must have the piston ontop dead-center compression before you set the valves.
Watch the rocker arms as you turn the engine over. If you have thepiston at top dead-center and the intake valve is closed, you have theengine set correctly. Once you’ve determined that the cylinder you’reconcerned with is in the correct position, slide the pushrod covers outof the way to expose the adjusters. Loosen the adjuster lock nut on thepushrod, and turn the adjuster up until there’s some up-and-downplay in the pushrod. At this time, turn the adjuster down until you’veremoved all of the play. Look for the split in the lock nut; you can useit as a reference mark. (You may have to turn the lock nut in order tosee the split.)
Turn the adjuster down four full turns. (This is the specification listedin the factory workshop manual.) You may choose to add anotherhalf-turn, which takes all of the play out of a well-used adjuster andlock nut assembly. At this point, tighten down the lock nut and repeatthe procedure for the other valve’s pushrod.
You need to be careful here, because the hydraulic tappet is full of oiland holding the valve off its seat. It will take several minutes for thevalve spring to compress the oil out of the hydraulic tappet. After you’vewaited five minutes, repeat the process for the other cylinder, remem-bering to find top dead-center compression for that cylinder as well.
As long as you’re inspecting the top end, it’s a good idea to check theside-to-side clearance of the rocker arms. This clearance will manifestitself as a tapping or ticking noise that sounds very much like a loosevalve. With the piston on top dead-center compression, try to slide
42 Harley-Davidson Maintenance
the intake rocker arm back and forth. It should only have a .004-inchplay. Aftermarket manufacturers make shims that allow you to setthis clearance properly. Just make certain that you keep the rockerarm centered over the valve stem while you shim out the excessplay.
Spark PlugsAs long as you have the spark plugs out for the valve adjustment, youshould check their condition. Sooty, black plugs indicate a carburetionproblem; while plugs with rounded center electrodes are ready forreplacement. If your plugs are ready for replacement, make sure togap them according to the factory specification. The gap should fallbetween .020-inch and .043-inch, depending on the year and modelyou’re servicing. Also, make sure you have the correct heat range.Never replace the plugs found in the engine without checking whetheror not the replacements are the correct type. Always go by whatthe manual specifies.
CarburetorHarley-Davidson has been using Keihin carburetors for more than12 years, and these have proven easy to tune given the propermaintenance. To begin the process, warm the bike up to operatingtemperature. Remove the air cleaner and check that the butterflyopens fully. If it doesn’t, adjust the throttle cable. After adjusting thethrottle cable, swing the handlebars from side-to-side to make surethere’s sufficient free play. The engine should maintain the set idlespeed as the bars move from side-to-side.
Now find the idle mixture screw. This is located on top of thecarburetor under an aluminum anti-tamper cap that must beremoved before the idle mixture can be adjusted. Drill a 1/8� holein it and thread a sheet metal screw into the hole. Use the sheet metalscrew to pull out the anti-tamper cap. Be careful you don’t drill thehole too deeply, or you’ll damage the idle mixture screw. To preventthis from happening, wrap a piece of tape around the drill bit .100� inchfrom the end of the bit. The position of the tape will indicate whenyou’ve drilled deeply enough.
Turn the idle mixture screw in or out until you achieve the highest idle.If the idle speed creeps above the speed listed in the manual, resetit with the idle stop-screw and readjust the mixture screw. You’llknow that you’ve set the mixture screw properly if the idle speeddrops when you turn the mixture screw in and out from your setting.
The correct setting should be very close to the one listed in the manual,somewhere between a half-turn and 1 1
4 turns out. If you find that the
Harley-Davidson Maintenance 43
engine runs best with the mixture screw set at less than a half-turn,then the idle jet is too large. If you find the opposite is true, then theidle jet is too small. Of course, this will be the case only if the enginehas been modified from stock or if there’s some problem with it, suchas bad rings or valves that aren’t seating properly.
Replace the anti-tamper cap with a new one when you’re finished withthe carburetor. Drive it in carefully with a small ball peen hammer.Also, the air filter should be replaced if it’s excessively dirty. Filtersusually last for about 10,000 miles, but this figure varies according toriding conditions. If the bike is operated on dirt roads, the filtershould be replaced more often.
Harley-Davidson makes an excellent replacement-filter kit under the“Screamin’ Eagle” name. This filter is made of oil-pleated paper andcatches dirt particles as small as five microns in size. Filters actuallywork better once they’re a little dirty, and they can be washed andreused several times.
Oil LevelsThe Harley-Davidson engine is much more sensitive to dirty oil thanan automobile engine. HD engines contain rolling element bearings inthe crank train, and dirt can ruin these bearings in short order. A car hasplain bearings, and dirt often embeds itself in the soft bearing materialwithout harming the journal. For this reason, Harley-Davidsonengines should receive frequent oil and filter changes. The oil shouldbe changed every 2,000 miles, while the filter should be with every oilchange.
If you drain the oil and find that there’s more than a quart in thecrankcase, this is a signal that the oil pump has a bad check valve. TheHarley-Davidson engine is of a dry sump design and, as such, containsan oil pump that draws oil out of the crankcase and back into the oiltank. Excess oil in the crankcase results in smoking and plug-fouling.The most common cause of “wet sumping” is a bad check ball.
ChassisAfter you’ve serviced the engine, it’s time to address the chassis. We’vealready talked about adjusting the final drive chain or belt, but you’llalso need to check the brake pads for wear. Any pad worn unevenlyor down to the wear indicators must be replaced immediately.
If the bike has hydraulic brakes, the fluid must be checked. Replace thefluid if it has been two years or longer since the last change, or simplytop it off if the fluid is still clear. Be careful what kind of fluid you’readding. Some types aren’t compatible. Check with the owner of the
44 Harley-Davidson Maintenance
bike if you’re in doubt. Failure to do so will necessitate a completetear-down of the braking system.
Go over the rest of the bike. The cables should be lubed with a lightoil, such as ATF or 3-In-1; their free play should also be set to factoryspecifications. Check for frayed cables, especially at the levers. Inaddition, remove and lube the pivot bolts from the clutch and brakelevers. You can improve the shifting dramatically with this simpleexercise.
The tires should be checked next, as you pay special attention to thewear bars molded into the tread. If the wear bars are flush with thesurface of the tire, then the tire is ready for replacement. Tire pressuresare listed in the owner’s manual and should be strictly adhered to. Ifthe bike you’re servicing has tires other than those it came with, youcan find the recommended pressures from the manufacturer. Thefactory-recommended tire pressures generally apply for aftermarkettires as well.
The level in the battery is very important, and any chassis tune-up isincomplete without a battery-servicing. Replace the electrolyte withdistilled water. You may want to test the specific gravity with ahydrometer for a more complete picture of the battery condition. Asyou’ll remember from past study units, the proper specific gravityshould be between 1.275 and 1.30.
By virtue of their 45� V-twin engines, Harley-Davidson engines vibrate.This vibration causes bolts and nuts to loosen over time. Go over allexternal fasteners and check to see that they’re properly torqued. Athread-locking compound is very useful in keeping bolts tight thatfrequently become loose. Make sure you thoroughly clean the threads ofany bolt you treat with thread locker; this will help it perform properly.
Now check the fork seals for leakage. Fork oil that gets past the forkseal will often leak onto the brake caliper and cause a loss of brakingpower. Fork seals should be replaced as soon as possible to prevent dirtfrom getting into the fork and slider. Then, while you’re inspecting thefork seals, check the front wheel and steering head for worn bearings.
You should know that Harley-Davidson motorcycles contain taperedwheel bearings in the front wheel that require more care than the sealedball bearings found in Japanese bikes. Use lithium grease to lube thesebearings. Heavy wheel-bearing grease will be squeezed out of therollers as they rotate. However, make sure the bearing spacer is setcorrectly. A dial indicator set on the end of the axle in the front wheelshould indicate .004�–.018� of axial play. If that’s not the measurementyou get, you’ll need to select one of three different-sized bearing spacersavailable from Harley-Davidson.
Harley-Davidson Maintenance 45
You’ve now completed a thorough maintenance check of a typicalAmerican V-twin motorcycle. Proper maintenance is essential inkeeping any bike running well. It also contributes to the safety of therider. Poorly maintained bikes are accidents waiting to happen.
46 Harley-Davidson Maintenance
Road Test 4
1. What’s the first step in setting valve clearance?
________________________________________________________________________________
2. True or False? Spark plugs with square-shaped center electrodes should be replaced.
3. What signifies that the idle jet is too small?
________________________________________________________________________________
4. True or False? Filters only work well when they’re completely clean.
Check your answers with those on page 47.
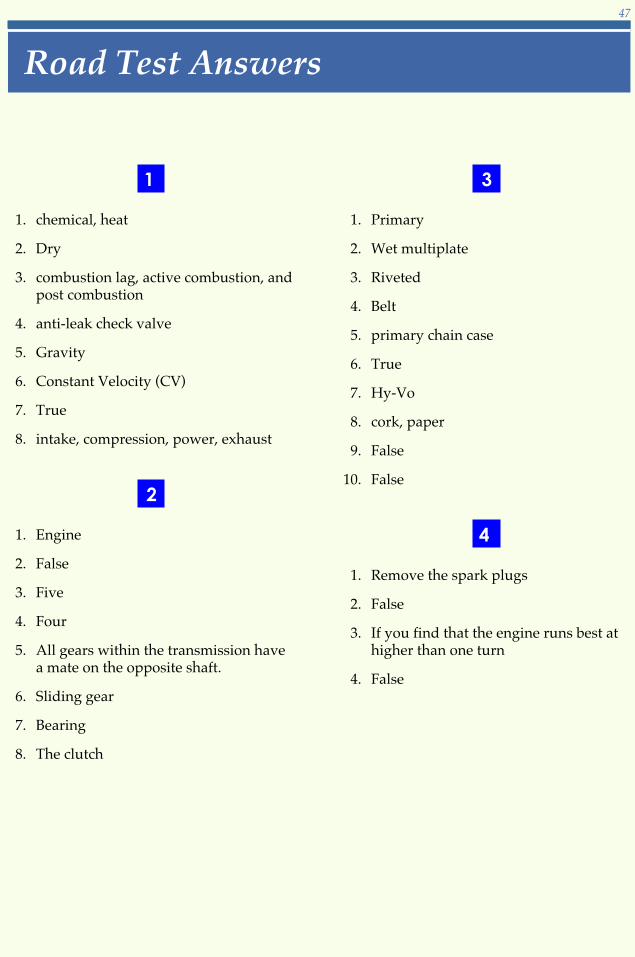
1
1. chemical, heat
2. Dry
3. combustion lag, active combustion, andpost combustion
4. anti-leak check valve
5. Gravity
6. Constant Velocity (CV)
7. True
8. intake, compression, power, exhaust
2
1. Engine
2. False
3. Five
4. Four
5. All gears within the transmission havea mate on the opposite shaft.
6. Sliding gear
7. Bearing
8. The clutch
3
1. Primary
2. Wet multiplate
3. Riveted
4. Belt
5. primary chain case
6. True
7. Hy-Vo
8. cork, paper
9. False
10. False
4
1. Remove the spark plugs
2. False
3. If you find that the engine runs best athigher than one turn
4. False
Road Test Answers
47

ONLINE EXAMINATION
When you’re confident that you’ve mastered the material in your studies, you cancomplete your examination online. Follow these instructions:
2. Click the Back button on your browser.3. Click the Take an Exam button near the top of the screen. 4. Type in the eight-digit examination number.
Examination
For the online exam, you must use this
EXAMINATION NUMBER:
03302000
1. Write down the eight-digit examination number shown in the box above.