Stitched Up Stocking By Joanna Marsh - Janome...the seams of the stocking. Start sewing about 1”...
13
www.janome.com Page 1 Stitched Up Stocking By Joanna Marsh “Wouldn’t you know that every year Christmas sneaks up on me? It never fails that there is usually another family member to add to the Christmas lists and I love to make new stockings to welcome them! Select from dozens of decorative stitches on the Horizon Memory Craft 8900QCP Special Edition to embellish a simple strip pieced stocking and you will have your new stockings knocked out in no time!” Joanna Marsh of Kustom Kwilts and Designs Skill Level: Beginner to Intermediate Sewing Time: 4 hours Janome Supplies Required: • Memory Craft 8900QCP Special Edition • Standard Sewing Foot A • 1/4 Seam Foot O • Red Tip Needle • Pre-wound bobbin • Empty bobbin Fabrics/Notions Required for 1 Stocking: • Stocking template, printed at 100% and assembled according to letter markings on template pieces. • 4-5 various fat quarter prints sub cut into: - (10) 16” x 12 1/2” (cut 2-3 strips from each fat quarter) - (1) 2” x 10” for stocking loop • 1 fat quarter for stocking back • 1/2 yard of lining fabric for the interior of the stocking • 1/2 yard of fabric (won’t be visible when the stocking is complete) sub cut into: - (2) 18” x 20” • Batting, sub cut into: - (2) 18” x 20” • Coordinating all-purpose sewing thread • Decorative sewing thread Student Supplies Required: • Marking pen/tailors chalk • Rotary cutter/ruler/mat • Fabric scissors • Safety pins • Binding clips • Iron • Spray starch (optional)
Transcript of Stitched Up Stocking By Joanna Marsh - Janome...the seams of the stocking. Start sewing about 1”...

www.janome.comPage 1
Stitched Up StockingBy Joanna Marsh
“Wouldn’t you know that every year Christmas sneaks up on me? It never fails that there is usually another family member to add to the Christmas lists and I love to make new stockings to welcome them! Select from dozens of decorative stitches on the Horizon Memory Craft 8900QCP Special Edition to embellish a simple strip pieced stocking and you will have your new stockings knocked out in no time!” Joanna Marsh of Kustom Kwilts and Designs
Skill Level: Beginner to IntermediateSewing Time: 4 hours
Janome Supplies Required:• Memory Craft 8900QCP Special Edition• Standard Sewing Foot A• 1/4 Seam Foot O• Red Tip Needle• Pre-wound bobbin• Empty bobbin
Fabrics/Notions Required for 1 Stocking:• Stocking template, printed at 100% and assembled according to letter markings on template pieces.• 4-5 various fat quarter prints sub cut into: - (10) 16” x 12 1/2” (cut 2-3 strips from each fat quarter) - (1) 2” x 10” for stocking loop• 1 fat quarter for stocking back• 1/2 yard of lining fabric for the interior of the stocking• 1/2 yard of fabric (won’t be visible when the stocking is complete) sub cut into: - (2) 18” x 20”• Batting, sub cut into: - (2) 18” x 20”• Coordinating all-purpose sewing thread• Decorative sewing thread
Student Supplies Required:• Marking pen/tailors chalk• Rotary cutter/ruler/mat• Fabric scissors• Safety pins• Binding clips• Iron• Spray starch (optional)
www.janome.comPage 2
Stitched Up Stocking
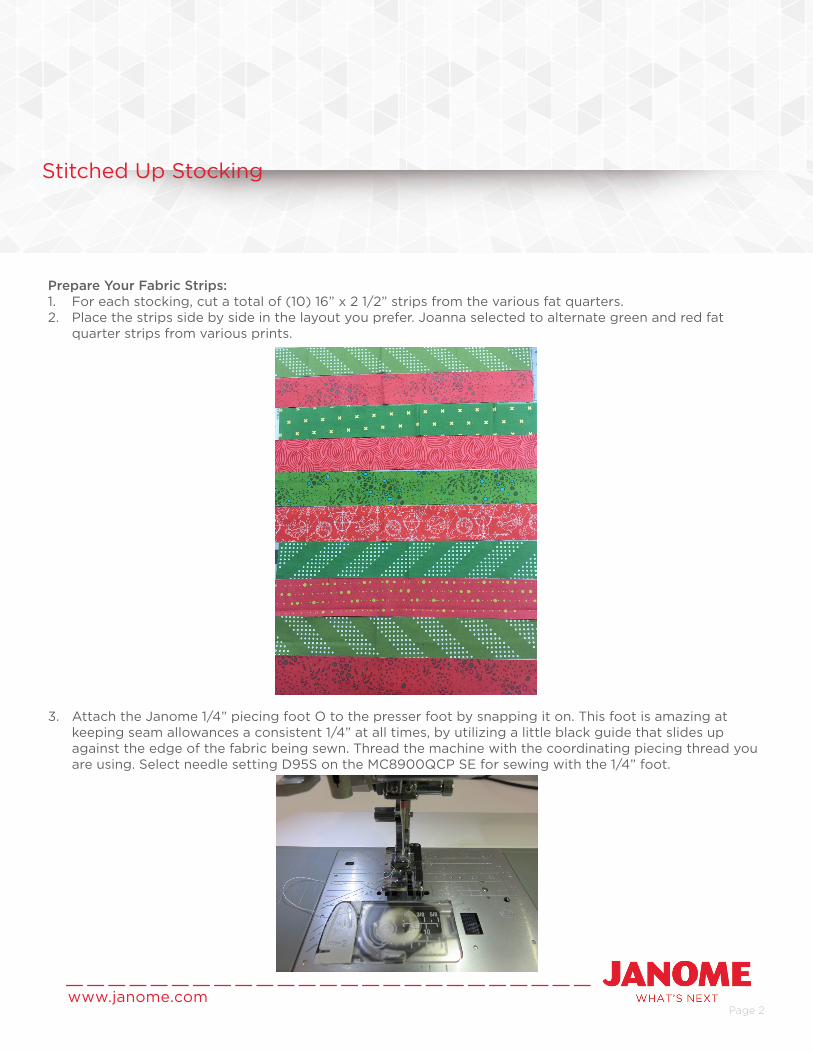
Prepare Your Fabric Strips:1. For each stocking, cut a total of (10) 16” x 2 1/2” strips from the various fat quarters.2. Place the strips side by side in the layout you prefer. Joanna selected to alternate green and red fat
quarter strips from various prints.
3. Attach the Janome 1/4” piecing foot O to the presser foot by snapping it on. This foot is amazing at keeping seam allowances a consistent 1/4” at all times, by utilizing a little black guide that slides up against the edge of the fabric being sewn. Thread the machine with the coordinating piecing thread you are using. Select needle setting D95S on the MC8900QCP SE for sewing with the 1/4” foot.
www.janome.comPage 3
Stitched Up Stocking
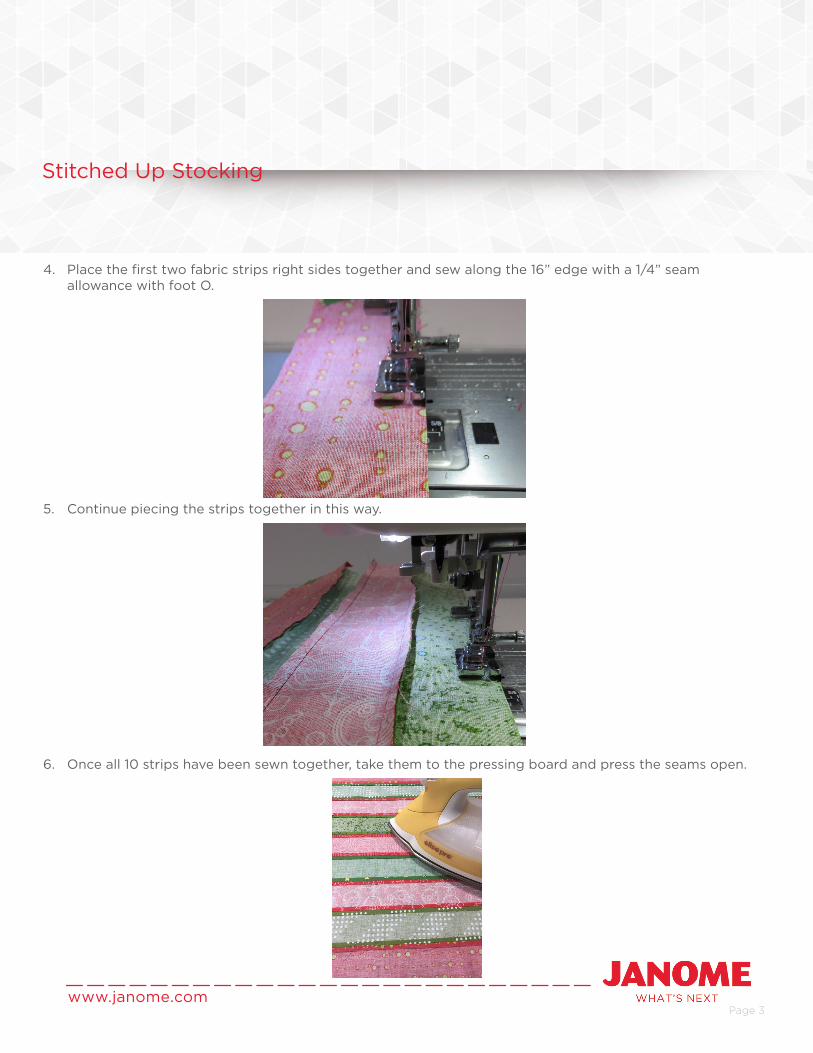
4. Place the first two fabric strips right sides together and sew along the 16” edge with a 1/4” seam allowance with foot O.
5. Continue piecing the strips together in this way.
6. Once all 10 strips have been sewn together, take them to the pressing board and press the seams open.
www.janome.comPage 4
Stitched Up Stocking
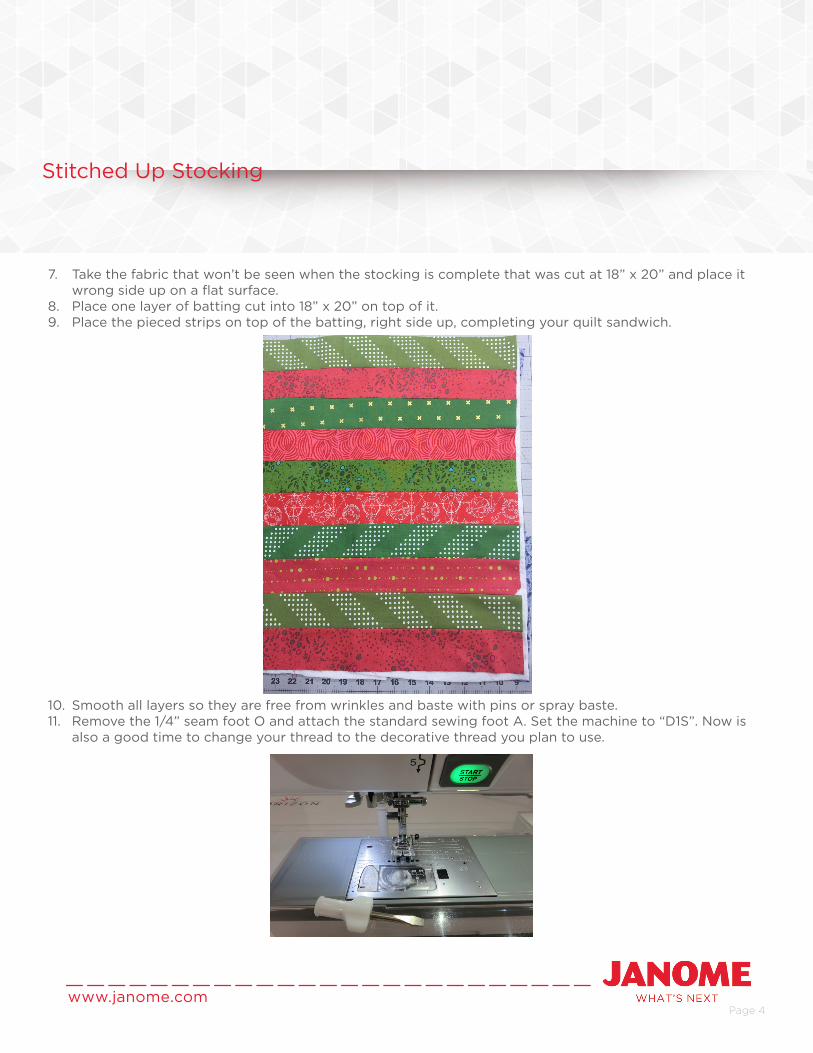
7. Take the fabric that won’t be seen when the stocking is complete that was cut at 18” x 20” and place it wrong side up on a flat surface.
8. Place one layer of batting cut into 18” x 20” on top of it.9. Place the pieced strips on top of the batting, right side up, completing your quilt sandwich.
10. Smooth all layers so they are free from wrinkles and baste with pins or spray baste.11. Remove the 1/4” seam foot O and attach the standard sewing foot A. Set the machine to “D1S”. Now is
also a good time to change your thread to the decorative thread you plan to use.
www.janome.comPage 5
Stitched Up Stocking
12. Select a decorative stitch from the menu on the MC8900QCP SE. Joanna selected stitch #82 for its simple design, but ability to stand out and embellish busy fabrics. There are so many to choose from, you could even select a different one for between each strip!
13. I chose to center the decorative stitching over the seam between each strip of fabric. You may choose to do more decorative stitching, especially if you are working with solid fabrics. This is a great way to quilt and embellish the stocking at the same time. Just be sure to smooth your fabric as you go to keep the stocking free from wrinkles. Complete the decorative stitching on the stocking.
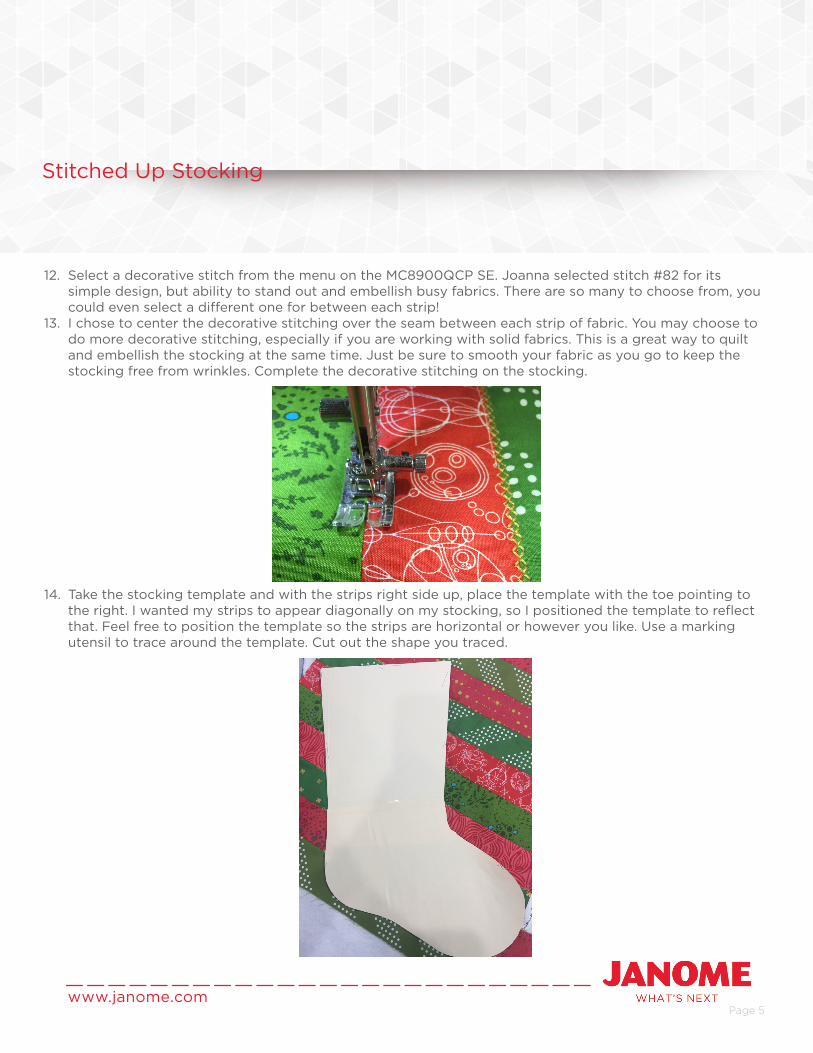
14. Take the stocking template and with the strips right side up, place the template with the toe pointing to the right. I wanted my strips to appear diagonally on my stocking, so I positioned the template to reflect that. Feel free to position the template so the strips are horizontal or however you like. Use a marking utensil to trace around the template. Cut out the shape you traced.
www.janome.comPage 6
Stitched Up Stocking
15. Take the remaining 18” x 20” piece of fabric that won’t be seen when the stocking is complete and place it wrong side up on a flat surface. Place the remaining piece of 18” x 20” batting on top of it. Take the single fat quarter you selected for the back of the stocking and place it right side up on top of the batting. Baste in place with pins or basting spray. You can choose to not quilt the back if you desire or you can do a light stipple or more decorative stitching on the back.
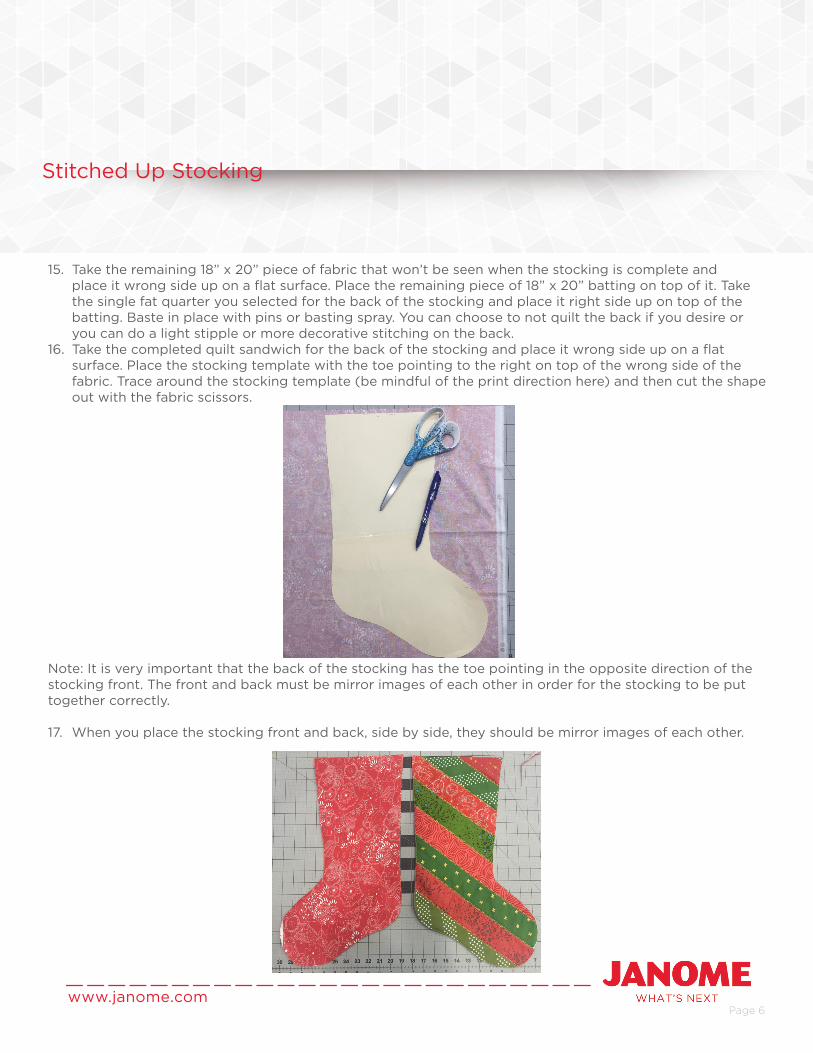
16. Take the completed quilt sandwich for the back of the stocking and place it wrong side up on a flat surface. Place the stocking template with the toe pointing to the right on top of the wrong side of the fabric. Trace around the stocking template (be mindful of the print direction here) and then cut the shape out with the fabric scissors.
Note: It is very important that the back of the stocking has the toe pointing in the opposite direction of the stocking front. The front and back must be mirror images of each other in order for the stocking to be put together correctly.
17. When you place the stocking front and back, side by side, they should be mirror images of each other.
www.janome.comPage 7
Stitched Up Stocking
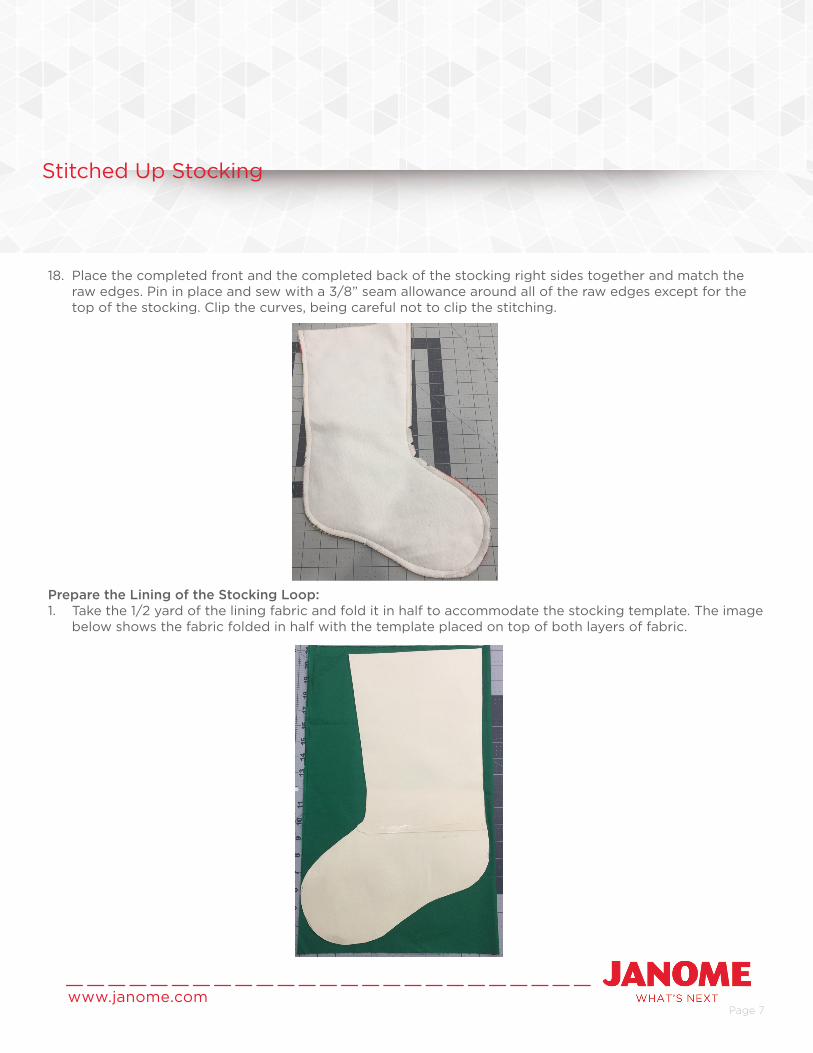
18. Place the completed front and the completed back of the stocking right sides together and match the raw edges. Pin in place and sew with a 3/8” seam allowance around all of the raw edges except for the top of the stocking. Clip the curves, being careful not to clip the stitching.
Prepare the Lining of the Stocking Loop:1. Take the 1/2 yard of the lining fabric and fold it in half to accommodate the stocking template. The image
below shows the fabric folded in half with the template placed on top of both layers of fabric.
www.janome.comPage 8
Stitched Up Stocking
2. Trace around the stocking template (it doesn’t matter which direction the stocking toe is pointed in now that we are cutting 2 layers at once) with a marking utensil and then cut out the shape you traced.
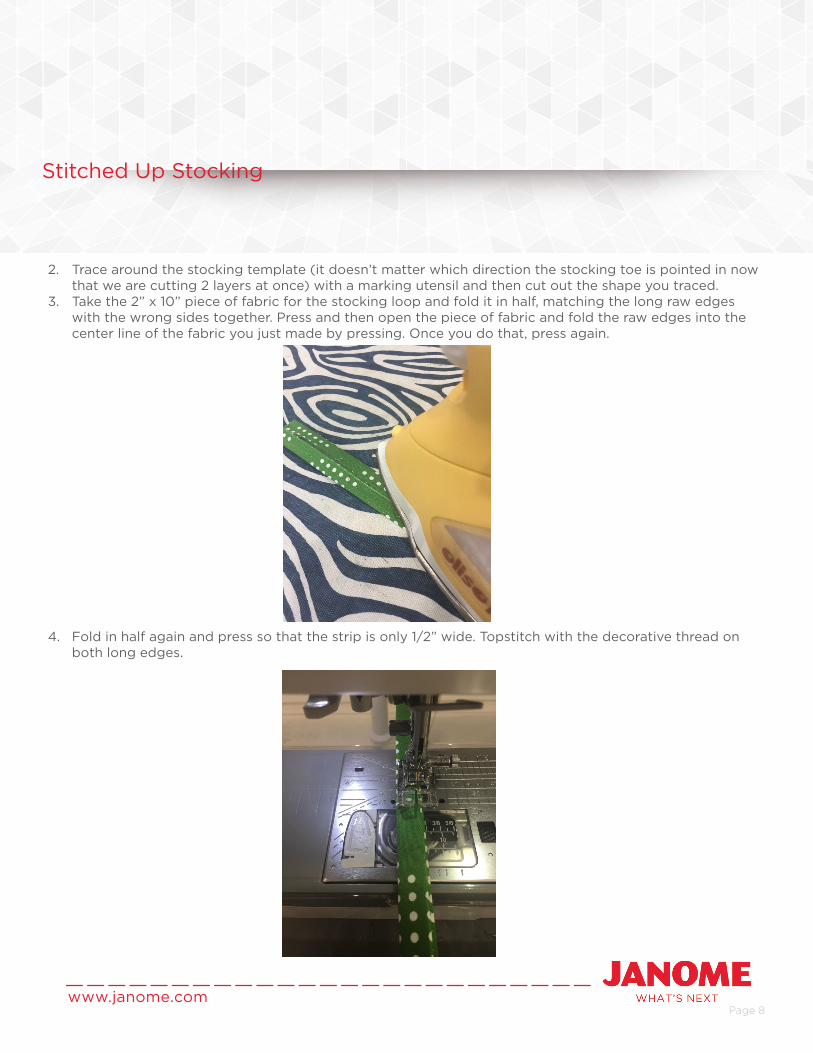
3. Take the 2” x 10” piece of fabric for the stocking loop and fold it in half, matching the long raw edges with the wrong sides together. Press and then open the piece of fabric and fold the raw edges into the center line of the fabric you just made by pressing. Once you do that, press again.
4. Fold in half again and press so that the strip is only 1/2” wide. Topstitch with the decorative thread on both long edges.
www.janome.comPage 9
Stitched Up Stocking
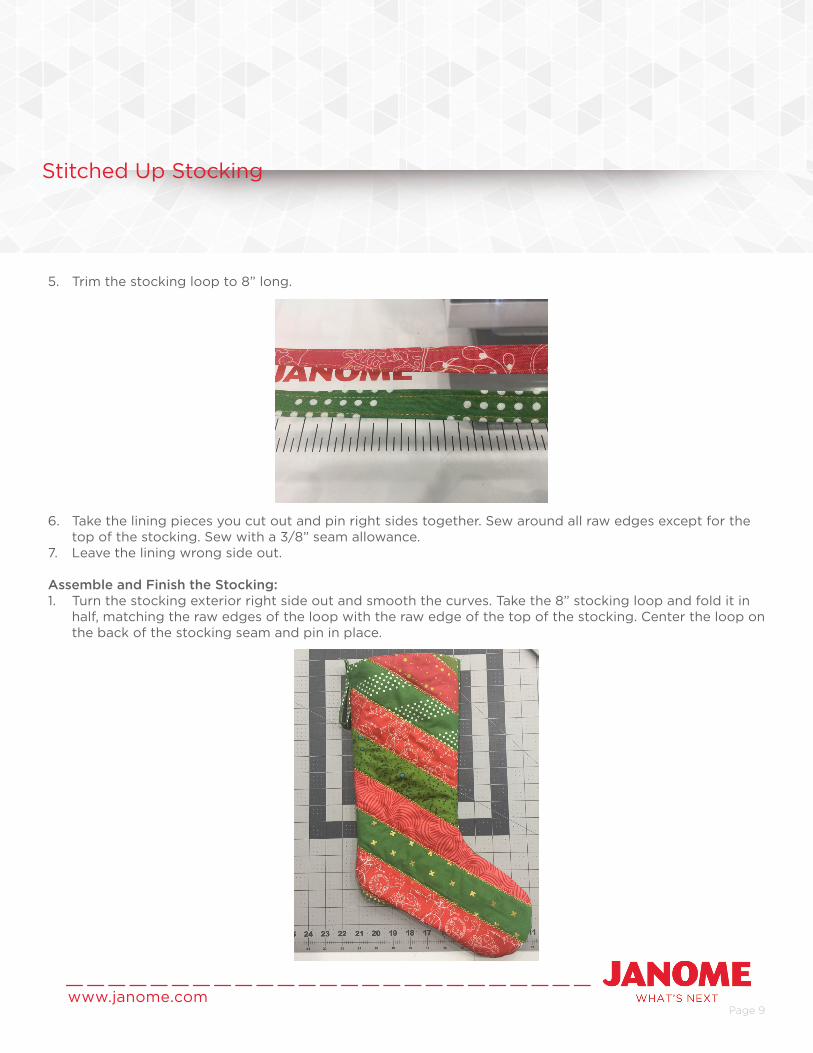
5. Trim the stocking loop to 8” long.
6. Take the lining pieces you cut out and pin right sides together. Sew around all raw edges except for the top of the stocking. Sew with a 3/8” seam allowance.
7. Leave the lining wrong side out.
Assemble and Finish the Stocking:1. Turn the stocking exterior right side out and smooth the curves. Take the 8” stocking loop and fold it in
half, matching the raw edges of the loop with the raw edge of the top of the stocking. Center the loop on the back of the stocking seam and pin in place.

www.janome.comPage 10
Stitched Up Stocking
2. Place the exterior of the stocking (should be right side out) inside the lining (should be wrong side out). Make sure the stocking loop is still pinned in between these pieces, with the raw ends even with the raw edges of the top of the stocking.
3. Match the top openings of the exterior and lining of the stocking and pin in place. Be sure to match the seams of the stocking. Start sewing about 1” before the back stocking seam and stop sewing about 1” after the other stocking seam to leave a generous opening for turning. Sew around the top of the stocking with a 3/8” seam allowance.
www.janome.comPage 11
Stitched Up Stocking
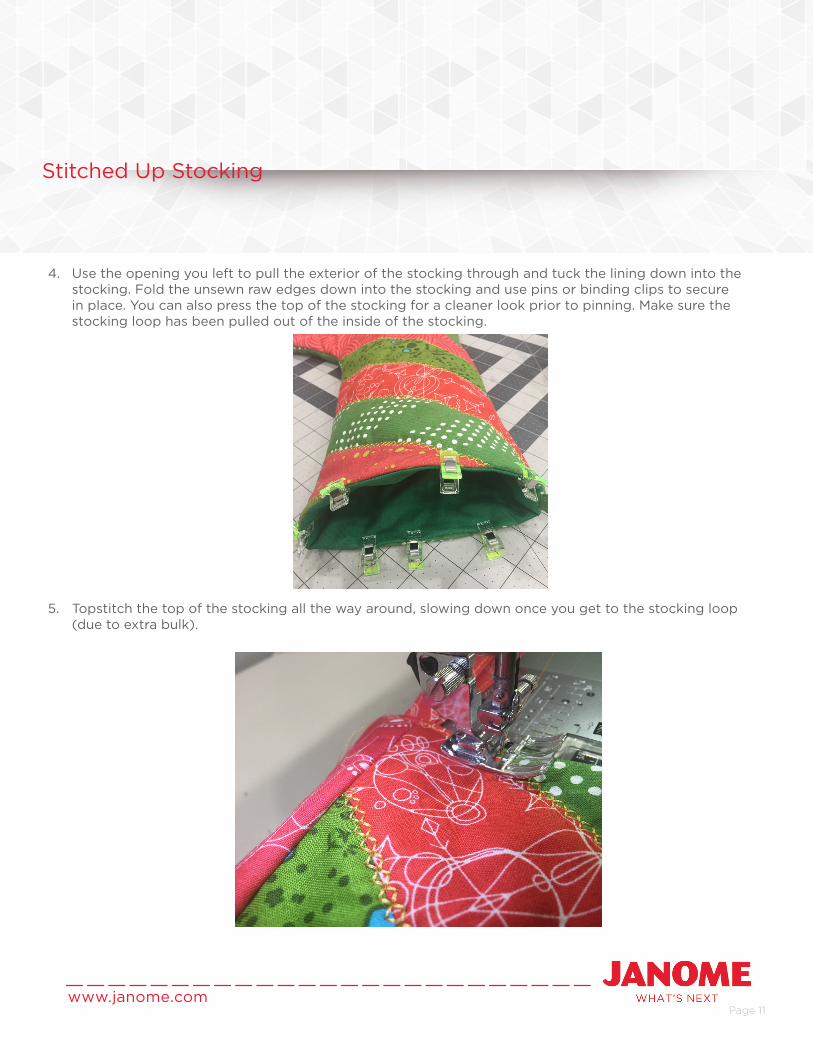
4. Use the opening you left to pull the exterior of the stocking through and tuck the lining down into the stocking. Fold the unsewn raw edges down into the stocking and use pins or binding clips to secure in place. You can also press the top of the stocking for a cleaner look prior to pinning. Make sure the stocking loop has been pulled out of the inside of the stocking.
5. Topstitch the top of the stocking all the way around, slowing down once you get to the stocking loop (due to extra bulk).
www.janome.comPage 12
Stitched Up Stocking
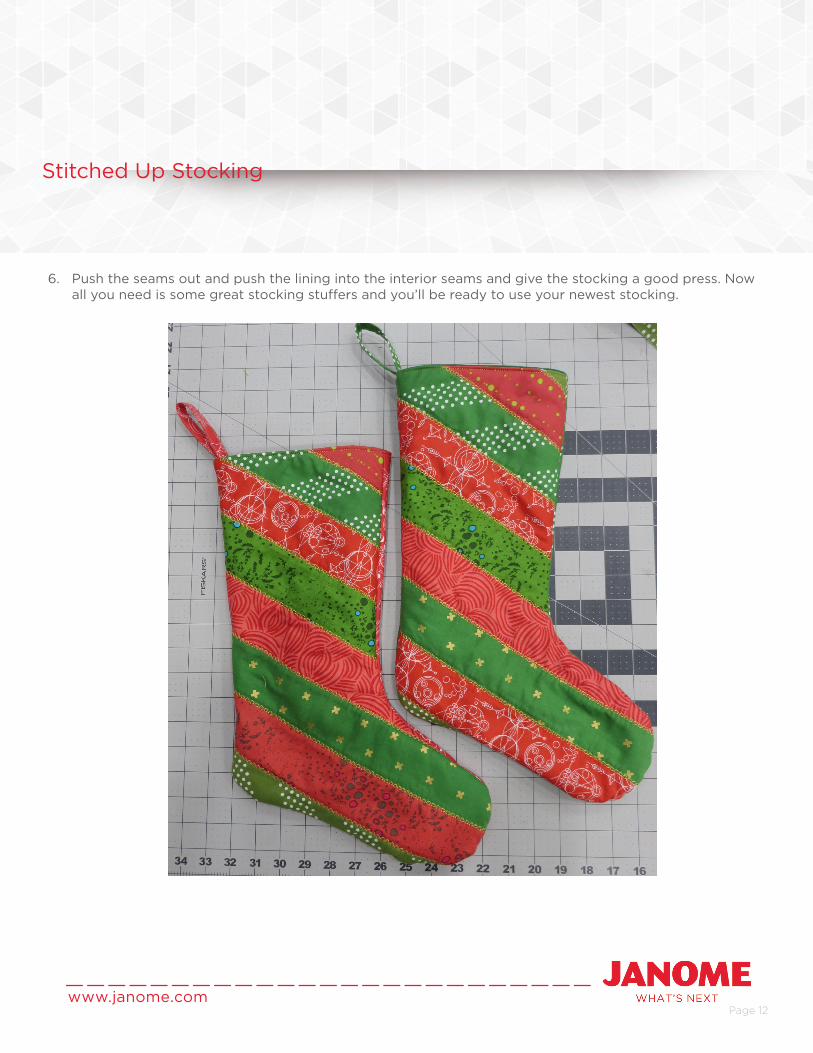
6. Push the seams out and push the lining into the interior seams and give the stocking a good press. Now all you need is some great stocking stuffers and you’ll be ready to use your newest stocking.
www.janome.comPage 13
Stitched Up Stocking