![In vitro plant production through apical meristem culture ... · regeneration from callus cultures [7]. Meristem-tip culture is an important technique for the production of disease](https://static.fdocuments.net/doc/165x107/5ea00a71a584c3433161b086/in-vitro-plant-production-through-apical-meristem-culture-regeneration-from.jpg)
Standard Operation Procedures (SOP) for IITA in vitro … Operation Procedures (SOP) for IITA in...
68
www.iita.org Standard Operation Procedures (SOP) for IITA in vitro genebank
Transcript of Standard Operation Procedures (SOP) for IITA in vitro … Operation Procedures (SOP) for IITA in...
www.iita.org
Standard Operation Procedures (SOP) for IITA in vitro genebank

i
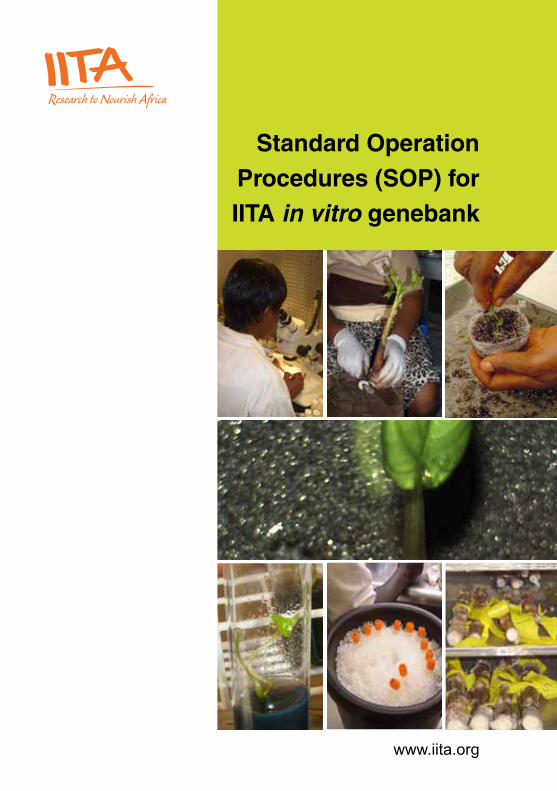
Standard Operation Procedures (SOP) for IITA in vitro genebank
Badara Gueye, Abigael Adeyemi, Mercy Debiru, Bimpe
Akinyemi, Motunrayo Olagunju, Adetoyese Okeowo,
Shirley Otukpa and Dominique Dumet

ii
© International Institute of Tropical Agriculture (IITA), 2012. Ibadan, Nigeria
To Headquarters from outside Nigeria:IITA, Carolyn House,26 Dingwall Road, Croydon CR9 3EE, UK
Within Nigeria:PMB 5320, Oyo RoadIbadan, Oyo State
ISBN 978-978-00000-0-0
Correct citation: ooooooooo
iii
Content
Foreword ........................................................................................................ viiiIntroduction ....................................................................................................... 1
Section 1........................................................................................................... 2Plant tissue culture laboratory best practices ................................................... 2Working under laminar fl ow hood .................................................................... 2Using the precision balance ............................................................................. 4Ph Meter calibration.......................................................................................... 5Use of the autoclave ......................................................................................... 6
Section 2........................................................................................................... 7Media preparation for in vitro plant tissue culture ............................................. 7Equipment/Items needed................................................................................ 12
Section 3......................................................................................................... 13In vitro introduction for medium term storage ................................................ 13Selection and identifi cation of accessions to be introduced in vitro ............... 13Sample preparation for in vitro introduction ................................................... 13Surface sterilization of samples ...................................................................... 16Meristem excision and culture from apical or axillary buds ............................ 17Nodal cutting cultures .................................................................................... 19Equipment/Items needed................................................................................ 19
Section 4......................................................................................................... 20Germplasm in vitro conservation (medium-term storage) .............................. 20Monitoring the in vitro collections .................................................................. 21Sorting for subculturing................................................................................... 22Plantlet subculture .......................................................................................... 22New transfer/replacement of old material in the gene bank ........................... 24Equipment/Items needed ............................................................................... 25
Section 5......................................................................................................... 26In vitro gene bank inventory system ............................................................... 26Inventory system display ................................................................................ 26Adding new items in the inventory .................................................................. 26Creation of a bank location for the newly registered accession ..................... 27Registering and sorting contamination and necrosis ..................................... 28Registering plantlet sorting for indexing, distribution, and subculture ............ 28

iv
Sample relocation .......................................................................................... 29Editing a mistake in the record ..................................................................... 30Item browsing ................................................................................................. 30Summary overview ......................................................................................... 30Equipment and items ..................................................................................... 31
Section 6......................................................................................................... 32In vitro sample preparation for indexing ......................................................... 32Accession sorting for virus indexing ............................................................... 32Cassava sampling for indexing ...................................................................... 32Yam, banana, and plantain sampling for indexing .......................................... 34Uploading of indexing results to the GRC inventory ....................................... 35Equipment/items needed ................................................................................ 35
Section 7......................................................................................................... 36Cryopreservation procedures developed at IITA ........................................... 36Droplet/vitrifi cation technique ......................................................................... 36Encapsulation/dehydration technique............................................................. 40
Section 8......................................................................................................... 46In vitro germplasm distribution/reception ........................................................ 46Request registration, agreement and import permit ....................................... 46Germplasm preparation for distribution .......................................................... 46Packing preparation and shipment ................................................................ 47Receiving Germplasm .................................................................................... 48Equipment and supplies needed .................................................................... 49
Section 9......................................................................................................... 50Safe duplication of the in vitro collection ....................................................... 50Germplasm selection for safe duplication ...................................................... 50Offi cial documents issuance ........................................................................... 50Trip planning ................................................................................................... 51Trip logistic ..................................................................................................... 51
Section 10....................................................................................................... 55Germplasm acclimatization (Post-fl ask process)............................................ 55Germplasm selection for acclimatization ........................................................ 55Planting pot preparation ................................................................................. 55Planting in vitro plantlets ................................................................................ 56Transfer to sterile soil ..................................................................................... 58Equipment/Items needed................................................................................ 59

v
Photos1. Lab staff dressed with lab coat, white slippers and head cap. ................... 22. Subculture tools to be autoclave in the tool box (left). ............................... 33. Working tools arrangement on the workstation. ......................................... 34. Sensitive weighing balance (left) and the “g” one, on the shake-proof table ... 45. Chemical weighing. .................................................................................... 56. Sterile medium taken out from the autoclave, after the sterilizing cycle. ... 67. Chemicals preparation for the culture medium preparation. ...................... 78. Adding chemicals to the mixture of culture medium preparation. .............. 89. Adding chemicals from stock solution to the mixture. .............................. 1010. pH adjustment using pH-meter and magnetic stirrer. ............................... 1011. Culture medium dispensing using automatic media dispenser ................ 1112. Sterile culture medium after sterilization and cooling, ready for use. ....... 1213. Cassava cuttings in thermo-treatment process. ....................................... 1414. Cassava cuttings after 4 weeks thermo-treatment ................................... 1415 a. Yam fi eld collection. ............................................................................. 14 b. Yam vine cuttings sprouting in the screen house. ................................ 14 c. Yam vines with apical and axillary buds ............................................... 1416. Plant materiel (Musa) sampled at the fi eld collection. A: view of the
fi eld collection. B: exemple of Musa main plant with suckers around. s=sucker, mp=main plant. C: Sucker collection. ...................................... 15
17. Plant materiel trimming process. A: removal of the sucker’s roots. B: remaining materiel after cutting of roots, external and old leaves. C: reducing of superfl uous corm and leave sheats with knife. D: obtained white internal part of the Musa suckers. E: samples kept in water ready for surface bleaching (disinfection). .......................... 15
18. Cassava cuttings in the disinfection process. .......................................... 1619. Yam cuttings in the disinfection process. ................................................. 1620. Meristem excision with stereo microscope under laminar fl ow. ............... 1721. Yam axillary bud excision steps. .............................................................. 1722. Cassava apical meristem excision steps. ................................................ 1723. Steps of Musa meristem excision. A: the meristem is localized
(red circle), the removing of the leaf sheats surrounding it is gently started. B: leaf sheats are removed carefully, one after the other. C: the Musa meristematic dome is close, under 2 or 3 leaf primordia. D: the Musa meristematic dome, covered by 1 or 2 leaf primordia with reduced corm, ready for culture. .............................................................. 18
24. Excised meristem of Musa sp. (A), cassava (B) and yam (C). ................ 1825. Obvious sign of meristem growth, observed 2 to 4 weeks of culture on
meristem culture medium. ........................................................................ 18

vi
26. Growing sequence of new introduced yam germplasm from meristem regeneration. ............................................................................................ 19
27. Fully develop yam plantlet ready for storage. .......................................... 2028. Overgrown cassava plantlets due for subculture. .................................... 2029. Contaminated cassava plantlets. ............................................................. 2130. Contaminated Yam plantlets. ................................................................... 2131. Necrosed cassava plantlet. ...................................................................... 2232. Pulling out of the plantlet from the tube for subculture. ............................ 2233. Cutting of a yam plantlet during subculturing. .......................................... 2334. Micro-cuttings ready for subculture. ......................................................... 2335. Newly subculture yam micro-cuttings to be transferred to the growth room. ..2436. Barcode label printer. ............................................................................... 2637. Printed barcode labels. ............................................................................ 2738. Barcode labels post on test tubes. ........................................................... 2739. Scanning of barcode label on test tube. ................................................... 2840. Cassava leaf samples collected in Eppendorf tubes for indexing. .......... 3341. Yam plantlets after 3 weeks preculture. ................................................... 3742. Meristem excision using stereo-microscope. ........................................... 3743 a. Excised yam meristem. ........................................................................ 37 b. Excised Cassava meristem. ................................................................. 3744. Cryovials containing the excised meristems in loading solution. ............. 3845. Loading solution drained out from the cryovial, using dropping pipette. .. 3846. Cryovials containing meristems in PVS2 solution, placed at 0 ºC. .......... 3847. Aluminium strip carrying PVS2 containing the meristems. ...................... 3948. Aluminium strip carrying PVS2 containing the meristems plunged
in the LN and dragged in the cryovial. ..................................................... 3949. Cryovials (in rack) immerged in LN, containing the aluminium
strip carrying PVS2 droplet with the meristems. ...................................... 3950. Aluminium strip carrying PVS2 droplet with the meristems
placed in the unloading solution. .............................................................. 3951. Meristems cultured on recovery media (0.3M sucrose) covered
with sterile fi lter paper. ............................................................................. 4052. Obvious sign of meristem growth observed 2 to 4 weeks of
culture on meristem culture medium. ....................................................... 4053. Yam plantlets after 1 week preculture for encapsulation dehydration
cryopreservation method. ........................................................................ 4154. Yam apical bud on a 1 week old plantlet for encapsulation
dehydration cryopreservation method. ..................................................... 4155. Shoot tip excision using stereo-microscope. ............................................ 4156. Excised yam shoot tip cultured on M1 medium. ...................................... 41

vii
57. Physical dehydration: Baby food jar fi lled up with silicagel and cover by a fi lter paper. .............................................................................. 42
58. Yam shoot tips culture on M2 culture medium, straight after freezing. .... 4259. Yam shoot tips 1 week after culture on M2 culture medium. .................... 4360. Yam shoot tips sprouting 4 weeks after culture on M2 culture medium. .. 4361. Test tube wrapped in cling fi lm. ................................................................ 4762. Wrapped test tubes arranged horizontally in a polystyrene pack,
alongside the printed labels on them. ...................................................... 4763. Shipment carton containing the germplasm to be sent, fi lled up with
polystyrene chips, before sealing. ............................................................ 4864. Jiffy pod of Peat pellet after soaking. ....................................................... 5565. Peat pellet content mixed with vermiculite. .............................................. 5566. Filling of inner bag. ................................................................................... 5667. Musa sp. Plant preparation for planting: A: Pulling out from the
test-tube of the in vitro plantlet, B: Gently rinsing of the roots with water, C: plantlet ready to be transplanted. ............................................. 56
68. Gentle cleaning of cassava plantlet for acclimatization. .......................... 5769. Cassava plantlet planting for acclimatization. ......................................... 5770. Musa sp. plantlet planted on sterile top pot. ............................................ 5771. Musa sp. transplanted plant covered with plastic bag. ............................ 5772. Transplanted cassava plant in a big plastic pot, prior to
enclosing in a plastic bag. ........................................................................ 5873. Upper part of the outer bag folded and hung up. ..................................... 5874. Developed yam plant (30–50 cm). ........................................................... 5875. Developed cassavaplant (30–50 cm). ...................................................... 5876. Developed Musa sp. plants (30–50 cm). ................................................. 5977. Fully developed Musa sp. Plant ready for fi eld transplantation. ............... 59

viii

1
Introduction
In response to genetic erosion and in line with IITA’s objectives (increased food security and poverty alleviation), the Institute is maintaining several international collections of African staple crops. The clonally propagated crops, i.e., yam (Dioscorea sp.), cassava (Manihot esculenta) and banana/plantain (Musa ssp.) are maintained in the fi eld and also in vitro genebank conditions where germplasm is maintained into in vitro slow growth conditions (medium-term storage). This conservation system, which involves standard in vitro procedure and specifi c conservation conditions, is described in the present document.
Any member of staff working for GRC must be familiar with the Standard Operation Procedures (SOP). These are also the training documents used for capacity building in in vitro conservation and use. SOPs are continuously subjected to modifi cations as some of the operations described are suboptimal and require further research.
The SOPs document for conservation and use is divided into the following sections:
1. Plant Tissue Culture Laboratory Best Practices
2. Media preparation for in vitro plant tissue culture
3. In vitro introduction for medium-term storage
4. Germplasm in vitro conservation (medium-term storage)
5. In vitro Genebank inventory system
6. In vitro sample preparation for indexing
7. Cryopreservation procedures developed at IITA
8. In vitro germplasm distribution/reception
9. In vitro collection safe duplication
10. Germplasm acclimatization (Post-fl ask process)

2
Photo 1. Lab staff dressed with lab coat, white slippers and head cap.
Plant tissue culture laboratory best practices
The success of plant tissue culture and in vitro conservation rely on several basic operations. Each must be completed following international standards. Below are some common operations for which all staff involved must be trained to follow precise guidelines:
Working under laminar flow hood
• Whatever the activity, all in vitro activities involve (at some point) working in a sterile environment (under the sterile laminar fl ow). As a result, it is important to keep the laboratory space as clean as possible and to optimize the use of the laminar fl ow cabinet.
• Any operator working in the plant tissue culture wears a lab coat (cleaned weekly), lab slippers, and cap (especially the women) to reduce the risk of outside-sourced contamination (photo 1).
• Whenever it is to be used, the laminar fl ow hood (light and air fl ow) and the bead sterilizer are switched on at least 30 min before use. Both items are cleaned with Ethanol (70 %) and paper towel on a paper towel. The laminar fl ow bench (workstation) should be sprayed with alcohol as often as possible during any activity (for example, when switching to a new plantlet).
• Before starting to work under the laminar fl ow, all operators wash their hands with soap and regularly disinfect them with ethanol (70%) spray.
• Each operator uses a tool box containing forceps, scalpel holder, square-like cut paper towels and foil papers paper towels, and foil papers square-
Section 1

3
like shape (photo 2). The tool box is prepared the day before use as it requires sterilization.
• Each operator prepares its fl ame by fi lling up the lamp with concentrated pure Ethanol and lights it with a lighter. To maintain a good sterile air fl ow, only essential items should be maintained in the workstation, such as forceps and scalpel, fl ame, sterile paper towel, plant material,
Photo 2. Subculture tools to be autoclave in the tool box (left).
Photo 3. Working tools arrangement on the workstation.
spray bottle (Ethanol 70 %) and tools sterilizer. The items have to be placed for ease of operation and in such way as to not break the sterile airfl ow (Photo 3).
• Some of the items may be kept on a trolley or at the top of the workstation (test tubes, petri dishes, etc., as long as they are closed or in sterile packs) to avoid overfi lling the working space.
• The forceps and scalpels must be placed in the bead sterilizer for at least 10 seconds for proper sterilization (and should not be left there too long). After bead sterilization, make sure the instruments have cooled down
4
before you use them.
• Before bringing any plant tissue out of its container (test tube, petri dish, jars), the operator should place a sterile paper towel (using forceps) on sterile aluminium paper foil on the workstation of the laminar fl ow hood (Photo 3). This operation is repeated each time a new tissue is taken out of a sterile container.
• While working under sterile laminar fl ow, make sure you keep open the space in front of any tissue you are working on and avoid passing your hands over it to limit the risk of contamination.
Important: Talking while working under the laminar fl ow is one of the major sources of external contamination; a mask over the mouth can help to reduce that risk.
• Each operator is responsible for properly cleaning the laminar fl ow cabinet and the tools used on a daily basis. The tool boxes are reset with paper towels, forceps, and scalpel holders and then sent for autoclaving.
Using the precision balance
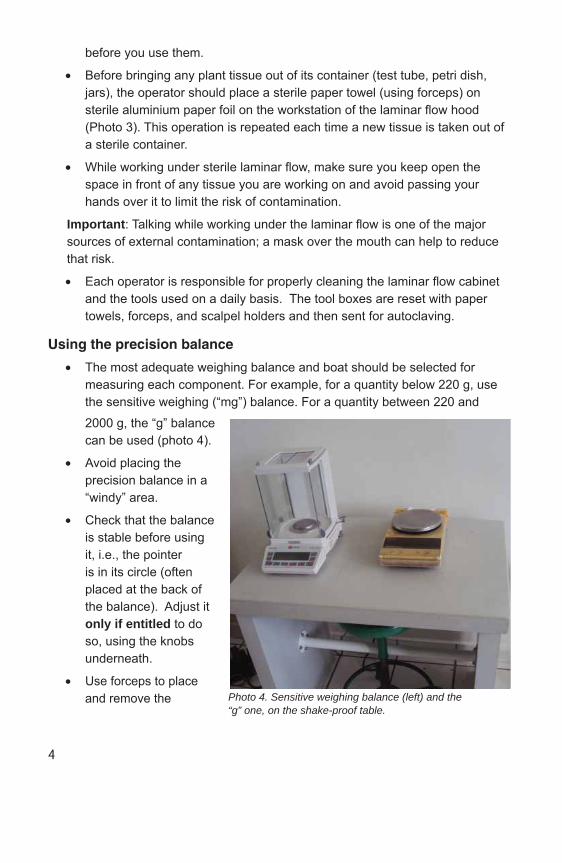
• The most adequate weighing balance and boat should be selected for measuring each component. For example, for a quantity below 220 g, use the sensitive weighing (“mg”) balance. For a quantity between 220 and
2000 g, the “g” balance can be used (photo 4).
• Avoid placing the precision balance in a “windy” area.
• Check that the balance is stable before using it, i.e., the pointer is in its circle (often placed at the back of the balance). Adjust it only if entitled to do so, using the knobs underneath.
• Use forceps to place and remove the Photo 4. Sensitive weighing balance (left) and the
“g” one, on the shake-proof table.

5
weighing boat on the weighing scale plate. Use a spatula or a spoon to dispense an adequate quantity in the boat and use your index fi nger to adjust the quantity; (do not use your whole hand).
• Reset the balance to 0 after placing the weighing boat on it before depositing the compound on the scale (photo 5).
• Use a clean spatula or spoon for each compound.
• Once you have taken any chemical out of its storage container DO NOT return it to the container as it could contaminate the product. Hence, take a small quantity to avoid unnecessary waste.
• Clean the balance and surroundings carefully after use.
Ph Meter calibration
The use of the pH meter is restricted to authorized staff, as it is a sensitive and fragile piece of equipment. The calibration of the pH meter is done at the beginning of every week beginning by the assigned staff, using calibration buffer solutions.
• Switch on the pH meter, remove the protector/storage cap from the electrode reading tip, and clean it up gently with distilled water and a soft paper towel.
• Plunged it in the pH 7 calibration solution and press the reading button. The pH should be stable at 7 ± 00.1
Important: for all pH readings, the pH meter display should be allowed to stabilize (a smiley face is displayed when it is stable).
• Remove the electrode from the pH 7 calibration solution, clean up with distilled water, and plunge it into the pH 4 calibration buffer solution.
• When the pH display is stabilized at 4 ± 00.1, remove and clean the electrode.
• The pH meter is now ready for use on prepared culture media. (See culture
Photo 5. Chemical weighing.

6
media preparation procedure.)
Use of the autoclave
Only authorized and trained staff can use the autoclave.
• Autoclave control tape should be stuck on all items entering a sterilization cycle (test tubes, bottles containing media, dissection instruments, etc...). If the tape colour fails to confi rm sterilization, the media is discarded and other items can be re-autoclaved.
• The autoclave should be handled with care because it can be dangerous if wrongly used. Untrained persons CAN NOT operate it.
• All items (forceps, fi lter papers, etc.) entering the autoclave are either wrapped in aluminium foil or enclosed in autoclavable containers.
Photo 6. Sterile medium taken out from the autoclave, after completion of the sterilizing cycle.
• The autoclave is cleaned at least once a week
• At the end of the sterilization cycle, the autoclave should be opened with care; the hot steam can be harmful.
• Use protective gloves when removing the sterilized containers (Photo 6) and let them cool down on a trolley before storage.

7
Media preparation for in vitro plant tissue culture
In vitro culture implies maintaining plant tissues in artifi cial conditions for conservation or multiplication purposes. The success of in vitro culture depends on several parameters. Amongst them is the culture medium, i.e., a substrate from where the tissue will extract the critical elements for its growth, such as minerals, water, growth regulators, antioxidants, vitamins, and carbon source. The optimal composition and form of the medium depend on the crop, explant type, and the purpose of the culture (regeneration, proliferation, shoot initiation, rooting, callus production ...). Extreme accuracy in the composition of the media is needed for successful in vitro culture.
The key steps for media preparation are described below:
• The laboratory technician in charge of media preparation must wear a lab coat. Depending on media components, wearing cap, gloves, and mask are also advisable, especially for chemicals in a powdered form.
• Before preparation of a medium is started, a checklist is printed of all the components and tools needed. That list contains the chemicals, glassware, spatula or spoon, weighing boats, tubes in racks, pen, marker, etc., required. The items are assembled at the workstation.
• Chemicals in powdered form are sorted (photo 7) and weighed FIRST.
• Components in liquid form (stock solutions, usually kept in the fridge) are sorted next and added to the mixture.
Photo 7. Chemicals preparation for the culture medium preparation.
Section 2

8
• To dilute powdered compounds, beakers of a suitable size and fl ea (magnetic sticks) are selected and placed on a magnetic stirrer.
• Each beaker used is labeled (using paper tape) with the name of the medium in preparation (e.g., cassava multiplication media), name of operator, and date of preparation.
• A container of the proper size/shape containing a volume of double distilled or deionized water (equal to 1/3 of the fi nal volume of the culture medium in preparation) is placed on the magnetic stirrer.
Photo 8. Adding chemicals to the mixture of culture medium prepared.
Important: DO NOT use tap water. It may contain undesirable salts, dissolved gases, and microorganisms an so may change the composition of the medium and explants’ growth
• Weigh each of the powdered chemicals and add them directly to the beaker following the checklist order (see Laboratory best practises procedure). As a new compound is added into the beaker, tick the reference list to avoid double weighing.
• Rinse any measuring container with double distilled water and add the rinsing solution to the main beaker (photo 8).
• For components requested in a very small quantity (growth regulators, vitamins...) stock solutions are prepared at an adequate concentration.
− For example: if 0.1 mg of a component A has to be added in the mixture, it’s easier to add 1 ml of a stock solution concentrated at 0.1 mg/ml (5 mg of component A in 50 ml of water).
• DO NOT pipette directly into a stock solution. A small quantity of the stock solution is dispensed into a clean container before for pipetting the exact amount needed using an accujet. The remaining solution is discarded (photo 9). The duration in storage of stock solutions depends on the compound and the storage temperature. For example, vitamin stock solutions maintained in the fridge are made anew every 4 weeks.

9
Cul
ture
med
ia re
copi
es
Type
:
Dat
e:
Q
uant
ity:
O
pera
tor:
Cas
sava
Yam
Mus
a sp
.
Com
pone
nts
Mer
iste
m
med
ia
(per
L)
mul
tipli-
catio
n m
edia
(p
er L
)
Mer
iste
m
med
ia
(per
L)
Alte
rnat
ive
Mer
iste
m
med
ia (
per L
)
mul
tipli-
catio
n m
edia
(p
er L
)
Reg
eren
e-ra
tion
med
ia
(per
L)
Pro
lifer
atio
n m
edia
(p
er L
)
Mul
tiplic
atio
n P
5* m
ediu
m
(per
L)
MS*
bas
al m
ediu
m4.
43 g
4.43
g4.
43 g
4.43
g4.
43 g
4.43
g4.
43 g
4.43
gM
yo-in
osito
l10
0 m
g10
0 m
g10
0 m
g10
0 m
g10
0 m
g10
0 m
g10
0 m
g
Suga
r30
g30
g30
g30
g30
g30
g30
g30
gNA
A (N
apht
halen
e Ace
tic A
cid)
0.2
mg
0.01
mg
0.2
mg
0.01
mg
0.
18 m
g
BA
P (B
enzy
l Am
ino
Purin
e)0.
15 m
g0.
05 m
g0.
15 m
g0.
13 m
g
2.3
mg
4.5
mg
2.25
mg
IAA
(Indo
l Ace
tic A
cid)
0.18
mg
0.18
mg
GA 3 (
Gib
bere
llic a
cid)
0.04
mg
0.
08 m
g
Aden
ine
sulfa
te80
mg
80
mg
Ki
netin
1 m
g
L-cy
stei
ne
20
mg
20
mg
As
corb
ic ac
id
10
mg
10 m
g1
mg
Purifi
ed
Agar
7 g
7 g
7 g
7 g
7 g
Gel
rite
2
g2
g2
g
* M
uras
hige
T, S
koog
F. (
1962
). A
revi
sed
med
ium
for r
apid
gro
wth
and
bia
ssay
s w
ith to
bacc
o tis
sue
cultu
res.
Phy
siol
ogia
Pla
ntar
um 1
5 : 4
73-4
97.
pH …
……
(5.7
+ 0
.1)
Hea
t to
mel
t Aga
rM
ake
up to
……
……
… (Q
uant
ity)
D
istri
butio
n: …
……
……
…. /
Tub
es o
r Pet
ri di
shes
A
utoc
lave
: T°
= 12
1°C
, Tim
e: 1
5 m
in
S
tora
ge:

10
• Once all components of the check list have been added to the beaker (except for the solidifying agent: Agar, phytagel, gelrite...), check that they are all fully dissolved and switch off the magnetic stirrer.
• Adjust the volume with distilled / deionized water to 9/10 of the fi nal volume preferably with a measuring cylinder.
• Check the pH Meter calibration, rinse the electrode and adjust the pH to the recommended level (Photo 10), in general 5.7 ± 0 1, by adding droplets of buffer solutions 0.5 M NaOH (below 5.7) or 0.5 M HCl (above 5.7). This operation requires stirring. Once completed, the pH meter electrode is rinsed with double distilled water.
Important: The pH should be allowed to stabilize after each droplet has been added in order not to over-acidify or alkalinize the medium. Note that after 3 over-acidifi cations or alkalinizations the medium should be discarded.
• Once the pH is set, switch off the magnetic stirrer and take out the magnetic fl ea with the magnetic retriever.
• Weigh an adequate quantity of the solidifying agent and distilled water to reach the fi nal volume.
• To help the gelling agent to dissolve, heat the mixture on a hot plate or in a microwave (20 min at maximum level for 2 L of mixture).
Photo 9. Adding chemicals from stock solution to the mixture.
Photo 10. pH adjustment using pH-meter and magnetic stirrer.

11
Important: Make sure the magnetic fl ea is removed before the beaker is put into the microwave.
• Once the agar is fully dissolved and melted, the hot medium is dispensed into test tubes or jars. For test tubes, a media dispenser (photo 11) is used for the accurate distribution in each tube (5 ml for small test tubes 125 × 16 mm, 15 ml for big test tubes 150 × 25 mm). Each test tube is then tightly closed with a plastic cap.
Important: Media distribution must take place before it starts to cool down i.e. to solidify as delay can result in medium heterogeneity and diffi culty in dispensing.
• Alternatively, fresh medium containing agar can be autoclaved without pre-heating if it is to be dispensed by hand under laminar fl ow (often in petri dishes).
Photo 11. Culture medium dispensing using automatic media dispenser
− Use a bottle or Erlenmeyer fl ask with a capacity at least 200 ml larger than the quantity of liquid it contains. This will prevent loss/splash in the autoclave chamber during the cycle.
− When using bottles, close the cap loosely (to avoid pressurization) and make sure a bottle with a plastic collar is used for easier distribution
• Label the recipients (tube racks, bottles etc…) with the name of the medium, date of preparation, and operator’s name.
• The completed culture medium is then sterilized in the autoclave at 121 oC for 15 min.
• After removal from the autoclave, the medium is allowed to cool down (photo 12) and solidify before use. It can be stored for 1–2 weeks in a cool, clean place (ideally at 8–10 oC).
• All staff must clean the bench surface, the glassware, and the tools they used when preparation is completed.
12
Equipment/Items needed
• Glass Beakers and Erlenmeyer fl ask
• Measuring cylinder
• Magnetic stirrer and fl ea
• Magnetic rod/retriever
• Water distiller/deioniser
• Paper tapes (for labeling and autoclaving)
• Microwave oven or hot plate
• Chemicals
• Stock solutions
• Pipette
• Forceps
• Spoon, spatula, and weighing boats
• Paper towel
• Media dispenser machine (optional)
• pH meter
• Weighing balance (for g and mg)
• Wash bottle
• Autoclavable recipient (bottle, Erlenmeyer fl ask) and closure system
• Autoclave
• Refrigerator
• Marker
• Gloves, lab coat, nose mask
• Culture vessels (test tubes, petri dishes, …)
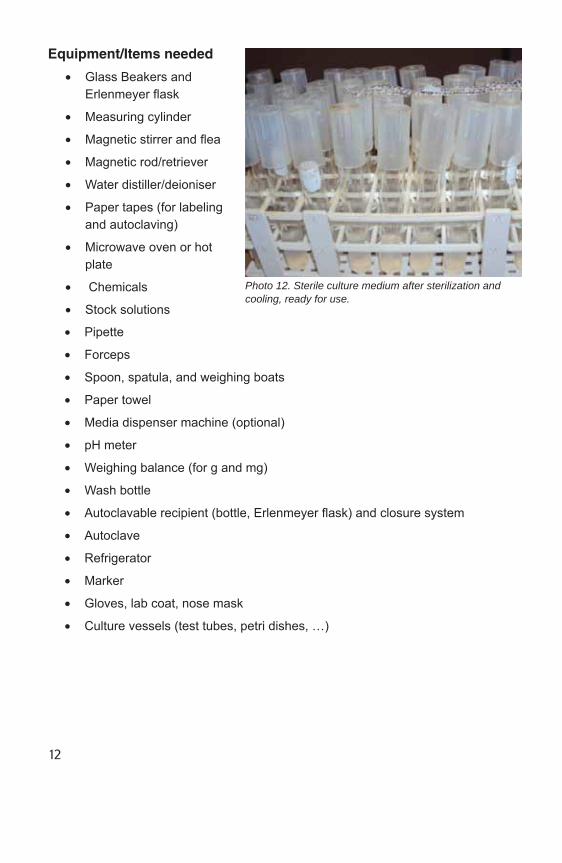
Photo 12. Sterile culture medium after sterilization and cooling, ready for use.

13
In vitro introduction for medium term storage
The establishment of the plant material in the in vitro culture system is called in vitro culture. It involves two main steps: In vitro introduction (explants are transferred aseptically from fi eld or screen house into a culture container) and multiplication (where an adequate environment is provided for the explants to evolve into small plantlets). One application of in vitro culture is in vitro conservation where tissues are maintained in slow growth conditions (medium-term storage). At IITA, three collections are maintained in vitro (yam, cassava, and banana/plantain). The initial explants used are preferably apical or axillary meristems, and meristem-derived plantlets are maintained in slow growth conditions. Occasionally, nodal cuttings are used as initial explants but they are not preferred as their level of endogenous pathogens is much higher than for meristems.
Selection and identification of accessions to be introduced in vitro
Any accession maintained in the fi eld collection but not yet introduced in vitro is a potential candidate for in vitro introduction. Before planning any new introduction, a careful match is needed between accessions already in vitro and accessions maintained in the fi eld bank (presently the reference collection). Occasionally, the introduction of a new accession can be done in an emergency if it is considered at risk in the fi eld or if a special request has been received.
Sample preparation for in vitro introduction
Before in vitro introduction is started, adequate plant parts must be produced, preferably from young shoots.
Cassava sample preparation and collectionFor cassava, young shoots are obtained from thermo-treated cuttings. This approach allows virus eradication from the mother tissues in more than 50% of the shoots.
• Both ends of the cutting (20–30 cm long) collected from the fi eld bank are covered with wax before being transferred into a growth cabinet (Photo 13) at a temperature regime of 28–38 oC for 6 hours dark and 18 hours light.
• In such conditions, cuttings produce new shoots within 3–5 weeks (photo 14).
• For each accession, 10 newly sprouted young shoots are selected (nodal cutting or 1 apical shoot on 1 cm stem). They are then cut with scissors or a scalpel and kept in a dry and clean container.
• The accession number or name is recorded carefully on each container.
Section 3

14
Yam sample preparation and collectionFor the in vitro introduction of yam it is advisable to use young shoots. The initial explants preferred are apical (meristem) or axillary buds. Note that for yam, meristem regeneration is not yet optimal and virus eradication via meristeming is limited. As a result, and as stated above, nodal cuttings explants (1 bud + 1 cm stem maximum on each side of the bud) can also be used to ensure in vitro establishment of the germplasm.
• Young shoots are obtained from fi eld bank material newly planted or from vine cuttings (photos 15a–15c) culture in the screen house. (See vine cutting procedure.)
Photo 13. Cassava cuttings in thermo-treatment process.
Photo 14. Cassava cuttings after 4 weeks thermo-treatment
Photo 15a. Yam fi eld collection. Photo 15b. Yam vine cuttings sprouting in the screen house.
Photo 15c. Yam vines with apical and axillary buds
a b
c

15
Important: The samples should be collected from non-fl owering plants.
• For each selected accession, 10 cuttings are collected (either nodal cuttings = 1 bud + 1 cm stem maximum on each side or apical cuttings = 1 apical shoot on 1 cm stem).
• They are then cut with scissors or a scalpel and kept dry in a clean container. The accession number/name is carefully recorded on each container.
Banana/Plantain sample preparation and collectionAt IITA, the preferred fi eld explants for banana/plantain in vitro introduction are apical shoot meristems which are extracted from suckers in the fi eld collection.
• For each accession, 2–10 suckers (photo 16) are collected from the fi eld and labeled carefully.
• The suckers are trimmed with a knife to remove the roots and the old external leaves. The white internal part obtained of each sucker is placed in distilled water in an individual container (photo 17).
Photo 16. Plant materiel (Musa) sampled at the fi eld collection. A: view of the fi eld collection. B: exemple of Musa main plant with suckers around. s=sucker, mp=main plant. C: Sucker collection.
a b cs
mp
Photo 17. Plant materiel trimming process. A: removal of the sucker’s roots. B: remaining materiel after cutting of roots, external and old leaves. C: reducing of superfl uous corm and leave sheats with knife. D: obtained white internal part of the Musa suckers. E: samples kept in water ready for surface bleaching (disinfection).
a b c d e

16
Surface sterilization of samples
All the samples are brought to the laboratory in their containers for surface sterilization.
• Disinfection solutions are prepared as follows: sterile distilled water, alcohol solution (Ethanol 70% v/v), sodium hypochlorite solution (2.6 % active agent NaOCl) at 10to 5% containing a few droplets of a wetting agent, e.g., Tween 20.
Important: Use only freshly made sodium hypochlorite solution.
• Samples are rinsed quickly with tap water once or twice to wash off soil particles. Liquid soap can also be used to clean the plant parts better (photo 18).
• Rinsed explants are soaked in several solutions in succession (occasional shaken for better contact) and under the laminar fl ow (sterile environment) as follows:
− 5 min in alcohol solution (Ethanol 70% v/v).
− 20 min in sodium hypochlorite solution.
− Three times in sterile water (rinsing).
− 10 min in sodium hypochlorite solution.
− Using sterilized forceps, transfer cuttings into a sterile container (photo 19).
− Three times in sterile water (rinsing).
• After the disinfection sequence, all explants are left in their sterile containers (except for banana/plantain explants which are kept distilled water) until further processing.
Photo 18. Cassava cuttings in the disinfection process.
Photo 19. Yam cuttings in the disinfection process.
17
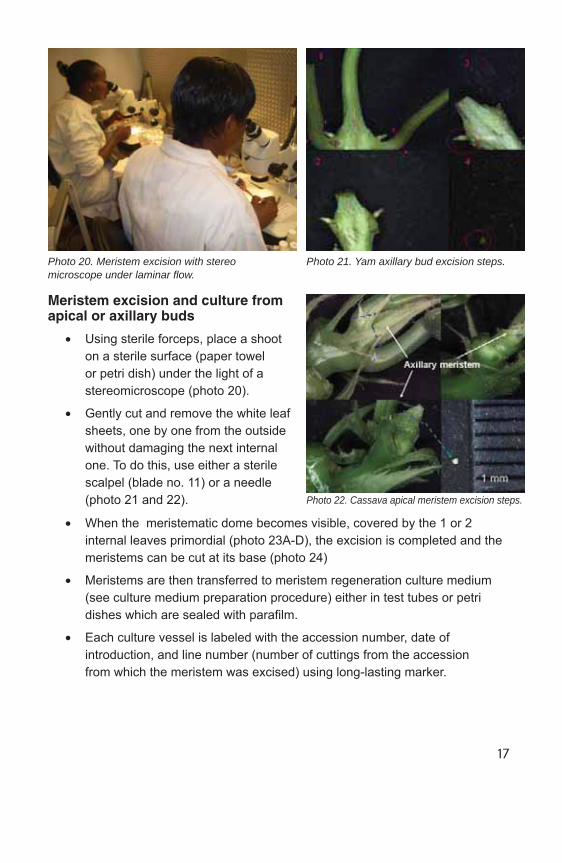
Meristem excision and culture from apical or axillary buds
• Using sterile forceps, place a shoot on a sterile surface (paper towel or petri dish) under the light of a stereomicroscope (photo 20).
• Gently cut and remove the white leaf sheets, one by one from the outside without damaging the next internal one. To do this, use either a sterile scalpel (blade no. 11) or a needle (photo 21 and 22).
Photo 20. Meristem excision with stereo microscope under laminar fl ow.
Photo 21. Yam axillary bud excision steps.
Photo 22. Cassava apical meristem excision steps.
• When the meristematic dome becomes visible, covered by the 1 or 2 internal leaves primordial (photo 23A-D), the excision is completed and the meristems can be cut at its base (photo 24)
• Meristems are then transferred to meristem regeneration culture medium (see culture medium preparation procedure) either in test tubes or petri dishes which are sealed with parafi lm.
• Each culture vessel is labeled with the accession number, date of introduction, and line number (number of cuttings from the accession from which the meristem was excised) using long-lasting marker.

18
• The cultured meristems are transferred to the growth chamber (T °25 ± 1 °C, 12h light/24h and light: 38 μmol/m²/s).
• Obvious signs of growth are visible within 2–4 weeks: greening and elongation and/or callus formation (photo 25). Calluses are occasionally observed at the base of the shoot.
Photo 23. Steps of Musa meristem excision. A: the meristem is localized (red circle), the removing of the leaf sheats surrounding it is gently started. B: leaf sheats are removed carefully, one after the other. C: the Musa meristematic dome is close, under 2 or 3 leaf primordia. D: the Musa meristematic dome, covered by 1 or 2 leaf primordia with reduced corm, ready for culture.
Photo 24. excised meristem of Musa sp. (A), cassava (B) and yam (C).
a b c d
Photo 25. Obvious sign of meristem growth, observed 2 to 4 weeks of culture on meristem culture medium.
a b c

19
5. Nodal cutting cultures (Possible only for yam or cassava)
• After sterilization, shoots are placed on a sterile surface (paper towel or petri dish)
• With the help of a scalpel (with a sterile blade), the whitening edge of the stems are cut (hypochlorite effect).
• To avoid explant mis-orientation in vitro, make sure the upper part of the stem is shorter than the lower one (for later orientation).
• With sterile forceps, the longer part of each explant is planted into agar (one shoot per tube) and the tubes are sealed with parafi lm.
One week after culture, the meristem are screened to remove contamination.
For shoots derived both from meristems or nodal cuttings once the length has reached 2–4 cm, at least one bud is sent for subculture as described in the Genebank management procedure (photo 26).
Equipment/Items needed• Aluminium foil• Autoclavable plastic box• Paper tapes (for labeling)• Beads sterilizer and burner (fl ame)• Computer + excel/access software + pocket PC (optional)• Forceps (long and short)• Laminar fl ow cabinet• Long-lasting markers• Paper towel• Parafi lm• Scalpel holder and surgical blades (no. 11)• Spray bottle fi lled with Ethanol 70%• Ethanol (96%) for the burner (fl ame)• Tube racks• Sample bottles• Sodium hypochlorite solutions (10% and 5%) + Tween 20• Sterile distilled/deionised water • Knives and scissors for trimming the fi eld samples
Photo 26. Growing sequence of new introduced yam germplasm from meristem regeneration.

20
Germplasm in vitro conservation (medium-term storage)
Photo 27. Fully develop yam plantlet ready for storage.
Photo 28. Overgrown cassava plantlets due for subculture.
Section 4
As described in the in vitro introduction procedure, IITA’s in vitro system generally starts with a meristem introduction step. Once in vitro, meristems are expected to evolve into fully developed plantlets. This generally requires several subcultures, i.e., the selection of the active part of the growing tissue and its transfer onto a fresh medium at a relatively high temperature (25 oC). Once the plantlets are fully developed, i.e., show roots and stems with at least 2 nodes (photo 27) they are transferred to in vitro slow growth conditions (i.e., a relatively lower storage temperature at IITA: 18 ± 1 oC for yam and banana/plantain, 19 ± 1 oC for cassava). Five plantlets of yam and 10 plantlets of banana/plantain are maintained in slow growth condition for GRC and breeding material. During storage, the in vitro plantlets progressively exhaust their culture medium and overgrow (photo 28) their test tubes, i.e., they reach the top of the cap. As a result, they start showing necrotic signs (drying medium, dry leaves, etc…). When such observations are made it is time to subculture the plantlets. Depending on the crop, and maintenance conditions in IITA, subculture is needed every 6–18 months (cassava), 18– 30 months (yam) and 3–6 months (banana/plantain). While maintained in vitro, contaminated plantlets are occasionally observed. This can be due either to the presence of undetected endogenous bacteria in the meristem at the time of introduction or to poor laboratory practices (contamination with fungi, bacteria, mites at some stage of the in vitro process). Any contaminated plantlets need to be removed and destroyed as soon as they are observed to avoid possible contamination of the rest of the collection. Below are described the

21
main steps required for effi cient in vitro plantlets maintenance. Monitoring and subculturing are the keys in this process.
Monitoring the in vitro collections
• All test tubes maintained in the in vitro Genebank are monitored once a week for signs of necrosis and contamination.
• Each tube is taken out of the rack and carefully checked for contamination, especially inside and on the surface of the culture medium, around the roots, the stems, and the leaves, and inner sides of the container (photos 29 and 30). Note that bacterial contamination can be a creamy-like cloud inside or on the culture medium’s surface, sometimes coloured.
• For fungal contamination, the mycelium structure is often observed with a feathery, white or grey texture. Spores can be observed on that latter contamination type (small, black grain-like/bead-like objects.)
• Any contaminated plantlet must be discarded as soon as it is detected to avoid propagation to other tubes.
• Necrotic plantlets show a yellowish colour, shrunken and drying leaves/stems and often a dry medium (photo 31).
• Contaminated tubes and those that contain necrotic plantlets are autoclaved to prevent further contamination to occur. After autoclaving, the contents of the tube are discarded in the sink; the tubes and caps are recycled after being washed and dried.
Photo 29. contaminated cassava plantlets. Photo 30. contaminated Yam plantlets.

22
• All items removed from the gene bank are recorded as contaminated or necrotic in the inventory system. (The same applies to the subculture room.)
Sorting for subculturing
• Whatever the accession, once all plantlets show obvious sign of necrosis or the number of seedlings maintained in the bank is lower than three, it is sent for subculture (renewal of the stock).
• One or two tubes are taken for each accession (note that in the case of breeding material 1–8 tubes will be taken). Also note that, where possible, at least one plantlet of each accession should remain in the bank.
• The tubes are recorded as having been “sent for subculture” in the inventory system. (See Inventory system procedure.)
Plantlet subculture
• One barcode label of each accession selected for subculture is transferred to the fi rst test tube (head tube) containing fresh medium and where the fi rst new micro-cutting will be placed for that particular accession. All the test tubes behind the head tube will be used for the same accession.
Important: Make sure head tubes or accessions are not mixed.
• Pull out of the test tube the plantlet ready for subculture using long, sterile forceps and drop it on the sterile paper towel (photo 32).
Photo 31. Necrosed cassava plantlet. Photo 32. Pulling out of the plantlet from the tube for subculture.
23
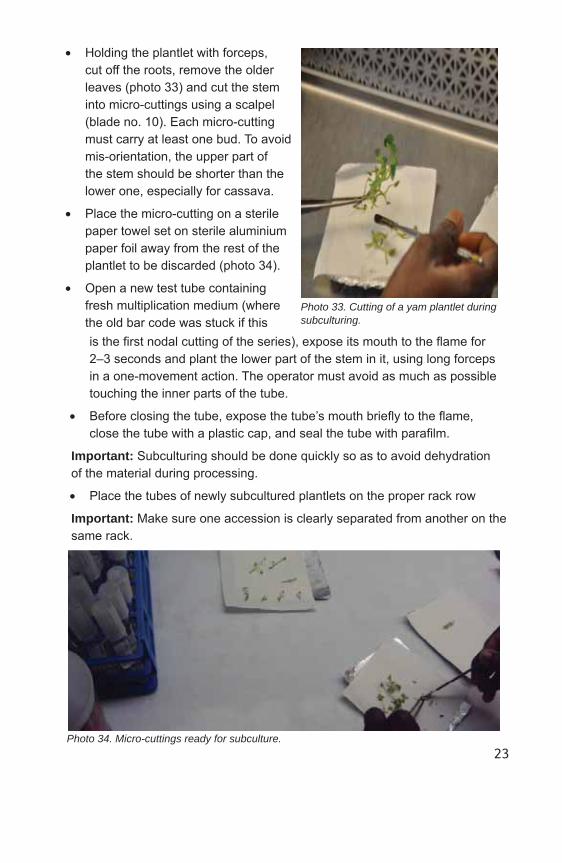
• Holding the plantlet with forceps, cut off the roots, remove the older leaves (photo 33) and cut the stem into micro-cuttings using a scalpel (blade no. 10). Each micro-cutting must carry at least one bud. To avoid mis-orientation, the upper part of the stem should be shorter than the lower one, especially for cassava.
• Place the micro-cutting on a sterile paper towel set on sterile aluminium paper foil away from the rest of the plantlet to be discarded (photo 34).
• Open a new test tube containing fresh multiplication medium (where the old bar code was stuck if this
Photo 33. Cutting of a yam plantlet during subculturing.
Photo 34. Micro-cuttings ready for subculture.
is the fi rst nodal cutting of the series), expose its mouth to the fl ame for 2–3 seconds and plant the lower part of the stem in it, using long forceps in a one-movement action. The operator must avoid as much as possible touching the inner parts of the tube.
• Before closing the tube, expose the tube’s mouth briefl y to the fl ame, close the tube with a plastic cap, and seal the tube with parafi lm.
Important: Subculturing should be done quickly so as to avoid dehydration of the material during processing.
• Place the tubes of newly subcultured plantlets on the proper rack row
Important: Make sure one accession is clearly separated from another on the same rack.

24
• Once all subculture operations for the selected accessions are completed by the operator, subculture information is recorded in the inventory system. For subculture operations, the date of subculture and number of micro-cuttings obtained are captured and recorded in the inventory system. (See inventory system procedure.)If the accession is transferred to the bank for the fi rst time, the accession origin (meristem or nodal cutting), health status, line number, location in the store, and
Photo 35. Newly subculture yam micro-cuttings to be transferred to the growth room.
introduction date are also recorded. This latter information will follow the accession during its lifetime.
• Transfer the tubes to the growth chamber (temperature 25–27 oC, photoperiod 12/12, 38 μmol.m-2.s-1) for growth and rooting (photo 35).
• One week after subculture, the tubes are screened for contamination and necrosis. Any in the two categories are discarded as described above and the inventory is updated.
New transfer/replacement of old material in the gene bank
• Once micro-cuttings show a well developed root system and stem (around 6 weeks after subculturing in the conditions described above) they are transferred to the bank area (photo 27).
• For each accession, the old plantlets are replaced by the new one at their initial location with a maximum of 5 tubes per accession for gene bank material and 10 tubes per accession for breeders’ material.
• The newly transferred plantlets are recorded in the inventory system as “bank update.” The old or extra ones are recorded as extra and will be discarded.
• The storage conditions of the in vitro gene bank are as follow: 12 h light per day, 43 μmol.m-2.s-1, 18 ºC for yam and banana/plantain, 19–20 ºC for cassava.

25
Equipment/Items needed
• Aluminium foil
• Autoclavable plastic box
• Paper tapes (for labelling)
• Beads sterilizer and burner (fl ame)
• Computer + excel/access software + pocket PC (optional)
• Forceps (long and short)
• Laminar fl ow cabinet
• Long-lasting markers
• Paper towel
• Parafi lm
• Scalpel holder and surgical blades (no. 10)
• Spray bottle fi lled with Ethanol 70 %
• Ethanol (96%) for the burner (fl ame)
• Tube racks

26
In vitro gene bank inventory system
The maintenance of the clonally propagated crop collections in the in vitro gene bank is a dynamic process. At any time the inventory of the collection needs to be accurate, i.e., careful monitoring is needed for the safe conservation of the germplasm. Any operation applied to the germplasm (acquisition, subculture, elimination, distribution, acclimatization, indexing, duplication ...) creates new information/data. To keep a record of these changes, an on-line inventory system was deployed. The system is based on bar coding any test tube containing one plantlet and scanning the tube every time an operation is applied to the plantlet.
Inventory system display
The online inventory system of the GRC collections is available on the IITA intranet (http://tomcat1.iita.cgiarad.org/inventory/login.jspx;jsessionid=7AD24FE129F44D7103B13EAC67D2E2E7) and on the IITA website (http://genebank.iita.org/). Only authorized person have access to the inventory page. After login on the intranet, the fi rst and main page (called ‘Dashboard’) displays various links associated with the different gene bank operations, such as Common inventory, Tissue culture, Items and lots, Tools, and Open trials.
− Example: Register new inventory update, view inventory updates, list trial data, and Create trial sections are grouped under Common inventory.
Adding new items in the inventory
This function is used to register a new entry (new accession) in the inventory system.
• From the Dashboard page, click on Add new inventory item, under Items and Lots.
Photo 36. Barcode label printer.
• Fill in all the information requested (crop name, accession name and identifi er, crop prefi x, alternative name, Latin name, short notes …) and click on update.
• As appropriate, also enter any new information, such as number of tubes, line number, culture container, introduction and last subculture date, origin of the germplasm (meristem or nodal cutting); update for validation and then select for printing (Photos 36 and 37).
Section 5

27
• Newly registered accession will be selected automatically by the system and bar coded labels are generated for printing, according to the number of tubes previously entered.
• Prints the bar coded labels (stickers with a bar code) and paste them on the corresponding test tubes (photo 38).
The item (accession) is now registered as a lot in the inventory system.
Creation of a bank location for the newly registered accession
Each accession is assigned one location in the bank. The accessions are arranged by racks, eight locations per rack (four locations per side).
− Example: for rack number 1, sublocations are created as 1.1, 1.2, 1.3 and 1.4
• Click on register and rename location under Tools from the dashboard.
• Select in the ROOT>In vitro collections>Ibadan>crop...
• Select the rack number and create the location by clicking on ‘Add sub-location’
• Number the rack accordingly, and create a sub-location as well.
Important: Lot migration is needed to fi nalize the assignment of a location to the registered lots.
From the dashboard, Click on Migrate lot under Tools
Photo 37. Printed barcode labels.
Photo 38. Barcode labels post on test tubes.

28
• Select from ‘ROOT’ the location of each accession, following the sequence described above (creation of location).
• Scan the bar code of the accession tube (photo 4), using the hand scanner (or the pocket PC device) (photo 39).
• The location is then automatically assigned to the accession.
• Place the accession’s plantlets (physically) in the rack, on the relevant shelf Photo 39. Scanning of barcode label on test tube.
Registering and sorting contamination and necrosis
Any operation affecting the remaining number of in vitro plantlets maintained in the bank must be recorded. Once plantlets have been identifi ed as contaminated or necrotic they are discarded and the inventory is updated accordingly. (See Bank handling procedure)
• Click on ‘Register contamination or necrosis’ under Tissue culture on the dashboard.
• Click on ‘Start editing’ and scan the bar code label of the tubes to be discarded one by one. A list of the scanned tubes is automatically displayed on the screen.
• Validate the changes by clicking on ‘Commit changes’.
• Previous scanned records for contamination or necrosis can be checked by clicking on ‘Review contamination or necrosis checks’ under Tissue culture on the dashboard.
Registering plantlet sorting for indexing, distribution, and subculture
As stated above, any operation affecting the remaining number of in vitro plantlets maintained in the gene bank must be recorded, whether for fi nal elimination of the subculture or for various other reasons.

29
Tubes going out of the gene bank:• Click on ‘Begin new subculturing batch’ under Tissue culture on the dashboard.
• Select the type of operation (outgoing or incoming) on the ‘Transaction type’.
• Select ‘Subculture purpose’ on the Subtype list (subculturing, distribution, safe duplication ...)
• Click on ‘Start editing’ and scan, one by one, the bar code labels of the tubes going in or out.
• Validate the change by clicking on ‘Commit changes’.
Tubes coming into the gene bank after subculturing• Click on ‘View current subculture status’ under Tissue culture on the dashboard.
• Select the subculture list (created earlier for subculturing) under ‘Batch title’ column.
• Click on ‘Register subcultured lots’.
• Enter the number of tubes obtained for each accession, then click ‘Update’ to validate.
• The newly registered subculture information can be viewed by clicking on ‘Selection’ link.
• Make sure the adequate printer is selected on the dashboard.
• Click on ‘Print labels’ and stick the labels on the corresponding tubes.
• In ‘ROOT’ selection, migrate the lots to ‘Growth Chamber’ accordingly with crop and collection.
− Select from ‘ROOT’ the ‘Growth Chamber’ location for the particular crop.
− Scan the bar code of the plantlet (with hand scanner or pocket PC).
− The accession is then automatically assigned to the Growth Chamber location.
− Place the accessions/plantlets in adequate growth chamber and shelf.
Sample relocation
Whatever the reason for subculturing, once the newly subcultured plantlets have reached the optimal development stage for gene banking; they are transferred from the subculture room to the storage room.
• From the dashboard, Click on ‘Migrate lot’ under Tools.
• Select the location of each accession from ‘ROOT’ following the steps described above.

30
• Scan the bar code of each plantlet assigned to this location.
• The accession is then automatically migrated to the location.
• Return the plantlets to the rack and adequate shelves in the storage room.
Editing a mistake in the record
The function ‘Trials’ is used to reverse data capture if there is a mistake in scanning,
For example, if ‘Contamination’ operation was chosen instead of ‘Necrosis’. Note that for security reasons, access to ‘Trial’ is limited.
Creation of a trial • Click on ‘Create trial’ under Common Inventory on the dashboard.
• Select from the list, the mismanaged operation. (Click on the title from the ‘Title’ column.)
• Click on ‘Reverse changes’. This will bring back the selection list scanned.
• Re-select the right operation type then commit the changes.
• Review the list of trials on the ‘List trial data’ link under Common Inventory on the dashboard.
Item browsing
Any accession detail can be found using the ‘search box for item’:
• Enter the accession number or name in the search box and click on ‘Search’.
• Select the accession from the proposed list and click on the name in the ‘Name’ column’
• The accession page is displayed with the information about the lot.
• The information of a particular lot is obtained by clicking on the accession name in the ‘Item’ column.
• A lot can also be selected for label printing: click on the ‘Select ‘link of the particular lot.
• Once the lot information is displayed, click on the ‘Current quantity number to change’ information
Summary overview
The summary overview of the inventory system allows general information to be found on the total number of tubes per crop. The needed summary inventory of a particular crop can be selected from the ‘ROOT’ sequence.

31
• Click on ‘Summary overview’ under Items and Lots on the dashboard
• Select the crop and location in the ‘ROOT’ sequence
• Select ‘crop summary’ in the list, then the crop in the ‘crop list’ and then ‘germplasm type.’
• The summary overview can be exported in an Excel fi le.
Equipment and items
• Bar code labels
• Label printer
• Hand scanner
• Desktop PC
• Pocket PC (optional)
• Intranet access
Inventory Dashboard page

32
In vitro sample preparation for indexing
The international collections maintained at IITA are distributed worldwide for research in food and agriculture. It is, however, important to index the material maintained to prevent the spread of any disease across the continent. As a consequence, indexing (health status check of in vitro seedlings) is performed as early as possible during the in vitro conservation process. Indexing involves collecting leaf samples from the in vitro seedling at an adequate time for further analysis by the Germplasm Health Unit (GHU). GHU is responsible for virus testing using serological and molecular tests. Only viruses of quarantine importance are tested during the process.
Accession sorting for virus indexing
Accessions pending for distribution have priority over other accessions. Usually up to 100 accessions (maximum) not yet indexed are selected per batch.
• Tubes from the selected accession are sorted out from the rack maintained in the genebank (out of the fi ve plantlets for conservation and ten for breeders’ lines). Ideally, different lines are selected from each accession to broaden the possibility of fi nding clean material. (See in vitro introduction procedure.)
• A maximum of four tubes is selected for each GRC accession and fi ve tubes for each breeding accession.
• The sorted tubes are recorded as “sent for indexing” in the inventory system. (See Inventory system procedure.)
Depending on the crop and the available technique, indexing is performed either on in vitro seedlings or acclimatized plants.
Cassava sampling for indexing
Indexing is performed directly on in vitro seedlings and involves one subculture step during which samples of leaves are collected for analysis. (See Genebank management procedure.)
• Set up the laminar fl ow and equipment/items/instruments needed for subculture as described in Laboratory best practises procedure of the SOP. In addition, Eppendorf tubes placed in a rack on ice chips are prepared before subculture and kept out of the laminar fl ow hood.
Important: Make sure the Eppendorf tubes are kept at 0 oC to slow down the metabolism.
• With sterile forceps, place a sterile paper towel (set on sterile aluminium paper foil) in the workstation of the laminar fl ow.
Section 6

33
Important: A new set of sterile paper towel/aluminium foil and forceps is used for each plantlet processed.
• Open the tube carefully and avoid crossing hands over the workstation so as not to break the sterile airfl ow. (This should be ensured for all actions during the subculturing.)
• Pull out the plantlet using long forceps and drop it on the sterile paper towel.
• Holding the plantlet with forceps, cut off the roots. Then cut out all the leaves (especially the major ones), place them aside on a fresh paper towel.
• Micro-cut the stem with the use of a scalpel (blade no. 10). Each micro-cutting must carry at least one bud. To avoid mis-orientation, allow the upper part of the stem to be shorter than the lower one.
• Place the obtained micro-cutting on a sterile paper towel set on sterile aluminium paper foil away from the rest of the plantlet to be discarded.
• Open a test tube containing fresh multiplication medium, expose its mouth to the fl ame for 2–3 seconds and plant the longer part of the stem into it, using long forceps in a one-movement action. The operator must neither touch the inner parts of the tube nor the culture medium in the tube.
• Briefl y expose the tube’s mouth to the fl ame before closing it with a plastic cap and seal the tube with parafi lm.
• Using forceps collect all the leaves discarded on the paper towel during subculture from that particular plantlet and transfer them to an Eppendorf tube.
• Label both the top and the side of the Eppendorf tube (photo 40) with the accession number, indexing tube number, and line number.
• Place the Eppendorf tube in the ice chips.
• The newly subcultured plantlet is labeled following the same format as the Eppendorf tube, i.e., accession number, Eppendorf tube number, line number, in addition to the introduction and subculture dates.
Photo 40. Cassava leaf samples collected in Eppendorf tubes for indexing.

34
− Example: For an accession A with fi ve tubes (T1-T5), all the leaves of the tube 1 (T1) are put in a same Eppendorf tube labeled T1. All the newly obtained tubes from the subculture of that tube 1 are also labeled as T1. The same is done for the following tubes of the accessions A.
• Newly subcultured plantlets in tubes are placed in a rack labeled with the following information: crop, subculture purpose, operator’s name, and date. They are considered as back-up.
• Subculturing should be timely to avoid the dehydration of the leaf and stem samples under the laminar fl ow.
• New subcultures are processed as described in the Genebank management procedure.
• For indexing status and replacement, see section below.
• Eppendorf tubes containing the leaf samples are sent to GHU for virus testing. For each transfer to GHU, an inventory list of the samples transferred is printed, checked, and signed by both GRC and GHU. The list contains the following information: crop, Indexing batch, number of samples, and date of sample deposit.
Yam, banana, and plantain sampling for indexing
Indexing of yam and banana/plantain is performed on material from plants grown in the screen house or the fi eld. Indexing involves detailed general observation of the plant at different stages of development as well as serological and molecular tests.
• Selected plantlets with the same accession and line number are divided into two groups
• One group is sent for acclimatization while the second is kept in vitro as back-up.
• Plantlets sorted for acclimatization are recorded as ‘sent for indexing’ in the inventory system. (See Inventory system procedure.)
• Selected plantlets are acclimatized, as described in the post fl ask management section.
• The most isolated room available is chosen for the acclimatization to avoid external re-infection of the plants.
• Once plantlets have grown into well-established plants (root system and mature leaves) around 2 to 3 months after planting, the GHU is informed.
• GHU staff performs the fi rst observation of the plant and collect leaf samples for laboratory tests (Elisa + PCR).
Important: The labelling of the Eppendorf tubes must match the labels of the plants maintained in the screen house

35
• GHU generally repeats observation and sampling at 2 and 6 months and may occasionally ask for transplantation to the fi eld for further observation.
Uploading of indexing results to the GRC inventory
The status of each sample tested for viruses is provided by GHU to GRC.
• For cassava, individual plantlets declared clean are sent either for subculture (for multiplication or further genebanking) or, if well-established, directly to the genebank. They are recorded as ‘virus free’ clones in the inventory system.
• In vitro plantlets found virus- infested are discarded unless they are the only representative of the accession in vitro. If so, plantlets are transferred the gene-bank and recorded as ‘virus infected’ clones.
• For yam and Musa sp., the clean status of the acclimatized plants does not guarantee that the back tubes in the laboratory are clean (even those obtained from the same meristem). For that reason, GHU advise the re-introduction of material in vitro from the certifi ed aclimatized plant, especially for international distribution.
Equipment/items needed• Aluminum foil• Autoclavable plastic box• Paper tapes (for labeling)• Beads sterilizer and burner (fl ame)• Computer + Excel/Access software + pocket PC (optional)• Forceps (long and short)• Scalpel holder and surgical blades (no. 10)• Laminar fl ow cabinet• Long-lasting markers• Paper towel• Parafi lm• Scalpels and surgical blades (No 10 and 11)• Spray bottle fi lled up with Ethanol 70%• Burner (fl ame)• Ethanol (96%) for the burner (fl ame)• Eppendorf tubes (1.5 or 2 ml)• Test Tube and eppendorf tubes racks• Plastic bags for acclimatization• Sterilized top soil• Screen house small pots

36
Cryopreservation procedures developed at IITA
At IITA, clonally propagated crops are maintained in the fi eld and in vitro slow growth conditions. (See the in vitro genebank management procedure.) Cryopreservation, i.e., storage of biological materials at ultra-low temperatures (generally in liquid nitrogen at –196 ºC) is the third option for the ex situ conservation of clonally propagated crops. Once frozen, plant tissues can theoretically be stored for ever as long as they are maintained below –80oC. Cryobanking is today’s cheapest storage option for the very long-term storage of clonally propagated crops. In addition, cryopreservation can also be used for virus elimination (cryotherapy).
Between 2007 and 2011, IITA explored meristem cryopreservation for yam and cassava via two approaches: encapsulation/dehydration and droplet/vitrifi cation, two of the most common cryopreservation techniques. The droplet/vitrifi cation process showed a high rate of effi ciency for most cassava accessions tested. For yam, the success of the techniques was found dependant on the accession and it was concluded that substantial improvement might be observed once yam meristem culture was optimal. The encapsulation/dehydration technique was tested only on yam and did not show a high rate of success.
Droplet/vitrification technique
This process is based on the treatment of plant tissues with cryoprotectant solutions (before and after exposure to a freeze/thaw cycle) and ultra-rapid freezing/thawing rates. While exposure to cryoprotectant solutions contributes to both plant cell dehydration and stabilization during the freezing cycle, fast cooling/thawing prevents the formation of lethal ice crystals.
Droplet/vitrification planning steps • Clones are selected 3 weeks before the trial takes place.
• For cassava and yam, nodal cuttings are subcultured in test tubes on standard multiplication medium. (See the in vitro genebank management procedure.)
• Growing conditions for the nodal cuttings are as follows: 12 h photoperiod, 43 μmol.m-2.s-1, 25–27 ºC for 3 weeks (optimal duration in terms of the regeneration vigor of apical and axillary buds).
− A purchase order is raised at least 1 week before the trial as the liquid nitrogen (used as the freezing agent) is supplied from Lagos.
• The day before the trial, the following items are sterilized: standard tool box, 9 cm fi lter paper, and aluminum foil strips (5 × 20 mm).
Section 7

37
• Recovery medium (0.3M sucrose), unloading solution, and the regeneration medium (standard meristem culture medium) can be prepared in advance. Media are dispensed in small petri dishes; unloading solution is kept sterile in a bottle.
• Loading solution and Plant Vitrifi cation Solution 2 (PSV 2) are prepared on the day they are to be used. These solutions are fi lter sterilized (to avoid loss of specifi city through heating).
Droplet/vitrification process steps• Apical and axillary buds (meristems) are excised from 3-week-old plantlets
(photo 41) using a stereo-microscope under a sterile laminar fl ow (photo 42).
• Excised meristems (photos 43a and 43b) are immersed in the loading solution in a cryovial (cryotube) for 20 to 60 minutes (photo 44).
Photo 41. Yam plantlets after 3 weeks preculture.
Photo 42. Meristem excision using stereo-microscope.
Photo 43a. Excised yam meristem. Photo 43b. Excised Cassava meristem.

38
Important: Make sure the meristems are in contact with the loading solution and shake the cryotube gently if necessary.
• Drain the loading solution with a plastic pipette (photo 45) and replace it with freshly prepared PVS2. Allow 30 minutes exposure at 0 ºC, in ice chips (Photo 46).
Photo 44. Cryovials containing the excised meristems in loading solution.
Photo 45. Loading solution drained out from the cryovial, using dropping pipette.
Important: As over-exposure to PVS2 is toxic for the meristems, observe the exposure time carefully.
• Meanwhile, cryoboxes (racks) containing fresh and labeled cryovials are immersed in a liquid nitrogen-proof Dewar fl ask containing the liquid nitrogen (LN).
• After adequate exposure duration to PVS2, remove the PVS2 containing the meristems from the cryovial (cryotube) and transfer to a sterile petri dish maintained cold (on an ice pack).
• Take one drop of PVS2 containing up to fi ve meristems with the plastic pipette and transfer onto a sterile aluminum foil strip (5 × 20 mm) (photo 47).
• Take the strip carrying the droplet with pointed tip forceps and rapidly plunge it into the LN and drag it into a cryovial immerged in LN (photo 48).
Photo 46. Cryovials containing meristems in PVS2 solution, placed at 0 ºC.

39
Important: While dragging the aluminum strip into the cryovial, make sure it is kept under the LN.
• In our experimental trials, meristems were kept in the LN for between 15 and 60 minutes (photo 49).
• For thawing, one aluminum strip carrying the droplet is taken out of the cryovial with the aid of forceps and rapidly plunged into the unloading solution at room temperature for at least 15 minutes (photo 50).
Important: This step is critical and has to be done quickly with smooth shaking to wash away the PVS2 from the meristem.
• Meristems are removed from the unloading solution with a plastic pipette and dropped on sterile fi lter paper placed on recovery medium (0.3M sucrose). The unloading solution is then aspirated with the pipette and discarded (photo 51).
Photo 47. Aluminium strip carrying PVS2 containing the meristems.
Photo 48. Aluminium strip carrying PVS2 containing the meristems plunged in the LN and dragged in the cryovial.
Photo 49. Cryovials (in rack) immerged in LN, containing the aluminium strip carrying PVS2 droplet with the meristems.
Photo 50. Aluminium strip carrying PVS2 droplet with the meristems placed in the unloading solution.

40
• Meristems are kept in the dark overnight in the growth chamber.
• They are then transferred directly on fresh standard meristem medium (without the fi lter paper) and maintained in the dark for another 7 days before going back to the normal light regime of the growth chamber.
• Meristems are regularly screened for contamination. (See in vitro introduction procedure.)
• Regeneration is monitored for 4 to 6 weeks following cryopreservation and expressed as greening, stem or leaf elongation, callus formation, and new node formation.
• Tissues showing any obvious sign of growth are transferred to a new multiplication medium as necessary (photo 52).
Encapsulation/dehydration technique
This approach is based on the extreme dehydration of the plant tissue before freezing to avoid the formation of lethal ice crystals. To facilitate handling the meristems are embedded in a neutral matrix (encapsulation) before being submitted to osmotic and evaporative dehydration. The encapsulation/dehydration technique takes longer (3 days) than the droplet/vitrifi cation (1 day). The method described below has been applied only to yam meristems.
Encapsulation dehydration planning • Clones are selected a few weeks in advance to build up a stock of apical
and axillary buds.
Photo 51. Meristems cultured on recovery media (0.3M sucrose) covered with sterile fi lter paper.
Photo 52. Obvious sign of meristem growth observed 2 to 4 weeks of culture on meristem culture medium.

41
• Nodal cuttings are subcultured for 1 week on a hormone-free culture medium (containing active charcoal) under the following growth chamber conditions: 12 h photoperiod, 43 μmol.m-2.s-1, 25–27 ºC (photos 53, 54).
• A purchase order for LN is raised at least 1 week before the trial. • The different media and encapsulation solutions are prepared (M1 and
M2 media, 1.25 M sucrose liquid medium, polymerization and alginate solutions) as described in the tables below.
Encapsulation dehydration stepsDay one
• Shoot tip are dissected under stereo-microscope (photo 55) and cultured overnight in the dark on M1 media (photo 56).
Photo 53. Yam plantlets after 1 week preculture for encapsulation dehydration cryopreservation method.
Photo 54. Yam apical bud on a 1 week old plantlet for encapsulation dehydration cryopreservation method.
Photo 55. Shoot tip excision using stereo-microscope.
Photo 56. Excised yam shoot tip cultured on M1 medium.

42
Day two
• Shoot tips are placed into the alginate solution with the help of a pipette. They are then sucked up along with alginate solution into dropping pipette. Single drops containing preferably only one shoot tip are then dropped into the polymerization solution. They instantly form a bead in contact with the polymerization solution.
• Beads are allowed to polymerize for 20 minutes before being transferred into a 1.25 M sucrose solution.
• Encapsulated shoot tips are left in the dark in the high-sucrose solution for 24 hours and shaken at 90 rpm.
• The silica gel that will be used the next day for the evaporative dehydration is activated/sterilized and dispensed as follow: baby food jars are fi lled up to the three-quarters level with silica (or Chameleon®) and a sterile fi lter paper or wire gauze is placed at the top of the jar before being covered with a proper cap (photo 57). The jars are placed overnight in an oven at 100 ºC for sterilization.
Day Three
• The silica gel is taken out of the oven at least 2 hours before use to allow it to cool.
• Encapsulated shoot tips are removed from the 1.25M sucrose liquid medium and briefl y blotted on a fi lter paper before being placed on the fi lter paper at the top of the silica gel in the baby jar. Beads are dehydrated for 5 hours (optimal dehydration duration tested for yam) in the growth chamber.
• After 5 hours of dehydration, dry beads containing the shoot tips are placed in a pre-labeled cryovial. The top is screwed down properly and the cryyovial is plunged in the LN for freezing for 15 to 60 minutes.
Photo 57. Physical dehydration: Baby food jar fi lled up with silicagel and cover by a fi lter paper.
Photo 58. Yam shoot tips culture on M2 culture medium, straight after freezing.

43
Important: Make sure the cryovial is kept under the LN when plunging it (as it tends to come up if not held properly).
• Thawing is performed at ambient temperature. Cryovials are removed from the LN, opened quickly, and the beads are dropped onto M2 culture medium. (Photos 58 and 59)
• Encapsulated meristems are maintained 7 days in the dark in a growth chamber before being transferred to 12 hours photoperiod.
• Meristems are regularly screened for contamination. (See in vitro introduction procedure.)
• Regeneration is monitored for 4 to 6 weeks following cryopreservation and expressed as greening, stem or leaf elongation, callus formation, and new node formation.
• Tissues showing any obvious sign of growth are transferred to a new multiplication medium as necessary (Photo 60).
Equipment and supplies needed• Aluminium foil cut in strips (5 × 20 mm)
• Autoclavable plastic box
• Paper tapes (for labeling and autoclave)
• Beads sterilizer and burner (fl ame)
• Forceps (long and short)
• Laminar fl ow cabinet
Photo 59. Yam shoot tips 1 week after culture on M2 culture medium.
Photo 60. Yam shoot tips sprouting 4 weeks after culture on M2 culture medium.
44
• Long-lasting markers
• Paper towel
• Parafi lm
• Scalpel holder and surgical blades (no. 11)
• Dropping pipettes
• Cryovials (2 ml)
• Racks for cryvials
• Erlenmeyer fl ask with wide mouth
• Spray bottle fi lled up with Ethanol 70%
• Ethanol (96 %) for the burner (fl ame)
• Tube racks
• Baby food jar
• Liquid nitrogen
• Chemicals for the culture medium preparation
• Icebucket, ice chips, and icepack
• Sterile paper fi lter or or wire gauze
• Silica gel (or Chameleon®)
Preparation of media and solutions for cryopreservation• For the preculture culture medium (multiplication culture medium) and the
standard meristem and shoot tip regeneration culture medium, see culture medium preparation procedure.

45
Culture media and solutions for droplet/vitrifi cation cryopreservation method
ComponentsLoading solution
(/L)
PVS2 (/L)
Unloading solution
(/L)
Recovery media = 0.3 M sucrose
(/L)
MS* powder medium 4.43 g 4.43 g 4.43 g 4.43 g
Myo-inositol
Sucrose (Saccharose) 137 g (0.4 M) 137 g (0.4 M) 410.6 g (1.2 M) 102.6 g
Glycerol 146 ml (2 M) 237.6 ml (30 %, 3.26 M)
Ethylene glycol 135ml (15 %, 2.42 M)
DMSO 136.6 ml (15%, 1.9 M)
Ascorbic acid 5.6 μM
Gelrite 2.5 g
* Murashige T, Skoog F. (1962). A revised medium for rapid growth and biossays with tobacco ssue cultures. Physiologia Plantarum 15 : 473-497.
Culture media and solutions recipes for encapsulation/dehydration cryopreservation method
ComponentsPreculture Medium
(/L)
M1 Medium
(/L)
M2 Medium
(/L)
Alginate Solution
(/L)Polymerisation
solutionMS* powder
medium 4.43 g 4.43 g 4.43 g
Myo-inositol 100mg 100mg 100mg 100mg 100mgSucrose
(Saccharose) 30 g 100g 30g 30g 30g
BAP(1mg/ml) 2ml
ANA(1mg/ml) 100μl
CaCL2 14.7g
Alginate 30gActivated charcoal 2g 2g 2g
Agar 7g 7g 7g
* Murashige T, Skoog F. (1962). A revised medium for rapid growth and biassays with tobacco ssue cultures. Physiologia Plantarum 15: 473-497.

46
In vitro germplasm distribution/reception
In vitro collections of the clonally propagated crops conserved at IITA by the GRC are distributed worldwide under the Standard Material Transfer Agreement (SMTA) for research for food and agriculture.
Request registration, agreement and import permit
• Germplasm distribution is initiated by an offi cial request, most of the time through e-mail containing information such as the requestor’s name, affi liation, the purpose of use, and a confi rmed list of the material requested. Once a request is received, the secretary in the GRC sends a Standard Material Transfer Agreement (SMTA) and a standard letter (informing the requestor about the procedure), prior further processing. These data are centralized by the secretary and are uploaded to the on-line system. The request is forwarded to the proper GRC offi cer for processing by the GRC head.
Important: Note that the Head of GRC needs to be informed of any on-going distribution. Also note that the request is put on hold until the recipient has signed the SMTA or proved he intend to sign it.
• For international requests, the request is put on hold until the recipient has provided an import permit or confi rmed that he will be able to provide one. Once the import permit has been received, a phytosanitary certifi cate request is sent to GHU. Both the import permit and phytosanitary certifi cate must accompany the germplasm during shipment.
Germplasm preparation for distribution
• Virus status of accessions requested is checked.
− If virus-free certifi ed plantlets are available in the collection they are sent for multiplication. The newly subcultured plantlets will be distributed.
− If the accession is not yet certifi ed as virus free, it is sent as a priority in the next batch for indexing. (See germplasm health testing procedure.) If all plantlets have already been indexed and found not clean, a new introduction (from thermo-treated stems in the case of cassava) is needed urgently.
− Note that sometimes, special authorization to import non virus free plants is provided by the requesting country. A phytosanitary certifi cate is still needed as well as an offi cial authorization from the national plant quarantine authority from the importing country.
Section 8

47
• When the number of plantlets in the requested accessions is available, the plantlets are shipped with adequate documentation (see above). Please note that shipment must be overviewed by GRC and the Head of GHU.
Packing preparation and shipment
In vitro plantlets are cultured in test tubes or polyethylene bags. They are packed carefully to avoid sample deterioration (tube breakage, plantlet contamination, and mix-up of the culture media …) during shipment which can occur if the correct position of the tubes is not respected,, compression, shocks, drops, etc.
Important: Please note that as from October 2011, all following steps have to be completed in the presence of one representative from the GHU.
• Each tube containing one plantlet is wrapped completely and neatly with cling fi lm to prevent cross-contamination if there is a leakage (photo 61)
• Wrapped tubes are then arranged horizontally in a polystyrene pack.
• Tubes are sealed to the pack with transparent scotch tape alongside their printed labels (photo 62).
• When cultures are packed in polybags, the bags containing the plantlets are folded carefully to prevent damage to the plantlets and to fi t them properly into the packs. They are also sealed to the pack and labeled.
• The polystyrene packs holding the tubes are deposited on a layer of polystyrene chips in a carton. They are kept vertically in the carton.
• Once all polystyrene packs have been arranged, polystyrene chips are poured on the packs and the carton is shaken for the chips to fi ll the empty spaces and create a soft support for the packs in such a way that the packed tubes don’t touch the sides of the carton (photo 63).
Photo 61. Test tube wrapped in cling fi lm.
Photo 62. Wrapped test tubes arranged horizontally in a polystyrene pack, alongside the printed labels on them.

48
• Import permits, phytosanitary certifi cate, covering letter, list of the accessions, and number of plantlets packed for shipment are checked by the Head of GRC and enclosed inside the carton.
• The carton is then sealed with adhesive fi lament tape. Stickers showing ’Fragile’ and position arrows are pasted on the carton to prevent mishandling by the carriers.
• All offi cial documents requested for the shipment
Photo 63. Shipment carton containing the germplasm to be sent, fi lled up with polystyrene chips, before sealing.
are placed in an envelope pasted on the carton. (Note that original copy should preferably be kept in the box.)
• The pack is then taken to the mail room for shipment by the secretary.
• Once sent, generally by a fast delivery system (UPS, DHL etc...) the tracking number is sent to the recipient. Whoever supervises the shipment is asked to check progress (on internet with the tracking number) for prompt action if any issue arises during shipment.
Receiving Germplasm
Germplasm is also received in the in vitro lab for safe duplication, as a new acquisition, or by special request for breeders (improved lines). According to quarantine rules, the received pack is forwarded to the GHU straight away for inspection and verifi cation. The health of the received germplasm is evaluated and it is released to the GRC, if there is no evident contamination risk. The GHU may, sometimes, need to observe the germplasm in the growth chamber, screen house, or fi eld to ascertain the cleanliness of the received germplasm. Once cleared, germplasm is handed over to GRC for in vitro processing (conservation, multiplication …).
49
Equipment and supplies needed
• Polystyrene packs
• Polystyrene chips
• Transparent scotch tape
• Cling fi lm
• Printed labels
• Carton
• Filament tape
• Covered test tube with cling fi lm

50
Safe duplication of the in vitro collection
To reduce the risk of losing unique germplasm from the international collection while it is maintained in vitro in Ibadan, IITA’s Genetic Resources Center is partially duplicating the in vitro collections in Cotonou (Benin Republic). The host institute is Africa Rice Centre. The duplication operates like a black box, i.e., material is regularly deposited in a growth chamber in the host institute, and whenever it is necessary and possible, it is replaced with fresh material. The host institute is responsible only for monitoring the growth chamber where the duplicated germplasm is kept.
Contact name at Host institute: Sanni Kayode (Africa Rice) and Dr Tamo or Hessouh Andre (IITA Offi cer in Charge and Administrative Offi cer)
The process involves the regular transfer of young in vitro plantlets from Nigeria to Bénin and the repatriation of contaminated or necrotic plantlets from Bénin to Nigeria.
Germplasm selection for safe duplication
Germplasm selection and sorting for safe duplication are done from the in vitro collection maintained in Ibadan.
• Selection is done by matching the germplasm from the main collection (IITA Ibadan) with the safe duplicated one. Accessions not safely duplicated at the time of the selection are potential candidates.
• Subculture target for the selected accession: 2– 5 tubes per accession. Note that these cultures must be maintained in a separate growth chamber until their transfer to Cotonou.
• Inventory of the selected accessions: 4 to 6 weeks after subculture, the tubes are bar-coded and located (migration) to Cotonou for safe duplication. (See inventory system procedure.)
• Plantlet packing: The location of bar-coded tubes is written on a little piece of tape and pasted on the caps, so that the tube’s location will be easy to fi nd when at Cotonou.
Official documents issuance
• Before any transfer/repatriation, the list of plantlets ready for transfer is sent in due time (at least 2 to 3 working days) to IITA’s GHU for the issue of the transfer authorization (Annex 1). An authorization is also requested for the repatriation of the contaminated/necrotic/overgrown plantlets.
Section 9

51
• Quarantine issue: As this is a black box activity, i.e., none of the germplasm transferred can be distributed/used, the standard quarantine procedures do not apply (no need for an import permit and phytosanytary certifi cate).
Trip planning
• The Head of the GRU at Africa Rice (Dr Sanni) and IITA’s OIC in Cotonou are informed of the dates for the visit as early as possible.
• Appointment for technical support: the cleaning and the technical checking are requested for the room (the GRU staff are asked to inform the FMS at Africa Rice for any work needed: bulb to be replaced, AC matter, cleaning, and so on …) and an appointment is set for regulation.
• A car and driver are booked by the GRC secretary.
• The GRC secretary raises a Travel authorization (TA) for the GRC staff and the driver 1 week before the trip (to allow the approval process and cash advance collection to be completed).
• Accommodation is booked in Cotonou for the staff by the secretary, if necessary with the help of Mr. Hessouh (IITA‘s local Administrative Offi cer in Cotonou).
• One day before the trip, the tubes are packed in a big plastic box and well covered. Various accessories (towels for cleaning, tape, marker, a bucket and rubber bands) are also packed as necessary.
Trip logistic
• On day 1, an early start from Ibadan is advisable, (7 to 9 am latest).
• Upon arrival at Africa Rice, the conservation room key is collected from GRU staff: from Tia Daniel or Theo Tim.
• The plantlets are unpacked straightaway in the safe duplication room. The state of the room is evaluated: accessibility, cleanliness, AC, light, etc.; conditions in the room should be set at 19 oC and 12hphoptoperiod.
• Once this is completed, staff can check in their hotel.
• On day 2, the work should start at 8:00 am and start by cleaning the shelves with towels.
• New locations are created in new racks as needed.
• Accession replacement can start, i.e., contaminated, necrotic or old plantlets are removed and replaced by the new plantlets.

52
• At the end, all racks are inspected again for contaminated/necrotic tubes: removing and re-arranging is done if needed. The contaminated/ necrotic/excess tubes are packed in the plastic box for repatriation and the room is cleaned before staff leaves the place.
• Sorting the tubes sorting and arranging new locations take at least one full day. The group drives back to Ibadan once the operation is fully completed
• Upon arrival to Ibadan, repatriated tubes are scanned out to update the inventory system. Once pocket PCs are fully available/operational, the location and inventory will be easier as the scanning out, location checking, etc., will be done directly in Cotonou.

53
Annex 1. Authorization letters

54
Annex 2. List sampleCassava accession for Cotonou safe duplication Aug. 2010

55
Germplasm acclimatization (Post-flask process)
The transfer from controlled in vitro growth conditions to the natural environment (fi eld or screen house) is traumatic for in vitro plantlets as they have to adapt to severe environmental changes (non-aseptic conditions, new temperature, light, and hygrometric conditions, no carbon supply, i.e., need to become photosynthetic, etc.). The progressive change of environment before the transfer to fi eld conditions is called acclimatization or hardening. Acclimatization is a critical step as it links conservation to use. Below are the main steps for acclimatization.
Germplasm selection for acclimatization
• Plantlets are sorted either for indexing (see Germplasm health testing section) or for distribution purposes.
• Only plantlets showing a well-developed root and shoot systems are selected for acclimatization.
• A plastic peg is allocated for each plantlet selected. The peg is labeled with the accession number, line number, and date of acclimatization as well as any other useful information about the plantlet.
Planting pot preparation
The nature of the substrate used for acclimatization varies with the crop
• For cassava plantlets, a mixture of peat pellets (Jiffy pods) and vermiculate is prepared as follows:
• For 100 plantlets, soak 67 peat pellets (photo 64) in water for at least 1 to 2 hours.
• Mix the contents with 650 g of vermiculite (photo 65), then wet the mixture with water.
Photo 64. Jiffy pod of Peat pellet after imbibition.
Photo 65. Peat pellet content mixed with vermiculite.
Section 10

56
• Fill up small plastic bags (inner bag) to the three-quarters level with the mixture (photo 66).
• For yam plantlets, only peat pellets (Jiffy pod) are used. The peat pellets are soaked for at least 2 to 3 hours before use.
• For the banana/plantain plantlets, sterile top soil is dispensed in small pots three-quarters full.
Planting in vitro plantlets
• Gently remove the in vitro plantlet from its test tube with forceps (photo 67a).
• Rinse the root system with water to eliminate the agar (photo 67b, 67c and 68).
• Plant each plantlet in an inner bag fi lled up with adequate substrate (see above) (photos 69, 70).
Photo 66. Filling of inner bag.
Photo 67. Musa sp. Plant preparation for planting: A: Pulling out from the test-tube of the in vitro plantlet, B: Gently rinsing of the roots with water, C: plantlet ready to be transplanted.
a
c
b

57
• Enclose in a plastic bag after sprinkling some water inside the bag and on the plant (photo 71). For cassava, transfer each inner bag (on what the plantlet is planted) into an empty and bigger plastic pot (18 cm diameter) before enclosing everything in a plastic bag (photo 72).
• Pots are maintained in an insect-proof screen or glass house with a warm and preferably bright environment. The upper part of the outer bag can be folded and hung up for space saving (photo 73).
Important: During acclimatization, the plant environment is kept humid by a regular input of water in the plastic bag. When necessary, fertilizer can be added to the substrate to boost plant growth, but only when the root system of the plant is well established.
Photo 71. Musa sp. transplanted plant covered with plastic bag.
Photo 70. Musa sp. plantlet planted on sterile top pot.
Photo 69. Cassava plantlet planting for acclimatization.
Photo 68. Gentle cleaning of cassava plantlet for acclimatization.
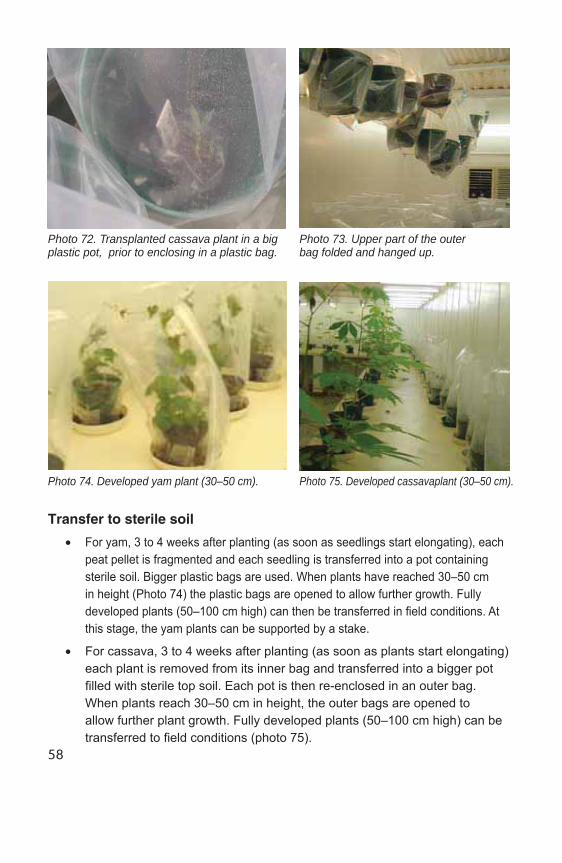
58
Transfer to sterile soil
• For yam, 3 to 4 weeks after planting (as soon as seedlings start elongating), each peat pellet is fragmented and each seedling is transferred into a pot containing sterile soil. Bigger plastic bags are used. When plants have reached 30–50 cm in height (Photo 74) the plastic bags are opened to allow further growth. Fully developed plants (50–100 cm high) can then be transferred in fi eld conditions. At this stage, the yam plants can be supported by a stake.
• For cassava, 3 to 4 weeks after planting (as soon as plants start elongating) each plant is removed from its inner bag and transferred into a bigger pot fi lled with sterile top soil. Each pot is then re-enclosed in an outer bag. When plants reach 30–50 cm in height, the outer bags are opened to allow further plant growth. Fully developed plants (50–100 cm high) can be transferred to fi eld conditions (photo 75).
Photo 72. Transplanted cassava plant in a big plastic pot, prior to enclosing in a plastic bag.
Photo 73. Upper part of the outer bag folded and hanged up.
Photo 74. Developed yam plant (30–50 cm). Photo 75. Developed cassavaplant (30–50 cm).
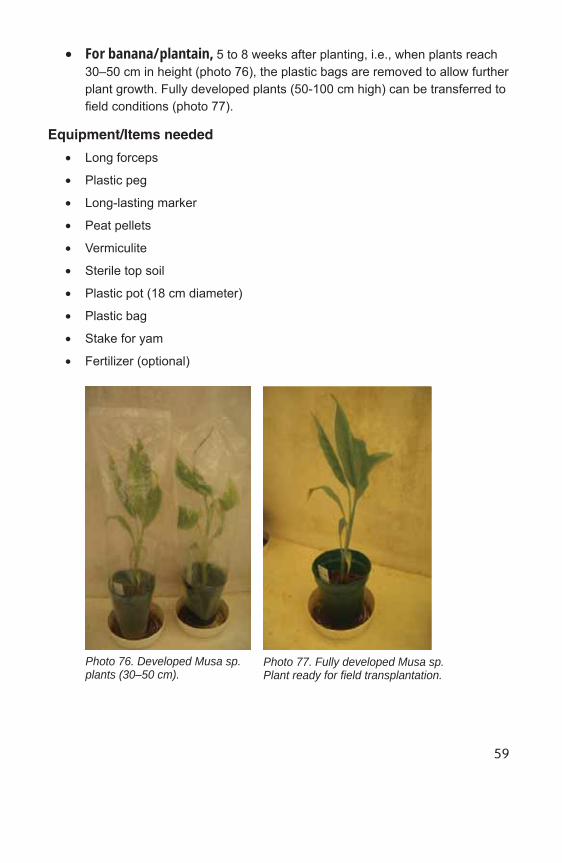
59
• For banana/plantain, 5 to 8 weeks after planting, i.e., when plants reach 30–50 cm in height (photo 76), the plastic bags are removed to allow further plant growth. Fully developed plants (50-100 cm high) can be transferred to fi eld conditions (photo 77).
Equipment/Items needed
• Long forceps
• Plastic peg
• Long-lasting marker
• Peat pellets
• Vermiculite
• Sterile top soil
• Plastic pot (18 cm diameter)
• Plastic bag
• Stake for yam
• Fertilizer (optional)
Photo 76. Developed Musa sp. plants (30–50 cm).
Photo 77. Fully developed Musa sp. Plant ready for fi eld transplantation.